 Reddit reviews 3D Print Removal Tool
We found 26 Reddit comments about 3D Print Removal Tool. Here are the top ones, ranked by their Reddit score.
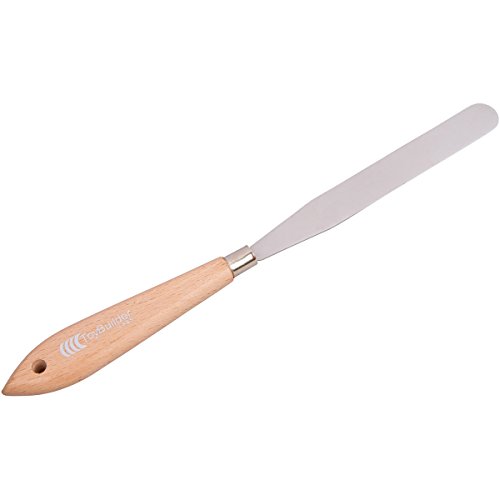
120 mm / 4.5 inch long flexible blade helps to reach underneath large printsRounded edge is safer and less likely to tear print bed tape.Speeds removal of parts from print bed.Useful to pop prints off the bed, and to scrape off stuck-on plastic.An essential addition to your 3D Printer Tool Kit.
I got one of these:
https://www.amazon.com/gp/product/B00VB1U886
Super thin edge gets under the edge of prints without damaging the print or the buildtak.
Here is a list of things that people will always need, I understand you can't stock everything as overhead is an issue with retail, and storage as well, but most of these are small enough that they can occupy the shelf space you currently have. As for the larger things, like the 2020 extrusions, you could sell them in common lengths of 500mm and 1000mm and let the customer cut them down to the size they need, or just don't carry these at all. It's not a niche item, but for a retail store like you it would be hard to store and maintain, but man, would it be nice to be able to get those locally if i needed a piece for a project instead of having to wait on mail order.
this is just a basic list, others have listed other things as well, Steppers, Belts, Pulleys, Bearings etc. If you want 3d printing as a reason for other people to go to your store, these items will satisfy the need. Just keep prices fair, I have no issue paying a bit more compared to amazon to get it today.
I will give you my background before my opinions. As everyone has different goals, opinions, and experiences.
I got my printer near the end March of this year. I have something like 2500m of filament run though it, and no idea how much print time.
When I received my printer, my test prints failed and I was pissed. But this community helped improve my Cura settings and started producing usable parts. I then went nuts and printed out a BUNCH of mods. This is by far my most favorite thing. There's always something I can print to improve the quality of the prints.
THe down side is I went too far and got to a point where I couldn't produce anything of quality. So, 2 weeks of tweeking and researching later I'm printing in PETG with beautiful quality and very minimal visible layers.
My most recent project in PETG:
http://i.imgur.com/sVf7S2D.jpg?1
So, now to answer your question...
> How do you like your Maker Select?
I love it. It allowed me to buy a cheaper printer (One of the cheapest at the time @ $350) that produced amazing results. It also has upgrades you can purchase or print to improve the quality, so investing smaller amounts over time to make it better and better. I highly recommend it to anyone who is starting because it does require tweaking which forces you to learn and understand how exactly 3d printers work. A major plus was that this community has a lot of Maker Select users for support, which was a MAJOR plus for me.
As of today, I've purchased the following upgrades:
So, in the last ~3 months I've spent an additional $264... Oh god, don't tell my wife! All are totally not necessary, mind you. The only thing I'd 100% recommend you do are print out the following to mods:
DiiiCooler along with buying the 50mm blower fan. There are cheaper options out there, I just wanted it faster so I bought it through Amazon to get free 2 day shipping.
z-Brace - This is key, and will run you maybe $15 worst case scenario to get enough M4 screws and the threaded rods.
Edit: Forgot a couple more things I bought.
That's another $59, so $323... I have a problem. again, 95% of this is NOT NECESSARY. I'm just addicted to modding.
http://www.amazon.com/ToyBuilder-Labs-Print-Removal-Tool/dp/B00VB1U886?ie=UTF8&psc=1&redirect=true&ref_=oh_aui_detailpage_o03_s00
sharpen the tip.
Not just from prusa, pick and choose. URLs for examples.
Digital caliper, 12" https://www.amazon.com/gp/product/B000EJUBBU/ref=oh_aui_detailpage_o02_s00?ie=UTF8&psc=1
Extra brass nozzles.
Hardened steel nozzle, 0.4mm to 0.6mm for printing abrasive exotics (wood, glow in the dark, carbon fiber etc)
Print removal tool https://www.amazon.com/gp/product/B00VB1U886/ref=oh_aui_detailpage_o02_s01?ie=UTF8&psc=1
Locktite blue bolt-fixer (Walmart, Home Depo, Lowes etc) to stop bed sensor from moving.
High temp anti-seize for nozzle threads https://www.amazon.com/gp/product/B0053ZS1Z8/ref=oh_aui_detailpage_o02_s01?ie=UTF8&psc=1
Raspberry Pi 3, 5v Pi 2A Power wart, Micro SD card, & Webcam for octoprint monitoring.
Relay board for Pi/octoprint to power up & down printer remotely. https://www.amazon.com/gp/product/B0057OC5O8/ref=oh_aui_detailpage_o04_s02?ie=UTF8&psc=1
1lb of silica gel to keep filament dry.
Filaments, various.
Fire extinguisher rated for electrical fires.
Dedicated smoke alarm.
Do you have anything that resembles this with a thin "blade". https://www.amazon.com/gp/aw/d/B00VB1U886/ref=mp_s_a_1_1?ie=UTF8&qid=1483243443&sr=8-1&pi=AC_SX236_SY340_FMwebp_QL65&keywords=Printer+removal&dpPl=1&dpID=31vIt7tpDfL&ref=plSrch
If you do you can try to slide the thin part under the part. If you don't have something like that you can remove the bed and put it in a freezer and it should just pop off or you could take off the tape with the print attached.
I use [these] (https://www.amazon.com/dp/B06XWFM1HJ/ref=cm_sw_r_sms_c_api_i_OYE.AbP0JQ8X9) brushes for cleaning filament off of the extruder because you will inevitably have prints that leave filament all over the hotend. [These] (https://www.amazon.com/gp/aw/d/B00VB1U886/ref=mp_s_a_1_2?ie=UTF8&qid=1526590824&sr=8-2&pi=AC_SX236_SY340_QL65&keywords=3d+print+removal+tool&dpPl=1&dpID=31vIt7tpDfL&ref=plSrch) are really cheap and good for removing prints from the bed. One of them should last you several months. You’ll also eventually need to clear out a clogged nozzle so some [nozzle cleaners] (https://www.amazon.com/gp/aw/d/B072JJ7H5P/ref=mp_s_a_1_3?ie=UTF8&qid=1526590910&sr=8-3&pi=AC_SX236_SY340_QL65&keywords=3d+printer+nozzle+cleaner) will come in handy.
> Thanks in advance for answering my questions.
I purchased it last August. (781 hours logged) It's almost litterly been printing out of the box since day one. The only issue I had out of the box is that the one screw on the build plate got bent as a result of the 2 free spools bouncing into it. I ordered a box of them from McMaster and had it fixed by the end of the week. I contacted Lisa on their google chat form and from what I understand, they now come with the screw as a result of my support ticket. This was an annoyance yes, but I've had more issues with my reprap and that costed me more than this pritner when I bought it. (I originally had a Makergear Prusa)
Most: I love the fact that it prints 100% of the times I try to print something. I rarely, and I mean RARELY have a failed print. I love that I can hit print before I go to bed and wake up to a completed part in the morning.
Least: This is small, and it took a while but I have since out grown the build platform (9x6x6 inches). I recently ordred an 8x12 plate from McMaster and that arrives on monday and we'll see how that works. (PSA this requires removing one of the extruders - if you want more info on this let me know)
Yes, no issues. Just close up the printer with the included panels.
No, I use a glass build plate and a thin coat of purple glue stick. I then spritz water on the plate before each print. I never have a sticking issue and I never have warpage. I personally prefer PLA though since Hatchbox has come to light and makes GREAT PLA
Like I said just above, I use a glass build plate, so I haven't had any warpage issues with the bp. Leveling the bed is a bit of a challenge but I'm fussy about it and I want it within 0.0005 or less so it takes me a while. The reason I'm fussy is because I've only had to level the bed 2 or 3 times since owning it.
The first was when I got it
The second was when I added the glass build plate
The third was when I removed one extruder and added an aluminum carriage.
That's it. It never lost it's level and it's gone through 3 moves (like I moved apartment to apartment)
The only experience I had was with that screw initially. I contacted Lisa on their Google Chat forum and she handled it mostly. Sadly, it wasn't as 'perfect' as I wanted since their solution was to send the printer back instead of sending me a new screw. Never the less, they did try to help on the matter and told me how I could go about getting money for the screw if I so desired. In the long run, it's a screw and I just ordered them from McMaster. I have zero regrets from it and I think I know my printer a bit beter because of it.
single extruder carriage (PSA: their single extruder block is not FF compatible.
My Thingiverse for example prints
Some things I would buy shortly after getting the printer:
Spare Extruder fan : I tend to slip and put a screw drive in the path of this, shattering the blades. If you're a clutz like me, get it. I've needed 4 so far. ::hangs head in shame::
Glass Build Plate : Best purchase I've made for my FF. Works great, easy to install and use. Also get thermal sheets and purple elmers glue, and print the spacer found on my Thingiverse page under "Flashforge Upgrades". Also get a spatula, and dikes
Simplify3D : A lot people tend to spend $X,XXX on a printer and then try to use free software with it and complain when it doesn't print right. To me that's like buying a car without tires. A Corvette ain't shit without a decent set of tires. It's kind of pricy compared to free, I know, but at real CAM programs (which is what this basically is) cost $8,000 or more. It truely is a great printer program and I wish I had purchased it much MUCH sooner than I had.
Last and most importantly, get the an active cooling fan. I originally printed this, and purchased a 12v power supply and added some fans to it. I have since moved on to the offical one from FF. It's not as good but I haven't really ran into an issue. If I had to print from my right extruder, it would be an issue though. What I liked about it, is that it's a plug and play added on. No "modifications" needed to added.
TL;DR / Closing thoughts: I would buy this printer again in a heartbeat. ESPECIALLY if they came out with one similar to the Replicator 2 with the 11.9" build plate. Instead it looks like they went a different way judging by CES but oh well, there's always next year. Further more, I think this is a great entry level printer for someone looking to have a printer help with projects and not be one of them. That doesn't mean you can't mod it or upgrade or whatever, it just means you don't have to if you don't want to.
Hope this helps and answers any questions you might have. Feel free to ask more though!
Hey, I highly recommend this spatula
the one that came with my 3d printer was dollar store garbage and would have gouged my buildtak if I hadn't had the lucky foresight to buy this one first.
This one is so thin that it can easily get under parts, just don't "pry" upwards or it'll bend it! (I bent mine but it still works like a champ)
I'm not sure how much help I'll be, but I also use a Flashforge Creator Pro...
1: If you're sick of dealing with abs, just put some blue painters tape on the bed and print PLA, once you open up the thing enough and modify your settings it does PLA perfectly well.
2: PVA glue stick, (though it looks like you are already using this) helps with bed adhesion with ABS and also gives you a bit of an ablative layer for when you are scraping things back off.
3: get a print removal tool like https://smile.amazon.com/ToyBuilder-Labs-Print-Removal-Tool/dp/B00VB1U886/ref=sr_1_4?ie=UTF8&qid=1494526580&sr=8-4&keywords=print+removal+tool to help pry things off the bed without destroying the sheet.
4: rafts, these really help with getting things off the bed, you waste quite a bit of plastic, but it's much easier to get things off.
5: bed level (and height) adjustment (and this really should be number 1) the little plastic sheet they give you to slide under the nozzle is of no real value, you may just be printing the first layer way too close to the bed, and absolutely squishing the filament into the bed. It is far more useful to just print a leveling pattern and then see where the bed needs adjustment and how it's extruding than to even bother with pulling the sheet out from under the head. I use this one http://www.thingiverse.com/thing:97151 and generally will tweak things until the strands are attached but will come off with my fingernails.
https://www.amazon.com/ToyBuilder-Labs-Print-Removal-Tool/dp/B00VB1U886/ref=sr_1_1?ie=UTF8&qid=1491502589&sr=8-1&keywords=3d+print+tool
Works great.
https://smile.amazon.com/ToyBuilder-Labs-Print-Removal-Tool/dp/B00VB1U886/ref=redir_mobile_desktop?_encoding=UTF8&dpID=31vIt7tpDfL&dpPl=1&keywords=3d%20printer%20knife&pi=AC_SX236_SY340_QL65&qid=1493570144&ref=plSrch&ref_=mp_s_a_1_1&sr=8-1
Get a spatula tool like the Cricut spatula or our print removal tool (http://www.amazon.com/ToyBuilder-Labs-Print-Removal-Tool/product-reviews/B00VB1U886 or http://www.toybuilderlabs.com/products/toybuilder-labs-print-removal-tool) so that you don't tear up the bed.
I use this on my PEI sheet and it seems to work pretty well:
https://www.amazon.com/gp/product/B00VB1U886/ref=oh_aui_detailpage_o05_s00?ie=UTF8&psc=1
I usually pull things off when the bed is 40-50C.
I use a thin metal spatula for removing prints from the bed. It often tears the masking tape, but that's OK - That encourages me to put down fresh tape, and fresh tape makes for better prints.
Sorry I can't answer all of your questions, but here's a few suggestions. Number one, a better part cooling fan. Just buy a cheap blower fan like this one, and print a radial cooling fan like this one. This should help a bit with your bottom screw holes being messy. For bigger prints this is a necessity. When it comes to getting prints off of the beds, I use a glass bed with a gluestick for adherence, and to remove prints I use this thing. Incredibly, incredibly useful. It's thin enough to get under prints without denting them, and the long design lets you move it underneath prints to free the whole this. The end is also sharp enough to scrape glue off of the printbed. Works a lot better than the scraper included with the printer.
Here is the mobile version of your link
What usually causes this?
I've had my printer long enough to use up my first roll of filament and besides a mess up calibrating it (dug a little into the bed on one side), it's pretty clean and flat still. I use This tool to remove my prints.
Or is replacing your bed a common thing? I'm still getting used to everything.
Be more gentle when getting it off. Are you possible just ripping it off with brute strength? Like get this thing for $6.
Adhesion is important but overdoing it can lead to this issue. From what I see in the picture, you might have a slight elephants foot (the first layer is so smashed into the bed it squishes out sideways and creates a lip or burr on the part.
you're doing something wrong, i've owned a FFCP for years and only once damaged the bed.
The key is not to try to get under the bed, but to apply a horizontal pressure with a wedge onto the print right where it touches the bed. I use this print removal tool:
https://www.amazon.com/ToyBuilder-Labs-Print-Removal-Tool/dp/B00VB1U886/ref=sr_1_3?ie=UTF8&qid=1494530501&sr=8-3
This is what I'm using and it's been fine for the past 6 months; glossy finish. I think what Prusa includes is closer to 7 mil though.
I'm sure there are some differences in heat transfer properties or something with regards to using a thinner sheet; but the only things I've noticed are that the screen printing can distort the surface slightly (visible dimple, but can't feel it) and I need to be more careful with my removal tools so I don't accidentally scratch through it and into the heat bed. I had been using a super sharp putty knife, but switched to this recently (basically a thin metal kitchen spatula, with rounded corners).
I just slide this along the edge and it pops up. I don't know why a razor wouldn't work the same, unless you're cutting into the PEI. The tool has blunt edges, but anything rigid and thin should work the same. I only print in PLA, though, so maybe it's different with other materials.
Look at something like this :https://www.amazon.com/dp/B00VB1U886?ref=yo_pop_ma_swf
I used to just wreck prints trying to get it off with the stock scraper they send with the printer. It’s a thinner edge so it really seems to pop it off the bed a lot easier. I got that second one I linked a few posts back and I don’t use one of the tools but the longer one I’ll use after using the first tool on big prints outside of that this one really seems to get under prints with out to much effort.
Another solution that I have heard good results with but I not personally use is this stuff: https://www.amazon.com/dp/B01N2JGTWJ/ref=cm_sw_r_cp_api_xQdWAb79FZS82
It’s on my list to try but my current printer doesn’t really need anything to help with binding or release from the bed. Now I did pick up a bed surface called geckotek : www.geckotek.co it’s supposed to be a bed pad like on the printer already but is supposed to just release prints after the bed cools down. Might run around $20 so it’s not to bad of a loss not sure when I’ll get around to installing it but could be better than the current surface it has now.
For a camera/smart switch look into a octopi setup. It uses a raspberry pi but it acts as a print controller. From what I heard is you can start/stop prints as well as upload prints you sliced and just run it from there. But you are supposed to be able to remote view it with a camera as well. I just never got around to setting one up but I do have everything if I ever need it. I normally run my long prints on the days I know I’m home but I normally don’t have to many issues though I have failures in the middle of the night but with me being close by I can catch it before any chance of damage. I do have my printer on a ups but I think it’s on the end of its life span so I will most likely need to replace it or the batteries later this year.
These have sharp edges that will damage your bed. Use this one instead:
https://www.amazon.com/ToyBuilder-Labs-Print-Removal-Tool/dp/B00VB1U886
I've got two of these: https://www.amazon.com/ToyBuilder-Labs-Print-Removal-Tool/dp/B00VB1U886/
Work great.