 Reddit reviews 8mm OD 20mm Long Light Load Compression Mould Die Spring Yellow Compression Mould Die Spring for The Ender 3s Bed 20pcs
We found 11 Reddit comments about 8mm OD 20mm Long Light Load Compression Mould Die Spring Yellow Compression Mould Die Spring for The Ender 3s Bed 20pcs. Here are the top ones, ranked by their Reddit score.
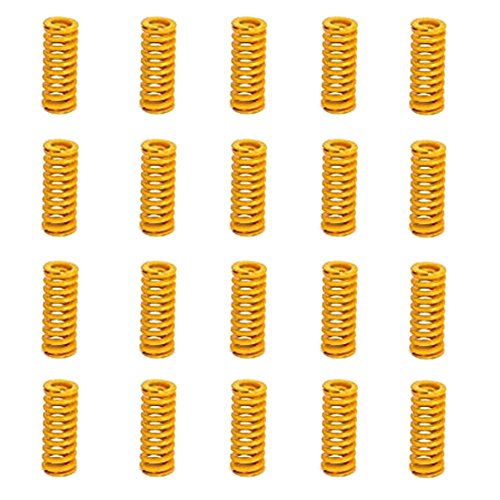
Product Name : Die Spring; Loading Grade : Light LoadHole Diameter (OD) : 8mm/0.31";Rod Diameter (Inner Dia) : 4mm/0.16"Free Length : 20mm/0.8";Material : MetalColor : Yellow; Model : TF 8*20Package Content : 20 x Die Spring, because the quantity is counted by people, if the quantity less 20, please contact us, we could resend new 1 pack product to you
It's possible that while removing a previous print you knocked the bed out of level. One of the best upgrades I usually recommend is heavier duty springs to replace the stock bed level springs.
Something like these:
https://www.amazon.com/gp/aw/d/B07FY47BX7?psc=1&ref=ppx_pop_mob_b_asin_title
I got this set from Amazon and it's way more than you need. I've sent a few sets to other friends who have gotten Ender 3s and still had leftovers for when I bought my second one.
There are several videos on youtube for first time ender 3 setup. Mostly they cover some detailed orientated techniques like...
Nice ! I can see you've done your homework lol, all good choices. I'll just give you a few suggestions then since you've pretty much got it covered. The springs I used on my enders were these: https://www.amazon.com/gp/product/B07FY47BX7/ref=ppx_yo_dt_b_asin_title_o02_s00?ie=UTF8&psc=1 You might need longer screws, not sure about that, but you can get those at any hardware store, probably around 35mm m3 screws should do the trick. And the motor vibration dampers i used were these: https://www.amazon.com/gp/product/B07C7FRLNX/ref=oh_aui_search_asin_title?ie=UTF8&psc=1 you don't need them on the z-axis, just the x and y. As far as smoothers go, I think the creality boards currently use a4988 stepper drivers, so you'd probably not see any benefit from tl smoothers. I'd definitely recommend the glass bed, since ender 3 print beds are almost always warped to some extent which can make leveling the bed a real pain in the ass. The hardened steel nozzle is cool, just be aware it's not as good at transferring heat to the filament as a brass nozzle, so it prints slower, and it's only useful if you're planning on using abrasive filament like carbon fiber or glow in the dark filament. Pla, petg, wood pla, and abs don't need it. You can actually print anything you want with a brass nozzle, you'd just replace it more often depending on how much abrasive filament you use. Also, don't know which fan shroud you're planning on, but the bullseye is very good and it uses the stock fan : https://www.thingiverse.com/thing:2759439
Sorry about the wall of text lol.
I highly recommend upgrading the springs.
I got these, they are 10x more stiffer and make bed leveling a breeze.
Linear rails are really nice, but honestly I think it's total overkill for a budget printer like this, if you got the cash though go for it.
Just a word of caution though, lots of people have had mixed experiences with the linear rails off aliexpress. some people love em, others have ordered them and they've fallen apart in their hands while installing them.
Me personally, I upgraded all the wheels and bearings to these. they are way more stiffer than the stock wheels and the bearings on those suckers roll like butter. You can just do the bed wheels but I upgraded all of them, was one of the best mods I've bought yet.
Also I'm not sure if this is still an issue, but last I heard the TH3D firmware had some really bad issues with Jerk settings being set WAY too high or acting very buggy. Have you noticed movements that are pretty violent? really high jerk values can throw your bed leveling level off during a print if it's strong enough.
Sure
These are what I have
Probably nothing. There's a good chance you're extruder gear is slipping. IMO the stock spring doesn't put out enough force to grip the filament and there's no mechanism to tension it. I would recommend one of the following:
Pull out some filament and check for solid bite marks. If you don't have any or have very light bite marks you know your issue.
​
It's on my todo list to merge my model with the newest extruder bracket so you can tension the spring easily.
I'm pretty new to this too, I bought my Ender 3 Pro around the same time as you. Quiet printing is pretty high on my list as well as being able to print high-temp exotic filaments in the long term while maintaining reliability.
First upgrades I purchased were stiffer bed springs so I would be less likely to throw the bed out of level while removing prints or working around the printer and Capricorn XS tube since it has a more consistent internal diameter, fits closer to the filament, and can work with slightly higher temps. I also picked up a pack of bowden couplers recently as I noticed the end nearest the extruder is sliding past the coupler jaws on de/retraction; don't worry about that unless it's an issue for you. That's about $30 alone since I don't have a supply shop locally and have to order those parts in bulk. I had a Pi 3B laying around unused and flashed Octoprint onto it. Highly recommended. I have a replacement Noctua hotend fan, buck converters, and 5015 blower on order to quiet the fan noise; about $32. Just replaced the Meanwell psu fan with a 60x25mm Noctua I had lying around (Note: there may be better options in the 92-120mm range to replace part of the PSU housing, but that's what I had laying around). Next upgrade coming is the SKR Mini E3 with TMC 2209 drivers ($28) to eliminate almost all of the stepper noise. Also looking into a replacement for the control board fan and some vibration isolating feet for the frame. As far as higher temp printing I haven't made a lot of progress aside from buying a titanium all-metal heat brake ($11) winch I have yet to install or inspect, and looking into enclosure and electronics relocation avenues.
Either way the mods I purchased came in at around $100 US which should quiet the printer and help with reliability. Also looking into picking up a good M3-M4 bolt kit if any exist in the US.
Here are some links to the things I picked up and will, which may be helpful if you're in the US. Mostly from Amazon.
Type | Name | Link | Price
---|---|----|----
Reliability | 8mm x 20mm yellow springs | Link | $6.98
Reliability | Capricorn XS Tubing | Link | $11.49
Reliability | PC4-M6 / PC4-M10 Pneumatic Bowden Fittings | Link | $11.99
Silence | Noctua 40mm x 10mm 3-pin fan | Link | $13.95
Silence/Various | LM2596 Adjustable Buck Converters | Link | $10.95
Silence | 24v 5015 Radial Ball Bearing Fans | Link | $7.19
Silence/Various | SKR Mini E3 w/ TMC 2209 drivers | Link | $28.81
High Temp | Titanium All-Metal Heat Brake | Link | $11.52
TOTAL: $102.88 US + Tax
Parts already purchased/ bought with printer
Type | Name | Link | Price
---|---|----|----
Reliability/High Temp | OEM Ender 3 Glass Bed | Link | $20
Reliability | Feeler Guage Set | Link | $5
Reliability | 608zz Bearings, using with this(My Remix), this, and this, though I like this design a bit better | Link | $5.98
QoL Improvement | Raspberry Pi 3B w/ Octoprint | Link | $34.46
Silence | Noctua 60mm x 25mm 3-pin fan, goes with this mod | Link | $14.95
TOTAL: $80.39 US + Tax
Future planned upgrades
Bed springs?
https://www.amazon.com/gp/product/B07FY47BX7/ref=ppx_yo_dt_b_asin_title_o02_s00?ie=UTF8&psc=1
pretty sure he means these
Simple fix: lower your z-endstop - the value in the assembly instructions is just a guideline.
Z-binding will most likely not be fixed by dis- and reassembly. It commonly results from the z-stepper being too close to the vertical beam. Some people used spacers that didn't work for me. I printed this adjustable z-motor mount that solved my problems. I have since also replaced the original rigid coupler with a flexible one.
Another thing I've done is to install stronger springs on the bed. (Something like these)