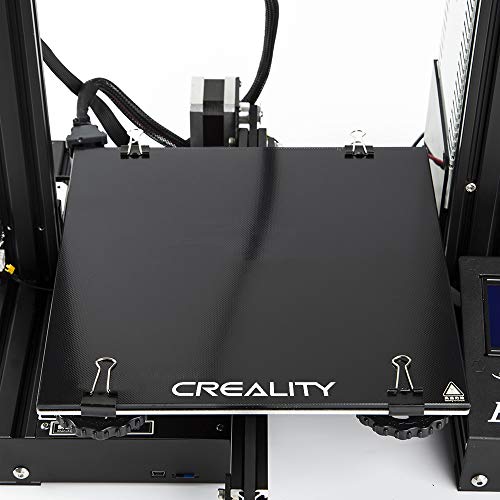
 Reddit reviews Creality 3D Printer Platform Heated Bed Build Surface Tempered Glass Plate for Ender 3/Ender 3 Pro 3D Printer 235x235x3mm
We found 19 Reddit comments about Creality 3D Printer Platform Heated Bed Build Surface Tempered Glass Plate for Ender 3/Ender 3 Pro 3D Printer 235x235x3mm. Here are the top ones, ranked by their Reddit score.
Very easy to take off the models, NO tools to remove modelsUse clips to fix the glass plate on the hot bed.Higher temperature higher sticky. The models will stick on bed firmly when temperature is highFit for Ender 3 and Ender 3X 3D printer.If you have any question or problem,please feel free to contact us
Creality 3D Printer Platform Heated Bed Build Surface Tempered Glass Plate for Ender 3/Ender 3 Pro 3D Printer 235x235x3mm https://www.amazon.com/dp/B07FSM8DK9/ref=cm_sw_r_cp_apa_i_Z0KGDbQPPRZFX
16.99 dollhairs to be exact.
I just ordered this one - should arrive tomorrow. I’ve read reviews saying it’s so much better than the stock one that this should ship with the Ender 3
https://www.amazon.com/gp/aw/d/B07FSM8DK9
The hammer was a joke, please don't use a hammer for troubleshooting!
This is like the glass bed that I have on mine. It has a coating on one side to help prints stick, and the back side is bare glass. Did you have a piece of glass on yours already? I didn't notice it in the picture.
What you absolutely MUSTTTTTTT!!!! order? Nothing. The printer works as is. But if you want to do yourself a favour, here's a list of what I consider essentials:
- New springs, both bed and extruder. I don't have a link for an extruder one as I upgraded my entire extruder drive frame and that came with a better spring
- A new removable bed. Creality glass bed or glass with a PEI sheet is my bed of choice
- Thermal pad to avoid the annoying bed clamps. Cut squares out of it, lay them in a checkered pattern alternating between thermal pad and nothing and place your bed on top. They will hold the bed in place and help with heating
- Stepper dampers if your printer is anywhere near where you spend your time, it sounds like a bloody jackhammer right out of the box
- New tube fittings, the stock ones are terrible and will give out in a matter of weeks at best. They also barely hold onto the tube
There are a ton of other great upgrades, but I think a good idea is to get a feel for it yourself.
What you can do, however, is check out some printable upgrades. I have this thread where people contributed with their choice of printable upgrades. It's a great list you can refer to later. Essentials on that are the fan guard and LCD back cover simply because the Ender 3 as is has the fan and back of the LCD exposed and that makes it crazy vulnerable to dust and gook damage
I just have the Creality glass bed from amazon https://www.amazon.com/gp/product/B07FSM8DK9/
It's been fantastic. Assuming your bed is properly leveled you don't even need to use adhesive, just make sure to clean it every once in awhile.
+1 for putting a glass bed on the printer. Also the stock extruder gear setup SUCKS! Go ahead and get an all-metal one because that plastic arm will break eventually. The debate rages on about putting sound dampeners on because some folks advocate just replacing the drive controllers (more $$$). Personally I put the dampers on and am really happy with the noise reduction, Also, the fans used stock are all sleeve bearing type. Not a good choice for the hotend which is constantly moving. I say run them until they get noisy/fail and then replace them with some good ball bearing fans (remember if you order replacements that they are 24v, not 12v). Oh and I also put stiffer springs under the bed as well. (See links below)
Links are what I used, there are many options out there....
Glass bed
Creality 3D Printer Platform Heated Bed Build Surface Tempered Glass Plate for Ender 3/Ender 3 Pro 3D Printer 235x235x3mm https://www.amazon.com/dp/B07FSM8DK9/ref=cm_sw_r_cp_tai_CvzBCbDCS9RHE
All Metal Extruder Gear
Luxnwatts Creality Aluminum MK8 Extruder Drive Feed Upgraded Replacement for CR-10 CR-10S S4 S5 3D Printer Part https://www.amazon.com/dp/B076PFHM1F/ref=cm_sw_r_cp_tai_gwzBCb17T787N
Noise dampers
CCTREE NEMA 17 Stepper Steel and Rubber Vibration Dampers with M3 Screw for Creality CR-10,10S 3D Printer,CNC (Pack of 3) https://www.amazon.com/dp/B07C7FRLNX/ref=cm_sw_r_cp_tai_.wzBCb0ANF2QJ
Stiffer bed springs
uxcell 8mm OD 20mm Long Light Load Compression Mould Die Spring Yellow 10pcs https://www.amazon.com/dp/B013G5I4US/ref=cm_sw_r_cp_tai_ZxzBCbGVJ10CA
I went with the Crealitty Glass Bed Upgrade
There are mixed feelings on what to go with. A lot of people just use a mirror or similar, but to me it was worth $20 to know it wasn’t going to shatter on me at any point.
Hi, I have the tempered glass one with ridges, they don't say it needs anything. I think If you use a glue-stick on it would stick forever. When I had it placed good it worked without anything, but something happend and it unleveled itself.
https://www.amazon.com/Creality-3D-Platform-Tempered-235x235x3mm/dp/B07FSM8DK9/ref=sr_1_4?keywords=ender+3+glass+bed&qid=1566487149&s=industrial&sr=1-4
The idea on using the glass to space it is great! I will try it!
Thankyou for respoding :)
This is the one I bought.
https://www.amazon.com/gp/aw/d/B07FSM8DK9/ref=yo_ii_img?ie=UTF8&psc=1
Thanks for the detailed reply.
​
I need to read more to understand the z switch and z screws you are referring to. I have no idea what those are. I assembled by watching some channel on youtube do it. It was like a tales from the crypt vibe channel.
​
As much as it sucks, I probably need to completely disassemble it and start over. There has to be something done incorrectly for it to be this difficult. I am definitely going to get one of those gauges before I get back into. I returned the springs today and ordered different springs on amazon. When they get here, I might sit down one night and try again.
​
As for the bed, the glass one I got was scratched to hell from those stupid springs. I didn't know I had to raise or lower whatever switch you were talking about. Like I said earlier, I already ordered a SD card reader so that will be a definite mod. As for the octopi, is there a list somewhere on this subreddit of everything you need to purchase before starting? I have a raspberry pi at the house. I originally bought it to build a retropie but I haven't gotten around to it yet. I could use it for the printer if needed. I really like the idea of remote printing, having a webcam to see the print live, and putting a part on there that stops the print if there is a filament issue.
​
I have to go into the city tomorrow so I was thinking of stopping by ikea and getting some Lack Tables for the eventual enclosure but now I don't know if I am even going to keep the Ender 3. I am debating on returning it and moving up a tier. I really want to get started on this but it seems like I am never going to be able to print any of this awesome stuff. So many awesome files on thingiverse and I can't use any of them.....
​
Here are the parts I have purchased so far....
​
SD Card Extension
​
Glass Bed
​
Springs that I bought that would not lower bed enough
​
Most Recent Springs I am going to try
​
Metal Extruder Upgrade
​
Filament Black and Red
Yeah, that's kinda what I was worried about. This is what I purchased. https://www.amazon.com/gp/product/B07FSM8DK9/ref=ppx_yo_dt_b_asin_title_o01_s00?ie=UTF8&psc=1
I was kinda hoping to be able to put the sticky build sheet on the back side, and leave the coated side against the heated plate. The reviews seem to suggest that the coating wears away very quickly. But I'm afraid that the coating will mess with the adhesion of the polycarb build sheet.
Ideally, it would be great if I could just put the polycarb sheet on the back, and just flip it back and forth and use both surfaces. Just don't know how safe it would be having either surface directly against the build plate.
Printed in two parts. You can see the seam right above where I redacted my PII. Printed in Overture PETG. I used CHEP's petg profile in Cura but had to turn the flow rate down on the printer to 65% because the infill was falling apart. took about 18 hours total I think. printed on the this glass bed because my build plate has a huge bulge in the center. 205C/50C. Going to CA glue and clamp it together and prime and paint it to look like aged/patinaed copper.
This is only about my fourth print and my first with PETG. I can't believe the quality and surface finish I can get out of this little workhorse
Here's the aluminum extruder assembly. The plastic one that comes on the printer WILL break. It's just a matter of time. They crack from stress after a while and even before that they creep and you'll start getting missed extrusion.
Here's the stiffer bed springs. You won't have to compress these as much to get a good stiffness.
Another really popular upgrade is this glass build plate. It has a special coating that makes it so parts stick without adhesive, and it leaves a really smooth surface on your prints. Parts stick really well then when it cools down they self-release.
The 3 upgrades I linked are extremely popular upgrades. You can get by without the glass bed, it's just an option because the stock bed will wear out eventually.
I bought a heated glass plate also: https://www.amazon.com/dp/B07FSM8DK9/ref=cm_sw_r_cp_apa_i_i-RBCbRVFQ0FN
All I do is maybe 8 back and fourths over where it's going to print then rub it in with my hand.
I just ordered one today. https://www.amazon.com/dp/B07FSM8DK9/ref=cm_sw_r_cp_apa_i_ApDCCb7WCN032
I want to say it has a textured surface where you don't have to use hairspray and the like.
https://www.amazon.com/Creality-3D-Platform-Tempered-235x235x3mm/dp/B07FSM8DK9/ref=mp_s_a_1_6?crid=3FDMZV71B8DWJ&keywords=ender+3+glass+bed&qid=1551067444&s=gateway&sprefix=ender+3&sr=8-6
Using this bed
Creality 3D Printer Platform Heated Bed Build Surface Tempered Glass Plate for Ender 3/Ender 3 Pro 3D Printer 235x235x3mm https://www.amazon.com/dp/B07FSM8DK9/ref=cm_sw_r_cp_api_i_4BwJDb8ZYB5F2
Creality 3D Printer Platform Heated Bed Build Surface Tempered Glass Plate for Ender 3/Ender 3 Pro 3D Printer 235x235x3mm https://www.amazon.com/dp/B07FSM8DK9/ref=cm_sw_r_cp_apa_i_SxkoDb69RT69H.
If you print PLA, you're good to go. Any other you might need glue stick, (it ain't that bad).
Directly. Creality 3D Printer Platform Heated Bed Build Surface Tempered Glass Plate for Ender 3/Ender 3 Pro 3D Printer 235x235x3mm https://www.amazon.com/dp/B07FSM8DK9/ref=cm_sw_r_cp_tai_s9RvDbM16RZ7Y is the one I got. It has a coating on it. I have been extremely happy, though it took me another 15 minutes to relieved since it’s thicker and you gotta reset everything.
Only real change is you should wait for it to cool before pulling stuff off, but once it cools, it doesn’t stick. Like... at all. It’s quite nice. Also, it doesn’t warp, which I only found out after, because I was only after a new bed and figured I’d upgrade. Then I read about it ;)