 Reddit reviews EDO Tech Ultra Compact USB Direct Hardwire Adapter Kit for Apple iPhone 7 6 6plus 5 5S 5C 4 3G 3 HTC One Nokia Lumia Google Nexus Sony Xperia LG Optimus Smartphone Phone GPS SiriusXM Radio Dash Cam
We found 11 Reddit comments about EDO Tech Ultra Compact USB Direct Hardwire Adapter Kit for Apple iPhone 7 6 6plus 5 5S 5C 4 3G 3 HTC One Nokia Lumia Google Nexus Sony Xperia LG Optimus Smartphone Phone GPS SiriusXM Radio Dash Cam. Here are the top ones, ranked by their Reddit score.
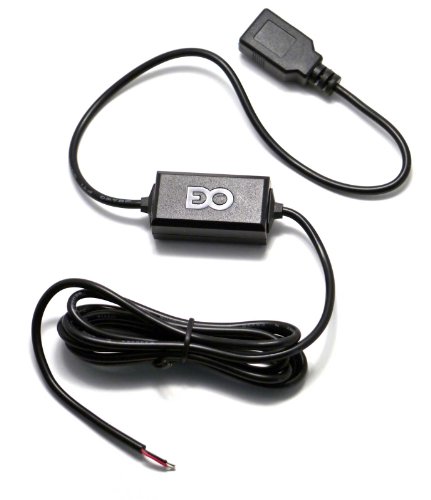
kit includes one ultra compact USB port direct hardwire kit for car or motorcycle onlysimple solution of adding an onboard USB charging port for your Apple iPhone, smartphone, GPS, XM Sirius Satellite Radio and many other mobile devices. for Apple Lightning 8 pin, 30 pin, Micro, Mini USB cable.easy installation: use a fuse tap or wire tap to draw power from fuse block or wire.cable length: approx 5-1/2' in total, 1' from type A female USB to regulator box, 4-1/2' from regulator box to wire end. additional wires can be added to the kit's end to increase the total length. regulator power spec.: 12V~24V input, 5V 1200mA output, regulator box size: about 2-1/2"x 1' (4.5cm x 2cm)30 days money back, one year replacement warranty
It's pretty easy to add a usb charging port with this and this.
I ordered it off of ECS tuning here https://www.ecstuning.com/ES2960267/?gclid=CPft7qCXoMoCFY0XHwodk04N6g
And I wired it into my fuse box with this https://www.amazon.com/dp/B00I3P6QQG/ref=cm_sw_r_cp_awd_uYSKwbJDYPJXS
Easy install and cleans up nicely, would recommend.
I just installed this exact thing in my car (well, sort of, I got the version with a full size female USB port instead of the mini male port so I wouldn't be constrained to that one cable)
Anyway! That is not an inline fuse. That is the 12v to 5v step down, and you definitely need a fuse on top of that.
Here's everything I bought (note that you will need the fuse tap that fits your car)
https://www.amazon.com/gp/product/B00I3P6QQG
https://www.amazon.com/gp/product/B00K17A2E6
And with that and a 6 inch mini USB cable I had lying around, my G1WC is hard wired to my car!
One more note: all these EDO adapters are miswired. They put garbage on the data lines of USB, so your camera thinks it's connected to a PC. A trimmed piece of tape covering the center pins on the USB cable (there are four pins, 1 2 3 4, you need to cover 2 3) fixes that problem elegantly.
As someone with soldering skills, I would just install a supercapacitor on the power lead to power the camera for the few seconds the car is cranking.
However, if you don't have those types of skills, you could hardwire your cam to an ignition hot supply instead of accessory hot supply like it is now. What you'll need is a fuse panel tap like this one to tap into a source of ignition hot at the fuse panel, and a USB hardwire kit like this one to supply the 5V needed by the cam. Then a long enough USB cable to reach from the fuse box to the cam.
Anyone with an hour or two to spare and a crimper can do this easily. If however you aren't comfortable doing this yourself, a local audio shop should be able to install this for you very easily.
Yes. https://www.amazon.com/Compact-Hardwire-Adapter-Smartphone-SiriusXM/dp/B00I3P6QQG/ref=asc_df_B00I3P6QQG/?tag=hyprod-20&linkCode=df0&hvadid=312182162834&hvpos=1o3&hvnetw=g&hvrand=14892076698876430292&hvpone=&hvptwo=&hvqmt=&hvdev=m&hvdvcmdl=&hvlocint=&hvlocphy=9021698&hvtargid=aud-801381245258:pla-567154152460&psc=1
You need either a in line wired USB or wire a cigarette lighter receptacle in and use your existing adapter. You can't just wire the USB cable in directly. USB is 5v.
This
http://www.amazon.com/Inverter-Converter-Adapter-Cellphone-Hard-wired/dp/B017PWWA9O/ref=sr_1_1?ie=UTF8&qid=1457222128&sr=8-1&keywords=wired+USB+12+volt+adapter
or This
http://www.amazon.com/Hardwire-Smartphone-Navigation-SiriusXM-Satellite/dp/B00I3P6QQG/ref=sr_1_3?ie=UTF8&qid=1457222128&sr=8-3&keywords=wired+USB+12+volt+adapter
or this
http://www.amazon.com/uxcell%C2%AE-Charger-Cigarette-Lighter-Female/dp/B00EZJBELQ/ref=sr_1_5?s=automotive&ie=UTF8&qid=1457222216&sr=1-5&keywords=cigarette+lighter+socket+adapter
I have a cig lighter wired in under the dash and one of those 3 output USB adapters for dashcam and some other stuff.
I've used little usb direct hardwire dealies like this guy before.
Just power it of switched 12v, and hide it all nicely behind the dash.
Or this one will give you direct micro usb, to cut out a cable.
edit : I'm sure there are waaaay cheaper options that do the same thing. Those were just easily found :)
They sell compact 12V to USB power supplies like this:
https://www.amazon.com/Compact-Hardwire-Adapter-Smartphone-SiriusXM/dp/B00I3P6QQG/ref=asc_df_B00I3P6QQG/
One of these is compact and light, you can use double stick tape to attach to back of mirror.
SolderSeal connectors both solder and insulate in one connector:
https://www.amazon.com/Connectors-Sopoby-Waterproof-Automotive-Electrical/dp/B01FI6IKG6
Or just use some T-taps like these:
https://www.amazon.com/Electrical-Terminals-Insulated-Connectors-Baleauty/dp/B06Y61K18G
In general with a multimeter you can quickly identify which wires are positive ( + 12 volts) and which wires are ground (-) on a car. The vehicle chassis is ground.
https://www.amazon.com/Multimeter-Multimeters-Voltmeter-Ohmmeter-Backlight/dp/B07G4BH5F8/
https://learn.sparkfun.com/tutorials/how-to-use-a-multimeter/all#measuring-voltage
This is what I have.
I actually ran the USB-C power cable behind my dashboard and into a USB jack that is directly wire into the fuse box with a fuse tap. It makes it look really clean.
****Do any of this at your own risk or hire a professional to do it for you.***
Here are the parts I ordered to put mine together. I'm posting this bc of PMs.
Mobius or [Cheaper Mobius but longer wait from China] (http://www.banggood.com/Mobius-Action-Camera-1080P-HD-Mini-Sports-Camera-Wide-Angle-Edition-p-917817.html) I wanted the Wide Angle Lens for a better shot
Capacitor You don't want the battery sitting in the sun. A capacitor can handle it. So you replace the battery completely with this capacitor
Windshield Mount My mobius came with a mounting bracket that fits on this mount. The mount itself is very small, but the 3M sticker is very strong.
Hardwire Kit When hard wiring this in to the car via fuse box, this knocks the voltage down from 12v to 5v, which is what the camera needs. I used some wire strippers to expose about 5" of the red and black cables. Then stripped about an inch off each cable to expose the actual wire. The red wire goes in to the add-a-circuit mentioned below, then you crimp it closed with pliers (wasn't super easy, I must be weak). You partially unscrew a metal bolt that is attached to the metal car frame as a ground ( I used the one on top of my fuse box).
USB to Mini-USB This connects from the hardwire kit to the camera or 90 degree elbow mentioned next, for a better angle. If you are setting up the auto record when external power is on, which is what you want to do for a dash cam, you need to cut a piece of electrical tape width-wise and cover the two middle pins inside the USB cable. This is because the two middle pins (2 and 3) are data pins. Leaving those exposed makes the camera think its connected to a computer and will only do data transferring. By covering them, it only get power from pins 1 and 4 and doesn't think it's connected to a computer and will actually record.
Right Angle Mini-USB to Mini-USB Adapted This just helped keep the USB cable from sticking out too much (better angle)
Add-a-circuit This is the ATO (bigger fuse), but I ended up using the ATM (Mini) because my car has both and the fuse I wanted to use ended up being a Mini. It'd be best to look through your fuse diagram and find something non-vital (meaning don't tap in to a fuse that controls ABS or airbags, etc) and switchable (meaning it only comes on when the car turns on. You don't want the camera running 24/7), figure out what type of fuse it is, and buy that size. I ended up getting my new add-a-circuit (Littlefuse) from Oreilly auto parts for $6.99 and it came with 3, 4, 7.5, and 10A fuses. Also take note of the amperage (Never use a higher amp fuse than your add-a-circuit supports because the wire gauge may not support it and melt/burn. When adding the circuit, I removed the original fuse from the fuse box, a 10A fuse and put it the first slot(my add-a-circuit supports up to 10A) and for the 2nd slot, I used a 3A fuse because the camera and radar don't draw much. You don't want to use a higher amp fuse than necessary. Also, in my car 2011 JettaSportwagen, the add-a-circuit points down or it doesn't work. Make sure it's plugged in the correct direction or it won't do anything
32GB MicroSD Card Works fine, just make sure to format it through the camera.
Unofficial but awesome Mobius Configuration Tool Use the tooltips(hover over each option) to figure out what each things does. I set mine to autorecord when external power or the button are pushed.
You can find a lot of info here: dashcamtalk.com
To summarize the connections are:
Choose a fuse from your car's fuse diagram (non-essential and switchable), pull it, place it in the correct slot of the add-a-circuit (don't go to higher amps than is supported), plug in a fuse from the add-a-circuit kit in to the other slot to protect your camera (I used a 3A), strip the hardwire kit's cables mentioned above, put the red cable (+) from the hard wire kit in the the red end of the add-a-circuit and crimp it closed, attach the black cable (-) to a screw attached to the metal car frame, tape the two middle pins (2 and 3) in the USB cable with electrical tape, plug the USB in to the female USB on the hardwire kit, run the USB cable from the fuse box around the edges of your cars trim, up by the rearview mirror, attach the right-angle mini-usb adapter, choose where you want to mount the camera (make sure to check using the USB plugged in and camera mounted to the mount, in case it bumps the rearview mirror) (I held it on the windshield about where I thought I wanted it (to behind and to the right of the rearview mirror and took some test footage, watched it on a computer, decided it looked ok, pulled the sticker cover and attached it), clean your windshield with glass cleaner, attach the mount.
Can I use this?
https://www.amazon.com/Compact-Hardwire-Adapter-Smartphone-SiriusXM/dp/B00I3P6QQG/ref=sr_1_2?s=wireless&ie=UTF8&qid=1502485089&sr=1-2&keywords=fuse+tap
I never touched a fuse box before. Quite handy with computers though. What tools will I need?