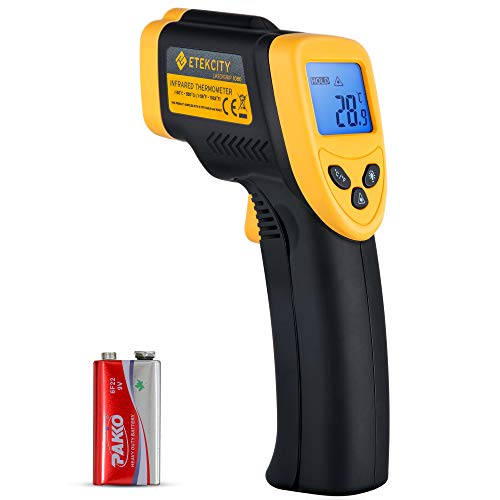
 Reddit reviews Etekcity Lasergrip 1080 Non-Contact Digital Laser Infrared Thermometer Temperature Gun -58℉~1022℉ (-50℃~550℃), Yellow and Black
We found 79 Reddit comments about Etekcity Lasergrip 1080 Non-Contact Digital Laser Infrared Thermometer Temperature Gun -58℉~1022℉ (-50℃~550℃), Yellow and Black. Here are the top ones, ranked by their Reddit score.
BETTER ACCURACY: The distance to spot ratio is 12: 1, meaning the laser grip 1080 can accurately measure targets at greater distances compared to most other IR thermometers;TARGET QUICKER: Measure surface temperature ranging from -58℉ to 1022℉/ -50℃ to 550℃, you can choose the unit from ℉/ ℃; Response time: ≤500Ms; A built in laser gives you the precision to hone in on the exact space you want to measureADDED FUNCTIONS: The LCD screen is backlit, also has an auto-off function to extend the battery life, and features a low battery indicator so you never accidentally run out of juice (battery included)VERSATILE DESIGN: Infrared technology makes this thermometer handy to measure the surface temperature of various objects especially temperatures above boiling points and below freezing points; Use it when you are cooking and barbequing, performing auto maintenance, doing home repairs, and a host of other tasksNOTE: The thermometer can't measure the internal temperature of an object; Temperature readings from this devices are inanimate objects, the measured temperature for humans or animals will not be correct; FDA, FCC, CE compliant; Class 2 laser, optical power 0. 5-0. 9MwNOTE: For best accuracy, the distance between the thermometer and object of measurement should approximately be 14. 17 inches (36cm). Material Type: Plastic
People will say things like 'screaming hot cast iron'. I disagree.
Let me recommend one of these. Then buy a bunch of high quality unsalted butter and make ghee (just cook the butter very low, crockpot even, until all the layers are seperated. Scrape the fat off the top, then pour the middle layer into a container, do not let the stuff at the bottom get in. You will lose a tiny amount of ghee but it's just butter so don't worry about it.). Ghee won't smoke till like 485. anything between 400 and 450 is plenty hot enough for a good sear.
Cast iron doesn't heat evenly. It retains heat exceptionally well. So what I do is preheat the pan for about 5 minutes on a 4/10 on my stove (flat glass stovetop). By then, at least half the pan's about 400. I throw in the fat, wait for the fat to get up between 400-450 (takes seconds), then drop the seasoned steak on a part maintaining that heat large enough to cover the steak. I do 3 minutes a side at that temp.
Sear's great. I can leave up the smoke alarm. I don't even need to open windows. I don't even put the overhead fan for the stove on...cause there's next to no smoke.
Here's a steak I made last night (half eaten).
I've yet to try, but I will next week; putting a cast iron weight on the steak while it vacuum seals. This, in my head, should keep the steak perfectly flat instead of getting 'scrunched' a little by the vacuum sealing. The only part on my steaks that haven't seared well were where the steak got 'scrunched' and wasn't flat and even. I think that will solve that.
EDIT: Quick note since people like this comment...Someone made a comment that changed my life a bit with sous vide. They said to just cook the meat sous vide, ice bath, then fridge. You can then keep it in the fridge for like 2 weeks (I've never let it go that long, usually within a week) but it ends up being like 75% meal prep'd. Searing takes all of 10 minutes with the pan preheat. Pop steaks out in no time flat.
Applicable point about searing is that from cold is key (3 minutes per side from hot will 100% overcook it).
Not to sound like some know it all asshole, but I've found infrared thermometers to be amazing when getting my pans up to the right temp, especially on a unfamiliar stove.
Do you have a photo of the second boa? BCI and BCC aren't THAT different in size, though BCC average a foot or so larger.
I use thermometers like this, and place the probe on the substrate in the center of the hot spot. I have a temp gun like this to make sure the temps in other areas are within acceptable ranges.
You ALWAYS want to know the temperature of your hot spot, since the heating element can get hot enough to cook your snake. I just noticed this, but you need to get that lamp out of there - she can reach it, and she will burn herself on it. Boas LOVE climbing and they are dumb at registering pain.
Take out the lamp and replace it with an under tank heater or heat tape regulated by a thermostat (unregulated UTHs are dangerous). You can get a decent and affordable thermostat here.
At my last pastry job they used this Now I can't live without one. I use it for everything
TL;DR warning
Are you willing to invest in some tools? Do you like Five Guys? (skinny burgers) The fastest burger procedure that I know of is Kenji's Ultra-Smash technique, which makes a pair of thin patties in no time. Takes about a minute per burger (two patties with cheese). Details here:
http://www.seriouseats.com/2014/03/the-food-lab-maximize-flavor-by-ultra-smashin.html
You can also do a regular smash burger, which is thicker (McDonalds-thin), but takes longer (~1.5 minutes per side, about 3 minutes total per burger):
http://aht.seriouseats.com/archives/2012/09/the-burger-lab-smashed-burgers-vs-smashing-burgers.html
The advantage of the ultra-smash is that it's super quick & you can toss a piece of cheese to melt between two patties, so you can pump out a ton of burgers in no time. You will need a few tools, namely:
It's not rocket science, but getting a proper setup will let you have a workflow that makes cooking for a crowd a breeze. I have a big extended family, so I cook in bulk a lot, but I also use this for just my immediate family because it's so fast to get setup. There is an up-front investment required, but everything you'll buy will pretty much last forever, so it's worth it if you like to eat burgers!
So the first two things you need are a metal cooking surface & a heat source that can pump out a lot of heat. I don't recommend a regular grill because they simply don't get hot enough; you need 600 to 700F to do this. You can either do a compact setup (a 2-burger surface with a single burner) or invest in a quality flat-top setup (more expensive, but lets you do more burgers at once). The ideal surface to do this on is a Baking Steel, which is very expensive. There are knockoffs for cheaper, but I like BS because they have a Griddle version with grooves to catch the grease:
http://www.bakingsteel.com/
You can also do it with cast iron. Lodge has a griddle for $25:
http://www.amazon.com/Lodge-LDP3-Double-Reversible-Griddle/dp/B002CMLTXG
If I'm just doing a single regular smash burger at a time, I use a 12" cast-iron pan. $28:
http://www.amazon.com/Lodge-Cast-Iron-Skillet-L10SK3ASHH41B-12-Inch/dp/B00G2XGC88/
If you do get into cast-iron, read up on this seasoning procedure (i.e. the way to keep it smooth & slippery without Teflon). It's a bit of a pain, but it's worth learning because anything you buy in cast-iron can be handed down to your kids because it lasts forever:
http://sherylcanter.com/wordpress/2010/01/a-science-based-technique-for-seasoning-cast-iron/
You will want a heavy smashing tool as well. I have this massive 2.5-pound cast-iron press. It fits inside the 12" pan above (but not the 10"). $13:
http://www.amazon.com/Update-International-Heavy-Weight-Hamburger-Commercial/dp/B002LDDKZ6
If you plan on doing ultra-smash burgers, you'll need a scraper. This is the one Kenji recommends, but you can probably find something locally: (Home Depot or Lowes)
http://www.amazon.com/Plextool-Wall-Paper-Stripper/dp/B00AU6GQLQ/
Anyway, getting back to the cooking part: you'll need a hi-temp burner. I like Bayou Burners, they sell them on Amazon. I have an SP10: ($50)
http://www.amazon.com/Bayou-Classic-SP10-High-Pressure-Outdoor/dp/B000291GBQ
I use that with my 12" cast-iron pan for when I'm just doing a few burgers for the family. 15 minutes = 5 burgers. You can also slap a flat surface like a cast-iron griddle or Baking Steel on that puppy. Also comes in a square version (not sure how the BTU's compare). I also have some KAB4 burners that I use with my Baking Steel, among other things. More expensive, but larger shell & burner: (more even heat over the cooking surface)
http://www.amazon.com/Bayou-Classic-KAB4-Pressure-Cooker/dp/B0009JXYQY/
For cooking more at a time, you can get a cooktop. Blackstone has a 36" cooktop available, but it doesn't get very hot (don't get me wrong, it's an awesome tool, but I've had trouble breaking 500F on mine, which means you're not cooking 1-minute burgers on it, plus the heating is kind of uneven, so you have to work in the hot spots for faster cook times). Also comes in a slightly smaller 28" version (but it's only like $50 less, so it makes more sense to get the full-sized version because you get so much more cooking area). The nice thing with this setup is that for $299 (or a bit less if you shop around at places like Cabela's), you can cook like 20 burgers at a time, it's absolutely insane! I make epic breakfasts on it. Plus it folds up for transport, which is really handy. We use it for all of our family events & holidays:
http://www.amazon.com/gp/product/B00DYN0438
A better version is from Tejas Smokers. They make camping stove carts that have burners built-in & have griddles available separately. They get super hot, downside is the cost: you can easily spend $700 on a nice setup.
https://tejassmokers.com/Camp-Stove-Carts/23
Oh yeah, Blackstone did just come out with a compact outdoor griddle which can run off those little one-pound green tanks if you want. They go for around $99 ($79 if you have an Ace Hardware near you). I have not tried this, but it gets good reviews. I'd be curious to see what kind of temperatures it can achieve:
http://www.amazon.com/Blackstone-Portable-Griddle-Outdoors-Camping/dp/B0195MZHBK
So that's a basic introduction to the cooktops: you need some kind of decently-sized metal surface, a hi-temp burner, a smashing tool, and optionally (but recommended) a scraper. You will also want to get a strong, high-quality spatula. A good one is $32:
http://www.seriouseats.com/2010/07/equipment-the-due-buoi-wide-spatula-my-new-fa.html
Available here:
http://www.duebuoi.it/x/uk_usd/catalog/p/spatulas~805-16x10.html
If you opt for cast-iron, get an infrared temperature gun (doesn't work too well on shiny metal surfaces like steel tho). $17:
http://www.amazon.com/Etekcity-Lasergrip-1080-Non-contact-Thermometer/dp/B00DMI632G/
A cheap digital kitchen scale is useful too, for measuring out the proper amount of meat. $14:
http://www.amazon.com/Ozeri-Digital-Kitchen-Capacity-Stylish/dp/B003E7AZQA/
This collection of tools ensures that you have the proper workflow: a metal surface to cook on, the ability to bring the surface to a high temperature (and know what that temperature is for precise control), the ability to weigh your meat so you can pre-measure out what you need, the ability to smash the burger down, and also to properly scrape it off. Again, it's not rocket science, but if you have a wussy grill or a crappy surface or weak smashing/scraping tools, you're gonna have a bad time. You just need the right setup to pump burgers out fast!
So on to prep. For ultra-smash, you do a pair of 2-ounce ground beef balls. In the tutorial above, they use a mix of meat for 25% fat. I just grab some regular 80/20 ground plus some salt & pepper. For regular smash burgers, do a single 4-ounce ball (optionally 5 ounces...useful if you have a big cooktop for a bunch of burgers at one time & are only doing a single patty per burger). The nice thing is, there's no special prep required for the meat, so you can make all of your burger balls ahead of time. If you have 10 people & are doing ultra-smash, let's say half of them get 2 burgers, so 15 burgers total, or thirty 2oz balls. If you have 20 people & are doing regular smash, again with half getting an extra burger, that's 30 burgers total or thirty 4 or 5oz balls. So that takes care of prep...adjust as needed. If you're feeding mostly dudes, you'll want to add more seconds (and thirds) to the equation.
There are a variety of buns you can get. Crap buns will make for a crap burger. See if you can find potato buns or brioche buns. Those are pretty soft. Buns aren't overly hard to make, but I have yet to find a decent recipe that takes under 40 minutes, so I usually only doing fancy home-baked buns for my family rather than a crowd. Buying 5 or 10 pounds of ground beef & making smash balls out of them will take you all of ten minutes, but making buns can take forever. Here's a good recipe if you want to try it out tho:
http://smittenkitchen.com/blog/2009/07/light-brioche-burger-buns/
Or this, if you wanna get crazy:
http://www.seriouseats.com/2015/05/fresh-cemita-rolls-mexican-sandwich-burger-bun-bread-food-lab-recipe.html
Or this one, nom nom nom:
http://amazingribs.com/recipes/breads/brioche_hamburger_buns.html
But eh, just hit up Sam's/Coscto/BJ's and buy some hamburger buns in bulk, problem solved. Or find a local bakery that has good rolls. There's a good shootout of buns here:
http://aht.seriouseats.com/archives/2011/04/the-burger-lab-whats-the-best-bun-for-my-burger-taste-test.html
(continued)
Is this still happening when you turn the bike on today?
To confirm it's only running on one cylinder, check the temperature of the exhaust headers while it's running. I use this thermometer, but you can just hover your hand over and figure it out.
What you want is a digital thermometer like this one: https://www.amazon.com/Etekcity-Lasergrip-1080-Non-contact-Thermometer/dp/B00DMI632G/ref=sr_1_1?ie=UTF8&qid=1473889665&sr=8-1&keywords=digital+thermometer+infrared
Hey Dave - I picked up one of these for measuring track and tire temps. Any thoughts on the adequacy of it for that purpose?
I've used your advice and typically adjust tire pressures based on temperature 3x a day: 9AM session 1 , 11AM session 3, 1PM session 4. This is the wear I shoot for - any suggestions? I have been running 31/32 in the AM and 33/34 in the afternoon.
If you’ve only had her for 6 days and have tried feeding 3 times, it’s way too much. On top of being in a new environment, having food presented over and over is stressful. When bringing a new snake home, you should leave them completely alone for a week- no handling- and then offer food. From now, wait a week before you offer food again, and don’t handle her between now and then. You should make sure she’s eaten at least 2 times in a row before handling, and wait 48 hours after she’s eaten so she has time to digest.
In the meantime, make sure her enclosure is set up correctly- correct temperature (78-80 cool side, 88-92 hot spot) with heat sources controlled by thermostats, humidity at least 60% or higher, at least 2 secure hides and other clutter like fake plants and branches. As others have mentioned, aspen is bad for holding humidity- cypress mulch or coco fiber/chip is better. Read through the care info in the group stickied post if you haven’t already.
Both of my BPs ate F/T right away despite being fed live at the breeder. To warm it up, thaw in the fridge overnight in a ziplock bag. When it’s thawed, fill a bowl with the hottest water from the tap and put the mouse (still in the bag) in the water. I usually have to change the water out a couple times as it cools. Warm it like this until the temperature measures at least 100 degrees measured with an infrared temp gun like this one . I would also use feeding tongs not your hand.
Hope this helps, congrats on your new baby. 😊
Congrats on your new baby! Since you're new to the world of beardies, please read up on their care with these wonderful guides:
Comprehensive Care Gudie, Nutrition Guide, A wonderful Cheat Sheet!
You will want to get in an Infrared Temp Gun for the most accurate readings for your basking/warm/cool areas. The sticky thermometers on the side are severely inaccurate. This will help guarantee your beardie's temps are where they need to be for proper digestion and health.
I cannot tell from the picture, but mealworms should be avoided until your dragon is over 6 months old as they're very hard to digest and can cause compaction- as should adult superworms.
Micro super worms, pheonix worms/black soldier fly larva, dubia roaches, silkworms, and crickets are all safe options for your baby.
What does your lighting setup look like?
Get a "Brew in a bag" bag, if you want to do BIAB. They're resilient and worth the extra money. You won't find them on Amazon.
If you want to start going to all grain you can buy a large Coleman / Igloo cooler (60 quart is what I use, can do up to 10 gallon batches). Ball valve and fittings, some pipe tape too. Don't forget a pulley to help get the bag out of the cooler!
You can get a flask, stir bar, and everything else you need to start making yeast starters.
Grab a large spoon and/or a flask wisk to help mashing.
Amazon also sells immersion chillers to help with the post boil. I bought mine for $50 and I think it's the 25' one. Works like a charm for 5 gallon batches.
Get a good pair of insulated gloves for your brew day!
Amazon also sells thermometers to help track mash temperatures. I have this one and this one. They're both great. An IR thermometer is great to have for yeast starters too...but definitely not needed. Would put that at the bottom of my purchase list.
Oh! A sterile siphon is also awesome. Bought that from Amazon too.
And so I don't keep rambling, Homebrewfinds as a good list of filler stuff from Amazon. Things like campden tablets, hop bags, pieces to make hop spiders....etc. http://www.homebrewfinds.com/homebrewing-related-amazon-fillers
Refined avocado oil does actually have a high smoke point. I personally use Safflower oil, which also has a very high smoke point.
I would recommend getting an infrared thermometer (this is the one I have) so you can more accurately control the temperature of your pan.
https://www.amazon.com/Etekcity-Lasergrip-1080-Non-contact-Thermometer/dp/B00DMI632G/ref=sr_1_2?s=hi&ie=UTF8&qid=1467908210&sr=1-2&keywords=infrared+thermometer
I use mine all the time, and it has lasted for years.
Just posted this in another thread, if it doesn't work you either are using the laser to aim, which doesn't work, or you got one that doesn't go to a high enough temp. Anyways heres the post:
I have this. Turn off the laser and aim with the big hole. You can easily find them at a depot store in your town too instead of waiting on shipping. Just ask for infrared thermometers.
I would suggest getting rid of aspen (tends to be bad about retaining moisture and can tend to mold easy if over humid) and graduate to coconut husk. Either eco earth or reptile prime. You could even go so far as about 60% coco fiber and 40% cypress bark (forest floor is a common brand name from zoo med)
I just switched to reptile prime and it's amazing.
Also invest in a temperature gun something like this
https://www.amazon.com/Etekcity-Lasergrip-1080-Non-contact-Thermometer/dp/B00DMI632G/ref=pd_lpo_vtph_469_bs_lp_tr_t_1?_encoding=UTF8&psc=1&refRID=P44CS9W74GA9M2Q0ZCC3
and digital probes (tons of options out there)
You will be much happier knowing what the actual temps are instead of guesstimating with those flimsy analog dials.
We just got a laser thermometer like this, and have found it great so far. There is a slightly cheaper model as well. Good luck!
https://www.amazon.com/Etekcity-Lasergrip-1080-Non-contact-Thermometer/dp/B00DMI632G/ref=sr_1_3?ie=UTF8&qid=1487966083&sr=8-3&keywords=laser+thermometer
I highly recommend one of those laser guns that takes temps. Oven/hotpot temps are notoriously +-50 degrees. or even more. https://www.amazon.com/Etekcity-Lasergrip-1080-Non-Contact-Thermometer/dp/B00DMI632G/
Sturdy step stool ($40) - not the rickety tubular kitchen chair ones, I mean one where you can stand on the top. a Buy it for Life item, not inexpensive, but safe. https://www.amazon.com/Louisville-Ladder-AS3002-6966014-2-Foot/dp/B00182TWL2
Leatherman multi tool (around $50), which i keep in the junk bowl because I can never find a screwdriver fast enough. Pricey new, less expensive when you buy it second hand or in a pawn shop. they don't really break, but you do have to clean and oil them once a year. https://www.amazon.com/LEATHERMAN-Wingman-Multitool-Stainless-Steel/dp/B005DI0XM4/
Cordless drill (under $50), mine basically has the screw driver bit in it 90% of the time. the rest of the time I drill lots of pilot holes. pay attention to the battery... if you can get one with a battery that is shared by other tools in the line, then it is easily replaceable and if you buy another tool in that line you can swap batteries. I like to have 1 battery in the charger and one in the device. https://www.amazon.com/BLACK-DECKER-Cordless-Driver-BDCDD12C/dp/B0111N8L7I/
Spirit, bubble or torpedo level. (under $10) the Hanging kit usually contains just the wires and hooks, but you need a small spirit level for hanging pictures and shelves evenly. doesn't matter the brand they all work the same https://www.amazon.com/WilFiks-Leveling-Resistant-Different-Visibility/dp/B07M62GJYP/
Small tool boxes vary in quality. I don't know if this is for you or someone else. But don't buy anything unless it's a NAME BRAND, cheap metal tools bend and can break with too much torque. Even the Stanley line that Walmart sells isn't fabulous, but it's better than a nameless brand. I don't like SETS of tools, but you need to start someplace, buy GOOD tools one at a time, I love finding $$$ tools at thrift stores. https://www.amazon.com/STANLEY-94-248-Piece-Homeowners-Tool/dp/B000UHMITE/(i bought a cheap socket set 4 years ago to replace my stolen ones and they already have rust)
Bucket organizer. (around $15) If you buy a SET of tools, take the plastic blow molded container and put it in the recycling. You will never bother putting the tools back in and when you get more tools they won't fit. Bucket Organizers are pockets that fit around a 5 gallon bucket. You shove your tools into the pockets and everything else in the middle. And keep it in the bottom of your closet and carry it to where you need the tools. https://www.amazon.com/Bucket-Boss-10030-Bucketeer-BTO/dp/B00GK4TOWK
Tack Hammer. (under $15) You won't need a big 22 oz hammer, but a smaller 16 oz one with a normal handled and then a Tack hammer, these have a narrow head and sometimes are magnetic and hold the nail in place. Tack hammers are easier to use for hanging things exactly where you want them. https://www.amazon.com/Stanley-54-304-5-Ounce-Magnetic-Hammer/dp/B00002X1XD
Stud finder.(under $20) uses a battery, and lets you know where the studs are behind drywall. BEST PURCHASE EVER. https://www.amazon.com/Upgraded-Stud-Finder-Wall-Detector/dp/B07VLDTVFQ/ any brand will work fine.
Digital Infared Thermometer (under $20) Non-contact Digital Laser Infrared Thermometer Temperature Gun - ALSO BEST PURCHASE EVER... works in the kitchen for food and oven temp, fridge temp, and for locating drafts and cold spots around doors and windows. https://www.amazon.com/Etekcity-Lasergrip-1080-Non-Contact-Thermometer/dp/B00DMI632G
Toilet Plunger - the sort with the extra bit on the end. https://www.amazon.com/Get-Bats-Out-Plunger-Bathroom/dp/B00ODD5MD0 you do NOT want to be waiting around for someone to unblock your toilet. It may be disgusting but scoop out some of what's in the toilet before you start plunging, it's less disgusting than having to mop it off the floor. You want the plunger that makes a seal around the bottom.
BUCKET. (under $10) mine is constantly in use, i keep it in the tub and toss wet things into it. I have gone through EVERY TYPE on offer...I was so sick of plastic buckets, that warped and stained, where the handles ripped out. But the BEST and cheapest one I have ever found is a flat back duraflex bucket for watering horses. Not kidding. Made of a hard polyethylene these things are designed to be flung around and stepped on by 2000 lb animals. https://www.amazon.com/LITTLE-GIANT-Flat-Back-Dura-Flex-Plastic/dp/B000HHLHPS/ these are cheap if you buy them in a feed store, but even with the shipping on Amazon it is WELL WORTH the money. You will need a bucket when you empty the back of the toilet tank to change the flushing flapper or gasket, and you will need it when you empty the commode itself, if you have to change out the wax seal underneath.
Blanket hangers. (6 for $27) yeah this is obscure, but when I moved I lost a LOT of storage space. These saved my sanity. I use them to hang up quilts and sleeping bags in the back of the closet OFF SEASON. I also use them to hang blankets, sheets curtains and stuff once they come out of the laundry aren't quite dry. I didn't even know there was such a thing before now I wouldn't give them up. https://www.amazon.com/Stock-Your-Home-Comforter-Organization/dp/B00EUG51JU
Flashlight. ($30-50) I've written about these before. Until I bought a GOOD one, I had no idea how bad the others were. Cheap flashlights are great to have scattered about in the cellar, or in the junk drawer. but if you really want TO SEE, get a great flashlight. I gifted myself one for christmas one year and I love it. It hangs by the door and if I am going to be out very late or the weather is bad, I shove it in my bag. It will also illuminate Well past the end of the porch and into the yard if I hear a noise. https://www.amazon.com/Pelican-Carded-SabreLite-Flashlight-Yellow/dp/B01CKAIYV4 any very good brand will do, but I found Maglites to be dangerously useless.
> Would that be powerful enough to heat a 75 gallon tank? I read that the basking spot also needs to be at least 100 degrees farenheight.
You won't know until you check it with an accurate thermometer- you want the ambient air in the basking spot to be around 90ºF and the surface of the basking spot itself to be 105-110ºF for a juvenile.
You want to measure these temperatures accurately with a digital probe thermometer or a laser temperature gun- the guns are cheap.
Once you check the temperature then you adjust the light until you get things perfect but you can't just guess. If it's not warm enough you can simply raise his basking area via a taller platform, rock, or branch.
How are you fixed for his UVB light? That is equally crucial!
Care Guide.
I’ll link what I use.
For water.
https://www.chewy.com/zoo-med-digital-thermometer/dp/154874?utm_source=google-product&utm_medium=cpc&utm_campaign=hg&utm_content=Zoo%20Med&utm_term=&gclid=EAIaIQobChMIgoWLsNql4wIVUYezCh0pQQS7EAQYASABEgJScPD_BwE
For basking area.
https://www.amazon.com/Etekcity-Lasergrip-1080-Non-Contact-Thermometer/dp/B00DMI632G/ref=mp_s_a_1_1_sspa?keywords=temp+gun&qid=1562602149&s=gateway&sr=8-1-spons&psc=1
Get an infrared thermometer. Not perfect, but it gives a ball park pan temperature.
Link
Hot is one of the more subjective words in the dictionary. What's hot to you may be warm to me. Fortunately, they make a thing called a laser thermometer that will tell you exactly how "hot" your grasshopper is. Here's one for example. Take measurements of the parts in question.
I would say the light is completely unnecessary. It'll hurt the eyes, especially if the gecko is albino, plus I think 75w is probably going to be too hot in addition to the heating pad. The heat gradient should be fine if you have a heating pad that covers 1/3rd. I would recommend ditching the light.
I use this one
Have this one and it's great. Used it originally in my silkscreening class actually to watch temps on the shirts. https://www.amazon.com/gp/product/B00DMI632G/ref=oh_aui_detailpage_o04_s00?ie=UTF8&psc=1
Some of my favorite things.
Here you go: http://www.amazon.com/Etekcity-Lasergrip-1080-Non-contact-Thermometer/dp/B00DMI632G/ref=sr_1_4?ie=UTF8&qid=1451344205&sr=8-4&keywords=infrared+thermometer
What are you looking to do?
If just walking out to the field and taking temp measurements: Any digital thermometer will work. In my truck, I've got both a temperature gun and a digital instant read (not these exact units, but pretty similar).
If you want crazy cool/hi-tech, you can go with something like John Deere's FieldConnect. It's will give you moisture and temp readings, as well as send the readings to you.
Hmmmm...If you know the name of the shop that did the work, they should keep records on the mileage. You could then call them and confirm that it indeed "has not been driven that much." I know dealerships will do this, but I'm not sure about small shops.
I truly doubt it's the belts, but I wouldn't discount it. The only thing I can think of that would make them slip is if there is oil or some other slippery fluid lining the entire inside portion of the belt, which you can easily look for.
http://www.amazon.com/Etekcity-Lasergrip-1080-Non-contact-Thermometer/dp/B00DMI632G/ref=sr_1_5?ie=UTF8&qid=1453141132&sr=8-5&keywords=temperature+gun
$15, hold it as close as you can to the spot you're measuring. This will allow you to see if your sensors match the actual temperature.
I have a little temperature gun. I'm constantly measuring the ambient temp, water temp, and dough temp. I don't have any formulas but I think it helps develop a feel for how temperature affects the process. For example this time of year my kitchen is typically 65-68 degrees which is pretty cold for room temp, so I decided to put my dough in the oven with the light on (about 75 degrees) between folds for the bulk fermentation. I think that helped.
I think the best advice, though, is not to fret over it too much! It's a lot like yoga, you just have to let go and enjoy your own journey. Embrace the ebb and flow of gradually improving with practice. There are so many variables to play with and no perfect loaf.
You and I are probably similar. I had never cooked before spontaneously deciding I was going to cook all of my own food from scratch on my 37th birthday. I also spent HOURS slaving away on often so-so dishes and felt discouraged. I pushed through that initial 2-3 month window of crappiness and now I'm 2.5 years into cooking 6 days a week and it's been life changing. That said, I still don't LIKE cooking, but I don't mind it, and I love the feeling that I finally know what I should be eating.
I think it was J. Kenzi Lopez Alt who said that good food is the result of:
Good recipes: I can't believe there's 41 comments and no one's mentioned Budget Bytes. She is the queen of pragmatic, low cost, fast-enough, from-scratch, healthy weeknight dinners. For your first couple of months of cooking try focusing on just her recipes. They're beginner friendly and very well written.
At least until you develop the sense of what makes recipes good, avoid YouTube, gif recipes, Pintrest, and the obnoxious blogs full of too-well-staged-photos. They're interested in views and shares, not cooking.
Here's some other sites that produce consistently good food:
Here's some confidence building fantastic recipes:
Good Ingredients: In the beginning I found that cooking was often way more expensive than I'd ever imagined. That was in part because I hadn't built up much of a pantry (oils, vinegars, spices, other condiments), but the main reason was because I was shopping a supermarket. For both cost and quality reasons, each week try finding a new market in your area. In particular, look for ethnic markets frequented by people of the biggest ethnic culture in your area. The asian, mexican, and middle eastern markets in my area have better quality food for quite seriously 50-75% less than a supermarket. The closest supermarket charged $7/lb for prepackaged ground beef. The mexican place nearby charges $3/lb for ground beef they grind themselves.
Speaking of ethnic markets, try to find an ethnic market with a dry goods section where you can scoop out as much of an ingredient as you want into bags for cheap.
If you live in a metropolitan area find a Penzeys. They sell spices that are much higher quality than a supermarket for about 25-50% less than supermarket prices.
You're going to need tons of chicken broth. Until you inevitably start making your own large batches in a pressure cooker a year from now, stick with Better Than Bouillon(https://www.betterthanbouillon.com/wp-content/uploads/2018/06/BTB_Package_8oz_Roasted_Chicken_Base-2017.png). It's cheaper and better than the crap you get from a can or carton.
Good Equipment: The most important thing is a sharp knife. Here's the $27 knife everyone usually recommends. Even if you already have a knife, it's probably dull if it's not new and you haven't sharpened it; get it sharpened or buy a new one for now. Learn to hone it before or after each use.
Go to a kitchen supply store, Smart & Final, or Amazon and get a couple of 1/4 sheet trays ($4?), ten or so bar towels ($1 each), and a prep bin ($4) so that your prep area looks like this. Also get a bench scraper ($5). The 1/4 sheet trays keep your ingredients organized and ready to go. The prep bin saves you from having to keep a trash can nearby and keeps things tidy. The bench scraper is a time-saving godsend for moving stuff around. A proper prep station alone will probably cut your cooking times by 10-20%.
Good Technique: Once you have an organized prep station and you get your workflow down, the biggest time saver is going to be knife skills. Onions & garlic will be your most commonly chopped items, so watch several videos and make sure that each time you chop one of those it's meaningful practice. To avoid cutting yourself: get a sharp knife, while cutting always consider what would happen if your knife slips, and every time something awkward/unusual happens, take a small pause before you continue cutting.
The art of home cooking by recipe really comes down to heat management. Get an infrared thermometer for $20, they're incredibly valuable when starting out. For the vast majority of sauteing, turn your pan to medium high (just guess) and measure your pan with that thermometer until it's around 300 then pour in whatever oil you're using. Keep checking them temp with the thermometer until that oil is around 330-360 then toss in your meat or vegetables. If you wait a few seconds, slide the food out of the middle of the pan, and check the temp again you'll see it's in low 200's because the food saps the heat out of the pan. Your goal is to keep that heat in the 300's. Note that as the food heats up the pan will get hotter quicker, so as you're learning keep monitoring that pan and get used to the sounds it's making so eventually you'll manage heat through sound & instinct.
The last thing is: use more salt. If you're cooking a recipe that looked great, and got great reviews, and it doesn't seem like you made any big mistakes yet it's still bland, it's because you didn't add enough salt 100% of the time. It took me a while to realize that when I add salt to a dish someone else has made, they had already put a good amount of salt in it. So when salting a dish that makes four portions, you're not going to just shake in some salt from a shaker, you're going to pour in a teaspoon or more.
Get a deep fry thermometer. They should have one in the kitchen gadget aisle at your grocery store. Or grab one cheap off Amazon. For a few more bucks, you can get a handheld infrared thermometer which is infinitely more fun to use (and doesn't require cleaning).
2 more things. If that heat lamp is resting on metal mesh cut a hole around where the light bulb is. The mesh on the cage could create a mini oven and have your bulbs burn out in half the time. Second, get a heat temperature gun to test that spot. Its the only accurate way of testing a basking spot. https://www.amazon.com/Etekcity-Lasergrip-1080-Non-contact-Thermometer/dp/B00DMI632G/ref=sr_1_1?ie=UTF8&qid=1497757240&sr=8-1-spons&keywords=temperature+gun&psc=1
Home Depot, Lowes, and even Amazon have these handy infrared thermal temperature readers. They are relatively cheap and you can scan the mobo to see if you have any components getting too warm. I would check with that that to see what's going on and then go from there.
Edit: Etekcity Lasergrip 1080 Non-contact Digital Laser Infrared Thermometer Temperature Gun -58℉~1022℉ (-50℃~550℃), Yellow and Black https://www.amazon.com/dp/B00DMI632G/ref=cm_sw_r_cp_api_OCRrzb8HTB27T
I got this one off Amazon pretty cheap. Does the job for what I need it for.
Here's a cheap IR thermometer that would probably do the job.
https://www.amazon.com/Etekcity-Lasergrip-1080-Non-contact-Thermometer/dp/B00DMI632G/ref=sr_1_1?ie=UTF8&qid=1474470595&sr=8-1&keywords=infrared+thermometer+amazon
I'd check the air temp coming out of the vent in the hot room vs. the temp coming out in other parts of the house. It might be that the ducting in that part of the house doesn't have enough insulation and is losing a bunch of coldness on it's way to that room. Or it just might be the farthest from the air handler. In any case, cool air coming out shouldn't be any more than around 60-62 at the worst.
It's also worth checking the temperature differential in the air handler between the temp going in and the temp going out. It should be in the 20-30 degrees range at least, i.e. 85 degree air comes in, 55 degree air goes out. You can usually do this with a cheap probe thermometer and is a standard test done by any AC guy that checks out the system.
Once you have a under tank heater, it will probably be warm enough that you won't need the lamp. I'd also get a thermostat, in my experience heat pads will be 10-20 degrees above where I want them depending on what substrate I'm using (With slate tile it's 95 on full blast, with paper towels/news paper it will get up to 110). You could also just use a lamp dimmer from Lowes/Home Depot attached to the UTH.
Lamps will raise the ambient temperatures more and UTHs will directly heat the ground, which is what leos need, so they're always the best choice. You'll want to get a reliable thermometer that measures ground heat. So, a digital thermometer with a probe or a temp gun. Temp guns are great and can be bought at home improvement stores (but they're cheaper online). The warm side should be around 90 and the cool side should be around 75.
Do you know their sexes? Leos can only be housed together if they're both females and very similar in size. Males will fight and males with females can breed and/or fight. Even if they are both females, I'd be very careful. Bullying can happen even with females, and sometimes it's hard to see the signs because reptiles' social cues are way different than humans. They really always do best when housed alone. If you do choose to house them together, I'd double your hides. Two cool hides, two warm hides. The more hides there are, the less chance of fighting there is.
edit: forgot to say, yes that UTH should be fine. A rule of thumb is that it should cover about a third of the bottom of the tank.
I like using laser thermometers
Alright! So that fixture itself isn't bad, but the UVB bulb that is in there probably isn't great. There is a bunch of research that suggests those coil style UVB bulbs aren't great for our beardies and don't cover the tank in enough UV. This hood is what we use along with this bulb. This light should be on during the day and turned off at night. General consensus is at least 12 hours on. That hood may come with a bulb already, but if it does, it's probably the 5.0 which isn't strong enough for bearded dragons. That why I gave the link to the 10.0 version. This bulb should be replaced once a year even if still illuminates, as the capacity to produce UV diminishes after about a year.
The other thing in the fixture may be a CHE (ceramic heat emitter). If it just generates heat but no light, then that is what that is. You really only need that if the tank temperature drops below 75-70 degrees F. Make sure not to use any red or any lights at night as bearded dragons can see color and it will disrupt their sleeping.
Finally, it sounds like you don't have a basking light. Even though your house stays pretty warm, beardies still need a basking spot of around 105 degrees F. In the now empty spot where your old UVB bulb was, you can use one of these. Some people just use flood lights from Home Depot or elsewhere, just make sure it's not an LED one. You can use this light dimmer to control the light output to get the basking spot to the correct temperature. I would recommend this infrared temperature gun to check for the correct temperatures during the day and at night.
Lighting is one of the biggest things for bearded dragons and can take some time to get set up correctly. It's good to ask questions and research! I still learn new things about beardies all the time. I'll get pictures of our setup tomorrow and show you. I would tonight, but our babies are already sleeping!
One last thought, as some others have said, if you have an exotic vet nearby, it certainly wouldn't hurt to have Ember checked over. They can check for parasites or other issues before they become a problem.
Pleaaaase get a thermostat. Snakes move substrate and burrow and do weird snakey things, and uncontrolled temperatures can burn your snake, have it go off its feed, cause it to regurgitate, or even crack the glass of your tank. Most tank heating pads fluctuate in temperature, so even if it's reading 108 right now, most reptile pads can spike to 120-130F.
I use this thermostat for all of my tanks, for all of my species. https://www.amazon.com/MTPRTC-Controller-Thermostat-Germination-Reptiles/dp/B000NZZG3S Cheap and prime-eligible!
Also, I recommend getting a laser thermometer if you have any reptiles at all-- specific temperatures are vital to your snake's husbandry if you want it to thrive, and being able to check surface temperatures is super important (in addition to a temp prob that can measure ambient temp in the rest of the cage). I use this one: https://www.amazon.com/Etekcity-Lasergrip-1080-Non-contact-Thermometer/dp/B00DMI632G/ref=sr_1_1_sspa?s=lawn-garden&ie=UTF8&qid=1510799376&sr=1-1-spons&keywords=temperature+gun&psc=1 It works like a charm!
You should always have temps available on the warm and cool side.
If you don't have fixed thermometers I highly suggest spending the extra $$ on a battery powered infrared thermometer.
Something like: https://www.amazon.com/Etekcity-Lasergrip-1080-Non-Contact-Thermometer/dp/B00DMI632G/.
Depending on age, their basking spot should be 95-100(fahrenheit) for adults, a little warmer for juveniles, 100-105. The ambient temp of the basking side will naturally be higher than the cool side.
The cool side should be noticeably different in the 80-85 degree range.
 
Hope this helps, please provide an update!!
Get one of these and find out just how hot dryer is getting. If either the Thermal Limiter or the High Limit Thermostat is bad you usually can't tell by looking.
Etekcity Lasergrip 1080 Non-contact Digital Laser Infrared Thermometer Temperature Gun -58℉~1022℉ (-50℃~550℃), Yellow and Black https://www.amazon.com/dp/B00DMI632G/ref=cm_sw_r_cp_apa_i_3P14AbZ9RCK9B
This is the one I've used for over a year for my dab setup and it works flawlessly. $17 on Amazon, elegible for prime
For our ambient temperature thermometer we use this: https://www.amazon.com/gp/aw/d/B0013BKDO8/ref=mp_s_a_1_10?ie=UTF8&qid=1505841625&sr=8-10&pi=AC_SX236_SY340_FMwebp_QL65&keywords=digital+hygrometer&dpPl=1&dpID=516gPXAOs5L&ref=plSrch
For testing the temperature of the basking surface we use this: https://www.amazon.com/gp/aw/d/B00DMI632G/ref=mp_s_a_1_1
We use this to measure humidity
https://www.amazon.com/gp/aw/s/ref=is_s?k=Caliber+4R+Gold+Digital%2FAnalog+Hygrometer+by+Western+Humidor
And this as a thermometer
https://www.amazon.com/gp/aw/d/B00DMI632G/ref=sr_ph_1?ie=UTF8&qid=1481523239&sr=sr-1&pi=AC_SX236_SY340_QL65&keywords=laser+thermometer
I like those two because of their accuracy
Sounds silly, but it works! And yeah, aa the other person said, definitely invest in a temperature gun. A very cheap, but crazy useful tool. This is what most people have, including myself. Comes with a battery and everything.
This is the one I got, it's pretty widely used and has good reviews: https://www.amazon.com/gp/aw/d/B00DMI632G/ref=mp_s_a_1_1?ie=UTF8&qid=1492547819&sr=8-1&pi=AC_SX236_SY340_FMwebp_QL65&keywords=temperature+gun&dpPl=1&dpID=41A5BxdiHmL&ref=plSrch
I know it might seem very hot, but uromastyx, for example, need 120F basking spots, and some monitors need 140! Heat is very important, so don't over compensate and go too low when you dim the lamp.
Now I'm gonna break out my infrared thermometer
Ditch the infrared bulb. It messes with their sleep. And I would get a timer for your basking lamp and uvb - I got a cheap $5 one that they had at target for Christmas lights but you can find them on Amazon too. For me it's a lot easier having his lights going on and off automatically than having to remember to switch them on and off everyday. What kind of substrate are you using? Do you have a basking rock under the basking lamp? You should and you should also get an infrared thermometer to make sure the basking rock is at the proper temp. I think it's 105-110 for juveniles and 100-105 for adults but I could be off a bit. That part is important though for digestion. What size crickets are you offering? They should be no bigger than the space between your beardie's eyes. If your beardie is at least 16" you can also try super worms. My beardie is 8 months old and it took a lot of veggie buying before I found the two leafy greens he likes best - collard and turnip greens. He also hates it if I try to add fruit or veggie toppings he just wants the leaves. He eats more veggies when I just give him leaves. Oh! What kind of substrate are you using? Tile is recommended in here and works really well.
ETA links - thermometer https://www.amazon.com/gp/aw/d/B00DMI632G/ref=sxts1?ie=UTF8&qid=1487564979&sr=1&pi=AC_SX236_SY340_QL65
Timer - https://www.amazon.com/gp/aw/d/B00P76URH8/ref=mp_s_a_1_6?ie=UTF8&qid=1487564997&sr=8-6&pi=AC_SX236_SY340_QL65&keywords=outlet+timer&dpPl=1&dpID=41oJZwx0ioL&ref=plSrch
I have one of these Digital Laser Infrared Thermometers and found that my bed is the same, warmer in the center.
I also found it's about 5°C cooler than what the control box is set to.
Does the FLIR agree with your control box setting?
Buy one of these and test for yourself. Your skin gets hot when under the sun. Like 120 to 150 degrees F. Test your other arm to see how much you ir sunscreen is actually keeping you arm cool. I doubt much at all (but I would be genuinely interested to see).
My first pancake (the one on the bottom of the stack in the picture) was a little light in color and runny when I flipped it and the pan surface was about 350F when I did it. I pumped up the heat a bit to around 370F-375F and then I got that nice sizzle when I poured the batter on. The IR temperature probe gun is one of my most used kitchen gadgets and takes all the guesswork out of getting a properly hot pan for searing and such.
They're pretty cheap if you are interested in getting one. They are really handy I find.
The temperatures the tower faced were fine, as long as it wasn't locked into a car in a parking lot in the sun. The tower getting hit could definitely cause the problems you have, I remove my gpu whenever I move my system to keep it safe. The only thing holding the card into your case is two screws and a small clip, so the card may flex if it is the tower is bumped.
>It actually is and always has been mounted with the fans pointed toward the ground
I have an issue with my HD 6970 where the card won't boot if the orientation is weird, it's unlikely your problem. My card is a special snowflake.
You should try reflowing the solder with a heat gun (I don't recommend the oven method because it's harder to keep track of the heat and everything is heated). You will want to purchase a laser thermometer to monitor temps, they're like ($10-20 on amazon)[https://www.amazon.com/Etekcity-Lasergrip-1080-Non-contact-Thermometer/dp/B00DMI632G] and super useful for cooking.
IMPORTANT: THE SOLDER CONNECTING THE SILICON TO THE SUBSTRATE MELTS AT ABOUT 130C AND THE SOLDER CONNECTING THE SUBSTRATE TO THE PCB MELTS AT ABOUT 200C. I'll add an edit with an imgur link labeling the silicon chip, the substrate, and the pcb. You will want to heat the silicon chip to 130C first as it is the least invasive way to fix the problem. If artifacts continue, you will want to reflow the substrate to the pcb.
Edit: Here's the link: https://imgur.com/a/1MCDMpB
This is a good thing! Did you clean and lube the slide pins while you were there? If not go back and do that step. A cheap IR temp gun can give you a good idea of whether there is a problem (plus it's fun to play with)
I just bought this on amazon. Friend recommended it to get the stone to the right temp.
Etekcity Lasergrip 1080 Non-contact Digital Laser Infrared Thermometer Temperature Gun -58℉~1022℉ (-50℃~550℃), Yellow and Black https://www.amazon.com/dp/B00DMI632G/ref=cm_sw_r_cp_api_i_EeIcBbPPSDHX0
Here's what I want to know - why is there an identical one under a different brand name? Is it just a scenario where some Chinese factory makes it and whoever wants to market it can slap their name on it?
(code worked for me, btw)
Edit: the bad reviews mostly seem to be about how inaccurate it is. It's so tempting, because I've wanted one of these since I saw Alton Brown use one years ago, but I think I'll pass.
This is the thermostat I own.
You simply plug the heat pad into the thermostat and set the temperature. The thermostat will turn the heat pad on until set heat is reached, then turn it off after a bit. When the temperature drops back down, it will turn it back up. Another good thing to own is a heat gun to verify floor temps and adjust the stat if necessary. Also, like most technologies, thermostats can and will eventually fail. That's why it's important to check the temp everyday even when using a thermostat, to ensure it functions properly. I've had a friend use lower quality stats that failed and sadly led to the death 10 of his reptiles. Better safe than sorry.
Meant to reply much sooner, so not sure if you've already found what you were hunting for, but if he keeps reptiles as pets, a heat gun would be a great gift. Something like this.
I've been keeping reptiles for a few decades, and a heat gun is an absolute essential item. You don't know how much you need it until you have one. Hope this helps.
You can use something like this to check temps more easily. It's not the most accurate thing ever, but it's pretty good and ideal for this situation:
https://www.amazon.com/Etekcity-Lasergrip-1080-Non-contact-Thermometer/dp/B00DMI632G/ref=sr_1_3?ie=UTF8&qid=1482495995&sr=8-3&keywords=thermometer+gun
What about one of these. I've got one and it's pretty easy to check suspect spots real quick.
The Melexis sensors are pretty quick. It's the same thing they use in IR temp guns. Probably not "instant" enough to catch a falling object reliably, so you'd likely still need an inspection platform.
I would imagine this whole apparatus to basically be a welded steel box (~5mm thick steel or so on a square tube pedestal bolted to the concrete), so it wouldn't really matter if it was on fire or not. It would be oxygen deprived once in the chamber and self-extinguish. That sort of construction would also aid in weather resistance as well as tamper resistance.
I had a thought regarding your reward - spherical objects are probably going to be easier to dispense since they will require no special orientation. You could model your dispenser and feed mechanisms off of a paintball gun hopper system.
What are your power requirements? That might inform how complex you can make it and how many moving parts there are. You could further greenify it by making it solar powered if you live in a suitable climate.
Word of warning, batteries are much more complicated than they seem (see: Samsung). Buy off-the-shelf battery management if you choose to go that route.
Sounds like you've already got the "hiding in the bushes" part down - you just need the tazer now!
I have something like the below . I would just say beware what shares that breaker to try and not overload it. I'm not an electrician or anything just overly paranoid. I haven't regularly charged yet to get a good idea of how much power I use. I have a short commute so 110v charges it fine and I live 2 miles from a supercharger. I'm still waiting for my registration so I can get the car in my Edison account to get 13¢ off peak rates and a 1000$ credit.
https://www.amazon.com/Etekcity-Lasergrip-1080-Non-Contact-Thermometer/dp/B00DMI632G/ref=mp_s_a_1_5?keywords=fluke+temperature+gun&qid=1571292759&smid=ATVPDKIKX0DER&sprefix=fluke+te&sr=8-5
With the pad on the way you should be fine anyways.
This ~20$ thermometer is top seller on Amazon and has great reviews it's not 100% accurate of course but certainly good enough to determine an issue with temperatures.
Put one of these on your wish list.
Malcolm, I'm happy that you're happy :)
Just so we're on the same page, you're using Caputo 00 pizzeria flour,, right? 65% water is a little high for Caputo. For your next bake, go with this:
100% flour
62% water
3% oil
1% diastatic malt
2% salt
.3% instant yeast
1% sugar
Your yeast should be 3.2g per teaspoon. Your malt is 14g per tablespoon (3 teaspoons). You'll need to check the packaging of your salt to check it's density. If it's a fairly standard fine grain salt, it should be around 13g per tablespoon, but definitely check for greater precision. How are your excel skills? A spreadsheet can be enormously helpful for these kinds of conversions and for scaling a recipe up/down.
And don't forget... photos :) Right now, I'm just helping you reach a somewhat generic really good pizza realm. To hit Glascow more precisely, I'm going to need to see photos of the underside of the dough (right before stretching) and of the finished pie.
It's a no contact IR thermometer - http://www.amazon.com/dp/B00DMI632G?psc=1
It can be a little finicky when measuring straight water due to the reflectivity, but I always double check mash/sparge water with a probe. I'd love to upgrade to a thermapen, but that can be pricey.
Total system draw can be measured with something like this a power energy usage meter. This in case you don't have a power supply with reporting.
​
And something like this, a laser thermometer to check the VRM temps or if your mobo has sensors something like HWMonitor_x64 would tell you the temps. Not really know much about the MSI B350.
You need to have one of these. An IR thermometer is a tremendously valuable tool for owning a reptile.
Other than that be safe and get a new UTH immediately. If it's not working, or periodically malfunctioning that's bad.
I hope these links help to the basics you will need. Everything else is just personal preference. But all together about 400.
http://www.petsmart.com/reptile/supplies/habitats-and-decor/terrariums/exo-terra-reptile-terrarium-15040.html
http://t.petco.com/shop/en/petcostore/product/zoo-med-reptisun-t5-ho-terrarium-hood-36-l#
http://t.petco.com/shop/en/petcostore/product/zoo-med-repti-basking-spot-lamp-value-pack-100-watts#
http://t.petco.com/shop/en/petcostore/product/zoo-med-reptisun-100-uvb-t5-ho-lamp#
http://t.petco.com/shop/en/petcostore/product/flukers-clamp-lamp-with-dimmer#
https://www.lllreptile.com/products/10824-small-bamboo-root-jungle-gym
https://www.amazon.com/dp/B004PBB1JE/ref=sr_ph_1?ie=UTF8&qid=1486446181&sr=sr-1&keywords=Zoo+med
https://www.amazon.com/Zoo-Med-Digital-Terrarium-Thermometer/dp/B000MD3MFA/ref=sr_1_1?s=pet-supplies&ie=UTF8&qid=1486446243&sr=1-1&keywords=zoo+med+digital+thermometer
https://www.amazon.com/dp/B00DMI632G?ref_=ams_ad_dp_asin_1
This was pretty interesting so thanks for doing it. I also want to see something like Andrace said and be able to measure temperature across the tires. I was going to suggest a crude method of taking a infrared temperature gun, but the pyrometer would be a even more accurate way of doing it.
It would be interesting to see temps after each lap, how the pressure affects how quickly the tires warm up/stay at peak temp, current weather, track temperature, length of run, how staggering your pressures affects your temps/times. Just some thoughts for future data.
Did you get the same kind? Make sure you're pointing the right part of the thermometer at the banger (you're using a quartz banger?). It's not the laser pointer part, it's the opening below it. Usually from about 6 inches away, it'll read pretty consistently. Since it's so close, DON'T USE THE LASER POINTER! Or at least don't pay attention to where it's pointing. You want to aim the sensor opening at the banger, not the laser.
Also, it reads in real time, you don't have to hold and release!
Yes, it jumps up and down a little bit at the beginning, probably because it's reading the heat of the air rising around it. But you should be able to read a downward trend, especially after it cools down slightly.
Message me back if you don't figure it out, I'd be happy to post a video or something. I'm super-happy with mine, and would be glad to help you get your working. Good luck!
First thing, get a non-contact thermometer like this: https://www.amazon.com/Etekcity-Lasergrip-1080-Non-Contact-Thermometer/dp/B00DMI632G and measure the supply air temperature.
​
There's a zillion opinions on how cold the supply air should be (google up "temperature drop across a/c coil"). My rule of thumb is that it should be about 20C/40F colder than the ambient temperature, YMMV. You might also want to trace the temperature along refrigerant supply and return lines and see if they lose much along the way from the condenser to the air handler.
​
I have a hunch that you may have replaced the thermostat along with the rest of the system, see if it is calibrated correctly, and whether there's any airflow into uncooled space behind the wall it is mounted on.
a laser thermometer, great! Kind of nerdy, but totally useful for getting your coffee and lunch heated up to just the right temperature.
​
I got one for Christmas a few years ago, I love that thing! How hot does my TV run? Laser thermometer, How hot is my coffee? Laser thermometer. How hot is the guinea pig, laser thermometer, how hot is the wall when it's 95 degrees out? Laser thermometer....plus, it's less than $20
​
I also like Plato and the color green. my favorite equation is E=mc2 but I'm still sure they will love the laser thermometer :)
​
https://www.amazon.com/Etekcity-Lasergrip-1080-Non-Contact-Thermometer/dp/B00DMI632G/ref=sr_1_1_sspa?keywords=laser+thermometer&qid=1562544242&s=gateway&sr=8-1-spons&psc=1
Sounds like you got a bad power supply.
Leave side off and buy one of those temperature guns and point it at the different components while it's heating up.
https://www.amazon.com/Etekcity-Lasergrip-1080-Non-Contact-Thermometer/dp/B00DMI632G/ref=sr_1_1_sspa?crid=3MNJ3KJFI79F5&keywords=temperature+gun&qid=1561996335&s=gateway&sprefix=temperature+%2Caps%2C341&sr=8-1-spons&psc=1
I have this one and can attest to its awesomeness. Etekcity Lasergrip 1080 Non-contact Digital Laser IR Infrared Thermometer Temperature Gun, Yellow/Black https://www.amazon.com/dp/B00DMI632G/ref=cm_sw_r_taa_h-7AxbYEMQJKJ
https://www.amazon.com/Etekcity-Lasergrip-1080-Non-contact-Thermometer/dp/B00DMI632G
That's not really an accurate way of measuring. If you have no problems I would say maybe that works fine but using one of these will give you far more accurate results.
? What about the basking spot? I use a laser thermometer to check the temp at a specific spot. That temp actually sounds a little low for a veiled. She might be looking for more warmth.