 Reddit reviews Finware 10 Pair XT60 XT-60 Male Female Bullet Connectors Power Plugs with Heat Shrink for RC Lipo Battery
We found 11 Reddit comments about Finware 10 Pair XT60 XT-60 Male Female Bullet Connectors Power Plugs with Heat Shrink for RC Lipo Battery. Here are the top ones, ranked by their Reddit score.
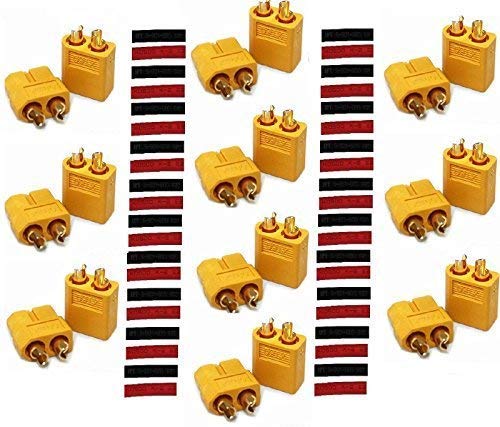
10 Pair High Quality Female and Male XT60 ConnectorsHeat Shrink 2:1 both Red and Black Included - 2 Feet TotalXT-60 Connector for RC Lipo Batteries Drones Airplanes Cars Vehicles60 Amp Current Handling Bullet ConnectorsHigh Temperature Nylon Material
Just completely swap the connector to anything. https://www.amazon.com/Finware-Female-Bullet-Connectors-Battery/dp/B01ETROGP4/ref=sr_1_3?s=electronics&ie=UTF8&qid=1549167374&sr=1-3&keywords=xt+connector
They make these in various sizes and you could replace it again if it ever breaks.
This is where things get a bit weird for the Type 97. The official battery for them is wonky as fuck and requires the removal of the entire lower grip to install.
I, on the other hand, did some measuring and found these particular batteries. They fit perfectly in the grip, I'm not even kidding. Did some measurements with my calipers and these are the only batteries with the perfect proportions where you can slide the buttplate off the grip (normally reserved for the tool kit that comes with the gun) and slip it in there. However, as I'm sure you notice, you'll need to convert your gun to XT60. Not a difficult conversion, but it does require some patience, a soldering iron, and some connectors. I picked up this pack and it does me just fine
If it's useful, I too just got started, and built a similar drone. When it came to charging, I had to read a ton of stuff. Here's what I did (all non-referral Amazon links. you may find cheaper on banggood if you want to wait forever):
ISDT Charger
12v Power Supply
Balance Charger
To connect these up, it may be useful to have some extra XT60 plugs since the power supply won't have XT60, and neither does the balance charger.
With these optional parts, I was able to make a nice looking (and more safe) charger from the power supply, along with a 3d print available here
Voltmeter
Power plug
I found this to be a pretty fun project, and wasn't as expensive as some options I saw on HobbyKing or everywhere else. To be fair, it wasn't the cheapest option either.
Buy some real 14 AWG silicone jacket wire, (this is what I'm using) and a set of quality XT60 connectors like these.
Ideally you want crimped ring terminals for all power leads that connect to screw terminals, putting bare wire into them isn't how they're meant to be used.
The 14 AWG has enough area so you can solder them to both positive and negative pads on the heatbed respectively, and terminate those with 1 XT60 connector. A word of advice - dismount your heatbed, flip it upside down and put it on something that can take some heat for a bit like corkboard. Heat it up to 60-80C, turn it off, then remove the stock connector and solder the wires. Otherwise you'll get nowhere trying to solder to a room temp heatsink.
The matching XT60 connector uses the same 14AWG to crimped ring terminals, going to the MOSFET board. For reference, here's one I'm using on my printer.
I only removed the power pins from my bed, I pre-cut the connector so I could leave the middle pins and connector shell for the temp sensor attached to the bed, then I could still use that to disconnect those wires. Works great because the little retaining mechanism is in the middle of the connector over the sensor wires.
Pre-tin the XT60 wire cups and the wire itself before you try to solder them together unless you've got both a beefy soldering iron and good soldering skills, otherwise your connector will end up with a faulty solder connection.
Now it's easy to disconnect the heatbed.
YW!
I also use it on the UPPER part of the heatbreak (the tube that goes into the cooling block), helps transfer heat from the tube to the aluminum fins.
NEVER on the lower part that goes into the nozzle, the idea is to prevent heat creep UP the tube, adding some there would be bad, very bad. :-0
JST connectors - I don't think that they will handle the current requirements of the heater. Fine for fan & thermistor, but the heater needs a heavier plug.
I went a little overboard since I had some but this is what I used for the heater (I smoothed the sharp corners & edges):
https://smile.amazon.com/Finware-Female-Bullet-Connectors-Battery/dp/B01ETROGP4
PP
These are the ones. It says "finware" not sure if its the manufacturer or the distributor..... The item has 114 reviews and the rating is 5 out of 5.....
so i'm looking at buying these bulbs, these connectors and this wire. altogether it'll be around $20, but i'll only need some of this stuff for each.
i'm trying to decide if it is worth buying the extra connectors and wire or if i should just buy this pair of connectors with wire already soldered on and the bulbs and save myself $10.
The only video I could find of the MOSFET board installation was very long and somewhat unclear to a newbie. It looks like he mounts it under the printer rather than the control box and overall just seemed really difficult.
I just went ahead and pushed the button on my order from Amazon that includes the XT60 Connectors w/ Heat Shrink and the 6-1 Soldering Kit I would have preferred the MOSFET but in hopes of not getting over my head, it was a total of about 30$ and seems doable.
While you are at it, replace the lossy Tamiya connector there. https://www.amazon.com/Finware-Female-Bullet-Connectors-Battery/dp/B01ETROGP4/ref=sr_1_4?keywords=XT60+connectors&qid=1571109188&sr=8-4 wire both ends and you wont need to adapt anymore.
Ok thank you so much! Is it these that have been linked from that website?
https://www.amazon.com/Finware-Female-Bullet-Connectors-Battery/dp/B01ETROGP4/ref=sxts_k2p_hero2?pf_rd_m=ATVPDKIKX0DER&pf_rd_p=2668835662&pf_rd_r=S6R4R8BWK779TRY0V987&pd_rd_wg=EO22e&pf_rd_s=desktop-sx-top-slot&pf_rd_t=301&pd_rd_w=5EfKl&pf_rd_i=xt60+connectors&pd_rd_r=P19PEF82ZJTF265YT9T0&ie=UTF8&qid=1478461649&sr=2
pretty sure I got this one https://www.amazon.com/Finware-Female-Bullet-Connectors-Battery/dp/B01ETROGP4/ref=sr_1_4?ie=UTF8&qid=1551117789&sr=8-4&keywords=xt60
​
​