 Reddit reviews Firbon A4 Paper Cutter 12 Inch Titanium Paper Trimmer Scrapbooking Tool with Automatic Security Safeguard and Side Ruler for Craft Paper, Coupon, Label and Cardstock (Black)
We found 5 Reddit comments about Firbon A4 Paper Cutter 12 Inch Titanium Paper Trimmer Scrapbooking Tool with Automatic Security Safeguard and Side Ruler for Craft Paper, Coupon, Label and Cardstock (Black). Here are the top ones, ranked by their Reddit score.
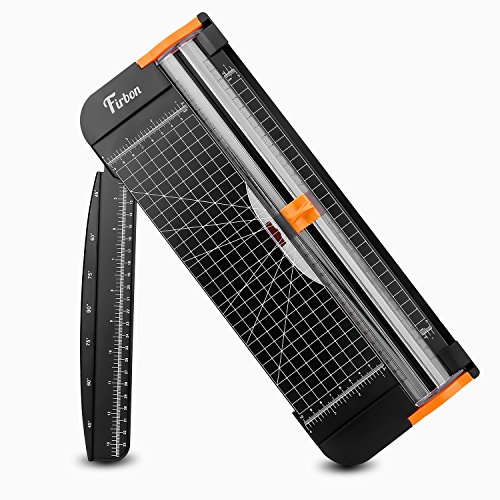
Professional Guillotine: Present the clean straight cutting along printed line. No drag! And easy to replace the blade when it become blunt.Size and Materials: Design to cut A3,A4,A5 Paper, Photos, Cards, Laminated Stuff (within 1.5mm) and more. Max cut 12 sheets paper (80g/m2) every time. Cut a little lesser prolongs blades' service life better.Accurate Measurement: With 45-degree to 90-degree angle measuring plate and cm/inch scale. Ensure to trim the angle and length you wanted.Portable and Safe: This cutter is lightweight and convenience. Only work when you press the blade, perfectly protect user especially children.Versatile Making: Your ideal cutting tool for making craft projects, wedding invitation cards and greating card. Suit for home, office, and school.
Would [this] (https://amazon.com/dp/B075NYWF5P/ref=cm_sw_r_cp_apa_i_OV4TCbJYYH80Q) help?
I used Oracal vinyl and a paper cutter for the angles/straight-edge cuts.
I watched this video and it really helped me out + gave me direction with applying the vinyl, even though it was my first time messing with it on a bike.
Before cutting the pieces out of the vinyl roll, I used paper to help create a template. I didn't take many photos of the process, but I did create a "highlight" on my Instagram account (same username), showing a few pics/vids that I took during the process.
I would invest in the paper cutter. They really are not very expensive--i have what I imagine is probably the smallest size and it works for my everyday crafting needs.
You can also try folding, licking the edge, and tearing paper. I do that and actually really like the soft edge you get. Just practice a bit and as long as you fold straight, you'll get straight pieces from it.
P.S. Here's a 12 inch cutter from Amazon, I have the same size but different brand. This one is under $11: https://www.amazon.com/dp/B075NYWF5P/ref=cm_sw_r_cp_api_i_tFiYDbC67CWHZ
I use a combination of techniques. 3D printed dungeon tiles, dry erase flip mat and tiles. If there is a nice pre-existing gridded map I want to use then I will print it at home.
I use a relatively cheap Ink Jet printer and I added a "continuous ink supply" system (CISS) purchased off eBay. It has paid for itself many times over.
I print the maps full size on many letter sized sheets. Trim the edges as necessary using a ruler and utility knife or something like This.
Next I will use small pieces of Post-It tape to hold the pieces together from the front side.
Finally, I flip the whole thing over and use packing tape along the seams on the back of the map. Then the Post-it tape can be easily removed without tearing up the map or messing with the images at all. You can follow-up by running a glue pen inside the overlap from the top of the map if you wish.
It sounds like a lot of work, but I can generally do a map that spans 8 pages in about 30 min from PC to finished paper map. It's much cheaper then printing at a print shop. After 2 or 3 maps the CISS and supplies pay for themselves. I try to reserve this for larger areas or maps that might be reusable.
Many map makers on Patreon also make modular systems, like forests, cities, etc. I print these out and glue them to 8" x 8" pieces of chipboard or cereal box. They can go together any way you want.
These would be super easy to make especially if you have the right machine - https://www.amazon.com/Binding-Machine-Manual-Operation-BUYOR/dp/B07GDXK1HB/ref=sr_1_2_sspa?ie=UTF8&qid=1541711463&sr=8-2-spons&keywords=binding+machine&psc=1 (Push down to create the hole punch and push back to open up the binding and slide on the paper.)
Based on your dimensions it looks like the previous person may have just been printing out 2 per page then cutting them in half. (8.5/11 page). Hole punching then sliding them on the binders.
​
Now for the covers, they just look like clear binding covers: https://www.amazon.com/Fellowes-Binding-Presentation-Covers-52089/dp/B0015ZVXIW/ref=sr_1_3?ie=UTF8&qid=1541711751&sr=8-3&keywords=clear+binding+cover
​
And then if you want to be exact I recommend a steady hand or just a standard paper cutter. https://www.amazon.com/Firbon-Scrapbooking-Automatic-Safeguard-Cardstock/dp/B075NYWF5P/ref=sr_1_5?s=office-products&ie=UTF8&qid=1541711789&sr=1-5&keywords=paper+cutter
​
You may have to recreate the file itself, but overall easy to do!
​
Hopefully that helps!
​
Edit: And binding combs, which could also just be cut in half with scissors
2nd Edit: The paper, I would personally use a cardstock for the covers, but that would generally be personal preference. The inside you could just use regular paper
​
​