 Reddit reviews Xacto Precision Razor Saw Set
We found 14 Reddit comments about Xacto Precision Razor Saw Set. Here are the top ones, ranked by their Reddit score.
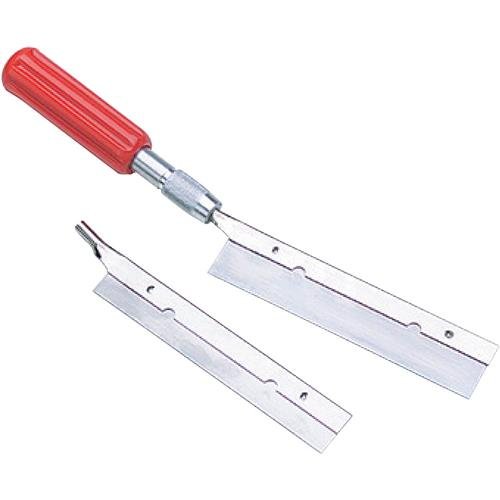
Precision Razor Saw SetDelicate Sawing of Models and Railroad TracksGreat For Cutting Metal, Balsa Wood and PlasticComes With Different Blades Types See Description For More DetailsThis is an aftermarket of generic part
The tool you're looking for is called a razor saw. Good luck with the mod!
Edit: Keep in mind that it is not solid plastic, and you will have holes where you make your cut. You could use plasticard and green stuff to cover that up though.
I'd use a razor saw to cut them off the bases. If you start your cut just under the boot, it should be easy to remove the figures cleanly with little to no damage.
I'm actually trying to figure out the same thing right now for frozen blood samples.
I've been (minimally) successful with a biopsy punch. If you can find one large enough, you might be able to extract ~25mg consistently. Especially if you warm the end slightly.
The next thing I want to try is a small serrated saw, which should be cleaner than chopping. I used to have one from xacto, but i'm sure there is an equivalent surgical tool example
Please let me know i you find a solution!
Xacto Razor Saw from Amazon for $10.
a hobby saw with a thin kerf
Before you go and start sawing away with a regular hobby knife try a razor saw, and like /u/_hei said try freezing and popping them off first.
http://www.amazon.com/Xacto-X75300-Precision-Razor-Saw/dp/B00004Z2U4
>Is there a correct way to break pasta in half? I just snap it with my hands, but then pieces go flying
Go to your local hobby shop, they should have some really small saws, it'll take a while but really good food is worth the wait.
Headswaps are often one of the most straightforward conversions to learn (with a couple big caveats :) )
The most important thing is the amount of provisional fit. That is to say, you have to eyeball the head and the place you want the head to go, and get an idea if they:
Size/scale should be obvious.
Amount of neck is helpful because a head sitting right on shoulders isn't going to look right. So, if one head has a bunch of neck exposed, and the other has a hood folded up around the neck, that could be the same amount of above-shoulder-below-head material.
You could saw the hooded fellow off at the line of the hood (leaving the hood in place) and then saw the one one with a lot of neck at roughly the same angle from high at the back to a little lower at the front, to match the angle of the hood. (leads into #3!)
If you can manage a similar angle of cut, great. If not, try to cut more neck, or supporting material off of the head, so that you can then file it to more closely match the angle you cut on the body it is supposed to attach to.
Really, getting a clean cut is the hardest part. If you're using plastic, you have lots of wiggle room, as a good thick cyanoacrylate glue will let you chemically fuse the two pieces together. If one or both pieces are metal you have to be a bit more precise. Big gaps can be filled with a bit of smooshed up putty, but if you can get it close without putty, its best to do so (in general).
n.b: If you get into conversions much over time, you will expand your capabilities if you can learn a little it of putty smooshing eventually, but I would say its best to learn to judge, plan, and execute as precise of cuts as possible early on. You'll thank yourself later.
Once you've got a reasonably close match, you're in the home stretch. If plastic: melt that shit together with CA! Otherwise, learn to pin the pieces together for long term strength and viability of the figure.
A good primer on general pinning ideas and techniques is available here if you're interested: https://www.youtube.com/watch?v=QhyQOUz-Dx4&t=1s
If you're in the US, I recommend just buying cheap paperclips, or bulk brass rod from a hobby shop or somewhere like DickBlick etc. Having a small handful of good pinning material on hand (and a good pinvise with very fine drill bit) is worth its weight in gold over time if you want to learn to do tricky head/limb/weapon swaps.
Happy to offer more advice if it would help. PM me, or hit up the 'HowTo' area of the RandomPlatypus forum, and leave a post about what you're looking to learn, and someone will totally offer some advice. :)
Good luck!
Oh! and if you're interested in trying things like headswaps and other conversions, in addition to a good pair of cutters that most people seem to instinctually have on hand, a razor saw will set you up for serious success.
Pick one up if you can afford it, you won't regret it!
https://www.amazon.com/Xacto-X75300-Precision-Razor-Saw/dp/B00004Z2U4
As a fellow Custodes player I hope I can shed some light on these questions, but I am by no means an expert, so I can only answer to my experience.
Hope this helps out, and let me know if I can clarify more on something.
The saw?
Something like this Xacto X75300 Precision Razor Saw Set
Indeed! Those are great ideas!
I just found this saw which is 40 teeth per inch with a kerf thickness of .0165", and says it works with metal. That seems promising, and relatively inexpensive.
I'm trying to not buy too many tools since I'm away from my workshop until late summer, and right now I'm basically working out of the equivalent of a hotel room.
It's a saw.
That's a pretty common size, in my opinion. When you're carving in the round, most people trace the design onto the wood with pencil (there's some techniques for this as well, like using center lines to maintain good proportions) and then cut the blank to roughly match the design with a bandsaw or coping saw if you are doing it by hand.
Personally, I go with the coping saw and as I make the cuts, I tape the sawed-off pieces back together with masking tape and retrace the pencil lines so I can more easily conceptualize the proper cuts on a 3d object. The coping saw can be rather tiresome work though.
Another good method is to use stop cuts to precisely take away large amounts, but instead of using a knife to make the stop cut, use a little saw. This small Xacto saw is amazing for that purpose.. I've tried a number of small, hand-held saws and this one has very fine teeth and minimal kerf so it works well in basswood. Just cut in with the saw, then use the knife to gradually slice down the unwanted material to the stop cut.
My first project was also an egg and I have to say it is a very boring project, although it was useful to figure out how the grain affected various cuts. Choose a more interesting one next time from the start and it will be far more enjoyable. I'd recommend trying a wood spirit (like an old man face). There's plenty of tutorials and examples on youtube/google. Picking up a coping saw or the Xacto to rough out what you want to carve will get some parts started even quicker.
This was about halfway through my second carving attempt ever, doing a wood spirit. You can see how you use the corner of the blank for the bridge of the nose and round off the head around the other three corners. Way more fun.
Sorry https://www.amazon.com/Xacto-X75300-Precision-Razor-Saw/dp/B00004Z2U4