Best adhesive putty according to redditors
We found 204 Reddit comments discussing the best adhesive putty. We ranked the 21 resulting products by number of redditors who mentioned them. Here are the top 20.
We found 204 Reddit comments discussing the best adhesive putty. We ranked the 21 resulting products by number of redditors who mentioned them. Here are the top 20.


No.... They both have issues recognizing with loud music or sounds playing. You get the same issues with the dot if your speaker is placed near it, or it's built-in speaker is turned up too high.
edit: Here's amazon's placement guide for alexa devices:
> Place your Alexa device in an ideal location
> Make sure your Alexa device is at least eight inches away from walls or other objects that may cause interference (such as microwave ovens or baby monitors).
> If your Alexa device is on the floor, move it to a higher location.
Echo requires more power to power the built-in speaker. They could have opted for USB c but that wasn't a standard when it came out. Google home also uses a proprietary ac adapter, and it came out this year. They also both don't have a 3.5mm because they were designed to be used with the built in speaker that actually sounds good.
Really neither is better than the other, they're designed for different purposes. One is for voice controlled, loud, high-fidelity music playing speaker in one package and another for a low cost have an echo in every room to control your house. (Gen 1 echo dot was a limited manufacturing run, so they limited it to existing echo users to buy. It's a higher quality build too. uses american TI SoC, has stereo speakers (ones from smartphones), has the volume ring from big sister echo, so it was more expensive as well.) (Gen2 is plastic, has buttons for volume control, has a really cheap mono speaker (one you find in a child's toy), uses chinese Mediatek SoC - this is why the price is so low.)
You might want to clean the microphones of the echo (not with compressed air, use something like blutack to remove the dust. be careful and don't use too much pressure. you don't want to get blutack stuck in the hole.), and also unplug and let it sit for a few minutes if you need to shout it at it in a quiet room. That's not normal.
Maybe these vicious, thoughtless vandals used that extremely hazardous, environmetally-toxic substance known as FUN TAK. When this material is used to adhere objects to other objects, it's been known to require TWO FINGERS to separate those objects.
When will these EVIL VILLAINS be BROUGHT TO JUSTICE???@?
3M Command strips work great, they have a variety of configurations to hang just about anything. They are, however, not inexpensive.
We use poster putty to hang lighter paper things (like posters)
Not OP but I’m assuming It’s the putty stuff you stick posters up with - “blue/blu tack” is the branded Aussie nomenclature (think Kleenex for facial tissue).
Get some of those reusable tac strips. They’re used for hanging posters and aren’t supposed to leave a residue.
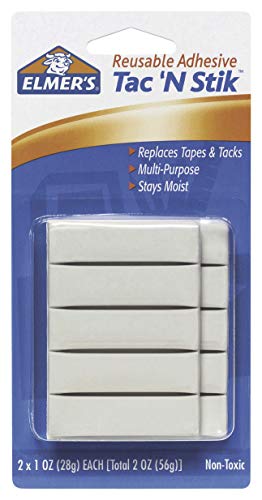
https://www.amazon.com/Elmers-Tac-Stik-Reusable-Adhesive/dp/B001CEMCXQ
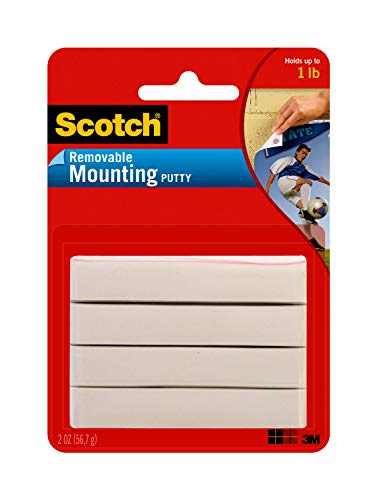
I use Scotch Mounting Putty. As long as you don't use too much, it comes off of walls with no residue or damage left behind.
That looks like Poster Putty. If it's good enough to hang my Monster Energy Drink™ poster on my wall, It's good enough for my car!
poster tack.
stuff like this
https://www.amazon.com/Elmers-Poster-Tack-Reusable-Ounces/dp/B000BKQDB4
Blu-Tack is what you need. This is pretty much exactly what it's designed for.
Blu Tack
Blu-Tack Reusable Adhesive 75g https://www.amazon.com/dp/B001FGLX72/ref=cm_sw_r_cp_apa_AuF.ybQGE1KJT
This stuff is great for figures. It doesn't stain and it is pretty good at holding stuff in. I use it all the time with Figmas and nendos, when scales won't stay on there stands, and for BJDs
Try using a bit sticky tack to get the arms lined up as a dry fit before you glue, that way you're not trying to grow 3 extra hands and fidget with alignment that keeps shifting on you constantly. Use the tack to stick the pieces together, then you can adjust and remove the tack point by point when you're happy with their alignment and ready to glue.
Something like this: https://www.amazon.com/Bostik-Blu-Tack-Adhesive-801103/dp/B00I42EOJE/ref=sr_1_4?ie=UTF8&qid=1509542585&sr=8-4&keywords=bluetack
When I read these threads, I'm reminded how fortunate I am that I had a dad who was building circuit boards for the Navy and had a soldering iron in my hand when I was 9. Thanks for the reality check. Let me offer some tips.
> Conclusion: should I invest in magnifying glasses? Do you use a magnifying glass? Also, an absurdly bright light in front of you would help.
I would resist(no pun) this as long as possible. Seems like a really good idea, ends up being a crutch that hurts you. I think once you get more acquainted with the iron, the smallness of the components will matter less. I also sometimes use a headlamp to light up specific areas. Looks kinda silly but works a treat.
> Conclusion: fix your helping hands to something. Make sure your elbows can rest on the table to keep your work steady.
Absolutely, even a couple C clamps could do the trick. That being said, I've been using adhesive putty to hold my workpieces, it's great, highly recommended.
> Conclusion: a very pointed pencil tip would help. Some people like knife tips.
I can understand why you might want this, but it's actually going to hurt more than help. A needle tip does not hold or transfer heat like a larger tip. What you'll gain in precision, you'll lose in actually being able to solder something. Instead, a knife or chisel tip(my preference) both still come to a relative point, but have enough mass and surface area to adequately heat a joint. The precision will come with practice.
> Conclusion: keep track of your components, and maybe put them immediately back in the labeled bags. Or in labelled bins.
Reading component color codes should only be a last resort, especially for small components. Even if the colors are easy to see and understand, they only tell you what the resistor should be, not what they actually are. Instead, get yourself a multimeter. Then, you can measure the actual resistance of components, saving the strain on your eyes, and arming you with advanced knowledge about the actual resistance of the component. Honestly, a multimeter is indispensable for myriad reasons, this just being one. It's the actualization of our greatest commandment, Ohm's Law. It's the tape measure of electronics.
> Conclusion: triple check your order.
Yup.
Yup! I use poster hanging putty (like this one from Loctite) to put into the grooves to clean out the gunk. It's sticky but not too sticky so it picks up the dirt and crud but doesn't leave residue or itself behind.
The dark marks from scratches and dirt are much harder. Prevention works best by using the putty to clean it out regularly as needed.
Use Blu Tack! 2 x Bostik Blu Tack Mastic Adhesive Putty Non Toxic Blue approx 60g 801103 https://www.amazon.com/dp/B00I42EOJE/ref=cm_sw_r_cp_api_i_A07TDb049R108
An Apple genius told me it’s what they use and it’s amazing for me. I was so embarrassed to show my nasty AirPods case before. Now I just put this gummy like substance anywhere and it picks anything up.
For better painting, especially on the Stormcast side, do sub-assemblies and for gaming before you have completely finished paintjob, stick the models together with blue-tac/poster putty - get this shit anyways, great for sticking wash pots to table so you don't flip them on your table/carpet etc. Another tip - if you cannot remove remains of the blue tac from model by hand, use a bigger blue-tac ball to remove it.
Subassemblies before painting:
Liberators - Hands with shields kept separate, add with bluetac before model is finished for playing
Retributors - "backpacks" kept separate for better access to back area. Possibly weapons as well for access to the front.
Prosecutors - wings removed if possible for painting them separately (way better handling) and access to the whole model, especially the Prime model has somehow very stupid wing placement.
Lord-Celestant on Dracoth - generaly not really much possibility for subassembly at all :(
Relictor - just glue this shit together, you can access anything on the mini
Chaos - in general I don't think there is any need for sub-assemblies, as the models have generaly open poses allowing great access for painting. However, Korghos Khul might be a good idea to keep him separate from the lord (blue tac) and therefore both models separate from base (blue tac).
By the way, I generally use bluetac to attach models to bases for playing, as bases are usually the last thing I paint/customize to match the whole paintscheme.
Ditch the PVC holders and terminal blocks. Just put a hole through the bulkhead large enough for electric match wires.
When you prep for flight, run the ematch leads through and connect them to your altimeter. Plug the hole with the sticky stuff sold for attaching posters to the wall and put your charge into the corner of a plastic bag, stuff the match head down in, fold it over and wrap it with masking tape.
FWIW, I got the poster putty idea from Kent Burnett, the guy who designed the Talon.
If you're insistent on deconstructing before painting, but want to play a few first, try using sticky-tack or fun-tack to keep the minis together and on their bases. Keep in mind, if painted pieces before gluing and are using a plastic glue or cement, you'll need to get the paint/primer off the contact points before gluing or it won't work properly. Even if you're using regular super glue you should still remove any paint to make a stronger bond.
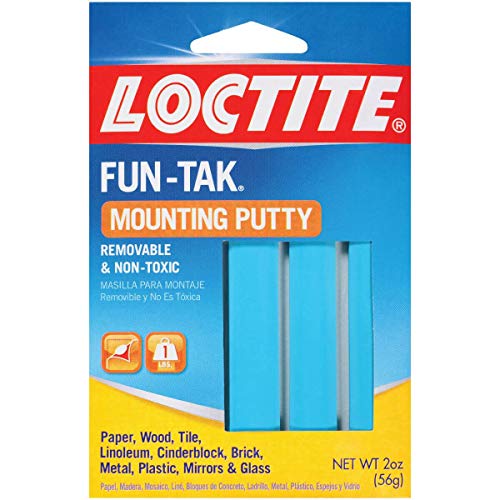
https://www.amazon.com/Loctite-Fun-Tak-Mounting-2-Ounce-1087306/dp/B001F57ZPW
Blu-Tack
Use Blue Tack.
Here's some ideas:
I would focus on decorating by area to make the rest of your home feel festive, if you can't focus around a fireplace like you seem to have in the past.
​
This stuff?
https://www.amazon.com/Loctite-Fun-Tak-Mounting-2-Ounce-1087306/dp/B001F57ZPW/ref=sr_1_3?keywords=blu-tack&qid=1564766773&s=gateway&sr=8-3
or is the brand "blu-tack"? Or is it all the same stuff?
Forgot your other question! It’s actually sticky tack like from the office supply section that would be for putting up posters and such. Loctite Fun-Tak Mounting Putty 2-Ounce (1087306) https://www.amazon.com/dp/B001F57ZPW/ref=cm_sw_r_cp_api_t-tQBbKF8MKKT I use it to stick minis to pop bottles so I can spray paint them to prime them.
Sticky Tak. That soft blue stuff you can find in the office supplies aisles. Test it on a small part of the poster, to make sure it won't cause damage. I've found for many paper materials I've used it to hang things, it hasn't caused any damage yet.
It's just this stuff, maybe it's called something else where you live but it's just something to hold the parts together in a way that can be easily removed so you can check any potential issues before you glue everything. You don't have to have it it's just more convenient than holding the parts together by hand.
Looking at the default loadout the kill teams have on GW's website as an example, I'd definitely leave the shield, the two handed hammer and the heavy flamer separate as they cover up large portions of the marines body and would make things hard to paint. The others I'd probably just paint fully assembled. It's not about how detailed they are, it's about whether or not there are parts to the model that cover up other parts and would make those parts difficult or impossible to paint.
https://www.amazon.com/Blu-Tack-060968-Reusable-Adhesive-75g/dp/B001FGLX72
He's not talking about Tic-Tacs or metal pin "Tacks" LOL
The Blood Rage models are plastic, not resin. I'd recommend getting primer from a hobby store like Michael's or Hobby Lobby. It should be a little cheaper if you get one of their 40-50% off coupons from their websites. This should be fine. As with any primer, you'll want to spray 1-2 thin coats, preferably when the air is dry (less than 50% humidity). You won't lose any detail that way.
As for the wash, you probably could get away with 1 of those bottles. You could either order 1 and then just order another (if you're ok waiting) when/if you run out, otherwise just order 2 right away. If you ever paint other models in the future, you'll use it.
Edit: I'd also recommend getting some Blue Tack to stick on the bottom of your models so you can stick them to some cardboard. It makes it easier to bulk-prime, and if you're just using a wash on them, you don't even have to remove them from the cardboard when you do that.
I just use Dap Poster Putty. I roll a little ball of putty that I keep on a little plastic square. It works like the Onzow Zero dust, except when the surface gets too dirty I fold it over and reshape the ball. It's sticky enough to clean the stylus but doesn't leave any putty on the stylus behind. Other brands might work, but I know for sure that Dap's putty won't do any harm. Link to Dap Poster Putty
I regret getting the monitor I used for this because the ports on the back were sticking out like this. This made the frame maybe a half-inch deeper than it had to be.
If I was to do this again, I would pick a dell monitor that doesn't have adjacent ports like the picture. And one with USB ports built in, so when you turn off the monitor, any hardware I have plugged in (like the Raspberry Pi I used for my frame) would turn off with it.
The frame and mirror are sandwiched between the front of the frame and adhesive putty that's pressed into the corners inside the frame. I think corner braces woulda been a solution but I've already been to the local hardware store like 3 times the day I realized this.
Edit1: Actually there may be issues with Dell monitors like power timeouts and data corruption. So scratch that.
Edit2: Sounds like it's only certain Dell models that have may have this issue.
There was another thread about that the other day https://www.reddit.com/r/dragonquest/comments/cm9a2s/this_dqiii_hero_bring_arts_figure_is_awesome/
They also mentioned the hands, and mine has the same problem so it seems to be the line.
And if you think Erdrick is hard to balance, try Alena. Between the hair, hat and cape she's top heavy and all over the place ith weight distribution.
For standing them, some people use tack. It won't let you do anything with them, but it can make the difference.
Personal suggestion, put packing tape (the thick clear stuff) on the backside of the poster in the corners and maybe a few other places, put a glob of blue sticky tack on the tape, and then mush it up on the wall. The tape on the poster will keep the tack from tearing the poster when you try and take it off.
Although, it would probably be better to take the poster to a copy shop or office (depot/max/whatever) shop and get it laminated. They might have a laminator big enough, call ahead first.
Here is my list I will put links when I can.
Citadel Shades- also known as washes. I would suggest Nuln Oil as your black wash and Reikland Fleshshade as a brown wash. Example you would black wash the probe droids but I would suggest the brown wash for the wookie.
I find these washes great for new painters because you don’t have to do anything to them. Use them right out of the pot.
http://www.games-workshop.com/en-AU/Citadel-Shade
Also the Citadel base paints that have the metal look to them like lead belcher are excellent for doing highlights on metal surfaces like the blasters or the droids.
For all my normal colors I only use the 1$ acrylic paint from normal craft stores. They work just as well as long as you water them down. You pay more for the special miniature paints and Side by side I did not see the difference in my Minis.
For primer I use white for most things even stuff that will be dark. It is much easier to make something darker. It is harder to lighten up it back up. The washes especially the black wash will darken up the mini as well so it is important for the colors to be brighter than you think they will needed to be.
Some talked about having to do more than one coat and for about half my colors I normally do two coats but the white gives me the freedom to just do one coat if I want it to look lighter. Example I have to paint a mini one time that was wearing jeans. I only applied one coat of blue paint then used the black wash over it. This gave the jeans this faded look and was done much easier than having to do the lighter highlights by hand.
For brushes a size 0 1 and 2 would be a good start. For washing I use a side 3-4 as well since that makes it quicker.
Varnishes there is only one to use Testors Dull coat
http://www.amazon.com/Testor-Corp-1260-Spray-Testors/dp/B0035LOUMU
Ok here are items that are just really nice to have that you may not have thought about
You will need something to put the models on while you are painting them. I use corks and you can get those at a local craft store then you pick your brushes up. You don’t want to be holding on the mini while painting as your figures will pull even some of the dry paint off with enough handling.
Best way to attach them to the corks is poster tack. It is reusable and holds them very secure.
http://www.amazon.com/Elmers-Poster-Reusable-Adhesive-E1531/dp/B000BKQDB4/ref=sr_1_3?ie=UTF8&qid=1420900105&sr=8-3&keywords=poster+tac
For priming I have seen a lot of people use a box to prime the minis and I have done this but I find it sometimes hard to get primer over the bottom of the minis. My solution to that is a yard stick. You are going to get paint all over it so make sure it is not one you ever plan on using as a yard stick again. Use the poster tack to minis to the stick. This allows me to flip the minis over completely to be able to get primer even in the hard to reach spots. I can spray about 12 minis at one time.
Edit wanted to add some examples of my work. These are the first minis I ever painted.
http://s750.photobucket.com/user/mrush007/slideshow/Zombicide%20First%20Batch
For next time. :)
I give you... [sticky tack](Elmer's Poster Tack, Reusable, 2 Ounces https://www.amazon.com/dp/B000BKQDB4/ref=cm_sw_r_cp_api_PhHVzbS0QAD20)
After seeing the various customizations out there I decided to take a shot at my own. I'm not a crafty sort (as you can probably tell) but I am pretty happy with the outcome.
This setup lets you see enemy number, HP, and status without having to look at a computer screen or sleeves. How to do it...
UPDATE: Don't buy them- the yellows are defective and you can't easily insert your standees without scuffing them.
https://www.amazon.com/gp/product/B000BQMFEC/ref=oh_aui_detailpage_o03_s00?ie=UTF8&psc=1
https://www.amazon.com/gp/product/B00MDU77YW/ref=oh_aui_detailpage_o03_s00?ie=UTF8&psc=1
Even if you aren't very crafty this is pretty easy to do and it makes updating combat results a breeze. Just rotate the dice and attach status as needed. I'm always looking to optimize, so if you can think of any further improvements, let me know!
> Am definitely thinking contrast paints are the way to go for starters. Do they come in inclusive sets?
​
Depends on if you remember how to paint, really. It's another way to do things. No sets, AFAIK, but they are intended to replace base, shade and layer paints with one paint, so they're overall either cheaper or better value for money, if you didn't do highlights before contrast paints.
​
Supplies:
--Razor knife
​
--Cut mat
​
--plastic glue
​
--*thick* superglue
​
--Spray primer of choice
​
--cheap arts & craft store brushes
​
--sticky tac
​
--gatorade caps
Been painting a few years and lurking here forever, here's my advice:
> Mixing Brush: I am told that you should not mix paint with your primary brushes. Where can I buy a cheap brush for mixing, and anything special I need?
If I'm already using a "larger" brush (1 or higher) I'll mix with my good brushes and just be mindful of how far up the ferrule I am or use the back of the brush. If I'm using a detail brush I'll use a super cheap synthetic 2 or 3. Look on amazon or at a local art chain (Michaels) for cheap student grade packs of round brushes. You'll end up using these for terrain, PVA glue, and all sorts of other things.
> More Brushes: My kit came with a 2 flat and 0 round. What other brushes will I need, and what in your opinion is a good brand to buy? Any set that covers all the basics? Although I am new to painting, I'd like something that will last me and be quality. They sell SoHo brushes in my local store, which look like they are great quality. Any users here?
This topic can get pretty involved. Brushes have a lifespan so if you're new to the hobby I wouldn't recommend dropping money on higher end Kolinsky brushes like W&N Series 7 or daVinci Maestro. For a new painter I recommend Winsor & Newton's University series and Army Painter's Wargamer brushes. The W&N University brushes are higher than average student quality acrylic brushes that can be abused. They're great for basecoating with thicker mixes. The Wargamer brushes are a cheap intro into real sable hair so you can get started at layering with thinned paints.
> Primers: This is a big ? for me --- Spray primers, basic black white and grey? Which ones, what brand, etc... Really unsure what is recommended here, as in a store there are so many, but hoping /r/minipainting can help as we are all painting the same stuff. Would love some specific product recommendations here.
For the most part, you have three options: spray cans, brush-on, and airbrush. I can't really recommend spray primers - they require ventilation, have trouble with humidity, and can only be sprayed at one consistency. Many of the hobby spray cans advertised for basing your minis aren't actual primers. Brush-on primers are the most economical but run the risk of losing detail on the mini if applied heavily. Airbrushing is my preferred method using either Mr. Hobby's Mr. Surfacer 1500 thinned with Mr. Color Leveling Thinner for highly detailed minis, or Vallejo Primer for tabletop quality minis. Vallejo Primer's are acrylic and polyurethane so they're more protective but can sometimes take away detail.
> Finish: I saw a few videos where they spray some 'protective' finish on a product, I believe there are matte finishes as well as gloss finishes? Can I get any 'matte/gloss finish' product, or are there certain ones for miniatures?
Same three options as priming. If your minis are going to be handled often, I recommend a glossy coat then a matte coat. Glossy varnishes are stronger than matte varnishes, so this combo will give you the most protection. You are more likely to lose some detail this way. If your minis are for display only you can skip the varnish and just be careful. Dried acrylics are basically thin plastic so they have some durability on their own. Brand-wise I airbrush using Liquitex Professional gloss and matte varnishes, thinned with Vallejo airbrush thinner and a drop or two of Vallejo flow-improver. Vallejo varnishes are also good but Liquitex offers the best bang for your buck.
> Mini Holders: I found this product which looks amazing, but is not available until late 2017 since the Kickstarter has ended. Are there any similar products that someone could recommend, or should I just go with something very simple? Would love to hear some ideas.
I use an old Citadel paint pot and white poster tack to stick to the bottom of the base. If you want to paint individual parts, heat the tip of a needle/pin with a lighter, press it gently into the glue joint of the mini (the hole will be hidden later), then press the other side of the needle into a wine cork or similar.
> Brush Care: I got a "masters" paste from a store that I was told to rinse and swirl my brushes in after painting. Any other tips or is this okay?
Master's is the best option, just make sure you follow the directions and use warm water for best results. You can also get a small bottle of W&N Brusher Cleaner and Restorer to have on reserve if you accidentally let paint dry on one of your better brushes. If it's a cheap or synthetic brush you can clean it with original Windex (WITHOUT Ammonia-D) or Vallejo airbrush cleaner, followed by a wash with Master's.
> Carving/Scraping tools: I know some minis need to be cut from a sheet and some have mold lines that need to be cleaned. How is this done and what tools are needed?
Get a decent pair of sprue cutters - I recommend these. You should be able to find these for $10 at a local hobby store. For plastic minis you should be fine with just an X-acto or similar knife for getting rid of mold lines - just run the blade mostly perpendicular to the line and "shave" it gently.
> Storage Box: For all the little things that come along with painting, what do you use/recommend to store everything in?
A coffee mug works fine as a brush holder. You can try a hardware store for all sorts of containers if you're traveling with paints. Otherwise desk space and some imagination (spice racks) or money (official paint stand) are all you need.
> Paint Agitators: I was told to get some steel balls and put them in every paint bottle I have. It's okay to leave them in there. Would these work, or any concerns?
Please do not use steel ball bearings. You can attempt to buy "marine grade" ball bearings but unless it's reputable and expensive they are still likely going to rust and ruin your paint. I use hematite beads for necklaces for my paints. 4mm for dropper bottles and 6mm for pots. You can get them cheaper at Michaels w/ a coupon and they're inert so they won't stain your paints.
> Flow Improver: Thoughts? I was told to mix this into my washes. How much should I add, one drop? Is this product okay, or is this only for airbrushing?
Flow improver is generally used for airbrushing to extend the drying time and prevent clogs. Fluid retarder in the form of actual art supply from W&N or Liquitex, Vallejo's Glaze Medium, or Games Workshop's Lahmian Medium are what you're looking for. These can all be used to turn a normal paint into a wash (heavy dilution), or can be used to extend drying time for wet blending (light dilution). I can't give you exact ratios as each paint company, each color, and the age of your paints will dictate that. Trial and error is the only method here.
One thing that hasn't been mentioned yet is a wet palette. It will save you a lot of headache when learning to wet blend and will let you save mixed paints for many days. You can get one for cheap and use either the papers that come with it or kitchen parchment paper. Both will yield different results so play around with both. Be sure to use distilled water or you're likely to get some funk from mold after a couple days.
I've made my own from some of this stuff: Locktite Fun-Tak Mounting Putty as I remember that it was a recommended use of another brand my mom used to buy years ago.
Blue tack - this is a semi-sticky putty that is really good at getting the dirt in crevices. Basically you push it down onto the dirty area and then lift the putty and it will take the dirt off with it. It won’t leave residue on your AirPods.
It's called Blu-Tack.
https://www.amazon.com/Blu-Tack-060968-Reusable-Adhesive-75g/dp/B001FGLX72
> Put your mini on something, like in my picture it's tac'd to a piece of 1" pex. A lot of people put theirs on an old pill bottle or something. POINT IS, not to hold the mini with your hand. Keeps oils off and makes it easier to paint.
Blu-tack and a wine cork.
My mother had both of her gen airpods go significantly quieter to literally no sound at all. Literally to the point where we were convinced that it was beyond repair. Then used Blu-Tack on both airpods and it literally goes inside the mesh and sticks to everything and gets everything out. To the point where it sounds like new. Ive been there and Blu-Tack was the solution. https://www.amazon.com/Blu-Tack-S050Q-Reusable-Adhesive-75g/dp/B001FGLX72/ref=sr_1_6?keywords=blue+tack&qid=1571687327&sr=8-6
Blu-Tack Reusable Adhesive 75g https://www.amazon.com/dp/B001FGLX72/ref=cm_sw_r_cp_api_KMKPzb07ZXA7T
I pull off a half-inch piece and use it once a week for 4 weeks. It'll last you a lonnnnng time for almost $7.
Blu-Tack
It's a dream on AirPods too.
Thank you! I will try all those points that you've mentioned! As for the eyes, I wasn't brave enough to paint the black of the eye. Didn't want that guy to end up looking like a lizard.
As for the blu tak, do you mean something like this?
its a German glue called UHU
On Amazon
http://www.amazon.com/Scotch-Adhesive-Putty-Removable-860/dp/B000AN7EW4
These are what I've been using for my marvel legends and black series figures.
http://www.marauderinc.com/mobile/Category.aspx?id=1836
I also use blue tack
Elmer's Poster Tack Reusable Adhesive, 2 Ounces, (E1531) https://www.amazon.com/dp/B000BKQDB4/ref=cm_sw_r_cp_api_d011xb98MDCE3
Related, I got Elmer's Poster Tack and it works well for me. Not sure what the difference is other than being blue.
https://www.amazon.com/Elmers-Poster-Tack-Reusable-Ounces/dp/B000BKQDB4
Response to question block 1
I have yet to play against the AI player ("Alien Player"), and while the Doomsday Weapon scenario is a bit "simple" I find it enjoyable trying to build up and prepare for the onslaught of a superior foe. Then gain, I like the theme and simple play of Ogre (so glad I got the pocket edition when it was $2.95; I can't see paying for a deluxified version of this, but I do know back in the day people did buy minis and those did look pretty awesome).
Close Encounters adds in a challenge against Space Amoebas plus revises the alien AI. Better yet (for me), it adds in a cooperative mode and a way to play that aren't "kill another player".
I haven't even punched my Replicators expansion yet, so I can't comment on it. Nice hex tiles are included through.
 
I do want to note that there are ways to speed up the play of Space Empires: 4X:
The point is you could probably get a fast multiplayer game in, and then as the group gets faster you can start dropping some of these to experience the fuller flavor of the game.
 
Concerning the P500, there are some staple games that GMT will always print. Men of Iron: Volume I failed at P500 and wasn't printed due to costs, but is now back in a tri-pack. Twilight Struggle will always be reprinted despite the P500 number because it will eventually sell (and has made enough to justify keeping a stock on hand). Space Empires: 4X products are between the two, but on the side of "reprint it as it will sell."
 
Response to question block 2
The game board is 21" x 28.75", so it should fit in the 35.5" x 25.5" size - but it may shift around. Solution? Buy some poster tack and tear off little pieces. If you aren't leaving it set up for months, this should clean off nicely. Since you aren't hiding your units from an opponent, they can all be face up with the number indicator next to them (though you might run out of space if you develop large fleets - but then use post it notes and make fleet boards to track... Close Encounters comes with 3 fleets, which is disappointing as Stellar Conquest had 15 fleet counters - so maybe make your own counters).
 
Rather than setting up the board with exploration tokens, get some draw bags and draw as you explore (maybe put a cube or a piece of poster tack on unexplored spaces to mark them... or a piece of post-it note). I like one for each player homeworld color plus one in black for deep space counters. This speeds setup/teardown for me.
Also, get some GMT counter trays to sort/store all those counters and use the tray divider template. I have 4 player trays with all their ships and 1/4 of the number counters on the top two rows divided up into thirds, and this fits the first two expansions in. On the lower half I have full sized bins for all the other counters (MS pipelines, colony ships, homeworld counters, fleets, etc). It works very nicely, but I'll probably have to subdivide a couple more bins once I punch Replicators. The great thing about the trays is they have lids that are fully removable, so quick setup and and quick teardown.
 
With these tricks, I think you should be able to setup, store, restore, and then tear down the game pretty efficiently without too many problems - but still take photos just in case.
**
EDIT: Solo Scenarios
Okay, did a read over the rulebooks to break down the solitaire games.
Solitaire Scenario #1 & #2: Doomsday Machine (**Base Game)
Small or large map. Build up your colonies & defenses to face off against 3 waves of increasingly tougher Doomsday Machines. Basic tutorial on how to build up defenses in light of a statistically superior foe, but won't teach you how to get aggressive and win the game normally.
Solitaire Scenario #3: Base Game Alien Player(s)
Face off against 2-3 alien players. These aliens get CP in a few different categories (defenses, tech, fleet), where fleet CP are not spent until you either move to attack their homeworld or encounter one of their fleets. There are two types of fleets: regular and raider (cloaking). It gives you more of a sense of what it is like to go out an attack while defending yourself against other players, but you don't get to see the same stacks as you would in a multiplayer game.
Solitaire Scenario #4: Space Amoebas (Close Encounters)
Three different giant space amoebas have appeared in deep space. While expanding, you need to research science technology so you can eventually build space vessels (no counters provided, use mine sweepers counters instead). Then you have to go out and survey the amoebas, earning 10 research points to determine how you can attack them. Finally, you build a fleet and go wipe them out. Oh, all the while the amoebas will be dividing and slowly taking over more and more hexes. You can build mines and move them into a hex where the amoebas are to stop the spread that turn, but then there is a chance they will learn to attack the mines and become immune to them.
Your goal is to save your civilization from this encroaching threat. Difficulty determines how soon they start spreading. This is the opposite of the Doomsday Machine scenarios, so you are instead focuses on learning how to build an offensive fleet and how to take the battle to an enemy.
Solitaire Scenario #5: Close Encounters Alien Player(s)
This uses a base game like system but adds in a bunch of extra rules from close encounters, and there are flowcharts to help determine what the alien players does. The aliens now can colonize planets, take over your colonies, build exploration and extermination fleets, might destroy colonies that they can't take with ground troops, get alien artifact cards, and so on.
Solitaire Scenario #6: Close Encounter Alien Player(s) VP game*
Takes the 2 player cooperative variant with a galactic capitol you need to protect and turns it into a solo game. Aliens also now earn VPs, so can also win that way.
 
As /u/grey81 said, it isn't quite the real game. You don't have another intelligent human player moving pieces and developing stacks, you don't see them revealing colonies and building MS pipelines, and you don't see the stacks suddenly shift towards you and ask yourself "is it a bluff or an attack fleet - and do I have tech to defend or should I go on the attack first?" However, the basic game even multiplayer is still "survive the onslaught while figuring out how to attack yourself" and isn't that much different from the Solitaire Scenarios (especially the Close Encounters alien player ones).
Either way, as a solo player I think Replicators isn't too useful to get beyond having some neat components. No solitaire scenarios officially made for it, and I'm not sure you could use the content in it too effectively for a solitaire scenario. Unfortunately, multiplayer solitaire wouldn't work well for this game due to hidden information and a bluffing element... so you'll need to decide if it fits your style. (I personally am glad they have an objective based solitaire mode vs "get your best score" type play you see in Agricola or Subdivision* - but others love that style and hate this battle oriented style of victory.)
If the glue itself is her concern you can use "Poster tack" it's removable and leaves no residue.
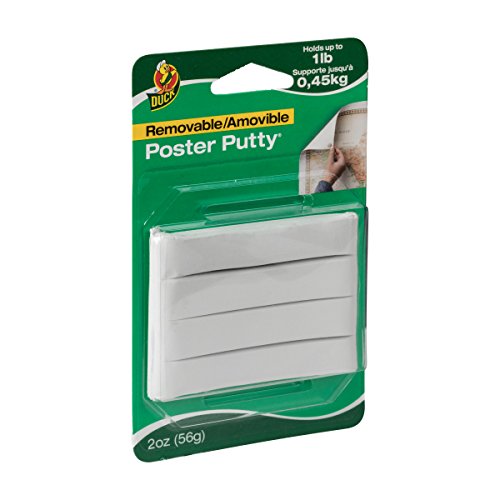
https://www.amazon.com/Duck-Removable-Mounting-Poster-1436912/dp/B000BQMFEC/ref=sr_1_3?ie=UTF8&qid=1510170671&sr=8-3&keywords=poster+putty Poster Putty is useful when holding components in place while soldering, for those that dont have a fancy circuit board holder.
i use [poster tack] (https://www.amazon.com/Duck-Removable-Mounting-Poster-1436912/dp/B000BQMFEC/ref=sr_1_3?ie=UTF8&qid=1473540329&sr=8-3&keywords=poster+tack)
Never done it, but I would try something like a padded laptop tray and use some poster putty for the cards to keep them in place.
I've been using kneaded erasers to tack my sample bottles down to the work space, but I imagine sticky-tack would serve the same role.
If you can, grab some poster putty at an office supply store. It'll hold the big gear steady. Have fun!
https://www.amazon.com/Elmers-Tac-Stik-Reusable-Adhesive/dp/B001CEMCXQ/ref=sr_1_2?ie=UTF8&qid=1500529294&sr=8-2&keywords=poster+tack
I use this for all my warriors, Tyrants, ect, way less time consuming than magnets
The slightest nudge will send her flying! I put a little poster putty under the feet of the Star Wars Pop!s that can't stand on their own (K2S-O Maz, IG-88, Hera, Sabine, ME-809) and firmly place them down on a shelf. I have also used it to place some Stranger Things literally upside down on the bottom of a shelf. The putty starts to warp and dry, so it needs to be replaced every few months or so. I take all my Star Wars Pop!s off the stands so they better match my other lines.
I'm interested in how well it saved the print! I've never seen that before. Do you think some Tac 'N Stik would work as well?
https://www.amazon.com/Elmers-Tac-Stik-Reusable-Adhesive/dp/B001CEMCXQ
https://i.imgur.com/fbPUCDG.png
No, it's not messy, it's not like gum, it's made to be reusable. It never really dries out but it's not very sticky. The one I have isn't even actually blue, like this one: https://www.amazon.com/dp/B001CEMCXQ/ref=cm_sw_r_cp_api_i_1qceBbVGTJTQ3
I use Loctite Fun-Tak. Here's Atom Smasher of Tabletop Minions discussing poster tack.
> Once you get good enough, using push pins instead of staples to hold up a paper target on a cardboard backer is cheaper and more convenient (for me).
Locktite fun-tak works great too. http://www.amazon.com/Henkel-1087306-Loctite-2-Ounce-Mounting/dp/B001F57ZPW
Poster tac | Blu tac - I haven't used it first hand (edit: on board games), but I'd be tempted to try this stuff as a something relatively inert, hopefully not going to interact with the inks etc., and non-permanent but will still hold things down/keep them from skittering.
Invest in blu tack. It is gentler on paper crafts than clear tape.
to stick the press on to the stand, use loc tite mounting putty
Loctite Fun-Tak Mounting Putty 2-Ounce (1087306) https://www.amazon.com/dp/B001F57ZPW/ref=cm_sw_r_cp_apa_i_JZt7CbC6S8NRZ
I have the exact same printer - what I've been using is mounting putty, rolling it into small balls, and then placing it under all four legs. The problem with Monoprice's printer is that the metal frame allows for a lot of vibration and shaking during prints (particularly fast ones), since usually one leg seems to always be in the air. Mounting putty dampens a lot of the movement and transfers it onto the table/surface, as long as you can place a small amount of putty on each corner, then press the printer down. Also, I mounted it onto a sturdy faux-granite countertop, which seemed to reduce the shaking to virtually zero.
Here's an example of the putty I use - I found it at a local hardware store for $2 a pack, and you can use it for a bunch of other non-3D printing stuff. It's non-toxic, easy-to-roll, has easy removal, worked in a bunch of temperature conditions, and stays pliable for a long time.
https://www.amazon.com/Loctite-Fun-Tak-Mounting-2-Ounce-1087306/dp/B001F57ZPW
I use this stuff: Loctite Fun-Tak Mounting Putty 2-Ounce (1087306) https://www.amazon.com/dp/B001F57ZPW/ref=cm_sw_r_cp_apa_i_pfp8CbWEJG0HD
I put some on a pops feet when it won't stand to help balance it out. There's probably better solutions out there but this one has worked for me. Hope it helps.
https://smile.amazon.com/Loctite-Fun-Tak-Mounting-2-Ounce-1087306/dp/B001F57ZPW?keywords=poster+putty&qid=1537728855&sr=8-5&ref=sr_1_5
Best thing I have used is blue tack that I got from amazon. It always cleans them really well for me.
https://www.amazon.com/dp/B001F57ZPW/ref=cm_sw_r_cp_api_i_hZXVDbFKDMGT4
Also called Fun-Tak
I've had good luck with fun tack.
http://www.amazon.com/Loctite-1087306-2-Ounce-Fun-Tak-Mounting/dp/B001F57ZPW
Based on reviews though I'd probably go wtih this for posters: http://www.amazon.com/Command-Poster-Adhesive-Value-48-Strip/dp/B001KYSAN4/ref=sr_1_1?s=hi&ie=UTF8&qid=1377529947&sr=1-1&keywords=command+strips
Yeah exactly.
This
You could also just put a post-it note.
I use sticky tack. You know. The poster putty. I do this with all my components too. I hate fiddling with helping hands and pcb holders. This stuff is blue gold.
https://www.amazon.com/gp/aw/d/B001F57ZPW?psc=1&ref=ppx_pop_mob_b_asin_image
As reference. You can get it at a ton of diff places by a ton of diff manufacturers.
Interesting project!
I take it that the whole assembly will be mounted vertically on a wall for display purposes?
Would a few unobtrusive pins/ pegs/headless nails into the backboard in strategic places to support the Games/Console work? You could colour them to match the background, or even just make them into some kind of shiny feature?
Alternatively, perhaps some transparent acrylic sheeting made into either a narrow shelf/ shelves or some clips, might be an option which would be near-invisible at any distance....
Or could you bend some thin, stiff wire/ brass rod into supports/clips and fix it to the backboard, as this might also be quite unobtrusive depending on how you do it....
Otherwise, magnets and/ or velcro might be a good 'Plan B,' although be careful when using magnets around electronics! :>)>
A really cheap temporary solution might be a big dollop of Blu-Tack (http://www.amazon.com/Blu-Tack-060968-Reusable-Adhesive-75g/dp/B001FGLX72), but I'm not sure this would hold up very well over time :>)>
Hope that helps, good luck! :>)>
PS - don't forget to make the presentation frame easily openable, for when access to the Console is needed!
I haven't used it but have heard good things about Blu-Tack: https://www.amazon.com/Blu-Tack-060968-Reusable-Adhesive-75g/dp/B001FGLX72
This stuff?
Blu-tack, poster-tack, etc: https://www.amazon.com/Blu-Tack-060968-Reusable-Adhesive-75g/dp/B001FGLX72
A few tiny balls of this stuff under any speaker will keep it from walking. It keeps a light, cast-aluminum enclosure that I have on a glass shelf from dancing, and it scales up just fine.
(It will probably stain. So will anything else with some weight on it. I've had the non-sticky side of foam weather stripping pull layers of baltic birch plywood apart before.)
Recommend using Blu Tack to hold the speakers on the stands: https://www.amazon.com/Blu-Tack-060968-Reusable-Adhesive-75g/dp/B001FGLX72/ref=pd_bxgy_196_2?_encoding=UTF8&pd_rd_i=B001FGLX72&pd_rd_r=T8DVQH7MR5F6T8T55JWY&pd_rd_w=y4G37&pd_rd_wg=p7EBL&psc=1&refRID=T8DVQH7MR5F6T8T55JWY
Most commercially available stands will have 3M or similar two-sided adhesive. I use Blu Tack on mine, and it takes a surprising amount of force to dislodge the cabinets once they've settled. That's a US link, but I'm sure you can find it in Europe.
While I don't necessarily know what's available in your market, I will add that you should take precise measurements before buying anything. If those monitors aren't at ear-level, your sound is likely to be compromised.
Not entering, but I strongly recommend taking blu tack to hang stuff with...
Sorry, yeah tape, but some tape is hard to get off in the end so you can also use some of that Command adhesive solution that they use for frames, should not damage the speakers. Alternatively I personally just used Blu Tack.
I'll let you in on a little secret. Saved many a pretty thing in my house which is filled with cats:
https://smile.amazon.com/Blu-Tack-S050Q-Reusable-Adhesive-75g/dp/B001FGLX72
It won't save everything, but it helps a lot.
Thanks. :) I use simple Blue Tack, leaves no stain cheap and reusable.
Bostik Blu-tack Original Mastic Putty Adhesive Non-toxic Blue 60g Ref 801103 https://www.amazon.co.uk/dp/B00I42EOJE/ref=cm_sw_r_cp_apa_i_GoJADb7DE3GAM
Get some Blu-tac; it's REALLY inexpensive and it as an excellent vibration insulator. Prevents feedback.
https://www.amazon.com/Bostik-Blu-Tack-Adhesive-801103/dp/B00I42EOJE/ref=sr_1_fkmr0_2?ie=UTF8&qid=1473996518&sr=8-2-fkmr0&keywords=blu+tac+3m
Blue-tack.
https://www.amazon.com/Bostik-Mastic-Adhesive-approx-801103/dp/B00I42EOJE/ref=pd_lpo_vtph_229_tr_t_2?_encoding=UTF8&psc=1&refRID=Y2DE49D3TD74PFZQP1BF
I've used it before and it doesn't tear the maps, and you only need a tiny amount.
2 x Bostik Blu Tack Mastic Adhesive Putty Non Toxic Blue approx 60g 801103 https://www.amazon.com/dp/B00I42EOJE/ref=cm_sw_r_cp_api_i_Cli.Ab3Q3918K
Nope. The "teeth" that fit into the holes are how the caps stay attached to the plastic of the thumbstick. Once they are removed theyre basically useless.
And they arent sold separately as they are simply part of the thumbstick itself.
Get some Uhu tac/ poster puddy and stick some under the caps you did buy when you place them on the joysticks. Should work like a charm.
I understand that some people have ridiculous amounts of money, and that this is a very nice looking product, but seriously, spending $15 on a deck hanger is very expensive considering most decks cost less than that, and 30¢ of mounting putty would basically do the same thing.
It's like a putty, I got mine at CVS for like 2$.
example i wouldn't buy what I linked because that's sort of pricey for what it is, that's just a visual example.
This is what I do. I have a lot of Harry Potter keychain figures because the scale works better (Dobby, Nifflers, Picket, etc) and museum putty keeps the wobblier ones standing. Marvel key chains are especially difficult because of the bobble head. My classic Ant-Man pop stands up on his own but The Wasp has tiny little needle legs and a GIANT HEAD so I ended up super-gluing her to an extra stand.
something like this if you want to go with a hidden closing.
The only thing you need is https://www.amazon.com/Faber-Castell-Reusable-Removable-Adhesive-Multipurpose/dp/B075QDRJWZ
It is the most effective way to remove gunk from ports, earphones, keyboard etc. Does not stick to the port at all, stays clean, no need to use liquids. Guaranteed to work 100%. Apple quoted me $100 to change my magsafe port as it stopped working. Turned out it was just gunk. 2 mins with this product cleaned it up completely. Just like new.
This...comes off clean too. Make sure you get the putty. Not the transparent adhesive "dots".
don't use tape. use this. put it on the back of the display plate, press onto the wall. donzo.
Hmmmmm. Try this to get past the grainy-ishness
Scotch Removable Mounting Putty
There's all kinds of options - you can paint a number onto the base of the monsters if you know you're going to use more than two or three, or you could stick a little numbered flag on the mini with poster tack.
Amateur tip from a fellow newbie.
Get yourself some poster tack and an old pill bottle. Use the tack to stick the mini to the top of the pill bottle and hold that when you're painting. You'll get less paint on you, and you'll avoid smudging the beautiful work you just did when you turn to the other side. :)
You can fill the pill bottle with pennies or something to give it some heft so it doesn't fall over constantly. :)
I use this Elmer's stuff, I think it's basically the same stuff. Adhesive and insulation!
This stuff. I use it a lot at work for our safety posters.
http://www.amazon.com/Elmers-Poster-Reusable-Adhesive-E1531/dp/B000BKQDB4
(Also, if you do go the spraymount route, I would spray the foam board, not the poster. This way the sticky is on the board and the poster reamains relatively clean.)
I recommend poster tack, a small disk of it under the base can resist those mild table bumps. http://www.amazon.com/Elmers-Poster-Reusable-Adhesive-E1531/dp/B000BKQDB4 -Q.
Nice job! Try to keep the camera in focus (how blurry or clear the images is and what range it is clear at) and the set stable though.
When I started I had this same issue, but it's a super easy fix.
Get some poster tack http://www.amazon.ca/Elmers-Poster-Reusable-Adhesive-E1531/dp/B000BKQDB4 like this, roll it into small balls and stick it under objects you don't want moving, such as the stationary car I use this on my videos all the time for background objects and under the feet of figures to keep their feet from sliding.
With the focus issue, all you need to do is turn off auto focus, your camera is trying to focus on the car which makes it out of focus for a few seconds while you're taking the picture. All you gotta do is make it so that its on manual focus or MF so that it doesn't attempt to change the focus in the middle of the shots.
Good luck and Happy Animating!
Gage (HonestHatch - https://www.youtube.com/channel/UCSy1co_9jsUHKu3wO-r3ffg)
There's all different kinds of brands of it, but this is the stuff you want. http://www.amazon.com/Elmers-Poster-Reusable-Adhesive-E1531/dp/B000BKQDB4/ref=sr_1_2?ie=UTF8&qid=1376087075&sr=8-2&keywords=poster+tac
I haven't used this yet, but a friend recommended poster tack to block off non straight lines link
I would get a slightly bigger piece for stability. Stick it to the bottom of the desk with poster putty
Poster Putty great when you have delicate items to solder, holds stuff in place without having to mess with grippers and clips.
Gorilla Clear Tape I use it to keep my RX in place and under all my ESCs in combination with zip ties. Some of the stickiest stuff I've found yet and I run a sign shop so I deal with adhesives all the time.
No Its different. But here I found it on amazon for two bucks.
https://www.amazon.com/Duck-Reusable-Removable-Mounting-1436912/dp/B000BQMFEC/ref=mp_s_a_1_5?keywords=glue+tack&qid=1561967090&s=gateway&sr=8-5
This seems needless complex.
Why not skip the thumbtacks? You can just as easily trim the tape around the magnet and apply it directly to the measured points on the wall.
Or better yet, poster putty or something similar. It's cheaper, faster, and from my experience, non-damaging.
https://www.amazon.com/dp/B00006JQ5N/ref=psdc_3236443011_t3_B002DL7VII
https://www.amazon.com/Duck-Reusable-Removable-Mounting-1436912/dp/B000BQMFEC/ref=sr_1_5?keywords=blue+tac&qid=1557435042&s=office-products&sr=1-5
https://www.amazon.com/Duck-Reusable-Removable-Mounting-1436912/dp/B000BQMFEC
Yep. Although this was covering up the walls of my cube that are made for push pins. I'd think for real walls you could get that poster putty stuff so that it won't hurt the walls or anything.
I'm not sure how far you're willing to go, but one of my favorite solutions is poster putty. It seems silly, but this stuff sticks to just about anything. I used it to mount my sensor bar on top of my LCD TV. The best part is that if I don't like/want it anymore, it comes off cleanly.
maybe poster putty?
https://www.amazon.ca/Duck-Removable-Mounting-Poster-1436912/dp/B000BQMFEC
or check this thread
https://www.reddit.com/r/malelivingspace/comments/384m6w/whats_the_best_way_to_hang_a_huge_flag_on_a_wall/
Bam!
Not super cheap but this will do the trick. You can also use poster tack (YMV with different brands). Maybe spray a coat of matte varnish on before applying tape/putty just to be safe.
Masking fluid could work too, but it has some caveats. You need to paint it on pretty thick, and don't let it sit for too long or it will be hard to get it all off. Its better for paint chips and small things, I don't recommend it for hoards of tyranids.
Masking is one of the drawbacks of airbrushing. You might be better off using a brush for the red, then carefully airbrushing highlights with just some quick masking. Then go back and touch up the blue with a brush if needed.
mounting putty. It also works great for cleaning the case and lid.
nice..but for those not wanting a permanent solution, maybe go with putty instead.
No prob. It comes in little bricks and you pull off however much you need
https://www.amazon.com/gp/aw/d/B000BQMFEC/ref=mp_s_a_1_1?ie=UTF8&qid=1519649123&sr=8-1&pi=AC_SX236_SY340_FMwebp_QL65&keywords=wall+tack&dpPl=1&dpID=51xwrPsViRL&ref=plSrch
Use putty to pull that junk out. I use this for my AirPods. https://www.amazon.com/gp/product/B000BQMFEC/ref=ppx_yo_dt_b_asin_title_o00__o00_s00?ie=UTF8&psc=1
I have used this stuff to hold my fridge innards together and while it's not the most elegant solution, it's cheap and it's worked for 2+ years so far.
i just really really want to use this sticky tack in order to combine the "my neighbor totoro" blu-ray and dvd together to create the greatest movie experience ever, all while ruining my blu-ray player! :D:D:D:D please oh please Schmad on my add on :p
I have the same figure.
While it does come with some white tack, it sounds like yours is missing, but this still will do the trick: https://www.amazon.com/gp/product/B001CEMCXQ/ref=oh_aui_detailpage_o03_s00?ie=UTF8&psc=1
​
But the museum wax @suddenly_ponies mentioned looks awesome as well and will probably stick better.
I use Elmer's Tac 'N Stik https://amzn.com/B001CEMCXQ
When I was in grade school the teachers used to hang decorations in their classrooms with this tacky blue putty stuff
Found it!
http://www.amazon.com/Loctite-Fun-Tak-Mounting-2-Ounce-1087306/dp/B001F57ZPW
Not sure on the strength with figures
Loctite Fun-Tak Mounting Putty 2-Ounce (1087306) https://www.amazon.com/dp/B001F57ZPW/ref=cm_sw_r_cp_apa_i_54PGDb3VXYEN1
grab some $3 fun tac off amazon. works great.
Damn we’ll at least you fixed it. Next time just use blu-tack Loctite Fun-Tak Mounting Putty 2-Ounce (1087306) https://www.amazon.com/dp/B001F57ZPW/ref=cm_sw_r_cp_api_YGk.Bb5CQJ4DF
It’s like really stiff putty that doesn’t come
apart easily.
I’ve owned my AirPods for almost 2 months and never had to clean them. I just clean my ears a lot more now and I don’t workout with mine. All of my wired EarPods would get clogged but I would just buy new ones. AirPods are too expensive too do that though so I just make sure my ears are clean.
Also you might want to get a case or a skin if you’re worried about ink or stains. I almost had the same thing happen in my work bag but I noticed the pen cap beforehand.
Yep, use locktite [Puddy](Loctite Fun-Tak Mounting Putty 2-Ounce (1087306) https://www.amazon.com/dp/B001F57ZPW/ref=cm_sw_r_cp_api_i_VmDvCbEK0X4A2) for earbuds works like a charm.
I use Loctite Fun Tak to hold the models onto whatever I'm using as a base. I also use it to suspend my brushes *brush down to dry on the side of my desk. Stuff is awesome and a little goes a long way.
Loctite Fun-Tak Mounting Putty Has worked perfectly for me.
Pick up some some blu-tack.
https://www.amazon.com/Loctite-Fun-Tak-Mounting-2-Ounce-1087306/dp/B001F57ZPW
Fun Tak
https://www.amazon.com/dp/B001F57ZPW/ref=cm_sw_r_cp_awdb_OZjLzbKW91QVH
https://youtu.be/arw-OUhx9Rw
yeah I used some kind of putty
http://www.amazon.com/Loctite-1087306-2-Ounce-Fun-Tak-Mounting/dp/B001F57ZPW/ref=sr_1_16?ie=UTF8&qid=1450982665&sr=8-16&keywords=putty
I used this instead because its easier to shape than masking tape, and it can be reused a few times.
The only problem I'm having with these is it takes more effort to remove than masking tape
On the VR lens lab adapters... I'm using poster putty to keep them in place. Works great for me and cheaper than printing a new adapter and getting new lenses.
https://www.amazon.com/Loctite-Fun-Tak-Mounting-2-Ounce-1087306/dp/B001F57ZPW/ref=sr_1_2?ie=UTF8&qid=1479924243&sr=8-2&keywords=loctite+fun-tak
FWIW, I really wish the Rift had been made more friendly to glasses - either with an optional "facial interface" or some mounting posts attached to the lens assembly. I don't blame VR Lens lab - there's just nothing in there to attach anything or corners for a friction fit.
Cheapo solution that I actually use more than my helping hands is just a glob or two of blue tack Just stick whatever you're working on to the putty.
you are only supposed to use one per speaker so maybe your looking at the wrong holes, if they are too close together?
also, that mount is only meant for specific speakers, the majority of bookshelf speakers have no mounting holes and are meant to just sit atop the stands.
some people use fun tak to secure the speakers:
http://www.amazon.com/Loctite-1087306-2-Ounce-Fun-Tak-Mounting/dp/B001F57ZPW/ref=pd_bxgy_hi_text_y
https://smile.amazon.com/gp/product/B001F57ZPW/ref=oh_aui_detailpage_o01_s01?ie=UTF8&psc=1
I use a little ball of blue tack-type stuff. https://www.amazon.com/gp/product/B001F57ZPW/ref=oh_aui_detailpage_o00_s00?ie=UTF8&psc=1
It holds the mini well and comes off clean. And it's reusable as long as you don't somehow get the stuff dirty. I got the idea from a Learn to Paint Kit that suggested using bottle caps or pill bottles to keep your hands off the mini.
hm, i bought this iirc
https://www.amazon.com/Blu-Tack-060968-Reusable-Adhesive-75g/dp/B001FGLX72
It's got like 4 strips of blutak in it and i think i used 1 per magnetized cube
You can use Blue Tack adhesive like these and put a small amount in the peg hole of the weapon to increase adhesion (I believe your MG ARF Kai has trouble holding the huge tactical arms sword?)
Per the Gundam manga series, the ideal enemy suit is the Amatsu Mina. Although I am currently having some problems finding this 1/100 NG from back in the day... Otherwise, the Blue Frame D is a fantastic choice as an antagonist suit.
Blu tack. It's like blue putty. You make 4 or 5 similarly sized balls, and put them under the speaker.
Blu-Tack Reusable Adhesive 75g https://www.amazon.com/dp/B001FGLX72/ref=cm_sw_r_cp_apa_jmIHAb5CSBAKP
I'm thinking you didn't have anything like Blu-Tack on hand? Not that I've had a rubber (pencil, or otherwise) stuck in my ear before, but if I did that would be one of the first extractions methods I'd try using.
This is the stuff you want for masking with putty. I've tried other kinds and had problems with them leaving an oily residue, but never had that problem with Blu-Tack.
How did you airbrush the Vallejo chipping medium? I have some of that stuff and hate it hate it hate it. Like you said, it doesn't brush well. I've tried thinning it with all sorts of stuff and spraying it, or spraying it neat, high pressure, low pressure...whatever. Never found the right combination and just can't get a good even coat with it.
This?
https://www.amazon.com/Blu-Tack-S050Q-Reusable-Adhesive-75g/dp/B001FGLX72
So after a quick google it turns out Blue Tac is an Australian only thing lol.
' Just ask at a store for that clay stuff you tack memos and pictures up with and they should know what ya mean.'
Also known as: Plasti-Tac, Fun - Tac or Clay Strips
https://www.amazon.com/Bostik-Blu-Tack-Reusable-Adhesive-Blue/dp/B001FGLX72/ref=pd_bbs_2?ie=UTF8&s=hi&qid=1231643004&sr=8-2
http://www.amazon.com/Blu-Tack-Reusable-Adhesive/dp/B001FGLX72/
I have 2 (three if you count our collective "work tank") and they do rattle. Worse with the lid on it. I think it's the lid that's the worst part. But i wouldn't say it's a significant amount. I sleep with my head 4 feet from my bedroom tank.
After a few weeks, a little gunk builds up and and that can really help quiet down the lid.
Try something like a few balls of blu-tack. It could really help silence a loud rattle. If it's still noisy, even without the lid, maybe try pulling out the little grey impeller guard and re-seating the impeller. But if it's just the lid rattling, you can quiet that down.
I suggest some putty and use it to grab and pull wax, dirt and grime OUT of the AirPods instead of "jamming" it down in there.
This is personally what I use. Blu-Tack Reusable Adhesive 75g https://www.amazon.com/dp/B001FGLX72/ref=cm_sw_r_cp_api_Cn05yb3WHNPCM.
Great for cleaning out the screen filter and the tight spot just underneath, between the pod and the stem, as well as the inside lid and pod nest of the airpod case.
Was searching for info on the firmware for the mouse and came across this thread/comment:
I've been using blu-tack (http://www.amazon.com/Blu-Tack-060968-Reusable-Adhesive-75g/dp/B001FGLX72) to clean the grips and it works beautifully. I just spread out a layer of the tack and press down real hard and then peel it off and it's as good as brand new.
I got here late, but one of the handiest accessories that I've picked up for board gaming recently is some blu tack.
If you've never used it, it's basically a removable sticky putty which doesn't leave a residue or stick so strongly that items will be damaged. It's great for temporarily sticking things down. You can use it for sticking down folded boards so they lay flat. You can also use it for sticking down small boards which are light or slightly warped and move or spin easily. You can also stick cards to boards, if it's something that will stay there the whole game and interaction with the card (taking pieces on & off) will cause it to move around.
Blu-tack in a few places on the bottom of the base will stick it to a desk nicely, and shouldn't leave any permanent marks on the desk or the stick.
>Blu tack
https://www.amazon.com/Blu-Tack-S050Q-Reusable-Adhesive-75g/dp/B001FGLX72
It's literally called [blue-tack] (https://smile.amazon.com/Blu-Tack-060968-Reusable-Adhesive-75g/dp/B001FGLX72/ref=sr_1_1?ie=UTF8&qid=1492113034&sr=8-1&keywords=bluetack)
The straps are a great idea. I also heard that Blu Tack works well for that, might give that a try. Apparently this accessories4less site is pretty well known, 2nd mention in this thread. I'll give it a shot. Thanks!
https://www.amazon.com/Blu-Tack-060968-Reusable-Adhesive-75g/dp/B001FGLX72
Paracord + bungee is the best. You want to find a bungee that has some weight to it (or you can just tape some additional weights, maybe some of those useless G502 weights) and a good solid base. I use a Zowie Camade, and it's actually the best bungee I've used although pretty overpriced for what it is. The Roccat Apuri is also nice, but it has USB hub functionality that lots of people won't need and won't be able to justify the price.
Worse bungee I ever used was the Razer one. No stability, no weight, just kept flopping around and sliding.
Some people just take some Blu-Tack and stick the cable to the monitor bezel. Basically has the same result.
I haven't used those so can't say. They do look 'fiddly' to me.
Vibrapod cones were recommended here. $8 each...
Some folks swear by a ball of blue tack instead of something ready made. I haven't used these things but they come up repeatedly in my reading.
I haven't had to use it yet, but I hear people post this product for removing debris from AirPods. https://www.amazon.com/Blu-Tack-S050Q-Reusable-Adhesive-75g/dp/B001FGLX72
A clean toothbrush as well
You could place Blue-Tack, which is an adhesive and acoustically inert putty, between the speaker and the stand.
Bring posters, while they may not want holes in the walls from pins you can put things up with Blu-Tack
A link to blue tack? Any will do. Idk what county you're in, but in Australia you can just get it at any supermarket or general convenience store....
Found one anyway
For the mounting of the Elac B6, which I have a set, I am using these stands:
https://www.amazon.com/gp/product/B00092HW9G/ref=oh_aui_detailpage_o09_s02?ie=UTF8&psc=1
and then used blu-tack for adhesive for the speakers, and the speaker stand was knocked over by my mother's dogs which the speaker successfully stayed on the stand.
https://www.amazon.com/gp/product/B001FGLX72/ref=oh_aui_detailpage_o08_s00?ie=UTF8&psc=1
http://www.amazon.com/gp/product/B001FGLX72?keywords=blue-tack&qid=1457452867
You can try packing a couple small globs of blu-tack inside the keycap.
Is this the stuff you talking bout? https://www.amazon.com/Hygloss-Products-HangTak-Reusable-Adhesive/dp/B004NNGG58/ref=asc_df_B004NNGG58/?tag=bingshoppinga-20&linkCode=df0&hvadid=%7Bcreative%7D&hvpos=%7Badposition%7D&hvnetw=o&hvrand=%7Brandom%7D&hvpone=&hvptwo=&hvqmt=e&hvdev=m&hvdvcmdl=%7Bdevicemodel%7D&hvlocint=&hvlocphy=&hvtargid=pla-4583932698997667&psc=1&th=1
Hygloss Products HangTak Reusable Adhesive Putty Tack for Posters, Signs, Crafts - 2... https://www.amazon.com/dp/B004NNGG58/ref=cm_sw_r_sms_c_api_lQcQBbR25QGY2
It’s a random example. The stuff I linked is pretty expensive. Just go to a craft store and they should have it.
UHU Glue.
https://www.amazon.com/dp/B00JW7APY8/ref=cm_sw_r_cp_tai_3iyGDbDZMF1NT
A tiny amount of something like this under the wheels.
i bought this item https://www.amazon.com/Circle-Pad-Cover-Nintendo-Accessory-Inport/dp/B00C1XYUY6
as the circle pad silicone had begun to tore off i went to rip it from the circle pad housing. as i was thinking glue is a bad idea, i got this material https://www.amazon.com/Faber-Castell-Multipurpose-Adhesive-Non-Toxic-Removable/dp/B01DMA7QW4
good thing is this adhesive is removable (though there are some traces but can be removed easily) so that you can adjust the thickness until it feels right. the way to apply it is like applying a thermal paste, but way smaller
edit: the circle pad silicone is glued to the housing but since the silicone is flimsy, the glue is somewhat flimsy as well. should be easy to rip the silicone apart
Museum putty. It's removable but will act like a glue.
Sticky Putty- Reusable Museum & Gallery Quality Adhesive Putty, The "Duck Tape of Tak"- 2 Pack https://www.amazon.com/dp/B01GEGXP0K/ref=cm_sw_r_cp_apa_i_kRLGDbXKN012R
I use this stuff and it holds up just fine. No damage on anything I stick it to.
This is what I used. - https://www.amazon.com/Tack-Original-Adhesive-Putty-Pack/dp/B01JRZQLX8
Put it in the pits of the d-pad mold.
Many have recommended Blue Tack over the years for securing speakers to stands:
https://www.amazon.com/Scotch-Lightweight-Mounting-Putty-Blue/dp/B01M235HXA
I can't vouch for whether or not that might affect the vinyl finish on the bottom of the KEFs. If it was me, I wouldn't care (it's the bottom!) but just throwing it out there.
If you're worried about that, something like this might work too. I use these a lot.
https://www.amazon.com/SlipToGrip-Premium-Cell-Pads-TWIN/dp/B00V5099GU
Sticky tack holds your shit up way better than tape and unless your on an uneven surface comes right off (I use command strips if its on something im afraid it won't come off cleanly)