Best art drawing supplies according to redditors
We found 1,186 Reddit comments discussing the best art drawing supplies. We ranked the 641 resulting products by number of redditors who mentioned them. Here are the top 20.
We found 1,186 Reddit comments discussing the best art drawing supplies. We ranked the 641 resulting products by number of redditors who mentioned them. Here are the top 20.


Make it Noodler's bulletproof.
Once this touches fabric it is never. Ever. Coming out. Not even with bleach. If you want something ruined forever, this will more than do the trick.
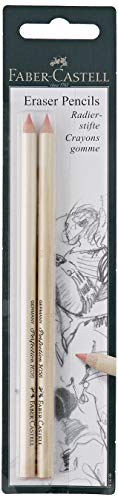
So I have one of those erasers that's in pencil form, like, it looks like a pencil, but instead of "pencil lead" or whatever, it's an eraser. It gets into tiny spaces to erase small stuff.
Anyway, I've had luck toning down smears like this with these erasers. They have a light grit, so don't press too hard. It might help!
https://www.amazon.com/Faber-Castell-185698-Faber-Castel-Pencils/dp/B005M4LAUS/ref=sr_1_4?ie=UTF8&qid=1539890603&sr=8-4&keywords=eraser+pencil
lol I think the same thing every time I see those. It looks like someone ctrl-v'd a generic anime face on the head without bothering to resize it proportionally.
Faber-Castell makes really nice pens though. I use this set.
I'm uh, I'm really concerned that "customers that viewed this item also viewed" something called the "Fat Old Fred" after I clicked on that 55 gallon drum of "Passion Lubes" Natural Water-Based Lubricant. The horror that is Fat Old Fred, with his gaping hole of a mouth above his "Bob... Bob had bitch-tits" bitch-tits, just staring back at me with his permanently closed eyes and what appear to be his removable nose and mouth area.
I just know I'm worried about the kind of search suggestions I'm gonna get in the future. Also, in grand Amazon fashion, the most helpful two reviews for the "Fat Old Fred" are here:
> "The handy carrying case is also quite useful for carrying other dismembered obese human torsos.
> Just in case you were curious."
And..
> "I'm really happy with my Fat Old Fred, Black. Though if I'm being up-front, I have to deduct 1 star for it not being quite black. It's actually closer to the color of wet terra cotta. Anyway, I was thrilled upon the arrival of my Fat Old Fred, Black, and immediately began to explore the various uses for a silicon sculpt of a kind-of-old-looking obese torso. My first idea was to cover him in paint and use a trebuchet to launch him at a giant canvas (after all, we all know art is really a process not a product amirite?) but I achieved unsatisfactory results as I seemed to only get face+tits+belly prints. After an hour or so the wall of my warehouse loft wound up looking like a giant had dipped their balls in paint and slapped them all over my wall. Not a good look, unfortunately.
> My backup plan was to pimp him out to the crackheads who have an encampment in the storm drain under my warehouse, and so far I'm happy to say I've already recouped my costs in crack rocks and crusty dollar bills. A-, 8/10 would buy again."
http://i.imgur.com/cT9xoIl.jpg
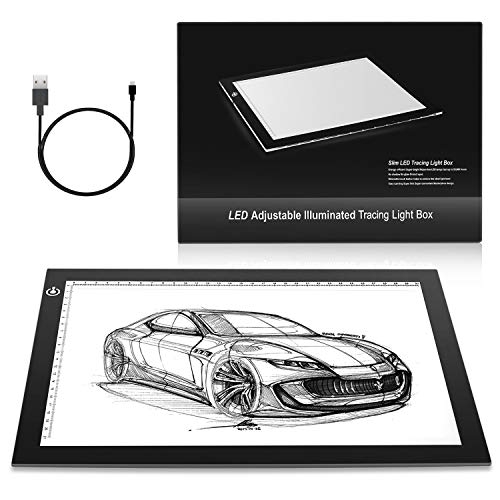
light underneath, something wide like this. This is just the first one I found in a quick and dirty search, you can probably find cheaper. Other people have had success with a white towel in their lap with good lighting from above the work. Try the towel first of course, it's the cheapest. :)
Speakers will make your life so much better. I'd recommend getting a shower speaker too, your flatmates will love you.
A door stop is the right answer.
If you get a memory foam mattress topper your life will be so much better. It makes any bed amazing, and, although they aren't particularly cheap, they can last a very long time. I have this one
Get some good quality pens and books of paper. You don't want the refil pads as they always fall apart sooner or later, get some which have metal binding on one side. For pens I always got a box of these or these. They make the vast amounts of notes you need to take much better.
Don't buy the recommended reading until you have checked how many copies the library has. There's a good chance you'll be able to read them enough without paying for them, or search Bookname.pdf into google and it will probably be there.
Pint glasses are very useful things to have, but I found it added a nice touch to my flat if they were all borrowed from pubs.
get a multipack of playing cards on the cheap from amazon. You'll probably get through a fair few packs in first year. Some poker chips were a nice thing to own as well. In 3rd year I got Cards Against humanity as well, and it is a very good game for predrinks
Get minimum 1 good frying pan, 1 good saucepan, a good wooden chopping board, a good chefs knife, a baking sheet, and a colander.
Get a bottle opener like this one and you will have hours of fun pinging the caps at people
I didn't use mine much in 1st year, but all the other years of uni my bike was a great thing to have. It allows you to shop further away (so cheaper) and reduces your reliance on public transport. It also means you can get out of your area of the city occasionally, which is nice.
A french press means you can make a whole pot of great coffee for your flatmates when you are all getting up after a heavy night, at which point they might crown you or start worshiping you or some shit
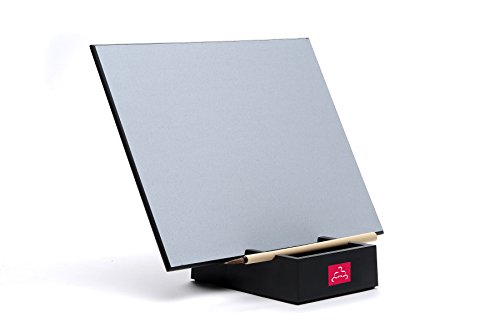
Get a tripod, a light table, if you have the camera and lens already this is about a s cheap as you can get it. Blurry image of my setup a while back
First off, that's so thoughtful!
I'm no expert by any means. I am very much a beginner with not much to show for it, but I got into watercolor in a roundabout way through calligraphy and hand lettering. Now, despite only putting in some months experience, I have poured hours into finding a nice starter set for myself, so hopefully I can shortcut some of this for you.
I respectfully disagree with the other commenters. As convenient as national chain hobby shops are, they are pricey for that convenience, and I rarely find people who know a lot about one thing versus a little about a lot of things. The only exception I've found to this near me is Jerry's Artarama, but that might be different where you are. If I'm in a pinch and I can't wait the two days for shipping, I will only go into a Michaels or Hobby Lobby if I am armed with one of their 40-50% coupons. Even then, 9 times out of 10 it is more expensive than ordering via Amazon for the materials I am looking for. Additionally, since they can only carry so much inventory, I only find (1) the most basic (cheap in price and quality) items or (2) very famous names.
Watercolors can seem very expensive if you're measuring price per mL, but remember that high quality pigments are meant to be diluted with water, and a little bit goes a very long way. Watercolors are also meant to be mixed! Your SO will want to learn about color theory as she goes (tons of great youtube classes on this too), so that also means to start she doesn't need a massive set. So long as she has most of the primaries she will start coming up with all the colors she needs for her project. Additionally, as she gets more into it, she might find that while she likes her set from X brand, she likes the burnt sienna from Y brand, and the french ultramarine from Z brand. Getting tube colors + an empty watercolor tin will give her a strong base to start painting right away but the flexibility to add her own colors piece by piece as she plans more projects and paintings. Also, when tube paints dry in the tin (you can rewet them/reuse them later), they become portable, giving the same convenience of pan sets.
This was my starter set from [calligraphy] (https://www.amazon.com/Kuretake-Picture-Letter-MC20-36V/dp/B001MPA6W4/ref=sr_1_1?ie=UTF8&qid=1511058329&sr=8-1&keywords=kuretake+gansai+tambi+watercolors). I love the pigments, but in retrospect I could've gotten by with WAY LESS colors. In retrospect, I should've gotten something like this with a tin. Remember, the tin doubles as a mixing palette. Daniel Smith is a very popular American brand, but surely not the end all be all. Windsor & Newton, English brand, is also popular, and they have a fairly good "student" grade line called Windsor & Newton Cotman where you can save some money but not skimp out on too much quality.
Watercolor is almost exclusively done on paper. Now, since water and paper generally don't mix, you'll be concerned with the "pounds" of the paper. For everyday practice, many watercolorists are comfortable with 140 lbs spiral bound pads of cold press (meaning it's a bit rough in texture, not smooth). I like spiral bound because you can flip through and work on a few different concurrent projects (for the love of god, make sure they're completely dry first though q.q). These will buckle and warp with very heavy water application. Final projects, or anything meant for professional scanning and printing or super heavy wet work, you will probably be buying 200 lbs+ paper as needed. These can be bought in blocks/pads or as single sheets. As the pounds go up, so does the price.
Brushes! These can also get very pricey, but as with the pigments, there may be some sense in it. Higher end brushes are affixed with either natural or synthetic (or a mix) of hairs that (1) hold more water than cheap brushes and (2) keep the hairs from falling out into your paints or painting. I personally use Windsor and Newton brushes, but I don't have a lot of different types yet, and that seems to be fine to learn on. A round brush goes a long way, as you learn to put down a lot of color or very fine lines depending on how much pressure you put on the paper. As a starter set you might get two round brushes in two sizes like a 4 and a 12.
Finally, while there are lots of artists in Art Fundamentals, I might post this specifically in /r/learnart or /r/watercolor for more insight. Most of us here are working on constructional drawing with pen and paper, not necessarily painting.
They still have that sort of thing. You can get them on Amazon, because of course you can.
They have a nice zen version called a Buddha Board. It comes in different sizes.
Some quick questions, do you write really small now?
Most of the engineers I know do write small, which is why I ask. /u/the_illest does this joke you see here every time this question is asked, but it is a good recommendation to start. I personally recommend the Pilot Metropolitan over the Lamy Safari, I think it is a nicer pen to use, and the I believe the nib is better. If you write fine, you might be better off going to Goulet and getting the new model in fine, than buying the medium nib on Amazon. If you write really small, I really like the Metropolitan with the nib from the Pilot penmanship swapped onto it. The link here is more than I spent on the penmanship, if you search you can find them cheaper (I think on Amazon sometimes, I got two for that price). The Japanese EF nib is closer to a western UEF nib (the medium on the Metro is very close to an EF on the Safari). The line is very thin, and comfortable if you are used to writing small with a mechanical pencil.
With this, pick up a bottle of Noodler's black , and you will be set.
Now, to deviate a little from the standard answers. If you want something a little different, the Nemosine Singularity is an good intro pen that has gotten a lot of good feedback.
For a cheaper alternative, but usually only in a medium nib, the Jinhao x750 or x450 are big pens that make a statement (Amazon has sellers that ship these from China, Goulet pens carries them for $10 in stock).
There are a few others on Amazon that people like in the starting range, Parker, Scheaffer, etc that some like, but generally, the popular ones are the Metropolitan and Safari.
My suggestion is to buy a Pilot Metropolitan, which comes with both a cartridge and a converter so you can try both out. I would also suggest getting a bottle of a basic, workhorse ink. Something like Noodler's Black would be a good option, a nice saturated black that is waterproof and behaves pretty well on cheap paper.
As a fellow rookie Tau collector/painter I have to say these look pretty cool but I noticed some of the finer panel lines are a little uneven so I wanted to make a suggestion that saved me alot of time and headaches.
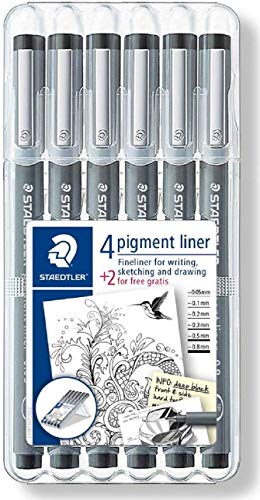
You can buy black pigment liners with a 0.05mm tip that will fit right into those panel lines to let you quickly black them out, giving a nice and crisp edge to the armor panels and other fine details.
The one linked is just one I had from my other hobbies but you can get pigment liners from most craft shop with various colors and tip sizes. The .05 or .03 mm ones are the best, anything larger and you're not gonna fit it in the gaps.
edit: grammar, also sorry I can't post a pic of the results, I'm at work on a slow Sunday :)
I have no idea what this would be used for
Sieht nach typischen Pigment Linern aus, kann die von Staedtler empfehlen. Das Skizzenbuch sieht nach nem klassischen Moleskine oder Leuchtturm 1917 aus
My advice:
Starting & Ending I like the away knot method for starting. I use a tiny crochet hook to weave the tail into the beginning stitches. It's faster than threading a needle on the tail & all that nonsense. For ending I weave the remaining thread tail through the last stitches and trim the excess. Keeps the back pretty clean and holds up reasonably well.
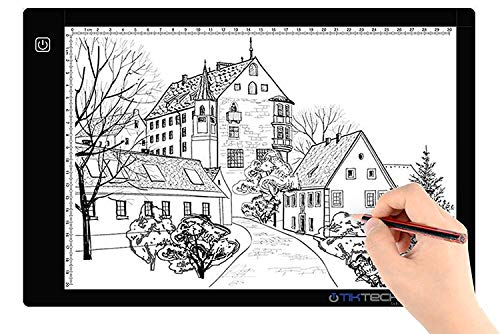
Transferring patterns Invest in a LED light pad, they're pretty cheap on Amazon. My absolute FAVE for light colored fabric is the DMC transfer pen For darker fabric, I trace the pattern w/ an ultra fine sharpie on either Sol-u-film stabilizer or tear-away stabilizer, pin/baste it to the fabric and sew through it.
Digitizing you don't need to worry about unless you have an embroidery machine.
Running out of floss Leave yourself enough extra to weave back through at the end. Start where you left off using whichever method you like. Don't leave a gap between stitches and you won't be able to tell from the front. If you mean it in the other sense, DMC floss is widely available at craft stores and all you have to do is match numbers.
Best Fabrics Non-stretch fabrics similar in weave to cotton broadcloth. The heavier the fabric, the more force you will be using to push the needle through. I like using linen since it has a slightly looser weave and looks ~classy~. I sometimes layer it on top of a cotton broadcloth before starting to stitch to add stability or opaqueness to the piece (Don't want the back of the stitches showing through to the front after all)
Keeping the back tidy Using the starting & ending methods I mentioned above will greatly help. And take the time to trim your excess thread tails whenever you start or end.
Finishing a piece There are tons of ways to finish your hoop, this is my favorite
Unasked for advice The quality of your floss matters so don't go generic unless you want to hate life. Get yourself an emory needle sharpener (the strawberry that hangs off of tomato pincushions) and some Thread Heaven.
There are tons of how-to blogs etc out there on the internet for you to educate yourself with and honestly half the fun of it for me has been discovering different techniques & trying them out.
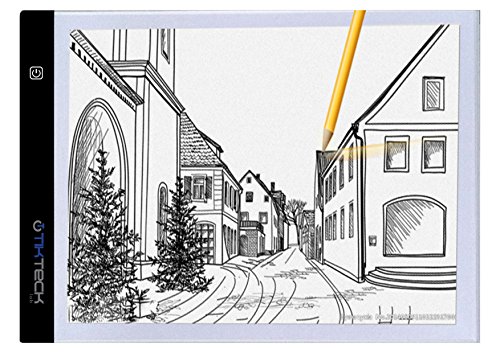
A lightbox. https://www.amazon.com/Tikteck-Ultra-thin-Brightness-Stencilling-X-rayViewing/dp/B01M26S3VY/ref=sr_1_6?ie=UTF8&qid=1548998299&sr=8-6&keywords=lightbox
Know nothing about the quality of the above one, just first one that came up.
Say no more, fam.
Keyboard: WASD 61 Keys with custom cap colors (built on their site)
Headphones: Sennheiser HD 598 SR with open backs.
Pen: Baoer 388 with a medium nib
I want to buy a nicer pen but for right now this one (with Noodler's black ink) works perfectly. I use numbers a lot at work, so I plan on making a separate number pad soon, and I also am probably going to purchase a trackball to place between the keyboard and number pad. The headphones I bought on Prime Day for half their normal price (at the time).
Pilot Metropolitan <F> nib and Noodler's Black. Use a CON-40 or CON-50 converter for the ink as the included converter is more for cleaning than anything
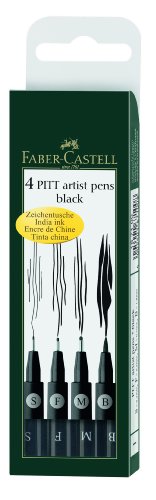
These were Faber Castell Pitt pens, 4 pack from Amazon (https://www.amazon.com/dp/B000TKEZDO/ref=cm_sw_r_cp_apa_i_LuF7AbF24XN09)
Great, now Amazon is recommending some really weird shit for me.
Like any hobby the initial cost to start will always be high. You may be tempted to buy cheaper tools but whats the point if you plan on building Gunpla for a while and will end up replacing them. If you only want to build 1-2 kits then you can get away with 2 dollar clippers and a box cutter but it won't give you good results.
Despite the cost these are still the tools I recommend that EVERY Gunpla owner who doesn't plan on painting their kits purchase
A) Tamiya 74035 Sharp pointed side cutters, worth every penny
B) Xuron 410 Side Cutters, very durable at an affordable cost
C) X-Acto X3000, Comfort rubber grip, comes with 2 blades
D) 3 Fine tipped Gundam Markers, Black, Grey and Brown
E) Krylon Acrylic Flat Coat, large can for only $5-6
And that's it.
2)Use the Tamiya cutters to cut the remaining nub, with practice you can get it practically flush to the part.
3)Clean up the nub with a hobby knife. You don't need sandpaper or a file if you did the steps above correctly and the flat coat will mask any scratches.
4)Use the Gundam markers for lining
6)Finally finish with a top coat
Total cost with amazon prime is $65. Yes the Initial cost is high but the tools above will last you for 20+ kits (you will need to buy more blades and flat coat). If you really can't afford that you can save up for the Tamiya sharp pointed side cutters and use the Xurons in the mean time (you will have more work to do).
So $38-65 initial investment to me is really not that expensive
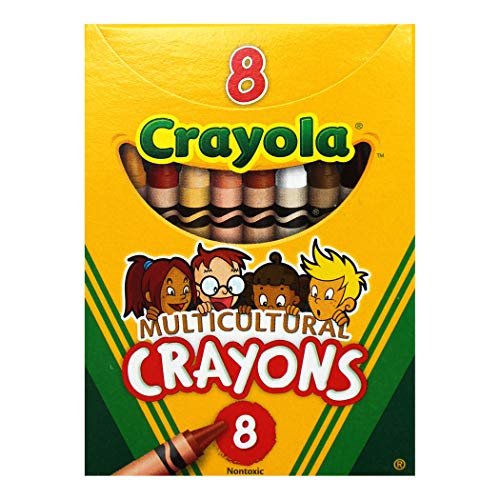
It was not the Mandela Effect. They were introduced in 1949, and changed in 1962. (Trust me, they have a whole interactive museum in this town, we know Crayola.) That said, I do also remember using "flesh" crayons, but my grandmother kept many old boxes around.
There is indeed also a box of multiethnic skin tones--you can get it here, for instance.
Get Noodlers ink. The stuff is awesome and doesn't bleed through moleskine paper.
If you're using a fountain pen, go with Noodler's Bulletproof Black. Amazon UK has it for under 20 quid, and it's both free-flowing and permanent.
If you're using a dip pen, basic black ink is less expensive. IIRC, I've used Senshi (their top item) and it worked OK. I grew up using Speedball Super Black India Ink, which is listed on that page for under £9. Most of those are for dip pens only, and not suitable for fountain pens.
A Buddha Board, its one of the coolest things I've seen that somewhat relates to meditation. I'm sure your friend would love it! Buddha Board Amazon
Your line work is actually not bad. But, mixing the cartoon features of the face with the realistic musculature of the body looks off to me.
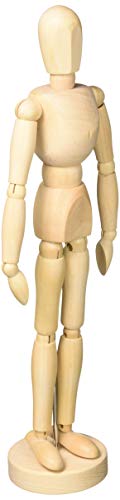
You should get one of these to help you progress in body proportions.
>Constructive criticism for how I can improve my art is greatly appreciated :)
I think it's good, but it needs some technical love. Study anatomy, buy a mannequin for reference, get the details right - it looks to me like his left upper arm is about half as long as it should be, and that his neck isn't centered on his shoulders. Some of the coloring is throwing me off too, like there's shaded bits in his shoulder armor, head, gauntlets, yet other areas like his upper sleeve are just flat blocks of color? And I can't tell what's up with his lower half, like what's below that last maroon piece, and are there even legs there? Finally I don't think the detailed, almost airbrushed quality of the skybox is really working with the comic book/screenprint-style colorblocking of the main illo.
Most of my friends are full-time artists and I've written for Juxtapoz, Hi-Fructose, and have written a lot of art and design articles for automotive magazines. The number one thing most young artists get wrong is accuracy, like the anatomy issues I pointed out. You can do anything you want with a thing, that's what makes your art your own, but you have to first be able to render that thing correctly. Unless you're Picasso, but even he could do it if he'd wanted to.
So I'd pay more attention to style overall and make your choices cohesive, and I'd work harder on presenting living creatures more accurately. But do keep working, you have the talent to make good stuff. Go for it!
Using a reference will make you better at drawing creatively. Just don't use a photograph.
Seriously, set up a still life of any random crap you have. Toss your bath towel in a heap and draw that to study light and texture. Draw with your eyes closed or without lifting pencil from paper. Get people to pose for you or just sketch them when they're not paying attention. Draw self portraits.
Later on, when you decide you want to draw hobbits or unicorns or whatever, you'll have the mental reference you'll need. Plus mannequins are cheap.
Alvin Wooden Human Mannequin (Unisex) 12 Inches Tall https://www.amazon.com/dp/B001OBMZIE/ref=cm_sw_r_cp_apa_5vRWBb1ADA316
> I mean, why else is there "20 pounds of ass" sitting on one of our shelves, next to a torso.
https://www.amazon.com/Fuck-Silly-Bubble-Butt-RD173/dp/B01CGZJGT2?th=1
It doesn't quite look realistic anyway, even with the skin colour...
but then I guess it would look even less realistic without the skin tone?
Also, completely unrelated, but equally hilarious :
https://www.amazon.com/dp/B004JOB9Z8/
Great review :
>The handy carrying case is also quite useful for carrying other dismembered obese human torsos.
Welcome to the hobby, friend! Here's a few useful tidbits of info for you.
None of the Gundam kits from the last 20 or so years need glue. That's a standard feature across pretty much every Gundam model kit. So in that regard, feel free to pick any design you like. Not all kits are created equally, but a quick search across this subreddit will help you figure out if the kit you're looking at happens to be hot garbage (and there are a few that are).
To more directly answer your question, the starter set uses an older model of the classic RX-78-02 Gundam. The Revive version is a much, much better model. You can find it here on Amazon.
A panel lining pen (or pens) are not required, but certainly make for a better final product. They're pretty cheap on their own, and generally you'll want at least grey and black, and possibly also brown. Alternatively, you can get a pack of all 3. You'll also want so basic q-tips/cotton swabs to clean up your panel looking.
You're also going to need some nippers. Nippers come in a range of types, qualities, and styles. The best nippers are single sided (that is, one side is a blade and the other is flat). These, the infamous Godhands are hands down the best nippers on the market. They're expensive as shit, but worth every penny. If you're on a medium budget, Tamiya's nippers are the next best option. There are cheaper nippers out there, but they're gonna come with significantly inferior results. That said, a lot of that can be addressed with...
A good hobby knife. You'll be just fine with a simple, cheap X-Acto knife, but there is (in my opinion) a better option. My personal favorite, the Tamiya Design Knife. It's got a slightly smaller blade, which will let you get into tighter spaces with it. It also comes with a metric crapton of replacement blades. You'll want to replace the blade every couple kits, but there's a bunch of them in there. There same container that holds the replacement blades even has a second chamber to dispose of your old blades into.
Finally, you may want some fine pointed (possibly angled) tweezers for decal application. Finger oils can screw up the adhesive on the stickers. You can pass on this starting off most likely, but you'll want to get some eventually.
TL;DR, the starter pack isn't the best option. If you're after the granddaddy Gundam, get the Revive. Otherwise, pick your favorite design. The newer the kit, the better, generally speaking. Look at the copyright date on the box cover to see. Bottom left corner.
You're going to need nippers, which can get pricey, but the cost is worth it. Start with a mediocre pair, and upgrade to the Godhands once you're committed to the hobby. You'll need a knife, too. You can cheap out on this one, but there are better options IMO.
Optionally, get tweezers, panel lining pens, and cotton swabs.
Edit: other good starter kits
HG Barbatos is a great kit. The build process for IBO models is a bit different than other gunpla, though, as they have a quasi-inner frame.
HG 00 Gundam is another great starter. It's also the first kit I ever panel lined, and it was a great starter for that.
If you're wanting a Zaku, the HG The Origin Zaku II Type C is probably the best Zaku kit released to date in 1/144 scale.
Finally, I'd feel bad for not suggesting my all time favorite HG build. It was just a fun, fun kit to make and to pose. The HG 1.5 Gundam. It's got some really cool gimmicks and, unique colors, and an awesome design.
I'm pretty new myself. I've been using a light box (you can get cheap USB ones now, I picked one up on Amazon) and a washable fabric pencil.
Interested to see what other people are using.
Edit: this one. A4 Ultra-thin Portable LED Light Box tracer USB Power LED Artcraft Tracing Light Pad Light Box for Artists,Drawing, Sketching, Animation. https://www.amazon.com/dp/B01JPD6QZK/ref=cm_sw_r_cp_apa_cMcNBbE3X1S9X
Behold
If you have any plants, moonwater is great for tending them. You can also use it in teas, baths, cleansing sprays, and as a base for any kind of magical liquid mixture.
I also like to use it for making temporary drawings/inscriptions - marking out a circle on the floor, or writing on a buddha board.
Lettering guide! or are you talking about the parallel rule that's table mounted (that's a mayline and it's got a cabling system)
https://www.amazon.com/Alvin-AL666-Lettering-Guide-Template/dp/B001DNAHRO
Lettering guide. Should be between $3 and $6, can be found many places online or in specialty art stores. Literally invented for making ruled lines.
you might benefit from one of those little wooden skeletons artists use. You can pose the figure and then orient it to see the perspective you want to paint from.
https://www.amazon.com/Alvin-Wooden-Mannequin-Unisex-Inches/dp/B001OBMZIE
I think you would just see a whole lot less of the legs period, at least from this vantage point.
eww. it feels kinda gross that this link is already purple for me... it's because I fell into this amazon rabbit hole the other day from another /r/ofcoursethatsathing post (circumcision trainer). From there I clicked on "Fat Old Fred, Black" and the lube (and some gimp masks) was listed under also-viewed from there.
If you wish to use markers for panel lining, you will want a fine tip pen such as:
https://www.amazon.com/GSI-Creos-Black-Gundam-Marker/dp/B00HY8JI7C
I bought a [Tamiya tool set] (https://www.amazon.com/Tamiya-Basic-Tool-Horizon-Hobby/dp/B000BMYWXI) like a decade a ago and I still use the side cutter and blade. I am not use to hobby knives, so I cut the nub far from the piece and then use the slide knife in that set to remove the remaining nub. I'm just more comfortable with that than I am with hobby knives. And then if there are still white stress marks, run over it with your fingernail. It works, don't know the chemistry or physics behind it. Get a [gundam marker lining pen thing] (https://www.amazon.com/GSI-Creos-Black-Gundam-Marker/dp/B00HY8JI7C/ref=pd_lpo_21_lp_t_4?_encoding=UTF8&amp;psc=1&amp;refRID=P3JJW08V8MEW95H7MR8M). You can use other fine tipped marker, different colors, etc, but your mileage may vary.
I do this as well, and honestly prefer it - for me, it's much easier and faster than using a scanner. I used to use the (very expensive and fancy) Hasselblad Flextight that my university provides, but found my new method to be far easier and faster while also providing better results.
I use a cheap "tracing pad" from Amazon to illuminate the negative.
I put the tracing pad on a low table, then set-up my tripod above it, so my digital camera is pointing straight down. I use a Sony A7r with a 90mm macro lens, but any digital camera that can focus close enough works. The one key point here - it's very important that the camera is level and actually pointing straight down - otherwise you'll not only get keystoning, but your plane of focus will be off and so your negative will not be entirely in focus.
I stop down to around f/8 and 1/8th or so of a second at the base ISO, and use the 2-second self timer to avoid shake. I keep the camera still and just move the negative on the light table to photograph it in thirds. Takes about 10 seconds per negative.
Then, I use Lightroom's built-in batch panorama stitch to stitch all the frames into a single large .dng. I then open the .dng using Adobe camera raw's default settings in photoshop, and the perspective crop tool makes it really easy to crop to just the negative, including or excluding the frame borders per your preference.
Then I invert the negative using a single adjustment layer and do color correction from there, following the guide from Alex Burke's e-book. But you could also try Negative Lab pro.
https://www.amazon.com/dp/B01JPD6QZK?ref=yo_pop_ma_swf
Super cheap and perfect! I know what you mean about being light sensitive, which is why I started hunting for a different option!
I bought this light table and the light can go through 5 pages of watercolor paper.
https://www.amazon.com/gp/aw/d/B01M26S3VY/ref=ya_aw_od_pi?ie=UTF8&amp;psc=1
I normally have a sketch ready before hand but this will work well for you from my experience.
I use a couple methods:
The left won the culture war and are widespread in universities and public schools. The indoctrination starts early, they show you videos about inclusivity. Then you are taught about the history of racism in America, slavery, Jim Crow, and the impressionable children are told it was all the fault of the white man (even though slavery was practiced in countless other cultures). Guilt is imposed on the child and they are told that the evil conservatives are to blame. The right is stereotyped as being made of bible thumping rednecks who would lynch blacks if given the chance. In high school, I remember that conservative was synonymous with evil.
Likewise, progressivism is associated as all that is good in the world. So if you oppose any progressive law, it can't be for moral reasons, since it is already established that the left is the only moral party. Therefore they must be racist/sexist/whateverist. It only gets worse in college, where students are taught about privilege, sexual objectification, and all that other bullshit. I remember in one of my undergrad chemistry classes we spent about 10-15 minutes listening to the professor lecture about how Watson and Crick stole the idea of the double helix from a woman, Rosalind Franklin. This disease has spread far and deep, but thankfully people are starting to wake up.
https://www.amazon.com/Crayola-Multicultural-Crayons-Assorted-Specialty/dp/B00006IQCA
My Lamy Safari is getting quite worn out. I've had it for years and it's been riding around in my pocket the entire time. Switching back to writing in cursive with that pen made it so that I can actually somewhat keep up with notes without developing horrifying writer's cramp.
A large portion of the black coating is gone off of the wire clip, it no longer retains in the cap like it should, and I've had to replace the nib where it got loose in my pocket and got crushed. Still love the thing, though. In the end, it's wound up saving me money, because the $40 I spent on the pen, a bottle of ink, plunger insert, and replacement nib is all I've spent on writing implements in the last 3 years or so, whereas before, I was going through multiple G2 gel pens a month.
I have no idea why that caused me to go off onto such a tangent. I guess I'm just attached to that pen. I use Noodler's Bulletproof Black Ink in mine, by the way.
EDIT: Why not get that USP in .45 ACP, by the way? I think I would have gone with .45 instead. I already have half a dozen handguns in 9mm, though, so maybe it's just saturation on my part.
Okay, sweet. So, one of the cool things about fountain pens is their customization to how you want to write. Do you like writing small and precise? Get an EF or F nib. Do you like cursive-looking writing? Get an italic nub. Do you like sexy line variation? Get a flex nib.
My point is that I would get one of the two most recommended starter fountain pens so that you won't be stuck with an experience you don't like having spent $50 on a design or nib size that doesn't suit you: the Lamy Safari or the Pilot Metropolitan. After the first few pens, you'll have an idea of what you really like in a fountain pen. These pens are both inexpensive, relatively high build quality, and nice writers. I started with a Lamy Safari EF as my first pen and I still use is regularly because it is a nice pen, despite it being inexpensive. But I think you can look around Youtube or Google some reviews on the two and see which one looks more appealing to you. I personally recommend the Lamy Safari because it has a "tripod" grip that helps beginners position the pen so that the nib is in the right orientation. See the Safari here. The Metropolitan is also a nice pen. So again, whatever you think looks cooler.
Fountain pens can be refilled through disposable cartridges or through filling mechanisms that take up ink from a bottle.
My first bottle of ink was Noodler's Black.
And to refill the Safari, I had to buy a converter.
I started using fountain pens around 5 or so months ago, and my bottle of the same ink is still going strong. (Although I have bought tons more other colors. :D).
I wrote a slightly more extensive "beginner fountain pen guide and why you should use fountain pens" comment on another post, and I'll link that here if you want to read it.
Online, the ink I use is on Amazon so I just get it there in recent years.
Any of the inks that are considered "bulletproof" from Noodler's (Noodler's black, 54th Mass. etc.) will not smear (unless they haven't dried). Once a bulletproof black is on some cellulose material (e.g. paper, fibers) it is there for good.
http://www.amazon.com/Noodlers-Black-Waterproof-Fountain-Pen/dp/B000MVZ2E6/ref=sr_1_1?ie=UTF8&amp;qid=1427578163&amp;sr=8-1&amp;keywords=noodler%27s+black
Noodler's Black is fairly well known for being bleed resistant:
https://www.amazon.com/Noodlers-Black-Waterproof-Fountain-Pen/dp/B000MVZ2E6
For bleed through I've found that higher quality paper helps more than different inks. I like these A5 Clairefontaines:
https://www.gouletpens.com/clairefontaine-1951-clothbound-notebook-black-lined/p/C195246
I really like these artist pens have some in black and some in grey. Feels more authoritative then pencil and you can get a nice sense of tone with the greys.
If you don't want to mess around with ink, I'd recommend the Faber-Castell Pitt Artist Pens. http://amzn.com/B000TKEZDO
Its a white board that turns black when you paint water onto its surface. As the water evaporates, the painting fades. Very calm, much zen. http://www.amazon.com/Original-Buddha-Board-Master-letting/dp/B0010TEFFQ
A Buddha Board for sure. Artsy and spiritual - you paint on it with water and it fades away in time.
I think a "buddha board" might be what you're looking for. There's also a cheaper mini one
The Ames Lettering Guide helped me when I was practicing my lettering to be a draftsman.
What a lovely idea! For me, it's been fun testing out materials and finding what I like to use. Depending on her media interests, here's what I'd recommend thinking about:
A Brush Pen (especially for cartooning on the go!):
http://www.amazon.com/Pentel-Pocket-Brush-Refills-GFKP3BPA/dp/B002LJRKN8/ref=sr_1_1?ie=UTF8&amp;qid=1448983878&amp;sr=8-1&amp;keywords=cartooning+brush
A Nice Brush:
http://www.amazon.com/Winsor-Newton-Kolinsky-Pointed-Brushes/dp/B0013E68TO/ref=sr_1_1?ie=UTF8&amp;qid=1448984196&amp;sr=8-1&amp;keywords=Windsor-Newton+Series+7+sable+%232
Some Ink:
http://www.amazon.com/Speedball-2-Ounce-India-Super-Black/dp/B0007ZJ8TM/ref=sr_1_3?ie=UTF8&amp;qid=1448983937&amp;sr=8-3&amp;keywords=ink+cartooning
A Brush Cleaner:
http://www.amazon.com/General-Pencil-Company-Masters-Preserver/dp/B0009RRT9Y/ref=pd_sim_201_12?ie=UTF8&amp;dpID=512oIauSQjL&amp;dpSrc=sims&amp;preST=_AC_UL160_SR149%2C160_&amp;refRID=1J5XTFQ5TBWPSS5E39AV
An Ames Lettering Guide:
http://www.amazon.com/Alvin-Ames-Lettering-Guide-AL666/dp/B001DNAHRO/ref=sr_1_1?ie=UTF8&amp;qid=1448984324&amp;sr=8-1&amp;keywords=AMES+LETTERING+GUIDE
A copy of Making Comics by Scott McCloud (SO useful!):
http://www.amazon.com/Making-Comics-Storytelling-Secrets-Graphic/dp/0060780940/ref=sr_1_13?ie=UTF8&amp;qid=1448984007&amp;sr=8-13&amp;keywords=cartooning
$100 will get you pretty far! obligatory ymmv, a lot of supplies depend on what and how you paint (do you paint large or small? do you paint outside a lot and need a travel kit? and so on), etc, etc, but here is how i would spend the money:
kuretake gansai tanbi, 36 color set - the best set of watercolors i have used and relatively cheap, the colors are vibrant, mix well, and set beautifully.
probably where most of the money should go after upgrading your paints. i like the strathmore 500 series and the canson papers for sketching and learning. other higher end brands that are recommended a lot are arches, bee paper, and fluid 100. definitely try out both hot press and cold press, people usually develop a preference but one is not necessarily better than the other.
honestly, brushes are not that important as long as they are not frayed or shedding. i've seen tons of professionals use and recommend this cheap set by grace art. i also like the princeton neptune brushes.
if you still have money left, i would suggest trying something cool like metallic and pearlescent paints if it interests you. or use the money towards other mediums if you want to branch out.
watercolors LINK
we starting to use it in art schools and continue to use them in art academy. they really are good. no need to dig deeper in more expensive, pro watercolors.
fancy watercolors (i personally love them, but really, basically fo fun, mixed media) LINK
watercolor pad LINK
that's my choice. would highly recommend this producer, really great absorption, thick paper, different formats available. anyway, it's really good.
brushes is really very personal choice, depends on technic and such. I like this one LINK great for miniature work. You can look for some squirrel hair brushes in local store orLINK , they are good for starters and for wet painting.
EDIT. fanart sample where all those stuff used at once :P
To add to this, invest in a Drawing Mannequin. You can even get one for android. They will help you plan body poses and give you something to work off of.
Nice! If you'd like to take it further you should get him a mannequin. He can pose it and even though his style is very animated atm, it will help get him a good sense of proportions!
This is what I did in college. I used bathtub crayons to write on it. They also work great on mirrors and windows (and bathtubs). http://www.amazon.com/Play-Visions-Crayola-Bathtub-Crayons/dp/B0043BYOO0/ref=sr_1_1?ie=UTF8&amp;qid=1457577859&amp;sr=8-1
They are called "Color My Bath" and we got them off amazon.com We also got some Crayola bath crayons and bath paint off amazon.com as well. All really fun things to do in the tub and it all washes away easily. The crayons can be completely submerged and they will still work great.
Edit: here is the link http://www.amazon.com/gp/aw/d/B004813L0S/ref=redir_mdp_mobile/179-1283759-8108138
http://www.amazon.com/gp/aw/d/B0043BYOO0/ref=pd_aw_sims_2?pi=SY115&amp;simLd=1&amp;dpPl=1&amp;dpID=41kvL%2Bsnz1L
http://www.amazon.com/Play-Visions-Crayola-Bathtub-Paints/dp/B009ZXLU0C
I have some of these. You can get them at any store like Meijer, Target, Kmart, etc. I took these to a fancy hotel and left the housekeeping drawings on the shower wall.
Edit: Crayons!
Customers who viewed this item also viewed Fat Old Fred.
Customer who viewed that also viewed this weird as shit thing.
https://www.amazon.com/Nasco-Fat-Old-Fred-Black/dp/B004JOB9Z8/ref=pd_sbs_121_3?_encoding=UTF8&amp;psc=1&amp;refRID=972QP906FX8R49C70EPT
Buy the cheapest, thickest sketchbook you can, (in the UK, I'd hit up The Works)and some pens, ballpoint maybe, preferably fineliners, like these bad boys, then fill it up.
There are tons of resources available.
Some tips I have picked up:
Start with perspective, simple one-point perspective and a bunch of boxes ( try this place ), and just fill sketchbooks up.
Split your drawing time into practice and personal, still draw stuff you love, but make time to just practice. Noone else will see the results, it's just for you to learn how things look.
Use reference, not tracing if you can avoid it, as much as you can. Learn what things actually look like, how bits of the body fit together and work. Draw what you see, not how you think things look.
Try and find others who are learning too and learn together, even just posting stuff online for advice.
*From the last one, try and see advice as positive, noone is perfect and (other then the occasional twat), use what they have said to get better :)
Sorry for the wall of random stuff, I'm still early in my journey too and these are the tips I keep hearing again and again. Good luck!! Can't wait to see what you come up with in the future.
Staedtler Pigment Liner I believe is what is being used.
Edit: Kiket to liner.
Thanks! The lines were done with XS Faber-Castell, which utilize India Ink. I love their pens :)
Edit: This is the set I use
https://www.amazon.com/dp/B005HF562K/ref=cm_sw_r_cp_awdb_WBH8ybEFZKG9D
I recommend taking a trip down to a local hobby store that sells gunpla- I've found that (at least for mine) it's usually cheaper and can have kits that aren't available online. You can also improve your build with some panel lining- using one of these (or a marker of your choice) along lines in the design to make it look as though 2 panels are separated.
GSI Creos Black Fine Point Gundam Marker https://www.amazon.com/dp/B00HY8JI7C/ref=cm_sw_r_cp_api_i_w8YVDbZW4ESJD
Amazon has several, here's one for under $25. They're really worth the bucks, or get on eBay and you might find an older flo tube model, but the LEDs are nice. I know sime guys stick a white photo in their iPads and use that, too. If you're shooting film, you really get to the point where inspecting your negs is needed, and it's handy to keep by your scanner to check for dust (well, mine's by my enlarger!)
I got it on amazon, let me see if I can get a link. I will say there are a bunch of the same kinds posted around in the related items
Edit: the link for the light box I got
Scanning is costly, yeah. If you shoot a roll a week or more, it's a no-brainer, cause you'll make back your costs on what you save in paying for lab scans pretty quick. If you shoot less than that, "it depends".
If you're just shooting 35mm, a used Plustek is a great way to go, or even a new one if you want a warranty. If you also shoot medium format, I'd look for a used Epson V700 or higher; I wouldn't bother with the lower number Epson flatbeds; the resolution just isn't enough for me to make it worth the hassle of scanning.
If you already have a DSLR or other interchangeable lens camera, and especially if you already have a macro lens for it, you can also try DSLR scanning. Even if you don't have a camera, you can get set up for around $500-700 depending on what you need to buy. If I had to do it from scratch here's what I'd get.
So all in that's everything you need for DLSR scanning, and it comes to $707 plus the ongoing LR subscription. You could cut the cost a lot if you already own some of those things, or by using a cheaper 35mm holder than the Nikon ES-2, such as a 35mm-sized Digitaliza, or rigging up an older Nikon ES-1. You also don't need NLP and Lightroom; you could get away with free software like the GIMP. You might also be able to find a cheaper tripod at a yardsale or thrift store that will work fine, but they can be clunkier than modern ones.
All that is why people say "if you already have a camera" with DSLR scanning. Otherwise, why not just get a brand new Plustek 8100i AI for $490 and get about the same level of image quality for less money, or even less with a used model. So, it kind of depends on your personal situation.
"OK, we'll stop at 8."
Was the one you bought by any chance this set? If it's that set, or one that looks like it, then all of the bigger markers are mainly for detail painting. The smaller one is intended for panel lining, but I'd suggest at least getting a black lining marker too, since gray is too light for many colors.
If I plan on painting the kit, I cut every pieces out so that I can paint them all at once. However, I organize pieces into sections - L/R legs, L/R arms and so on. When I paint, each section goes on their on tray to prevent confusion. I have been building long enough that, even if I mix the parts together, I should be able to find what I need.
I try not to mix PG parts though. That's like finding that one piece you need in a pile of Lego.
-----
>cheap clippers to cut from the runner and then to try and cut closer to the part.
That's the cause of your problem. You should be using a sharp nipper and cut further away to the piece, then shave it down with a very sharp hobby knife or, if the gate is thin enough, cut against the piece with your nipper.
------
It is possible to polish the part with sanding only, however, it will take a lot of time and quite a bit of sand papers. Here is how I often hide my sanding
My experience with inks is pretty limited, I hope others will help me out with suggestions. I use Private Reserve DC Supershow Blue, which is a full, darkish blue. My uncle recommended it to me because it is easy to clean and it is easy to restart pens that have dried up using a drop of water. HOWEVER, it has no water resistance whatsoever, so if you expect your notes to come in contact with water (aka rain), they will smear badly. Inks like a Noodler's Bulletproof Black are great if you want your notes to last a long time. However, I haven't used a bulletproof ink before, but I know they smell.
The paper makes the experience and for the time being this will treat you nicely. You can get a 5 pack for three dollars at most Target.
If you can justify the price Rhodia and Clairefontaine makes excellent paper.
Ink:This is a well behaved ink that will work great on any paper.
Waterman is a nice ink sold on Amazon, I have inspired blue and it's excellent and a lot of fun.
The folks here will suggest all different kinds of ink, enjoy your new pen and try not to get addicted like me!
Noodlers Bulletproof black has a pretty big following. I use it myself and it perfectly fits my ink needs. They also sell other inks that people seem to enjoy, but I personally have no experience with them.
How about a nice pen? Have you ever used a fountain pen?
This pen is great. I have one with a silver trim. I've had many a fountain pen, and this is still my favorite, even more so than pens that cost me twice as much. Feels good, looks good, made very well, writes well. Just don't drop it. It will break. That's the only downside for me. However, I've broken mine 3 times, and epoxied it back together and polished it up each time.
When you start using a FP, paper becomes important too. Cheap paper and some fancy notebook brands (i.e moleskine) are horrible for fountain pens. Ink will bleed and spider on the page. I'd suggest looking at this brand of paper. They're cheap(er than moleskine), look good, and take fountain pen ink super well.
You'll need some ink too. I'd suggest starting with something from Noodler's ink lke this. Some FP inks are waterproof, some are not. Bulletproof, iron gall, or pigmented inks are usually water proof.
I know that probably puts you closer to $100, but imo, it's worth it if that's something that interests you.
Noodler's Ink black. Item number 19001. I use the pen at work so I have to keep things simple and professional. I'd prefer a nice dark blue, but, eh. It's for my paperwork.
I like your handwriting. Mine is still sloppy but I'm working on it.
If cleaning doesn't work then I'll try the soap trick. Thanks.
i got these two with a metro
hope i got the right stuff lol
For the major borders I used a Medium .7mm and for the stairs and fine details, as well as the crosshatched border a Small .3mm
I use Faber-Castell artist pens. Go through them fairly fast but they give me awesome lines. I just wish the Medium .7mm was actually a .8mm hhahaaha
Here is a link: http://www.amazon.com/Pitt-Artist-Pens-Wallet-Styles/dp/B000TKEZDO
I'm so sorry for your loss. <3 I'd love to use this to build my drawing skills as well as managing my anxiety. Thank you for this contest.
He sounds like a good recipient for a Buddha Board.
I'd also think of a pile of great books that delve into the therapy/specialty he's interested in, knowledge goes with any lifestyle. Or maybe a book on how to build furniture yourself that's easy to make and light on the environment.
> Preferably something basic, that improves quality of life and will last a lifetime.
Victorinox Swiss army knife with lots of necessary features. For $50 I don't know too many things that will last a lifetime, maybe someone else here knows better.
HandHook I think you'll love this
/u/argirl09 (my latest newbie) has a water writing board thing on her list. I've played with one and can say that if five minutes of readability is too much but you also don't want the ability to erase your work at will, this is for you. Do you have cats? They'll enjoy drinking from and pushing over the water glass you leave out to use with the board.
Small container of lube.
https://www.amazon.com/Buddha-Board-100-The-Original/dp/B0010TEFFQ
I got it as a gift. But, it's nice. It's kind of kitcshy, but it's calming/relaxing to draw/write on it. Just requires water. It comes with the brush.
Rubbing alcohol - I have no idea! I think it does break down the colours but USE IT GENTLY because you can bleed right through paper if you're not careful. My mom showed me how to do this when I was young and just learning how to use Prismacolours.
Generally when needing to fill something with solid colours I'll use a circular motion for even coverage rather than line-shaped strokes, but yeah, that's basically the idea.
Currently the lighting on the picture is kind of undefined - you have shadows underneath things, but light plays in strange ways and reflected / refracted light also does weird stuff. This tutorial kinda explains things better than I can: http://theartcenter.blogspot.se/2010/03/sam-nielson-painting-process.html - Basically, you want to think about where your primary light source is, how the material you're colouring will interact with that light, and then the shape of what you're colouring. Rimlight is the white around the edges of say, Lugia's wings.
I will recommend these watercolour sets because I LOVE them: http://www.amazon.com/Pelikan-Color-Opaque-Watercolor-Set/dp/B00170ZSLS/ref=sr_1_1?ie=UTF8&amp;qid=1462365768&amp;sr=8-1&amp;keywords=pelikan+watercolours Used them for years. They're student grade but I love how they work. Make sure you're using sturdy paper!
I am using these watercolours currently: http://www.amazon.com/color-Kuretake-picture-letter-Unleashed/dp/B001MPA6W4/ref=sr_1_1?ie=UTF8&amp;qid=1462365862&amp;sr=8-1&amp;keywords=japanese+watercolours They're flipping fantastic, if not a bit more expensive.
LMK if you have more questions / need more clarification. :D
I currently use kuretake watercolors with these brush pens and I think they’re pretty solid. It’s not a huge investment and I think they’re a good starter pack for casual water colorists.
I highly also recommend clipping your pages and having maybe a hair dryer handy so your pages don’t warp from getting too wet.
I think they're a great starter kit. You get a wide variety of colors. The problem with them is that there are mixed opacities -- sometimes two colors right next to each other on the color wheel might be different. One green could be opaque, one could be transparent.
I used them exclusively as my travel palette until I started to build out my collection of professional colors.
My absolutely favorite "set" is the Kuretake Gansai Tambi set ($29 on Amazon). Keep in mind, these are Japanese style, so they will be richer in color, but I absolutely love how brilliant everything is. This was definitely my workhorse at home while I was building out my professionals... but truth be told, sometimes I still go back to these because I love them so much.
&#x200B;
EDIT: Adding some links to works myself and my sister-in-law have done with them, so you can see the richness.
1.
2.
3.
4.
I use a tablet with reference pictures, but another thing I have found useful is I have a "drawing model" doll - https://www.amazon.com/Alvin-Wooden-Mannequin-Unisex-Inches/dp/B001OBMZIE as an example - that i can pose and touch and then the model can see what I am talking about with a weird pose or look...
You could get one of those wooden human mannequins. Artsy people have those, right?
I like it! It has a few anatomy specific things though. You may want to spend more time looking at Jack's hands throughout the show. The show has a very simple-shape-y style and the hands are much easier than in other shows. Additionally, Jack looks thin but not small in the show because he has broad shoulders and a narrow waist. Your image seems to have his shoulders broad, but the pauldrons make it harder to see and he looks a bit disjointed, plus his waist is pretty wide. If you're going to be doing lots of art of people in the future, you may want to pick up something like this since human proportions are hard to draw on the best of days. One last thing, the feet are very small. They should be about as long as his forearms.
With all that out of the way, this is a very solid start, especially considering how hard it is to draw humans. Keep at it! You could end up a really great vector artist!
Damn, lol how about Fat Old Fred then?
Λολ. Θα πάρω και το recommended προιόν από κάτω.
I see your.... Whatever it is and raise you Fat Old Fred http://www.amazon.com/Life-Form-LF03749U-Fred-Black/dp/B004JOB9Z8/ref=pd_sim_sbs_indust_2
You know what, that's actually a good map! It's pretty clear and represents a good start.
/r/mapmaking is a good place to look around, and there's even helpful threads popping up all the time. If you decide to get more serious about making maps, I'd recommend a Wacom tablet for drawing on a computer. You can use free tools like GIMP or Krita. Of course you can use a mouse with these, but pen & tablet is easier.
If sticking to regular paper, get something like these. Good pens of different thicknesses. If you can express terrain using only "textures" in black & white (here is an example I found on /r/mapmaking), you can really make it pop once you start adding color!
Biggest tip is to just keep at it. And don't be afraid to re-do things over and over to try out different styles.
Gotcha, in that case, here's a few well worth adding to any collection if it's not too late:
Bic Soft Feel Medium Easy to control when pushing softly, reliable ink flow. Great for light lines and construction. The tip does displace by about a mm when you press hard, so it makes dark lines more difficult to reliably create.
Zebra Z-Grip Max Harder to control for lighter lines as the ink flows a little too well. The tip has no displacement though, which means darker lines are much easier to create reliably compared to the bic.
Zebra Z-Grip Flight aka Z-Grip Smooth in the UK. Similar to the Max, no nib displacement, but the ink flows so freely, this is not something to be used for light construction. Very smooth if you like that sort of thing.
The cheap crystal and disposable ballpoints you find all around are OK, but the ink flow is unreliable. On rough paper, they generally have stable nibs and can produce almost pencil-like lines, but they stop and start working so often, it can be annoying.
Non-Ballpoint honorable mentions:
Pilot Hi-Tec C 0.3 - Free flowing hybrid pen. No variation in line-weight, and no going back. Unforgiving but fun when you're searching for ideas and not caring about the final quality.
Pilot G-Tec C4 0.4 - As above, but the 0.1mm difference is significant. Usually used to add line weight to sketches done in the 0.3.
Staedler Pigment Liners - Unfortunately mistaken to be 'markers' because people keep calling them that. Smooth and reliable ink flow with the hard nib. Much thicker and less scratchy than the Hi-Tecs, and far less forgiving. Worth getting a whole set as preferences will vary and the size difference between each is significant. Restrictive as they don't work well at shallow angles, but on the plus side, you can marker over them.
Most importantly, if you're going to be drawing using ballpoints, make sure to accompany it with toothy/rough paper. The paper is 80% of it imo. Smooth stuff just doesn't cut it with ballpoints if you want a consistently high level of control over line weights.
There are lots more of course, but these are my experiences so far.
Good luck!
It's a staedtler pigment liner. They come in packs from 0.05 to 0.8. I use them all the time, perfect for tiny details
The regular Staedler fineliners run, but their "pigment" liners don't.
https://www.amazon.com/gp/aw/d/B004L87XRA/ref=sr_ph_1?ie=UTF8&amp;qid=1467672443&amp;sr=sr-1&amp;pi=AC_SX236_SY340_QL65&amp;keywords=Staedtler
Get yourself a pack of good ol' Staedtler pigment liners. You can't go wrong. Link for reference: https://www.amazon.com/gp/aw/d/B004L87XRA/ref=mp_s_a_1_6?ie=UTF8&amp;qid=1492185452&amp;sr=8-6&amp;pi=AC_SX236_SY340_FMwebp_QL65&amp;keywords=staedtler&amp;dpPl=1&amp;dpID=51U5RvwpsEL&amp;ref=plSrch
Ever look into getting something more like a pigment pen? I admit, I'm a Pilot G2 guy myself so I am interested in seeing what recommendations there.
Something like the Staedtler or Sakura is what I am referring to. They have a bit more bleed-through if you are writing on standard A4 paper, but when I've had the pleasure of using those types of instruments I am never disappointed.
I have these
Masking fluid is used to cover the spots you want to keep white in a painting. You put the masking fluid on those spots and once its dry you can paint over it then when the paint is dry again you rub off the masked bits with an eraser and TA DA! It’s really cool!
Thank u :3
I don’t erase the guide lines, this drawing was done without an eraser or ruler. I’m trying to play with pencils’ tonality. As an example first I draw the outline with a HB, if I do some mistakes I go over it with B or press harder on the HB.
When I’m doing a non technical drawing and I need an outline I do a basic pencil sketch and the trace it.
The red pencil idea is good if u plan to process ur work digitally.
Also u can use different types of erasers, there are some that look like a pencil ( https://www.amazon.com/Faber-Castell-185698-Faber-Castel-Pencils/dp/B005M4LAUS ) or are soft like dough ( https://www.ebay.com/itm/Soft-Rubber-Kneaded-Eraser-Wipe-Highlight-Art-Sketch-Painting-Correction-Tools/233278662189?_trkparms=ispr%3D1&amp;hash=item36507de62d:g:nGEAAOSwglJdHNfj )so u can mold it as u wish to get more precision.
Overall, with time u won’t need an eraser.
Sorry, I tried to link it, but it didn’t work. Let me try again: here!
It might not be a colored pencil. Might be an eraser pencil
https://www.amazon.com/Faber-Castell-185698-Faber-Castel-Pencils/dp/B005M4LAUS/ref=sr_1_4?
I appreciate your comment, truly. I can somewhat relate to you, as I was very much into art back in High School, but quickly gave up on it due to anxiety and low self-esteem. There was a good ten-year hiatus before I began to pick the pencil up again this earlier this year.
I suggest starting small. I challenged myself to draw all 151 of the first generation of Pokemon on post-it notes. You can see some of them in my submission history if you're curious. It sounds silly, but that's what I had available to me at work, and I could usually spit one out after working on them on breaks and lunches. I tried to do one a day. The more I worked on them, the more I began to get my confidence back. Once they were done, I had an immense sense of fulfillment and accomplishment.
You don't have to do something that intense, but I found that setting smaller goals first, and seeing them through, was what helped, even if I wasn't pleased with some of the small things. It was only after these that I had the courage to try something bigger and more complex, like the helmets I've done.
Practically speaking, get yourself a few tools of the trade. I use a mix of .7 and .3 mechanical pencils, with HB graphite for the former and B lead for the latter. I also use eraser pencils to get fine erase lines for detail, and smudging sticks to blend.
Sorry. I know this was probably more word vomit than you may have expected or wanted. Your comment just struck a similar chord to my own experience. That said, just start small, and realize that all of the tiny mistakes you see in your work are mistakes that, for the most part, only you can see. Everyone else will just see a work of art, and enjoy it for what it is. Trust me. That was my largest hurdle. You can do it too.
Good luck. :)
I have the same problem I think. For me, it doesn't really flake off though, it kind of smears off. Also, it happens with some colors and not others — usually really pigmented ones. People say light layers help, but some colors seem impossible to me; Dahlia and Peacock Blue come to mind.
For a wax pencil, I personally prefer Derwent Coloursoft — the color stays where I put it, no matter how pigmented, and I'm not stuck with having to do light layers.
My favorite is Polychromos, which are oil-based. They're very high quality and not cheap, so after buying a lot of pencils, I went with the option to buy the 60 pack with a free sharpenert (works better than my hand crank one tbh) on Amazon, and got the individual colors I wanted from Dick Blick - the 60 pack comes with a booklet containing all of their colors, and there are swatches on the Dick Blick website, which made it easy.
Also, I just got the Arteza 60 pack gel pens which are around $20 and work really, really well. Gelly roll are considered top of the line, and although I have a set of their whites that I love and some colors, they're quite expensive, and the tip is very thick, so I prefer others for coloring most of the time.
Here are some things I always recommend to new colorists that will work with any brand —
Derwent burnishers, blenders, vinyl eraser and sharpener
Derwent electric eraser
Faber-Castel Eraser Pencils
[BTSKY cases] (https://www.amazon.com/dp/B01BXZFNJI/ref=cm_sw_r_cp_apa_6vaTAbHACFY0W) there are lots of other sizes/styles/materials, but I think the book style is the easiest way to organize pencils.
Looks great! I recommend getting a panel line marker, they are so cheap but make such a massive difference to a kit. Welcome to the hobby :)
Gives more of a natural look on light colored armor plates, black gives more of a classic cartoon look. Brown is used for warm colors and sometimes zeon/zaft/etc suits. You are looking for something called a "fine tip gundam marker", You can get them online. There is also something called "panel line accent" which is applied with a brush and some people feel gives a more natural look, I would reccomend starting with the marker, as its easier to learn with. Keep a qtip around when using it incase your hand slips. any residue clears up with a bit of rubbing alchohol, dont use nail polish remover, it can melt plastic.
https://www.amazon.com/GSI-Creos-Black-Gundam-Marker/dp/B00HY8JI7C/ref=sr_1_8?keywords=gundam+marker&amp;qid=1566105777&amp;s=toys-and-games&amp;sr=1-8
If you are going for 30 dollar tamiyas just drop the extra 5 dollars and get these, they come with free shipping on your whole order and tax free. https://www.gundamplanet.com/gundam-planet-premium-side-cutter.html
They also carry sanding sticks
https://www.gundamplanet.com/supplies.html?cat=30%2C31%2C29
I use these: http://www.amazon.com/GSI-Creos-Black-Gundam-Marker/dp/B00HY8JI7C/ref=sr_1_1?ie=UTF8&amp;qid=1411874898&amp;sr=8-1&amp;keywords=gundam+fine+tip
I use a black for parts that are molded in a dark color, and a grey for things that are much lighter. They're really easy to use, and you don't have to be precise with them. Keep some q-tips and a bit of rubbing alcohol handy, though. Just set the ink into the panel line in as many passes as you fee is needed. Let it dry for just a little bit, then gently flick over the line using the q-tip. Don't even push down that hard, just gently stroke over the area. This will help spread ink away from the line, if not pick it up entirely. Any excess can be rubbed off using another q-tip with a very modest amount of rubbing alcohol on it. It'll come right up and leave your lines filled.
There's a lot of tutorials on youtube, and various methods (I've heard a lot that panel washing works best, but haven't tried it), but that's how I do mine and I'm pleased with the results.
I would suggest buying a really cheap HG kit that you can screw around on, test a bunch of different techniques and see what works best for you. That way if you totally screw up you won't be out of a lot of money.
edit: Also, there's alternatives to these pens. I used some sakura microns I had laying around on my first HG and it looked good, but buying a set of those is going to be more expensive in the long run than getting gundam pens. I've seen some individual very fine point pens at Michaels for about a buck or two, but I've not yet tried them. They seem like they can get the job done, though.
Panel lining. Use a very fine-tip paint marker, like this; brush on inks; or even really, really, really thinned down paints. Use it to pick out the separations between the toy vehicle's molded in body panels, hatches, and doors. Really helps make them "pop."
https://preview.redd.it/8n8h1p3x9ef11.jpg?width=640&crop=smart&auto=webp&s=0800dd71f8a56bed87de388256da7f86e8f9e574
I use gundam panel lining pens, like these: https://www.amazon.com/dp/B00HY8JI7C/ref=twister_B01N8TDZIM?_encoding=UTF8&amp;psc=1 - black
https://www.amazon.com/GSI-Creos-Point-Gundam-Marker/dp/B006B3YYZM/ref=pd_bxgy_21_img_2?_encoding=UTF8&amp;pd_rd_i=B006B3YYZM&amp;pd_rd_r=WF27RX3KPCKMWVEPFH2E&amp;pd_rd_w=5XjyC&amp;pd_rd_wg=XTRl0&amp;psc=1&amp;refRID=WF27RX3KPCKMWVEPFH2E - grey
You might want to get a black thin tip gundam marker to fill in the lines. Other tools that are helpful are a pair of side cutters for cutting parts off the runners, and some x-acto knifes and sandpaper to get rid of the nubs left from cutting the pieces out. I usually use 800+ grit. A flat top coat can be sprayed on to remove the shine from the kit, and give it a more model like look than something that looks like a toy. Hope this is helpful!
There's not much in the wiki at this point about pointed-pen guidelines, but it does link a couple of generators that you can use: shipbrook's or knestled. Your third alternative is to draw them yourself, but personally I find that to be rather tedious. Additionally, if you draw them half-assedly (i.e., not completely parallel or at the proper angle) you'll also be doing yourself a real disservice when it comes to practicing.
I prefer the knestled generator (full disclosure: I wrote it), and here's a pdf (tweak the settings here) example you could use straight-away for copperplate. If you intend to draw directly on your printer paper, I'd recommend making all of the lines very light. As /u/funkalismo says, though, it's preferable to make reusable thick-lined guideline sheets and place your practice sheets on top. This may not be an option depending on the transparency of your practice paper, or if you don't have a light table for example.
For completeness, zanerian.com (2) has a couple guide sheets that are simple images, but they are hardly ideal.
its the tombow "fudenoske" brushpen, i order them from amazon here. its meant for caligraphy but i find it really good for linework, would recommend!
Pinselstifte brauchen normalerweise keine Tusche oder Tinte mehr.
Thanks, I'm glad you like it. Lately I've been making adjustments to my style in order to be a bit more economical. Particularly with the use of line so that I don't need to rely quite so heavily on color in order to add dimension. You can compare it to my current portfolio.
[This] (https://www.amazon.com/Fudenosuke-Brush-Pen-Soft-Black/dp/B019Z6SYIE/ref=sr_1_4?ie=UTF8&amp;qid=1503408160&amp;sr=8-4&amp;keywords=Tombow+brush+pen+soft) is the pen I used for my lines. The color was added in Photoshop.
Thanks :D
It's made with a Tombow WS-BS Brush Pen Fudenosuke, soft tip.
I love that pen! And they have one with hard tip as well- that one is just as good but for smaller writing/ drawing.
My old setup. It's more or less still the same. I'm scanning 120 film in this photo.
Amazon, something like this.
A super cool Lightbox for used2bgood cause she's awesome and kind af.
Here's the basic set that is associated to the classic Gundam colors. There are many more sets that you can buy if you are willing to search around for them.
Thanks! I use some paint pens! GSI Creos Gundam Marker Basic Set (6 Markers) https://www.amazon.com/dp/B0009AFN0S/ref=cm_sw_r_cp_api_i_9qmsDbBKTQP2B
Those are the ones I use. Take some getting used to. So practice on some junk castings first 😆😂
So i just got back from Asia and got a haul of HG and one RG and MG. I'm just getting back into Gunpla after a 10~year hiatus, and want to take a step up in to beginner level painting/panel lining/etc instead of just straight builds.
Some 1/144s I got that I want to start working on:
HGBF X-1 FullCloth (the one Lucas used in BFT)
V2 AB
HG Wing0
HGBF Wing Honoo? (Its a red.... Wing gundam?)
HD X Divider
I dont know the first thing about painting, and have watched some tutorials here and on youtube.
Gundam Marker basic set
Gundam Marker Metallic
Thanks in advance for the random questions.
Might this be something like you were talking about?
https://www.amazon.com/GSI-Creos-Gundam-Marker-Markers/dp/B0009AFN0S
Cut with these
Sand with this
Fill in stressed plastic with these
A general pack like this, is a good starting point. If at some point you need a color outside of that set, try searching for an apporpriate color through hobbywave, or robot4less.
http://www.amazon.com/GSI-Creos-Gundam-Marker-Markers/dp/B0009AFN0S/ref=cm_lmf_tit_6
You can also use one of these for panel lining:
http://www.amazon.com/Gundam-GM01-Black-Fine-Line/dp/B0027ORJ10/ref=pd_sim_t_4
Hey everyone!
I'm as new as it gets. So, I made a shopping list after doing some research on everything that I think I need to start. I'll place the links to all the items in the lines below. Everything is on Amazon because... well why not?
Gundam
Glue
Marker
Tweezers
Knife
Cutters
Mat
More Markers!
*Krylon Matte Finish
Am I missing anything?
This is what I got. They shake like paint pens do, so I figured they were the same.
Thank you.
What is the purpose of the yellow, red and blue pens if you are just going to use the grey, black and brown ones?
So this was my first gunpla! I got impatient waiting for my gundam markers to come in (which are taking forever!) so i decided to try my hand at lining and using the decals. I wanted to put one i cared a little less about before i put together my SD Freedom Gundam. I was thinking about doing Freedom with some orange instead of blue (maybe), but wasn't sure how to do a metallic-ish orange without an airbrush :P
Thank you, which markers should I pick up? these?
http://www.amazon.com/gp/product/B0009AFN0S/ref=ox_sc_act_title_4?ie=UTF8&amp;psc=1&amp;smid=A9Q1SRRTDFE7O
I bought the set of gundam markers in the link below. However, when I tried to apply the gray, the gray looked darker than the gray from the runner. I smeared it to give it a feather effect but it was still too dark to be the same color. Am I suppose to let it dry first and then it would be the same shade of gray?
Also, this shade of gray of course only works of the darker one. What color is the one from the legs? Can't be th white one.... can it?
Lastly, is there a marker for epyon's color scheme if I want to continue with this method for epyon?
http://www.amazon.com/gp/product/B0009AFN0S/ref=oh_aui_detailpage_o04_s01?ie=UTF8&amp;psc=1
[Lamy 2000] (http://www.amazon.com/Lamy-2000-Fountain-Black-L01F/dp/B001D3PYT0/ref=sr_1_1?ie=UTF8&amp;qid=1397277169&amp;sr=8-1&amp;keywords=lamy+2000) as a modern pen, [Sheaffer Snorkel] (http://www.peytonstreetpens.com/sheaffer/1950s-sheaffers/sheaffer-valiant-snorkel-1950s-black-medium-superior-restored.html) as a vintage { [here] (http://www.peytonstreetpens.com/sheaffer/1950s-sheaffers/sheaffer-triumph-tm-touchdown-fountain-pen-gold-filled-fine-very-nice-restored.html) is another snorkel that matches your EDC}. however if you want something to try it out first go with a [pilot metropolitan] (http://www.amazon.com/Pilot-Metropolitan-Writing-Fountain-91107/dp/B009X9Z2FW/ref=sr_1_1?ie=UTF8&amp;qid=1397277744&amp;sr=8-1&amp;keywords=pilot+metropolitan+fountain+pen). Finally [here] (http://www.amazon.com/Noodlers-Black-Waterproof-Fountain-Pen/dp/B000MVZ2E6/ref=sr_1_1?ie=UTF8&amp;qid=1397277859&amp;sr=8-1&amp;keywords=noodlers+black) is a good black ink to start with. If you want me to recommend another color ink or want a specific trait in the pen just ask!
I just got a JinHao pen and it looks amazing. The reason I say looks is because I don't have ink for it. I've checked the sidebar and the sub wiki and such, but I had a question for y'all. What's your favorite non-blue and non-black ink? If I was going to go black I'd get this and blue would be this. But I want something.. different.
I'd like to stay around or under $20.
I haven't tried many inks, but the one I'm using now is Noodler's Bulletproof Black, and it's just excellent. In a Lamy Safari EF, it's my go-to pen for everyday use.
I just bought Noodler's black and it's exactly what you want. The only small thing is that it's not a pure, darkness of space black.
http://www.amazon.com/gp/product/B000MVZ2E6/ref=nav_timeline_asin?ie=UTF8&amp;psc=1
Oil based inks? No, it wouldn't flow as nicely and it wouldn't flow as nicely in the pen. However, there are some safe pigment inks that are "waterproof." I want to put a disclaimer here though, you should not use any ink not intended for fountain pens, ever. Specifically India ink. It's too heavily pigmented and will destroy the pen's feed (that's the piece that rests behind the nib and connects to the ink reserve).
There are a few notable waterproof inks out there, most of them are labeled as "taper proof" or "safety ink" intended for office use. After all, there still are a fair share of professionals who use fountain pens but need to have taper proof signatures (same goes for personal use and signing documents). Noodle's bullet proof ink is quite good, and inexpensive for a waterproof and tamper proof ink. Platinum also makes one as well. There are others out there, but they escape my mind. Only downside to the waterproof inks is they are not quite as "wet" as other inks., and they lack the verity of colours
Sorry, I should've been more specific. When I wrote Noodler's, I meant Noodlers Black, this one.
> if you find an ink too wet, you can add a tiny bit of water to make it drier. This works by diluting the amount of surfectants/other things that help the ink flow.
Well that's new for me. Thanks, that's awesome to know this! I'd think quite the opposite because all this wetness/dryness logic (such as add water = wetter).
For fineliners, I would highly recommend Faber-Castell Pitt Artist Pens, in the thinnest tip size. But if you're going to get these, I HIGHLY recommend buying the pack with all 4 tip sizes and picking the one you like best, since a lot of people have different preferences. All the sizes will come in handy at some point for bullet journalling. They're about $10 on Amazon for the 4 pack.
If you're a student and you're planning on using your bujo to write down HW and/or you also wanna be a bit more cost efficient, I recommend gel pens. It gets really annoying to have to switch between a fineliner for writing HW and stuff in my journal and using a pen to take notes or do something for class (which is why I use a fineliner in the summer and a gel pen during the school year LOL). I recommend the Pentel Energel Gel Pen, in the 0.3 mm size. They dry super quick, so they're great to use for highlighting or if you're a leftie. And they look just as nice as a fineliner on your standard journal paper. Also great for taking notes in school because of the quick drying time. To save money, what I do is use an existing pen body I have (I have a zebra sarasa pen body) and just replace the existing ink with Pentel Energel refills. A pack of 12 refills is $11 on Amazon. I bought the refill pack a year and a half ago and still have 5 refills left. Or if you want the actual pen itself, it's $7 for a pack of 3.
Hope this helped!
CROCODILE DUNDEE!!!!! :D Now that's a knife!
Dude. Big Trouble In Little China on the big screen is awesomesauce. Resevoir Dogs is another good one of mine.
Baby Bunnies. Precious. Baby. Bunnies. Cuteness. Precious. Darlings. Sweethearts!
Pens to draw bunnies!
<3 <3 <3 <3 <3BUNNAHZZZZZ<3 <3 <3 <3 <3
cheesecake all day everyday
My favourite dessert are profiteroles mmmmmmmmmmm.
Item under $15
Draw stuff! That's what I did when my internet was out for a whole week.
Tomorrow, 9AM.
Linky
Faber-Castell Pitt Artist Pens
They go easily over acrylic paint and make really smooth lines. Lots of painters who do black outlines use them because they are more exact. I use the "brush" one and the others are good for smaller projects or watercolors. I would not recommend using anything other than the brush-tip one for paintings because the tips are too hard and much gouge the paint or ruin your pen tip.
Heres a link to the pens. I bought it off of amazon. I use the superfine size normally. Faber-Castell PITT Artists' Pen Set Black. https://www.amazon.ca/dp/B000TKEZDO/ref=cm_sw_r_sms_apa_DN1czb14KM9FM
A decent sketch pad is just better than any notebook or printer paper you probably have lying around.
My favorite pens are these
This particular pack of 4 has different tip sizes. I can use all 4 of them on one good piece. Not use them up, just use each one of them.
If you want to up your game, you can use any kind of graphite pencil (even a regular #2) and some tortillons for shading. It took me a while to brave shading but it was a game changer when I took the leap.
I just pinterest for "Zentangle Patterns" and stick them all on a board and go for it. You'll build off of them and use borders. Where you find empty space, you can just search your board for something that compliments or contrasts and fits your space.
I'm real proud of the ones I've done and get a lot of compliments. I guess it means a lot because I literally can't draw a car or a dog.
Some neat ideas for artsy people are a Buddha board and an expert coloring book.
As soon as I found out about the Buddha Board I knew I wanted one.
It is a special board that allows you to paint with water. When the water dries, the image vanishes. It is supposed to be a zen thing to show you to paint just for the sake of painting, since the image will disappear. It is also supposed to be a symbol that everything is temporary.
I also use coloring and collect as many coloring books as I can.
This is this first time I have ever tried to enter hyperlinks in a comment and I hope it works. I could have just screwed these hyperlinks up royally, lol.
I'm probably too late, but some ideas!
The mug is a cute idea, I love these "Surprise Mugs"
We don't know which country you or she is from, but it might be nice to get hers something small from her country (or something from your country that's super distinct if she's very excited about living there).
For instance, if she is from Germany, you could get her some Hanuta -- I know when I moved away from home, it was very comforting to get reminders from there.
Or if she's from Belgium, Stroopwafels might be nice to go with tea! Just something small that represents her home.
As for relaxation items (which seems to me to be one of your best options seeing as your ultimate goal is to help her relax, right?), I have a few:
Gong for her desk at work?
A zen "Desktop Garden?"
A Buddha Board for work?
A little desktop fountain?
A diffuser for at home (SUPER relaxing, but you'd also need essential oils)?
Or even a necklace diffuser?
16
You need this [Buddha Board] (https://www.amazon.com/dp/B0010TEFFQ/ref=cm_sw_r_awd_ryIQwb3AYPNY7)
It is a super cool canvas that you paint with water and then it disappears in minutes. Zen painting. :)
The Buddha Board is my new go-to gift. It's cool and suits a wide variety of personalities (mother that needs a Zen moment, CEO that needs a Zen moment, cube worker that needs a cool cube toy, that artsy-fartsy guy that did that thing for me once, the weird chick that no one knows anything about but I drew her name in a Secret Santa).
I understand. Well, there are many different styles of printing for you to choose from.
I cut my teeth on printing in 10th grade drafting class. We were expected to print legibly on blueprints in an architect style, so we spent countless hours just writing the alphabet. Same goes for boot camp. In boot camp we had to stand watch and keep a log. If the text was printed in anything less than perfect, we were punished. So we practiced and practiced and practiced.
Work on your letters. One by one. Over and over. Either buy some graphing paper for guidelines, or buy a ruler and an Ames Lettering Tool. Learn to use it and your letters will improve.
Brush, in my humble opinion, is a musthave. You don't need anything fancy, don't you have some shitty old brushes at home? Any kind will do. Also I've seen people using another pen to load, it's a matter of preference. You dip one nib and load another with it, but you need to have two holders for that too...
For starters I would also reccomend getting one of these or these to help you with the guides. It's a boring chore so making it faster and more effective is a good way to motivate yourself actually do it :)
Lightbox is a nice overall thing to have for a calligrapher, but not an essential tool. You'll need about $40 to get one.
I can't comment on the more usual supplies since it seems like you're set, but I'm probably missing something so I'll let more knowledgeable people answer about that.
What do you need a compass for???
When I took my architectural drafting course, we used this template to make lines in light pencil (which would be erased later):
http://www.amazon.com/Alvin-L666-Lettering-Guide-L-666/dp/B001DNAHRO
actually that was the brand of paper I got
my paints are Japanese
https://www.amazon.co.uk/Kuretake-Gansai-Japanese-Watercolour-Paints/dp/B001MPA6W4
I've recently gotten into painting Japanese watercolor postcards on etegami paper. Etegami painting is supposed to be a relaxing experience where clumsy is good. Plus, as postcards they're fun to mail to friends and family.
https://www.jetpens.com/Akashiya-Etegami-Postcard-Size-Paper-Gasen-Paper-Pack-of-10-Sheets/pd/4720
(You can get the size you need)
https://www.amazon.com/Kuretake-Picture-Letter-MC20-36V/dp/B001MPA6W4/
At this moment I'm using Kuretake 36 colour set. https://www.amazon.ca/dp/B001MPA6W4/ref=cm_sw_r_sms_apa_i_W0EBCb4TNW996
This is the thing I was talking about
If you can, buy yourself one of these, and some water based clay to get a hang on anatomy and positioning. Good luck!
Welcome to RAoA! It's so much fun here btw :)
This show is simply put: far underrated. It was witty, clever, funny, sad, and frankly near perfect.
PS: Did you watch new Doctor Who episode on Sunday?! OMG!!!!
Bath Tub Crayons Add On $3.97 from Things for Eli list
Wax Strips Add On $6.09 from her Health/beauty list.
Boom! Roasted.
Leroy Jethro Gibbs from NCIS is my pick. I could go on and on why I love him but my biggest reason is because he reminds me so much of my grandfather. Very tough exterior but once he allows you inside you see a completely different person.
"Rule #51, "Sometimes — You're wrong,"
My son is very big into drawing at the moment and these bath crayons would absolutely make his summer.
https://www.amazon.com/Nasco-Fat-Old-Fred-Black/dp/B004JOB9Z8/ref=pd_sbs_121_5?_encoding=UTF8&amp;psc=1&amp;refRID=D5ZRJS30VP37S4PZDENY
Your order has been added to your cart
https://www.amazon.com/Nasco-Fat-Old-Fred-Black/dp/B004JOB9Z8
u know how satisfied u will nbe if uy clicj on one foi rthese linkish
https://www.amazon.com/Uncle-Jims-Worm-Farm-Composting/dp/B000Q5S7RM/ref=sr_1_1?ie=UTF8&amp;qid=1491257886&amp;sr=8-1&amp;keywords=worms
https://www.amazon.com/Dummy-Display-Phone-Model-Non-working/dp/B01MTVDPOQ/ref=sr_1_1?ie=UTF8&amp;qid=1491257901&amp;sr=8-1&amp;keywords=fake+iphone
https://www.amazon.com/Nasco-Fetus-13-Weeks/dp/B004JOD3G6/ref=sr_1_1?ie=UTF8&amp;qid=1491257919&amp;sr=8-1&amp;keywords=fetus
https://www.amazon.com/Nasco-Fat-Old-Fred-Black/dp/B004JOB9Z8/ref=pd_sbs_328_4?_encoding=UTF8&amp;pd_rd_i=B004JOB9Z8&amp;pd_rd_r=80Y6TG8QQ7R4GMA6TJEH&amp;pd_rd_w=SAtuy&amp;pd_rd_wg=dARaX&amp;psc=1&amp;refRID=80Y6TG8QQ7R4GMA6TJEH
https://www.amazon.com/RCA-RCT6103W46H-10-inch-Android-Keyboard/dp/B013LAHT40/ref=sr_1_1?ie=UTF8&amp;qid=1491257959&amp;sr=8-1-spons&amp;keywords=rca+tablet&amp;psc=1
https://www.amazon.com/Whitelabel-Bluetooth-Dongle-Compatible-BlueSoleil/dp/B00E86EFY4/ref=sr_1_25?ie=UTF8&amp;qid=1491257981&amp;sr=8-25&amp;keywords=bluetooth+dongle
https://www.amazon.com/FunKo-FUN5545-Shrek/dp/B00WMMTUNW/ref=sr_1_13?ie=UTF8&amp;qid=1491258011&amp;sr=8-13&amp;keywords=shrek
[thasnk gpeopel fmor all yur support
Even better. Fat Old Fred
https://www.amazon.com/gp/aw/d/B004JOB9Z8/ref=pd_aw_sim_sbs_236_1?ie=UTF8&amp;psc=1&amp;refRID=P38HWHG1YGYGVNP01ZW5&amp;dpPl=1&amp;dpID=51s7hCHnqQL
Everyone else's advice is great, but once you're ready to move in to pens, I suggest a liner pen set like https://www.amazon.com/Staedtler-Pigment-Sketch-Regular-308SB6P/dp/B004L87XRA < this, if you can get it (~$11 USD; online and in art stores. Sakura's Pigma Micron pens are also good but a little less sturdy and pigmented in my experience). They're of different widths so you can explore line width (this piece looks to me like one width though), and they come in a sturdy case. Like all pens, be gentle on the tips, and they'll last a long time.
And besides lessons online, try thinking of your own drawing challenges. Once you learn how to put shapes together and show what you see on paper, it's a lot more fun to draw things you want to draw.
Best of luck and keep posting your progress!
Depends on the size. A size '01' is .25mm which is fine for most of the smaller panel lines. There is a size '005' which is .2mm and if you can find one, it's more versatile than the 01.
My son started panel lining with markers and honestly, my set of Liners work just as well as the different brand name markers he has for much cheaper.
The new hotness though is using Tamiya wash and an extra fine nib in a fountain pen holder. Panel lining with a wash (premade or lacquer-based DIY wash) is a whole new world.
So yeah, you can draw an eye at a time. That's great, because you took the time to notice what those gooey ocular nerves look like. Now you should buy a sketchbook and a few ink pens to aid your creativity. When I talk about effort, I mean time, dedication, focus, attention to detail.
Starting with a brush pen (fibeliner) will cause you all sorts of headaches. Although a novel way to make different lines and weights, I use it for large features or final touches.
I started with these great Steadler pens and this exact Sketchbook. The pens last me a long time, maybe 6 months of drawing almost every day.
I've drawn for a little more than two years, but have gotten exceptionally better because I bought the appropriate supplies.
Does she use just one pen thickness? She might like something like this which has different thicknesses for more detailed drawings.
You said she had graded pencils, maybe she would like graded pens too? (I haven't used these yet, so not sure on the quality)
Has she ever used a brush pen? I found them very interesting and you can create unique drawings with them.
If you prefer to get her some paper, look for something with at least 100gsm (this is the thickness of paper) I find 80gsm too thin for ink drawings.
Maybe also having a look for books on things she might like, like books on historic maps or tattoo designs. Reference books are brilliant for inspiration.
This pretty much. I started doing the lesson using a ballpoint pen and ran into the same problem regarding the indents being left on the paper. When I was doing ghosting lines it really started to become apparent that I should pick up a fineliner. Whenever I would use a ruler to make my first line it would leave an indent in the paper, so whenever I would do superimposing lines I was never sure if I was actually drawing my lines as straight as I was or if my hand was just trailing along the indentation left on the paper.
I'm currently using a Staedtler Pigment Liner that I bought from Amazon for $10.72, I'd recommend it.
Honestly, most of my journals only have 5-10 sentences per page. I do a lot of collage, drawing, and abstract painting.
Here's what I suggest:
Buy some cheap liquid watercolors and some [sponges] (https://www.amazon.com/gp/product/B00VF2KEAI/ref=oh_aui_detailpage_o01_s00?ie=UTF8&amp;psc=1). You can do backgrounds on every page before you start. This helped me build the habit of nightly journaling, and removed the fear of "ruining" a page. Any parts that I didn't like I could collage over!
Start using your own photos as much as possible. One of the easiest ways to do an image transfer is to alter an image on the computer, then print it out on an ink jet printer. I use cheap-ass photo paper for this, while the photo is fresh. Spray it with water, then put face-down and rub it into the page. (A rubber brayer is nice, but a used gift card or other hard object would be fine.)
Did you know that you can buy bulk stickers from [Amazon???] (https://www.amazon.com/DreamerGO-Graffiti-Transparent-Motorcycle-Skateboard/dp/B01M9FHC08/ref=pd_sim_21_11?_encoding=UTF8&amp;pd_rd_i=B01M9FHC08&amp;pd_rd_r=YGCTQJHQC1ZBD807ASAQ&amp;pd_rd_w=ESCUg&amp;pd_rd_wg=E85wC&amp;psc=1&amp;refRID=YGCTQJHQC1ZBD807ASAQ)
I also suggest making a to-go bag. If you make your backgrounds at the beginning of the week, or before you start the journal, this makes it extra easy. Mine has:
I often use my journal to annotate from books (I used to do it INSIDE the books, but I found them difficult to read with any new clarity that way, and I'm trying to move to digital.) Since I mostly read self-help/improvement books, that made some great starting points for prompts.
thanks! i used a set of fineliners on regular paper, staedtler i think, black. let's see, i think it's these;
http://www.amazon.com/Staedtler-Pigment-Sketch-Regular-308SB6P/dp/B004L87XRA/ref=sr_1_14?ie=UTF8&amp;qid=1374696986&amp;sr=8-14&amp;keywords=staedtler+fineliner
yea me to so far... thinking about getting some
Staedtler 308 SB6P Pigment Liner Fineliner's though as they seem to be smaller (in nib width)
https://www.amazon.co.uk/gp/product/B004L87XRA/ref=ox_sc_act_title_2?ie=UTF8&amp;psc=1&amp;smid=A3P5ROKL5A1OLE
For drawings like these, you should vary the thickness of your lines more. Using different values for your lines will help your drawings pop. My friend, who is an accomplished artist, does a lot of drawings like these, here is a link to a gallery of some of his drawings that are similar to yours. Jack Graves III . Be sure to click the thumbnails for a full size view.
You should seriously consider getting a pack of art pens. They will help you immensely with this, and they are worth the less than $20 investment. Here are three to browse on Amazon. Prismacolor, Faber-Castell, and Sakura Micron Pens.
I'm a pen and ink artist, and [these] (http://www.amazon.com/Pilot-Precise-Rolling-Assorted-26015/dp/B000J07E7I/ref=sr_1_1?ie=UTF8&amp;qid=1415656843&amp;sr=8-1&amp;keywords=precise+v5+pen) are my weapon of choice, they are perfect. Also [these] (http://www.amazon.com/Faber-Castell-Black-Wallet-Assorted-Pitt/dp/B005HF562K/ref=sr_1_2?ie=UTF8&amp;qid=1415656901&amp;sr=8-2&amp;keywords=artist+pen+set) are amazing for mixed media drawings on gesso, I could show you some things I've done with each if you're interested.
Do you have pictures of your stuff? I'm drawing something up for you now!
Yeah; don't mess up!
I'm just kidding, I do have an actual tip. Since I don't know your experience level, it might be stuff you know already, sorry if so.
Use pens with different size tips (such as these ) to differentiate different elements, like the outline of the mountains vs the contours of the mountains, and the coastline vs rivers. Start by inking everything but the thinnest lines with a medium size pen, then go over the thicker lines with the thicker pen. This gives you some wiggle room for changing shapes slightly during the inking process, so you're not stuck with the first line you laid down. Then when all of that is done, give it about 10-20 minutes to fully dry and erase your pencil lines gently with a white eraser.
Then go in with your thinnest pen and do the finest lines.
I was watching this funny fake Prismacolor color pencil review, and found out about these eraser pencils ($~9.00) that would really help with my art/shading.
I recommend either the thin panel lining markers in grey, black, and brown or a set of real touch markers that has those three colors
I panel lined with a set of panel lining markers for quite a while and only recently tried using real touch markers for panel lines and while the panel lining markers work pretty good I think I prefer real touch markers
The real touch markers are initially messier to apply but I think they clean up nicer just using like a qtip and make for some nice sharp looking lines
Probably not as good as a panel wash but I like them so far
Edit: here is a black panel lining marker https://www.amazon.com/GSI-Creos-Black-Gundam-Marker/dp/B00HY8JI7C/ref=sr_1_1?ie=UTF8&amp;qid=1473087011&amp;sr=8-1&amp;keywords=Panel+lining+markers+gundam
Otherwise a black fine tip gundam maker would also work, such as this!
Granted the link I sent you is the US Amazon site, but I've used it on my own Petitgguys with nothing more than a bit of over drawing that is easily cleaned up with a cotton swab.
If you don't already have a proper tool kit like This you'll want to get one, when i first started i just used household tools like scissors and my kit's came out horrible with nub marks all over the place. The file or some sandpaper will work wonders to remove those. You'll also want a panel line marker like This they come in different colors so look around to get the one that matches the model your working on, adding panel lines alone greatly improves the look of the model. After you have the nub mark removal and panel lining down the sky is the limit you can dabble in custom painting or try your hand at kitbashing custom models. Research each thoroughly before trying them and expect a lot of errors at first if you try those.
I'm using the Black Gundam Marker. I did a lot of cleaning on the kit when I messed up but I just couldn't get it right. My main issue was that I made sure to do it lightly but it went on so thick, and I always have shaky hands so that never helped the situation.
EDIT: This is the marker I use http://www.amazon.co.uk/GSI-Creos-GM01-Black-Fine/dp/B00HY8JI7C
If you just want to draw on them to add detail I recommend
http://www.amazon.com/GSI-Creos-Black-Gundam-Marker/dp/B00HY8JI7C/ref=sr_1_1?s=office-products&amp;ie=UTF8&amp;qid=1422131965&amp;sr=1-1&amp;keywords=gundam+marker&amp;pebp=1422131945212&amp;peasin=B00HY8JI7C
they're designed for use on Gundam models and work great and have a very fine tip. I've used them on other figures before too and had no problems. If you get them just be sure not to touch the marker right away so it doesn't smudge.
They have a silver and a gold as well which work beautifully, I use them for everything with customs. There's other colors available but those have thicker tips so I wouldn't recommend them for fine details.
GM01 Black Fine Line https://www.amazon.co.uk/dp/B00HY8JI7C/ref=cm_sw_r_cp_api_eExyybGVJ187W
Gundam Marker GM02 Gray Fine Tip GUNPLA https://www.amazon.co.uk/dp/B006B3YYZM/ref=cm_sw_r_cp_api_RHxyybAA0VTDA
Grey on white and light colours black on darker colours
Nice! Can't wait to see it decaled.
You can either mask it off with Tamiya masking tape (they do curved tape too), paint very carefully with a thin brush, or use a Gundam lining marker pen to do it.
https://www.amazon.co.uk/GSI-Creos-GM01-Black-Fine/dp/B00HY8JI7C/ref=sr_1_1?s=kids&amp;ie=UTF8&amp;qid=1483116413&amp;sr=1-1&amp;keywords=gundam+pen
Hi. 2 questions.
1). Are these kits all legit/genuine gunpla, or are there any knock offs/bootlegs?
2). If i panel line with this do I need a top coat? Ive heard it dries and ive heard it doesnt and needs top coat.
Thanks
Thanks for all the help! I realized that I actually have one of these light pads https://www.amazon.com/Huion-Ultra-thin-ADJUSTABLE-Illumination-Lifetime/dp/B00J0UUHPO/ref=sr_1_10?ie=UTF8&amp;qid=1468537533&amp;sr=8-10&amp;keywords=light+pad . I was using it for another project, but I'm done with that project now and it should really fill that role everyone is talking about with the lightbox.
You can buy a 5mm thin led box for 45 dollars. no need to hack something together for 50.
https://www.amazon.com/Huion-Ultra-thin-ADJUSTABLE-Illumination-Lifetime/dp/B00J0UUHPO/ref=sr_1_1?ie=UTF8&amp;qid=1468283836&amp;sr=8-1&amp;keywords=led+box
What kind of light panel is recommended to DSLR scan film? Is a $40 model is enough (for example: https://www.amazon.com/dp/B00J0UUHPO/ref=cm_sw_r_cp_dp_T2_XGVtzb6KGX84B) or should I look for higher end product (and why)?
Thanks!
Scan was using my Nikon D3300, a macro lens, and a nifty little backlight I found on Amazon. Reversed the negs in Gimp.
My only mistake was forgetting to dump my presoak (a new concept for me coming from the D76 world) and pouring in my developer. Once I realized what I had done, I dumped the whole lot out, quickly warmed up another 300ml of developer, and resumed the process.
If you really want to kick it up a notch, I recommend getting a nice brush pen. They are awesome for inking drawings. https://www.amazon.com/dp/B019Z6SYIE/ref=cm_sw_r_cp_api_zUJKAb4ZJ3GDZ
If you want something larger, you can look for tracing tables like this one. I have something similar and use it more to view negative holders than to take photos (happy with my scanner), but I would say it should well too.
Ideally you want to avoid any extra surfaces in between, so I would rather try to make a mask with a window for the film.
There are definitely cheaper options out there that are just as good as the cricut brand. I personally have this one that works perfectly
I just got a basic LED tracing table off amazon, it has worked wonderfully: https://www.amazon.com/ME456-Light-Ultra-thin-Power-Tracing/dp/B01EBA8ZX8/ref=sr_1_3?ie=UTF8&amp;qid=1496185073&amp;sr=8-3&amp;keywords=light+table
Thin and usb powered
I actually just buy it loose leaf so that I can write letters on it, and I use a thin usb [light table] (https://www.amazon.com/gp/product/B01EBA8ZX8/ref=oh_aui_search_detailpage?ie=UTF8&amp;psc=1) with a sheet of dot-grid underneath so I can see the dots through the page. I actually like how you can see both sides ghost on a personal letter because it feels more literature-y. I couldn't use Tomoe for regular activities like work sketches and diagrams, journaling, note taking, or story writing. You really have to use a second sheet of printer paper to cover as you write because dry times can be an hour or more. On the bright side of things, with the light table this doesn't really matter because you can still see what you've written. It's just not especially convenient to use somewhere else than your desk at home (although it does fit next to your notepad and you can use it with an external USB battery pack like you use to recharge your phone if you're feeling particularly adventurous). People will go out of their way to talk to you about it if they see you using a fountain pen and portable light table in public, like a coffee shop. If you're interested, I could take a picture later today when I'll be writing a letter on it :)
I just read all the articles on types of handwritten European scripts on Wikipedia, picked one I liked, and Googled alphabets to practice. If I had a printer (soon!), I'd print out a copy of the alphabet and use my light box to trace over and over again.
I use this cheap light table from Amazon, and have been having good luck. The light is quite even by the time you get more than an inch or two from the edges. I got it for the same reason you are looking - I kept getting the iPad pixels in the shot, especially since I prefer to stop my macro lens down a bit to help alleviate film curl focus-plane issues.
Here is a DSLR scan made using the table. It is stitched from four shots taken with an Olympus OM-D EM5 and the 60mm Macro lens. The negative was literally taped to the lightbox, with no glass on top. It is a bit overexposed, but that says more about my post processing techniques, not the setup.
I’m using this lcd light box. I also have a flash with an off camera trigger. Think it would be worth it to invest in a better light source? Will that really effect my colors?
I think that's about right.
My D90 was the precursor to the D7000 so I just missed it.
I got this
https://www.amazon.com/gp/product/B01KHHKCKI/ref=oh_aui_search_detailpage?ie=UTF8&amp;psc=1
Tikteck A4 Ultra-thin Portable LED Light Box Tracer USB Power Cable Dimmable Brightness LED Artcraft Tracing Light Box Light Pad for Artists Drawing Sketching Animation Stencilling X-rayViewing https://www.amazon.com/dp/B01M26S3VY/ref=cm_sw_r_other_apa_i_t5j7CbVYHR58V
Got something like this for my classroom.
I also said that you could "get away without the extra torso", so save yourself the re-draw if you're happy with it, just work on the arms.
I know that it's a couple extra bucks, but some tracing paper and/or a light box might really help with revisions. You can get them at any art store.
https://www.amazon.com/Artists-Tracing-Sheets-Translucent-Sketching-Lightweight/dp/B0788K7D3K/ref=sr_1_13?ie=UTF8&amp;qid=1525955462&amp;sr=8-13&amp;keywords=tracing+paper
https://www.amazon.com/Ultra-thin-Brightness-Sketching-Stencilling-X-rayViewing/dp/B01M26S3VY/ref=pd_sim_229_4?_encoding=UTF8&amp;pd_rd_i=B01M26S3VY&amp;pd_rd_r=45M3ZZWCPYYH9E7AWSEC&amp;pd_rd_w=ZPgFf&amp;pd_rd_wg=UYM5X&amp;psc=1&amp;refRID=45M3ZZWCPYYH9E7AWSEC
I recommend this https://www.amazon.com/gp/product/B01M26S3VY/ref=oh_aui_detailpage_o09_s00?ie=UTF8&amp;psc=1
I bought it for class and has been working great for me.
Thanks for the suggestions! She actually got a disappearing ink pen recently and was pretty pumped about it. I don't think she has a magnetic needle holder, so I'll look into that!
I was also thinking a light box, she mentioned she wanted one but I don't know if there are any differences based on the material being traced. This was the model I had in mind: https://www.amazon.com/gp/product/B01M26S3VY/ref=crt_ewc_title_huc_1?ie=UTF8&amp;psc=1&amp;smid=A21H40ERIBU45K
"Natural Talent" is a lie. It doesn't exist. Anyone anywhere who is any good at anything, is so because they worked hard and practiced for a long time.
The kid's 9 years old, anything that he tries to do, he is going to get frustrated. All you can do for now is encourage him, and help him learn to derive fun from the process of art-making, rather than worrying about the result. Getting hung up on particular techniques and styles at this early on is, I think, counter-productive. All it will do is serve to highlight the disparity with his current skill level and that of others around him, which is discouraging. Get involved with him in the process, draw with him. Are you no good at drawing? Great! Have fun drawing with him, and show him that making a perfect drawing isn't the most important thing. And maybe you can begin learning and developing as artists together.
One thing that can help make the process more exciting is new tools. Is he drawing mostly with crayons and markers? Get him some (cheap, nontoxic, water-soluble) paints or pastels. Make collages out of ripping construction paper. get him a Buddha Board, or just some sidewalk chalk. Experimenting with different mediums will help get him engaged in the process of making art, and not worry about the final product.