Best artist drawing aids according to redditors
We found 59 Reddit comments discussing the best artist drawing aids. We ranked the 41 resulting products by number of redditors who mentioned them. Here are the top 20.
We found 59 Reddit comments discussing the best artist drawing aids. We ranked the 41 resulting products by number of redditors who mentioned them. Here are the top 20.


Someone I know pointed this out to me about two years ago. I tried it out and it sucked. There's NO WAY the eyes in the OP's pictures were made with these decorations.
So, what to do?
Spirit Halloween makes these ($17 as of this writing) which are pretty darned good. They're AC powered, three to a set, randomly blink, made of dark green plastic so they blend in really nice, and have some pretty sturdy plastic hooks to hang them.
But you want to go homemade, here's how I addressed the shortcomings of the toilet paper roll version.
Yeah, this is pretty complex for a little DIY decoration. OTOH, my daughter and I had fun making them together and we now have about a dozen of them that are now going strong on their third Halloween.
They are asking for stencils they can print. You cannot take a piece of paper, print it, and have it work as a stencil. You have to cut it out using the paper as a template. Cutting it out is the part that is tedious and makes it look like shit when it comes to digi camo because you can very easily spot defects.
Here are some ready made stencils.
So I started painting with actual paint again last month, for the first time since the '90's (yes, I know, I'm old as fuck). I'm starting with gouache and going more or less through the progression Jeff Watts uses in his gouache atelier class: grayscale for awhile first, then the Zorn palette (that's black, white, red, and yellow ochre), then finally a warm/cool palette. (I'll probably detour post-Zorn into some slightly larger limited palettes before I bust out a full warm/cool one.)
So the pictures in the link are in reverse order. The top one is a drawing I just finished this evening that I'll start painting over tomorrow. I drew it scaled up from the photo with the help of one of these.
After that are just some examples of paintings, again, from newest to oldest. They're all generally pretty small; Johnny Cash is on a 6x8 board, the others are on about 4.5 x 7 or so. The new piece, the Greek bust, is on watercolor paper, the rest are on bristol board.
The last picture is where I tack them all up when I finish them, right over where I work. The top row of the board is the Wall of Shame, where I put my fuck-ups.
Everything on the board is also in chronological order. So, the first couple of days, I was just figuring out how to mix the paint to the right consistency, getting used to the tools, that sort of thing, not really worried at all about making good paintings, just throwing it down and getting reacquainted.
After that I did a couple of studies of old illustrations (a pulp cover and a 60's magazine illustration) before moving on to photo studies. After I finish the Greek bust, I'll do a few still lifes.
Once the cork board is all filled up, I'll clear it off and start on the Zorn palette!
Lettering guide. Should be between $3 and $6, can be found many places online or in specialty art stores. Literally invented for making ruled lines.
Lettering guide! or are you talking about the parallel rule that's table mounted (that's a mayline and it's got a cabling system)
https://www.amazon.com/Alvin-AL666-Lettering-Guide-Template/dp/B001DNAHRO
I completely took everything down. Look up a good disassembly video on YouTube before you start, but it's really a pretty simple gun. All the plastic is a 2 piece clamshell design. Just be careful of all the springs and linkages pertaining to the trigger. Take pictures of it all before you remove it for reference when reassembling. As far a prep goes, I like to sand plastic with a very fine sandpaper (600 grit if available, but no rougher than 400) to avoid deep scratches, and then clean/degrease with mineral spirits. The black, grey, white, and clear coat are ordinary flat Krylon, and the blue is heatproof engine paint.
When painting, more light coats yield a better finish than fewer heavy ones. There are untold numbers of tutorials on YouTube for spray painting if you're not well-practiced at it. The [digital camo stencils] (https://www.amazon.com/Redleg-Camo-Digital-piece-stencil/dp/B00IIPW7D2) are pretty easy to use. I'd recommend practicing on something you don't mind screwing up first, though. I did it on that ammo can in the background of one of the pictures. On this particular one I did white first, then grey, then black. [Reversing the order with the same colors looks very different.] (https://imgur.com/a/LiAJ8) The same goes for [other color combos,] (https://imgur.com/a/CBdk3) so experiment on other crap before you decide exactly what you wanna do to the gun.
If you would rather keep it simple, [single color] (https://imgur.com/a/k65uF) paintjobs are simple and easy while still looking good, and [two tone] (https://imgur.com/gallery/kSuLV) schemes can be done with just some masking tape, an x-acto knife, and patience.
Edit: If you decide to paint the barrel and buffer tube as well, for the love of God, don't get any paint inside them. I don't know what would happen with a little inside the barrel (probably nothing), but I wasn't careful and a little paint inside the buffer tube will gum it up real good. Trust me. Roll up a piece of paper inside the buffer tube and tape off the ends of the barrel. Also, I like to hang my parts from wire on a clothesline while painting (makes it easier to cover all sides uniformly) but with a little care it can be done on a flat surface too. Just don't turn anything over before it's dry, and let things sit overnight before reassembly so you don't smudge anything while it's still wet.
I just ordered them off Amazon!!
Bullet Journal Stencil Plastic Planner Stencils Journal/Notebook/Diary/Scrapbook DIY Drawing Template Stencil 4x7 Inch, 12 Pieces https://www.amazon.com/dp/B074WTLWX6?ref=yo_pop_ma_swf
oh! like these?
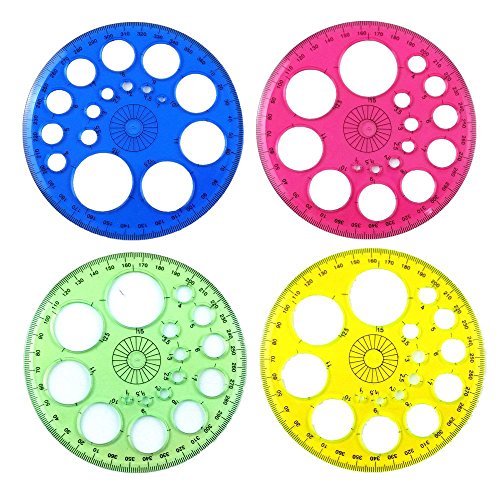
Circular Protractor, you can buy it on Amazon https://www.amazon.com/Colorful-Circular-Plastic-Protractor-Template/dp/B06XDQ2FFV
I've been self teaching myself up until this coming January, when I'll be taking on a graphic design minor. A few things that I use that I happen to really enjoy are:
I hope this helps you!!! Good luck in your studies.
http://www.amazon.com/Organic-Chemistry-Stencil-Drawing-Template/dp/B00MNKC0EE
Some of this might just be common sense, but it might be helpful. Ask yourself quantitative questions about sizes, lengths and angles. Is x wider than y. Is the angle I drew bigger or smaller than the reference. Is this shape fatter or skinnier. The whole time you're drawing, make comparisons. Compare your drawing to the reference and compare the aspect you are drawing to other parts of the drawing.
Pick one length and treat it as your base unit. This is the one unit you will treat as a benchmark. You can compare some lengths to any other length in the drawing, but be sure to choose the me back to this basic unit to check your work.
You can use your pencil as a guide for comparing lengths. When drawing from life hold it up at arms length and perpendicular to your eye (keep the distance constant so it isn't skewed by perspective) and grip it so that the distance between the point and your fingers matches what you see. Then you can use this to compare other lengths that you are observing. You can do the same with a reference by laying it down on the photo.
A good tool for this is a proportional divider. https://www.amazon.com/dp/B005QSBA2S/ref=cm_sw_r_cp_apa_i_EtZWCbWTPDG6F
You can adjust where the pivot point is to scale up or down your drawing from what you are seeing. As long as you keep the pin in the same place, you will get consistent measurements of proportions. And you can use the v shape to measure angles. You can us it for photo reference by touching the points to the page like a compass. Or you can use it for life drawing (just make sure you keep it the same distance away, using it with your arm fully stretched out
Practicing with one will help build your intuition for angle and proportions if you use it smartly. Make your best guess, and then use the proportional divider to check your work. Over time, you'll improve if you do it this way.
What a lovely idea! For me, it's been fun testing out materials and finding what I like to use. Depending on her media interests, here's what I'd recommend thinking about:
A Brush Pen (especially for cartooning on the go!):
http://www.amazon.com/Pentel-Pocket-Brush-Refills-GFKP3BPA/dp/B002LJRKN8/ref=sr_1_1?ie=UTF8&qid=1448983878&sr=8-1&keywords=cartooning+brush
A Nice Brush:
http://www.amazon.com/Winsor-Newton-Kolinsky-Pointed-Brushes/dp/B0013E68TO/ref=sr_1_1?ie=UTF8&qid=1448984196&sr=8-1&keywords=Windsor-Newton+Series+7+sable+%232
Some Ink:
http://www.amazon.com/Speedball-2-Ounce-India-Super-Black/dp/B0007ZJ8TM/ref=sr_1_3?ie=UTF8&qid=1448983937&sr=8-3&keywords=ink+cartooning
A Brush Cleaner:
http://www.amazon.com/General-Pencil-Company-Masters-Preserver/dp/B0009RRT9Y/ref=pd_sim_201_12?ie=UTF8&dpID=512oIauSQjL&dpSrc=sims&preST=_AC_UL160_SR149%2C160_&refRID=1J5XTFQ5TBWPSS5E39AV
An Ames Lettering Guide:
http://www.amazon.com/Alvin-Ames-Lettering-Guide-AL666/dp/B001DNAHRO/ref=sr_1_1?ie=UTF8&qid=1448984324&sr=8-1&keywords=AMES+LETTERING+GUIDE
A copy of Making Comics by Scott McCloud (SO useful!):
http://www.amazon.com/Making-Comics-Storytelling-Secrets-Graphic/dp/0060780940/ref=sr_1_13?ie=UTF8&qid=1448984007&sr=8-13&keywords=cartooning
The Ames Lettering Guide helped me when I was practicing my lettering to be a draftsman.
The charcoal contrast looks great. I found this video which is very relevant to your drawing. It's a mixed graphite/charcoal drawing of the beautiful Audrey Hepburn. She has jet black hair like Alita in the reference photo.
Yes, use graphite first and then charcoal last. You can prevent smudging by using a piece of paper to rest your drawing hand. When you're finished with your art, you can spray it with a fixative like this which has a matte finish.
Here's a secret weapon to use for values: a value chart. Our eyes deceive us. When dark values are next to semi-dark values, the semi-dark value can appear much lighter than it is. Print out the chart and place it on the reference picture and all areas where the value changes on Alita's face. You'll get a sense of how dark or light the values are in the reference. Then use that value chart on different areas of your drawing and you'll know where you need to darken or lighten.
Here's another secret weapon: the proportional divider. You don't need to use grid lines. Actually you can use none or only a few lines. Some people claim it's cheating, but that's nonsense. You still have to draw the picture and it will improve your sense of proportion. Here's the dirty secret: many portrait artists will use it to check their drawing. They will draw it freehand, but will check the proportions with the divider or compass or pencil. Here's the quick video and here's the longer video by an art teacher.
I don't see many comments on actual technique, but I believe sharing ideas is very important.
I happen to love office supplies, so to me, this is a lot of fun :)
Double Ended Pencil Lengthener
when pencils get too short to hold on their own put them in the holder.
https://www.amazon.com/Size-Double-Ended-Pencil-Extender/dp/B01AGLKQBK
https://www.ebay.com/itm/Maries-Adjustable-Dual-Head-Pencil-Extender-Holder-Sketch-School-Office-Art-/392131644648
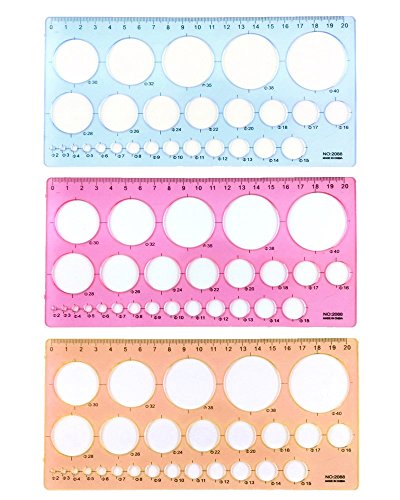
I really want a [Set of 2 Artistic Drafting Art Templates of Various Shapes and Designs] (https://www.amazon.com/dp/B01EEVIRXW/ref=cm_sw_r_cp_apa_TYt0Ab6D7JXRZ). Lol that wasn't super catchy!
To add to this, here's a stencil that I liked as well as a small ruler. :)
Of course
20 PCS Journal Stencil Plastic Planner Set for Journal/Notebook/Diary/Scrapbook DIY Drawing Template Journal Stencils 4x7 Inch https://www.amazon.com/dp/B075N3N6S6/ref=cm_sw_r_cp_api_i_DAYkDb5WKA0B5
19.5"W x 37"L x 19.75"W (13 strips of 1.5" wide).
I used an Amazon template, traced it with pencil, then used the Dremel to carve it out.
https://www.amazon.com/dp/B075FB8VBQ?ref=ppx_pop_mob_ap_share
Fuck the tape use this one way gold mirror film: https://www.amazon.com/s?k=one+way+gold+film&sprefix=one+way+gold&ref=nb_sb_ss_i_0_12
Also, I would avoid plexiglass and try to find something thinner and doesn't require heat to bend. Otherwise, print out a mold to shape the plexiglass to and heat it over that.
Edit: Use this for the visor base then put the mirror film over it. Place film on this, cut rough shape, mount inside helmet, finish cut. I was thinking you could go to school supplies and look for clear folders or thick binder separators. That would be cheaper.
Trail of Paw Prints Stencil for Walls and Crafts - Reusable Stencils of a Trail of Paw Prints for Painting in Small & Large Sizes - Made in USA https://www.amazon.com/dp/B0767HDLWT/ref=cm_sw_r_cp_apa_ytOVBbBSTW256
If you’re crafty, you can do this yourself with some fabric paint. Use large stamps (large ones made for paint, not the detailed rubber type meant for ink) or a stencil and sponge brush. Practice on paper or scrap fabric before trying it on your jeans.
Use a couple shades of blue and some white to get the effect as shown, or branch out with more colors, like these handpainted Gucci jeans from a few years ago.
Template here and I used a Dremel on the unions. https://www.amazon.com/dp/B07P7TGGPB/ref=cm_sw_r_cp_apa_i_1tLjDbH769A2K
I got these, it’s mostly banners, boxes, and arrows
Is there much of a difference between Lettermate and Envelopemate? I'm thinking of ordering this one on Amazon right now... you get both sizes and it's Prime eligible!
The Original Envelopemate - 3 Tools-in-One
You can get these not quite the same, but still interesting (and useful).
When I took my architectural drafting course, we used this template to make lines in light pencil (which would be erased later):
http://www.amazon.com/Alvin-L666-Lettering-Guide-L-666/dp/B001DNAHRO
Brush, in my humble opinion, is a musthave. You don't need anything fancy, don't you have some shitty old brushes at home? Any kind will do. Also I've seen people using another pen to load, it's a matter of preference. You dip one nib and load another with it, but you need to have two holders for that too...
For starters I would also reccomend getting one of these or these to help you with the guides. It's a boring chore so making it faster and more effective is a good way to motivate yourself actually do it :)
Lightbox is a nice overall thing to have for a calligrapher, but not an essential tool. You'll need about $40 to get one.
I can't comment on the more usual supplies since it seems like you're set, but I'm probably missing something so I'll let more knowledgeable people answer about that.
What do you need a compass for???
I understand. Well, there are many different styles of printing for you to choose from.
I cut my teeth on printing in 10th grade drafting class. We were expected to print legibly on blueprints in an architect style, so we spent countless hours just writing the alphabet. Same goes for boot camp. In boot camp we had to stand watch and keep a log. If the text was printed in anything less than perfect, we were punished. So we practiced and practiced and practiced.
Work on your letters. One by one. Over and over. Either buy some graphing paper for guidelines, or buy a ruler and an Ames Lettering Tool. Learn to use it and your letters will improve.
Thank you! I found that it was impossible to find a large photo of the feather pattern, and also very difficult to find an image of it that was straight.
I was in Fred Meyer and I saw the Seahawks cape, and that had a small version of what I was looking for. I ultimately blew it up, and printed it out to use to create my stencils.
This was the result for that, if you would like to use it.
For the stencils, I used these 4mm thick sheets from Amazon. I bought a 10-pack. While creating the stencils is tedious, it certainly beat the idea of painting one feather at a time on the wall. With 10 stencils, it went much faster than expected.
Hope this helps!
Edit: To add, Lowes will mix the exact Seahawks colors for you. I had a 14' by 10' room, and I used 1 gallon of wolf gray (it was close, but just the right amount), and ordered 1 pint of the green and blue (although I had plenty to spare).