Best artist light boxes according to redditors
We found 82 Reddit comments discussing the best artist light boxes. We ranked the 28 resulting products by number of redditors who mentioned them. Here are the top 20.
We found 82 Reddit comments discussing the best artist light boxes. We ranked the 28 resulting products by number of redditors who mentioned them. Here are the top 20.


light underneath, something wide like this. This is just the first one I found in a quick and dirty search, you can probably find cheaper. Other people have had success with a white towel in their lap with good lighting from above the work. Try the towel first of course, it's the cheapest. :)
Get a tripod, a light table, if you have the camera and lens already this is about a s cheap as you can get it. Blurry image of my setup a while back
Thank you /u/sundaequeen for your tip post! My tracing skills aren't thaaat great, but it was so much fun to do and turned out pretty good.
I used canva to draft the addresses and used Playlist Script and Charlevoix Thin fonts. I bought this inexpensive lightbox and it worked perfectly.
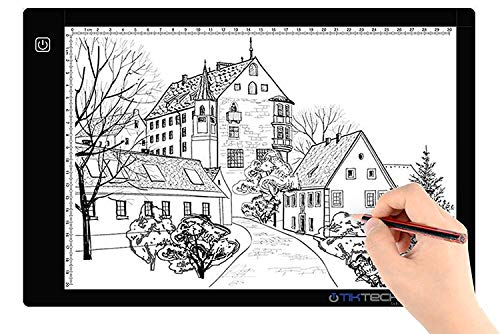
A lightbox. https://www.amazon.com/Tikteck-Ultra-thin-Brightness-Stencilling-X-rayViewing/dp/B01M26S3VY/ref=sr_1_6?ie=UTF8&qid=1548998299&sr=8-6&keywords=lightbox
Know nothing about the quality of the above one, just first one that came up.
My advice:
Starting & Ending I like the away knot method for starting. I use a tiny crochet hook to weave the tail into the beginning stitches. It's faster than threading a needle on the tail & all that nonsense. For ending I weave the remaining thread tail through the last stitches and trim the excess. Keeps the back pretty clean and holds up reasonably well.
Transferring patterns Invest in a LED light pad, they're pretty cheap on Amazon. My absolute FAVE for light colored fabric is the DMC transfer pen For darker fabric, I trace the pattern w/ an ultra fine sharpie on either Sol-u-film stabilizer or tear-away stabilizer, pin/baste it to the fabric and sew through it.
Digitizing you don't need to worry about unless you have an embroidery machine.
Running out of floss Leave yourself enough extra to weave back through at the end. Start where you left off using whichever method you like. Don't leave a gap between stitches and you won't be able to tell from the front. If you mean it in the other sense, DMC floss is widely available at craft stores and all you have to do is match numbers.
Best Fabrics Non-stretch fabrics similar in weave to cotton broadcloth. The heavier the fabric, the more force you will be using to push the needle through. I like using linen since it has a slightly looser weave and looks ~classy~. I sometimes layer it on top of a cotton broadcloth before starting to stitch to add stability or opaqueness to the piece (Don't want the back of the stitches showing through to the front after all)
Keeping the back tidy Using the starting & ending methods I mentioned above will greatly help. And take the time to trim your excess thread tails whenever you start or end.
Finishing a piece There are tons of ways to finish your hoop, this is my favorite
Unasked for advice The quality of your floss matters so don't go generic unless you want to hate life. Get yourself an emory needle sharpener (the strawberry that hangs off of tomato pincushions) and some Thread Heaven.
There are tons of how-to blogs etc out there on the internet for you to educate yourself with and honestly half the fun of it for me has been discovering different techniques & trying them out.
After extensive nerd research ;) ...this is the one that seems like the best quality in US Amazon store. Thanks for the idea!
Cinema Lightbox
I'm pretty new myself. I've been using a light box (you can get cheap USB ones now, I picked one up on Amazon) and a washable fabric pencil.
Interested to see what other people are using.
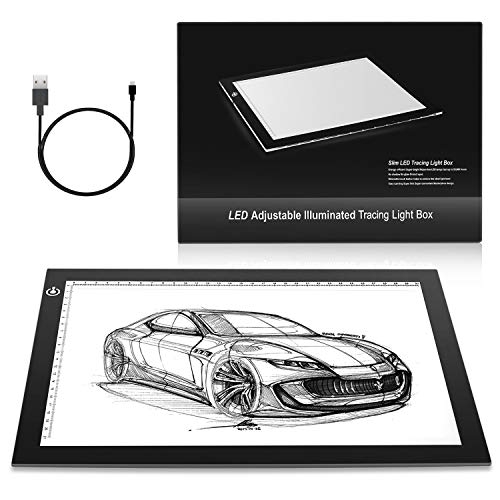
Edit: this one. A4 Ultra-thin Portable LED Light Box tracer USB Power LED Artcraft Tracing Light Pad Light Box for Artists,Drawing, Sketching, Animation. https://www.amazon.com/dp/B01JPD6QZK/ref=cm_sw_r_cp_apa_cMcNBbE3X1S9X
So you want to be an animator
Things you'll want.
Traditional kit (start here)
-An artist light box. $17
A4 Size Ultra-Thin Portable LED Light Box Tracer 7500K White LED Artcraft Tracing Light Pad Light Box w 3 Level Brightness for 5D DIY Diamond Painting Artists Drawing Sketching Animation https://www.amazon.com/dp/B06Y1JNHNM/ref=cm_sw_r_cp_apa_GZ9PBbYNNCECG
-Animation paper. $12
Canson Artist Series Acme Punched Translucent Animation Paper, 12 Frame, 20 Pound, 10.5 x 12.5 Inch, 100 Sheets https://www.amazon.com/dp/B0054DIGPY/ref=cm_sw_r_cp_apa_lX9PBbJ27H216
-Animation paper peg. $7
Animation Peg Bar, Comic Tools Ruler Fixed Paper Feet for Fixing Animation Paper https://www.amazon.com/dp/B07BZKKZ8Z/ref=cm_sw_r_cp_apa_hY9PBbHQQTSMG
Digital kit
Toonboom
Difficult to learn but extremely powerful and major networks use it.
https://www.toonboom.com/?gclid=CjwKCAjw85zdBRB6EiwAov3RiqYEZRpWO9EfYkcsznCHkJ5YWbESNYrXmNQnj6UIyvPApMGlii3KqxoC-UoQAvD_BwE
Clipstudio paint
Fun program focused on making comics but has good tools too
https://www.clipstudio.net/en
Adobe animate
Personally I hate it, but haven't used it since 5.5 Super clunky. I'm assuming you can find this one if you must.
Optional
Rotoscope that bitch!
With 3Ds Max or Blender
Digital tablet
Not all tablets are made equal however if you want a screen this is probably the best you'll get for $500. With screens remember bigger does equal better in the sense that you should always draw larger then you think.
Huion GT-220 V2 8192 Pen Pressure Graphics Drawing Monitor 21.5 inch HD Pen Display Digital Drawing Tablet Monitor - Black https://www.amazon.com/dp/B071WLDLZJ/ref=cm_sw_r_cp_apa_V29PBb3PDRC4C
Try using a mixture of both traditional and digital to achieve the best effects in animation
I bought this light table and the light can go through 5 pages of watercolor paper.
https://www.amazon.com/gp/aw/d/B01M26S3VY/ref=ya_aw_od_pi?ie=UTF8&psc=1
I normally have a sketch ready before hand but this will work well for you from my experience.
I do this as well, and honestly prefer it - for me, it's much easier and faster than using a scanner. I used to use the (very expensive and fancy) Hasselblad Flextight that my university provides, but found my new method to be far easier and faster while also providing better results.
I use a cheap "tracing pad" from Amazon to illuminate the negative.
I put the tracing pad on a low table, then set-up my tripod above it, so my digital camera is pointing straight down. I use a Sony A7r with a 90mm macro lens, but any digital camera that can focus close enough works. The one key point here - it's very important that the camera is level and actually pointing straight down - otherwise you'll not only get keystoning, but your plane of focus will be off and so your negative will not be entirely in focus.
I stop down to around f/8 and 1/8th or so of a second at the base ISO, and use the 2-second self timer to avoid shake. I keep the camera still and just move the negative on the light table to photograph it in thirds. Takes about 10 seconds per negative.
Then, I use Lightroom's built-in batch panorama stitch to stitch all the frames into a single large .dng. I then open the .dng using Adobe camera raw's default settings in photoshop, and the perspective crop tool makes it really easy to crop to just the negative, including or excluding the frame borders per your preference.
Then I invert the negative using a single adjustment layer and do color correction from there, following the guide from Alex Burke's e-book. But you could also try Negative Lab pro.
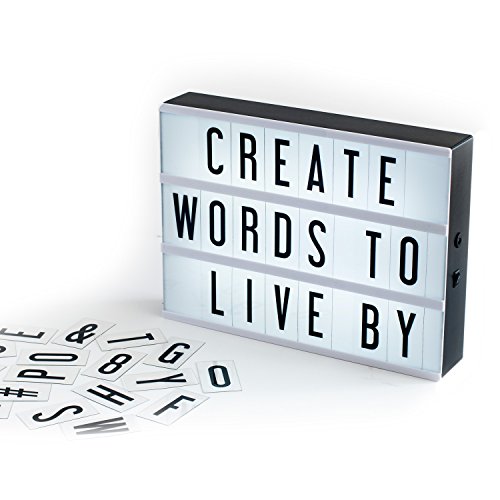
Light up letter board.
Example: https://www.amazon.com/My-Cinema-Lightbox-changeable-personalized/dp/B0167XQQHO
Google image search on Amazon
Google search
I use a couple methods:
https://www.amazon.com/dp/B01JPD6QZK?ref=yo_pop_ma_swf
Super cheap and perfect! I know what you mean about being light sensitive, which is why I started hunting for a different option!
While true, in reality it's a little "eh", since tablets get used all over the house, require charging, and generally turn off constantly. (Though fine in a pinch!) having a dedicated box by your scanner or enlarger is a huge help in getting the images out. And when there's stuff like this out there ($35, but I'm sure even cheaper stuff if you look around, but this is a sexy thing), really no reason not to.
I cannot stress the light pad enough! I can't work without it.
https://www.amazon.com/Ultra-Thin-Portable-Brightness-Sketching-Animation/dp/B06Y1JNHNM/ref=sr_1_2_sspa?crid=3FZ3O83FKVIF5&keywords=a4+light+pad&qid=1574440695&sprefix=a4+lig%2Caps%2C297&sr=8-2-spons&psc=1&spLa=ZW5jcnlwdGVkUXVhbGlmaWVyPUEzQkFQMFk4V01aNldSJmVuY3J5cHRlZElkPUEwNDc1MjM4Nko3T0NRTUJVODRaJmVuY3J5cHRlZEFkSWQ9QTAzOTE1NTgzS1ZQN0RRMDZYQlNGJndpZGdldE5hbWU9c3BfYXRmJmFjdGlvbj1jbGlja1JlZGlyZWN0JmRvTm90TG9nQ2xpY2s9dHJ1ZQ==
I don't usually have a problem even on HP Laserjet 32#
But you can also get a lightboard and the paper will look practically transparent.
A4 LED Light Box Tracer Ultra-Thin USB Powered Portable Dimmable Brightness LED Artcraft Tracing Light Pad Light Box for Artists Drawing Sketching Animation Designing Stencilling X-ray Viewing https://www.amazon.com/dp/B074QMTX2B/ref=cm_sw_r_cp_api_i_l8uNDb33YE3HN
Would this work?
Ooh, I like this painting, good job so far! Diamond Painting is a really fun hobby. I'm on my second one also.
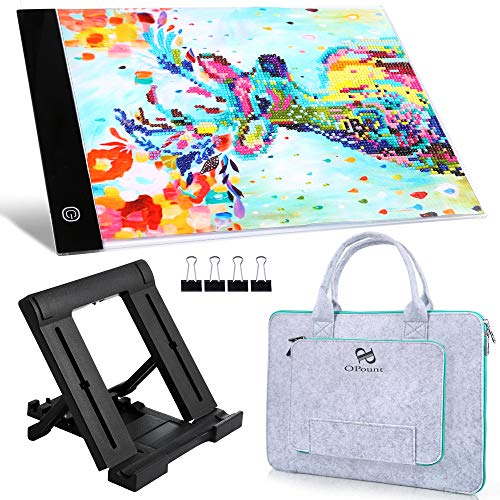
From one newbie to another, I've founnd that light-pads like this one,
https://www.amazon.com/PP-OPOUNT-Including-Polyester-Sketching/dp/B07PMR5NLZ/ref=mp_s_a_1_16?keywords=a4+light+pad&qid=1570578475&sprefix=a4+lig&sr=8-16
are essential. This is an A4, bigger ones, being the A3 & A2 are more expensive.
I use a similar light box when stitching on dark colored fabric. Works great. Way better then the eye strain and headaches. Diamond Painting A4 Ultra-Thin Portable LED Light Box Tracer USB Power Cable Dimmable Brightness LED Artcraft Tracing Light Pad for Artists Drawing Sketching Animation Stencilling X-ray Viewing https://www.amazon.com/dp/B07FL5153Z/ref=cm_sw_r_cp_api_i_n0ulDbNVZJN61
I got it on amazon, let me see if I can get a link. I will say there are a bunch of the same kinds posted around in the related items
Edit: the link for the light box I got
A light box is the best way. Or you can hold the paper backwards against a light source.
Like this:
Tracing Light Box, AGPtek® 17"(A4 Size) LED Artcraft Tracing Light Pad Light Box For Artists,Drawing, Sketching, Animation https://www.amazon.com/dp/B00YA9GP0G/ref=cm_sw_r_cp_apa_90H4xb02H60X8
Scanning is costly, yeah. If you shoot a roll a week or more, it's a no-brainer, cause you'll make back your costs on what you save in paying for lab scans pretty quick. If you shoot less than that, "it depends".
If you're just shooting 35mm, a used Plustek is a great way to go, or even a new one if you want a warranty. If you also shoot medium format, I'd look for a used Epson V700 or higher; I wouldn't bother with the lower number Epson flatbeds; the resolution just isn't enough for me to make it worth the hassle of scanning.
If you already have a DSLR or other interchangeable lens camera, and especially if you already have a macro lens for it, you can also try DSLR scanning. Even if you don't have a camera, you can get set up for around $500-700 depending on what you need to buy. If I had to do it from scratch here's what I'd get.
So all in that's everything you need for DLSR scanning, and it comes to $707 plus the ongoing LR subscription. You could cut the cost a lot if you already own some of those things, or by using a cheaper 35mm holder than the Nikon ES-2, such as a 35mm-sized Digitaliza, or rigging up an older Nikon ES-1. You also don't need NLP and Lightroom; you could get away with free software like the GIMP. You might also be able to find a cheaper tripod at a yardsale or thrift store that will work fine, but they can be clunkier than modern ones.
All that is why people say "if you already have a camera" with DSLR scanning. Otherwise, why not just get a brand new Plustek 8100i AI for $490 and get about the same level of image quality for less money, or even less with a used model. So, it kind of depends on your personal situation.
Do that, but also get a lightbox so that you can trace the original really easily and do the 'final' coloring/inking.
A few months ago I saw someone recommend the Huion brand 9x12 LED lightbox (can't remember where) and I've had it in my amazon wishlist since. The 12x16 inch also has good reviews. The slightly older version also has great reviews. The only difference is the new one comes with a couple sheets of tracing paper and 2 rubber pucks to put under it to make it tilt for angled viewing. Haven't bought one because I have a very old fluorescent light box that I never use so I don't really need a new one.
A super cool Lightbox for used2bgood cause she's awesome and kind af.
There's not much in the wiki at this point about pointed-pen guidelines, but it does link a couple of generators that you can use: shipbrook's or knestled. Your third alternative is to draw them yourself, but personally I find that to be rather tedious. Additionally, if you draw them half-assedly (i.e., not completely parallel or at the proper angle) you'll also be doing yourself a real disservice when it comes to practicing.
I prefer the knestled generator (full disclosure: I wrote it), and here's a pdf (tweak the settings here) example you could use straight-away for copperplate. If you intend to draw directly on your printer paper, I'd recommend making all of the lines very light. As /u/funkalismo says, though, it's preferable to make reusable thick-lined guideline sheets and place your practice sheets on top. This may not be an option depending on the transparency of your practice paper, or if you don't have a light table for example.
For completeness, zanerian.com (2) has a couple guide sheets that are simple images, but they are hardly ideal.
I use a Testrite CS-4 copy stand bought used on eBay clamped to a desk, a cheap tracing tablet from Amazon, 4 2" steel spacers from a hardware store, a pane of glass (from a picture frame) on the spacers set off from the light source, and to hold the film flat I used a jewelry saw to cut a couple brass blanks into sort of neg carriers, back with craft foam. And then a macro lens (get a native one if budget allows, but it doesn't need any crazy specs. A longer focal length gives you more room under the lens for adjusting the neg). And finally Negative Lab Pro, because you will go crazy trying to manually color-balance the RGB curves if you're shooting color stocks.
Something like this should work well. I have one on the way, but it's not here yet so I can't give you any firsthand info yet. I'd sell you my fluorescent light box which I've used for DSLR scanning in the past, but the shipping would probably cost too much. :-)
My old setup. It's more or less still the same. I'm scanning 120 film in this photo.
Amazon, something like this.
I use a desk with a spinny chair lowered all the way so the desk is about chest level for me. It's much easier on the back and easier to see the designs. I sometimes use my coffee table and sit on the ground but that's a lot less fun.
My lighting is bad everywhere so I just use a clip on desk light like this one. It's extremely nice to be able to move the light around to the part I'm working on.
I've seen these light tables advertised as well. There are also a variety of lap desks and trays that might make things easier on you. A bit pricey but nicer than a tote lid for sure. I wish you good luck and good posture.
https://www.amazon.com/dp/B07H99D39B
link
Probably not a bad idea actually.
I've just bought a metal mesh stand for the iPad that holds it up at a good angle and keeps the back open for ventilation. I'll report back once it arrives and I can try it out. Got to be better than resting it on a cushion where it gets all hot.
This was what I bought: https://www.amazon.co.uk/gp/product/B076VBHYKW/
I recommend this https://www.amazon.com/gp/product/B01M26S3VY/ref=oh_aui_detailpage_o09_s00?ie=UTF8&psc=1
I bought it for class and has been working great for me.
You can buy a 5mm thin led box for 45 dollars. no need to hack something together for 50.
https://www.amazon.com/Huion-Ultra-thin-ADJUSTABLE-Illumination-Lifetime/dp/B00J0UUHPO/ref=sr_1_1?ie=UTF8&qid=1468283836&sr=8-1&keywords=led+box
Thanks for all the help! I realized that I actually have one of these light pads https://www.amazon.com/Huion-Ultra-thin-ADJUSTABLE-Illumination-Lifetime/dp/B00J0UUHPO/ref=sr_1_10?ie=UTF8&qid=1468537533&sr=8-10&keywords=light+pad . I was using it for another project, but I'm done with that project now and it should really fill that role everyone is talking about with the lightbox.
How about this one?
I've seen some people basically velcro or otherwise attach it to a plate that is then bolted to an Ergotron Arm. If you want to go with the first option, let me know, I can maybe fabricate something up for you. I've also seen some people use different stands like this
https://www.amazon.com/AGPTEK-Multifunction-Skidding-Prevented-Tracing/dp/B076VBHYKW/ref=sr_1_3?ie=UTF8&qid=1525394792&sr=8-3&keywords=drawing+stand
to hold it up.
I think that's about right.
My D90 was the precursor to the D7000 so I just missed it.
I got this
https://www.amazon.com/gp/product/B01KHHKCKI/ref=oh_aui_search_detailpage?ie=UTF8&psc=1
Thanks for the suggestions! She actually got a disappearing ink pen recently and was pretty pumped about it. I don't think she has a magnetic needle holder, so I'll look into that!
I was also thinking a light box, she mentioned she wanted one but I don't know if there are any differences based on the material being traced. This was the model I had in mind: https://www.amazon.com/gp/product/B01M26S3VY/ref=crt_ewc_title_huc_1?ie=UTF8&psc=1&smid=A21H40ERIBU45K
I just read all the articles on types of handwritten European scripts on Wikipedia, picked one I liked, and Googled alphabets to practice. If I had a printer (soon!), I'd print out a copy of the alphabet and use my light box to trace over and over again.
I actually just buy it loose leaf so that I can write letters on it, and I use a thin usb [light table] (https://www.amazon.com/gp/product/B01EBA8ZX8/ref=oh_aui_search_detailpage?ie=UTF8&psc=1) with a sheet of dot-grid underneath so I can see the dots through the page. I actually like how you can see both sides ghost on a personal letter because it feels more literature-y. I couldn't use Tomoe for regular activities like work sketches and diagrams, journaling, note taking, or story writing. You really have to use a second sheet of printer paper to cover as you write because dry times can be an hour or more. On the bright side of things, with the light table this doesn't really matter because you can still see what you've written. It's just not especially convenient to use somewhere else than your desk at home (although it does fit next to your notepad and you can use it with an external USB battery pack like you use to recharge your phone if you're feeling particularly adventurous). People will go out of their way to talk to you about it if they see you using a fountain pen and portable light table in public, like a coffee shop. If you're interested, I could take a picture later today when I'll be writing a letter on it :)
Scan was using my Nikon D3300, a macro lens, and a nifty little backlight I found on Amazon. Reversed the negs in Gimp.
My only mistake was forgetting to dump my presoak (a new concept for me coming from the D76 world) and pouring in my developer. Once I realized what I had done, I dumped the whole lot out, quickly warmed up another 300ml of developer, and resumed the process.
I have a cheap lightbox from Amazon, which I setup on a table. I use a large Vanguard tripod which has a tilt-head so I can hang the camera directly over the lightbox. I level both the lightbox and the camera with a small bubble level.
I'm using an OMD EM5 (mk 1), with the Olympus 60mm macro lens. I turn off IS, switch to manual focus, manual exposure, f8.0. I use the 2 second self timer to avoid camera shake.
I've been laying the negatives down with a piece of glass to hold them flat, but it is causing me some issues, and I've been advised to ditch the glass and rig up another way to keep the negatives flat. Sounds reasonable, but I don't have a good solution in place yet.
While shooting I use the MF magnification option to set focus, and check it every few negatives in case I bumped something. Using f8 gives you a little latitude there. I turn the histogram on and make sure that my exposure is right in the middle - this gives you density correction because you can just keep making the shutter speed longer to let as much light through the dense negative as you want.
In processing, I crop in photoshop to the image boundaries, then use the photoshop actions from this blog post, which work very nicely. I then export a TIFF (LZW compression, no layers), and import into Lightroom for final cleanup, exposure tweaking, and dust removal.
Then, put that shit on instagram.
I'm new to the film scanning side of it, but I've been doing macro capture for other scenarios for a long time, and this method is quick and easy to setup. Took about 30 minutes including fiddling-around time and setup to scan through two rolls of 120 film the other day.
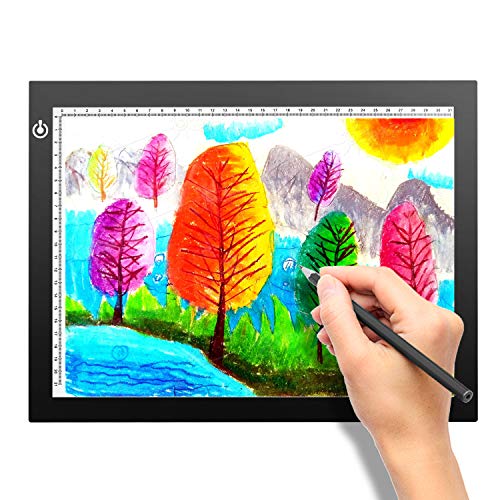
Tikteck A4 Ultra-thin Portable LED Light Box Tracer USB Power Cable Dimmable Brightness LED Artcraft Tracing Light Box Light Pad for Artists Drawing Sketching Animation Stencilling X-rayViewing https://www.amazon.com/dp/B01M26S3VY/ref=cm_sw_r_other_apa_i_t5j7CbVYHR58V
Got something like this for my classroom.
I have this one and I have no complaints.
A4 Portable LED Light Box Trace, LITENERGY Light Pad USB Power LED Artcraft Tracing Light Table for Artists,Drawing, Sketching, Animation https://www.amazon.com/dp/B07F147VF6/ref=cm_sw_r_cp_apa_i_txHVDbXVEZFM0
I just got a basic LED tracing table off amazon, it has worked wonderfully: https://www.amazon.com/ME456-Light-Ultra-thin-Power-Tracing/dp/B01EBA8ZX8/ref=sr_1_3?ie=UTF8&qid=1496185073&sr=8-3&keywords=light+table
Thin and usb powered
Definitely start with paper. Very sweet idea too. For anyone interested in an inexpensive light box they sell these on amazon in various sizes Diamond Painting A5 LED Light Pad Board Tablet Portable Dimmable Brightness, LED Artcraft Tracing Light Pad Light Box for Artists Student Drawing, Must Have for Paint with Diamonds https://www.amazon.com/dp/B07H6YMRWD/ref=cm_sw_r_cp_api_i_t1sUCb2H6062Q
If you want something larger, you can look for tracing tables like this one. I have something similar and use it more to view negative holders than to take photos (happy with my scanner), but I would say it should well too.
Ideally you want to avoid any extra surfaces in between, so I would rather try to make a mask with a window for the film.
I used to keep a full size light table running 4' fluorescent tubes for production. I upgraded to these flat LED light surfaces last year. Way handier and a lot more portable.
https://www.amazon.com/dp/B00DNPCZVG?psc=1
A4 Light Box, SAVFY Ultra-thin Portable USB Powered LED Artcraft Tracing Light Pad Copy Board for Artists,Drawing, Sketching, Animation https://www.amazon.com/dp/B0756G1KQ3?ref=yo_pop_ma_swf
^^ this is the one I bought. I looooove it! It's like a sheet of plastic that has led lights in it, that you can use to trace really easily. Put the original underneath your clean paper and have at it! Having lines to concentrate on will be a good mind numb-er. I always have a great time tracing mandalas. It's super relaxing! And then you get the joy of coloring it!
As a guy who uses the maker, i use my cricut on my bed and use bluetooth. I only use power that way. Couple things, since you got time, pickup your cricut housings like "knife blade" "deep cut housing" "fine point" and blades on ebay. i use make offers and get stuff 70% off. I buy cricut brand too not off brand.
​
alot of shops clearance and resell on ebay. For HTV heat transfer vinyl like t shirts, you'll want a heat press and HTV vinyl. For other projects you use permanent or temporary vinyl. Weeding which to me was like what does that mean when I started. Is just pulling off the excess vinyl from your cut before sticking down what you cut.
​
So as most mention here you'll need weed tools which are basically hooks and tweezers. Cricut sells these kits for ridiculous costs but if you hit up ebay you can get them cheap.
Also you'll want a light table for weeding, of course cricut has a answer thats ludacris costs.
I got this one one amazon on sale for 10.00 works great, there are alot so shop around but beats the hell out of 60+ dollars.
https://www.amazon.com/Ultra-Thin-Portable-Brightness-Sketching-Animation/dp/B06Y1JNHNM/ref=sr_1_5?keywords=LED+Tracing+Light+Box&qid=1573026714&s=arts-crafts&sr=1-5
​
As for the Cricut maker, i got mine through best offer on ebay for about 150 less. I made a offer on a new one and settled on a price with free shipping. Cricuts like apple, unless antiquated. their items never go on sale and all machines are excluded from sales at craft stores in the fine print.
Quick recap, unless shes paper crafting. a good starter kit will be.
- Stick mats
- blades
-weed tools
-light table
- Transfer tape.
- Armor etch for frosting glass.
- dollar tree is a gold mine for cheap glasses, picture frames, contact paper as a transfer tape substitute.
Siser is also a brand fav on HTV and vinyl on amazon, cheaper then cricut brand and just as good.
The storage and table stuff. i'd personally consider the table and chair but let her get storage that suits her needs. I think your hinging a hell of a bet this will become a day to day use for her. best to invest the money in light box, tools and blades.
​
I almost forgot, for cheap photo paper and cradstock. go to walmart but don't buy from craft section. go to the office supply area. they sell bulk cardstock there for 5.00 for like a 50-100 pack vs 15.00 or more at other sections or craft stores.
Cinematic light box on Amazon:
https://www.amazon.ca/Original-My-Cinema-Lightbox-characters/dp/B0167XQQHO
There are definitely cheaper options out there that are just as good as the cricut brand. I personally have this one that works perfectly
ja ... https://www.amazon.com/Original-My-Cinema-Lightbox-personalized/dp/B0167XQQHO
https://www.amazon.com/Tracing-AGPtek%C2%AE-Artcraft-Sketching-Animation/dp/B00YA9GP0G
Yeah, I had ordered a V600. I did some research and decided to cancel the order and buy the light table and a tripod for it. The scans are a pain to learn, but once it's learned, they are 100% better looking.
I’ve used one for weeding vinyl I’ve cut, works well for glitter/thick materials. I like the one linked below, inexpensive, USB (I prefer it)
Not sure what your application is.
A4 LED Light Box Tracer Ultra-Thin USB Powered Portable Dimmable Brightness LED Artcraft Tracing Light Pad Light Box for Artists Drawing Sketching Animation Designing Stencilling X-ray Viewing https://www.amazon.com/dp/B074QMTX2B/ref=cm_sw_r_cp_api_i_LqajDbNQRPTNZ
What kind of light panel is recommended to DSLR scan film? Is a $40 model is enough (for example: https://www.amazon.com/dp/B00J0UUHPO/ref=cm_sw_r_cp_dp_T2_XGVtzb6KGX84B) or should I look for higher end product (and why)?
Thanks!
I also said that you could "get away without the extra torso", so save yourself the re-draw if you're happy with it, just work on the arms.
I know that it's a couple extra bucks, but some tracing paper and/or a light box might really help with revisions. You can get them at any art store.
https://www.amazon.com/Artists-Tracing-Sheets-Translucent-Sketching-Lightweight/dp/B0788K7D3K/ref=sr_1_13?ie=UTF8&qid=1525955462&sr=8-13&keywords=tracing+paper
https://www.amazon.com/Ultra-thin-Brightness-Sketching-Stencilling-X-rayViewing/dp/B01M26S3VY/ref=pd_sim_229_4?_encoding=UTF8&pd_rd_i=B01M26S3VY&pd_rd_r=45M3ZZWCPYYH9E7AWSEC&pd_rd_w=ZPgFf&pd_rd_wg=UYM5X&psc=1&refRID=45M3ZZWCPYYH9E7AWSEC
I’m using this lcd light box. I also have a flash with an off camera trigger. Think it would be worth it to invest in a better light source? Will that really effect my colors?