(Part 2) Best artists paintbrushes according to redditors
We found 386 Reddit comments discussing the best artists paintbrushes. We ranked the 166 resulting products by number of redditors who mentioned them. Here are the products ranked 21-40. You can also go back to the previous section.


To me, watercolors are
the perfecta pretty ok way to get in to painting.A few of my favorite supplies:
And a few of my favorite watercolor youtube channels:
This is a good faith c&c, but it’s going to be long, so bare with me. I am only a moderately talented painter, but even I recognize some real issues here.
***
The execution on this looks pretty bad.
Biggest single issue is the thick paint. This paint looks like totally unthinned GW paint, which is gloop out of the pot. You need to work in much thinner layers.
I personally recommend a bottle of Vallejo thinning medium. It mixes in better than water and the cap design is controllable. If you can’t get that try to at least use distilled water that is clean and in a separate pot than your brush water.
This dude needs to get a nice even spray prime, I recommend white or gray. (Money tip: Krylon Colormaster Primer sold at Walmart works fine and is only $5. Make sure you get the primer, not the prime&paint 2-in-1 can) Then layer on the main colors in ~2 separate thin layers before applying some washes, and then finally some highlights.
For the armor, uniform, and skin I would pick out a base color, a wash, and a highlight color. For each section paint your base in 2 thinned coats, wash it, reapply a very thinned original base color to the highlighted areas, mix the base color with the highlight color and reapply that to a smaller area to define the most raised bits, finished off with very gentle applications of the highlight color to the very top areas.
For the boots and pouches just paint them brown, highlight with a brown/skin tone mix, then overwash with a brown or fleshwash to merge the tone together. Easy way to get a leather look. Paint the pouches all brown, don’t make random flaps on them the tan of the body armor. You want to communicate that the armor and pouches are different items.
For the green uniform, a green camoshade or a DIY wash made from a dark green will work. Don’t use a blackwash on it or it will look like soot. On your current wash of the legs there is also pooling down below the back of the knees, this is caused by excess wash on the surface as it dries. You want to avoid this by having a brush move the wash back into the recesses or remove it from the model as the wash dries.
Certain areas should be underpainted. All the silver should be painted black if you primed white/gray. Then you can drybrush/lightly apply silver paint and any areas you miss will be black which makes it look like dark metal. Sometimes I’ll leave fairly sizable gaps of black in silver colored items, it really works to create depth. For metal I’d reapply a black/nuln wash over it as well to really make it darker.
The exposed skin should be underpainted white if you primed black. I would not do facepaint on a helmeted head, it doesn’t read. If you want to do tactical facepaint, a helmetless exposes head. Catachan or Anvil heads.
I generally try to paint from the “inside” out. So I do the button layer like the cloth uniform and get it based and washed, then the body armor, then the pouches. I try to minimize the numbers of touch ups needed on the lower layers. This helps me keep models crisp.
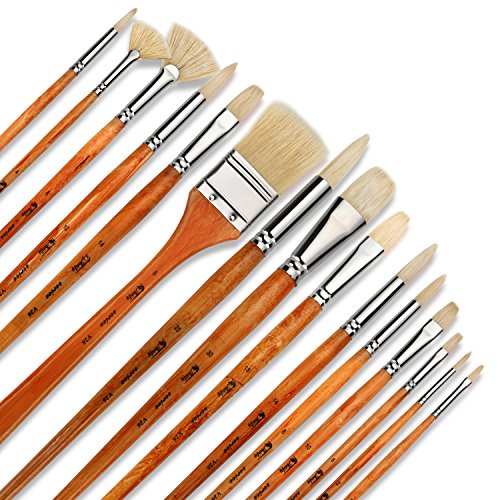
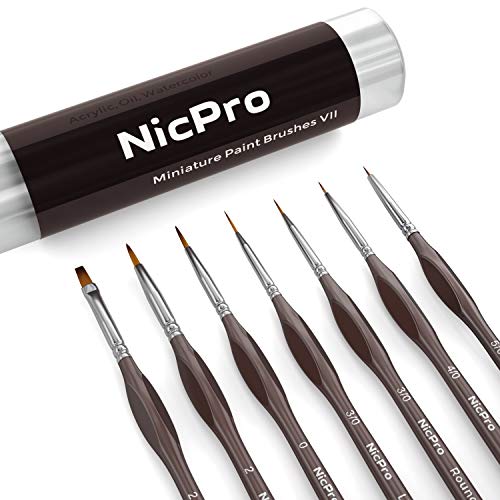
For most of this process you should be using large or medium sized brushes. Save your fine brushes only for when you need them. If you need cheap but good larger brushes, these have worked for me really well: https://www.amazon.com/gp/aw/d/B01ARMLLB2?psc=1&ref=ppx_pop_mob_b_asin_title
I also automatically always recommend getting a small jar of Masters Cleaner & Preserver to keep your brushes in good working order. This will save itself in cost easily by saving your brushes. Clean them with this and with cool or running room temp water throughout sessions, do not uses hot water as it can ruin the glue holding the bristles in place.
Catching up on YouTube’s warhammerTV tutorials will be a great help. Even though your guardsmen use a different color scheme, the general principles will remain the same as the guides.
Going to back up here and talk about moldline cleaning. This is a secondary issue but it has to be done before priming. Get a hobby knife and pull the blade over all the plastic seams to get rid of them. These seams become visible problems especially when you start using washes.
I want to start off with this very important thing to remember, "take your time" while doing this model there was times I only sat down for a few minutes and times I was there for over an hour.
I would recommend practicing the techniques listed below on the sprues (the frame surrounding the parts of the model)
I over do the details,(lot of it you can't see in the pictures. I post) but I enjoy the painting and get satisfaction off of it, it can be toned down and still look good
I normally look over the book, Google the characters/vehicle down load multiple pictures to refer to and get an idea what colors I want before getting started. I also watch YouTube videos to see if there is something difficult I need to be aware of.
Sometimes it is easier to paint some of the details while the parts are still on the sprues, see the black in the chest plates I painted them before I cut them loose, it was easier to do them that way. But I always waited until I put section together (ex: chest, waste , arms , legs and head) to do the wash "weathering" this way they all blend together. With this one, I want it to look more weathered at the bottom and less as it went up
Some definitions:
Wash "weathering" this is how I made the "dirty look" i did not let it set for 10 mins. I applied small sections and wiped off what I did not want with a Q-tip. The darker parts, I just applied small amounts with with a fine tip brush.
Dry brush
As you can see here Dry brushing really gives the look of age /worn out.
you would be better off going to the link I provided and watching a few videos.
Variety of brushesif you buy the dirt cheap brushes, you will get a cheap paint job. The ones I linked are a good set to start with, they give you a wide variety of choices. Main thing to do is CLEAN...CLEAN CLEAN...them after each use. With thinner and soapy water. Do not leave them setting in the thinner or water, the points and edges with get messed up quick. Wipe them off with a paper towel, reform the ends when done.
Magnifing head set is the best way to get the small details, i have this set and they work okay, there are better sets out there.
Hope this helps
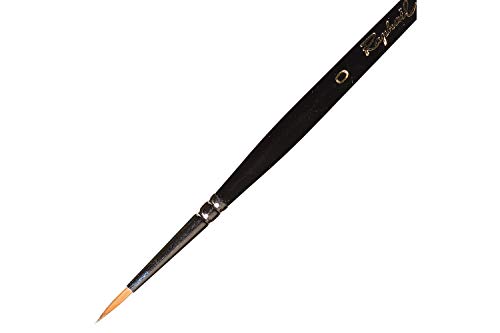
I personally use Raphael 8404 kolinsky sable brush, size 0 image, another. And I have been happy with it.
They have very pointy tip and quite big "body" (also known as paint reservoir) which keeps paint wet, so it does not dry onto bristles.
Key things with text painting for me have been to use very tip of the brush and have paint that flows easily. I use Vallejo black ink, but any other paint will work too when thinned enough. (thin your paints :) )
those are sculpting brushes...
https://www.amazon.com/COMIART-Flexible-Sculpture-Silicon-Brushes/dp/B00MRTCP4G
Nails are SUCH a great source of euphoria once you get it down! Make sure you have a good base coat and top coat. Base coat to let the polish adhere better and to prevent the polish from staining your nail. Top coat to protect all that effort you put into doing your own nails! My fav for both are Seche Vite and Seche Clear. As others have said, wipe off any excess polish on the lip of the bottle. I typically will bring the brush up to about 2 mm to 3 mm from the edge of where the nail meets the skin/cuticle and press down and push up. This fans out the brush head a little and allows you to inch closer to the edges without necessarily touching the skin there. then drag down the length of the nail. Repeat on the 2 flanking sides. Once that's dry, repeat for a 2nd coat. Usually you would have to wait for the polish to dry before putting on a top coat, but the one I linked is great for impatient girls like me because you can put the top coat on while the polish is still wet! It binds with the polish and keeps it strong and the whole thing dries relatively fast too.
I always get some polish on the rest of my finger even though I try really hard not to, its inevitable, (especially when you switch hands to the non-dominant one >__<) so I use a small brush I have from painting art supplies. The thinnest brush (like the ones on the left side), or asmall angle brush used for brows work great. Dip that in some nail polish remover and clean up the sides/excess polish. Voila!
Best of luck girl! You got this!!
PS: Right now my favorite polishes are from KL Polish. I bought a ton of them when my friend said they were going out of business and had a big sale. The colors are great and very long lasting, but the best BEST thing about this polish is the brush. OMG this brush!! It's a nice curved shape that conforms to your nail and makes it a lot easier to get closer to the edges.
A great place to start is the mini painting starter sets by Reaper:
https://www.amazon.com/Reaper-Miniatures-08906-Learn-Paint/dp/B00NTMC49G
https://www.amazon.com/dp/B01N458GBK/
They're not too expensive, and they are a great intro to mini painting. They also come with pieces to practice techniques on, and a lot of paints to work with as well. I'd get those, and maybe some brushes.
I also would recommend a wet palette to keep paints wet between painting sessions, magnifying glasses to help see, and a mini holder.
I also got these brushes, which seem to be working well for me, and have a mix of useful ones.
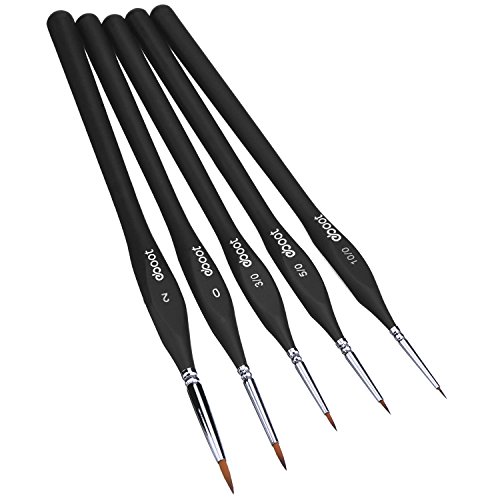
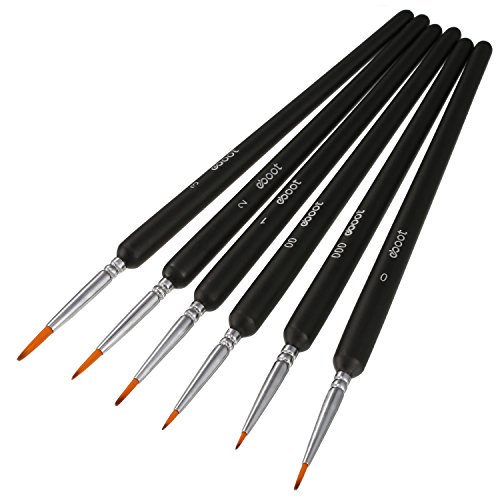
These aren't that expensive for brushes and I use them for really fine detail https://www.amazon.com/gp/product/B016DSMU0U/ref=oh_aui_search_detailpage?ie=UTF8&amp;psc=1
The smallest one is similar to a 01 micron pen, or thinner depending on how it's used. The larger sizes seem fine for what you want too.
I got these, which I saw being recommended on multiple places (including in the watercolors weekly discussion here by u/artomizer)
And white. The white is pretty important.
OP: $12 for paint, $5 for brushes.
Ive got a set of these. they are a step up from the craft store brushes I was using. They are fine brushes. nothing terrible about them. and inexpensive enough that you can learn from mistakes.
Contrary to what others say - and I may get shouted down for this - I dont think it is necessary to or even advantageous to go for the high dollar brushes at first. Let me explain: Expensive natural brushes are not impervious to abuse and mistakes. But they do put up with it better than the cheaper synthetic. That might seem like a good thing. But I submit that starting out with the cheaper synthetic and trying to take care of those will teach better brush control and discipline that will be maintained as you move up to the natural brushes. So you learn habits like frequent cleaning, avoiding abusing the tips with poking or extreme angles. the tips on the synthetics in my experience curl in a heartbeat if you poke and push.
If you want to go au natural and skip the synthetics, there is a set of ZEM brushes on amazon that I got recently and Im enjoying them a great deal. the #2 is the most useful of them. the 4 is a bit large but useful for big areas while still pointed enough that its not sloppy. Ive only used the 0s for really tight spots.
https://www.amazon.com/ZEM-BRUSH-Kolinsky-Artist-Detail/dp/B00M7HPVV2/ref=sr_1_1?ie=UTF8&amp;qid=1549116717&amp;sr=8-1&amp;keywords=zem
Nothing stops you from learning
Imagine if we would have a WDYWT, but everyone would paint their outfit instead, lol
I took a class and the teacher uses these because they are cheap and he can just toss once no longer useable.
I have these now (yet to use) but also cheap craft brushes and reaper master brushes - davinci which I use the most, especially for fine work. But expensive so I never touch bottom of container when washing out. Never use roughly. Now have brush cleaner. And I baby them. Craft. Or cheap sale art brushes for everything else.
Edit: correctives link
Knock: https://www.amazon.com/Wildrider-Layer-Paint-Games-Workshop/dp/B007RSHL2S/ref=sr_1_4?keywords=citadel+red+paint&amp;qid=1565187497&amp;s=gateway&amp;sr=8-4
Yourself: https://www.amazon.com/Games-Workshop-Citadel-Base-Mephiston/dp/B007RHZ9CS/ref=sr_1_1?keywords=citadel+red+paint&amp;qid=1565187535&amp;s=gateway&amp;sr=8-1
Out: https://www.amazon.com/Tamiya-Models-Mini-Acrylic-Paint/dp/B0099WQ5O0/ref=sr_1_11?keywords=red+model+paint&amp;qid=1565187638&amp;s=gateway&amp;sr=8-11
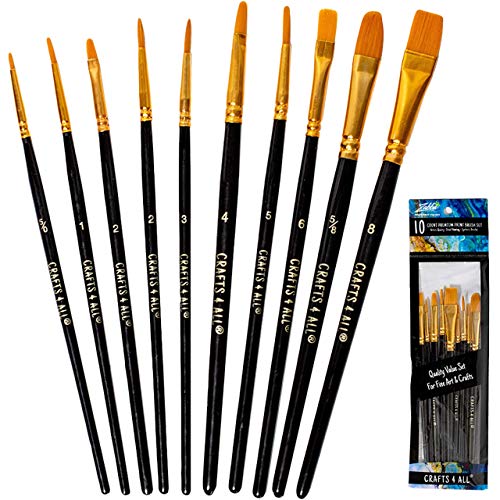
https://www.amazon.com/Crafts-ALL-10-Professional-Watercolor/dp/B071WLVR7B/ref=sr_1_6?keywords=model+brushes&amp;qid=1565187660&amp;s=gateway&amp;sr=8-6
Of COURSE!
I got these little business cards: https://www.amazon.com/Fecedy-100pcs-Blank-Business-Message/dp/B01M9ANM0J/ref=sr_1_3?ie=UTF8&amp;qid=1524834471&amp;sr=8-3&amp;keywords=business+card+blank
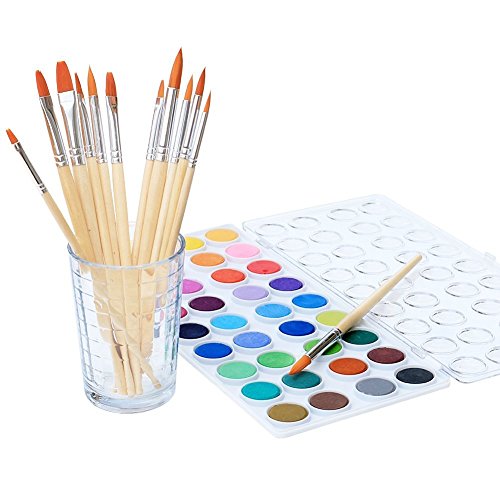
A cheap watercolor and paintbrush set: https://www.amazon.com/Watercolor-Variety-Quality-Brushes-Everything/dp/B01G7KHNWE/ref=pd_sbs_201_3?_encoding=UTF8&amp;pd_rd_i=B01G7KHNWE&amp;pd_rd_r=BCHHR7BDEC6BWT64H4WC&amp;pd_rd_w=UiU2S&amp;pd_rd_wg=5teXV&amp;psc=1&amp;refRID=BCHHR7BDEC6BWT64H4WC
The watercolors were super easy to use, they blend quite well on the paper cards. I would start with a lighter color and then add a few drops of a dark and smoosh it all together into a big blob. Some of them look better than others, but taken together when they are hung in the clip card holder I have, they look nice.
My sister in law did the writing, she used a brush lettering pen I think. I was going to try and do it, but she has nicer handwriting than me. :)
I second the notion that you need more water, or you should also be wetting the paper first with a wash so that the colors will flow into one another and form more of a gradient effect that is often seen in space watercolors, etc! You might also find joy into mixing some of your own colors, particularly blacks and grays! Here's a link on some brief watercolor color theory!
http://www.watercolorpaintingandprojects.com/basics/mixing-two.html
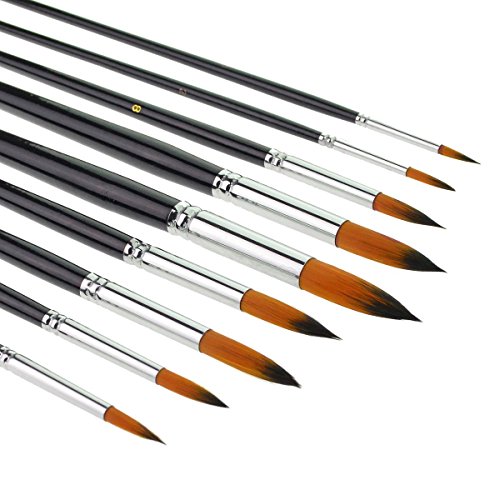
Also, is the brush in the photo the one that you used for the painting? If so, you might want to invest in a better quality round brush as it looks the edges might be too frayed to achieve a more even stroke! I use these and I find they work quite nicely!
https://amzn.com/B015ZBIME4
I hope this isn't an overload of information or anything! Best of luck with watercoloring!
Glad to hear it.
On the inevitable Painting supply questions that will be coming shortly...
Do you plan to paint like the box art for your army? or going to do your own thing?
Paint:
Brushes:
Glue:
Model Fixes:
For the ONE HAPPY CHOICE 🥳🤩🤪 brushes, are you talking about the miniature brush set?
50 Pcs Pack of Synthetic Sable Fine Detail Paint Brushes Set for Miniature, Scale ... https://www.amazon.com/dp/B073YDKWWP/ref=cm_sw_r_sms_c_api_i_8NC1Cb6Y2DJBR
I use a Da Vinci series 35 size 0 for all my details but they are super expensive on amazon.
I've heard good things about [this set] (https://www.amazon.com/ZEM-BRUSH-Kolinsky-Artist-Detail/dp/B00M7HPVV2/ref=mp_s_a_1_2?ie=UTF8&amp;qid=1537841509&amp;sr=8-2&amp;pi=AC_SX236_SY340_QL65&amp;keywords=zem+kolinsky&amp;dpPl=1&amp;dpID=41bpKKr9LoL&amp;ref=plSrch)
That is called pilling, and it happens on low-quality papers due to fillers in the paper (not 100% cotton rag) and poor sizing (sizing is what makes the paper less absorbent and suitable for water mediums). I looked it up and that brand in particular has awful reviews for just what you're experiencing. With paper of such low quality you really can't do more than 1-2 layers of painting, you can't scrub the paper at all, etc. In my opinion paper is the area you should splurge on even if you can't anywhere else - you can work with lower quality paints and brushes but paper will literally destroy itself.
If you really can't afford much for paper, try out strathmore 400 series - it's at Michaels and maybe Hobby Lobby. I was able to do a lot to it before I moved on to artist grade papers. But I would recommend Fabriano Artistico (that's the artist quality in the line), you can get 20 sheets of 9x12 cold press for about $22. There is also Arches, Saunders Waterford, and Canson Heritage - there are more but these are the ones I've tried and I prefer Fabriano.
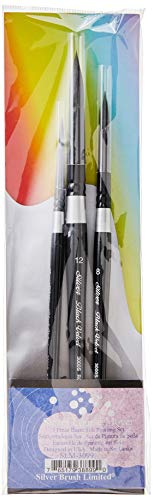
This brush set is $35 and comes with 3 different sized round brushes from a good brand:
https://www.amazon.com/Silver-Brush-SLM-Basic-Painting-Watercolor/dp/B008BRYGEK
And this is $25 for a single brush but it's an excellent brush I highly recommend you pick up eventually:
https://www.amazon.com/Princeton-4750Q-6-Synthetic-Squirrel-Watercolor/dp/B00512C1VS
This type of brush holds a ton of paint and water and it behaves a bit differently than others in that it is very soft, so the bristles all move and you have to adjust the brush, but it's wonderful once you get used to that.
And this is $14 for a good set of student grade paints:
https://www.amazon.com/Winsor-Newton-Cotman-Colour-Sketchers/dp/B00004THXI
^^ You can find that in the store as well but it's double to triple the price Amazon charges.
But if you can afford to spend more, my favorite brands are Daniel Smith, M. Graham and Holbien. They are expensive, around $10 per tube but you must remember that a tube will last a VERY long time, you'll need much less paint as these are full pigment with no fillers. You can get a small 5ml (read: SMALL!) set of Daniel Smith to try out:
https://www.amazon.com/Daniel-Smith-285610005-Essentials-Introductory/dp/B00WT5VRF6
for about $27. These tubes are small but should still last you months. And you should be able to mix most colors that you want with just these shades (just look up a mixing guide). If you want to purchase individual 15ml tubes of any of these brands I recommend Dickblick.com, it's $2-3 cheaper per tube than Amazon which really adds up.
hmm considering my last dry spell lasted for 10 years (as the walmart buy were i used to live stopped carrying gunpla) ya i took up fan fiction writing, and drawing. I also played a lot more video games too. hmm well as for paint for the last three years since i got back into gunpla again(god bless amazon.com) I really always have green, yellow and white sitting around as i tend to just by the 2 ounce six pack starter kits you can buy for airbrushing.
The resin i have these aforementioned colors sitting around is because I almost never use them when I paint, except for when I am mixing colors. on the other hand i tend to run out of black the most as that is the color i use the most. now i have a 16 ounce bottle that will not likely run out any time soon. hahahhaha
you can always run to your local Walmart and pick up a few colors of testors enamels hand paints for around ten bucks. hay the little there cheap but good little bottles of paint and made in the USA. But i mainly use them for detail work nowadays. you can get some top/clear coats online for around 5-10 bucks (the cretex gloss coating i use is about 5.88 and is a add on item) on amazon. I got a 16 oz bottle of clear Matte top coating from Badger Air-Brush company for around 15 bucks last year and only used maybe an ounce total of it so its not to bad for them online. It may be for airbrushing but it does spread well with a paint brush too (i have done it on some kits.)
as for your gundam marker drying out, you can get a micro fine sharpie, they work just as good and are easier on the wallet. or you can thin out some testors black and get a fine point paint brush to use that for panel lining. You can find a desist small tipped brush at Walmart for around 2-6 bucks. or you can get a great set of minnieture painting brush for 10-15 bucks. link: https://smile.amazon.com/gp/product/B016DSMU0U/ref=oh_aui_search_detailpage?ie=UTF8&amp;psc=1
also you can pick up HGIBO kits for about 10-15 bucks on amazon, and they are for the most part full frame kits so you do not necessarily need to spend a lot of cash to get a MG kit when you can pick up an HGIBO kit for 12 bucks or a 1/100 IBO kit four around 25 bucks on amazon. you can get them even cheaper if you do a little digging into different sellers.
as a matter of fact i actually just got a a hard to find MG Re-gz for 53 bucks on amazon. When you take into account the fact that a lot of sites do not have the MG much less the HG of this kit it getting it 3 bucks cheaper then it would cost with shipping from Gundam planet, thanks to prime free shipping, it was a nice find.
so really you do not necessarily need to go threw dry spells to get a kit depending on the grade and line. a lot of the HG's are going down in price thanks to the fact that since AGE they have been making them out of PS and PP, instead of ABS, PS and PP.
Paints: /u/cajolerisms mentioned Windsor and Newton Winton paints as a solid student grade, and I second that recommendation. You're going to do a bunch of paintings where the limiting factor is skill more than materials, and for those the materials only have to be good, not great. W&N Winton is good paint.
A couple of drops of walnut oil will keep your paints on the palette from drying out for a good long time, a couple of days at least if you seal it in Tupperware and refrigerate it when you're not using it. Thinned with a drying medium they'll still dry to at least tacky to the touch overnight on the canvas, though, unless you really build up a thick impasto layer.
For colors I use a Zorn palette for portraits: ivory black, titanium white, cadmium red medium, and yellow ochre. For everything else, I drop the black and yellow ochre and add in ultramarine blue, cadmium red medium, cadmium yellow medium, and burnt umber. At some point when I'm more experienced I'll probably want a warm / cool palette, and a strong green like sap green for doing landscapes, but for now just the simple chromatic palette works fine.
Brushes: Hog bristle brushes are your workhorse. They're not expensive, either. I have these, these, and these. The first two are better quality but I end up using the long-handled ones most, for the first, like, 75% of each painting. Then I switch to the others for the finishing work. I've got some cheap synthetics and a long-handled watercolor brush - a round size 0 - that I can use for fine details, and when they wear out I'll replace them with some better ones, but I had them lying around already so I put them to work.
Surface: If you want to work on canvas, canvas panels are more economical than stretched canvas. (And I never liked the bounciness of working on stretched canvas; I like having a stiff surface to scrub on.) These and these are, I'm pretty sure, exactly the same panels, just with a different label on the back, and I've been happy with them so far.
Medium: Windsor and Newton Liquin is a solid choice. A good basic medium is half linseed oil / half odorless mineral spirits.
I personally use Raphael Sable Kolinsky Brushes, sizes from about 0 to 2 depending on what I'm working on. They're fairly priced for their quality and you can definitely feel the difference between this and a cheap brush when painting.
If you make an investment in some nice brushes that you get something to clean them with and keep them in top form. Personally I use the Master's Brush Cleaner.
I started typing and this ended up being really long, hopefully it helps. I might have gone overboard, so if you need / want a TL;DR or more info on anything just say the word and I'll do what I can :)
My personal preference is to add details and touch-ups to my figures. I've done a few full repaints, and I'm working on my first airbrushed figure, but I really like adding in details where the factory didn't :)
---
Paints:
I've had good results using alcohol based acrylics like Tamiya, Model Master, or Testors Acrylics (I think Enamels are Testors' main line, so make sure to check what type it is). Alcohol-based acrylics thin and clean up nicely with 91% isopropyl alcohol, I usually pick it up from whatever pharmacy is nearby (don't get the 70%, it doesn't work at all).
Citadel and Vallejo make nice water-based acrylic paints in additional colors, you'll definitely need a primer if you're working with Vallejo (I've only used a couple of Citadel paints, so I can't really speak to them).
You'll want to stay far away from acrylic craft paint, I've tried it in the past and it doesn't come out well at all (I just use some empty glass or plastic jars from stuff like sour cream or salsa since they're not too big).
Some folks like enamel paints, and there might be another kind of model paint, but the chemicals in those paints and their thinner tends to be quite strong so I avoid them. I used un-thinned enamels when I first started painting, and when I tried to use the thinner it ended up melting my paint tray and making a mess, so I'm not too keen to give them another try.
---
Tools are going to differ a bit depending on how you want to paint (hand painting vs airbrushing or spray painting).
---
Hand Painting:
You'll need paints, some soft bristle brushes (I have a set like these), something to stir your paint (I use a Badger Paint Mixer and love it to bits), thinner (depending on your type of paint), a mixing tray, some pipettes for measuring paint and thinner, something to hold your parts while painting (I like these Aligator Clips), something to stick the clips into (I use a styrofoam block wrapped in plastic from a craft store, but I've seen folks use taped together cardboard like from Amazon boxes or the cheap foam coolers), some fine grit sand paper or nail buffing blocks to help rough up the surface slightly to help the paint stick, and something for topcoat (I absolutely love Pledge Multisurface Floor Care, aka Future Floor Wax, it's a clear acrylic wax that dries to a semi-gloss to gloss shine, it brushes on nice and self-levels for a smooth finish, and one bottle will last a REALLY long time; I got a bottle a few years ago and I've used it on a LOT of gundams and TFs and the bottle is still half full). You may also want some smaller containers or jars to hold your thinner, brush cleaner (alcohol or water), and topcoat if you're using Pledge just so you don't need to keep the big bottle out on your workspace.
---
Airbrushing:
You'll need an airbrush and compressor, and then a lot of the same supplies as above. You'll also want some small-ish jars to store your thinned paint so you can re-use your leftover paint instead of having to toss it, and some painter's tape to mask off parts you don't want to paint and to keep your paint lines clean.
You can airbrush inside the house, but you'll want to do it in a well ventilated area if you don't have a spray booth (box with a fan and air filter to help move the fumes out the window and help keep the paint from spraying everywhere). I'm still learning to paint with my airbrush, so I don't have too many tips here.
---
Spray painting:
You'll need your choice of spray paints, alligator clips, fine sand paper, and some painter's tape to mask off areas so it doesn't get everywhere. I definitely wouldn't advise using spray paints indoors, the fumes tend to be really strong. I haven't really used spray paints in a long time, so I'm not a lot of help here either.
---
Markers:
Some folks might recommend sharpies or paint pens / markers, but I've never had good luck with them.
I do highly recommend using a Micron, Graphix, or Prismacolor marker / pen for highlighting panel lines in .005 thickness for most figures. The .01 and even .05 markers can work well too, but they might be too thick for some figures, so a couple different thicknesses can't hurt (I've got a pencil case full of lining markers from those brands). Don't use sharpies for panel lines, unless things have changed, even the thinnest ones tend to dry a purpley-blue instead of black, and the lines are still really thick compared to the Micron.
---
Painting Tips:
https://www.amazon.com/Premium-Synthetic-Miniature-Brushes-Painting/dp/B01FWIC124/ref=sr_1_2?keywords=fire+in+me&qid=1562022608&s=arts-crafts&sr=1-2
I got one of these that has some okay brushes for drybrushing the smaller spots. I got mine for liek 14$ tho, not 20 so maybe look around for a cheaper set?
If you plan to do more painting, I recommend going through a pack of these before buying expensive hobby brushes (including so you learn brush care properly). I've been using the synthetic (cough) "One Happy Choice" brushes for advanced tabletop painting, and still haven't cracked open some hobby brushes I recently bought. They won't last as long as a hobby brush, but you can abuse them (: better.
https://www.amazon.com/Synthetic-Brushes-Miniature-Painting-Watercolor/dp/B073YDKWWP/ref=sr_1_3?crid=NPEE0P0J41CW&keywords=one+happy+choice+brushes&qid=1567033046&s=gateway&sprefix=FZ-R45HFU%2Caps%2C211&sr=8-3
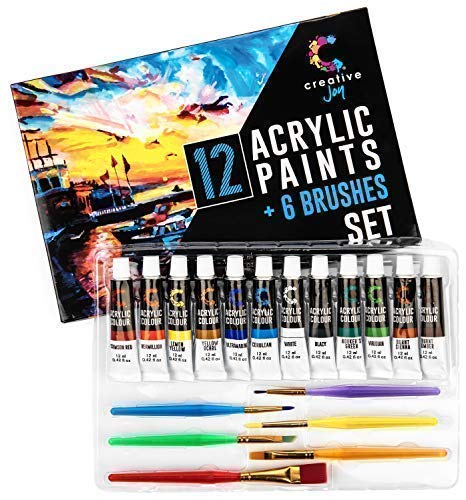
Paints: https://www.amazon.com/Creative-Joy-Brushes-Great-Painters-Adults-Beginner/dp/B01FDYSZ5Y/ref=sr_1_4?keywords=acrylic+paint+set+creative+joy&amp;qid=1567135428&amp;s=gateway&amp;sr=8-4
Varnish: https://www.michaels.com/americana-duraclear-ultra-matte-varnish/10329783.html?cm_mmc=PLASearch-_-google-_-MICH_Shopping_US_N_Crafts%26Hobbies_N_N_N_N-_-Crafts+%26+Hobbies&amp;&amp;cm_mmc=PLASearch-_-google-_-MICH_Shopping_US_N_Crafts%26Hobbies_N_N_N_N-_-Crafts+%26+Hobbies&amp;gclid=Cj0KCQjw753rBRCVARIsANe3o44Oiz6BzCoGaQdC39GREwjdaSWrTJ8talnBYBBMx5NDqGIKhzbYVwMaAmNCEALw_wcB&amp;gclsrc=aw.ds
Like I said, for some colors it's fine, for others it's pretty bad.
I started with synthetic brushes and ended up getting bristle brushes afterward. It's the type that Bob Ross uses. They pick up more paint and are a bit stiffer: https://www.amazon.com/gp/product/B01N0J37MT
I highly recommend staying away from Turpentine. It's known to sensitize the body resulting in skin reactions such as eczema, difficulty breathing, irreversible kidney damage and even nerve damage.
It's just not worth the risk in my opinion. Check out odorless mineral spirits or terpenoid as a much safer alternative.
CDC Occupational Health guideline for Turpentine:
https://www.cdc.gov/niosh/docs/81-123/pdfs/0648.pdf
Bought it at Michael's, but here's a similar set on Amazon.
This set looks really wonderful to me! I'm not an artist, but those reviews could convince even me to give it a try!
I know it isn't relevant to what I linked for you, but I'd love to have this game for my family to play together!
https://www.amazon.com/dp/B01D9W6SNS/?cv_ct_id=amzn1.idea.30QJOPDITFI5D&cv_ct_pg=storefront&cv_ct_wn=aip-storefront&ref=exp_cov_taehatypes_dp_vv_d
This is what TaehaTypes has on his amazon storefront, it's what I use as well.
i bought these brushes from amazon and they work fine
Krytox 205g0 is typically the preferred lube for linear switches. You can get it from switchmod.net, and you'll want some fine tipped paintbrushes like this. Read some lube guides if you've not already, Topclack has a good one or Krelbit (the guy who runs switchmod).
For less messy amazon links you can extract the part after "/dp/" in
https://www.amazon.com/Pointed-Paintbrushes-Marrywindix-Watercolor-Painting/dp/B015ZBIME4/ref=sr_1_3?ie=UTF8&amp;qid=1484200358&amp;sr=8-3&amp;keywords=round+watercolor+brush
and make it:
https://amzn.com/B015ZBIME4
BEEP BOP
Plz send any recommendations via PM
Raphael Kolinsky Sable size 0 https://www.amazon.com/dp/B004Z7743U/ref=cm_sw_r_cp_apa_i_ja4RCbTC0Z5NX
This one?
Yeah also called rubber shapers, though they technically aren't rubber anymore. They do tend to "pull" on the clay if used dry, try dipping them into some water or baby oil for better results. This is the set I have. Works well but one of the tips has gotten beat up since I used it on clay that was too dry. Derp.
I use an off brand watercolor kit off of Amazon. https://www.amazon.com/dp/B01G7KHNWE/ref=cm_sw_r_cp_apa_5k.Wzb19G4QJ4
Seconding that. And get a set of micro brushes like this: https://www.amazon.com/dp/B07BQ42113/
I have the 15pc version of those brushes and they help so much with trying to paint tiny parts be its model tanks or minis.
I recently purchased this set. da Vinci Watercolor Series 5500 Maestro Paint Brush Set, Round Kolinsky Red Sable with Gift Box, Multiple Sizes, 3 Brushes (Series 10) https://www.amazon.com/dp/B00WMEZQAQ/ref=cm_sw_r_cp_apa_7cjLzbWKX9MFJ
I've been very happy with it. Many people compare the Da Vinci 5500 series with series 7 in terms of quality. But amazon isn't a great place to find decent premium brush deals. I've found it kinda confusing. Look on Blick.com at the Kolinsky brushes and they even have a bit of a tutorial on the differences between the different types of hair.
I recently bought these fine tip paintbrushes and they’re great for tiny details.
Sorry it was me trying to link from my phone
https://www.amazon.co.uk/dp/B01FJ90O0W/ref=cm_sw_r_sms_awdb_NNuTyb55QAYHH
That should work
Watch this video, I found this extremely helpful. https://youtu.be/Y8U2yBMiVUc.
I recently got some da Vinci brushes and they are pretty awesome: da Vinci Brushes 3 Brush Gift Set https://www.amazon.com/dp/B00WMEZQAQ?ref=ppx_pop_mob_ap_share
>Get a bigger palette.
Thanks, I definitely will :)
>I use a nylon bristled 2" and 1" brush.
Is the nylon not too soft for the oil paint? I guess it doesn't make a huge difference for background work, but I thought I'd ask.
Are there any brushes you use frequently that are missing from the set I found?
>Jerry's Artarama Online
Wow, that's a way better price than other stores I found online. That's awesome, thank you so much! Link for the curious.
>I'm documenting my progress on youtube
I took a look, your paintings look great! I'm excited to get started too, hopefully someday soon. Thanks for all your help!
I would like to purchase the Start Collecting! Astra Militarum box, but I thought I would need to buy the full hardbook for the rules and codex? While I would like the Space Marines from Dark Imperium, I don't have much interest in the Death Guard models.
&#x200B;
Are there any brushes you might recommend? Been browsing around Amazon using this one as an example. https://www.amazon.com/Premium-Synthetic-Miniature-Brushes-Painting/dp/B01FWIC124/ref=sr_1_9?keywords=miniture+paint+brush+kit&qid=1558220257&s=gateway&sr=8-9
> Paint Nites
I was thinking of buying a 2 pack canvas from michael's and then this