Best automotive fuses & accessories according to redditors
We found 179 Reddit comments discussing the best automotive fuses & accessories. We ranked the 83 resulting products by number of redditors who mentioned them. Here are the top 20.
We found 179 Reddit comments discussing the best automotive fuses & accessories. We ranked the 83 resulting products by number of redditors who mentioned them. Here are the top 20.


![6 Way Blade Fuse Box for Automotive [ATC/ATO Blade Fuses] [100 Amp][LED Indicator] [Protection Cover] [10-30V DC; 12V] Auto Marine Fuse Block](https://m.media-amazon.com/images/I/51UG0KP8TNL.jpg)


![10 Way Blade Fuse Box for Automotive [ATC/ATO Blade Fuses] [100 Amp][LED Indicator] [Protection Cover] [10-30V DC; 12V] Auto Marine Fuse Block](https://m.media-amazon.com/images/I/51WHV+XqidL.jpg)


this is what I use and hide the wires behind trim/headliner.
Here's what you do for an ideal dashcam installation:
POWER CABLE OPTION A (quick and sloppy)
POWER CABLE OPTION B (looks like it came that way from the factory)
Buy these instead you get ten times the fuseable links and they're high quality, I've used 8 of mine already. [Then wire the positive to this female USB adapter] (https://www.amazon.com/dp/B00OXZ06I4/ref=cm_sw_r_cp_apa_seqXzb06KBW3B1292856) and ground the negative out to the body.
Dont get me wrong. This is very good work. If the point was to make is seamless into the car you nailed it.
However, this splitter would have only taken you seconds for the same result, electrically. Amazon
OPs link is the dual.
Pro tip. If anyone grabs this, buy 2x fuse taps (your proper sizing) so you don't have to have ugly wiring to your cig light port
---
Write down your values right now.
0 being the lowest, 10 being the highest.
A129 isn't a bad dash cam, but be prepared for your values to shift after ownership after a while. If you did your research, you know what you are purchasing. A129 2CH is what it is, as advertised.
---
Micro SD cards last about a year or 2, maybe 3, then die. They have a limited number of read/write/rewrite cycles. Some are not Dashcam rated (will say in the warranty use in a dash cam will void warranty.) Some dash cams are picky with Micro SD cards and reject them on an unknown criteria. Some dash cams have recommended brands of Micro SD cards.
So I don't know how Viofo parking mode activates under different situations.
1st wire (Postitive) -> Always on fuse = Parking mode; 2nd wire -> Ground wire (Negative) to unpainted bolt (completes circuit).
Or
1st wire (Positive) -> Ignition only fuse = No parking mode; 2nd wire -> Ground wire (Negative) to unpainted bolt (completes circuit).
1st wire (Bat) -> Always on fuse = Powers dash cam; 2nd wire (ACC) -> Ignition only fuse = Detects if parked or driving; 3rd wire -> Ground wire (Negative) to unpainted bolt (completes circuit).
I don't know how/if A129 changes from 2 -> 3 wire, or from 3 wire viofo -> 3 wire Power Magic Pro.
All Fuses, including Tap a fuse should match your vehicle's type. Mini/Mini low profile are the most common. There are also ATO, Micro 2, Micro 3, and Maxi type fuses.
Read your owner's manual for fuse box location(s) typically 2-3 in every vehicle - in/under dashboard (use this one), Under hood (avoid at all costs), In door (use able but not favored), and Trunk (Use able but not favored.)
The 2017s are plagued with the same and I didn't want to run a wire out of the single cig lighter outlet in the center console storage.
So I followed one guy's forum post, got a fuse tap and a USB converter and wired into the accessory fuse which for me is right next to where my left foot sits while driving. Ran the wires up underneath the steering column with some wire clips and good to go!
use a Mini Fuse Tap to tap into one of those fuses, then connect the black wire to a ground, and the red wire to the wire coming off the fuse tap.
easy peezy
Buy a fuse tap and a cigarette lighter socket. Then check your interior fusebox for an ignition-switched source. Tap into that then use whatever cigarette-to-usb adapter you want.
Hey dude!
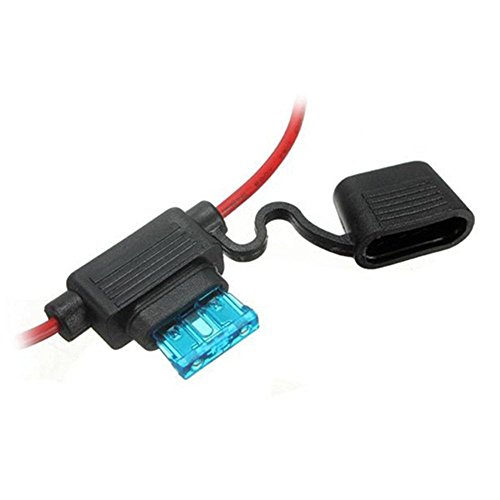
https://www.amazon.com/Parts-Express-Water-Resistant-Fuse-Holder/dp/B0002KR88A
Just make sure that's crimped/spliced somewhere between the positive lead of the battery and your fishfinder. Very Bad Things can happen should your fishfinder get dunked without it in place.
Do you have a test light? Start with the truck off see what doesn't have power. Turn the truck on and see what has power and then what it does. All of that is going to have 12v's just need to find one that has power at the key position you want. They make cool fuse taps that make it really easy
If your cig lighter is hot when the car is off then you can use that. You can also use a fuse split-er to hardware it without cutting any factory wires.
Like this...
https://smile.amazon.com/Mini-Fuse-Circuit-Adapter-Terminals/dp/B00AK0TGRS
If you use one of those make sure to get the right fuse type that matches your car and extra low amp fuses for the camera power line.
I would use this
Get a fuse box like this then attach wires to cigarette adapters. The fuse box is connected directly to battery with another fuse between them.
EDIT: Mind you, I'm still trying to figure out what size fuse, circuit breaker goes between them LOL
EDIT #2: Also, from this fuse box, you directly connect LED lighting, your cig adapters and any other 12v source you may have. All the fuses are in one place instead of in-line. Makes it easy to diagnose problems as you can just pull the fuse to work on something. Make sure to label!
EDIT #3: Also.. get some these fuses. It's cheap and now you have a ton of extras!
Model of? Dash Cam? I have this one (https://www.amazon.com/Rexing-Dashboard-Recorder-G-Sensor-Recording/dp/B00X528FNE), there's different versions/models from them. But I just wanted something basic and didn't want to spend a lot in case it turned out to be crap. Then you can get these https://www.amazon.com/10-Pack-Add-circuit-Adapter/dp/B01DYQM6EO and tap into a fuse if you don't have a free/open one.
It'll all work together well enough. Some will probably dog on you for buying a prefab box. But not everyone has the ability/skill/desire to build it themselves nor do they even care. When it comes to prefabs, I've found the QPower boxes to be pretty well built. Wish I knew the tuning frequency of that box, but hey, it'll be loud.
No, you don't need a whole second wiring kit for the LC2i. But you'll need some smaller, say 14 or 16 gauge, wire and a small inline fuse holder. 5A is more than sufficient. If you'll be doing more work on you/your friends car, just buy this kit now. Whole huge box for not much more money.
Here’s my write up on JeepForum
This is the fuse block I used
I used 6-position covered terminal blocks similar to these, although I got them for $3/ea at a local store
This was my ground bus bar. it was cheaper when I bought it, and 10-position is nice but I probably could’ve gotten away with less
These are the waterproof sealed relays I would recommend
This is the circuit breaker I wish I used, but I had the 150A on hand. I’ll probably swap it out at some point
Edit: to add on, I used heatshrink on noninsulated female disconnects so that I could have everything properly color coordinated for easier work if I needed to make repairs/modifications in the future. I only used 1/4” Red/Yellow/Black HS on the board :)
EDIT 2: I used the wrong link for my writeup. It's fixed now!
Subwoofer, Amp, 8 gauge cable kit, trim removal set, Fuse taps, and T-Taps
As for a guide, I just used other guides online and pieced them together. Really should have made a well-documented one when I did it, but I installed mine 6 months ago. Already forgot certain things. Just remember to look up the speaker wire colors for the back speakers before you tap into them and know that putting the power cord through your firewall from your battery is going to be a total bitch :)
Also just to clarify, the fuse taps are for the remote wire going into the amp. I tapped the sunroof fuse as it shuts on/off with the ignition (I don't have a sunroof, but it shouldn't matter if you do or not). Also also, that black cable going into my amp on the left side is a bass knob that came with the amp. That's wired all the way up into my glove box, so it can be adjusted easily if it becomes too much. The wires with kit and everything are long enough that you shouldn't need anything else, and everything tucks away in the door seem guides so nothing is showing at all.
I did that in my work truck.
USB is 5 volts, not 12. You will need a step down transformer. I used an 'add a circuit' to get switched power from my fuse panel. Ran the wire to a 12v plug behind my glove box. Then shoved a USB car charger into the plug. I ran a USB extension cable from the plug up beside my instrument panel and plugged in a 3 port USB bank. Now I can have three things plugged in at a time. The USB charger lasts about a year and a half to two years before it dies, but I use it heavily for work.
Add a circuit: https://www.amazon.com/dp/B01DYQM6EO?ref=ppx_pop_mob_ap_share
12v plug: https://www.amazon.com/dp/B074CT5CSN?ref=ppx_pop_mob_ap_share
I got a pack of [these] (https://www.amazon.com/dp/B015GYN38A/ref=cm_sw_r_other_awd_76MPwb4TCY4GW) so not to compromise existing circuits. Worked great for my A118C
5x20mm AGC Fuse Holder Inline , something like this. Maybe not such heavy leads.
To wire in, one side would connect; Power in, and pin 2 of both SSR's.
The other side; Controller pins 1, 5, and 7.
get a low profile fuse splitter.
https://www.amazon.com/gp/product/B01DYQM6EO/ref=oh_aui_search_detailpage?ie=UTF8&psc=1
So... I have to ask... did you know a resistor and a relay are completely unrelated functionally? As in, resistor resists, adding a load to the circuit, (for various reasons needed) and a relay uses a signal from one circuit to complete a wholly separate, circuit.
Therefore, I don't know why you'd use a resistor in place of a relay. Like, at all. Perhaps I need enlightenment there... :)
As far as what relay, in a car, a standard 12v car 'box' relay will do. This one's cool, it comes with a socket it plugs in to. These are cheap and just lying around in any auto parts store, however, and you can use female spade terminals if you want and just bolt it in somewhere handy.
Don't forget either an inline blade fuse holder or an AGC one, and I'd fuse it for, oh, 5 amps. Shouldn't need much, just make it fast blow, and enough amps to ensure the lights won't blow it, but it'll blow in a short. LEDs shouldn't need a big fuse, really.
Hope that helps ya.
Dead thread, but just for posterity's sake: I've started experimenting with these.
I think these can be utilized safely. I'm basing a build around a RapidLED aluminum enclosure. This allows me to earth ground anything I may bump in the tent. I've also bought inline fuse holders to limit the current on both legs (independently) of the AC (positioned as close to the main power cord as feasible.) Finally, a little kapton tape to cover the solder joints that can't be heat-shrinked (eg., right on the boards themselves, which are behind a the enclosure's plastic splash-shield to begin with.)
Just a little taste from today's initial testing, I think the 50 watt ICs may be a bit ambitious. I wired up three of them on my 20" enclosure, and even with the 92mm fan going (though in fairness, without thermal compound behind the boards) they were putting off a bit of smoke. Upon shutdown, none of the wires look melted, so I think the smoke must have been from the boards themselves. I'm not sure if this is some initial out-gassing, but I'm uncomfortable with it. I'm going to try again with some 20w & 30w ICs. The flicker that Big Clive talks about on his youtube channel wasn't very noticeable to my naked eye.
Sounds like you’re describing an add-a-fuse. Link for reference. E Support 12V 24V Standard Add A Circuit Fuse Tap Piggy Back Blade Holder Plug Socket Car Pack of 5 https://www.amazon.com/dp/B0146EB8EM/ref=cm_sw_r_cp_api_ut0OAbFR9K11N
Along with the converter you linked, use an Add-a-circuit to tap into your fusebox (make sure you buy the ones with the right size for your truck). Use a multimeter to find which fuses are activated when your key is in the ignition.
Personally, I'm using a cigarette lighter socket and usb adapter (like this) instead to wire in my dashcam, but they both do the same thing as the converter you linked.
The last piece of the puzzle is having your Pi shutdown gracefully (via a switch), or even some sort of battery backup. This will prevent corruption of your microSD filesystem, which might occur when simply cutting power to the Pi. There are a bunch of different implementations online on how you can do this.
Links to everything I used for my installation:
https://www.amazon.com/gp/product/B01G8HUTCW/ref=ppx_yo_dt_b_asin_title_o00__o00_s00?ie=UTF8&psc=1
https://www.amazon.com/gp/product/B00HNMLQAG/ref=ppx_yo_dt_b_asin_title_o01__o00_s00?ie=UTF8&psc=1
https://www.amazon.com/gp/product/B076F1WXRC/ref=ppx_yo_dt_b_asin_title_o01__o00_s00?ie=UTF8&psc=1
ADVMonster has some good controllers for auxiliary lights.
I made my auxiliary light circuit using instructions from post #2 here: http://www.klrforum.com/2008-klr650-wrenching-mod-questions/10863-power-source-aux-lights.html
My bike has a free 12v port that's only on when the key is in the on position which I used for the relay switch. I don't know what your bike has that's similar to it though.
I bought these:
DIGITEN 5x20mm GDC Fuse Holder Inline screw type with 16 AWG wire (Pack of 10)
Foxnovo Fast-blow Glass Fuses Quick Blow Car Glass Tube Fuses Assorted Kit Amp
HELLA 965400001 12V 30A SPST Relay with Bracket
I designed and 3D printed a waterproof holder for the relay and switch that I used. I can send them your way if you want.
clinometer
Removed the radio and capped it with abs plastic, fit it with a usb charger and [four of these switches in different colors] (https://www.amazon.com/gp/product/B001GH1PU0/ref=oh_aui_search_detailpage?ie=UTF8&psc=1) using these housings
the switches got to [relays] (https://www.amazon.com/gp/product/B017VDI0GY/ref=oh_aui_search_detailpage?ie=UTF8&psc=1) that are powered [by this fuse box] (https://www.amazon.com/gp/product/B00QMTAZ1W/ref=oh_aui_search_detailpage?ie=UTF8&psc=1) that is mounted to the top of the OEM fuse box under the hood.
Those power my OBHS and OBA. Other two switches not in use yet, hoping for rock lights/light bar some day maybe?
Removed the old fog light switch panel, replaced with abs plastic and volume control that goes to an amp that goes to a stereo jack that i just plug into my phone for music.
Just add an outlet by tapping into your fuse panel!!
https://www.amazon.com/gp/product/B013JXVG2U
https://www.amazon.com/gp/product/B0002KRC5Y/
The vehicle has a wire from the alternator to the battery. It is usually too small. If you connect your house battery charging wire at the alternator rather than at the vehicle battery you will improve the charging of the house battery without adding additional current and voltage drop to the charging path for the vehicle battery.
The wire from the vehicle alternator to the house battery gets the switch somewhere between the two. It doesn't matter where. If it is near either end or in the middle it doesn't matter. The switch instructions say to put it near the vehicle battery. It doesn't matter. The ohms are the same no matter where you put it. Make the wire as short as possible. Locate the switch out of the weather and wherever it is best to have a short total wire length.
Fuses protect wires to avoid fires. The size of the wire sets the upper limit of fuse size. The wire needs to be protected at every source of power. Your house battery charging wire has a connection to two sources of power. The house battery and the vehicle battery / alternator both feed the wire and both need a fuse. Mount the fuses as close as possible to their power sources.
The inverter takes a large DC current. A 440 watt blender using a 90% efficient inverter will need 40 Amps running, maybe twice that starting. Mount the inverter as close as possible to the house battery. If the inverter has its own fuse and the cable from the battery to the inverter is so short that it can't touch any ground even if cut or disconnected then maybe you don't need a fuse between the battery and the inverter.
The fuse box I used is:
https://www.amazon.com/OLS-PSZACCEPS051H-6-Way-Illuminated-Blade/dp/B00QMTAZ1W/ref=sr_1_1?s=automotive&ie=UTF8&qid=1478725271&sr=1-1&keywords=automotive+fuse+block
You connect a wire from the house battery to it, put in the fuses then connect the fuse box outlet connectors to your loads. Again, put a fuse at the battery to protect the fat wire to your fuse box. If the wire to the fuse box is short enough so that even if the nut holding the wire on the fuse box falls off the wire can't reach anything grounded then maybe skip the fuse.
Specific answers
1 and 2) Wire from alternator - fuse - fat wire - separator - fat wire - fuse - house battery. Then from house battery to inverter, house battery to fuse box, both with fuses if necessary.
3) fuse size depends on wire. For small loads just use #12 wire and a 20 amp fuse. For your fat wire for charging the wire size depends on the length. If you mount the house batteries behind the driver's seat and the alternator is on that side of the engine you can probably get by with 10 to 15 feet. At that length #6 would be the smallest I would recommend. For #6 I would suggest 80 amp fuses.
https://www.amazon.com/gp/product/B00W5SG2C0/ref=oh_aui_detailpage_o04_s00?ie=UTF8&psc=1
4) Standard blade fuses fit in the fuse box linked above, not mini.
https://www.amazon.com/120-Pieces-EPAuto-Assorted-Standard/dp/B01DYQ5T3O/ref=sr_1_5?ie=UTF8&qid=1478727709&sr=8-5&keywords=automotive+fuses
5) Grounds are equal in importance to the +12 wiring. Any resistance will drop voltage and cause problems. When 2 items share a ground connection and that connection gets high resistance the symptoms get strange and diagnosis gets difficult. For a battery ground you need a hole drilled and a bolt run through. Star washers on both sides of the steel are helpful. You must grind away any paint. Find some ground connections that already exist to see how Sprinter did it. The battery black wire is like what you need for your house battery. Small wires around tail lights are like what you need for your small loads. The inverter should be connected with a short fat wire directly to the battery. The separator switch needs a small ground like other loads. There may be small grounds around the van that you can add to.
6) The fuse box doesn't get a ground connection.
7) The biggest risk (but least likely) is burning down the van with an electrical fire. The most likely risk is making some small arcs and blowing some fuses. A likely risk is connecting something backwards. LEDS just don't work backwards. If you connect your inverter backwards it will likely blow internal fuses, maybe fry the thing. The fan may go backwards, maybe fry. If there is arcing that involves alternator current it could kill the alternator.
Now the fierce criticism. Those coolers will kill batteries and not keep your food cold. If your van is 90F inside and the cooler drops it 30 then inside the cooler it is 60F. Not cold enough. 55 Watts is 110 Amp hours per day. You need to have a volt meter to keep from killing your battery. Do not wire an inverter like you wire a phone charger. The inverter needs short fat wiring. Search the internet and you tube about crimp connectors for fat wire and for #12. Don't strip a wire and twist it around a bolt and then tighten a nut. Look at the way wires are done from the factory in your van. No sharp edges, no loose unsupported wires. Before working on vehicle wiring disconnect the battery minus wire.
For the sake of argument, I actually have the products I have linked. I have only one battery and no disconnect switch. I upgraded the vehicle battery size. I have a vent fan, LED lights, chargers, no blender, 100 Watt solar. That makes me informed and experienced, not expert.
https://www.amazon.com/gp/aw/d/B00QMTAZ1W/ref=mp_s_a_1_3?ie=UTF8&qid=1484512150&sr=8-3&pi=AC_SX236_SY340_FMwebp_QL65&keywords=12v+fuse+block
Here's a solid one.
Regular car batteries are made to have a lot of cranking power, and then stay on a trickle charge once the alternator gets going. Running the battery voltage down each night and charging it daily will kill the life of your battery (if it's not deep cycle).
Honestly, charging a phone (5w), running some small LED lighting (8w), and a couple 12VDC fans (6w) can all be done through your cigarette lighter port and won't be drawing more than 20watts. If you ran that all night, you would only be using 15amp/hrs or so of your battery; and if you get 8 hours of sunlight, you only need a 30watt solar panel to charge it back up. Whenever you are talking about solar though, you should plan on doubling your capacity to account for non-optimal performance, cloudy days, long winter nights, etc.
kieranmullen gives a pretty good rundown of what you would need to setup a separate 12v system but seems like overkill for what you are asking (and would run you about $300-400).
Personally, I would get a 100 watt panel, 7 amp charge controller, the cheapest 12v deep cycle marine battery from walmart, and maybe a 3-400w inverter (for a laptop charger or any other AC devices). Also, I'd put an inline fuse between my charge controller and load, and maybe another between the battery and charge controller.
I can answer the dashcam wiring for you. Best way that I have found is to use a fuse tap like this.
http://www.amazon.com/Qiorange--circuit-Adapter-Blade-Holder/dp/B015GYN38A/ref=sr_1_2?ie=UTF8&qid=1464329991&sr=8-2&keywords=fuse+tap
You will also need the appropriate fuse for that particular dashcam. And you will need a 12V to 5V converter for the dashcam. Like this.
http://www.amazon.com/Dash-Camera-Vehicle-Hard-Wire/dp/B00MH4ZVHO/ref=sr_1_1?ie=UTF8&qid=1464330070&sr=8-1&keywords=dash+cam+wire
PS: Best part about this one is that you can install an inline fuse, which is much easier to find an appropriate rated fuse than it is with the automotive fuses.
I bought mine a few weeks back pieced together on Amazon. I saw that listing too, but I skipped it because it looks like you get 4 different types of fuse taps. And you need two of the correct type. So I think you'll end up with one fuse tap that works and 3 that are useless, but I could be wrong. Here's what I did:
$10 coupon brings it to $160 for the A129 with gps mount:
VIOFO A129 Duo 2-Channel Full HD 1080p 30fps Car Dash Camera with GPS Logger https://www.amazon.com/dp/B07CT6JPYW/
VIOFO A129 Dash Cam 3 Wire Acc HK3 Hardwire Kit for Parking Mode https://www.amazon.com/dp/B07K83R5W1/
ABN Fuse Tap Fuse Holder & Fuse 2-Pack – 12V Add a Circuit Kit – ATM Low Profile Mini Fuse Blade & 15A AMP Adapter https://www.amazon.com/dp/B01BU59K90/
This is only ~$1.50 more than the listing you were looking at but it definitely has the right fuse taps.
Buy a kit that comes with a selection of fuses. If it's too late for that, you can get fuses at any auto parts store.
If that blade fuse is blown, I'd suggest replacing it with a newer fuse holder with some ring connectors crimped on. Way easier and cheaper than finding a new blade fuse.
Fuse Holder
Ring Connectors
Overview
Not wanting to spend hundreds on the RIGrunner series of distribution boards and being limited by their options, I decided to make my own versions.
I am new to electronics and I had no idea how to make PCBs a couple of days ago, so I need some help here. I will give some for free if someone help me with the technical problems or verify the files (more in the end), and of course I will make everything public for everyone to use personally.
About this board
This is the most simple and my first version. UNTESTED AT ALL at this point. It uses soldered/crimped 12ga wires, and [Keystone 3557-2] (http://www.mouser.com/ProductDetail/Keystone-Electronics/3557-2/?qs=cxy41lVAGV%2FfbyASjpXK1g%3D%3D) Fuse Holders. Fuse holder is rated for 30A, so is the contact. The fuse holders accepts both ATC/ATO and mini size fuses, and looks nice. The mounting holes are for 6-32 or 3mm size screws (0.142''/3.6mm ID)
Any problems you see with the design? Connectors placed too close/too far?
Component Cost
At the highest retail price (lowest volume), 7 holders and 7 connectors cost about $15, plus the cost of some 12ga wires (building wire). 7 good quality [Eaton fuses] (http://www.mouser.com/Circuit-Protection/Fuses/Automotive-Fuses/_/N-ba8b5?P=1yocc0hZ1z0s1g2) adds another 7 dollars, or you can get [120 pcs of cheap stuff] (https://www.amazon.com/Cal-Hawk-CAPCFM-Assorted-Truck-Mini/dp/B0045K2Q9Y/ref=pd_bxgy_263_2?_encoding=UTF8&pd_rd_i=B0045K2Q9Y&pd_rd_r=65EQMQKVBF7B5AFRSBNF&pd_rd_w=dzzaU&pd_rd_wg=pK73O&psc=1&refRID=65EQMQKVBF7B5AFRSBNF) on Amazon for the same price. In the end it should be less than $20 w/o the PCB.
Depending on where you get the PCBs made, it can be cheaper, or a lot cheaper than the commercial options.
Future designs
For future versions - what functions would you like to have on your power distribution board?
Case
I have some experience in CAD and CAM, so I should also be able to make some enclosures for whatever board I come up with. It should be pretty cheap for a simple folded sheet metal case or some machined plastic cover and mount them with standoffs.
Software problems / design checking
I'm using KiCAD - free, no licensing needed whatsoever. The files, both KiCAD files and Gerber files can be found [here] (https://github.com/cjm27/Powerpole-Distribution-Boards) on GitHub. I have two problems now:
If someone is experience with PCB manufacturing, I will really appreciate some verification before I send the files to production.
Thanks everyone for reading. 73
A 12 speaker system is going to need 3 4 channel amps at 4 ohms, and you will want a good dsp with an adequate number of line outs rather than relying on that many rca splitters. And that's without subwoofers. Then replacing those speakers is going to cost a pretty penny too. I would budget about ten times more if you want to use all those speakers
Dsp:
Alpine pxe-0850s- $700
https://www.crutchfield.com/p_500PXE0850/Alpine-PXE-0850S.html
Amp:
Pioneer gm a6704 or similar - $140x3, $420 total
https://www.crutchfield.com/p_130GMA6704/Pioneer-GM-A6704.html?tp=35782
Speakers:
Infinity reference 6.5 or similar - $75 a pair, 6 pairs- $450
https://www.crutchfield.com/g_473750/6-6-1-2-6-3-4-Speakers.html?tp=78072
Head unit:
Doesn't really matter what you buy with the dsp, as long as it has at least 4 pre outs
Jvc kd-x360bts - $70
https://www.crutchfield.com/p_105KDX360B/JVC-KD-X360BTS.html?tp=72310
Install:
You'd need some serious custom work to get 3 amps and a dsp installed, no one makes a wiring kit for that.
Large fuse block - $35
https://www.amazon.com/gp/aw/d/B078SCQJNM/ref=sspa_mw_detail_5?ie=UTF8&psc=1
0ga Inline fuse holder - $10
http://www.knukonceptz.com/mobile-audio/inline-fuse-holders/sp/bassik-0-gauge-anl-in-line-fuse-holder-with-fuse/
25 feet 0 gauge power/ground wire -$25
http://www.knukonceptz.com/mobile-audio/power-wire/bassik-power-wire/sp/bassik-0-gauge-power-ground-wire-red/
100 feet 12 gauge speaker wire - $20
http://www.knukonceptz.com/home-theater/speaker-wire/bassik-speaker-wire/sp/bassik-12-gauge-speaker-wire-audio-cable/
20' 4 channel rca cable - $25
http://www.knukonceptz.com/mobile-audio/rca-cables/karma-v3-rca-cables/sp/karma-v3-twisted-4-channel-coaxial-rca-cable-20-feet/
6x 3' 2 channel rca cable - $1.79 a set, $12 total
http://www.knukonceptz.com/mobile-audio/rca-cables/bassik-rca-cables/sp/bassik-twisted-pair-2-channel-ofc-rca-cable-1-meter-3-feet/
Metra dash install kit - $11
Metra 99-3002 Dash Kit For GM Truck And Van 95-05 https://www.amazon.com/dp/B00029X1LO/ref=cm_sw_r_cp_apa_i_ACOHDb99YRAGC
Metra radio wiring kit and antennae adapter- ~~$25
Various fuses, wire terminals, cable management, ferrules, tools etc - $50
Total- ~$1853. Budget $2000 for shipping, taxes, unseen extra costs
You car has "mini fuses" and I get an assortment from Amazon. The ratings range from 5 amps to 40 amps.
This is the set that I have: https://www.amazon.com/dp/B0045K2Q9Y/ref=cm_sw_r_cp_api_ERyszbQ91N786
X2,
My camera didn't come equipped for hard-wiring so I had to clip the cigarette lighter plug off. I bought an add a fuse adapter, and spliced the positive into it, and ran the negative to a ground terminal by the fuse box. The wires are totally concealed, and I still have my lighter outlet for charging my phone. I didn't have to remove any panels. I was able to tuck the wires inside from the edge.
I tapped into the fuse box using one of these. I ran all wires behind the trim. Took me 30 min to install.
Floor lights: https://www.amazon.com/LEDGlow-Million-Color-Underdash-Interior/dp/B004N6YRDS/ref=pd_day0_263_3?_encoding=UTF8&psc=1&refRID=BCYSQ22HXC5N63B4ZG2H
Add a fuse circuit: https://www.amazon.com/10-Pack-Add-circuit-Adapter/dp/B01DYQM6EO/ref=sr_1_5?s=automotive&ie=UTF8&qid=1511740880&sr=1-5&keywords=car+wire+taps
You will also need a 5 amp car fuse. Auto zone has them for about 1$.
Use the hood release bolt as a ground point for the lights.
If you run the wires correctly it looks 100% OEM I set the LED color to match the red trim on my car and it looks so good!
Zip ties help and a coat hanger to run the wires through tough spots.
these add a circuit work great and allow for a fuse on both the original circuit and the added one. As long as you aren’t drawing crazy amps where the original wires can’t handle it your fine. A cell phone booster should be fine
The way I setup my LEDs is I wired the lights directly to the battery with an inline 5A (I believe....might be way too high, could be around 2A, I don't remember, just calculate what your lights will draw) fuse on the ground.
Here is what I used (not the same brand etc etc, I got mine at a PepBoys for double that price because I was impatient), and it worked great!
EDIT: this will provide you with constant power, which is what I wanted because I can switch the lights on without having to turn the key. Great ambient lighting for relaxing in a lot at night.
That will work. It's so you don't pull your power from whatever accessory line you use. Otherwise you can pop fuses. You connect your accessory to the relay switch side. Run power and ground from good sources. Either at the fuse block or battery. They have easy to add fuses that will give you a fused power source. Not the best. But fine for what you're doing.
https://www.amazon.com/gp/aw/d/B013JU4K76/ref=mp_s_a_1_1?qid=1465361189&sr=8-1&pi=SY200_QL40&keywords=20+amp+add+a+circuit&dpPl=1&dpID=41yEQHvf8XL&ref=plSrch
Run this to your relay. Then use the output of your relay for switched power
There are lots of other ways to do this. This is what I feel is the right way
On my car with how I have the Android mirror wired up it turns on with the key on ACC or when starting the car, and the Android mirror stays powered until I turn the key to OFF.
It took a lot of probing around to find the fuses I needed to tap off of, but the Android mirror came with a cheap but usable power probe tool that works even better than a multimeter for finding fuses with and without power.
I ended up using the two fuses:
I also used "Add-a-circuit Fuse TAP Adapters" to tap off of the fuses so I did not have to cut or tap off of wires:
https://smile.amazon.com/gp/product/B01DYQM6EO
The only other wiring is connecting both fog lights together and passing the fire wall. The wire has the two connectors for the lights, 2 grounds, and comes together to connect with the fog light line by the the reservoir.
I'd take some pictures, but I needed to put the bumper back on..
The eBay kit came with another set of wires but that was just an extension in case the fog light line was too far away. So the only other wiring is the harness in the pictures.
Would you like more detailed picture of that?
I know the green plug is for the button and I'm assuming black for ground.
The little black box things with the two red wires does have a 15 amp fuse in it.
It was just confusing me that the two red wires had connectors on them.
What is the proper way for finding wires with the correct Volts and Amps?
In order to avoid the splicing, could i use something like this?
I actually just bought this for a project on my jeep. Works really well and is pretty small.
Here is what I crudely drew
This is the Radio
This is the Fuse Box
Basically where the fuse is going for the Radio I was wondering if I could cut them off and have it go from the fuse box to the radio and put a 15 amp fuse in and get the same results.
The fuse box on the radio is supposed to be plugged directly to the battery for max power but the auxiliary fuse box will be plugged the same way.
If not that's fine I just wanted to make sure before I went and cut it out and I will just run a wire from the battery to the radio.
Do you have a multi meter? Is the battery dead? Seems like a silly question, sorry. If that's all your going to run off your fuse block, you might not need that heavy duty thing. The only thing drawing the most amps is your bilge pump. I'm guessing around 15 amps. You won't need the ground bus bar if everything is on the battery. The negative side will essentially keep everything grounded.
I would think you only need something like this.
http://www.amazon.com/gp/aw/d/B00QMTAZ1W/ref=mp_s_a_1_3?qid=1457629487&sr=8-3&pi=SL75_QL70&keywords=auto+fuse+block
You just need to hook up the positive side of the battery to the post. Then properly fuse each output. Then run a return line to the negative terminal of the battery.
Most of my experience is navy radios and wiring police cars with all their sirens,lights, radios and what not.
Our grounds were essentially the body of the car which is connected to the negative end of the battery.
Just pay attention to your wire Guage too.
Typically no since there might be a 'spot' in the plastic molding of the fuse block, but if there are no metal contacts underneath, short of taking the whole fuse block out and modding it, you can't get there from here.
Most fuse blocks are setup to have a power 'bus' which connects the input side of the fuses to switched and/or constant battery power, but I've never seen a way to add a bus that's not there.
There are many 'add-a-tap' products that let you piggyback off another fused circuit. Ideally choose a less-critical circuit like your radio power circuit to hack into.
https://www.amazon.com/Qiorange-circuit-Adapter-Blade-Holder/dp/B015GYN38A?ref_=fsclp_pl_dp_2
You want to check that the fuse you select is off when the key is off, and on when the key is on - assuming that matches the relay wiring for the isolator.
Something like this is pretty handy for tapping into the fuse block.
https://www.amazon.com/gp/product/B0146EB8EM/
You have a few options:
The usual cautions/warnings apply with respect to identifying the correct lead/contact that you're tapping the power from, how you make the connection(s), and disconnecting the ground lead of the battery before working.
I used fuse taps when I wired mine: https://www.amazon.com/10-Pack-Add-circuit-Adapter/dp/B01DYQM6EO (I didn't get these specific ones--my dashcam came with some already). Find a place in the fuse box to tap into switched or always-on power, plug in the original fuse, plug in the dashcam fuse, wire your power up to the other end, run it however and that's about it. No need to cut any wires or splice into anything with T-taps.
https://github.com/fochica/fochica-wiki/wiki/Fuse-tap-guide has lots more detail.
sure.. you can.. if you don't want a working camera..
You're going down the right path.. you'll need a hardwire kit like that and a fuse tap like this
The hardwire kit I used after research and recommendations from this subreddit
Just today I did my hardwire for my A119S off the front passenger fusebox with the 2 exact items I linked.. I found a fuse that was ignition on/off and spent about 5 minutes doing the work.. spent about 3 times as long routing the cable in a nice fashion around the a-pillar and window...
Every random shutdown I've ever experienced has been traced to a power issue. My mobile rig had corrosion at the battery terminal which started out as random shutdowns during high power tx and progressed to shutdown during any power level tx. Fixed that by putting a fuse box tap inside the cab of the truck (https://www.amazon.com/gp/product/B0742BZXC2/ref=ppx_yo_dt_b_search_asin_title?ie=UTF8&psc=1) on an unused power source.
The other problem I had was my HF rig wouldn't put out max power on tx. Turned out a power management box I had in the power chain was dropping about 1.6 volts, resulting in the HF radio either shutting off or transmitting less power. Removed the offending box and all is well.
Moral of the story: Even if you think your power supply circuit is good, check it thoroughly!
Most are right below/in-front of the rear view mirror, trying to minimize the amount of view they are blocking while maximizing their own view. Note that your state/location may have laws about where you can place them.
I bought a second one for my rear window but haven't installed it yet.
I don't know what people "usually" do, but I'll be hard-wiring it myself (running a wire from a fuse tap at the fuse box to behind the glove box where it will power a splitter which will power the USB cords to both cameras).
I used these. No extra switch when i turn my key the lights come on. https://www.amazon.com/dp/B01DYQM6EO?ref=ppx_pop_mob_ap_share
Remove the dash piece under the steering column and then the metal plate behind it to gain access to the main ignition harness that goes up to the steering wheel. Cut back the wire loom and look for a heavier guage solid pink or pink with black stripe wire. Make sure to test it with a dmm that it goes from 0 to 12v with the key turning on and off. You will need to get an inline fuse holder like this: http://www.amazon.com/gp/aw/d/B0002KR88A/ref=mp_s_a_1_2?qid=1452992553&sr=8-2&pi=SY200_QL40&keywords=inline+fuse&dpPl=1&dpID=41xeCvxvLdL&ref=plSrch and a 10 amp fuse to go in the fuse holder. Solder one side of the inline fuse holder into the pink or pink/black wire and wire an extension wire to go from the other side of the fuse holder up to the radio. Wire the extension to the red ignition wire of the aftermarket deck harness and test that it turns on and off with the key. Once that's done bolt the metal plate back up then the under dash and put the rest back together.
Hi, thanks for the reply! Dealing with AC power seems a bit scary for a completely unexperienced person like me. I was trying to stay away from inverters, but I may not have a choice with my laptop. How much efficiency is lost from going from 12v to 110 to 19? On a separate note, have you had any experience with wiring 5v usb charger ports to the battery? Could I just use dc to dc converters with heatsinks?
 
Also, I'm a bit confused about the fuses. Right now I'm planning on hooking up the battery to 3 switches (master, 12v cig outlets, and usb), two 12v cig outlets, and two usb ports (usb on one connection). Between those things, I was thinking of setting up a fuse box with one of these with a 3a fuse for the usb ports and possibly 5a for the car chargers? I don't know if it would be better to use 3a since I'm just going to have a dew heater and maybe (if I can find an adapter) a charger for my laptop.
If I were to use the kind of fuse setup you mentioned, how would that work? It says it includes 40a fuses, would I just replace those with 10/15a? Also, if I were to use those wire fuses for each connection rather than a box like that, is there any downside to using different gauge wires? The website mostly says those wire fuses are 10 or 12 gauge while I was planning on using 16. I'm honestly not sure if I even need 16 for the setup or if I should just go with a thicker wire like 12 gauge for the entire setup.
 
I'm very interested in those powerpole connections.Do you have an example on your setup on how they are connected to the different components both inside the battery container and outside? Did you use the powerpoles on the inside or just normal wiring with insulated terminal connections?
>Edit: For external use of those powerpoles, would you remove the 12v adapter male end from the wires on the device, connect the wires to their associated powerpole connection, and then plug that into the powerpole box?
 
Thanks!
I would use one of these to tap into a fuse that only comes on when the key is on, rather than tapping directly into the lines. You should be able to find them at any local auto parts store, walmart should carry them too.
I wouldn't run the LED's in parallel, especially with strip lighting, you'll have inconsistent brightness across the strip, and may well cause the whole thing to burn out. Always do it in series.
It's really, really easy to add your own ambient lighting to the Focus (or any car really). Most LED strips are already 12v. They'd need an adapter from house wall power but in a car (the vast majority of them anyway) the 12V circuits are already there! If you're concerned about your own electrical knowledge they make kits too; they're pretty inexpensive and you could splice open that cigarette adapter line to wire it in directly or get something like this. Personally I'd buy my own strips, controllers, and hard wire it though (make sure you confirm controller works with your strip). Since you're in the footwell I'd also recommend weatherproof but it's not super necessary since it won't be directly exposed.
You could tap in to an accessory line/fuse to have them always on or get fancy and wire them in to the dash lighting for when the headlights are on so that they only come on at night. I just used these fuse taps the other day for a dash cam and radar detector install; make sure you have the right fuses for your install though. I had to pickup some lower amperage ones to properly protect my lower amperage gear.
Some LED strip lighting is easy to adhere or screw down depending on your preference and you can even get RGB and an IR/RF/bluetooth controller to customize.
Anyway, the whole thing should take nothing more than an hour or two and less than $100 in parts.
Friend, "super confused" and a 72W battery stack start to make me nervous about advising you. Here's a pic about how to connect a BMS. https://imgur.com/a/eeh7C4h
Short circuit fault currents can be really high. I highly advise you to fuse your battery as close to the + terminal of your holder as you can. I like this automotive type: https://www.amazon.com/Nilight-Harness-Automotive-Standard-Warranty/dp/B0002KR88A
The 7.5A fuse would be a good starting choice.
be safe.
Blue Sea Systems 5035 ST Blade 6 Independent Circuit Fuse Block with Cover https://www.amazon.com/dp/B006VELERM/ref=cm_sw_r_cp_apa_qzcJBbGV5KY2Q
120 Pieces - EPAuto Assorted Car Truck Standard Blade Fuse Set (5/7.5/10 / 15/20 / 25/30 AMP) https://www.amazon.com/dp/B01DYQ5T3O/ref=cm_sw_r_cp_apa_dDcJBb1W0PM5K
> I'm comfortable with soldering and electricity in general but not auto-wise.
Me too, I hadn't done anything like this, but it wasn't too hard. I crimped instead of soldering because I figured it wouldn't make a difference, and didn't want to move my soldering station, but either way works.
I used this tutorial to remove the pillar and run the wires up to the windshield.
I hid all the wires above the fuse box, essentially behind the little storage cubby on the left side of the steering column.
Finally, I used this type of add a fuse (there are a bunch of similar products but they're all about the same. Any auto parts store will carry the same thing). If you look in your owner's manual, you can find which fuses are switched (on when the car is running) or running straight off the battery (on all the time). So, depending on whether you want it to run when parked or not. If you want it to run while parked, I'd recommend getting a battery setup if you want to run it as a parking monitor.
In relation to your PRHT squeaks, I have no idea, since I have a soft top and haven't had issues with it. Maybe try browsing around on Miata.net.
Let me know if you have any more questions.
Lights don't "pull 12v", they need 12v to work and then use/pull X amount of amps. I think you're confused by the difference between volts, amps, and how fuses work. Voltage is like the measure of force moving the electricity (electrons) through the wire, and amps is the measure of how much electricity is moving through the wires.
The fuse numbers are the rating that the fuse blows at, not how much that circuit uses normally. Like if your radio only uses 8A peak, then it would run through a fuse that is rated at 10A, so if it ever spikes above 10A, then the fuse blows and opens the circuit to protect from damage.
Anyway, I would pick a fuse slot that powers an accessory, like the radio fuse or the 12V accessory port(/cigarette lighter. Whatever you call it). So if the fuse were to blow, the only thing that is affected is just the lights and the accessory port.
Easiest thing to do is get a fuse tap and use it to install your lights. That way you don't have to cut any wires on your car and everything is properly protected. Something like this: https://www.amazon.com/10-Pack-Add-circuit-Adapter/dp/B01DYQM6EO/ref=sr_1_3?keywords=fuse+tap&qid=1571284619&sr=8-3
https://www.amazon.com/Audio-Stereo-Distribution-Block-Ground/dp/B078SCQJNM/
I saw that thing on Amazon like a year ago. Interesting to see one in the wild
was looking for something similar to this Audison block as an all in one distro solution:
https://www.amazon.com/Audison-Connection-Mini-Distributor-Masseverteiler/dp/B005C8MLZW/
....
afaik, those are really the only two options for blocks of that style.
Is there any reason why you wouldn't just buy a normal 12v relay and run it to the ignition switch from the fuse panel instead of spending $60 on one with a relay built in? For example use these:
https://www.amazon.com/OLS-6-Way-Blade-Indicator-Protection/dp/B00QMTAZ1W/ref=sr_1_3?ie=UTF8&qid=1497658098&sr=8-3&keywords=fuse+panel
https://www.amazon.com/OLS-Split-Charge-Relay-Switch/dp/B01MYPTVJD/ref=sr_1_1?ie=UTF8&qid=1497658136&sr=8-1-spons&keywords=12v+relay&psc=1
I'll be using inline fuse holders like this one: http://www.amazon.com/Parts-Express-Water-resistant-Fuse-Holder/dp/B0002KR88A/ref=pd_sim_263_4?ie=UTF8&dpID=41xeCvxvLdL&dpSrc=sims&preST=_AC_UL160_SR160%2C160_&refRID=15HM852D3AFHRX18VJ0X
Pops are caused by slight differences in timing of +/- power supplies reaching their design voltages. Better amplifiers should have muting circuits/output relays to prevent this. The only time that changing input volumes will have an effect is when the pop originates from outside the amp (mixer, xover, EQs, etc.). If your Bryston pops with nothing connected in to it, have it checked out.
Also, make sure to add in-line fuses when testing, if not permanently. NS-10s can be pricey to repair.
I had a studio client replace many NS-10 drivers because some client complained "the fuses corrupt the sound." I added internal fuses and they charge the complainer for a repair every time a speaker stopped working. Funny how complainer never noticed the corrupt sound. I got paid every time I had to open speakers to replace fuses.
Edits: typos
Thanks! It was definitely a goal of mine to have all the wiring as tidy as possible. I suppose that's why the setup still doesn't work :). I could just toss some relays and inline fuses under the hood and be done with it, but I'd rather build a housing for that stuff. I'm hoping to find a water resistant plastic box that's big enough for at least 8 fuses and 7 relays. I'd use something like this perhaps for the positives, and a smaller bus for the negatives. I'd like to mount the whole contraption on top of the brake booster. I'm struggling with that right now, though, trying to source a good sized box and figuring out how to mount it.
Thanks, so I just need to buy two identical Mini fuse taps?
like this kit? https://www.amazon.ca/DIGITEN-Assorted-Inline-circuit-Adapter/dp/B01G8HUTCW/ref=sr_1_5?ie=UTF8&qid=1549426538&sr=8-5&keywords=mini+fuse+tap OR https://www.amazon.ca/Qiorange-circuit-Adapter-Blade-Holder/dp/B01J9GTL6O/ref=sr_1_1_sspa?ie=UTF8&qid=1549426538&sr=8-1-spons&keywords=mini+fuse+tap&psc=1
I'm confused about why you've twisted the red and yellow together (rather than yellow to black), as he used a simple two-wire piezo in the video... Regardless, as you've got it, do you get a buzz with the engine off, headlights on, and black grounded (to the engine block or the AC fuse, as you've got it)?
Would you describe how you wired the buzzer to test it (what you connected each wire to)? I think you're super close to getting this working -- if you haven't got it already.
Edit: For you or others, I'd recommend implementing a fuse tap to safeguard the addition you're making to your electrical system. You could use the same amp rating of the fuse you're tapping.
Hey, thanks!
I'm going to go into detail on the equipment I bought with my next video (and I've got a really fascinating powerpoint presentation where I try to explain a little electrical theory without putting everyone to sleep). I'll answer your question here though:
I started with a kit that came with the wires you're asking about. The solar panels have those short (2 or 3 feet) wires that end with what's called an MC4 connector. The wires have the MC4 connector on one end, and a bare wire on the other. The MC4 is a weatherproof, snap-on connector.
For the second panel, I had to get the MC4-tipped cables separately. From browsing YouTube, it looks like you can save some money by buying the connectors alone and splicing them onto a wire. I didn't feel like messing with this.
I got all my stuff on Amazon. Here's the list:
The parts for my installation came out to a little over $400.
Hope that helps! :)
It’s this one.
I’m thinking about picking one up soon. Seems like a great deal and will help simplify installation of several amps/dsp.
You can use these to make hardwiring easy to install, safer (each device has their own fuse), and quick to uninstall. https://www.amazon.com/dp/B01BU59MFW/ref=cm_sw_r_cp_apa_n7e5ybQFXY5SR
Then I usually use this for the ground wires and connect it to a clean metal part near the fuse box. https://www.amazon.com/dp/B00QSBAD8O/ref=cm_sw_r_cp_apa_u-e5ybFTTHNQG
I have used this for multiple different hardwire installs and they have all worked great and have never had an issue.
If you tap off the cigarette lighter and it is a 10A fuse or larger you will be fine as long as you aren't literally trying to use it as a cigarette lighter (the red glowing thing) as well. Buy some of the correct sized fuses for your car as spares off eBay for really cheap (or harbor freight) and keep them in your spare tire well. They can be a life saver. Never ever ever... ever... put in a larger fuse than what originally came in the fuse slot. The fuse is there to protect the wiring, not the devices.
Now, you can use a tap if you'd like and be fine if and only if you use the stock fuse and then a 5A fuse for the dash cam. Most dashcams only use 2A and they are getting more and more efficient so you should be fine. This method means you have to run it through the firewall which will suck. Plus you would likely have to cut a hole in the fuse box lid which could let water in which is bad. Do you have an auto-dimming mirror? You can splice power off of that too.
edit: By fuse tap I mean one of these: https://www.amazon.com/10-Pack-Add-circuit-Adapter/dp/B01DYQM6EO . Do not use the kind that just wedge in alongside the stock fuse. Those will stretch out the fuse prong slot.
Yes, also, you might want to consider adding a relay and fuse block for accessories:
[Relay]( https://www.amazon.com/dp/B078T8CMF6/ref=cm_sw_r_tw_dp_U_x_bqmiDbBMSEFWX via @amazon)
[Fuse Block](https://www.amazon.com/dp/B00QMTAZ1W/ref=cm_sw_r_tw_dp_U_x_yrmiDbE7ZJ4HY via @amazon)
Wiring Guide
The fuse block should be under the seat/tail in a protected area.
Ok, so if I want to switch them all with one switch I should ideally have a switch that can handle 15a+?
 
So run the 5v and ground cables to all the strips in parallel from the power supply to get even illumination? I'm assuming the reason to do this has to do with voltage drop across 5m of LED's.
 
So something like this fuse box holder with a 15a fuse on the wires powering the LED would do it?
> they give off gases that may be dangerous. Is that anything to worry about if I have a roof vent fan and another fan running inside while I sleep?
Nah. Even if you were to leave a dead battery charging in the sun, or a full battery depleting in the dark, you'd notice the gas (smells like rain) before it'd become an explosion hazard, and it's gases that'd wake you up and make you feel uncomfortable enough to start changing something before they could hurt you from breathing them. It's not like Carbon Monoxide, which will make you sleepier while killing you or anything. One has to kinda try pretty hard to enclose it (made even more difficult in a vehicle), with way more battery, to get an explosion or fast enough asphyxiation with that kind of stuff. Just ventilate all the time, even if passively, like you said.
> I'm confused as to how I hook up 12v outlets to my charge controller so I can actually charge things.
I know some controllers have load monitoring, but I find that feature pretty much useless, and it's the only reason I can see to hook up loads through the controller. Maybe put your fridge on it, in case your battery bank takes a dump, so you don't also lose a fridge full of food, but otherwise, I prefer to run the solar charger straight to the battery, and run all loads off of the battery. I like to use one of these as my positive bus bar and "main" distribution, right off the house bank. One fuse for alternator charge circuit, one for solar, one for inverter, and one for less-demanding loads through a guy like this.
I think you and I use very different devices then. I've seen plenty of glass fuses on circuit boards and thermal fuses that self-reset.
Anyways, to OP's question, I do not believe you should install a switch like that without a 3 amp or less fuse inline, even if it's one of those glass fuses in a "container" it'll make sure your switch doesn't get overloaded.
https://www.amazon.com/DIGITEN-5x20mm-Holder-Inline-screw/dp/B00VLBAF84/
Fuses are a fail safe in case there is a surge, they don't control how much current goes through the outlet. But even if there is a surge you still have the charger as a secondary fail safe. If the bigger fuse still blows, then it's the charger. Car fuses are dirt cheap at a few cents a pop, and you should have them in glove box anyways.
http://www.amazon.com/120-Assorted-Truck-Mini-Fuse/dp/B0045K2Q9Y