Best brewing & fermentation equipment according to redditors
We found 467 Reddit comments discussing the best brewing & fermentation equipment. We ranked the 150 resulting products by number of redditors who mentioned them. Here are the top 20.
We found 467 Reddit comments discussing the best brewing & fermentation equipment. We ranked the 150 resulting products by number of redditors who mentioned them. Here are the top 20.


You raise some good points, but your attitude sucks. Anyway, here are the answers you are looking for:
The comic is definitely vague; it ends with "let age", but knowing how to rack and age wine is an art all in itself!
TL;DR: If you know nothing about dandelion wine then this comic is a nice primer to which is actually a fairly simple process. It leaves out some details but you probably shouldn't be making wine from a comic's instructions to begin with.
Source: I make dandelion wine, so I guess you were right.
I don't know of any good comprehensive tutorials, but I can write a bit of one up for you. Do some googling. This website is a good source of information and I refer to it quite often.
The problem with a tutorial for how to make wine is that there are so many variations and methods from extremely simple to extremely complex.
The first wine I made was from store bought grapejuice just make sure you're getting it without preservatives as the preservatives can screw it up. You can do this for about ~$5. If you have a home brew store nearby I would recommend going there, but you can also order online.
After the week and a half, you will have a drinkable young wine with lots of yeast sediment in the bottom. It will taste alright though (maybe a bit fizzy and slightly sweet). Just pour carefully to avoid getting sediment in. Don't bother letting this one age, it will turn bitter if you don't get it off the sediments so go ahead and drink it. This is more about just understanding the process and proving to yourself you can do it.
You need a bit more equipment and to spend some time reading to go much past that point. As an example, the wine above will be cloudy. Typically you would "rack" the wine off the sediment into another container and continue letting it sit. You might do this several times over the course of a year. The flavor profile will change drastically over that time, the wine will mellow out and taste less "alcoholy" and it will slowly clarify as the yeast settles out. You need to research pectic enzymes for fresh fruit fermentations, and also probably read about acid, tannin, and campden tablets to get really good results or to let it age for extended periods of time. You can also get much better results out of whole fruit (i use frozen) than juice, but its a bit more involved.
The one piece of advice I would give you is that when you start buying equipment, skip the 1 gallon jugs and fermenting buckets. Go straight to the 5 gallon. 1 gallon is 5 bottles of wine, but its the same amount of work to make 1 gallon as it is 5 gallons. Much better to make 25 bottles at a time. I have gotten lazy lately, but for awhile I kept 3 batches going at any given time and was able to have more than enough to only drink wine I made and never buy alcohol.
Edit: Alternately, you can buy wine making kits that will produce really good wine. The problem is you need the equipment and they are expensive. I avoid them because I calculated out that the kits using good wine grapes average ~$4 dollars a bottle, where as ones I make from fresh fruit generally average ~$0.50 per bottle. Most people are a bit surprised, but a blueberry, blackberry, or strawberry wine can be every bit as good and complex as grape wine.
Start with a small batch just to make sure you like it. Chop up the habaneros, and put them in a quart-size mason jar. If you want to add other things like garlic, onions or the like, feel free. Or just straight habaneros. Now, make a brine - take 975 grams of distilled water and 25 grams of kosher or pickling salt (don't use iodized salt) and mix it together until the salt dissolves. Pour this brine over the peppers, leaving about 2"/4 cm space at the top of the jar. You should have plenty of brine left over, so pour some into a ziploc bag and seal the bag. Put this bag in the jar on top of the peppers, so that it holds the peppers submerged under the brine - you don't want any pieces of pepper floating at the surface, so make sure everything's submerged. Cap the jar (it's a lot easier if you get some lids like this or this), and set somewhere warm (around 70-80F). Within 24-48 hours you'll start to see bubbles and fizzing - fermentation is underway. It usually goes anywhere from a few days to a couple weeks. If you don't have those airlock lids, you'll need to burp the jars a few times a day - just crack them open a little bit to release the pressure. After 2 weeks or so, they should be done. You can then smoke them - take them out of the brine, and pop them into a smoker. Cold or hot smoke - dealer's choice. Fruit wood is best - peach if you can get it, apple otherwise. Smoke them for a few hours, then pop them in your cabinet to dehydrate all the way down and blitz them up into your powder.
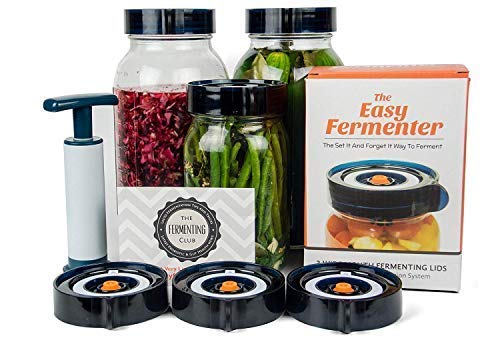
dude, just pick up a three pack of these:
https://www.amazon.com/Easy-Fermenter-Wide-Mouth-Lid/dp/B01DJVVORE
so worth it.
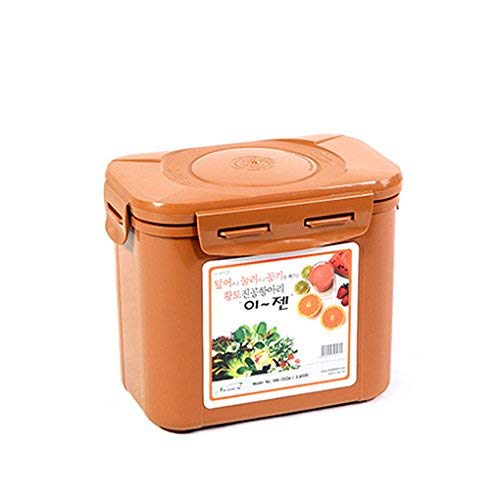
https://www.amazon.com/jen-Kimchi-Container-Probiotic-Fermentation/dp/B00SWBJJQ0
For the lazy
Fermentation crock like you make kraut or kimchi in.
Also, it's incredibly simple to make. Here is a very basic recipe to make cider. I would recommend using a glass bottle and a real airlock like that to make it, simply for sanitary reasons.
I would think that a water lock would be the best method. These are mostly used for brewing beer.
I think heating is easier to control than cooling. The solution really depends on your budget.
I think there are essentially 3 pieces.
I also saw a video where instead of (1) they monitored the temperature manually (E.g., with a cheap $1 thermometer sticker) and then they used a standard cheap electrical timer ($10) that you might have anyway and configured the toggles so the heater came regularly and long enough to maintain the desired temperature.
If you want to make 1 gallon batches, which I recommend for beginners, buy a two gallon bucket. You want the extra space because your batch size will really be 1.25 gallons so you can top off your secondary. When you mix the mead for the first 4 days to add oxygen and degas CO2, it will foam a bunch and you dont want a mess. After you mix the mead, add nutrients. To learn more about nutrients, google "advanced nutrients in meadmaking"
There are some things in your description that could be cause for concern. I'm going to address specific details in your post, and include a link at the end. Please make sure you read through the link at the end!
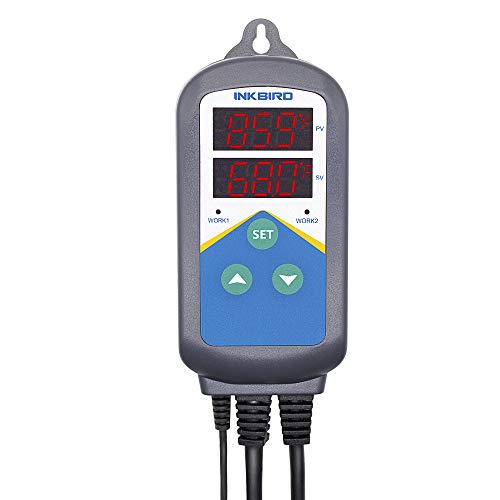
First, is your heat pad hooked up to a thermostat? If not, unplug it and do not use it until you have a thermostat. A thermostat is even more essential than a thermometer. An unregulated heat pad is dangerous. Do NOT use a heat pad without a thermostat, or you risk serious burns to your snake! Two inexpensive models are InkBird and Jumpstart/Hydrofarm.
Thermometers and humidity gauges are also very important. Ball Pythons have specific heat and humidity needs. They will reject food, get sick, or have bad sheds if their temperatures and humidity are not on-par. Don't wait on this! And don't waste your time on analog dials. Start with an inexpensive digital thermometer/hygrometer to make sure your conditions are accurately monitored.
Neither the "daytime" nor the "infrared" lights are really appropriate. Snakes can see the light from both. You want a bulb that can be left on overnight without bothering the snake. Plus ambient light from a window is usually enough unless your room is particularly dark. Ditch both of your current heat lights and get a single Ceramic Heat Emitter bulb instead. It emits heat, but no light, and can be left running 24/7. ALSO get a lamp dimmer for your heat lamp, so you can more specifically control its heat output.
Next, ball pythons really should have two hides, one on the hot side and one on the cool so they don't have to sacrifice feeling safe to thermoregulate. Please get a second hide!
Now, with those specifics addressed, I highly recommend you read the following link dump by _Ataraxia. She did a good job compiling the most common advice on this sub. Pay special attention to those care sheets - read them all the way through.
You'll likely find things about your current enclosure (like aspen, which has a tendency to mold and doesn't retain humidity well) aren't quite appropriate for proper ball python care. We're here to help you and provide recommendations to ensure the long, happy life of your new scaly friend.
part 2/2
One of the things you have to do is decide where you want to draw the line for your own personal definition of the word "raw". A commonly-accepted definition of following a raw diet is that at least 75% of your food is either raw or is cooked at temperatures below 104F to 118F. Some people go 100% with no heating at all. This is really important to figure out because you have to decide how stringent you want to be. For example, "raw almonds" aren't actual raw, because current laws require pasteurization of all almonds in the United States - so no almonds, no almond butter, no almond milk, etc. if you are truly 100% raw. Two additional things to consider are dehydration & pasteurization:
Fourth, I'd recommend picking up the Thrive Diet book by triathlete Brendan Brazier. This book contains many raw vegan recipes. These are high-energy recipes as well, as the book is oriented towards athletic performance.
Fifth, you may want to look into growing & fermenting your own foods. A few starter ideas:
Sixth, it's worth building up an inventory of great ingredients & recipes. A few starter ideas:
>I just threw out a bag of chips and decided it would be my last time ever buying anything like that. I don't want to buy anything processed again (after I eat up these remaining veggie dogs).
Food & health isn't so much of a destination, as a journey - learning what works best for your body, finding new ingredients, recipes, and tools, etc. Defining what path you want to take is important because that's what guides your day to day eating decisions, and also results in how good you feel, energy-wise. People generally go vegan for two reasons:
What often happens, in reality, is that people buy highly-processed fake meats (burgers, dogs, etc.), snack foods (potato chips, etc.), and junk food (dairy-free ice cream, candy, etc.) & then wonder why they don't feel good. Only you know how your body feels, so you have to figure out what works for you, which means trying new things, defining what your diet entails, learning about macros, and so on.
I've tried a variety of dietary approaches over the years (keto, paleo, low-carb, vegetarian, vegan, raw vegan, fruitarian, etc.), all with pretty good results. One of the biggest things I've discovered is that having a meal-prep system in place is critical to success, unless you have a lot of energy, free time, and a strong love of preparing food. I like to work in the kitchen...when I'm in the mood. The rest of the time, I need to feed my body my macros so that I feel good, look good, and am healthy, and really, I just need to fill the void when I get hungry & want something tasty.
So hopefully this gets you started in the right direction...there's an infinite amount of resources out there on the Internet, from raw vegan cheesecakes to walnut taco "meat". It also helps tremendously to eat according to your macros, and to figure out your eating schedule, which enables you to figure out a meal plan every week, instead of just winging it on a daily basis & struggling with being consistent & having consistent energy as a result.
I'd look into something like this with this with this. So that's $11.50 plus shipping, which at worst would be a total of $20 for 640 ounces of hooch.
If you always keep your hooch at room temperature, you should be able to pour out about 60 oz into another bottle, drink that, then pour new juice on top of the four ounces of remaining old hooch, and the whole process should start over again. Keep on top of it, and you can perpetuate the whole fucking thing.
this is incredible over-priced, or am I missing something? I use essential the same set-up and it cost a little under $20.
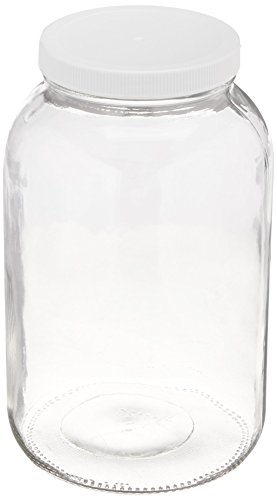
https://www.amazon.com/1-gallon-USDA-Fermentation-Glass-Jar/dp/B006ZRBGSC/ref=sr_1_3?ie=UTF8&qid=1491232715&sr=8-3&keywords=gallon+jar
https://www.amazon.com/Pro-Quality-Nut-Milk-Bag/dp/B00KLT6X9W/ref=sr_1_3?s=kitchen&ie=UTF8&qid=1491232680&sr=1-3-spons&keywords=nut+milk+bag&psc=1
I'd recommend an airlock that will allow air out but not in. Fermenting in a sealed lid could cause the fermented contents to build up pressure from the CO2 and then explode.
Grapes, ehh no wine you can make at home will compare to a $10 bottle of red you could get at the store.
Cider is different story, most of America's cider making apple varietals were chopped down during prohibitions, so the cider market isn't what it could be, compared to wine.
Now most apple juice you'd buy at the store is gonna be from Dessert Apples, apples with low tannins(bitter stuff that gives body/better flavors) and high in sugar. Most apples you'd find on trees, say in your back yard, are probably a dessert apple, unless theyre crab apples in which case theyre pretty okay for making cider. A good varietal for cidermaking that is grown in the USA is Winesap, that's probably the best you can find, if you don't know what you're looking for. If you have any access to peaches or pears you can add those to your juice to give it a little complexity.
So here's what I would if I were ( and I am) a frugal bastard wanting to make cider on the cheap. Go to wholefood, trader joes, any "organic" market you can find and look for one of these now the key for apple juice, if you're buying from the store, is that is DOESN'T have any preservatives. Those preservatives help block or inhib fermentation, so it has a longer shelf life. You want something that says it doesnt have any preservatives, look on the ingredient list for things like potassium sorbate.
So you've got your juice ( and conveniently a glass container to ferment in) now you need to get some sugar ( any sugar will do), an airlock, a rubber seal, and some yeast. Throw some sugar into the juice, toss some yeast in, put the bung (rubber seal) on, put some water in the airlock, smush that into the bung, place in 55-65F degree dark room, and wait 2 weeks.
Ka-Blam 6-10% Cider. Add back in some apple concentrate to taste when you serve it, and there you go 5-8% ABV Apple Cider on the cheap.
And now you get to keep the glass container, which is known in the brewing world as a carboy for future brews.
Here is, albeit a little over priced, bung and airlock combo from amazon.
I can't really tell, and I hope not. Its literally just the airlock this one to be exact, and the jug. The jug is new today, and when I cap it, it builds pressure with no leak. The airlock works to my knowledge (I gently blew air through it and it bubbled normally) so I don't get what could be happening.
Sorry to be this guy but get a damn airlock. Seriously though the next time you or your friend make an amazon purchase try buying something like these here. They're so cheap and you'll need them eventually if this hobby interests you.
The balloon will most likely being to lost its elasticity and start to feel crunchy. When this happens it's very likely that the balloon will start to tear or the small hole you made will become large enough, from loss of elasticity to keep it closed, for bacteria and airborne contaminants to get in.
I brew beer mostly, no patience, and the yeast for an ale sometimes takes up to 36 hours to get going to the point where I see good bubbling in my airlock. Good luck!
We are commercial and make it all year. Local ingredients like grapes and apples we can only get around now. But we can always order juice year round, too.
It is harder in the winter to keep batches warm but we've been doing it for 8 years now. So yes, you can make mead all year in PA.
There are many yeasts that can go to 50 F but it will take a longer time for the fermentation to complete. 1116, 71B, 1118, and DV10 can all do 50. Fermenting at a lower temp can create additional flavors or aromas that don't get forced out as easily with a warmer ferment.
You can also buy Fermenting wrap or a
Fermenting belt
Granted, I've never made the mead in the official cookbook, but my husband and I make a batch of mead every fall. We start with apple cider and honey instead of the suggest water and honey. This is called a melomel, or apple mead, and it's not entirely necessary, we just like it more that way. And for your first tries, you don't have to get super fancy brewer's yeast. We just use baker's yeast from the grocery store to keep our costs down. It's not the best quality, but the first few batches are never going to be perfect, and it's better to make the early mistakes on less-expensive ingredients.
For the actual brewing, I highly recommend getting a bubble airlock for your carboy. It lets the carboy release gases, so you don't have to worry about potential explosions, but also doesn't let in flies and other pests that are attracted to the smell of said gases. Also! Once it's been fermented and strained, you can add extra spices and things to flavor it. We usually add a bit of brown sugar (I have a sweet tooth) and usually a tiny bit of extra cinnamon so that flavor stands out a bit more with the apple.
Last, when it's all finished, make sure you store your mead in the fridge or other likewise cold space. No matter how well you strained your mead, there will always be yeast left in it, and those little buggers can and will start being active again if left at room temperature. That can lead to a build-up of gas and a taste you may not enjoy.
If you just want to circulate the water, buy a submergible pump. I've had more luck with models designed for high temp applications, like (food grade) hot oil, but regular water pumps will do the trick.
If you want to also control the temperature of the water, either buy a sous vide or look into an Inkbird cooler/heater like this. Then add a heating element or a hot plate.
6.5gal plastic fermentor - $17.88 (Don't bother with glass fermentors!)
6.5gal Bottling Bucket - $18.81
Hydrometer - $12.99
3 3-piece airlocks - $5.00 - trust me, they'll break.
stopper not needed with plastic fermentor
Bottle filler - $5.09
10 ft 3/8th inch tubing - $10.99
Auto siphon - $8.76
don't need a bottle brush with plastic fermentor
144 bottle caps - $5.78
Use any pure sugar for priming - just calculate it right. I use cane sugar without issue.
Wing bottle capper - $15.48
Dial thermometer not really needed if you're slapping on an adhesive one, but definitely get this for a hot liquor tun if you're doing that.
Wine thief - $11.20
I never used a funnel or fermentor brush - you can use anything to clean but I suggest Oxyclean rinses
32oz Star San - $20.70
Adhesive Thermometer - $4.84
Total Cost: $137.52. Not ridiculous savings BUT you get 32oz of star san instead of 4oz of io-star which will last you years and sanitizer is expensive. You get a plastic fermentor instead of glass which is so much easier to clean and keep light out. Glass carboys are good for aging and aging is good for wine or special beers. Focus on simple ales that don't require it first.
The real savings come when you do all grain and make your own equipment. You can save $137 alone if you buy a big stainless steel pot and slap on a dial thermometer with a ball valve.
I would simplify the whole build and get a small chest freezer, a brew belt or wrap and an Inkbird temp controller
No wiring or "building" anything and it would take 10 minutes to set it up
If you can find a chest freezer on Craigslist for a decent price this should all cost right around $100
You could try a heating pad or a heating belt.
Honestly, you could do a 1 gallon batch for much cheaper if you want. You could buy a gallon of water in a plastic jug, get some sort of air lock and bung (so long as the bung fits the jug), buy some wine yeast for a dollar or so and make your batch in the jug. Some people just put a balloon over the opening and poke a hole in it.
The only other thing you'd need is bottling equipment (tubing to transfer into the bottles, a bottle capper and caps or a bottle corker and corks, and empty bottles). Everything else is optional. Hell, the bottles are optional if you have enough people!
If you are having problems with it getting moldy (and depending on the ferment, aren't comfortable with removing the mold from an otherwise good ferment) then you probably need something like this: https://www.amazon.com/Easy-Fermenter-Wide-Mouth-Lid/dp/B01DJVVORE
I would suggest going with a salty brine ferment to cut done on the mold, with or without whey. You can use a plastic bag filled with water to keep what you are fermenting under the brine.
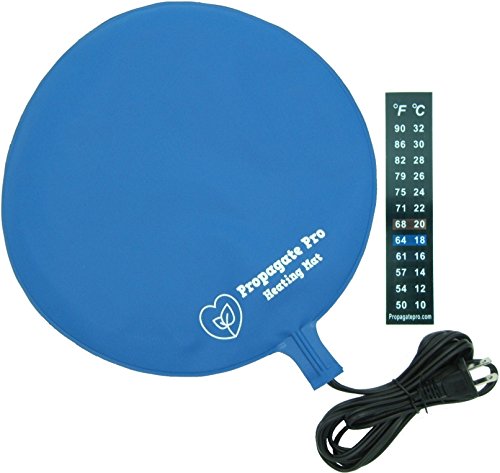
I use a heating pad
Brewing & Fermentation Heat Pad... https://www.amazon.com/dp/B072V15ZK2?ref=ppx_pop_mob_ap_share
http://www.amazon.com/The-Compleat-Meadmaker-Production-Award-winning/dp/0937381802
Start there if you look to make future batches. Also, I wouldn't have used distilled water. Spring water is better. Yeast needs vitamins and minerals. I would also use better yeast in the future. Lalvin D47 is a good mead yeast. I'd replace your baloon with an airlock. They are really cheap. http://www.amazon.com/Piece-Plastic-Airlock-Sold-sets/dp/B000E60G2W
I'd keep what you have out of direct sunlight (so in a closet or throw a blanket over it) and I'd keep it at 70 degrees F.
Yup, that's probably your problem then. I highly recommend a simple airlock like this:
https://www.amazon.com/SocalHomeBrew-Plastic-Piece-Airlock-Pack/dp/B000E60G2W
There are other methods you can use, but this is the simplest and least likely to blow up. If you want a really basic set-up to get started, just get an empty two-liter soda bottle, poke a hole in the lid to fit the airlock and then brew your kombucha with that. You might want to pasteurize the kombucha before you add the champagne yeast to minimize the possibility of introducing unwanted yeast strains and bacteria, but that's up to you. You'll probably get alcohol either way.
It's easy. EASY. It's not like the sweet hornsby's stuff. IT's drier and closer to beer.
If you wanted to experiment I'd buy a gallon or two of apple juice, like tree top. You don't want anything other than ascorbic acid as a preservative, a packet of chapagne yeast. Like this (http://www.amazon.com/Champagne-Yeast-10-Packs-Dried/dp/B00434CB74) You only need one and they're usually about .55 a shot.
Get an air lock like this: http://www.amazon.com/Piece-Plastic-Airlock-Sold-sets/dp/B000E60G2W/ref=pd_bxgy_gro_img_z.
Take your juice and pour yourself a small glass to give it a little airspace.
Take the lid and a drill bit and drill a hole in the juice cap sized right for the air lock to fit into the lid tightly. The plastic is soft so you can force it to get a tight seal. I used a pocket knife. If you want to save the headache, you can spend $2 on a rubber bung to fit the container lid.
Put a couple table spoons of sugar and dissolve it into some warm water. Add, I don't know, maybe a quarter of the packet of yeast. THat little packet is usually for five gallons. Eyeball it.
Let it set and get a little bubbly then add the measuring cup of liquid to your juice jug. Recap it with the air lock and enjoy. YOu can put distilled water or booze into the airlock. It doesn't matter which.
Then you wait.
After a week taste it. If you like it, drink it. If it doesn't taste hard enough wait a few more days. AFter you do the first one, you'll want to do two gallons then five. A gallon goes pretty fast. When it gets to where you like the hardness and sweetness of it, put it in the fridge with the airlock on it. IF you cap it while it's still actively fermenting you could get too much co2 built up in the bottle and have a problem.
Seriously talking about $15 at the MOST to start up and after that, it's the cost of yeast and apple juice.
PM me if you have any questions. I'm not an expert, but I do okay.
I based it on the Son of Fermentation Chiller plans but made modifications to the dimensions to allow it to fit two carboys. Originally I just had a cheap thermostat from Home Depot and only cooling, but had some issues in the winter months with the beer getting too cold at night and the yeast dropping out before it reached the targeted FG. So eventually I upgraded the temp controller to the STC 1000 which does both heating and cooling and picked up a 4" duct fan, some 4" duct, foil tape, and cut up an old brew belt I had laying around. I would highly recommend building one if you have the resources. It's probably the single biggest improvement to my brewing process I've ever made.
One of this https://www.amazon.com/gp/product/B00KTJXOBO/ref=oh_aui_detailpage_o05_s00?ie=UTF8&psc=1 and https://www.amazon.com/gp/product/B0041F2DL4/ref=oh_aui_detailpage_o05_s00?ie=UTF8&psc=1
I found these grommets and airlocks are bigger than the ones I got from my lhbs.
How big are your batches?
6.5 is fine for 5 gallons
2 gallon bucket for 1 gallon batches
7.8 gallon bucket for 6 gallon batches
https://www.amazon.com/Learn-Brew-LLC-7H-EOH8-VCRW-Carboys/dp/B0064OED86/ref=sr_1_1?ie=UTF8&qid=1468506553&sr=8-1&keywords=carboy+cap
http://www.amazon.com/gp/product/B0064OED86/ref=oh_details_o05_s00_i00?ie=UTF8&psc=1
Yeah, I agree. Ceradyn is a great option, thanks for bringing it up. For reference, they are available on Amazon:
http://www.amazon.com/Katadyn-Drip-Ceradyn-Water-Filter/dp/B0007U010W/
Actually the Gravidyn is a tiny bit cheaper - this is the one I have:
http://www.amazon.com/Katadyn-Drip-Gravidyn-Water-Filter/dp/B0007U011G/
For anyone who's wondering, yes, the two systems are identical except for the filters that come with. You can put Ceradyn filters in the Gravidyn setup, and vice versa.
The filters are quite delicate, though, and prone to cracking and breakage. You need to inspect them carefully for hairline fractures when you get them. For example, one of the ones in my Gravidyn was broken on arrival. I convinced Amazon to send me a spare one (rather than having to send the whole system back). Also, when I was moving stuff around in one of my storage closets in the garage, I accidentally dropped one of the spare Gravidyn filters on the concrete floor. It was inside its protective cardboard box, but it still broke. I was heartbroken - such a waste of money from a moment's clumsiness. Make sure to treat these things with kid gloves!
For completeness, here are the spare filters - Gravidyn:
http://www.amazon.com/Katadyn-20720-Gravidyn-Replacement-Element/dp/B0007U011Q/
And Ceradyn:
http://www.amazon.com/Katadyn-Ceradyn-Replacement-Filter-Element/dp/B0007U0116/
Hope it's ok posting links like this... I have no stake, not connected with the company at all etc.
The Monolithic filters are also interesting, and they claim to remove arsenic and lead as well. I would be concerned with arsenic in the surface water around here, though it might only be something that is in ground water (i.e. from wells etc). Anyway, these are very simple and cheap too, you can make a bucket filter around one of these little things and have a basic system. I don't know how much formal testing they have had, but they seem to be used a lot in 3rd world countries.
http://www.monolithic.org/water-filters
http://www.monolithicmarketplace.com/collections/frontpage/products/just-water-ceramic-drip-filter
As I said earlier, if I ever have to use the creek water, then I intend for the Monolithic to be the first stage, then treat with calcium hypochlorite (pool shock - 78% TurboShock from Poolife is the best I've found), then treat again with the Katadyn to remove the chlorine and just do another round of filtering in general. I figure I should be covering my bases with this.
http://www.amazon.com/POOLIFE-Poolife-TurboShock-1-lb/dp/B0017SSFU6
And also in case anybody's interested: To treat water with calcium hypochlorite, first make a bleach solution (NOT FOR DRINKING!) by adding a heaped teaspoon to 2 gallons of water. Then you can treat drinking water with this by using 1:100 ratio (i.e. for every 1 part bleach solution, 100 parts water). This should make it obvious that the calcium hypochlorite is pretty concentrated stuff - you shouldn't be trying to treat drinking water directly. First make the solution, then use that to treat the water. For reference, the 1:100 ratio translates into roughly 2.5-3 tablespoons of solution per gallon of drinking water, or 3/4-1 cup to every 5 gallons of water (if you're treating by the bucket). I give a range since it might be easier to measure 3 tablespoons and 1 cup rather than fractions like 2.5 and 3/4, and I think it's probably true that a little over treatment won't do any harm, especially if you are filtering it out anyway. Let the water stand for at least half an hour when treating, the longer the better. Contact time is important for killing the viruses etc.
Also, the pool shock is hard to store safely, since it produces chlorine. Anything metal will get corroded over time. The best method I have found is to use the mason jars with the metal canning lids (the ones that come in two parts). The 1 lb packs of TurboShock fit nicely in a 1/2 gallon jar. I know the lid is metal, but it has a plastic coating on the inside, and those lids are the best sealing I have found. I can put three jars inside a plastic 5 gallon bucket that has been sealed with a Gamma spintop lid. Then I can check on them every few months, and I'll know immediately if the jars have been leaking inside the bucket, because you'll be hit with the chlorine as soon as you open the bucket. I figure if the metal lids start rusting, then I'll just see what their safe lifetime is, and treat them as consumable items. A box of lids is only a few bucks, so replacing them every six months or year or whatever is no big deal. I also wrap the jars inside the bucket in bubble wrap, just so they won't break against each other if things are thrown around during an earthquake. With 3 lbs of the calcium hypochlorite, I'm ready to disinfect a LOT of pond water! Maybe also useful as bartering material in the event of a long term service outage, you never know.
Oh, and one last thing - I got a set of long handled measuring spoons, so that I will be able to reach inside the jars to get the pool shock out without having to tip them up or whatever, risking getting this toxic substance on my skin or in my eyes (big nope).
http://www.amazon.com/ChefLand-Set-Sizes-Stainless-Ingredients/dp/B00AEUR6K8
I know metal isn't good with calcium hypochlorite, but I'm not storing them with the stuff and their contact time will be minimal, and I'll be washing them after each use. I just figure it's useful to try to consider the practicalities of how you will use stuff in reality... also, I'll probably not make 2 gallons, but rather only 1 gallon at a time, which will mean a heaped 1/2 teaspoon of pool shock. And how to store the bleach solution? I found some nice 1 gallon jars with plastic lids for that:
http://www.amazon.com/1-gallon-USDA-Fermentation-Glass-Jar/dp/B006ZRBGSC
The solution should be good for a couple of weeks, I think, if stored in a cool dark place. I guess you could also use it to treat your bucket toilet, so maybe you won't waste much.
Sorry, as you can tell I have thought way too much about this stuff. :P
I would recommend starting with a jar like this;
https://www.amazon.com/1-gallon-USDA-Fermentation-Glass-Jar/dp/B006ZRBGSC/ref=sr_1_8?ie=UTF8&qid=1524584912&sr=8-8&keywords=kombucha+1+gallon+jar
You won't need the top; however, it's nice to store for later use of the jar.
Add to that a standard coffee filter and an elastic to keep it on the jar.
It has a 1 gallon volume so you can follow the subreddits suggestion for a master recipe;
https://www.reddit.com/r/Kombucha/comments/5b1ztm/reddit_master_kombucha_recipe/
If it tends to be cold where you are < 75 F ambient temperature you may want to consider also snagging one of these;
https://www.amazon.com/VIVOSUN-Waterproof-Hydroponic-Fermentation-Germination/dp/B073PTZCJ4/ref=sr_1_4?ie=UTF8&amp;qid=1524584986&amp;sr=8-4&amp;keywords=kombucha+heater
If you are sourcing something used, please be sure to know what was in it before and clean it appropriately and then rinse it to insure no antibacterial or other cleaner residues reside, which could hinder the yeast and or bacteria from thriving.
Many folks prefer to have more surface area for the pelical to grow and find that it speeds up the over all process along with having appropriate temperatures.
Good luck!
As was already stated, definitely use glass as plastic and metal will both have adverse effects on your brew. The only thing I have to add is a recommendation for one to buy. Good luck!
How does this look for a shopping list?
Airlock
Yeast
Jar One (3L vol)
Not sure how much water, but maybe about 2.3L?
25 Raisins
1 Cinnamon stick
1 whole orange, sliced, no peels to prevent bitterness
1 pinch of allspice
1 pinch of nutmeg
1.6kg of wild flower honey
1 whole clove
Jar Two (also 3L vol)
Again, not sure on the water. 2.3L maybe?
1kg blackberries
1.6kg of wild flower honey
I've made some slight modifications to this, mostly to make it easier to follow. I've also included steps that should be quite obvious to someone who's done any homebrewing before, but I wish someone had told me when I first started.
I'd link to the original, for the sake of attribution, but the user who posted this deleted their account not long after I wrote everything down.
This will produce a sweet fruit-mead (or melomel). WARNING this will be far more alcoholic than it tastes, and should not be consumed if you've recently taken antibiotics, or suffered gastric distress, as the yeast culture will still be alive, and will happily colonize your intestines if your gut microbiome is too fucked up.
Equipment: Most of this stuff will be a good deal cheaper at your local homebrew store, but I've included amazon links (also to the yeast).
At least 2 (3 is better, for reasons we'll get to) 1-gallon jugs (I don't recommend scaling this up), glass preferred. Add an extra jug for each additional batch. This one includes a drilled stopper and airlock
Drilled stoppers (or carboy bungs) and airlocks, non-drilled rubber stoppers.
An autosiphon and food-safe tubing.
Food-safe sanitizing solution (I recommend StarSan).
An electric kettle with temperature selector is useful, but not needed.
If you want to bottle it rather than just keeping a jug in your fridge:
Empty beer or wine bottles (just save your empties), capping or corking equipment, caps or corks, and a bottling wand.
Ingredients:
2.5 lbs (1130g) honey, clover recommended.
A cup (approximately 250ml) or so of fruit (I recommend blackberries, and I strongly recommend against cherries, other recipes have worked for me, but this yields a very medical flavor with cherries).
1 packet Lalvin EC-1118 yeast (a champagne yeast notable for its hardiness, its ability to out-compete other microorganisms, and its high alcohol tolerance).
Optional: potassium sorbate (to reduce yeast activity when our ferment is done), pectic enzyme (aka pectinase - for aesthetic purposes). Both are also available in bulk.
Process:
Day 1:
Mix sanitizing solution with clean water at specified proportions in one of your jugs, filling the jug most of the way. Stopper it, shake it. Remove stopper, set it down wet-side-up (to keep it sterile), pour the fluid to another jug. There will be foam left behind, this is fine, don't bother to rinse it or anything. At low concentrations this stuff is totally fine to drink, and won't ruin your fermentation or flavor.
Add honey to jug, all of it.
If you have a kettle, and your jug is glass, heat water to around 160F (71 Celsius), pour a volume into your jug roughly equal to the amount of honey present. Fix sterile stopper to jug. Shake until honey and water are thoroughly combined. The heat will make it FAR easier to dissolve the honey. Set aside for an hour or so while it cools. Add clean water 'til mostly full, leaving some room for fruit and headspace.
If you're missing a kettle, or using a plastic jug, this is gonna be a little harder. Fill most of the way with clean water (I recommend using a filter) leaving some room for fruit and headspace. Fix sterile stopper, shake 'til honey and water are thoroughly combined. This will take a while, and you will need to shake VERY vigorously.
At this point, you should have a jug mostly-full of combined honey and water. To this, add fruit (inspecting thoroughly for mold, don't want to add that). Then dump in a single packet of the Lalvin EC-1118 yeast, don't bother rehydrating it first or anything, it'll be fine going straight in. Add pectic enzyme if you have it (this does nothing to the flavor, it just makes the end product less cloudy). Stopper it up, shake it again. This jug now contains your "must" (pre-ferment mead).
Pour some sterilizing fluid in a bowl, put a carboy bung/drilled stopper in the bowl, with an airlock. Ensure full immersion. Let sit for a minute. Replace stopper with your bung/drilled stopper, affix airlock. Fill airlock with clean water, sanitizing fluid, or vodka. Rinse the stopper, fix it to your jug of sanitizing fluid.
Place must-jug in a dark place, I recommend a cabinet or closet.
Days 2-7:
Retrieve jug, give it a little jostle. Nothing so vigorous as to get your mead into the airlock, but enough to upset it. This is to release CO2 buildup, and to keep any part of the fruit from drying out. The foaming from the CO2 release may be very vigorous. Do this over a towel for your first batch. If the foam gets into your airlock, clean your airlock and reaffix it. Perform this jostling procedure at least once per day, more is better.
Day 8:
Final jostling, I recommend doing this in the morning.
Day 9:
let it sit, we want the sediment to settle.
Day 10: Time to get it off the sediment
Shake sterilizing fluid jug. Affix tubing to siphon. Put the siphon in the sterilizing fluid, shake the jug a little just to get the whole siphon wet. Siphon fluid into either a third container or a large bowl. This is all to sterilize both the inside and outside of your siphoning system.
Remove siphon from jug. Give it a couple pumps to empty it of any remaining fluid. Place siphon in your mead jug, leaving the end of the tubing in sterilizing fluid while you do this.
Take the jug that you just siphoned the sterilizing fluid from. Dump what fluid remains in it. Place the end of the tubing in this jug, then siphon the mead into it. Make no attempt to get the last bit of mead into your fresh container, it's mostly dead yeast and decomposing fruit.
Add potassium sorbate if you have it, stopper the jug, place it in your fridge.
Clean the jug you started in. Clean your siphon and tubing.
Day 11:
Let it sit
Day 12 or later: time to transfer again, or bottle it.
If you no longer have a jug full of sterilizing fluid, make one.
Repeat the earlier steps to sterilize the siphoning system, with a bottling wand attached to the end of the tubing if you want to bottle.
Sterilize your bottles or a clean jug, either with fluid or heat.
Siphon mead either into your bottles or jug. Stopper/cap/cork when done.
Put your jug/bottles in the fridge.
The yeast culture is still alive, and will continue to ferment. The fridge, and optional potassium sorbate, will merely slow this down. I recommend drinking any bottles within two months, to avoid a risk of bursting bottles. The mead should already be tasty at this point, but usually tastes much better after a couple more weeks.
EDIT: Fixed the formatting up a bit.
No worries of safety for the rust, but I'd definitely recommend a food grade ceramic fermentation crock for future ferments. They're not super expensive, they will literally last your lifetime (as long as you don't drop it). This is the one I use, has a built in water airlock (just keep it topped up every few days), its thick and heavy and opaque to prevent light damage. They also make a 10liter version for larger ferments! Good luck!
https://www.amazon.com/gp/product/B00JG77G8M/ref=oh_aui_detailpage_o06_s00?ie=UTF8&amp;psc=1
Just finished my first sauerkraut batch in the TSM crock, it turned out great :)
Don't worry about rushing to finish it super quickly. I've been eating kimchi since I was itty bitty, and I actually prefer it as it gets more and more sour. Plus, if you ever want to cook with kimchi, sour is definitely what you want. You can make killer fried rice, stews with pork and tofu and potatoes, crispy, chewy pancakes... So many great options for cooking with kimchi, but fresh just won't do for these kinds of things.
I tend to make my kimchi in really large quantities given that I live in a household of only two, and I am a Korean married to a very white man (he likes kimchi, too, but he'll never eat as much of it as me). I usually pack most of it into my giant kimchi container (like this, but taller: https://www.amazon.com/Crazy-Korean-Cooking-Sauerkraut-Fermentation/dp/B00M40ANMO ) and then I pack the rest into quart sized mason jars, usually 2-3 of them. The big boy goes into the far back of the fridge where it's coldest, and I forget about it until all the jars are empty. I leave the jars out to jump start the fermentation. A couple days later I have my choice of sour level. If I want super fresh tasting kimchi just for eating, I can always raid the big boy hiding out in my fridge. For most of my meals/cooking, I pull from the jars. Once all the jars are empty, I'll fill one jar from the big boy with kimchi that I can keep more easily accessible.
Have you tried making your own fermented foods? My husband makes kimchi and other ferments in mason jars with these lids. It's really easy--just wash and cut up veggies and put them in the jars with whatever else the recipe calls for (salt water, usually), pop the lids on, and let them sit for a month. I've never done kombucha, but I hear it's pretty easy as well.
https://www.amazon.com/dp/B01DJVVORE
I have 3 extra wide airlocks that I bought for a family member and they never used. You are welcome to them fellow kimchi maker. Let me know if they would fit those jars. I would recommend the wide mouth weights as well or a rock in a 5% salt zip lock bag to weigh it down.
https://www.amazon.com/Easy-Fermenter-Wide-Mouth-Lid/dp/B01DJVVORE
Here you go
Easy Fermenter Wide Mouth Lid Kit: Simplified Fermenting In Jars Not Crock Pots! M... https://www.amazon.com/dp/B01DJVVORE/ref=cm_sw_r_sms_c_api_i_8PWODb005SZB5
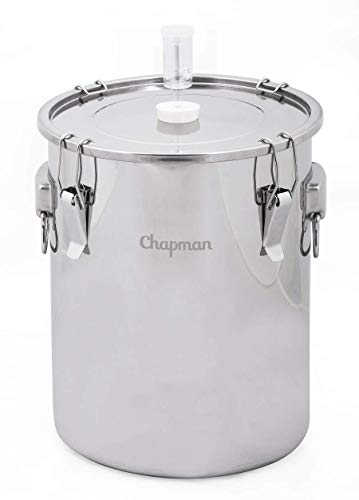
If your looking into upgrading to stainless to avoid plastic I would suggest a Chapman stainless bucket fermenter. They don't have all the bells and whistles of an SS brewtech bucket, but the price is more forgiving.
Amazon link
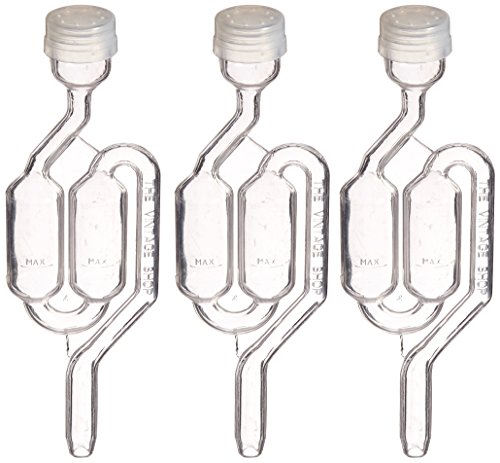
Yeah they're called air locks, there's a few different types to choose from but standard ones look like this!
https://www.amazon.com/dp/B075LRMRDQ/ref=cm_sw_r_cp_apa_i_3i8RDbD24QD3T
I use these. I fill them with vodka instead of water.
https://www.amazon.com/dp/B075LRMRDQ/ref=cm_sw_r_other_apa_i_e5BXDbTNQK6V9
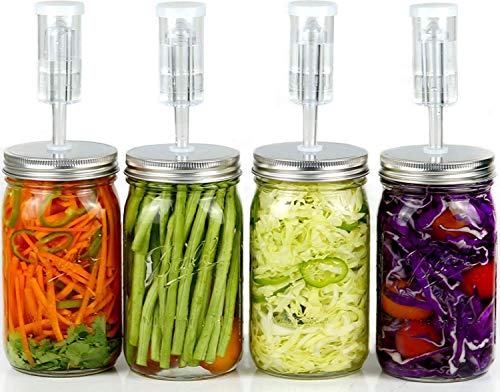
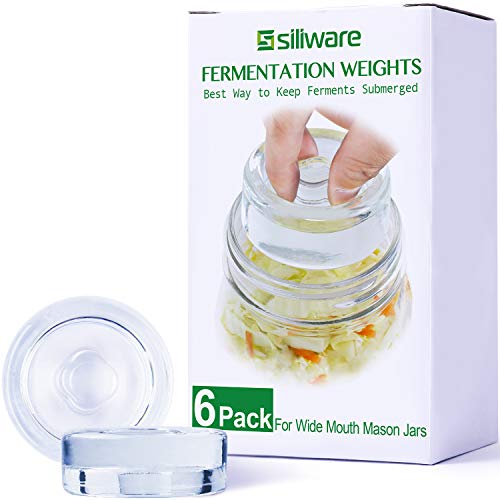
From reading your other posts, it sounds like you do this fairly often. I would recommend getting some fermentation weights. I have these.
I also recommend getting some self burping lids like these. All in all, you're talking about under $30.
Airlocks
One of my other airlocks has broken (cat jumped on the bucket of fermenting mead and attacked the bubbling airlock), so I am down to making one bucket at a time right now. A new airlock would go far towards allowing me to make enough mead to gift to all my friends/family for the winter holidays.
Before you pull the trigger on that, there's a groupon for a homebrew set:
http://www.groupon.com/deals/gx-midwest-hydroponic-atlanta
It's the basic kit plus brewing ingredients, PLUS a $25 coupon. The kit you linked also includes:
-Carboy, if you really want to get it. Honestly, for a first batch, you can get by without one and just do a single stage fermentation, but it's recommended to get a secondary. My first batch was an extract that spent ~2 weeks in a primary then straight to bottles. Came out great. There's a good deal at Amazon right now on a 6 gallon glass carboy. Also add a bung and Airlock
-Bottles. Drink some beer, keep some bottles. If you want to buy them, get 48 for a 5 gallon batch (about $25) or go cheap and get some plastic PET bottles. Also a good option. See: every argument of plastic vs. glass for a comparison.
-Large stock pot. For a first extract, you won't need more than a 2 gallon boil, so you can get by with as small as 12 qts. A cheap 12 qt pot can get you started.
Molds, fungi and yeasts are all around us, absolutely. They're everywhere. If you want to do an experiment, you can open a bottle of fruit juice for a day or so and after that day, fix an air lock to the opening. It won't take too long before you see air being forced out of the bottle through the air lock. That's local yeasts that found your juice while you left it open, eating the sugars in the juice and breaking them down into alcohol and carbon dioxide. The alcohol stays in the liquid while the CO2 escapes through the airlock. If you choose to use grape juice you may have drinkable wine by the time it's done.
Are you looking for a recipe that specifically uses ginger bug? I've only done a little fermentation as far as food, but I've done a little more of beverages. If you seal your concoction right after bottling, you can put it in the fridge as soon as it's carbonated and it will not have produced much alcohol (based on my limited experience with homebrewing). The fridge will stop it from carbonating as long as it's below 45-50 F-ish, so you want to leave it at room temp until it carbonates.
If you're concerned about how much alcohol it produces, I recommend making a small batch and bottling it in 2 containers. Seal one so it carbonates and give the other one a bubbler so it won't carbonate. When the sealed one finishes carbonating, you can check the alcohol level with a hydrometer (do you have friends who homebrew? I bet you could borrow theirs). I assume the carbonated one will have a similar amount of alcohol. Note: you do need to measure with the hydrometer both before and after fermenting to know the alcohol content. Plenty of resources online to find the calculation. Edit: I forgot to say - check the alcohol content of the non-carbed bottle as the carbonation will mess with your hydrometer readings.
If you're willing to not use your ginger bug, read on!
This recipe uses bread yeast to carbonate (is that heresy on this sub? I've not spent much time here). It takes just a day or two to carbonate then you put it in the fridge to stop the yeast. Tastes pretty good!
From some personal experimenting, the flavor ratio I like is:
This quantity isn't much (maybe 3/4 c?) but the ratio should scale up. I was playing around with tablespoon-type amounts because I didn't want to go through loads and loads of ginger. For the ginger juice, I grated the ginger with the grater blade on my food processor (had to stop to pull fibers out of the holes every so often) and then hand-squeezed the juice out of the pulp.
It's fairly ginger-spicy (which I find good) but not overpowering. You can always start with less water and add more as necessary. I used this lemon:ginger ratio because more lemon made it taste like ginger-flavored lemonade (good, but not my goal) and more ginger made it taste like disinfecting floor cleaner (also not my goal). I played with sweetness by making a light syrup (25 g sugar to 100 g water) and trying varying levels of that in the final mix.
Amazon might not be ideal for anything but the airlocks, but here goes:
Airlocks, pack of 3 for $5.39 at the moment.
Lids, probably available for the same or less at your grocery store.
As for grommets, the hardware store is your best bet. They're classed by their internal and external diameters. Internal diameter (ID) is what you're going to squeeze the airlock stem into, external (ED) is the size of the hole you've drilled in your lid. The ones I use have an ED of .5 inches. I don't remember the ID, but that's more flexible. Easier to jam a tapered stem into a rubber hole than it is to make the grommet fit into an inflexible hole in a plastic lid.
Just match the ED to whatever drill bit you're using, and you'll be fine. Oh, speaking of, none of this is going to work without a drill. But the cheapest drill you can find will work just fine. I like a spade drill bit for making clean holes in plastic lids, but other types will work just fine. If need be, you can remove burrs left in the hole with a hobby knife or file.
I'm afraid I'm made this all sounds harder than it actually is. It comes down to:
If you attempt this and have any trouble, feel free to PM me. I stumbled a bit with this at first and would be happy to help you DIY it.
I'm sure the mix is fine; the pressure just built up. The fermentation process creates CO2.
The Lactobacillus bacteria responsible for the fermentation are facultative anerobics, and fermentation works better without oxygen. If you like you can punch holes in the lids and glue in some airlocks which can be found at winemaking supply shops.
This is an airlock:
http://www.amazon.com/Piece-Plastic-Airlock-Sold-sets/dp/B000E60G2W
You fill it up to the little line with sanitizer or vodka and it allows the CO2 being generated by the yeast to bubble out, but nothing from the outside to invade. If you can find one, you'll need a stopper that'll fit your 2-liter bottle that has a hole in it the right size for the airlock. If you can't find one, you should maybe loosely cover the top of the 2-liter bottle with sanitized tinfoil.
I use plastic fermenters which are have much worse heat conduction than glass but I'll give my two cents. I use a rectangle (about 6"x4") of pink foam insulation with a little slot chiseled out to about half the length that fits the temp probe. I just tape this tightly to the side of the fermenter and slot the temp probe into it (I use the same ITC-308 temp controller). However, what I did to test the efficacy was measure the temperature each time I took a sample for gravity readings. Since I found that the temp was within a couple tenths of a degree of the reading, I found that this was fine. Whichever way you choose to measure it, I recommend testing the internal temp that way until you dial it in.
Edit: The ITC-308 works great btw, I use it on my fermentation chamber (converted chest freezer) and keezer and have never had a problem whenever I've measured the direct temp vs the reading of the probe.
Edit 2: Also forgot to say but I use this $22 heating belt taped to my fermenter (or two fermenters which I've done twice and had equal success with). I ferment in a chest freezer so it has cooling capability but as long as your ambient temp is less than your fermentation temp you're fine using a heat source to regulate. The other thing I did when I wanted to keep the temp higher (85-95 F) for Kveik yeast and kettle sours is I wrapped the fermenter and heating belt setup with this reflectix insulation with a 1" air gap and cut to the proper size which worked perfectly (did the same thing for my full volume biab mash tun and kettle).
They're quite easy to make. I use mine all winter long. Just need a heater and a controller. I use the two below.
Brew Fermentation Heating Belt, 1-Count https://www.amazon.com/dp/B001D6IUB6/ref=cm_sw_r_cp_apa_Q3L1BbH29S370
Inkbird ITC-308 Max.1200W Heater, Cool Device Temperature Controller, Carboy, Fermenter, Greenhouse Terrarium Temp. Control https://www.amazon.com/dp/B01HXM5UAC/ref=cm_sw_r_cp_apa_04L1Bb1CAC4VY
Brew Fermentation Heating Belt, 1-Count https://www.amazon.com/dp/B001D6IUB6/ref=cm_sw_r_cp_apa_i_U4hPDb1C4RD85
eBay Aquarium temp controller + reptile heat cable + sweater = winning.
Replace the heat cable with a BrewBelt and the sweater for Reflectix or similar
Add a Thermowell Stopper and you are really in business.
Instructions on HomeBrew Talk for the temp controller wiring. I used that same diagram but only a single outlet plug. I have no use for the cooling side currently so I only use it to control heat. I've built 2 of these so far with the Reflectix and reptile cable and I love them! The Thermowell is a really great addition, seems to be more accurate than just taping the probe to the fermenter.
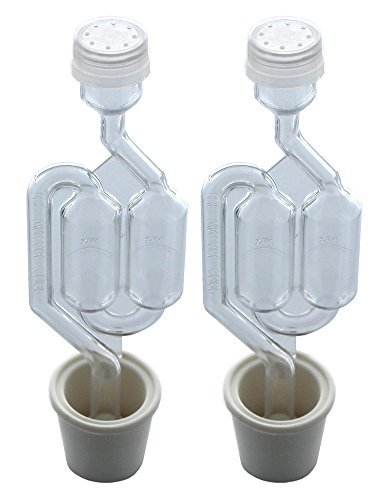
Side note: If you do use an airlock for long term, get this type....
https://www.amazon.com/Twin-Bubble-Airlock-Carboy-Bung/dp/B00A6TRKO4/
versus this type....
https://www.amazon.com/Home-Brewing-Supplies-48-9AJX-W965-Econolock-6pk/dp/B0041F2DL4/
I currently have six carboys on the rack coming up on 12 months and they all have the first type of airlock with the double chamber. At most I have lost 5mm of water over that period. I use a sharpie to mark a line so I can see if they are evaporating. With the second type of airlock, I can't go three months before having to add water. They also have a tendency to open a pathway for air to get to the wine while looking like they are okay for fill level.
Lids: White Plastic Standard Mason Jar... https://www.amazon.com/dp/B017IT8U2U?ref=ppx_pop_mob_ap_share
Airlock: Home Brewing Supplies... https://www.amazon.com/dp/B0041F2DL4?ref=ppx_pop_mob_ap_share
Grommets: Home Brew Ohio black Replacement... https://www.amazon.com/dp/B0149K5RZY?ref=ppx_pop_mob_ap_share
This woman's kimchi is super spicy. I only used 1.5 cups of hot peppers. Anyway, I've gotten used to how hot it is and find myself craving it. I eat 2 tablespoons of it with every plate. And I drink kefir milk or kefir water. Kombucha sometimes, but that takes 2 weeks to get good. The kefirs take 2 days and are pretty strong.
I mention kefir because if you make milk kefir in a Fido jar for say a day and a half at room temperature. The curds and whey will separate and you strain that whey into a jar with either olives, baby cucumbers, hardboiled eggs and beet juice, asparagus, cabbage (kimchi and sourkrout), pear onions, salsa, Brussels sprouts, garlic, and I'm sure more. You use the curds you made with the milk kefir grains to make fermented hard cheeses, yogurt (awesome for ball jar parfaits, cream cheese,
If you want to get really crazy you can buy a 5\8" glass drill bit off amazon for 6 dollars. Drill holes in the lids. Use either rubber grommets or a drilled airlock grommet and airlocks to let the CO2 buildup release without letting fresh air back in. The company that makes and sells them call them Pickl-It jarsImage. They look identical to what you can make for much cheaper. This isn't necessary but it costs about 5 bucks to do to each jar and the result is that you now have a 40 - 120 dollar fermentation crock.
Buy this jar: http://www.crateandbarrel.com/fido-5-liter-jar-with-clamp-lid/s495151?a=1552&amp;device=c&amp;network=g&amp;matchtype=&amp;gclid=CJ7Whp7ZkroCFabm7AodOmkAHQ
Or at surlatable if you want more than 1 jar, and want 1.5 liters like the legit picklits. I found 3 liter Fido jars at hobby lobby for $5 each. I suppose just look for clamped glass jars with italy stamped on the bottom, not china.
The dehydrated food you weigh after and portion out into serving sizes. If I'm packing them as a lunch I separate atleast the meat from fruits and vegetables. Match each serving of meat with what used to be one or two cups of kale. A solid ammount of tomato chips and mango, peaches, apples or banana leathers. (Go easy on the mango) Blend and fruit rollup your berries. I'm not a nut and grain person, but a granola bar probably wouldn't be bad in there. I suppose you could stuff all these bags into a food saver bag and have like a cheap, fresh and healthy MRE all set and ready. No cooking required. I'm not sure how long the meat would last. So I wouldn't let it sit too long. Plus make sure your jerky sits in a brown paper bag for a few days first. To draw out any more moisture before vacuum sealing it.
Also a newbie, waiting for all my equipment to arrive from Amazon... But I picked up this 2 gallon bucket:
https://www.amazon.com/dp/B0064O8WWE/ref=cm_sw_r_cp_apa_BssFybCMY4GHZ
To piggy back on u/stormbeforedawn's comment.
This is the equipment I used that I've had good luck with so far. It's what he recommended, I'm just providing links to the specific product I used.
I do it 5 gallon batches so 5 gallon cheap store apple juice, 2 lbs of corn sugar, 2-3 lbs of peeled shredded ginger, and [champagne yeast] (https://www.amazon.com/gp/product/B00434CB74/ref=od_aui_detailpages01?ie=UTF8&amp;psc=1). Put it all in a Fermenter bucket with an airlock. Wait two weeks and bottle it/put it in a keg.
Or, you could have one that's sure to be food grade delivered in 2 days with handy charts on it.
I have always used home brew buckets they are 6.5 gallons, have gallon markings, and made from food grade plastic. Usually only around $20 at a local homebrew store. Here is an amazon link. https://www.amazon.com/dp/B0064O8X5K/ref=cm_sw_r_cp_apa_j-iiybTG2K9X4
Regular brewers bucket. https://www.amazon.com/6-5-Gallon-plastic-fermenter-lid/dp/B0064O8X5K/ref=sr_1_1?s=home-garden&amp;ie=UTF8&amp;qid=1521752930&amp;sr=1-1&amp;keywords=brewers+bucket
I can get them for less at my local, but for illustration purposes there is a link.
Oh yes, and it is quite simple to get the stuff together without buying a kit. Do you have a local home brew store?
This subreddit's wiki which includes a beginner section: https://www.reddit.com/r/Homebrewing/wiki/index
There are several videos on youtube that have good instructions.
Here is a basic list of gear to brew beer in a bag. You can get all of this stuff on amazon if you don't have it already. This is not the best list, but it works.
http://homebrewmanual.com/home-brewing-equipment/
Some of the stuff you won't likely have at home:
Beer recipes: http://beerrecipes.org/
To get grains from amazon, type in the grain type and it will provide you options. If you don't have the ability to mill it yourself, you can order it crushed. Its not ideal, but if you don't have a homebrew store near you and don't have your own mill....it will work. You will have to measure out the correct amounts for each grain that you add on your own from the bulk that you ordered. If you want to brew with extracts, you can also order those on amazon as well.
You can order hops on amazon the same way as grains or extracts.
Or, if you have enough containers, simply transfer it into containers of the correct size. It's not really the 'headspace' that we're worried about, or that has any effect on the amount of oxygenation. It's the surface area that is touching gas. Another simple solution, if you're sure you're done fermenting, is just to seal your fermenter with something like this.
Surely! I have 6-gal plastic carboys. I currently have a carboy cap that has a racking cane and a filter on the other end. The end of my racking cane tubing is attached directly to a barbed disconnect on the liquid post. I still use gravity but I get the siphon going by blowing through the filtered end of the carboy cap. I actually am purchasing this today to replace the filter so I can use pure CO2 to push the beer from my carboy. Just know if you use CO2 to push the beer from the carboy to keg that you need to keep the pressure very low as the carboys are nor pressure retaining vessels.
I have to give credit where credit is due though. I built this after seeing /u/brulosopher 's kegging method
This is what I use for 1F:
https://www.amazon.com/gp/product/B006ZRBGSC/ref=oh_aui_detailpage_o03_s00?ie=UTF8&amp;psc=1
This is what I use for 2F:
https://www.amazon.com/gp/product/B01CUJQTPI/ref=oh_aui_detailpage_o03_s00?ie=UTF8&amp;psc=1
When I bottle for 2F, I pour all of the kombucha into a different bowl and clean out the 1 gallon jar after each brew so the yeast doesn't gather on the bottom. I am on my 5th batch, everything has been great so far.
hey i just watched this video, you might want to try a few new things regarding the dill pickles:
It is fairly easy to get large equipment like vessels and burners locally in India but it's the little stuff that makes your brew day/bottling day easier like the bottle fillers and auto siphons which are kind of difficult/expensive to get hold off. Depending on which city you are in hops, malts and yeast can be easy to source especially if you have any brewpubs around. The selection of hops is again very limited so like like /u/chino_brews suggested you could get bulk hops from YCH. Dry brewing yeast is available (Fermentis, Lallemand) but it is mostly sold in 500g bricks so I would recommend picking up some 11g packets as well. You should definitely pick up a large 16/32 oz bottle of StarSan and a tub of PBW or something similar for cleaning and sanitizing. I would also pick up a hand held bottle capper, a racking cane, a couple of airlocks and a spigot for bottling. Almost everything else can be improvised or jugaad if you're a little handy :)
Don't, it's a bad idea for this. This is a good set up for making a gallon of hard cider, mead or beer. But OP is going to spend a good hour or 2 trying to get those peppers out. Also there is no way to weigh it down because of the cone shaped interior, and you can not fit anything in the tiny hole that work anyway. So, mold it a high probability.
But, for other fermentation purposes (i.e. mead), this set-up is fine and you can get one gallon carboy just by buying some decent apple cider and resuing the jug. The other parts are simply a rubber stopper and an airlock..
The plastic pieces are Airlocks typically used for fermenting beer/wine.
http://www.amazon.com/Twin-Bubble-Airlock-Carboy-Bung/dp/B00A6TRKO4
For best results, add sugar, add champagne yeast, and put one of these where the cap goes. They fit directly in a welch's container.
Malt extract is basically a syrup. It's sugar (and some other things) it needs to be dissolved in hot water so buy a thermometer and a big ass spoon.
Get the water up to 155-200 degrees F.
Add all of your extract and stir a lot until it's dissolved.
Then raise water/syrup mixture until it boils and add .5 oz to 1 oz of hops. Set a timer for 60 minutes. after 15 minutes add another .5oz-1 oz hops. Wait 30 minutes and add another .5oz to 1 oz hops.
Cool mixture to 70 F. Add Yeast.
Put in a clean sterilized container with a way to release pressure.
Like [this] (https://www.amazon.com/Twin-Bubble-Airlock-Carboy-Bung/dp/B00A6TRKO4/ref=asc_df_B00A6TRKO4/?tag=hyprod-20&amp;linkCode=df0&amp;hvadid=222720245886&amp;hvpos=1o1&amp;hvnetw=g&amp;hvrand=7780163563752260182&amp;hvpone=&amp;hvptwo=&amp;hvqmt=&amp;hvdev=c&amp;hvdvcmdl=&amp;hvlocint=&amp;hvlocphy=9007095&amp;hvtargid=pla-384129294913&amp;psc=1)
Oooo I want to try this. How many grams of yeast for six gallons? Do I need to buy a special sanitizer?
This is what I have in my cart right now:
[Airlock](https://www.amazon.com/gp/product/B00A6TRKO4/ref=ox_sc_act_title_1?
smid=ATVPDKIKX0DER&psc=1)
Yeast
6 gallon carboy
Anything I'm missing beside the juice?
I just use a madolin cutter on some cabbage, sprinkled with salt, twisted and mashed, and repeated until all my cabbage was salted and in my pot. Then I covered with water and put a plate on top to keep it submerged. They actually sell some nice stone vessels to use for this with weights that fit them perfectly. https://www.amazon.com/dp/B00JG77G8M You can also get weights that are meant to fit mason jars perfectly.
I'm using this fermentation container.
Is the whole thing still good for consumption or do I have to throw this batch out?
I use these plastic kimchi fermenters and they work perfectly! Well worth the money, imo. Have two with pickles and two with kraut at the moment.
There are also special containers made for stuff like kimchi that help hide the smell. Obviously only during storage and nothing can be done when you're eating it haha.
Looks really nice!!! I make kimchi on a regular basis, always in a big crock with weights. I just bought a set of these so I feel more comfortable doing small batches in jars. I like mine to ferment for about a month or so for more sourness.
They work great so far. Here is the link do yourself and get some weights as well.
Easy Fermenter Wide Mouth Lid Kit: Simplified Fermenting In Jars Not Crock Pots! Make Sauerkraut, Kimchi, Pickles Or Any Fermented Probiotic Foods. 3 Lids(jars not incld), Extractor Pump & Recipes https://www.amazon.com/dp/B01DJVVORE/ref=cm_sw_r_cp_apa_i_x4epDbEKK7H0Y
4-Pack of Fermentation Glass Weights with Easy Grip Handle for Wide Mouth Mason Jar https://www.amazon.com/dp/B076V66FZ4/ref=cm_sw_r_cp_apa_i_T6epDbKRM0CDH
Large mouth mason jars, with these lids.
https://www.amazon.ca/dp/B01DJVVORE/ref=cm_sw_r_other_apa_i_tfnGDbWQYR98Q
This isn't super useful for a "right now" solution, but in the future, you could make your own fermented foods using this and a mason jar.
kimchi fermentation lid
You can also look for fermentation crocks and there are mason jar lids fitted with air locks
https://www.amazon.com/Easy-Fermenter-Wide-Mouth-Lid/dp/B01DJVVORE
They look like these. I have them, they're great.
I use these: Easy Fermenter Wide Mouth Lid Kit: Simplified Fermenting In Jars Not Crock Pots! Make Sauerkraut, Kimchi, Pickles Or Any Fermented Probiotic Foods. 3 Lids, Extractor Pump & Recipe eBook - Mold Free https://www.amazon.com/dp/B01DJVVORE/ref=cm_sw_r_cp_apa_SEeTBb8MQ12Y9
I've had great experiences with them.
Assuming you're asking about the lids. I bought a set of the Easy Fermenter Lids from Nourished Essentials.
https://www.amazon.com/dp/B01DJVVORE
I've been fermenting for a while now, these lids are great and turn most jars into fermenting containers.
Looks good! How far along is this and do you have an amazon link to the lids?
Edit: here's the link but they seem to be out of stock https://www.amazon.com/Easy-Fermenter-Wide-Mouth-Lid/dp/B01DJVVORE
Wide mouth mason jars with these on top
Easy Fermenter Wide Mouth Lid Kit: Simplified Fermenting in Jars Not Crock Pots! Make Sauerkraut, Kimchi, Pickles Or Any Fermented Probiotic Foods. 3 Lids, Extractor Pump & Recipe eBook - Mold Free https://www.amazon.ca/dp/B01DJVVORE/ref=cm_sw_r_cp_api_i_0ITXDbA6WMKFD
https://smile.amazon.com/dp/B01DJVVORE/ref=cm_sw_em_r_mt_dp_U_bmx1DbPF79GQ3
Go with the coots recipe, it's what I'm using. With all the top dressing and other additions I'm sure it's drifted pretty far off that original mix though. I'm finishing up the 4th round but I did till/remix with more pumice and biochar after the 2nd round.
I am currently using 1 maxi with 4 distribution drippers in each 15g pot. Only thing I add to my res is agsil (silica) and some BTi to combat fungus gnats. I started with 2 maxis and no distro drippers at first but I'm really liking the 4 different drips. With just the 2 maxis the sides where there were no drippers got a little to dry for my liking. I've never had a run away dripper but plan for it just in case. My system is gravity powered so they could theoretically empty the res but that's a 13 gallon trashcan so it would never exceed that much water.
Not sure on the compost, I've only used homemade thermal compost and homemade ewc and the worms are fed the BAS craft blend so it should be nutrient rich.
I don't really do aact as much anymore...I just never really saw a huge difference and the brewing is annoying. Fermenting is awesome though, get some half gallon jars and fermenting lids. Exploding a glass jar of fermented stuff isn't awesome lol.
300w in a 3x3 is 33 watts per sq foot. That should give you pretty great results. There are 3 voltages of those new Vero 29s so that will pretty much just depend on how you want to drive them, how many watts per chip you want, etc. I'm guessing the HLG-320H-C drivers would work well but I haven't actually looked at the datasheets recently.
Kinda all over the place but hopefully that helps. Too many dabs! Just got some rosin plates and went a little too hard "testing"
145w or LED will generate about as much heat as 145w of HPS. Stick with the HPS.
To get cooling under control, you'll need to post details. Or, better, pics. 600w isn't a lot in a 4x4. Lots of people do it.
Without details, look at a CoolTube style hood on it's own ducting circuit--pulling air from outside, through the cooltube, then straight back outside using a 6" duct fan. That gets rid of most of your heat, versus a bare bulb/wing setup.
Then get a decent 6" inline fan as your main exhaust for the tent. Run this through a programmable thermostat, so it's only kicking on when you tell it to (on at 75 degrees, off at 72, for example). A fan speed controller for the inline is useful, to limit noise and the rate at which you are pulling all the humidity out of your tent. But not strictly necessary if you have the thermostat.
Both ducting circuits (one for the CoolTube, one for the Tent) should be vented outside. Or at least outside the room.
I know that adds a bunch of cost. You can go cheap on the CoolTube, ducting, and duct fan. Don't go cheap on the inline. Having proper ventilation (and, IMO, a programmable thermostat) is essential to be able to run, well, in all seasons. You have a good tent/light pairing. Get the ventilation right, and you can dial in your environment. That's 80% of the battle.
I used this one before moving to a room controller. If money is tight this looks like a good unit.
Without knowing where you are in the world, it's tough to recommend specific places to buy things.
I do want to point out a couple of things, however:
For a digital thermostat, I highly recommend the Inkbird ITC-306T.
Yes, I have the CHE connected to a dedicated thermostat for the tank. This is the specific one I have https://www.amazon.com/gp/product/B01FTQ669S/ref=oh_aui_detailpage_o04_s00?ie=UTF8&psc=1. I don't rely on the lighting for heat (my basking is a low 25W bulb) but on the CHE.
this is the thermostat i have. i chose thise one because i use 2 CHE lamps and this thermostat will let me use both, some only have a single plug
Considering ditching my glass carboys in favor of this stainless bucket. Any thoughts?
Chapman 7 gallon Stainless Steel Fermenter
Edit: I do 5 gallon batches
https://www.amazon.com/dp/B072V15ZK2/ref=sxr_rr_xsim_1?pf_rd_m=ATVPDKIKX0DER&pf_rd_p=9ddc66f6-9fc0-49ff-b2fa-06a39d9859e6&pd_rd_wg=EP8Mr&pf_rd_r=6JZZQ1MGNMA3K1ZGK6H8&pf_rd_s=desktop-rhs-carousels&pf_rd_t=301&pd_rd_i=B072V15ZK2&pd_rd_w=hHUaZ&pf_rd_i=kombucha+heat+pad&pd_rd_r=5ff68ad1-aa6e-4a49-a1e0-9f07be998c8f&ie=UTF8&qid=1541266250&sr=1
&#x200B;
Works like wonders for me
I use the same size gallon jars, but without air locks. I always use a few whole cabbage leaves to try to seal the little bits below. Of course you should try to push everything down really well before you put the whole leaves in, then fits them in and keep pushing again to get the liquid above it. Then I use some glass weights like this. They are really made to fit wide mouth quart mason jars but any weight is good to help get the brine up. I find that if they are within the straight part of the jar (below where it starts to taper in) i can get 3 of them in a triangular shape which does a pretty good job of getting the brine up.
https://www.amazon.ca/SocalHomeBrew-Plastic-Piece-Airlock-Pack/dp/B000E60G2W
This is the airlock. The reason I can't brew in the winter is that it's too cold for me to sit outside for two hours making my mash and then my boil. -15 Celsius is a little crazy to be doing anything in outside.
the only thing with these kits i didnt care for was the airlock that comes with them. most come with a "S" shape airlock, they work just fine i just dont like them because you cant really clean them well. might want to pick up a 3 piece like this.
https://www.amazon.com/SocalHomeBrew-Plastic-Piece-Airlock-Pack/dp/B000E60G2W/ref=sr_1_1?ie=UTF8&amp;qid=1464846742&amp;sr=8-1&amp;keywords=3+piece++airlock
http://www.amazon.com/SocalHomeBrew-Plastic-Piece-Airlock-Pack/dp/B000E60G2W/ref=zg_bs_979848011_1
Another option is to use airlocks for the second phase
I've considered buying the e-z caps too. But then I realized it's essentially one of these airlocks with a convenient screw top attachment to fit on a standard 2 liter bottle and some yeast. If you're trying to go cheap, it might be worth putting together the few pieces necessary to DIY, add some rubber stoppers and a gallon jug of juice and you're pretty much good to go.
In fact, I might just buy all that stuff now...
Edit: It'd probably be cheaper at a local homebrew shop, none of these links I put in here actually come from Amazon so you can't get combined or Amazon Prime shipping. :(
I much prefer this one for my SS Brew Bucket:
Brew Fermentation Heating Belt, 1-Count https://www.amazon.com/dp/B001D6IUB6/ref=cm_sw_r_cp_apa_i_vaL4Cb0HTVEWC
I used to use the one listed above...but I found the electrical connections on it flimsy. They broke off after about 6 months. I've been using the heater belt for 2 years now with no issues. It keeps the beer at a consistent +/- 1°
Maybe something like this?
You can definitely get cheaper heating belts than that, I have one that I paid around £7 for. All it does is supply heat, you wrap it around your container and there's no temperature control or anything so you have to monitor your brew's temp manually (easy if you have a floating thermometer or stick on thermo strip) but it does the job. Mine looks something like this
You can wrap this around your fermenter;
http://www.amazon.com/Brew-Belt-Fermentation-Heating-1-Count/dp/B001D6IUB6
Also use this as a thermostat to regulate temperatures/turn the brew belt on and off.
http://www.amazon.com/All-Purpose-Temperature-Controller-Thermostat-Stc-1000/dp/B008KVCPH2/ref=sr_1_1?ie=UTF8&amp;qid=1421948732&amp;sr=8-1&amp;keywords=stc1000&amp;pebp=1421948735262&amp;peasin=B008KVCPH2
You'll attach the probe to the side of the fermenter, insulate it with a towel. Then put the brew belt either above or below (not touching the towel or the probe). The STC will kick on the belt whenever the beer is below whatever temperature you set on the STC.
https://www.amazon.com/gp/aw/d/B001D6IUB6/ref=mp_s_a_1_1?ie=UTF8&amp;qid=1483065273&amp;sr=8-1&amp;pi=AC_SX236_SY340_FMwebp_QL65&amp;keywords=Fermenter+warming+band&amp;dpPl=1&amp;dpID=414cI-RupZL&amp;ref=plSrch
Works like a charm
Cool, coots recipe it is.
The recipe in the sidebar specifically mentioned horse manure compost, so I'd imagine it would be fine, though hearing from others would be reassuring too. I'll do some more research though.
> fermenting lids
> > $29.99
holy shit that's highway robbery. Maybe I'm missing something, but those seem to do the same thing as homebrewing airlocks. With these grommets and these airlocks you'd be able to make 5 of those for about 15 bucks. Regardless, thanks for the advice, since cleaning up fermented plant material and broken glass doesn't sound very fun. Any ferments (or top dressing additions, etc.) you're particularly fond of?
As far as the LEDs go, I'm thinking of building 2 light assemblies, each with 2 BXRC-30E10K0-D-73 and 2 BXRC-40E10K0-D-73. That would mean 2 3000K and 2 4000K chips per assembly. Those chips drop 37.2V at 1400 mA, so I'd run them on a HLG-185-C-1400b and add a potentiometer to let me dim the driver down to ~1000mA, which would give me a range of 38-52W per chip. I think that gives me a lot more flexibility than a single monolithic light.
I've gone through a lot of iterations of my planned LED setup lol. If you'd have asked me two days ago I'd have said cxb3590s all the way, but 25 bucks a COB from digikey seems like a pretty solid deal. I haven't even checked kingbrite yet.
Your response was super helpful, much appreciated!
I use these...
https://www.amazon.com/Gallon-Plastic-Fermenter-drilled-lid/dp/B0064O8WWE/ref=mp_s_a_1_2?crid=3BOCV43TCMST7&amp;keywords=2+gallon+fermenting+bucket&amp;qid=1551151619&amp;s=gateway&amp;sprefix=2+gallon+ferm&amp;sr=8-2
TLDR: The "Full kit" looks like it has the basics. As others have said, you might want a food-grade plastic bucket for primary fermentation, and you'll need bottles/containers to store the end product in.
If it were a "complete" kit I'd probably put one together which included One step sanitizer to sanitize equipment,a plastic fermentation bucket, and an auto-syphon to make racking (i.e., transferring the liquid from container to container) easier.
If it's something you're interested in pursuing further, there's plenty more you could consider picking up. A bottle filler for the auto syphon, a filtration kit to help clarify wine/mead, fining products, you might want to look into picking up more things like yeast energizer and yeast nutrient (which it sounds like this kit comes with some) and sulfate/sorbate (to stabilize the mead before back-sweetening) etc.
There are lots of recipes and lots of help available, so read up and feel free to ask questions and have a lot of fun experimenting and trying new things :)
2 gallon bucket with drilled lid, $16.17. This will be perfect for what you're describing. http://www.amazon.com/Gallon-Plastic-Fermenter-drilled-lid/dp/B0064O8WWE/ref=sr_1_2?ie=UTF8&amp;qid=1426011617&amp;sr=8-2&amp;keywords=2+gallon+bucket
Dunno if I've ever seen 1.5 gallon, but 2 gallon would be good for a 1 gallon melomel recipe.
Edit: New formatting...
What's a simple, intro ~6.5 gal fermentation bucket?
edit: This one keeps coming up, but so many reviews complain about the lid not sealing air tight. But then others say to not worry about that too much because it's just letting gas escape anyway without letting anything in.
Don't forget the easiest and cheapest pump there is! You can easily find this in local restaurant supply shops.
1 Gallon Pitcher
You can easily siphon it too, just more to sanitize post boil.
Also, get some of these!
Or these!
Which fermenting bucket do y'all like? I bought this one, but it came with a hole drilled in the bottom like it was a bottling bucket. I returned it for a replacement... which came with the exact same thing.
To bottle your wine, you're gonna want an auto-siphon (one of these bad boys http://www.amazon.com/Fermtech-5516-Regular-16-Auto-Siphon/dp/B0064ODELI/ref=sr_1_1?ie=UTF8&amp;qid=1462350125&amp;sr=8-1&amp;keywords=auto-siphon) and appropriate tubing.
You're also going to need some kind of liquid dispenser (a la http://www.amazon.com/Arrow-Plastic-00756-Beverage-Dispenser/dp/B005S4LOYY/ref=sr_1_10?ie=UTF8&amp;qid=1462350089&amp;sr=8-10&amp;keywords=water+dispenser - wash that shit out first).
You'll use your siphon to "rack" your wine into the dispenser and then dispense it into bottles of your choosing. If anything, buy the siphon's tubing at a homebrew store and not online; a lot of online venders sell non-food grade tubing and list it as food grade.
To clean out your jugs (carboys) I recommend Oxyclean Free (http://www.amazon.com/OxiClean-Versatile-Stain-Remover-Free/dp/B005GI8UPI) used in conjunction with really any clean scrubber. I'd clean out the bottles with this stuff too, then sanitize with star san. I usually keep some star san in a spray bottle; it makes life a lot easier.
Check craigslist first for carboys. I got 5 6.5 gallon glass carboys for 75 bucks last year. As far as the rest...don't spend a ton.
You want a large primary fermenter, I don't use the buckets because they're too small if you want to use a bunch of fruit for a melomel. You can get a very high quality 14 gallon lab quality HDPE container for 31 dollars drill a hole in it and put in a bung with a 0.25 psi ozone check valve. You never have to worry about your airlocks going dry!!
You want a large stainless steel spoon, no plastic one as they are flimsy and will bend. I think I paid 7 bucks for mine at my local brew place.
You want a carboy brush that you can attach to a drill. I bought mine locally 3 years ago (it's a cheap shitty one like this) and I still use it all the time and it hasn't had any problems.
For sanitization, go Iodophor, it's cheap and it doesn't foam like StarSan, making it easier to rinse out carboys after you buzz them with the brush on your pistol drill. Buy this locally, it's very cheap, and you don't use a lot (like 1 cap full for a carboy) so if you buy the 4 ounce bottle, it will probably last you a year or more. I brew probably 100 gallons a year, and the 16 ounce bottle I bought 3 years ago is still like 1/3 full.
And always go glass, fuck plastic carboys.
For chemicals, go to your local brew place and get some bulk potassium metabisulfite it's the same thing as in campden tablets but it's cheaper in loose form, and a 1/4 teaspoon works just fine in place of a tablet.
I also buy potassium sorbate, it works differently than sulfites to stop fermentation, I use both when I use chemicals at all. You should get this locally, shipping accounts for most of the amazon cost.
You will want an autosiphon, doing it with the racking cane can be kind of a pain in the ass when you're brewing alone. I use a vacuum pump, but don't put up the 200 bucks until you know this is a hobby you really like. Again, get this locally as it's bulky but light so you'll get it cheaper vs buying online.
I don't personally use yeast nutrient except for a very few specific high test (like over 20% ABV) meads. I use raisins, they provide tannins (so you don't have to buy that in loose form) they help to acidify the brew just a bit (so you don't have to buy acid blend) and they provide plenty of nutrient for your yeasties. I add like 1 cup of finely chopped grocery store brand raisins when I brew to each 5 gallons of primary fermentation. Toss these in with your initial water boil to sanitize them and help to break them down a bit for the yeast. You can't taste the raisin after the yeast is done with them, they marginally add some more sugar, but it's so little that I don't even bother to take this into consideration when calculating.
For corking...start with 20 ounce beer bottles and a crown capper. The reason I say this is those lever action corkers fucking blow, none of them are good, and you'll end up with mead all over the place. Until you're ready to invest in a Portuguese floor corker stick with oxygen absorbing crown caps and 20 ounce beer bottles (which you should also buy locally as shipping will kill you on these.) I still bottle all of my no chemical meads in 20 ounce beer bottles to prevent them from launching corks.
Lastly, ditch the hydrometer. Get a Refractometer that has both brix and specific gravity. You will lose less wort and you don't have to worry about accidentally dropping and shattering the thing (which always happens 5 minutes before you need it.) Hydrometers are SUPER fragile.
Equipment:
2 5 gallon glass carboy
Bubble Airlocks These allow the CO2 to escape the carboy while keeping the oxygen out. Alcohol fermentation is an anaerobic process. Too much oxygen will cause production of acetic acid(vinegar).
Non-Chlorinated water(I buy 5 gallon jugs, carboys what have you of spring water from my local co-op. Make sure it is spring water. Not "drinking" water. Chlorine isn't good for yeast.)
Wine siphons are really helpful. Used to just use a polyurethane tube, and that lead to some trial and error siphoning. There are two fermentations that'll happen during the process. You'll have to siphon the wine from one carboy to another. Hence why you need 2. Pro tip: Don't stick the siphon all the way to the bottom. That's where yeast, the oak chips, and clay from the primary fermentation are going to settle. Same with the secondary, but that'll be mostly yeast if you siphoned from the primary properly.
A giant ass funnel and corks obviously.
Wine Bottles! Go with the green. Reduces oxidation by letting less light in.
Bottle Tree! Use this to let your bottles dry out after cleaning them. Make sure all your pieces are sterile.
A corker!
I usually buy a wine must kit that has the clay sediment for nutrient content, finely ground oak, yeast, clarificant, and of course the wine must. (Must is a high quality grape juice that is fairly dense). For a first time I do suggest getting a must kit. It has detailed step by step instructions along with it. It's going to take about a month for both fermentations to be completed. Do try to keep the temperature of the carboy between 75-80 degrees Fahrenheit/23.5-27 degrees Celsius. Saccharomyces cerevisiae thrives best at that temperature gradient.
The musts price range wise are going to be between 60-200 dollars for the most part. You can ferment anything with sugar though. A 5 gallon carboy is going to get you 25+ bottles of wine easy. It's actually interesting to see how the taste of the wine changes over time between each bottle. Generally the yeast/sugar content will give you ~12% alcohol in these kits.
This is the one I have: http://www.amazon.com/gp/product/B0064ODELI/ref=oh_details_o04_s00_i00?ie=UTF8&amp;psc=1
I might just upgrade to the 1/2 inch to make my life easier.
I made a book-length comment a while ago on here, lemme copy-paste it. This was for carboy-keg, but it's a similar idea. Just get creative about it ;)
"Sorry about the late reply, but here it goes.
Since you have a glass carboy and a siphon, I think you have 2 options: pressurized transfer and unpressurized (read: gravity) transfer.
First is pressurized, which is what I did. When I was doing research when I first did it, a lot of people used caps like these. Basically, they would use the large hole to put the siphon in, and the smaller hole to connect to the gas. The Gas connection should be easier with the cap.
To connect the gas, turn the regulator down to about 1 psi. be careful not to go too high, since the glass carboy can explode with pressure, so I wouldn't go higher than 1 psi. Close the tank once it's set, and disconnect the gas manifold from the regulator. This tube should go on the smaller hole on the cap, but again, this isn't how I did it so your mileage may vary. make sure you use a hose clamp and clamp it down tight too, because you don't want your CO2 to leak out. Essentially, this will push the beer from the top, down through the siphon, out the top of the cap, and down into the keg.
The siphon should fit down the cap, but if it doesn't you should be able to use a silicone tube that's the same OUTER diameter as the holes INNER diameter. The siphon hose will connect to the beer side of the keg -- or the side of the keg that normally dispenses the beer. In my case, the actual connector was clamped shut in such a way that I couldn't remove it, so instead I removed my faucet head and connected the 2 tubes. Either use a tube union like this one or jerry-rig something up. Make sure to use more hose clamps, because otherwise you'll have beer leaking all over which is no bueno.
At this point you should have a connection from the gas to the carboy and from the carboy to the keg. The last thing to do is know how to vent the keg. I have pin lock kegs without the pull-tab relief valve, so I stick a screwdriver into the unused connector to open it, allowing it to vent the gas that is being displaced by the incoming beer. On ball-lock kegs, they usually feature a nice pull-ring valve on the lid that can be pulled to release the pressure. Either way, you will need to release the pressure regularly during the process or else the pressure will equalize and the beer will stop flowing.
At this point, you should be able to start. Make sure all of the connections are tight, the connector is plugged into the keg, and you can vent the pressure. Open the CO2 tank valve, and make sure the regulator is still at a light 1psi or lower. The pressure of the gas will force the beer up into the siphon and down into the beer line, filling the keg from the bottom. This forces the gas out through the top of the keg, which is where you release the pressure that builds up as it equalizes.
Once it's done filling, turn off the CO2 tank and disconnect all of the tubes, and you have a full keg of beer!
The gravity version (which I haven't done) is basically the entire thing, but the carboy needs to be higher than the keg, and instead of a CO2 connection there . . .nothing. This obviously exposes some of the beer to the air, which is not good, but it probably is a lot less likely to explode. "
Haha thanks! It's just one of these caps with a regular airlock in the middle hole. It was only a couple bucks at my local homebrew store.
http://www.amazon.com/1-gallon-Glass-Jar-fermenting-Kombucha/dp/B006ZRBGSC/ref=sr_1_2?ie=UTF8&amp;qid=1397529260&amp;sr=8-2&amp;keywords=gallon+glass+jar
http://www.amazon.com/1-gallon-USDA-Fermentation-Glass-Jar/dp/B006ZRBGSC/ref=sr_1_2?ie=UTF8&amp;qid=1463408919&amp;sr=8-2&amp;keywords=gallon+glass+jar
These look PERFECT. Wide mouth, plastic lid, cheap, glass. What do you guys think?
You can get plastic lids for the ball jars. They also make half-gallon ball jars. You can get gallon sized glass jars as well
The first one says it will ferment, but because you use only vinegar you might not see much activity. Just follow instructions.
The second should get decent activity, and based off the recipe it looks like you might be able to use a one gallon container. ( I'm only estimating because I suck with metric)
Try this-
https://www.homedepot.com/p/Leaktite-2-gal-Bucket-2GL-WHITE-PAIL/202264039
or this-
https://www.amazon.com/1-gallon-USDA-Fermentation-Glass-Jar/dp/B006ZRBGSC
This is all based off you being in America, and with that in mind- you can usually find flip top/latch top jars at stores like tj max or Marshalls for about 5$. Good luck and have fun. If you have any trouble just ask.
Thanks everybody, sounds easier than I thought. Can you please look at these products and let me know if I'm missing anything
Glass jar
https://www.amazon.com/1-gallon-USDA-Fermentation-Glass-Jar/dp/B006ZRBGSC/ref=sr_1_3_m?s=home-garden&amp;ie=UTF8&amp;qid=1481986875&amp;sr=1-3&amp;keywords=gallon+glass+jar
Scoby
https://www.amazon.com/Poseymom-Kombucha-Scoby-Cup-Starter/dp/B00J3U9RMK/ref=sr_1_4_a_it?ie=UTF8&amp;qid=1481988107&amp;sr=8-4&amp;keywords=kombucha+scoby
Some bottles for transport https://www.amazon.com/Chefs-Star-CASE-Bottles-CLEAR/dp/B011SGS8U8/ref=pd_sim_79_5?_encoding=UTF8&amp;psc=1&amp;refRID=8GX2CTXPKCQN47F3H629
Is it really this easy, I've brewed beer before and the materials and process were significantly more difficult. Anything I'm missing?
Like /u/officeboy I use mason jars ranging from 6 ozs all the way up to 64 oz depending on the need. They're very handy.
If I need to do something larger, I use a one gallon glass jar from amazon. Cheap and works the same as the mason jars.
If I need to get above a 1 gallon starter, I just end up using a 3 gallon carboy just like a normal brew.
I bought this... and this
It ended up following around in the middle the first time and formed a second on the top so now I have two.
Noob here but what is this contraption with the red cap?
Edit: Nm Found it!
This is what I use, And get this plus the air locks
I got it at a local ferment shop but you can get them at amazon
I would strongly caution against a 35 quart pot. The Bayou Classic 44 quart (11 gallon) pot is only a little more, and it's of dimensions more ameniable to brewing (tall, rather than squat). If you plan to migrate to BiaB, the version with the basket is quite useful; you'll be able to fire your heat source without worrying about scorching the bag.
For ingredients, I would recommend looking around for a LHBS (local homebrew shop). You'll likely not save much money ordering those online, due to their weight/cost ratio, and a LHBS is often the centre of your local community of homebrewers.
With regard to literature, my bible is John Palmer's How To Brew. You can also read the first edition online, but much has been learnt since that was published and the latest edition has current best practices.
That equipment kit is decent, but there are a lot of things in it you'll probably wish you hadn't bought.
You will want:
I just got an airlock in the mail, I would recommend it, super cheap but it's well made.
Twin Bubble Airlock and Carboy Bung (Pack of 2) https://www.amazon.com/dp/B00A6TRKO4/ref=cm_sw_r_cp_apap_d2JwcdyQM9mwC
The best thing would be something like this airlock. Normally used to let off CO2 in home brew fermentation, would probably work just fine for this purpose. Just cut an appropriate size hole and add, follow instructions for particular airlock. Probably a bit cumbersome but I'm sure there's a way to engineer a sleek design somehowedit: didn't think about creating a vacuum would defeat the airlock and draw the water in :/
Cheapest thing: Two pack of airlocks with rubber bungs
How much: $1.25 +$5.45 shipping
Why do you want it: They're airlocks. I'm a homebrewer. I will use them to make delicious mead, cider, wine, and beer!
My favorite pokemon is: Hariyama!
1: A simple awesome tasting mead:
Okay, here we go:
You need something to ferment in. a 1-gallon bottle is perfect. You also need an airlock of some kind. Fermentation produces alcohol and carbon dioxide. If you sealed up something that's fermenting it would explode. So you want to let out the CO2 without letting IN any air (contamination, blah blah.) Some people use a balloon with a pinhole in it when they're getting started. But a proper airlock is only a couple bucks.
A profoundly simple, wonderful tasting mead that's great to start with is one called "JAOM" (Joe's Ancient Orange Mead.) There's nothing ancient about it.
Now? Just put all that in the jar and put your airlock on it and wait.
The hard part? Waiting. Depending on the temperature it may take a day to start bubbling. It will actively ferment for weeks. Perhaps a month or more.
You need to wait for it to clear. Really clear. Like "I can put a piece of paper behind this and read it through the mead" clear.
This is going to take months. I recommend putting it in a closet someplace and pretending to forget about it.
You'll notice, over time, that a layer of stuff is going go cover the bottom of the jar, and get pretty deep (maybe an inch or so thick.) This is fine. It's mostly dead yeast. There's nothing wrong with it, but it's a little gross, so you don't want it in the final product. What I did before I had syphoning gear was pour as much off the top into a soda bottle as I could, then pour the rest into another one. It would re-settle so that I could do it again.
It's a cumbersome process, and you'll always have to waste some of your initial product. But it's worth it.
Now that you have a bottle of clear mead you have two options, only one of which will you take.
Disclaimer: This isn't my recipe. I found this on one of my favorite sites on ye olde innert00bz. Those knuckleheads are awesome.
This might be a better investment. I use this for my 2F and it works great. You may also want to get a Air lock and a siphon as well.
Everyone's got time for it! Next time you're at the store, get a gallon or two of apple juice... the one in the glass jug. Get one or two Of these and a few packets Of this and you're good to go. If you want to get to the scientific part, get one of these to measure potential and finished alcohol content.
Dump out 1/3 of the juice, add more sugar for more alcohol if you want, add the yeast, put the air lock on and throw it in a dark place for a few weeks ;)
Someone didn't study home brewing much.
https://www.amazon.com/dp/B00A6TRKO4/
For next time
I'm in the same boat as you. I followed this recipe. The only additional step I took was melting the sugar before I added it to the mix.
I bought a jug and a set of airlocks on Amazon. I bought a 4lb bag of sugar, a can of frozen white grape concentrate, and some packets of yeast at the grocery store. It cost about $25 total, but most of it was on the jug and airlocks, and I won't have to buy those again.
Since I had the extra airlock, I started another batch in a 3/4 gallon bottle of grape juice with some added sugar. Should the grape juice batch turn out better, the $10 jug wouldn't have even been necessary. I'm 10 days in, we'll see which batch turns out better.
I'd like to do 5 gallon batches. I don't think the quantity from the Mr Beer keg is worth it.
How's this look? Total is around $80.
Fermentation bucket
Bung/airlock
Stock pot
Autosiphon
Star San or Idophor (What's the difference?)
Is there any advantage to having a carboy as well? How long would I leave the beer in the fermentation bucket?
So if I wanted to do sours, I'd basically have to get 2 of everything?
Edit - actually, wouldn't this kit be about the same, but with an extra bucket but no stock pot?
Edit 2 - another pot, 36qt is good price, leaving this here so I can find it again.
Without a proper airlock, the brewing vessel is either going to build up pressure and pop, or it's going to let in all sorts of things from the air, and would be about as safe as any attempt to drink grape juice that's been sitting out on the counter for a few weeks.
It's possible to brew this way, but it's almost guaranteed to end up poorly. There's a very high chance of it going bad, that is, of growing mold or other unwanted microbiotic visitors. You'll probably be able to see this happen.
Even if it doesn't work, the end result will most likely be one of the nastiest forms of wine you've ever had. It's not quite prison hooch, but it'll be close.
----
If you and your friends really want to try and get into brewing on the cheap, my suggestion is to start with an airlock and bung like these, find a gallon of apple juice or apple cider at the grocery store in a glass bottle with no preservatives (check the label), and drop in 1/4 of a packet of a brewing yeast like this one. It's a very beginner friendly (and kinda harsh) yeast that will survive mistreatment and bad conditions no problem. You put the yeast in the apple juice, you put a little water in the airlock, you put the airlock on the jug, and wait a month. You'll want to get a food safe hose to siphon out the brew when it's done, and you'll need bottles to age it in (the stuff will taste bad at first but give it 5-8 months and you'll have somethign wonderful). When the brew finishes that first month, fill up the bottles and seal them, then keep them somewhere cool for 5-8 months. Note: you'll need clean glass bottles, and you'll want to sanitize them or else any bugs in there will make the brew go bad while it ages. I like swing top bottles, they don't require a capper machine or a supply of caps.
Total cost to brew up a simple tasty cider, including all supplies:
Coming out to less than 50$ to get started, and most of that you won't have to buy again for later brews. If you find a local homebrewing shop you might be able to get these things cheaper... or not. At least you should be able to find them in single packs instead of amazon's bulk sets.
If you want to take it to the next level, use an airlock instead of a balloon and a strip thermometer. By keeping the temperature low (55F) you will get a smoother mead with less hot alcohols, but it will take longer to ferment.
Amazon has them
https://www.amazon.com/TSM-Products-31060-Fermentation-Harvest/dp/B00JG77G8M
&#x200B;
https://www.amazon.com/Gardeners-Supply-Company-5-Gallon-Stoneware/dp/B002P4RISG
There are sauerkraut recipes all over the internet, and it is one of the easiest things to ferment. Chop (or shred) cabbage, add salt, and wait. I also add caraway seeds. I think one of the most important parts to making sauerkraut is to make sure you have a nice crock. I used this one. Homemade sauerkraut is so good you can eat it like salad.
Most non Asian grocery stores tend to not sell their kimchi heavily fermented. The kimchi boxes work for any ferment for what it's worth. They look like this https://www.amazon.com/dp/B00M40ANMO
i currently use a carafe with an airlock but am looking to buy this which is for making kimchi and sauerkraut
http://amzn.com/B00M40ANMO
I would look into e-jens for an alternative. Come in different shapes and sizes plus it seems easier to clean
https://www.amazon.com/Sauerkraut-Container-Probiotic-Fermentation-Earthenware/dp/B00SWBJJQ0
Probably something like this . I've been eyeing these for a while myself.
Been noticing in a good number of Kimchi videos that Koreans seem to
use these and I'm wondering how well they hold up over time.
Never seen anyone put an airlock on their kraut before. The standard thing if you're making it in a jar is to close the lid tightly and just burp it once a day and take a taste, then refrigerate it when it's at your preferred level of sourness. Fermenting it in a sealed container helps it to absorb more CO2, which gives it a crisper texture.
Another good way to do it is to ferment in an e-jen kimchi container. Works great for all sorts of pickles.
Ah yeah here ya go.
Easy Fermenter Wide Mouth Lid Kit: Simplified Fermenting In Jars Not Crock Pots! Make Sauerkraut, Kimchi, Pickles Or Any Fermented Probiotic Foods. 3 Lids(jars not incld), Extractor Pump & Recipes https://www.amazon.com/dp/B01DJVVORE/ref=cm_sw_r_cp_apa_i_KA3jDbFHA0H7T
This is the set the lids and weights came from. First impressions: I really like them! They fit perfectly on wide-mouth Ball jars and the syringe seemed to get pretty much all of the air out. Just make sure you line up the threading because the first time I tried to put the lid on, it was crooked and very hard to get back off to fix.
Besides that, I’m basically remaking a sauce I made last year. But this time, I actually have a scale and was able to accurately measure my salt. When I made 4 different hot sauces last year, I had one that went bad, so I made sure to disinfect all of my equipment by soaking them in a bleach solution for about 10 minutes before starting. Hopefully between that, the airlocks, and the more accurate measurements with the salt will prevent any weirdness from happening.
Side note: the color that hibiscus gives the brine is absolutely beautiful and I love it so much.
Recipe:
-13 halved and seeded habaneros
-6 halved habaneros
-1 yellow bell pepper
-1 orange bell pepper
-4 guavas
-1 prickly pear
-2 inches of ginger, peeled
-8 small garlic cloves
-1 tsp. celery seeds
-2 tsp. coriander seeds
-4 hibiscus flowers
-5% brine with pickling salt by total weight (worked out to 39g for one jar and 40g for the other)
Fermenting for at least 2 weeks and then blending with brine and a small amount of white distilled vinegar for flavor and shelf stability. May also add a little xanthum gum to keep it from separating.
>Well, that depends. You say water. Do you mean a brine?
I meant brine. I take two cabbages, shred them in a food processor, put the shredded cabbage in oblong glass dishes, measure out two tablespoons of sea salt and massage that into the cabbage for 5 minutes, leave the cabbage in the glass dish for 1 hour, and then pack it into half-gallon mason jars. Once these jars are filled to the top (noob mistake I keep making), I use a sauerkraut pounder to squish as much brine out as possible. Afterwards, I add an additional 1 tsp of salt and put glass weights on the cabbage before putting on the lids. If at this point there's not enough brine to submerge the cabbage, I add a little bit of bottled water until it is submerged.
>Why are you adding extra liquid at the start instead of just 2% salt by cabbage weight?
I do this under two scenarios:
0. I pack the jars full of cabbage and pound out as much brine as possible but there's still not enough brine to keep the cabbage submerged
0. Sometimes I don't have enough cabbage to fill up a half-gallon mason jar so I add bottled water until it reaches near the top of the jar
>Do you have a weight in the jar (I assume not based on your question, but maybe you do)
Yes, I use the glass weights that came with the fermentation kit
Yeah either get plastic lids and manually burp whatever you're fermenting or get lids with airlocks that let air out but no air in.
These are the ones I bought when I started and while they're nice it's kinda overkill, if you can find anything plastic that has an airlock for cheaper I'd go with that.
After a quick search I found these and they look okay.
As a quick note, if you plan to make anything that smells strong, I'd advise against the ones I bought; they have rubber parts. I made kimchi using one of the lids and now it's my kimchi lid, because the rubber parts smell like an open jar of kimchi from meters away even after excessive washing and boiling in water for several minutes.
Glad to share, we've had a lot of fun with it! For canning, this site has some really good general info and basic recipes. Lately I use this book more, but she does not use pectin, I still do. Her process often involves extra steps with separating solids from liquid and cooking down the liquid - I don't do that, too much time and mess.
For fermenting, I went to a workshop to learn the basics. I'm really liking it because of how flexible and easy it is - no water baths and sterilizing, recipes aren't really needed. This site has a good guide for brine strength, but I approximate how much salt, and it's been fine. A basic sauerkraut, you slice up a head of cabbage, reserving the pieces of the core. Sprinkle about 3 tablespoons of Celtic sea salt or Himalayan pink salt (or some kind of salt with no additives) and massage it in for a few minutes. Sprinkle on some caraway seeds and mix in. Then pack it into a quart size, clean, ball jar. Pack it down firmly as you fill it, I use my fist, but you can get a sauerkraut packer - a wooden instrument to pack down krauts. Add all the liquid it has released too. Leave about 1-1.5 inches of head space, place the cabbage core and put a lid on it. The cabbage core is in lieu of other kinds of weight, basically you need the veg to stay under the liquid throughout. The cabbage should release enough liquid to cover it, but if not, add brine (3 tablespoons salt per quart) to cover. Then just let the good bacteria go to work for a few weeks, making sure to burp your jar every day at the beginning, then less frequently. In our first batch this year we forgot the first day after, and then the next day when we released the pressure it sprayed all over like a shaken can of soda. Because I am lazy, I got these lids that prevent the need for that step, but I still had one overflow because my cabbage released more water than I expected.
That is a basic recipe, but you can put in whatever you want, and just make sure it has enough brine. We made one with julienned beets, kohlrabi, onion, and carrot with some pickling spices. I did another with cabbage, greens, beets, onion and kohlrabi with mustard seed and oregano. These folks who ran the workshop I went to list their products here and there are some really good ideas for what combinations you might try. Have fun with it!
Wide mouth mason jars + fermentation weight + fermentation lid
I personally love these lids but they are pricey and the other ones work fine.
Easy Fermenter Wide Mouth Lid Kit: Simplified Fermenting In Jars Not Crock Pots! Make Sauerkraut, Kimchi, Pickles Or Any Fermented Probiotic Foods. 3 Lids(jars not incld), Extractor Pump & Recipes https://www.amazon.com/dp/B01DJVVORE/ref=cm_sw_r_cp_apa_i_SdIzCb490E139
Has anyone fermented with something like this?
&#x200B;
https://smile.amazon.com/Easy-Fermenter-Wide-Mouth-Lid/dp/B01DJVVORE/ref=sr_1_1_sspa?keywords=ferment&qid=1570111451&s=home-garden&sr=1-1-spons&psc=1&spLa=ZW5jcnlwdGVkUXVhbGlmaWVyPUFESzVOTjE2UEwwMU0mZW5jcnlwdGVkSWQ9QTA2MDYzNTIyOFZTOUhYUUlNVjlIJmVuY3J5cHRlZEFkSWQ9QTA1MTU0OTQxRk84WUNFSTlRWkk4JndpZGdldE5hbWU9c3BfYXRmJmFjdGlvbj1jbGlja1JlZGlyZWN0JmRvTm90TG9nQ2xpY2s9dHJ1ZQ==
Was looking at them last month. Not cheap to buy or ship here to the UK unfortunately :(
https://www.amazon.com/dp/B01DJVVORE/ref=cm_sw_r_sms_c_api_i_8PWODb005SZB5
You need a two stage Inkbird temp controller (https://www.amazon.com/dp/B01FTNL4DE/ref=asc_df_B01A6UZQX45379116/?tag=hyprod-20&amp;creative=395033&amp;creativeASIN=B01A6UZQX4&amp;linkCode=df0&amp;hvadid=167130986292&amp;hvpos=1o1&amp;hvnetw=g&amp;hvrand=7187178485843403005&amp;hvpone=&amp;hvptwo=&amp;hvqmt=&amp;hvdev=c&amp;hvdvcmdl=&amp;hvlocint=&amp;hvlocphy=9002216&amp;hvtargid=pla-308523201570&amp;th=1)
You need something to keep it cool (typically a fridge)
You need something to warm it up (I like this DIY set up http://www.brewstands.com/fermentation-heater.html)
You can use the thermowell but it isn't needed (tape the probe to the side of your fermentor and wrap bubble wrap around it for insulation. This will read the wort temp within 1°F.
You plug the Inkbird into the wall outlet. You plug the fridge in the cooling plug of the Inkbird. You plug the paint bucket lamp heater (or your heater of choice) into the heating plug of the Inkbird. Then you need to set your perimeters. I haven't used an Inkbird so I'm not 100% on what they are. Typically you will have set temp, temp differential (how far of a swing in temp you will allow), and compressor delay (this sets time in minutes the minimum wait time to turn the fridge on, this is used so it doesn't turn the compressor on and off frequently and wear it down).
This green one works awesome on my reef tank.
Inkbird controller, I bought one from Amazon.https://www.amazon.com/Fathers-Day-Gifts-Temperature-Controller/dp/B01FTNL4DE/ref=sr_1_1?ie=UTF8&amp;qid=1464848450&amp;sr=8-1&amp;keywords=father%27s+gift+ITC308
https://www.amazon.com/Inkbird-Pre-Wired-Temperature-Controller-Homebrewing/dp/B01FTNL4DE/ref=sr_1_2?ie=UTF8&amp;qid=1496347998&amp;sr=8-2&amp;keywords=itc+308
We bought one on amazon that will turn off the lamps at a certain temperature (give or take a specified threshold): https://www.amazon.com/gp/aw/d/B01FTQ669S?psc=1&amp;ref=ppx_pop_mob_b_pd_title
I was also super paranoid about the temperature and got two lamps, which has been really helpful...if only to prevent me from waking up in the middle of the night to check on him those first couple of weeks :) That one has two plugs controlled by one thermometer.
I just ordered one of these for $85 shipped. https://www.amazon.com/Chapman-Gallon-Stainless-Fermenter-Portless/dp/B01HIZF4SW/ref=pd_lutyp_simh_1_2?ie=UTF8&amp;dpID=41zBI3z1arL&amp;dpSrc=sims&amp;preST=_SL500_SR101%2C160_&amp;psc=1&amp;refRID=9SRV8ZGFM55V56D6WPH5
I have 7 and 14 gallon Chapman fermenters and really like them... especially the newer models at this price point! https://www.amazon.com/Chapman-Gallon-Stainless-Fermenter-Portless/dp/B01HIZF4SW?ref_=mw_olp_product_details
use a 15.5 sanke keg. take the spear out, use a carboy cap to seal,take the larger cap off and put in an airlock. sanke's can be found for around $20-40 depending on the condition of them. now you have a SS fermentor
if you want SS mfg, look at the chapman fermentors. https://www.amazon.com/Chapman-Gallon-Stainless-Fermenter-Portless/dp/B01HIZF4SW
I got this one recently, pretty cheap for stainless steel. Only downside is no conical base, but at that price, I can't complain.
I use this one and it works well. I've pushed it up to 80F so far but it seems it could go hotter.
https://www.amazon.com/Brewing-Fermentation-Homebrew-Fermenting-Heating/dp/B072V15ZK2
Fermentation Kit for Wide Mouth... https://www.amazon.com/dp/B075LRMRDQ?ref=ppx_pop_mob_ap_share
I used this PLUS weights because I'm an extra idiot.
https://www.amazon.com/Fermentation-Kit-Wide-Mouth-Jars/dp/B075LRMRDQ/ref=pd_lpo_sbs_79_t_1?_encoding=UTF8&psc=1&refRID=N8RJ66PS6EDXG3YSSNZJ
I'm assuming it's airtight. I barely opened it over 2 weeks.
Yes I use ball mason jars and dishwasher before each use. As for the lids I’m using these - https://www.amazon.com/dp/B075LRMRDQ/ref=cm_sw_r_cp_api_i_.Wk5CbB9JYDT6
It's done in a couple of different ways -
Some people just loosen the lid to let some of the gas escape, but you always run the risk of letting air in (could cause mold), but it really depends on how long a jar lasts you haha.
For intentional ferments, many folks use lids like this for the process with fermentation weights:
https://www.amazon.com/Fermentation-Kit-Wide-Mouth-Jars/dp/B075LRMRDQ/ref=sr_1_5?keywords=fermentation+lid&amp;qid=1571407118&amp;sr=8-5
Like this?
Air locks
This is what I used:
Fermentation Kit for Wide Mouth Jars - 4 Airlocks, 8 Silicone Grommets, 4 Stainless Steel Wide mouth Mason Jar Fermenting Lids with Silicone Rings (4 Set, Jars Not Included) https://www.amazon.com/dp/B075LRMRDQ/ref=cm_sw_r_cp_api_i_.rnVDb1DB18WK
Of course they sell them on amazon https://www.amazon.com/dp/B075LRMRDQ/ref=cm_sw_r_cp_api_i_DJ5QDb1BYWFSM
A glass weight would be best.
weights
Those are the ones I use and they work great. I’ve never done it with the bag. Just doesn’t seem sanitary and more likely to ruin your ferment.
I’d start with a small Batch so you don’t throw a lot away. You’ll learn from any mistakes and it won’t cost you a lot. Use 1 quart jar. Put your vegetables in there. Then mix 2 cups of water with one tablespoon of salt. Mix well and then pour into quart jar with the weight.
I learned from the video below. His simple technique works with pretty much any vegetable.
Craig’s kitchen
You are welcome! I found quite a few others that will probably work just as well and shave off a few bucks too!
$12.99
6 pack $15.99
Amazon link here.
Also bought these to go with it.
My wife bought me the book Fiery Ferments and now I can put it to use.
This kit also has an $8 off coupon.
$10 off this one.
I used those for a while and had siphoning issues I switched to these http://www.amazon.com/gp/aw/d/B000E60G2W?cache=0def084219be6974be04a3df0f07f8de&amp;pi=SY200_QL40&amp;qid=1408932109&amp;sr=8-3#ref=mp_s_a_1_3 and haven't had a problem since
You could get him a home brew kit if you want to springboard him into his hobby?
http://www.amazon.com/Basic-Homebrew-Home-Made-Beer/dp/B000QGI5RS/ref=cm_lmf_tit_1
Or else get him one/both books and a small piece of kit like an airlock. This would be good to have as a spare even if he already has a kit
http://www.amazon.com/Twin-Bubble-Airlock-Wine-Making/dp/B008ACWSZU/ref=sr_1_4?s=home-garden&amp;ie=UTF8&amp;qid=1418754163&amp;sr=1-4&amp;keywords=airlock
Plus how about getting him some nice craft beers to taste someone elses handywork? Does your local beer shop sell any unusual varieities or local breweries?
Lastly, every cyclist I know is always loosing their multitool
These bags are expensive and you can't sample the goods without using up a new bag. Get a glass jar and a burping lid. Example: https://www.amazon.com/Easy-Fermenter-Wide-Mouth-Lid/dp/B01DJVVORE/ref=sr_1_2?keywords=fermenting&amp;qid=1551063658&amp;s=gateway&amp;sr=8-2