(Part 2) Best building materials according to redditors
We found 1,243 Reddit comments discussing the best building materials. We ranked the 638 resulting products by number of redditors who mentioned them. Here are the products ranked 21-40. You can also go back to the previous section.


https://www.amazon.ca/Non-Slip-Stair-Treads-Tape-15-Pack/dp/B07C6GJ1LK/ref=asc_df_B07C6GJ1LK/?tag=googlemobshop-20&linkCode=df0&hvadid=337146517102&hvpos=1o3&hvnetw=g&hvrand=15036211224457770581&hvpone=&hvptwo=&hvqmt=&hvdev=m&hvdvcmdl=&hvlocint=&hvlocphy=9000014&hvtargid=pla-458390817305&psc=1
I looked into this as well and will order it if I find it too bad... the wife and kids went home for a mini-vacation while I did the urathane (oil-based is very fumey). If it’s not safe enough that seems like the best fix.
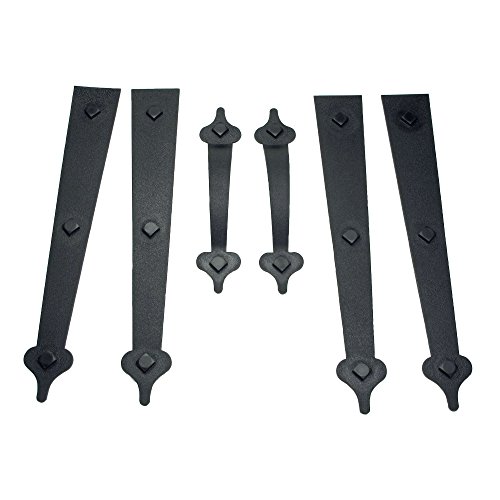
Have an extra $13.27? These magnet garage door accents add a lot IMO. We've had ours on for close to 2 years with no problems and they look fantastic. Plus they're cheap and super easy to install (just stick them on).
You do know that vent covers are like $20 and would easily fix your problem?
Problem Solved
I have hardwood and granite stairs in my house and this fixed the issue that you describe. And it is nearly invisible.
I've used the Knowles GK driver in all of my builds with a green damper on the TWFK. The sound signature is fairly flat, although I've never measured it. I'm no expert in sound and I haven't listened to a lot of good headphones so I don't really know how it compares to others. I have had a couple of people that told me they were the best sounding headphones they had listened to.
Here are all of the completed sets I've made. Set #1 and #7 were made for myself. #7 was just a reshell. The green and blue faceplates are Kirinite. It is typically used to make knife and gun handles. The wood is from a variety pack of veneer I bought from Amazon. For the wood, I cut rectangles of the veneer that are just bigger than what I need and glue them all together to get the thickness I need, typically 5 or 6 layers.
I also used a sheet of aluminum on my third set. I got it from a local metal supplier for free. Just a small cutoff. It was pretty difficult to work with. It had to be shaped before it was attached to the shell. It would get too hot and fall off when shaping it with it attached.
Nope, just masked and used a spray shield. Covering the top glass was the most time consuming.
I saw other people do the hardware on the garage doors and it adds some depth to it. I went with these on amazon and they're magnetic.
https://www.amazon.com/gp/product/B00QF6DFJQ/ref=oh_aui_detailpage_o05_s00?ie=UTF8&psc=1
Strap in, this got kind of long! I hope it's useful to someone.
I too have the "need a lot of bins and boxes and whatnot" situation because of my and my partner's hobbies. I sew and crochet and embroider and work with leather, and he works with electronics and 3d printers and so on. We share a small (10' x 10') room for our workspace and all of our most commonly accessed supplies.
Being someone who gets fixated on ideas frequently, I suggest that you open up your search to other options other than interlocking boxes. The reason I say this is that I am surrounded by bins and have been working with various sized bins to access things for a long time and I am tired of them. The problem is similar to what many other posters have mentioned: Getting items out of the boxes (even if they are small) is an Ordeal, especially if you have multiple boxes out, or if the box is very full and hard to put back together.
In general, a rule of thumb is to think about how you'll put your item away rather than how you'll access it. When we want access to something, it doesn't seem like a big deal to undo bins, bags, boxes, slide heavy things around, etc. because we get a reward at the end (yay, it's the thing! shiny!). After that, the idea of undoing all that stuff seems like a pain in the arse, and we just don't want to do it? (and what if we might need another thing from that bin? So, consider how you'll put it away, rather than how you'll get it out when designing a storage solution.
So, I am now moving away from the lidded box approach and encouraging my partner to do the same. Having watched Adam Savage's video describing first order retrievability, I am moving in that direction (although not yet to his ninjery level). Here's the video: https://www.youtube.com/watch?v=TWQAYfGxsPE.
I suggest the following types of storage for smaller objects. Bins still work OK for larger objects but someday I'd like to move away from that too.
Get some of this "fake" hardware for the garage door.
https://www.amazon.com/Household-Essentials-240-Magnetic-Decorative/dp/B00QF6DFJQ
Here's what your door might look like
https://m.media-amazon.com/images/S/aplus-media/vc/3600f80d-b4dc-4b19-a9ed-db4954785a5d._SL300__.jpg
>can I just add new caulk on top of the old cracked painted stuff while the tub is filled with water and call it a day?
No you can't. If you try to add caulk on top of that, it'll look like absolute shit.
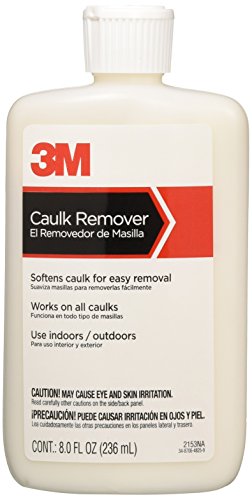
Use this to remove the old caulk: https://www.amazon.com/ALLWAY-TOOL-CT31-Caulk-Tool/dp/B004BGAER8/ref=pd_lpo_vtph_60_bs_t_1?_encoding=UTF8&psc=1&refRID=0KXKZVQRM0Q7PMYDZSTD
If it's really hard to remove, you can use some of this to losen it up and make it easier:
https://www.amazon.com/3M-Caulk-Remover-8-oz/dp/B000H5VNG8
​
When you recaulk, make SURE that you use caulk rated for bathrooms (it'll say on the tube). It needs to be silicone caulk. Not latex. If it's not specifically rated for bathrooms, it WILL get mold on it.
​
>I am worried this won't be enough though. I have never seen a tub with just drywall above it like this. So my next question is what are my options if caulking is not enough?
​
It should be enough if you're not showering in the tub, or bathing kids in there. A grown up isn't going to splash the water up that high.
If you want to waterproof it more, and then tile, without making a height difference, use this:
https://www.amazon.com/CUSTOM-PRODUCTS-LQWAF1-2-Redgard-Waterproofing/dp/B000NZ73SE/ref=sr_1_1?s=hi&ie=UTF8&qid=1535824995&sr=1-1&keywords=redguard&dpID=51Zf43NjFPL&preST=_SY300_QL70_&dpSrc=srch
​
It's a paintable waterproof membrane. Just paint it on (two coats) and it'll form a layer of 'plastic' protrecting the drywall. Then you can tile right on top of it. Use actual tile set and NOT mastic glue for the tiles. Mastic will grow mold.
​
Try that rug for him that I linked. It's less than $20 - easy to clean, looks good. Even just right outside his cage... He will love it! :)
​
For stairs try these clear strips or these or something like this.
​
Oh an you are very very welcome!
Yeah, I did a few test batches that were in the 12"x12" neighborhood. I used melamine for the forms and largely found this Ask This Old House video to be very helpful (although I didn't use the spray method for the initial coat). Key points that I used and learned:
I think that's pretty much everything. Doing a couple test pieces will teach you a ton. Have patience, have fun, and good luck!
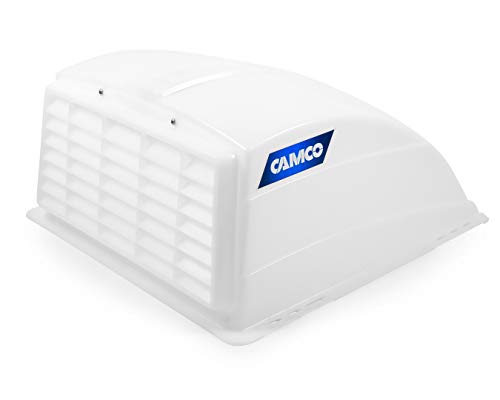
I definitely recommend covers as well. I've had plenty of rainy stuffy days where I couldn't open a window and was glad to have vent covers. Raises your roof line a bit though(broke one on a tree once). Really easy to install a replacement if it happens. Only cost about $20 each and don't require any sealing, they hover just above the roof.
https://www.amazon.com/Camco-Cleaning-Aerodynamic-Included-40431/dp/B000BUQODG
Fair enough. They actually make door-sized screens as well that fasten with magnets down the middle.
Edit; https://www.amazon.com/gp/aw/d/B00KZNOHTW?pc_redir=T1
Most are a standard size. You can safely buy one from Amazon...
Replacement vent
And this is what I put over my vent:
Vent cover
You don't have to worry about rain getting in, and theoretically, you can drive with the vent open.
>That's a gorgeous fence
My wife would digress, she says the curve isn't centered. 2 flats on one side, 3 on the other.
>I am an idiot
C'mon you run trivia nights, I've seen you post here plenty. There are true idiots on this sub, and you're not one of them (IMHO)
>don't know if I could actually do that.
Don't know until you try. I didn't know until I tried, but I had some fencebuilding experience when my family still had ranches (mostly the old men yelling at me to carry wood, sand, nail, no cutting)
This is how I did it. Maybe I can lend a hand, I dunno. You'd have to entertain my wife and kids and maybe feed us or something. Maybe you could do the same for us sometime.
Tools: (mostly cheap harbor freight)
I started off by measuring. Once I had my measurements in, I took a long hard look at my neighbors fence (we have that picture) and copied the framing. I scaled it for my entryway.
Once I had the basic design down, I drilled in my post cement anchors. I used 4 of these Simpson Strong Tie Fence Anchors. Even after a year, the fence is still as strong as the day I made it.
After I had my posts up, I put the J screw hinge onto the posts and connected some cross members so the posts would shore up against each other.
I took what would become my gate frame, and put the other half of the j screw hinge in. Then I did one final measure now that I knew how much space the hinges took up.
Pulled the 4x4's off the hinge post, and built out the rest of my frame. I made sure to leave plenty of room at the bottom for the gate to swing freely. After the frames were complete, I re-hung them on the J hooks.
Once the frames were up, I began skinning them. I laid a 4x4 at the bottom to give myself spacing (Didn't want the skin scraping) and put up fenceboard. Throughout this entire process, I used deck screws with the star bit. These bits don't slip, and the screws are coated to sort of self lubricate themselves through the wood.
After all the skin was up, I tied a string to where I thought was center at the bottom of the fence. I stretched the string to the top of the fence and tied a crayon to it (just didn't have a pencil) The string acts like a giant compass, and let me make a nice even arc.
Finally, I took a hand held jig saw and sawed along the line at the top making that nice curve.
Only took me a day to knock it out.
Do you mean patio? :P
Easy enough. Get one of these then do the hammer drill thing. For bolts in to the concrete either use the wedge anchor or set some bolts in with epoxy. Probably wise to use stainless steel for all your bolts.
The garage door opener can be found here
ismartgate garage door opener
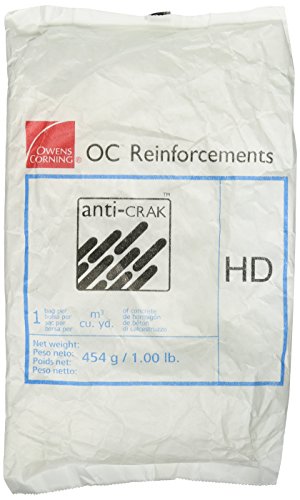
Out where I live, we have moved away from the rebar for light duty applications, such as patios and driveways. Crack control is now done with "kitty fur" and control joints:
https://www.amazon.com/32-500-4-Inch-Anti-Crak-Concrete-Fibers/dp/B000CODWAE
We mix this thoroughly into the concrete, and the fibers help to prevent cracking during the curing process, and afterwards. They are available in many different thicknesses and lengths, depending on the job:
http://usa.sika.com/en/solutions_products/Construction-Products-Services/Concrete/concrete-reinforcing-fibers.html
Call around, and see if this is available in your neck of the woods.
Is the smart garage door opener you listed any different than buying an the smart upgrade kit for current openers?
Something like this?
https://www.amazon.com/Chamberlain-CIGCWC-Internet-Smartphone-Connectivity/dp/B00C1CF1S6/ref=sr_1_5?ie=UTF8&qid=1484141777&sr=8-5&keywords=myq
so a coded garage door (one that we can easily multi-program), plus specific keys for the actual apartment door-door.
that's kind of what i was thinking, i just want sure how to best do the garage door as an entrance.
probably easiest to do a key-chain garage door opener + key, like this
> I wish he would have a trust issue about it, I'm tired of fixing mi
Get some of those magnetic screen doors. The dog will run right through it and it places itself back.
These both work:
Which MyQ system do you have?
Ceiling Mounted
or
Wall Panel
With the wall panel version you can set an auto-close timer right on the wall panel.
I had originally bought the ceiling mounted one myself but found it wasn't reliable and lacked this feature. I switched to the wall panel one and it works much more quickly and has the auto-close timer. Much easier to install as well. If you have the ceiling mounted one I would return it and switch if it isn't too late.
I redid my stairs a few years ago and didn't do grit in the finish. After a few close calls, I ended up putting tread tape down. No one notices it, and I haven't fallen yet. If I did it again I'd try grit, but I'm happy with it now.
Check out the Homekit subreddit: https://old.reddit.com/r/HomeKit/
There is a website called https://homekitnews.com/ that has reviews of a lot of products controlled by IOS devices.
For your garage try this product:
https://www.amazon.com/ISMARTGATE-PRO-Garage-aka-Gogogate2/dp/B07PZDKMZ9/ref=sr_1_2_sspa?crid=394T3QH2I1N7&keywords=ismartgate&qid=1573604123&sprefix=ismart%2Caps%2C214&sr=8-2-spons&psc=1&spLa=ZW5jcnlwdGVkUXVhbGlmaWVyPUExR0hZQzdXWjc0VkVLJmVuY3J5cHRlZElkPUEwNjg0NzUyMkI3WDBGNEwwREE0SCZlbmNyeXB0ZWRBZElkPUEwNTQwMTUwMUpISVYzRE5GMDdKQyZ3aWRnZXROYW1lPXNwX2F0ZiZhY3Rpb249Y2xpY2tSZWRpcmVjdCZkb05vdExvZ0NsaWNrPXRydWU=
Check out the Homekitnews website to get other recommendations for other products.
Food Grade 85% .. insanely strong when not diluted.. you can dilute 5 to 1 water to acid or 10:1 water to acid easily. I have put rusty bolts in the undiluted and they come out like they were sandblasted in about an hour.. the threads all cleaned out like new.
https://www.amazon.com/Gallon-Grade-Phosphoric-Remover-Clean/dp/B06XZSW3QX
or you can buy a quart of rustmort which i always use to use as an autobody tech .. its great .. I would say its probably a 10:1 dilution
https://www.amazon.com/SEM-69504-Rust-Mort-Quart/dp/B000HI690U/
this is why I will never drink cola drinks again
https://jillcataldo.com/wp-content/uploads/2017/04/cokeingredients.jpg
https://www.amazon.com/3M-2153DC-NA-Caulk-Remover/dp/B000H5VNG8
Did you know Amazon will donate a portion of every purchase if you shop by going to smile.amazon.com instead? Over $50,000,000 has been raised for charity - all you need to do is change the URL!
Here are your smile-ified links:
https://smile.amazon.com/dp/B013UGZYOM/ref=cm_sw_r_cp_api_pgfJzbNESY9AX
---
^^i'm ^^a ^^friendly bot
The heat is supposed to work perfectly,l the time period is to make sure the heat penetrates all the crevices. My wife and I didn't have that option, so we got a steamer for all the cushions and pillows, and used Cimexa dust to coat everything and fill all the nooks and crevices, and carpenters tape to help seal certain areas thouroughly.
My only recommendation at this point would be to get some of these.
If it's not caulk, this suggestion won't help, but I recently used 3M caulk remover to get the gunk off after we removed (horrible, hideous, ugly) metal shower doors. You squirt it on, let it sit for awhile, and then come back and scrub it off. It took some elbow grease, but it worked pretty well.
> I'm in the country - not sure I'd do that in the city.
Here's what we do in the city:
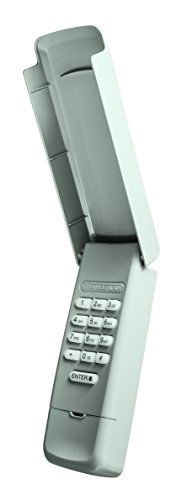
https://www.amazon.com/Chamberlain-LiftMaster-Craftsman-940EV-Garage/dp/B004QM7O34. It's just a remote control with a keypad so installation is a 5-minute job.
Lacks the "secret passage" factor though.
Magnetic screens for your doors work great
Is is this thing? http://www.northshorecommercialdoor.com/st30gadoopvi.html
It doesn't look very big. I'd probably just take the clip off and put it in my pocket (that's why I do with my garage remote, actually). If you want to go smaller, you could consider something like this.
Any programmable 300 MHz remote should work with the gate receiver. I'd find one with the same dip switch config as the remote you have. The switches are basically the "combination" that allows the remote to open the gate. Open old and new remotes, set the switches on the new remote to mimic the old one. Then the new remote should open the door.
From what I can tell reading up on the types that use 10-position switches and operate on 300mhz, you should be safe with pretty much any universal garage opener that:
Should be easy to find one on Amazon, or anywhere. I like the key-ring size ones. Roommate got one of these (except the version that works for our door) and it works great. It arrived with a dead battery though, so he ended up having to replace that, but even if that happens to you too it's still way less than the $50 your landlord wants for it.
From reading wikipedia about garage opener tech, the DIP switch types haven't really changed since the 90's. So there shouldn't be any surprises in the switch-containing types.
Edit: And yes, that's what you do. Copy the switch positions and it should just work. If it doesn't, double check that the switch positions (left vs. right, and up vs. down) are the same on the new remote. Could be the first digit is on the right instead of left, or that down means 'on' instead of 'off'.
This is what I have left over from a former house.
There many options for clear skateboard grip tape -- https://www.amazon.com/ZUEXT-Skateboard-Waterproof-Rollerboard-Wheelchair/dp/B0755WR3XR/ref=sr_1_5?keywords=skateboard+grip+tape&qid=1563144164&rnid=2941120011&s=outdoor-recreation&sr=1-5
That gym grip spray, which is resin mostly, does not last long. I tried it on my own feet in one of the bathrooms.
Not 100% sure what the difference is (might just be depth of unit/quality of construction), but this is the actual product on Amazon. Similar, but not quite the same. The actual product is about $20 more expensive on Amazon (although that price difference drops if you have prime).
I would look into quikrete 5000 which can be bought a Lowes for $5-6 a bag and just add fiberglass shards for added strength. That's what i plan on doing for my bathroom vanity.
https://www.amazon.com/32-500-4-Inch-Anti-Crak-Concrete-Fibers/dp/B000CODWAE/ref=sr_1_1?ie=UTF8&qid=1491533180&sr=8-1&keywords=fiberglass+fibers
Is this what you need?
Would one of these work for you?:
https://www.amazon.com/Magnetic-Screen-Frame-Velcro-Openings/dp/B00KZNOHTW
Check out iSmartGate it’s HomeKit enabled. Just check compatibility with your opener first.
This is the pro version that allows it to open 2 doors
ISMARTGATE PRO Garage (aka. New Gogogate2) - HomeKit, Google Assistant, Alexa and iFTTT Compatible Controller to remotely Open, Close and Monitor from Anywhere with Smartphone. https://www.amazon.com/dp/B07PZDKMZ9/ref=cm_sw_r_cp_api_i_x8DjDbCJK1P70
This one allows one door
ISMARTGATE LITE Garage (aka. New Gogogate2) - HomeKit, Google Assistant, Alexa and iFTTT Compatible Controller to remotely Open, Close and Monitor from Anywhere with Smartphone https://www.amazon.com/dp/B07PX311B3/ref=cm_sw_r_cp_api_i_f9DjDb4AWF7MW
I was surprised at how much these magnetic garage door accents changed the look of my attached garage. There are many different styles to choose from, take seconds to “install” and made my garage look so much better. I bought mine at Lowe’s for 2x this price, so I’d definitely look online.
Feed the dog outside, exclusively. It will help a lot. And check this out so the dog can freely go in and out, but not the mosquitoes. http://www.amazon.com/dp/B00KZNOHTW
I can't remember the name of the one I used, but I think it was this one. McLean VA Locksmith
1727 Cy Ct, Vienna, VA. One thing that helped immensely that I highly recommend is keypad locks. I first got one for my garage door and now I have one for the house door. https://www.amazon.com/Chamberlain-LiftMaster-Craftsman-940EV-P2-Compatible/dp/B004QM7O34 or https://www.homedepot.com/p/MiLocks-Keyless-Satin-Nickel-Entry-Door-Knob-TKK-02SN/300081947 . Sorry you are having a bad day.
So I attached the garolite to the build plate using this as it was all I had on me https://www.amazon.com/gp/product/B0141L81GS
This is what I used for the garolite. I scored it and broke it in half with a box cutter.
https://www.mcmaster.com/catalog/125/3783
Unfortunately (or fortunately), parts stick so well to it that it will peel part of the garolite off during removal. I'm using taulman bridge. This is unlike the aluminum build plates that came with my markforge, where it has a piece of garolite laminated to the top that doesn't peel. I guess you get what you pay for as one of those plates costs $150.
https://imgur.com/a/nAGtBBB
​
Oh well, it was worth a shot.
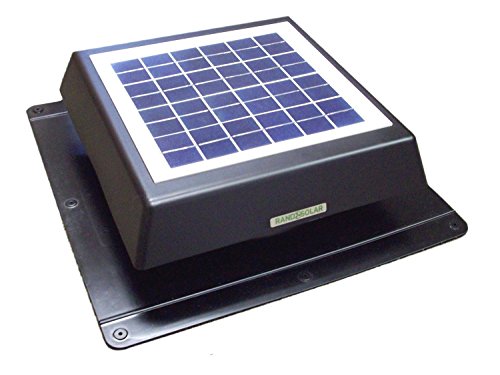
I added one of these - https://smile.amazon.com/Solar-Powered-Attic-Watt-W-Ventilator/dp/B00M0NI4PS/ref=sr_1_3?keywords=solar+powered+attic+fan&qid=1554429795&s=gateway&sr=8-3 to my greenhouse.
At 86 degrees F, it kicks on and really does well to pull the hot air out and pull the outside air through side vents.
Cheap enough and runs itself once installed.
This 3M clear grip tape works great!
We just got an Chamberlain WD1000WF to replace our old sears opener from the 90's and it is really nice, it's so quiet the dogs don't even know we're home anymore.
https://smile.amazon.com/Chamberlain-WD1000WF-Smartphone-Controlled-Ultra-Quiet/dp/B013UGZYOM/ref=sr_1_5?s=hi&ie=UTF8&qid=1466562318&sr=1-5&keywords=garage+door+opener
Not perfect, but something like this may be the least noticeable
https://www.amazon.com/Non-Slip-Stair-Treads-Tape-15-Pack/dp/B07C6GJ1LK/ref=zg_bs_110761011_5/146-8787011-0284839?_encoding=UTF8&psc=1&refRID=BY5XE1TZDZZ9WA4C4V30
Dig a hole 2 feet deep (minimum), pour a footer using an 8" tube form, and use a post base. You can set the base and put the anchors into the concrete while it's still wet to avoid having to drill (just make sure you get it plumb using a torpedoes level). It'll run you all of fifty bucks. The EZ base is the most expensive part.
I was really surprised there were as cheap as they are, but internet-enabling my garage door opener only required a ~85 dollar kit. Seems to work with tons of models, since Chamberlain seems to be the parent brand to a bunch of them.
Serious reply.
I purchased a garage door kit that connects to my android and my wifes iphone.
http://www.amazon.com/gp/product/B00C1CF1S6/ref=oh_details_o01_s00_i00?ie=UTF8&psc=1
It works out pretty well but does seem a bit stalkerish because i can see when she gets home.
Thank you for your submission, please remember to supply as many details you can.
These include, if applicable: size, origin (store and/or geographic location), age, and any writing on the item. Additional pictures can be added as a comment in this post.
Whatever you've googled/found already should be included to save time and effort.
Thanks.
I am a bot, and this action was performed automatically. Please contact the moderators of this subreddit if you have any questions or concerns.
Price History
I got the chamberlain whisper drive with wifi. I love that I can check to see if it's open, closed or even alert me when it does either. It comes with a battery backup too. I love it. My parents got it and love it too!
It took me 3 hrs to install and it syncs with the Nest for the home/away.
Edit: Added more stuff
https://www.amazon.com/gp/aw/d/B013UGZYOM/ref=mp_s_a_1_2?ie=UTF8&qid=1498961928&sr=8-2&pi=AC_SX236_SY340_QL65&keywords=chamberlain+garage+door+opener&dpPl=1&dpID=41rYyO2QJ8L&ref=plSrch
We have a cheap solution to the problem of forgetting to close the garage door. We get a Chamberlain garage door monitor and put the receiver in a prominent area of the house.
http://www.amazon.com/gp/product/B0002YX7MM/ref=oh_aui_detailpage_o07_s00?ie=UTF8&psc=1
http://www.amazon.com/gp/aw/d/B003F0G60A/ref=mp_s_a_1_1?qid=1417905748&sr=8-1&pi=AC_SY200_QL40
Instead of using the sliding screen, maybe you could use one of these:
https://smile.amazon.com/gp/product/B00KZNOHTW/ref=ppx_yo_dt_b_asin_title_o02_s00?ie=UTF8&psc=1
The dog can push it aside as he goes in/out of the doggy door.
We don't have a doggy door, but we have had one of these magnetic screens for the last 4 years (they last 2 summer seasons for us). It works well to keep the bugs out once you get it hung correctly. The dogs learned to use it in a few minutes.
Can i just get some normal concrete from a big box store and mix in glass fibers?
Im considering this for the concrete:
https://www.lowes.com/pd/QUIKRETE-ProFinish-Crack-Resistant-80-lb-High-Strength-Concrete-Mix/3026899
and
https://www.amazon.com/gp/product/B000CODWAE/ref=ppx_yo_dt_b_asin_title_o04_s00?ie=UTF8&psc=1 for my fibers
Ahh. I see what ya did there. Lol
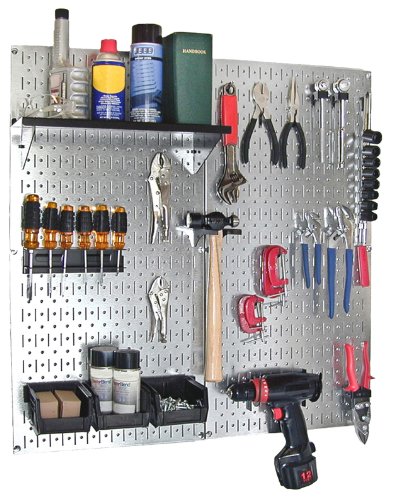
God bless amazon. Wall Control 30-WGL-200GVB Galvanized Steel Pegboard Tool Organizer https://www.amazon.com/dp/B002LZSWFW/ref=cm_sw_r_cp_api_i_kFVzCbPRPTAQH
Have you thought about removing the screen door and installing one of those magnetic screens? Like this: http://www.amazon.com/Premium-Magnetic-Screen-Door-Mosquito/dp/B00CEFRCVO
That way you could have the dog door and it folds out of the way but can snap into place when you have nice weather and want to keep bugs out.
Having made them before I would say wood veneers work quite well. They likely need to be one sided and you will have to play with your settings because it's fairly easy to burn through. That said I've had the best results with these two:
Cedar Wood Veneer and Veneer Variety Pack
The cedar veneers are super consistent in quality. Thin enough to feel like a biz card but thick enough that they are sturdy like card stock paper. Prints well and gives a reasonable differentiation between shades of light and brown so that you can get some complex imagery going if you feel like it. The variety pack comes with a whole selection of woods of varying color and quality. Some are full of burls which don't lend themselves well to lasering over, and others have such a grain pattern that distracts to much from small imagery as used in a biz card. On the other hand some of them have beautiful sheen as well as very striking color.
Here's an example of some done with two veneers from the variety pack.
Other than perhaps wanting to dilute a bit to get the sulfate down with some beers you can make that water work. My water is fairly similar (though I don't have quite as much sulfate) and my tactic is phosphoric acid to get my pH in line since it purported to be more flavor neutral than lactic. Due to how much I need to add I use 85% phosphoric. https://www.amazon.com/Gallon-Grade-Phosphoric-Remover-Clean/dp/B06XZSW3QX
I use Bru'n Water for my calculations and after many brews of my mash pH being right on I trust it completely.
Fill the buckets and then install brackets on top.
brackets on Amazon
If you can't get the app to work, buy this and install it next to the garage door.
Chamberlain / LiftMaster / Craftsman 940EV-P2 Garage Door Opener Keyless Entry Keypad, Security +2.0 Compatible https://www.amazon.com/dp/B004QM7O34
I don't remember what exactly got me interested in inlays/marquetry but I rented a book on marquetry from the library and picked up the few tools I needed to get started and went on from there.
If you're interested in marquetry I recommend "The Fine Art of Marquetry: Creating Images in Wood Using Sawn Veneers" by Craig Vandall. He doesn't focus on the history/theory behind marquetry too much but gives a straight forward approach on where to begin and what tools you need to start.
For materials, I buy my veneer sheets from Amazon .The product linked gives you the most variety in wood species, great quality control, and value per sheet of veneer. For dyed veneer I go to B&B Rare Woods (their website is a little dated). Their dyed veneer's and regular veneer sheets are top notch. They also let you order book matched veneer sheets.
Let me know if you have any other questions or if you have trouble finding information on a certain subject. Cheers!
​
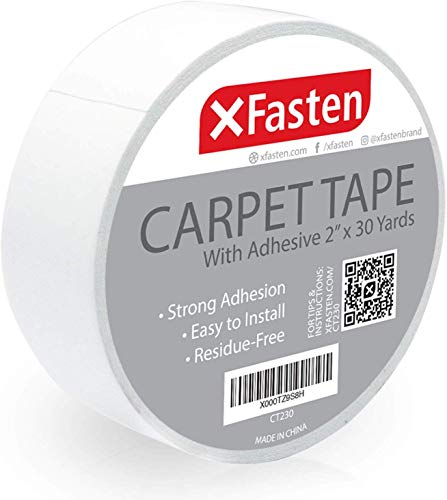
I've been using this stuff from Amazon and been fairly happy with it but if I can pickup something locally at a Fastenal even better.
Just realized it looks like you can only buy it by the case on their website at least. I'll probably just stop into the store and see what they have, never thought of them for tape. Thanks for the suggestion.
Anti-slip tape: http://smile.amazon.com/dp/B000Y0ZXDK
Let’s see.
https://www.amazon.com/Gallon-Grade-Phosphoric-Remover-Clean/dp/B06XZSW3QX
There we go.
I was thinking about this one:
Rand Solar Powered Attic Fan-8 Watt-W Rooftop https://www.amazon.com/dp/B00M0NI4PS/ref=cm_sw_r_cp_api_-YDdzbWVE712K
This might be a good investment for you: http://www.amazon.com/Chamberlain-CLDM1-Clicker-Garage-Monitor/dp/B0002YX7MM/ref=sr_1_1?ie=UTF8&qid=1422052513&sr=8-1
Thanks! I'm reading this second paragraph over and over and still kinda scratching my head. I would love to learn electrical I just am struggling. My thought is to get the trailer livable (meaning walls/floor/ceiling/insulation/windows) first and then as I see what it's like to live in it and potentially save up more money I'll slowly continue the build (storage/furniture/luxury stuff/electrical?).
​
I'm open to solar but the setups I see here are always so complicated and overpowered for what I'd need. What I meant is that something simple like this probably won't work because it doesn't have a battery so it only runs when the sun is out and honestly just seems pretty cheap and shitty in general. My fear on doing my own solar setup is that I would end up spending way more then predicted buying things I struggle to understand that would be heavy and take up a lot of space and possibly be noisy.
​
My mindset is pretty open to anything if I can understand it and afford it. I am trying to find guides and resources that are more suited my my minimalist needs (heat, ventilation) if you know of any sites/forums/videos/etc. that may be useful I'd love to know. Another challenge is that most of what I see is geared towards vehicles.
You can buy this:
https://www.amazon.com/Gallon-Grade-Phosphoric-Remover-Clean/dp/B06XZSW3QX
will last you a while (notice it's 85%), so 8.5 times more potent. Acid malt is also not that much more expensive than regular malt, about $2 per pound vs $1 for regular malt and I would usually use 1/2 pound for corrections, so comes to 50c per 5g batch - I don't think it's worth the effort with the sparging.
Why not just buy a solar powered car window fan and take it apart? As long as you keep all the wiring labeled no worries. Or if you need more airflow than that there are premanufactured solar powered roof ventilators.
https://smile.amazon.com/Solar-Powered-Attic-Watt-W-Ventilator/dp/B00M0NI4PS/
One area I could see room for improvement on is garage doors and add on equipment. I had my snowblower stolen because I accidentally left the door open over night. Why isn't some kind of indicator in the house telling us the door is open/closed a standard? Why is it that the add on indicator I bought from Chamberlain such an un-reliable POS?
The problems I've experienced with that product seem to be fairly common per the Amazon reviews. It needs to be un-plugged and plugged back in to reset about 4-5 times per week. Recently, my 3 year old unit stopped transmitting for no apparent reason (changed the battery and brought it in the house right next to the receiver, no go). There doesn't seem to be any other significantly better product on the market that isn't hard wired or a true alarm system (which I don't need, I just need something to remind me I forgot to close it. And also, my garage is detached, which makes hard wiring a pain).
As for the doors themselves, it seems crazy to me that you have to really be well read on them to adjust the springs and other 1940s technology that goes into them. It kind of blows my mind that innovation stopped at remote openers. Or even just simple annoyances, like having to get a step ladder to adjust the amount of force needed to pull the door open or push it back down (I occasionally have to adjust when winter gets particularly brutal).
Can someone please help me?
I have the following garage opener: Chamberlain WD1000WF 1-1/4 HPS Wi-Fi Garage Door Opener https://www.amazon.com/dp/B013UGZYOM/ref=cm_sw_r_cp_api_pgfJzbNESY9AX
If i want to add homekit to it, do I buy only this new device or something else as well?
Thank you
http://www.amazon.com/Chamberlain-CLDM1-Clicker-Garage-Monitor/dp/B0002YX7MM
We use these. If you looked a little harder, probably at a shop nearby you could find it cheaper.
Did my tub using this - helped quite a bit with the scraping.
(Insert your own "big, hard caulk" joke here).
This is the kit not just the panels and it's currently $66.97 on Amazon.
El Linko:
First off, i seriously doubt it is caulk (in the traditional sense). I t is most likely a contruction adheasive. From the looks of it, probably Power-Grab. This is a polyurethane adheasive that is pretty much permeneat. You could try a caulk remover, but it may not do much. The one I linked is water based so it's probably a bit milder than some of the other (more effective) removers like McKanica. Realistically, those adhesive can be dissolved though. The manufacturers basically recommend using a thin wire to 'cut' the adhesive free. I would try the plastic razor and heat. You MIGHT be able to soften it some with mineral oil which will also give the benefit of lubricating your razor. Good luck!!!