(Part 2) Best car audio & video installation products according to redditors
We found 1,584 Reddit comments discussing the best car audio & video installation products. We ranked the 366 resulting products by number of redditors who mentioned them. Here are the products ranked 21-40. You can also go back to the previous section.


I have always wanted to have a "smart" radio. My parents have always owned various Pioneer, Kenwood, and Sony radio decks, but they always had their cons to them (clunky OS, different type of touch screens that suck, lack of features, very expensive $800-$2000), useless features, etc.). I wanted something that runs Android 6.0+. I thought about using iPads, but I didn't want to waste a bunch of money for something that is going to be used in my car only. I wanted a budget friendly "smart" radio. That is when I found the perfect tablet, the Nexus 7 2013. Cheap, powerful, Android 6, compact, somewhat thin and small, and best part, it fits in a double-din radio deck.
After finding various projects that people have used, I decided to order a bunch of stuff from Amazon (everything was bought with Prime) and see if I could get this to work. It took about 3 weeks to work out all the bugs, but it runs perfect now. I never found anyone that did this mod in a Nissan Pathfinder, so that was difficult going on my own, reading various wiring diagrams and getting power, sound and steering wheel controls to work. After lots of testing each wire, and lots of trial and errors, everything is working how I want it too.
Questions that people have asked me that I can remember on the top of my head:
Q: How do you turn the tablet on and off if the power button is blocked?
A: Easy, with Timur's Kernel, and the USB car charger hooked up to the accessory power, when I turn my key on/start my car, the tablet detects power from the USB, which wakes the screen/powers on. (ELI5: there are 2 power sources in your radio, a constant 12 volt power, and an accessory key power. So when you turn the key to ACC or ON, it gives power to the tablet, but when you turn the key off, it takes away power from the USB port.)
Q: How does it hold up in the wonderful California heat?
A: Shockingly very well. It hasn't given me any issues in ~95F (+35C) degree weather. There was a day where it was 115F (46C) degrees outside, and that is when the tablet finally said NOPE and started locking up and freezing due to the ridiculous heat. After running my AC for a few minutes, it cooled the tablet down to reasonable temperature and ran normally again. When my car is parked, I have a windshield sun shade that helps a ton with keeping the sun off my black/gray dash, and/or microfiber towels over the screen to keep the sun off. If it's super hot, I just take the tablet/radio/air conditioner part out of my car and bring it inside (not that hard to remove).
Q: How do you control the volume?
A: With the JoyCon EXC, it translates either CAN, IBUS, resistive, or digital steering wheel control signals, to USB keyboard signals that the tablet can see. I have the Joycon setup to have Volume UP/DOWN, Screen ON/OFF, PAUSE/PLAY, and PREVIOUS/NEXT. Click here for more information.
Q: How do you listen to the radio/music?
A: Spotify Premium. While I can spend ~$10 on a radio antenna to USB to listen to over-the-air radio stations, I never listen to the radio. When I had my old stock radio, I never listened to the radio part. I always used my 3.5mm jack to plug in my phone for Spotify. Great perk about being a broke college student is getting 50% off Spotify Premium.
Q: Can you/do you watch TV or movies on it while you drive?
A: I can, but I don't. Pay attention to the freakin' road.
Q: How do you get internet on it since it's a WiFi version?
A: I use my Bluetooth hotspot on my phone to get internet for Waze, Google Maps, etc. I can also use the WiFi hotspot, but that uses more power. I can drive from California to Idaho running Waze the whole way and it uses about ~300MB of data.
Q: Can you make phone calls with it?
A: This has been something I have been trying, but have not had success with yet. I use an app called [TabletTalk] (https://play.google.com/store/apps/details?id=com.apdroid.tabtalk&hl=en), but it doesn't push the microphone/sound through the tablet. I gave up on this since I have a Samsung Gear 2 Neo smartwatch that has a microphone/speaker on it. Some day I will explore with this more.
Q: How do you power your speakers if you removed the radio?
A: I lucked out big time with this issue because my Nissan Pathfinder has the Bose System built in. That means that there's an amplifier already installed that powers the speakers. So the tablet sends the sound to the Behringer UCA202 DAC, that then converts to a 3.5mm headphone jack that then splits into the Left Front/Rear, Right Front/Rear, and dual subwoofer channels that go to the car wiring harness that then goes to the amp. This saves me hundreds of dollars. For vehicles without a stock amplifier that rely on the radio for power, that is when you will need to buy an amplifier to power the speakers. My 12 inch subwoofer also plugs into the DAC and works perfectly.
Q: I see the reverse camera, how did you get that to work with the tablet? How does the tablet know when you are in reverse?
A: There were 2 ways to get this to work, one way is by video detection, or the other way is by the JoyCon EXC. I chose to do the video detection way because it was simpler and waiting about one second for the app to open was fine with me. I use an app called EasyCap viewer.
Q: Why is there paper over the JoyCon, EasyCap, USB charger etc.?
A: The plastic pieces over the EasyCap and USB charger were bulky/broken. The JoyCon didn't come with a cover. Paper was the easiest/closest thing I had at the moment. If only I had a 3D printer. Someday..
Q: Why is the mic in the vent and not somewhere else? Doesn't the wind from the HVAC cause problems?
A: It was a last-second add-on and just put it in there without having to rewire the harness. I also didn't know where to move it that made it look "stock". I've gotten some great opinions on where to move it! Thanks for those!
I'll add more common questions here when I think of them.
Breakdown of Parts:
Price | Part
---|---
$100 | Nexus 7 2013 32GB WiFi (flo) (bought from /r/hardwareswap)
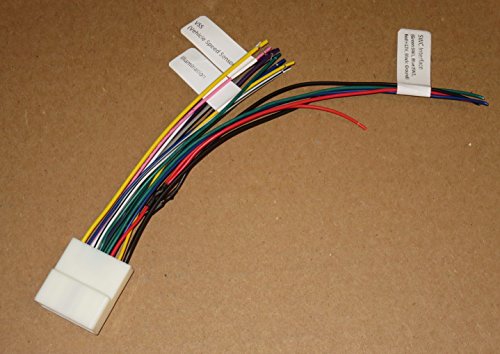
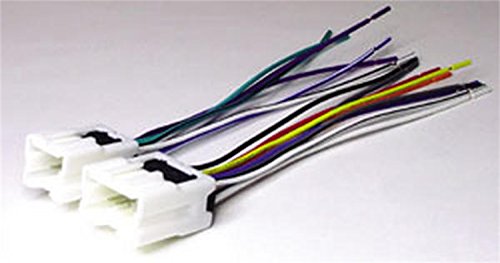
$5 | Nissan Radio Wiring Harness
$6 | AmazonBasics 4-Port USB 2.0 Hub
$20 | Esky EC135-05 Rearview Camera
$95 | JoyCon EXC
$7 | Tendak OTG USB cable
$30 | Behringer UCA202
$7 | VideoSecu Amplified CCTV Microphone
$25 | Timur's Kernel v4.0 for Nexus 7 2013
$10 | Maxboost Car Charger
Free/Other/Already owned | EasyCap USB Video Capture Card, RCA cables, 3.5mm audio cables, USB cables, 12-16 AWG wire, grinder, zipties, paper, hotglue, other random stuff.
TOTAL COST | ~$305
TL;DR: Modified my Android tablet to work as a replacement for my radio. Worth it? YES. Best Radio Ever.
Have Questions? Ask away. Since I had to learn most this crap on my own, I can share my experience with others and give pointers in the right direction.
EDIT #1: Formatting.
EDIT #2: RIP my inbox. I would never have guessed this would get this popular. I'm just speechless. Wow. Thanks everyone! Trying my best to reply to everyone! Also added another question to this.
I use these at work in marine environments:
http://www.amazon.com/3M-Heat-Shrink-Connector-Piece/dp/B008HMHJDO
Over that I apply more heat shrink. Holds up pretty well.
In my experience, there are two schools of thought on wiring in accessories. The first and most common approach is to tap into the vehicle's existing wiring to power all your stuff off the main battery. This is a terrible thing to do, though, especially with modern vehicles as they can be very sensitive to voltage drops and changes. Plus, it introduces the potential for countless gremlins that will ruin a trip, and may cause your vehicle to not function.
​
The second and better school of thought is to design a secondary electrical system from scratch, that is connected only once to the main vehicle and that is at the battery OR the alternator (Battery is easier and way more common). The second way gives you a lot more freedom to build your system, because it all comes down to math. First, start with your power source -- how are you going to power your stuff?
​
If you are going to do a second battery, then that's your answer. Find a place to put it that is near the chassis (as in, keep the weight low) and make sure you can secure it so it does not become a projectile. Connect it to your main battery using a DC to DC Charger (CTEK is good, Redarc is great and priced to match, Renogy is good but cheaper and not as widely tested). Then, install a fuse block near the second battery and run your accessories to that. If you want to run everything off the main battery, then instead of finding a place to install a second battery, just do the Fuse Block.
​
The Fuse Block then becomes what you wire everything extra to -- literally everything that didn't come with the car should go through this fuse block. It's only connected to the main battery by two wires. By starting with this principle, if there are any problems at all with your accessories, your vehicle should still run without any electrical gremlins causing your rig to sit down, and if you need to totally isolate the system, 5 minutes to disconnect those two wires is all it takes.
​
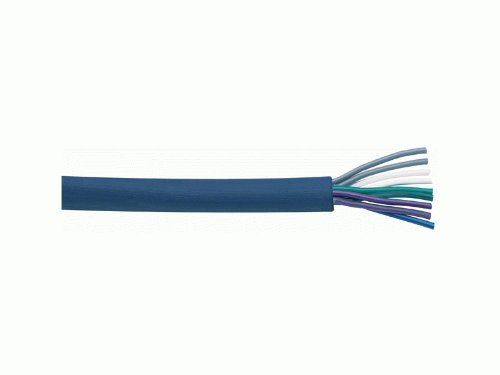
As far as the accessories themselves, the rest then becomes pretty easy -- figure out the energy required to run the accessory (quality manufacturers will supply this info), figure out where you are going to physically install the accessory, and how long the run of wire will be to power it. Select a wire that will be appropriate for the current, and you are good to go.. If you have many accessories in one place -- lets say you want to have a dash panel with 4 switches in it -- then I recommend getting multi-strand cables, like this:
​
https://www.amazon.ca/Metra-MC918-20-20-Feet-Nine-Conductor-Multi-Use/dp/B004H1KAMQ/ref=sr_1_2?keywords=vehicle+wiring+multi+conductor&qid=1563898763&s=gateway&sr=8-2
​
This allows you to route one "Master" Cable to your switch block rather than running 10 individual wires. Obviously you'll need to buy the right gauge wire for your application.
​
A few other pointers:
​
​
We are hoping to use the ARB Linx system in our new rig to limit the number of wires we have to run. It's a fairly new option though so not a lot of people are familiar with it -- it might be worth a look though as it could save you some work.
This is a very common problem. It actually happens nearly every time in a car when you hook the charger and the AUX cable up to the same device. I'm not sure why your post doesn't have the answer yet given that there are already 9 comments, but the easiest way to fix this is with an optoisolator. Here's one for the car. http://www.amazon.com/gp/product/B0031U1ATQ/ref=pd_lpo_k2_dp_sr_1?pf_rd_p=486539851&pf_rd_s=lpo-top-stripe-1&pf_rd_t=201&pf_rd_i=B0015G2EZ2&pf_rd_m=ATVPDKIKX0DER&pf_rd_r=19ZBRBAAJVPRFV1VREQ5
Just search for something similar with RCA jacks at the other end.
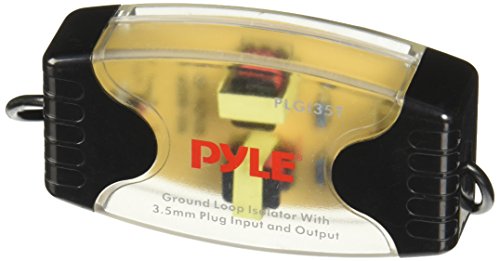
Here's another one that you could just put inline: http://www.amazon.com/Pyle-PLGI35T-8-Inch-Stereo-Isolator/dp/B004HJ35F2/ref=dp_cp_ob_e_title_4
And, if you feel like wasting a bunch of money, here's a monster branded one (note the 3rd review, BTW): http://www.amazon.com/Monster-MPC-ISM-201-XLN/dp/B0009RWKKM/ref=pd_cp_e_3
If any of you want to do this for your own computer, it's pretty simple depending on the resources you have available.
Here's what you'll need (disclaimer, I hardly know electronics. If you notice something wrong correct me, please):
Instead of getting the wires and dupont connectors, you could also just buy a power button, cut off the wires, and solder them to the switches. This will probably be more cost effective. I recommend this power button, as it has a reset switch and both LEDs (and thus, wires for all of them).
Once you have the materials, it's just a matter of soldering the wires to the pins, really. The orientation of the wires doesn't matter for the switches (i.e. you can attach them to the power button pins on your motherboard in any order), but make sure you get the right order for the LEDs (positive is the long leg, usually). I'd recommend cutting the LED legs to size as well.
Also, if you need a resistor, what I did was just solder it to the LED leg and then to the wire. That's probably the worst way to go about that, but like I said, I don't know electronics well. I'm sure someone else has a better idea.
EDIT:
If you can't find a way to mount this on your case, you can always 3D print (or laser cut, or fashion using regular tools) a box for it, run the wires through it, and place it on your desk.
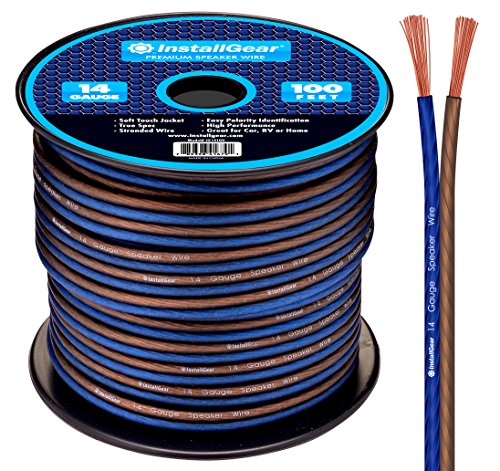
I think most people here recommend KnuKonceptz because it's inexpensive and true to gauge. You can buy some extra wire by the foot for the Big 3. By the way that's some great equipment.
https://www.amazon.com/dp/B01CSZAYF0/ref=cm_sw_r_sms_c_api_i_qgaCCb792MQ21
$16.00 plus shipping
Your done ✅
If you aren't afraid of some wiring it's really not bad to replace a head unit and you can save yourself a bunch. If you want to have someone do it you can go to bestbuy or another store that does installs. Its a lot of wires so it looks intimidating but all you need is the head unit of your choice, the bezel or surround if you still have a factory unit and optional but I do recommend is the adapter kit to plug into the stock harness. Putting it together is as easy as matching colors and soldering or just using butt connectors. It is a fairly simple process and if you mess it up the worst that can happen is it just won't turn on.
You pick a single din head unit and these are the items you need. You can do a double din but if I remember right you need a special adapter that is a it harder to find and pricier. Or you need I think one of the Japanese tombstones.
This will surround the radio and give it a cradle so you don't have blank spaces.
https://www.amazon.com/gp/aw/d/B0002BEYIQ/ref=mp_s_a_1_1?ie=UTF8&qid=1483301353&sr=8-1&pi=AC_SX236_SY340_QL65&keywords=miata+radio+install+kit+93&dpPl=1&dpID=41meO9lqHtL&ref=plSrch
This will plug directly into the stock plug and then you just connect the wires to the radio you pick out.
https://www.amazon.com/gp/aw/d/B0002BETW2/ref=mp_s_a_1_4?ie=UTF8&qid=1483301254&sr=8-4&pi=AC_SX236_SY340_QL65&keywords=miata+radio+install+kit&dpPl=1&dpID=41byl99kQ8L&ref=plSrch
Typically it's just a dupont connector with 2.54 mm spacing (0.1") I bought connectors and 22awg wire off Amazon to extend mine. The only issue I had was the insulation was a bit too thick to get into the connectors, so I'd suggest 24awg.
References:
http://www.amazon.com/gp/aw/d/B00CGWVFWW/ref=pd_aw_fbt_328_img_2?ie=UTF8&refRID=02SBMEQQZTNX8JAX34V3
Couldn't find the sunkee male version so similar:
http://www.amazon.com/gp/aw/d/B0132HFOYO/ref=mp_s_a_1_fkmr2_1?qid=1458671367&sr=8-1-fkmr2&pi=AC_SX236_SY340_FMwebp_QL65&keywords=sunkee+dupont+male
http://www.amazon.com/gp/aw/d/B00CO87S7O/ref=sr_ph_1?qid=1458671471&sr=sr-1&pi=AC_SX236_SY340_FMwebp_QL65&keywords=dupont+4
There is a crimper, but needle nose pliers work fine. I soldered the wire to the connector, then crimped with pliers and inserted into the housing. Make sure you get stranded wire so if it's in an area with movement it won't break.
This is the drone that I have built:
Been slowly building my first quad over the past month or so. Just when I have time. I bought a cheap carbon fiber kit off amazon. I will list everything I have bought so far.
Fly Sky FS-i6 Transmitter https://www.amazon.com/gp/product/B00VE3PZ3Y/ref=oh_aui_detailpage_o04_s01?ie=UTF8&psc=1
Fly Sky FSia6b RX (need this to run PPM instead of PWM): https://www.amazon.com/gp/product/B00VE3Q3XU/ref=oh_aui_detailpage_o02_s00?ie=UTF8&psc=1
LHI quad Kit with ESC's, Motors and Flight Controller: https://www.amazon.com/gp/product/B010FMGUS8/ref=oh_aui_detailpage_o04_s00?ie=UTF8&psc=1
Now the above kit comes with a CC3D flight controller, after some research, I decided that I would use a Naze32 rev6 board instead. I purchased that from Hobby king, I will list all hobbyking purchases after amazon.
Nylon hex nuts, screws and stand offs:
https://www.amazon.com/gp/product/B01EPLH08Y/ref=oh_aui_detailpage_o03_s00?ie=UTF8&psc=1
XT60 connectors: https://www.amazon.com/gp/product/B01E9HM7NC/ref=oh_aui_detailpage_o03_s00?ie=UTF8&psc=1
Lipo Voltage Checker: https://www.amazon.com/gp/product/B01E7UXVL8/ref=oh_aui_detailpage_o03_s00?ie=UTF8&psc=1
Battery / GoPro straps: https://www.amazon.com/gp/product/B01F7MEDW6/ref=oh_aui_detailpage_o01_s00?ie=UTF8&psc=1 PS: good velcro isnt enough!
Tri-blade Props. Buy a couple of these!:https://www.amazon.com/gp/product/B01CHDNRRK/ref=oh_aui_detailpage_o00_s00?ie=UTF8&psc=1
Extra arms....JUST IN CASE! https://www.amazon.com/LHI-Carbon-thick-250mm-Quadcopter/dp/B01715HGNU/ref=sr_1_1?ie=UTF8&qid=1472346179&sr=8-1&keywords=LHI+arms
These are all the hobby king stuff that I bought:
Naze 32 FC ACRO: http://www.hobbyking.com/hobbyking/store/__96841__AfroFlight_Naze32_Rev6_Flight_Controller_Acro_.html
1300 mah 3s 45-90c lipos: http://www.hobbyking.com/hobbyking/store/__18207__Turnigy_nano_tech_1300mAh_3S_45_90C_Lipo_Pack.html
Besides a lipo charger, the above will get you flying! Below is everything needed for the FPV aspect! I used to run RC cars so luckily I had a lipo charger from those days
Camera and transmitter from ebay: http://www.ebay.com/itm/262061528376?_trksid=p2057872.m2749.l2649&ssPageName=STRK%3AMEBIDX%3AIT
Clover antennas from ebay: http://www.ebay.com/itm/272297376391?_trksid=p2057872.m2749.l2649&ssPageName=STRK%3AMEBIDX%3AIT
Quanum Cyclops FPV Goggles from hobbyking: http://www.hobbyking.com/hobbyking/store/__104150__Quanum_Cyclops_FPV_Goggle_w_Integrated_Monitor_and_Receiver_AR_Warehouse_.html
Now this is prolly the most basic, beginners fpv setup that you can buy... Its perfect for learning and crashing lol. I have about 3 flights with mine so far, about 4 batteries. Buy props lol, lots of props. Already had to change 1 arm too.
Infinity Reference 5 channel amp - $239.99
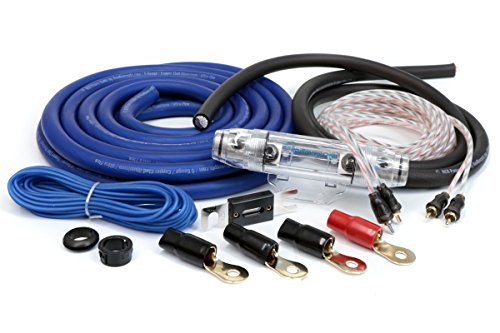
[4 AWG amp kit] (https://www.amazon.com/Rockville-RWK4CU-Copper-Complete-Installation/dp/B019Z3RCG2/ref=sr_1_6?ie=UTF8&qid=1550159767&sr=8-6&keywords=4+awg+amp+kit) - $49.95
9 wire - $24.95
Additional RCAs - $19.99
4 channel LOC - $23.34 - You need this because you're keeping your factory radio
RCA splitter - $7.45 - To get the 4 channel LOC to 6 channels for the amp's input. There's maybe other ways you could do this, but this is what I would do because it'd be the simplest to swap the radio in the future.
Infinity Reference 6.5" for the doors - $56.95/pair x 2 = $113.90
Infinity Reference 3.5" for the dash - $48.70
= $528.37 + Installation which will easily run between $200 - $350
If you'd like to spend a bit more you might ask about sound dampening on the doors. Or you might save the extra and put it towards replacing the radio in the future.
Here are the DuPonts
Here are the Female Connectors
and if you were making wires for breadboards, you'd need the Male Connectors
You don't need to slip over the connector, the heat shrink is already on the butt splice. You crimp then heat and it shrinks down and seals everything. There's a coating of glue the melts and oozes out. But you need to make sure you have a good crimp too, cheap ones will break or cut the heat shrink when you crimp. The glue also helps hold the wires in place. If you shrink it down without crimping, you'll still need to apply some force to rip the wires out.
https://www.amazon.com/3M-Heat-Shrink-Connector-Piece/dp/B008HMHJDO
Alternatively, invest in some Heat Shrink Butt Splices
Much less messy and far sturdier than twisting and wrapping with electrical tape. You just insert each end of the wire, crimp, and hit it with some heat to seal it. This way is weatherproof, electrical tape isn't.
There are a couple of things going on. First it sounds like you have speaker level signal out of home mini connected to line level input of amp. Second thing is probably ground loop noise.
To reduce speaker level signal to match line level amp input, add resistors to make a voltage divider similar to this video.
https://www.engadget.com/2017/12/11/mod-gives-googles-home-mini-speaker-its-missing-line-out-jack/
To reduce ground loop noise, try a ground loop isolator balaun such as this.
Noise Filter Ground Loop Isolator Eliminate Car Electrical Noise with permalloy core Transformers 3.5mm Audio Cable Black https://www.amazon.com/dp/B01N7QSOO8/ref=cm_sw_r_cp_apa_i_CYEODb1HB5TMB
ground loop isolator
I was doing a ham radio project and all was well until I placed the radio on the charger and I got a crazy hum. Putting this inline resolved all the issues. Best $8 I've ever spent.
Metra 70-7901 Radio Wiring... https://www.amazon.com/dp/B0002BETW2?ref=ppx_pop_mob_ap_share
Here's some that ship via Amazon Prime: https://www.amazon.com/dp/B01E9HM7NC/ref=pd_lpo_sbs_dp_ss_3?pf_rd_p=1944687442&pf_rd_s=lpo-top-stripe-1&pf_rd_t=201&pf_rd_i=B005FAPYXS&pf_rd_m=ATVPDKIKX0DER&pf_rd_r=QGZ6F6JXSQ8DRTGM8ADM
It's extremely easy to DIY. I'd strongly recommend visiting YouTube. Most customization shops will likely do it, but AFAIK it's not that common of a task due to how simple it really is to do. There's videos for pretty much any popular car model.
A screw driver, some zip ties and maybe a knife or pair of wire strippers is all you'll likely need to do it right.
In case anyone is curious here's what's involved:
That's really it. All that is a detailed way of saying "thread the wire around your windshield to the fuse box then bolt the neutral to bare metal and put the positive in your fuse box tapping a non-critical fuse that's only energized when the car is on."
You can make that existing wiring work for a 4 or 5 channel amp. You would just need to run the outputs back up to the radio harness or to each door. This makes it easy: https://www.amazon.com/dp/B004H1KAMQ/ref=cm_sw_r_cp_apa_i_uP6rDb766M3Y5
https://www.amazon.com/dp/B07N8KKR6X/ref=cm_sw_r_cp_apa_i_VS6rDbY2JVNC1
I just used this for a budget build recently. It would work with your speaker choices. At a 400$ budget you could do it and the 4 speakers and the speed wire. It will be loud. But you'll want to add a sub to it at some point for the low end that youll be missing
We made an enclosure out of foamcore boards and duct tape...they get chewed eventually, sure...but it worked better than this:
http://www.amazon.com/Marshall-Small-Pet-Deluxe-Play/dp/B0013TT2SS/ref=sr_1_1?s=pet-supplies&ie=UTF8&qid=1322368051&sr=1-1
Also, I got wire covers for everything like this:
http://www.amazon.com/American-Terminal-SL500-100-2-Inch-Tubing/dp/B0017686ZC/ref=sr_1_6?ie=UTF8&qid=1322368115&sr=8-6
For EVERYTHING...keeps the chewing down and keeps them from getting peed on. Also, every rat loves a buddy....
Perhaps wire loom? You should be able to buy it for a LOT less at your local Home Depot, Menards, Lowes, or auto parts store.
These connectors are the best type to use, especially if it's exposed to weather. I even tape or shrink wrap over these sometimes but it's not necessary.
If I have time and the project is appropriate or I can't spare extra bulk in a wiring harness, I'll skip covered connectors and use solder with bare metal connectors and shrink wrap.
I don't know what would cause that to pop up every few seconds but I've installed a couple of pioneer head units with a bypass module that allows video in motion. I'm guessing it would get rid of that message.
https://www.amazon.com/dp/B01L6Z1WYA/ref=cm_sw_r_cp_apa_i_naBDDbQ133A4Z
Ok mobile at the moment do I can't dig too far in but here's some quick results that look like they should work.
[Scosche NN03B Wire Harness to Connect An Aftermarket Stereo Receiver for Select 1995-Up Infiniti/Nissan] (https://www.amazon.com/dp/B0007KPS0A/ref=cm_sw_r_cp_apa_i_s1NvCbF8GSD2Y)
[Metra Electronics 40-NI12 Antenna Cable to Aftermarket Radio Adapter for Select 2007-Up Infiniti/Nissan Vehicles] (https://www.amazon.com/dp/B000PANZ7U/ref=cm_sw_r_cp_apa_i_t4NvCbTQJXTKT)
The job was simple enough if you're familiar with wiring. Match the functions of the harness that comes with the stereo with the adapter, crimp then together and bolt it all back together.
One thing to note is that there is no ground in the factory wiring. You will need to run one separately. I'd suggest hitting a bolt to the chassis nearby to minimize any ground loops.
I'm sure you can find a good write up over at the nextera forums if you get stuck.
Another note of caution. The two metal retaining clips in the bezel love to scratch the dash. Cover it with a cloth to save the surfaces.
I've replaced a couple NA Miata radios so I feel like I can comment. Whatever you do, buy the Metra wiring harness for your car. You splice it (using wire nuts) to the wiring coming out of your new head unit, and it plugs into your factory wiring connector. No cutting of your car's wires. It's the proper way to do it and you will be very thankful if you ever replace that radio again.
That out of the way, one thing to remember in a convertible is readability in direct sunlight. Most modern head units have LED displays that completely wash out in bright light. I have my eye on this mechless unit that has an LCD display: https://smile.amazon.com/dp/B07717WCVN
And finally - fitment. If you have a factory radio right now, chances are the size is not the standard "single DIN" or even standard "double DIN" because...I don't know. But if you buy the above mentioned unit, there will be a gaping hole below it and the size is odd. Moss Miata to the rescue! They sell a little cubby designed to properly fill the hole. It's stupid priced for a plastic box but it is a very specifically sized plastic box. Here's how it looks in my car below my weirdly mounted old head unit.
You should be able to mount your new head unit into the "rack" that your current radio is mounted to. It's fairly straightforward after you get things apart. That unit is lightweight too, so should be simpler to mount.
FINALLY - to get your old unit out you have to remove the center console and then the "tombstone" - which means you have to pop out your two eyeball vents. It's a harrowing thing on old plastic and there have been a few reports of broken trim. I've always been OK but I don't think I'd do it during really cold weather when the plastic is most brittle. To pop my vents I used a bit of paracord with a loop at the end. A bent piece of wire was used to fish the loop out of the opposite side of the vent, then a quick yank and out they pop. There are screws above the vents to remove the trim. You can look this all up online (miata.net).
Hope this helps.
P.S. if you have a power antenna, you likely will lose independent control of it. It will go up when you power up the radio, and go down when you turn it off.
Sure, I will try to list everything here, most of what I got was from Amazon.
$107 HQST 100 Watt,12 Volt Solar Panel
$20 Charge Controller from Amazon
$90 1000W Power Inverter I went overkill for most on this, but I wanted to power a chainsaw if needed, otherwise you would only need to put in $37 for something really good
$11 Battery to inverter cables
$64 35AH 12V Deep Cycle Battery
$14 12V LED lights
$5 light wiring
$6 Switch
$38 Solar Panel Wires
$13 Battery Cables
$16 Conduit Pipe
$17 Unistrut
$13 For the Satellite Mount on eBay
Then figure $20 for various nuts an bolts.
So for me it came out to about $434, but considering that I paid high for my inverter, and over paid on cables/wire (you can use cheaper cables, but I went with the pre-set ones for convenience), you could do it for just over $350.
I think you should keep your car and repair it. The $1000 is much cheaper than a new car, and the Corolla will last you many more years.
Could you not repair it, and try something like a 12v fan?
Like this:
https://www.amazon.com/AboveTEK-12V-Electric-Car-Fan/dp/B010CESJTC
What I'd do, and have done is run this into these Power distrobution block w/ fuse, and ground distribution block. Then you can just get a few feet of 4 gauge red/black for your amps.
Im gonna hook you up with two different set ups that will more than meet your goals: Either one will use this wiring kit. First 2 Soundqubed HDS212 subs and make sure you get dual 2 ohm voice coils. And get this box thats right around $400 for subs and a proper box. Or you could go with sundown E12s with this box for a little more$. for either setup a CAB 1600.1 for $200.
No matter which setup you pick you will be under the $800 you have budgeted.
That should be fine. It's possible to find it as a single cable too:
http://www.amazon.com/Pyle-Pro-PCBL43FT6-Stereo-Y-Cable-Adapter/dp/B004G87FLY/ref=sr_1_16?s=electronics&ie=UTF8&qid=1369358512&sr=1-16
You may find you get a lot of hum or buzz, more than you do listening to the PC alone. This is probably caused by a difference in the ground between the PC and mixer. These sorts of devices can then be a very helpful addition:
http://www.amazon.com/Pyle-PLGI35T-8-Inch-Stereo-Isolator/dp/B004HJ35F2/ref=sr_1_8?s=electronics&ie=UTF8&qid=1369358835&sr=1-8&keywords=ground+loop+isolator
http://www.amazon.com/Hosa-HEM-462-Eliminator-Audio-Integration/dp/B0042ZVZZ8/ref=sr_1_1?s=electronics&ie=UTF8&qid=1369358647&sr=1-1&keywords=ground+loop+isolator
It sounds like you did a bunch of research and you're totally ready for this bun!
Just a couple of specific ideas to add on to what the other commenters have suggested. This stuff is great for covering wires. If you find that the carefresh doesn't absorb odor as well, you can try a pelleted litter (I use oxbow eco-straw since it's safe for them to eat)
Congrats on your new bun!
You need:
1.) XLR connector like this: https://www.amazon.com/gp/product/B00067JJ8Q/
2.) Some long enough wire, for example: https://www.amazon.com/gp/product/B00UR0N370/
3.) One XT60 connector: https://www.amazon.com/gp/product/B01E9HM7NC/
4.) Some sort of quick disconnect plug, example: https://www.amazon.com/gp/product/B006ZOIJ0S/ (this is so that it can easily disconnect if you crash without damaging the cable)
Then just solder those parts together and you're ready to go.
PS: This case is optional but it perfectly fits 2 carvepower battery cases and the solar charger device + cable: https://www.amazon.com/gp/product/B01N6N3J8D/
It's something to clean up the sound if it's from power problems. There's lots of them out there, and they're pretty cheap.
Though gambling on that vs. getting a headphone extender for your known working back port may not be the best plan.
This. Mkv is fine on the nex. To play on motion you'll need a toggle switch or just buy a bypass for like 7 bucks.... they're all the same no reason to buy the "micro bypass" that's like 20+ bucks.... this is what I use but anything similar will work or you can build you own toggle... it's pretty simple too if you want to go that route... just ask if you care to go that route.
First, try plugging the power for your computer and Receiver in the same power outlet. If that doesn't work, then get a ground loop isolator. Here is an example:
http://www.amazon.com/Pyle-PLGI35T-8-Inch-Stereo-Isolator/dp/B004HJ35F2
You can get these with different types of connectors (RCA, 3.5mm, etc.).
This is the cure bruh: https://www.amazon.com/dp/B010CESJTC/ref=cm_sw_r_apa_kmGCxbA0VTMAK
This is very true, especially with many of the cheaper USB bluetooth dongles. My solution may be overkill, but I had one of those inverters to charge a laptop from the car, plugged the dongle into that and it eliminated 100% of the noise... which makes sense.
I believe the loop option is called a ground loop isolator.
(Example: https://www.amazon.com/ZIOCOM-Isolator-Eliminate-Buzzing-Completely/dp/B019FC6ZQQ)
Does anyone know anything about fixing RF Interference with a Ferrite RF Choke? My Vive has had tracking problems until 7:45, and I've tried everything except this. I'm not sure what I need though. I've seem some recommend this, which I would prefer since it's cheap, however this popular post recommended using 4 others, plus a second link box and cable, which would be $125+.
Would the cheaper choke work? Would I need multiple? How many loops of wire would I need to put through it? The radio tower I believe is messing with me is about 1000 feet away or so. Don't know the frequency it's at, all I know is when it lowers its frequency at sundown(7:45) my Vive works.
You need a microbypass.
afaik, this will do the trick for you
Really easy to install, just a few taps to make at the back of the headunit, and done.
No offence but if you don't understand the wiring diagram maybe you should get someone to do it for you?
If you're determined to do it yourself maybe you just need a wiring harness kit like this:
https://www.amazon.com/Scosche-NN03B-Harness-1995-07-Standard/dp/B0007KPS0A/ref=sr_1_2?ie=UTF8&qid=1494895498&sr=8-2&keywords=nissan+350z+wiring+harness
It all depends on your setup. I don't know what plugs Joying comes with and whether or not you have a bose system in your car etc.
If you're spending that much for a brake bleed kit, get an electric vacuum pump for ease. under $50 USD
vacuum pump
12v adapter
wires
I threw this together with the first 12v adapter I could find on amazon. If you want the run to pump better with more vacuum, get an adapter that pushes more than 2 amps. I have a 5 amp adapter and the pump runs like a top.
reciever
and
speakers
wire
$470ish and an amazing deal on the ELACs right now.
to be honest you could cheap out and not get a receiver, but this would allow you to add a sub and 7.1 surround down the line for less than $500
This one works fine for me: https://www.amazon.de/gp/product/B019FC6ZQQ/ref=ppx_yo_dt_b_search_asin_title?ie=UTF8&psc=1
And here's the one the other guy mentioned:
https://www.amazon.de/dp/B01LX0H29W/ref=cm_sw_r_tw_dp_U_x_opB0CbHJXRZGH
Yes it will work.
You will need this harness:
https://www.amazon.com/20-pin-Subaru-Headunit-Harness-Steering/dp/B01D9K3L44
and this adapter box:
https://www.amazon.com/Axxess-ASWC-1-Universal-Steering-Interface/dp/B00B4PJC9K/
If you get the Metra 70-7552 wiring harness (what crutchfield.com recommends), you won't have the steering wheel control wires and you'd have to tap in to your factory wires.
Sorry to confuse you!
Anyway,we find one link for you reference,it is not our store,we can not sure if it can solve your problem or not!please note!
https://www.amazon.com/dp/B00XDACVOM/ref=sxr_pa_click_within_right_2?pf_rd_m=ATVPDKIKX0DER&pf_rd_p=2957865822&pf_rd_r=1GWQS0HRW2C6BE6QY3S0&pd_rd_wg=OUqEh&pf_rd_s=desktop-rhs-carousels&pf_rd_t=301&pd_rd_w=8Iuo7&pf_rd_i=radio+filter&pd_rd_r=RKD1QV4ZXF5QEPQAA791&psc=1
You can get a cheaper alternative on Amazon. This is what I bought -- 100 ft for $14. I feel like that spiral cable wrap isn't the most protective. :X
You need a ground loop isolator likely because when charging the speaker(s) there’s a ac/dc conversion happening. Check this out. It has helped others with same problem. https://www.amazon.com/AUKEY-Ground-Isolator-Systems-Included/dp/B01L1NP7YI. Some say this ones better https://www.amazon.com/Isolator-Audiophile-Frequency-Without-Distortion/dp/B01N10AQ76/ref=mp_s_a_1_3?crid=3RV5RXTNPJ09E&keywords=krypt+ground+loop+isolator&qid=1555458843&s=gateway&sprefix=krypt+g&sr=8-3&utm_source=share&utm_medium=ios_app
Mine was a Bose as well. I'd highly encourage you to do the swap - modern radio features are pretty neat, and you can even put in something like this if you're feeling adventurous.
According to miata.net's audio page, the head units are all pretty similar - it seems the biggest difference is determining if you need to buy either this wiring harness or this one.
Both the head unit and the harness come with instructions on which wire carries which signal, so soldering them is simply connecting A to A. Honestly, the most difficult part of the swap I found was installing the mounting sleeve in my console - the unfinished metal edges dealt me more than a few cuts due to my stubborn refusal to protect my hands.
I spent a bit of time kicking myself for not photodocumenting the head unit installation, but ah well. There's no shortage of people willing to advise on the subject.
I have had amazing luck with the Sony XAV-AX100. It is a very stable head unit running AA and sounds way better than the stock stereo. It also looks like it could be stock as opposed to the obnoxious ones that have a million green blinky lights. It doesn't support wireless but you can retain steering wheel controls and center console USB, just by using this custom wiring harness. https://www.amazon.com/gp/product/B01D9K3L44/ref=ppx_yo_dt_b_search_asin_title?ie=UTF8&psc=1
I used this thread for install questions.
https://forums.nasioc.com/forums/showthread.php?t=2815667
I bought these to cover up my cords. They've worked well so far.
Yup!
https://www.amazon.com/gp/aw/d/B010CESJTC/ref=yo_ii_img?ie=UTF8&psc=1
It's super simple actually. I would recommend looking at a video or two and see how its done. here the stuff I used for mine if you're interested in at least looking it up. It's nice to be able to do it yourself and save on crazy install fees.
Pioneer AVH-2300NEX Multimedia DVD Receiver
Metra 70-1730 Receiver Wiring Harness
Metra 40-HD10 Antenna Adapter
iDatalink Maestro ADS-MSW Steering Wheel Control Adapter
APPS2Car Parking Brake Bypass
Duttek USB 3.0 Flush Mount Cable
I have a 2011 C250, does the C250 you are looking at have the aux jack in the glovebox?
I have a USB powered Bluetooth-to-aux streamer, got it from amazon for $20 or so, and it lives plugged in to a cigarette-to-USB adapter in the cigarette/12v plug also in the glovebox. I also have a line filter, because tehre was some whine when nothing was playing.
This is the bluetooth adapter: https://www.amazon.ca/gp/product/B0140QCYNU/ref=oh_aui_detailpage_o06_s00?ie=UTF8&psc=1
This is the line filter: https://www.amazon.ca/gp/product/B004HJ35F2/ref=oh_aui_detailpage_o06_s00?ie=UTF8&psc=1
First of all, more PICTURES!
So I saw a couple of other posts and got inspired. Mainly this one and this one.
I used wire and LEDs from amazon. 3 LEDs on each side.
And visor plugs and screws from ebay.
I wired the lights up to the switch as shown in the 2 other posts, which was really easy to do.
Then I wired the lights up through the trim.
I drilled holes in the plugs to fit the lights and put it all back together.
The pictures show some before and after, but I didn't have any pictures from night. The difference is huge, I can actually see in my car at night.
Scosche makes a wiring harness adapter.
Here's a link to Amazon
https://www.amazon.com/gp/aw/d/B0007KPS0A/ref=mp_s_a_1_1?ie=UTF8&qid=1525792990&sr=8-1&pi=AC_SX236_SY340_QL65&keywords=scosche+xterra+radio+wiring+harness&dpPl=1&dpID=41rDjw%2BkK2L&ref=plSrch
Yikes, never mind. Found them by searching, not sure why I couldn't find it til I made the post. For anyone who follows, I've found these on amazon :
housing : https://www.amazon.com/Phantom-2-54mm-Dupont-Connector-Housing/dp/B00CO87S7O/ref=lp_14034876011_1_1?srs=14034876011&ie=UTF8&qid=1485323427&sr=8-1
female connector: https://www.amazon.com/SUNKEE-Dupont-Jumper-Female-Connector/dp/B00CGWVFWW/ref=redir_mobile_desktop?_encoding=UTF8&refRID=02SBMEQQZTNX8JAX34V3&ref_=pd_aw_fbt_328_img_2
Thank you for the more detailed information. A lot of the explanations that say what to do are always AFTER it's failed, not before. And since I don't know a lot about electrical or boards in general it's all Greek to me.
Before I go breaking my board:
https://www.dropbox.com/s/y6d8at28o7njnjf/2016-09-12%2007.53.17.jpg?dl=0
The issue is with the connector to the left of the one labeled "Power" in my picture above. I need to break the green plastic connector (directly connected to the board) and leave the pins. Then Solder these pins to the posts sticking out the bottom of the XT60 female connectors. Something like: https://www.amazon.com/Finware-Female-Bullet-Connectors-Battery/dp/B01E9HM7NC/ref=sr_1_6?ie=UTF8&qid=1484342494&sr=8-6&keywords=XT60+connector
Then solder the wires to the pins of the male XT60 connector, plug, set it and forget it. Correct?
I can't imagine there being a lot of room from the board to the XT60 connector pins. That's going to be rough for a novice solderer like me. Pre-tinning the pins on the female side will be VERY necessary.
I'll show you my setup to see if it will work for you.
Dashcam - https://www.amazon.com/V1-Dashboard-Recorder-G-Sensor-Recording/dp/B00X528FNE/ref=sr_1_4?s=car&ie=UTF8&qid=1484000259&sr=1-4&keywords=dash+cam
add-a-fuse connected to an always hot fuse under the passenger side - https://www.amazon.com/HitCar-Vehicle-Circuit-Profile-Holder/dp/B00U61OO50/ref=sr_1_1?s=car&ie=UTF8&qid=1484000314&sr=1-1&keywords=add+a+fuse
12 volt to 5 volt adapter cable https://www.amazon.com/WheelWitness-Hardwire-Installation-Dashboard-Charger/dp/B00TGQ1Y3Q/ref=sr_1_3?s=car&ie=UTF8&qid=1484000362&sr=1-3&keywords=12+volt+to+5+volt+adapter
Run that to the dashcam, add a 64GB microSD and record at 720p.
You should get around 6 hours of footage before it erases the older one. You can spend a little more to get a dashcam that will support 128gb SD cards and get 12-14 hours out of it.
If you connect it to an always hot 12v fuse, you should have no problem keeping the dashcam running 24/7.
Note: In Texas, temp near the windshield can exceed 110 degrees so make you get a capacitor based dashcam if you live somewehre that gets really hot or really cold
https://www.amazon.com/Metra-70-8113-Amplifier-Integration-2000-2004/dp/B0007WRQQ2/ref=asc_df_B0007WRQQ2/?tag=hyprod-20&linkCode=df0&hvadid=312152566480&hvpos=1o5&hvnetw=g&hvrand=452740500094546377&hvpone=&hvptwo=&hvqmt=&hvdev=m&hvdvcmdl=&hvlocint=&hvlocphy=9017563&hvtargid=pla-493281881983&psc=1
[these] (http://www.amazon.com/Pyle-PLGI35T-8-Inch-Stereo-Isolator/dp/B004HJ35F2/ref=sr_1_6?s=electronics&ie=UTF8&qid=1405986076&sr=1-6&keywords=ground+loop+isolator) are what I got. They're very cheaply made, but they worked for me. Bought two... one for the left channel and another for the right channel.
I used some from a motorola 26 pin connector. They look very similar to this.
Edit: Found some on amazon for a cheaper price
You probably need some 2 conductor wire and a soldering iron. I would use a pretty thin gauge (high number) since the MQ172-3SA-CV(30) connector looks like it has really small tabs to connect to. If the insulation is too thick, you can try to trim the outside with an xacto knife. Of course, you want to keep insulation between the 2 conductors.
For example, 20 awg 2 conductor hookup wire. You can probably also find it at your local auto parts or hardware store.
I am assuming that the reason you want to hardwire the dashcam is because your cigarette lighter is live all the time, even when the ignition is off. If that is the only reason, you do not have to hardwire it, you can purchase a switched lighter adapter and keep the dashcam plugged in all the time and turn off the switch on the adapter when you leave the car.
I am just saying that because you have not indicated that you are interested in hardwiring because you want to use the dashcam in parking mode, and because you have said that you have no experience in car electronics.
However, if you want to go ahead with the hardwiring, I urge you to watch some videos on YouTube demonstrating how to hardwire. Here's one, e.g. https://www.youtube.com/watch?v=3I9FZL8btqc
As to the fuse to use in your car, I see that you have 3 fuses that are spare. You can use any one of those provided that it only becomes live when the car ignition is turned on. The only way you will know that is by testing it with a circuit tester.
So, along with the circuit tester you will need to buy a 'add a fuse' such as this https://www.amazon.com/HitCar-Vehicle-Circuit-Profile-Holder/dp/B00U61OO50/ref=sr_1_9?ie=UTF8&qid=1468810452&sr=8-9&keywords=Add+a+fuse
Make sure that the blades of the fuse are the same as what is in your car.
Be very careful when working in the fuse box that you don't short circuit anything. It could be bad news.
Yes, it will work. Get a good ground loop isolator that won't affect sound too much.
I have this for my '03 Celica GTS with the JBL kit. It looks like a direct fit for yours too.
It's not hard at all. Just grab a two colored wiring harness and I believe the ring's plug harness has both a white and white grey stripe. Cut about 4" from the plug and from the base station input Match it up to your new two colored harness and away you go. Super simple! Something like this below>>>>>>>
https://www.amazon.com/RoadPro-Hardwire-Replacement-22-Gauge-Parallel/dp/B001JT1CEE
I have, here's my install: http://www.focusfanatics.com/forum/8943153-post48.html
My add-a-fuse: http://www.amazon.com/HitCar-Vehicle-Circuit-Profile-Holder/dp/B00U61OO50
Sweet!
My next question is, do you know the name of the connectors? it almost looks like this (Dupont connectors)
https://www.amazon.com/SUNKEE-Dupont-Jumper-Female-Connector/dp/B00CGWVFWW/ref=sr_1_8?ie=UTF8&qid=1467660201&sr=8-8&keywords=dupont+connector
Which I have a plethora of, but it doesn't seem to be the same. Have any insight?
You can stop that. I think Mix 31 is the type of bead you need to block CB. Basically you loop the cables through something like this a bunch of times, like this, close to the speaker.
If can judge the noise is caused by ground loop power supply ,I recommend this device to eliminate the noise ,I tried it ,it is cost less than $8 and it is very useful .
http://www.amazon.com/dp/B019FC6ZQQ
To my knowledge, most of them are almost the same length so they can mount with the dash kit. And since you're on crutchfield, it says it comes with the installation gear which I hope is everything. If not, the harness is this if you don't have Bose, and the dash kit. It's pretty simple to wire the harness to the existing wires. They're all color coded and some you won't need.
There's also ground loop isolators, what do you think of them?
http://www.amazon.com/Pyle-PLGI35T-8-Inch-Stereo-Isolator/dp/B004HJ35F2/ref=pd_sim_auto_18?ie=UTF8&refRID=1M93G0HTVE1NX2EXVBE7
I got this awhile ago and it's works pretty well.
https://www.amazon.com/20-pin-Subaru-Headunit-Harness-Steering/dp/B01D9K3L44
Tap a fuse - 1st fuse protects your vehicle, 2nd fuse slot protects your dash cam - allows you to tap into the fuse, and power your dash cam.
Check google maps. Solution were those https://www.amazon.com/RF-Choke-31500-Ferrite-Material/dp/B00XDACVOM/ref=sr_1_8?s=industrial&ie=UTF8&qid=1461671439&sr=1-8&keywords=rf+choke
This is what I used to be able to use all features regardless if I’m parked or not.
Bypass Module
Thanks for showing the math behind it, definitely shows how falsely they have advertised it
With the welding cable, i have found this after a quick Google search
http://www.r-techwelding.co.uk/70mm-welding-cable/
They offer 50mm, 35mm etc but 70mm is the biggest. Is that worth it?
What about this? https://www.amazon.co.uk/KnuKonceptz-Gauge-Amplifier-Wiring-Installation/dp/B004YWC4FY/ref=sr_1_27?ie=UTF8&qid=1495667068&sr=8-27&keywords=amp+wiring+kit
It says CCA but I have no idea what that means in terms of performance
They do offer a long grounding wire for the "big 3" upgrade as xxYYZxx said, if that's worth it
If true the OP can work around it by installing an input transformer between the source and the headphone amplifier. This will break the unwanted ground short.
edit- like (this one)
Kript Noise Filter Ground Loop... https://www.amazon.com/dp/B01N7QSOO8?ref=ppx_pop_mob_ap_share
Ramps 1.4 Board - $19.99:
http://www.microcenter.com/product/442967/RAMPS_14_RepRapp_Arduino_Mega_Pololu_Shield_For_3D_printer_RepRap_Prusa_Mendel
Arduino Mega - $9.99:
http://www.microcenter.com/product/431995/Arduino_Mega_2560
4 Stepper Drivers - $12.99:
http://www.amazon.com/3D-CAM-StepStick-Electronics-Robotics/dp/B010MZ8SWO/ref=sr_1_1?rps=1&ie=UTF8&qid=1459314924&sr=8-1&keywords=a4988&refinements=p_85%3A2470955011
15 Jumpers (included with some ramps 1.4 boards) -
http://www.amazon.com/2-54mm-Standard-Computer-Jumper-100pack/dp/B00N552DWK/ref=sr_1_3?ie=UTF8&qid=1459314985&sr=8-3&keywords=2.54mm+jumper
5 2 Pin Dupont Connectors -
http://www.amazon.com/Happy-Store-2-54mm-Connector-Housing/dp/B00CO86Z6Y/ref=sr_1_3?ie=UTF8&qid=1459315118&sr=8-3&keywords=dupont+connectors
2 4 Pin Dupont Connectors
http://www.amazon.com/Happy-Store-2-54mm-Connector-Housing/dp/B00CO87S7O/ref=sr_1_1?ie=UTF8&qid=1459315201&sr=8-1&keywords=dupont+connector++1x4p
Dupont Pins:
http://www.amazon.com/Sunkee-Dupont-Jumper-Female-Connector/dp/B00CGWVFWW/ref=pd_bxgy_23_img_3?ie=UTF8&refRID=1Q5X8BG6ZJG846F7B4D1
I've already wired the head unit to the amp using the Metra amp interface harness. (Metra 70-8113 Amplifier Integration Harness for Select 2000-2004 Toyota Vehicles https://www.amazon.com/dp/B0007WRQQ2/ref=cm_sw_r_cp_api_hQJRyb2N0J5NS). I'm not too sure I wanna replace the amp, but if it comes down to it I will, it's just the rear deck speakers are not working too well. And yeah, that's what I've been able to dig up. Would I have to get a harness when I get the speaker?
Fans?
Will do! I want to make sure im doing this right, I would take the RCA outputs and ford head and feed those into the amp, and then use this wire to connect the amp output to the cars factory wiring to feed the 4 cabin speakers?
https://www.amazon.com/Metra-MC918-20-20-Feet-Nine-Conductor-Multi-Use/dp/B004H1KAMQ/ref=sr_1_3?ie=UTF8&qid=1542597755&sr=8-3&keywords=9+wire+speaker+wire
Or should I wire the 4 speaker outputs from the ford head into the amp, and then have it amplified, and feed the output of the amp back into the speaker side of the harness?
Googling around that seemed to be one of the possible issues.
I'm very ignorant when it comes to these things, but where would I attach this ground loop isolator? To the main AUX? The RCA? Or both?
Also, would this one work? https://www.amazon.it/Isolator-isolatore-eliminare-completamente-riproduzione/dp/B019FC6ZQQ/ref=cm_cr_arp_d_product_top?ie=UTF8
As he said ground loop isolator. Or a power conditioner. Power conditioners are a lot more though. They are usually used with high end stereo equipment and instruments like guitars.
I had bad static with line out to aux in on the mix amp gen 4 and this solved it.
https://www.amazon.com/Isolator-Audiophile-Frequency-Without-Distortion/dp/B01N10AQ76/ref=sr_1_6?crid=23OWCEXOMDQ3Q&keywords=ground+loop+isolator&qid=1557551859&s=gateway&sprefix=ground+l%2Caps%2C156&sr=8-6
But i had planned to need it. I may even get one for stream out.
Xenyx 802 boards are not a USB audio interface. You would need to plug in your mic into ch1 or ch2, then if you just want to send you Mic input to your PC then you will need to take cable like this one (https://www.amazon.com/Hosa-CMP-153-Stereo-Breakout-Cable/dp/B000068O3C) and plug it into your Main Out then the 3/4 end would plug into your microphone input on your PC.
You may want to use a ground loop isolator as well to ensure a clear and clean transfer of sound from the mixer to the PC. This is a good one (https://www.amazon.com/dp/B004HJ35F2/_encoding=UTF8?coliid=I1TOD2ZLXASPZE&colid=CB045PGEL00J). I hope this helps :)
I tried connecting it to the the same outlet as the other station with an extension cord and it still occured. I suppose it must be interference then. Any idea if this'll help?
https://www.amazon.com/RF-Choke-31500-Ferrite-Material/dp/B00XDACVOM/ref=sr_1_8?s=industrial&ie=UTF8&qid=1461671439&sr=1-8&keywords=rf+choke
No splicing the factory harness... but it does require splicing into two of the wires that connect to the button. The connectors snap over two of the wires to the button (unless I can find a connector that matches the button connector).
Power comes via an add-a-fuse connector, the ground connection works on any screw / connection to the vehicle body, and the button wires are tapped via snap on T-Tap connectors.
An additional benefit is that only changes the startup state - the button still works to turn it on \ off if there's ever a situation where you wanted it on.
What kind of noise are you getting? If it's a 50/60Hz hum using an isolation transformer on it's output would reduce it significantly https://www.amazon.com/Isolator-Eliminate-Electrical-permalloy-transformers/dp/B01N7QSOO8/ref=sr_1_6?ie=UTF8&qid=1491227544&sr=8-6&keywords=3.5mm+transformer
Alternatives are to run a long cable, optical or 3.5mm analogue from the PC to the sound bar directly.
I've just bought Takstar 82 PRO and I'm liking them so far. However, I have an issue when I connect those headphones to my old Technics amplifier (SU-V550, from the 80's). I hear a constant white noise when no audio is playing. The white noise volume increase with the volume knob, it's not audible when I play mp3s or flac or during movies (and youtube). Didn't have this problem whith my and cheaper Sennheiser HD201.
How do I fix it? Is an headphone amp the only way?
edit: could something like This solve my issue? Or does it make the sound worse?
Three ideas in increasing order of complexity:
Yes, but only in hindsight!
You might also want to pick up spare pins, female ends, a crimper, and spare headers while you're at it.
Some Ribbon cable can also be useful...
I went through so many pins and headers trying to figure out the right way to crimp those bastards so they stayed put... "crimp" it.. put it in the header... give it a slight tug... cable comes out... grab a pin to lever the catch allowing the pin and female end to be removed, break catch in process, curse.. try again...
Oh well, they're cheap, and I bought a lot expecting to screw up. :)
I am going to assume that u have a double din. The cheapest option would be the Pioneer AVH-290BT and you will need to buy radio wiring harness (my car needed this). I installed a 3.5mm audio cable too only to realize after that it has bluetooth
Or a 12 volt fan, like this or this.
You can absolutely connect all this to the factory head unit. The Pioneer amplifier that I linked to you can accept speaker wire inputs. No need for RCAs or line output converters at all. It's the white square 8-pin plug on the end of the amp. You'll clip each factory speaker wire in two, connect the side coming from the head unit to the white square 8-pin plug on the amp, then connect the output of the amp to the other side of the factory speaker wire going to each speaker. I'd recommend some 9-wire to help you with this. Easily connect all the head unit outputs to that, run to the rear in one small jacket, and into the amplifier.
Eleac cinema 5 speaker package originally retailed for 400.00 now sells for $199
https://www.accessories4less.com/make-a-store/item/onktxsr383/onkyo-tx-sr383-7.2-ch-x-80-watts-bluetooth-a/v-receiver/1.html
https://www.amazon.com/Impact-Mounts-Universal-Surround-Satellite/dp/B07RLY5TV5
https://www.amazon.com/InstallGear-Gauge-100ft-Speaker-Touch/dp/B01CSZAYF0
20-pin Subaru/Nissan Headunit/Radio Wiring Harness with Steering Wheel Switch wires
This is the thread:
​
https://www.toyotanation.com/forum/104-camry-5th-6th-gen-2002-2006-2007-2011-2nd-gen-solara-2004-2008/1567626-diy-gen5-headunit-upgrade.html
​
tl:dr you need:
​
Metra 70-8113
https://smile.amazon.com/Metra-70-8113-Amplifier-Integration-2000-2004/dp/B0007WRQQ2/ref=sr_1_1?keywords=Metra+70-8113&qid=1554440893&s=gateway&sr=8-1
​
Metra 99-8231 (if single din radio)
​
https://smile.amazon.com/Metra-99-8231-Single-Installation-2002-2006/dp/B00BAO15UE/ref=sr_1_1?keywords=Metra+99-8231&qid=1554440976&s=gateway&sr=8-1
​
​
Here's the basic parts list to build a bucket like this:
Lots of this stuff can be had cheaper at a home improvement or pet store. Check around. You'll need a soldering iron (I like my adjustable 40w), a drill and drill bits up to 3/4" (I like step bits for work on plastic), a heatgun or lighter to shrink that heatshrink tubing. An infrared thermometer is nice to have and can tell you the temp of your nutrients, the plant itself, your lights, etc...Just make sure to calibrate it first, all the cheap ones are inaccurate by at least a few degrees.
i got my wire and plugs from amazon and they work great.
wire
https://www.amazon.com/InstallGear-Gauge-100ft-Speaker-Touch/dp/B01CSZAYF0
plugs
https://www.amazon.com/Mediabridge-Banana-Plugs-Corrosion-Resistant-Gold-Plated/dp/B00JFC9BJU
got all of my subwoofer cables from Amazon as well. cheap and easy. Cable Matters and Amazon basics brand sub cables.
other than that, R/L/C should be a simple straight forward process. have all of your sources going into your receiver and HDMI out from your receiver to your TV.
I did this mod yesterday on my Monoprice Maker Select V2.1
I bought this: https://www.amazon.com/gp/product/B01E9HM7NC/ref=oh_aui_detailpage_o03_s00?ie=UTF8&psc=1
Disassembled printer
Used needle-nose pliers to pull the entire connector (while still plugged in) directly away from the board. It takes a little wiggling but the green and orange parts of the plug should eventually work their way off the metal posts still attached to one-another. (note, no heat was required to do this)
Solder on the female end of the plug to the board in it's place. Solder wires to the male plug.
Repeat (power & hotbed connectors)
Total of 8 solder locations.
Done in about 30 minutes with very minimal soldering skills and minimal disassembly.
Edit: Also worth noting that the listing for X60 connectors I linked came with red and black heat shrink tubing.
I don't know too much about wires, but I bought this and I think it's of excellent quality. Nice and thick. Has a heavy feel to it yet very flexible. Plus, I don't know about that tool. I used the Klein stripper and it's very nice. That doesn't seem like the best tool imo, but I'm no an expert.
Just to close the loop, I fixed this with a ground loop isolater
https://www.amazon.com/gp/product/B01N7QSOO8
These things might help: http://www.amazon.com/gp/aw/d/B004HJ35F2/ref=mp_s_a_1_7?qid=1404586418&sr=8-7&pi=AC_SX110_SY165_QL70
When I first got my cat she did the same thing. I ordered this tubing to go around our wires. It’s relatively cheap and you get a large amount. She never bothers anything that I’ve wrapped this around.
https://www.amazon.com/gp/aw/d/B0017686ZC?psc=1&ref=yo_pop_mb_pd_title
Is this the buzzing noise everyone is talking about on the JBL MKii305p speakers? https://imgur.com/VSoTcre
Will this ground loop noise isolator possibly fix this buzzing issue on my speakers? https://www.amazon.com/gp/product/B01N10AQ76/ref=ppx_yo_dt_b_asin_title_o00_s00?ie=UTF8&psc=1
This is a great thread! I'm ordering parts and preparing for my own install into a 2013 Subaru Crosstrek and I've been concerned with the issues people are reporting with steering wheel controls. It sounds like bypassing the ASWC unit and going directly into the head unit and programming the buttons there did the trick for you though? Does MODE button work to change modes? Does the VOICE button work for activating Siri? Would you mind sharing which parts you used to build your custom cable?
The harness I purchased actually includes the SWC wires compared to most harnesses that don't, so maybe this puts me in a good spot for being able to make this work correctly? https://www.amazon.com/gp/product/B01D9K3L44/ref=oh_aui_detailpage_o02_s00?ie=UTF8&psc=1
https://www.crutchfield.com/p_113DDX374B/Kenwood-DDX374BT.html?tp=20217&omnews=14403470
https://www.amazon.com/gp/product/B00XLXHVVE/ref=oh_aui_search_detailpage?ie=UTF8&psc=1
https://www.amazon.com/gp/product/B004H1KAMQ/ref=oh_aui_detailpage_o01_s00?ie=UTF8&psc=1
Day old post, don't care.
I bought some Revision Desert Locust goggles off ebay for ~$30. Spent another $20 for a 25mm fan (http://www.amazon.com/gp/product/B00MYNWUP4?psc=1&redirect=true&ref_=oh_aui_detailpage_o02_s01), some 20ga wire (http://www.amazon.com/gp/product/B001JT1CEE?psc=1&redirect=true&ref_=oh_aui_detailpage_o02_s01), and some on/off switches (http://www.amazon.com/gp/product/B00FH7WN2Y?psc=1&redirect=true&ref_=oh_aui_detailpage_o02_s00).
I placed the fan to one side of the goggles (currently held in place with hot glue, but might "upgrade" to zip ties instead), ran the wires on top of the goggles (held in place with zip ties) to the on/off switch on the other side. Then ran wires to the back where I have a spare rechargeable battery held in place with velcro. Covering the battery up with the cover that came with the goggles.
That fan puts out 2.8 CFM with not a hole lot of noise, and at only 25mm, that's an astonishing amount of air!!! I haven't had a chance to try it out yet, but I will be this weekend. The on/off switch is to keep what little noise the fan puts out down, as with these goggles, I do not forsee needing the fan constantly on.
A DAC powered by the USB directly won't help with the noise. You'll either need to run a Toslink connection into your DAC, use a line filter/isolator, or a better DAC that's self powered.
I was running into the same noise issue with my old USB powered DAC and ended up with this line filter before I got my Bifrost: https://www.amazon.com/gp/product/B01N10AQ76/ref=oh_aui_search_detailpage?ie=UTF8&psc=1
With my Bifrost, I have 0 noise as it's self powered and has noise filters going on inside of it. Just be aware that isolators remove some frequency along with the noise, but the one I linked completely solved my dirty USB noise problem.
Not unless your only gonna be running 500w rms... That's just preference, you can run a little more power through 8ga but I wouldn't. You'll want 1/0ga wire for a proper amp for those subs. Hell, that AT amp wants a 180A inline fuse. The Knukonceptz KCA 1/0ga kit would be fine since it can handle up to 250A. It's like $70 after shipping. Doesn't include RCA's or anything, but you already have that stuff in.