Best clamps according to redditors
We found 684 Reddit comments discussing the best clamps. We ranked the 324 resulting products by number of redditors who mentioned them. Here are the top 20.
We found 684 Reddit comments discussing the best clamps. We ranked the 324 resulting products by number of redditors who mentioned them. Here are the top 20.


Don't do this. Please do not do this.
You would get better results with some guides (like this or this) and a couple of sawhorses for the larger cuts. For smaller cuts I would use a miter box or a bench hook and a hand saw.
Designing and building a fence system that would stay parallel to the blade would take too long. If it is not perfectly parallel, or moves while cutting you are going to pinch the wood you are ripping. This is going to result in a board being rammed into your stomach, or a circular saw breaking free of its mount and flying around with a spinning blade. Either way, you are going to have a bad day.
Weekend woodworker here. This looks reparable, assuming you can get a few clamps on either side of the piece to hold it together while you glue it.
For glue, use Franklin International 1414 Titebond III Ultimate.
For clamps, use some Pipe-style clamps, like these. You'll need a clamp for every 6" or so of the crack.
If you have an air compressor or a can of air, like you use for cleaning computer parts, blow out anything that is in the crack. Probably will have some dust and small wood particles you want out before you glue it down.
Fill it with glue, clamp it down, and let it set for at least 24 hours and don't even look at it. Then, release your clamps and it should hold tight.
Well it obviously help to have your edges at 90 degrees, which you do not.
In general, anyone making panels should learn about four way clamps. I have 3 and have used them to make about 8 panels over the past few years and I can't imagine why I'd ever go back. They push the tops and sides at the same time, making racking impossible.
When you order them, you just get the hardware and then you split a 2x4 to attach the strips to. Here's a guy who can explain it better.a
E 4 protip: wax the wood parts with paste wax; it makes cleaning the glue off very easy.
I use this strap clamp on my projects, and it makes things so much easier if you're being a perfectionist. I get a bit obsessive about cutting the angles as close to perfect as I can, and dry-fit things together to make adjustments as needed. I use a longer-setting glue, so that i had plenty of time to get things set up first.
... that's probably directly related to why it's taken me a month to finish a rectangular light fixture, though.
I've also seen people use it to make an 8-sided table. It's pretty awesome.
Cool stuff!
Here's one thing- when stacking them improves the sound, I'm wondering if that's just due to having more resonant coupled mass. Try not stacking them but instead put something heavy and rigid (old HDDs, cordless drill battery, a brick, etc) on top of the drives. See if you get a similar effect. Also try putting something heavy on top of the stack...
By resonant coupled mass I mean material that gets the vibrations of the drive transferred to it, and thus helps with putting those vibrations into the air. Thus bolting the drives down to the board will help a lot. But let's come back to that.
-----
To build your box, you really only need a couple of tools and parts, which I'll link you to now.
Cordless Drill
Cheap Drill Bits
Circular Saw (a jigsaw is also OK)
Set of 4 clamps
Carpenter's Square
Angle Brackets
Wood Screws (probably want some 1/2 inch screws too for the brackets)
A piece of 1x2 wood moulding or similar
A piece of quality 1/2" plywood or MDF
Feel free to substitute whatever's on offer at your local big box home improvement store, it's the concepts that matter not the specific models of things. With that stuff you can build almost anything, your little box will be a snap.
The key with all that- use two of the clamps to clamp the board you're cutting down to the table. Then use the other two clamps to clamp a 2-4' piece of moulding down to the board. The moulding then serves two purposes: Along with the square and a pencil, it lets you draw a very straight and very long line along where you want to cut, and then when you move the molding back a bit (by the exact distance between the edge of the saw's skid plate and the sawblade), it forms a guide for the edge of the circular saw skid plate to slide against, giving you a perfectly straight cut even from a handheld saw.
Note: always cut with the saw facing away from you or your body, and keep your fingers away from the path of the blade! Let the tool do the cutting, don't force it. When you drill a hole for a screw, pick the drill bit that's as wide as the screw shaft (not the screw teeth).
I suggest using more angle brackets to rigidly mount the floppy drives to the casing itself. Obviously brackets that have the hole in a place which holds the drive flush against the casing are preferred. Angle brackets come in all different sizes, and you can always just drill another hole through the bracket if you need to. A larger angle bracket could hold both the upper and lower drive. Or for a stack of two drives, mount one to the inside of the main casing, and the other to the outside of the HDD casing.
-----
Now back on audio. A box like you designed might really help, especially if the back is closed as you're creating a cavity which focuses all the sound forward.
However you should also get a better microphone. If as you say it sounds great in person, well, that isn't being captured well on your video. The video is seriously lacking in bass- floppys make a great raspy bass and that doesn't come over well in the video. :(
I suggest an external mic, something which will stay right next to the drives and enclosure. There are also portable audio recording gadgets which have a good mic built in, I'm thinking something like this.
(Random sidenote- that's why the clapper slate exists, seeing the clap on film and hearing it on a separately-recorded audio track is used to sync up the video with the audio...)
For reference, consider how What is Love has really strong bass, but has a good quality mic right there.
Also production wise- what that guy sometimes does is first record half the drives with the mic right next to them, then record the other half of the drives with the mic right next to them, then sync the recordings and make the two (mono) recordings into the L and R of a stereo track and lay it over the video of the drives moving which is recorded without any microphone...
Hope that helps!
You can get a bar clamp that has reversible ends.
Something like this:
https://www.amazon.ca/IRWIN-QUICK-GRIP-One-Handed-Mini-Clamp/dp/B001DSY4QO/ref=asc_df_B001DSY4QO/?tag=googlemobshop-20&linkCode=df0&hvadid=292999463894&hvpos=1o1&hvnetw=g&hvrand=899368437878054851&hvpone=&hvptwo=&hvqmt=&hvdev=m&hvdvcmdl=&hvlocint=&hvlocphy=9001623&hvtargid=pla-437236176675&psc=1
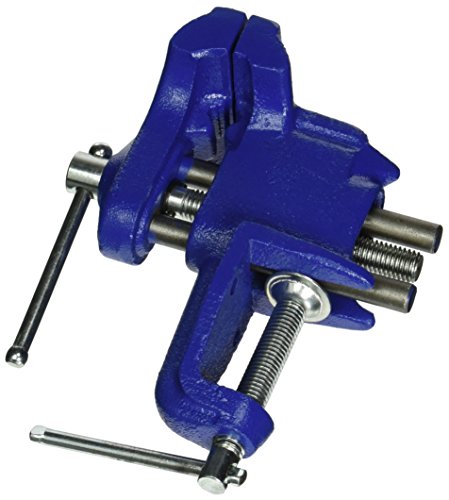
I built several ARs with one of these and a vise block, mounted to my apartment railing at the time: IRWIN Woodworking Vise, 3-Inch (226303ZR) https://www.amazon.com/dp/B0001LQY44/ref=cm_sw_r_sms_apa_i_MwRHDbJ83HPCT
Honestly, I'd save up for a real vise though. I only did it, because the only solid mounting surface I had was that railing at the time
That is a red eared slider. It is quite possibly the most popular pet turtle species. These turtles are popular because they're prolific and they look like little turtles, unfortunately in a few years that little turtle will have grown exponentially. Most of the time it's a parent who bought the turtle for a kid, kid loses interest, parent doesn't know what to do...
Do not release the turt. It would die in Toronto and even if it did not, environmentally if anyone releases a non indigenous species into the wild, although it sounds harmless enough there are large implications when it comes to OTHER reptile populations. This little turt could mate and create a bunch of other turts that eat up food sources etc...
1A.
A 10 gallon tank would be a great starter tank for a RES this size. 10 gallon tanks usually run about $10 at petsmart or petco so there is probably a similar cost up there
1.B
You will need two lights to run during the day:
1 UVB fixture with a bulb
and 1 heat lamp. Some people splurge and purchase heat lamp bulbs specifically made for reptiles, however I have found that using a household bulb provides the same amount of heat. User a bulb that the fixture can handle.
1C.
The turt will need a basking platform. There are super cool options but simple and efficient is the way to go if you're starting.
1D.
You will need a filter. Turtles poop a lot more than fish do so when you're shopping for filters always double the GPH needed to account for the extra nitrates.
1E.
You will need food. Every food is different and let me tell you from experience that you can spend hours researching what is best to feed your turtle...
Protein:
I have learned that omnivorious turtles such as a red eared slider do well if they are started with a protein rich diet and then transition into adulthood with an omnivorous diet.
I would suggest doing the following: go to the grocery store and buy a small Salmon fillet. It may seem silly, but it will last you a very long time. Keep the Salmon in the freezer and feed the turt a few small strips (a serving size should be thought of as, if the turts head were empty, how much food could you fit in it). Make the strips small enough so that the turtle can swallow it.
Feeding tip: Salmon or any other form of protein such as bloodworms, krill etc... can be quite messy because of the amount of oil in the meat. Many turtle keepers (me included) prefer to feed turtles outside of the tank in order to keep the living tank clean. get a small rubbermaid tub or something, make sure it's clean of course and fill it up with enough water for the turt to float around. feed the turt in that water, when you're done, discard the water and put the fat n happy turt back in the living tank. This method lowers the frequency of water changes and keeps the tank cleaner. Handling the turtle like this to feed is also helpful to make the turtle okay with being handled.
Calcium:
As you will read, reptiles need calcium in order to stay healthy. Snakes need calcium in the form of rat bones, bearded dragons eat crickets but turtles do best when supplemented with a cuttlebone. There are turtle specific cuttlebones but they're more expensive and the only real different is that they do not have the hard backing that the cuttlebones for birds have. All you have to do to remove the backing is toss it in a saucepan, boil it for a minute or so, let it cool and then that backing can peel off. This also softens up the cuttlebone some. It's not easy to get the backing off in one fell swoop, but turtles don't care if the cuttlebone is in one big piece or if it's in little white chunks. Calcium supplementation is vital for young turts just as the protein is. Once a week or so is good for calcium.
I have rambled. I am passionate about reptiles so I tend to nerd out. Anyway. Please feel free to PM me with questions, I would really love to help in any way.
Chad
I know, I snickered too but it's apparently a thing.
$45 on Amazon, definitely worth it.
https://www.amazon.com/dp/B00068P48O/ref=cm_sw_r_cp_apa_i_RQFxCbAMKZEKR
If you don't have a workbench you can bolt the workstation down on, I would advise getting some of these clamps (not these exact ones, but this style) to keep the base from moving around. You can put them on the backside and it usually won't interfere with the project.
They look like either the Nitto - Mustache Bar, or the Origin8 Tiki Handlebar
> 4 1/2” table Vice
https://smile.amazon.com/Yost-LV4-Home-Vise-41/dp/B00YS401X0/ref=sr_1_fkmr2_2?keywords=4+1%2F2%E2%80%9D+table+Vice&qid=1565969161&s=gateway&sr=8-2-fkmr2
You can get 1 for $24 or a pack of 2 for only $100...
I'd use a cheap wooden stool as a bench and a clamp-on vise. https://www.amazon.com/IRWIN-Clamp-On-Vise-3-226303/dp/B0001LQY44
Alright I'll bite. Hand tool shop
Narex Chisels 48.99
stanley Jack plane 59.99
stanley Smoother 45.00
Stanley low angle Block plane 31.25
HF combo square 6.99
HF Mallet 5.99
Stanley jointer 150
Sharpening stone (water) 33
Panel saw 1 (cross) 19.50
Panel saw 2 (rip) 16.99
Marking gage 20
Dovetail saw 26.82
Vise 26.46
marking knife 9
Total cost so far: 500.97
shipping from ebay depends on where you are but shouldn't be more than $60 so we factor that in:
560.97
build your own bench (not going to take the time to go into details but it shouldn't cost more than $500 for materials
so now you have
999.03 left to get whever else you want (more marking gages? switch some of the above for better stuff? spoke shave? cabinet scraper? router plane? brace and bit?)
You could get better prices for the ebay stuff above if you were patient that's just what's out there right now. the above is more than enough to do 90% of handtool projects though. Just watch those compound curves ;)
Shit, I'm sorry, I meant to say Quick Fist, Quick Grips are those overpriced Irwin clamps.
Some folks also use a product called "Quick Fist"; caveat emptor I've never used them myself so do some research first. They may have the same rotting problem as the bungie cords but I've not heard of that so far:
https://www.amazon.ca/Quick-Fist-Original-Mounting-Equipment/dp/B000CQPANY
The cheaper route and the best temporary setup would be 55 watt CFL bulbs in a work lamp reflector (they label cfls on equivalent to incandescent bulbs and actual watts used just pay attention to the actual watts used). I use this setup for my succulents and they work great but they don't have enough power for fruiting or flowering plants they are great for the growing stages. The CFLs need to be very close to the plants but far enough where the light doesn't burn them and you need multiple bulbs or one of these kind of florescent lights if you need to cover a lot of area. The 55 watt bulbs can cover about a 1.5'X1.5' area if they are smaller plants.
You can get the big 55 watt bulbs and the reflectors at Walmart. The smaller 25 watt cfls work great too but they need to be very close like 2 inches away close and you need multiples you can fit 4 of them on a power strip with adapters.
The LEDs cost a lot more even the smaller ones but you can find them here for pretty cheap they are the most power efficient option out of the two but they don't come cheap. You get what you pay for when it comes to grow lights.
Edit: they also sell 6500k 55 watt CFLs that have a bit better color for growing.
Could use this I reckon...
I keep some backup clothing. Specifically wool socks, boots and extra gloves and hat. If I get stranded and have to trudge through the snow I wanna be prepared.
Recovery straps arent too expensive either. I think mine was like $30. Get a hitch shackle too if you're gonna do that.
Besides that I keep extra fluids and litter or salt in a box in the back. I got one of these cause I didnt want anything permanent, and just chain it in the bed. Also sand bags for weight - this year I'm planning to build a frame to hold them in place.
Over summer I also built this rail-mount shovel holder, mostly to keep it from bouncing around or getting easily lifted. Its not really secure but its better than just tossing it in there. I used these clamps and these t-slot nuts for the rail. Hardware came from lowes, 3/8"-16, i think they were 1 1/2 inch bolts, washers, and the aluminum bar.
Where are you people buying any pipe clamp for less than $20.00? Heads are $17 : http://www.amazon.com/Bessey-BPC-34-4-Inch-Style-Clamp/dp/B0012YNJRO and then you have to buy the pipe. Black iron pipe is waaayyy more than 5 bucks.
Woodworker here. It's no problem at all to repair that break and end up with a neck that's more solid than before.
You can take it to a luthier and it'll be an easy job for them, or it's a pretty easy DIY job too.
Here's what I'd do: get a bottle of CA glue (super/krazy glue), a needle-tip glue injector, a clamp (a quick clamp would be fine, or any solid clamp with padded clamping surfaces to avoid marring the neck), a wiping cloth, and acetone (paint thinner or nail polish remover).
Gently force the break open slightly, and inject CA into several locations throughout the break. (The ideal would be to get a coat of glue across the entire surface, but that's not practical in this case.) You want to work quickly, as CA has a short working time, but don't rush. Once the glue is in place, immediately apply the clamp. I'd locate it directly on the first fret so it's central on the break. If using a quick clamp, get it as tight as it goes. A screw-based clamp should only be tightened to finger tightness, as those can apply much more force than a quick clamp and you don't need a lot of clamping force in this situation. If there's any glue squeeze-out, clean it up immediately with the cloth dampened with acetone. CA glue cures very quickly, so you can remove the clamp after only 5 minutes or so. Just to be safe, I'd let it sit for a day before restringing it.
The last thing to do to make it as good as new is to repair the finish. It looks like this neck has an oiled finish, so that makes things super easy. Feel across the entire joint. If you can feel the break at all, take a piece of 220 grit sandpaper and gently sand the joint, going with the grain. It shouldn't take much effort to get it smooth. Finally, get some tung oil (make sure it's 100% tung oil, not "tung oil finish"), apply a small amount to a clean rag, and wipe a thin coat across the repaired area. Let it sit for a few hours, gently sand with fine grit sandpaper (absolutely no more coarse than 220), and repeat. I'd repeat this process for three or four coats. If you notice a different coloration on the repaired area and want to keep it even, then oil the entire neck. (Precautions for working with tung oil: work in a ventilated area, and dispose of your oily rags properly. Either burn them, or lay them out in a ventilated area (preferably outdoors) until they become hard and brittle, at which point the oil is cured and the rags can be thrown out. If thrown in the trash or balled up before the oil is cured, they can actually spontaneously ignite.)
Vise: https://www.amazon.com/gp/product/B0001LQY44/ref=oh_aui_search_detailpage?ie=UTF8&psc=1
Bev block: https://www.midwayusa.com/product/855360/magpul-bev-block-ar-15-action-block
AR tool: https://www.midwayusa.com/product/1007352657/tapco-multi-tool-ar-15
Featureless grip: https://resurgentarms.com/products/ra-featureless-rifle-grip
I'm a big fan of this method. Was one of my first projects I did using chisels, I'm a newbie too. Made one of these with 1" pine, 4" harbor freight vise, and $20 Irwin wood vise. I have found I use the wood vise a lot more than the machinist vise. Even non wood things.
https://www.amazon.com/dp/B0001LQY4E/ref=cm_sw_r_cp_apa_hHNKBb6VMB03B
Looks like
Irwin 226361 Woodworker's Vise, 6 1/2 Inch https://www.amazon.com/dp/B0001LQY4E/ref=cm_sw_r_cp_api_7boLzbMF6F5DD
Two clamps from a hardware store should be about $4 -- total. Cheapie metal clamps are about $2 a pop. If you have 8$, you could even get two of these ones from Amazon
If you really can't afford clamps, simple warping on a backstrap loom requires 2 pegs. Have a chair with two arms? That just became your warping board. Have two pencils? Use those to preserve your cross. It's a short warp, sure, because it's the span of your chair arms, but it's a warp. Or use two chairs side by side -- the arms that are closest together are for your cross, and the arms farthest apart just hold your yarn. Stick pencils to preserve the cross right before you remove the yarn from the chairs. Have a walkway railing? Same thing - use the railing arms as your end pegs and use your dowels/pencils/tree twigs to keep your cross. You don't need a lot of tension on the warp, you just need to make sure it's even. Heck, if it was warmer out, you could probably even stick two spikes in the ground (metal spikes, wooden dowels, tree sticks even) the distance you want your warp to be and create your warp on that (again, using pencils/dowels/twigs for your cross)
We've been weaving for thousands of years. You don't need fancy equipment to create a warp - especially for a backstrap loom. Get creative, go slowly, BREATHE, and you'll get there. :)
Panel Clamp / Four way clamp
https://www.amazon.com/FOUR-CLAMP-PEACHTREE-WOODWORKING-PW670/dp/B001JB367I
tutorial on how to make your own from scratch
http://www.instructables.com/id/4-Way-Panel-Clamps/?ALLSTEPS
I haven't seen one that uses metal for the top+bottom rails in a long time. I don't think they sell them anymore.
http://imgur.com/a/NXrN7
Osir 1.5" inch straightener plates + control temp gutted and taped onto the straightener. The plates are melted into the pads for my clamp (they're the alternate wide ones instead of the regular pads like you see on everyone elses) and the circuit for the temp control I just taped back onto the edge of the clamp. I also carefully broke off just the plastic cover for the temp circuit so that way I could use the buttons. just used a bunch of electrical tape.
I'd give a full tutorial but I dont really have the money to go buy a bunch of stuff and then wait for it to ship again and all that. Theres a couple good tutorials out there on how to build one, just search "HMK Rosin Press" on google and youll eventually find something.
heres a link to the straightener (which I'd highly recommend despite what tutorials recommend, this has very accurate temp control settings) https://www.amazon.com/gp/product/B010BBKVYC/ref=oh_aui_detailpage_o00_s00?ie=UTF8&psc=1
and the clamp
https://www.amazon.com/dp/B001VND4X0/ref=sxr_srecs_prc_1?pf_rd_m=ATVPDKIKX0DER&pf_rd_p=3149131442&pd_rd_wg=2ZL39&pf_rd_r=KQK24Z3MEA5MMH5SKTBX&pf_rd_s=desktop-rhs-carousels&pf_rd_t=301&pd_rd_i=B001VND4X0&pd_rd_w=pUJ8E&pf_rd_i=irwin+quick+grip&pd_rd_r=45HF5M4XK41W0KVHQSA0&ie=UTF8&qid=1503036389&sr=1
I have one like that on some plants that aren't succulents and it's going really well. I just stuck some succulents under it too so we'll see how that goes. However, I have most of my succulents under this. It's super cheap, you just need a CFL lightbulb that has a "daylight" color (between 5000k-6500k) and is the equivalent of a 75 or higher watt bulb. Something like this (this is a four pack). You could get two of the one I use, plus light bulbs, for less than the one you linked too. And the clasp on the one I linked to is much stronger and bigger than on the LED light, so it's easier to attach in more places.
Edit to add that the clamp lamp with the reflector has a cord and an on-off switch. The picture makes it look like it's just a reflector and that you need to buy your own cord for the lightbulb.
I would suggest never taking photos in full sunlight. It can really change how the color is perceived.
I paint in oils and acrylic, and because I’m cheap I photograph my own work. There’s a technique in photographing indoors, but I prefer to take photos outside on a cloudy day out of direct light. This lessens the chance of having hot spots, and I’ll still probably have to color correct in photoshop as even in that light the sun can photograph the work as too warm or too cool depending on the time of year.
I’m not sure if you’re photographing 2d or 3d work, but the rules are different for each. You could jury-rigg a light diffuser. You can get a couple of these (you may be able to find something like this cheaper at a local hardware store or Walmart), put in a daylight bulb, look for one that’s not warm or cool. You want the light to be in the middle of the spectrum, some hardware stores have lightbulb samples. Then to diffuse the light put white paper or cloth between the bulb and your object. Make sure if your bulb gets hot that it’s not close enough to burn your diffuser. I suggest vellum, or plain white paper, or a very thin white sheet. You are just looking to make the shadow less harsh, and you want two lights because you want the light on either side of your object. For the background use something neutral. If your work is three dimensional you’ll want to curve the background. This video has instructions https://youtu.be/Vz-3hKfgs5I
It’s up to you to represent your work accurately to the buyer. If you keep getting this complaint I would suggest you change how you photograph your work, and not blame the customer for not reading your disclaimer. Besides you could be losing sales because potential customers won’t buy because they can’t be sure of what they’re getting.
Good luck.
This is what I use. It didn't come with mounting hardware, so I used 3/8ths inch lag bolts and washers for extra stability (which will be less than $2 at your local hardware store).
If the bandsaw runs, it should still be useful. You can purchase a new blade if there's an issue with the existing one. The chisels will be fine, but you'll have to learn how to sharpen them. Sharpening systems can be expensive, though.
Otherwise it depends a little on what you want to build.
If I were starting out on a significant budget, I think I'd go with a skil saw, triangle square, tape measure, and drill/driver set. And I'd be thrilled to have a bandsaw & chisels. If you can, buy a good skil saw. Don't too much worry about the quality of the rest.
Those will all be very useful later, too, of course. Might build some sawhorses first and go from there.
A skil saw is really useful for breaking down pallets, as well, in case you plan on making use of them as a source of lumber while you're starting out.
If you want a more specific list, I own these products:
https://www.amazon.com/Stanley-33-312-Powerlock-Tape-Rule/dp/B00002X2GN/ref=sr_1_5?ie=UTF8&qid=1497387060&sr=8-5&keywords=stanley+tape+measure
You don't need a 25' tape and a 12' tape is easier to use.
https://www.amazon.com/5280-01-15-Amp-4-Inch-Circular-Single/dp/B01BD81BLO/ref=sr_1_3?ie=UTF8&qid=1497387078&sr=8-3&keywords=skil+saw
That skil saw isn't the best in the world, but it'll get you pretty far.
https://www.amazon.com/Swanson-S0101-7-inch-Square-Layout/dp/B00002255O/ref=sr_1_1?ie=UTF8&qid=1497387123&sr=8-1&keywords=triangle+square
Just a cheap, basic square.
You'll also want some clamps, no doubt. On a tight budget I'd get some walmart cheapies. They're not great, but they get the job done, and clamps are crazy expensive. You want them to be basically like this:
https://www.amazon.com/IRWINQUICK-GRIPOne-Handed-Mini-Bar-Clamp-1964742/dp/B00002244S/ref=sr_1_1?ie=UTF8&qid=1497387348&sr=8-1&keywords=woodworking+clamps+hand
But larger (12-36"). And walmart brand is cheaper, I think they're about $3 for a 12" clamp.
Good luck! Ask questions!
If your goals are to do fine woodworking, like interior furniture (that isn't "rustic")...or if your budget is much larger, then you'll be looking at an entirely different set of tools.
Table saw, planer, orbital sander, bandsaw (if yours is no good), bench grinder, miter saw, jointer, in order of importance (to me!). And lots and lots of hand tools. Marking gauge, marking knife, awl, variety of drill bits, counter sinks.
Belt sander, disc sander, jigsaw, router. Router can be way up there in importance if you make good use of it--very versatile tool. I just don't use it a ton personally, and bits can be very expensive.
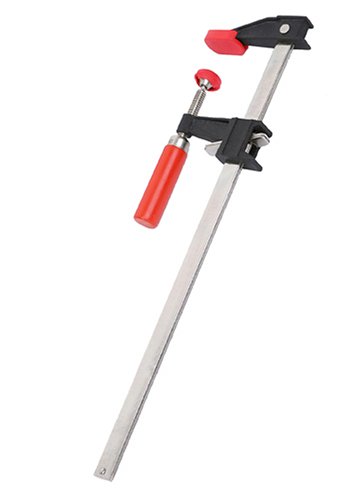
Both are correct. F clamps would be a more specific name for them. Irwin uses the term bar clamp to describe their quick grips I've also heard of sash clamps and pipe clamps being included in the term bar clamp.
Here you go. Better ones probably exist, but I wanted the cheapest half decent one that I could clamp to something outside to avoid making a mess and then take back inside to prevent rusting in the rain. I've had a good experience using this one at a buddy's house. Also, /u/d0nSocko mentioned that the one I bought would suck for metal (not sure why, he'll have to explain that one).
Total Startup: ~$500
Also to note most of the "hedgehog foods" you'll find are not good. Your hedgehog will do a lot better on a high end cat food. Kitten formula dry food is best for the first 4-6 months of its life then switch to adult. You can also try to incorporate high end wet chicken and turkey cat foods.
The mounts are just Quick Fists. https://www.amazon.com/dp/B000CQPANY/ref=cm_sw_r_cp_api_BiuTBbS59T137.
Fairly cheap, and they hold up well. Then I just bolted them to the panel and added a couple of more secure bolts in place of the regular plastic snaps that hold the panel in place.
These are solid: https://www.amazon.com/Bessey-KR3-550-50-Inch-Parallel-2-Pack/dp/B001HSO6TU/ref=sr_1_50?s=hi&ie=UTF8&qid=1519866448&sr=1-50&keywords=bar+clamps
You've probably heard the first law of clamps is that you can never have too many clamps.
The corollary to that is you can never have too many bar clamps of exactly the same model and dimensions because it is a massive pain to try to get panels aligned for glue-up when you you have two or more different sizes of clamps sitting at different heights from the workbench.
For light duty, I love these: https://www.amazon.com/IRWINQUICK-GRIPOne-Handed-Mini-Clamp-Pack-1964745/dp/B001NP9S7M/ref=sr_1_4?s=hi&ie=UTF8&qid=1519866799&sr=1-4&keywords=irwin+quick+grip. Super fast and easy to apply even one-handed.
I made the mistake of buying a lot of this style clamp when I was starting out: https://www.amazon.com/Bessey-GSCC2-524-2-5-Inch-24-Inch-Economy/dp/B000FA0BMC/ref=sr_1_4?s=hi&ie=UTF8&qid=1519866845&sr=1-4&keywords=bar+clamp
When you use them to span more than a couple of feet, they bow and that throws the jaws out of square with the work-piece. I eventually just threw them away.
Oh - I have never used these, but I've fiddled with them at the store and they seem solid and a bit better than pipe clamps: http://www.rockler.com/surefoot-aluminum-bar-clamps
I don't think people realize how expensive it is for a company to build speakers. The general consensus is that there is a 1000% markup, meaning a $1000 pair of speakers only are $100 in parts. The company has to spend money to design and research the speakers. All of that is done in a building that they pay for. Next, they've got to build the speakers. Someone personally has to screw in each driver and apply every vinyl finish. They have to pay people to do that stuff. Next, they get shipped to a distributor. Speakers are big and heavy, so that isn't cheap. The distributor takes a cut of the money. They then send the speakers to a dealer. Once again, shipping costs. The dealer also needs some money, so they raise the price to make some money.
I'll throw out an example. The Buchardt S400 is a good one. It is made out of parts that anyone can buy. They use this $20 tweeter with a waveguilde attached, this $34 passive radiator, and this $71 woofer. So, they come out to about $125 per speaker, and $250 for the pair. They most likely get bulk discounts, but we can ignore that. Anyways, you get about $250 worth of parts in $1800 speakers.
Anyways, besides what comes when you order stuff, you've got to get some other parts.
You'll need a pair of binding posts for every pair of speakers you make. I use these ones, but really any of them should work.
You'll need polyfill to fill the speakers.
Screws to screw in the drivers.
Speaker wire, for inside of the speakers as well as to wire it all up when you're done. Since you're spending this much on the setup, banana plugs to plug in the wires might make you feel better. You won't need them, but it is definitely much easier to use them.
Alright, so that is really all of the stuff that you'll need inside the speakers. Now we can talk about the building stuff.
Clamps. You'll be gluing the speakers together, and need to hold them in place while the glue dries. Speaking of, wood glue.
You'll need a soldering iron for soldering everything together inside. That one comes with solder as well, as far as I can tell.
However, you want to finish the speakers would be last. Spray paint, vinyl wrap, whatever you want really. You could even get paint and a roller and paint them like that. You'll most likely want to sand and prime them first.
I think that's everything. Anyways, that Buchardt example is one of many examples. These Von Schweikerts are $35k and only have like $5k in parts, or something like that. I looked them all up once but I don't remember. Anyways, this is all to say, a pair of $400 speakers like the Monitor Audios don't have $400 in parts. It's much less than that.
If I was starting from scratch I'd first get:
https://www.amazon.com/dp/B01LW80Y0J/ref=biss_dp_t_asn
At $9.8 a clamp for 330lb pressure quick clamps they're great. Not quite as nice as the heavy duty Irwins because each squeeze doesn't move them as much but for the price I'd go with the Yost.
https://www.amazon.com/Yost-M7WW-Rapid-Acting-Working/dp/B00SIQ1DDG/ref=pd_sim_328_2?_encoding=UTF8&refRID=BKJ5FP839P8N1FH21F8T&th=1
That vise is a pretty nice deal right now too.
Probably 2 packs of these but they'll take forever to arrive:
https://www.amazon.com/Jet-70460-2-Parallel-Clamp-Pack/dp/B000UBIXD0/ref=pd_sim_328_1?_encoding=UTF8&psc=1&refRID=BKJ5FP839P8N1FH21F8T
I'd get maybe 8 of these, and pipe from the home center:
https://www.amazon.com/Bessey-BPC-H34-4-Inch-Style-Clamp/dp/B0012YNJRO/ref=pd_sim_469_10?_encoding=UTF8&psc=1&refRID=ECFV96CT5EFKCBM4BQW1
Go to the home center for the current deals on the Bessey F style bar clamps, or HF specials, I don't think I can live with less than 8 of those.
And I'd say 6 of these:
https://www.amazon.com/dp/B0713YHP6Q/ref=biss_dp_t_asn
Based on current pricing I'd go with the Yost, but my personal favorite are the Jets. After getting the hang of the Yosts I honestly like them more than K body Revos from Bessey because they tighten faster and harder. However they have a bit of slop and you have to kinda nudge them to get them to bite, which was frustrating the first time I used them.
And there I've just spent $800 for you :)
Depending on what you make, corner clamps, miter clamps, twin screw wood clamps, dovetail/fence/drill press clamps, toggle clamps for jigs, track clamps for track saw, C clamps, pocket hole clamps etc.
Edit: pricing this out made me notice I've spent well over $1k on clamps... That list is probably barely half my clamps not even...
Bessey BPC-H34 3/4-Inch H Style Pipe Clamp https://www.amazon.com/dp/B0012YNJRO/ref=cm_sw_r_cp_api_tSy0xbFR9STT9
$15.00
10ft- 3/4in black pipe- $13.99 at Home Depot
That $30 for a 10ft clamp
Yes, those are pipe clamps:
https://www.amazon.com/Bessey-BPC-H34-4-Inch-Style-Clamp/dp/B0012YNJRO/
Best option BY FAR to get a long clamp on the cheap. You can also put out a tremendous amount of force with them. Great addition to any shop.
Look for a lumber yard around your area. Purchase plain-sawn lumber and take it to a milling company to have it thickness planed. Otherwise, check the 'materials' section of craigslist or just go to Home Depot.
If you want to make a dining table you will need clamps for the table top, unless you breadboard the ends and don't glue the long edges together. I personally like pipe clamps and buying kits and pipe at a hardware store is a fairly inexpensive way to get a bunch of pipe clamps for not much money.
Every tool I own I purchased off craigslist, or a yard sale.
Claaaamps. Moar Clamps!
https://www.amazon.com/Bessey-BPC-H34-4-Inch-Style-Clamp/dp/B0012YNJRO/ref=sr_1_5?keywords=bar+clamp&qid=1551187967&s=gateway&sr=8-5
I figured out how to change the tires pretty easily. You can take the tube out with the tire lever; this is the easy part.
To put the tire back on, first put the valve through the hole. Then, use the clamps and the tire iron (or possibly start with the tire levers) to do the rest. Clamp it as far as you can on each side (1/3rd to 1/2th the tire clamped in place) and keep moving the tire into position with two tools very close to each other starting close to the clamps. When you make some progress, put a new clamp into position. I had to use the tire irons for the last part as it's extremely tight. **You won't be able to go straight for putting the rest of the tire on, you have to do it bit by bit from the clamps.
Pedro's Tire lever - https://www.amazon.com/Pedros-6400051-Tire-Lever/dp/B001SN8IW0
Clamps - https://www.amazon.com/gp/product/B001DSY4QO
Tire iron - https://www.amazon.com/gp/product/B01FVGSO0A
Remington wet2straight on low setting. If you use a heat gun, it should show around 200-250. I use this one and it works well. Costs about twenty bucks.
If you want to go the extra mile, and honestly get 5-10% more yield, get a 600lb irwin clamp for another twenty bucks.
I would vote circular saw for cost and versatility. Team it up with something an clamping straight edge like this and you can cut down the OSB as well. In either case you won't be able to easily cut out the notches around the end posts as shown with either tool.
Its Solid black walnut. yes they are tapered. i built a taper jig with these: http://www.amazon.com/gp/product/B004JWGYIM/ref=oh_details_o08_s00_i00?ie=UTF8&psc=1 really nice, highly reccomended.
then router table with roundover bit.
I ended up buying the aluminum extrusions and the clamps and I am in the process of making my own version of the MonsterTech mounts.
I haven't finished mine, but I will post an album when I do. I still need to mount the plates.
Well, If filmmaking and video is your goal with these cameras I wouldn't recommend either.
If you're just starting and serious about video production here's a pretty effective starter kit that's just a tad over your $400 budget.
[Camera: Canon Vixia HF R400] (http://www.amazon.com/Canon-VIXIA-R400-Advanced-Camcorder/dp/B00AWZFJ22/ref=sr_1_1?ie=UTF8&qid=1395594961&sr=8-1&keywords=canon+vixia+hf+r400)
This is a decent starter camera. It's got a decent range of focal lengths, optical stabilization, microphone input, progressive frame-rates and most of all designed with video in mind. You'll need a SD Card
I noticed the cameras you picked resembles DSLRs but keep in mind that these in particular are not and with fixed lenses which defeats the purpose of having DSLR for video. Trust me, learn how to be effective with a camcorder first! Then, when your skill requires more artistic control you can upgrade.
Audio:
[Microphone:] (http://www.amazon.com/Audio-Technica-ATR-6550-Condenser-Shotgun-Microphone/dp/B002GYPS3M/ref=sr_1_1?ie=UTF8&qid=1395595673&sr=8-1&keywords=shotgun+microphone)
Having clean audio is probably the most important part filmmaking! The key is to get the mic as close to your subject as possible and away from your camera. You'll need a cable. If you need to mount it to your camera use this [bracket.] (http://www.amazon.com/Heavy-Photography-Bracket-Standard-Mounts/dp/B005Z4ROIW/ref=sr_1_1?ie=UTF8&qid=1395595189&sr=8-1&keywords=flash+bracket) This bracket will also help keep the camera stabilized when you go handheld.
Keep in mind this won't deliver perfect audio but it will be a MASSIVE improvement to the on board microphone and learning how to record with decent audio in mind is your first step into becoming a pro.
[Lighting:] (http://www.amazon.com/Bayco-SL-300-Clamp-Aluminum-Reflector/dp/B007RKKEHA/ref=sr_1_17?ie=UTF8&qid=1395595354&sr=8-17&keywords=can+lights)
Lighting is EXTREMELY important. A couple of these can lights will not only help with your image quality but put in you in the right direction for learning how to properly light your scene. You could start with daylight equivalent CFL bulbs.
[Tripod:] (http://www.amazon.com/AmazonBasics-60-Inch-Lightweight-Tripod-Bag/dp/B005KP473Q/ref=sr_1_3?ie=UTF8&qid=1395595413&sr=8-3&keywords=tripod)
You NEED a tripod. This one is cheap and cheerful. Looping the ends of a couple rubber brands around the pan handle and the other end around your finger will help deliver some smoother pans!
Total: $425/£258
Some things to keep in mind:
Best of luck to you!
edit: formatting
The specs say the fuse is n it is rated to 100 Watts, I'm pretty sure two bulbs will be fine. I wouldn't buy it though. The following link has what I use and works great and is cheaper :). http://www.amazon.com/gp/aw/d/B007RKKEHA/ref=mp_s_a_1_2?qid=1463168473&sr=8-2&pi=SY200_QL40&keywords=clamp+light&dpPl=1&dpID=41GDTn2U52L&ref=plSrch
Super easy to do at home, buy the following.
Golf Grip Kit (Deluxe Grip Kit: Hook Blade, 15 Grip Tape Strips, 4 Ounce Solvent, Rubber Vise Clamp) https://www.amazon.com/dp/B079YM7Y6J/ref=cm_sw_r_cp_api_i_UXkpDb59GXSWN
Yost LV-4 Home Vise 4-1/2" (1 Pack) https://www.amazon.com/dp/B00YS401X0/ref=cm_sw_r_cp_api_i_XYkpDbWFH24EM
You can buy a box of 100 on amazon for $13
Https://www.amazon.com/dp/B01B647W3G/ref=cm_sw_r_cp_api_Tfe3Ab2E9M90B
Alligator Clips
Skewers
I use two vice grips like these for easy removal of even the most stuck devices and lock rings: http://www.amazon.com/Quick-Grip-546-Mini-Bar-Clamp/dp/B00002244S/ref=sr_1_1?s=industrial&ie=UTF8&qid=1398807092&sr=1-1&keywords=irwin+quick+grip+clamp
http://www.amazon.com/Quick-Grip-546-Mini-Bar-Clamp/dp/B00002244S/ref=pd_sim_hi_4?ie=UTF8&refRID=0S4R920E0M6Z81B471N4
cant tell you how handy that thing has been for ecig related uses! no scratches on any of my mods or atties to date.
I use a https://www.amazon.com/IRWINQUICK-GRIPOne-Handed-Mini-Bar-Clamp-1964742/dp/B00002244S/ref=sr_1_6?crid=29OSKUC6N2YQ3&keywords=irwin%2Bquick%2Bgrip%2Bclamp%2B6%2Binch&qid=1559108566&s=gateway&sprefix=irwin%2Bquick%2Bgrip%2Bclamp%2B*%22%2Caps%2C210&sr=8-6&th=1 It provides perfect variability :)
I use one of these with a rubber shaft grip.
https://smile.amazon.com/IRWINQUICK-GRIPOne-Handed-Mini-Bar-Clamp-1964742/dp/B00002244S/ref=sr_1_4?ie=UTF8&qid=1492043839&sr=8-4&keywords=quick+grip+6%22
More uses than just golf clubs.
If you're going to set up a little operation gripping clubs for cash, the vice you posted would be a good addition. Otherwise you'll end up using it once a year for new grips.
The entire project can be done with these tools:
Total =$52
I made some cold frames this very weekend with some in fact. I also made a box frame for stretching a painted canvas with the same tool earlier this week. (I figured I would take care of some back burner projects that all need the frame clamp.)
It's this cool belt with a deployer wheel, 4 corner clamps, and then finally this handle for the last 2 or 3 inches of tightening. It's much higher torque than the deployer wheel, so basically you get your belt situated, bring it in with the wheel, and then when it's snug, you crank the handle down and it puts a ton of force on it -- equally!
Here's a picture. I wasn't taking a picture for you, so please forgive the darkness.
http://imgur.com/vuBbO1X
Bessey brand. I got mine at my local hobbyist store for 60 dollars, then saw it at Lowes for about 20 bucks.
Here's a referral free amazon link http://www.amazon.com/Bessey-VAS23-Vario-Angle-Strap/dp/B0000224B3
Strap clamp
Strap/band clamp.
Amazon
http://www.amazon.com/gp/product/B0001LQY44
It's pretty lightweight, I wouldn't do anything heavy duty on it and the clamps are only 3" max, but it was cheap and I just needed something simple for a mag block. I usually shim in 2 pieces of wood to protect my desk between the clamp and desk.
I just did this the other day. After many methods of trying like you did, I read that getting it in a table vice was the best method of taking it apart, so I went ahead and bought this one off of Amazon. It ended up doing the trick quite nicely. That sealant/adhesive is some tough shiz.
I got it with this gauge as well as it's cheaper than the one you posted.
I still haven't done the OPV mod as the gauge is still on the way in, and I ended up needing to replace my boiler thermostat as it got damaged recently.
Best of luck to you! It will/does eventually come off. Depending on your strength, you might want to get assistance from a strong friend as it was still difficult even with the vice.
https://www.amazon.ca/dp/B0001LQY4E/ref=cm_sw_r_cp_apa_i_mYVEDbBH59YEM
And
https://www.amazon.ca/dp/B078X8F1G8/ref=cm_sw_r_cp_apa_i_d0VEDbM0ZQEE9
I bought this vise because it's low profile. I attached some scrap 1x4 to it as jaws and it works great. It's no plumber's pipe vise but it hasn't let me down yet.
Hey, great choice on turtle, I have a central american/ornate wood turtle too :) I'm a little concerned about your light though- turtles need UVB and heat lights. UVB lights need to be replaced about once a year, they are either mercury vapor bulb (which produces UVB+heat) and require a ceramic fixture, or they are flourescent (compact or straight and long, don't produce heat). If you use a flourescent UVB bulb you need a heat light too, like incandescent or halogen. Based on your post, it sounds like maybe you didn't have a UVB bulb? Or you originally bought a UVB bulb, but used it for years? The element in light bulbs that produces UVB stops producing it after about a year of use, which is why they need to be replaced even if they haven't burned out and are still giving off visible light.
This bulb produces UVB and visible light only (no heat)
This is an MVB bulb that produces UVB+heat
And if you use MVB you'll need a fixture like this
​
What kind of light are you using now? Are you monitoring the temperatures? It might not be hot enough if it's too far away.
​
Are you in the US? Is it cold where you are? I've been having a bit of a hard time keeping my wood turtle active in the winter when it gets cold. The species doesn't hibernate/brumate so they shouldn't get cold in the winter. I use a ceramic heat emitter to give him a bit of extra warmth, especially at night.
​
You probably should take him to an exotic vet for a checkup since he hasn't been eating or drinking. Turtles are usually voracious eaters, so not eating is a worry. Are his eyes clear? Does he have a runny nose or anything else physically that might be worrying?
If you have a screen top tank your best bet for warming ambient temps will be a Lamp dome and a ceramic heat lamp. Make sure you buy a Thermostat!!!.
A standard heat bulb can work but you will have to buy a standard for the day and a blue light heat lamp for night. another issue with that will you will need to buy 2 thermostats and 2 timers one for each bulb and turn them off at a set time. The Ceramic you will only need one with a thermostat and leave it on all the time(during the winter).
You can also just buy a nice space heater and heat the whole room. But you will prob notice the cost in your elec. bill depending on the size of the room. with just the ceramic heater you are only heating the tank.
Under tank heaters will only heat the soil and radiant heat panels are way to large for a crestie cage/tank.
some Ref. material (its for snakes but same goes for any reptile cage)
http://pet-snakes.com/5-ways-heat-snakes-cage
Edit: Forgot to add the CHL will dry out the air in the tank but if you mist often or monitor the humidity another way you should be fine.
Youtube vid: https://www.youtube.com/watch?v=HWSLuq1rHDQ
I bought a 8 gal long from a local store last week, it cost me 30 bucks, 5 gal long was 25. I'm (Canadian) in Korea atm. That being said, you can get a 5 gal for 20~30 bucks shipped to you. Petsmart has a 10gal for 15 bucks That being said, mine came with a lid, I don't know if yours will, but you can make a cheap wire mesh/plexi lid for ~5 bucks at home depot, I'm not a fan of glass lids since I'm a clutz.
Heaters will also run you about 20~30 dollars for a good one, but you can get them cheap for about 10 bucks or so. Adjustable ones are great because they shut off if it gets too hot in the summer.
Lights: don't think too much on it. You don't have to get one that fits perfectly, and you don't need a professional aquarium lamp from the get go. You can pick a reptile lamp for under 10 bucks if you get them on sale. Unless you're going for a planted tank you don't need to spend 60+ bucks on lights and you don't need Co2. Hell, a desk lamp suffices.
Filter: bettas love slow water, I'd get a sponge filter like drysider said. pump is about 10 bucks, filter is 10~30 bucks depending on brand. air pump example Sponge filter example
I also ordered all these to complete the set up
5-Pack of T-Slot Nuts - Ideal T Slot Nut for Toyota Tunda & Toyota Tacoma Pick-Up Truck Bed Deck Rails - By Mission Automotive https://www.amazon.com/dp/B07739WXJB?ref=yo_pop_ma_swf
The Hillman Group 44018 3/8-16 x 1-Inch Button Socket Cap Screw, Stainless Steel, 5-Pack https://www.amazon.com/dp/B00IZFS0VI?ref=yo_pop_ma_swf
Quick fist clamps https://www.amazon.com/dp/B000CQPANY?ref=yo_pop_ma_swf
Plus Washers at my local hardware store
Pertinent info, a crosspost provided this insight regarding better fastening systems
Quick Fist, Quick Grips are those overpriced Irwin clamps.
I have these quick fists for my shovel. They can be bolted on to the two flat panels on the side of your roof rack to hold a shovel. I can take a picture in the morning if you're interested. You can do 70+ and it won't budge.
My buddy uses U bolts for pretty much everything else, including hi-lift jack.
I have a standard cab pickup and behind my seat I mounted my "truck axe" everyone thinks it's odd but it has come in handy multiple times.
Doesn't have to be anything fancy
These are the mounts:
https://www.amazon.com/gp/aw/d/B000CQPANY?psc=1&ref=ppx_pop_mob_b_asin_title
This is the axe:
https://www.amazon.com/gp/aw/d/B00BLUBXIG?psc=1&ref=ppx_pop_mob_b_asin_title&th=1
Also:
A good small ratchet set I found a nice one at autozone
I bought 12 of the 3/4 clamps for $8 each including prime shipping.So all 12 for under $100. I swear Amazon knows what I have searched for, but really would have bought more had I realized it was such a screaming deal!
Home Depot looks like the best current deal, I could use more!
No sooner am I looking and the 24" Bessey economy bar clamp shows up at $8.72. link
Home Depot shows it at $12.97
Hmm, so tempting
I believe he/she is referring to the F-Style clamp, which is the only prime-deal for that amount I could find.
https://www.amazon.com/Bessey-GSCC2-524-2-5-Inch-24-Inch-Economy/dp/B000FA0BMC/ref=sr_1_4?ie=UTF8&qid=1480108710&sr=8-4&keywords=bessey+clamp
https://www.amazon.com/TEKTON-39180-1-5-Inch-Ratchet-Spreader/dp/B000NY4UDQ/ref=sr_1_7?s=hi&ie=UTF8&qid=1497567741&sr=1-7&keywords=c+clamp
something like this
to expand on this.
you'll want to buy a cheap powered router, a straight bit, a couple of clamps and HEARING and EYE PROTECTION.
i can't stress those last two enough.
once you've done that,
i recommend practicing on a bit of extra wood. get the idea down and then do it on your final piece.
The Bessey pipe clamps have been at that price for a while now, and they have little feet that raise the work off the floor/table/whatever the clamp is sitting on.
Home Depot
Amazon
And the Irwin version at Lowes is a little cheaper.
Great value for money.
I prefer the style with the stand myself. Like these bessey's. Easier to use on large glue up when you can set the clamps up on a flat surface.
Looks like these. Naturally, you have to buy the pipe locally.
I'm in a similar situation, just bought a dw735x and I am hoping to make a cutting board by Mother's Day. Like you I didn't have enough clamps. I ran across a pretty good deal on amazon and now I have plenty of clamps for a cutting board. Just have to pick up some pipe from a hardware store.
Here's the link http://www.amazon.com/gp/aw/d/B0012YNJRO/ref=mp_s_a_1_1?qid=1398484165&sr=8-1&pi=SX200_QL40
Seen here? The blue ones appear to be Irwin quick-grip clamps, while the red ones are probably Bessey K body clamps.
Come on man, this shit isn't exactly hard to figure out.
"making dabs" lol
Sorry - I always just get a kick out of that usage.
You definitely don't need a press - a hair straightener can work great, but like other people said, if the bud is too dry it won't work.
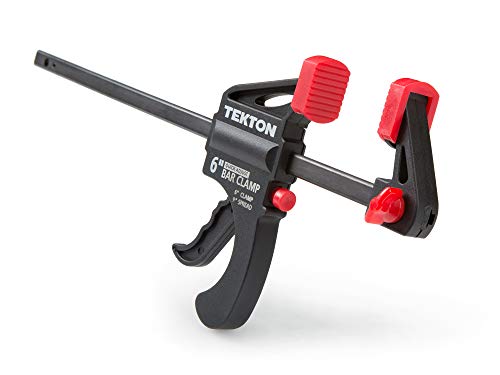
We use this clamp: https://www.amazon.com/IRWIN-QUICK-GRIP-1964758-One-Handed-Clamp/dp/B001DSY4QO/ref=sr_1_3?keywords=clamp&qid=1564765600&s=gateway&sr=8-3
In fact, if you're not going to make lots and lots of rosin, don't even invest in a press. This method will work well and get you a decent yield.
Take a look at how wooden model airplanes are built. They have scale plans that you can lay the parts out on and you can use T-headed push pins to hold them in place while the glue dries. Techniques here might be useful:
http://www.pldaniels.com/flying/balsa/balsa-pinning-methods.html
I have some little tiny bar clamps (like this: http://www.amazon.com/Irwin-Tools-5464-One-Handed-6-Inch/dp/B001DSY4QO ) that might help, too, although the ratchet action on them is quite strong and it would be easy to crush whatever you're working on.
Ah gotcha - makes sense. Imagine it's got to be quite a bit faster & gives a bit more even pressure that way. Actually, a C-Clamp would probably be better/easier to work with & modify for that purpose then.
Also - the type of thread is apparently called "ACME". Took me forever to find out what they called it. Have to assume there is a way to buy an acme rod with a hex head & matching bolt.
Aaaand last edit. I'm looking into doing this myself so figured I'd just add what I find in here as well. This seems like it'd be even better than the c-clamp since it's got attachment points built in to the nut - wouldn't even need to use the welded screw method. Or, for the lazy ones of us out there - there's of course this
> Some semi-set glue might cause some issues, right?
Absolutely.
> I'm considering glueing and clamping just a few boards at a time on my second try.
You might want to combine that with a glue with a longer open time. I typically use titebond 2, but titebond 3 (in addition to being waterproof once it cures) has a much longer time before it starts to set. Helpful for large glueups like this.
Also, consider getting some cheap panel clamps to squeeze them together and help keep them flat, all at once.
I've used circular saws with the fence attachment. It works okay. Well enough for carpentry work, but not for woodworking (IMO).
I use one of these and love it.
Yeah, I think you could do that easily. You'd want to put some holddowns on it to keep your piece in place.
Something like this: http://www.amazon.com/POWERTEC-20301-Horizontal-Quick-Release-Capacity/dp/B004JWGYIM/ref=pd_cp_hi_2
https://www.amazon.com/Bessey-STC-IHH25-Horizontal-Auto-Adjust-Clamping/dp/B0057PUFMG
This is what I ordered after watching the Monstertech videos and research. Now to order my 8020.
I'm pretty sure this Bessey horizontal inline is right around the same spec. The slot mounts are 1.3 to 1.89 inches wide, soooo... 32ish to almost 50 mm, which I think is right since their product looks like it uses 4080 double width extrusion to my eye. There's also a slightly smaller Bessey clamp that should fit 2040 or 3060 if that's what you happen to have, and I'm sure similar clamps would also work. That's the great thing about extrusion; it's like grown up Legos or Mechano :-)
Just as an aside, when I am looking for some dohickey or thingimabob and have absolutely no idea what it is called, I'll often just google a general term like 'types of clamps' and start scrolling through images until I see something close, then follow that trail, often using Amazon's "also shopped for" until I get to actual manufacturers and data sheets. I honestly had no clue what those things were called either until I went looking a couple of weeks ago after being inspired by that same site and having the same sticker shock. I'm glad it might help someone out, but I also hope that those with the means or less free time will support Monster Tech for their ideas. Were it not for the obscene shipping which they have no control over, I feel like they are actually selling a well crafted product at a fair price; those aluminum plates alone would be pretty pricey to custom order.
There's a bunch. I'm currently using a work lamp with a 60w bulb in it. You can use brew belts sold in homebrew stores, heating pads, heating wire from a pet store, etc. So many options but it depends how much you want to spend and what you feel will work best.
I wouldn't expect a lot for the price. 10000K is pretty high, you probably want more of a 5-6k range for freshwater plants. I got a similar cheap LED bar and it was barely enough to even illuminate a tank visually, let alone keep plants alive.
High end LED bars get expensive. If you want cheap lighting for a planted tank, just get fixtures like this and clamp or hang them above the tank, with daylight compact flourescent or LED bulbs (Home Depot or Lowes has a good selection.)
Absolutely! Thanks so much for the help.
So for the lighting, I bought two clip clights like https://www.amazon.ca/Bayco-SL-300N4-8-5-Inch-Aluminum-Reflector/dp/B007RKKEHA/ref=asc_df_B007RKKEHA/?tag=googleshopc0c-20&linkCode=df0&hvadid=292962912878&hvpos=1o2&hvnetw=g&hvrand=7779507648941511035&hvpone=&hvptwo=&hvqmt=&hvdev=c&hvdvcmdl=&hvlocint=&hvlocphy=9001212&hvtargid=pla-357225917488&psc=1 and wrapped white cloth over them to soften the light from them. What would you say the main issue is with the lighting? DIY of course, but is there anything I could do with what I have to improve the lighting?
That deal seems dead, I don't see $109 anymore on Prime.
The Yost 9inch vise is $82, lowest price according to Camelx3. Does anyone have any comment on it?
https://www.amazon.com/dp/B00SIQ1DDG/ref=twister_B015Z8OTRG?_encoding=UTF8&psc=1
I picked up one of these when they went on sale for ~$65 looks to be similar to the one he shows in his drawings. Not sure how often they go on sale for that price though, camelcamelcamel says they average around $95. The F9WW would be a decent option as well if you don't want to wait for a price drop. I haven't purchased a tail vise yet so I can't give recommendations for that, but it looks like he just uses the same vise on the end since it has a bench dog built into it
This expensive one has a T-REX on the side
I dunno, man. I am at the 'a vise does what a vise does unless it doesn't' opinion until I find out otherwise.
Here's a neat one:
$25 Yost vise
$400 Yost vise
Same company put their name on both products.
Alot of the love of wilton vises is for their old USA made vises. the cheaper ones like you linked are not very different than other Chinese import vises. That looks basically the same as this yost vise so that wilton is probably worth $10-$15 (unless it has made in usa on the side I cannot tell from that pic) $25 at the very highest end as a new small import wilton can be had for $50-$85 depending on the size.
https://www.amazon.com/dp/B00YS401X0/ref=psdc_5739459011_t2_B0013E2AQY
I wish I could find stuff this cheap in the UK.
If you want to build an AR on your own (grown man legos ftw) I suggest you build one. You can build a quality AR on the cheap. There is a barrier to entry from the tools you will need but from there on out you can use those tools for multiple builds. At a minimum you will need:
---
As for AR parts you can go pretty basic with an Anderson lower (~$45 not including paperwork). Or you can get a "better" lower that has build in ambi mag release, that tab that prevents rattling (can't remember what it's called atm), etc. The lower will last you through multiple builds. I'm still rocking the Anderson lower on this ~$4,500 build so it's definitely versatile.
From there you can also go basic with the upper, where I suggest an Aero Precision (~$65). From there you'll need a BCG, barrel, handguard, buffer tube (technical term is receiver extension), stock, pistol grip, trigger, and lower and uppers parts kits.
If you want something you can just go and shoot and don't care to modify, then buy a pre-built AR. If you want to build one to custom fit your needs then I suggest you put down the money on the tools. Best part about the tools is that you can fix and replace most issues that comes up with your or your friends ARs.
Also don't forget to buy some liquid blue and aluminium black just in case.
Get a reloading manual. I recommend the Hornady books, newer editions are better imo.
That way you know what all you'll need, and won't be looking for any thingys.
Here's a shopping list. You owe me a dollar:
https://www.amazon.com/gp/aw/d/B003ISVWC6/ref=yo_ii_img?ie=UTF8&psc=1
https://www.amazon.com/gp/aw/d/B01MAUZ71V/ref=yo_ii_img?ie=UTF8&psc=1
https://www.amazon.com/gp/aw/d/B000GSLKIW/ref=yo_ii_img?ie=UTF8&psc=1
https://www.amazon.com/gp/aw/d/B008MG7V1K/ref=yo_ii_img?ie=UTF8&psc=1
https://www.amazon.com/gp/aw/d/B00YS401X0/ref=yo_ii_img?ie=UTF8&psc=1
https://www.amazon.com/gp/aw/d/B001MYGLJC/ref=yo_ii_img?ie=UTF8&psc=1
https://www.amazon.com/gp/aw/d/B0013RA5DQ/ref=yo_ii_img?ie=UTF8&psc=1
https://www.amazon.com/gp/aw/d/B0001NA29U/ref=yo_ii_img?ie=UTF8&psc=1
https://www.amazon.com/gp/aw/d/B000OQRGF2/ref=yo_ii_img?ie=UTF8&psc=1
https://www.amazon.com/gp/aw/d/B004MCMCYE/ref=yo_ii_img?ie=UTF8&psc=1
https://www.amazon.com/gp/aw/d/B01M0LJM8G/ref=yo_ii_img?ie=UTF8&psc=1
https://www.amazon.com/gp/aw/d/B00LICGSFU/ref=yo_ii_img?ie=UTF8
Honestly, this is what I did: I found someone giving away a bathroom sink. I gratefully accepted the bathroom sink and threw the counter top away. Then, I went and got half a sheet of 3/4 inch plywood at home depot for about $15. I put it on top of the cabinet and screwed it down. Then, I had a $15 workbench. I got a cheap Yost LV-4 for $25 with Prime shipping from Amazon and had everything set up for $40
Combination of alligator clips (you can find plenty on amazon, I will post the one I used in the link below) and bamboo sticks (which you can find in the BBQ / outdoor sections at Walmart and the likes) with a styrofoam box will be immense help for you to spray paint with ease.
Alligator Clips
Alternative, you can assemble the kit, identify the pieces that you want to spray paint individually and the pieces that will be covered, and figure out which pieces you do not have to paint individually.
Tamiya, Mr.Hobby, Rust-Oleum, Krylon (Results may vary when not using hobby specific spray paint).
Clips can be found on Amazon or the electronic/wiring section of your hardware store. If you can wait for shipping buying them on eBay from China will result in more for less. I picked up 300 for around $10.
Sticks are bamboo BBQ skewers that can be found in the BBQ/Outdoor section of your local department store. I usually get 100 for around $1 (USD).
Yes, I was just thinking that... bend the legs out of the way. The craft press he uses in his photos, this one is pretty cheap on Amazon.
Edit: Here's the one I bought: Quick-Grip 546 Mini Bar Clamp by Quick-Grip
I used this system - http://smile.amazon.com/Kreg-R3-Pocket-Hole-System/dp/B000J43A7W/ref=lp_552488_1_2?s=power-hand-tools&ie=UTF8&qid=1422105125&sr=1-2.
I really liked it as it also allows you to set your depth and distance and just go - all of my pocket holes were made in one sitting. I used it with an Irwin 6" Clamp (http://smile.amazon.com/IRWIN-Tools-QUICK-GRIP-6-inch-546ZR/dp/B00002244S/ref=pd_sim_hi_1?ie=UTF8&refRID=0BGS8N79X833JZTM4W81)
I was totally thinking about this too. If I didn't have a full-time job and a ton of other commitments, I'd try to design and sell one!
Seems to me that you could make something pretty slick and fairly universal by using articulating fingers, kinda like a Gorillapod. In my mind I'm seeing something that resembles a 4-fingered claw or a hand that grips the phone. I think it would look cool as well.
Another option: 4 flexible corner brackets that are strung together with a tension wire that cinches down when you twist a knob, like a "band clamp" for building picture frames.
https://www.amazon.com/Bessey-VAS23-Vario-Angle-Strap/dp/B0000224B3
They come in very handy for clamping large and awkward jobs where a regular bar clamps doesn't work.
I'll update the post if I survive the process.
Those clamps are super awesome for mitered glue-ups like this. I have two of them for making boxes and the like. It's a Bessey Vario Angle Strap Clamp
A vise will work like this (just put something soft on both sides so you dont damage the cart) or even a pair of large enough pliers will work.
Yeah, I'm trying to save money on it too. What padlock brand/model are you disassembling? Field stripping this Kwikset is the first thing I did when I got it. Very nice to gain that familiarity with the workings before attacking it.
I went about making the picks by printing a Romstar template, matching scale to the ruler in inches on the print-out. Cut out the desired tools and glued them each to a ~5" long section of feeler stock (1/2" wide x 0.02" thick, meant for testing tolerances in machine shops and production lines. 0.02-0.025" is supposed to be the thickness for North American keyways.)
After glue drying, I clamped the feeler stock in a horizontal position in this small vice, and then used EZ Lock Metal Cut-off wheels @~30k RPM to generate a rough shape (Cat#EZ456, should be able to find for $2 per wheel or less, or even cheaper off-brand products). The slower you go and the less you remove at a time, the longer your wheel will last and the less likely you are to overheat the steel (which can cause weaknesses). I used long, light strokes down the whole 5" of feeler for every pass, removing sub-millimeter quantities each time.
I left about 0.5mm of the white paper surrounding the printed tool template, so that I could more cautiously produce the final tool shape with an aluminum oxide grinding wheel (Dremel 952,932,etc). I clamped the Dremel 4300 down to the counter with the bit hanging over the sink, and then hand-held the tool while using the length of the grinding wheel to remove some of the mountains and valley produced by the very thin metal cutting wheel. Holding the pick while leaving the Dremel clamped made it easy to affect how much metal was being removed with small changes in force applied. I used the corners of the grinding wheel to remove away the final material around the snake/hook/half-diamond business end. The same wheel was then used to remove rough spots and round out the edges.
Finishing used some 240 grit sand paper and then a felt buffing wheel with abrasive compound. All these Dremel items came in this Dremel 4300 kit I was gifted a while back. I have a feeling a bench grinder will do a much faster, cleaner job -- but we've all got to start somewhere! :-D
Edit: I'm in the same situation with the recording. Still have to get my white belt yet though! :-D I'll have to figure out a good spot for my phone, or maybe use my webcam. I agree on the cam, never hurts to have a cheap Logitech cam around.
Thanks!
this is the vice I have: http://www.amazon.com/gp/product/B0001LQY44/ref=oh_details_o03_s00_i00?ie=UTF8&psc=1
The black insert for holding the club is from golfworks.com
I use this Irwin Table Vice and this Remmington Hair Straightener and some parchment paper.
Take a gram or so of frosty nugs, compress them slightly, then place in the center of a folded piece of parchment and clamp the weed/parchment in the center of the ceramic plates. Then place the straightener into the table vice and compress until relatively tight. Now, keep the straightener at lowest heat setting, turn it on, and allow for it to heat until you begin to hear a light sizzling. Turn off the straightener, and compress the vice down as much as possible, allow it to squeeze for 20+ seconds (time and temp can vary between strains). Now remove pressure and see how much you yielded. Use a dab tool or toothpick to collect the rosin, consistency can range from crumble, pull and snap, shatter, or wet terpy oil. If it's too wet to collect, pop it in the freezer for a tiny bit to make it easier. Can also save the spent rosin chips to make edibles, or can be ground up and smoked.
Edit: grammar/spelling
It's this one
Original Quick Fist Clamp for mounting tools & equipment 1" - 2-1/4" diameter (Pack of 2) https://www.amazon.com/dp/B000CQPANY/ref=cm_sw_r_cp_api_i_AE5sDbV64WVS4
I just have them zip tied to the rack right now but thinking of getting some stainless screws for a more permanent solution.
To the pet barrier. I was able to use misc small bolts and nuts to mount the extinguisher holder and quick fists directly to the pet barrier. The shovel is held in the quick fist. The first aid kit is attached to the barrier with small bungees.
Quick Fist Clamp for mounting tools & equipment 1" - 2-1/4" diameter (Pack of 2) https://www.amazon.com/dp/B000CQPANY/ref=cm_sw_r_other_apa_i_BC5ACbSGPH16S
And
Northpole Light Universal Horizontal Bar Clamp Mounting Brackets Bull Bar Bumper Tube Clamp Roof Roll Cage Holder for Off Road Jeep LED Light Bar https://www.amazon.com/dp/B06XRG11TY/ref=cm_sw_r_other_apa_i_jE5ACb58PJN7B
Cheap, effective, and the quickfists have a hole in them to use a lock (I use a cable lock as used often on snowboards)
Quick fist it!
Looks great! We have the same basket and crossbars. How do you have the shovel and axe mounted? I used a couple Quick Fists and they work pretty well, but are sometimes kinda finnicky. Also, is your awning mounted straight onto the crossbars, or is it on the basket somehow?
I did it myself. I used quickfist and drilled thru the metal panels. Super cheap and they are great. I actually have an axe and shovel mounted on the rack. The shovel covers the axe. Original Quick Fist Clamp for mounting tools & equipment 1" - 2-1/4" diameter (Pack of 2) https://www.amazon.com/dp/B000CQPANY/ref=cm_sw_r_cp_apa_drrPBbZQ7X2MC
Pretty simple really! I went the affordable route after getting tired of seeing $80 shovel mounts on Amazon. I spent around $20 bucks in total for the mount. Here's another photo with a different angle.
I just went down to my local Home Depot and bought some conduit hangers. 2" hangers for my Thule MOAB IIRC. I sprayed them black to blend in a bit better since they come in silver.
Then I attached these rubber tool clamps to the conduit hangers using 1" #10 screws and washers.
So I wouldn't mess up the basket, I used some leftover rubber hose from my AOS install to act as a padding between the conduit hangers and basket.
I opted for a small cable lock to keep it from being stolen/tampered with.
I went with the Bully Tools 92510 12-Gauge Round Point Shovel Fiberglass D-Grip Handle because of it's sturdy construction. This thing is crazy strong.
Size tires are 285s with a small lift and leveling kit.
Shovel
Rubber Clamps
1-1/2 inch Conduit Hangers
Bought these parts then went to the hardware store for for a couple screws, washers, and nuts to put them together! Pretty cheap. Also, right now the shovel is ~ $50 but I purchased it a couple months ago for ~ $25 so I’d look around for a better deal.
These for stuff like that shovel would be nicer if you're always going to put it in the same spot Original Quick Fist Clamp for mounting tools & equipment 1" - 2-1/4" diameter (Pack of 2) https://www.amazon.com/dp/B000CQPANY/ref=cm_sw_r_cp_apa_i_sQb.Ab68C7ZH8
Trencher Shovel:
Manufacturer's site for specs: https://www.crkt.com/trencher.html
Amazon link for a better price: https://www.amazon.ca/gp/product/B01M0G10O4/ref=ppx_yo_dt_b_asin_title_o02_s00?ie=UTF8&psc=1
Mounting Pieces:
Quickfists: https://www.amazon.ca/gp/product/B000CQPANY/ref=ppx_yo_dt_b_asin_title_o03_s00?ie=UTF8&psc=1
T-Slot Nuts: https://www.amazon.ca/gp/product/B009SWGLHW/ref=ppx_yo_dt_b_asin_title_o03_s00?ie=UTF8&psc=1
Screws: https://www.amazon.ca/gp/product/B00IZFS0VI/ref=ppx_yo_dt_b_asin_title_o03_s00?ie=UTF8&psc=1
You will need a Drill and a 3/8" or 1/2" drill bit. Drill out the stock hole in the bottom of the quickfist to make the hole larger, the screws will then fit through. Put the T-Nut in the bed-rail and slide it down to where you want it. Screw the Quickfist to the T-Nut and you get what you see above! Insert your tool of choice!
I just drilled holes onto the OEM roof rack and install these
https://www.amazon.com/gp/product/B000CQPANY/ref=oh_aui_detailpage_o00_s01?ie=UTF8&psc=1
> Harbor Freight,
50 miles away. I could pay $6 shipping I guess.
$6 for a 24" clamp. Are these things any good?
The next closest I can find on Amazon is $10
https://www.amazon.com/Bessey-GSCC2-524-2-5-Inch-24-Inch-Economy/dp/B000FA0BMC/ref=sr_1_33?ie=UTF8&qid=1483331055&sr=8-33&keywords=bar+clamp+24%22
EDIT:
Also found these on ebay for $6.50 each.
http://www.ebay.com/itm/Lot-of-4-24-Inch-BAR-CLAMPS-Heavy-Duty-Woodworking-Wood-Carpenter-Tools-/311765298530?hash=item4896a8ed62:g:YGkAAOSwuTxV7dtW
How about this:
http://www.amazon.com/Bessey-GSCC2-524-2-5-Inch-24-Inch-Economy/dp/B000FA0BMC/ref=pd_sim_sbs_hi_4?ie=UTF8&refRID=113DXKNK8KG8X3D7E4CA
They make clamps that are reversible so they can also be spreaders, like this Tekton one. Probably not exactly what you're looking for, but its something close.
Clamp
Yeah, it worked well enough to do four or five simple case bindings. Then I bought a couple of these ratchet clamps at Walmart to press books between a board (you could use a sturdy clipboard for starters) and my desk. It doesn't have to be super heavy, so don't worry about not having equipment to start.
Bessey BPC-H34 3/4-Inch H Style Pipe Clamp https://www.amazon.com/dp/B0012YNJRO/ref=cm_sw_r_cp_apa_i_JsUvCbCP00DBD
I quite like these.
Pipe clamps. They’re relatively inexpensive. They’re just the ends and you put them on a piece of pipe. You buy the pipe separately so the clamp can any length you want it. Typically black iron or galvanized pipe, 3/4” - 1” depending on the size of the pipe clamp. The nice thing about pipe clamps is you can get one set and then just multiple lengths of pipe and swap them out depending on how long you need them. The should have them at most big box hardware stores. Very handy, especially when you need long lengths.
Here’s an example
Personally, I'd go with Bessey. The 3/4" fixtures are $12 each: https://smile.amazon.com/Bessey-BPC-H34-4-Inch-Style-Clamp/dp/B0012YNJRO/
Then head over to the local Home Depot or Lowe's and buy 10' sections of 3/4" black pipe. You can have a store employee cut the pipe and thread it for you. I'd buy two 10' pipes and have each of them cut into one 36" piece and two 24" pieces. Thread both ends, that way you can use a coupler if needed to extend the pipes. The 10' pipes should cost around $25 each.
You won't quite get to 10 clamps at a budget of $150, but you'll get pretty close!
Yeah, I dont mind their pipeclamps. I've purchased a few HF ones, had a couple fall apart, but the rest have lasted years actually.
That said, you can get bessey pipe clamps off amazon for almost the same cost. Those aluminum parallel clamps have had a 100% fail rate for me, so I'm done buying/recommending them.
https://www.amazon.com/Bessey-BPC-H34-4-Inch-Style-Clamp/dp/B0012YNJRO/ref=sr_1_1?ie=UTF8&qid=1522002867&sr=8-1&keywords=bessie+pipe+clamp
Craftsman Table Saw Model # $150
Shop Fox model #G8826 fence system $275
Freud P410 Premier Fusion 10-Inch 40 Tooth Hi-ATB General Purpose Saw Blade $80
Wilton 15” drill press $100
Parks 12” planer $600 This requires a little road trip
Atlas 6” jointer $150 Model #
Delta 10” bandsaw, Powerkraft radial arm saw and Rockwell contractor table saw $200
I would resell one of the tablesaws Just pick the nicest one and sell the other.
Oneway Multi Gauge $97 This is for setting the jointer perfectly and the dial indicator can be removed to make planer setting jig as described by Bob Vaughan (see youtube) or fine woodworking 107.
Angle block set for machine setup $30
Bessey Bar Clamps $14x3 plus maybe $10x3 for bars Say $75 total
Stanley sweetheart chisel set of 4 $80
This leaves $243 left for misc things like drill bits, planer/jointer knives or sharpening F style clamps a cordless drill, random orbit sander, sand paper ect.
Pipe clamps are pretty cheap, very rigid, and can be made to any length.
https://www.amazon.com/gp/product/B0012YNJRO/ref=s9_acsd_top_hd_bw_b2Jtq_c_x_1_w/141-2934950-2682627?pf_rd_m=ATVPDKIKX0DER&pf_rd_s=merchandised-search-3&pf_rd_r=JXFFTJNXZ338MM76V4BX&pf_rd_t=101&pf_rd_p=45e253bc-836e-5ed1-817f-396a339d6e64&pf_rd_i=553154
No, sorry, it is me who misunderstood.
https://www.amazon.com/gp/product/B0012YNJRO/ref=s9_acsd_top_hd_bw_b2Jtq_c_x_1_w/141-1319240-2436003?pf_rd_m=ATVPDKIKX0DER&pf_rd_s=merchandised-search-3&pf_rd_r=BA48TMSZW2Q5940ACE1F&pf_rd_t=101&pf_rd_p=45e253bc-836e-5ed1-817f-396a339d6e64&pf_rd_i=553154
Then maybe you are right. Could be sunlight heated it up.
​
I would imagine you can glue it back down again. Use some bar clamps to hold it tight: https://www.amazon.com/IRWIN-QUICK-GRIP-1964758-One-Handed-Clamp/dp/B001DSY4QO/ . Just put cloth in between the clamps and the veneer surface so you don't scratch it. Probably find some DIY information online about what kind of glue to use with veneer.
I will say that he's going to be limited with that workspace, but he can get by with some basic stuff. I also have extremely limited space. I have an outdoor shop space, but since it's not insulated and has no power, I'm very limited in what I can do.
However, here's a good list of things to get.
Keep in mind that father's day is coming up soon, and tools like these are popular things to be put on sale. Keep your eyes open :)
I’m in US so names of things might be different:
X-acto: Getting the nicer knife (with a cushioned grip) and a couple different styles of blades is so helpful!
I found that having The Chopper a miter box, and this thing kept my cuts square.
Now I have a mini miter saw and it’s pretty awesome but pricey.
A self healing cutting mat that you use only for cutting (don’t get glue etc on it).
Sandpaper to clean up messy cuts.
Glue: tacky for most things - let it set up a little on a scrap piece before applying, things won’t move around as much. cyanoacrolyte (non gap filling is better) and an accelerator are godsends when you can’t hold pieces together to dry.
mini clamps or mini clips and a square that you can clamp to (you can make this out of foam board and line it with parchment paper to keep glue from sticking) so you don’t have to hold it while it dries. The gentle painters tape also helps.
Wash your hands constantly! Have a ‘clean area’ for cutting and assembly and a ‘dirty area’ for glue ups.
Edited to add that I wouldn’t buy a styrofoam cutter off the bat, most schools have them and they’re just for concept massing models. Check YouTube for videos, the guys that make scenery for model trains etc are amazing.
For this job, or one very like it specifically, a couple of those one handed speed clamps would work really well, too. In this case, you'd clamp the handle/knob first, east to west, and then the rim, east to west. It's different than with the tape, because the forces applied go different directions; pressing on the tape is a vertical downward force, and the clamps provide an inward lateral force. (the elastic force of the slightly stretched tape is inward and lateral, but is also marginal; enough to slowly squeeze the excess glue out, but not enough to hinge-spring the two halves apart)
I just finished a rear tire change myself for the first time. A few things that helped me that I picked up from various youtube videos:
I used quick-grip clamps to compress the tire and keep it in the wheel on the opposite side I'm working on. I placed 2 clamps aligned with the spokes on either side of the valve, and worked on the other side so I don't accidentally damage the valve with my efforts. I have clamps like these:
https://www.amazon.com/IRWIN-QUICK-GRIP-1964758-One-Handed-Clamp/dp/B001DSY4QO
I lubed the tire bead edge and wheel rim with WD-40. It still took a lot of force to get the final section of bead over the rim, but the lube really helped. My first attempts at taking off the tire ended up with my old set of plastic levers snapping. Had to make a trip to the local bike store to get a new set of nylon tire levers with steel core. The ones I found were made by Specialized. They did a great job (tires were still stubborn but came off and on).
http://www.amazon.com/Nitto-Mustache-26-0-Clamp-Alloy/dp/B001GSOINU
I've got some Nitto mustache bars on my commuter, and I'm a big fan of them. I liked them so much I put some On-one Mungo bars on my next road bike.
These are commercially available. I bought the kit below and it works well.
https://www.amazon.com/gp/aw/d/B001JB367I/ref=gwm_tlc_pi?ie=UTF8&pd_rd_i=B001JB367I&pf_rd_i=mobile&pf_rd_m=ATVPDKIKX0DER&pf_rd_p=390f98e5-295c-4720-be21-c25f9965f6be&pf_rd_p=390f98e5-295c-4720-be21-c25f9965f6be&pf_rd_r=Y3XBZ765AJC6D43BRVTF&pf_rd_r=Y3XBZ765AJC6D43BRVTF&pf_rd_s=grid-6&pf_rd_t=Gateway&ppw=fresh
Hand vise: IRWINQUICK-GRIPOne-Handed Bar Clamp, Heavy-Duty, 6", 1964711 https://www.amazon.com/dp/B001VND4X0/ref=cm_sw_r_cp_apap_SKWbD2mBTHRZ9
Steel plates: Round Hot Rolled Steel Plate 1/4" x 4" Diameter Circle (Pack of 2!) https://www.amazon.com/dp/B00YWBU1P2/ref=cm_sw_r_cp_apa_Mdufzb3Q4YDXK
Epoxy: J-B Weld 8297 HighHeat 550 Degree Epoxy Putty Stick - 2 oz. https://www.amazon.com/dp/B007PP26RI/ref=cm_sw_r_cp_apa_ieufzbQD017AS
And turns out my stove is way easier to heat up the steel plates. But if you're interested in a heat gun I bought this one: Genesis GHG1500A Dual Temperature Heat Gun Kit, Grey https://www.amazon.com/dp/B00EU2T8GG/ref=cm_sw_r_cp_apa_pfufzbAPGCZ11
Sorry about the formatting, I'm on mobile
Thanks for the reply, I ended up going with this guy, Ill definitely consider mounting to a wood block
I bought a clamp-on straight edge similar to this a while back. It works great for both my saw and router. It's only downfall is that it will slide if you put too much pressure on it. I think I got mine for around $30 at Menards.
https://www.amazon.com/E-Emerson-Tool-C50-Contractor/dp/B003TXSAHU
Track saws are ok for those who don't have a table saw; can give accurate and final cuts. When you have a table saw, and you just want to break down sheet goods, cut them a little proud and do the final trim to size cut on the TS and use one of these https://www.amazon.com/Emerson-Tool-C50-Contractor-Straight/dp/B003TXSAHU/ref=pd_lpo_vtph_469_bs_tr_t_1/142-9921801-8497807?_encoding=UTF8&psc=1&refRID=6Q3W4CMNDX100KB6SXPV or something like it, to guide your circular saw. For me, 95% of the time my breakdown cuts are quite accurate but I've been doing this for a long time. Keep it simple.
I think that a cutting guide like http://www.amazon.com/E-Emerson-Tool-C50-Contractor/dp/B003TXSAHU is better than that one; you can cut at whatever width you like, rather than being limited to a 24" width. And honestly, it's not hard to cut a length of plywood and simply use that as your cutting guide.
I had the same problem in the middle of the project and took it back to Lowe's and got one of this type of thing. The one I got was cheaper, but the same idea.
You can easily and safely cross cut on a table saw if you build a panel cutting jig which is just two pieces of plywood with some hardwood runners. Hell get some of these clamps: http://www.amazon.com/POWERTEC-20301-Horizontal-Quick-Release-Capacity/dp/B004JWGYIM/ref=sr_1_3?ie=UTF8&qid=1453850395&sr=8-3&keywords=toggle+clamp
and put it on the fence of the sled and you get a really nice secured hold down. And best of all your work piece is not rubbing against your tabletop at all with really no chance of binding.
Get a board with a straight factory edge on it like a sheet of plywood. Get two clamps that you can screw into the plywood like these: POWERTEC 20301 Horizontal Quick-Release Toggle Clamp, 500 lbs Capacity, 225D https://www.amazon.com/dp/B004JWGYIM/ref=cm_sw_r_cp_api_j9fRzbADAJK23. Then, all you do is clamp the wood you want to square up to the plywood, and then run the straight plywood edge along the fence of your table saw. This process will transfer the factory straight edge to your 2x2.
I was considering a knock down top...one or two piece made from plywood. Two piece would lock together like leaves of a table using this http://www.rockler.com/align-n-lock , but come apart for compact storage. To lock down to the table, I would use toggle clamps like these...http://www.amazon.com/gp/aw/d/B004JWGYIM/ref=mp_s_a_1_1?qid=1408050140&sr=1-1
I'm not sure how to protect the felt from getting torn at the joint line, though, while keeping the surface flat.
Rails and arm pads, cup holders, speed felt...the works. I'd probably make it to fit a 6ft buffet table overhanging all sides so no one is stuck with folding legs where their knees should go.
I think that this would be a better use of space than a dedicated gaming table...and there's no way I could convince my wife that I should make a dining room table that doubles for games :(
I'd like to not duplicate anyone's mistakes who's already tried something like this, but maybe I'll be the first.
https://www.amazon.com/gp/product/B007UM56YG/ref=oh_aui_detailpage_o00_s00?ie=UTF8&psc=1
90% of the budget is just these clamps. Similar to the ones used by the MonsterTech guys as well (they are both Bessey Clamps)
These are the ones that MonsterTech is using (https://www.amazon.com/Bessey-STC-IHH25-Horizontal-Auto-Adjust-Clamping/dp/B0057PUFMG/). They are a bit more expensive. Not really sure what the difference is between the two.
EDIT: I just looked at my clamps and they are the same damn thing. Not sure why Amazon has them cheaper and labeled as "T24248" but they are STC-IHH25 clamps (that's the model # stamped into the side of them). No reason to buy them from the 2nd link since they more expensive and are the same thing as the first link. That is unless they shipped me the wrong clamps (not that I'm going to complain about that).
I just use one these for all my tanks. For a 10 gallon, put a 13w CFL bulb in it and call it good. Make sure you get one that is "daylight," around 6500k. I get them at Bed Bath and Beyond.
Works like a charm
I've made a soft-light box for really cheap before.
-Carboard box.
-Cut off one end so that it's open.
-Glue aluminum foil to the entire inside of the box.
-Insert a light through a hole on the back of box.
-Cover the open side with an old t-shirt or bed sheet.
Here's a link to my completed light box. Instagram Link
If you need better directions, I can look up the ones I followed. I just don't have them handy right now.
I used a clamp light similar to this, I just took off the aluminum reflector off of it.
>Between 3000K and 4000K, if growing a small tomato bush, which would you go for?
I'm conflicted actually.
Probably the 4000k, and this is the rational: The increased blue light will reduce stretching in plant, at lower light levels.
Why I'm conflicted is I know 3000k works fine, I like the warm light/ find it relaxing, and red spectrum helps with flowering (important in a tomato plant).
Ultimately it might come down to what had more lux or was on sale that day XD !
>is the PAR38 shape all that important
PAR (parabolic aluminized reflector) kind of is important, the reflector bit in particular, as it means there is more light going in the right direction and reaching the plant. Light intensity is more important than exact spectrum.
>could I go for a regular globe shape?
Yeah you could, just put it in a reflector.
I'd prefer the Tamron 90 2.8 macro because it gives you a bit more working distance. But you can shoot with that on pretty much any consumer body. I'd want to have a 50 1.8 (The standard lens) and a 90 2.8, plus a light tent, on a Rebel body for products. Depending on the size of the products two fixed lights could be fine.
The big feature I like for that sort of photography would be a fold out screen. So the 70D could be an option as well.
For what it's worth, the company I work for, a major niche ecommerce retailer, uses a 7D (Original) with the 18-135, 50 1.8, and a macro lens with primarily fixed lighting like this ( http://smile.amazon.com/Bayco-SL-300-Clamp-Aluminum-Reflector/dp/B007RKKEHA/ref=sr_1_5?s=hi&ie=UTF8&qid=1418920997&sr=1-5&keywords=dish+work+light ) and a light tent.
unfortunately i only have time to make video at night.
Clamp light like this one ?
For the light bulb, how many wattage do i need for a small room (10 feet x 9 feet)?
I think i can buy one cheap diffuser, but i don't know the differences between the one that looks like umbrella, or softbox
If i can only buy one, which 1 is better?
Thanks
I still asked for a picture of a set up. what size tank do you have? Ideally you will have 29 gallon tall tank. They are nocturnal so they don't need UVB light. They get their D3 from the repashy food instead. A UVB 2.0 flourescent light can be used for UVB and UVA and it will just make it a little more healthy. you want a basking corner of the tank at 85 F. you want to use a normal light bulb at 40-65 watt to get that temperature. just buy 2 of these they can be bought at home depot, or from amazon. in one of them put the 40-65 watt white light bulb. and another for your fluorescent light.
this website has some good suggestions too, just scroll down to the lighting section.
http://www.drsfostersmith.com/pic/article.cfm?aid=2365
If your basement is colder than 70 F you will probably want to get a red bulb to keep it warmer at night.
With this info you should be able to get your whole lighting set up for about $20
I recently purchased the top link off of Amazon in the US. It has everything I need for my small studio and a 3rd light if I ever expand (it also came with all the bulbs). I also got one of the bottom link as I was having issues with my chair casting a shadow (no bulb included).
https://www.amazon.com/gp/product/B0054K9EU8/ref=oh_aui_detailpage_o02_s00?ie=UTF8&psc=1
https://www.amazon.com/gp/product/B007RKKEHA/ref=oh_aui_detailpage_o03_s01?ie=UTF8&psc=1
Ya I had the same problem and ended up putting them on top of a shoebox to get them closer. I would definitely recommend getting them closer. Any idea what color temperature those bulbs are? I've read you want them around 5000k or above, and if they are really low, soft white bulbs they can cause stretching.
I don't know how much of a budget you are on, but if they continue to stretch too badly you could always supplement them with cool white 26 watt cfl lights. I ended up buying these things from Walmart: http://www.amazon.com/gp/aw/d/B007RKKEHA?pc_redir=1395095763&robot_redir=1
And I'm having a lot of success with them.
By the way anytime you have questions feel free to PM me and I can try to help. I love this stuff haha.
I use a light clamp and then I screw an adapter into the socket to plug in multiple lights. I clamp my lights to some of the rope that hangs from the tent. I have two of these set up along with my 300w LEDs.
http://www.amazon.com/gp/aw/d/B007RKKEHA/ref=mp_s_a_1_7?qid=1458506517&sr=8-7&pi=AC_SX236_SY340_QL65&keywords=light+clamp&dpPl=1&dpID=41GDTn2U52L&ref=plSrch
http://www.amazon.com/gp/aw/d/B00T5JD2P2/ref=mp_s_a_1_17?qid=1458506653&sr=8-17&pi=AC_SX236_SY340_QL65&keywords=light+socket+adapter
I bought a 9" vice with a 10" opening so that I could drill less dogholes. I just didn't want to have to swiss cheese the top.
https://www.amazon.com/gp/product/B00SIQ1DDG/ref=oh_aui_detailpage_o03_s02?ie=UTF8&psc=1
The vice works great but I wouldn't recommend buying it now. Price rose a lot since I bought it for $91.
Holdfasts are gramercy.
https://www.academy.com/shop/pdp/ncstar-armorers-wrench#repChildCatid=3134114
https://www.midwayusa.com/product/1019303727/ar-stoner-ar-15-roll-pin-punch-set-7-piece-steel
https://www.amazon.com/Yost-LV-4-Home-Vise-4-1/dp/B00YS401X0/ref=zg_bs_5739459011_2?_encoding=UTF8&psc=1&refRID=SJ1B9JG5TWAYKYE476FF
https://www.midwayusa.com/product/1007359056/wheeler-engineering-delta-series-upper-receiver-ar-15-action-vise-block-clamp
https://www.midwayusa.com/product/1007357996/wheeler-engineering-delta-series-multi-tool-with-torque-wrench-ar-15-steel
Does this look like everything I would need?
You are getting horrible advice and this thread is complete shit. Here is exactly what you need:
Vice.
Upper Vice Block.
Torque Wrench 1/2”.
Anti-Seize Grease.
Blue Loctite.
Punch Set.
Torx & Allen Set.
The reason people are recommending an armorers wrench is for the muzzle break install. Every armorers wrench has a slot designed for installing one. This isn’t mandatory because you can use a regular wrench but you might as well get one because you will need one to build a lower when installing the castle nut.
I bought this torque wrench for $40. It's been working fine so far. $22 on this vice. I picked up a BEV Block at GT's I think.
It's not amazing or anything, but I've been able to do everything I've needed to up to this point.
I waited for a sale and got a Harbor Freight torque wrench for $12, a punch set for $5, I've been using the Tapco castle nut wrench for like six years now. Holy crap, buy that upper clamshell from Midway while it's at that clearance price...all this and a good set of hex keys and some moly grease should cover the basics.
https://www.ikea.com/gb/en/products/chairs-stools-benches/step-stools-step-ladders/bekv%C3%A4m-step-stool-birch-art-30178879/
https://smile.amazon.com/dp/B00YS401X0/ref=cm_sw_r_cp_apa_i_RIAwCbWH95H3E
https://www.midwayusa.com/product/1007359056/wheeler-engineering-delta-series-upper-receiver-ar-15-action-vise-block-clamp
It is a Yost LV-4 and a cutting board from Ikea. I can't find it on their website but its raised about half an inch on two sides so it made mounting the vise really easy.
https://www.amazon.com/gp/product/B00YS401X0/ref=oh_aui_search_detailpage?ie=UTF8&psc=1 (Vise)
https://www.amazon.com/gp/product/B018QNM7V2/ref=oh_aui_search_detailpage?ie=UTF8&psc=1 (Vise jaws/pads)
https://www.midwayusa.com/product/210021/wheeler-engineering-delta-series-upper-receiver-ar-15-action-vise-block-clamp (Upper receiver block clamp)
Mount the vise on a scrap piece of wood with the appropriate bolts, then use two c-clamps (Harbor Freight say wut?) to hold said piece of wood with mounted vise to your counter.
That is roughly $65, you can torque until your face turns red and you pass out or the kitchen counter rips off the cabinets. You can also order a $8.00-$20.00 lower receiver vise block and you're set. Have fun building. Cheers!
This, but I regret it. Not big enough. OP has the right idea and I will probably get one of these woodworking vises in time.
iExcell 100 Pcs 2"/51mm Steel Alligator Clips Crocodile Clamps,Silver Tone Nickel Plated, Come in a Plastic Case https://www.amazon.com/dp/B01B647W3G/ref=cm_sw_r_cp_apa_WHD1BbYJWS9W3
Where I got mine
What about a mustache bar? They tend to make a cockpit feel a bit longer.
http://www.amazon.com/Nitto-Mustache-26-0-Clamp-Alloy/dp/B001GSOINU
I have a set of these holding a shovel in my Jeep, they'd work well for a mag light if you can find somewhere under the back seat for it.
Personally, if you're dead set on using a mag light I'd go with a 3D since it will probably fit in the glove box. Otherwise pick up a streamlight pen light in AAA or rechargable and enjoy a flashlight that's lighter, brighter, and in my experience more durable.