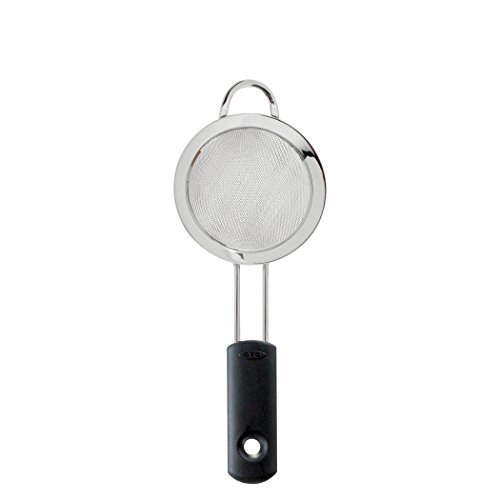
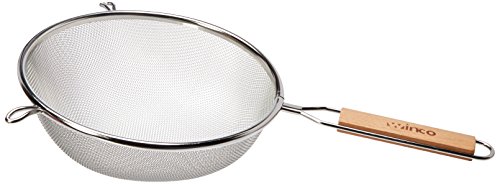
Best colandes & food strainers according to redditors
We found 667 Reddit comments discussing the best colandes & food strainers. We ranked the 235 resulting products by number of redditors who mentioned them. Here are the top 20.
We found 667 Reddit comments discussing the best colandes & food strainers. We ranked the 235 resulting products by number of redditors who mentioned them. Here are the top 20.


I can help you out! A phin is my daily cup, so I've got my particular model dialed in pretty well. Also, I have some foodservice experience so I can sort of estimate how you could make this work.
I use 16g-17g of freshly-ground beans in this 11oz phin. I use water between 200F-205F, splash in just enough to cover the grounds -- so that no "standing water" is visible" -- and wait 30s. Then I fill the phin and cover it. Grind size is the 5th setting on a Bodum Bistro burr grinder. I can make 4 phins in my kitchen in about 5 minutes, and then 3 minutes of cleanup, so assuming the people at your festival line up in an orderly fashion and you've got a very good process... You need a way to boil water, a set of 24-50 phins, and a team of 3-6 people to divide up the tasks:
To do 900 liters like this will require a dedicated team of 3-6 people; they will be producing no more than 2 servings per minute, even at peak demand.
If you're trying to make that many liters, you need to forget the idea of a phin.
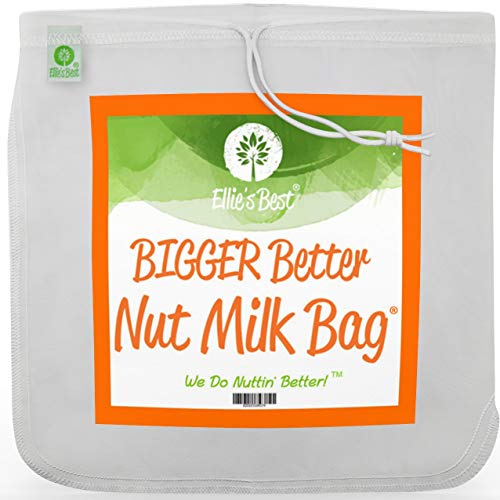
You have plenty of time to work ahead, so I would suggest buying some large 10-gallon coolers and some large nut milk bags and going for cold brew. Use this table to figure out your ratio. For each 10-gallon cooler you'll want to fill a nut milk bag with 60+ oz. of coffee beans, ground moderately fine, and let it sit for ~24 hours before removing the nut milk bags. If you're willing to accept some shrinkage, you can taste the coffee each hour after ~20 hours have passed and figure out when it's perfect. The key is to remove the nut milk bag once the brew is strong enough.
Cold brew can sit refrigerated for almost a week without going bad. You're going to need 24 of those 10-gallon coolers, though, and 24 nut milk bags... and that means minimum 90 pounds of coffee beans.
This is going to be much less expensive than trying to buy several hundred phins (!) and boiling 240 gallons of water on-site / on-demand. You probably can sell back the coolers, or get a good resale price for them on the open market, when you're done with them.
Each cup is going to cost you $1.50 or more to produce -- not counting the labor and assuming nearly-free water -- so sell it at a fair price.
Protip for your powdered sugar! Dump it in a mesh sieve and tap the side of it against your palm to dust the donuts more evenly.
I have posted this before but here it is again.
To make a magical tea is fairly easy. The first thing we need to do it make the THC into a liquid.
For tea, milk is going to be your best bet. Use whole fat milk preferable, DO NOT USE FAT FREE MILK. THC is fat soluble, meaning you need fat to draw the THC out of the magical herbs.
What you will need:
1/2 cup of Milk
quarter (1/4) of an ounce(z) of weed (which is just over 7 grams)
A good grinder (or a clean coffee grinder that you use for NOTHING other then grinding weed) Good Ginder on amazon
A Strainer Strainer I use on amazon
A pot or pan (i'd give you an amazon link for this.... but i'm sure you can find a pot or pan on your own XD )
Drink and enjoy.
You're welcome
Alright, I'm about to drop some knowledge down. I've posted this before (maybe on a different account) but I'm a coldbrew addict, and I'm about to change your lives.
Here's what you're going to need:
1) Space in your fridge.
2) A pound of your favorite coffee, ground, COARSE just like OP said (none of that Folgers bullshit)
3) One of these bad boys. Trust me.
4) Also, one of these. Ignore the name, They're magic.
Alright.
Take your water pitcher and actually remove all the pitcher filter shit. You can use any big container but I need a spigot to pour directly into my mouth. Once the filter and top plastic is out, all you should have is the vessel and the lid.
Fill your nut milk bag with your coffee. Place in the bottom of your pitcher and fill until the bag is covered with water, and let sit for a few minutes.
Empty out all your silt water and refill to the BRIM with water. Place it in your fridge.
If you're picky about your coffee strength, after 6 hours taste your coffee and then taste every hour until you hit a strength you desire.
Personally, I go 24-36 hours on my brew, and then squeeze the bag. My wife mixes the coffee with water since its very strong. I like the feeling of jitters in the morning.
Take the grounds and grow plants, compost, whatever floats your boat. Put the lid back on and put it back on your fridge. It will keep for 10-14 days, but I doubt it will last that long :)
I hiked the Appalachian trail and cooked dinners (and the odd lunch or breakfast) the whole way.
Lightweight backpacking food means dehydrated, and high in fat since it has the most calories per weight. My staples were pasta sides of varying flavors, peanut butter, ramen, quick-cooking pasta and dehydrated sauce, jerky, dried fruit, junk food (candy, honey buns, granola bars etc), cheese, oatmeal, summer sausages, and instant potatoes. I brought some dehydrated vegetables for a little nutrition, added olive oil/cheese to most things to add more calories. A few hot sauce packets go a long way too.
Hikers rarely to never used freeze dried foods due to cost. I ate a couple but they were all given to me.
You could move the butter in a screw top jar, maybe a small peanut butter container?
I did the whole trail with one pot (the infamous grease pot, get rid of the strainer and replace the handle with something lighter. It's as light as expensive backpacking pots at 1/5 the price), one small plastic cup for tea, and a spork. Boil some water, dump in your food, let it simmer for 5-10 minutes, eat. No one carried a pan since they were just dead weight.
Cooking in foil in coals does work. The problem is that stuff you can wrap in foil (potatoes, ground beef, onions etc.) has a very high water content and will therefore be very heavy.
Just make sure to avoid cashews. 1oz has 9 carbs :(
Also, I can't stress how easy it is to make homemade almond milk. Spend a few bucks on a milk nut bug to make it easier to make.
You can also use the left over pulp for almond meal / flour
no, you literally soak raw almonds and then blend it in a blender.
Because the solids are difficult to strain by gravity, you use nut bags. Speaking from experience, do not try to substitute nut bags for a cum sock.
30lbs, then your food and the extra clothes you're going to add on. You're carrying so much weight you might be miserable. I'm a believer in hike your own hike but man, that's a lot of crap you don't need and a lot of crap that's heavy. Every item you don't NEED is extra weight. It's luxury. It's luxury that's heavy and you're carrying for "just in case" or "so my butt doesn't get dirty"...like that 3oz seat cushion. That stuff adds up fast. Dump it.
Dump that huge pot and get a grease pot.
Dump the zippo for a bic, zippos suck in the woods, bics rarely fail.
Do you already own that tent? 6 pounds is freaking heavy.
Dump the knife sharpener, dump the lantern, the batteries and the charger, dump all of those drysacks and just use trash compactor bags...they cost less and weight almost nothing.
Your sleeping pad is also heavy. Get a cheap blue pad like this for now
Your pillow is among the heaviest available. An Exped Air UL and spare t shirt will save almost half a pound.
You dont need the scrapers and dishcloths, just the scraper, and you don't really need that.
Just those changes saves 5 lbs 2 oz, not counting the tent.
Here's how you do dis:
Preheat your oven to 240F (115C)
Take a baking sheet and line it with parchment paper
Break any large stems apart (I usually break anything over 1/2")
Spread out your stems over the sheet
Place in the preheated oven and let them cook for about 30-40 minutes
Pull them out and let them cool for 10 minutes
Use the parchment paper to funnel all the stems into a cooking pot
This next part all depends on how many stems you have
I add about a tablespoon of butter per "handful" of stems I have
This is important because the fat in the butter will bind with the THC (I've also used coconut oil for this as well)
Add enough water so no stems are sticking out
Turn it on the lowest setting and let it simmer for 30 minutes
Next you have to remove all the stems and debris
I use a small strainer like this:
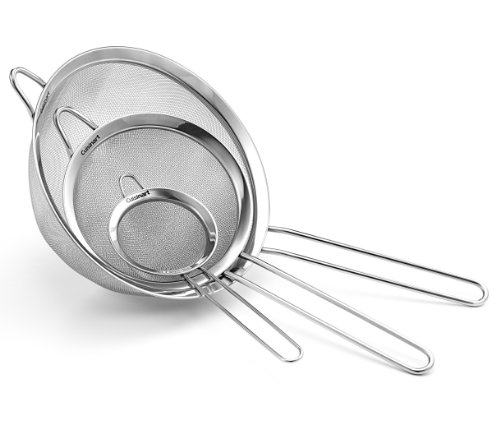
https://www.amazon.com/Cuisinart-Stainless-Steel-Strainers-CTG-00-3MS/dp/B007TUQF9O/
Strain it into a bowl or I use a liquid measuring cup so I can pour it easier
I like to make hot cocoa with it as I'm not a tea/coffee person but my girlfriend says that it's much better with a citrus tea than coffee
That's what I do with my stems. Hope this helps.
Edit: To fix the link and change some words around.
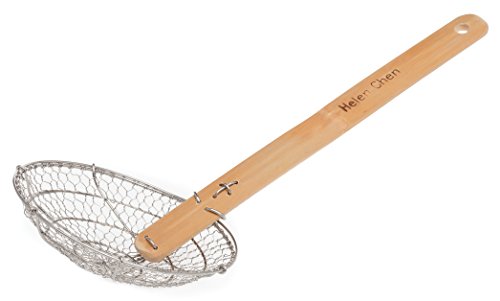
To save others the horror of googling "pasta spider," I think it's this
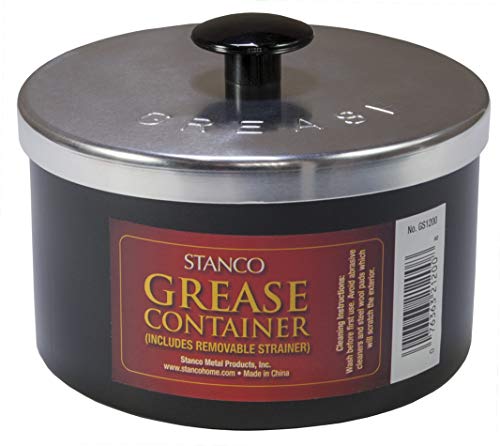
I have a British cook book from WWII that has a method for saving bacon grease. Now of course this was a time where most people didn't have fridges, but they recommend boiling the grease in water. Then straining well through cheesecloth and cooling the whole thing. Once it's cool lift off the fat and save in a container. It actually works really well and has a butter consistency but it plain white.
I usually save up a bit to do this in a batch and I use this container to keep it in. The strainer at the top keeps the big bits out.
That is not a colander.
This is a colander - large holes, used for pasta or veggies.
This is a sieve - small wire mesh, used for sifting flour and the like.
This is a strainer - wide wired mesh, used for anything too small for a colander, but not requiring the finesse of a sieve (like spaghetti)
Get yourself a cheap nut bag and steep with the grounds in that. Then you’ll have very little to filter afterwards because all that will get through is fines. Just make sure the container you steep in has a wide enough opening that you can remove the bag after the grounds swell.
https://www.amazon.com/gp/aw/d/B00G3ZHOLY/ref=oh_aui_i_sh_in_o0_img?ie=UTF8&psc=1
If you don't want to spend a lot of money right now go with this: http://andrewskurka.com/2011/how-to-make-a-fancy-feast-alcohol-stove/
and this:
https://www.amazon.com/Stanco-Non-Stick-Grease-Strainer-Black/dp/B000MVTIOQ
Then grab some foil from your house for a windscreen and grab a spork from KFC. You'll have a complete cooking setup for less that $10. Plus it's super light.
Use it for any high heat cooking you do. Frying steaks in it is great because it can take a really high heat without burning. You can also fry pork chops in it for a new flavor profile. Also, veggies (peppers, onions, garlic, Brussels sprouts) do well being cooked in bacon grease.
It is hugely versatile, and doesn't even need to be refrigerated.
Lastly, if you want a nice strainer / storage container, chick out this grease keeper.
I bought a bag of 1000 empty size 0 gel caps on Amazon.
I bought one of THESE to fill it.
I bought THESE tips.
I also bought one of THESE to lay out all of the caps to make them easy to fill.
Having had some practice at this point, I can fill all 100 in like 20 minutes. I probably go through like 150 per month.
I then keep them in the fridge so the coconut oil stays solid and they don't leak or melt.
They will leak if you sit on them, or if you leave them in a hot area (over like 80 degrees).
Using the 3 cup batch (which is the smallest that the magic butter maker will do) I get like 650ml (there is some loss from not getting 100% of the oil out of the cannabis flower). With each cap being 500 microliters exactly, I get 1300 pills from 6 ounces of flower, or almost a year's month worth of caps at the rate I eat them at minus whatever I use for cooking (I didn't turn all of my oil into caps so I could use it in cooking).
I found that emptying the magic butter maker into one of THESE and then squishing the solid remnents in the filter bag helps to get the most oil out of each batch.
The hole in the tip of the pipette's is slightly too small to prevent clogging, so before I use each tip, I open it up a smidge with a dental pick I bought at CVS for this purpose. I just push it in and pull it out once, I found that opening it more than that makes it drip and doesn't help any more to prevent clogging.
I haven't personally done anything with the leftover flower, but I suppose you could bake with it. I figure I have extracted most of the cannabinoids, so I just accept it as some loss.
Also, if you do the squeezing without gloves, don't do it before you have to drive anywhere...just a suggestion.
Philosophy: spend as much money as you can on the best Big 3 you can. Leave worrying about shaving grams with titanium mugs and other small shit until you get bored and you budget is bigger. :)
Big 3: $610
Cooking: $24.50
First Aid: $32
Clothing: $64
Other: $58
Total: $788.50
base weight : ~10lbs
I Got a pitcher and a nut milk bag on Amazon. You may also want to grab a small scale and a grinder, but you can probably measure out a batch to taste without.
I use it to strain boiled veggies, fish things out frying oil (or soup), force cauliflower through it to make "mashed potatoes" drape melted cheese over it upside down to make "bowls" (helps to keep it from getting soggy and drain a little grease) I even put a paper filter in one to make coffee pour over style when my coffee maker was broken.
this type
*added link
Buy this
Thoughts on mortar and pestle coffee grinding:
Helps to also use a strainer
Grind. Strain smaller grinds into collection container. Return larger grinds to pestle. Repeat until all grinds at suitable small size.
For French Press I would start with a coarse strainer. Then, when all the grinds fit through that, grinding is done. Next I would use a double fine strainer to just remove the dust from the rest of the grinds. What is left is perfect for French Press. Voila.
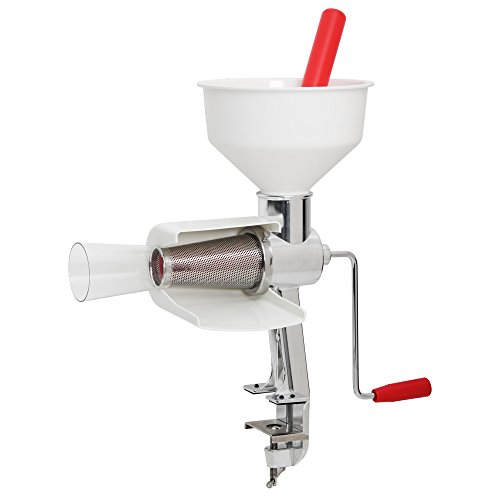
I can't attest either way about the Kitchen Aid attachment, but I use this to make salsa and it's amazing. No peeling, coring, or anything more than cutting out rotten spots. They have a salsa attachment you can use to make it chunkier, too (it comes in a 4 pack with some other screens). It's seriously a game changer!
Deluxe Food Strainer and Sauce Maker by VICTORIO VKP250 https://smile.amazon.com/dp/B001I7FP54/ref=cm_sw_r_cp_apa_i_ck20CbW5A9VP6
I know food processors are nice, but half the budget? I'd work on my knife skills and spend that money on a saucepan (non-stick for eggs, though a saucepan isn't ideal), maybe a strainer, and whatever else suited one's personal cooking style (I don't think my kitchen would feel complete without a rice cooker/steamer, for example).
Well, I have used many good ones, but this is probably the best.
If I were to build my kitchen from scratch, it would be pretty much what I have today w/out having to go through all the old, cheap stuff that I wound up buying getting rid of because it was low quality and wore out or broke or didn't work as well as it should have. So as follows:
All Clad Stainless:
Cast iron:
Enameled dutch oven (Staub):
Various Appliances:
Knives:
Other misc stuff:
Bakeware:
Fun things to have if you think you'll use them:
These are the things that I have right now that I'd get from the start if I were starting over from scratch. I have other stuff, but it's been gathered over time and I'm sure I've left out a few things, since I'm kind of working off the top of my head. Oh yeah, like a good set of storage stuff (Rubbermaid or similar) and a garlic press ... and ... and ... :)
Here you go: http://www.amazon.com/RSVP-Stoneware-Grease-Keeper-Black/dp/B0017U5DZY/ref=sr_1_1?ie=UTF8&qid=1347819739&sr=8-1&keywords=grease+keeper
After getting my first Instant Pot, I bought all sorts of inserts and accessories. After seeing people rave about a set they purchased from QVC, I finally broke down and bought the set. It is now my go-to set. If I had bought it first, I would not have purchased some of the other items. QVC 4 pc Silicone Pressure Cooker Insert
Another piece I use frequently is RSVP Stainless Steel Mesh Colander You can remove the handles to make it fit inside the 6 qt IP. I like it enough that I bought a second and left the handles on. With the handles spanning the Instant Pot insert, it is great for straining the last bit of broth from chicken bones
Yes. Use good organic whole milk for a treat but regular whole milk is also good.
I use Ellie’s best nut milk bag to turn it from regular to Greek yogurt at the end. Here is a link: https://www.amazon.com/dp/B00KLT6X9W/
this is incredible over-priced, or am I missing something? I use essential the same set-up and it cost a little under $20.
https://www.amazon.com/1-gallon-USDA-Fermentation-Glass-Jar/dp/B006ZRBGSC/ref=sr_1_3?ie=UTF8&qid=1491232715&sr=8-3&keywords=gallon+jar
https://www.amazon.com/Pro-Quality-Nut-Milk-Bag/dp/B00KLT6X9W/ref=sr_1_3?s=kitchen&ie=UTF8&qid=1491232680&sr=1-3-spons&keywords=nut+milk+bag&psc=1
It is actually very easy to make. Before I made them I ordered everything off of the internet except the green stuff. Organic coconut oil from amazon, Cap-M-Quick Gelatin Capsules, small crock pot, and an eyedropper or syringe.
Pretty easy process, just time consuming. I also didn't have a grinder and I had to break apart the plant by hand. I felt wasteful doing that though, so I recommend the grinder with kief catcher.
edit: new account so I cant make a new comment right now. Wanted to add this information for Woodbin. I used 1 oz (27 grams). Ended up with 157 pills. There should be about .17 grams in each pill. I wanted to make them a little less potent (.13 grams) but I didn't want to make 220 pills.
Most restaurants (not necessarily Indian food, but in general) use food processors like this for doing smooth purees and pastes. I got a Ninja 3-in-1 blender and food processor set at costco that works great.
I recommend a fine mesh strainer like https://www.amazon.com/OXO-Good-Grips-8-Inch-Strainer/dp/B00004OCLX or https://www.amazon.com/New-Star-Foodservice-38071-Reinforced/dp/B00LV3227O if you want to get perfectly smooth sauces. Using the back of a spoon or a rubber spatula to press the cooked sauce through the sieve will get virtually any fibers and bits out without any trouble
Stanco Grease Pot from Amazon is well regarded for lightweight and cheap.
I wouldn't cheap out on a pan. The GSI Pinnacle 8" is good quality and the MSR skillet is also worth the money.
Something like this https://www.amazon.com/Deluxe-Strainer-Sauce-VICTORIO-VKP250/dp/B001I7FP54
My family used something similar for years to make sauce from tomatoes. Wash and quarter the tomatoes, mash em into the hopper, turn the crank.
Okay, so a while ago I said I was going to make a gummy bear tutorial and I never did so I thought it was about time I at least made a write up for them. This recipe will get you right around 200 gummy bears.
Tools:
Ingredients:
Decarbing
Pre-heat your oven to 250F - 260F, use the digital theremometer to keep an eye on the temp to make sure it stays around there and does not get above 260F. I like to place my concentrates into the small pyrex dish and decarb in that. Put the dish with your concentrates in the oven for 30 minutes. You can check it around the 30 minute mark and see if it is fully decarbed. Look for it to be pretty clear of all little "carbination" like bubbles. When those are mostly gone you are done decarbing. It will take around 30 minutes. Go a little longer if you want couch lock / sleepy time gummies.
When it is done decarbing pull it out and set it to the side for a minute.
Infusing the coconut oil
Grab your medium sized pot and put a few inches of water in it. get it to a boil then turn the temp all the way down to a very low heat. When the water is ready place your dish with the freshly decarbed oil into the water bath and add the 1 Tbsp of coconut oil to the dish.
Let the two mix for a few minutes until they are nicely combined. It shouldn't take long maybe 10 minutes max.
Grease your molds
At this point if you dont have silicone molds (I do and I still grease mine for precautions) grease your molds so you don't forget to do it before adding your gummies.
Preping fruit juice (or water)
In the second small pyrex dish pour your real fruit juice / water or whatever base liquid you are using for your gummies. I havent tried much besides fruit juice and water but you can experiment with other liquids, but don't do an experiment on a batch with THC in it just in case something doesn't work out.
To the fruit juice / water add 1 tsp of soy lecthin and stir with the fork. Place the dish in the fridge for 5 minutes or so and stir again. Let it sit in the fridge stirring occasionaly until the soy lecthin is fully desolved.
This liquid mixture NEEDS TO BE COLD for the blooming process to work so make sure to keep it cold.
Mixing the dry ingredients
In your small non-stick pot mix the following together: 85 grams of Jello, 5 Tbsp of Gelatin, 1/4 cup of sugar. Completely mix them all together and dont let any of them get wet yet. Stir and stir until they are completely mixed.
Blooming
Take your mixed dry ingredients and pour in your friut juice (water) soy lecthin mixture. Stir it and get everything evenly mixed and make sure there are no lumps. When everything is evenly mixed place the lid on the small pot and let it sit for 10 minutes.
This is called "blooming" the gelatin and allows the gelatin to absorbe the water. The water needs to be cold because gelatin activates at about 120F and after that will start to set when it cools. We don't want it setting right now.
Cuisinart Set of 3 Fine Mesh Stainless Steel Strainers https://www.amazon.com/dp/B007TUQF9O/ref=cm_sw_r_cp_awd_SbS8wb3VC9ED6
Try this and go for a medium roast. The flavor will be noticeably improved. Don't ever try this with a flavored coffee or a light roast.
Don't use cold water, make it room temp and filtered. It must be filtered or the flavor of your water will overpower the coffee taste. I don't know why, it just does, trust me. When it steeps leave it at room temp for 14 to 16 hours. This I have found is the ideal time range for the perfect flavor. Remove the Nut Milk Bag ,if you happen to get one, and then refrigerate for at least 12 hours.
Then after the brew is chilled you will want to filter the liquid through a filter. I actually use cotton t-shirts to filter the coffee back and forth between two jars a couple times. I actually thought about using a silt filter to filter out the silt. Maybe I'll try it again some day when I have the time too.
If you ever want to try cold brew without having to go through this process try this. Because I can't drink hot coffee anymore because I realize how horrible it tastes. Bring on the hate mail.
Coconut. Use as little oil as possible (refined if you can find it), just enough to completely soak the kief. Then get one of these https://www.amazon.com/Pro-Quality-Nut-Milk-Bag/dp/B00KLT6X9W. Strain it while it’s hot enough to almost burn your hands, wearing nylon dish gloves makes it less painful. And squeeze the ever loving fuck out of it to get every last drop.
Another option would be to make some qwet hash, and then just decarb and mix it with the coco oil, no straining necessary and this allows you to use a very minimal amount of coconut oil, making the end product potent as fuck. With that method i squeeze 50,000 mg of thc into a less than a pint of oil regularly.
I use [this bag] https://www.amazon.com/dp/B00KLT6X9W/ref=cm_sw_r_cp_apa_i_eswdBb9CV16VN to make horchata. I put all the ingredients in the bag, and when it's done steeping, I pull it the bag and press it to get the delicious out.
Hmmm. Some things...
OK... this became a list. Sorry if I came off as a dick, trying to be constructive.
My parents' house burned down around Thanksgiving and they asked me for pot & pan recommendations as they rebuild. Here's a list I sent them of things that ought to last forever but won't break the bank (no Mauviel, Staub, All-Clad, Le Creuset, etc). #1 on the list is a 12" Lodge skillet, just like the one we have. :)
I use a fine metal strainer that can hold all the grounds. Refill the press half way, swirl, dump into the strainer over the sink. Repeat until the press is clean and leave the grounds to drain in the strainer for a bit. They dry enough to go in to the trash. OXO Good Grips 8-Inch Fine Mesh Strainer
https://www.amazon.com/OXO-Good-Grips-2-Cup-Separator/dp/B000BGTZSG/ref=pd_sim_79_1?_encoding=UTF8&pd_rd_i=B000BGTZSG&pd_rd_r=2324XAKNST516F944XT2&pd_rd_w=2esCW&pd_rd_wg=ftKWt&psc=1&refRID=2324XAKNST516F944XT2
Save the grease for your next recipe!!!
http://www.amazon.com/gp/product/B0017U5DZY/
If money is no object a copper pot for making jams and jellies is lovely. Something similar to this.
If you live in a hot environment it's nice to have a propane stove for canning outdoors in the Summer.
This food mill/strainer is great for making tomato juice and sauce.
http://www.amazon.com/Victorio-VKP250-Strainer-Sauce-Maker/dp/B001I7FP54/ref=sr_1_1
If you don't have a dedicated water bath canner that comes with a jar basket, finding a stainless steel rack that fits into the pot you plan on using is also a very useful thing to have. It elevates the jars off the bottom.
A steam juicer is also a nice piece of equipment.
A conical food press is also useful.
http://www.amazon.com/Mirro-9605000A-Canning-Accessories-Wooden/dp/B00002N5ZQ/ref=sr_1_12?
A good metal ladle that portions food in 1/2 or 1 cup measures makes things easier.
Cloth jelly bags are useful.
http://www.amazon.com/Norpro-615-Jelly-Strainer-Piece/dp/B001FBEHFC/ref=sr_1_1
A canning lid rack can be useful, I like mine but most don't use them.
http://www.amazon.com/Norpro-605-Canning-Lid-Rack/dp/B0000CF39X/ref=sr_1_8
Tattler lids are always useful since you can reuse them.
http://www.amazon.com/Tattler-Reusable-Regular-Size-Canning/dp/B0051PDXCQ/ref=sr_1_3
This is the best method. This is the type of strainer you need to wash rice.
I will say though, unless this is some really nice rice or you're really, really broke, just go to the store and get a new bag. In the US: if you go somewhere like Costco or you can buy large bags or generic brands, it should cost you $0.50-$1 per pound, and you won't grind your teeth down with the little rocks in your curry.
It is a colander. This is a strainer.
You can definitely put vanilla beans in while it's cooking. One of the recipes I based my method off of does just that - the nut milk bag she recommends is totally worth it if you wind up making yogurt frequently. I use yogurt in dressings, sauces, as a sub for sour cream, etc so I just make the plain stuff and add fruit, jam or honey as needed.
My favorite thing to make in the IP is this chicken & wild rice soup. Feel free to sub in homemade stock or a non-box mix of rice; I also like to add some spinach after it's cooked under pressure.
For a big list of recipes, Dad Cooks Dinner hasn't steered me wrong yet. His one-pot champ is the only way I make mashed potatoes anymore.
Pressure steam bratwurst in beer for ~10 minutes; while the brats are in the IP, fire up the grill. Throw the steamed brats on the grill (or in a hot skillet) to finish.
Corn on the cob - shuck it, throw 'em in the IP, steam function for 1 minute per ear.
We eat a lot of broccoli. I take a bag of frozen broccoli, put it in a steamer basket, and pressure steam for 0 (zero) minutes for perfect broccoli. This is also helpful when I realize at the last minute that I forgot to make a vegetable for dinner.
Hard boil eggs. Put as many as you want in a steamer basket, pressure steam for 6 minutes, natural release for 6 minutes, immediately run cold water over them.
Anything you slow cook can be pressure cooked in a fraction of the time, but the IP has a slow cook function that works perfectly. I love my Crockpots. I packed my Crockpots away.
People have recommended this nut milk bag for cold brew on this subreddit before. I might just get it now.
Nut and grain milks are so easy to make once you try it you will feel silly for ever spending money on it. Just take a cup of ANY kind of (usually raw) nut and soak it over night. Rinse it out then put it in any kind of blender with 3.5 cups water and a squeeze of honey or maple syrup and blend it. It does not need to be an expensive Blendtec blender, any 20 dollar Black & Decker/Oester will do just fine. Once blended pass it through this 10 dollar reusuable mesh bag and refrigerate. Lasts for 2 or 3 days and tastes amazing. My favorites are cashews and hulled sunflower seeds (by far the cheapest)
https://www.amazon.com/Pro-Quality-Nut-Milk-Bag/dp/B00KLT6X9W
I've only felt a kava hangover once so far, and it was with a tudei variety I bought from a botanical vendor. Where did you get your kava from? If your vendor didn't supply reliable info regarding the source and variety of your kava, then I'd recommend trying the Waka (warning: very pungent) or Fu'u from Bula Kava House, or any variety of kava from Gourment Hawaiian Kava.
If your kava is good, the next thing I'd suggest is trying the traditional hand-straining prep, rather than blending and straining like you're doing right now. You might be consuming too much plant material with your current prep method, which I've found to increase the possibility of short-term nausea. I'm hand-kneading my kava with this nut milk bag that I bought on Amazon. It feels very durable compared to the previous three strainer bags I've burned through already, and it's large enough to make big batches of kava if you wanted to. I usually add about 2 Tbsp of kava to my strainer bag for every cup of lukewarm water I use, then knead vigorously for ten minutes. You know you have a potent batch when your kava has an oily sheen on the surface, similar to an oil spill on asphalt.
My normal kava night involves 6 Tbsp kava and 3 cups of water, which should be around 4-5 shells. I usually drink my first 3 shells within 30 min, then drink each remaining shell in 15 min intervals. This will leave me feeling pretty good for 3 hours or so, at which point I will be perfectly relaxed for sleep. This always leaves me feeling refreshed in the morning with no nausea whatsoever.
Good luck!
I use a Nut Milk Bag
I fill the bag with a pound of coarse ground dark roast. Place the bag into a gallon pitcher , fill it with cold water, let it sit in the fridge for 18-20 hours, and remove the bag. Very little sludge, less mess, and strong as hell.
The vendors listed in the links on the sidebar are probably the most trustworthy that you could find. They do various degrees of testing (visit each vendor for details) and they appreciate the importance of a safe, reliable product. I'm pretty careful myself, and I feel comfortable with these folks.
I think the most satisfactory results come from the traditional prep method - you'll need some medium grind kava (not micronized or instant) and a squeeze bag, which is sometimes included for free, or else buy a 75 micron bag on amazon, like this one:
https://www.amazon.com/gp/product/B071CDZPJW/ref=oh_aui_detailpage_o04_s00?ie=UTF8&psc=1
There are full instructions on the sidebar. Once you have it down pat it's not difficult at all.
I'm not certain but I'm pretty sure it's not practical to grow your own kava. It would kind of be like growing your own coffee, it's possible, but not anything you'd really want to tackle.
I can buy unroasted beans for $12.50 for two pounds (so $6.25 a pound) at a local coffee shop here. I live in a college town so there are lots of these around, not sure if you can as easily buy it in bigger cities. You can also buy online, unroasted beans last a long time. A friend and I split one of these to start and after "committing" started buying locally. Sweet Marias has a lot of info too.
My roommate and I bought 12 pounds in January and still have probably 3 or so left and we... drink it nearly daily. Either way, much less than $10/month per person for great coffee.
The total of the other costs are probably $30 or $40 unless you go nuts. A popcorn popper (mine was $5 at goodwill, google this topic and you can find recommendations, mine is bad so I have to consistently stir it, still works fine though), something like this to cool it with (mine was way cheaper at Walmart), a $5 pour over coffee filter at Ace Hardware (only place I could find one locally wtf), and filters. Depending on the popper you might have misc other purchases to make it easier or more convenient.
Another friend bought a heat gun and uses a breadmachine set on "knead" to automatically stir while applying heat. YMMV on what works best.
The reason it's awesome is you can always have freshly roasted beans because you control batch size and how often you roast.
Here's one.
Get this
https://www.rei.com/product/127720/rei-co-op-backpacking-bundle
That's a pretty good deal for what you get. Note that the sleeping pad is not an optional item. You need insulation from the ground. You'll also need a pack, and on a budget I would recommend the REI Coop Flash 55. REI has a reputation for being expensive, but the REI brand stuff tends to be pretty good value.
You can also keep an eye on used gear on Craigslist. It's not uncommon to find used gear in good condition for 50% off retail. Good brands to look out for are Osprey for packs, Big Agnes for tents, Western Mountaineering/Feathered Friends for bags (tons of brands here), and Thermarest for pads. There are way more good brands (e.g. NEMO), but those are the big ones known for high quality.
Beyond those four things, you will need:
I probably forgot something but that should cover it.
I would consider a headlight or a sleeping pad
Depending on what type of cooking you want to do a homemade alcohol stove and a grease pot will let you cook all of these recipes. from Andrew Surka http://andrewskurka.com/section/how-to/food-nutrition/meal-recipes/
Here it is on Amazon. I've been using one for years with a cat stove and aluminum foil windscreen. Total cost less than $10 and UL.
https://www.amazon.com/Stanco-GS1200-Non-Stick-Grease-Strainer/dp/B000MVTIOQ
If you are doing mostly "freezer bag" meals, you will not need a very large pot, and shape is less crucial. However, if you plan to cook in your pot a lot, you will need to be more picky. Wider bottom pots are easier to cook in and eat from, and typically you want a pot wider than your stove for efficiency. Think about stability, both in the width of the pot and weight/length of the handle.
Titanium isn't really lighter, it's just stronger. I have an aluminum grease pot from Kmart, weight 3.5oz and holds 1.5 liters, it's nice and wide. Only cons are that it does not have a handle or fry pan lid, and will dent much more easily (but can also be bent back into shape or replaced cheaply). Grease pot from amazon.
Well, out of curiosity, what are the space limitations you're running into?
When I strain stock, I first pick out the bones and large pieces with tongs, then fish out smaller pieces with a spider strainer. All of that goes straight in the trash, then I can strain directly into my destination vessel (through a fine strainer in a single pour.
So for a 10-quart or whatever stockpot, I really only need a foot of counter space, to hold the destination vessel. You could even put it on an inactive stove burner if you don't have that foot.
PRO TIP for anybody who wants to make this: get one of these things
Try something more parabollic.
Buy real kava from a vendor here. The Savusavu waka from KavaTime has been getting rave reviews and it's mild taste makes it a good beginner kava.
For prep, you will need either:
A bag for kneading/straining... something like this will do the job.
Or:
The aluball
Whichever you choose, watch a few videos online to see how to use those tools to properly prepare kava. If you don't extract the kava well enough, you'll not feel the effects you desire.
No problem!
Its important to notice that I am using a traditional prep though. That means placing the kava in a strainer bag such as this and kneading it in a bowl of room temp to warm water for 5-10 minutes, making sure to wring all the water out at the end.
If I was consuming the whole root, the effects would be VERY different.
https://www.amazon.com/gp/product/B000KIE6ZM/ref=ppx_yo_dt_b_search_asin_title?ie=UTF8&psc=1 fill to 4 qt line with water, add entire bag of coffee (10-12 oz) to https://www.amazon.com/gp/product/B00158U8DU/ref=ppx_yo_dt_b_search_asin_title?ie=UTF8&psc=1 and soak. I do 12 hours for pre ground, 18-20 if I grind whole beans ( I grind more coarse than pre ground). Remove bag, pour in gallon container, top off with fresh water to gallon mark of storage container. Will be one gallon of cold brew.
I drink looseleaf with an infuser like this one, or in a ceramic teapot (haven't gotten around to shelling out for a clay one yet.) This is my process for making black tea, which is what I usually drink.
I'm not a huge fan of tea bags, because I'm sort of elitist about my tea and because I can't find many bagged teas that are as delicious and full-flavored as looseleaf teas.
When I'm drinking tea, it's usually before or with breakfast, so I'm generally just eating breakfast alongside it. However, for a treat, I like to get some McVitie's digestive biscuits to nibble on with a pot of tea. If you're American, you can often find them in international food stores (or order online!). They go wonderfully with tea, and they're way more appetizing than they sound.
I hope this helped, and that you can forgive my penchant for abusing paretheses! :)
I bought this from Amazon which works out great. http://www.amazon.com/gp/aw/d/B0017TZSU0/ref=mp_s_a_1_1?qid=1414332399&sr=8-1&pi=SY200_QL40 I have it next to the stove so I can use it to cook with.
I recommend getting a container for your bacon grease. I've got this one right here and it's treated me quite well over the years.
A quick aside: a single apostrophe (') means feet and a quote (") means inches.
Enjoy it, cast iron is the best!
Someone commented about using one of these handy bacon grease containers. They've got a nice little mesh filter built in. I bought one and LOVE IT.
Got one of these pups and never looked back.
I bought this grease keeper from Amazon on recommendation from r/Keto a while back. It's quite handy. Straining the bacon bits out ensures it'll keep longer.
http://smile.amazon.com/gp/aw/d/B0017U5DZY/ref=mp_s_a_1_1?qid=1421847606&sr=8-1&pi=AC_SX110_SY165_QL70&dpPl=1&dpID=41n5aeohTWL&ref=plSrch
I might have to look into that, do you have any links or anything like that? Also, my wife and I use our victorio food saucer when we process tomatoes and that thing is an incredible time saver.
http://www.amazon.com/gp/aw/d/B001I7FP54?pc_redir=1408762476&robot_redir=1
When you've established yourself as a homebrewer, make sure to pick up this book. Also pick up a spray bottle for sanitizer (good for sanitizing random surfaces) and a good strainer with a really fine mesh. I use this strainer and it works well. And be sure to check out /r/homebrewing.
Never done that. Buy I use something like this.
http://www.amazon.com/gp/aw/d/B001VZERX4/ref=mp_s_a_1_2?qid=1421270250&sr=8-2&dpPl=1&dpID=51Hf5PXB4cL&ref=plSrch&pi=AC_SX200_QL40
Would be really hard to make this mistake.
A mesh sieve? You could probably find one at your grocery store, or at bed bath and beyond. Here's an Amazon link with good reviews and a picture, in case you have no idea what I'm talking about, lol.
Broccoli should be fine. I soft boiled eggs right on it.
I purchased this basket after being recommended here. I use it for my veggies . . .
While they're a fantastic tool, a stand mixer is expensive. However, having a mixer on hand can be insanely useful. A decent handheld mixer can do the job for way less. Aside from that, these would be my suggestions.
1.) Knives. Get something decent and try to learn to keep them sharp. you don't need a huge knife block, 2 or 3 basics will do the trick. A small and large basic knife and a serrated knife will be plenty to start with. A set of basic cutting boards to go with these as well. Get more than one because you shouldn't cut raw meat on the same board as cooked meat or veggies and so on.
2.) Measuring tools. 1 set of measuring cups, 1 set of measuring spoons, 1 liquid measuring cup. I prefer metal for the first two and pyrex for the last. In my experience the numbers wear off the plastic ones pretty quickly and they stain. And yes you need all 3, liquids are measured differently than solids.
3.) Graduated mixing bowls. Pyrex are also great for these. I have this set and they have served me well.
4.) Pans. These really depend on what you want to do. If you want to focus more on cooking start off with a few basics. A larger stock pot, a sauce pan, one or two frying pans (i prefer to have multiple sizes) and some basic pans for the oven. A 13x9 metal or glass pan is a must have for me as well as an 8x8 or 9x9 square pan. If you want to bake as well you'll need to add cookie sheets and possibly a few more specialized items like muffin pans. Nonstick is sometimes frowned upon by chefs and cooks, but truth be told they're fine for most applications. Personally, I highly recommend against silicone pans. In my experience they smell foul and are a pain to clean.
5.) Utensils. Do not get the cheap shitty plastic set. Just don't. It's a waste of money. I cannot count how many cheap plastic spatulas I've thrown out because they melted or peeled or something. Go with silicone instead. You can use metal, but keep in mind metal tools+nonstick pans=scratched ruined pans. (This does not apply to spatulas used for things like stirring or spreading frosting btw, only to ones you will use on your stove). As for as what you'll need, I would suggest a set of wooden mixing spoons, and a set like this that includes the basic items; a normal spoon, a slotted spoon, a turner, and a pasta fork.
6.) Specialty utensils. Once again, these depend on what you want to do. Whisks are handy for a lot of things and a box grater comes in handy. A silicone pastry brush is nice for certain things and easier to clean than a normal one. A basic strainer was something I didn't realize how useful it was til I got it.
8.) Other Basics: Oven mits, towels, kitchen twine, tupperware in multiple sizes, egg separator, can/bottle opener.
9.) A basic cookbook. I'm a huge fan of this edition of the BH&G cookbook. On top of a lot of basic, fun recipes it includes a lot of extra information about tools, techniques, and some nifty tips and substitutions. I have a separate binder of my own recipes, but this is my most referenced cookbook.
What sorts of food are you hoping to learn to cook? I can expand on any of this depending on your interests.
https://www.amazon.com/Cuisinart-CTG-00-3MS-Stainless-Steel-Strainers/dp/B007TUQF9O/ref=sr_1_7?ie=UTF8&qid=1517934596&sr=8-7&keywords=strainer+handheld
Easiest way I've found is get a mesh colander, something like this. Add water to french press and pour grounds out into the colander over the sink. Dispose of grounds in trash or compost if you don't want to use sink.
a good colander and screen.
I put a regular, coffee pot filter into one of those regular metal strainers used in the kitchen for pasta, etc.
Then, I slowly pour the mixture of coffee and water (that's been sitting in that big jar all night) onto the filter/strainer. Since it's a coffee filter (and made for straining coffee) it catches 99% of the grinds. When I'm finished, I just dump the filter into the trash.
The only cleanup left is rinsing off the strainer- almost no coffee grinds touch that so it's just hot water then dry it. And the original (1st) jar where you originally brewed the coffee/water overnight may need a rinsing since some coffee grinds stick to it.
Equipment needed for my method: Two very large jars of equal size (the ones used for brewing Kombucha seem to cost less than mason), kitchen strainer, coffee filter... and coffee of course LOL.
Buy one of these NUT MILK BAG 😂 and make your own alternative milks. Oat milk is super cheap to make and you can always eat fortified breakfast cereals to get much needed vitamins.
Use your Santa gift for something better. Get a $9 nut milk bag, no seriously. Put some coarsely ground coffee in the bag. Put the bag in a pitcher with water and let it "brew" over night (about 12 hours). Boom, done. Dump out the grounds, rinse bag and use over and over again.
Shopping list:
One yellow onion, two if you love onions
Head of celery
Seven or eight carrots
Package of wild rice
A bunch of spices, if you for some reason don't own spices
Powdered chicken bullion
The Thanksgiving turkey carcass that you froze, of course
Your turkey pan drippings
A "nut bag" or "mash bag". You can get a nut bag on Amazon here, or you can go to your local homebrew shop and ask for a mash bag. It takes the place of cheesecloth, and it's totally worth the investment.
Stock prep:
Put the mash bag in your slow cooker.
Thaw that turkey carcass. When it's room-temperature, hand-separate the meat from the bone. Stick the meat in a plastic bag in the fridge, and put the bones in the mash bag you put in the slow cooker. Stick the drippings in the mash bag, too.
Quarter an onion, separate out the layers, and toss all four quarters into the bag. Cut four of the carrots and four of the celery sticks longways and shove those in there somewhere too.
Add a 1/4 teaspoon of sage, a 1/4 of thyme, a 1/4 of rosemary, a dash of parsley, four or five good grinds of pepper, a teaspoon of salt, and two bay leaves. I purposely under-salted because that is something that can be done at the table to taste.
Toss a teaspoon of bullion on top.
Fold the bag up and try to tuck it underneath itself. Make sure it's easy to remove from a bunch of hot liquid in the morning, though!
Fill the crock pot about half an inch from "full" with cold water.
Turn it on Low, then go to sleep.
Good morning!
Go into the kitchen. It will smell like Turkey Mecca, but be patient! Put a towel down and, being careful not to spill a bunch of crap everywhere, lift the bag out of the slow cooker and transfer it to a plastic bag. Move the plastic bag to the garage while you wait for it to stop steaming, then compost the bones and vegetables or else give them to Fido.
Peel the rest of the carrots and slice them into coins. Same with the remaining celery: wash it and cut it into pieces. If you LOVE onion, you can cut up a whole damn onion and add it, otherwise stick to half or a quarter. Add everything to the delicious-ass broth, then walk away for two hours.
When that two hours is up, and when the entire house smells like God has blessed you with the Eternal Turkey Soup, come back and get out that bag of turkey meat. Make sure it's bite-sized pieces, then add the entire horse-honkin' thing into the slowcooker.
Set a timer for 1h30m, then reread The Name of the Wind for a couple minutes.
Finally, make your wild rice on the stove. This stuff is actually really good, but any will do. Make two cups of it, and cook it on the "light" side, because it'll suck up some soup too.
(You can also add a box of fusilli to the slowcooker about 40 minutes before you want to eat if you want Turkey Noodle Soup, but I promise you, the rice is worth your time.)
When the rice is done, dump it wholesale into the soup. Click the little knob to "Off".
It's ready.
Say a quick prayer, because this soup will make you feel like you've been touched by the turkey angel.
Edit: two pictures - the bag inside our crockpot, and the morning addition of turkey
I have this one, and it works really well and it's a great price!
Things you will need:
http://www.amazon.com/OXO-Grips-8-Inch-Double-Strainer/dp/B00004OCLX) )
If you get a stovetop kettle, I recommend one that does not have seams at the bottom, and one that has a strong whistling mechanism.
When the tea is finished brewing, just stir it up, then pour it through the strainer into your awaiting mug, sweeten and add cream if desired, and enjoy :-)
i use this:
http://www.amazon.com/OXO-Grips-8-Inch-Double-Strainer/dp/B00004OCLX/ref=sr_1_2?s=home-garden&ie=UTF8&qid=1370818215&sr=1-2&keywords=fine+mesh+strainer
and it works very well. no mess, can just dump the solids out into the green bin.
you can just get a mesh sieve like this.
bonus: you can use it for other things. i use mine for baking all the time
Huh. You’re right. I remember mine was around $5 when I bought it but that might have been a little while back...
That said, this one’s $10:
OXO Good Grips 2-Cup Fat Separator
https://www.amazon.com/dp/B000BGTZSG/ref=cm_sw_r_cp_api_i_I.twDb7BRVWXY
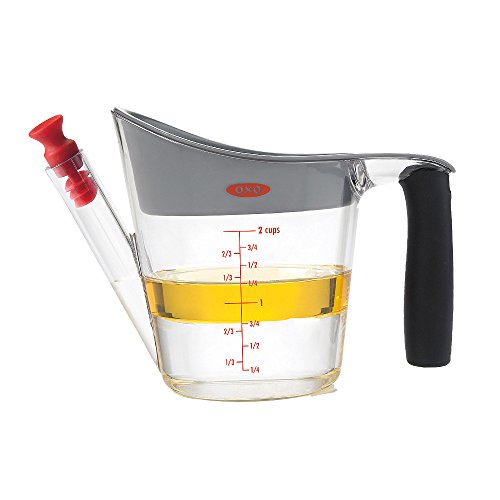
Totally agree, all that fat floating on top means the first half of the soup experience will be too rich and the rest will be too watery. BTW if you're using a spoon and paper towels, you should try a fat separator, makes life a lot easier.
edit: this is a fat separator- you should get the 4-cup, but this is a better illustration of how it works.
You are thinking of a different kind of apparatus. I mean something like this:
I just had friendsgiving last weekend and I ended up making my turkey stock ahead of time. I got some turkey thighs and drumsticks from the store(super cheap) roasted those and threw them in a stock pot with the standard stock veggies and some frozen chicken stock I had leftover. Then all I had to do day of was make a roux and add my stock to it. I still did pour the drippings into one of these things and add the nonfat part to the gravy so it wasn't wasted. Also added about a teaspoon of MSG to the finished product and everyone loved it. I've made gravy just from the drippings, and it has worked, but I always felt like I either didn't have enough gravy to go around or if I thinned it out enough to make the quantity I wanted, then it didn't have enough turkey flavor to it. making ti ahead of time made everything easier to put together day of and it was so good i literally had to stop my GF from drinking all the gravy before dinner.
Get one of these (or similar) fat separators. Put your pan drippings or whatever else in. It lets you pour out the liquid, while keeping the fat behind.
Or just heat it up, melt the fat, and enjoy the flavor!
$5 at Walmart, or my local grocery store (C-Town). $8 on amazon.
Another option that people love is the Imuza. Comes in 10CM and 12CM widths.
Years and years ago when I was a kid, bacon grease was strained in something that looked like this and used for all kinds of cooking examples here
Monoprice Titanium Stove 1.7oz $20
Stanco Grease Pot 3oz $10
4oz isobutane for stove 4oz $5
This works really well for meals that are simply boiling water and adding to dehydrated food.
If you get something like this it wont get rancid. Its the stuff in the grease that makes it go bad.
No. I've been using this pot over the flames of my Whisperlite twice a day for months and it's a total champ
http://www.amazon.com/Stanco-Non-Stick-Grease-Strainer-Black/dp/B000MVTIOQ
My Suggestions:
Response to your Questions:
Good luck! If I see a couple with a dog and a cloudburst I'll say hello!
If I can chime in on the cookware stuff. I agree with u/rusty075 about switching to aluminum as a good way to save weight.
Traildesigns has some pretty inexpensive aluminum cookware. Decent stuff for under thirty dollars.
Im playing around with the stanco grease pot that I read about on an ultralight forum. Its 9 dollars and seems to work just fine for boiling water.
Switching from aluminum might save you half a pound.
Re: Pots!
You should look into a "grease pot" from WalMart/Kmart. They're also offered on Amazon. They're super cheap ($10), super light (3.5oz w/ lid), and hold around 1.3 liters (just enough for 2 people if needed). You will need to buy some sort of "gripper" or pot lifter, but they're not expensive ($5-$15). If you wanted to save more weight/money, you could go without the pot gripper. There is also info on the internet (backpackinglight.com I think) on modifications you can do to the lid of the grease pot to shave weight further.
I was referring to a different grease pot of theirs:
http://www.amazon.com/Stanco-Non-Stick-Grease-Strainer-Black/dp/B000MVTIOQ/ref=sr_1_3?ie=UTF8&qid=1427807151&sr=8-3&keywords=imusa+grease+pot
The one you have may be thick enough to be food grade, it does still look like non-anodized, which would explain the staining.
preface: After reviewing the proposal below, I personally think you'd be better off merely leaving stuff behind (including the camera, if you still feel heavy), not buying any of the purchase recommendations (other than maybe Stanco pot and Frogg Toggs), and just slowly upgrading slots to whatever your dream best-in-slot items are one at a time, starting with sleeping bag/quilt, tent, backpack. There's no shame in a 15lb lightweight baseweight. It's not that terrible if you make sure to not overfill water, food, and worn clothing. :)
that drops you to 15lb for upwards of $40 usd + s/h... the main points to attack after that (other than in worn gear/carried clothing) are thus the 3.4lb tent, and 4.1lb backpack. But, as the backpack is new... Hard to tell man. $90 could get you a 3lb tent, $200 a 2lb tent. You could try to go tarp + bivy/bug net or poncho tarp+bivy/bug net to cut out something like 3 lbs, but even then you would be a lb heavy.
boom, you're at around 11 lbs baseweight without touching the 4.1lb backpack, the 1.5lb camera, or going no-stove. Keep in mind that you got forced out of camping by "extreme weather" once already, so going to something that might only be warm enough down to 40 degrees isn't necessarily smart. If you were the reason you left, I'd say that you are not properly wearing your layers. 46 ounces of sleeping bag, 28 ounces of softshell jacket, 12 ounces of merino tshirts, 8 ounces of rain jacket, and 25 ounces of shorts/pants should be enough thickness and weight to go far below the temperatures you're claiming you will see (one reason i suggested leaving so much of it behind and replacing the bag). Could you elaborate on the extreme weather temperature so we have a metric for what threshold of safety to put you at?
Get her a spider! It's much safer and more convenient, and there's no need to drain the pasta over the sink. You put a colander over a large mixing bowl and use the spider to scoop the noodles out of the water and into the colander. Deal with the water later when it's cool.
I wish my zucchini would grow, but, alas. Stupid end-rot.
Two great ways to make zuchini - both are better if you have a mandolin
Fried Zucchini Matchsticks
These are a little bit more like dumplings, but still good
The slotted metal spoon for frying is called a spider. The one in the video is not really that good for frying, in my opinion.
Something like this something with a woven wire scoop. You can also use metal utensils but nothing sharp on hard anodized aluminum, which I'm assuming you mean.
I use this for cold brew tea and coffee in a large pitcher
http://www.amazon.com/Nut-Milk-Bag-New-Improved/dp/B00158U8DU
It's just a giant ultra fine bag!
Maybe I don't have a strainer fine enough because those little protein clumps always go right through. The best thing I've found is a nut milk bag (used for making almond milk, etc.). It's a super fine mesh that will take out all of the solids from your cooking liquid.
http://www.amazon.com/K7-0SHH-5IIE-Premium-Food-Grade-Almond/dp/B00158U8DU
So I've been using this "recipe" for a while now to brew cold brew gifts for friends and fam!
I use 12oz of Counter Culture Big Trouble (i've experimented with MANY of their roasts for CB and have concluded that Big Trouble is the best and 46 is second)
I have it ground at my local shop at a courser than french press setting and go home immediately
At home weigh the exact g of coffee into large tupperware and add 4x that weight of water (I treat it like a pour over, with a short bloom period). Ensure all grounds are completely saturated and cover.
16 hours room temp.!
remove and filter through a nut milk bag first, and then through pour over filters
DONE
the best tupperware for this
the best coffee for this
nut milk bag
EDIT: and also don't forget that this is concentrate and need to be cut with water to taste (usually about 1:1)
Look up nut milk bags. https://www.amazon.com/K7-0SHH-5IIE-Premium-Food-Grade-Almond/dp/B00158U8DU
Edit: or hit up the local beer making supply store.
How about a nut bag and a pound of organic almonds to make her own almond milk?
http://www.amazon.com/Premium-Fine-Food-Grade-Almond/dp/B00158U8DU
Absolutely, but only if you always want to drink cold coffee (nothing wrong with that).
It's really easy. Depending on your tastes, you put 1:2 or 1:3 or 1:4 parts coffee to water and let it sit 12-24 hours then strain it. Add water or milk to it and drink it. Even easier if you use something like a nut milk bag to make a giant coffee "tea bag" to put down into the water, then you don't have to strain it. (this is what I do)
I started using a nut bag when making cauliflower mash and holy effing shit has it completely changed the game!
http://www.amazon.com/Premium-Fine-Food-Grade-Almond/dp/B00158U8DU
After boiling the cauliflower and processing it, I put it into the nut bag and squeeze it a bunch before returning it to the pot and following whatever recipe I'm using.
It's amazing.
1.) [Something that is grey.] (http://www.amazon.com/PetFusion-SmartGrip-Litter-Gray-Twist/dp/B007SQFRMU/ref=wl_it_dp_o_pC_nS_nC?ie=UTF8&colid=35DW5BWHD972D&coliid=I38TYTP3QO3VYV)
2.) [Something reminiscent of rain.] (http://www.amazon.com/Musical-MP-200-8-Inch-Rainmaker-Shaker/dp/B000CBURPU/ref=wl_it_dp_o_pC_nS_nC?ie=UTF8&colid=2YFT1UP19UC6T&coliid=I3SD8BF3BVM32F)
3.) [Something food related that is unusual.] (http://www.amazon.com/Nut-Milk-Bag-New-Improved/dp/B00158U8DU/ref=wl_it_dp_o_pC_nS_nC?ie=UTF8&colid=3S72V8PR4PYO1&coliid=I2AH1R1GSQ52JT)
4.) [Something on your list that is for someone other than yourself. Tell me who it's for and why. (Yes, pets count!)] (http://www.amazon.com/Mommys-Helper-Car-Seat-Shade/dp/B00125NZSQ/ref=wl_it_dp_o_pd_nS_nC?ie=UTF8&colid=2YFT1UP19UC6T&coliid=I1TXQG28XXBC0I) For my daughter, so she doesn't melt in the car.
5.) [A book I should read! I am an avid reader, so take your best shot and tell me why I need to read it!] (http://www.amazon.com/The-Girl-Left-Behind-ebook/dp/B00BSY6U6K/ref=wl_it_dp_o_pC_nS_nC?ie=UTF8&colid=ZJTYBG9S817P&coliid=I13JIN1E80H7G) Well, I haven't read this one yet, but I read her last book, Me Before You, a few months ago and LOVED it.
6.) [An item that is less than a dollar, including shipping... that is not jewelry, nail polish, and or hair related!] (http://www.amazon.com/Home/dp/B002G690B6/ref=wl_it_dp_o_pC_nS_nC?ie=UTF8&colid=LVUGPBTDLHFS&coliid=I2V27LFTC98I6K)
7.) [Something related to cats.] (http://www.amazon.com/Da-Bird-Cat-Toy-Store/dp/B000F9JJJE/ref=wl_it_dp_o_pd_nS_nC?ie=UTF8&colid=35DW5BWHD972D&coliid=I32WEJ4UV0RR)
8.) [Something that is not useful, but so beautiful you must have it.] (http://www.amazon.com/Japanese-Colorful-Rainbow-Synthetic-Costume/dp/B00966CIAO/ref=wl_it_dp_o_pC_S_nC?ie=UTF8&colid=VF4I3JWXLPHE&coliid=I3J6CNZ64SMNW5)
9.) [A movie everyone should watch at least once in their life. Why?]
(http://www.amazon.com/Pride-Prejudice-Restored-Edition-Colin/dp/B00364K6YW/ref=wl_it_dp_o_pC_nS_nC?ie=UTF8&colid=ZJTYBG9S817P&coliid=I2JAGS8BIXE6M9) Because Colin Firth.
10.) [Something that would be useful when the zombies attack. Explain.] (http://www.amazon.com/Lodge-L10SK3-12-Inch-Pre-Seasoned-Skillet/dp/B00006JSUB/ref=wl_it_dp_o_pC_nS_nC?ie=UTF8&colid=3S72V8PR4PYO1&coliid=I14266M2SVKSXM) Well, if I had to survive on my WL items alone, I would surely die. BUT, I figure this could at least come in handy to cook over open fires and it is the most weapon-like thing on my list.
11.) [Something that would have a profound impact on your life and help you to achieve your current goals.] (http://www.amazon.com/Reebok-Kettlebell-10-Pounds-Lime-Green/dp/B008R5HY54/ref=wl_it_dp_o_pC_S_nC?ie=UTF8&colid=39MD4F4AQ4MXM&coliid=I2XGPU1DE4SJW5&psc=1) Gotta get off the baby weight!
12.) [One of those pesky Add-On items.] (http://www.amazon.com/Kotobuki-Plastic-Egg-Mold-Fish/dp/B002TZ04JG/ref=wl_it_dp_o_pC_nS_nC?ie=UTF8&colid=LVUGPBTDLHFS&coliid=I2PHEI57WW2PIY)
13.) [The most expensive thing on your list. Your dream item. Why?] (http://www.amazon.com/Burley-Encore-2013-Bike-Trailer/dp/B00AVUHUEI/ref=wl_it_dp_o_pd_S_nC?ie=UTF8&colid=2YFT1UP19UC6T&coliid=I15NA2PJZUXBY4&psc=1) Maybe not my dream item, but the most expensive for sure. My husband and I love biking, but right now I'm sidelined since we have a 1 year old. This would let us all go!
14.) [Something bigger than a bread box.] (http://www.amazon.com/Tree-Condo-Furniture-Scratch-House/dp/B003XLIVZ4/ref=wl_it_dp_o_pd_nS_nC?ie=UTF8&colid=35DW5BWHD972D&coliid=I33YA670HLM8GP)
15.) [Something smaller than a golf ball.] (http://www.amazon.com/Yellow-Gold-Peridot-Dangle-Earrings/dp/B001H54K4O/ref=wl_it_dp_o_pC_nS_nC?ie=UTF8&colid=24R3M5GIPRKSE&coliid=I25YHXC05Q9VTT)
16.) [Something that smells wonderful.] (http://www.amazon.com/Tea-Forte-Loose-Leaf-Canister/dp/B006TZFOVU/ref=wl_it_dp_o_pC_nS_nC?ie=UTF8&colid=28JN11TB2DHP4&coliid=I3P4PBFBU5HWL6)
17.) [A (SFW) toy.] (http://www.amazon.com/Fisher-Little-People-Friends-Exclusive/dp/B008ZUGOAW/ref=wl_it_dp_o_pd_S_nC?ie=UTF8&colid=2YFT1UP19UC6T&coliid=IIMNWL3OA8808)
18.) [Something that would be helpful for going back to school.] (http://www.amazon.com/Wilton-2109-0309-Ultimate-Professional-Decorating/dp/B008GXE7P2/ref=wl_it_dp_o_pC_nS_nC?ie=UTF8&colid=29KYW0DBB8ME2&coliid=INH34JY48VH4F) If you are going to school to become a baker.
19.) [Something related to your current obsession, whatever that may be.] (http://www.amazon.com/Blendtec-40-620-54-Twister-Jar/dp/B0087Q1T1S/ref=wl_it_dp_o_pC_nS_nC?ie=UTF8&colid=29KYW0DBB8ME2&coliid=I394DCB2QJ4RAZ) Making my own sprouted nut butters!!
20.) [Something that is just so amazing and awe-inspiring that I simply must see it. Explain why it is so grand.]
(http://www.amazon.com/Fisher-Price-Little-People-Friends-Wheelies/dp/B00650F5SG/ref=wl_it_dp_o_pC_nS_nC?ie=UTF8&colid=2YFT1UP19UC6T&coliid=I3RS9BP4QYQAC7) Because tiny Super Friends in cars are awesome for raising a baby nerd. (On a related note, this question made me realize that I am boring and practical.)
fear cuts deeper than swords
Great list!
I'd just like to add a 2-oz measuring cup, since I tend to be more of a measurer than a speed-pourer, and this gives me more precision than a jigger.
Also, this is the fine-mesh strainer I use. (I swear I'm not an OXO salesman).
Unless you are looking to look fancy don't waste your money. Just go to amazon/walmart and find a shaker tin, all-in-one "jigger", and a pint glass from your local cabinet. That is really all you need to get started.
If you want to add on some stuff just to make life easier you can get a bar spoon, muddler, strainer, fine strainer (get rid of those ugly ice bits), and a citrus juicer.
Save your money for alcohol to make more drinks!
So, the easiest way to make it is to just dump some in some almost boiling water. The downside, obviously, is that you have loose leaves in the water, which is (IMO) not the most appealing tea.
If you want to keep the leaves out of the tea, then you need a strainer. I use (this one)[http://www.amazon.com/HIC-Snap-Mesh-Ball-Infuser/dp/B000I1ZZ24/] cause it's cheap, easy to get the tea into, and easy to clean.
A lot of people like the (pourover kine)[http://www.amazon.com/OXO-Good-Grips-3-Inch-Strainer/dp/B001713L84/], but I like my tea stronger than most, so I like to let the leaves spend more time in the hot water than the pourover method does, and the scissor type strainer I use gives me the most flexible.
If you've got it in a bag, this is the most thorough video I've seen on the subject.
https://www.youtube.com/watch?v=syAjix4QgNc
Otherwise, if you're using a strainer, all the same rules basically apply, you just use the strainer instead of the bag.
This would be much easier if you explain the motivation. It doesn't sound like you're looking for a cocktail, it sounds like you're look for a diet supplement because you or someone you know is suffering from an iron deficiency. To be honest, calling this a "cocktail challenge" kind of annoys me.
It would be much better to say, Hello, I am trying to meet an iron deficiency (and maybe other things?) in my diet by consuming blackstrap molasses and prune juice. Could you suggest a way to make this into a tasty drink? I am a vegan and I would like to be able to consume this with or without alcohol.
Anyway, sorry for the lecture. Here's how to do it.
You already know exactly what you want in the drink, more or less, so all we really need are some methods and proportions.
First, make spiced blackstrap molasses syrup. On the stovetop, combine
2 cups of blackstrap molasses
2 cups water
2 cinnamon sticks
2 star anise pods
5-8 cloves
5-8 allspice berries
Bring to a simmer on the stovetop, and then allow the mixture to rest until it comes to room temperature. Strain out the spices. The syrup will keep for at least one week, probably two.
I personally find prune juice to be digusting, especially in the volume that you would have to drink it to do you any good, but let's just assume for a moment that it isn't gross. I call this drink Michel Lotito, after the man who ate an entire airplane. (Plenty of iron in that!)
Michel Lotito
2 oz dark rum OR 2 oz strongly-brewed black tea.
2 oz Prune Juice
1 oz spiced blackstrap syrup
1 oz lemon juice
Shake all over ice and strain into a tumbler filled with ice.
Note: To be honest I'm not sure how sweet prune juice is, because I can't stand the stuff, but if it's as sweet as I fear, you might want to bump up the lemon to 2 oz.
I'm not sure how familiar you are with mixological technique, but I'm going to assume that you're not. I hope that doesn't come off as patronizing. Here are a couple of tips:
Good luck!
A fine mesh strainer is what you want
Get one of these: http://www.amazon.com/RSVP-Stoneware-Grease-Keeper-Black/dp/B0017U5DZY
Save your bacon fat and use it to cook with.
Per another Redditor's suggestion, I got one of these grease savers:
https://smile.amazon.com/RSVP-Stoneware-Grease-Keeper-Black/dp/B0017U5DZY/ref=sr_1_2?ie=UTF8&qid=1465509851&sr=8-2&keywords=grease+saver
I'm very happy with it. I got the white one and it looks nice on the counter. It includes a mesh filter that's easy to clean (I turn it up side down and run it under the faucet). The container is airtight, so the grease stays "good".
http://www.amazon.com/RSVP-Stoneware-Grease-Keeper-Black/dp/B0017U5DZY/ref=sr_1_1?ie=UTF8&qid=1464439021&sr=8-1&keywords=bacon+grease+catcher
I have one of these and it is amazing. I use it just like I would any other fat/oil to cook with. Instead of throwing down a pat of butter or a little oil to cook some meats in, throw in a spoonful of bacon grease.
I have one of these and I love it.
You may want to look into getting a grease keeper, or make one yourself.
I use an old pyrex measuring cup that has lost its markings to time, a small sieve, and a plastic wrap covering. This allows me to use just a small dab of superflavor when cooking my eggs (and other things!).
I use one of these.
RSVP Stoneware Grease Keeper - Black https://www.amazon.com/dp/B0017U5DZY/ref=cm_sw_r_cp_awd_WH12wbQMDQ4H2
It has a removable strainer inside.
A vegetable spiralizer to make zoodles!
http://www.amazon.com/Spiralizer-Tri-Blade-Vegetable-Strongest--Replacement/dp/B00GRIR87M/ref=sr_1_2?s=kitchen&ie=UTF8&qid=1414131384&sr=1-2&keywords=spiralizer
Bacon grease container!
http://www.amazon.com/RSVP-Stoneware-Grease-Keeper-Black/dp/B0017U5DZY/ref=sr_1_1?s=home-garden&ie=UTF8&qid=1414131409&sr=1-1&keywords=bacon+grease
bought one of these and keep it in the fridge. http://www.amazon.com/RSVP-Stoneware-Grease-Keeper-Black/dp/B0017U5DZY/ref=sr_1_1?ie=UTF8&qid=1377300436&sr=8-1&keywords=bacon+jar
I have one of these. Really great purchase because there is a strainer built in.
i have this
https://www.amazon.com/RSVP-Stoneware-6-Cup-Grease-Keeper/dp/B0017U5DZY
I just keep it on the counter in one of these.
I bought a Victorio food stainer to remove the seeds from my blackberry jam (the only kind of jam I make). I don't like the seeds, but I never liked the waste of fruit pulp of doing jelly.
I love the food strainer and am so happy I got it.
http://amzn.com/B001I7FP54
Only used it a few times so far, but seems to work really well.
Wow, very cool! Do you roll the boba by hand? I've heard it's really time-consuming.
Oh, I see. That makes sense. I guess you're obligated then to use loose-leaf tea, local milk, and local honey. Even so, you should be able to sell it at enough markup to net a profit. How much does each serving cost to make? $1?
Look into Boba Guys (SF). They use loose-leaf tea and local milk (almond is an option too) and sell at a higher price ($4.50 v $3.50). They market it as a premium version for boba enthusiasts and health-conscious consumers. Their site has pages explaining how they got started and why their prices are higher.
Personally, I prefer classic, stronger milk tea, but Boba Guys seems to be doing well in the city.
If you have 4 8-gal pots, then you can brew 8 gal and then pour it into another pot through a strainer like this or this. Or you can use 4 clothespins to attach cheesecloth over the second pot. I've tried fine-straining my milk tea to get rid of leaf dust (not that you'll have much) and it didn't do much, so I wouldn't bother.
Also, you could reinforce the healthy/hippie theme by using raw sugar. US brown sugar is just white sugar with molasses added back in. Demerara/turbinado have some molasses left in during processing. Muscovado has more. Black sugar (from Taiwan, Okinawa, or Korea) is considered a health food.
You're gonna need a can opener I chose thus one because my wife can only use one hand.
You can never go wrong with a good sturdy measuring cup
Measuring spoons are handy to have too.
And lastly since its your first place so you'll probably be eating a lot of pasta if money is tight so you'll need a good strainer
The problem I have with Fage is that now it seems to be either 0% fat or 2% fat.
Apparently there is nothing magical about greek yogurt, it's just yogurt that has been strained of the whey, and the whey contains a lot of carbs (and some protein).
So I am trying, like a lot of people, to make my own greek yogurt.
I purchased this 7" mesh strainer:
http://www.amazon.com/gp/product/B001VZERX4/ref=oh_details_o01_s01_i00
and
http://www.amazon.com/gp/product/B0042X9XAY/ref=oh_details_o01_s00_i00
(they arrived today)
and they each look like they can strain an entire 32 oz of regular full fat plain yogurt either by themselves, or lined with cheesecloth or a big coffee filter.
(I like yogurt, what can I say? When I went to college (early 80s), guys that liked yogurt were almost certainly gay, until one day when a very attractive biology professor started cranking out gallons every day and bringing it into the cafeteria.)
I would hate for low carb to mean I can't get my yogurt.
Also, spies like yogurt. http://www.hulu.com/watch/59977
More like 6 minutes cooking and 10 minutes natural pressure release.
A lot of the recipes use 1 to 1 on the water to rice ratio. My 1.5 to 1 may be working because I don't rinse or soak the rice first (time/lazy)
Details? Here's a few good pages that go in depth:
https://pipingpotcurry.com/recipe/basmati-rice-pip-pressure-cooker/
https://thisoldgal.com/pressure-cooker-perfectly-cooked-pot-in-pot-rice/
You can also use pot in pot to make small quantities of steal cut oats for breakfest (ready when you wake up).
I never use a pyrex dish for steaming vegies, not sure that would work instead I got the stainless steal mesh basket everyone gets and breaks the handles off of. https://www.amazon.com/dp/B007SPKR8U/
Good luck!
I bought a strainer for my presto electric kettle. I noticed on the reviews that users take the handles off to use it in a pressure cooker.
http://smile.amazon.com/gp/product/B007SPKR8U/ref=oh_aui_detailpage_o02_s00?ie=UTF8&psc=1
Strainers like these work really well, if you "jiggle" them a bit so the mini doesn't stay in contact with it at all times.
I think Reaper themselves says to use boiling, but hot enough for steam to form has been good enough in my experience. I'm new though--is there a reason you should avoid boiling?
I could really use these Cuisinart Strainers (from my Kitchen wishlist).
Thanks!
I cold brew gallons at a time with two pots, a strainer and a reusable nylon coffee filter for the final filter step.
Any grocery store has a cheap version of both for <$5 each. (Not sure why the amazon prices are this high, just the first images I could pull. )
Just pour from one pot to the other through the strainer 2-3 times, then set the coffee filter in the strainer for another 1-2 pours. Couldn't be simpler.
I use a small mesh strainer basket that I set over a small pot and push all my sauce/mash through. My results have been so spot-on with a store-bought quality I'm kind of blown away.
I bought these for general purpose straining and they have been perfect! I even use them for rinsing rise and other things like that. They work great for more than just sauce!
I find these to be simple and easy to control and low enough surface area with the small one:
Cuisinart CTG-00-3MS Set of 3 Fine Mesh Stainless Steel Strainers https://www.amazon.com/dp/B007TUQF9O/ref=cm_sw_r_cp_apa_fioNAbMMG7XVG
I just made the tonx recipe and it came out great. I used the suggested 140g per Litre. My normal brew is closer to 60g/L so I may try 120g next time. I got a bag for making nutjuice (god that sounds wrong) to make the filtering easier for next time. I'll report back next week when I try it out.
If you have a food processor or blender, you can blend the ginger finely and then strain the pulp through something like a cheesecloth, a cheese bag, or any other kind of fine straining bag (frankly, I would skip the cheesecloth because it is unwieldy and not reusable, unlike cheese bags). You can get a pretty respectable amount of juice from ginger. Note that if you don't have a food processor, you can just grate the ginger with a microplane.
It's a bag similar to a grain bag used for making nut milk. You place your nuts (usually almonds) in the bag and soak it in water. After the prescribed soaking period you lift the bag out and squeeze the water out. This leaches the nutrients from the nuts.
The bag I have is a bit stiffer than a grain bag, though.
http://www.amazon.com/Nut-Milk-Bag-Reusable-Strainer/dp/B00KI2RQHU/ref=sr_1_3?s=home-garden&amp;ie=UTF8&amp;qid=1412555156&amp;sr=1-3&amp;keywords=nut+milk+bag
I have to agree with this. Initially I used 1g to 10ml, but I realize it's too potent (getting about ±20mg/ml). Nowadays I use 1g to 20ml to reduce it to ±10mg/ml.
I use the following Instruction
The advantage of using jar to decarb is to minimize the smell. It barely smell like anything and should clear in 30 minutes or so if you open the windows.
I also use the following Nut Milk Bag to strain the liquid from the decarbed weed.
I usually use those droppers that pharmacy gives out to administer the dosage. I find that 50-70mg is best for a once-a-day smoker. Most of the time, I mix 5ml in 2-4oz of juice and barely taste anything.
Try a nut milk bag. They are reusable.
A reusable nut milk bag. I got a couple different sizes, they're great.
A nut milk bag works well...
https://www.amazon.com/Pro-Quality-Nut-Milk-Bag/dp/B00KLT6X9W
I followed this recipe to a T, except the temps. I've found decarbing is more effective and efficient @ 240F for 45 minutes, and kept the oil at 200F. This resulted in a very effective product.
For straining, I've found nut milk bags (like this) work much better and cleaner than cheese cloth.
haha yeah it does sound kinda dirty but I guess they are used for making almond milk or something like that. I use them to make cold brew coffee. Its pretty much just a large nylon tea bag.
&#x200B;
Here is one on amazon
https://www.amazon.com/Pro-Quality-Nut-Milk-Bag/dp/B00KLT6X9W
I'm a fan of nut bags & heat resistant gloves. Much easier to get the oils out, IMHO.
Get a nut-sack and use that. I start with a gallon of milk, then dump the yogurt (after fermenting) into this nut-sack (for straining nut milk) and leave it hanging for an hour over a bowl (less or more depending on how you want it). Dump it out, done.
I used a few things, settled on this as easiest https://www.amazon.com/Pro-Quality-Nut-Milk-Bag/dp/B00KLT6X9W/
When I cook oil, it's about 8 or 9 parts oil to 1 or 2 parts water-- never beyond 20% of the whole mass cooking. You just want a layer on top to take the crap you cook out away. And yes, you need to strain it well. I use this thing that I got almost exactly two years ago. One of the finer purchases I've made in life, too.
If I were you, I'd cook the whole mass up again and let it boil off some of the water, then strain it for reals and try to let it set again. The process is really easy, once you get it down. Just a little messy, but worth it-- and how else can you lick a nap off of your hands? :)
I've been unsatisfied using a French press to make cold brew (I filter it through a paper pourover filter after but it takes forever and clogs) so I bought a nut milk bag to try out. The question is, should I immerse the grounds directly in water and then filter through a nut milk bag after steeping, or should I pour the grounds in the nut milk bag and steep it inside the bag the whole time?
I've been doing some research and have seen people do both. My concern with steeping it inside the nut milk bag is if it kept the coffee from extracting properly for some reason.
I use this strainer instead of cheesecloth and love the results. I've used the same bag for several years now.
BTW - if you make cashew milk instead of almond milk, there is no straining as the cashews have no pulp.
I use a nut milk bag. It works wonders. I haven't had a "stuck" drip since I got one, and I can now use a variety of grind types (prior to getting the nut milk bag, I only used coarse grind, as other grinds were too prone to clogging the filter).
I wouldn't go back to just using the Toddy filter. This is the one I use: https://www.amazon.com/gp/aw/d/B00KLT6X9W/
Give it a shot.
These work really well, and leak like you wouldn't believe!
"Leave it to the Catholics to destroy existence."
Arguably, the greatest item on any of my wishlists is under 17 dollars. May I present to you....NESSIE!
https://www.amazon.com/dp/B0114WKC46/ref=wl_it_dp_o_pC_nS_ttl?_encoding=UTF8&amp;colid=2MWRUPPZ234WN&amp;coliid=I1DST7QCEPPMAS
https://www.amazon.com/gp/aw/d/B0114WKC46?
Ive never made tofu, so I'm not sure if this would work. But I use these for straining homemade yogurt all the time!
https://www.amazon.com/gp/aw/d/B01N2Q4O08/ref=mp_s_a_1_6?ie=UTF8&amp;qid=1526167474&amp;sr=8-6&amp;pi=AC_SX236_SY340_FMwebp_QL65&amp;keywords=reusable+cheesecloth
Here's what I do:
Get a Nylon Mesh Bag and a 1 gallon jug.
Fill 1/4 of the way with ground coffee (fresh ground is best)
Fill jug to the top with cold water
Sit on a counter for 12 hours
Remove bag
Enjoy cold brew and love life
If you have a food scale, you can make 4:1 concentrate and dilute it with boiling water 3:1, make 9:1 cold brew and drink it straight, or (this recipe) is about 12:1.
I would suggest a 75 micron strainer bag from Amazon such as:
https://www.amazon.com/dp/B071CDZPJW?ref=yo_pop_ma_swf
It is nylon and the material is very sturdy and to exact specifications. The only issue I had with it is the stitching started to come a little unraveled at the corners which was easily rectified with a little reinforcement hand stitching. I suppose this happens because of the rough handling of the bag through the kneading process. Although, besides the stitching the nylon is not going to overly stretch or tear itself.
Good luck.
I also just purchased and recieved a pack of 1 gallon "bubble bags". They are used to extract the essence from herbs and root powder. They are stacked 5 thick and go from 73microns to 200microns. I am looking to experiment with filtering a batch of micronized that I have that gives me bad GI issues. It seems my body does not like the root material at all. It is better with the knead method but it still persists although slightly in comparison. Basically, I am trying to salvage my micronized while seeing if I can produce a more thoughouly refined grog while maintaining the potency.
Hey there, I'm actually one of the people that's complained about kwk recently and think their bag may be the issue.
I followed the recommendations of a couple users and purchased one of these bags. I plan on testing it out tonight to see if it helps, I'll let you know how it works out.
Just to be certain, this is what you are talking about?
http://www.amazon.com/OXO-Grips-8-Inch-Double-Strainer/dp/B00004OCLX
Luckily I was able to recruit a neighbor to help me today but I need to solve that before the next solo brew.
http://www.amazon.com/OXO-Grips-8-Inch-Double-Strainer/dp/B00004OCLX
Gravy boat. The shape keeps the fat on top while allowing you to pour out the goodness from the bottom.
Similar, more modern one can be bought here
You do not have to spend a lot. Here are some suggestions that I choose to use even though I could spend the money on more expensive gear.
Pack: Rent until you decide you want to do this a lot and have already bought the rest of your gear
Tent: rent it for this trip if you don't already have one. If you do, it's best to split it up, poles and fly for you and tent for him or vice versa
Sleeping bags, bring them if you have them or rent
Stove: http://www.amazon.com/Ultralight-Backpacking-Canister-Ignition-silvery/dp/B00ENDRORM/ref=sr_1_1?ie=UTF8&amp;qid=1396264963&amp;sr=8-1&amp;keywords=backpacking+stove Works just as well as the 50$ one.
Water filter: http://www.amazon.com/Sawyer-Products-SP128-Filtration-System/dp/B00FA2RLX2/ref=sr_1_1?ie=UTF8&amp;qid=1396265006&amp;sr=8-1&amp;keywords=sawyer+mini+water+filter cheap, durable, no moving parts to worry about and it's super light
Pot: A lot of people use this, but it might be a bit small for you depending on what kind of food you're going to cook but this works well for freezer bag meals http://www.amazon.com/Stanco-Non-Stick-Grease-Strainer-Black/dp/B000MVTIOQ/ref=sr_1_1?ie=UTF8&amp;qid=1396265044&amp;sr=8-1&amp;keywords=grease+can
Long Johns and other clothing: Walmart usually has decent options. Make sure that they are synthetic. You may find that you already have a few things if you look through your clothes at home. Depending how thick they are your snowboarding socks might make good hiking socks or if you have long underwear for snowboarding they would be useful camping.
What are you doing for shoes? Do not waste money on boots if you don't already have them. 90% of trails can be done in good running shoes and 95% of trails can be done in light hiking shoes.
Misc hints: For water bottles just re-use old gatorade bottles, those nalgenes are super heavy. Think about getting two hiking poles instead of just walking stick but this is a preference thing. Avoid cotton at all costs and have fun!
This. And they're on Amazon for the lazy (cheaper at Kmart) https://www.amazon.com/Stanco-Non-Stick-Grease-Strainer-Black/dp/B000MVTIOQ/ref=sr_1_1?ie=UTF8&amp;qid=1467355948&amp;sr=8-1&amp;keywords=stanco+grease+pot
Pulled this off my budget backpacking bookmarks list.
https://www.amazon.com/Stanco-GS1200-Non-Stick-Grease-Strainer/dp/B000MVTIOQ
http://www.amazon.com/Stanco-Non-Stick-Grease-Strainer-Black/dp/B000MVTIOQ/ref=sr_1_1?ie=UTF8&amp;qid=1458849793&amp;sr=8-1&amp;keywords=grease+pot
That is one and is very similar!
I am talking about this one though: https://www.amazon.com/Stanco-Non-Stick-Grease-Strainer-Black/dp/B000MVTIOQ/ref=pd_bxgy_79_img_3?_encoding=UTF8&amp;pd_rd_i=B000MVTIOQ&amp;pd_rd_r=AT2XE5G2MTQ6PBXB800J&amp;pd_rd_w=BOOJu&amp;pd_rd_wg=cHF91&amp;psc=1&amp;refRID=AT2XE5G2MTQ6PBXB800J
Haven't personally tried it but I've heard good things about this: http://www.amazon.com/Stanco-Non-Stick-Grease-Strainer-Black/dp/B000MVTIOQ
Unstrained bacon fat has more protein in it and protein loves to stick. These are nice for straining bacon fat.
I have used an alcohol stove for about 6 years and I love it. I use mine with an MSR Titan Kettle but it is about $50. A cheap option would be to use a grease pot. Loads of people swear by them. You can buy one at Walmart too. The Toaks titanium pot is around $30. People also use this mug to cook water in and claim it will boil 2 cups. Here is another grease pot that people use.
You can make a windscreen for it out of lightweight aluminum flashing or heavy duty cooking foil.
All you need is one of these nifty do-hickeys.
I use one of these, and I've got the fry daddy.
Right. I make my own luck :)
Item
I've had no problems since I started to do the same thing, directly from the cold fridge (I don't let it sit out for more than a minute) into boiling water. I lower them into the water with a spider. When the eggs are cooked, I use the spider to pull out the eggs and place in a bowl filled to the brim with ice, which I then cover with water after putting all the eggs in. I then stir the ice bath around and let it sitfor 15 minutes.
Once upon a time, there was a girl who spent all her days in the kitchen. She once noticed a tiny little spider hanging out in the corner of the room. She called the spider Deputydawg and made it her pet. Every day for years, she found tiny little flies and fed the spider so it began to trust her.
One day, she was cooking and she looked up to see Deputydawg spinning a web. She smiled as he weaved up and down...but then...
He fell.
He fell into her cooking pot.
She gasped and panicked. Then suddenly she remembered that she had bought a tool perfect for such rescue operations and she managed to put little Deputydawg on the side to dry.
As he dried and thought of his ordeal, he noticed that the pot was boiling over and the sauce that the little girl was making had gone lumpy. He spun his little web onto a tool he knew would help her this time. and she picked it up and was able to stir the sauce back.
They had both had a lucky escape. Deputydawg was grateful that he hadn't fallen down that morning when pancakes and bacon were being fried.
The End.
do you have any Asian grocery stores? i always see them there. Also 5.99 on Amazon
Thank you for the contest lovie
I NID DIS strainer on my house stuff WL. THANKS FOR THE CONTEST!
Some people cold brew coffee in pitchers or jars with nut milk bags (like https://www.amazon.com/K7-0SHH-5IIE-Premium-Food-Grade-Almond/dp/B00158U8DU), which are basically just huge tea bags anyway. I usually use a big pitcher with a little tea filter insert thingy (this one: https://www.amazon.com/Takeya-Tea-Infuser-Size-Qt/dp/B00C75KOH0) and try to shake/invert the entire thing about halfway through since it seems to steep a lot better in some sections.
If you like cold coffee rather than hot, try making some cold brew. It's remarkably easy and does not have a lot of the bitter/sour flavor of hot coffee. I do it at home with a nut milk bag. Pour coffee grounds into the bag (like, bag half full-ish), submerge it in a pitcher of water, and leave it on the counter to soak for 12-24 hours, depending on how strong you want it. Then take out the bag and put the pitcher in the fridge. Voila! Cold brew ready to go for the week. Add milk/creamer/syrups to your taste. Once you're familiar with the flavor, you can try different kinds of beans and roasts. If you like Starbucks, you'll prefer a dark roast.
Almond milk is amazing—and healthier than regular milk, soy milk, and rice milk.
It's actually pretty easy (and cheaper) to make your own. You just combine some raw almond butter, water, and extra stuff to taste (stevia, honey, dates for sweetness, cinnamon, vanilla extract, cocoa powder, etc.) in the blender, blend until smooth, and you have almond milk almost from scratch! The amounts vary based on how much milk you want, the creaminess of it (i.e., less water for more creamy texture), the sweetness, etc.
Or you could do it the hard way and combine almonds, water, and extra stuff in the blender (you need a powerful blender though, in order to completely liquify the almonds). Then, you just strain this mix through a nut milk bag (e.g., this). Homemade, from-scratch almond milk! Without all of the preservatives and nasty stuff they put into it. Plus, it tastes better and is a lot cheaper.
Get a nut milk bag. You will laugh every time you say it and they work really well.
http://www.amazon.com/Nut-Milk-Bag-New-Improved/dp/B00158U8DU
get a tea strainer as such, http://www.amazon.com/OXO-Good-Grips-3-Inch-Strainer/dp/B001713L84/ref=sr_1_6/180-7891291-2265401?ie=UTF8&amp;qid=1463419291&amp;sr=8-6&amp;keywords=tea+strainer
Use a pestle to grind and push the coke through the strainer. I do this over a hot plate to help evaporate any moisture as well. Gets it just like what this guy posted. Good Luck!
I posted this in another thread recently; here's a pretty simple process that I use that works really well for me and my friends.
2a) Put your rock/powder in one of these over the hot plate.
2b) Use something like this or the back end of a spoon if your in a pinch (although I've found that a spoon doesn't work as well for bigger rocks) to crush up your rock/powder through the strainer onto your hot plate.
Perfect consistency every time.
http://www.amazon.com/OXO-Good-Grips-3-Inch-Strainer/dp/B001713L84/ref=sr_1_5?ie=UTF8&amp;qid=1373490385&amp;sr=8-5&amp;keywords=strainer
You can use something like this grease keeper and save it for future use. Most have a strainer built in, to keep food particles out of the saved grease.
If I'm not mistaken the values on MFP usually assume you're draining the leftover fat. So you don't have to "drink" the fat.
That being said, if you get yourself a grease keeper (I use this one) you can save that tasty bacon fat in the fridge and use it when you cook.
Then when you use a tablespoon of it when cooking you can log that into MFP.
I use one of these to keep my bacon grease in, stoneware wont crack like glass will. I put a piece of paper towel over the strainer to filter the grease a little better. It keeps right on the counter, of course bacon grease doesn't sit around too long in my kitchen.
https://www.amazon.com/RSVP-White-Stoneware-Grease-Keeper/dp/B0017TZSU0
http://www.amazon.com/dp/B0017U5DZY/ref=cm_sw_r_tw_awdm_0kLjtb0JWMYMR
We have one of these. It's damn handy.
Yes, strain first as the solid particles will be the first things to go rancid. Refrigerate for longest shelf life, or keep the grease next to your stove. That will have a shorter shelf life, but will not matter if you cook with it quite a bit! I bought this container: http://www.amazon.com/RSVP-Stoneware-Grease-Keeper-Black/dp/B0017U5DZY/ref=sr_1_1?ie=UTF8&amp;qid=1414336559&amp;sr=8-1&amp;keywords=grease+container
This would do the trick!
I save mine in one of these, mesh on top keeps all the bits out the yummy fat.
These are nice
https://www.amazon.com/gp/product/B0017U5DZY/?tag=baconmethod-20
You can force the finished sauce through a wire mesh strainer using a large metal spoon. This will leave behind all the larger fibers and seeds, but allow the microfibers through, which is what you want to emulsify the sauce. This procedure gets tedious if you're processing more than a couple quarts, though, and in that case, you want to use a food mill or better yet a food strainer.
This might alleviate the separation problem as well, though if your sauce is very watery and you're still getting separation, you may need to stabilize it with starch. A very small amount of cornstarch. (i.e., 1/8 tsp per quart) added before simmering won't appreciably thicken the sauce, but it will help emulsify it and prevent separation during storage.
Deluxe Food Strainer and Sauce Maker by VICTORIO VKP250 https://www.amazon.com/dp/B001I7FP54/ref=cm_sw_r_cp_api_i_LHPyDbWXFWFQD
I just found this The strainer holes used on the picture now is a little too big, but if you see this the top left one looks great to use instead.
I was thinking about getting one of these.
Freezer preserves. It may have a little too much sugar for "Eat Cheap and Healthy" reddit, but still tasty on biscuits. I follow the recipe on the Sur-Gel box. Get the pink box, it uses less sugar. And as an aside, this machine with a berry strainer will remove every single seed leaving nothing but berry pulp. It is a devil to clean though.
https://www.amazon.com/VICTORIO-VKP250-Strainer-Sauce-Maker/dp/B001I7FP54
https://www.amazon.com/VICTORIO-VKP250-1-Screen-Accessory-Strainer/dp/B002SVZITW/ref=sr_1_1?s=kitchen&amp;ie=UTF8&amp;qid=1467299416&amp;sr=1-1&amp;keywords=victorio+berry+strainer
Here?
https://www.amazon.com/Deluxe-Strainer-Sauce-VICTORIO-VKP250/dp/B001I7FP54/ref=mp_s_a_1_1?keywords=Deluxe+Food+Strainer+and+Sauce+Maker+by+VICTORIO+VKP250&amp;qid=1562351371&amp;s=gateway&amp;sr=8-1
Get one of these. I love the damn thing:
https://www.amazon.com/Deluxe-Strainer-Sauce-VICTORIO-VKP250/dp/B001I7FP54/
Doesn't serve QUITE the same niche. But it's instrumental for me in my hot sauce procedure.
My dude isn't old enough yet for purees, but friends of ours with old enough babies just puree up what they're having for dinner/lunch and feed it to their babies.
As for a device, I really like hand crank food mills because they're heavy duty and relatively quiet: http://smile.amazon.com/Victorio-VKP250-Strainer-Sauce-Maker/dp/B001I7FP54/ref=br_it_dp_o_nS_nC?ie=UTF8&amp;colid=3JZ708CWL55TX&amp;coliid=I1T5J3E6QEL3UN
If you want to go electric route, cuisinart makes a great, relatively quiet, mini food processor that does the trick pretty well.
Do not however, get this monstrosity: http://www.infantino.com/product.cfm?product_id=1445
It is the loudest thing. It seriously sounds like we're murdering a box of cats whenever it's running, and it will give you tinnitus if you don't wear earplugs while running it. We got it as a gift, and I really regret not keeping the receipt because GD it is loud.
Peels you'll want to remove for texture and gelling reasons (apple peels have a lot of pectin, and oddly sharp edges).
That said, I reccomend employing mechanical help with this. I like the squeezo for removing seeds and peels. I usually do a rough peel and chop/core, just to be tidy. But before this machine that was much more tedious and with it you can play it pretty fast and loose.
https://www.amazon.com/Deluxe-Strainer-Sauce-VICTORIO-VKP250/dp/B001I7FP54
Yes you can save your tomato seeds. Get them from fully ripe tomatoes. I usually scrape out the seeds and goop from several tomatoes into a small mesh strainer like this one. I then wash the seeds under cool water until most of the slimy stuff is gone and all you have left is clean seeds. Then I hang the strainer over a bowl and let them dry out like that for about a day. Don't let them dry out completely in the strainer or they will be stuck to it.
Once they are semi-dry, I dump them out into a glass bowl and let them dry for a couple more days. You'll have to break them apart a couple times while they are drying so they don't dry into one big lump. After they are separated and totally dry (4-5 days), I toss them into a zip-lock bag and store them in my garage until next year. Tomato seeds are one of the easiest seeds to save and re-start the next year. About 10 years ago I bought one tomato plant that turned out to be a huge producer and I've been saving seeds from it ever since. I've gotten over 10 years of tomatoes from one plant purchase.
Personally I use a fine metal strainer instead. It has no moving parts and can be used for well... strain things.
I too have a tiny rice cooker that would over boil. I'd get that starchy-water load all over my counter-top. I used to just rinse the rice a few times in the pot. If you have the time, you can let the rice soak for 15 min or so and then do a final rinse in a mesh strainer. Or you can just rinse the rice really well in the strainer before putting the rice in the cooker. I've tried using olive oil and that helps a little bit, but rinsing in the mesh strainer made the biggest difference for me.
You don't have to grind it, but it smokes better if you do!
If you don't have a grinder, you can use one of these which you can find near the cooking items in places like Walmart! You take a nugget of your bud, and rub it against the mesh. Do this over a Tupperware bowl or something, then pinch it into your bowl!
The hole on the side is called a carb, cover it with your finger and then light the bowl and start to slowly inhale. Then take your thumb off to clear the pipe. When it gets clogged, use a tooth pick or something to poke it!
If you take a toilet paper roll and stuff it full of dryer sheets, then tape some cloth or paper with holes poked through it you can exhale your hits into it, and it'll smell like laundry instead of weed! Make sure to use eye drops a few minutes before you go back home...And breath mints or gum!
I use a funnel and a typical kitchen strainer when transferring beer from the boil kettle to the fermenter.
This has two benefits, it removes the majority of the trub from the beer and it splashes and helps oxygenate the beer before primary fermentation.
You can use a strainer like this one to knock the fines out of a coarse grind. Just have to make sure the one you buy has a tight enough mesh.
Why do you need a sifter with moving parts? How about something like this: http://www.amazon.com/Chefn-Siftn-Sieve-Flour-Sifter/dp/B00DVGLJQO
I just use a fine sieve like this: http://www.amazon.com/Winco-MS3A-8D-Strainer-Double-Wooden/dp/B001VZERX4
Instead of spending all that time soaking your bud, why not try blanching instead? I've had really great results.
&nbsp;
First, drop your avb into a pot of boiling water for five minutes, making sure to completely submerge
Second, remove herb from water (I use a mesh strainer) and spread evenly on a baking pan and leave weed in oven to dry for 30 minutes at 235 degrees
Third, pull your bud out of the oven.
&nbsp;
If it's dry you're all set to start the canna butter fusion process!
Keep at it, OP! Brewing is an awesome hobby. You will certainly refine your techniques as you continue getting into it. One thing that you could definitely do differently is to use a strainer from the boil pot to the fermenter, using something silimar to this: http://www.amazon.com/Winco-MS3A-8D-Strainer-Double-Wooden/dp/B001VZERX4/ref=sr_1_4?s=kitchen&amp;ie=UTF8&amp;qid=1348453474&amp;sr=1-4 I find that this type of strainer is a big help since it has the little arms on it that allow it to sit right on top of the fermenter, it is stainless so you can sanitize the hell out of it, and the action of pouring it (from height if your aim is good) acts to aerate the wort and even cool it down a bit. Happy brewing!
I make my own... you can Google it if you want, but here is the gist of it:
I buy a 3lb bag of raw almonds at Costco for 11 bucks (YMMV). I take about of cup of almonds at a time and toss them in my blender (one of those fancy looking Ninjas FWIW), and pulse it 3-5 times. Then I sift the contents of the blender into my container with a fine meshed strainer. Put a piece of wax paper under the container to catch the bits that don't make it into the container (I end up with an extra 1/4 cup+ for each pound of almond flour I make...)
The bits that don't grind up fine enough to make it through the strainer get put in a separate container as almond "meal". My almond flour is not as fine as the stuff at the store, but I've done some baking with it and it works great and is a hell of a lot cheaper.
Here is the specific strainer I use to sift out the almond flour: http://www.amazon.com/gp/product/B001VZERX4/
Hope this helps.
EDIT: When I bought the strainer, it was 6-something dollars and shipped with Amazon Prime.
I've tried probably 6 or 8 strainers in various plastics and metals, and this is the best I've found: https://www.amazon.com/gp/aw/d/B001VZERX4
They even come out easily from kefir that's nearly cheese and the super thick coconut stuff I make.
this basket for steaming veggies, cooking eggs. Hubby was able to get the handles off for me. Use it almost daily.
The flavors in a pressure cooker (stovetop or electric) will infuse into each other whether they're in contact or liquid is touching them, so I wouldn't worry a lot about that if you really separate the bones/spices from the rest.
However, you could put the bones (are you making stock at the same time since using bones? or just making "broth" from meat?) and the star anise in a place where they could easily be fished out just in an open bowl/plate/etc above the liquid and ingredients below on some kind of riser/s, or tie them in cheesecloth or put them in something like a metal mesh basket right down in the liquid...this is the one I have, for example:
https://www.amazon.com/gp/product/B007SPKR8U/ref=oh_aui_search_detailpage?ie=UTF8&amp;psc=1
(we bent the handles to make that fit in a 6 qt Instant Pot, but they snapped off which is also fine).
Btw, when making stock rather than broth it's actually best not to have the liquid more than "barely covering" the bones and any aromatics used since it can get too diluted to gel well and won't be as concentrated if there's too much liquid. You may not want that if making broth though.
And most veggies would get badly overcooked and mushy if cooked for the same amount of time as "bones"/etc for stock, or various meats too; sometimes meats can be sliced really thin to help make them cook quicker, but might still be an issue.
(You might also want to ask this question in r/PressureCooking, or in r/instantpot especially if you have an electric pc.)
For the love of spaghetti i need strainers!
do you know how hard it is to hold a pot of spaghetti against a plate to drain out the water!!! its like im a fucking caveman!
Just shaking the grinds in a strainer.
Cuisinart Set of 3 Fine Mesh Stainless Steel Strainers, CTG-00-3MS https://www.amazon.com/dp/B007TUQF9O/ref=cm_sw_r_cp_apa_6TflzbDZSQEPG
I go lo-tech and use a strainer. Something like these: https://www.amazon.com/Cuisinart-Fine-Stainless-Steel-Strainers/dp/B007TUQF9O
Google organic poppy seeds and purchase. Eat a tagamet. Start with 8oz to 1lb of good seeds. Heat up about 20 oz of water to just below boiling and 16 oz of white grapefruit juice. Throw all that into a kitchen mixer (kitchenaid or similar) or use a hand mixer. None of this shake it in a bottle bullshit. Mix for 10-25 minutes. For those of you who are going to be doing this on a regular basis I recommend investing in a nut milk bag. It's reusable and works far better than poking holes into the top of a plastic cap or cheesecloth filtering. Place the bag over the mouth of a pitcher or large jar then empty the seed/liquid into the pitcher thru the bag to filter out the seeds. Let it sit and drip for a bit. Squeeze too. Drink. If your seeds are decent, repeat with the same seeds. If you have a nice yard and not terribly nosy neighbors and you happen to be making your tea in spring or fall, toss those seeds on the ground and maybe you'll have your own organic, local seeds in a few months.
Dudes. I make it by the GALLON. Lasts me about a week. I use a nut milk bag, then filter it through a 5 micron filter. But you can skip the latter if you carefully decant into a 2nd container, and don't mind a small amount of sediment.
For those wondering why, it was initially for convenience and to reclaim counter space but the final brew is less acidic, which is nice.
Dude... cold brew is the best and it’s a huge money saver.
I bought a Nut Milk bag $8
To steep the ground beans in and then bought a big jug with a spout $25
1 lbs. of ground coffee yields 1 gallon of concentrate. I pull the bag out to drain what’s held in the bag then add 1 gallon of water to give me 2 gallons of cold brew.
Beans $9 (I buy the local good stuff) it gives me about $.70 per 20oz cold brewed coffee.
SUPER WORTH IT!!
could also try a nut milk bag like this
http://www.amazon.com/Nut-Milk-Bag-Reusable-Strainer/dp/B00KI2RQHU/ref=pd_bxgy_k_img_z
I just ordered one of these reusable bags for making cold brew in a pitcher. My normal method is a bunch of grounds steeping in a large pitcher and then filtering the hell out of them, which is a massive pain. I'm hoping this thing will save me the filtering step and it's only $8 so I think it is worth the gamble.
LOL. I live in a relatively inexpensive area of the country. My kitchen is a decent size. Having nice things doesn't a better cook make though. I just really like that I have pretty much every tool that a recipe could call for. I also wanted to buy everything I wanted for the kitchen so that if we have kids and went down to one income, I would already have everything I wanted.
Here's a link to a jelly bag. I guess it's called nut milk bag. It's just a fine mesh bag for straining things. If you ever wanted a salad shooter and you're in the US, they have them all of the time at the thrift stores.
https://www.amazon.com/Pro-Quality-Nut-Milk-Bag/dp/B00KLT6X9W/
https://www.amazon.com/Presto-02910-Shooter-Electric-Shredder/dp/B00006IV0R
I am very much a "Buy It For Life" person, which is why I have literally thousands of dollars of All-Clad stainless steel and LeCreuset cast iron. I very much expect them to last forever. I try to buy things that I think will last for a very long time. I also go by America's Test Kitchen recommendations ("equipment reviews"), and they've only let me down a few times. Sometimes, the things I buy are the most expensive (e.g. the $400 Breville food processor or my $600 stand mixer), but I love my Corelle dishes that are sold at Walmart.
This is the basic recipe I use, but I'll use a nut milk bag
and up it to a Gallon and up the ratio of beans and brew it in a plastic gallon pitcher for 24 hours room temp.
Then just lift out the nut milk bag and give it a squeeze, and your concentrate is ready to go.
It stores in the fridge really well, and my wife and I will make the gallon last about a week.
I like to do half and half decaf which lets us drink more without the jitters :)
https://www.amazon.com/Pro-Quality-Nut-Milk-Bag/dp/B00KLT6X9W
It's 200 microns supposedly. Is more better?
I use a nut milk bag -- something like this:
https://www.amazon.com/Pro-Quality-Nut-Milk-Bag/dp/B00KLT6X9W/
Get something like this https://www.amazon.com/Pro-Quality-Nut-Milk-Bag/dp/B00KLT6X9W
Nut milk bags from amazon or local store. Filter it down to a very clear consistency.
Pro Quality Nut Milk Bag
If you wanna make edibles I'd recommend one of these
This works even better : https://www.amazon.com/Pro-Quality-Nut-Milk-Bag/dp/B00KLT6X9W
https://www.amazon.com/Pro-Quality-Nut-Milk-Bag/dp/B00KLT6X9W/ref=sr_1_1?s=home-garden&amp;ie=UTF8&amp;qid=1492056058&amp;sr=1-1&amp;keywords=strainer+bag#CustomerImages
do you think this would be good enough?
Just started juicing. I use the bag to strain the juice after blending. Its awsome, and its 9 bucks.
Pro Quality Nut Milk Bag - Big 12"X12" Commercial Grade
https://www.amazon.com/dp/B00KLT6X9W/ref=cm_sw_r_cp_api_mmp8ybA4YQ48R
If you want to make a lot of cold brew (I was making gallon batches at one point), nut milk bags let you skip all the filtering: https://www.amazon.com/Pro-Quality-Nut-Milk-Bag/dp/B00KLT6X9W
There was still some fine sediment, but I was content to let that settle and then pour carefully.
I actually make my own and it's a lot cheaper.
Tastes way better, you can control the amount and type of sugar you add, and you can go from 35 calorie cups to 120 calorie cups based on your almond to water ratio and what you want.
I go for a higher fat content myself, 4 oz almonds to 7-8 cups of water.
first result on google.
$30 Canadian.
$10 American
https://www.amazon.com/Pro-Quality-Nut-Milk-Bag/dp/B00KLT6X9W
Try one of these!
I got this one 2.5 years ago, run it in the dishwasher all the time and don’t spend any time hand-drying it or otherwise babying it, and it’s still spotless. Made from heavy-gauge steel.
https://smile.amazon.com/gp/product/B00O97D0DO/
Some of the Amazon reviews are not so complimentar, it’s possible quality has gone downhil.
Nessie! :)
Coming in a just a few cents under $5!
Looks like the Colander verison of the Nessie laddle named after the Loch Ness monster.
Pretty sweet tho.
perpetually angst-ridden ass fucks
Complete set of scrubs
Three chocolate oranges
Bean bag
People seem to love the Nessie Ladle
There's also a colander spoon thing
And I don't think we've met - hi, I'm 82364!
Cheesecloth
www.amazon.com/dp/B07C71TTXM?ref=yo_pop_ma_swf
Or Nut Bag
www.amazon.com/dp/B01N2Q4O08?ref=yo_pop_ma_swf
2 Pack - 80 Micron Nut Milk Bag - 12"X12" - Multiple Usage Reusable Food Strainer, Cold Brew Coffee Bag Cheesecloth, Food Grade Nylon Mesh, Filter For Almond/Soy Milk, Fruit Juice, Coffee and Tea https://www.amazon.com/dp/B01N2Q4O08/ref=cm_sw_r_cp_api_.KyUBb8R8EJQC
Anchor Hocking Montana Glass Jar with Fresh Sealed Lid, Brushed Metal, 1.5 Gallon https://www.amazon.com/dp/B000RMO41M/ref=cm_sw_r_cp_api_PLyUBbMJ17KBV
Yeah for a funnel, it's not a big deal. The worry is leaching metals into the drink (which can kill the bacteria or be toxic for heavy metals). You can get a stainless steel funnel on Amazon.
Then a nut milk bag covering the funnel works well. E.g. https://www.amazon.com/Pack-Multiple-Reusable-Strainer-Cheesecloth/dp/B01N2Q4O08
The filter bag is like this one? Nylon material?
Something like this https://www.amazon.com/Pinfox-Micron-Straining-Strainer-Brewing/dp/B071CDZPJW/ref=mp_s_a_1_6?keywords=nut+milk+bag+micron&amp;qid=1556673098&amp;s=gateway&amp;sr=8-6
Or some people just use nylon pantyhose.
A fine mesh strainer is the key. You can pick em up fairly easy. I have a fine and a course one and use them surprisingly often. I wouldn't mess with cloth/fabrics/ and especially coffee filters.. They are just way too fine. Cheesecloth is way too course and bundles would end up taking forever. I think this one is similar to the one I use for fine liquids..
http://www.amazon.com/Winco-MS3A-8S-Strainer-Single-Diameter/dp/B001VZ5E40/ref=sr_1_2?ie=UTF8&amp;qid=1422078777&amp;sr=8-2&amp;keywords=wire+mesh+strainer