Best contact cements according to redditors
We found 64 Reddit comments discussing the best contact cements. We ranked the 29 resulting products by number of redditors who mentioned them. Here are the top 20.
We found 64 Reddit comments discussing the best contact cements. We ranked the 29 resulting products by number of redditors who mentioned them. Here are the top 20.

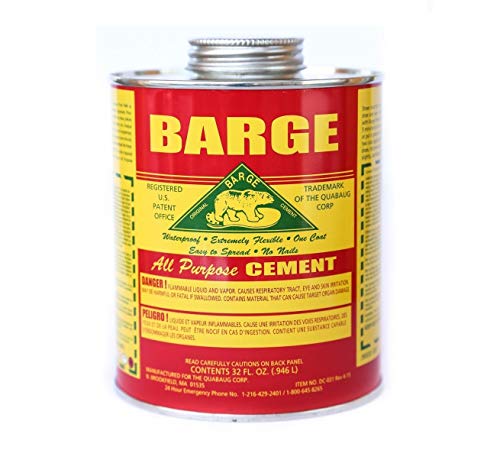


Barge contact cement. Pretty cheap.
[Here](Barge All Purpose Cement Quart https://www.amazon.com/dp/B0032YYOFS/ref=cm_sw_r_other_apa_Iqa1xbFCR6FJ6)
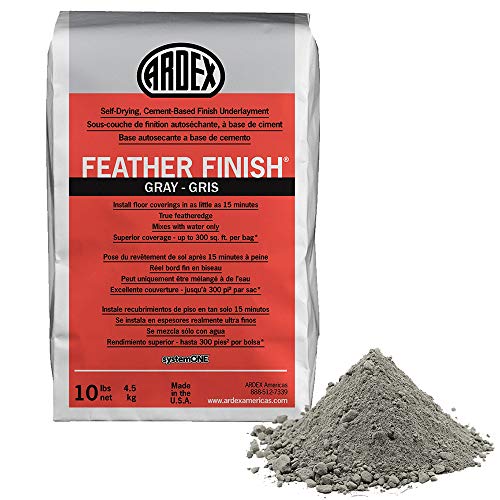
For photography, why not use a feather coat concrete product on plywood or drywall? It'll look much more like the concrete you Invision. Cement board doesn't have the same look
Ardex- Feather Finish 10 lbs https://www.amazon.com/dp/B004GUAIT8/ref=cm_sw_r_cp_api_rZTrybQ5PA6VA
Do a google search and you'll see the different finishes and what you'll need to do. It is durable. Commonly used to make concrete counters over laminate.
You can use white glue to hold down clear parts and photoetched parts as well.
The best glue for clear parts is one created to glue down watch crystals. It a=only takes a tiny amount and when it dries, it produces a strong, clear and slightly flexible joint:
G&S Hypo Watch Crystal Cement One tube will last a long time.
Testors makes a clear cement as well, but it's basically white glue: [Clear Parts Cement and Window Maker] (https://www.scalehobbyist.com/catagories/Paint_and_Construction/clear-parts-cement-and-window-maker/TES00003515/product.php?s=4&t=2&u=0)
For ABS or styrene plastic, use a glue that melts and bonds the parts together - you'll get a stronger join that way. Superglue isn't the ideal glue for models, since it's just a mechanical join with poor strength in a direction parallel to the joint. I only use it in very limited situations.
You can use the ancient standard Testors plastic cement or a liquid glue like the Testors liquid cement in the black bottle
My favorite glue though, is Tamiya Extra Thin.
In a pinch, you can also use Acetone as a styrene or ABS glue, but it will mar any plastic surface it touches, so it has to be used carefully. It will frost clear parts as well.
Finally, one "glue" that I recently discovered is SLA printer resin. It's fairly thick when liquid, easy to apply and hardens in seconds when exposed to UV light. I find the connection almost as strong as superglue - at least for model use.
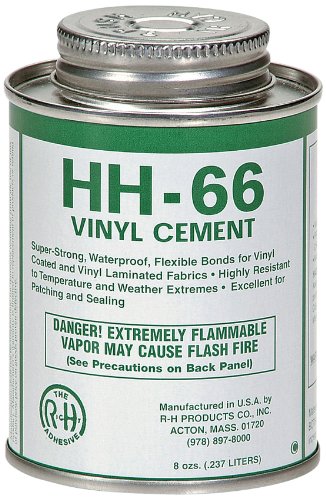
There are glues out there that are specifically made for patching vinyl
https://www.amazon.com/RH-Adhesives-Industrial-Strength-Cement/dp/B00BUB5JOA/ref=sr_1_3?keywords=vinyl+glue+clear&qid=1558944150&s=gateway&sr=8-3
....as a sample
Here is a schematic of the forge. I didn't include anything for attaching the burner, because it was a bit of a hack job using scraps. Feel free to improvise that part.
Give me a few and I'll add a parts list to this comment.Edit:
Parts List:
-2 sheets of 12"x24" 22 ga. steel
-Refractory mortar for fireplace/furnace (can always buy a bigger bucket)
-1 inch thick ceramic blanket 8 PCF x 1 x 24 x 60 HPS blanket (5 ft cut) is what I got. It was enough for several projects.
-High temp spray paint
Materials I had to buy:
Cost me about $50, plus some materials I had lying around. ($60 after that second fan)
Hope this post is informative enough guide anyone else interested in making one of similar design.
Video of it in action
Edit: Also, huge thank you to rcombs and derinerkan of #XKCD on Foonetic IRC network for helping me troubleshoot the fan issue when I set it on fire, and helping me figure out what I did wrong.
I found this supposedly food safe glue. However I dont think it will ever be the same. Personally Id glue it with something stronger and maybe turn it into a planter. Maybe you could find a flower your grandmother liked and you could plant one in there. Basically my reasoning is it was dropped once so I dont think it would withstand the heating and cooling that happens from regular use. So I would personally glue it up and just keep it as is.
https://www.amazon.com/gp/aw/d/B000MVTINW/ref=ox_sc_act_image_1?smid=ATVPDKIKX0DER&psc=1
Glass cement
The ATCO pot costs more than I wanted to pay, but it works great for me and don't regret the purchase at all. I find I buy a new brush head just about as I run out of the contact cement. I clean the pot out (mostly) easily, add the new contact cement, change the brush, and I'm good until the glue runs out.
Shoe goo is OK, but Barge is the real deal.
http://www.amazon.com/Elmers-E1012-China-Cement-1-Ounce/dp/B000MVTINW/ref=sr_1_1?ie=UTF8&qid=1371406953&sr=8-1&keywords=elmers+glass+ceramic+glue
Non-toxic, works great. :) I used it on a glazed yixing I was gifted (I know folks who sell such things and it regrettably arrived chipped).
I use Acrylic Solvent, it welds it together perfectly.
https://www.amazon.com/gp/product/B0096TWKCW/ref=oh_aui_detailpage_o05_s00?ie=UTF8&psc=1
This is the product I like to use to demonstrate how shit Amazon.ca is.. It's like $40 locally, and $28 U.S. On Amazon.com. Then factor in shipping.
Note that both listings are direct from the manufacturer.
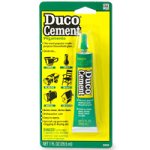
https://www.amazon.com/Duco-Cement-Multi-Purpose-Household-Glue/dp/B0000A605H
Duco cement is the traditional way to seal your reeds. Some reedmakers put duco cement on after the wires are on, wrap their reeds with nylon thread, and then put on two more coats of duco. Your reeds will never leak and your tube will be strong!
I used to work in a toilet factory and I had to wear steel toe boots. I worked 12 hour shifts so good boots were what you needed. I would spend over $200 for them.
I was very hard on them and they were always splitting. I asked one of the maintenance fellas what they used and he gave me a can of Barge rubber cement. This stuff would last a good couple of months of the hard abuse. So I can only imagine that this stuff will take of your shoe problem for good.
https://www.amazon.com/Barge-All-purpose-Cement-Leather-Waterproof/dp/B00ANV704U
Sakrete has a buff powdered pigment that you can add to gray concrete, quikrete has colorant to add to gray concrete as well. Sakrete colorant Quikrete colorant Buff is a Sandy beige color.
Barge All Purpose Cement
Locate a local sign shop, ask if they have a routing table. This will provide clean cuts, and most can accommodate typical straight cuts or shapes easily with their CAD system. If the material is thin enough, scoring and snapping should work.
Also, I've recommend looking into the following weld-on product (https://www.amazon.com/Weld-Acrylic-Adhesive-Applicator-Bottle/dp/B0096TWKCW). It can "weld" polycarb as well, just research what "weight" glue you want and insure that it adheres to whatever design aspect of your project (aka weld-on is not intended for aquariums...etc)
As for lubrication, the design intention is more important here as to what would work best....
I've never had a project like that but I see this Barge cement recommended for just this purpose everytime I see this problem come up. Its pretty much a permanent waterproof adhesive.
Safety first. No cosplay project is worth serious injury, death, or shortening your lifespan. The safer you are, the longer you'll live, the more time you'll have to make cool nerdy Halo shit. Complacency kills.
All the armor/prop building tutorials you'll ever need. For now, just look over the pepakura and foam tutorials in section 2. Or read them all. I'm not your boss. Plus, everything you learn here builds a foundation towards a better-looking build and a more enjoyable experience. Pepakura stuff is just more pertinent to what I'm discussing right now.
Amazon Shopping List:^*
^* ^(These two items will probably be the least familiar to most people, but they're the most important. Of course, there are other tools that come into play, but you'll figure that out once you read/watch the tutorials.)
Downloads and Tutorials:
Free Pepakura Designer v4.1.6 download - You'll be using this program a lot. It's very easy to use, especially if you know anything about 3D modelling, which I don't. Plus, it's free. And if it's free, it's for me, unless it's an STD.
Every Halo-related pepakura file in existence so far. Most of these are taken straight from the game. Some were painstakingly modeled from scratch by talented 3D artists, with only high-res reference photos for guidance. Definitely the most detailed way to build your projects. There are files intended for foam, but most are made for paper. Be sure to make the distinction. Even though the files designed for paper can be used to make foam armor (with some modifications, of course), a lot of the templates you print will go to waste. If it's unfolded for paper, the intention is to line it with fiberglass.
The fiberglass and bondo method is the most detailed and the most durable, but it's also the most expensive and the most time-consuming. I would not recommend this for a beginner on a budget, but if you have the money to spend, it can be a great lesson in patience. I made an ODST helmet using this method for my first attempt years ago. It's not a good-looking helmet, but I still have it. It's currently hanging in my workshop to serve as a reminder of the lessons I learned along the way and that I have the ability to jump straight into a project without any prior experience and finish with a prop that's... well, at least it's recognizable. Maybe one day, I'll gift it to someone who can bring it to its full potential.
This Instructables tutorial is probably the easiest one to follow that I know of. This is a great place to start if you've never touched pepakura, fiberglass, or even cardstock. I wish this tutorial existed when I built my first attempt 9 or 10 years ago.
Here's an ODST helmet you can make out of foam - cheap and easy, but not as detailed. These usually come out looking more angular than curved, so you'll have to get creative to solve that issue.
Bonus cardboard tutorial - fastest, easiest, cheapest, and quite honestly the best tutorial I have ever seen. This kid is a legend.
The best advice I can give to someone starting out is:
I hope this helps get you started, and if you decide to join the 405th, send a message to SGT Razor. I'll gladly watch your career with great interest.
Barge cement is good for flexibility.
I'm going to agree with getting a new strap, but check out the kits they make on Fabnik. I bought the Stitch kit and it's really very nice. And you get to make it yourself, so it's even more of a sense of accomplishment.
I've got a Quiksilver 5/4/3. I bought it because I had a buddy that used to work for DC and they're the same company, so I got 50% off.
Quik only had 2 options in my size in stock at the time. The one I got, or a super-fancy chest-zip 3/2 that was like $400. I opted for the 5/4/3 that was $200 before discount.
This winter will be my 3rd year on the suit. I suspect I'll get another 2-3 seasons out of it based on it's current condition. I rinse it with fresh water after every use, never let it dry in the sun (UV kills neoprene) and every month or so I "defunkify" it.
So far the only problem I've had with it were two tears where the chest section meets the sides of the chest. I think it was from the way I was putting the suit on or taking it off. I had my wife do a nice cross-stitch with dental floss, and I put some wetsuit glue on top and it's been good as new since. I've also been very conscious of how I pull up the legs and roll it off so I don't re-tear those spots.
EDIT: I usually surf 2-3 times a week so you have an idea of how many outings are on the suit.
I'm looking into repairing a cracked 51, would this acrylic adhesive help me seal the cracks?
That does suck. Looks like they just skimcoated the floor with some concrete something, probably something not suitable for a surface to be walked on. This is probably an acceptable thing to do on a properly prepared surface that won't get much traffic, especially a small one, but it was irresponsible to do it to a whole house. There's nothing bonding that top layer to what's underneath it and with a layer that thin, it's definitely to going to continue to crack and chip off.
You can patch it if you'd like, and try your best to paint the patch, but that's not a long term solution. You can't stain it because different types of concrete won't match even if you get the same stain. Also, I can't tell from the picture, but properly stained concrete usually has a sealant and a wax on top of that as well.
Looks like the proper thing would be to remove all the flooring and get to your subfloor again. Sometimes you can stain the subfloor itself with proper preparation but there's no way to tell without getting down there. Once you get to a bare floor though, you could have some leveler poured if you need it and then have the entire floor coated with a concrete micro-topping, which will actually bind to the concrete subfloor, be durable enough to walk on and give you a clean surface to stain. Unfortunately, none of this is probably good news.
Edit: This or something very close to it is most likely what's spread over that linoleum. http://www.amazon.com/Ardex-Ardex-Feather-Finish/dp/B004GUAIT8
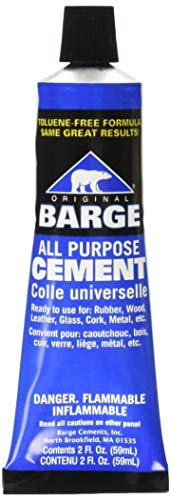
I got you fam. Tandy won’t ship it due to the UPS ground cost. (Federal law barge cement can’t ship air) but amazon.com will ship it though!
https://amzn.to/2B6y2vk - Barge Glue. It also comes in larger containers. Hopefully, you won't need that.
You will need a way of clamping or a least putting pressure on the sole.
If you need the pieces to stay together while you stitch try contact cement glue. Use a stitching pony and use a skiver tool to get the thickness down where the pieces overlap. Practice on some scrap until you are comfortable to stitch the real thing. You got this!
Barge All-purpose Cement Rubber Leather Shoe Waterproof Glue 1 Qt (O.946 L) https://www.amazon.com/dp/B00ANV704U/ref=cm_sw_r_cp_api_i_i3JSCb1M69AJN
Maybe this stuff ?
These are the cements that I have at hand. They are premixed and rather dense. My plan is essentially to slather it on there until it is well coated. I'm going to further rigidize the wool before doing so, so that it does not collapse down. The blanket is very thick, so I did not need to glue it to the forge body.
https://smile.amazon.com/gp/product/B06X9YRJSX/ref=ppx_yo_dt_b_asin_title_o07_s00?ie=UTF8&psc=1
https://smile.amazon.com/gp/product/B00ACIWN9Q/ref=ppx_yo_dt_b_asin_title_o06_s00?ie=UTF8&psc=1
Barge will do it. I can't find the original tutorial that taught me it, but it said put some on the patch, then on jacket (which shouldn't be different than panniers), wait a sec, then press together. Here's some one else who used it successfully.
I trust my printing setup so I am ok with very long print times. and gluing smaller parts will overall take longer and PLA and acetone form a very weak bond so do not use it, a much better option is this - https://www.amazon.com/gp/product/B0096TWKCW/ref=oh_aui_detailpage_o00_s00?ie=UTF8&psc=1
There are plenty of PETG solvents. Try http://www.amazon.com/Weld-On-Acrylic-Adhesive-Applicator-Bottle/dp/B0096TWKCW
Or you can use a mixture of 600mL nitromethane to 4L methylene chloride.
Nothing works real well long term that I have found. If you hand wash and are careful this product might help you get some more use out of your mug.
https://www.amazon.com/Elmers-E1012-China-Cement-1-Ounce/product-reviews/B000MVTINW
Barge All Purpose Cement Quart (O22721) https://www.amazon.com/dp/B0032YYOFS/ref=cm_sw_r_cp_api_i_fTViDbKTBKZ4Y
This. They use it to make and repair shoes. Make sure to put it on both sides and let it sit to get tacky. Once you stick them together they won’t come apart, so be careful.
Most superglues and epoxies aren’t certified food safe and given how such a teapot would be used, eg filled to the brim, overflowing, close to 100 celsius water depending on which tea you’re brewing. For that reason, I wouldn’t trust them to be safe.
There is Elmer’s Glue but I can’t say for how good it is. Results may vary.
However, you could always discard it as a useable teapot, and plant a cute succulent inside.
Another use would be to use it as an fair pot instead for excess tea during your brewing sessions.
It is way better than any thing I’ve used so far!
Amazon link for Barge
Eh, but I haven’t really found anything else that will top it.
Sorry for the late reply!
Leathercrafting is easier to get into than it looks. It's just like taking pieces of paper and stapling them together, except you are using leather and stitches.
I think the best way to start out is to make something simple and cut out as many unnecessary steps as possible (for example buy pre-dyed leather rather than trying to dye it yourself). Later on, you can start identifying features you want to add (e.g. rounded corners, beveled & burnished edges, etc.) and purchase more equipment as needed.
If you wanted to create a simple cardholder that looks like this, here's way you could do that:
That's it! Optionally you can look into beveling and burnishing your item.
If you are in the US, I'd recommend picking up a small panel of leather from Rocky Mountain Leather Supply. You can just get a sqft (9" x 16"). I used 3 oz (1.2 mm) thick Buttero leather in the cardholder above.
Then you need some thread and needles. If you want a more rugged, traditional look, Ritza "tiger" thread works great. For small goods, I'd use the thinnest available (0.6 mm for small spools). Size 4 John James needles are perfect for this. An alternative to the "tiger" thread is waxed linen thread (my preference).
Good pricking irons can be expensive, but you can probably start out with some cheap ones on Amazon. There are a few common options. These include diamond-shaped ones and french styled ones.
As you get better, you will want to start experimenting with rounded corners, burnishing edges, etc. There are a lot of great resources on this subreddit. If you have any particular questions about what I do or what tools I use, feel free to message me or email me at [email protected]!
P.S. Armitage Leather has a great tutorial for making wallets.
I'm still working on it. Here's the product I plan on using, it contains THF, MEK, and cyclohexanone:
https://www.amazon.com/Weldon-10097-Industrial-Medium-Bodied-Fast-Setting/dp/B00K2TOZ7I
Obviously, don't be stupid - use it outdoors and use PPE etc.
I've used this stuff for patches on my soccer jerseys that show signs of detaching. It's waterproof, too. Although it may be a little difficult to spread around on the thin lettering.
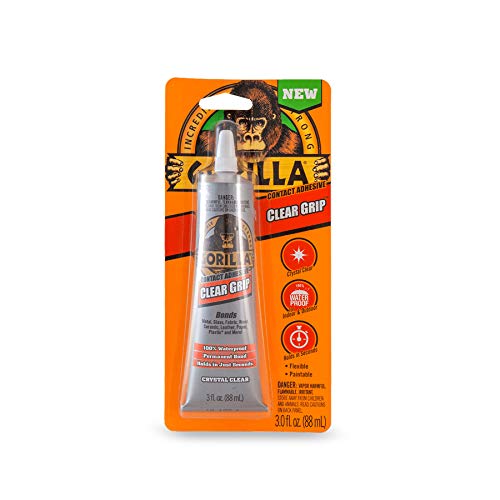
Gorilla Clear Grip Contact Adhesive, Waterproof, 3 ounce, Clear, (Pack of 1) https://www.amazon.com/dp/B06WGSRM4Z/ref=cm_sw_r_cp_apa_i_pGctDbKF5G95G
This comes in premixed sticks that you can work into the larger gaps:
https://www.amazon.com/Rutland-610-Refractory-Cement-64/dp/B008BM8TUC
LOL I thoguht this was a joke reply, but I googled it anyway.
http://www.amazon.com/Weld-On-Acrylic-Adhesive-Applicator-Bottle/dp/B0096TWKCW
Is this basically super glue? There are plenty of glues that will glue what I need glued, but I'm mostly concerned with the ash left afterward. Do you know if this burns away clean?
It's an odd property for someone needing glue to ask for so I can't imagine any glue being made with this property intentionally.
I heard this stuff works like acetone for PETG so maybe try it.
https://www.amazon.com/Acrylic-Plastic-Cement-Applicator-Bottle/dp/B0096T6OQK
In your FAK/ repair kit throw in a couple large pieces of tenacious tape, some duct or gaffer tape, small tube of adhesives (shoe goo and seam grip ), Leukotape, tiny spool of heavy thread, and 3 large needles. UL gear is great and you definitely dont need some ultra strong 1000D codura nylon backpack that weighs 9 lbs on its own, but it is fragile and a few multiuse repair items can go A LONG WAY.
https://www.amazon.com/Gorilla-Clear-Contact-Adhesive-Waterproof/dp/B06WGSRM4Z/ref
https://www.amazon.com/BSN-Medical-BEI076168-Leukotape-Sports/dp/B000E59HXC/ref
https://www.amazon.com/Gear-Aid-Tenacious-Repair-Fabric/dp/B001949Z4I/ref
https://www.amazon.com/Gear-Aid-Outdoor-adhesive-Tenacious/dp/B000BRDDW4/ref
https://www.amazon.com/Gear-Aid-Outdoor-Repairs-Needles/dp/B003B678VO/ref
https://www.amazon.com/Upholstery-Naturel-150-Yard-Assorted-Needles/dp/B016C39XW4/ref
https://www.amazon.com/Shoe-5510110-Mini-Adhesive-Pack/dp/B01JCCKWZO/ref
First: CHECK WARRANTY
Second: Acrylic Cement
[ Weld-On 4 Acrylic Adhesive - 4 Oz and Weld-On Applicator Bottle with Needle https://www.amazon.com/dp/B0096TWKCW/ref=cm_sw_r_cp_apa_LvTZAbVPP56XN ]
I can take a pic later this evening. The shoes are in excellent shape; they've been worn less than 10x. It's crepe so it's a little dirty but the bottoms have barely worn smooth yet.
By barge cement you mean this, correct?
>Gorilla Clear Grip Contact Adhesive, Waterproof, 3 ounce, Clear, (Pack of 1)
>
>https://www.amazon.com/dp/B06WGSRM4Z/ref=cm\_sw\_r\_cp\_apa\_i\_aATCCbFT1BNS5
​
Nope, I have not but only because I've never heard of it! I just picked up some Duco Cement -- http://www.amazon.com/Duco-Cement-Multi-Purpose-Household-Glue/dp/B0000A605H -- this looks like it may do the job. Like another commenter suggested, I'm going to break some other mugs and test it out!
I googled this stuff pretty fast and found:
> hirschkleber
> "temporary glue" [barge]
(this took a little googling, but I see that the taurine-free Barge comes off pretty easily with acetone)
> "permanent glue" [renia]
Thanks, looking forward to the other answers later today.
>
You can try I produced called bardge cement (https://www.amazon.com/Springfield-Leather-Companys-All-purpose-Cement/dp/B00BZZ1DP0/ref=pd_aw_lpo_200_tr_img_2?_encoding=UTF8&psc=1&refRID=XRH7Y7Z696AP6D2BTAZH) it is a contact adhesive. You might also try a product called (liquid stitch) they sell it at like Joan fabrics and all I would look up video on the bardge cement before using cuse once the glued peices touch you will never separate them ever..... ever
I wish you well on your cosplay