(Part 2) Best dutch ovens according to redditors
We found 490 Reddit comments discussing the best dutch ovens. We ranked the 133 resulting products by number of redditors who mentioned them. Here are the products ranked 21-40. You can also go back to the previous section.


As someone who has owned 3 Lodge Dutch Ovens before buying a quality one, it sure won't. The enamel chips and scratches way too easily on the Lodge ones. That's more of a pricing difference than a new vs. old thing though. Usually when people are referring to old cast iron they are not referring to the enameled stuff. The difference between the non-enameled pans is that the older ones were polished at the factory so they were smooth and they didn't (at least to my knowledge) come pre-seasoned. Newer Lodge pans aren't smooth, but I'm doubtful how much of a difference that actually makes. From first hand experience though, I can tell you that stripping the Lodge seasoning and re-seasoning the pan yourself will get you a pan that is, performance wise, similar to that older cast-iron. If you're willing to invest some money into it you can find plenty of older Griswold cast iron pans on eBay that are in excellent condition OR check out one of the newer companies making higher quality stuff than Lodge such as Field Company. If you want to learn more about cast iron check out /r/castiron.
EDIT: Although, now that I'm looking at this Dutch Oven more closely, it may not be the black enameled version as I had assumed.
EDIT 2: No, I take that back, looks like it is this one.
There are lots of other things I use daily:
etc.
But the point I guess I'm making is that you can get lots of good, cheap stuff to start with.
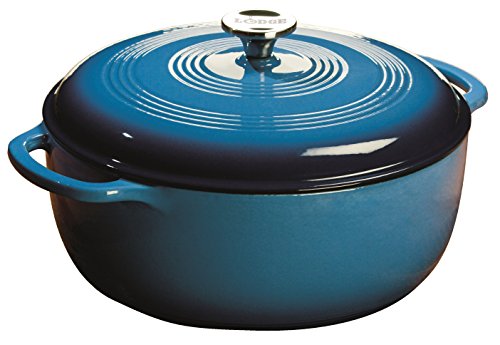
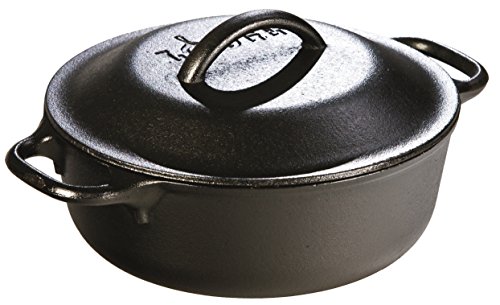
i know it might not be the same, but I've been super happy with our 6 qt lodge enameled dutch oven and it's way cheaper
​
https://smile.amazon.com/dp/B013FDOXJC/
It is on sale right now!
https://www.amazon.com/Cuisinart-CI670-30CR-Enameled-Casserole-Cardinal/dp/B0017HRLFC/ref=cm_wl_huc_item
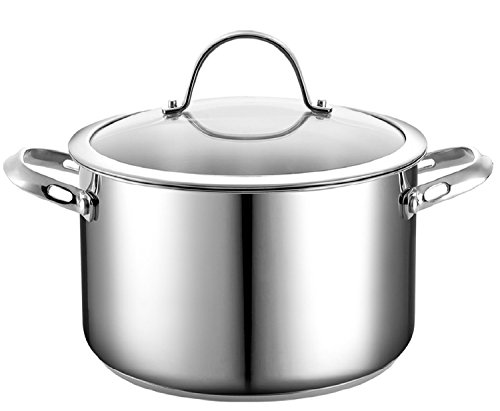
I use a stainless steel pot for boiling water. Right tool for the right job. I like a glass lid so I can easily see the action in the pot without removing the lid. Something like this.
That white bowl is a dutch oven, mate:
Amazon
So there are basically two keys here:
Typically when you make bread, you knead the dough manually by hand or with a dough hook. With no-knead bread, you use "time" as the tool to knead the dough; yeast will basically self-knead, IF given sufficient time (in a relatively warm environment). The process basically has 3 steps:
The reason so many people use Dutch ovens (basically an oven-friendly cast-iron bowl with a lid) is because of the heat retention. The heat radiates from the metal & cause the bread to "spring" up, so you can a nice round boule; the idea is basically to emulate a baker's oven, which creates kind of a steamy environment to allow the bread to do the proper rising trick when baking. Whole Foods sells loaves like that for five bucks; you can make it yourself at home for like a quarter, haha, plus a minute or two of time to stir up the ingredients & whatnot. A lot of people have never heard of no-knead bread & have no idea how easy it is to add homemade bread to your daily routine with minimal effort (literally like, minutes a day).
You can also use a flat surface, such as a cast-iron griddle, or a Baking Steel. I use a Baking Steel for most of my no-knead bread projects these days & just leave it in my oven all the time. I also have a smaller 2-quart Dutch oven for making Panera-style bread bowls for soup & stuff. You don't necessarily need a fancy, expensive Dutch oven (Le Creuset Dutch ovens can go for over $300; you can get a Lodge model that functions exactly the same, but isn't as pretty, for $40 on Amazon, and will literally outlive you).
There are also two additional factors for flavor:
You can do "speedy" no-knead bread, which is what I sometimes do with my Instant Pot, but you sacrifice some of the aromatics & flavor that develops from a long self-kneading rise time. It's not like a night & day difference, but depending on how sensitive your palette is, it can be the difference between "meh, bread" & "ooh, bread!". It's also fun to experiment with sourdough instead of yeast; you basically just have to let some flour & water "rot" for a week in a jar, and then use that in place of the yeast:
https://artisanbreadinfive.com/2017/02/06/easy-sourdough-starter/
It's super easy & helps with the flavor. You can also try using different flours, such as whole wheat & a bit of rye, as both of those provide additional flavor layers. I typically tell people to experiment several times a week over the course of a few months & see what they like; a lot of people end up liking this setup:
You can pick up that cheap cast-iron griddle (recommend pre-heating it for 45 minutes to get it to absorb the heat) above for like $20 on Amazon & start experimenting with round boules, small baguettes, Naan, pitas, flour tortillas, and so on. Flour is cheap (Costco sells 25-pound bags for $11 delivered) & the effort is pretty minimal (stir ingredients by hand, let sit overnight, form into a shape & let rise again, toss into oven to bake...really really easy).
The Instant Pot offers two benefits:
One tip for loading the bread: after proofing for the first rise, put the dough on a sheet of parchment paper, and then load the entire parchment paper into the Dutch oven. It will burn (a bit), but when you go to take off the lid to get the crispy crust, you can just slide the parchment sheet right out, since the dough will be solid bread at that point. That makes loading the dough really easy, without having to risk messing up the dough ball when putting it in the Dutch oven or risk burning your fingers!
It's a Lodge dutch oven! I would love a Le Creuset, but we ain't got money for that. So far, it works wonderfully.
notice how amazon jacked the price for this up to $115 at the beginning of the month...
Hey OP - If it's too dry, try cooking it inside a heavy pan covered with a heavy lid. I don't trust tin foil - either foil packs, or pans sealed with tinfoil. Any time you're doing long cooking, steam is going to seep out of them. Using a lid-covered pot will trap in the steam.
You may already know this stuff, but other here might not, so I'm going to cover the types of pans you need for cooking.
For the vast majority of my cooking that involves stove top or oven, I use these two pans:
I even use these pots to make bread New York Times no knead bread style. These are super versatile. The only other pans I use (less frequently) would be 10" non-stick saute for omelettes, and 12" non-stick saute for small volume saute and making things like hash browns, roasted potatoes / veg.
Only buy pans that are oven-safe up to 450 or 500 so you can start on stove top and then finish in the oven. Saute pans usually come with lids, but you almost never need them, but you absolutely do on the pots. Get all these pans with thick bottoms for better heat transfer properties - think walled pans will burn your food.
Live in a tent out in the woods. Buy a cast iron cooker and a bunch of dried beans, catch whatever wildlife you can and eat it with the beans. Buy some vegetable seeds and plant them near your campsite for fresh veges.
Close to your price:
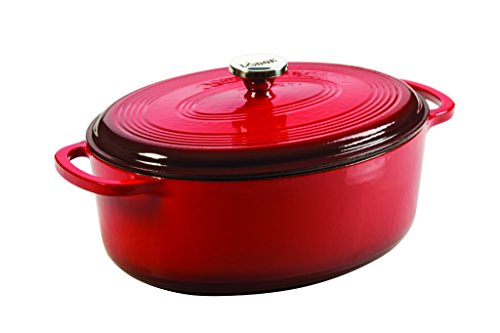
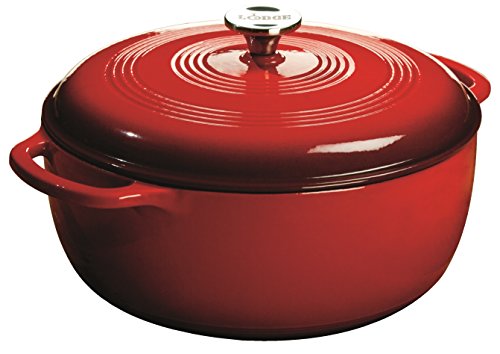
Lodge EC4D43 Enameled Cast Iron Dutch Oven, 4.6-Quart, Island Spice Red https://www.amazon.com/dp/B004QM8SK2/ref=cm_sw_r_cp_apa_U0zEAb2TJR40H
More bang for your buck:
Lodge EC7D43 Enameled Cast Iron Dutch Oven, 7.5-Quart, Island Spice Red https://www.amazon.com/dp/B0039UU9UE/ref=cm_sw_r_cp_apa_t1zEAbWHRXD9C
Tried to think of a gifts in that price range.
Oops, I just remember that America's Test Kitchen reviews products! Someone put together a list on Amazon of their 2012 Best products. See also one of their books.
Note: Sometimes you can't view their content because it's behind their paywall.
Here's the link for the USA.
AmazonBasics Pre-Seasoned Cast Iron Skillet and Dutch Oven Set https://www.amazon.com/dp/B073Q8VDWF/ref=cm_sw_r_cp_apa_DzG-BbD29E379
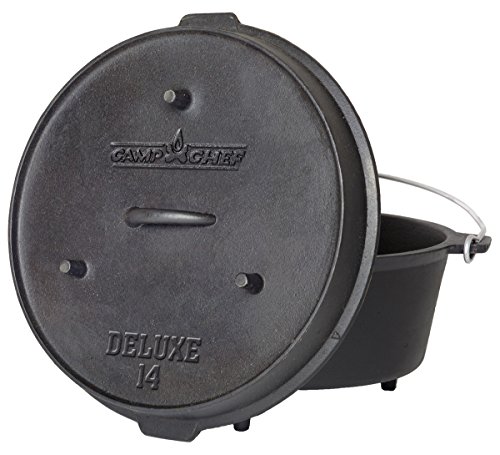
Get yourself a big ass cast iron dutch oven and make it in your camp fire. Don't follow the advice of /u/RandomAsianGuy and use a mix. That's just dumb. Making gravy doesn't take hours. You can make enough for 50 people using a huge dutch oven with one batch in about an hour.
edit: I linked to a 12 quart dutch oven. You may want to consider a 20 quart for 50 people.
Seems like a good cooking pot could be added. Zebra pot with the metal clips, for example.
Also, a good folding skillet.
EDIT: My preference above either of these is a Dutch oven if you can manage the weight. I know people generally say to get one with legs for camping, and that's mostly true if you have some kind of transporation (car, four wheeler, horse, etc.). But when I pack mine for multiday hunting trips, I actually prefer to take one without legs. If I need to lift it up off the coals I can just use rocks or hang it, but it packs down much easier without the legs. Something like this for one or two people. If you have a party of four, then obviously you'd want a larger one, but then it's best to organize with everyone and trade off weight. Have one person carry the larger Dutch oven in their pack, and you take some of their heavier gear in yours so even out the load everyone carries.
People say to get the ones with legs primarily because of the lid design, a rimmed lid which lets you pile on coals and not worry about them spilling into your food when you lift the lid. This is a nice feature, but it isn't necessary. Just brush the coals off the lid before you lift it and shovel them back on once you've put the lid back on if you need to keep cooking. It's cast iron. You're not going to lose enough heat in that time frame to matter.
"Oven safe up to 400 degrees F"
That tells me there's a coating on it that when it gets too hot, gives off fumes. I would stay away from this one.
My recommendation is something like this:
http://www.amazon.com/Gibson-91601-02-Hummington-Eco-Friendly-Multi-Size/dp/B00H9U7Y5S/ref=sr_1_2?s=kitchen&ie=UTF8&qid=1452959859&sr=1-2&keywords=green+ceramic+pan
The ceramic pans are AWESOME
Lodge makes a comparable oven to Le Creuset. That size is perfect.
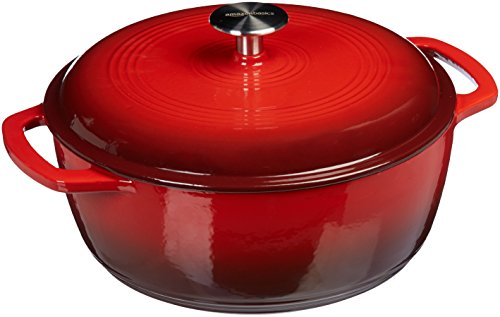
Hello fellow Torontonian! I've been eyeing this Amazon basics Dutch oven for a while now: AmazonBasics Enameled Cast Iron Covered Dutch Oven, 7.3-Quart, Red https://www.amazon.ca/dp/B073Q9PSWD/ref=cm_sw_r_sms_apa_i_P.KXDbY9GZC5A
It has great reviews and is supposed to go down to $50 on Black Friday (that was the boxing day sale price), so wait for that :)
I've had a lot of success baking in this guy:
http://amzn.com/B0039UU9U4
Already comes with a metal knob for the high heat of no knead bread.
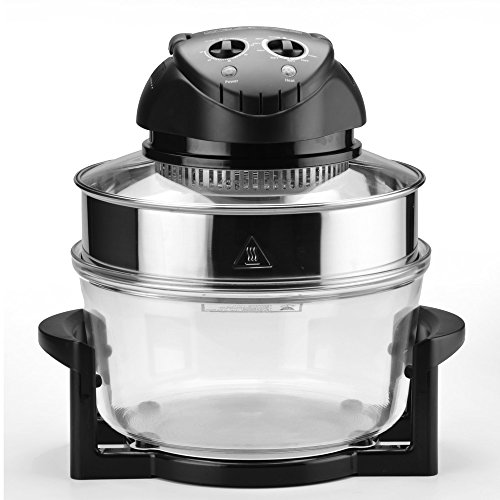
We have one of those. My mom has ALWAYS had one. It's a convection oven, like a fry daddy. It's not an oven I would use to "bake" things. We like to roast meat in it. You get a nice crispy crust on meats. Also, it's great for fish. I personally love mine and use it often. But I still wouldn't replace my oven with one. Here's something similar. https://www.amazon.com/Mainstays-201519-Turbo-Convection-Quart/dp/B01M4HJ9AB
Oval has the following LWH dimensions
Product Dimensions: 9.5 x 14 x 6.5 inches ; 11.1 pounds
Round has the following dimensions
Product Dimensions: 10.8 x 13.6 x 6.8 inches ; 11.2 pounds
They both have about the same size handles with the width being the releveant measurement here.
Oval has the width of 14 inches and round has width of 13.6. So oval one won't be able to accommodate significantly larger cut of meat.
Lodge Logic makes a great dutch oven that is perfectly fine for about a third of the cost. I own one, it's great. You don't need name brands to make good food.
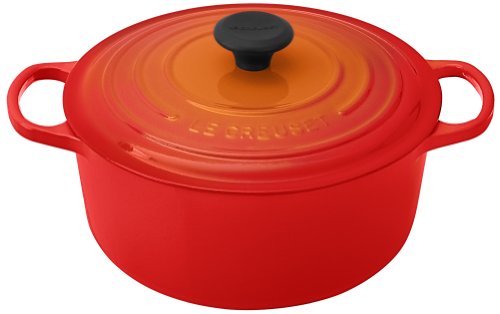
http://www.amazon.com/Le-Creuset-Signature-Enameled-Cast-Iron/dp/B0076NOHG2/ref=sr_1_1?m=ATVPDKIKX0DER&s=kitchen&ie=UTF8&qid=1419110261&sr=1-1
http://www.amazon.com/Lodge-EC6D43-Enameled-Island-6-Quart/dp/B000N501BK/ref=sr_1_4?s=home-garden&ie=UTF8&qid=1419110287&sr=1-4&keywords=lodge+logic+dutch+oven
See what I mean?
I think that's normal. See the second photo at https://smile.amazon.com/Staub-19612823-Shallow-Cocotte-6-Quart/dp/B07632LVM7.
edit: You can see it a bit better in this photo:
https://imgur.com/a/6jp8fLl
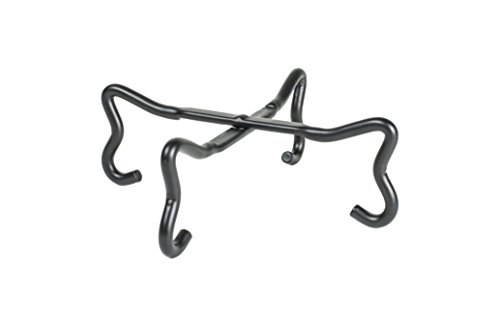
A dutch oven, a campfire, and/or charcoal briquets. You can "stack" dutch ovens on top of each other, with each oven being a size smaller than the one below it. They do make aluminum dutch ovens, intended to be used by horse or mule pack trains. They are quite a bit lighter than cast iron dutch ovens. Other items that go along with dutch oven cooking are a lid lifter and a lid "rest." You can control the temp of the oven by the number of briquets on the lid.
BTW, the type of lid with a lip all the way around, so that one's briquets don't roll off is really de rigueur. You don't want the type with a "rounded" dome lid.
https://www.amazon.com/Lodge-Lifter-Lifting-Carrying-Ovens/dp/B0000TPDJE/ref=pd_bxgy_img_2/132-7088107-2513867?_encoding=UTF8&pd_rd_i=B0000TPDJE&pd_rd_r=a15db4a3-c5ec-48ae-a51c-e7e82a6be9e0&pd_rd_w=jZOKH&pd_rd_wg=dy07K&pf_rd_p=a2006322-0bc0-4db9-a08e-d168c18ce6f0&pf_rd_r=K9CA053T5P8AKZW5BS1A&psc=1&refRID=K9CA053T5P8AKZW5BS1A
https://www.amazon.com/Lodge-A5-11-Camp-Dutch-Black/dp/B07DR5GTQD/ref=pd_bxgy_79_img_3/132-7088107-2513867?_encoding=UTF8&pd_rd_i=B07DR5GTQD&pd_rd_r=218eacb9-5d6c-4dad-91cf-e16da1dbf183&pd_rd_w=FCwCZ&pd_rd_wg=fzNzP&pf_rd_p=a2006322-0bc0-4db9-a08e-d168c18ce6f0&pf_rd_r=SCQYZACAA61WGGX4V72E&psc=1&refRID=SCQYZACAA61WGGX4V72E
https://www.amazon.com/Texsport-Cast-Dutch-Handles-Handle/dp/B00019H602
https://www.amazon.com/Lodge-L12DCO3-Deep-Dutch-Quart/dp/B00008GKDW/ref=pd_cp_468_3?pd_rd_w=TDeqb&pf_rd_p=ef4dc990-a9ca-4945-ae0b-f8d549198ed6&pf_rd_r=8VGGH6PZZKBJ4R0A6D24&pd_rd_r=875f9396-8df3-4c2e-8746-b23d663c901f&pd_rd_wg=E7Hfs&pd_rd_i=B00008GKDW&psc=1&refRID=8VGGH6PZZKBJ4R0A6D24
https://www.amazon.com/Bruntmor-Legged-Pre-Seasoned-Camping-Flange/dp/B01MSDAZ16/ref=pd_lpo_sbs_468_t_2?_encoding=UTF8&psc=1&refRID=Z9HYH8Z0DMHWE7J87NES
Hi /u/Bakabc30
I'm sadly late to this party, but hopefully you'll still see this.
America's Test Kitchen did an equipment review video on dutch ovens about a year and a half ago.
Their best buy pick is comparable to Le Creuset in terms of a light-colored enamel (better to monitor browning & fond) and low straight sides, at a much lower price: the Cuisinart Chef's Classic model. They did note that the enamel didn't withstand their abuse testing as well as Le Creuset, but it doesn't affect its cooking performance.
In their detailed written equipment review (which requires a membership to access), ATK wasn't fond of the dark-coloured enamel that Staub uses, and the Lodge enameled models were the heaviest of the bunch, with flared sides that resulted in a narrower inside cooking surface.
Before we got our "Egg," to free up the oven, I used a roaster.
The turkey came out perfect everytime and I could use the oven for everything else.
I haven't had any issues with sticking but I've always used a circle of parchment paper underneath the bread.
This is the one I bought -- working great so far!
Next time try cooking it longer and lower. You won't have to worry so much about overcooking it. I put mine in one of these guys, and let it cook overnight at 220.
I used this grate in my 6 quart Lodge
Do you have one of these type cookers? They come with those also.
Thanks guys.
I've never done deep frying before, so this will be a fun kitchen adventure.
Cooks Illustrated says that the electric deep fryers aren't worth it, and recommends just using a dutch oven. If anyone's curious, based on their recommendations and some other sources, I picked up a bunch of stuff for deep frying:
A Lodge Enameled Cast Iron Dutch Oven: http://www.amazon.com/dp/B0039UU9UE
A Lodge Deep Fry Basket: http://www.amazon.com/dp/B000050AV6
A thermometer: http://www.amazon.com/dp/B00EHNH3JC
A 13-Inch Splatter Screen: http://www.amazon.com/dp/B00004RFJR
A gallon of peanut oil: http://www.amazon.com/dp/B00A2A7LBE
Strainers to help recycle the oil after use: http://www.amazon.com/dp/B001UFQBAM
Decided to try peanut oil because of it's high smoke point (450°F), and I like peanuts, so if it imparts any flavor, that's ok!
I really like the company Thermoworks. I have the other cooking thermometer from Thermoworks that's cheaper, and love it, but it's max temperature is only 392°F. The one above is 572°F.
The splatter screen above is recommended by Cooks Illustrated because it's fine grained enough to actually keep the splatter contained, and apparently many others aren't.
Cooks Illustrated also recommends putting your used oil in the freezer to keep it fresh between uses.
As I said, never done this before, so happy to hear other thoughts and suggestions!
I also found it on Amazon.
Not sure if they have that available in (Guess) Great Britain or South Africa (that is where I picked up Cheers.)
Consider an induction range with a convection oven. I, too, had an electric range until recently. I absolutely despised electric. And I, too, was looking into a gas range... but then I tripped on induction ranges, bought one, and I love it.
I like induction better than gas. I had gas for many years before moving to a home with an electric range. Induction reacts instantly to temperature changes. It heats incredibly fast. The top is nice and flat so it stays nice and clean, where gas ranges tend to get pretty grimy with all those grills and indentations that get burned on grease that is almost impossible to get off. And stuff doesn't burn on to an induction cook-top like it does with electric. There are other pluses too long to get into here.
You'll need cookware that works with it, but we found some great stuff for decent prices, and much of what you have may work just fine... if a magnet sticks to the bottom of your pan, it will work on induction. If it doesn't stick, it won't work. This is the stuff we bought. We like it better than our all-clad stuff, and it costs a fraction of the price: This, this, and this.
Anyway, look into induction. Like this one.
Get one big one; your storage will be easier and your options for other uses "larger". The Amazonbasic has worked like a charm for us for a while. Given the price difference, we can replace it, like a non-stick skillet, if need be, though I have not had any any problems using it hundreds of times. Name brands get stuck in our heads, but functionality is what matters in cook ware.
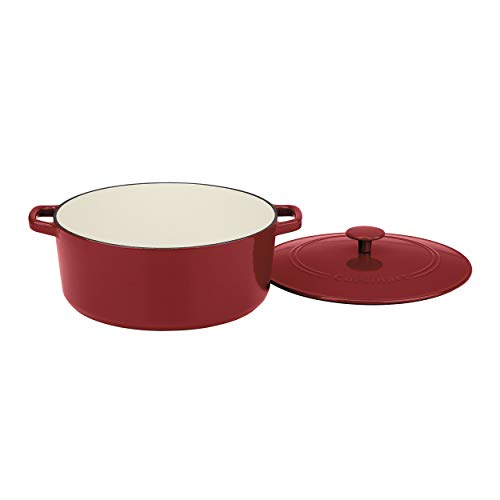
Le creuset is definitely a nice addition but will probably blow OP’s budget. Maybe they could find a used one in decent condition for a good price but all the ones I see used around here are still asking $200. The Cuisinart 7qt Dutch oven came in second best by cooks illustrated testing and is only $76 on Amazon right now. Good deal and will prob last as long as a Le Creuset if cared for properly.
link to amazon
yup
This one or This one with a lid would be cute-but-useful editions to your basket.
Also, you're a great and thoughtful friend. Just so you know. :)
5 or 3-quart or somthing in between. I love this enameled piece over my Le Creusets
I only have Lodge and Le Creuset dutch ovens.
EDIT: Go to Walmart and look at the sizes if you can.
I just saw your edit. This is the one I have. https://www.amazon.com/Nesco-481825PR-Professional-Stainless-Porcelain/dp/B003I4F7D0/ref=sr_1_1?ie=UTF8&qid=1503240570&sr=8-1&keywords=nesco%2Broaster&th=1
Yeah I already planned on putting some rolled up tinfoil on the bottom. Any idea on a temp and time?
http://www.amazon.com/Lodge-Color-Dutch-Caribbean-7-5-Quart/dp/B0039UU9U4/ref=pd_sim_k_7
Why not a cast iron caldron? Hahaha, BREWWW.
Plus, just 'cause it's cool, this octopus.
I have a 5 quart Lodge enameled Dutch oven. Way cheaper than any other brands and it has more than done the job for me... If money is a concern, get a Lodge. If not, go for this: http://www.amazon.com/Le-Creuset-Enameled-Cast-Iron-2-Quart/dp/B00004SBH4
Here you go, combo cooker
But the price went up, i think i got it during the amazon basics sale.
Rent: $550
Phone: $35
Food: $220
Credit: $400
Savings: $100
Health/Dental: $75
Misc/Fun/other: $100
Total: $1480
My opinion is that you need something more like this. As the other poster mentioned, your two jobs aren't going to sustain the budget you developed.
Food: no offense, but you need to look a bit more into how to meal prep each weekend, or over a couple evenings if you don't have free weekends, and buy cheaper food. You really should NOT need to 'cut calories' to spend less money on food. Buying 'family size' portions of meat and then breaking that down into weekly packages and then sticking two weeks worth in the freezer will do a lot. You just need to make sure you have a plan for the food as it goes in so you don't waste it. I make four meals a week, on keto (think lots of expensive meat), and I barely spend more than $60/week and I have more income to work with. I make four because that way I don't get sick of eating the same thing every day. These meals can be incredibly easy and cheap (fried eggs over some greens with spices or some bacon on the side) and others can be easy to prep as well. I'll link you some of my favorites so you have some ideas. Non-cream based soups are great because you can make a double batch once a week for three weeks and stick half in the freezer. Then, one week, you don't have to cook and yet you have three meals already complete.
Phone: If you are past the two years you have to be on a contract (because that seems to be standard in the US when people buy new phones), then you need to get over to a non-contract provider. I was spending less than $35/month for internet and phone service comparable to what I had when on a contract. That's Net10 and gives you unlimited talk, text and 2gigs of 4G data then slower after that. You might even be able to find something better in your area.
Health/Dental: Both are important things to have in the US. One slightly more than minor issue with your health or teeth can put you in thousands of dollars of debt. If your employer is covering 75%, your monthly cost should not be that high. Ask if there are other single folks in the office that you can ask what comes out of each paycheck or if they have a cheat sheet that shows how much each plan costs. Even getting the cheapest plan that will at least cover emergency care, if big, bad things happen, etc, could really save you.
Credit and Savings: I knocked both down because I don't see how your budget will allow for your numbers. I bumped up the credit because not getting that paid off quickly is going to cost you in the long run. As the other person mentioned, get an emergency fund established, but after that, put in only a little until that debt is gone and then you can transfer that line item in your budget to savings.
403B: Google tells me that the only difference between a 401K and a 403B is that the admin costs for running a 403B are less. What that means for you will vary dependent on what exactly your company does, but with lower admin costs, more of the money goes into investments. Doesn't sound like it has a huge effect though to the bottom line. Which means, when you are looking at whether to put any of your money into it, that depends on what you can afford (frankly, it doesn't look like you can afford it for the next couple years until you get that CC debt paid off) and how much your employer will match.
More recipe and food info:
Budget Bytes
Budget Bytes Meal Prep
Some of my favorite recipes:
Swedish meatballs, though this recipe is working a bit hard
Egg roll in a bowl
Mexican shredded chicken - put on lettuce or rice
Chicken salad
Chicken taco soup
Sausage and White Bean soup
Black bean soup
Garbanzo bean salad
Roast chicken in milk- sounds weird, tastes awesome
Other tips: when buying meat, buy what is cheap. Often people will buy boneless, skinless chicken breasts when thighs would cost you a dollar less a pound. Or they buy a rotisserie chicken when buying a whole chicken and baking it (to use in recipes), would save a lot. So, look at what is cheap and plan your meals accordingly. Most recipes that call for '1 lb of chicken' don't matter if it's white meat or dark. If it asks for dark and you use white, it might be drier than you thought, but that's about it. Quit buying junk food or pre-prepped foods. They are expensive and not worth the money.
Same with produce. If your grocery stores have apps that show you the sales, put those on your phone and meal plan around that.
Here's how I meal prep: Thursday night, I plan what meals I want to make for the next week and then I make a grocery list on my phone of all the ingredients I need. Friday after work, I get the groceries. Saturday or Sunday, I cook. Now all I have to do all week is grab my lunch or supper out of the fridge and re-heat. Sometimes I have everything prepped in separate containers, sometimes there isn't room or that's not convenient. In the latter case, I put each meal in one big container and then each evening, I prep the next days lunch (and supper if you work nights) into easy to take with me containers and I'm all set for the next day.
When you are planning meals and want to save money, plan a 'cheap' meal each week. Pancakes & bacon, eggs and greens, black bean soup, etc. That will drastically help keep your grocery bill down week to week. If you suck at meal prep/cooking, a cheap slow cooker (spending more than $15-20 is too much! Shop at thrift stores if you can't find one that cheap) will help take care of one meal while you make the other ones. I find that anything in slow cooker but soup or roast is kind of meh, so you may end up using it less as you get the hang of cooking more often.
Since Christmas is coming up, if there are kitchen things that you need, make an Amazon Wish list and hand that out to friends and family so that you can better prepare for being able to cook more. Things I highly suggest: TWO really good, big non-stick skillets (I like enamel lined, but NO METAL USED with those); two good sized pots - think 5 quarts, stainless steel; one smaller sauce pot; Crock pot - 3 quart is fine; Something like this that can go from stove to oven; a couple wooden spoons and rubber spatulas.
ETA - I should have mentioned - one good tip on meal prep is to prep veg, onions, get spices out, etc for one meal while the other meal is simmering on the stove or in the oven. This is why I like to have two big skillets- one can be something cooking away while it's not slowing me down on starting the next thing. Because of this, it only takes me about 2 hours of prep, cooking and cleaning up (I do have a dishwasher for most of my items) each week.
Funny you should ask - I am in the process of making baked beans right now! I copied my recipe from a personal website (that documents my wedding) and pasted it below. I currently just finished step 4, rinsed the beans, and put them in the fridge overnight.
There are two things I am doing differently than the recipe. First off I bake them (starting at step 5) in a dutch oven. Specifically this dutch oven which fits 4x the recipe. Making 4x the recipe also means that I use exactly one jar of molasses (12 oz).
The second thing is that I throw in a handful or two of chicos. My Mom sends them to me from New Mexico, and they help give the beans a more smokey flavor. You can probably find them online if you search "chicos corn for sale."
**
Baked Beans
Some people say it is best to use a ceramic bean pot for baked beans, but it will work in just about anything that is oven safe. I made 16x this recipe or 5 gallons for the wedding. I don't recommend you try to make 5 gallons at once, but you really should make your beans in bulk. Beans are some of the easiest things to make, but they are incredibly time comsuming. It's not much more work to double or triple this recipe, so make extra and freeze your beans - I have a 1 gallon of baked beans in the freezer as we speak. For the record, these beans are vegan.
Ingredients:
2 1/2 cups (i.e. 1 bag) dried navy beans, soaked overnight
1/3 cup molasses
1/4 cup brown sugar
1 Tablespoon dry mustard
1/4 teaspoon cayenne
1 Tablespoon Cumin
2 teaspoons tamari
2 medium onions, chopped
2 bay leaves
3 cloves garlic, minced
1 teaspoon salt
freshly cracked pepper
2 Tablespoons Vinegar
Sri Racha Sauce
i.e. Mustard Powder
Special Type of Soy Sauce with Distinct Flavor, most baked beans are made with salt pork or bacon and tamari can be seen as vegetarian flavor replacement. Tamari can be considered optional, but don't intentionally leave it out!
Must be Huy Fong Foods Sriracha Hot Chili Sauce
Steps:
I'll take a [BIFL Le Creuset] (http://www.amazon.com/Le-Creuset-Enameled-Cast-Iron-2-Quart/dp/B00004SBH4) instead, thank you.
Unfortunately, non-stick, by its very nature, is not long lasting. There are some things that you can do to extend the life of the pan, however.
The first is to only use wood utensils in the pan (even silicon and rubber can leave behind trace amounts that can reduce the life of the pan). Second, never heat the pan up past medium and don't leave the pan on the burner without food for more than 5 minutes while you're pre-heating the pan. And also, try to introduce oil/fat into the pan and coat the pan with a thin layer before anything else.
As far as recommendations are concerned, I recently picked up this:
Gibson Home 91601.02 Hummington 2-Piece Ceramic Non-Stick Fry Pan Set, Green
https://www.amazon.com/gp/product/B00H9U7Y5S/ref=oh_aui_detailpage_o04_s00?ie=UTF8&psc=1
They probably won't last more than a couple of years, but at $16 for both, I think $8 a year is a good deal. I've had them since Christmas and they still work like the day I got them.