Best electrical wires according to redditors
We found 413 Reddit comments discussing the best electrical wires. We ranked the 179 resulting products by number of redditors who mentioned them. Here are the top 20.
We found 413 Reddit comments discussing the best electrical wires. We ranked the 179 resulting products by number of redditors who mentioned them. Here are the top 20.


![Electrical Wire 16 AWG 16 Gauge Silicone Wire Hook Up wire Cable 20 Feet [10 ft Black And 10 ft Red] - Soft and Flexible 252 Strands 0.08mm of Tinned copper wire High temperature resistance (16AWG)](https://m.media-amazon.com/images/I/31Iyl-ZikrL.jpg)

$38.37 (considering you have a soldering iron) and don't mind doing some coding, I'd estimate it would take 20 minutes at most if your not putting much detail into it.
Library: https://www.arduino.cc/reference/en/language/functions/usb/keyboard/
Here's a Youtube video as well, https://www.youtube.com/watch?v=SHIcliL4O14
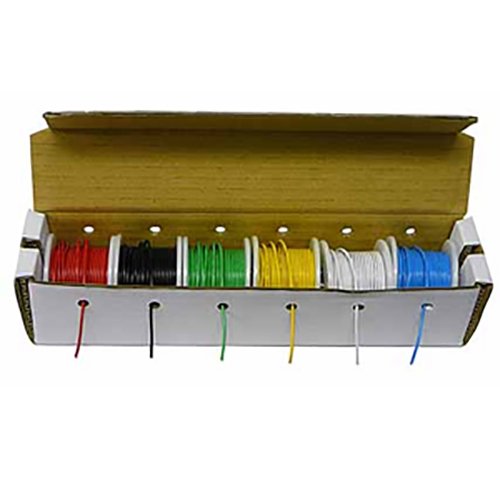
Here's what I do and it's what Already__Taken is talking about. Buy this: http://www.amazon.com/Electronix-Express--Hook-Wire-Solid/dp/B00B4ZRPEY/ref=sr_1_1
Cut a piece to size and strip and bend the ends.
I've had one of these for about 15 years and have never used it. Don't even remember where I got it exactly, but it came with another one with an offset handle that I did try once just to check it out. Didn't care for it at all.
28g Kanthal Wire - Standard Starter Stuff. My favorite.
Sterile Cotton Balls - You can also go the cheap route and buy a bag of cotton balls from CVS and boil them before using them.
Intellicharge Charger - Efest also makes one with an LED screen that is my personal favorite, but it's like $30. This one is the most often recommended charger in this sub.
BOOM, give that bitch some juice (Sony VTC5) - Again, most commonly recommended battery in this sub. The purple Efests aren't bad either, but this is the standard.
Safety first, MOTHER FUCKER! - Seriously, you need one of these. Can't be vapin' on that crazy wacky coil you made up if it might blow your face off. I figured I'd include an Amazon link, but chances are you can get one of these much cheaper at your local Vape Shop or on ebay.
Alright, you've loaded up your cart, you whipped out that credit card, now you wait. How should you pass the time?
OH SHIT! Lets watch a chubby guy build your dripper! - This crazy mofo is using silica wick, but you can use your cotton the same way. Once you're familiar with how the Helios is set up, any rebuilding video will be applicable. Check out a few once you're familiar with the parts.
Finally, get some JUICE, BITCH! You mentioned you have some puny little e-go thing, so I'm sure you're familiar with juice. But you need to understand something, son... You're about to take the step from puffin' on a thing shaped like an e-cig to "CHUCKIN' THE VAPE!" Flavors you liked before will probably taste like ass on a dripper, and flavors you could never appreciate before are going to taste fuckin' amazeballs.
Start with the old Reddit standards, Bombies' - 'nana Cream and Suicide Bunny - Mother's Milk. Then explore from there.
That's it. 'bout $40 of new hardware and an hour on youtube and you've got yourself a new hobby.
For the record, that's a sick little setup you got there too. Jelly, bro.
Happy vaping!
LED:
https://smile.amazon.com/gp/product/B009K6IW00/ref=ppx_yo_dt_b_asin_title_o00_s00?ie=UTF8&psc=1
16 gauge wire to help extend it from the cargo area to the hatch:
https://smile.amazon.com/gp/product/B0746HRVZP/ref=ppx_yo_dt_b_asin_title_o00_s00?ie=UTF8&psc=1
Video I based my install on:
https://www.youtube.com/watch?v=Cawn3piUVVo&t=223s
Fuck buying kanthal from a vendor. you can get 100' of it for under $8 from here
This shit is the fucking bomb:
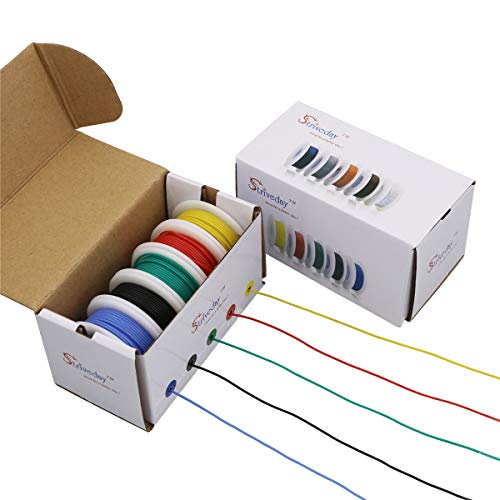
Striveday™ 30 AWG Flexible Silicone Wire Electric wire 30 gauge Coper Hook Up Wire 300V Cables electronic stranded wire cable electrics DIY BOX-1 https://www.amazon.com/dp/B01KQ2JNLI/ref=cm_sw_r_cp_api_2iPZAbSBZNYGQ
It's got silicon so it doesn't melt or pull back when you tin or solder, and is really easy to strip.
But I'd say in the 24-30 awg range.
Here's some installs I've done with it lately
https://imgur.com/a/oQ3v2
Intv2 rgb and GC comp mods.
Using Amazon links only...
My favorite RDA right now (although I own the authentic, this should be good enough, as I've never really had issues with clone RDAs): http://www.amazon.com/Vulcan-RDA-Clone/dp/B00OWKB3GE/ref=sr_1_2?ie=UTF8&qid=1420579323&sr=8-2&keywords=vulcan+rda Also look at TOBH Atty v2.5, Plumeveil, and Mephisto. All good clone atomizers!
As for mods, it pretty much comes down the which one you find aesthetically pleasing. Some off the top of my head you can look for are Nemesis, Stingray, Stingray X, Caravela, 4Nine... They often come in varying finishes (stainless being the most common, but you'll also see gold, copper, black). Nemesis and 4Nine tend to be on the cheaper side, but I found this Caravela for only $21.99 on Amazon for you: http://www.amazon.com/Caravela-Mechanical-Clone-Stainless-Steel/dp/B00OBUD6SS/ref=sr_1_10?s=miscellaneous&ie=UTF8&qid=1420579698&sr=1-10&keywords=mechanical+mod
Then I would recommend picking up one or two 18650 batteries, either Sony VTC4 or Samsung 25r (I own and use both). Rolled organic cotton from CVS pharmacy (will last you years), kanthal wire for rebuilding your coils (I use Temco: http://www.amazon.com/TEMCo-Kanthal-Wire-Gauge-Resistance/dp/B00FBSVQX6/ref=sr_1_3?ie=UTF8&qid=1420579851&sr=8-3&keywords=kanthal+26g ), and an ohm meter to ensure safe builds: http://www.amazon.com/Resistance-Reader-Meter-Rebuilding-Atomizer/dp/B00KI0BMMC/ref=sr_1_1?ie=UTF8&qid=1420579903&sr=8-1&keywords=ohm+reader
Hope this helps! Btw, Youtube is your FRIEND! How I learned everything, just watched videos for whatever I was looking to do.
Amazon. I use BNTECHGO brand and have no complaints other than its expensive for 10 feet of wire. But I didn't find much cheaper really. Any silicone wire will do.
I use https://www.amazon.com/gp/product/B01CQJF3BS/ for ESC signal/all other low power wires on the quad. And https://www.amazon.com/gp/product/B00TG1TRL2/ for ESC power.
For my next signal wire purchase I might go up to 26 or 28 gauge. The 24 isn't too big at all but smaller would work just fine too.
For what it's worth, I can vouch for this seller and the LED tubes. I bought a lot a while back from him and installed them in my basement. The shipping was quick, the deal was good, and the LED tubes produce light as they should. I have had no issues with the tubes and installing them was pretty simple after I did one, the rest were a quick install. If I had more lights to retrofit, I would buy more but I got all I needed.
Should you buy these, you may want to also pick up some of these connectors. That made the ballast removal and rewiring very, very easy.
Can't make it for you, but here's what you need minus a soldering iron:
https://www.amazon.com/CESS-303-3-5mm-Adapter-Cables-Connectors/dp/B01G0NF9CY
https://www.amazon.com/BNTECHGO-Silicone-Flexible-Strands-Stranded/dp/B00TG1TRL2
https://www.amazon.com/25ft-Expandable-Braided-Sleeving-BlackRed/dp/B071WF5K2X
https://www.amazon.com/130-pcs-Adhesive-Assortment-MILAPEAK/dp/B075NBCDPQ/
You want an Arduino Uno R3 and a relay board to plug into it. Raspberry Pi is may more powerful and expensive than what you need and the Arduino is much easier to program. /r/arduino would love to help more.
http://www.instructables.com/id/Arduino-Christmas-Light-Controller/
Relay Board
Arduino but you can get them cheaper elsewhere
wires to connect them
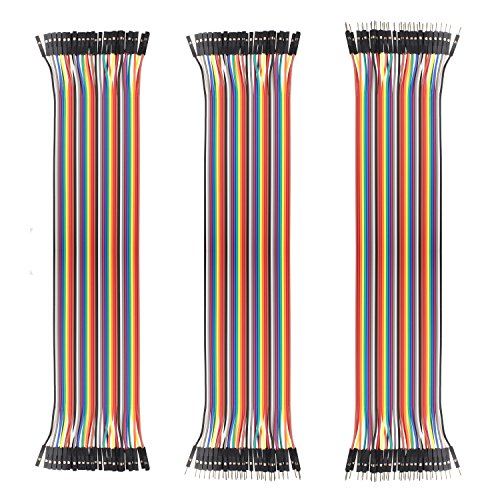
http://www.amazon.com/Breadboard-jumper-wire-70pcs-pack/dp/B0040DEI9M/ref=pd_cp_e_1
Sounds like you've done your homework ...
Here are my two cents:
I'd say skip the mechanical mods all together ... it almost seems pointless to me when you can get some really nice high wattage regulated mods for cheap.
If you are wanting to buy a whole new rig I'll link what I am using as my daily carry below.
Cana Modz DNA 30watt box mod - $68.99
Kayfun Nano (clone) - $29.95
Sony VTC4 battery - $12.95
28g Kanthal A1 resistance wire for my coil - $5.45
I use organic cotton for my wick which you can get at almost any drug store on the planet.
I love my setup and for just a little over $100 in total you really can't go wrong with it ... I haven't smoked an analog in over 8 months.
Hope that helps, feel free to ask me any questions you might have.
Slightly cheaper on amazon.
http://www.amazon.com/Genuine-Lightning-Vapes-Kanthal-Resistance/dp/B00FTJ4SWI/ref=sr_1_3?ie=UTF8&qid=1404702147&sr=8-3&keywords=28g+kanthal+wire
Well, that's easy! Just need some cash and I will guide you to the rest. Okay, istick30- http://www.eciggity.com/eleaf-istick-30w-battery/
that will replace your evod. Also, if you don't want to mess with an atomizer go with but a solid vape-http://sweet-vapes.com/apvs/joyetech/joyetech-egrip-20-watt.html
Okay, if you are currently rocking an evod...I will make the assumption that you would be new to rebuilding(which is making the coils, instead of buying prebuilt ones...not meaning to over explain but if you are new, I just want to inform you).
You will need to watch some videos on how to build coils- https://www.youtube.com/watch?v=SfuOOgOvjL4 (also a solid review of the Taifun GT2)
Then you need to purchase the Taifun GT2- https://www.fasttech.com/product/2047800
You will also need 28 gauge kanthal A1- http://www.amazon.com/Kanthal-Gauge-Wire-32mm-Resistance/dp/B00JVXVKB0/ref=sr_1_2?ie=UTF8&qid=1422333395&sr=8-2&keywords=kanthal+a1
And I suggest japanese cotton-http://www.amazon.com/Cotton-Labo-ORGANIC-Puff-200pc/dp/B000TCD51A/ref=pd_sim_misc_8?ie=UTF8&refRID=0JSXYVNPVVYFJVCYDTZ0
And if you are going this far, get the best juice- http://www.stasheliquids.com/collections/drippers-paradise/products/my-sweet-one?variant=928219087
So search youtube for Taifun builds-https://www.youtube.com/results?search_query=taifun+builds
Then replicate-
And if you need some help- let me know and I will build some coils and send them to you pre-wicked...but I would suggest just going for it...tweezers...scissors...drill bit around 1/8in or just get a shitty set and you are good.
Remember- idiots build coils all the time...https://www.youtube.com/watch?v=cDz0otQmSH4
http://www.amazon.com/gp/aw/d/B00FTJ4SWI/ref=mp_s_a_1_11?qid=1395153268&sr=8-11&pi=AC_SX110_SY165_QL70 $7.50 with free shipping for a 100' roll of 28g.
I'd say yeah. It's some damn good gear right there, some may say the best there is at the moment. you can get an ipv3 from vapordna for the same price but with a cool logo if you wanted to. If this is your first rebuildable setup, you'll also want some japanese cotton pads, a precision screwdriver set, some 28 gauge kanthal, and some 24 gauge kanthal. If this isn't your first rebuildable setup, I'll just go ahead and shut the fuck up.
The step up to claptons from regular wire is a big one. You'll get even better performance out of fused claptons, but the difference isn't as large as you'll see when you transition from regular to clapton. Super fancy builds are usually on par with fused claptons, but they're pretty much just for show despite what they say on the YouTubes.
It doesn't have to be expensive, though. Just buy a couple rolls of cheap wire on Amazon (I recommend TEMCo), grab the nearest drill, and spend some time learning to make your own. Your first few will suck, but the next few will be functional, and then after the first dozen or so it'll be pretty easy. A 250-ft spool will last you a long, long time for all of about $7.
https://www.amazon.com/TEMCo-Kanthal-wire-Gauge-Resistance/dp/B00FBSVQX6/ref=sr_1_7?ie=UTF8&qid=1485384791&sr=8-7
Stainless is all I use. It's a bit finicky, yeah, but it's the best TC-capable wire for flavor and safety. Nickel has safety concerns regarding nickel poisoning, is a soft metal which makes it more difficult to work with, and can't be dry burned. Titanium has safety concerns with respect to titanium oxide, tastes weird (to me), and can't be dry burned. Stainless has none of those issues, but is tricky to get working correctly until you get the hang of it.
Get rid of the connectors altogether and just run straight wire. That's what I did and no more warm/hot wires. I even upped it a awg. Here is what I used.....
https://www.amazon.com/BNTECHGO-Silicone-Flexible-Strands-Stranded/dp/B017U6PGLO/ref=mp_s_a_1_12?keywords=14+awg+silicone+wire&qid=1565624169&s=gateway&sprefix=14+awg&sr=8-12
For future reference, you can get the same thing for almost half the price from TEMCo, either directly or through Amazon.
For my (future) sub ohm mech modders out there. Here is a quality setup that will allow you to rebuild to your heart's delight. I recommend a minimum of 4 batteries.
optional
I'm going to give you a list with some upgraded options.
|Item|Base|Upgrade|
|-----|------|---------|
|Mod|Sentinel M16 Clone ($24.99)|Nemesis Clone($31.99)|
|RDA|IGO-W ($12.99)|
|Battery|Sony VTC5 ($10.99)|Buy more.|
|Charger|Nitecore i2 ($11.55)|Nitecore i4 ($16.25)|
|Wire|28 gauge Kanthal ($7.30)|
|Cotton|Your local drugstore, like $4)||
|Total|$71.82 + tax/shipping|All upgrades: $94.51|
You could save a couple bucks by ordering from China, but you'll be waiting quite a while for your stuff. I'm not a huge fan of the Sentinel clone, but it's really inexpensive. If you're cool waiting like a month, then I'd get the Nemesis Clone from FastTech.
That's about all I can think of for now.
i'd think 600w is way too high (i'm an electrical engineer)
if you use kanthal instead of nichrome (actually most ecig modders use kanthal) it is pretty cheap. the only thing you would have to manage is power to it and the way the coil is set up in the bowl.
As for idle vs burn temp, you could just use an arduino (or just the micro) to control two different mosfets that run 5v and 12v (or whatever voltage you want)
kanthal link:
http://www.amazon.com/TEMCo-Kanthal-Wire-Gauge-Resistance/dp/B00FBSVQX6/ref=sr_1_1?ie=UTF8&qid=1406154845&sr=8-1&keywords=kanthal
Dude, $100 is a lot if you go for clones. Except for those with 'authentics', all of our rigs are well under $100.
Here is what I setup for my brother:
4nine - $21.51
Kayfun Lite Plus V2 - $30.02
Nitecore i2 Charger - $11.79
18350 Purple Efest Battery - $4.24 each w/ 'ISPower' Coupon
28g Kanthal - $5.45
Bag of Cotton Balls - $3
_____
Total: $66.01
...and that's a REALLY nice setup. You could get away with half that and still have a great setup.
/u/TheBackFeed
get these wire kits. they are priced pretty well.
stranded for hooking up to pots, switches, jacks:
http://www.amazon.com/Electronix-Express-Hook-Wire-Stranded/dp/B00B4ZQ3L0
solid for perfboard/stripboard/breadboard wiring:
http://www.amazon.com/Elenco-Hook-Up-Colors-dispenser-WK-106/dp/B008L3QJAS
also use http://taydaelectronics.com for great prices on commonly used parts for synth/pedals/etc. mouser and others can be overwhelming with selections and minimum quantity of part orders. tayda usually has a promo code they give out on their facebook fan page every couple months for 15% off as well...
also don't buy SMD when you can buy DIP(w/ sockets).
like many have said, use IC sockets if you're planning on continuing synth DIY.
3M Hand Wire Connector Driver WCD-H https://www.amazon.com/dp/B001CGLGUY/ref=cm_sw_r_cp_api_NMVozbEPHEJM4
I use this for all splices. I'm 26 and have had guys ask why I use that. I tell them I'll show them in 20 years when I don't have wrist issues. Works fantastic.
You could use this - available from Adafruit as well the last time I checked.
I used this. Cheaper by length, but it does get confusing with only 1 color...
It's super easy, don't be intimidated. You will need to buy 32 guage kanthal wire, and 3 mm silica wick. Get them on amazon, it's a LOT cheaper than buying from a vape website.
Wire
http://www.amazon.com/Kanthal-Gauge-20mm-13-75-Resistance/dp/B00C8H5ZFI/ref=sr_1_1?ie=UTF8&qid=1382543329&sr=8-1&keywords=32g+kanthal
Wick
http://www.amazon.com/High-Quality-Silica-Wick-Length/dp/B00C54KTJQ/ref=sr_1_1?ie=UTF8&qid=1382543354&sr=8-1&keywords=3mm+silica+wick
As far as videos, I can't access youtube, I'm at the office. Go to youtube and search "rip trippers evod head" (I think it's the second one down) or "rebuild evod head". It's so easy. You will need a torch, but can use a lighter, but using a torch is better.
Watch the videos, and if you have any questions, feel free to pm me. Make sure you torch the crap out of the silica wick until it's white hot. It will taste funny if you don't. Also, torch the kanthal wire, so it will bend easier, and burns any contaminants. The trick is to get the coils close to each other, and evenly spaced. It took about 3 attempts before I got it down. Now, I can do it in my sleep and in under 3-4 min. Plus, when you get this down, you can try micro coils, which is basically the same process, but you can really crank up the wattage for a ton of flavor.
Your link doesn't work, but I'm going to assume you're talking about this.
Edit: 30 Gauge for $5.75 too
This is what you are looking for:
Striveday™ 30 AWG Flexible... https://www.amazon.com/dp/B01KQ2JNLI?ref=ppx_pop_mob_ap_share
I actually didn't tally up the cost as that wasn't really of a concern to me, but I'll try my best to provide links to the things I bought for this. Feel free to add it up for me!
I also bought various tools, like crimpers, Dremel kit, drill, etc, but I don't consider those to be project-specific as I'll have them for the foreseeable future. Let me know if there's anything you see that you think I missed!
28 gauge ... http://www.amazon.com/gp/aw/d/B00CQO83L6
30 gauge ... http://www.amazon.com/gp/aw/d/B00D9FPCLK
32 gauge ... http://www.amazon.com/gp/aw/d/B00C8H5ZFI
I always keep a roll of 30 awg wire on hand for doing any kind of work like this. I recommend the wire wrapping kind with thin insulation. Perfect size for soldering onto QFP parts too.
Amazon is your friend.
http://www.amazon.com/gp/aw/d/B00JVXVKB0/ref=mp_s_a_1_2?qid=1422324544&sr=8-2
100' 28g Kanthal $6 (I use 26g on my subtank, but 28 works too. This is just the first one that showed up)
http://www.amazon.com/gp/aw/d/B000TCD51A/ref=mp_s_a_1_1?qid=1422324636
More Japanese cotton than you will know what to do with $8
http://www.amazon.com/gp/aw/d/B00FZPDG1K/ref=mp_s_a_1_1?qid=1422324748
Angle cutters, not needed but it makes getting a clean cut very easy $5
http://www.amazon.com/gp/aw/d/B004800I6Y/ref=mp_s_a_1_18?qid=1422324973
Precision screw driver set, also not needed but handy for both the fact that they are in fact screw drivers and that you can use the slotted ones for wrap coils with a consistent and known inner diameter. $8 (you can get this for a lot less at Walmart, Lowes, harbor freight... Etc)
So a little over $25 shipped and you will not need kanthal or cotton for a very long time.
Advanced/box mod starter setup.
For an OKR-T10 mod.
I should mention that, yes, I am friends with /u/DBLiquids, but I am not doing this at his request. This is my own doing, and for fairness I also linked to a second Duke vendor as well.
Here for the Duke, curently the product has been removoed from the site due to some issues with the shopping cart.
here for the Duke again,
and here (again) for the Zorro.
The Zorro is a passthrough you will not need any batteries for this as it comes with a power supply. As for batteries for the Duke look for 10 amp 2900 mAh batteries from here. They must be niple top for ease of use.
I am going to stop here, and go over some battery safety with you.
For a charger my top three suggestions are in order:
As for an atomizer you should get a TOBH, an iGo-W or iGo-W 4.
Kanthal you can get from Amazon. I would suggest the 28 gauge that I linked.
Something to wrap around, multimeter, screwdrivers, tweezers, pliers, cotton, and large butane torch. I will not link these as you either have them already, or they can be easily sourced locally at either your local hardware store or drug emporium.
First side note on the cotton just make sure that it is bleached with hydrogen peroxide and not bleach. Organic or bleached with hydrogen peroxide are both fine. Boil if you want, but it is not necessary.
Second side note The prices for the batteries and chargers are manufacture direct. Amazon is your friend if you want a better price. look at Illumination Supply will also be a good source for batteries if you want to price hunt.
Hi!
First off, congrats on wanting to quit. = )
I have this Kayfun 3.1 (the one on the left, though that isn't my pic), which I believe is Tobeco. I say believe because I got it from a local B&M. I know the owners and it's what they use so I didn't bother to ask as I knew it would work. I've had absolutely no problems with it whatsoever and love it. Best flavors I've ever had, super easy to rebuild once you get the hang of it, no leaks, threads are like butter.
Getting a 3.1 over the Lite was just a choice of how much juice I wanted to carry.
I got my wire from here and bought organic cotton from Walgreens.
As far as juice goes, if you're trying to save some money I'd suggest Mt Baker Vapor. There's a post I saved from someone here who ordered an obscene amount of Mt Baker juice for under $100 and I can find it if you want because it came down to bottle size. I'm sure you'll get plenty of other great recommendations.
What batteries do you have? I have a stingray and an igo-w and with my vtc4s it works fine, but with my 1600 mah efests it won't fire because the insulation on the battery covers some of the 510 connection. I think there is the same issue with the efest 35 amp only with the firing button, I don't know for sure.
So to be safe I'd recommend sony vtc4s or 5's with the stingray. And the igo is great but I think the Omega would be better since it has adjustable airflow. The intellicharger i2 is cheap and good. For the kanthal I think 28 would be the most versatile.
The stillare clone would be great too.
I really liked how the guys used a breadboard jumper like these to show the proposed route to sneak the servers through the new PP office. It was a subtle, geeky touch that makes the show that much more immersive.
Lots of good info about things to research as a beginner already posted.
As for gear, I would suggest something like a stingray x. It is a very snazzy mech mod, and you can get them relatively cheap. SXK made a solid clone, and they are sold as SXK and also as Infinite.
I would suggest an Infinite CLT for an atomizer. Extremely solid RDA, its cheap, has adjustable air flow, and decent size post holes, which will allow you to experiment with different types of builds as you get more comforatble. If you don't mind a tighter air flow, the tugboat v1 has really good flavor, and you can get one for like 9 bucks on 101vape.com, so that is another option.
I would start out with 28 gauge kanthal, you can find it here for under $8 for 100 ft.
Battery charges, I would suggest either an efest luc v4 (a bit more expensive) or an nitecore intellicharger. I think they both come in 2 or 4 bay. For batteries, Sony VTC4 will handle most builds that you would run, but be sure to find an ohm reader so you can test what you build, very important when you are starting out.
http://www.amazon.com/TEMCo-Kanthal-Wire-Gauge-Resistance/dp/B00FBSVQX6/ref=sr_1_cc_1?s=aps&ie=UTF8&qid=1409425256&sr=1-1-catcorr&keywords=28g+kanthal+wire
found this kanthal on amazon, and already added that charger to my basket.
It really depends on what you're looking to do. I realize at this point you probably don't even know what that is, but a general idea would help.
But for starters, you could get general things like:
The rest is kinda up to what you want to do, but some other suggestions would be:
These kinds of things you'd only need one to test/play with, then if you find a specific application/project, you can order more.
Paracord-
This is what I used: https://www.amazon.com/gp/product/B072JPJDBK/ref=ppx_yo_dt_b_asin_title_o04_s01?ie=UTF8&psc=1
You really have endless options, this store on amazon has almost 600 different paracord:
https://www.amazon.com/gp/product/B007Z1QOTS/ref=ppx_yo_dt_b_asin_title_o01_s00?ie=UTF8&th=1&psc=1
​
The Wire-
https://www.amazon.com/gp/product/B07G2SWB19/ref=ppx_yo_dt_b_asin_title_o04_s00?ie=UTF8&psc=1
or (These are just the 2 I bought, I am sure there are others out there)
https://www.amazon.com/gp/product/B01KQ2JNLI/ref=ppx_yo_dt_b_asin_title_o08_s01?ie=UTF8&psc=1
​
Bodkin-
https://www.amazon.com/gp/product/B003WMFVRA/ref=ppx_yo_dt_b_asin_title_o04_s00?ie=UTF8&psc=1 (To Thread the Paracord through. I stripped the ends of the 4 wire, twisted 2 and 2 together, threaded through the back hole, twisted those combined wires together, and then heat shrinked the over it with the small clear one in the box (link shown later))
​
Heat Shrink-
https://www.amazon.com/gp/product/B07KT25J42/ref=ppx_yo_dt_b_asin_title_o08_s01?ie=UTF8&psc=1
​
USB Type A-
https://www.amazon.com/gp/product/B07G9FLG28/ref=ppx_yo_dt_b_asin_title_o08_s01?ie=UTF8&psc=1
​
JST 2.0 ph 5 pin connector (There is way more here than you will need as it comes with 5/6/7 pin connectors. Most mice use the 5 pin)-
https://www.amazon.com/gp/product/B077LYP4T9/ref=ppx_yo_dt_b_asin_title_o08_s00?ie=UTF8&psc=1
​
Wire Strippers- As Long as they go to 30AWG, you should be good. This is just a cheap option
https://www.amazon.com/gp/product/B07D25N45F/ref=ppx_yo_dt_b_asin_title_o00_s00?ie=UTF8&psc=1
​
Precision Screw Drivers-
https://www.amazon.com/gp/product/B0747DYJJR/ref=ppx_yo_dt_b_asin_title_o09_s00?ie=UTF8&psc=1
​
A Third Hand (Not needed but will probably make your life easier)-
https://www.amazon.com/dp/B076WSZLDL/ref=sspa_dk_detail_1?psc=1&pd_rd_i=B076WSZLDL&pd_rd_w=IeORA&pf_rd_p=8a8f3917-7900-4ce8-ad90-adf0d53c0985&pd_rd_wg=SCnJH&pf_rd_r=AKZJGB4959GQT25YX2ZJ&pd_rd_r=cf871c96-9c47-11e9-99da-dd5cbc43a5ca
​
You will also need a soldering iron, and thin solder, the points to solder are small. https://www.amazon.com/Welding-Diameter-Storage-Electrical-Electronics/dp/B01N0VNNKO/ref=sr_1_5?keywords=solder&qid=1562018188&s=gateway&sr=8-5&th=1
​
Other references I used:
https://www.overclock.net/forum/375-mice/1588984-mice-cable-pin-arrangement-internal-connector-size-database.html#/topics/1588984
​
https://www.reddit.com/r/MouseReview/comments/7xtnyi/diy_how_to_make_your_own_paracord_cable_for_any/?utm_medium=android_app&utm_source=share
​
*Unless you have replacement mouse feet, be careful removing your current set*
This is something I use (Striveday™Flexible Silicone Wire 22awg Electric wire 22 gauge Coper Hook Up Wire 300V Cables electronic stranded wire cable electrics DIY BOX-1 https://www.amazon.com/dp/B01LH1FR6M/ref=cm_sw_r_cp_api_fsn3Ab1TTXV65) and you can flatten the wires on the breadboard and eventually solder on a final prototype if you want that
You can use any male to female ones, they're not special. Something like this should work fine.
248, 214, 325 all use them, for 214 and 325 you get your own new breadboard with the lab parts kit. Also, buy your own jumper wires like these ones https://www.amazon.com/Breadboard-Jumper-Wire-75pcs-pack/dp/B0040DEI9M, the ones in the lab suck.
Sorry about the late reply here. I actually have a couple Vamos and they are decent but a tad outdated these days. If I had to do everything over again from the start, this is what I would do.
That is basically one of the best starter kits you could get for getting into rebuildables. Yes you're going to end up spending $100 or so but you'll get a much more satisfying vape.
I don't have much to add just going to go in to a bit more detail. I usually try to keep at least 2 or more of each screw or nut my drones use, that includes the motors, camera mount, ANY screw.
Loctite/thread locker will help but some times repeated hard crashes loosen screws and you may not realize it. With that said you don't want to use anything above blue Loctite such as red or green, you want to be able to get the screws off!
I also bought a ton of micro JST connectors and a crimper to repair balance lead connectors. This wouldn't be needed if you are diligent about keeping your battery wires away from your props, I was not, but some times it is unavoidable.
And the random things I keep around are; velcro, VHB tape, shrink tubing of various sizes(you can get assortments from Amazon), spare VTX pig tails, various sizes of silicone wire (26awg for ESC signal wire, 18ga wire for power and ground to ESCs, 14awg for power leads), flush cutters, different tipped tweezers, spare antenna cable for the receiver, servo leads, circlip pliers.
All that comes to mind at the moment but I am sure I am missing stuff. Here are some links!
Flush Cutters
26awg Silicone Wire
14awg Silicone Wire
VHB Tape
Micro JST Crimper
Micro JST Connectors
Circlip Pliers
Servo Connectors-not silicone
Tweezers
Buy some real 14 AWG silicone jacket wire, (this is what I'm using) and a set of quality XT60 connectors like these.
Ideally you want crimped ring terminals for all power leads that connect to screw terminals, putting bare wire into them isn't how they're meant to be used.
The 14 AWG has enough area so you can solder them to both positive and negative pads on the heatbed respectively, and terminate those with 1 XT60 connector. A word of advice - dismount your heatbed, flip it upside down and put it on something that can take some heat for a bit like corkboard. Heat it up to 60-80C, turn it off, then remove the stock connector and solder the wires. Otherwise you'll get nowhere trying to solder to a room temp heatsink.
The matching XT60 connector uses the same 14AWG to crimped ring terminals, going to the MOSFET board. For reference, here's one I'm using on my printer.
I only removed the power pins from my bed, I pre-cut the connector so I could leave the middle pins and connector shell for the temp sensor attached to the bed, then I could still use that to disconnect those wires. Works great because the little retaining mechanism is in the middle of the connector over the sensor wires.
Pre-tin the XT60 wire cups and the wire itself before you try to solder them together unless you've got both a beefy soldering iron and good soldering skills, otherwise your connector will end up with a faulty solder connection.
Now it's easy to disconnect the heatbed.
The wired used with breadboards is 22awg solid. You can buy something like this: http://www.amazon.com/Electronix-Express--Hook-Wire-Solid/dp/B00B4ZRPEY/ref=sr_1_1?ie=UTF8&qid=1457843220&sr=8-1&keywords=22awg+solid if you want a lot of different colors. Or just buy spools like this: http://www.amazon.com/Ajax-Scientific-Solid-Hook-Up-Length/dp/B00EPQ83JK/ref=sr_1_2?ie=UTF8&qid=1457843220&sr=8-2&keywords=22awg+solid
If you chose to go the rebuilding route this is what you need, and some atty suggestions at the end.
You need- wire- http://www.amazon.com/Genuine-Lightning-Vapes-Kanthal-Resistance/dp/B00JVXVKB0/ref=sr_1_2?ie=UTF8&qid=1413428261&sr=8-2&keywords=kanthal+a1
cotton- either balls or pads http://www.amazon.com/Organic-Cotton-Balls-80-Count/dp/B00CD8FCRI/ref=sr_1_6?s=hpc&ie=UTF8&qid=1413428355&sr=1-6&keywords=organic+cotton http://www.amazon.com/Cotton-Labo-ORGANIC-Puff-200pc/dp/B000TCD51A/ref=pd_ybh_5
drill bit set- http://www.homedepot.com/p/Unbranded-Drill-Bit-Set-13-Piece-45110/204590609#product_description
Tweezers- any pharmacy
Disposable butane torch- any gas station
ohm reader- http://101vape.com/meters/170-ohms-meter.html
(most regulated mods have a built in one, but a reliable and exact external ohm meter is very good to have)
rebuildables- tanks- kayfun https://www.fasttech.com/p/1605200 (google some kayfun build tutorial videos, stay under 20 watts while vaping on it)
drippers- magma https://www.fasttech.com/p/1718100
zenith https://www.fasttech.com/p/1770202
(both of those drippers are a good start because you can block 1 air intake and make single coils untill you are comfortable enough to build dual coils)
I own these drippers and that tank. They are the cheapest clones on the market but all work great. Shipping takes 3 weeks, chose first class china e-packet as shipping option
OPTIONAL- coil jig, no need for drill bits, MAKES COIL BUILDING EASY https://www.fasttech.com/p/1878301 (I've honestly never tried this, but I recently ordered one to try out, should have it in 2 weeks)
https://www.amazon.ca/StrivedayTM-Flexible-Silicone-electronic-electrics/dp/B01KQ2LHFI/ref=sr_1_2?ie=UTF8&qid=1491827359&sr=8-2&keywords=28+gauge+wire
Is this the wire that you utilized? I'm on the market for some. I've tried some jewellery wire, but it hasn't been holding the paint very well.
It's not too bad to figure it out, I wish that I started with rebuildables instead of spending too long trying to troubleshoot my Nautilus and Aerotank. The main barrier to entry is just collecting all the stuff you'll need, and getting past the intimidating "what the hell is this" beginning.
So you'll want a couple of 18650 batteries (it can only run off one, but having a backup is just really nice)- buy good quality ones, the best-recommended on this sub being Samsung 25R and Sony VTC5. VTC5s are pretty tricky to find right now. http://www.eciggity.com/samsung-inr18650-25r-2500mah/
You'll need some atomizer as well- it can be either a dripper (drip juice straight onto wick, tastes better and gives bigger clouds) or a tank-style one (more convenient). With its standard 510 connection, I believe it should work with pretty much any tank, but you'll be wasting its potential if you don't pick up a rebuildable atty. Try it with whatever tank you have now, see how it works.
To start out with rebuildables, you'll need the atty- google around for recommendations. Commonly recommended RDA (rebuildable dripping atomizer) picks for good flavor are the Magma and Freakshow, though I haven't tried the latter. Commonly recommended RTA (rebuildable tank atomizer) are the Kayfun and Lemo. I haven't done anything with RTAs but they'll work out the same.
To actually get your first build once you get your atty, you'll need a couple of things:
To not blow yourself up, and get your builds just the way you want them. ~15$. http://www.eciggity.com/eleaf-digital-ohmmeter-voltmeter/
Conductive wire. You build coils with this. Start with 28-gauge, it's the most common size to work with. ~5$ for a huge amount. http://www.amazon.com/Genuine-Lightning-Vapes-Kanthal-Resistance/dp/B00FTJ4SWI/
It's cotton. Buy it wherever. Some people use fancy organic Japanese cotton, or other types of wicking material. ~cheap
You just need these to have small diameter things to wrap around. You'll want something like 2 or 3 millimeters, but different sizes are good to have. ~cheap.
Once you actually have all the stuff you need, everything will end up being much simpler than you expected- youtube tutorials and asking for help on reddit will both work. If you do end up buying all the stuff you'll need, feel free to PM me for help with it.
This is a lot simpler and cheaper if you can find someone who knows what they're doing and just bum off their ohm meter/kanthal/cotton- it saves a lot of effort. Your B&M might be able to help you out here, but I don't know what the store is like.
If you don't even know what the coils are made of, chances are you haven't been brought up to speed on coil resistance and battery safety. You don't mention what kind of mod you're using, but if it's a mech, get a vape shop to help you figure things out before you blow your face off.
That said, here are some things you will need eventually:
I've never used the lever ones. These are what I'm used to.
i've had this problem many times.
its almost certainly that your wires are making intermittent contact. i've had to replace my bed sensor wiring and power wiring about 4 times.
once however my actual temp sensor cracked in half and i had to replace it with a 100k thermistor.
https://www.amazon.com/Gikfun-Thermistor-Temperature-Sensor-Printer/dp/B018QL5LPI/ref=sr_1_4?ie=UTF8&qid=1481397650&sr=8-4&keywords=100k+thermistor
here are the thermistors and as for the wiring, if thats what it turns out to be(most likely is)
sensor wiring
https://www.amazon.com/gp/product/B01708AYYQ/ref=oh_aui_detailpage_o05_s00?ie=UTF8&psc=1
power wiring
https://www.amazon.com/gp/product/B00TG1TRL2/ref=oh_aui_detailpage_o05_s00?ie=UTF8&psc=1
i also recommend using https://www.amazon.com/Wago-222-412-LEVER-NUTS-Conductor-Connectors/dp/B00HIOP6SC/ref=sr_1_5?ie=UTF8&qid=1481397789&sr=8-5&keywords=wago+connector
for the wiring inside the unit, so that your wiring can be replaced easily without buying a new wiring harness.
You are correct that the cost of the actual wire is negligible, which is why I didn't actually add it in the cost.
You are also correct that it is kynar. Perhaps it was inappropriate to mention the wire at all, I was just trying to stress that I am using high quality parts not that it is the end all be all of wire :) Although I would not say you can get a "big ass spool" of it for $10. This is what I use:
https://www.amazon.com/Jonard-Industries-R30G-0100-Coated-Silver/dp/B00IKDI35I/ref=sr_1_3?ie=UTF8&qid=1481292737&sr=8-3&keywords=kynar
Fedex is $7, but I always insure for $300 which brings the cost to about $10-11
I would opt for a nice low resistance silicone wire something like this: http://www.amazon.com/BNTECHGO-Gauge-Silicone-Wire-Feet/dp/B00TG1TRL2/ref=sr_1_1?ie=UTF8&qid=1452174862&sr=8-1&keywords=16awg+silicone+wire
the trick on the ICS that im currently trying to figure out where to put the mosfet with rear wiring the gun i dont want to impede on buffer tube battery space, and really the nice wire channels that they make will not hold both the battery leads and the trigger wires for the mosfet. Also We use hand made mosfet's with a self resetting fuse
It's pretty straight forward. Here are the parts I'm using:
Those are the things I bought specifically for this project. The things I already had that helped are:
This post has made me realize I have way to much electronics stuff just lying around...
They mean wire and wick for use in building and rebuilding your own coils in RBAs and the like.
Cheapest thing on my wishlist.
Awesome contest, Thanks!
I used flexible jacketed 28 gague wire to fix mine: Striveday™ 28 AWG Flexible... https://www.amazon.ca/dp/B01KQ2LHFI?ref=ppx_pop_mob_ap_share
I also drilled holes and did the rewire externally as fixing it internally was a PITA: X-55 external rewire https://imgur.com/gallery/djSSb
You can use something like flat wire which should last a lot longer than typical wire in this application and won't have a "hump" like cord protector would have. It looks like you'll need to use the terminal blocks they sell so you can actually connect regular wire to the flat wire and to banana plugs on the ends.
https://www.amazon.com/Ghost-Adhesive-Speaker-Conductor-Sewell/dp/B079NTKWS2
Disclaimer: I've never used this stuff.
buy this pack and look for the wire separately. the pack of cotton I linked will last you a life time where the one in that pack you linked will last you maybe 2 or 3 weeks.
I use some of this for all of my projects. It has worked well and is easy to strip. Stranded wire is fine as long as you are tinning your wires.
Wire.
Wick.
And of course other diameters available from the same vendors.
And check out the video I linked in the OP. You'll need a pin or needle, needlenose pliers, and a small pair of dikes. Really simple. I also have daylight-white LED lamp with a built in magnifier for these old-fart eyes.
Have you thought about a rebuildable? A decent Kayfun clone shouldn't be much more than $30, and enough 28ga wire to last months is about $6 on Amazon, and a bag of cotton could probably last a year for a couple more bucks. If the flavor gets stale, it takes about three minutes to change out the cotton wick, assuming you have a way to empty the tank (blunt tip needles are great for this) and some decent scissors to trim the wick. I find the flavor noticeably better than my Aerotank Mega, and the upkeep costs are so much better.
Youve come to the right place my friend. I just got done building another one and came out great! I was going to upload a tourtual myself since it seems there aren't too many good ones out there for noobs and this sub regularly gets questions about this mod. Personally I find the best ones to be here:http://gameboymacro.com/macro-tutorial-ds-lite/
and here: https://www.youtube.com/watch?v=z2fRbT-KkKw
Granted the video is only subtitles but he does a good job explaining it and is not hard to follow for a visual learner.
If you have any questions shoot me a message, I'd be happy to help!
EDIT: If I could make one word of advice, I would say ditch the SMT resistor and go for a good old fashion 330 ohm resistor set. Don't just buy one cause in the chance that you ruin it you will want some spares lying around! Heres what I buy when I run out: http://smile.amazon.com/gp/product/B00BVOR6IS?psc=1&redirect=true&ref_=oh_aui_detailpage_o08_s00.
And if you plan to add a speaker or two, get some of this Kynar Coated Wire: http://smile.amazon.com/gp/product/B00IKDI35I?psc=1&redirect=true&ref_=oh_aui_detailpage_o08_s00.
This wire works great and is very versatile when it come to doing handheld mods, I use it for everything not just for these macro mods.
wires
Stripper
I used the documentation for the auber for wiring (although my machine says 2011 on the bottom, i had to follow the "2005" documentation for wiring neutral out of the back). I can link my parts below:
Rex C100 PID + thermocouple + ssr:
https://www.amazon.com/gp/product/B07QS2ZXC4
Thermocouple was wrong size for boiler so bought:
https://www.amazon.com/gp/product/B07MK55HTG
Crimping Wiring Connectors:
https://www.amazon.com/gp/product/B0776PY5JK (To tap power for pid)
https://www.amazon.com/gp/product/B078PMWNJC
​
High heat wire:
https://www.amazon.com/gp/product/B0746HRVZP
​
Along with wire strippers, mounting electrical tape
I installed an Ecobee in my place a couple of months ago and just saved the old thermostat, faceplate, and hardware so that I can reinstall it when I move out. As /u/StewieGriffin26 mentioned, check your wiring situation, because older thermostats may not have a wire carrying power from your HVAC control board to the thermostat, which newer thermostats require. If there's an unused spare wire in your existing cable bundle that's long enough, you can use it to run power from the HVAC control board to your thermostat. Otherwise you may need to install a new thermostat cable with enough wires to run an additional power wire, unless Nest has a power extender kit option similar to Ecobee, or some other workaround to avoid running new cable.
I used a combo of parts purchased from amazon and from armacost's website. Here are links to what i picked up.
Lights (Amazon)
Wire (Amazon)
LED Quick Connects (Amazon)
Light Diffusing Trays (Amazon)
Dimmer Switch (Amazon)
Power Supply (Armacost Lighting Website)
I went on a little shopping spree for my DIY/rebuildable stuff. Picked up the following:
5 glass beakers, 50-1000ml
4 oz amber glass boston round bottles, pack of 12
2x pack of 6 2oz amber bottles w/droppers
2x 2pack 8oz amber bottles
[labels for bottles] (http://www.amazon.com/gp/product/B00004Z5SM/ref=oh_details_o00_s00_i03?ie=UTF8&psc=1)
100count transfer pipettes
2 10 packs of 5ml blunt tip syringes
Heated ultrasonic cleaner (for quick steeping)
100ft A1 32 AWG kanthal
100ft A1 30 AWG kanthal
100ft A1 28 AWG kanthal
12ft 2mm braided hollow Ekowool
Pair of locking hemostats
butane pencil torch (for torching ekowool)
This genius little invention - everyone should buy this, it was like six bucks
other than that, a couple anyvape mini davide glass clearos because the protank 2 group buy I organized will likely not have a replacable drip tip, and I need at least 2 mini glass tanks that can take my bds60 from captivape.
i need me a fucking workshop, not sure where I'm going to put all this stuff...
Here is the link to save you some time
Seconding everything people have said here and want to add the following.
A glass bed with 10mil PEI from CS Hyde will do wonders for bed leveling.
Upgrade your Y plate as soon as possible, the stock one warps over enough time making bed leveling nearly impossible.
All metal hotend such as the micro swiss is amazing, no more clogged PTFE tubing, easier to clean if it does.
Z brace is a must, also print a fan cooler like the Diicooler on thingiverse. Replace the stock part cooling fan with a nice radial fan, plenty on amazon, make sure its 12v. This helps prints come out cleaner.
Yours should come with thumbwheels, if not, print some, bed leveling is easier with it.
Print some spring cups as well, keeps the springs straight and not bending when leveling the bed.
DO THE MOSFET MOD TO MAKE IT SAFE!
Watch this vid and do his printed mods https://www.youtube.com/watch?v=Tpcm4XEbP1Q&t=752s&list=PLyIdpN_zILcknsQzSZSiWhQ685NxkWsvD&index=2
Also, stay far far FAR away from Shaxon filament! It broke my hotend, check my post history to see the red glob of death I dealt with. I have had very good luck with eSun PLA.
Links for bought parts:
Fans: [here (https://www.amazon.com/gp/product/B00MJU6JR2/ref=oh_aui_detailpage_o02_s00?ie=UTF8&psc=1)]
Glass plate: [Here (https://www.amazon.com/gp/product/B07B2YLWF9/ref=oh_aui_detailpage_o03_s00?ie=UTF8&psc=1)]
Hotend: [Here(https://www.amazon.com/gp/product/B01E1HANLS/ref=oh_aui_detailpage_o05_s00?ie=UTF8&psc=1)]
Y plate: [Here (https://www.amazon.com/gp/product/B07B251KBS/ref=oh_aui_detailpage_o01_s00?ie=UTF8&psc=1)]
MOSFET: [here(https://www.amazon.com/gp/product/B01HEQVQAK/ref=oh_aui_detailpage_o02_s00?ie=UTF8&psc=1)] and wires [here(https://www.amazon.com/gp/product/B017U6PGLO/ref=oh_aui_detailpage_o02_s00?ie=UTF8&psc=1)]
I highly recommend you take it to another store and ask them if they can build your first coils for you. Most places will do it for you for free if you buy a small container of ejuice from them. Ask if you can watch them build it, and ask questions about what type of wire, wick, diameter of the coil, etc. I've found that every good store is glad to help train new users and won't make you feel bad about starting in the hobby. Get used to how their coil acts, performs, etc. Some of my local places have 'build and brunch' days, where they invite lots of people to come in and get help, learn about stuff, share tips, etc.
You're also going to want a few spare batteries (so one can charge while you're using the other), a battery charger, wick, wire, and an ohm meter.
You can compare prices on Amazon to make sure you're not paying 2x retail.
Cheap ohm meter: http://amzn.com/B00KI0BMMC
I'm sure you can get better ones, but I have this. It matches the readings on my evic, so I'm reasonably sure it's accurate.
Wire cutters: http://amzn.com/B00FZPDG1K
Kanthal wire:
24g http://amzn.com/B00H8DQ01U
26g http://amzn.com/B00JTGYS40
28g http://amzn.com/B00FBSVQX6
Never hook up new coils to your battery without doing a resistance check first. Results can be very very bad.
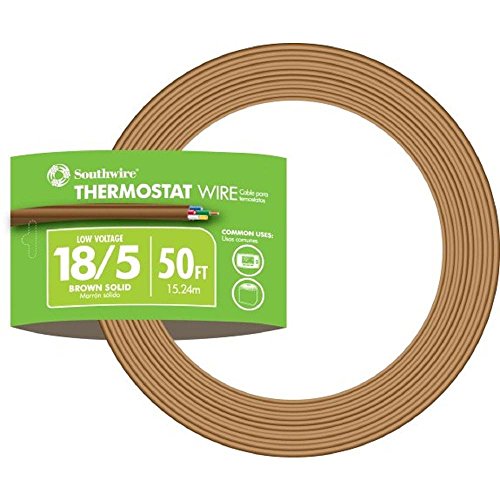
I concur with this. If you are talking portable and not a 110AC deal, put a 12v car or motorcycle battery at your launch station with power routed to each launch pad. You can go with a microcontroller if you want but I think it would be overkill and I would prefer physical switches in any event. Big buttons to mash. You can get some 18-5 or 18-7 thermostat wire:
https://www.amazon.com/Southwire-64169622-Conductor-Thermostat-Power-Limited/dp/B0069F4HHC
(here is some 14-5 if you're really worried about the gauge)
https://www.wireandcableyourway.com/14-5-soow-portable-cord-600v-ul-csa.html
If using a 5 conductor as an example, you ought to be able to take power to the buttons on one wire of the five through a master kill switch, then use fire buttons on the other four that return the individual launch pads to ground. One cable from launch control to launch station.
No, it doesn't matter at all, you just need a 12 volt power source like the cigarette lighter receptacle. There are also a lot of car modification shops if you want someone to do the installation for you.
If you want to just get one of the inexpensive backup cameras from Amazon you should check out some video tutorials to get started. Some people power the camera off of the reverse light (you know, the white lights on the back of cars when they go in reverse). That means that the camera stays off until you go into reverse. Personally I just leave my camera on, so I power everything off of my Cigarette Lighter Receptacle. Here are the parts I used:
A camera and monitor.
A cigarette lighter receptacle adapter.
A terminal strip. (This connects the cigarette receptacle to the camera and monitor).
Extension cable to connect your camera to your terminal strip.
Wire crimp connectors to connect the camera to your extension cable.
Optionally, but recommended: A cigarette receptacle splitter so you have extra power ports.
Sorry if my way of doing it is a little hacky, but it works. Let me know if you have any questions.
I wanna give you a comparison build if you ditch wireless and go for a traditional passive speaker system. This is just an example:
That's a full-fledged 5.1 system that will knock the socks off of a soundbar or any wireless system for $975 total. Some quality oxygen-free copper 14AWG speaker wire, banana plugs and some raceways (or ghost wire https://www.amazon.com/Ghost-Adhesive-Speaker-Conductor-Sewell/dp/B079NTKWS2) would run you about an additional $100~$150.
If you have the room for it, replace the bookshelf L/R speakers with towers of equivalent price from the link I showed you above. And you can add a second sub in the future and 2 Atmos speakers on your ceiling. Totally modular.
You can even shell out a bit more and get ridiculously good bass performance to make your movies + games + music that much more immersive. I'd recommend either an HSU VTF-3 MK5 for around $600 (http://www.hsuresearch.com/products/vtf-2mk5.html), or an SVS PB-1000 (which I personally have and recommend) which runs around $430 used (https://www.amazon.com/gp/offer-listing/B00K88UMPW/ref=dp_olp_all_mbc?ie=UTF8&condition=all).
Err, the tweezers just fyi MUST be ceramic tipped. You can't use normal tweezers.
For kanthal your best bet is amazon.. extremely cheap.
HERE and HERE
edit: the tweezers on Fasttech HERE
Hahah. No prob man. I'm always willing to help out a fellow vaper, especially someone in the military. 3 of my best friends served a year in Iraq and two of them are now Rangers. Anything I can do to help make your time pass easier would be my pleasure. First off, you don't need a butane lighter for the kanthal. That's not necessary at all. I don't torch any of my wire before putting it in. Usually you would use that to oxidize SS mesh before using. The first thing I mentioned was the V4 Fogger. You can buy this here( http://www.eciggity.com/fogger-v4-1-v4-4/ ) since it is sold out on Fasttech. I would also buy a replacement tank for this since it is glass. You can buy a couple of them since they are on Fasttech for only $1.80 each, just add it to your order(I would prob buy 5 just in case. It's overboard, but just in case). Next you can buy 100ft of 28g kanthal wire here: http://www.amazon.com/TEMCo-Kanthal-Wire-Gauge-Resistance/dp/B00FBSVQX6 . Next is the cotton. You can buy organic or sterile cotton. You can find this at CVS or Walgreens. I would buy about 3 bags of this just in case. If you run out, I'm sure the base that you will be stationed at would have a couple of hand fulls for you. As for other devices, not sure what you are into. Drippers are good for clouds but you have to keep dripping on them intermittently. Kayfuns/Russians are good for the tighter draw if that's what you are into. You can find these clones on fasttech as well for a decent price. Last but not least, an ohm tester: http://www.fasttech.com/products/0/10006334/1494601-atomizer-resistance-tester-ohm-meter . Let me know some other questions that you have. Also, how long you going for?
Very similar to these https://www.amazon.com/Breadboard-Jumper-Wire-75pcs-pack/dp/B0040DEI9M right down to the tie holding the bundle. As for components last night I bent the hell out of the leads on a DHT22 https://www.adafruit.com/product/385.
Also here's the Japanese cotton. You peel off the outer layer of cotton and use the absorbent middle layer.
http://m.nordstrom.com/s/2935650/
And you'll need kanthal, 28 gauge most likely or maybe 26 gauge. Order it on amazon.com from either lightningvapes or temco.
http://www.amazon.com/Genuine-Lightning-Vapes-Kanthal-Resistance/dp/B00JVXVKB0/ref=sr_1_2?ie=UTF8&qid=1410414364&sr=8-2&keywords=28+gauge+kanthal+wire
That's one of the main problems with building kanger coils low. The increased wattage eats right through those insulators. If you're going to build low, I recommend a good RBA. I recently got a Russian 91% clone from fasttech for ~15. If you're going to persist with kangers, I definitely recommend getting some 32 ga kanthal. Five wraps around a 1/16 drill bit will give you around 1.8 ohm. 4.25 shipped off Amazon
Edit: links are hard.
I've never used CAT5 but I can say that 22 guage stranded wire works for almost everything, including the hot end. This is what I used:
https://www.amazon.com/Electronix-Express-Hook-Stranded-Gauge/dp/B00B4ZQ3L0/ref=sr_1_1?ie=UTF8&qid=1468851524&sr=8-1-spons&keywords=22+gauge+stranded+wire&psc=1
You will want some 16 guage for the PSU to board wires and for the bed, but the heater pad already has long enough wires on it.
Your VTX instructions seem pretty simple to follow. Lines drawn from pad to pad, just copy what it has there. You want small gauge wire for this stuff so 22 gauge should work fine IF it is stranded silicon covered wire. You can buy kits of wire with multiple colors easily enough off amazon.
Other types of wire can be too brittle, the insulation will tend to burn and retract when soldering which can leave the wire too exposed. Silicone and stranded is the way to go. Like this.
The important part is to double and triple check your connections are right, and do a continuity check or use a smoke stopper before you ever plug a battery in.
Breadboard jumper wire 75pcs pack (amazon)
http://www.amazon.com/Electronix-Express-Hook-Wire-Stranded/dp/B00B4ZQ3L0/ref=pd_sim_hi_8?ie=UTF8&refRID=19STRGWSJDCYK0V7GY4S is what I bought. It's good to have on hand in case you decide to customer wire your guitar.
If your guitar is vintage-like and you want to use old school cloth wire, you can buy that too http://www.amazon.com/GAVITT-Cloth-Covered-Pre-Tinned-Pushback-Vintage-Style/dp/B00IFB3O5O/ref=sr_1_9?ie=UTF8&qid=1394739935&sr=8-9&keywords=guitar+cloth+wire . I use that on my vintage reissues.
So, for a basic beginning to get into electronics you need:
This would be a starter kit which would help build up soldering skills and start building up knowledge.
Getting Started in Electronics is a good read for a beginner to understand basics in circuit theory. I may have seen this floating around the interwebs as a PDF when Radio Shack was going down.
Is this the right kanthal to buy?
http://www.amazon.com/Kanthal-Wire-28-Gauge-Resistance/dp/B00FBSVQX6/ref=sr_1_1?ie=UTF8&qid=1397096496&sr=8-1&keywords=28+gauge+Kanthal+Wire
I have no idea what I am doing or what else I need to buy, have any suggestions :-)
wire
I bought these on Amazon.
I didn't need it all fo rmy printer but I am always tinkering and having some wire handy was worth it.
Thats very informative!! is this the wire you use
It's not very hard. First get some wire, I recommend 28 and 30 gauge.
30 gauge
28 gauge
Next get some drill bits. You can find a set at walmart for about $7.
Then practice. First wrap a micro coil (3/32" or 7/64" drill bit). Once you do that, unwrap it, do it again. And then do it again. Then once you are happy with it, throw it in the build learn how to squeeze out the hot spots. Vape see how you like it. Then rip it out and try a different size, different number of wraps, different size wire. You have 100 ft of 28 gauge and 30 so don't worry about wasting wire when you are first leaning, and the wire is so cheap that even if you are doing a build a day, then you are only losing $10 a year (maybe $15-$20 if you want to try different sizes).
Then to figure your ohms, use this http://coiltoy.ermeso.com/ see what the build should be, try building it. If you don't hit the target (don't worry if you are close) then try to build until you hit it. Then remember what you did to get that resistance. Then remember what works the best with that coil as far as voltage/wattage.
And the biggest thing don't be afraid to try anything. You never know if it will be good unless you try it.
[Kanger Protank 2] (http://m.ebay.com/itm/261434582730?nav=SEARCH) with an [iTazte VV battery mod] (http://m.ebay.com/itm/321459335778?nav=SEARCH). You can [rebuild the coils yourself] (http://youtu.be/cIoH-mOXKsc) with [Kanthal wire] (https://www.amazon.com/dp/B00JVXVKB0/ref=cm_sw_r_awd_IAlgub1DRSACN) and Silica/Cotton wicks!
Will a breadboard jumper wire work? I have tons laying around.
something like this: https://www.amazon.com/Breadboard-Jumper-Wire-75pcs-pack/dp/B0040DEI9M
Yup. Well dont throw any away till you have about 7 or 8 bad ones. Keep them for later. You can buy some Kanthal and some Organic cotton and rebuild those for pennies, and you will get a much nicer vape.
Nitecore
http://www.amazon.com/Nitecore-IntelliCharger-i4-Battery-Charger/dp/B005UAI372/ref=sr_1_1?ie=UTF8&qid=1405819372&sr=8-1&keywords=nitecore
VTC's
http://www.amazon.com/Sony-US18650VTC4-2100mAh-Rechargeable-Batteries/dp/B00J470LTA/ref=pd_sim_sg_4?ie=UTF8&refRID=1E35CBKZ68479WX7KXRR
28 Gauge Kanthal
http://www.amazon.com/TEMCo-Kanthal-Wire-Gauge-Resistance/dp/B00FBSVQX6/ref=pd_bxgy_sg_text_y
Also, will the VTC5 work in the K100?
nightcore $11.80 amazon, vtc4 $11-pair amazon, vtc5 $22-pair amazon, when purchasing batteries always buy from a reputable source and do your end by reading reviews and viewing photos to be sure you are comfortable purchasing from any vendor, ohm reader = $20 atleast for a dedicated one potentially less if you use a cheap and possibly unreliable multimeter, kanthal 28g 100feet $6.50 amazon, wick = $?free-$$? type source amount etc. Doesn't factor in shipping or tax. The only reason I linked amazon is due to them being very good about protecting their buyers issuing returns and refunds when needed. Prices may be cheaper from other sources.
$6 for 100 feet with free shipping
edit: $1 or $2 per foot is highway robbery.
For wire I'd buy something like this:
https://www.amazon.com/BNTECHGO-Gauge-Silicone-Wire-Black/dp/B00TG1TRL2
You probably don't need 16 gauge but it doesn't hurt and it's only $5
You can solder right? I'm assuming you can solder... otherwise this is much more difficult and more expensive as you'll need to find the right adapters.
Buy
($6)Wires:For the MOFSET mod
($1o)MOFSET
($6)Wire spades:For the MOFSET mod
($8)Assorted M3 Bolts:You need some for a few mods and for the bolts you will inevitably strip on this
cheapwonderful machine($13)Longer assorted M3 Bolts:For a few mods
($9)M4 Bolts:For one of the mods
($9)Metric allen wrench set:Had to order one of these since metric tools aren’t common round these parts
(~$20) PLA of preferred choice- You’ll run out of the sample bit quick so go ahead and order a roll or two to be prepared. You will note some upgrades require ABS so a small spool of that to your order will also help.
($6)M3 Lock nuts:Critically needed for a simple mod
($10)Threaded rod and nuts:Please note that this item seemed difficult to find online. I recommend going to your local hardware store and getting two 5/16” rods of at least 16” in length. They should have an assortment of threaded rod in various lengths available. Also note that the pitch of the threading matches the nuts you buy. Further instructions regarding this can be seen in Azza’s Z-Axis braces below.)
($6)9mm Wrench for the nozzle: Don’t wait for your first clog, go ahead and have this on hand to remove/change the nozzle. Note to only tighten/loosen the nozzle when heated.
Below is the order of printable upgrades I recommend but I suggest you mix in a few other prints along the way because this is a hobby after all and you should be having fun. It helps to have your quality as tuned in as much as possible for some of these so be patient and keep trying if you need to.
Print
Spool holder- temporary : Until you can mount your spool on top of the enclosure or any other personal preference.
Belt tensioner- print x2
Z-brace
Shielded stop button
Cable relocator : It’s a pain, but if you spend the time to do this and turn your extruder motor 90 degrees then you can get the full Z height without ruining your cables. It does involve opening all the cables to the PSU and feeding a few extra inches back through the cable chains.
Cable shroud : Looks nice if you do the cable relocator.
The following need to be printed in ABS:
M3 Bed Nut retainer: 10/10 upgrade. I know they look worse than the nice metal stock ones, but these help keep your bed level longer.
CiiCooler
Glass bed Holder
Now that the first major round of printed upgrades is done it’s time to shift to a few more supplies to pick up to really fine tune the machine.
Buy
($5)Radial fan: For CiiCooler
($5)Glue sticksThis and a glass bed is magic
($25)Borosilicate glass 8” x 8”
($26)Y-Carriage plate upgrade: This has been a nice upgrade as I now only need to relevel the bed every couple weeks instead of every print. Check out this guide for a ‘how to’ as well as a free upgrade by shifting your Y pulley over.
($15)rechargeable dehumidifier: For keeping in the bin with your opened filaments
($9)Extruder gears: Might be able to hold off on these, but will need eventually. If for some reason you have a Maker Select with metal X-axis blocks (V1 and V2, but not V2.1) then this is a must. You can follow this guide for a how to.
($28)Metal extruder plate and lever: Not needed, but nice.
($14)Noctua 40mm fan: Not needed, but makes the printer a lot quitter. A LOT quieter.
($50)MicroSwiss All Metal Hot End: The destruction of my PTFE tube by this point pushed me to doing this upgrade. If needed you can follow this guide for replacement. Remember to tighten/loosen when the nozzle its hot.
($6)Ceramic cotton: Tore off the stock one when replacing for the all metal hot end by accident. At least its thicker than stock
Now that the printer is in its final form, its time for the enclosure which is a stacked Ikea Lack hack.
Print
Spool holder
Pi Case
120mm fan cover
Fan grill
120mm fan PSU modification: I edited this to fit upside down since my PSU is mounted on the underside. This was nice since I blew the 40mm fan anyways so it made everything a lot quieter than before.
IKEA Lack filament guide
Webcam holder: This is one I designed specifically for the webcam I happen to have lying around. The camera mount piece can be changed out no problem though for what ever webcam you have or buy. The SketchUp file is included on Thingiverse for such purpose.
Buy
($20)2x Ikea Lack: Luckily there is one right down the street from me. I am located in North America though, so we do not have the STUVA, if you live literally anywhere else you may check in to this as an alternative.
($80)Plexi glass for enclosure: Could be cheaper alternatives, but it looks cool
($9)Foam pads for feet
($42)Raspberry Pi3: For OctoPrint. I also suggest using a different USB cable than the stock one provided by Monoprice or you will have issues.
($9)2x 120mm fans: Used for the power supply cooling and enclosure
($6)Rocker Switches so that the enclosure fan can be on for PLA, but off for ABS
($15)Dimmable LED lights
($10)8mm LED light connectors
Total:
$250 printer + $452 upgrades/parts + ~$80 PLA/ABS to date
Well, if it must be electric, here's a rapid red formula.
https://www.reddit.com/r/Nerf/comments/632gev/what_to_do_with_a_stryfe/dfs33lm/?utm_content=permalink&utm_medium=front&utm_source=reddit&utm_name=Nerf
Increase your amount of wire though.
https://www.amazon.com/dp/B0154MAECC/ref=cm_sw_r_apap_z1S2DpS1FlvVN
Maybe even skip the dummy battery if you can solder a wire to the electrical contacts instead. (And maybe cardboard wrapped in electrical tape if you need a spacer to keep the other batteries from moving around).
In theory you could get unit cost down to $25.33. With a one-time setup cost of $35.
I know this isn't the answer you want, but for six dollars...
https://www.amazon.com/Breadboard-Jumper-Wire-75pcs-pack/dp/B0040DEI9M
As everyone else has said, you don't want those batteries nor that charger. They are unsafe to use in a mechanical mod, and that charger will either crap out on you or break within a few months. You'll also need an ohmmeter to check the resistance of your builds, kanthal for your coils and something for wicks. Recommendations below:
I know it seems like a lot to take in at first, but it'll be worth it once you get everything and it's nice high quality stuff to last you.
I saw that guide and wanted to do it, but what sort of wire would you use for those twisted pairs?
https://www.amazon.ca/Striveday-Flexible-Silicone-Copper-Electric/dp/B01LH1FR6M/ref=sr_1_1?ie=UTF8&qid=1499781694&sr=8-1&keywords=22+awg+wire
Is this stuff any good?
Amazon sells Temco wire, it's $7 for 100ft. They also have organic cotton balls, I get these.
I have an authentic Brass Monkee and it's my favorite RDA. I wish it were just a tad bigger to build on. The Tobh I have is from Tobecco, and the o-rings are shit. They frayed really quickly. Maybe I just got unlucky? While o-rings are easily replaced, the quality of the Tobecco was good, so I'd assume the Brass Monkee clone would be as well.
Depends if you're interested in the 18650 mechanical mods or more like box mods.
If you started on a kanger tank of any kind, most would consider a Nautilus an upgrade. But venturing further the Kayfun is probably a better option if you take the time to build and learn.
As for mods; You could use a Nautilus on an MVP 2.0 for a box mod. All the way up to DNA chip mods which just give you more exclusive control over your exact power input to the coil.
I started with an eGo-C and eventually decided to try new stuff. Clearomizers and different tanks. Kanger T3's to PT2. Cartos and all kinds of bs.
If I had to recommend you a set up via my personal tastes and through real testing. I would tell you to buy:
VTC-4 Purchase LINK
Nemesis Clone Purchase LINK
Kanthal Purchase Link
Charger Purchase LINK
Ohm Meter
Cotton LINK
And your own e-liqid of course.
None of these items are necessary to vape on and are not of a professionally organized list. But they'll definitely move you on up in the vaping world and your experience can be completely tailored however you like with these items.
I believe I found the wires needed, but it would be awesome if someone checked, just to be sure!
​
Also, are the yellow wires the same as the others? I can't find markings on mine.
I'm a fan of these for joining 6 wires:
https://www.amazon.com/Wago-Wire-Connector-Clear-Conductor/dp/B000F5THV8
I didn't want to create a whole post for this question, sooo, would this wire suffice for trying to build a induction heater for my dynavap? https://www.amazon.com/dp/B01KQ2JNLI/ref=cm_sw_r_tw_dp_U_x_9NH1CbAKYCS8J
Kanthal is typically used and will be your most commonly seen wire. I only know of Gplat as an alternative (I used it... not worth the price increase IMO) I get mine from Amazon, I originally started with 28 gauge, then a buddy let me borrow his 26 gauge, that was good too. I purchased some 24 gauge and it drains my batteries hard (which is why I want a dual box mod.)
Yes, a mod is the housing. Then you will need your atomizer and battery.
I started dripping with the IGO-w atty with the Smok Magneto Mod. Biggest problem I had with it is it was small and i had to drill the air holes. I still use the Magneto.
I would never suggest tank anything. I tried both the genuine and the clone russian 91% and it was a terrible experience.
So, for a beginner getting into dripping I would suggest these parts:
[Plum Veil Atomizer] (http://www.eciggity.com/plume-veil-clone-by-tobeco/) (Note! I have not bought anything from this site.)
ANY single battery 18650 mechanical mod. They all realistically do the same thing. RipTrippers.com does a lot of reviews, they should be able to point you in the right direction. I do however suggest one with a magnetic fire button instead of spring. (It will lower resistance and last longer because springs are weaker than magnets)
Atleast 2 [18650 Sony batteries] (http://www.myvaporstore.com/SONY_VTC5_18650_2600mAh_Battery_Flat_Top_30A_p/sny65026-f.htm)
Charger I chose the two battery one for money purposes but I suggest the 4 since it's only like $5 more and can charge a myriad of batteries
[These clamp things] (http://www.amazon.com/5-5-KELLY-Hemostat-FORCEPS-Straight/dp/B000QWK174/ref=sr_1_6?ie=UTF8&qid=1414788271&sr=8-6&keywords=medical+clamps) makes building much easier
I use these but a lot of people use nailclippers
[Wire] (http://www.amazon.com/Genuine-Lightning-Vapes-Kanthal-Resistance/dp/B00JVXVKB0/ref=sr_1_2?ie=UTF8&qid=1414788396&sr=8-2&keywords=28+gauge+kanthal+wire) either 28 or 26 gauge is what I would recommend.
Cotton Balls
[Ohm Tester] (http://www.amazon.com/gp/product/B00MBNCOMG/ref=s9_simh_gw_p328_d0_i1?pf_rd_m=ATVPDKIKX0DER&pf_rd_s=center-2&pf_rd_r=0J7AHRP45YSC4DHAS7DB&pf_rd_t=101&pf_rd_p=1688200382&pf_rd_i=507846)
Drill bits, allen keys or screwdriver to wrap coils around (i usually use Allen Keys)
Another Screwdriver for you builds
Tweezers are nice for accurate adjustments
Some people suggest a torch.... it's a waste of money for most builds. The main idea behind them is they are used to burn off any chemicals on the wire... but when you are done building you just fire it a few times before you put cotton in them and it does the same thing. Some builds need a more flexible wire... that is the only time you will need it.
Note: I 100% support the use of Clones, especially when you are starting out your vape life. They save so much money and do an adequate (if not better) job of most authentics.
Recently I finished a 3S Rapidstrike build:
Motors
Microswitches
Some wire
a lipo battery
Also tools, like a soldering iron or a dremel (i don't have a recommendation here, i just use a hobby knife).
My stock flywheels recently gave up the ghost, so I replaced them with some Worker flywheels.
The only other thing that comes to mind right now are flywheel cages: consider one of these 3D printed ones from the Open Flywheel Project, or an Artifact Red cage + flywheels.
this is what I use:
http://www.amazon.com/Electronix-Express--Hook-Wire-Solid/dp/B00B4ZRPEY/ref=sr_1_1
This will probably work for you:
http://www.rfcontrolsystem.com/index.php?main_page=product_info&cPath=470&products_id=579
In the manual it doesn't fully tell you where to put the power leads. Hook it up like in the youtube video linked by the other guy. If the directions are backwards, reverse the motor. Red is + and black is -.
You will need a 12 V DC power supply. Often called wall warts or wall plugs. You can get one on Amazon, Fry's, Best Buy, etc. Here's the first one I found, I have no idea about whether it's a good brand or good price or anything. Read the reviews. It's a 2 Amp which exceeds the minimum I calculated earlier, but you could go for a 3 amp as well:
http://www.amazon.com/BINZET-Adapter-Regulated-Supply-Copper/dp/B00PJZQDDO/ref=sr_1_1?s=electronics&ie=UTF8&qid=1457316150&sr=1-1&keywords=12+V+wall+plug
You will need the little plug that take DC power as input and outputs a red and black wire. Here's an example:
http://www.amazon.com/5-5mm-2-1mm-Female-Connector-Camera/dp/B005CMP434/ref=cm_cr_dp_asin_lnk
You will also need wire to go from the plug to the board, and since there are multiple points on the board to connect to +12V and 0V, you will need jumper wires to spread to multiple terminals like she does in the video. So you need something like this.
Finally to cut and strip the insulation from the wires you will need something like this.
Sorry to bug you, but one more question. If I'm to run a C wire, should I just replace the original wiring with a 5 wire bundle? I ask because the wires are not labeled, so I don't know which is R and which is W up at the thermostat. Was thinking this: https://www.amazon.com/Southwire-64169622-Conductor-Thermostat-Power-Limited/dp/B0069F4HHC/ref=sr_1_5?ie=UTF8&qid=1549010519&sr=8-5&keywords=thermostat+wire
perfectly fine. i mean they're literally the same cables that ceesa uses so i was pretty confident they were gonna be just fine. but somebody messaged me and he ordered awg 30 wires from amazon but they were almost double the thickness of the ones i used (https://www.amazon.com/StrivedayTM-Flexible-Silicone-electronic-electrics/dp/B01KQ2JNLI/ref=sr_1_5?keywords=awg+30&qid=1549838351&s=gateway&sr=8-5)
he couldn't even get them through the paracord so there seems to be a difference.
https://www.ebay.com/itm/25-Meter-Litze-ROT-0-05mm-LIFY-Kupferschaltlitze-Kabel-auf-Spule/251860664436?epid=2267028362&hash=item3aa410c074:g:mp8AAOxy2LJRBppz:rk:2:pf:1&frcectupt=true
internation ebay link for the ones i used. german linked was already posted in the previous post
I use a twirly it’s great never will go back.
https://www.amazon.com/3M-Hand-Connector-Driver-WCD-H/dp/B001CGLGUY/ref=mp_s_a_1_12?ie=UTF8&qid=1536976071&sr=8-12&pi=AC_SX236_SY340_QL65&keywords=ideal+wire+nut+driver
First advice is to get yourself some 28 guage kanthal. Will be a hell of a lot easier to work with and you can build a bigger coil.
can we bring wire?
like these
http://www.amazon.com/Genuine-Lightning-Vapes-Kanthal-Resistance/dp/B00JVXVKB0/ref=sr_1_2?ie=UTF8&qid=1419138970&sr=8-2&keywords=kanthal
Amazon - Lightning Vapes LLC
ok what about 100
http://www.amazon.com/dp/B00PEYI6LM/ref=wl_it_dp_o_pC_S_ttl?_encoding=UTF8&colid=3DJMT7TZ7Z9H7&coliid=I2B3WL0E1JHUJL
http://www.amazon.com/dp/B00JVXVKB0/ref=wl_it_dp_o_pC_nS_ttl?_encoding=UTF8&colid=3DJMT7TZ7Z9H7&coliid=I15SR2BR9HVXHX
http://www.amazon.com/dp/B000YL8NOK/ref=wl_it_dp_o_pC_nS_ttl?_encoding=UTF8&colid=3DJMT7TZ7Z9H7&coliid=I1EJK40ZD0H5UA&psc=1
http://www.amazon.com/Resistance-Reader-Meter-Rebuild-Atomizer/dp/B00MBNCOMG/ref=sr_1_2?s=industrial&ie=UTF8&qid=1419535183&sr=1-2&keywords=ohm+reader
http://www.amazon.com/dp/B00J470LTA/ref=wl_it_dp_o_pC_S_ttl?_encoding=UTF8&colid=3DJMT7TZ7Z9H7&coliid=I30LGRC3K0X7R3&psc=1
http://www.amazon.com/dp/B00NND4EJ4/ref=wl_it_dp_o_pC_S_ttl?_encoding=UTF8&colid=3DJMT7TZ7Z9H7&coliid=I3QTS9HTELPMME
just dont know what mod clone
or i was thinking this kit ? http://www.amazon.com/Nemesis-Stainless-Mechanical-Patriot-Silver/dp/B00PIMCBTS/ref=sr_1_7?ie=UTF8&qid=1420960019&sr=8-7&keywords=rba+clone
I tried this stranded wire because it is all I had on hand for the LED/sensor other than my thicker solid core wire. There was no spec sheet for it, but someone on amazon answers said its resistance was 0.3 Ohms per foot and I only ran about 2 ft of it. Do you think that’ll work? If not, I’m open to buying some different stuff.
I need to check my soldering tonight with a meter but so far transferring it from my breadboard to a “perma-proto” board has bricked it lol. Here’s a picture of how I wired the sensor with the capacitor - maybe you can see the problem. I tried researching it but don’t really know the verbiage even.
What to buy:
Sterile cotton rolls: Sold at drug stores like CVS. Boiling to remove any chemical traces would be a good idea.
32 gauge Kanthal Wire: Link is 100' for $5 on Amazon. That should last you a long, long time.
1/16th drill bit or small screwdriver to wrap coils around.
EpicVaping video guide
I think Ideal made one that has an offset shank, similar to the old Klein offset cabinet blade screwdrivers. I have one somewhere - the plastic wire nut head is red plastic, and the handle is red and black.
Edit: Never mind, I guess it's a 3M tool.
Get a wirenut spinning wrench
3M Hand Wire Connector Driver WCD-H https://www.amazon.com/dp/B001CGLGUY/ref=cm_sw_r_cp_apa_i_RhxLDbKD9XD82
I bought a set of 24 gauge hookup wire in 6 colors, which is very helpful for keeping things clear.
I’ve also found that heat shrink tubing is helpful for insulating loose joints (eg direct connections between LED and current-limiting resistors) and offering extra color-coding options.
I decided to do PWM. If I use a transistor I won't need a heat sink, right? Will I need any capacitors?
these are the parts I've found so far (Other than motion sensors, short jumper wires, and other common items)
Transistor \
Relays/ One or the other, transistors preferably
Wires
Nano Every
Breadboard(s)
Barrel Jack
Soldering Iron
Solder
Lights + Cable - Would the cable work with the barrel jack to provide power for the Nano Every and the LEDs?
Potentiometers
Awesome! That helps a lot. Could I use [this] (https://www.amazon.com/dp/B0069F4HHC/ref=cm_sw_r_other_awd_g2RDwbF02MBT9) to connect two cut strips? I'm going to micro center today to see if they have any wiring there.
I'm a huge fan of these things.
.. Just buy a spool and 28awg and run it yourself, I don't think usb2 cables require shielding, though you could buy some of that too if you want... not sure what width i'd go with, but here's an example amazon item that's 3/8 diameter.
https://www.amazon.com/Tinned-Copper-Metal-Braided-Sleeving/dp/B01MEG9V2R/ref=sr_1_cc_2?s=aps&ie=UTF8&qid=1520449645&sr=1-2-catcorr&keywords=metal+braided+shielding
if you want fancy colors:
https://www.amazon.com/StrivedayTM-Flexible-Silicone-electronic-electrics/dp/B01KQ2LHFI/ref=sr_1_1?s=industrial&ie=UTF8&qid=1520449792&sr=1-1&keywords=28awg+silicon
Here is an example: http://www.amazon.com/Breadboard-jumper-wire-70pcs-pack/dp/B0040DEI9M/ref=sr_1_3?ie=UTF8&qid=1333314122&sr=8-3
Right now I am using wires out of Ethernet cables but I am planning on getting a box of these: wire
If you have shoe molding along the floor, often possible to pull it up and run speaker wire behind. There's also flat speaker wire than be run a little more easily under area rugs: https://www.bestbuy.com/site/rocketfish-50-spool-ultra-flat-speaker-wire-white/5715510.p?skuId=5715510 . And ghost wire than be run up a wall and then painted over: https://www.amazon.com/Ghost-Adhesive-Speaker-Conductor-Sewell/dp/B079NTKWS2
If you don't use speaker wire and subwoofer cable, then you'll have to run a power cord to each speaker and sub. Might paint a terrible picture of that, and then maybe you might get to run speaker wire :)
Outlaw Audio makes wireless kits that can be used with speakers and subs.
http://www.outlawaudio.com/products/OAW3.html
http://www.outlawaudio.com/products/OAW4.html
I have no experience with nichrome so I couldn't say, kanthal is pretty easy to find in other places though http://www.amazon.com/Kanthal-Gauge-20mm-13-75-Resistance/dp/B00C8H5ZFI
People make those super clean looking breadboard setups using spools of wire like this:
https://www.amazon.com/StrivedayTMFlexible-Silicone-Electric-electronic-electrics/dp/B01LH1FR6M/
And something like this to bend the wire into shape:
https://www.amazon.com/Velleman-VTBEND1-Resistor-Component-Bending/dp/B00TSUXJ3I/
Your stepper motors will plug directly in. You'll have to experiment with which direction the connectors go on. You can't damage anything if you get them wrong, so don't worry too much about it. You CAN damage things if your stepper controller current is too high, so make sure to check that before you start.
The endstops connect to X- and Y- on the white connector strip. They should share a common ground that you can just connect to any ground (the black strip.) I just used regular jumper wires like these.
You pull 24v and ground for the blue terminal block from the power supply's white 4 pin connector. The power supply board is labeled, so it's not hard to figure out what's what. You can cut the original connector and reuse it, or build a new one. The connector body is A19952-ND and the pin sockets are A19991CT-ND. I got mine from Digi-Key.
Here's where it gets weird. You need to invert the laser control signal from the Arduino to the L pin. I built the circuit on this page, although you could use an inverting optocoupler I suppose. The L pin, handily enough, is on the same white 4 pin connector as the 24v. GRBL 1.1 changed the laser output to a different pin, so your laser output will come out of the pin labeled Z+ on your shield.
I think that's everything I did with regard to the controller. Let me know if you've got any other questions.
 
edit: You might have a different PSU than I do, so none of this will make sense. In that case, read this.
Post a drawing of your living room.
If you don't want to dig into the walls, there is speaker wire that is flat and will stick to walls.
https://www.amazon.com/Ghost-Adhesive-Speaker-Conductor-Sewell/dp/B079NTKWS2
That's just regular wire that you can buy in spools, sometimes called 'hookup wire' either solid core or stranded. Cut to length, and solder.
https://www.amazon.com/Stranded-different-colored-spools-included/dp/B00B4ZQ3L0/ref=sr_1_3?ie=UTF8&qid=1526439010&sr=8-3&keywords=wire+assortment
https://www.amazon.com/Valuepro-JMS818-01G-Stranded-Hook-Up-Assortment/dp/B00R5CFAR4/ref=sr_1_sc_2?ie=UTF8&qid=1526439036&sr=8-2-spell&keywords=wire+assortmenthook+up+wire+solid
Hear the crickets? :(
https://www.amazon.com/gp/product/B01KQ2LHFI/ref=ox_sc_act_title_10?ie=UTF8&psc=1&smid=ANPVYBWUHNHQ2
I have never been so torn...order 150ft of 20ga-30ga. 30 of each color...
I mean..I know I will use it over the next 3 years...
The XT60 connectors were actually just delivered today and the 3D Printer Heated Bed Power Module along with 14 Gauge Silicone Wire will be delivered tomorrow. I went ahead and ordered all of that alongside the printer just to be on the safe side, was just hoping it wouldn't be necessary.
I have my stock filament sensor wired directly to my RPi. I bought these cables from Amazon and soldered them together to get 36" length so there's enough slack as Z rises. It works with OctoPrint and the "Filament Sensor Reloaded" plugin.
This may be helpful:
https://www.youtube.com/watch?v=j7JfQXTf16U
When first getting into mechs there are a few costs that are unavoidable. They are as follows:
Good batteries
Sony VTC5 or VTC4 from illumn.com or another trustworthy battery supplier.
A good charger
Nitecore i2, Nitecore i4, Efest LUC v4, or Xtar brand chargers.
Ohmmeter
http://www.fasttech.com/product/1519800-atomizer-resistance-tester-ohm-meter
Kanthal
28 gauge
http://www.amazon.com/gp/aw/d/B00FBSVQX6?cache=38a824a0030f01bef8e0aaea10a9fb59&pi=SX200_QL40&qid=1411501324&sr=8-1#ref=mp_s_a_1_1
24 gauge
http://www.amazon.com/gp/aw/d/B00K22JQ2E?cache=38a824a0030f01bef8e0aaea10a9fb59&pi=AC_SX110_SY165_QL70&qid=1411501449&sr=8-6#ref=mp_s_a_1_6
Organic cotton balls or rayon (sold as cellucotton 100% rayon)
This stuff will need to be bought no mater what mechanical mod you get (Gauge of kanthal can be different sizes)
Now for the fun part, picking mods. The nemesis is a solid performer.
Nemesis
http://www.fasttech.com/products/3027/10009160/1604509
This should immediately be done to the switch. It is the best modification that I have ever made and it is free.
http://www.reddit.com/r/electronic_cigarette/comments/1yczcg/my_fix_for_the_nemesis_button_and_how_to_shorten/
Switch Magnets
http://www.fasttech.com/products/3099/10005773/1558901-switch-magnets-for-nemesis-mod-10-pack
If you want power regulation you can use a kick module which regulates wattage between 5 and 12 watts.
Kick Module
http://www.fasttech.com/products/3099/10006524/1501000-variable-wattage-kick-module-for-mechanical-mod-pv
If you are using a kick then you don't need to worry about voltage drop, but if you are going for more than 12 watts (which you are most likely going to do unless you are using a kayfun or clearo) copper tape will reduce voltage drop significantly.
Copper Tape
http://www.amazon.com/gp/aw/d/B00CBPK0FW?cache=38a824a0030f01bef8e0aaea10a9fb59&pi=SY200_QL40&qid=1411500089&sr=8-1#ref=mp_s_a_1_1
Also optional, to reduce voltage drop and overall length of your mod. This one is specifically made to fit the nemesis and kayfun.
Nemesis Hybrid Connector
http://www.fasttech.com/products/3023/10009156/1662400
I use one of these to connect the nemesis in 18350 mode with a kayfun 3.1. It stands at 4 inches tall and is great for putting in your pocket when you're out drinking, causing trouble, or whatever it is that the kids are doing these days.
If you are looking for something a little cheaper to just get the feel of a mech, I started with an M16 telescopic mod.
http://www.fasttech.com/products/1411/10005307/1627200-sentinel-m16-style-telescopic-mechanical-mod
You won't be able to put a kick in it or use copper tape and it is made mostly out of aluminum, but it is a solid mod to start with and can take 18350-18650 batteries. Any 18350 batteries that you get should be AW IMR or purple Efest batteries.
Of course you will need an atomizer to go with your new mech. Most 3 post drippers are good to start out with. I prefer the IGO-M because of the large air holes and 2 screw positive block, but there are a lot of options for drippers. The Kayfun 3.1 is usually a good starter rebuildable tank atomizer (RTA)
And last, but not least, we get to battery safety and types of mods. Godofsteam.wordpress.com/intro-to-vaping/ is the best site that I have ever visited for research into mechs and rebuildables. It should be all you need to help you get started.
Here is my setup:
The battery for the P3 last me 16 to 18 hours before I have to charge them again. I usually buy 2 batteries and have one in reserve fully charged.
I have the exact same wire and i find i need less wire to achieve the same resistance as others, that is extremly weird
I doubt that you're going to get a better price than this on here
http://www.amazon.com/gp/aw/d/B00FBSVQX6/ref=mp_s_a_1_1?qid=1398059494&sr=8-1&pi=SX200_QL40
They also have other gauges of wire on there too
Here's what I got,
http://www.amazon.com/gp/product/B000TCD51A/ref=oh_aui_detailpage_o04_s00?ie=UTF8&psc=1
http://www.amazon.com/gp/product/B00JVXVKB0/ref=oh_aui_detailpage_o05_s00?ie=UTF8&psc=1
http://www.amazon.com/gp/product/B00FBSVQX6/ref=oh_aui_detailpage_o01_s00?ie=UTF8&psc=1
You can get tons of rebuilding stuff on Amazon for cheap. I definitely recommend Japanese cotton for your wick.
Japanese cotton wick
Kanthal
so i'm looking at buying these bulbs, these connectors and this wire. altogether it'll be around $20, but i'll only need some of this stuff for each.
i'm trying to decide if it is worth buying the extra connectors and wire or if i should just buy this pair of connectors with wire already soldered on and the bulbs and save myself $10.
I bought two of these: $9.99 - Spytec Hardwire Kit , and a pack of these $7.69 - Add-a-Circuits.
So basically, you pop 1 of those add a circuits into your fuse box. You pull a fuse, put that in its place. It has two slots for the original fuse you pulled as well as the 15 Amp fuse that comes with it for the Dash cam's power. Get that package I linked as it's only $8 and comes 5 of them and with the fuses you need. A single one on Amazon without fuse was $5-6. Then you crimp both red ends of the two hard wire kits to the add a fuse. Just insert the two red wire together and smash with pliers. Then attach the two black wires to a bolt on your car's frame (I found one inside the fuse box itself.)
Then pull the A-pillars on your car and run the long mini USB cables to where you want the cameras to live. Tuck the cables under pillar panels or into the headliner seems near the windows. I usually shove the wires into the headliner panels with a putty knife.
One note though, the spytec kits have very long USB cables, more than enough to run from your front fuse box through the A Pillars to the rearview mirror area. However they are not long enough to run from the fuse box across the entire length of the car, through the hatch area and onto the hatch back glass of my Veloster. So what I did was cut the USB power cable side, and solder in about 6' more black and red wire. I just had I laying around in my shop, but any cheap 18 AWG wire will do.
If you like, even though my install is finished, I could make a small movie clip about how it looks to help guide you.
So something like this should work?
..or less than $5: http://amzn.com/B00C8H5ZFI
Connectors like these will help you keep your 6-wire neutral bundle tidy.
If you want something you will hold onto for more than a couple months I would go with the following:
Kayfun 3.1
Choose one that works with 18650s
Intellicharge
28 Gauge Kenthal
These Sony 18650s
aren't the real deal, but it's so hard to come by legit ones without seeing them in person.
Also you may want to pick up some organic cotton balls at a local shop (Walgreens, Walmart, Target, etc.).
Depending on the mod you choose, this should be under $100. GG
Edit: If you are entirely new to coil building and how batteries work, I would suggest educating yourself first. There are plenty of resources on the subject.
Oh dear god, please buy one of these:
http://www.amazon.com/Elenco-Piece-Pre-formed-Jumper-wire/dp/B0002H7AIG/ref=sr_1_1?ie=UTF8&qid=1345765743&sr=8-1&keywords=jumper+wire+set
http://www.amazon.com/Breadboard-jumper-wire-70pcs-pack/dp/B0040DEI9M/ref=sr_1_2?ie=UTF8&qid=1345765764&sr=8-2&keywords=jumper+wire+set
You are going to injure yourself cutting and stripping wire for your project.
Here you go
$26(4) 25rs use code lv15
http://www.lightningvapes.com/products/samsung-inr-18650-25r-battery
$4.50 100ft kanthal http://www.amazon.com/Kanthal-Gauge-Wire-32mm-Resistance/dp/B00JVXVKB0/ref=sr_1_2?ie=UTF8&qid=1422678718&sr=8-2&keywords=kanthal
$12.19 nitecore i2 http://www.amazon.com/NiteCore-i2-V2014-Universal-Intelligent-batteries-Compatible/dp/B009JMDD9U/ref=sr_1_3?ie=UTF8&qid=1422678942&sr=8-3&keywords=nitecore+i2
$3 Cotton walgreens or walmart
$20-25 misc RDA from /u/musicka
$80 Sig 150 http://www.ebay.com/itm/SIGELEI-150W-V2-BOX-MOD-EXTRAS-100-AUTHENTIC-BEST-MOD-MODABLE-VAPE-150W-/291367295575?pt=LH_DefaultDomain_0&var=&hash=item43d6d81a57
If you don't want to use Ebay then you can find them for around the same price all over the place.
$5 Screwdriver set Harbor Freight (20%off codes online)
$1.50 Pliers
$1 Wire Cutters