Best fuses according to redditors
We found 188 Reddit comments discussing the best fuses. We ranked the 99 resulting products by number of redditors who mentioned them. Here are the top 20.
We found 188 Reddit comments discussing the best fuses. We ranked the 99 resulting products by number of redditors who mentioned them. Here are the top 20.

![Uriveusa 12V Car Add-A-Circuit Fuse TAP Adapter Fuse Holder with 10A, 20A Fuse [Upgraded Fuses] - (2 Pack) (Micro2 Fuse)](https://m.media-amazon.com/images/I/31Ke6pgFjCL.jpg)


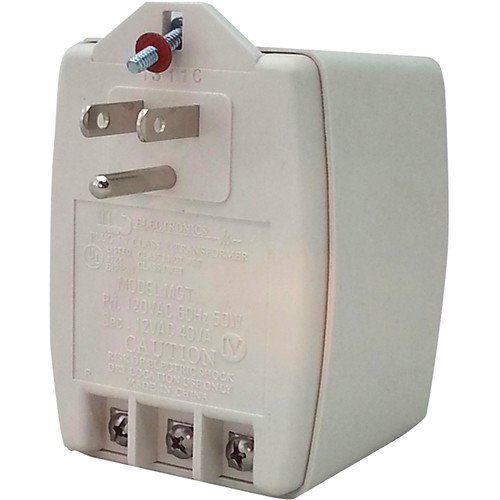


OMG! How flippin' old is your house? I haven't seen one of those in forty years.
Congratulations. You are the proud owner of a Bussman receptacle and fuse holder. Man, that is seriously old school. Like 1930's old.
Believe it or not, you can still buy one today:
http://www.amazon.com/Cooper-Bussmann-BP-SRU-Receptacle-Holder/dp/B00004WA3I
The reason it's not working is that your microwave is drawing more power than the fuse could handle. Chances are that the wiring leading to that outlet is undersized, at least by today's standards. I urge you; no, I STRONGLY urge you not to pull out the outlet and replace it with a new one. I am worried that if I am correct, your microwave could overheat the wiring in that circuit. Trust me on this........overheating wires in an old house will never result in a good outcome.
If I am correct about what caused the outlet to shut down, you should pull a new circuit into the kitchen for your microwave. It is the safe way to solve your problem.
I would pick up a resttable fuse
It's pretty easy to add a usb charging port with this and this.
You'll be looking for something like this near the heating coil, I presume. It could be elsewhere also but once located, see if the temp & amp ratings are legible and order exact or something close.
Edit- A continuity test across the ends will let you know if the fuse is the culprit...infinity=blown.
You should buy one of these
Others have covered understanding current draw and battery capacity. I'll add a couple more things:
Here's my 5 amp hour LiPo for my FT-817 with fuse and powerpoles. https://imgur.com/a/OWpJQ
I understand not everyone is mechanically inclined, but I hate to see people paying for a dashcam install. They're one of the simplest installs you can do on a car! Even if you've never wired anything in your life, it's pretty simple! If you really hate the cigarette adapter and want to hide your wires, all you need is about $8 on amazon, or at autozone, oreillys, anywhere for an "adapt a fuse".
You just need to connect the positive from the dashcam to this baby and pop it in the fuse panel (almost always located in the car). Connect the negative to just about anything metal in the car and it's grounded.
Like others have said, be sure you bought a dashcam with a capacitor and not a battery. The heat out here will ruin the battery, fast. The capacitors have a little easier of a time.
Good luck!
https://www.amazon.com/Uriveusa-Circuit-Adapter-Holder-Upgraded/dp/B01LFXA5YQ/ref=sr_1_1_sspa?keywords=car+fuse+adapter&qid=1564186478&s=gateway&sr=8-1-spons&psc=1&spLa=ZW5jcnlwdGVkUXVhbGlmaWVyPUEzQzgxMlkwMU9DNjhKJmVuY3J5cHRlZElkPUEwNzA1NDIxQk9FVTQ1TkszUkI0JmVuY3J5cHRlZEFkSWQ9QTAwMjMyMjgzOEQ1RjdSNTdRSVhKJndpZGdldE5hbWU9c3BfYXRmJmFjdGlvbj1jbGlja1JlZGlyZWN0JmRvTm90TG9nQ2xpY2s9dHJ1ZQ==
Apeman = Lipo battery = lasts 1 or 2 summers, then dead.
---
Budget dash cams:
Best value:
Versatile: Mobius ($70-100 USD) (Requires separate purchase: Power cable or hardwire kit + Micro SD card + adhesive Mount) + recommended purchase Super capacitor - Good video quality, Fair build quality, Lackluster parking mode: Automatic, Not buffered, Requires hardwire kit with low voltage cut off feature to enable parking mode. No wifi/cellphone app. - This isn't the best dash cam in the world, but it is one of the smaller ones. It was made for the drone world, and repurposed for the dash cam world. Lacks Cloud feature. - No GPS - Lacks G sensor (because it is part of the drone world)
Budget Dual Cams:
Last year's Flagship Dual Cams:
This year's Flagship Dual Cams:
Taxi/Uber Cam:
Suggested Hardwire kits:
Things that make hardwiring easier:
Yep I've said the same thing in the subreddit. Always buy a thermal fuse that permanently blows. The one from the BOM will reset itself IIRC. I believe this is one of the ones I've used in the past printer bed only needs to go to ~110 for ABS, that gives you a little leeway over. I use rescue tape to secure them to the heating pad to make sure they will blow if the need ever arises.
using something like this:
http://www.amazon.com/Shipping-CIRCUIT-BLADE-PROFILE-FUSETAP/dp/B00K17A2E6
Allows you to tap into an existing fuse slot fairly easily, its pretty much unplug a fuse, plug it and two fuses in.. then you can wire to the existing wire and a metal to the frame point under the dash.
I have done this with my car since my cigarette lighters are always on.
I used it to wire one of these in: http://www.amazon.com/uxcell%C2%AE-Charger-Cigarette-Lighter-Female/dp/B00EZJBELQ
And I just plugged my cam into that.
Well, I have a splitter on that now and my cam and gps are on it.. but same thing..
I've got the old version of that camera and it's very good. Importantly for me, it's small enough to fit behind my rear view mirror and has a really nice small mounting bracket with tape rather than a huge suction cup that will fall off every other week.
My power outlet is inconveniently placed, so I used add a circuit to hard wire it into my fuse box.
Most people will find a switched wire at the fuse panel using a fuse tap.
The module plugs into the antenna jack on the PCM. The plug types are different so that's where the adapters come in. There is a stick on button to turn it on and off and control calls and audio track. You tune the radio to a specific station and hold the button to turn on the module and go into BT mode. Hold the button to turn it off if you want to listen to the radio.
Here is a good DIY guide. Pretty easy, even for a dunce like me. If you don't want to splice the power to your PCM harness, you can get a fuse doubler to plug into the fuse box in the driver's side footwell. For the mic, I just wedged it in the corner of the dome light frame piece and ran the cable along the headliner and around the passenger side, behind the glove box, and into the rear of the center console. You can tuck the wire into the passenger door rubber molding with a plastic card so it's hidden and tight.
/r/porsche thread
Thank you so much for your reply! This is exactly the type of response I was looking for! The size was a worry to me, but I felt it was a bit over exaggerated since it was often compared to the A118C which just has a sleeker look on the window. I think you confirmed that for me. As far as the reviews I was referring to: There were several on amazon that said they received a free device in order to review it, and they all had 5 stars which made me suspicious of an inflated review. Also some of the reviews would mention the driver assistance prompts like they were great, even though I have received the overwhelming opinion that it sucks (but I can just turn it off). This just made me suspicious as well.
I think I am leaning more towards the Yi dash cam, since it seems to offer more features and be a little better quality image. Although a bit more obvious, I think you proved it is still quite small. I think I will just risk it on the battery issue and call it a lesson learned if it screws me over. It rarely exceeds 100F where I live.
Anything else you think I should know before purchasing the Yi? I will probably purchase with the link in the original post text if that matters.
Also, since you seem quite knowledgeable about it, I also had a question about hard wiring to my fuse box (since I only have one cigarette lighter.) If you don't know the answer to this, it is fine I just figured I would try. I plan on buying this and this to hard wire it. Would this be acceptable and all I would need? Also is there another way to wire it without going through the fuse box, because then I won't be able to put the cover back on the fuse box (small issue but still) that also does not involve the cigarette lighter. Again, if this is not your specialty, it is fine.
Again, thank you so much for your detailed reply. It really helped me make my decision!
Use a multimeter, and figure out which of your fuses are only activated when the key is on.
Then use a fuse tapper("add-a-circuit kit") in place of it.
Done. Nice an easy, no splicing or anything.
Ya, it's fairly easy. Use a company like Sonicelectronix.com, who have the best prices and often include free accessories for the install like wiring harnesses dash kits and antenna adapters.
The two things you will need to be aware of is that you will need the "keys" to get the radio out. They don't tend to come with the gear but you can usually take your car to your local shop and they will have keys and remove it for a few bucks. The next thing, to get an accessory wire, you must run a fusetap over to the fuse box on the driver side and tap into something that turns on and off with the car, like wipers.
How I did the wiring on mine:
Install the angel eyes themselves per instructions. Run the wiring so everything leads to the relay being mounted in the bin at the right rear of the engine bay. Early models have the DSC/ABS module there, later models have just an empty bin.
Use the following image of the relay as a guide to where you lead the wires. The Pinout will be the most useful part.
http://i.imgur.com/Yrm9vxU.jpg
30 - Angel eye positive wire
87A - To footwell light
87 - To positive battery terminal
85 - Trigger wire
86 - Ground
Most instructions have you running the trigger wire to the DME and here's where I differ. In the bin where you mount the relay you'll see a grommet with a rubber plug on the firewall side. Carefully cut a little "+" into that and feed the trigger wire and the one that goes to the footwell light through there. (See link at the bottom for a picture showing it)
Inside the car you're now going to work in/under/behind the glove compartment. With a flashlight look for where those wires you poked through the grommet came in and pull them through. Tap the footwell wire into the positive lead to a footwell light. The other one will share a connection with a circuit in the fuse panel. You want to use a slot that is on only when the ignition is in the "on" position, and is off when it's in "accessory" or "off". You can use a multimeter or a test light to confirm this. There should be several options. Now you need an "add-a-circuit" adapter like the link below. Use that to connect to the trigger lead. Be sure to use the fuse with the same rating as the one the angel eye wiring harness came with.
http://www.amazon.com/Littelfuse-FHA200BP-ATO-Add-A-Circuit-Kit/dp/B0002BGELQ/ref=sr_1_1?ie=UTF8&qid=1427662052&sr=8-1&keywords=car+add+on+fuse
The link below is to a great step-by-step that I modified, so use it for the pictures and most individual steps, just on its Step 4, run the trigger to the fuse panel instead of the ECU accessory wire. These instructions also don't include step-by-step for running the other wire to the footwell light for the fade-on when you unlock and fade-off when you lock your car. It does show the grommet you'll be slicing to get the wires to the cabin though.
http://www.fastm.com/m3/angeleyes_orionv2.html
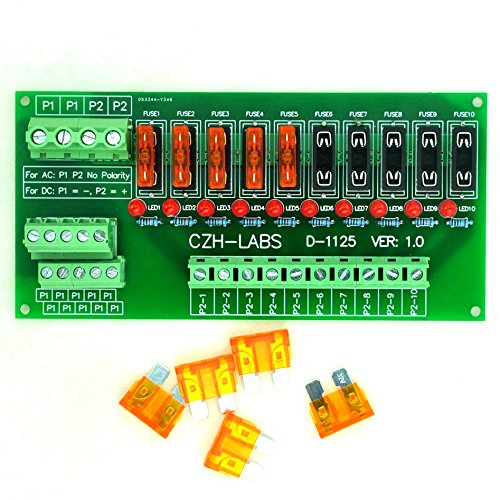
It's a standard CCTV Item. The power supply is too.
https://www.amazon.com/Electronics-Salon-Panel-Position-Distribution-Module/dp/B01FCW7T0E/
I got it on Amazon.
Electronics-Salon Panel Mount 10 Position Power Distribution Fuse Module Board, For AC/DC 5~32V . https://www.amazon.com/dp/B01FCW7T0E/ref=cm_sw_r_cp_apa_Xu51Bb8X6834K
You can use a fuse tap and tap power from the fuse box. I used this to tap power from the USB power port to power my dash cam.https://www.amazon.com/Uriveusa-Add-Circuit-Adapter-Holder/dp/B01LFXA5XM/ref=sr_1_1_sspa?keywords=Fuse+tap&qid=1557030683&s=gateway&sr=8-1-spons&psc=1#customerReviews
I don't like mine being taken up either. I used a female cig lighter adapter and a fuse tap. So, this means I didn't have to cut up the BT adapter and have a non-destructive way to get 12v to the BT adapter.
https://www.amazon.com/gp/product/B0006TIRZA/
https://www.amazon.com/gp/product/B0002BGELQ
You could just grab the 12V directly from the fuse box using something like this. That's what a lot of dashcams do. Just select one with a fuse and wire rated for the current you want. You can also use a separate fuse for the charger and the raspberry pi if its that much of a concern, then just use a step down converter to power the pi and power the stepper motors directly off the 12V line.
If you want to get really fancy you could have a separate battery for powering your system, then charge that battery with a 12V line from the car. That kind of system would be a lot more resistant to interruptions from the starter motor.
finally pulled the trigger, it been a long time since i wanted one. The only thing that kept me from doing it was that i wanted it hardwire not freaking wires going to my cig lighter port. Well after spending 5 minutes on youtube it's not really hard at all... So i went out to my car to see what would to be done and doubt it will take me no more than 10 minutes to set up.
Just in case anyone want to know what i ordered for their selves
SpyTec A119 + GPS Logger 1440p Car Dash Camera
Spy Tec Dash Camera Vehicle Hard Wire Kit
fuse tap
Lexar High-Performance microSDHC 633x 32GB
I just installed this exact thing in my car (well, sort of, I got the version with a full size female USB port instead of the mini male port so I wouldn't be constrained to that one cable)
Anyway! That is not an inline fuse. That is the 12v to 5v step down, and you definitely need a fuse on top of that.
Here's everything I bought (note that you will need the fuse tap that fits your car)
https://www.amazon.com/gp/product/B00I3P6QQG
https://www.amazon.com/gp/product/B00K17A2E6
And with that and a 6 inch mini USB cable I had lying around, my G1WC is hard wired to my car!
One more note: all these EDO adapters are miswired. They put garbage on the data lines of USB, so your camera thinks it's connected to a PC. A trimmed piece of tape covering the center pins on the USB cable (there are four pins, 1 2 3 4, you need to cover 2 3) fixes that problem elegantly.
Easy way:
Get one of these: http://www.amazon.com/Littelfuse-FHA200BP-ATO-Add-A-Circuit-Kit/dp/B0002BGELQ/ref=sr_1_4?ie=UTF8&qid=1347317089&sr=8-4&keywords=mini+fuse+add+a+circuit
Plug it into a circuit that comes on with ACC, being sure not to overload the fuses.
Run wires through the firewall. Attach red to red, black to Battery Neg.
Right way:
Use ACC/RUN signal to trigger fused relay. Output of relay runs radio.
Heh, sorry. You need to connect the red wire to a 12volt DC power source (more on that in a minute) and the black to "ground" (any metal part of the car. Usually a screw on the body somewhere).
The power is normally supplied by the lighter adapter, but as you can imagine, there is a lot of electricity flowing around your car. The simplest solution is to get a properly sized fuse tap (there are 2-3 different sizes of fuses commonly used so you have to make sure you get the right one for your car). You remove a fuse (for something that gets power only when the car is on, like the radio) from the fuse box under the steering wheel, plug in the tap and add the fuse back in on top.
You can then crimp the red wire of the direct connect into the fuse tap and you have power. Find something metal to screw the black wire to, and that recreates what the lighter plug does without taking up the space in the lighter.
As far as how to do it in the back of a car, you will have to pull some interior body panels off to get access, but stuff like license plate lights are usually a great place to get a switched source of power.
To get power from a wire that's already in place, you just need one (not the 100 in the link) of these instead of a fuse tap. You slide one end over the existing wire, plug the new wire you want spliced into the other end, then use pliers and snap the cover down, which automatically splices the wire for you.
Hope that's clearer.
I use this one: https://www.amazon.com/dp/B075CTPZW6/ref=cm_sw_r_cp_apa_04LQAb367PJ8W
That one's 40VA, but 1000mA is more than enough power.
Worked with my Ring 2 before I switched to Nest.
Cigartte lighter socket + quality car phone charger + Add-a-circuit kit (check your fuse type) + some quality tape + Right-angle USB charging cable
You wire the red wire on the cigarette adapter to an add-a-ciruit (i.e. with a crimp tool). The black wire goes to ground (i.e. tucked under some bolt someplace, or a ring terminal ). You put the charger in the now-attached cigarette adapter in the fuse area under your driver's side dash. Then you need to route an appropriate USB cable (i.e. with one with a right-angle head or right-angle adapter on the dash cam side) to the under dash area (usually by tucking it under the headliner over the windshield, and then by popping the A-pillar cover off and the side panel of the dashboard, and feeding the cable through). Once you have all the wires under the dash, you just need to hook them up, test them, and then tape them together so they can't come loose.
The advantage of going this route is that you 'own' all the pieces. If any part of the formula isn't working out, you can change just that part. You also get a spare USB-C charging port for free since that adapter has both A and C.
Get an Add-A-Circuit fuse tap. Basically it looks like a double fuse holder with two blades on one side and a wire coming off of it. You simply remove one of the fuses from your fuse block (convenient if you have a fuse panel under the dash) and plug it into that spot and place the removed fuze into the fuse holder. That functionally restores the fuse you removed. Now you have a fusible tap (the wire) and by placing an appropriate fuse in the second fuse socket that wire will supply 12V. Amazon has them here: https://www.amazon.com/Uriveusa-Add-Circuit-Adapter-Holder/dp/B01LFXA5XM/ref=sr_1_1_sspa?keywords=add+a+fuse&qid=1574443792&sr=8-1-spons&psc=1&spLa=ZW5jcnlwdGVkUXVhbGlmaWVyPUFFOUpFNzZERjFTSlomZW5jcnlwdGVkSWQ9QTA4NTg4MDgyT1g1WjIwTVVVM081JmVuY3J5cHRlZEFkSWQ9QTAzMjA2NzEyQkZXT1E5UlBVUVZSJndpZGdldE5hbWU9c3BfYXRmJmFjdGlvbj1jbGlja1JlZGlyZWN0JmRvTm90TG9nQ2xpY2s9dHJ1ZQ==
I have had the 9500ix for 4+ years now and it's been working pretty well. It's saved me from at least 4-5 tickets. As /u/13489194 stated below though, there are newer models out there that work better and are worth a few extra bucks. What I've noticed in the past few years is a very annoying increase in false positives with all the new cars that have side radar blind spot detection.
I mounted mine up on the top of the windshield a few inches below the headliner and to the right of the rearview mirror. It doesn't obstruct my view, and only prevents the passenger sunshade from fully opening a bit.
What you want to do is get a hardwire cable, a tap-a-fuse, and a trim tool and just gently pull on the trim and use the plastic trim tool (aka bone tool) to push the wire in behind the trim, down the A-pillar, and then into the fuse box. Not sure about the S6, but on my A5, it made it easier getting it down the A pillar to remove the "Airbag" plastic cover piece that covers up a Torx screw, and slightly unscrew the cover over the pillar so you can more easily fish it in.
Hardwire that bad boy into a fuse that is only on when the car's ignition is on, such as the Homelink Garage door opening or something. I dunno about the S6, but on my A5 there are fuse panels on both the passenger and driver's side. I put mine on the driver's side so that I can mount the little mute button assembly w/ the included velcro right below the headlight switch assembly. I can easily and quickly mute it as well as see the flashing light while driving.
Some stuff I'd recommend:
Escort Max 360 Detector
Hardwire adapter unit (no need for the bluetooth one as the Max has bluetooth built into it now)
Tape a fuse
Trim tools to fish the wire in
Other common tools you'll need would be a screwdriver, Wire Crimper/Stripper, and a socket to punch down the ground connection in the fuse panel.
Also, you'll want to be running the Waze application when driving as it will notify you of police locations reported by users. That's saved me a lot, especially when they aren't using radar or are using laser.
I'm not sure if magnetizing is the right word but there was twice where it seemed "stuck on" but physically the button was fine. The inline kill switch is piece of mind since I already had to replace the starter due to bad switch.
Idk if you can tap into the ignition wires because that could be why your ignition switch isn't working if it's shorted along the path? Also I didn't know if I could still set off anti theft by doing that.
If it works out find that way it's probably the better way by far.
It was just easier for me to run the wire to the starter in conduit
Also this is what your looking for.
https://www.amazon.com/gp/aw/d/B007D5DB88/ref=mp_s_a_1_3?ie=UTF8&qid=1481474012&sr=8-3&pi=SY200_QL40&keywords=atm+add+a+circuit&dpPl=1&dpID=41CRkb2MSEL&ref=plSrch
Got mine at AutoZone and it had 12g wire it says to only run a 10a fuse for the circuit your adding.
They have something similar in the US and Canada.
Not sure how much they're used.
The knivio bluetooth is a good call, ive had mine for almost a year now which works perfectly and have done exactly what you want to do. What i used was an Add a circuit and then wired a new cig socket to the add a circuit i bought form autozone. Now it will auto connect and turn on only when the key is switched to acc position when connected to the right fuse, typically rap, ign, with that specific size fuse. Also i just hid the extra socket under the dash. Also if you do end up getting a noticeable noise/interference which i highly doubt use this ground loop isolator.
Hi,
I found two different video's where they tell you which harness & wires are to be used for the main speakers between the two different style head units, for MK6 Jetta's respectably. If you have anything other than a base model, your car will likely have tweeters as well, not to be confused for the line out converter install (and if you have the Fender setup then I have no clue). I may be able to find the diagram somewhere that I used for my LOC setup. Good luck!
The LOC/harness wiring is described @ 5:50 for this one
and
This one starts at 10:35 for the wiring - I personally don't like to use the "piggyback" wiring connectors this guy uses & suggests; rather wire in anything power related with an inline fuse box setup so it's protected.
If you get one, also get the TAP adapter, and the Hardwire kit. They're pretty cheap.
Using this, I ran the hardwire kit up behind the rear view mirror, behind the headliner, down the plastic on the A pillar, and back behind the kickpanel and into the fuse box with the TAP adapter. I can't remember which fuse I used without looking but it's wired into one where the camera automatically comes on whenever the accessory is active or the truck is running. When I turn off the truck, the camera turns off, automatically. I don't have to do anything except clear off the saved videos once every 6 months or so.
Some screwdrivers, pliers and a socket wrench to get into the tighter spots.
I used this to power the under the seat amp
http://www.amazon.com/Circuit-ATC-Piggy-Standard-Holder/dp/B009K6U582
Replacing speakers is so easy, it took me 45 minutes tops. The head unit was a little more time consuming, but very simple if you follow instructions online. You just have to remove the whole bottom part of the dash
A quick overview of the install of my ThinkWare F750 and Hardwired kit in the Crosstrek.
http://imgur.com/a/Eo2bm
Camera (bought at BestBuy price matched Amazon):
https://www.amazon.com/dp/B00VA5S9PW/ref=cm_sw_r_other_apa_aztlxbR4ZTV0S
Hardwire Kit (Bought at BestBuy):
https://www.amazon.com/dp/B00NC062E8/ref=cm_sw_r_other_apa_aAtlxbWWAME40
I used a Fuse Vampire Tap so that I had flexible options for power. In addition I did not wire to a constant constant 12v system since I don't want to use the parking feature. If you want to use this, but two fuse taps. Mine came from Blain's, you can get them on Amazon.
https://www.amazon.com/dp/B00I0MWPXU/ref=cm_sw_r_other_apa_lJtlxb74S99ZS
Use this video to learn how to remove the A Pillar:
https://youtube.com/watch?v=qt-hhesUlSI
So just replacing it you would need to verify that the conduit is providing the ground. It is done that way sometimes.
If it is the ground this should suffice. https://www.amazon.com/Bussman-BP-SRU-Fuse-Cover/dp/B00004WA3I/
Do note that I have no clue as to how code effects all of this. I am not an electrician I just play at one. I will let the real ones around here answer how code plays out here.
http://www.amazon.com/gp/product/B00I0MWPXU
http://www.amazon.com/gp/product/B00C3DQRY0
These are the products I used to wire in my dash cam. So far I've had no issues with either. Also, I did a write up on installing one in my Elantra, but it should be about the same general steps for wiring up one in the Aveo as well:
http://imgur.com/a/MSLpz
Hope it helps!
Also, I installed the fuse tap where the fuse for the 12V accessory (cigarette lighter) goes, that way the camera doesn't stay on when my car is off.
I haven't gotten any rear cams yet, but I've got this cam up front in both cars (buy it directly from Spy Tec, it's also on Amazon but you might get a counterfeit), I'd recommend a capacitor cam in hot climates (a battery will deteriorate in the heat, the capacitor gives it just enough power to save the video when shutting down). I've got it mounted to the rear view mirror so it's less visible and won't fall off, and I've got it hardwired into my fuse box (tuck the wire up under the headliner along the top of the windshield, run it down the pillar, and use an add-a-fuse like this to connect it to a switched (only on when the car is on) fuse like a cigarette lighter).
This is a great find. I would have jumped on that too. Those fishing controllers are cool. Just got a couple myself. Definitely take the yellow out of them and replace that fuse. It should be pretty easy to find online. If you want to upgrade the fuse to a re-settable one these will do just that. If it blows and the port stops working, it will reset when you cycle the console.
Terminals: (need 2, get at least 10, you'll mangle at least a couple) https://www.digikey.com/product-detail/en/molex/0330122001/WM2989CT-ND/2405588
Add-a-circuit: https://www.amazon.com/Uriveusa-Circuit-Adapter-Holder-Upgraded/dp/B01LFXA5YQ
Also need some 16g wire (or so, 16 is the smallest that properly fits the blue crimp connection on the add-a-fuse, though I'd recommend using heat-shrinkable butt splices instead, just for the water proofing).
For wiring, I recommend using a fuse tap.
When I installed mine, I used this fuse tap, tapped into the windshield wipers circuit, fused with a 5A fuse. I took the power cable included with my camera, cut the lighter outlet adapter off, crimped and heatshrinked the hot wire to the tap. Then added a ring terminal to the ground, and grounded to a bolt near the fusebox that went through the body. Power cable is pushed under and hidden by the passenger-side kicker, A-pillar, and headliner trim.
If you do this, make sure your camera can take 12V in, and that you tap into a non-critical and switched-ignition circuit. Don't tap into things like the fuel pump, radio, or lighting. I like using the wiper circuit for taps because it's almost guaranteed to be switched-ignition, factory fuse has plenty of overhead for a little camera, it's not an immediate safety issue if the fuse blows, and I use the windshield washer often enough to know if the fuse has blown.
Camera is completely hidden behind the rearview mirror - you will not notice it from the inside or outside unless you're specifically looking for it. Also worth mentioning why you want to use switched-ignition. Battery drain is not really significant (car battery will run a dashcam for weeks if not months). The flash memory in SD cards (any flash memory for that matter) wears out over time - constant recording will wear out the card extremely quickly. I replace my SD card annually for this reason.
Seems like the hardwiring kit in /u/nonvideas post is out of stock. You can use these two things instead:
http://www.amazon.com/gp/product/B00I0MWPXU?psc=1&redirect=true&ref_=od_aui_detailpages00
http://www.amazon.com/gp/product/B00EZJBELQ?psc=1&redirect=true&ref_=od_aui_detailpages00
This is what I used. There's a panel under the fuel lid/hood release latches that uncovers a small fuse panel. First, unscrew the big bolt you see (you may have to pry the bigger plastic cover slightly) using a 13mm socket. Tighten the bolt so that the black ground cable from the cigarette lighter thing is secure. Then, insert the red power cable into the red wire connector from the fuse tap and crimp the wire. Now you're ready to tap your fuse box. Take out the fuse you want to tap, insert it into the fuse tap, then insert the fusetap fuse into that same socket. Now you're tapped into the battery power and only the ignition will power the cigarette lighter.
I attempted this.. In my experience its not possible. Instead i fuse-tapped from the internal fuse box an accessory fuse, so when the car turns on the lights are on.
During the day they unfortunately are on.. but you will not notice them unless they are super bright.
Cant remember what fuse i used... Think it was the 11th position or 9th position fuse (just test both) here
This is the [tap] (https://www.amazon.com/gp/product/B00K17A2E6/ref=oh_aui_detailpage_o00_s00?ie=UTF8&psc=1) and [lights] (http://www.ebay.com/itm/4pc-Red-LED-Under-Dash-Kit-Interior-Glow-Lights/271823827548?ssPageName=STRK%3AMEBIDX%3AIT&_trksid=p2057872.m2749.l2649) i used, i also grabbed 20 gauge wire from home depot. (You will need to know how to wire them together)
I have the GoControl - it works just fine and is very unobtrusive. I use an external 24V power supply with it as I have a 40-year old furnace with a 2-wire control and no 'C' connection. We can say "OK Google set the thermostat to 70" or "OK Google make it warmer", and use the SmartThings app to adjust the heat when we're away from home. (Note the comment I added above about smart outlets.)
http://www.amazon.com/Littelfuse-FHA200BP-ATO-Add-A-Circuit-Kit/dp/B0002BGELQ/ref=sr_1_1?ie=UTF8&qid=1369754411&sr=8-1&keywords=add+a+circuit
Yes. You'll need to find a 12 volt power source that turns off with the key is removed from the ignition. This may or may not be simple. You'll need a multi-meter, and you'll need to probe power sources under the dash until you find one that cuts off when the key is out. Usually, the best place to start is at the inside fuse block. You can get a fuse tap that fits into the existing fuse slot and gives you a power lead and the existing fuse. [Like this] (http://www.amazon.com/gp/product/B0002BGELQ/ref=pd_lpo_sbs_dp_ss_2?pf_rd_p=1944687442&pf_rd_s=lpo-top-stripe-1&pf_rd_t=201&pf_rd_i=B000CQDRTI&pf_rd_m=ATVPDKIKX0DER&pf_rd_r=0HP8993WYB5TQ9Q8D907)
You may need to look at your fuse block to see if you need one with a lower profile.
I would most likely keep it hidden and use the charger for just the dashcam, nothing else. Just debating if it's worth spending the extra $20-25 (CAD) on the anker charger and USB cable.
The fuse tap that I bought (this one) has a 5amp fuse - I don't need another in-line fuse, do I?
I'm on the fence about the always on fuse. I want it for parking mode, which supposedly right now is sub-par on the A119s, and it would also end up costing me an extra $40CAD for the low voltage cut off.
Any thoughts around going one way or the other with respect to my situation?
Depending on the cam there will either be two or three wires that need connecting. One will be a ground and can be connected to any bolt around the fuse box that connects to the metal of the car body.
If only two wires then you would connect the other to either a fuse that is "always on" such as the stop lights (simply marked STOP) on my fuse box cover, or a line that is only on when the key is in and turned on, like the radio fuse. Which way you connect it will depend on your installation/camera and if you want to have a parking mode, etc
If there are three wires then you need to connect the remaining two wires to both of the fuses outlined above. If you know what kind of fuses your car uses (probably can google this) you can buy your add-a-fuses from amazon or if you don't just go to a car parts place, they can give you the correct ones.
An add-a-fuse is like this -> https://www.amazon.ca/gp/product/B00I0MWPXU/ref=oh_aui_detailpage_o02_s00
you pull the existing fuse out of your fuse box, stick it into the add-a-fuse, so that there are now two in the add-a-fuse, and you install it where you took the fuse from. then just crimp the wire in the crimp connector (you'd want pliers for this) and you're good!
http://www.mmmonkey.co.uk/dreamcast-controller-port-fix-fuse-f1-replacement/
https://www.amazon.com/gp/product/B00X77Q7A0/
Like this?:
https://www.amazon.com/gp/product/B00U61OPZ4/ref=ox_sc_act_title_1?ie=UTF8&psc=1&smid=A3CA5H83RV6W5M
Check out this site to find an always-on circuit. Likely door locks, cabin lights, etc. Or you could splice one of the fuses under the steering column. Avoid anything airbag related (yellow stickers, yellow wires, yellow tape) and the illumination circuits (dash lights, backlit buttons, they are backwards from other circuits and you'll short it like I did). I'd probably recommend getting a fuse jumper and tapping into an always-on circuit. Be careful about draining the battery, of course. I'd suggest a mobile jump starter if you're planning on using power with the car off.
Someone on this forum recommended [this] (https://www.amazon.com/gp/product/B075CTPZW6/ref=od_aui_detailpages00?ie=UTF8&psc=1) for adding a C wire. It works great! Follow this [diagram] (https://www.doityourself.com/forum/attachments/thermostatic-controls/48111d1426649484-wireless-thermostat-replace-wired-honeywell-th8320r-external-transformer-n-boiler.jpg)
There's my problem.
http://www.amazon.com/HitCar-Vehicle-Circuit-Profile-Holder/dp/B00U61OPZ4?ie=UTF8&psc=1&redirect=true&ref_=oh_aui_detailpage_o00_s00
Based upon that specific one.... you have the SMALL version. I ordered the MINI and its too shallow. Thanks for your help, I will be ordering up the small version now.
Which fuse did you tap into? It seems like the consensus is 86 but it makes me weary since its the airbag module. Are there any others that are on only with the ignition?
Thanks again for your help!
A few thermal fuses on the hot wires is a good idea too.
https://smile.amazon.com/SF240E-SEFUSE-Cutoffs-Thermal-Degree/dp/B015675DA8/ref=sr_1_9?ie=UTF8&qid=1483805336&sr=8-9&keywords=thermal+fuse
Dual battery you will at least need this:
https://www.amazon.com/Smart-Dual-Battery-140A-Isolator/dp/B00400IYTK
https://www.amazon.com/Scoshe-EWFH-Single-Fuse-Holder/dp/B000KIR8M0/ref=pd_bxgy_263_img_2?ie=UTF8&psc=1&refRID=Y4S68RZF6CFYXAZBN52B
https://www.amazon.com/Absolute-ANL200-2-Pack-Fuses-Plated/dp/B005EUTLYW/ref=pd_bxgy_263_img_3?ie=UTF8&psc=1&refRID=Y4S68RZF6CFYXAZBN52B
Then its on to pwm vs mppt charge controller
and a panel and wiring.
I used something like this when I wired one into the CRZ.
https://www.amazon.com/Circuit-ATC-Piggy-Standard-Holder/dp/B009K6U582
Well, I think the cleanest way (not messing with factory wiring) is to either add the cable directly to the battery, or to get the ground from the factory ground point, and the positive from the positive solenoid cable. The latter way is the most nice (otherwise you have a bunch of connections on the battery).
There should be two wires on the battery, a positive and a negative (sometimes there are two positive, but rare on modern bikes unless someone already messed with the wiring). Follow the thickest positive cable, it will go to a solenoid like this. First of course remove the battery from the bike (to avoid any shorts while messing with the wiring). Then unscrew that cable which goes directly from the positive battery to the solenoid, on the solenoid end. Now you need to get an eye wiring connector on the cable of that fuse box (most likely with a 6mm or 8mm hole, you can find them at any electrical store or any electrician...), and add it on the solenoid (besides the factory thick wire coming to it, and perhaps there are even other factory wires on there...). Also use some heat shrink tubing on the crimped eye to insulate and make it look clean (I'd also suggest you use as much wire sleeving as possible - either pvc or braided or just heat shrink tubing - that makes the wiring job look really nice and safer, you can also use insulation tape but that's a bit less professional). That's it, you have the fuse block wired to a good positive battery connection. For the negative, also follow the thick negative wire from the battery, it usually goes to the frame or an engine mount - unscrew it there, and add another wire with the eye connector on. Insulation isn't important for ground wires, but it still looks a lot nicer if you use it.
So something like this? And then just strip the end of the wire for the dash cam and connect it to that?
im using this to power the ecobee
the way this works is there are two posts each sending 12v. One leg (yellow) is connected to the rC and the other leg (blue) is connected to the C for a total of 24v.
I want to know if i can just splice the two 12v legs into one and get 24v for the C.
the rC getting 12v seems to be tricking the furnace into thinking it needs to pump heat.
I have a 2 zone, 2 taco system that ecobee tells me to use a fast-stat along with the transformer to "add a common" but I dont need to add a common...i have a free wire already, so im trying to utilize it (if possible)
I don't know what the grommet looks like through the firewall, but if there's room, you may try using a piece of safety wire or similar and pushing it through next to the wire loom, then make a loop on the end and pull your wire back through. That's what I've done in the past for similar applications.
For the fuse and ground, I know that many people have used Add-A-Circuit kits for this sort of thing. They sell them on Amazon or at any auto parts store. That's probably your best bet. I much prefer not to have to cut and splice factory wiring whenever possible.
I couldn't answer all your questions, but I hope that's at least a start. You may want to head over to MSF and see what others have done. Here's a thread for a similar install that I found after a quick search. Looks like OP used the hole for the hood release cable through the firewall and tapped into the BPV line for the pressure reading.
Hey, I was wondering if it would be possible to use an adapter that turns one fuse into two rather than splicing the cable?
If not, do you think something like this would work?
Also, is this what you mean by testing light?
If any of these parts aren't correct, could you send me amazon links for the correct parts because I'm trying to use up my gift cards.
I really appreciate your help and I'll try to order the right parts as soon as I get the O.K. from you.
I wouldn't recommend tieing into anything after the fuse since it could overload that circuit and blow it (I doubt it will happen, but it could).
You can buy something like this: http://www.amazon.com/Littelfuse-FHA200BP-ATO-Add-A-Circuit-Kit/dp/B0002BGELQ and make it a new circuit with it's own fuse.
Hope that helps.
Get one of these and run a new wire. No need to splice into existing OEM wire harnesses that cost a fortune to replace.
I used this one in mine
http://smile.amazon.com/Circuit-function-Bussmann-ATM-10-ATM-15/dp/B007D5DB88?ie=UTF8&psc=1&redirect=true&ref_=oh_aui_detailpage_o04_s00
I fit perfectly and is powering my dash cam now in my '14.
Here’s the links to the things I bought.
Heater cartridge
SEFUSE
HeatBlocks, Nozzles, Heatbreak
100K Thermistor
Here is the emblem, here is the exterior lighting, here is the interior lighting, and here is the fuse tap needed to wire anything to a car's fuse box!
****Do any of this at your own risk or hire a professional to do it for you.***
Here are the parts I ordered to put mine together. I'm posting this bc of PMs.
Mobius or [Cheaper Mobius but longer wait from China] (http://www.banggood.com/Mobius-Action-Camera-1080P-HD-Mini-Sports-Camera-Wide-Angle-Edition-p-917817.html) I wanted the Wide Angle Lens for a better shot
Capacitor You don't want the battery sitting in the sun. A capacitor can handle it. So you replace the battery completely with this capacitor
Windshield Mount My mobius came with a mounting bracket that fits on this mount. The mount itself is very small, but the 3M sticker is very strong.
Hardwire Kit When hard wiring this in to the car via fuse box, this knocks the voltage down from 12v to 5v, which is what the camera needs. I used some wire strippers to expose about 5" of the red and black cables. Then stripped about an inch off each cable to expose the actual wire. The red wire goes in to the add-a-circuit mentioned below, then you crimp it closed with pliers (wasn't super easy, I must be weak). You partially unscrew a metal bolt that is attached to the metal car frame as a ground ( I used the one on top of my fuse box).
USB to Mini-USB This connects from the hardwire kit to the camera or 90 degree elbow mentioned next, for a better angle. If you are setting up the auto record when external power is on, which is what you want to do for a dash cam, you need to cut a piece of electrical tape width-wise and cover the two middle pins inside the USB cable. This is because the two middle pins (2 and 3) are data pins. Leaving those exposed makes the camera think its connected to a computer and will only do data transferring. By covering them, it only get power from pins 1 and 4 and doesn't think it's connected to a computer and will actually record.
Right Angle Mini-USB to Mini-USB Adapted This just helped keep the USB cable from sticking out too much (better angle)
Add-a-circuit This is the ATO (bigger fuse), but I ended up using the ATM (Mini) because my car has both and the fuse I wanted to use ended up being a Mini. It'd be best to look through your fuse diagram and find something non-vital (meaning don't tap in to a fuse that controls ABS or airbags, etc) and switchable (meaning it only comes on when the car turns on. You don't want the camera running 24/7), figure out what type of fuse it is, and buy that size. I ended up getting my new add-a-circuit (Littlefuse) from Oreilly auto parts for $6.99 and it came with 3, 4, 7.5, and 10A fuses. Also take note of the amperage (Never use a higher amp fuse than your add-a-circuit supports because the wire gauge may not support it and melt/burn. When adding the circuit, I removed the original fuse from the fuse box, a 10A fuse and put it the first slot(my add-a-circuit supports up to 10A) and for the 2nd slot, I used a 3A fuse because the camera and radar don't draw much. You don't want to use a higher amp fuse than necessary. Also, in my car 2011 JettaSportwagen, the add-a-circuit points down or it doesn't work. Make sure it's plugged in the correct direction or it won't do anything
32GB MicroSD Card Works fine, just make sure to format it through the camera.
Unofficial but awesome Mobius Configuration Tool Use the tooltips(hover over each option) to figure out what each things does. I set mine to autorecord when external power or the button are pushed.
You can find a lot of info here: dashcamtalk.com
To summarize the connections are:
Choose a fuse from your car's fuse diagram (non-essential and switchable), pull it, place it in the correct slot of the add-a-circuit (don't go to higher amps than is supported), plug in a fuse from the add-a-circuit kit in to the other slot to protect your camera (I used a 3A), strip the hardwire kit's cables mentioned above, put the red cable (+) from the hard wire kit in the the red end of the add-a-circuit and crimp it closed, attach the black cable (-) to a screw attached to the metal car frame, tape the two middle pins (2 and 3) in the USB cable with electrical tape, plug the USB in to the female USB on the hardwire kit, run the USB cable from the fuse box around the edges of your cars trim, up by the rearview mirror, attach the right-angle mini-usb adapter, choose where you want to mount the camera (make sure to check using the USB plugged in and camera mounted to the mount, in case it bumps the rearview mirror) (I held it on the windshield about where I thought I wanted it (to behind and to the right of the rearview mirror and took some test footage, watched it on a computer, decided it looked ok, pulled the sticker cover and attached it), clean your windshield with glass cleaner, attach the mount.
You buy the fuses separately to suit the size of the wire you are trying to protect, ANC fuses mount to the posts.
https://www.amazon.com/Absolute-ANL200-2-Pack-Fuses-Plated/dp/B005EUTLYW
Thank you!
Is this the correct hardware kit?
https://www.amazon.com/Viofo-3-Wire-Hardwire-A129-Camera/dp/B07KZGM9LS/ref=sr_1_2?crid=QK7O5MVGQXYV&keywords=viofo+3+wire+acc+hardwire+kit&qid=1569346851&sprefix=Viofo+3-wire+hardwire+kit%2Caps%2C227&sr=8-2
Is this the correct tap-a-fuse kit?
https://www.amazon.com/Uriveusa-Circuit-Adapter-Holder-Upgraded/dp/B01LFXA5YQ/ref=sr_1_1?keywords=tap-a-fuse+wire&qid=1569346818&sr=8-1
I don't know of any plug in devices, but you could install a small fuse holder out there and protect only the receptacles the caretaker has access to. Order a 7 or 8 amp fuse and it'd give you a fighting chance.
Not in my jeep but I installed a sat radio box in my moms new honda and had to top into a constant and switched source. I bought two Add-A-Circuits from AutoZone. Just get the right size for your fuses.
Use a multimeter to find an open fuse slot in the fuse box that is a switched source. (Just have someone in passenger seat turned key on/off for you while you check them) Tap into it with the add-a-circuit and most have their own fuse holder so you can prevent any problems.
I got it to work with this 150 watt inverter but there was a catch that could be potentially harmful which I'll type below:
http://m.advanceautoparts.com/p/schumacher-150-watt-power-converter-xi15/11021654-P?searchTerm=150+watt
Interestingly enough this 140 watt inverter's over current protection would shut itself down and reboot about every 20 seconds:
http://m.advanceautoparts.com/p/schumacher-140-watt-280-peak-watt-power-converter-xi14/10999863-P?searchTerm=140+watts
The catch :
The factory rated fuse for my cigarette lighter style vehicle power port that blew after a few seconds is 10a. I popped in a 15a fuse temporarily as a tester to match the 15a draw rating on the 150 watt inverter (the 140 watt inverter draws 13a)
The board started charging and I monitored it from 73% to 98% it was pretty damn satisfying.
( ⚠️ WARNING ⚠️ potential hazard to be taken seriously)
Permanently replacing a 10a fuse with a 15a fuse can lead to "Hot wires" an cause a fire 🔥. Just don't do it. There is a reason the 10a fuse is there.
Permanent plan, for me at least:
I am going to use a fuse tap rated for up to 20a:
https://www.amazon.com/dp/B00K17M2IU/ref=cm_sw_r_cp_api_1tG9ybW509X4S
This fuse tap will be running to an unoccupied 20a fuse slot reserved for the Acura MDX tow package.
From there I am going to solder and heat shrink this to the fuse tap:
https://www.amazon.com/dp/B06XZYT4YG/ref=cm_sw_r_cp_api_DHG9ybCFR0YDT
This should do it with the 150 watt inverter. Safely.
I think you mean like this>
http://www.amazon.com/Bussmann-BP-MB-20-Circuit-Breaker/dp/B000GAS1GY
edit - I didn't find any 30A rated ones though, maybe look as to why your appliances are blowing fuses that they didn't use to? See what things share a circuit and reduce the load on the circuit by not running multiple things at the same time.
Nah I'm totally okay with running cable through the firewall. I've set up the sound system in my car so I've already done that for the power cable, I've also tapped into the clock for the remote wire for the amp.
So essentially, find out where the fuse is for dome lights, (insert object always on here), plug in one of these bad boys: http://www.amazon.com/Littelfuse-FHA200BP-ATO-Add-A-Circuit-Kit/dp/B0002BGELQ
and use the wire for power?
I did the same, took me a while to get it working properly though.
I don't know, I don't use the cable clips. I used one of these to wire it into my car and ran the cable behind the siding roof lining.
The power connector needs to run to a switched power source. In Trailblazers (and most other late model GMs), there is no switched power wire for the stereo. This gives you 2 options. Option 1 is to run the power connector wire to a physical switch that you would have to flip to turn the amp on and off. This is less than ideal, because if you forget to turn it off, you can end up draining your battery. Option 2 is to get an add-a-fuse, and put it in to a slot (such as cigarette lighter) in the fuse box (under the rear seat) that will give you switched power. You might have to try a few different slots until one works.
Hook the Bazooka harness's red cable to your car radio harness's orange cable. Hook the Bazooka harness's blue/white cable into your fuse box with an "add-a-circuit" available at your local Walmart or Autozone. Use some speaker wire or something to get it over there and ziptie it neatly along they way. Add it to a circuit that turns on and off with the key, maybe the cigarette lighter circuit. Hook the black ground ring to a bare metal (not painted) bolt on your car's chassis. Hook the speakers up as stated. When you're all done, make sure it works and that it turns off when your car is off. Enjoy!
A power inverter is what you'll need. As for wiring it in, perhaps something like this will help. You could just find a circuit that comes on with the key (radio circuit usually) to plug that into. However, that wire does seem a little too thin to run an inverter..