Best hardware adhesives & sealers according to redditors
We found 395 Reddit comments discussing the best hardware adhesives & sealers. We ranked the 182 resulting products by number of redditors who mentioned them. Here are the top 20.
We found 395 Reddit comments discussing the best hardware adhesives & sealers. We ranked the 182 resulting products by number of redditors who mentioned them. Here are the top 20.


Needed some more desktop space so I decided to build a new desk (technically a shelf, I know) from a butcher block countertop.
I decided to use an unfinished ash butcher block countertop from Home Depot. 74" x 25" x 1.5"
I sanded it with 220 grit even though it comes out of the packaging with a pretty good finish. I did knock the corners off though.
Finished with 2 coats of Zinsser Sealcoat Universal Sanding Sealer sanding between coats with 220 grit. Then I wiped on 4 coats of 50/50 minreal spirits and a satin finish oil Polyurethane. Followed by brushing on 2 coats of 100% polyurethane. Wiping on the layers was definitely easier and left a nice surface but because this is used as a desk I switched to straight polyurethane for a heavier/more protective layer.
I added 2 Power grommets using a 3-1/8” hole saw and 2 flexible cord grommets Using a 2-3/8” hole saw on each end as well as 2 power strips screwed to the underside. Before I made any holes I mapped out stud/bracket location on the underside to make sure I wouldn’t have any interferences.
For mounting to the wall, I used heavy duty shelf brackets from Rockler fastened to the studs with Spax Lag Screws and fastened the countertop to the brackets with Spax cabinet screws
I am not sure if I need to put another support in the center of the table or not. Any opinions? I am not concerned with the weight necessarily as the brackets are good for 2,920 lbs per Rockler's website. But i am not sure if it will bow overtime if it's not supported.
​
Edit1: Added a center support Bracket: https://imgur.com/gallery/LGl7UT2
Edit2: Picture of working desk. Would love to wall mount the monitor. https://imgur.com/gallery/QfH6M9a
Edit3: I ended up going with a wireless charger grommet that sits pretty flush with the desk surface.
https://imgur.com/KkMJZEp
https://imgur.com/yjPurX6
Yup. Expanding spray foam. That stuff is awesome. Unsure about brand, but looks like Great Stuff Expanding Spray Foam
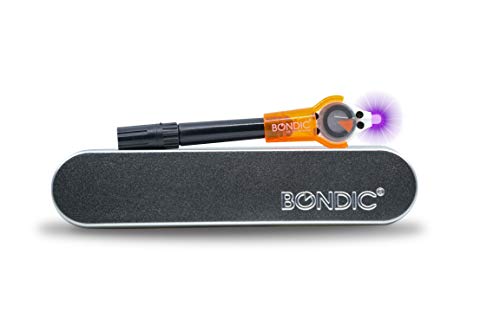
UV Light Glue is perfect for fixing glass. I have used it on 2 bong bowls that I broke at the stem and a steamroller I split in two. One pen will last for a while and they are only 20$
http://www.amazon.com/Bondic-Anything-Waterproof-Resistant-Plastic/dp/B00QU5M4MG
Edit: My dad owned a window and glass repair shop, we used pens like this all the time to fix small chips in stained glass. It dries clear (it can be lumpy though if you use too much) and will not break from high heat.
Interesting idea! I went on a hunt and this is the coolest thing I've found:
It's done with a process called plastination:
> The water and fat are replaced by certain plastics, yielding specimens that can be touched, do not smell or decay, and even retain most properties of the original sample.
They're been doing this since 1970s so I figure there's probably a guide online. Next logical step was a search for "DIY plastination":
I do not have any evidence that the same procedure would work on mushroom flesh, other than the flickr link above.
EDIT:
Per the plastination patent by Gunther von Hagens:
>EXAMPLE 3
>A globular cactus having a diameter of approximately 15 cm was partly hollowed out from its root end by means of a curette, and it was then immersed sequentially for three hours each in 50% aqueous acetone, pure acetone, and dichloromethane. Thereafter it was immersed in a solution of a commercial epoxy resin prepolymer stable at low temperature, but curing at elevated temperature. The vat holding the prepolymer and the immersed cactus was stored in a vacuum at 10° C. for eight hours, whereby all volatile solvent was extracted. When drained of excess prepolymer and held in an oven at 40° C. for six hours, the cactus hardened, but otherwise retained its original appearance and color.
Just curious how much a DIY setup would cost so I made a shopping list:
Great ideas in this thread; I'll put in a plug for the GlueBot - good deal less than $50, but there is a little accessory kit you could add to bring it up closer to $20. Maybe for an occasion other than Valentine's Day.
It is definitely something I didn't know I needed until I used it.
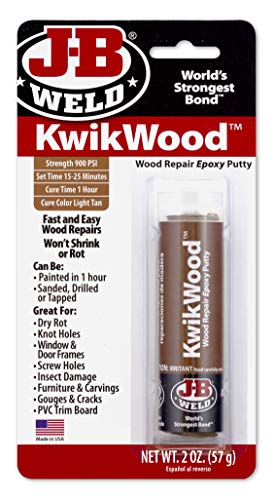
Fill the entire hole and area with some kwik wood epoxy (not wood filler) and let it set up per the directions (I want to say an hour?). Re-drill the hole for the strike plate and screw into it.
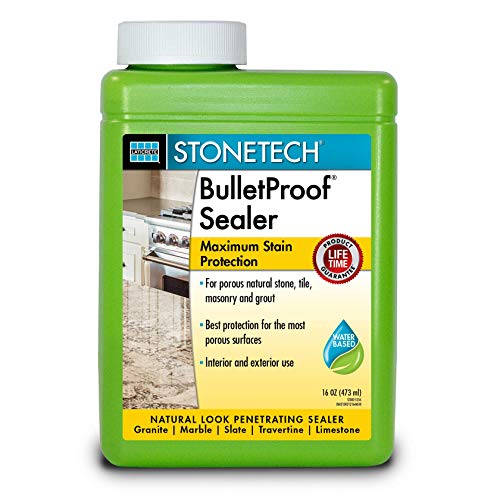
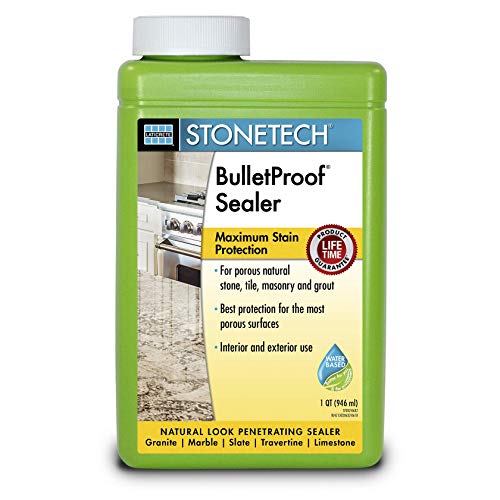
Serious upvote for /u/socaTsocaTsocaT's suggestion to use StoneTech's Bulletproof. It is an awesome sealer. Follow the directions, and it does an excellent job of keeping your granite looking good for many years.
https://www.amazon.com/StoneTech-BulletProof-Sealer-1-Pint-473L/dp/B005ZGSS0S
Nah. You need something to go in the hole and seal it from the inside.
Great Stuff 157906 Insulating Foam Sealant, 12 oz, Cream https://www.amazon.com/dp/B0002YW0W0/ref=cm_sw_r_cp_apa_i_fLx2DbHDZKH41
https://www.amazon.com/Bondic-Activated-Waterproof-Resistant-Anything/dp/B00QU5M4MG
It works really well. I would recommend using like a 220 grit with it though. I usually do a 120 grit sand on a .2 layer model before I do any fill.
It does dry kinda fast though, so I would do a pass or two and leave it alone.
If you keep messing with it as it dries, you will start pulling it up and causing it to clump. Kinda like bondo does when it starts to cure.
Then I use the plastic wood for seams and any imperfections ect.
Sand the whole thing down with 220.
Then do a coat of filler primer sand with 220 repeat till you are happy, then paint.
I don't recall exactly. Like I mentioned most of the 2x4's were leftover that were laying around I had to buy 4 or so to supplement what I had on hand. In addition to that I bought the following tools as I didn't have them before and I was just getting started;
) or so later which I have a lot leftover from
So roughtly;
The cost included a lot of startup costs for tools for me which will be long lasting. You could save quite a bit of money by buying used but in my local market planes are really hard to come by and hand saws are non-existent.
Glubot - it looks funny to a non woodworker, but it is an amazing thing to have around the shop. It makes glue ups about 100 times more enjoyable. Maybe get some silicone brushes to go with it.
Magnifying Lamp - a great addition to any shop. Be sure to get one with a long arm like this one so he can mount it behind his bench and still be able to use it.
Incra Rulers - these are the best damn rulers you'll ever use. The slots make consistent marks that are very reliable. A 12 inch T ruler would be best, but this one is also cool.
Wool Socks - if you live in a cold climate and his shop isn't heated, this would be an awesome gift. I got these socks specifically and they are awesome. Me feet never overheat, but they keep me very warm and are very comfortable. This is a damn good deal actually... I might order these now.
Our team uses a variety of different types: Gorilla Glue, Titebond, and more. Gorilla Glue is really good, but just be sure that you wipe off the excess or it will expand. Titebond is really reliable but it takes a very long time to dry. Zapagap is pretty pricey but it dries insanely fast and it is really strong.
Here's a link to all of the glues: 1. Gorilla Glue can be found at Home Depot 2. Titebond We put the Titebond in to smaller containers which can be found here 3. Zap a Gap
EDIT: We also use something called InstaSet Accelerator. It should be used only in emergencies along with zapagap.
Okay so It's a pretty labor-intensive process, so be forewarned
I didn't want to just draw the parts by hand because I wanted the shield to be game accurate, so I took this picture and had it printed on a poster at my local staples, I used the largest poster size, so this was about $20. I then cut out the entire shield from the poster to draw the base, and cut out each of the detail pieces to trace.
I cut and sanded everything with a multi-use dremel. The wood that I used was 1/4 inch birch, which is easy to cut and sand. I got a big sheet at home depot, and I ended up only using half. (I might use the other half to make the Master Sword Scabbard later this year) I would recommend using 3/4 inch wood or layering more pieces than I did, because my shield doesn't have anywhere near as much depth as I would like.
So I cut out the smaller shield pieces for layering by tracing the large shield piece, then taking a 2-3 inch block of wood and running it around the inside edge of the first trace. I made sure the three pieces were centered on top of each other before supergluing them together.
I filled spaces on the layered shield with wood bondo, sanded that down as smooth as possible, then filled all the little holes with wood filler, of course you have to sand this too. Then I painted it with this, but you can use a lighter shade if you want a different look. Finally, I covered the whole thing in newspaper except for the little parts where the border shows through (the silver triangles) and I painted those silver.
For the border I cut the border out of the poster and traced it on the birch, cut it out with a dremel, then cut it into sections and sanded it down. I laid it down on top of shield base (after I had filled it in with the bondo) and filled the gaps between the border parts with bondo. What this does is reconnect the border pieces in a curved manner that perfectly fits on the base. When the bondo dries, add more bondo on the reverse side of the border to strengthen the connection. Then you can sand it down smooth. Spray paint that shit silver and you're good.
For the triforce, pointy decals, and bolts for the border, I cut them out of the poster, traced them onto particle board, cut them out and sanded them to look 3-dimensional. I painted them, and that's that.
Attach all the pieces together using wood caulk. The last step is adding Hylia's Crest, which was frustrating to figure out at first. What I ended up doing was cutting out the details from the poster, tracing them onto this and cutting them out. These decals were a little too pink for me, so I painted them with this glossy red paint. Finally I peeled off the backing and stuck them on the shield.
To hang it up, I pounded some small nails into the back and hung a metal wire between them.
Thanks for your interest. I'd be happy to answer any other questions you have!
Bondic is mental stuff!
https://www.amazon.co.uk/Bondic-Purpose-Instant-Stronger-Adhesive-Starter/dp/B00QU5M4MG/
Hopefully Amazon ships to your country.
I just used these fittings for my build. I tried super glue first. Would not recommend it. It cause the collars to become cloudy when the glue dried. And some cloudyness migrated up the tubing too.
I ended up buying this UV glue from amazon as i couldnt find anybody who carried monsoon's branded UV glue.
http://smile.amazon.com/Bondic-Anything-Waterproof-Resistant-Plastic/dp/B00QU5M4MG?ie=UTF8&psc=1&redirect=true&ref_=oh_aui_detailpage_o03_s00
This stuff was perfect. Very strong and is holding well. And it cures clear.
I guess I could provide a guide for my palm rest
Supplies needed:
 
Instructions:
epoxy putty like milliput or green stuff or even JB Weld. First use a bit to make an imprint of the pattern of the plastic (use some plastic wrap so it doesn't stick to the car, or if you're a pro, use a mold release agent, or vaseline on the car part, press the putty on the plastic and let it harden) then fill the hole with some of the putty and use the pattern mold you made to press it flat.
Should come out pretty close. You may need to remove the part to put tape behind it to help keep the putty from squishing through the holes too much.
You could try PerfecRepair. I use it occasionally to repair damaged sticks. It works very well.
Don't assume anything is sealed. With most builders every element of the house goes to the lowest bidder. Conduct yourself accordingly!
Do it yourself, it is a very easy DIY task. Take particular care in high stress areas, like kitchen counters and wet areas like shower or tub enclosures.
My counter installer advised using this: http://www.amazon.com/Dupont-Stonetech-Professional-BulletProof-1-Quart/dp/B00065W8G8
So I did.
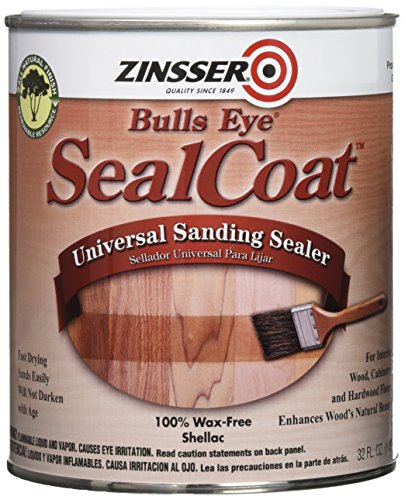
If I use stain, I'd usually give it a thin coat of shellac before I start poly. If it's an oil based stain, it can get swirled around a bit from the poly (whatever solvent you use). A coat of shellac seals it in, and the poly has no problem adhering to it. A 1-2 lb cut of clear, dewaxed shellac works great. If you don't want to mix your own, this is one you can buy. You can wipe on the shellac. It dries quickly; 30 min. or so. Give a light sanding to knock off any nibs (400 grit), clean off the dust, and poly as usual.
Get some of this stuff - expanding foam - should be able to pick it up at any hardware store. It's basically Styrofoam in a can and has a flexible nozzle - you should be able to squirt it into the holes in the locker, filling it with a foam that will rapidly harden, ruining anything inside and making it very hard to open.
First, you want to avoid softwoods and stick with your basic hardwoods (oak, maple, cherry, ash, poplar and a few others. No rainforest hardwoods, as they tend not to have happy reactions in many people).
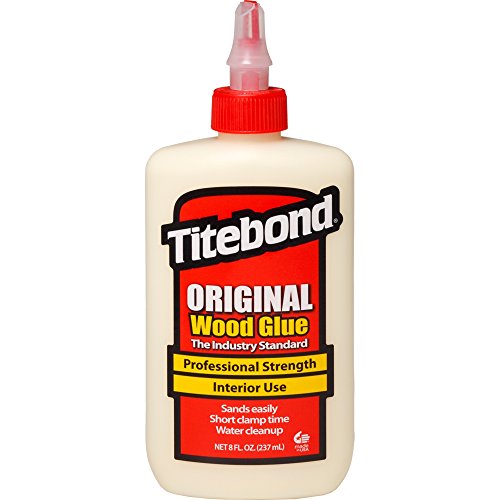
As long as the cherry does not touch the glue, there should be no problem. Remember that a very thin bead of glue is more than adequate for almost all purposes. I would recommend A simple wood glue like http://www.amazon.com/Franklin-International-5063-Titebond-Original/dp/B0002YWZPW/ref=sr_1_1?s=hardware&ie=UTF8&qid=1367548726&sr=1-1&keywords=titebond+original+wood+glue
Most say a mineral oil rub is all you should use, but others may disagree with me. DO NOT put anything on the inside of the bowl or anywhere else that may come in contact with embers or flame.
End of discussion :p
https://www.amazon.com/gp/aw/d/B0002YQ3KA/ref=mp_s_a_1_1?ie=UTF8&qid=1502036539&sr=8-1&pi=AC_SX236_SY340_QL65&keywords=titebond+iii&dpPl=1&dpID=41RDbuNSm-L&ref=plSrch
There are larger sizes available but this is a good size for the first one you buy
I've had success with https://www.amazon.com/21506-Plastic-Wood-Filler-16-Ounce/dp/B000BQYI24/ref=sr_1_7?ie=UTF8&qid=1485477785&sr=8-7&keywords=wood+filler
Bondic! Wish I could get some on my store.
https://www.amazon.com/Bondic-Anything-Waterproof-Resistant-Plastic/dp/B00QU5M4MG
StoneTech's Bulletproof sealer is my goto product. An extremely durable finish that holds up for years between applications.
https://www.amazon.com/StoneTech-BulletProof-Sealer-1-Pint-473L/dp/B005ZGSS0S
How long since the paint was put on there? If it's had time to cure, give it a cleaning and a light scuffing. Then put a clear polyurethane over it.
If it's, say, an older piece and you want to preserve the "patina", use shellac as a barrier coat, then put the poly over that.
Or you could go buck wild and hose it down if you wanted.
You need one of these instead.
I swear by StoneTech's Bulletproof. Best sealer on the market, in my humble opinion:
https://www.amazon.com/StoneTech-BulletProof-Sealer-1-Pint-473L/dp/B005ZGSS0S
That is not going to be strong enough. THIS is what you need - it's a two part polyvinyl product. If you are trying at Lowes, THIS or THIS would work.
Bondic - Liquid Plastic Welder - LED UV Light Activated Bonding Tool - Waterproof And Heat Resistant - Starter Kit https://www.amazon.ca/dp/B00QU5M4MG/ref=cm_sw_r_cp_api_i_LyiADbXCCZXJ4
Something along these lines seems like it would work great for on the fly repairs. Im gonna take my fathers advice and just buy one for myself for the future!
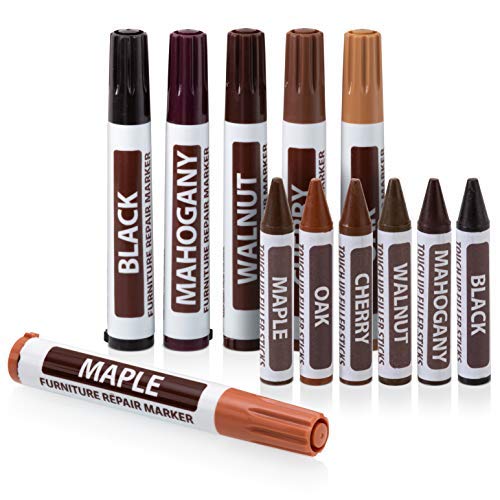
Glue+sawdust and get some of these; https://www.amazon.com/Ram-Pro-Total-Furniture-Repair-System/dp/B075ZZXB8K/ref=sr_1_1?ie=UTF8&qid=1523812019&sr=8-1&keywords=wood+crayon
Yeah, i agree, they should be a bit loose. If you're concerned about them loosening during use, use a drop of thread locking liquid, like this:
https://smile.amazon.com/Loctite-37418-Strength-Threadlocker-6-milliliter/dp/B000FIXQXK
PuterPro
I remember buying some clay-like stuff, for the woods scratches etc, and there was a pen that followed with it. Now, I am not the most artistic, but I somehow matched the shade and the color, and after a few weeks of just staying there, it blended in eventually. It is still visible, but not eye-popping, you have to literally squat down and see it. I’ll try to find that thing. And because it’s a little scratch, it’s not worth to change the planks because of it.
EDIT: This is the closest thing I could find. Obviously not ideal, but if you have that artistic side or can work with colors, I believe you’ll make wonders with it! ;)
I have a glu-bot for woodworking and I'm thinking of buying one for leather as well -
https://www.amazon.com/FastCap-Glu-Bot-Glue-Bottle-Ounces/dp/B0006IUW8G
One of the primary values of the glu-bot for woodworking is that you can use in multiple orientations, but it is also amazing at keeping glue for long periods of time and is fairly cheap.
Bondic Laser BONDING TECH SK001 Liquid Plastic Welder Complete Starter Kit, 4-Gram, 4g https://www.amazon.ca/dp/B01MR7J5ZX/ref=cm_sw_r_cp_api_i_xPS0CbWZEKEJY
I’ve used it for many kids toy repairs, very strong.
If you buy a wood desk from Office Depot, IKEA, or anywhere else, ALWAYS put it together with a squiggled bead of Titebond Wood Glue on the surface of every joint and place a dab of glue into every dowel and screw hole. It will not come apart or wobble. Just be sure to wipe away the excess glue with a wet towel as you tighten the joints.
As an example, a sizable particle board corner desk with built in cabinets on each side that I bought in 2000 at Best Buy is still in use by my Dad and has been through moves from FL > NC > OH > WI (and now three different homes in WI) in the last 18 years and has never come apart.
I have done this for 25+ years and have never had a piece of furniture assembled in this way fail on me.
This is the stuff in case you aren't familiar - You can get it at any Lowes/Home Depot locally: https://www.amazon.com/Titebond-5063-Original-Wood-8-Ounces/dp/B0002YWZPW?psc=1&SubscriptionId=AKIAILSHYYTFIVPWUY6Q&tag=duckduckgo-osx-20&linkCode=xm2&camp=2025&creative=165953&creativeASIN=B0002YWZPW
I generally achieve this by using "green stuff/kneadtite" (or more typically for weaponry...) milliput and sculpting the weapons.
I feel like actual wood might not be as durable as I'd prefer for regular tabletop use, especially if you have players that haven't been taught to be gentle with the miniatures or if you don't have a case for transport purposes. It should hold paint alright tho...but to be fair I've only ever used it for an actual basing material.
Highly recommend the Mohawk Finisher's Choice clear lacquer. Goes on super nice.
Make sure you let your friend's artwork dries really, really thoroughly and apply a few solid layers of de-waxed shellac over it before the lacquer coat (I like the Bulls-Eye SealCoat stuff). If you don't, you risk the paints interacting badly. It might also be good to lay down a coat of shellac before your friend paints to stop their work soaking into the wood.
I'd suggest letting the art dry for at least 2 weeks. Apply a thin layer of the shellac with a soft brush. Let it dry for a few hours. Apply another coat, but french polish this one (so it's super smooth). Let it dry overnight then apply a third coat (also french polish). Let it dry for 24 hours then gently sand it flat with 320 grit. Then wipe it down with a lightly damp cloth (not with denature alcohol, use water), wait 10 mins, then apply another layer with a french polish technique.
After that's dried for 24 hours, start spraying lacquer! This will mean there's a solid, even layer to lay the lacquer down, and several layers between the lacquer and the art.
Oh! It's magic. Spray in whatever weird shape you want, let it expand into a shoggothian mass of foam, then carve into shape. Great for oddly shaped props that really need to be lightweight.
I believe I used Kamui's tutorials for this:
https://www.youtube.com/watch?v=O23TM-z0OXk
https://www.youtube.com/watch?v=MDDo83M68Kk
And the particular brand I used was this stuff: http://www.amazon.com/GREAT-STUFF-Filler-Insulating-Sealant/dp/B0002YW0W0/ Had to use two cans for the bow.
You could try some weatherstrip seal?
https://www.amazon.com/Duck-Brand-284426-Adhesive-Weatherstrip/dp/B0025KUSX2
Or you could try some great stuff foam, it has a "straw", might be able to angle in space?
https://www.amazon.com/gp/aw/d/B0002YW0W0/ref=mp_s_a_1_1
I've said this a few times when these threads crop up. I'm building a beginner model ship by Constructo, called the Albatross. It's a good starter kit, and has pretty decent instructions in various languages and with pictures. Always read a couple of steps ahead and do some research before you take the plunge as the instructions aren't 100% and some terms don't go between languages well.
I have quite a collection of hobby type tools about after many years as a kid in the hobby, but the kit comes with a decent knife, blades, sanding block, tweezers and pliers. Constructo also do other, smaller, cheaper kits too, but I thought if I'm making a ship, I want a half decent square rigger, since I work on a real one so it's a bit closer to my heart.
Since you're a newbie, let me elaborate on what might make your life a little easier when making the kit.
A few things I would suggest additionally you may need, would be definitely some dress making pins, maybe a vice that's bolted to your desk, just so it's easier to hold, and some decent wood glue. I also use the odd mini cramp. A small razor saw is a good plan too, as it makes chopping wood a little easier than just using the supplied craft knife, especially when the planking is on the model and you can't press down with a knife. I wouldn't bother with using the metal tacks in the kit, use the dress making pins instead, the tacks are shite and leave big holes, they also bend horribly. When you need to bend any wood, soaking it is a good idea, makes it a lot more malleable, there is a lot of resource online to help you with these techniques.
You can view a finished Albatross by /u/Sun_Searcher here.
For the money, I think it's a good one to have a crack at as a starter. I'm after building HMS Surprise, but she's a bit big and advanced for a newbie to contemplate, so when this one is done, perhaps Surprise shall be next, much to my Mrs's consternation.
Here's my last picture, I've gotten a bit further but life seems to be getting in the way at the moment.
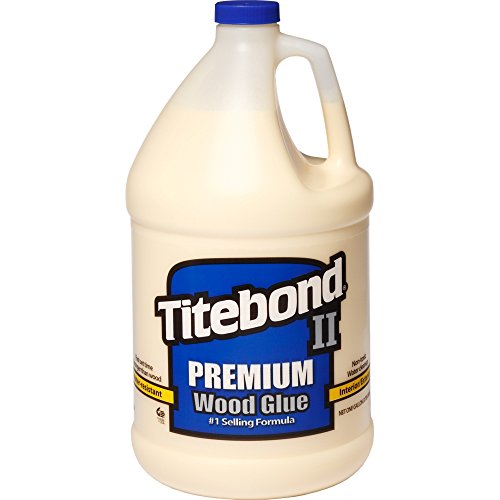
>http://www.amazon.com/Franklin-International-5006-Titebond-Premium/dp/B0000223UQ/ref=sr_1_4?ie=UTF8&qid=1343614206&sr=8-4&keywords=titebond+II
$20/gallon. Not really that much, IMO.
Get bondic. I used to use super glue but discovered Bondic. I confirmed with the company its 100% Salt and Freshwater safe once cured. Takes 4 seconds to cure once the UV is blasted on it. The stuff is amazing.
http://www.amazon.com/Bondic-24016-Plastic-Starter-Anything/dp/B00QU5M4MG/ref=sr_1_1?ie=UTF8&qid=1451457479&sr=8-1&keywords=bondic
To clarify are you referring to the sharp angular corners on the metal housing for the CA's?
If so, I feel your pain... The shell design albeit aesthetically pleasing are kind of an ergonomic clusterfuck (IMHO). From personal experience I strongly recommend using some sort of quick-set silicon/rubber to get a comfier fit! Sugru or Radians' Moldable Ear Plugs work great!
Here's a pic of my KZ ZS5 knockoffs with Sugru covering those harsh edges that make them uncomfortable for extended listening or under and minimumal pressure. Since the CA's have no diaphragm ports or venting on the shell you could get away with covering interior side's surface entirely to give the best form fit to your ears. I'd suggest you don't try to fit them with a material like Sugru directly on your ears unless it's made for that like the Radians' earplugs. (Also added tip, just put a generous amount of the moldable rubber in the general shape of your ears and shave down the extra after its set)
If you decide you'd rather not have the rubber attached to your Jupiter's for a more permanent (less hassle imo) addition, just go the moldable ear plugs route and tape over the iem's nozzles first. Then quickly slap the globs of silicon in your ears making sure they're making a nice, deep seal over your ear canal, and squish the CA's snugly into the mold. Make sure they're in nice and secure with the nozzle seated towards your ear drum. (Tip: Do this fast because the silicon becomes unsalvageable roughly 30 seconds to a minute after you've mixed it) With this option you won't need any ear tips for your CA's and they'll have excellent isolation. The downside being they do look like you're wearing some strange franken-hearing-aid homunculus of sorts. (You can get them in a tan color 😂)
This: https://www.amazon.com/PerfecRepair-Cigar-Repair-Crack-Sealer/dp/B072BD918F/ref=sr_1_1?keywords=cigar+glue&qid=1569934592&sr=8-1
Try https://www.amazon.com/dp/B00QU5M4MG/ref=cm_sw_r_cp_awdb_t1_K6pSCbWV0EQPN
Titebond 3 is what you want. It's a little expensive but definitely worth it.
If there is significant rot you should look into replacing the compromised sections. To plug holes I have found "GREAT STUFF" works pretty well depending on the size of hole. They sell it at nearly any home improvement store and even Amazon
If the problem is only around the screws, your only real solution would be to replace the bad screws. Again, if you don't feel comfortable getting on the roof because of structural problems it may be time to replace the rotted sections.
That will be a problem. As others said, best solution is to replace the switch, but that will require opening up the KB, desolder the existing switch, and solder the new one in.
Temporary solution would be needle-nose plier and pull out the stem's remainder, then super-glue the stem back, reinforce with Bondic plastic welder from the outside (a little ring around the break)
This is a weakness of the floating design keyboards... not much protection from lateral forces, eps. in the corners. If you use a carrying case, think about adding some reinforcement in the bottom. Cardboard would do. If you want to go fancy I think Elite keyboards have "Keyboard tent" hard shells for sale.
I've seen a vid on facebook where a guy repaired a leg with bondic. I bought some but have not used it yet.
/u/zodd06 mentioned bondic which I really hope I never need but that looks like a future solution.
i would recommend getting a can of this or something similar. Drill a tiny hole in the wall, and empty the bottle in the wall near the pipe, it expands and might give you enough insulation in there to keep it from freezing and without opening the wall up. If the wall is white get some of this and just wipe it over the hole you made, or if its in a not so noticeable place, fuck it and leave it or get some similar looking paint and cover it. This is all a last resort attempt before opening the wall and insulating it yourself, no guarantees this will work at all.
This is what I use. It's basically just de-waxed shellac. This stuff is alcohol based and has a dry time of about 10 minutes. I will brush it on with a foam brush, wait till dry and then give it a light rub with 320 just to knock down any high spots or dust.
I use wipe-on poly more often than brush on. I have never used water-based though, so I can't speak to how that works. Regular wipe on poly is essentially polyurethane diluted with mineral spirits to get it to a wipe-able consistency. It goes on much thinner than the brush on stuff, but goes on much more even in my opinion and drys much faster. You can re-coat in 2-3 hours. You will need to apply many more coats when compared to brush on, I find it takes about 3-4 coats of wipe on to equal 1 coat of brush on, but you don't get drips or runs or brush marks in your finish so it's worth it to me.
What do you think if this?
https://www.amazon.com/Countertop-Epoxy-Resistant-Resin-Quarts/dp/B00BJORLEE/ref=sr_1_4?ie=UTF8&qid=1518473250&sr=8-4&keywords=uv+resistant+resin
Probably not. Check a local paint store, sometimes they stock wood finishes, else Woodcraft/Rockler if there is one near you or online.
I have the same desk and have a spot or two where I ruined the veneer as well. I’m thinking this might help and I’m ordering some for myself soon
https://www.amazon.com/dp/B075ZZXB8K/ref=cm_sw_r_sms_c_api_i_kb.4Ab9BEPFT1
Epoxy putty if you don't particularly care what it looks like and just want an easy strong fix, or you could do a scarf joint or something with the leg to replace the broken section but it's hard to say exactly what might work without a picture.
For example, I just ordered this because I can't stand the circular shape of this.
You will be happy with those Sony's - lot of bang for your buck!
For your cable problem, take a look at Sugru
Maybe this’ll work?
Moldable glue like sugru. https://www.amazon.com/dp/B01M65432U/ref=cm_sw_r_cp_api_i_tXzsDbR3EEKPA
There’s also homemade stuff too called proto putty. https://alltop.com/viral/make-proto-putty-putty-solidifies-hours
This type of stuff is good for unique applications, not sure how well it’s work with cloth/fiber cables.
The foam I used was the first that came to mind when I made it but there's probably an alternative. I wanted something that would fill the center so it was more sturdy and that I could cut and shape. It also had to be light since I'm not all that strong.
The foam that I used isn't really all that bad. Just made sure you wear proper protection (mask, goggles, etc) and have a garage or outdoors to work in.
But if you're a bit concerned still, maybe try this? It's an expanding foam in an aerosol can. But you'd have to make sure you have a tarp out since it sticks to a lot. Once it sets, you can cut at it. I'd make a shield shaped casing and spray the foam into it if I were to use it (kinda like spraying it into a bowl... except shaped like the shield). I honestly don't have much experience with it but I've heard good things about it.
I'm not sure what else would work but I hope this helps! :)
I don't really mind as long as its smooth on top. I like the "old" look of the chest anyway so a crack is fine
Should I add another brace further along the crack also, or only brace the "crossbeam"?
And when you say epoxy, just fill it in with something like this?
Thanks
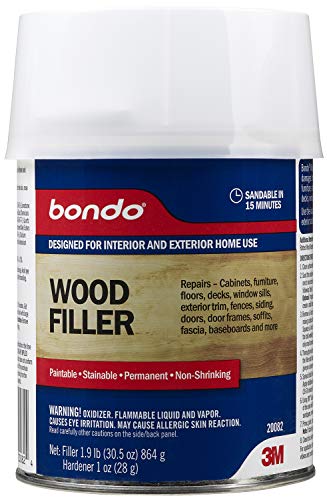
obviously you have never heard of this amazing product. https://www.amazon.com/Bondo-Home-Solutions-Wood-Filler/dp/B0007ZG9T4/ref=zg_bs_383886011_3
Is this what you mean by the millIput?
Something like this:
https://www.amazon.com/Bondic-BONDING-SK001-Plastic-Complete/dp/B01MR7J5ZX/ref=sr_1_5?keywords=uv+bondic&qid=1562000740&s=gateway&sr=8-5
https://www.parts-express.com/dayton-audio-18-ultimax-subwoofer-and-cabinet-bundle--300-7099
https://www.amazon.com/Polyfill-Stuffing-Polyester-Pounds-Schonfeld/dp/B0085A87NY
https://www.amazon.com/Titebond-Ultimate-Wood-16-Ounces-1414/dp/B0002YQ3KA
https://www.amazon.com/Behringer-NU3000DSP-BEHRINGER-iNUKE/dp/B005EHINAS - 1250 watts RMS into 8 Ohms (bridged) for series voice coils.
Cabinet + driver is $425. Polyfill is under $10 per pound, less if recycling pillows. $11 for the wood glue. $280 for the amplifier, $240 if using Amazon Warehouse deal. Total cost is right around $750, a touch higher if you need to rent some clamps for 24 hours to put it together.
Of course, my whole post is sort of wasteful because I see that the driver is out of stock.
FYI, you get more with this listing for the same price, just in case anyone buys it.
https://www.amazon.com/dp/B00065W8G8/ref=psdc_161917011_t1_B005ZGSS0S
Ive used this a couple times: Bondic
Its a type of glue that cures using the UV light from an led. They got a few of them at my workplace and they seem pretty useful.
Edit: Just read the description, apparently its not a glue but a plastic that remains liquid till you cure it with UV light and has quite good bonding capabilities. The reviews are hit and miss so maybe it depends a lot on the bonding surfaces.
Will these do, 6ML size? https://www.amazon.ca/LOCTITE-37418-Medium-Strength-Threadlocker/dp/B000FIXQXK
The armor kits are included in the original game purchase?
Edited the post above so that you can see exactly what I was talking about.
Some of the other stuff I didn't mention will be listed below.
Tried this as my marking knife , rather than the narex at first. Didn't sharpen easily for me, so I got the Narex Marking Knife.
Needed a coping saw so I could start doing dovetails easier. This is the one I have chosen. Does the job well enough, nothing to write home about.
The Glu-bot Sure you could use a mustard bottle, but I'll be damned if this little thing wasn't a bit useful. Being able to squeeze glue in any direction is very useful. This is one of those 'you mock the crap out of it until you try it yourself' items. Remember 6 of these gives you 96 oz of glue, but is the same cost as a full gallon and the cost of the gluebot together.
For sharpening: use one of these. Yes, freehand sharpening is fairly easy and quick. But at first using training wheels is both easy and convenient. It gets you a sharp blade everytime because it takes that pesky human error out of the equation.
After I did a long bit of youtube videos and making my own projects, i ran into this book. It solidified my understanding of a lot of woodworking knowledge. I don't know if it is a beginner type resource, but it definitely helped me out.
Glu bot for the win. Nice job. I like the inlay. https://www.amazon.com/FastCap-Glu-Bot-Glue-Bottle-Ounces/dp/B0006IUW8G
Fill the edges in good with kwik wood epoxy, let it set up good, then re-screw it. Make sure you really push it down and up into the gaps behind where you'll be screwing.
I've actually come to use Bondic UV plastic welder 😜
Oh no! lol if the super glue isn’t enough you could use liquid plastic. Its a clear gel that hardens with UV light. https://www.amazon.com/dp/B00QU5M4MG/ref=cm_sw_r_cp_api_i_Uwg7CbBCY51YC
If you aren't looking to replace it you might be able to get away with covering it up with something. Like a corner protector.
You could use wood filler to rebuild the corner, then use these to try and paint back the wood grain, then top it off with something like varnish or nail polish to match the gloss.
Consider sealing the granite with Stonetech's Bulletproof. One of the best sealers I've ever found:
https://www.amazon.com/StoneTech-BulletProof-Sealer-1-Pint-473L/dp/B005ZGSS0S
Love your kitchen. It is clean, functional, but not cluttered. Looks like some awesome meals are going to come out of there. Congratulations to you and your family on a job well done.
You may or may not have to go that route but this stuff will do the job if you decide to use it.
Another fun option, the makers of self watering planter suggest wood glue
Link 1: https://www.thingiverse.com/thing:903411
Glue itself: https://www.amazon.com/Franklin-International-1414-Titebond-3-Ultimate/dp/B0002YQ3KA
Depending on the depth of the scratches you can use wood-filler to fill up the holes. If the scratches are mostly superficial, try sanding it out.
Is the door painted or natural? In the former case full restoration will be easier. And yes, /r/woodworking or /r/DIY would probably be better for a question like this.
I'd like it to fit in my current space and those measurements do, they're very close to the existing table that is in this space.
About the glue joint:
If I choose to do biscuits, what's the easiest and best way to do it without owning a biscuit joiner or should one really purchase a biscuit joiner?
If I go with dowels, what's your dowel size that would be used on a 2"x12", assuming your typical 2" label coming out to 1 3/4"?
And I forgot to ask in my original post, Is this wood glue acceptable? Of the multitudes of woodworking videos I've watched on Youtube (wood whisperer, Frank Howarth, etc) they seem to mostly use titebond.
Edit: Also in regards to sanding the edges in preparation for a butt joint, what grits are you supposed to be using and how do you make sure that your sanding doesn't make the edges uneven? I don't have access to a jointer, is that something I should have done to the boards prior?
Are you able to remedy this situation at all?
Spray Insulation Foam works well.
Are your windows taped up?
Foam strip insulation around your doors and windows?
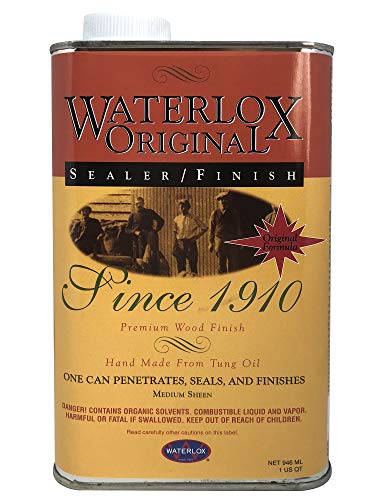
I looked up Waterlox after your suggestion. For anyone interested here is a link to it.
And another link for anyone buying it (not an affiliate link).
It's a tung oil varnish mix, so it pops the grain and builds pretty fast. You can apply it over stain if you want, but I'd see how the maple pops with tun before deciding to stain.
As mentioned, it's pricey (like $30/quart https://www.amazon.com/Title-Waterlox-Original-Sealer-Finish/dp/B009LKWLJI/ref=sr_1_5?keywords=waterlox&qid=1571064212&sr=8-5) but near bulletproof once you're done. As it's designed to react to itself, there's no 'sand between coats' required or anything else required, which makes it faster to apply.
https://www.waterlox.com/project-help/guide?id=9eff2fa9-c7bc-4cf4-972a-5d19faccfbc8
The only hiccup I've had is that it skins over quick if you don't use bloxygen or the like to keep the air out of the can.
Not sure if you are in the states, but here is a good link for one: https://smile.amazon.com/dp/B0006IUW8G/
For $8 you can't design and print it for less, especially out of a material glue won't stick to.
https://www.amazon.com/Bondic-Anything-Waterproof-Resistant-Plastic/dp/B00QU5M4MG
Here's a (supposedly) better one on Amazon.
I don't know if they'll replace the case piece. If you've got accidental damage protection on it it's possible they'll replace it.
You could use something like Milliput to fill the hole - https://www.amazon.co.uk/Milliput-MPP-5-Epoxy-Putty-Black/dp/B002CSX7Z8/ref=sr_1_1?ie=UTF8&qid=1481221976&sr=8-1
A new quiver would not go amiss as my DIY one tends to collapse. Otherwise, I'm always running out of loc-tight and I go through pry-tools like nobody's business.
I've had problems with this too. This year I was going to try putting a little Blue Locktite (Medium Strength) on my hardware. Get medium strength so that it will withstand some stuff, but still can be removed easily with hand tools.
Totally smokable. For the future, though, dont put tape over it. You can get a jar of cigar glue on Amazon for $10USD and you just use the brush to glue it back together like in the picture. It's made of the same stuff they use to glue it together at the factory, so it's safe to smoke.
What about blue loctite?
https://www.amazon.com/Loctite-37418-Strength-Threadlocker-6-milliliter/dp/B000FIXQXK
Hard to strike a balance between "not permanent" and "won't move without you noticing". You may need to wrench the puppy off if you use this, but it shouldn't walk out.
I just started about six months ago, and I thought I would add some pretty un-sexy things to the list... but Im so happy with them
Silicone Glue Brushes Are completely reuseable
Digital caliper Since grabbing this I have used it countless times when making cuts to match
Edit: Apparently I can't bullet point :(
It's a brand of Tung oil finish.
https://www.amazon.com/dp/B009LKWLJI/
I can't find a replacement piece anywhere online.
I would suggest hot-gluing it in place or using some UV curable additive plastic welding to build that area back up, then a small drill bit to reform the screwhole.
I would assume the radiator kits would be toxic.
Other info would be
Why cant you find a leak in something that is 1/2 inch big.
Needing it to be non toxic would be helpful
What is the pipe to maybe replacement is your best case
Googling "non toxic liquid pipe fixer" came back with this https://www.amazon.com/Bondic-Activated-Waterproof-Resistant-Anything/dp/B00QU5M4MG
Good luck
FastCap Glu-Bot Glue Bottle (16 Ounces) https://www.amazon.com/dp/B0006IUW8G/ref=cm_sw_r_awd_4VFevb0V4S2SZ
I need to fill in door hinges and a door latch on the door frame from where I removed a door. Would this product work to fill the space? After which I would sand it down and then paint? Or do I need to cut a thin sliver to fit? The hinge is shallow.
https://www.amazon.com/Bondo-Home-Solutions-Wood-Filler/dp/B0007ZG9T4
I have used JB Weld kwickwood with good success for a number of repairs.
The epoxy plus wood shaving is also a great idea. I have done similar things to fill cracks on a smaller scale with superglue
I'm sorry, wax free Shellac.
https://www.amazon.com/Rust-Oleum-Zinsser-854-Sealcoat-Universal/dp/B000C02BXW/ref=sr_1_3?ie=UTF8&qid=1525884218&sr=8-3&keywords=dewaxed+shellac
We have had GSD's for the past 20+ years. This is likely our last one. He HATES the nail gun. He isn't very crazy about the garage in general but will sometimes hang out with me or will run in, steal some wood and lay in the driveway making toothpicks.
The Beast:
https://i.imgur.com/2G3YMGh.jpg
I have a Friend/co-worker with a Great Dane and they let her sleep in the bed. I don't know how they do it. He has told me stories of her stretching and pushes him straight off the bed onto the floor.
"LOCTITE® Blue Threadlocker 242® is an all-purpose, medium strength threadlocker. Ideal for all nut and bolt applications 1/4" to 3/4" (6 mm to 20 mm)."
http://www.amazon.com/gp/aw/d/B000FIXQXK?pc_redir=1410063109&robot_redir=1
It is removable, but you might want to consider getting extra plates for your other gear.
https://www.amazon.com/gp/aw/d/B000FIXQXK
I'm a big fan of wax free shellac mixed 1:1 with denatured alcohol. It's idiot proof (that's why I'm a fan). I couldn't find the right type of shellac at the big box stores, so ordered it off Amazon.
shellac
Apply it with an old t-shirt. When you cut it, it's so thin that it dries super fast. Can build up 4 or 5 coats in 30 minutes or so.
Not yet. You still need This
Sorry for the late reply. First of all, take all of this with a grain of salt. This is my first build, so I am by no means an expert. You should definitely look in to all this on your own rather than blindly trust my purchases.
Here are the tools I got in my Amazon order:
I hope this helps.
http://www.amazon.com/gp/product/B0006IUW8G/ref=s9_qpp_gw_p469_i7?pf_rd_m=ATVPDKIKX0DER&pf_rd_s=desktop-1&pf_rd_r=1217VWZTFEHZX0Z5Y76W&pf_rd_t=36701&pf_rd_p=1970559082&pf_rd_i=desktop
It's more of a joke than it ever was, rap music I mean. Some of the "classic rap" wasn't actually bad, but this new "gangsta rap" crap makes me want to spray Great Stuff in my ears.