Best hardware nuts according to redditors
We found 146 Reddit comments discussing the best hardware nuts. We ranked the 103 resulting products by number of redditors who mentioned them. Here are the top 20.
We found 146 Reddit comments discussing the best hardware nuts. We ranked the 103 resulting products by number of redditors who mentioned them. Here are the top 20.


Nice! I left the middle parts solid and used a cordless drill to make the holes. I figured since I'll never take them apart, they won't become stripped. I've also seen serrated brass nuts pressed/melted in with a soldering iron. It creates a durable threaded hole:
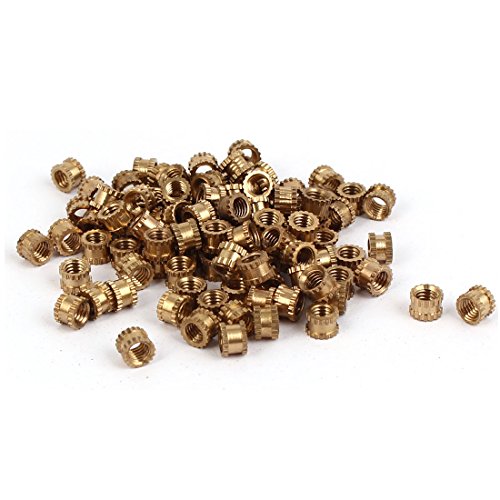
M3x5mm(L)-5mm(OD) Metric Threaded Brass Knurl Round Insert Nuts 100pcs https://www.amazon.com/dp/B00Y20YLKY/ref=cm_sw_r_cp_api_-S2-BbYAV507F
I thought now would be an appropriate time to share my first RPi project. Here are some links to more niche parts I used:
Raphnet Adapter
Standoffs
Disconnectable cables (for easier cable management, not necessary)
The GPU is simply mounted to the wood with a screw like it would be in a case, there's a little support that I covered with silicone on the back end.
For the motherboard I used these and these.
Wood beads are easy to find. As for the missing cap, I'd replace all 4 with something new that still fits the motif. Trying to make 1 to match the other 3 will be more expensive.
Cut a larger wooden ball in half. Find a Tee Nut to match the threading on the rods, drill a hole to accept the Tee Nut, apply some epoxy to the inside of the hole, gently hammer on the Tee Nut, allow it to dry, then thread it on.
You can be assembled and printing with the included tools in about half an hour, with no prior 3D printer experience. That's not a problem.
Actually getting the most out of the printer though, that depends on what you want to use it for.
I use it for making functional prints, replacement parts, and sometimes cool trinkets. I am not an artist, if you want to model and print sculptures, good luck. I haven't a clue.
If you're like me and want to make what I make, here's a list of things you should get:
Things you should print:
Things you should download:
While I'm making suggestions, I'd say you should get some PLA and PETG to start with, ignore ABS entirely. It's slightly cheaper per kilogram, but there are toxic fumes to worry about and it really needs an enclosure to print (well).
PLA is cheap enough, but doesn't flex as much as ABS so it's better for different applications. PETG is like the best parts of PLA and ABS, but you have to print at lower speeds.
I print at 45mm/s, 5 second minimum layer time using both PLA and PETG and it works perfectly. 210C/60C for PLA and 250/70 for PETG.
If you have any questions, you know where to find me. :)
I keep some backup clothing. Specifically wool socks, boots and extra gloves and hat. If I get stranded and have to trudge through the snow I wanna be prepared.
Recovery straps arent too expensive either. I think mine was like $30. Get a hitch shackle too if you're gonna do that.
Besides that I keep extra fluids and litter or salt in a box in the back. I got one of these cause I didnt want anything permanent, and just chain it in the bed. Also sand bags for weight - this year I'm planning to build a frame to hold them in place.
Over summer I also built this rail-mount shovel holder, mostly to keep it from bouncing around or getting easily lifted. Its not really secure but its better than just tossing it in there. I used these clamps and these t-slot nuts for the rail. Hardware came from lowes, 3/8"-16, i think they were 1 1/2 inch bolts, washers, and the aluminum bar.
Nuts and bolts on Amazon are kinda weird in that there is some predatory pricing taking advantage of how damn many search results you're going to find. The part linked from the first thingiverse page is $7 for 10 locknuts. You can get 100 of them for $8 if you do some searching on your own. I've actually bought these and they're fine:
uxcell® M3x0.5mm Zinc Plated Nylon Insert Hex Lock Nuts Black 100pcs https://www.amazon.com/dp/B015A3DT2W/ref=cm_sw_r_cp_api_K5roxbXPHB1XJ
There are some silver locknuts for cheaper, or normal nuts if you just want to use blue thread locker with them. You may be wondering why the hell you would want 100 of these... The answer is that M3 nuts and machine screws are ubiquitous for assembling 3D printers, accessories for printers and printed contraptions in general.
Source: a certain company forgot to include half the specialty screws and nuts in my printer kit, had to learn way too much about finding them on my own.
Anyway, if you're in the US pm me with your shipping address and I'll front you a few of these guys. They'll probably survive in an envelope.
DSLRs are really front-heavy, which can exacerbate vibrations. I'd find a way to balance its center of gravity directly over the mount.
What kind of mount is it?
EDIT: ALSO: You need to secure the top of your camera as well. You can get a simple hotshoe mount like this and improvise some hardware. Basically you want to make a tripod that mounts to the top of the camera to either the base of your mount or additional suction cups.
T-nuts I used threaded inserts are first but it caused the MDF to bow out around where the threaded insert were, obviously bad for a level table.
you will need to cut recessed circled so the part with the prongs sit flush to the under side so they don't hit the frame.
T-tracks were too expensive for how many I wanted.
I use a separate sheet of MDF that I screwed into the original waste board so it's easy to replace and I don't have to mess with re-calibrating the frame every time.
No problem!
I completely lied without intension. I looked back at my amazon order and realized that its 5/16. Still plenty for the task bc I zig zagged them but nowhere near 5/8"! Thanks for catching that. This is where I got them from
If you're doing docker why not k8s? :)
Or look at your other options. Ubuntu is great, but there are a few OSs particularly for docker containers like rancheros that will reduce overhead and streamline deployment.
And I mod a lot of my gear. I would consider stringing them on a couple rods or building a tower. The rods would be nice because you could hang them in a rack :).
Edit: by rods I mean a couple of these guys cut to length (also available shorter and cheaper, but the are 2x rack length). Just get some matching nuts and bam, instant rack. If you want a non-rack form factor something else may better allow for swapping out parts and mounting fans. If rack mount, hang that from a shelf, load the shelf with psus. Just use 80mm (not 120) coolers to maximize packing :)
All you need is a cheap red dot sight (there's no recoil on a camera so your cheap sight isn't going to lose its zero), a short section of picatinny rail, and a hotshoe to 1/4" tripod adapter. You'll have to drill and tap the rail section to 1/4"x20 and once it's all put together and aligned superglue everything together so it doesn't move. I had the pic rail left over from another project so I saved ten bucks there. You obviously don't need 10" of picatinny rail so just cut off as much as you want. For extra cool points use an Eotech
The lens is a Rokinon 500mm mirror lens.
https://www.amazon.com/ZRM-Pronged-Furniture-Assorted-Four-Pronged/dp/B07SXGYSR2
Nyloc nuts.
Absolutely not necessary (really), but I also bought new screws that are a little harder and the hex socket is less likely to deform.
Also not necessary, but nice to have is a miniature metric wrench set.
As I said, it's not hard, but does take a couple hours. Go slow, take a break if needed. There's a video somewhere on youtube of someone doing this which should alleviate any concerns about the difficulty. Remember, if you do this, you're obligated to post the before and after 7x7 bed level image from Octoprint.
If you buy regular climbing holds, the plywood you mount them on will need some separation for the end of the bolts to stick out.
Therefore, I'd say screw 2x4s into studs. Take a piece of 3/4" plywood and mount t-nuts into it (here). Screw that into the 2x4s. That gives you separation from the wall, letting the bolts screw in enough. Plus you get the added benefit that your forearms won't hit the door frame. I've gotten some really annoying bruises like that.
https://www.amazon.com/uxcell-Female-Knurled-Threaded-Embedment/dp/B01IYWV8Q0/ref=sr_1_1?ie=UTF8&qid=1525384922&sr=8-1&keywords=knurled+brass+insert
These are what I use.
Carbon Steel Lock Nut, Zinc Plated Finish, Right Hand Threads, Self... http://www.amazon.com/dp/B000NBKLM8/ref=cm_sw_r_udp_awd_HtkSub0YB4D93
What you're talking about is called a cam fitting or a cam lock: http://www.amazon.com/Uxcell-a12010500ux0151-Furniture-Fitting-Pre-inserted/dp/B00880QVTS
Those types of "joinery" methods are not very strong. All my ikea furniture is now very loose and racks around like crazy.
You would be much better off screwing it with a countersunk hole and covering up the screws by glue a decorative wood veneer or just a thin piece of wood as an accent or something.
You could also consider pocket holes and use plugs to fill and finish the holes.
So I found the bag of "stock" D-bot parts I'd replaced, and tested those specific ones I linked to, and they work fine with the parts.
These: https://www.amazon.com/dp/B019ZXUSY0/ref=biss_dp_t_buying_options
So if you're looking to recommend some specific T-nuts, those work.
>Does't seem sturdy enough if I wanna put my feet up :(
If it's made from chipboard / particle board you probably wouldn't want to do that anyway :-) But if you made it from plywood it would be plenty strong enough.
Those metal locking nuts /u/doc_lock is describing are actually quite secure, but they do favour easy disassembly over strength. This is what they look like, along with their associated bolt.
The easiest thing you could do is lean the headboard against the wall, then push the bed up to it. I've lived with that solution a few times.
For extra credit, stick some felt pads on the top corners of the headboard so it doesn't bang against the wall or abrade the plaster. (That also helps if the headboard is solidly attached to the bed.)
If you do want to bolt them together, I suggest you assemble the two pieces, set them together, than use the holes in the headboard as a guide to drill matching holes in the bed frame. I'd use machine screws with nuts and fender washers -- those distribute the load well so the screws won't pull out. In the US, use 1/4-20 screws; in the metric world, use M6.
If there's not enough clearance for the drawers inside the bed, you can use T-nuts like these instead of hex nuts. And use shorter screws.
I have a piece of mdf with holes drilled in it and T-nuts on the back side.
https://www.amazon.com/Hillman-Group-180297-Pronged-100-Pack/dp/B000H61YF2/ref=sr_1_1/180-7989447-8305100?s=industrial&ie=UTF8&qid=1468022702&sr=1-1
I printed a bunch of hold downs on my printer and use 1/4 20 bolts to hold my part.
Easy! Bed rail nuts
Assuming your camera has a cold shoe/hot shoe, you could use a Cold shoe to 1/4"-20 adapter and an iPhone tripod mount.
Following up on the original comment... Don't use these. They're damn near impossible to get perpendicular to the surface of the wood and they're way more expensive than blind nuts.
Trencher Shovel:
Manufacturer's site for specs: https://www.crkt.com/trencher.html
Amazon link for a better price: https://www.amazon.ca/gp/product/B01M0G10O4/ref=ppx_yo_dt_b_asin_title_o02_s00?ie=UTF8&psc=1
Mounting Pieces:
Quickfists: https://www.amazon.ca/gp/product/B000CQPANY/ref=ppx_yo_dt_b_asin_title_o03_s00?ie=UTF8&psc=1
T-Slot Nuts: https://www.amazon.ca/gp/product/B009SWGLHW/ref=ppx_yo_dt_b_asin_title_o03_s00?ie=UTF8&psc=1
Screws: https://www.amazon.ca/gp/product/B00IZFS0VI/ref=ppx_yo_dt_b_asin_title_o03_s00?ie=UTF8&psc=1
You will need a Drill and a 3/8" or 1/2" drill bit. Drill out the stock hole in the bottom of the quickfist to make the hole larger, the screws will then fit through. Put the T-Nut in the bed-rail and slide it down to where you want it. Screw the Quickfist to the T-Nut and you get what you see above! Insert your tool of choice!
I bought these: https://www.amazon.com/gp/product/B075ZZW7VL/
Buy
($6)Wires:For the MOFSET mod
($1o)MOFSET
($6)Wire spades:For the MOFSET mod
($8)Assorted M3 Bolts:You need some for a few mods and for the bolts you will inevitably strip on this
cheapwonderful machine($13)Longer assorted M3 Bolts:For a few mods
($9)M4 Bolts:For one of the mods
($9)Metric allen wrench set:Had to order one of these since metric tools aren’t common round these parts
(~$20) PLA of preferred choice- You’ll run out of the sample bit quick so go ahead and order a roll or two to be prepared. You will note some upgrades require ABS so a small spool of that to your order will also help.
($6)M3 Lock nuts:Critically needed for a simple mod
($10)Threaded rod and nuts:Please note that this item seemed difficult to find online. I recommend going to your local hardware store and getting two 5/16” rods of at least 16” in length. They should have an assortment of threaded rod in various lengths available. Also note that the pitch of the threading matches the nuts you buy. Further instructions regarding this can be seen in Azza’s Z-Axis braces below.)
($6)9mm Wrench for the nozzle: Don’t wait for your first clog, go ahead and have this on hand to remove/change the nozzle. Note to only tighten/loosen the nozzle when heated.
Below is the order of printable upgrades I recommend but I suggest you mix in a few other prints along the way because this is a hobby after all and you should be having fun. It helps to have your quality as tuned in as much as possible for some of these so be patient and keep trying if you need to.
Print
Spool holder- temporary : Until you can mount your spool on top of the enclosure or any other personal preference.
Belt tensioner- print x2
Z-brace
Shielded stop button
Cable relocator : It’s a pain, but if you spend the time to do this and turn your extruder motor 90 degrees then you can get the full Z height without ruining your cables. It does involve opening all the cables to the PSU and feeding a few extra inches back through the cable chains.
Cable shroud : Looks nice if you do the cable relocator.
The following need to be printed in ABS:
M3 Bed Nut retainer: 10/10 upgrade. I know they look worse than the nice metal stock ones, but these help keep your bed level longer.
CiiCooler
Glass bed Holder
Now that the first major round of printed upgrades is done it’s time to shift to a few more supplies to pick up to really fine tune the machine.
Buy
($5)Radial fan: For CiiCooler
($5)Glue sticksThis and a glass bed is magic
($25)Borosilicate glass 8” x 8”
($26)Y-Carriage plate upgrade: This has been a nice upgrade as I now only need to relevel the bed every couple weeks instead of every print. Check out this guide for a ‘how to’ as well as a free upgrade by shifting your Y pulley over.
($15)rechargeable dehumidifier: For keeping in the bin with your opened filaments
($9)Extruder gears: Might be able to hold off on these, but will need eventually. If for some reason you have a Maker Select with metal X-axis blocks (V1 and V2, but not V2.1) then this is a must. You can follow this guide for a how to.
($28)Metal extruder plate and lever: Not needed, but nice.
($14)Noctua 40mm fan: Not needed, but makes the printer a lot quitter. A LOT quieter.
($50)MicroSwiss All Metal Hot End: The destruction of my PTFE tube by this point pushed me to doing this upgrade. If needed you can follow this guide for replacement. Remember to tighten/loosen when the nozzle its hot.
($6)Ceramic cotton: Tore off the stock one when replacing for the all metal hot end by accident. At least its thicker than stock
Now that the printer is in its final form, its time for the enclosure which is a stacked Ikea Lack hack.
Print
Spool holder
Pi Case
120mm fan cover
Fan grill
120mm fan PSU modification: I edited this to fit upside down since my PSU is mounted on the underside. This was nice since I blew the 40mm fan anyways so it made everything a lot quieter than before.
IKEA Lack filament guide
Webcam holder: This is one I designed specifically for the webcam I happen to have lying around. The camera mount piece can be changed out no problem though for what ever webcam you have or buy. The SketchUp file is included on Thingiverse for such purpose.
Buy
($20)2x Ikea Lack: Luckily there is one right down the street from me. I am located in North America though, so we do not have the STUVA, if you live literally anywhere else you may check in to this as an alternative.
($80)Plexi glass for enclosure: Could be cheaper alternatives, but it looks cool
($9)Foam pads for feet
($42)Raspberry Pi3: For OctoPrint. I also suggest using a different USB cable than the stock one provided by Monoprice or you will have issues.
($9)2x 120mm fans: Used for the power supply cooling and enclosure
($6)Rocker Switches so that the enclosure fan can be on for PLA, but off for ABS
($15)Dimmable LED lights
($10)8mm LED light connectors
Total:
$250 printer + $452 upgrades/parts + ~$80 PLA/ABS to date
https://www.thingiverse.com/thing:3663683
I used a threaded insert instead of just screwing into the plastic.
I get them on amazon.
use threaded inserts instead of trying to thread into the print it's self. I use these: https://www.amazon.com/gp/product/B00Y20YLKY/ref=oh_aui_detailpage_o01_s01?ie=UTF8&psc=1
Just look on Amazon for threaded inserts in what ever size you want. I am using the ones I posted along with nylon screwed so I'm not conducting electricity from what ever I am fastening down. I do have stainless steel ones I use too for parts that need a stronger fastener.
Check out this post from 3Dhubs on threaded inserts: http://www.3dhubs.com/knowledge-base/how-assemble-3d-printed-parts-threaded-fasteners
you could do that or use 3/8" threaded inserts embedded from underneath the ply. Then when you want to use the saw just drop bolts and washers through the feet into the inserts.
The whole printed extruder assembly, ABS print cooling shrouds, extra nozzles.
M3 screw kit.
M3 square nuts.
M3 lock nuts
My current tap handles are wooden children's alphabet blocks from a flea market with these inserted.
Anything can be a tap handle if you can drill a hole in it to insert those.
T-nuts are also a lot easier than inserts. You just drill a 5/16 hole and press-fit them in. 100 of them should probably cover your needs.
http://www.amazon.com/gp/product/B000H61YF2
Sure its actually really simple if you have access to some power tools.
It is 1/2 in from the side and 1 in from the top. Id use a scroll saw if you have it but a jigsaw will work. Start by drilling out a few holes in your soon to be center hole this will give you a place to start your saw without having to cut from the outside.
Note: if using a jigsaw you should mark out your hole and cut from on both sides of the handle as a jigsaw may not cut as straight through as you'd like.
Note: You can get a bit fancier and replace the second washer and first nut with one of these
Drill a hole for another bolt at one end of both sticks in the same place(right side of pic). On the other end drill a pilot hole for the 2 screws that will hold the blade in place( left side of pic. make sure its big enough that the screws can go in with very little effort mine were about an inch long. At just under an inch from the end cut a blade slot slightly past your pilots (without the screws in). Mark your inches on your sticks
As i said i made this with stuff laying around so if you buy more specialized hardware you could definitely improve on my tool. It might also be beneficial to use a hardwood on you blade sticks. I haven't used mine much yet so it is possible they could split where the blade is mounted. if you know a way to put in the blade notch without cutting from the outside please share!!
I just built an Anet AM8 using 2040 extrusion.
Those angle need M5x10
You can also get a 100 pack of the T nuts for cheap as well
https://www.amazon.com/gp/product/B019ZXUSY0/ref=oh_aui_detailpage_o03_s01?ie=UTF8&psc=1
Any m3 nylon locking nuts will work. Should be able to buy them in any hardware store. https://www.amazon.com/gp/aw/d/B015A3DRO2/ref=mp_s_a_1_4?ie=UTF8&qid=1511555342&sr=8-4&pi=AC_SX236_SY340_FMwebp_QL65&keywords=m3+nylon+nut&dpPl=1&dpID=41jHPPYWzLL&ref=plSrch
This would work
Nevermind, found a bag of 100 here on Amazon.. Thanks all! http://www.amazon.com/gp/product/B000NBKLM8/ref=oh_details_o00_s00_i00?ie=UTF8&psc=1
Threaded inserts like these? Wouldn't need to drill a full hole through the case...just enough for the insert.
>Foil pommel nut inside
>
>Foil pommel nut outside
The inside-hex nut on my epee is 22mm (0.866 inches, or just under 7/8 inches) long, has an outside diameter of 10mm (0.394 inches, or just over 3/8 inches), and is sized for a 6mm (0.236 inches, or just under 1/4 inches) hex key. Approximately the top 5mm are not threaded, leaving approximately 17mm of threading.
Most fencing tangs are threaded using 6mmx1mm threading (source 1, source 2, source 3).
It seems like the inside-hex hut would be an example of an "Allen nut"/"socket nut", which McMaster-Carr apparently does not carry in metric specifications.
Though, these, these, and these look like they would be able to serve as replacement outside-hex nuts.
>Foil pommel lock washer
The "split lock washer" would have the same OD as the nut (that is, 10mm, or just over 3/8 inches) and an ID equal to or greater than the OD of the threading (that is, 6mm, or just under 1/4 inches). You can probably find matching split lock washers at your local hardware store without too much difficulty.
>Foil insulation tubing
As others have suggested, heat-shrink tubing from McMaster-Carr with a 3mm (0.118 inches, or just under 1/8 inches) diameter should work.
>Foil german point spring
You'll have to measure several aspects of the springs in question - specifically: the diameter/gauge of the wire that makes up the spring, the outer diameter of the spring (that is, the outer diameter of the cylinder represented by the spring), the uncompressed length of the spring (that is, the height of the cylinder represented by the spring), and the number of coils in the spring - to find a match; see here and here.
The point spring, and the other components not already discussed, are probably more-easily sourced from a fencing equipment supplier than trying to find the same components elsewhere.
https://www.amazon.com/dp/B00Y20YLKY/ref=cm_sw_r_cp_apa_i_0EJOCbQ7N3H2A
https://www.amazon.com/dp/B07119HX51/ref=cm_sw_r_cp_apa_i_h3JOCbZWF12W4
A couple things to be aware of...
The brass inserts will get some melted PLA coming up through the bottom of them and this ruins the threads. Make sure the holes are reamed a bit so the insert begins to go in with a friction fit at first for the best results.
The countersunk screws are not as ideal as a panhead screw would have been. I used the flathead ones because that's what I had on hand. I made the custom bottom plates with the countersink because of this (there was trial and error).
The extra thumb buttons are useful, I can't imagine not having them. There is a scenario where I think a 5x7 layout would be better (maybe only on one hand) to provide an extra column of keys, but in hindsight the dual 5x6 layout works for me (I still have 3 unassigned keys!)
I believe they're 2.5M, I bought this one or something similar.
https://www.amazon.com/HOBBYMATE-Standoffs-Assorted-Quadcopter-Raspberry-Pi/dp/B06XW978ZP/
I've been working on this table project for a little while now, and now just need to fasten the legs to the table tops. One issue that that these raw oak slabs were never planed more than the rough cut from the tree, so their fairly uneven, and even bow a little (don't think it shows in the pictures, though). For that reason, I need a way to level the legs so that the tables don't rock once their finished. Shimming the plates with washers should be easy enough to get the table level, but I'll need machined threads to run the fasteners into and out of (and then into and out of again) so that they'll still hold once it's all said and done. I've looked at a few different options for this problem, but aren't convinced any of them are ideal. T-nuts would work, but I think they might pull out since they won't be held in from the top of the table surface (not interested in that industrial look). These threaded inserts and these similar ones would seem to do the trick, but the reviews raise questions about the strength of the material in dealing with hardwood, as well as problems with the material stripping while trying to place them. Anyone have any suggestions/advice?
TLDR: Looking for fastener solutions to affix table legs to the underside of an oak slab that will allow adjusting to level the table.
Here are some on Amazon, Prime-eligible. I'll probably get a larger batch too, but these are relatively cheap to play with and they get here fast. :-)
I've found them a bit hit and miss, I used them on drawer handles, which may not be the ideal use case. One of 5 has already come loose. I tried to fix by shoving PLA fibres after it and melting a rim around, but no joy.
The surface area of the grip part is very small on the ones I have, and also the lines down the edge run lengthways, where if they have been crossways they'd have been like knurling adding some grip.
I got mine on amazon and ebay. https://www.amazon.co.uk/M3x5mm-Metric-Threaded-Insert-100pcs/dp/B00Y20YLKY/ref=sr_1_6?ie=UTF8&qid=1539132205&sr=8-6&keywords=threaded+inserts
I've started to (where possible) build little enclosures for nuts instead. It's a lot more hassle and less fun.
Any tips on the inserts welcomed (I bought a bloody load of them)
Lots of cheap options on Amazon. If you don't want the bar you can get a couple of these t-nuts that fit inside the track and screw the fork mount into that for an out of the way semi permanent options.
Sunlite Fork Mount Bike Block https://www.amazon.com/dp/B000AO7GRG/ref=cm_sw_r_cp_apa_2dOwzbNNVRVQF
1018 Steel T-Slot Nut, Black Oxide Finish, Grade 5, Tapped Through, 3/8"-16 Threads, 5/8" Height, 9/16" Slot Depth, Made in US (Pack of 5) https://www.amazon.com/dp/B009SWGLHW/ref=cm_sw_r_cp_apa_IgOwzbJSKR2CC
I used these and they fit with a little filing (my printed holes anyways end up a bit too small)
It's just standard 1/4"-20 threading, it says it in the description. Here is a $5 alternative: http://www.amazon.com/SMALLRIG-Hot-Shoe-Adapter-Monitor/dp/B006LB5YLM/ref=sr_1_1?s=electronics&ie=UTF8&qid=1413131523&sr=1-1&keywords=hotshoe+tripod+mount
The first result I get is same day delivery /shrug
https://www.amazon.com/Honbay-100pcs-Stainless-Steel-Square/dp/B06XPFLNBS