Best heating & cooling equipment for labs according to redditors
We found 46 Reddit comments discussing the best heating & cooling equipment for labs. We ranked the 26 resulting products by number of redditors who mentioned them. Here are the top 20.


Here is the starting material : http://i.imgur.com/ODGD6cU.jpg
I used 140 grams of nug only.
I used an MKV: http://i.imgur.com/wwAKvaK.jpg
for the extraction with a mixture of 83% N-Butane and 17% Propane. I filled the sleeve with dry ice and locked the column full of solvent for an hour in order to dewax the oil.
Once the oil was collected, I spread it thin on the PTFE sheet and put it into my AI Vacuum Oven.
For purging I set the temp to 90 degrees at first, and finish the slab at around 100 degrees (temp's can be strain dependent as well). I'll put it to full vac and let it go. This slab took 50 hours to complete. Every 10 hours or so I will regularly "flip" my oil slab to make the bottom the top in order to remove solvent a bit better.
This Agent Orange from TGA genetics grows so well for me. The oil tastes incredibly citrusy and sour, and smells like orange and lemon candies on the exhale. A nice hybrid high with the sativa dominating, it's a great smoke with a bunch of friends over.
Feel free to ask any questions!
Homebrew Materials:
Vacuum Pump Oil
Vacuum Tubing
1/4" Barb x 1/4" NPT Male Hose Fitting
1/4" Male x 1/4" Female NPT Extension Hose
Vacuum Pump
Filters
Spatulas
Magnetic Stir Bar
Digital Hotplate with Magnetic Stirrer
Nitrile Gloves (Better than Latex)
Empty Capsules (Buy Separated unless you hate your life)
Capsule Machine (If you value your sanity, buy more than a 100... I hated my life doing this)
Mohr Pipets
Pipette 10ml
Mortar and Pestle (If you're doing orals, get this... Otherwise, you're playing Russian Roulette with your doses and liver)
Funnel (For pouring into small places)
Alconox (For clean your shit)
Temperature Gun (How hot is my shit?)
Graduated Cylinder (If you measure with beakers, you're a fucking idiot... And you should consider Volumetric Flasks)
Beaker Set
1 Liter Beaker (Because brewing en'masse is better)
Scale (I have a 2kg one, too)
Calibration Weight Set
Calibration Weight 100g (Because you need two for the scale linked)
Vacuum Regulator (Unless you want to filter 9001 times due to broken shit)
Oil (Any USP grade, filtered or unfitlered)
BB
BA
Butyl Stoppers
Flip Top Seals
Crimper
Vials (Unsealed)
Autoclave (Cheaper than an oven, why are you using an oven?!)
Weight Boats (Buy a million of these. They're cheap and useful)
Did I miss something? Probably. Yes.
For those of you whom would like to make one of your own you can purchase the magnetic stirrer hot plate here ($210), and the Pyrex Erlenmeyer Flask here ($15.95)! Total investment cost: $225.95.
Alternatively you can purchase this magnetic stirrer hot plate for significantly less, bringing the total cost down to $175.90.
Buy one of these. You can dry out the liquid clumps and reuse the litter. It'll pay for itself in a matter of decades.
And don't mind the smell as the action is taking place. (Source: Used one of these for wood shavings on a previous job. Filled the room with a wonderful burning tree scent.)
That flat hotplate is not ideal for a RBF (Round Bottom Flask.) To use it more effectively, you might try getting a pot the size of the burner, or a bit larger, and filling it with sand. The sand gets hot and heats the flask relatively evenly around the bottom.
When your finances permit, look for a good heating mantle, preferably with stirring. Something like this: https://www.amazon.ca/Heating-Magnetic-HMS1000ml-Temperature-100-240V/dp/B07Z5KTW6P/ref=sr_1_27?keywords=heating+mantle&qid=1574245664&s=industrial&sr=1-27
Of course, then you will need stir bars, if you want to stir your reaction while heating. (You usually want this.) https://www.amazon.ca/Magnetic-Stirrer-Mixer-Diameter-Length/dp/B07461T2PR/ref=sr_1_1?keywords=stir+bar+olive&qid=1574245874&s=industrial&sr=1-1
And it would be good to use a jack to be able to raise the mantle to the flask, so you can lower it when you want to remove heat, and not have to move the glassware. Handling hot glassware is not a great thing to do for a variety of reasons.
Oops sorry I should have explained better. You don't actually pass your biological stuff through / over flame, just use flame to help maintain a clean workspace. Glass, tools, etc. gets flamed though.
TL;DR: Generic microbiology aseptic technique: article and video
Preface: I did NOT invent this. This is just how we microbiologists do our normal lab work, so it's what I tried to do when I started tissue culturing, and it seems to work just as well for TC. But I suspect this might seem like heresy to a real TC person...
Basic process is:
Tips/techniques for winning the odds game:
EDIT: Formatting. And I'm so sorry this got so long... I got carried away
I've used the ones that are little butane tanks that you stick your existing burner to the top of, they tend to leak a little and aren't the greatest. Neighbors in the lab use camping stoves, which seem to work pretty well. I just use a cheap alcohol burner like this one and it serves my purposes fine.
They use a small alcohol lamp. Amazon sells them in appropriate sizes.
For example
Any replacement lamp will not automatically snuff itself, though. You will have to do this manually.
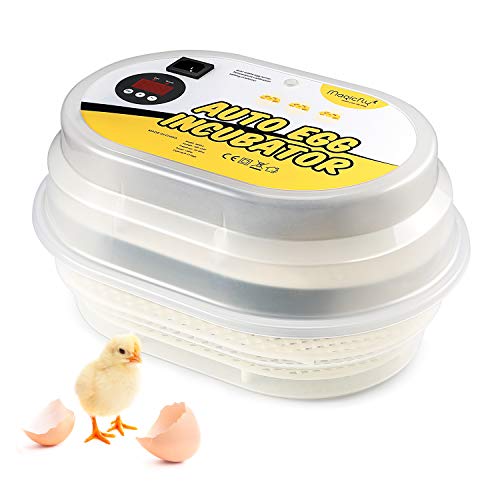
Well one option for 9-12 eggs is https://www.amazon.com/Automatic-Digital-Incubator-Poultry-Chicken/dp/B01H1S1NZE/ref=sr_1_1?ie=UTF8&qid=1488250669&sr=8-1-spons&keywords=incubator&psc=1
there is also this one that lets you do up to 48 you dont have to but its way less expensive. https://www.amazon.com/Best-Choice-Products-Incubator-Temperature/dp/B010OUJCGS/ref=sr_1_10?ie=UTF8&qid=1488250669&sr=8-10&keywords=incubator
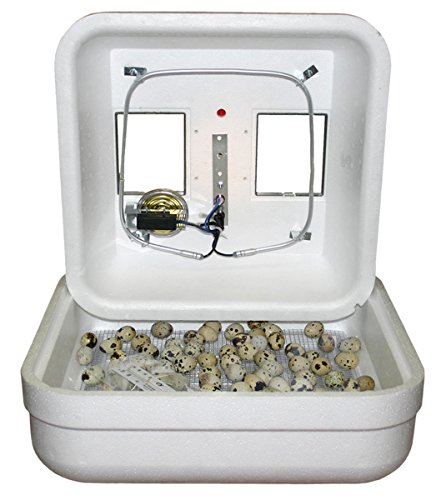
Aside from that i got nothing else ^_^. I always think the brinsea are to pricey. I personally get by with a foam incubator, the magifly mini, and hopefully soon my 4 silkie hens.
Science lab incubator.
https://www.amazon.com/12-140E-1-Digital-Incubator-220W/dp/B007PD5QE0
Or even a print dry 3d filament dryer or just a food dehydrator. Something to control a low heat range.
Man, so much this. Like, I 100% think its going to suck...but its going to be an absolutely *fascinating* amount of suck.
You could not go out of protest (though given your family's attitude, it doesn't sound like that will accomplish much)...OR you can get your parents off your back, and pick up one of the best "train crash/rubber necking" stories of all time, in one go.
Bonus points if you make your gift a $300 version of something super absurd, like this professional concessions nacho cheese pump,
​
https://www.amazon.com/Paragon-2028C-Professional-Concessionaires-Construction/dp/B009AUGCM6/ref=sr_1_1?crid=HC51QSZWU3XD&keywords=nacho+cheese+warmer+with+pump&qid=1555530136&s=gateway&sprefix=nacho+cheese+war%2Caps%2C138&sr=8-1
If you use a flask with vacuum, you need to use a round-bottom flask because flat bottom flasks have the risk of implosion when used with vacuum. That leaves heating mantles, and they are expensive but I wouldn't say they're a fortune (rotovaps--now those things cost a fortune).
You should be able to find a heating mantle for $100 or something like that if your desired flask volume isn't too large.
Here is a stirring heating mantle for not much more than $100.
I believe that a heated plate is essential in the speed steeping process (which I assume is what you're going for) in which case I doubt you're going to find one under $100. I believe this one is the go-to for most people here. There are some "lightly used" ones on amazon as well for a few bucks cheaper.
This was from DL:
You guys convinced me to home brew. Especially after I just did some math on what my latest $2k purchase would get me.
Putting together the list, will be refining as I learn more.
Which Bottle Top Filter?
---------------------------------
Or
Which Pipettor?
---------------------------------
or
Money is not an object. I'm not the type to do things cheaply or in a half-assed way. Lets set up the dream home brew lab now. I'll post pictures.
What to buy?
The home version is to raise the temps to between 75-80c and sustain it there, while mixing, for an extended period of time, and allowing it to cool to near room temp before bottling.
I use one of these: https://www.amazon.com/Scilogex-86143101-MS-H280-Pro-Circular-Top-Magnetic/dp/B00AYGIFCA
Once temperature is reached: https://i.imgur.com/4NWmbeN.jpg
Four hours later: http://i.imgur.com/wsUfL3f.jpg
As you can see the color has changed significantly, and to the extent one would expect with a well "steeped" juice.
It also remedies some of the unpleasant volatiles by allowing them to escape as gas coming off the flask.
I recently sent a pretty big email list to my brother, so I'm just copy/pasting out of the email. Before you ask why I'm recommending 12 packs of the beakers, it's because they break, and you WILL break them. Buy this stuff:
Scilogex 86143101 Model MS-H280-Pro LED Circular-Top Digital Magnetic Hot Plate Stirrer with 5.3" Diameter Ceramic Coated Plate, 110V
http://amzn.com/B00AYGIFCA - I'm not sure why, but when you use this link, it takes you to a non-amazon supplier. Click the link to buy from other sellers that offer prime shipping. It's $60 cheaper.
Spinpak Magnetic Stir Bar Assortment with Pivot Ring (Pack of 6)
http://amzn.com/B002VBW72K
Glass Beakers, 50ml Pack of 12
http://amzn.com/B003K1EH0A
Glass Beakers, 100ml Pack of 12
http://amzn.com/B003K1KQKK
Edit: Also, I don't turn the heater on until I've finished adding all ingredients except nicotine, but the entire time, I'm running the stirrer. Once all ingredients excluding nicotine are in, I then set the hotplate to 80c, and run the mix for 90 minutes. If you have beakers that have a cap, use the cap to capture vapor instead of letting it escape in to the atmosphere. If you buy the beakers I linked, you'll need to cover them. I use plastic wrap with a very small rubber band (like for orthodontic braces.)
Edit 2: Before heat is applied, I'm stirring at 200 rpm. Once the solution is up to temperature, I increase to between 450 - 700 rpm depending on the viscosity of the liquid I've created. You'll have to play around with the speed until you arrive at a speed that is not causing the liquid to spin out to the sides so much that the magnetic pill is halfway out of the solution.
Edit 3: I have sacrificial magnetic pills in each of my bottles of nicotine. When I take them out of the freezer, they go directly on the stirrer. NO HEAT. Just leave the cap on and stir for a while.
Edit 4: Before you balk at the $200 price tag of the stirrer, consider this. My ADV is POET Amaretto Nite Cap. It's $22 a bottle. I go through a bottle in a little less than 3 days. This stirrer costs the same as 9 bottles. A bottle of DIY juice costs approximately $1 to make. Do the math.
Non-mobile: http://www.amazon.com/dp/B00187YP1O/ref=s9_zwish_hm_bLWDNz_g328_i1
^That's ^why ^I'm ^here, ^I ^don't ^judge ^you. ^PM ^/u/xl0 ^if ^I'm ^causing ^any ^trouble.
Hmm. Your thoughts on this for steeping?
http://www.amazon.com/dp/B00AYGIFCA/ref=wl_it_dp_o_pC_S_ttl?_encoding=UTF8&colid=1CD90EEBCVSXZ&coliid=I30SA4FL051ZQR
Stuff you'll need (Prime links given)
$200 digital hotplate: amzn.com/B00AYGIFCA
$13.50 large flask: amzn.com/B00BERGESK
$9 rubber stopper to fit flask: amzn.com/B00ES3UE9C (can be had for $.50 at Fred Meyers or lab stores)
$17.49 for a hose to run from faucet to condenser: amzn.com/B000KI7VN6
$16.72 for the condenser: amzn.com/1450567898
$13.03 for a stand to hold the condenser: amzn.com/B00657N7TS
Misc you likely already have around:
Large pot or dish that can hold the flask
Cleaning sponge or rag
1/2 gallon vegetable oil
Total cost: $269.74 and maybe $20 for the misc stuff if you lack it
Preparation: This needs to be done in a temperature controlled room; the method uses slight variations in temperature to isolate out the individual chemicals, so any fluctuation in the room will hinder this. You will need to be near a sink with a running faucet. Be prepared for this method to take 24 plus hours.
Method:
As I said, this really only works for THC-like cannabinoids, you won't get any terps with this method without much more expensive equipment (theyll just evaporate away), and the overall loss is great enough that its unlikely youll be able to get an isolate of CBG or THCV, since they are such a small percentage of the cannabinoids, but you should have no problem getting pure THC and even CBD, assuming your starter strain has more than a percent of it. Once you have isolates you can isomerize and do other fun stuff as well.
That said, pure THC isnt fun at all, but its a great learning experience, and you can also use the same setup to distill essential oils or liquor, which is a slightly different process but uses the same equipment (though you can sub the digital hotplate for a cheaper electric range for those purposes)
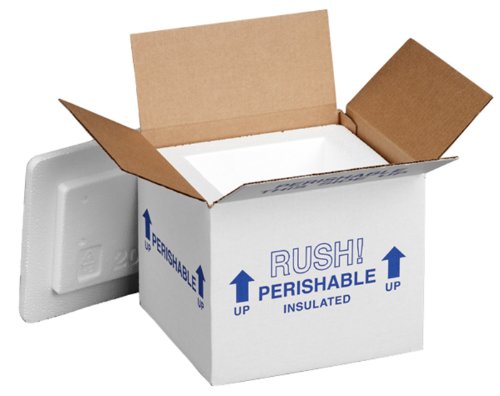
Yup. Frozen solid, with 4 frozen icepacks, in a frozen food shipping box.
http://www.amazon.com/Polar-Tech-205-T14C-Insulated/dp/B00DE2K178/ref=sr_1_2?s=industrial&ie=UTF8&qid=1419306359&sr=1-2&keywords=Polar+Tech+small
Ok so in not sure if I told you that i actually got some egg clutches.
https://m.imgur.com/a/w3WC0SW
Problem is I'm not sure what I did wrong or right, because I changed so much in desperation. I noticed that they only played over the substrate that currently had BSF larvae in there, which I read females are attracted to. Or it could be the fact that you indicated that they dont like coffee grounds.
Anyway so i have been watching these eggs to see if they hatch. It seems i may have to invest in a small incubator to keep someone steady temp. The temp dropping to 23°C at nights and I have caught it at 35°C during the day at its peak. So I'm not sure if the eggs have dried out... just waiting to see . This is about day 4... have not seen anything hatch yet .
Was thinking about getting this
https://www.amazon.com/Magicfly-Digital-Automatic-Incubator-Chickens/dp/B00KD75VHW
Hm ok. Surprisingly I found some decently affordable (if a bit small) lab ovens on amazon, I realize this doesn't have a dehumidifier function, but would something like this work? Maybe stick some giant bags of silica beads in there to really suck the moisture out.
https://www.amazon.com/G-Q-F-Manufacturing-1602N-Hova-Bator-Incubator/dp/B0145O6C0S/
OMEM makes good reptile egg trays if you still need those.
Definitely get a hygrometer/thermometer combo so you can monitor inside it. You can also optionally change out their thermostat for your own proportional one but that would be pricey. Safer for steady temps though.
I just bought this fella about 15 minutes ago. I'm so F-ing excited!!
http://www.amazon.com/Scilogex-86143101-MS-H280-Pro-Circular-Top-Magnetic/dp/B00AYGIFCA/ref=sr_1_3?ie=UTF8&qid=1418151533&sr=8-3&keywords=heated+magnetic+stirrer
They are more than that bro.
They are a couple grand at least. http://www.amazon.com/gp/aw/d/B00187YP1O/ref=s9_zwish_hm_bLWDNz_g328_i1
I believe steam and pressure are far better than dry heat alone for sterilization purposes.
Post removed for having amazon referral links. Please ensure that nothing with "refRID" is allowed.
For example:
http://www.amazon.com/Scilogex-86143101-MS-H280-Pro-BlueSpin-Circular-Top/dp/B00AYGIFCA
1200 is for the smaller one
http://www.amazon.com/Ambient-12x12x11-Desktop-Degassing-Sterilizing/dp/B009WSJNNQ/ref=sr_1_1?ie=UTF8&qid=1382033363&sr=8-1&keywords=across+international
Hmm. That is tough. Canned/pouched chicken, salmon and tuna. Do you like sardines? Excellent source of protein and calcium. Canned beans, chicken/beef broth, canned chilies, even some cans of commercial pre-made chili can be ok, especially if you watch the labels for sugar content. You might try canned veggies like green beans, lima beans, sometimes you can find canned collards, spinach or greens depending on the area, sliced and canned mushrooms too.
Dried onion, garlic powder, oregano, salt, pepper, hot sauce, herbs and the like are going to be your friend if you are cooking via microwave or crockpot.
A cooler with some heartier veggies like broccoli, cabbage, brussels, kale, zucchini, peppers, onions and the like would probably stay fresh for several days at a time especially since most of those veggies would be ok outside of the fridge. Ice packs like these are excellent for keeping things cold for awhile: http://www.amazon.com/Polar-Tech-Leakproof-Viscous-Refrigerant/dp/B008K9609I/ref=pd_sim_hg_7?ie=UTF8&refRID=0QW1Z2NTDWXHYPVGMSV7
You might want to google low-carb camping or backpacking for ideas, and check out this thread:
http://www.reddit.com/r/keto/comments/1bztel/low_carb_campingbackpacking_foods/
it's a little wooden box. kinda like hellraiser. http://www.amazon.com/Scilogex-DILVAC-Maker-Pressure-Gauge/dp/B007BFD2KW/ref=pd_sbs_indust_2
there are bags too but this is more fun.
I usually sneak in a GIJOE or Han Solo, kids love seeing it.
I looks like you can get Petri dishes, test tubes and beakers pretty cheap on Amazon. Bunsen burners are a little more expensive but not too bad.
I have no idea why they wouldn't have put an address though. Sorry, hope everything gets sorted for you.
Not sure what you need but there is this. Wide range of prices depending on what you want.