(Part 2) Best home brewing & wine making products according to redditors
We found 2,321 Reddit comments discussing the best home brewing & wine making products. We ranked the 888 resulting products by number of redditors who mentioned them. Here are the products ranked 21-40. You can also go back to the previous section.


I don't know of any good comprehensive tutorials, but I can write a bit of one up for you. Do some googling. This website is a good source of information and I refer to it quite often.
The problem with a tutorial for how to make wine is that there are so many variations and methods from extremely simple to extremely complex.
The first wine I made was from store bought grapejuice just make sure you're getting it without preservatives as the preservatives can screw it up. You can do this for about ~$5. If you have a home brew store nearby I would recommend going there, but you can also order online.
After the week and a half, you will have a drinkable young wine with lots of yeast sediment in the bottom. It will taste alright though (maybe a bit fizzy and slightly sweet). Just pour carefully to avoid getting sediment in. Don't bother letting this one age, it will turn bitter if you don't get it off the sediments so go ahead and drink it. This is more about just understanding the process and proving to yourself you can do it.
You need a bit more equipment and to spend some time reading to go much past that point. As an example, the wine above will be cloudy. Typically you would "rack" the wine off the sediment into another container and continue letting it sit. You might do this several times over the course of a year. The flavor profile will change drastically over that time, the wine will mellow out and taste less "alcoholy" and it will slowly clarify as the yeast settles out. You need to research pectic enzymes for fresh fruit fermentations, and also probably read about acid, tannin, and campden tablets to get really good results or to let it age for extended periods of time. You can also get much better results out of whole fruit (i use frozen) than juice, but its a bit more involved.
The one piece of advice I would give you is that when you start buying equipment, skip the 1 gallon jugs and fermenting buckets. Go straight to the 5 gallon. 1 gallon is 5 bottles of wine, but its the same amount of work to make 1 gallon as it is 5 gallons. Much better to make 25 bottles at a time. I have gotten lazy lately, but for awhile I kept 3 batches going at any given time and was able to have more than enough to only drink wine I made and never buy alcohol.
Edit: Alternately, you can buy wine making kits that will produce really good wine. The problem is you need the equipment and they are expensive. I avoid them because I calculated out that the kits using good wine grapes average ~$4 dollars a bottle, where as ones I make from fresh fruit generally average ~$0.50 per bottle. Most people are a bit surprised, but a blueberry, blackberry, or strawberry wine can be every bit as good and complex as grape wine.
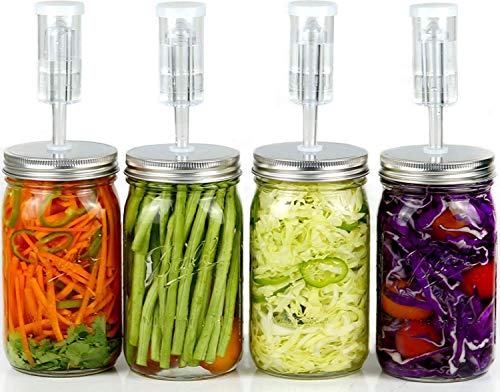
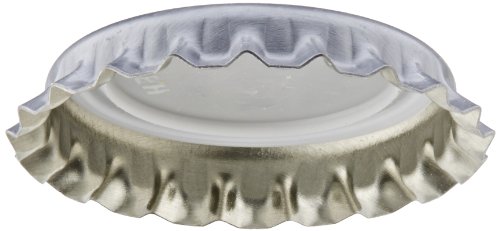
Start with a small batch just to make sure you like it. Chop up the habaneros, and put them in a quart-size mason jar. If you want to add other things like garlic, onions or the like, feel free. Or just straight habaneros. Now, make a brine - take 975 grams of distilled water and 25 grams of kosher or pickling salt (don't use iodized salt) and mix it together until the salt dissolves. Pour this brine over the peppers, leaving about 2"/4 cm space at the top of the jar. You should have plenty of brine left over, so pour some into a ziploc bag and seal the bag. Put this bag in the jar on top of the peppers, so that it holds the peppers submerged under the brine - you don't want any pieces of pepper floating at the surface, so make sure everything's submerged. Cap the jar (it's a lot easier if you get some lids like this or this), and set somewhere warm (around 70-80F). Within 24-48 hours you'll start to see bubbles and fizzing - fermentation is underway. It usually goes anywhere from a few days to a couple weeks. If you don't have those airlock lids, you'll need to burp the jars a few times a day - just crack them open a little bit to release the pressure. After 2 weeks or so, they should be done. You can then smoke them - take them out of the brine, and pop them into a smoker. Cold or hot smoke - dealer's choice. Fruit wood is best - peach if you can get it, apple otherwise. Smoke them for a few hours, then pop them in your cabinet to dehydrate all the way down and blitz them up into your powder.
Don't buy a kit! They sell you all kinds of shit you won't use when there are better options for similar money.
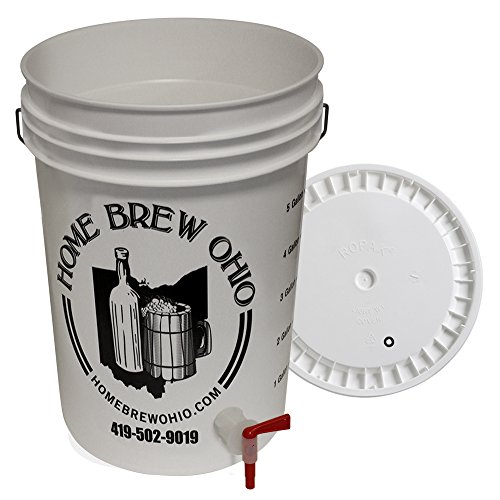
Get a brewing bucket as if you don't have a bottler then this will make your life so much better.
Get 2 carboys (glass is best but better bottles will work too). Check Craigslist for these...you can get some awesome deals.
Get 1 Refractomoeter instead of a hydrometer because they use WAY less of your must to calculate and they aren't mega fragile like hydrometers are.
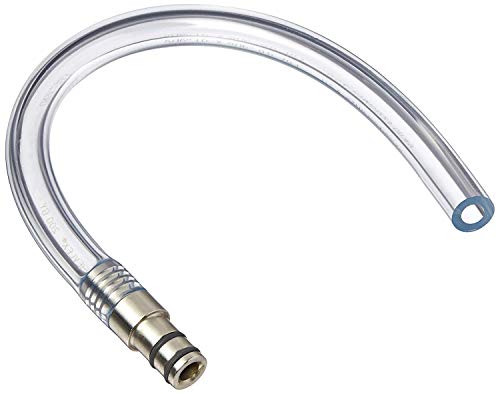
You will want an auto siphon
You will want a carboy brush that fits on a cordless drill because cleaning a carboy without one fucking sucks (and for 18 bucks this is a no brainer).
You will need sanitizer. I personally like Iodophor because it's super cheap, it doesn't really foam up and it lasts forever. I bought one of THESE bottles like 2 years ago and it is about half full even though I brew between 50-100 gallons a year.
I always advocate people start with beer bottles rather than wine bottles. The reason for this has less to do with the bottles and more to do with equipment. The Ferrari Bottle Capper is 14 dollars while a good floor corker for wine bottles will set you back 60 bucks. In addition, it's cheaper to bottle in 20 ounce beer bottles with caps rather than in wine bottles with good corks. Use of a double lever corker for wine bottles should be considered a war crime...seriously...unless you're a masochist who loves dumping wine everywhere and having to clean it afterwards...then just avoid them...they are absolutely awful.
If you go the wine bottle route then NEVER use agglomerated or colmated corks (the ones made from tiny pieces of cork glued together) as they fall apart and will leave chunks in your bottles. In addition they don't age well, so you are much more likely to lose your brew to spoilage. I like synthetic Nomacorc but you can also buy very good quality solid natural corks as well.
Good oxygen absorbing bottle caps on the other hand are mega cheap. Again...this isn't about one being better than the other, so you can use either one.
For wine bottles, I REALLY like the ones with screw tops because they make it nice and easy to cap your bottles once opened. But for all of your bottles buy these locally...shipping will double or triple the cost of these vs buying locally. I get them for 15 bucks a case a few miles from my house...they're almost 30 a case on Amazon or close to that from Midwest or from Ohio (shipping is like 11-15 dollars a case.)
For beer bottles...I prefer clear, but they'll be tough to find locally so I often end up with brown ones. Again...buy these locally not online due to shipping costs. Your local brewing supply stores buy these pallets at a time so even Amazon can't compete with the lack of shipping costs.
Buy one of these bad boys. Also, yes you can reuse starsan for more than one bottle.
Edit: I assume by "rinse and repeat" you are using the idiom. But in case you aren't, don't rinse the starsan off. It's no-rinse.
If you want to make 1 gallon batches, which I recommend for beginners, buy a two gallon bucket. You want the extra space because your batch size will really be 1.25 gallons so you can top off your secondary. When you mix the mead for the first 4 days to add oxygen and degas CO2, it will foam a bunch and you dont want a mess. After you mix the mead, add nutrients. To learn more about nutrients, google "advanced nutrients in meadmaking"
>Have you made any liquor based drinks?
Screwdrivers are pretty good. Vodka and cranberry carbonated is pretty good as well. Margaritas you would think would be really good, but not so much. The sweeter the starting liquid the better it tastes carbonated, as carbonic acid is pretty bitter by itself. (carbonic acid is co2 dissolved in waters technical name, fun fact: The Ph value of our blood is what our bodies use to determine how much we need to breath. It is made slightly more acidic the more co2 is present.)
As far as supplies go, you need at a minimum,the stuff below. You can always get a bigger tank or longer/better hoses etc. But this is quite literally exactly what I have, and I only fill my tank up every 6-8 months (sooner if I make some dry ice with it.)
If you buy everything from amazon it will run you about $150, my local beverage distributor, in Atlanta suburbs, had most of this stuff a fair bit cheaper, so you may want to check with them first (I got burned by not checking).
Honestly, this was one of the best $100 or so I have ever spent. We buy those Mio squirt drinks when they go on sale, its like paying $0.08 for a 2 liter of Diet Faygo, plus all of the SodaStream flavors work as intended, you can get those from target for like 5 bucks and they make gallons of Soda. Plus all of the fruit stuff, and quixotic beverages just for fun.
Usage:
Stainless mesh hop strainers are amazing for racking liquid off of fruit. Something like this.
I recently made a melomel with 30# of crushed blueberries and about 18# of honey. It hit about the 5 gallon mark. As you can expect it was pretty crowded in the bucket. I gently finessed the strainer down into the mead, put my racking cane inside the strainer, and racked out into secondary. I doubt a single bit of fruit made its way in there and the siphon didn't get stuck at all.
In the end I was able to get about 2.8 gallons of mead without pressing which is pretty much what I was expecting to get. Pretty impressed!
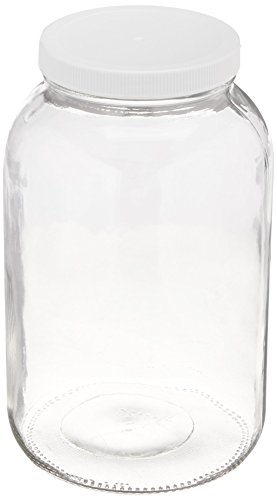
this is incredible over-priced, or am I missing something? I use essential the same set-up and it cost a little under $20.
https://www.amazon.com/1-gallon-USDA-Fermentation-Glass-Jar/dp/B006ZRBGSC/ref=sr_1_3?ie=UTF8&qid=1491232715&sr=8-3&keywords=gallon+jar
https://www.amazon.com/Pro-Quality-Nut-Milk-Bag/dp/B00KLT6X9W/ref=sr_1_3?s=kitchen&ie=UTF8&qid=1491232680&sr=1-3-spons&keywords=nut+milk+bag&psc=1
My wife drinks 3-4 bottles of carbonated water every day. We used to buy Pelligrino at Costco, at $14/case, or around $60/mo. That was 3 years ago. This thing paid for itself a long, long time ago for me.
On top of that, I purchased a 5 pound tank from Amazon, and an adapter which hooks the tank up to the SodaStream. The tank costs $23 to refill, but has far more capacity than the little bottles the SS comes with. I have to refill it about once every two months.
Links:
https://co2doctor.com/freedomoonespec.htm
http://www.amazon.com/CO2-Tank-Aluminum-Cylinder-Valve/dp/B0085282UK/ref=sr_1_fkmr0_1?ie=UTF8&qid=1393961834&sr=8-1-fkmr0&keywords=7ln+co2+tank
Note: You can get a tank and swap it at some local shops, but where I live I can't find anyone who does that, so I had to buy the new tank.
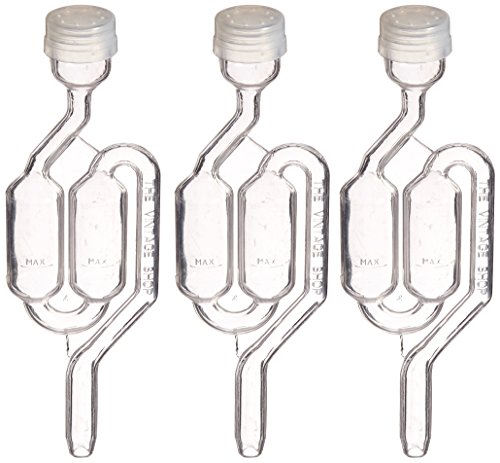
I'd recommend an airlock that will allow air out but not in. Fermenting in a sealed lid could cause the fermented contents to build up pressure from the CO2 and then explode.
I bought a bunch of 16oz. glass swing-top bottles from a retail place called Chef's Emporium. I put pourer tops on them when in use and seal them with the swing top when it's time to put them in the fridge.
They're all over Amazon. Like this: Swing Top Grolsch Glass Bottles 16oz - CLEAR - For Brewing Kombucha Kefir Beer (6 Set) Bonus Gaskets https://www.amazon.com/dp/B01LB1862A/ref=cm_sw_r_cp_api_pG0Rzb1GQ3PJY
Freebie: You know how homebrewers (beer/moonshine) in America use copper tubing for heat transfer? They need to cool the beer down quickly.
That shit sells for $60 on amazon Guess how much it costs in China? $15. How much retail? Last time I was in the States... almost $100. What's the difference with a Global 500 company in Ningbo and a small extruder in Montana? MOQ. MOQ is like $10,000. Shipping to LA is $1900. Tariffs and VAT? NONE (HTSUS, anyone?). Amazon fulfillment is like $100/month (if you put ALL of your stock in their warehouse) and $2/product for shipping. Throw it on eBay and you got a stew going. Call 600 niche retail stores in America and get an order of 40 of these at $30 and you're going places.
If you're an English teacher, look out for shit like this. I sell something tangentially related to this product, and there is money to be made with that community. /r/entrepreneur
Not sure if you have found these yet. They are about $1.60 a piece... The best way to overcome the fewer bottles is to brew more beer =)
http://www.amazon.com/CASE-OF-12-Bottles-AMBER/dp/B005CIFIDO/ref=pd_sim_indust_1
These are the bottles I use for second fermentation.
This is the heating pad I use. It's pricey but you have complete control over the exact temperature you want and if it's a hobby you plan on continuing, it's well worth it.
6.5gal plastic fermentor - $17.88 (Don't bother with glass fermentors!)
6.5gal Bottling Bucket - $18.81
Hydrometer - $12.99
3 3-piece airlocks - $5.00 - trust me, they'll break.
stopper not needed with plastic fermentor
Bottle filler - $5.09
10 ft 3/8th inch tubing - $10.99
Auto siphon - $8.76
don't need a bottle brush with plastic fermentor
144 bottle caps - $5.78
Use any pure sugar for priming - just calculate it right. I use cane sugar without issue.
Wing bottle capper - $15.48
Dial thermometer not really needed if you're slapping on an adhesive one, but definitely get this for a hot liquor tun if you're doing that.
Wine thief - $11.20
I never used a funnel or fermentor brush - you can use anything to clean but I suggest Oxyclean rinses
32oz Star San - $20.70
Adhesive Thermometer - $4.84
Total Cost: $137.52. Not ridiculous savings BUT you get 32oz of star san instead of 4oz of io-star which will last you years and sanitizer is expensive. You get a plastic fermentor instead of glass which is so much easier to clean and keep light out. Glass carboys are good for aging and aging is good for wine or special beers. Focus on simple ales that don't require it first.
The real savings come when you do all grain and make your own equipment. You can save $137 alone if you buy a big stainless steel pot and slap on a dial thermometer with a ball valve.
I use a Vinator for my bottles (http://www.amazon.com/Avvinatore-Vinator-Bottles-1-Count-Box/dp/B001D6FUDC) and just throw my caps in the reservoir that's full of Star San.
A good option if you have Amazon prime: https://www.amazon.com/dp/B003UCCLG6
Not sure what your setup is, but I found having an immersion wort chiller in my starting brew days was incredibly efficient and time-saving (I did full 5 gal boils). These start ~$50 on Amazon, but you can buy coiled copper piping (the most expensive part) at any hardware store, bend yourself and use some inexpensive plastic tubing (make sure it’s heat resistant to handle the initial wort temp), some clamps and a faucet adapter. Cools wort remarkably fast and if you keep it clean and sterile (like all brew equipment), it will last as long as you brew beer.
Immersion wort chiller
There’s a few other quality of life equipment upgrades I’m sure you’ll find out along the way as you brew, but I felt this was well worth the money for the time and hassle it saved me.
Mead is super easy and rather cheap compared to other types of brewing. If you have a local homebrewing store they can help you get started and will have everything you need, most major cities have one and I find that the people are almost always very helpful.
The first thing is to decide volume, then if you want to boil or not, and then recipe (which includes batch strength). I prefer to boil my mead to help dissolve the honey and make sure its good and sanitized, but thats not entirely necessary
So Optional Equipment (if you boil)
1 Big Boil Pot - This needs to be big enough to do however much you want as a batch. If you get a 5 gallon pot, this is good enough for 2-3 gallon mead as well as if you got into Extract Beer Brewing. If you buy a 10 gallon boil pot (usually $120 or so) its big enough for 5 gallon All grain beer batches, as well as 5-8 gallon mead batches
2 Burner - If you are doing smaller batches your stove can handle it, if you move up to big batches or beer batches it helps to have a propane burner and propane tank.
Non optional Equipment:
1 Fermentation/Secondary Vessel - There are two options here. The cheaper route is the 8 gallon buckets with a lid and an airlock. A rubber mallet also really helps to get it on the first time (trust me here). They are about $20. The second option which I'd recommend is one of the Speidel fermenters, they are a bit more expensive at $50-$60 but have a nice spigot for siphoning and are super nice. You also need an aging vessel as you need to let it sit for 5-6 months before bottling. For this I recommend a PET carboy or a smaller Speidel Fermenter
If you are doing 5gallon, get the 8g Speidel or equivilant sized bucket. Get a plastic carboy or the smaller speidel fermenter for aging
The downside to not doing the Speidel fermenters is then you need a bottling bucket and a siphon pump to get the mead out of the bucket, I like the speidel fermenters because I can just transfer to it and use it to bottle with.
Bottle Filler and 3' rough of Hose - This is for bottling
Bottles - I prefer the nice flip top ones but they are usually around $30 for only 12 of them. The other option is to buy some bottle caps, and clean
Iodophor / Star San - Cleaner, just google them. You need this to clean all your equipment as well as your fermenters
There are some minor other things, such as a Big spoon for stirring, having a thermometer is a good idea... maybe other things but I think I covered most of it
Recipe: (The recipe itself)
Normal recipes are around 3 pounds of honey per gallon of water, so you need to get 15lbs of honey if you do 5 gallons. More honey will up the alcohol, less honey will lower it
A vial or two of yeast. I like to pitch two of them just to make sure it starts. I use Sweet Mead Yeast
Yeast Nutrient - Mead doesnt have some of the nutrients beer does, so a bit of this added per the instructions gets the yeast going
Optional - Flavoring. I tried out strawberry this time, totally optional but just google it and you can find it. Usually it comes in a tiny bottle
Instructions
First you dissolve honey into water. If you are doing a 5 gallon batch, use 5.5 gallons of water. If you are going to boil, nows a good time. During this process, Add the yeast nutrient. Put the mixture into your fermenter vessel. Cool it down to room temperature (important)
Its fairly important to ferment at 68-70 degrees for at least the first week or two (yeast stuff), so if you don't have central heating/cooling that could be an issue you have to tackle from another angle. At this point, pitch the yeast and seal it up and let them do their job
Wait about a month for it to ferment (the airlock will go bloop bloop a lot). Sanitize the hose and secondary/aging vessel, this vessel should be close to your actual volume so there isn't head room. Then transfer to the secondary, pop the airlock on it and let it age for usually 3-6 months, depending on your patience. At that point, transfer it back to a different vessel (to get it off the trub) and during this process add any flavoring (if any). Finally, siphon into bottles using that little spring bottle filler attached to the hose, and cap it
That was a bit long winded but I was trying to be thorough. if you have any questions feel free to PM me!
It's sold by Amazon, not a 3rd party... so I don't think it is. Unless whoever Amazon buys it from is promoting it, which I doubt.
ref=in amazon links just tells amazon which button the user clicked.tag=is what is used for the amazon affiliate program (examples)./u/Akira_Yamamoto could have removed everything after
/dp/B00H7HFINS/and the link would still work.If you backfilled whatever vessel you were pouring into with CO2 you could use a coffee filter of some sort in theory without oxidation. When the mead flows through the filter it's aerated and oxidation from this is the #1 mead killer for rookies.
The reason it gets shit on (and rightfully) is that it is completely and totally useless and if you are doing it you are doing it for the wrong reasons, either due to having the wrong tools or not enough patience.
I just racked a 2 no water cherry 5 gal meads with a cane and no filter with no issues. A baffle on the cane prevents the worst of clogging.
https://www.amazon.com/Fermtech-5478-6H-Auto-Siphon-Tubing-Clamp/dp/B00SDLLZDY/
There is a photo of one with a clip. This allows you to not stuff it in the shite in the bottom, and the baffle prevents you from sucking it up.
If you don't want to waste any mead at all, you can toss the tailings in a smaller carboy in the fridge and decant of the sediment and consume right away. You should get 95%+ of your mead that way without fruit.
My cherry meads had 10 lbs of fruit per gallon, and one I bagged the other was free fruit. The free one was slightly more annoying to rack while the one in the bag was set and walk away after the bag of fruit was removed. Bags in a bucket primary are the easiest way to deal with fruit.
If you have piles of fluff from pureed fruit, badly flocculated yeast, or whatever else, cold crashing and bentonite is the proper answer, and failing that time. And don't puree fruit if you are concerned about yields.
Lastly, you won't clarify mead without ~1 micron filtering. Anything larger than that will settle in hours to a few days. Coffee filters are ~20 micron. They will only remove gross solids like fruit skins.
I have a sterile filter rig that steps from 25 micron to .45 under co2 pressure. Filtering has a purpose when it's being used as a good tool, not a crutch.
I've made some slight modifications to this, mostly to make it easier to follow. I've also included steps that should be quite obvious to someone who's done any homebrewing before, but I wish someone had told me when I first started.
I'd link to the original, for the sake of attribution, but the user who posted this deleted their account not long after I wrote everything down.
This will produce a sweet fruit-mead (or melomel). WARNING this will be far more alcoholic than it tastes, and should not be consumed if you've recently taken antibiotics, or suffered gastric distress, as the yeast culture will still be alive, and will happily colonize your intestines if your gut microbiome is too fucked up.
Equipment: Most of this stuff will be a good deal cheaper at your local homebrew store, but I've included amazon links (also to the yeast).
At least 2 (3 is better, for reasons we'll get to) 1-gallon jugs (I don't recommend scaling this up), glass preferred. Add an extra jug for each additional batch. This one includes a drilled stopper and airlock
Drilled stoppers (or carboy bungs) and airlocks, non-drilled rubber stoppers.
An autosiphon and food-safe tubing.
Food-safe sanitizing solution (I recommend StarSan).
An electric kettle with temperature selector is useful, but not needed.
If you want to bottle it rather than just keeping a jug in your fridge:
Empty beer or wine bottles (just save your empties), capping or corking equipment, caps or corks, and a bottling wand.
Ingredients:
2.5 lbs (1130g) honey, clover recommended.
A cup (approximately 250ml) or so of fruit (I recommend blackberries, and I strongly recommend against cherries, other recipes have worked for me, but this yields a very medical flavor with cherries).
1 packet Lalvin EC-1118 yeast (a champagne yeast notable for its hardiness, its ability to out-compete other microorganisms, and its high alcohol tolerance).
Optional: potassium sorbate (to reduce yeast activity when our ferment is done), pectic enzyme (aka pectinase - for aesthetic purposes). Both are also available in bulk.
Process:
Day 1:
Mix sanitizing solution with clean water at specified proportions in one of your jugs, filling the jug most of the way. Stopper it, shake it. Remove stopper, set it down wet-side-up (to keep it sterile), pour the fluid to another jug. There will be foam left behind, this is fine, don't bother to rinse it or anything. At low concentrations this stuff is totally fine to drink, and won't ruin your fermentation or flavor.
Add honey to jug, all of it.
If you have a kettle, and your jug is glass, heat water to around 160F (71 Celsius), pour a volume into your jug roughly equal to the amount of honey present. Fix sterile stopper to jug. Shake until honey and water are thoroughly combined. The heat will make it FAR easier to dissolve the honey. Set aside for an hour or so while it cools. Add clean water 'til mostly full, leaving some room for fruit and headspace.
If you're missing a kettle, or using a plastic jug, this is gonna be a little harder. Fill most of the way with clean water (I recommend using a filter) leaving some room for fruit and headspace. Fix sterile stopper, shake 'til honey and water are thoroughly combined. This will take a while, and you will need to shake VERY vigorously.
At this point, you should have a jug mostly-full of combined honey and water. To this, add fruit (inspecting thoroughly for mold, don't want to add that). Then dump in a single packet of the Lalvin EC-1118 yeast, don't bother rehydrating it first or anything, it'll be fine going straight in. Add pectic enzyme if you have it (this does nothing to the flavor, it just makes the end product less cloudy). Stopper it up, shake it again. This jug now contains your "must" (pre-ferment mead).
Pour some sterilizing fluid in a bowl, put a carboy bung/drilled stopper in the bowl, with an airlock. Ensure full immersion. Let sit for a minute. Replace stopper with your bung/drilled stopper, affix airlock. Fill airlock with clean water, sanitizing fluid, or vodka. Rinse the stopper, fix it to your jug of sanitizing fluid.
Place must-jug in a dark place, I recommend a cabinet or closet.
Days 2-7:
Retrieve jug, give it a little jostle. Nothing so vigorous as to get your mead into the airlock, but enough to upset it. This is to release CO2 buildup, and to keep any part of the fruit from drying out. The foaming from the CO2 release may be very vigorous. Do this over a towel for your first batch. If the foam gets into your airlock, clean your airlock and reaffix it. Perform this jostling procedure at least once per day, more is better.
Day 8:
Final jostling, I recommend doing this in the morning.
Day 9:
let it sit, we want the sediment to settle.
Day 10: Time to get it off the sediment
Shake sterilizing fluid jug. Affix tubing to siphon. Put the siphon in the sterilizing fluid, shake the jug a little just to get the whole siphon wet. Siphon fluid into either a third container or a large bowl. This is all to sterilize both the inside and outside of your siphoning system.
Remove siphon from jug. Give it a couple pumps to empty it of any remaining fluid. Place siphon in your mead jug, leaving the end of the tubing in sterilizing fluid while you do this.
Take the jug that you just siphoned the sterilizing fluid from. Dump what fluid remains in it. Place the end of the tubing in this jug, then siphon the mead into it. Make no attempt to get the last bit of mead into your fresh container, it's mostly dead yeast and decomposing fruit.
Add potassium sorbate if you have it, stopper the jug, place it in your fridge.
Clean the jug you started in. Clean your siphon and tubing.
Day 11:
Let it sit
Day 12 or later: time to transfer again, or bottle it.
If you no longer have a jug full of sterilizing fluid, make one.
Repeat the earlier steps to sterilize the siphoning system, with a bottling wand attached to the end of the tubing if you want to bottle.
Sterilize your bottles or a clean jug, either with fluid or heat.
Siphon mead either into your bottles or jug. Stopper/cap/cork when done.
Put your jug/bottles in the fridge.
The yeast culture is still alive, and will continue to ferment. The fridge, and optional potassium sorbate, will merely slow this down. I recommend drinking any bottles within two months, to avoid a risk of bursting bottles. The mead should already be tasty at this point, but usually tastes much better after a couple more weeks.
EDIT: Fixed the formatting up a bit.
Cleaning means removing soil (organic or inorganic).
Sanitizing means killing microflora (bacteria, yeasts, molds).
If you don't clean first, the soils give the bacteria etc. a place to hide.
The things that are the hardest to clean are also the most important: bottles and the fermenter.
Anyway, for both, the answer is easy: hot water, OxyClean, and time.
For bottles, I use a few 5-6 gallon buckets (ale pails), fill them with OxyClean and hot tap water, then use a noodle claw to "dunk" all of the bottles. I usually do this overnight, but you can also just go for a few hours. Then I (wearing rubber gloves) pull out each bottle, empty a bit, give it a shake to dislodge any last nasties, and then rinse with fresh water. Repeat. Takes about 30 minutes. Then sanitize. Easiest way is with a vinator.
For the fermenter, I dump in one scoop of OxyClean, fill with hot water right up to the tippy-top (in the bath tub), then leave it overnight. Drain the next day. Rinse. Fill with sanitizer. Let it stand for a few minutes. Empty. Cap with saran wrap (sprayed with sanitizer) and a rubber band. That will prevent dust/spores/anything else from taking root in your carboy.
In general, when brewing I have one bucket full of OxyClean solution standing by, and one bucket of StarSan (or SaniClean, the non-foaming StarSan) standing by.
I'm not super familiar with the sanitizer setting on dishwashers, so for all I know that might be really effective. But StarSan washes will DEFINITELY remove that Oxiclean residue.
If you do decide to use StarSan, you can hugely speed up the process with one of these. Way, way faster than soaking.
My setup is something like this:
Homebrew shops generally carry the tanks, and can fill them for you. You're probably looking at $120-$150 initial cost, but your cost per carbonation is pretty close zero: just the cost to refill the tank.
With this setup, you carbonate directly in plastic soda bottles. I generally use seltzer bottles, since they don't have any residual flavors in them, and they're designed to hold the pressure.
Transfer whatever you want to carbonate into a plastic bottle (about 3/4 full). Get it as cold as possible: for sodas, that's as close to 32-F as you can get; for cocktails, it's maybe 20 to 25-F. Squeeze the excess air out, screw on the carbonator cap, attach the gas hose, and shake the hell out of the bottle. Release the pressure (carefully; some mixtures can foam a lot), and repeat once or twice if you want really strong carbonation. For water, I usually carbonate around 35 psi. For cocktails, closer to 45 psi.
To bottle cocktails or sodas once they're carbonated, you can use 187ml champagne bottles and an inexpensive bottle capper. Your local homebrew shop probably carries both.
How big are your batches?
6.5 is fine for 5 gallons
2 gallon bucket for 1 gallon batches
7.8 gallon bucket for 6 gallon batches
Yeah, I agree. Ceradyn is a great option, thanks for bringing it up. For reference, they are available on Amazon:
http://www.amazon.com/Katadyn-Drip-Ceradyn-Water-Filter/dp/B0007U010W/
Actually the Gravidyn is a tiny bit cheaper - this is the one I have:
http://www.amazon.com/Katadyn-Drip-Gravidyn-Water-Filter/dp/B0007U011G/
For anyone who's wondering, yes, the two systems are identical except for the filters that come with. You can put Ceradyn filters in the Gravidyn setup, and vice versa.
The filters are quite delicate, though, and prone to cracking and breakage. You need to inspect them carefully for hairline fractures when you get them. For example, one of the ones in my Gravidyn was broken on arrival. I convinced Amazon to send me a spare one (rather than having to send the whole system back). Also, when I was moving stuff around in one of my storage closets in the garage, I accidentally dropped one of the spare Gravidyn filters on the concrete floor. It was inside its protective cardboard box, but it still broke. I was heartbroken - such a waste of money from a moment's clumsiness. Make sure to treat these things with kid gloves!
For completeness, here are the spare filters - Gravidyn:
http://www.amazon.com/Katadyn-20720-Gravidyn-Replacement-Element/dp/B0007U011Q/
And Ceradyn:
http://www.amazon.com/Katadyn-Ceradyn-Replacement-Filter-Element/dp/B0007U0116/
Hope it's ok posting links like this... I have no stake, not connected with the company at all etc.
The Monolithic filters are also interesting, and they claim to remove arsenic and lead as well. I would be concerned with arsenic in the surface water around here, though it might only be something that is in ground water (i.e. from wells etc). Anyway, these are very simple and cheap too, you can make a bucket filter around one of these little things and have a basic system. I don't know how much formal testing they have had, but they seem to be used a lot in 3rd world countries.
http://www.monolithic.org/water-filters
http://www.monolithicmarketplace.com/collections/frontpage/products/just-water-ceramic-drip-filter
As I said earlier, if I ever have to use the creek water, then I intend for the Monolithic to be the first stage, then treat with calcium hypochlorite (pool shock - 78% TurboShock from Poolife is the best I've found), then treat again with the Katadyn to remove the chlorine and just do another round of filtering in general. I figure I should be covering my bases with this.
http://www.amazon.com/POOLIFE-Poolife-TurboShock-1-lb/dp/B0017SSFU6
And also in case anybody's interested: To treat water with calcium hypochlorite, first make a bleach solution (NOT FOR DRINKING!) by adding a heaped teaspoon to 2 gallons of water. Then you can treat drinking water with this by using 1:100 ratio (i.e. for every 1 part bleach solution, 100 parts water). This should make it obvious that the calcium hypochlorite is pretty concentrated stuff - you shouldn't be trying to treat drinking water directly. First make the solution, then use that to treat the water. For reference, the 1:100 ratio translates into roughly 2.5-3 tablespoons of solution per gallon of drinking water, or 3/4-1 cup to every 5 gallons of water (if you're treating by the bucket). I give a range since it might be easier to measure 3 tablespoons and 1 cup rather than fractions like 2.5 and 3/4, and I think it's probably true that a little over treatment won't do any harm, especially if you are filtering it out anyway. Let the water stand for at least half an hour when treating, the longer the better. Contact time is important for killing the viruses etc.
Also, the pool shock is hard to store safely, since it produces chlorine. Anything metal will get corroded over time. The best method I have found is to use the mason jars with the metal canning lids (the ones that come in two parts). The 1 lb packs of TurboShock fit nicely in a 1/2 gallon jar. I know the lid is metal, but it has a plastic coating on the inside, and those lids are the best sealing I have found. I can put three jars inside a plastic 5 gallon bucket that has been sealed with a Gamma spintop lid. Then I can check on them every few months, and I'll know immediately if the jars have been leaking inside the bucket, because you'll be hit with the chlorine as soon as you open the bucket. I figure if the metal lids start rusting, then I'll just see what their safe lifetime is, and treat them as consumable items. A box of lids is only a few bucks, so replacing them every six months or year or whatever is no big deal. I also wrap the jars inside the bucket in bubble wrap, just so they won't break against each other if things are thrown around during an earthquake. With 3 lbs of the calcium hypochlorite, I'm ready to disinfect a LOT of pond water! Maybe also useful as bartering material in the event of a long term service outage, you never know.
Oh, and one last thing - I got a set of long handled measuring spoons, so that I will be able to reach inside the jars to get the pool shock out without having to tip them up or whatever, risking getting this toxic substance on my skin or in my eyes (big nope).
http://www.amazon.com/ChefLand-Set-Sizes-Stainless-Ingredients/dp/B00AEUR6K8
I know metal isn't good with calcium hypochlorite, but I'm not storing them with the stuff and their contact time will be minimal, and I'll be washing them after each use. I just figure it's useful to try to consider the practicalities of how you will use stuff in reality... also, I'll probably not make 2 gallons, but rather only 1 gallon at a time, which will mean a heaped 1/2 teaspoon of pool shock. And how to store the bleach solution? I found some nice 1 gallon jars with plastic lids for that:
http://www.amazon.com/1-gallon-USDA-Fermentation-Glass-Jar/dp/B006ZRBGSC
The solution should be good for a couple of weeks, I think, if stored in a cool dark place. I guess you could also use it to treat your bucket toilet, so maybe you won't waste much.
Sorry, as you can tell I have thought way too much about this stuff. :P
I would recommend starting with a jar like this;
https://www.amazon.com/1-gallon-USDA-Fermentation-Glass-Jar/dp/B006ZRBGSC/ref=sr_1_8?ie=UTF8&qid=1524584912&sr=8-8&keywords=kombucha+1+gallon+jar
You won't need the top; however, it's nice to store for later use of the jar.
Add to that a standard coffee filter and an elastic to keep it on the jar.
It has a 1 gallon volume so you can follow the subreddits suggestion for a master recipe;
https://www.reddit.com/r/Kombucha/comments/5b1ztm/reddit_master_kombucha_recipe/
If it tends to be cold where you are < 75 F ambient temperature you may want to consider also snagging one of these;
https://www.amazon.com/VIVOSUN-Waterproof-Hydroponic-Fermentation-Germination/dp/B073PTZCJ4/ref=sr_1_4?ie=UTF8&amp;qid=1524584986&amp;sr=8-4&amp;keywords=kombucha+heater
If you are sourcing something used, please be sure to know what was in it before and clean it appropriately and then rinse it to insure no antibacterial or other cleaner residues reside, which could hinder the yeast and or bacteria from thriving.
Many folks prefer to have more surface area for the pelical to grow and find that it speeds up the over all process along with having appropriate temperatures.
Good luck!
As was already stated, definitely use glass as plastic and metal will both have adverse effects on your brew. The only thing I have to add is a recommendation for one to buy. Good luck!
> Please list ALL the basic equipment for pressurized CO2?
I use a CO2 fire extinguisher rather than a normal cylinder, but it's essentially the same.
Only real downside is the ongoing cost. Other thing to think about are balancing CO2 levels when the lights go off, but that's easy enough to accomplish with the timer plug.
Cost for me was about £100 all in, but I got lucky with some cheap CO2..
I have a DIY I built from googling for my 15g. It is a constant pain in the ass to get the mixtures right for given surface agitation and bioload. And then every time you want to make a change, you have to wait a day for the mixture to restart. And if you are using CO2 to lower pH, this causes wild pH swings. And, you can't turn it off at night.
Save yourself pain and buy a real setup:
http://www.amazon.com/gp/aw/d/B001DTNWF2?pc_redir=1407847266&amp;robot_redir=1
http://www.amazon.com/gp/aw/d/B0058XWDFO/ref=pd_aw_sims_5?pi=SL500_SS115&amp;simLd=1
http://www.amazon.com/gp/aw/d/B0085282UK/ref=pd_aw_sims_2?pi=SY115&amp;simLd=1
http://www.amazon.com/gp/aw/d/B008UCOFJW/ref=pd_aw_sims_1?pi=SY115&amp;simLd=1
$175 with prime.
EDIT: Jesus I totally forgot about the leaks. Constant leaks in the DIY system. I had several seals give after several weeks of use. So you are never safe. I think I currently have zip ties holding my overflow lines together.
I bought a basic Fermtech 5478-6H Auto-Siphon Mini with 6 Feet of Tubing and Clamp https://www.amazon.com/dp/B00SDLLZDY/ref=cm_sw_r_cp_apa_i_f1EuDb9WJSGFD
Siphon. Had another sterilized carboy and transferred it. Then added my new spices and fruits.
You're always gonna need two containers in my opion. This is my second time and my first was a fucking failure. So I've done more studying. And what's best for at least 1gl brews. It's more investment. But worth it
Have a look at 1 gallon extract kits Buy a 1 gallon jug of wine (about $8) then dump out the wine or drink it and use that as your fermenter. You have a pot,spoon and save up some bottles or buy https://www.amazon.com/Chefs-Star-CASE-Bottles-CLEAR/dp/B011SGS8U8/ref=pd_lpo_vtph_328_bs_t_2?_encoding=UTF8&amp;psc=1&amp;refRID=THND89S8R7NBS9W8Y5SV.
Possibly, but look at this instead. I just bought one, and it's working out great. Cheaper than the one you linked to, as well.
Some things I see that you could do are:
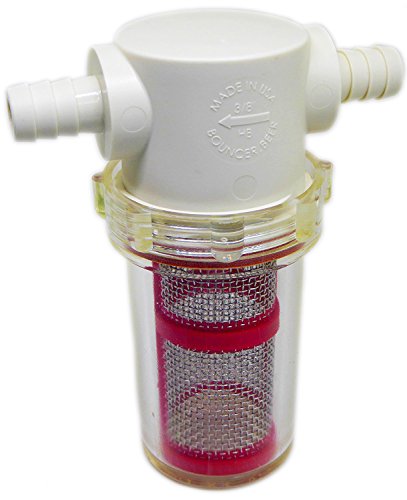
Are these essentially the same product? Is Bouncer double the price for a legitimate reason?
https://www.amazon.com/gp/product/B01JWO5RK2/ref=ox_sc_sfl_title_8?ie=UTF8&amp;psc=1&amp;smid=AXFBTTM28FB1
https://www.amazon.com/gp/product/B00CH2JSIY/ref=ox_sc_sfl_title_9?ie=UTF8&amp;psc=1&amp;smid=APP34LIR2J3LQ
If you have issues getting the seeds out, I picked these up a while ago. It goes inline with your siphon hose and I got the smaller mesh to get out things like pulp or seeds. Works great.
https://www.amazon.com/gp/product/B06XR6M3GB/ref=ppx_yo_dt_b_search_asin_title?ie=UTF8&psc=1
https://www.amazon.com/gp/product/B01JWO5RK2/ref=ppx_yo_dt_b_search_asin_title?ie=UTF8&psc=1
I recently switched from using recycled GT bottles to swing tops. It made a world of difference! Honestly, the carbonation increased by 50%.
These are the ones I bought off of Amazon...Swing Top Bottles
I got mine at my local brewery supply store! These seem similar.
Yeah they're called air locks, there's a few different types to choose from but standard ones look like this!
https://www.amazon.com/dp/B075LRMRDQ/ref=cm_sw_r_cp_apa_i_3i8RDbD24QD3T
I use these. I fill them with vodka instead of water.
https://www.amazon.com/dp/B075LRMRDQ/ref=cm_sw_r_other_apa_i_e5BXDbTNQK6V9
https://www.amazon.com/Gallon-Bottling-Bucket-Spigot-Beer/dp/B000E62H8I
Ah, then they probably AREN'T oxygen resistant caps. You'll want something along the lines of https://www.amazon.com/Beer-Bottle-Caps-Absorbing-Homebrew/dp/B000Q64T8M
And let us know if it's an anomaly!
Oh yes, and it is quite simple to get the stuff together without buying a kit. Do you have a local home brew store?
This subreddit's wiki which includes a beginner section: https://www.reddit.com/r/Homebrewing/wiki/index
There are several videos on youtube that have good instructions.
Here is a basic list of gear to brew beer in a bag. You can get all of this stuff on amazon if you don't have it already. This is not the best list, but it works.
http://homebrewmanual.com/home-brewing-equipment/
Some of the stuff you won't likely have at home:
Beer recipes: http://beerrecipes.org/
To get grains from amazon, type in the grain type and it will provide you options. If you don't have the ability to mill it yourself, you can order it crushed. Its not ideal, but if you don't have a homebrew store near you and don't have your own mill....it will work. You will have to measure out the correct amounts for each grain that you add on your own from the bulk that you ordered. If you want to brew with extracts, you can also order those on amazon as well.
You can order hops on amazon the same way as grains or extracts.
Based on my setup, you need;
Decent thermometer
Auto Siphon & tubing
hydrometer
wine/beer thief
carboy or bucket for fermenting + rubber stopper & blowoff tube
bottling bucket w/ spigot
bottling wand
bottle capper + bottles & caps
I recommend 10 gallon kettle, I regret getting only 8 gal.
mesh brew bag sized to fit your kettle. Useful for both BIAB and batch sparge brewing.
Optional but very useful;
10 gallon mash tun (square or round cooler + steel braid/false bottom + brass valve) I regret only getting a 5 gallon. Easy home depot built.
DIY stirplate using adjustable computer fan + magnets + stir bar and a flask (I pull it off with a 1 gallon glass jug)
vinator
Fermentation chamber with temp controller!
This - though I'd recommend going one further and trying to get the accompanying bottle drying tree too - e.g. the one shown in the multi-buy here: http://www.amazon.com/Avvinatore-Vinator-Bottles-1-Count-Box/dp/B001D6FUDC
Rince, invert onto the stand, and leave to drop while you get set up to bottle, then just grab em off the tree as you go!
Sounds like a waste of electricity. I bought the Vinator bottle spritzer and 90 bottle drying tree stand that goes below it. Fill with iodophor or starsan and it's quick and easy.
For force carbing I just set to 40psi for 24 hours then drop to serving pressure and let it sit for a couple of days. It's pretty drinkable after the first day, but I'm not overly concerned about super accurate volumes of co2.
To bottle without some kind of beer gun, you'll want to drop pressure as low as you can and put the bottles in the freezer to get super cold first. I'd also pour half a glass first to let the beer cool down the faucet. I got one of these for filling growlers and it would make things easier for bottling from keg on the cheap too. Leave about as much space in the neck as if you were bottle conditioning and cap on top of the foam.
I visited them a few weeks back since I have heard some good things about them. Overall I thought they had a good line-up with nothing offensive but also not really anything that made me stand-up and cheer. I visited again on the Hartbeat release and while it was a good offering, I thought it was actually more underwhelming than their normal IPA offerings. It really needed a more generous dry hop punch.
And not to be a beer snob or anything, but they fill the growlers straight from the tap. They don't use a growler filler (which is basically tubing that allows the beer to fill from the bottom of the growler to the top) or flush with CO2 prior to filling. This was noticeable the next day when we opened the growler and it was under-carbonated and had lost a bunch of aroma.
I'm not sure what you consider pricey as hell, but I have this one, available for $45. If you are doing extract with partial boils, I might just do an ice bath in the sink. That's what I used to do. If you are doing all-grain and/or full boils, I'd save up the $45.
Anybody think buying this wort chiller for $50 is a good deal? 20' of the same tubing at Home Depot is $27 before tax, and I have a $50 Amazon gift card.
Very cool, looks good! There's definitely a satisfaction that comes with building something with your own hands.
If anyone needs a good cheap chiller, I recommend this one. 25' for $51.50. It becomes an even better deal if happen to need anything else from the same seller. I tacked on an auto siphon, some air locks, and some yeast and the shipping only went up slightly.
You might be able to, If you went with a pin lock keg they are cheaper. Only problem with the mini fridge is that you may have to modify the fridge to get the C02 lines into the fridge, unless the tank, regulator, and keg can fit in there. I use this regulator https://www.amazon.com/Kegco-KC-LH-542-Premium-Regulator/dp/B003WX772G/ref=sr_1_1?ie=UTF8&amp;qid=1491405625&amp;sr=8-1&amp;keywords=c02+regulator with the dual output. This one is a little cheaper. You will need lines I suggest 5/16th for air and 3/16th for serving. 5 feet each should get you in a good situation for kegs. See if you can find a C02 tank on say craigslist or an old one. I swapped a really old tank at Airgas that was no longer fillable for a decently new one.
You would probably also want a picnic tap for your setup.
I picked up both my 9 gallon kettles (one with dual ports) for <$100 bucks shipped on black friday 2 years ago. I have seen other stuff go on sale for pretty cheap. If you can hold out, it might be worth waiting.
As for your regulator. I picked up this dual gauge regulator last week. It appears to be working well. For less than 50 bucks shipped (I have prime) it worked out well. However I don't know about longevity. It looks to be a much better build quality than my last one that went out because of what looked like old age.
I recommend bottles that are rounded. I've had a couple bottles explode in the past, but they were the type pictured, the ones with corners. I think those create weak points, perhaps? My kombucha is extrememly bubbly, but it never breaks the rounded bottles!
http://www.amazon.com/CASE-12-Beer-Bottles-AMBER/dp/B005CIFIDO?ie=UTF8&amp;psc=1&amp;redirect=true&amp;ref_=oh_aui_search_detailpage
Most of the online retailers carry them. For example. Northern Brewer has them for $29.99/dozen (amber, 16 oz.) Amazon has them too.
Is there some other facet of this search that I'm not getting?
Amazon has grolsch type bottles for homebrewing.
This is an example. If you search "homebrewing bottles" you should find several different types.
http://www.amazon.com/CASE-12-Beer-Bottles-AMBER/dp/B005CIFIDO/ref=sr_1_7?ie=UTF8&amp;qid=1449637437&amp;sr=8-7&amp;keywords=homebrewing+bottles
If there is a homebrewing supply store near you they probably have them as well.
I have a set of fastracks and a set of [these bottles] (http://www.amazon.com/CASE-OF-12-Bottles-AMBER/dp/B005CIFIDO) and they work resonably well together. Every now and then one of the caps gets in the way, otherwise they fit well and are 10 times easier for storage than a bottle tree.
I use amber bottles, like this one.
Amber beer bottles, like this one, or amber wine bottles, like this one, also work great and might look a little nicer but are harder to label.
You can probably find these bottles cheaper on non-amazon websites too, just do a google search for "amber bottles" and look around. They come in different shapes and sizes too.
Also a newbie, waiting for all my equipment to arrive from Amazon... But I picked up this 2 gallon bucket:
https://www.amazon.com/dp/B0064O8WWE/ref=cm_sw_r_cp_apa_BssFybCMY4GHZ
To piggy back on u/stormbeforedawn's comment.
This is the equipment I used that I've had good luck with so far. It's what he recommended, I'm just providing links to the specific product I used.
I do it 5 gallon batches so 5 gallon cheap store apple juice, 2 lbs of corn sugar, 2-3 lbs of peeled shredded ginger, and [champagne yeast] (https://www.amazon.com/gp/product/B00434CB74/ref=od_aui_detailpages01?ie=UTF8&amp;psc=1). Put it all in a Fermenter bucket with an airlock. Wait two weeks and bottle it/put it in a keg.
Or, you could have one that's sure to be food grade delivered in 2 days with handy charts on it.
I have always used home brew buckets they are 6.5 gallons, have gallon markings, and made from food grade plastic. Usually only around $20 at a local homebrew store. Here is an amazon link. https://www.amazon.com/dp/B0064O8X5K/ref=cm_sw_r_cp_apa_j-iiybTG2K9X4
This is what I use for 1F:
https://www.amazon.com/gp/product/B006ZRBGSC/ref=oh_aui_detailpage_o03_s00?ie=UTF8&amp;psc=1
This is what I use for 2F:
https://www.amazon.com/gp/product/B01CUJQTPI/ref=oh_aui_detailpage_o03_s00?ie=UTF8&amp;psc=1
When I bottle for 2F, I pour all of the kombucha into a different bowl and clean out the 1 gallon jar after each brew so the yeast doesn't gather on the bottom. I am on my 5th batch, everything has been great so far.
Here is what I plan on getting for the 10 gallon. I also plan on buying a Finnex Planted+ II whenever it comes out.
CO2 Regulator- http://greenleafaquariums.com/products/gla-gro-co2-regulator.html
Fertilizer- http://greenleafaquariums.com/aquarium-fertilizers-supplements/pps-pro-fertilizer-package.html
CO2 indicator solution- http://greenleafaquariums.com/products/cal-aqua-double-check-indicator-solution.html
Drop Checker- http://www.amazon.com/dp/B00J594UVM/ref=wl_it_dp_o_pC_S_ttl?_encoding=UTF8&amp;colid=1XASUQHYFCLHB&amp;coliid=I3NWGM7JZJRTSD
CO2 Tank- http://www.amazon.com/dp/B0085282UK/ref=wl_it_dp_o_pC_nS_ttl?_encoding=UTF8&amp;colid=1XASUQHYFCLHB&amp;coliid=I2XE9EO3Z2DAGA&amp;psc=1
Subtrate- http://www.amazon.com/dp/B0002DH0QM/ref=wl_it_dp_o_pC_nS_ttl?_encoding=UTF8&amp;colid=1XASUQHYFCLHB&amp;coliid=I10PPPB3TWL6ZG
I just bought a 3 gallon used pinlock soda keg, with all the fixings (dual regulator, picnic tap, o rings.etc) for $150 from Adventures in Homebrewing. Went on amazing.com and got a 5# co2 canister for $66. Just need to fill it up at a local air soft store and I'm good to go for a little over $200.
Still leaves me 2 gallons to bottle, or I could just brew in 3 gallon batches.
FWIW, I ended up buying a tank on Amazon for $64, and then immediately swapping it out for a full tank for $20 at a welding supply store in the Bronx (http://www.awisco.com/). Even with cab fare there and back, it still beats the $150 for a refill and empty tank that website recommended.
hey i just watched this video, you might want to try a few new things regarding the dill pickles:
It is fairly easy to get large equipment like vessels and burners locally in India but it's the little stuff that makes your brew day/bottling day easier like the bottle fillers and auto siphons which are kind of difficult/expensive to get hold off. Depending on which city you are in hops, malts and yeast can be easy to source especially if you have any brewpubs around. The selection of hops is again very limited so like like /u/chino_brews suggested you could get bulk hops from YCH. Dry brewing yeast is available (Fermentis, Lallemand) but it is mostly sold in 500g bricks so I would recommend picking up some 11g packets as well. You should definitely pick up a large 16/32 oz bottle of StarSan and a tub of PBW or something similar for cleaning and sanitizing. I would also pick up a hand held bottle capper, a racking cane, a couple of airlocks and a spigot for bottling. Almost everything else can be improvised or jugaad if you're a little handy :)
Don't, it's a bad idea for this. This is a good set up for making a gallon of hard cider, mead or beer. But OP is going to spend a good hour or 2 trying to get those peppers out. Also there is no way to weigh it down because of the cone shaped interior, and you can not fit anything in the tiny hole that work anyway. So, mold it a high probability.
But, for other fermentation purposes (i.e. mead), this set-up is fine and you can get one gallon carboy just by buying some decent apple cider and resuing the jug. The other parts are simply a rubber stopper and an airlock..
Yes sir.
CO2Meter RAD-0301 Mini CO2 Monitor, White
https://www.amazon.com/dp/B00H7HFINS/ref=cm_sw_r_cp_apa_i_uI0rDb4NME0AN
So I learned a long along the way. The graphs and stuff was the easy part!
Originally I wanted to wire up my own sensor so I picked up a breadboard, a dht22 sensor, some jumpers to wire it up, and a ribbon cable / adapter to connect the breadboard.
The basic guide for that can be followed from this tutorial here:
https://www.raspberryweather.com/wiring-for-dht22/
However, in my search for a co2 sensor to add to my breadboard, a fellow redditor pointed out a low cost usb sensor that includes temp and co2! The hackaday project seems to mention one that also does humidity along with it, but it appears to be over twice as expensive on their site ($200!). So decide if you want humidity. It's an important stat, but you can get it with the dht22 if you go that route.
The usb co2 sensor and hackaday links are here:
https://hackaday.io/project/5301/logs
https://www.amazon.com/CO2Meter-RAD-0301-Mini-Monitor-White/dp/B00H7HFINS
Ok, so now all the sensors are up, you need code that reads the sensors and outputs json. I put these together based on the samples from dht22, and the hackaday project. I can post these if you need them.
Ok, next step. This is overkill I suppose for what we are doing, because it's designed to be super scalable. Anyway, I have a server running influxdb (open source, free) and it runs a time series database. I would not recommend saving the influxdb database onto a sd card. Either put it on a server that is always running, or get a second raspberry pi, and attach a usb harddrive, and write to the harddrive. USB speeds are slow, but sd card writes are atroicious, and sometimes kill cards
Then on the raspberry pi, which is connected via wifi, I run a client called telegraf which will run the scripts that parse the sensor data and output json. Telegraf sends the sensor data to influxdb where it is stored very effeciently.
Here are the links for graphing side of things:
https://docs.influxdata.com/influxdb/v1.2/introduction/installation/
https://docs.influxdata.com/telegraf/v1.2/introduction/getting_started/
Ok so now we have all of our data in the database, the last step is presentation. There's a "standard" opensource tool for this too, again, because this software is used by major players in the tech industry, we can leverage their work.
A project called grafana is my dashboard tool. I run this on my server and it allows me to point it at influxdb, and design queries to create graphs and dashboards. grafana installation info is here:
http://docs.grafana.org/installation/
http://docs.grafana.org/guides/gettingstarted/
Sorry this is getting long....
I also installed the raspberry pi camera, so that I can run timelapses. Originally this was simply a timelapse, but once I had influxdb running I had to take it a step further!
Now I added a couple steps to my timelapse script. Between each picture, I ran a script that queries influxdb to get the json data out of it, then runs a ruby script to create a graph based on that json using a gem called gruff, then superimposing that on the source images so when my timelapse was created later it had the environmental data.
It's still a work in progress (no co2 yet) but here's a recent one I made to show off the floodtrays / irrigation timers I got going this weekend:
https://www.instagram.com/p/BQKAUu7DXed/
Anyway, it was . If you want some code dumps from my setup or help with parts lists let me know. The data is all realtime, and the dashboard auto refreshes as data comes in :)
I got a c02 mini desktop usb sensor on amazon, actually works with linux! only about $60! I have not used it yet but in testing it has worked great.
Edit Link: https://www.amazon.com/gp/product/B00H7HFINS/ref=oh_aui_detailpage_o05_s00?ie=UTF8&amp;psc=1
Your recipe sounds like it'll turn out well if all goes according to plan! You may want to add some sweetness back if it ferments dry, but you've got several weeks to figure that out and read the Wiki to get all caught up on the method and terminology to things like back sweetening and nutrient addition schedules. I admire that you're being industrious with your fermentation equipment, I wasn't brave enough to start fermenting with whatever I had on hand with my first batch.
If you think you'll stick with it, here's the equipment I used for my first batch. I highly recommend looking into it if you think you'll do another batch! (I apologize if you aren't in the US, Amazon is my go-to)
All-in-all, this is just about my current setup excluding yeast, yeast nutrients, and extra carboys and airlocks. The list above comes out to about $127.45 USD before tax, which really isn't too bad considering one gallon should yield just shy of 5 standard wine bottles! Most commercial meads I've seen ranges from $15-$25 with some exceptions (There's a winery near me called Oliver Winery that makes a mead called Camelot Mead that sells for about $8 per bottle. Very good for such a cheap mead, you can probably find it at Total Wine & More if you have one nearby).
&#x200B;
Sorry for such a long comment! Best of luck in your mead-making adventure!
Edit: If you have a local homebrew store, I would opt for that rather than Amazon. Prices may not be as cheap but you won't have to wait for shipping, you'll be able to support a local business, and employees at homebrew stores are usually really helpful and they can recommend recipes and give you pointers. Nothing beats face-to-face interaction!
You have one of these?
https://www.amazon.com/Fermtech-5478-6H-Auto-Siphon-Tubing-Clamp/dp/B00SDLLZDY/ref=sr_1_2?crid=3FSQTFCNKS7D6&amp;keywords=auto+siphon&amp;qid=1569088031&amp;s=gateway&amp;sprefix=auto+si%2Caps%2C170&amp;sr=8-2
Best to start the siphon in a pot of clean water to get it going, clamp off the hose and then transfer the cane into the mead to begin siphoning it out. If you hold it as you're doing it, you can prevent any of the sediment at the bottom from getting in. Just stop it before it gets there.
If you're not looking to spend much I would suggest some half gallon growlers. You can usually pick them up for 5 dollars empty at your local craft beer brewery. They're great if you have a second fermentation recipe that you enjoy. It is a lot less work filling up one of these instead of multiple grolsch style bottles. Another thing I use is an auto siphon. Also cheap on Amazon. Makes filling bottles a breeze.
Auto-Siphon Mini with 6 Feet of Tubing and Clamp https://www.amazon.com/dp/B00SDLLZDY/ref=cm_sw_r_cp_apa_sJwuybWN82B85
This is what I've been using. Weird, though, because it sounds like what you recommended.
These have worked well for me: https://www.amazon.com/dp/B011SGS8U8/ref=cm_sw_r_cp_apa_ZGtEAbFW4725R
I also found something similar at IKEA that would work just as well
I recently got on of these guys Dry Hopper
I used it for a tropical IPA for a party last week, and it went rather well. No hop particles and no clogged dip tube. The top is pretty secure on it, too.
I use a stainless steel corny keg container. I currently have a keg on tap with 3 oz of pellets in it and have had no clogs.
I recently picked up one of these -- haven't used it yet, but I intend to just drop it in and let it sink. I actually like that it sinks so that I know I am getting complete submersion -- I was always suspicious of how much I was getting out of the socks that would float at the top.
To your inquiry of how will it be fastened -- it won't, but I really can't think of how that could be an issue. Instead of retrieving the hops, I would recommend that you push your beer to an empty corny and leave the hops behind -- way better in concerns of exposure/quality.
EDIT: Looked around on amazon a bit more and apparently some come with a small chain, but you still have a valid question -- not exactly sure what it would be attaching to...
These can be nice, re: transfer:
https://www.amazon.com/Bouncer-inline-beer-filter-regular/dp/B01JWO5RK2
Amazon! They came with the bottles.
https://www.amazon.com/dp/B01LB1862A?ref=ppx_pop_mob_ap_share
Swing Top Glass Bottles - Flip Top Brewing Bottles For Kombucha, Kefir, Beer - Clear Color - 16oz Size - Set of 6 - Leak Proof Easy Caps, Bonus Gaskets, Chalkboard Labels and Pen - Fast Clean Design https://www.amazon.com/dp/B01LB1862A/ref=cm_sw_r_cp_apa_i_P6dxDb9CYMEXP
So I’m a newbie (and had some explosion issues) but here goes with what I did!
1.) I did 2F for 5 days at room temperature. Longer than the 2 days people sometimes recommend, because I had tried one bottle after 3 days and it was too sweet. (I also bottled 1F at sweeter than I would drink because I wanted to ensure carbonation.)
2.) I used chunks of strawberry, minced ginger, and lime juice. (Also made one with pineapple purée but that exploded!) ((Also made raspberry-lime not featured with mashed raspberry and that worked the best out of the three flavors.))
3.) About 1/4 cup fruit per 16 oz kombucha bottle. (For the featured Strawberry-Lime-Ginger: 1/4 cup finely chopped strawberry, 1 tsp minced ginger, 2 tsp lime juice.)
4.) These https://www.amazon.com/Swing-Top-Glass-Bottles-Chalkboard/dp/B01LB1862A?ref_=fsclp_pl_dp_1
Going forward thing I’m going to try different are:
-Juice over plant matter like someone suggested (except raspberry which worked great!)
-And I’m going to try to use herbs and perhaps chia seeds in one batch!
Happy Brewing!
Amazon!
Swing Top Glass Bottles - Flip Top Brewing Bottles For Kombucha, Kefir, Beer - Clear Color - 16oz Size - Set of 6 - Leak Proof Easy Caps, Bonus Gaskets, Chalkboard Labels and Pen - Fast Clean Design https://www.amazon.com/dp/B01LB1862A/ref=cm_sw_r_cp_api_i_4J.MDbCKXHADR
https://smile.amazon.com/gp/aw/d/B06Y2F4BMY
> Proteins are what you're feeling in a 'full' beer, and taking care to ensure they stay in the beer will get you the body/mouthfeel/head retention you're looking for
What would you recommend to do in order to achieve this?
I haven't taken the pH of my water, I've just been using it from the tap. My neighbor brews some of the same exact recipes I did (same LHBS) using his faucet water as well. He does partial mash, but I don't believe he's treating his water/adjusting his pH.
My cleaning process has been pretty light, as far as I can tell. I bought everything new, but I did a PBW clean of my kettle and fermeters before I used any of them. I fill the fermeter with StarSan on brew day and dump that into the bottling bucket just before I transfer from the kettle. I have never used dish soap or anything aside from PBW and StarSan (and then a rinse with water after cleaning) on my equipment.
I had been adding additional sugar to the bottles for the 3F (or 2F if I skipped the flavoring stage). But that has always been a pain, and is completely hit or miss depending on what kind of flavoring (fruit, ginger, etc.) was used, how much sugar it contributed, and what other yeasts and other bugs it brought with it (I always used organic, fresh/frozen ingredients before this test).
Ginger, for instance, has it's own native yeast that can stall your ferment by killing your kombucha yeast and slowing down the process until its yeast takes over.
What I was doing was transferring the kombucha after the 2F flavoring stage via siphon to my bottling bucket (https://www.amazon.com/Gallon-Bottling-Bucket-Spigot-Beer/dp/B000E62H8I/ -- but these can be had at your local brew shop for about $12), straining out the solids along the way, and adding enough simple syrup (sugar dissolved in a very little bit of water) to the brew, and very gently stirring to mix -- but not enough to introduce too much oxygen (oxidation can stall / prevent your bottle ferment). I then transferred from the bottling bucket using a small hose attached to the spigot that went to the bottom of each bottle... again, as to not introduce additional oxygen.
So came out great, and others never carbed up at all, leaving me with overly sweet 'buch from all the added sugar -- and excessive sugar is something I was trying to avoid by drink kombucha in the first place.
I got sick of it all, and after reading a lot about force carbonation and how easy it is, I decided to not work about carbonation until I get my new kegerator and keg setup up and running. Every time I talk to someone who has done it with kombucha, or who homebrews beer, they immediately say force carbonation in kegs is the only way to go, and that I'll be so much happier not dealing with bottle carbing.
I'm not saying that you can't perfect the carbonation in bottles method... clearly many here have. But even when I didn't use a carboy in between for flavoring and flavored with fruit right in the bottles, the results were always inconsistent, and not worth all the time wasted on sub-par results.
Like all of what I've ever done in my kombucha brewing, I'm looking for the most efficient, cost-effective (not cheapest), and replicable processes, with the eventual goal of being able to make a quality, consistent brew every time. And frankly, I love figuring all this out and continually refining the process. It's a huge scientific puzzle with tons of variables, and it's a blast!
Do you have one of these?
I'd like to do 5 gallon batches. I don't think the quantity from the Mr Beer keg is worth it.
How's this look? Total is around $80.
Fermentation bucket
Bung/airlock
Stock pot
Autosiphon
Star San or Idophor (What's the difference?)
Is there any advantage to having a carboy as well? How long would I leave the beer in the fermentation bucket?
So if I wanted to do sours, I'd basically have to get 2 of everything?
Edit - actually, wouldn't this kit be about the same, but with an extra bucket but no stock pot?
Edit 2 - another pot, 36qt is good price, leaving this here so I can find it again.
Amazon has it, and it'll be delivered by tomorrow: http://www.amazon.com/Beer-Bottle-Caps-Absorbing-Homebrew/dp/B000Q64T8M/ref=sr_1_1?ie=UTF8&amp;qid=1410318689&amp;sr=8-1&amp;keywords=homebrew+bottle+caps
With standard bottle caps they say the brew remains true for about 6 mo. after bottling. They have oxygen absorbing bottle caps that are supposed to keep beer for over a year. I've also read that you can wax the top of your bottles to prevent oxygen from seeping in. I'm thinking about doing this for my most recent bourbon vanilla porter brew.
NOTE: I've never tried aging beer for more than 3 or so months so I cannot attest to either wax or oxygen absorbing caps methods.
No, just regular metal ones like the ones below.
I am wondering if my capper failed on me. It seemed like it sealed everything fine but it also seems like that's the only possible explanation.
https://smile.amazon.com/Silver-Oxygen-Barrier-Crown-Count/dp/B000Q64T8M/ref=mp_s_a_1_4?keywords=bottle+caps+for+homebrew&amp;qid=1572026207&amp;sprefix=bottle+caps+&amp;sr=8-4
I came here to say to just use your dishwasher but several have beat me to it. I use the dishwasher racks to hold the bottles, a vinator filled with starsan to rinse the insides, and the open door of the dishwasher to hold the bottles while filling...lots of good info here...Cheers!
You could always get this bottle washer. You'd only need a relatively small amount of sanitizer. Each bottle will only take a couple seconds.
I've got this thing to go with my perlick taps on my kegorator. I haven't tried it yet though.
Meh, I use one of these not that exact one but one that fits my tap. I just turn the flow down to a trickle and it fills bottles or growlers fine.
Growler filler would work. I keg almost everything but a growler for travel is great sometimes. Maybe like this: https://www.amazon.com/Bev-Rite-Extraordinary-Jug-Growler/dp/B003FW6BA8
Hi everyone! I have This kegerator http://www.edgestar.com/KC2000TWIN-EdgeStar-Full-Size-Dual-Tap-Kegerator-And-Keg-Beer-Cooler/KC2000TWIN,default,pd.html I am trying to find a hose big enough to fit. I bought this growler filler http://www.amazon.com/Draft-Warehouse-Extraordinary-Jug-Growler/dp/B003FW6BA8/ref=sr_1_1?ie=UTF8&amp;qid=1453319907&amp;sr=8-1&amp;keywords=growler+filler however, its too big. Does anyone have a similar kegerator and perhaps can direct me to the right diameter hose that will work for this? Thanks in advance.
Edit - sorry for the poor formatting. I copy pasted this from a couple of days ago when I asked and it wont let me put links in update mode.
Thanks!
This is now the easiest method you've found :-)
https://www.amazon.com/gp/product/B003FW6BA8/
That's beautiful! And it could double as a huge wort chiller :D
There are primarily 3 types, with different pros and cons: immersion, counterflow, and plate.
I use this one, which is an immersion chiller. These are typically the least expensive, both to purchase or to build. This is your best bet, in my opinion.
You could also check out a counter-flow chiller which is more expensive, but arguably more efficient. I say arguably because I don't want to open a can of worms here - immersion chillers will definitely do the job.
You can also build both immersion and counter-flow chillers, there are plenty of DIY tutorials and articles. In my experience, the copper in and of itself is too expensive to justify it. If you can find the copper at a good price, however, then that is certainly an option.
Plate chillers are typically the most expensive option, and generally used in more automated setups with pumps and whatnot. You can check them out, but I wouldn't necessarily recommend getting one.
Just found my notes:
Do you have a wort chiller? http://www.amazon.com/Homebrew-Immersion-Wort-Chiller-Copper/dp/B003UCCLG6
You could also make or buy a flight glass set.
Here is the desktop version of your link
Some people don't chill at all, and just leave it overnight to get to room temp. You don't want to put a lid on before it drops to 160ish due to DMS still coming out, but you want to have a lid on by 140 to reduce wild yeast.
Personally I like my IC. And you can get it fairly cheap like here. It's only a 25' one, but that's what I use and can drop 10 gallons of wort to 80 degrees in half an hour (faster in winter, slower in summer).
For temp control, use a cooler. This is the cooler I use. It is perfect to hold any fermenter I've seen. Fill with 65f water. Put your fermenter in the cooler. Add frozen 16-oz soda bottles to keep water temps at around 65f. Monitor your fermenter temps (using the stick-on fermometer ... just be sure the fermometer isn't under water!). I've found adding 1 frozen bottle in the morning and 1 in the evening keeps temps exactly where I need them..
If your fermenter has a spigot in the bottom - place the fermenter inside a contractor trash bag (the super thick durable kind) before placing in the water. You don't want to risk infection by having the spigot exposed to the water.
For BIAB and All-Grain ... #1 - BIAB is all-grain. It is just easier. The ingredients are the same. The end result is the same (Beer!). The complexity, cost, and time are different. So, I'll just list out a 2-vessel BIAB-in-a-cooler hybrid system.
Total - $255 shipped to your door.
This setup will be a setup that you can use for all types of Ales. You can even do low-temp ales that ferment at 50-55f by adding more ice/colder water to the cooler. Don't think it would be efficient enough for lagering.
Process:
EDIT - you will need an extra 5-gallon pot to heat sparge water.. forgot that. They can be found anywhere for about $20. As always - check craigslist to save even more $$$$. This is the cheapest and most efficient setup I've been able to put together. If you really want to get fancy - then you can add a stainless steel fermenter from Chapman Brewing Equipment for an extra $99. The fermenter is well worth it!
EDIT 2: As always SANITIZE everything at all stages. Also - with all-grain, you'll eventually want to get into water chemistry. Read up on that. AND a good kitchen scale is needed for measuring out hop additions (and later water chemistry adjustments). Kitchen scales can be had cheap. You'll want one that is accurate and can be calibrated.
Yea I feel ya. I'm getting this co2 tank with this regulator
I wanted to get the 5lb cause it will last a long time and is only like $15 to refill at the welding supply near me. I hopefully won't have to upgrade until I get my 250g tank and ill be getting a 20lb for that one.
If he were to buy a TWO product dual regulator like the one you link to, then the answer is yes. His pricing indicated that he was only looking at a single product dual regulator like this: http://www.amazon.com/Kegco-Premium-Series-Gauge-Regulator/dp/B003WX772G/ref=sr_1_3?ie=UTF8&amp;qid=1407323203&amp;sr=8-3&amp;keywords=dual+pressure+regulator
Ah yeah good catch - will need to pick a different regulator and remove that bubble counter.
Hows this one look?
http://www.amazon.com/Kegco-Premium-Series-Gauge-Regulator/dp/B003WX772G/ref=sr_1_4?ie=UTF8&amp;qid=1421537185&amp;sr=8-4&amp;keywords=c02+regulator
Says for beer specifically but I'm guessing that doesn't matter
Get a 5lb CO2 tank, a regulator, ball lock valve and a Carbonator and make your own fizzy water. It's delicious.
Try amazon, this one says they can ship to finland. Shipping would be ~30 bucks though. Might buy the whole assembly in that case.
Ball Lock and hose
Coupler and valve assembly
As for getting the tank filled, I would go to your nearest bar or restaurant that uses co2 for their soda/beer and just see who their vendor is.
Am I missing anything? Or better reccomendations?
Tank
Regulator
Diffuser
Wow thank you!
http://www.amazon.com/gp/product/B003WX772G?psc=1&amp;redirect=true&amp;ref_=oh_aui_search_detailpage
Clearly states how to even add onto it in the question section.
So, an alternative to kegging if you aren't ready for the expense is the buy those flip top brown bottles like these.
I have those, as well as a keg (which I only use for special occasions/parties right now as I don't have a kegerator) - the flip top bottles remove a lot of the hassle involved in bottling as you don't need to cap them. They are also larger than standard 12 oz bottles, so it takes less time.
Mason jars are made to withstand vacuum, not internal pressure. so you're more likely to have an explosion with those than a bottle made to have internal pressure. The Grolsh style beer bottles work great. I also like using 1/2 gallon growlers (get the ploy caps).
If you intend to have a sparkling product, you can try flip-top bottles. I have a bunch that originally held beer that I've successfully used for bottling carbonated things.
As others have said, champagne yeast doesn't guarantee a sparkling end product.
This?
I use these...
https://www.amazon.com/Gallon-Plastic-Fermenter-drilled-lid/dp/B0064O8WWE/ref=mp_s_a_1_2?crid=3BOCV43TCMST7&amp;keywords=2+gallon+fermenting+bucket&amp;qid=1551151619&amp;s=gateway&amp;sprefix=2+gallon+ferm&amp;sr=8-2
TLDR: The "Full kit" looks like it has the basics. As others have said, you might want a food-grade plastic bucket for primary fermentation, and you'll need bottles/containers to store the end product in.
If it were a "complete" kit I'd probably put one together which included One step sanitizer to sanitize equipment,a plastic fermentation bucket, and an auto-syphon to make racking (i.e., transferring the liquid from container to container) easier.
If it's something you're interested in pursuing further, there's plenty more you could consider picking up. A bottle filler for the auto syphon, a filtration kit to help clarify wine/mead, fining products, you might want to look into picking up more things like yeast energizer and yeast nutrient (which it sounds like this kit comes with some) and sulfate/sorbate (to stabilize the mead before back-sweetening) etc.
There are lots of recipes and lots of help available, so read up and feel free to ask questions and have a lot of fun experimenting and trying new things :)
2 gallon bucket with drilled lid, $16.17. This will be perfect for what you're describing. http://www.amazon.com/Gallon-Plastic-Fermenter-drilled-lid/dp/B0064O8WWE/ref=sr_1_2?ie=UTF8&amp;qid=1426011617&amp;sr=8-2&amp;keywords=2+gallon+bucket
Dunno if I've ever seen 1.5 gallon, but 2 gallon would be good for a 1 gallon melomel recipe.
Edit: New formatting...
What's a simple, intro ~6.5 gal fermentation bucket?
edit: This one keeps coming up, but so many reviews complain about the lid not sealing air tight. But then others say to not worry about that too much because it's just letting gas escape anyway without letting anything in.
Don't forget the easiest and cheapest pump there is! You can easily find this in local restaurant supply shops.
1 Gallon Pitcher
You can easily siphon it too, just more to sanitize post boil.
Also, get some of these!
Or these!
Which fermenting bucket do y'all like? I bought this one, but it came with a hole drilled in the bottom like it was a bottling bucket. I returned it for a replacement... which came with the exact same thing.
http://www.amazon.com/1-gallon-Glass-Jar-fermenting-Kombucha/dp/B006ZRBGSC/ref=sr_1_2?ie=UTF8&amp;qid=1397529260&amp;sr=8-2&amp;keywords=gallon+glass+jar
http://www.amazon.com/1-gallon-USDA-Fermentation-Glass-Jar/dp/B006ZRBGSC/ref=sr_1_2?ie=UTF8&amp;qid=1463408919&amp;sr=8-2&amp;keywords=gallon+glass+jar
These look PERFECT. Wide mouth, plastic lid, cheap, glass. What do you guys think?
You can get plastic lids for the ball jars. They also make half-gallon ball jars. You can get gallon sized glass jars as well
The first one says it will ferment, but because you use only vinegar you might not see much activity. Just follow instructions.
The second should get decent activity, and based off the recipe it looks like you might be able to use a one gallon container. ( I'm only estimating because I suck with metric)
Try this-
https://www.homedepot.com/p/Leaktite-2-gal-Bucket-2GL-WHITE-PAIL/202264039
or this-
https://www.amazon.com/1-gallon-USDA-Fermentation-Glass-Jar/dp/B006ZRBGSC
This is all based off you being in America, and with that in mind- you can usually find flip top/latch top jars at stores like tj max or Marshalls for about 5$. Good luck and have fun. If you have any trouble just ask.
Thanks everybody, sounds easier than I thought. Can you please look at these products and let me know if I'm missing anything
Glass jar
https://www.amazon.com/1-gallon-USDA-Fermentation-Glass-Jar/dp/B006ZRBGSC/ref=sr_1_3_m?s=home-garden&amp;ie=UTF8&amp;qid=1481986875&amp;sr=1-3&amp;keywords=gallon+glass+jar
Scoby
https://www.amazon.com/Poseymom-Kombucha-Scoby-Cup-Starter/dp/B00J3U9RMK/ref=sr_1_4_a_it?ie=UTF8&amp;qid=1481988107&amp;sr=8-4&amp;keywords=kombucha+scoby
Some bottles for transport https://www.amazon.com/Chefs-Star-CASE-Bottles-CLEAR/dp/B011SGS8U8/ref=pd_sim_79_5?_encoding=UTF8&amp;psc=1&amp;refRID=8GX2CTXPKCQN47F3H629
Is it really this easy, I've brewed beer before and the materials and process were significantly more difficult. Anything I'm missing?
Like /u/officeboy I use mason jars ranging from 6 ozs all the way up to 64 oz depending on the need. They're very handy.
If I need to do something larger, I use a one gallon glass jar from amazon. Cheap and works the same as the mason jars.
If I need to get above a 1 gallon starter, I just end up using a 3 gallon carboy just like a normal brew.
I bought this... and this
It ended up following around in the middle the first time and formed a second on the top so now I have two.
I have a 5 lb [co2 tank](Zebra DNA Luxfer L6X Aluminum CO2 Tanks with CGA320 on/off Valve 5 LB, Brushed https://www.amazon.com/dp/B0085282UK/ref=cm_sw_r_cp_api_IxrIybWJW0EKA) it came empty, but I found a local place that fills my tank and gives it back instead of taking the empty and giving you an already filled one. I personally didn't want to do DIY because it's way more work where this you just fill it, attach your regulator with tubing and have your diffuser in the water. Pretty quick and easy setup. Highly recommend co2.
It came out to about $325. I opted for the led on the solenoid. Also, having the atomizer on the outside of the tank will be nice. This is the CO2 tank I went with.
Noob here but what is this contraption with the red cap?
Edit: Nm Found it!
I got it at a local ferment shop but you can get them at amazon
I would strongly caution against a 35 quart pot. The Bayou Classic 44 quart (11 gallon) pot is only a little more, and it's of dimensions more ameniable to brewing (tall, rather than squat). If you plan to migrate to BiaB, the version with the basket is quite useful; you'll be able to fire your heat source without worrying about scorching the bag.
For ingredients, I would recommend looking around for a LHBS (local homebrew shop). You'll likely not save much money ordering those online, due to their weight/cost ratio, and a LHBS is often the centre of your local community of homebrewers.
With regard to literature, my bible is John Palmer's How To Brew. You can also read the first edition online, but much has been learnt since that was published and the latest edition has current best practices.
That equipment kit is decent, but there are a lot of things in it you'll probably wish you hadn't bought.
You will want:
Price History
ReviewMeta: ★★★★☆ 4.0/5 from 59 valid reviews
CamelCamelCamel - [Info] │ Keepa - [Info]
_
These savings aren't just Black and White.
^(Info) ^| ^(Developer) ^| ^(Inquiries) ^| ^(Support Me!) ^| **[^(Report Bug)](/message/compose?to=The_White_Light&subject=Bug+Report&message=%2Fr%2Fbapcsalescanada%2Fcomments%2Fcyte23%2Fother_desktop_co2meter_sensormonitor_109_tax126%2Feyu3i1c%2F%0D%0A%0D%0A%0D%0A%0D%0APlease+explain+here+what+you+expected+to+happen%2Fwhat+went+wrong.)**
$65 https://www.amazon.com/CO2Meter-RAD-0301-Mini-Monitor-White/dp/B00H7HFINS/
I hear you. It was $70 on Amazon: https://www.amazon.com/gp/product/B00H7HFINS/ref=ppx_yo_dt_b_asin_title_o03_s00
Even though it's a low-end model it logs data over USB, so I have to hooked up to a raspberry pi feeding data to a graph. It's very handy for knowing empirically how any of my attemtps to lower CO2 actually perform.
I got this one from Amazon and I really like it: https://www.amazon.com/gp/product/B00H7HFINS/ref=oh_aui_detailpage_o07_s00?ie=UTF8&psc=1
Fermtech 5478-6H Auto-Siphon Mini... https://www.amazon.com/dp/B00SDLLZDY?ref=ppx_pop_mob_ap_share
This one comes with tubing and a clip to adjust the siphon depth.
No, I got it at my local hydro shop. It's probably equivalent to this. Plus a couple aeration stones and a small fish tank pump for the top feeding.
I like the setup a lot. I don't have much to compare it to, but it works well for me. Changing the water in the bucket is the only annoying thing, but I have an auto-siphon from home brewing which helps a lot.
I bought these and they've worked out well so far. I've only used the for 3 batches. No explosions and my strawberry second ferment was on the verge of being too carbonated.
https://www.amazon.com/Chefs-Star-CASE-Bottles-CLEAR/dp/B011SGS8U8/ref=pd_sim_sbs_79_1?ie=UTF8&amp;dpID=51vunCRbh9L&amp;dpSrc=sims&amp;preST=_AC_UL160_SR160%2C160_&amp;refRID=ZYCKXHCPJPRABD169RBJ
Thanks for the advice, I'll definitely try soda bottles. I've also seen easy cap bottles: https://www.amazon.com/Chefs-Star-CASE-Bottles-CLEAR/dp/B011SGS8U8/ref=sr_1_1_sspa?ie=UTF8&amp;qid=1523023099&amp;sr=8-1-spons&amp;keywords=easy+cap+beer+bottles&amp;psc=1
I'd like to try these in the future, if these work how I think they're supposed to, it would save me the cost/hassle/space of keeping caps and a capper. Do you know of any downsides to this kind of bottle?
Thanks for your detailed reply! By the way, what do you consider a "carbonation safe bottle"? My first inclination was to use the flip-top style that I use for beer like these. Would these be appropriate for carbonating and storing for a month or two?
For the 2F I am using the glass swing top bottles that I've purchased from amazon.
https://www.amazon.com/Chefs-Star-CASE-Bottles-CLEAR/dp/B011SGS8U8/ref=sr_1_6?ie=UTF8&amp;qid=1487950546&amp;sr=8-6&amp;keywords=glass+swing+top+bottles
Recipes on the internet! It's basically whiskey and heavy cream. It's not terribly hard to make aside from making sure the cream doesn't curdle and isn't time consuming at all. Just Google "bailey's recipe" and you'll get a ton of versions, all pretty similar. No suggestions on which one as I haven't made it in years, but I just picked one at random from Google. Just don't listen to the ones that say you need eggs, it's unnecessary (and gross) IMO.
Too little too late, but you can make huge batches, get [inexpensive but nice looking glass bottles](Chef's Star CASE OF 6 - 16 oz. EASY CAP Beer Bottles - CLEAR https://www.amazon.com/dp/B011SGS8U8/ref=cm_sw_r_cp_api_KrVyybC36C3R0) off Amazon, and gift them for a cheap and easy but crowd pleasing present.
These are the bottles - found them on Amazon
I bought a kit initially just to get past any worry that I would miss something....it got me started anyways. If I would do it over I would just buy a gallon glass jar (wide mouth), some black tea, a starter scoby with liquid, some sugar, a flexy funnel (for bottling), and some flip top bottles. The kit added about 15 extra bucks to the cost if I had bought everything by itself. I also bought a few large glass pyrex jars for scoby hotels and/or to hold the scoby if I don't re-make a fresh batch that day. I also bought fresh cutting boards, saucepan and wooden spoons so I can keep that separate and really clean away from any other cooking I do.
Kit: https://www.amazon.com/gp/product/B00LW7OR4A/ref=oh_aui_detailpage_o05_s02?ie=UTF8&amp;psc=1
Bottles: https://www.amazon.com/gp/product/B011SGS8U8/ref=oh_aui_detailpage_o00_s00?ie=UTF8&amp;psc=1
For the cover I have been using a coffee filter with a rubber band and it's been working super.
I've had no issue with mold or worrisome stuff happening to my kombucha. Each time it works perfectly and forms a nice healthy pellicle/scoby for the next batch. I think a few things you can do to make sure it doesn't 'go bad' is to remember to get all liquids to room temperature before dumping it in, don't use metal on it, wash your hands well before touching, don't use antibacterial cleaning products near it, and clean utensils with white vinegar before using. That being said, it appears to be sort of hard to kill it so it's a pretty beginner-friendly hobby.
$7 Amazon US.
£90 Amazon UK!
Whaaaaaat!
Let's talk about keg to keg closed transfers. My first transfer experience was successful. My second transfer didn't work due to hop matter blocking the dip tube at the top of the keg. Any reccomendations how to avoid this in the future? Something like this or this?
I have a couple of questions regarding dry hopping in a keg. I am looking for a more efficient and better way to to do this. I purchased one of these https://www.amazon.com/gp/product/B01GHSI9WO/ref=oh_aui_detailpage_o00_s00?ie=UTF8&amp;psc=1 and my plan would be the following:
1-After primary move the beer to a dryhop keg.
2-Insert the tube with the hops in the keg. Give it some CO2 pressure to seal it.
3-Dry hop for 5 days.
4-prepthe serving keg.
5-connect the two kegs.
6-transfer beer to serving keg.
A few questions:
-I should dry hop at room temp?
-I shouldn't carbonate until the beer gets to the serving keg?
-Any other tips?
Thanks.
Hey I just came across a solution for this problem in a video by the Mad Fermentationist . He uses an inline bouncer filter while transferring. I may order one and see how it goes!
I think this is a better option for a pocket Randall
https://www.amazon.com/Bouncer-inline-beer-filter-regular/dp/B01JWO5RK2
Here. Buy a blue screen for it. The red one isn’t fine enough.
>I am now considering just bottling it where it is. I've prepared the bottles. I'll strain the beer into the bottles through a sieve because there's some debris in what I've pulled out for samples. Tastes gritty, no fun.
No no no! Absolutely do not do this, it will oxidize the crap out of the beer. If anything you can use an inline beer filter, e.g. Bouncer. There's a reason siphons are so popular in this hobby. Draw liquid from the top, don't suck up sediment. Personally I really dislike plastic fermenters with spigots, this being one of the lesser reasons, sanitation being one of the bigger ones.
&#x200B;
> Also might be worth noting I fermented it in a bucket with a tap. I've been taking samples from. The tap to check gravity.
You should know that every time you take a sample this way, you suck in oxygen from the top, just FYI. I'd limit it to no more than one or two if you're measuring.
Listen to this guy OP, he's the only one that actually answered your question. Those canning jars can't take too much pressure and are not usually perfectly cylindrical, this puts even more pressure on the corners.
They would probably work if you did a short 2F but then you'd have the same problem as you did with the growler, not enough carbonation, plus the added risk of a glassy, liquidy mess.
I'd just order a pack or dedicated swingtop bottles from amazon. If you wanted you buy a couple of 4-packs or Grolsh lager for the same price, and get the added bonus of 2 exta bottles and all of that delicious beery goodness.
https://www.amazon.com/Swing-Top-Glass-Bottles-Chalkboard/dp/B01LB1862A/ref=mp_s_a_1_3?keywords=kombucha+bottles&amp;qid=1567886502&amp;s=gateway&amp;sr=8-3
Swing Top Glass Bottles - Flip Top Brewing Bottles For Kombucha, Kefir, Beer - Clear Color - 16oz Size - Set of 6 - Leak Proof Easy Caps, Bonus Gaskets, Chalkboard Labels and Pen - Fast Clean Design https://www.amazon.com/dp/B01LB1862A/ref=cm_sw_r_cp_api_i_d6N7Cb4D5PVHC
Isn't this a brewing bottle though? The bottle cap is supposed to go off before the bottle explodes. You can check this as example.
Had similar problems early on. Went from 7 day 1F to 10 day solved that for me. I also keep my house in the high 70's-low 80's which i know some people find unbearable (comfortable temp for me).
Also I don't add sugar to 2F, but usually just let them sit for 4 days before refrigerating (though i might go back to 3 since my latest batches have had too much carbonation).
Finally, i started to use these bottles instead and they're honestly amazing. Best seal of the 3 brands I've bought and I'll be sticking with them.
I just used one of these for the first time. I used pellet hops. It’s pretty rad!
https://www.amazon.com/dp/B06Y2F4BMY/ref=asc_df_B06Y2F4BMY5266918/?tag=hyprod-20&amp;creative=395033&amp;creativeASIN=B06Y2F4BMY&amp;linkCode=df0&amp;hvadid=198078807540&amp;hvpos=1o1&amp;hvnetw=g&amp;hvrand=17215079381502969390&amp;hvpone=&amp;hvptwo=&amp;hvqmt=&amp;hvdev=m&amp;hvdvcmdl=&amp;hvlocint=&amp;hvlocphy=1020955&amp;hvtargid=pla-319252294200
Hah! That URL! Sorry, on mobile
How about drilling out a small stainless filter like this for the dip tube (https://www.amazon.com/Micron-Filter-Stainless-Cornelius-Brewing/dp/B06Y2F4BMY/ref=sr_1_2_sspa?keywords=hop+filter&qid=1563815355&s=home-garden&sr=1-2-spons&psc=1)
Connecting that to the dip tube, Fermenting in the keg, adding fruit and letting it do its thing, then transferring out to another keg when you're ready to? I bought one of these to do that with my fruited berliners but haven't had the time. I have also removed the poppet for transfers like you're saying but have ended up with clogs from the serving keg to the tap.
Why do so many people dry hop in these canisters? They’re an awkward fit in a fermenter, they have holes in top and the space could be cramped 😕
I think I like these bags more. It’s way bigger and I think it seals off better.
No worries! On cheesecloth in the keg - I did that once and some loose strands of cheesecloth ended up in the valve poppet, which made everything foamy. Not fun.
&#x200B;
A couple other options:
You can still purge. Just open it quickly and throw in the hops. I would highly recommend either bagging the hops or using a dry hopper, cause hops will clog up quick disconnects like you wouldn't believe.
I've recently bought a few of these but have yet to use them. After having a few muslin bags get stuck on the tip of the dip tube at the bottom of the keg, I've decided that stainless is probably a better option.
Fermentation Kit for Wide Mouth... https://www.amazon.com/dp/B075LRMRDQ?ref=ppx_pop_mob_ap_share
I used this PLUS weights because I'm an extra idiot.
https://www.amazon.com/Fermentation-Kit-Wide-Mouth-Jars/dp/B075LRMRDQ/ref=pd_lpo_sbs_79_t_1?_encoding=UTF8&psc=1&refRID=N8RJ66PS6EDXG3YSSNZJ
I'm assuming it's airtight. I barely opened it over 2 weeks.
Yes I use ball mason jars and dishwasher before each use. As for the lids I’m using these - https://www.amazon.com/dp/B075LRMRDQ/ref=cm_sw_r_cp_api_i_.Wk5CbB9JYDT6
It's done in a couple of different ways -
Some people just loosen the lid to let some of the gas escape, but you always run the risk of letting air in (could cause mold), but it really depends on how long a jar lasts you haha.
For intentional ferments, many folks use lids like this for the process with fermentation weights:
https://www.amazon.com/Fermentation-Kit-Wide-Mouth-Jars/dp/B075LRMRDQ/ref=sr_1_5?keywords=fermentation+lid&amp;qid=1571407118&amp;sr=8-5
Like this?
Air locks
This is what I used:
Fermentation Kit for Wide Mouth Jars - 4 Airlocks, 8 Silicone Grommets, 4 Stainless Steel Wide mouth Mason Jar Fermenting Lids with Silicone Rings (4 Set, Jars Not Included) https://www.amazon.com/dp/B075LRMRDQ/ref=cm_sw_r_cp_api_i_.rnVDb1DB18WK
Of course they sell them on amazon https://www.amazon.com/dp/B075LRMRDQ/ref=cm_sw_r_cp_api_i_DJ5QDb1BYWFSM
Don't do your 2F in plastic bottles! The plastic will leech into your brew, leaving a nasty after-taste. Instead, try reusing kombucha bottles you buy in-store, they're rated to hold carbonation and won't leech anything into your brew.
I'd recommend buying some swing-top bottles if you're planning on brewing into the future - they make a big difference!
You could get him a home brew kit if you want to springboard him into his hobby?
http://www.amazon.com/Basic-Homebrew-Home-Made-Beer/dp/B000QGI5RS/ref=cm_lmf_tit_1
Or else get him one/both books and a small piece of kit like an airlock. This would be good to have as a spare even if he already has a kit
http://www.amazon.com/Twin-Bubble-Airlock-Wine-Making/dp/B008ACWSZU/ref=sr_1_4?s=home-garden&amp;ie=UTF8&amp;qid=1418754163&amp;sr=1-4&amp;keywords=airlock
Plus how about getting him some nice craft beers to taste someone elses handywork? Does your local beer shop sell any unusual varieities or local breweries?
Lastly, every cyclist I know is always loosing their multitool
http://www.amazon.com/CO2-Tank-Aluminum-Cylinder-Valve/dp/B0085282UK