(Part 3) Best home & kitchen products according to redditors
We found 125,772 Reddit comments discussing the best home & kitchen products. We ranked the 50,696 resulting products by number of redditors who mentioned them. Here are the products ranked 41-60. You can also go back to the previous section.


![Freshware Meal Prep Containers [15 Pack] 3 Compartment with Lids, Food Containers, Lunch Box | BPA Free | Stackable | Bento Box, Microwave/Dishwasher/Freezer Safe, Portion Control, 21 day fix (32 oz)](https://m.media-amazon.com/images/I/51604hEQ6qL.jpg)
Here are 4 things that I think will allow you to cook about 90% of everything you see on the internet.
A decent 8" kitchen knife. The Victorinox is a heavy lifter without breaking the bank.
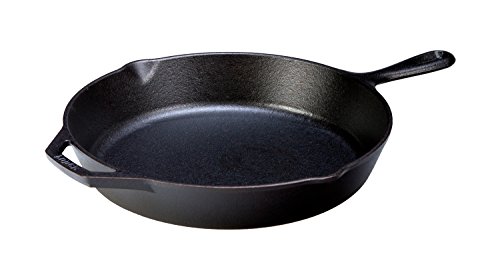
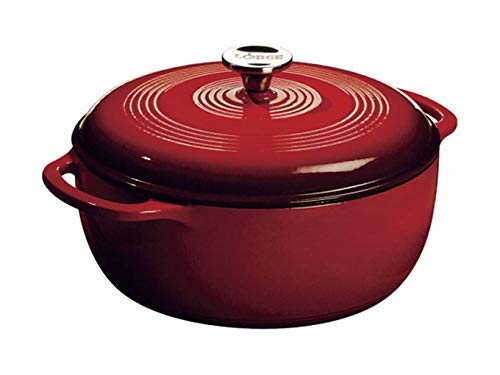
A solid dutch oven. Here I recommend a Lodge, but Le Cruset is fantastic as well. A dutch oven allows you to do tons of one pot meals, braising, frying, soups, sauces, baking bread etc..
A 12" fry pan. This is for proteins, sauteing, all kinds of breakfast applications (eggs, homefries, shakshuka, etc).
A 3 qrt saucier. This one is pretty pricey, but you can get other good, cheaper options if you do a little research. This can double as a pot to boil water, make sauces, curries, and candy. A sauciers smooth sides are much easier to clean and can serve as a good compromise between a saucepan and a saute pan.
I've listed them in order of importance. A knife and a dutch oven can do a ton by themselves. I'd also recommend a pair of kitchen tongs, a handheld fine mesh strainer, and am immersion blender. In fact, I'd try to get those before the fry pan and the saucier, they open a lot of doors for you.
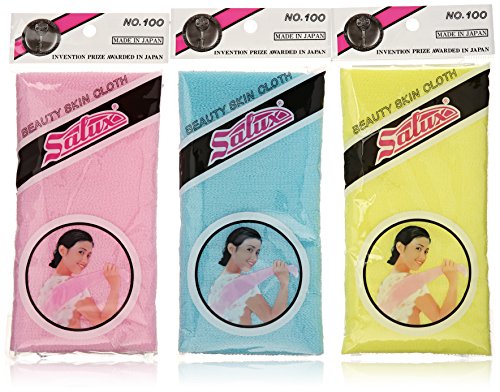
Let me change your life!!! Hop on Amazon and search “Italy cloth”. $4.38 for an 8 pack of these miraculous exfoliating washcloths!
I’ve had KP since I was a kid and I tried everything. Since I found out about these the skin on my arms, thighs, and butt is so much smoother and even.
Shower with warm water, and after a few minutes start gently scrubbing your entire body and watch as your dead skin rolls off. Rinse well and cry about how smooth your body feels and embrace your new life as a baby dolphin.
Edit: here’s the link! https://www.amazon.com/dp/B004C8DR1U/ref=cm_sw_r_cp_api_i_4v1XDb21R9B2T
You're in luck.
I've considered buying this
I absolutely love these little wash cloths. You take a hot bath or shower then firmly wipe down your arms and legs in strokes. The dead skin and buildup comes right off, kinda gross but really satisfying in a weird way. It leaves your skin super smooth and soft days after.
Dude, get a Pizzazz oven. Cheap, countertop appliance that makes wonderfully crispy fries, pizzas, fish sticks, whatever. Pretty much anything that "I guess you could microwave" but would taste better in the stove. Makes it fast, and literally easier than microwaving. Half the time of the oven.
Have you ever actually made a hot pocket in the stove? No. Because it takes an hour to make 1 fucking hot pocket. So you microwave that piece of shit, and it comes out like Elsa aborted the fetus of Satan. Hot and cold and kinda gross. But you'll eat it anyway.
Nah trick. None of that shit. You throw that piece on the Pizzazz. 15 minutes to an evenly heated, cheesy, crispy orgasmic pizza log. Oh shit man. It's for real.
BUT WAIT. THERE'S MORE. You pull that Hot Pocket from the stove, and you're waiting 5 minutes minimum, and still burning your whole shit up like you tried to tongue-fuck my anus after I've just honked out a spicy taco bell dirt snake.
Fuck that, Hoss. The Pizzazz rotating pizza oven cooks quickly, and then continues to rotate while blowing streams of cool air down at the food. That Hot Pocket/fish stick/pizza roll/sausage/pizza/YOU NAME IT is presented at the perfect temperature for immediate ingestion.
I hate you. I had just found the link to post that :(
ALL THAT WORK
I'M POSTING IT ANYWAY
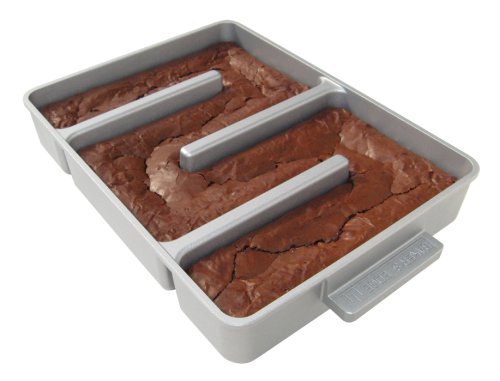
http://www.amazon.com/Bakers-Edge-Nonstick-Brownie-Pan/dp/B000MMK448/
Neener.
If you like the edges, then this product, is for you good sir!
http://www.amazon.com/Bakers-Edge-Nonstick-Brownie-Pan/dp/B000MMK448
(Found this awhile back, thought it was cool myself lol)
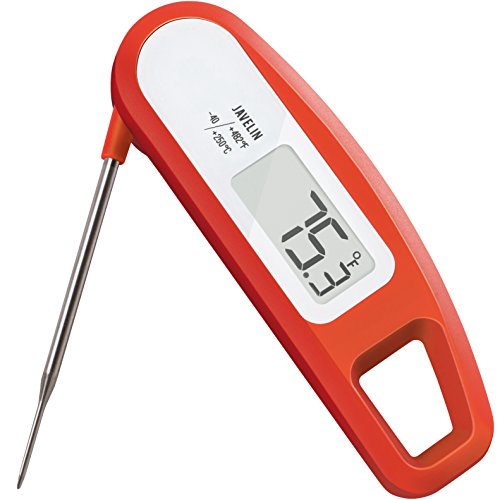
I bought a Thermapen and I love it. But back when I was living with my folks, my mom also really liked using it from time to time. For Christmas I bought her a Lavatools Javelin because it was cheaper but still looked good. I also found that I liked that thermometer as well. Plus, it has a magnetic back so it hangs out on the fridge, so I found that more often than not I was reaching for it instead.
Again, I love my thermapen, and it's absolutely worth its price, but for those balking at the cost, that $25 Javelin is a really good buy.
You need this -> https://www.amazon.com/Bakers-Edge-Nonstick-Brownie-Pan/dp/B000MMK448
Your brownies look delicious, btw! 😋
I thought you were linking to this.
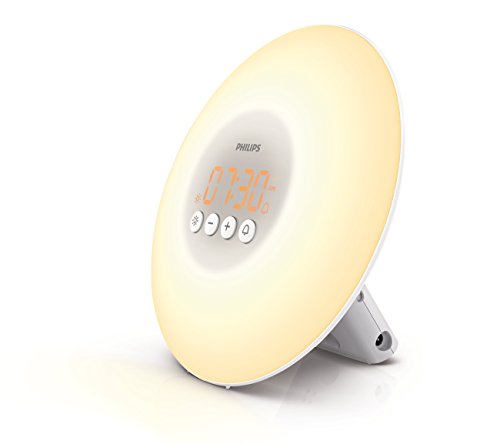
One of these. Slowly amps up the light until you realize you're awake. As opposed to "EH EH EH EH EH" and cursing the world. There are cheaper ones from other companies, different models that do bird sounds too, etc.
I've had KP since I was a kid and am finally getting handle on it in my 30s. My current routine is glycolic lotion twice a day, creams on the affected areas 3-4 times a day, and then physical exfoliation and using zinc or sulfur soap a couple times a week to keep the bumps at bay. But since skincare is YMMV, here's the exhaustive list of almost two decades of treatment, in case some of these other things will work for you!
100% of the items can be purchased via Amazon in the US - it's pretty much the only way I shop.
Beginner Level
If your KP has just appeared, focus on physical+chemical exfoliation and moisturizing. Look for lotions with the following ingredients:
Paula's Choice and Derma Doctor's KP duty both work well because they combine a few of these, but you can also get Amlactin, Eucerin and Glytone which are more focused on a single ingredient. Nearly all of the Eucering, Gold Bond, Cetaphil, etc. creams that work have one of the above ingredients, so take a look at the back of the bottle or on CosDna to figure out what works best for you. Prescription creams include Carmol 40 and Ammonium Lactate in higher concentrations.
Physical exfoliation includes:
My dermatologist also recommended moisturizing CONSTANTLY, which really helped smoothe my arms. According to his instructions, "constantly" meant that I needed to be able to feel the lotion on my skin 24/7 for at least 3 weeks, which for me meant a new layer of cream every hour or two. Pretty much any moisturizing lotion or cream will do. I'm partial to [CeraVe Moisturizing Cream] (https://www.amazon.com/gp/product/B013GDK3SQ/ref=oh_aui_search_detailpage?ie=UTF8&psc=1) (creams are less watered down than lotions, and this one drys down wonderfully, leaveing my skin feeling buttery but not sticky). Lush dream cream and Aveeno are also faves.
Intermediate Level
If a bit of exfoliation and moisture aren't working, you might want to consider if there are other skin conditions making your KP worse. For example, it turned out for me I had some fungal skin issues that made my KP bumps more inflamed. Topical steroids can help, but use with care as they can cause skin thinning. Try adding something with the following ingredients in to see if any of the following work. Also talk with your derm about getting a mild prescription treatment that might include an antibacterial or steroid component.
As others have mentioned, sunlight also helps. Either give yourself 15 minutes of sun a day or look into UV treatments.
Finally, consider dietary factors – for me cutting out dairy, sugar, and gluten when I really want crystal clear skin makes a big difference. Adding healthy oils and fats to your diet can also improve skin quality.
Advanced Level
I not only have KP, but years of scarring and redness (Post Inflammatory Erythema, or PIE) from picking at the bumps when I was younger. Laser treatments have almost 100% gotten rid of this and made my arms the smoothest and clearest they've been in almost two decades. However, these are pricey (for me, ~$200 a treatment and it took 4) and a serious time commitment. But if nothing else works, consider it.
Other Tips
The Great Barstool Brownie Debate - Center Pieces vs. Corner Pieces
Pretty heavy CW in the article.
> Now over the years I’ve had my fair share of disputes over arbitrary opinions such as this, but this one is disappointing and flat out scary. I cant believe we live in world where people want corner brownies with burnt, crunchy edges.
and
>The center brownie embodies everything that makes a brownie a fucking brownie. And thats why its superior.
and
>And dont you dare…DONT YOU DARE…bring pizza into this.
The cultural homogeneity on this is becoming really scary. The center culture has captured the mainstream. Here's Buzzfeed with So, Brownies On The Edge Of The Pan Are Trash And I'll Tell You Exactly Why. Here's Delish.com with 5 Reasons You Should Never Eat The Edges Of Brownies. And more, and more, and more. Everywhere - you - look, the center culture reigns supreme.
I work at a large technology company, and in office discussions center culture is just automatically assumed. I'd love to be able to talk about what I like, but I'm afraid that any deviation from the center line will get me branded an edgelord. It seems that just five years ago or so, it was OK to cautiously admit that edges aren't that bad, but nowadays the best I can do is to try to quickly change the topic.
For now, Edge Culture can still use technology, but now that the Overton window has shifted away from it, I worry this solution won't last. These devices already have to carry cancer warnings in California, and I think the state legislature is mulling over an outright ban.
I can only hope that some of the IDW members will adopt Edge Culture and help counterbalance the relentless drive to the center… although I doubt even that will help, at this point.
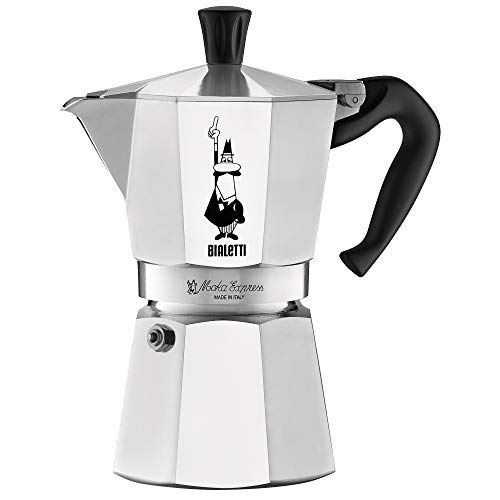
>mocha pot
Did you mean Moka Pot?
That flavoured salt is flavacol.
I've seen it sold locally under a generic name in bulk food stores. You can also probably buy it at any party supply store that rents popcorn makers. And of course it's available wherever fine internet is present.
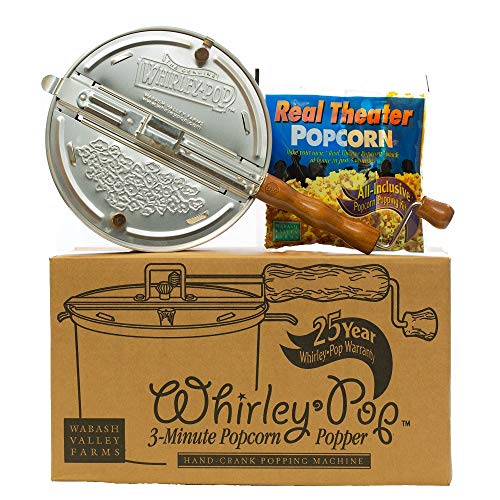
The consensus seems to be that flavacol, coconut oil, and a premium popcorn kernel (eg. Orville Redenbacher), cooked in a whirley pop or similar, will get you as close as possible to theatre popcorn at home.
Well, there are a lot of ways to do it, depending on your budget. It's pretty simple if you buy the right equipment, but "the right equipment" is expensive and improvising is fiddly.
I'd recommend looking this site over some, they have a lot of introductory guides and such. /r/roasting is also an awesome sub in general.
The biggest issue with home roasting is that the beans need to move continuously, for the entire roast, or else they get burned. There are some ways to do this with improvised equipment though:
-Using an air (popcorn) popper. Assuming you have the right model, it does get hot enough to roast coffee, and the beans are light enough to blow around in the interior chamber nonstop. It gets pretty messy though, and you don't have much control. You also can't do huge batches of coffee all at once.
You should have a dedicated popper just for coffee, since you don't want the different oils mixing. Also, some poppers aren't powerful enough, and many modern ones have safety features that'll automatically shut off before it gets hot enough. Some people have fun with disabling those features and/or modding their poppers to give them more control.
"The Poppery II" is a commonly-suggested model for air roasting like this. They don't make them anymore, but they were made like tanks and so you can often find them in thrift stores.
This is a good, cheap, intro way to do it, though the lack of control is annoying. The flavor develops in part based on how long it's kept at each temperature point, and an air popper gives you very few options for adjusting temperature.
Alternatively,
-Using a stovetop popcorn roaster, like this. It has a handle that allows you to stir the coffee continuously, and it can work pretty well. The main drawback is monitoring/nailing the temperature, which is tricky. It's easier with a gas stove.
There are other methods as well, like using a heat gun, but I've never tried them and can't comment. I should also point out that everything I've just explained is a fire hazard, as is coffee roasting in general - the beans need to get quite hot, and they give off a thin, paperlike substance called chaff. I've never had a fire, but it's something you need to be aware of and plan for accordingly.
-If all of that sounds like too much of a hassle, you can just buy an actual coffee roaster. They make it way easier, and you can generally roast much larger batches at once. Sadly, they tend to be pretty expensive.
I'd recommend this one, which is actually on the very inexpensive end for a roaster. It's good quality though, and I've had one for over 1.5 years now without issue. Also note that the site I linked includes 8 pounds of free coffee when you buy from them, and (at least when I bought mine) they charge the same price for the unit as everyone else. So that's nice.
I really like roasting my own coffee. It can be a pain at times, but it means I always have fresh-roasted coffee available. Unless you buy from a local roaster, you've probably never had fresh coffee before. Whole bean coffee goes stale in like a week, and grocery store coffee is much older than a week. Pre-ground coffee goes stale in like minutes or hours.
They cover the stale taste up by burning the shit out of their beans, and so almost everything you see in a grocery store is only 1-2 stages removed from being charcoal. This page shows you what the beans look like at every stage, and you can see how "french roast" actually means "burnt to hell."
Man, long post! At any rate, roasting your own coffee can be quite nice. Green coffee beans run around $4-6/pound normally and you can sometimes find it for even cheaper. At least where I live, even burnt grocery store coffee is often much more expensive than that. So you're paying less for better quality -- as long as you don't mind improvising, or a big up-front investment.
Edited tl;dr: It's a good way to save money and get better coffee, though it can be either annoying or require a big upfront investment. This page has a lot of good introductory info on the whole process.
Salux Nylon Japanese Beauty Skin Bath Wash Cloth/towel (3) Blue Yellow and Pink https://www.amazon.com/dp/B007IAE5WY/ref=cm_sw_r_cp_api_i_REWFDbPFKBPW0
These are awesome
> I researched dutch ovens about two years ago and came to the conclusion they weren't worth the money
You certainly know what's best for your own situation, but I can tell you that my enameled dutch oven is a workhorse for me and looks to last for decades (already had mine over 10 years). Again, YMMV, but I wouldn't be so quick to dismiss them in general.
Hario V60+Filters, Bonivita Electric Kettle (or any goose neck kettle), a kitchen scale that reads in grams, a stop watch/timer, and some coffee. Done. If you have the extra money get an electric burr grinder, if not just have the roaster or wherever you buy the coffee pre-grind it for pour over.
edit: Added some Amazon links in so people can see prices.
Hence the creation of this lil' beauty.
I do think this post is BS too, but I have that same [espresso maker](Bialetti 06800 Moka stove top coffee maker, 6 -Cup, Aluminum https://www.amazon.com/dp/B000CNY6UK/ref=cm_sw_r_cp_apa_i_OedKDb3B9DN2J) and it absolutely gets hot as fuck on the bottom. You put it directly on the stove top to use it.
Edit: Links don't work here, I guess. It's a Bialetti Moka Express for those wondering. It works very well.
You may want to invest in this.
Alright- I'm gonna throw at you my standard 'I've got cash to buy new cookware: what do I get' list. It's pretty much the same for a guy/gal who just got divorced, a dude/lady moving out of the dorms and into their first apartment, or really anyone who is working with nothing but some bare cash and wants to turn it into food.
------------------------------------------------------------------------
------------------------------------------------------------------------
You'll notice the startling lack of any 'set' or anything of that sort here. That's because sets of pots you don't need are dumb. You'll note none of these have glass lids, that's because glass breaks. You'll note none of this stuff costs a fortune, and that's because it doesn't have to. This setup can handle 95% of cooking tasks without breaking a sweat, and without your credit card company celebrating the new statue they can build outside their main office because of all the money you spent. Leftover cash? Buy a knife, get a few wire racks and baking pans, and buy a nice cut of steak, some pasta, some salmon, and veggies to try out your new gear.
Amazon link to Italy towels, which is ironically what they are known as.
E: formatting
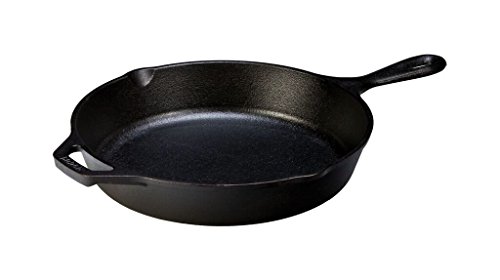
"I'm too poor for nice cast iron"
Cast Iron $16: https://www.amazon.com/Lodge-L8SK3-Skillet-Pre-Seasoned-10-25-inch/dp/B00006JSUA/ref=sr_1_1?s=kitchen&ie=UTF8&qid=1486658136&sr=1-1&keywords=lodge+cast+iron
Maple Syrup $18: https://www.amazon.com/Hidden-Springs-Organic-Maple-Formerly/dp/B00COBZH06/ref=sr_1_2?s=grocery&ie=UTF8&qid=1486658154&sr=1-2-spons&keywords=Maple%2BSyrup&th=1
I bet you can find a used one at Tag Sale and re-season it for less.
Amazon link (no affiliate, I was just curious how / if they still made them).
They're only $39 now ($47.54 in 2004 dollars), so they've actually gone down in price and the reviews still seem good.
https://www.amazon.com/Presto-03430-Pizzazz-Plus-Rotating/dp/B00005IBXJ/
Below is the recipe - I also added broccoli :
Ingredients -
Instructions -
Bottom line is: not really.
Even the moderately good super-automatics start at 4 times the top of your budget ... and they come with plenty of problems of their own which will mean you're going to end up being disappointed in them.
In your budget, you can get yourself a decent hand grinder; a moka pot and a milk frother ... team those up with some decent fresh roast beans and you can get yourself a very acceptable cappuccino. If you spend just a little more and get an electric burr grinder, then you're going to find it a lot easier and faster to grind your beans and you'll use the moka pot more.
For what you're saying, I'd recommend going with: an Encore; a bialetti; and, matching milk frother. All those links are pulled straight from Amazon, but by all means shop around and you might get it down to your budget. As it is, that comes to around $200 - most of which is the grinder. Once you have that grinder, though, you open up a whole world of good coffee in the home.
Edit for link
Do yourself a favor and buy a Moka pot
That shit will survive the apocalypse and I'll be brewing dank coffee over a fire built with the dried bones of my children
Whats so funny about a dutch oven?
http://www.amazon.com/Lodge-EC6D43-Enameled-Island-6-Quart/dp/B000N501BK/ref=sr_1_1?ie=UTF8&qid=1407013173&sr=8-1&keywords=dutch+oven
This is great advice. The only addition (or substitution for the Aluminum Skillet if you're on a budget) I would make is a cast iron skillet. Not as 'non-stick' as the caphalon but will literally last a lifetime.
this:
https://www.amazon.com/Bialetti-6-Cup-Stovetop-Espresso-Maker/dp/B000CNY6UK/ref=mp_s_a_1_3?ie=UTF8&qid=1542296556&sr=1-3&pi=AC_SX236_SY340_QL65&keywords=bialetti&dpPl=1&dpID=41UCgigskiL&ref=plSrch
Coffee is wonderfully strong and concentrated. The only thing you need to replace from time to time is the sealing ring. I‘ve done that twice so far, I use the system daily and have had it for over 15 years.
You could always go with this, but the reactions when you show up to the office potluck won't be as interesting. https://www.amazon.com/Bakers-Edge-Nonstick-Brownie-Pan/dp/B000MMK448
Use this. Throw it in the washing machine after you are done so that bacteria doesn't grow on it (like on a loofah).
Amazon started selling smoking accessories. At one point, they didn't. The prices are bomb af and the OP is not even the tip of the iceberg. Check it:
200 glass screens for $20
bomb ass tree perc handheld bubbler with 19mm f for $20
1 ft glass bong with 2 honeycomb percs, a splash guard, and ice catch 19mm f for $40
AND CHEAP
GRINDERS OUT
THE WAZOO
-
-
-
and yeah, you can get that classic little six shooter grinder we've all come across forn $5.50 and free shipping.
-
---
And that's just a couple of the things I've come across.
-
Ladies and Gentlemen, we live in the future.
This!
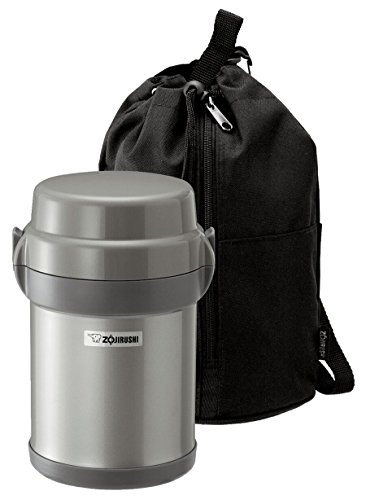
It's nice and small but it can hold so much. And I love to go all out for my lunch since I don't eat much dinner. Add to the fact I hate when I spill soup in my backpack this is the best thing since magic for me.
There are ways to make sure the turd brownies turn out perfectly everytime.... http://www.amazon.com/Bakers-Edge-Nonstick-Brownie-Pan/dp/B000MMK448
Always at least 2 crunchy edges
I got a 12" Lodge cast iron skillet off Amazon for $17 bucks a few months ago. It's pre-seasoned and fantastic, and Lodge is a great brand. Ships free too. I absolutely adore it.
Check it out: http://amzn.com/B00006JSUB
When I was living the bachelor life with my brother, our sister bought us a pizzaz, which was a rotating plate that had heat lamps above and below the plate for heating up pizza.
This was the best way to reheat leftover pizza or fries ever. No way I have found comes close to having it taste like it just was made again. Not even close. I need to buy it again because when I moved in with my now fiancée, we gave it to my brother since he's living by himself and doesnt cook much.
I should get one again.
https://www.amazon.com/gp/aw/d/B00005IBXJ/ref=mp_s_a_1_1?ie=UTF8&qid=1493007555&sr=8-1&pi=AC_SX236_SY340_FMwebp_QL65&keywords=pizzazz+pizza+oven
The 10.25" Lodge skillets is $14 and pretty much holds at that price on Amazon. They are BIFL as long as you season it correctly and condition it after every use.
this opinion is popular enough that all "all corner" brownie pan has been invented. you might want to look into it
Baker's Edge Nonstick Edge Brownie Pan https://www.amazon.com/dp/B000MMK448/ref=cm_sw_r_cp_api_ZYyKBb0CVMXZV
I've forced myself to become a morning person during my last semester (the first of my PhD) for the same reasons you mentioned. I made small changes that didn't make it easy, but made it tolerable.
For one, I got a light alarm clock. This one goes on sale regularly, wait and you can get it for $40. It starts filling the room with light for 30 minutes before the back-up sound alarm goes off (which you cannot adjust on this model, but it starts quietly and gets louder). Light usually does not wake me up or keep me awake, but this thing makes your room brighter than the goddamn sun. I find that I wake up easier, probably because something something circadian rhythms sunrise something something.
Once I drag my ass out of bed, I also turn on a light therapy lamp on my desk while I eat breakfast and browse Reddit. This also makes it easier to move around in the morning, and helps with seasonal depression as well.
I'll be honest here, some of these things might be the placebo effect (which of course is still an effect, so I don't really care). My advice is to try various forms of light therapy, but to get things with a money-back guarantee and give it a few weeks to see how things are going. :)
A few weeks into doing this stuff and waking up early, I even started going to the gym in the morning (even though I hate gyms, and mornings) and I've found that it a) wakes me up, and b) makes me feel like one of those obnoxiously productive people who go to the gym in the mornings.
Edit: Still have to figure out how to drag my butt out of bed on a good time on weekends though. It seems like I either wake up at 5am or 11am. Still working on this :)
I use these Korean bath towels, since I find them really efficient for exfoliating. This would be after I have shampoo'd and rinsed my hair, and leave in my conditioner. By then, the steam should have loosened the dead skin off so that a few swipes remove my dead skin. Otherwise, I use standard Western body wash.
http://www.amazon.com/pcs-Asian-Exfoliating-Bath-Washcloth/dp/B004C8DR1U
Also, on a side note, consider getting the roommate a very cheap cast iron pan.
It's EXCELLENT at searing things, and pretty much indestructible. Here's a super cheap, very reliable cast iron pan.
That way you can avoid strangling him later if he does it again ¯_(ツ)_/¯
People will say things like 'screaming hot cast iron'. I disagree.
Let me recommend one of these. Then buy a bunch of high quality unsalted butter and make ghee (just cook the butter very low, crockpot even, until all the layers are seperated. Scrape the fat off the top, then pour the middle layer into a container, do not let the stuff at the bottom get in. You will lose a tiny amount of ghee but it's just butter so don't worry about it.). Ghee won't smoke till like 485. anything between 400 and 450 is plenty hot enough for a good sear.
Cast iron doesn't heat evenly. It retains heat exceptionally well. So what I do is preheat the pan for about 5 minutes on a 4/10 on my stove (flat glass stovetop). By then, at least half the pan's about 400. I throw in the fat, wait for the fat to get up between 400-450 (takes seconds), then drop the seasoned steak on a part maintaining that heat large enough to cover the steak. I do 3 minutes a side at that temp.
Sear's great. I can leave up the smoke alarm. I don't even need to open windows. I don't even put the overhead fan for the stove on...cause there's next to no smoke.
Here's a steak I made last night (half eaten).
I've yet to try, but I will next week; putting a cast iron weight on the steak while it vacuum seals. This, in my head, should keep the steak perfectly flat instead of getting 'scrunched' a little by the vacuum sealing. The only part on my steaks that haven't seared well were where the steak got 'scrunched' and wasn't flat and even. I think that will solve that.
EDIT: Quick note since people like this comment...Someone made a comment that changed my life a bit with sous vide. They said to just cook the meat sous vide, ice bath, then fridge. You can then keep it in the fridge for like 2 weeks (I've never let it go that long, usually within a week) but it ends up being like 75% meal prep'd. Searing takes all of 10 minutes with the pan preheat. Pop steaks out in no time flat.
Applicable point about searing is that from cold is key (3 minutes per side from hot will 100% overcook it).
Here is what I found while procrastinating (still working on it). If, instead, you're a broke motherfucker like me, there are alarm apps for Android that slowly raise the alarm volume over X period of time so it doesn't jolt you awake. Mine begins barely noticeable, and eventually will start vibrating if I ignore the alarm for 10 or so minutes.
Bonus too, if you sleep by yourself, some of these apps can track your sleep movement, and wake you up at the right time based on if you're in REM sleep or not.
Cast iron pans are not as expensive as you think they are
Total ~119.90
That leaves you ~$80 to get ancillary things like measuring cups and spoons, cutting board, and a sauce pot.
That link is highway robbery.
https://www.amazon.com/Freshware-15-Pack-Compartment-Bento-Lunch/dp/B01GH5KQLO/
Going strong for one year now. Hamilton Beach var temp kettle. http://www.amazon.com/Hamilton-Beach-40996-Programmable-1-7-Liter/dp/B0083I7THI
Lodge cast iron.
I've gotten a 12 inch skillet ($20 at Target) and a 5 quart dutch oven with a 10 inch skillet lid ($33 on Amazon). I use them almost every day and they're my favorite tools in the kitchen, as well as my sturdiest.
I also got a Saddleback medium bifold wallet that's been perfect for the last couple years. I anticipate many more decades to come with it!
Going through this thread, I've remembered a couple more. I now have 2 Orion belts that I wear almost every day! The first is the hot dipped harness leather belt, and the second is the tan harness leather belt that I got for around $28 on Massdrop.
The last BIFL item I've gotten is a pair of Ex Oficio briefs this Christmas. They've been great so far...hopefully they hold up!
Some of us like the edges...
even more so the corners...
https://www.amazon.com/Bakers-Edge-Nonstick-Brownie-Pan/dp/B000MMK448
If you are making your boyfriend lunch every day, you need to take a look at bento boxes! It's a Japanese lunchbox. Usually it has rice, fresh veggies, eggs, noodles, chicken, sausages, or anything else you can imagine! I've even made sushi, dumplings and soup. I haven't made any in a couple years, but I used to make them for my wife. They are very healthy and filling and don't need heating.
They make special boxes if you want. However, a couple Tupperware containers will work fine. If you really get into it, you might find a thermos lunch jar.
You can try this book from Amazon. It's a good intro from an American perspective.
http://www.justbento.com/
http://www.aibento.net/
http://lunchinabox.net/recipes/
Lets start before Cubans, and I'll assume you know nothing about cigars and just start from the beginning.
Okay, as far as humidors go, there are a bunch of options. The quickest and easiest way is to buy a tupperware container that seals well and a few boveda packets (you can get either on amazon). I'd recommend 65% if you're using a "tupperdor" (69% for a wooden humidor...of course depending on the climate where you live etc...). Rough rule of thumb is to use one 60 gram packets for every 25 cigars the container can fit. We'll get more into wood humidors later.
The next thing you'll want to have is a digital hygrometer. You can snag one for 15-20 bucks on amazon. If you're using multiple tupperdors, I wouldn't worry about having one in each, just switch the meter to a different container every week or so to make sure they're staying good. With boveda packets, you shouldn't have a problem. Anyway, when you get your hygrometer, you want to calibrate it. The packaging or instructions may say that it is calibrated at the factory and does not need to be tested. Ignore that. Get a bottle cap, fill it about 2/3 up with table salt, and a few drops of water. Put the cap in an airtight container (a zip lock bag will do) with the hygrometer. Wait a day, and see what the hygrometer says. If it says 75%, you're good. If it doesn't, adjust it until it does, and then leave it in the bag a few more hours to make sure it stays there. You will find that you may develop your own preference for the Relative Humidity (RH) of your cigars, but it your container is reading in the mid sixties to the low seventies, you're around where you want to be. Keep an eye on the temperature, too. I like to keep mine below 70 degrees F. If they get into the high seventies, your cigars may literally begin hatching beetles.
Now onto wooden humidors: these are much more of a pain in the ass than tupperdors, in terms of setting it up. As far as a specific model, there are a ton and it depends on too many things to specify from the information you gave. Personally, I'd recommend a humidor that can hold more cigars than you plan on needing. My first humidor holds fifty cigars. I now have another 25 count (although, that was free and I didn't need it until I figured "fuck it, might as well fill it"), a 100 count, and two tupperdors. So as far as picking one out, I'd recommend again going bigger than you think you need, make sure it is at least lined with spanish cedar, and just check reviews to see how it seals. Every humidor will have bad reviews because a lot of people don't know how to season them, so look for reviews from people who seem to know what they're doing. And I'd personally stay away from anything with a glass top, it's just another place it can lose a seal.
Speaking of seasoning, you have to season a wooden humidor, which means to sort of saturate the wood to the correct humidity level. If you don't, the wood will eat up the humidity being released by your humidifying thingamajig instead of it being all for your sticks. There's a couple ways to do this: you can get distilled water (or a premade solution of distilled water and propylene glycol, it really doesn't matter) and wipe the wood down with it, with a barely damp cloth or sponge. If you get the wood too wet, it will warp and the humidor won't seal. Then leave a bowl or shot glass filled with the distilled water in the humidor and let it sit a few days. Note that the water being distilled is not optional, do not use any other water, no tap, no spring water. Only distilled water. You want nothing in the humidor except spanish cedar, cigars, and moisture.
The easier way to season a humidor is to buy boveda seasoning packets. They regulate the environment in the humidor to 84%. Buy the same amount you'd need if they were regular bovedas, one per 25 cigar capacity. Put them in the humidor, close the humidor, come back 14 days later and take the packets out. Replace them with (I'd recommend) 69% packets. Put cigars in over the course of a few days (you don't want to add them all at once, it will swing RH levels).
I'd recommend this for a tupperdor, in the largest size:
https://www.amazon.com/gp/product/B00284AG5U/ref=oh_aui_detailpage_o04_s00?ie=UTF8&psc=1
I have this humidor, I like it:
http://www.cheaphumidors.com/the-othello-checkerboard-pattern-cigar-humidor.html
I also have this smaller humidor which I'm still seasoning, but it seems to seal well enough:
https://www.amazon.com/gp/product/B072NZK9K4/ref=oh_aui_detailpage_o05_s00?ie=UTF8&psc=1
Seasoning packets:
https://www.amazon.com/Boveda-Humidity-Seasoning-Humidifier-Dehumidifier/dp/B004NXXBLA/ref=sr_1_10?s=hpc&ie=UTF8&qid=1502648759&sr=1-10-spons&keywords=boveda+seasoning&psc=1
Packets to regulate RH (pick whatever RH you'd prefer, I like 69 for wood and 65 for tupperdor):
https://www.amazon.com/Boveda-2-Way-Humidity-Control-Large/dp/B004LHSOBK/ref=sr_1_1_s_it?s=hpc&ie=UTF8&qid=1502648826&sr=1-1&keywords=boveda+69
Distilled water/propylene glycol if you want to go that route:
https://www.amazon.com/gp/product/B0040OEB6G/ref=oh_aui_detailpage_o02_s02?ie=UTF8&psc=1
Hygrometer (I like round ones because a lot of humidors will have a cutout for the shitty analog hygro they all come with and the round ones will fit there):
https://www.amazon.com/gp/product/B004167OY4/ref=oh_aui_detailpage_o02_s01?ie=UTF8&psc=1
Someone let me know if I missed anything.
Edit: I didn't mention beads, the "soak this weird thing in distilled water" humidifier or kitty litter because I really don't think there's a good reason to steer someone towards them, but I really haven't ever used any of it so if someone wants to add something about those, please do.
Lifting weekdays: alarm at 5, caffeine pill, whizz, back to bed until 5:30 alarm (Philips light alarm clock gradually lights up from like 5 to 5:30, at 5:28 "Teenage Dirtbag" plays from my computer requiring a password to stop.)
Gym clothes already laid out on top of work shoes. Put thems on. Grab studiously packed bag (containing running shoes, lifting shoes, work clothes, lifting belt, watch, cash, ). Walk 5 minutes to gym eating a 'nanner. Change into running shoes. Foam roll, static stretch, dynamic stretch, change into lifting shoes and grab belt, Weaklifts. Finish and change back into work shoes. Stop at a deli and get all the breakfast that fits into a foil container (that's like a pound of food: mostly eggs, some taters, two sausage patties, a few strips of bacon, all the Sriracha) for $4.50. Subway to work. Shower at work (we have a shower and locker room) and change into work clothes. At my desk by about 9:15.
Sir please sit down and let go of my hand, I'm here to help. That's a Thermapen by Thermoworks, it's one of the world's fastest and most reliable digital thermometers, but it comes at a price. - a cheaper option is the Thermopop, and an even cheaper option is the Lavatools Javelin - I haven't tried it myself, but the reviews on Amazon are stellar.
Cholesterol you eat has very, very, very little bearing on your blood serum levels. Bad-cholesterol levels are tied to genetics and inflammation. Good news! Eat all the eggs you want. Bad news! Stress contributes to inflammation.
How much longer are you going to be in this situation? Would it be worth it to pick up a cheapish chef's knife and a dutch oven? Because my-oh-my what you can do with a dutch oven on a stovetop is amazing and I am just full of recipes.
Also, these caffiene stir sticks have been getting popular at my local college.
I can't do much to help you, but if you want some recipes I can help out a bit with the stovetop cooking. (In the interest of transparency, some of these recipes are from my own blog.) As far as the smell goes . . . fuck it, the crab hates you anyway so just make like a duck and let her roll off your back.
Seafood Stew - I say dutch oven for this, but you can totally use a regular pot.
Cheeseburger Tacos
Carnitas Tacos
Chicken Paprikash
If you've got a broiler in the oven that works Eggs in Prugatory is a favorite of mine.
If you're feeling up to making dumplings, I have a recipe for pierogies that is pure comfort food.
And I could go on about eggs the way that Forest Gump's buddy did about shrimp.
spend the other $49 on weed
There are lots of other things I use daily:
etc.
But the point I guess I'm making is that you can get lots of good, cheap stuff to start with.
https://www.amazon.com/dp/B01GH5KQLO/ref=cm_sw_r_cp_api_MHZUzb7630GX4
Philips Wake-up Light with Sunrise Simulation alarm clock, White HF3500/60 https://www.amazon.com/dp/B00F0W1RIW/ref=cm_sw_r_cp_api_CGWIAbPJ400JF
This is the one I have, searching "light alarm clock" on amazon will give you cheaper options that probably work just as well.
I like to go to work early because I get out early and can get to the gym, shop for groceries before the crowds. I found the difference between waking for work and on the weekends only varied by an hour. Yet i was tired and wanted to snooze for work. On weekends I woke naturally and was never tired. I realized that I was waking up naturally to the sunlight.
So i bought this alarm clock that simulates natural light and since I've gotten it no more waking for work tired, no snoozing. Coffee not necessary to stay awake on the job.
https://www.amazon.com/gp/product/B00F0W1RIW/ref=oh_aui_detailpage_o06_s00?ie=UTF8&psc=1
i’m currently dealing with this as well! i’ve received some advice through this subreddit that’s helped a bit that i’ll list below but def keeping an eye on this thread just in case there’s anything else that helps!
so what you’re dealing with is probably keratosis pilaris (same as i). at first i was going to buy first aid beauty’s ultra repair cream to smooth my skin, but then someone mentioned gold bond’s ultimate rough & bumpy skin cream and it’s been working wonders. FAB’s product is $32 vs gold bond’s $10 product and i have no complaints so far.
what i do is use a dry brush 2-3x a week before i shower to exfoliate my skin then in the shower i’ll also use a cloth with my body wash that helps with exfoliating even more. once out i apply the gold bond cream on my trouble areas and let dry.
hope this helps out!
in-shower exfoliating cloth suggestion: here
Or, a trio of Salux cloths for under $12 that can be machine washed and are so obscenely big you can cut them in half and they're totally still usable. Fantastic for both home use and travel. I've had mine for almost 4 years.
https://www.amazon.com/Salux-Nylon-Japanese-Beauty-Yellow/dp/B007IAE5WY
This one is pretty sweet, but I recommend you get yourself a virtual skillet. Coming off an addiction as serious as yours you can't just jump straight into cookware like that man.
Excuse me from copying my reply from a previous BIFL, but I still feel strongly:
MISTER BENTO MISTER BENTO MISTER BENTO
It's a bit complicated--follow me here. It's an insulated tube just like a thermos, with four round containers. I'll take you through them, from the bottom up.
Soup bowl: Actually a pretty nice soup bowl. It's got a lid that screws on, as well as a pressure-valve on the lid to prevent a vacuum forming as it cools (it's going to cool a little, no matter the insulation... thermodynamics still exists).
Rice bowl: It's a Japanese product, so there's a big compartment for rice. I never have a problem fitting a sandwich in here, if that's what you're in the mood for. You... you get used to sandwich-pucks eventually. Important thing here is that the lid on this bowl is thick and insulated, to help keep whatever's in here and the soup warm.
Veggie bowl: As I understand the typical Japanese meal (read: none), this is a bowl that's supposed to house some vegetables. You may have noticed that the bowl below this has a thick insulating layer. The way it's designed, this compartment and the one above it aren't insulated. It's actually pretty cool, when you think about it. I would usually use this for some roughage... dry cereal or something.
Tiny top bowl: This is it. Another non-insulated bowl. I'd usually put a cookie or two in here.
The whole thing is leak-proof, and it really does a fantastic job. Once you think about the two-hot-two-plain thing, you can put some fun meals together. The insulation works well--soup was always warm come lunchtime. And it's surprisingly big, too. You won't finish eating and want for any more. I didn't finish a lot of times, or I'd use one of the compartments just to hold a mid-day snack.
I know you might balk at the price, but if you think you might like something like I'm describing, I really can't endorse the product enough.
Baker's Edge Nonstick Edge Brownie Pan https://www.amazon.com/dp/B000MMK448/ref=cm_sw_r_cp_api_i_F2oWCbXERXVBJ
The enamel Lodge pots have an average rating of 4.5 with over 1300 reviews on Amazon, and they are less than $50.
The Le Creuset is probably better, but that's a ridiculous amount of money to spend on a pot imo. Even if you replaced the Lodge pot every 5 years, it would take you almost 30 years and 6 pots before you sunk enough money in them to equal one 1 Le Creuset pot.
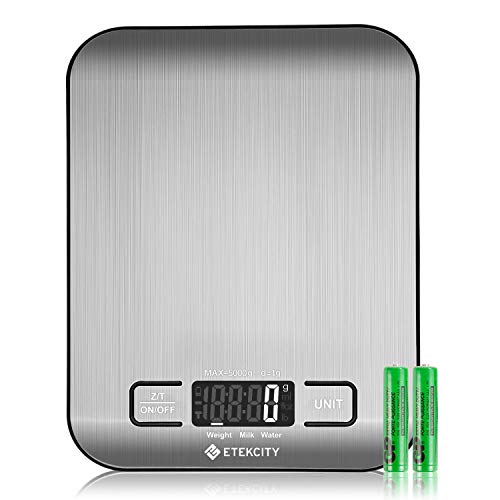
Pretty sure it's this one! I have it too, it's great for the price.
Etekcity Food Digital Kitchen... https://www.amazon.com/dp/B0113UZJE2?ref=ppx_pop_mob_ap_share
Have you considered a seasoned cast iron skillet?
The Lodge ones are cheap and will last forever if you wash them properly after use.
https://www.amazon.co.jp/dp/B00006JSUA/
I got one of these 7 years ago after a few years of wasting money on the usual variety of non-stick pans and its still going strong.
You need to take a little care in how you clean it after use, but its great to cook with.
Cast iron pans are AMAZING for cooking almost anything in. Try to avoid cooking highly acidic foods in them, because that can break down the seasoning that builds up as you use the pan. In other words, use an enameled pot for dishes that have a lot of tomatoes. The best cast iron frying pan to get is the Lodge 12-inch skillet -- it's big and heavy, but not too big for your stovetop, and it provides a lot of room to fry in. They typically sell at Wal-Mart for between $16 and $19, depending on the Wal-mart you go to. It's very easy to find a used cast iron pan at yard sales, flea markets, Goodwill, etc; but based on experience I've seen those pans are usually the 10-inch size or smaller, and if you only have one cast iron pan then I'd suggest going for the 12-inch size. (TJ Maxx/Marshalls had a shipment of those Lodge cast iron pans earlier this year, with the 12-inch size going for $14.99; if you look in one of those stores you may still be able to find one.)
I'll admit to being biased in favor of cast iron, so based on my advice above for an enameled cooking pot, I'd likewise suggest a big, heavy, enamel-coated cast iron pot. The really expensive enameled pots like Le Creuset can run into the hundreds of dollars, and their owners swear it's worth the price; but for most folks, a less expensive brand of enameled iron pot will perform just as well for a fraction of the price. If you're near an Aldi's, with its own brand names for just about anything in the store, you can usually find a 5-quart enameled iron cooking pot for $20 to $30 in there. Wal-Mart sells a 6-quart enameled iron pot by Lodge for $50, which I think is a great price because Lodge is a very reliable and durable brand.
Generally speaking around here the Thermoworks Thermapen (and the other Thermoworks products) is considered the gold standard. And there is no reason why it shouldn't be. It is accurate and fast. But it is also somewhat pricey. Especially for people just getting into grilling.
Personally, especially for people just getting serious about grilling, I tend to recommend the LavaTools Javelin ( https://smile.amazon.com/Lavatools-PT12-Javelin-Thermometer-Chipotle/dp/B00GRFHXVQ/ ). The price is nice and low and the performance is fairly comparable to the Thermapen. (source: http://www.brewunited.com/index.php?blogid=150 ) Note that the tester ( u/sufferingcubsfan ) thought he was testing the PRO model when in fact he was just testing the standard.
While the testing wasn't exactly vigorous or scientific journal worthy, it was enough in my book to save myself the $75 and go with the Javelin. That was @ 1.5 years ago and I haven't looked back yet. I've also given it as a gift to friends that either grill or brew beer (or both) and haven't heard a complaint yet.
Nigga if you can't buy this $10 grinder off Amazon and have it sent to your house in 3 days you're doing something wrong
Chromium Crusher 2.5 Inch Zinc 4 Piece Tobacco Spice Herb Grinder - Gun Metal Color https://www.amazon.com/dp/B00700W0TW/ref=cm_sw_r_cp_apa_kFMQAbXCGN882
sharp stone. chromium crusher. space case. diamond grind. cali crusher. sweet stone
http://www.amazon.com/Chromium-Crusher-Piece-Tobacco-Grinder/dp/B00700W0TW/
both the chromium crusher and sharp stone are on amazon, with free shipping. the sharpstones are about ten bucks more
Shower normally with hot water; this will soften the hair. I generally shave only at the end of a shower as other products might clog my pores.
Exfoliate; this will remove dead skin and dirt, which will help keep it from clogging the razor, promote the release of any ingrown hairs, and further soften the hair.
Lather with a moisturizing shaving soap or if you run out of shaving specific products, hair conditioner works in a bind. Let lather sit for a minute or two; it will further soften the hair.
Starting from the base of your ankle, shave in short strokes (maybe 3-4 inches) upwards against the grain, rotating around your leg; longer strokes evidently can clog the razor faster.
Rinse the blade after every rotation; not rinsing will force you to take multiple passes, and that is something you want to avoid.
The backs of the legs takes practice. I contort myself so I can see for the most part. Calfs are easy to see, but hamstrings are not. If you cannot contort yourself, lift your knee to your shoulder so you can see your hamstrings and shave downwards against the grain from the knee to the butt.
Go slow. A woman's legs are one of her best assets; take care of them.
Do not neglect your toes, thighs, arm pits and knuckles. Arm hair is optional, but even ciswomen can have hairy arms and not give a shit.
Rinse with cold water; as cold as you can possibly endure. This will snap shut your pores and help mitigate bacterial invasions. It helps stops razor bumps, ingrown hairs and acne.
Pat dry with a clean towel; never rub dry because you will exacerbate any micro cuts and make them worse.
Moisturize wherever the blade touched you. Even pros get get micro cuts, so you might want to invest in a medicated moisturizer.
The reward for being diligent?
Rub your freshly shaved legs together; it feels like heaven. It's really quite addicting.
-----------
Edit: added stuff
Have you heard of Salux? That's what I use after having read about it on reddit somewhere. i bought mine from these guys specifically: https://www.amazon.com/gp/product/B007IAE5WY
People with eczema and all sorts of skin problems were saying it was a godsend, so I nabbed it. I'm not a big fan of Nylon in the least and it doesn't feel great like them soft poofy shits you can get at target, but my skin does look incredible. I'm not ashy ever, either, which is nuts cos i'm always ashy.
Now I'm imagining one of these in the shape of a swastika for themed deserts.
"One hot moist gooey blondie swastika, topped with a heaping scoop of our housemade "Bav-Aryan creme" ice cream and lightly sprinkled with a light almost ash like dusting of our "Holo-chocolate" that'll have you stand up and shout "Sieg Delicious!"
God... now I kind of want to go to Nazi TGIF.
Try one of these:
http://www.amazon.com/Bakers-Edge-Nonstick-Brownie-Pan/dp/B000MMK448/ref=sr_1_4?s=home-garden&ie=UTF8&qid=1345422894&sr=1-4&keywords=perfect+brownie+pan
http://www.amazon.com/Chicago-Metallic-Non-Stick-Solutions-Brownie/dp/B00457RHL4/ref=sr_1_2?s=home-garden&ie=UTF8&qid=1345422894&sr=1-2&keywords=perfect+brownie+pan
Also, Lodge makes enameled cast iron as well. It's good stuff too.
http://www.thehungrymouse.com/2011/06/06/dutch-oven-battle-lodge-vs-le-creuset/
> spiceindiaonline.com/crispy-chicken-65/
I'm inclined to mostly agree with /u/Amnizu. I dont think I've ever seen deep frying in a pot like that, even if it is heavy bottomed, the outside is not heavy so it will not retain the temperature of the oil as well as cast iron would. A $20 Cast Iron pan is usually my go to for frying. Even safer and probably better would be something like this. A Quart of Oil is actually quite a bit in that kind of pot. When using the Cast Iron get an 1-1.5 inches of oil up to temp then slowly add in each piece of chicken. The recipe you are using has water in the ingredients which is ok, as long as you don't have excess sauce on the chicken when you put it in. Water and frying are not friends. You might even want to reduce the amount of water just a little. To be safe keep some Baking Soda near by to put out any potential grease fires. I'm no pro so take what I say with a grain of salt. I usually use a cast iron pan and it comes out great, makes the house smell though. Hope this helps.
I have, maybe six, pans I use for 90%+ of my cooking:
Runners up - stuff I use enough that I'm glad I have them, but if I didn't wouldn't really notice:
Would you consider a Tupperdor?
Sistema 1870: $20
Boveda Packs: $17
Digital Hygrometer: HygroSet II - $14 or Caliber IV - $24
Spanish Cedar Trays: $13
Product Reviews, Winter Edition:
I get up at 5:30am everyday and this is the key. The way to make getting up easiest is go to bed early (obviously), im usually in bed by 10 at the very latest. Some people try to find a shortcut perse but an early bedtime is really the only option. Another thing I have found is do not snooze. If you get in the habit of snoozing it just snowballs to more snoozing and you'll be even more tired. 10 minutes of you laying there isnt going to make it any easier, and if you do fall asleep getting up will be even harder the second time.
I do have a little more trouble getting up in the winter mainly because I wake up in the dark so I bought a sun light alarm clock which brightens up the room gradually before the alarm.
Based on the look of it in the Pizza video it looks like this one:
https://smile.amazon.com/Etekcity-Multifunction-Stainless-Batteries-Included/dp/B0113UZJE2/ref=sr_1_4?ie=UTF8&qid=1519225794&sr=8-4&keywords=kitchen+scale
When I'm overwhelmed I find it best to break up a big task and do small things one at a time. These are a lot of valid questions, but some of them you might not need to worry about just yet. Maybe some steps like this will help:
You do not need to cut out things like fast food, chocolate, homemade meals, etc., cold turkey unless you really want to. I haven't, though. I still eat sushi, pizza, sub sandwiches, etc., just not nearly as often and most of the time I make it fit into my 1500 calorie/day budget. You just need to make sure you're logging everything accurately (most calorie apps have a recipe function that helps you with homemade food). And then most of the time you make it so that those foods do not put you over your calorie allotment for the day by making your other meals smaller, or something like that.
Cheat days help some, hinder others. The thing you need to remember is that this is a process, there is sometimes experimentation. You can try cheat days or meals; if you find they're not working for you for some reason, don't have them as often or at all. There is not a deadline, so if something sets you back a little that's okay, you can just get back on track and adjust.
Take a deep breath! You can do this! Post in the daily Q&A threads if you have any questions! And don't forget to celebrate your victories in the SV/NSV daily thread. We are here to help!
And for those that think that would be too hard, get a whirley popper. Crazy easy and almost as quick as mircowave popcorn (at least on my gas range).
Everyone should own a cast iron skillet.
They are like $15 on Amazon
C'mon OP...
You wouldn't download a Lodge Seasoned Cast Iron Skillet - 12 Inch Classic Cast Iron Frying Pan with Assist Handle (Made in USA).
This is a pretty good skillet and it's well under budget. http://www.amazon.com/Lodge-L10SK3-Pre-Seasoned-Skillet-12-Inch/dp/B00006JSUB
Solid job! Definitely better than my first steak-cooking experience. A few recommendations, echoing the other ones here:
Again, nice work - happy cooking!
EDIT: Took a second look and I noticed it was a nonstick. I can't recommend highly enough investing the $30 in a [Lodge cast iron skillet] (http://www.amazon.com/Lodge-L10SK3-Pre-Seasoned-Skillet-12-Inch/dp/B00006JSUB). It'll last you a lifetime and cook considerably better than anything else!
Bialetti - stove top espresso maker - you'll never need to buy an expensive coffee maker ever again.
Leuchterm 1917 journal for my bullet journal
6in Ruler to go with my journal - fits in the back pocket perfectly
Huhuhero Color Pen Set also to go with my journal -- has every color you'll need and has a really nice thickness. I use a finer tipped Staedtler for writing but these pens are perfect for titles and decorating and under $6 can't be beat
Customizable dog tag
Ahava Dead Sea Bath Salts - for a luxurious bath that won't dry you out
Ramekins for all of your baking needs. It's also fantastic to use for cooking (holding onto spices, separating eggs, etc.) and for serving dips.
Dog Toy Basket - adorable, holds a ton of toys, and looks really chic in my apartment.
Salt and Pepper Mill Grinders - pretty and functional
Bath Overflow Cover - get your water higher for a more satisfying bath
Bath Spa Pillow
Grippy Stand - the BEST stand for any size tablet.. I have two of them they're so good
Hotel Spa Cotton Towel 4 Pack - smallish bath towel with so many uses. I leave then by the front door to wipe the pup's paws.
Popin Cookin 9 Pack - the MOST FUN you'll ever have 9 times over
Tons and tons and tons of books - look under the "available for less money" links for "used" paperback versions that will make them super affordable and they usually come nearly brand new!
http://www.amazon.com/Bakers-Edge-Nonstick-Brownie-Pan/dp/B000MMK448
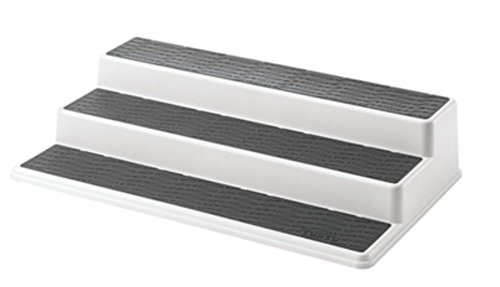
Sistema Klip It. Price is high on it right now - usually it's $12.99.
I use my Pizzazz.
Lodge pans are cheap.
https://www.amazon.com/Lodge-Cast-Skillet-Pre-Seasoned-10-25-inch/dp/B00006JSUA/ref=sr_1_3?s=kitchen&ie=UTF8&qid=1503956693&sr=1-3&keywords=lodge+cast+iron
I got mine for $18 at a Target. Not sure where you are but those prices are way too much.
My korean body scrub mitt.
It's essentially just a super powered loofah, but I put some body wash on it and scrub myself like I can purge my sins about once a week. Keeps my skin super soft. It's really helped for dry itchy skin in the winter time.
One can find these at your local Jjimjilbang, "oriental" mart, or on amazon.
Are these the towels you're taking about?
Actually instead you should try these exfoliating Italy Towels that they use for Korean Scrubs, I just got them on amazon.ca https://www.amazon.com/pcs-Asian-Exfoliating-Bath-Washcloth/dp/B004C8DR1U and I love them, I just use them in the shower before your body wash/soaps/ shaving, I usually use them once a week after after my hair step, so that my skin gets softer from the water. They are reusable too.
Tony Moly also sells a version of this.
Be sure to soak your feet before using. Like, until they are wrinkly. It'll help your skin to actually soak up the solution.
Also, the basis of this is really just exfoliating. You can get similar results without having to do the full peel by simply manually exfoliating your feet. It sounds gross, but I find it works without having to go through the whole process of molting feet for a week.
While in the bath - once your feet are nice and soaked and the skin is softened, you can usually just use a pumice stone, an abrasive cloth (like Italy clothes from South Korea or exfoliating mitts that are made of fine viscose (I prefer these for full body rub downs as well as feet - easier to use), or just your finger nails. You can feel the dead skin coming off - finger nails are especially useful around the toes.
Mr. Bento weighs in at 1,230ml.
Ms. Bento is shy of your goal at 828ml.
I bought this lunch container for my daughter when she was in kindergarten and it's still going strong, and she loves it. It has two temperature-controlled containers and two "regular" containers, so I can give her hot and not-hot foods at the same time (e.g., soup and a sandwich). I can make her a hot lunch at 7:45am and by lunchtime it's still hot. As a bonus, the lid doubles as a bowl so I can give her foods to mix on the spot at lunch, which she adores.
My daughter is now 10 and in fifth grade and I've made virtually all of her school and preschool meals. I learned three distinct lessons in those years:
The first point is easy enough to understand so I won't dwell on that.
The second point ties into your frustration with your sandwiches and wraps. Those sorts of foods aren't fun for kids. Know what is fun? Finger foods, foods that look gross, and foods that they can assemble themselves. Turkey and cheese sandwich? Boring. Turkey, cheese, and bread, cut up into cubes, maybe with a little cup of mayo on the side for dipping? Fun. Add a drop of green food coloring to the mayo to make it "gross" and even more fun. Pizza bagel: Half a plain bagel, a small cup of pasta sauce, a small cup of shredded cheese, and a small cup of pepperoni. Let your kid assemble his own pizza before eating it. Fun. Chicken noodle soup is boring; chicken alphabet soup is fun. You can give your kid make-it-yourself tacos in his lunchbox with a couple of small flour tortilla wraps (they sell 6" wraps at my supermarket) and little containers of lettuce, cheese, and cooked ground beef. So much fun.
Preparation and packaging is also very important, especially when you're dealing with breaded foods (chicken nuggets or fish sticks, for example). Through trial and error I discovered that I can fold half a dozen chicken nuggets into a paper towel, put it in the "hot" part of my daughter's lunch box, and she'll still have reasonably crisp nuggets when it's lunch time. PB&J is usually a soggy mess for kids; the jelly soaks into the bread which in turn gets mushy and gets squished in the lunch bag. This can be fixed by spreading PB on BOTH pieces of bread, then covering and refrigerating overnight. In the morning, apply jelly, put the sandwich together, and put it into a sandwich container. The PB acts as a moisture barrier to the jelly, the refrgieration keeps the PB's oils from soaking through the bread, and the sandwich container keeps it from getting squished. Perfect PB&J at school, every time. If you aren't sure how something will hold up, try it yourself. Make yourself the lunch you'd give to your kid, prepping it at the same time you would normally prep lunch for him, storing it as you would for your kid, and then take it out and eat it when it's your kid's lunchtime and see how it holds up. Soggy bread? Crushed chips? Unappetizing appearance? Keep those things in mind because if YOU see it then your kid is going to see it too.
I'll also throw out a bonus tip: Take extra condiment packets any time you eat out. Individual serving packets of ketchup, mayo, honey, jelly, etc go a LONG way to making your kid's meal better.
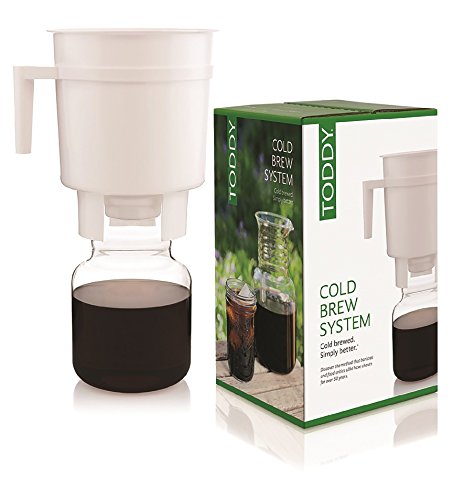
I use the Toddy system.
http://www.amazon.com/Toddy-T2N-Cold-Brew-System/dp/B0006H0JVW/ref=sr_1_1?ie=UTF8&qid=1458661773&sr=8-1&keywords=toddy
I believe he said in his most recent subscriber stream it was this:
Toddy Cold Brew System
Highly recommend the Toddy cold brew. Yeah, it's way more expensive than the Mason jar, but it holds a lot more and is also very easy to use.
I'm a huge Kenji fan myself. I've cooked nearly half of the Food Lab book, and dozens of his recipes from the website, great stuff!
My thoughts on gifts
Lavatools PT12 Javelin
A Nice carbon steel wok
A good Dutch Oven
A torch for searing, or Creme Brulee
An awesome knife
Another awesome, but cheaper and well rounded knife
The list could go on, and on, and on....just some thoughts though.
Here are some on Amazon I like I suggest hand washing but haven’t run into issues microwaving them. And they actually keep the foods divided. I don’t like my foods mixing so that’s a big plus for me
I use cast iron daily, let me address your problems here:
>First issue- stuff sticks to it all the time. I used to be able to cook eggs without even touching a spatula, but I can't shake them loose anymore, and of course the yolks break when I try. If I nudge them with a spatula, they come off clean, but then there's just one more thing to wash in the morning.
Are you putting down any butter or oil before you fry your egg? If your eggs are sticking, you're probably cooking them on too high of a heat. Since your pans are brand new, I'd hold off on frying up eggs just yet and just cook tons of bacon and other greasy foods in them to help build up the seasoning or put the pan through another seasoning process.
>Oh wait, you're not supposed to wash cast iron, are you? Except you can, except you shouldn't, except that's a myth, except it etc. etc. etc. No one has a straight answer and it's annoying.
The "no soap" myth hearkens back to the days when most dish soaps contained lye (this is what strips the seasoning). That isn't the case with most soaps anymore. You can use soap, but I wouldn't recommend it on a pan that isn't sufficiently seasoned. If you can get away without using soap when you clean the pan, do that instead.
>Okay fine, I think, so the bottom of the pan is rough which apparently isn't how it's supposed to be, and I've heard people like to grind the surface down to make it smooth. Let's try it. I got some sandpaper and sanded it down, not baby-ass smooth but still a major improvement. Time to re-season it.
The smoothness of the pan isn't super important in the "non stick" properties of the pan. I've been cooking with modern lodge pans for while with the rougher texture and haven't had an issue.
>I have tried several times now, both on the grill and in the oven, to re-season this thing and it just goes to shit. I tried more heat, less heat, different amounts of oil... but it's frustrating to have to wait several hours only to find out that it didn't work, again.
Follow this guys guide instead. I have no idea how you were seasoning them before, but this should yield some excellent results as I use the same process.
>"You have to really use it for a few years to get it really non-stick and working well."
Whoever said this is very wrong. As long as the seasoning build up is good, you use plenty of oil and not cooking on too high of a heat you shouldn't have things sticking.
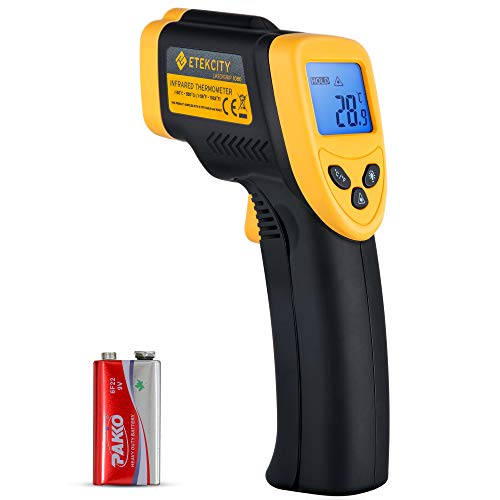
Edit: I like to use a infrared thermometer to make sure I'm getting my pans up to the right temperture before I start cooking.
I'm sorry you've had such a bad time with cast iron. I for one tossed out all my teflon and non-stick pans due to the fact the coating would come off due to how much I cook.
I won't ever go back to teflon pans.
These thermometers read accuratley in about 1 second and also leave a very small, non leaking hole.
If you want the best tasting popcorn, get yourself a Whirly Pop
Just pour in a little bit of oil, some popcorn, and a good amount of salt, and you will have the best tasting popcorn.
A few bovida packs to control the humidity:
https://www.amazon.com/dp/B077KVC1VY/ref=cm_sw_r_cp_api_i_3R24CbMC6041A
And any airtight tupperware container. Even one from the kitchen will do the trick. I like these:
https://www.amazon.com/dp/B00284AG5U/ref=cm_sw_r_cp_api_tFGGBbEKPFVT7
For long term storage you may want a hygrometer to monitor the humidity:
https://www.amazon.com/dp/B00JXOKQVW/ref=cm_sw_r_cp_api_lIGGBbM73ZESW
And if you want to get fancy and organize with cedar trays, two of these work perfectly stacked in the container above.
https://www.amazon.com/dp/B0733TYGWX/ref=cm_sw_r_cp_api_SffLBbPJZC8XN
Then store it in a cool part of your house.
Hey! I'll offer up some noob advice since I just started a couple months ago myself and had these same questions. Firstly, welcome to the sub and to the cigar world in general. Hopefully you'll really enjoy your first few smokes and become a BOTL (brother of the leaf)! So here's the good news - a "starter kit" like you are asking about is actually so good that it can be a "lifetime kit." Many people here who have been in to cigars for many years still use this system. A humidor is very nice, but the cheaper ones aren't that great, and even the more expensive ones are truly not necessary. You can keep cigars in just as good condition in the setup I'm about to tell you as any that are kept in expensive humidors, generally. So what you want is nicknamed a tupperdor. Just like it sounds, it's tupperware made to be a humidor. The key is that it has to be airtight. So your basic glad snap lid things aren't usually good enough, but the ones that are airtight are still cheap, they just have snap tight latches and usually a rubber seal around the lip. This one is what I am currently using. Actually many people here use it as well. If you scroll down on that page you will see the "other people bought" suggestions are for a Spanish cedar cigar tray and a digital hygrometer, so you can see many people buy these for this purpose. [This is another option as well.] (https://www.amazon.com/Prestige-Group-AJ25-Acrylic-Humidifier/dp/B00J21X9IS/ref=sr_1_2?ie=UTF8&qid=1501388463&sr=8-2&keywords=acrylic+cigar) This one has the cedar lining in it already but holds fewer cigars and displays differently,
your call. Then you will need a humidity pack like this one from Boveda. They are cheap and this size works for up to 25 cigars I think. Anyway, you simply put it inside the tupperdor with your cigars and close the lid, that's it! The Boveda packs will maintain the humidity int he box at 69%. There are other levels you can get like 72%, and that's more of a personal preference I think. I found that 69% was very common so I went with that and it's been working well for me so far. Also, you don't actually NEED the cedar tray, but it does have some benefits for long term storage of cigars. I actually grabbed some thin Spanish cedar sheets out of a used cigar box and laid them on the bottom of my box for now. Works fine. As for the hygrometer, it's also not required for your needs. I still don't have one. The Boveda packs do their job very reliably. So there you have it, an inexpensive and very reliable way to store cigars for the short term while you test out the cigar world, and it will work long term if you like it and decide to keep smoking. Certainly others with more experience than me will chime in here if I made a mistake or three, this sub community is pretty great. Anyway, enjoy and if you have more questions fire away!
I have this same issue and I've improved it greatly over the last month! I was actually taking photos intending to make a post about it but this is perfect.
http://imgur.com/FYACo1o
I know the lighting in these photos is different, but the before photo on the left looked as bad or worse than it does in the photo. The after photo is in ultra bright natural light, and that was after two weeks of my new routine every day, an absolutely enormous improvement for me! I'm looking into additional options now, but so so happy with this start as it eliminated like 70% of my issue.
Routine - Every time I take a shower (basically every day)
Allow to dry, and voila! I hope this works for some folks here.
They are called Italy Towel. I found them with the other body care items. It looked like this when I purchased it about a year or so ago
https://www.amazon.com/dp/B004C8DR1U/ref=cm_sw_r_sms_awdb_t1_Bo.MBbREA8FPF
I have this guy. This is the cheapest variable-temp kettle I've ever seen.
The interface is a little weird, and it's definitely not as easy to use as the Cuisinart PerfecTemp, but it sets accurately to within 5 degrees and holds 1.7 liters. It's served me well for probably around a year now. For ~$40, it can't be beat. That's barely more than most non-variable kettles.
I have this one. It's been great so far, though I just got it about a month ago. My only complaint is that the cord is super short, so if you aren't using it right on your kitchen counter, it can be kind of hard to find a good place to plug it in.
Coffee and cigs.
FYI, this is the best coffee maker I've ever used.
Replace all meat with tofu/vegetarian similars (ie Beyond Meat, Gardein, Morning Star Farms, etc) -- I sometimes imagine Red Kibble being similar to Vegan/Vegie Crumbles (I think Morning Star Farms or Gardein makes it) mixed with some curry powder, paprika, cayenne pepper for the spiciness and color....maybe in a tikki masala sauce....
If you have deep pockets (Mr Mao style): lab grown/cultured meat
oh yes....Mushrooms of all types (visit an asian grocery store for a wider selection) cooked in different ways (sauted, soups, seared, fried, etc)
For Alex's lasagna, just swap out the meat for non meat mentioned above and swap out the cheese for soy cheese or artificial cheese (I guess Velveta like products would also be ok)...add some sauteed mushrooms for good measure...the noodles and tomatoe paste/sauce would probably be the same?
....and of course "tubes of goo"... You could make it fun (not really) - taking labels off/tape over all tubes and let folks figure out what they are sucking down (squeeze cheese, frosting, applesauce, yogurt, etc...if feeling passive aggressive...throw in mayonnaise, ketchup, mustard, hot sauce into the mix...)
​
//update
one more thing about Alex's lasagna - if you wanted to make it true to the episode, I remember he baked/served it in one of those all edge brownie pans: https://www.amazon.com/Bakers-Edge-Nonstick-Brownie-Pan/dp/B000MMK448
Alex's Lasagna Image reference: https://www.syfy.com/sites/syfy/files/styles/1200x680/public/wire/legacy/beauty_shot_lasagna_0.jpg
​
For the real cheese - I think I recall Miller saying they confiscated "Wheels of Cheese" (think it was cheddar from Vermont...or maybe Wisconsin?)that was bound for Titan- that could be kinda expensive....maybe stop by costco and get a good sized wedge or small wheel/ball and make labels (to stick to the outside plastic) saying things like "UN Customs clear", "Inventory ID: Earth-Titan23of67", "Ceres Customs Cleared", "Evidence - Star Helix - DO NOT REMOVE", generate barcodes and folks can decode with barcode apps, etc.....
https://www.amazon.com/Bakers-Edge-Nonstick-Brownie-Pan/dp/B000MMK448
I'll throw my vote in for a sharpening stone. If he doesn't already have a nice sharpening set, maybe consider getting him something like a nice diamond sharpening stone; I've seen them for $50 or less.
Tools are always nice. Here are some suggestions to think about:
~ microplane grater
~ Japanese mandolines can be fun to have around.
~ Fish spatulas can be a handy tool.
~ Does he have a good quality peeler? Everyone has a "normal" peeler, but I like to have a good quality horizontal peeler, like one of these, to use sometimes.
~ Does he do a lot of baking? If so, maybe some silicone baking mats for his baking sheets, or maybe some parchment paper.
~ Does he like to use fresh citrus juice very much? Does he have a citrus reamer?
~ Does he like to use fresh garlic? Maybe a garlic press?
~ Silicone spatulas?
~ Does he have a pepper grinder for fresh ground pepper?
~ Does he have a set of mise en place bowls or something to use to keep his stuff organized when he's working?
~ Does he have a scale? You can find plenty of options for home-use digital scales that can weigh up to 11 or 12 pounds, and use either pounds, or grams (if he's doing anything metric.)
~ Something like a good quality cast iron pan can be a lifetime investment, because if they're well cared for, he'll be able to pass it on to his grandkids someday.
~ A dutch oven will always be useful to serious home cooks. The enameled cast iron type are very popular, but they come in many different sizes and shapes, so keep that in mind when picking one out.
~ Knives are always nice. Paring knife, utility knife, serrated slicer, etc.
Those are just a few suggestions that popped into mind. Good luck, I hope you find something nice for him.
Hey, I love popcorn, it's awesome. Maybe you love it too? Got a stove? If you do, get yoself one of these - http://www.amazon.com/Wabash-Valley-Farms-25008-Whirley-Pop/dp/B00004SU35
If you put it on medium high (electric stove), put in the oil and add three kernels, wait for them to pop then dump the rest of the kernels in, you will have popcorn that pops nearly all of the kernels. The Orville Redenbacher kernels pop the best IMO (I was buying bulk from sprouts, but they weren't popping as well). Also, get this - http://www.amazon.com/Gold-Medal-Prod-Flavacol-Seasoning/dp/B004W8LT10. You now can make movie theater style popcorn in less than five minutes.
Enjoy!
Do you have a photo of the second boa? BCI and BCC aren't THAT different in size, though BCC average a foot or so larger.
I use thermometers like this, and place the probe on the substrate in the center of the hot spot. I have a temp gun like this to make sure the temps in other areas are within acceptable ranges.
You ALWAYS want to know the temperature of your hot spot, since the heating element can get hot enough to cook your snake. I just noticed this, but you need to get that lamp out of there - she can reach it, and she will burn herself on it. Boas LOVE climbing and they are dumb at registering pain.
Take out the lamp and replace it with an under tank heater or heat tape regulated by a thermostat (unregulated UTHs are dangerous). You can get a decent and affordable thermostat here.
I could never get up early very well until about three years ago, when my dad had to retire for health reasons and gave me this alarm clock he used.
It's one of those ones that glows brighter and brighter leading up to the alarm going off. In the last three years, the alarm itself has woken me up maaaybe five times. The light is always what woke me up, which is a nice gentle way of getting up.
I know it sounds like essential-oils voodoo bullshit, but I swear this clock rewired my brain into a morning person. I essentially only use the clock as a backup now, I set it for 6:30 a.m. but my brain is up about 6 a.m. anyway.
I'd highly recommend getting an instant read thermometer. You will never overcook a steak again. Here is the one I use. Pull your steaks off at about 130-135 degrees for medium rare.
Also, let them rest for 5-10 minutes before you cut into them. Also, salt them generously about an hour before you cook and pat off any excess moisture on the surface before you throw them on the grill. They will be a lot juicier, and you'll get a better sear on the outside this way.
The Thermapen is awesome, for sure, but I'm not entirely convinced most cooks need it when something like this can give similar results at maybe a second or two slower and fractions of degrees less accuracy for 1/3 or 1/4 of the price.
I'm surprised no one has mentioned Hamilton Beach 1.7 L. I've had it for a just about a year and a half, it has a standard 1 year warranty if any malfunction happens (no questions asked), its a bigger kettle (1.7 L is on the larger but not crazy huge end of electric kettles). I did quite a but of research and because I like mine programmable and also not crazy expensive (I didn't exactly think controlled temperature water was worth 200$ on some I saw while researching mine). I bought mine for either 40$ or 45$ with Amazon Prime (so free two day shipping, and it stays at this price, not from a third party), and it does have a really nice, although h not necessary for myself, guide on the side of the kettle telling you in small subtle print what temperature for what tea (or coffee) drink is needed. It only does preprogrammed temperatures (the temperatures for white, black, green, Oolong and coffee) and it does tell you the exact temperature at every moment, as it's boiling or sitting at room temperature. So there is a bit of control manually if absolutely necessary. But I find complete temperature control is unnecessary when it comes to tea brewing. The preprogrammed temperatures do tea well.
Edit: here's a link to Amazon where it's sold by Hamilton Beach at a 10$ discount for 3
$39. (Just a note, I never got a feeling that it was cheap even though it's definitely in the lower end. Hamilton Beach makes great small kitchen appliances and this steel kettle has been amazing. Plus their customer service has always been really easy going). http://www.amazon.com/gp/aw/d/B0083I7THI/ref=mp_s_a_1_7?qid=1459456433&sr=8-7&pi=AC_SX236_SY340_QL65&keywords=hamilton+beach+electric+kettle&dpPl=1&dpID=4186x8-tdwL&ref=plSrch
TL;DR warning
Are you willing to invest in some tools? Do you like Five Guys? (skinny burgers) The fastest burger procedure that I know of is Kenji's Ultra-Smash technique, which makes a pair of thin patties in no time. Takes about a minute per burger (two patties with cheese). Details here:
http://www.seriouseats.com/2014/03/the-food-lab-maximize-flavor-by-ultra-smashin.html
You can also do a regular smash burger, which is thicker (McDonalds-thin), but takes longer (~1.5 minutes per side, about 3 minutes total per burger):
http://aht.seriouseats.com/archives/2012/09/the-burger-lab-smashed-burgers-vs-smashing-burgers.html
The advantage of the ultra-smash is that it's super quick & you can toss a piece of cheese to melt between two patties, so you can pump out a ton of burgers in no time. You will need a few tools, namely:
It's not rocket science, but getting a proper setup will let you have a workflow that makes cooking for a crowd a breeze. I have a big extended family, so I cook in bulk a lot, but I also use this for just my immediate family because it's so fast to get setup. There is an up-front investment required, but everything you'll buy will pretty much last forever, so it's worth it if you like to eat burgers!
So the first two things you need are a metal cooking surface & a heat source that can pump out a lot of heat. I don't recommend a regular grill because they simply don't get hot enough; you need 600 to 700F to do this. You can either do a compact setup (a 2-burger surface with a single burner) or invest in a quality flat-top setup (more expensive, but lets you do more burgers at once). The ideal surface to do this on is a Baking Steel, which is very expensive. There are knockoffs for cheaper, but I like BS because they have a Griddle version with grooves to catch the grease:
http://www.bakingsteel.com/
You can also do it with cast iron. Lodge has a griddle for $25:
http://www.amazon.com/Lodge-LDP3-Double-Reversible-Griddle/dp/B002CMLTXG
If I'm just doing a single regular smash burger at a time, I use a 12" cast-iron pan. $28:
http://www.amazon.com/Lodge-Cast-Iron-Skillet-L10SK3ASHH41B-12-Inch/dp/B00G2XGC88/
If you do get into cast-iron, read up on this seasoning procedure (i.e. the way to keep it smooth & slippery without Teflon). It's a bit of a pain, but it's worth learning because anything you buy in cast-iron can be handed down to your kids because it lasts forever:
http://sherylcanter.com/wordpress/2010/01/a-science-based-technique-for-seasoning-cast-iron/
You will want a heavy smashing tool as well. I have this massive 2.5-pound cast-iron press. It fits inside the 12" pan above (but not the 10"). $13:
http://www.amazon.com/Update-International-Heavy-Weight-Hamburger-Commercial/dp/B002LDDKZ6
If you plan on doing ultra-smash burgers, you'll need a scraper. This is the one Kenji recommends, but you can probably find something locally: (Home Depot or Lowes)
http://www.amazon.com/Plextool-Wall-Paper-Stripper/dp/B00AU6GQLQ/
Anyway, getting back to the cooking part: you'll need a hi-temp burner. I like Bayou Burners, they sell them on Amazon. I have an SP10: ($50)
http://www.amazon.com/Bayou-Classic-SP10-High-Pressure-Outdoor/dp/B000291GBQ
I use that with my 12" cast-iron pan for when I'm just doing a few burgers for the family. 15 minutes = 5 burgers. You can also slap a flat surface like a cast-iron griddle or Baking Steel on that puppy. Also comes in a square version (not sure how the BTU's compare). I also have some KAB4 burners that I use with my Baking Steel, among other things. More expensive, but larger shell & burner: (more even heat over the cooking surface)
http://www.amazon.com/Bayou-Classic-KAB4-Pressure-Cooker/dp/B0009JXYQY/
For cooking more at a time, you can get a cooktop. Blackstone has a 36" cooktop available, but it doesn't get very hot (don't get me wrong, it's an awesome tool, but I've had trouble breaking 500F on mine, which means you're not cooking 1-minute burgers on it, plus the heating is kind of uneven, so you have to work in the hot spots for faster cook times). Also comes in a slightly smaller 28" version (but it's only like $50 less, so it makes more sense to get the full-sized version because you get so much more cooking area). The nice thing with this setup is that for $299 (or a bit less if you shop around at places like Cabela's), you can cook like 20 burgers at a time, it's absolutely insane! I make epic breakfasts on it. Plus it folds up for transport, which is really handy. We use it for all of our family events & holidays:
http://www.amazon.com/gp/product/B00DYN0438
A better version is from Tejas Smokers. They make camping stove carts that have burners built-in & have griddles available separately. They get super hot, downside is the cost: you can easily spend $700 on a nice setup.
https://tejassmokers.com/Camp-Stove-Carts/23
Oh yeah, Blackstone did just come out with a compact outdoor griddle which can run off those little one-pound green tanks if you want. They go for around $99 ($79 if you have an Ace Hardware near you). I have not tried this, but it gets good reviews. I'd be curious to see what kind of temperatures it can achieve:
http://www.amazon.com/Blackstone-Portable-Griddle-Outdoors-Camping/dp/B0195MZHBK
So that's a basic introduction to the cooktops: you need some kind of decently-sized metal surface, a hi-temp burner, a smashing tool, and optionally (but recommended) a scraper. You will also want to get a strong, high-quality spatula. A good one is $32:
http://www.seriouseats.com/2010/07/equipment-the-due-buoi-wide-spatula-my-new-fa.html
Available here:
http://www.duebuoi.it/x/uk_usd/catalog/p/spatulas~805-16x10.html
If you opt for cast-iron, get an infrared temperature gun (doesn't work too well on shiny metal surfaces like steel tho). $17:
http://www.amazon.com/Etekcity-Lasergrip-1080-Non-contact-Thermometer/dp/B00DMI632G/
A cheap digital kitchen scale is useful too, for measuring out the proper amount of meat. $14:
http://www.amazon.com/Ozeri-Digital-Kitchen-Capacity-Stylish/dp/B003E7AZQA/
This collection of tools ensures that you have the proper workflow: a metal surface to cook on, the ability to bring the surface to a high temperature (and know what that temperature is for precise control), the ability to weigh your meat so you can pre-measure out what you need, the ability to smash the burger down, and also to properly scrape it off. Again, it's not rocket science, but if you have a wussy grill or a crappy surface or weak smashing/scraping tools, you're gonna have a bad time. You just need the right setup to pump burgers out fast!
So on to prep. For ultra-smash, you do a pair of 2-ounce ground beef balls. In the tutorial above, they use a mix of meat for 25% fat. I just grab some regular 80/20 ground plus some salt & pepper. For regular smash burgers, do a single 4-ounce ball (optionally 5 ounces...useful if you have a big cooktop for a bunch of burgers at one time & are only doing a single patty per burger). The nice thing is, there's no special prep required for the meat, so you can make all of your burger balls ahead of time. If you have 10 people & are doing ultra-smash, let's say half of them get 2 burgers, so 15 burgers total, or thirty 2oz balls. If you have 20 people & are doing regular smash, again with half getting an extra burger, that's 30 burgers total or thirty 4 or 5oz balls. So that takes care of prep...adjust as needed. If you're feeding mostly dudes, you'll want to add more seconds (and thirds) to the equation.
There are a variety of buns you can get. Crap buns will make for a crap burger. See if you can find potato buns or brioche buns. Those are pretty soft. Buns aren't overly hard to make, but I have yet to find a decent recipe that takes under 40 minutes, so I usually only doing fancy home-baked buns for my family rather than a crowd. Buying 5 or 10 pounds of ground beef & making smash balls out of them will take you all of ten minutes, but making buns can take forever. Here's a good recipe if you want to try it out tho:
http://smittenkitchen.com/blog/2009/07/light-brioche-burger-buns/
Or this, if you wanna get crazy:
http://www.seriouseats.com/2015/05/fresh-cemita-rolls-mexican-sandwich-burger-bun-bread-food-lab-recipe.html
Or this one, nom nom nom:
http://amazingribs.com/recipes/breads/brioche_hamburger_buns.html
But eh, just hit up Sam's/Coscto/BJ's and buy some hamburger buns in bulk, problem solved. Or find a local bakery that has good rolls. There's a good shootout of buns here:
http://aht.seriouseats.com/archives/2011/04/the-burger-lab-whats-the-best-bun-for-my-burger-taste-test.html
(continued)
At my last pastry job they used this Now I can't live without one. I use it for everything
Have you heard of Sensory Processing Disorder? I have OCD and don't think that your aversion is related to that, but it's pretty unusual. I say that I don't think its OCD because the way you talk about soap is more physical than mental-and while I'll be the first to talk about nausea and feeling physically ill because of anxiety, you describe a very SPD like experience. I hate brushing my teeth because the taste of every toothpaste and physical sensation of brushing and movement triggers my gag reflex, but using warm water and being aware of how important it is helps me power through most of the time.
Is bar soap different than liquid soap? Have you ever tried powdered soap? How do you deal with dishwashing soap and laundry detergent? Does shampoo not trigger the same ill effects? Have you ever used a cream cleaner? Have you ever used orange Gojo hand cleaner? Do scented lotions or candles affect you in the same way that scented soap does?
I'd definitely recommend seeing a therapist who has experience with OCD and autism, because sensory stuff and compulsive behaviors (or lack of behavior) can be linked to that stuff. If you have any success, please post an update!
Edit: to add, have you ever used a nylon net? one of these things, it dramatically changes the texture of liquid or bar soap to something more like foamy shampoo, which might help.
Edit 2: Dr. Bronner's liquid castile soap has a very different texture than most liquid soaps, might be worth giving it a go.
oh man you asked for it. This is what I do if i have a day off and nowhere to be:
I like to put on a mud mask (I like the volcanic clay one from Innisfree, or the pore refining charcoal one from clinique) wait for that to dry, and then hop in the shower to rinse it off, and wash my hair. Then I fill up the tub and put in some nice bath salts or a lush bath bomb, apply a hair mask and a sheet mask. After extensive soaking, I scrub off with one of those korean towels (gets all the dead skin off your body. it's pretty gross but very worth it.)
After that, hop back in the shower, rinse off completely, shave, and then moisturize. Takes a long time but man do I always feel good afterwards.
I had success with “Italy Towels” about once a week to scrub (a lot of) dead skin off after a soak in hot water. Also, using coconut oil after showering and especially after scrubbing did great for any raised bumps.
Hey there, I've got all kinds of eccentric natural beauty/health products that I can suggest:
I don't use body soap at all -- I just scrub in the shower with an asian washcloth.
I do use soap on my hands, as they're exposed to all sorts of yucky stuff and then I touch food and other people. For soap, I use Dr. Bronner's. I also use it as body wash if I get something unusually gross on my body (engine oil, for example).
For deodorant, I use one of those crystals. I like this one just cause it's shaped like regular deodorant.
I make my own lotion with shea butter and jojoba oil from Amazon. I weigh out 70g of shea butter and 30g of jojoba oil in a bowl and melt them in the microwave. Then I mix them up and put the bowl in the fridge for a few minutes to cool. I use an electric mixer to mix the lotion and then put it back in the fridge for another few minutes. Eventually, the lotion cools to the point where I can whip it (kind of like whipping cream). I also add some essential oils once it's cooled but still fairly liquid (coconut and lemon is my current jam) so that takes care of perfume :)
For toothpaste, I actually use tooth powder. (It's also good for the whole TSA nonsense.) There are a bunch of brands, Ecodent, for example.
I'm including some product links, just so you can see what I'm talking about. I haven't purchased that particular brand of shea butter, but it looks nice :) You might try going down to your local health food/hippie store and see what kind of products they have in their beauty section. My local store has stuff like soap, shampoo, and conditioner in bulk, so you can buy just a bit and try it out to see if it works for you :)
Freshware 15-Pack 3 Compartment Bento Lunch Boxes with Lids - Stackable, Reusable, Microwave, Dishwasher & Freezer Safe - Meal Prep, Portion Control, https://www.amazon.com/dp/B01GH5KQLO/ref=cm_sw_r_oth_apip_nwM2vbBbdLsNG
LIFT Certified BPA-Free Reusable Microwavable Meal Prep Containers with Lids, 28-Ounce, 7 Pack (Includes Ebook) https://www.amazon.com/dp/B0128YT76S/ref=cm_sw_r_oth_apip_aolRSnwdmSHs2
Looks like these https://www.amazon.com/dp/B01GH5KQLO/
They're amazing and I love them
this is better than any store brand, pretty much the best you can get without spending 2-300 on a creuset
http://www.amazon.com/Lodge-Color-EC6D43-Enameled-6-Quart/dp/B000N501BK
i got mine for 40 but 50 is still a great deal
Easy recipes huh?
Well, I am from Louisiana, born in NOLA, love to cook.
Jambalaya:
Celery (stalk)
Onions (2)
3lbs of smoked sausage (Conecuh or sim)
Chicken soup base, chicken stock or water
Long grain rice
Olive oil (any oil. Or shortening or butter or margarine)
Seasonings (salt, pepper, garlic, cayenne)
Prep:
You need a generous pot (I use a 6qt) with a thick bottom (avoids burning) here is mine.
https://www.amazon.com/Lodge-EC6D43-Enameled-6-Quart-Island/dp/B000N501BK/ref=sr_1_3?ie=UTF8&qid=1527677444&sr=8-3&keywords=lodge+dutch+oven+6+qt
Chop your celery and onions up (smallish, but not tiny) I leave the leaves on the celery, prefer to have it for a little garnish value when using in rice dishes. So I just chop right off the whole stalk and add leaves and all. You want to put equal amounts of celery and onion, about half a stalk of celery. I chop onions in two halves then dice face down each at 90 degrees.
Slice your smoked sausage to no larger than 1/2” - (bite size)
Combine in pot with just enough olive oil to keep it from sticking, high heat initially then turning down as the sausage begins to cook, cook medium, covered, stirring often, until onions are changing to translucent and celery is softer and sausage is leaking.
Measure out two cups cups of rice and add to mixture, measure out twice as much water as rice and add. (Any seasoning you add to water will flavor the rice, so I tend to substitute chicken soup base or chicken stock for my water to give the rice some flavor)
Stir until well mixed, add seasonings. (Dash salt, dash pepper, half dash cayenne or Cajun seasoning (Tony chachere’s w/e).
Bring to a full boil, cover, then turn off, and ignore for twenty minutes.
This makes enough for dinner plus guests and leftovers.
You want to make sure that you get the sausage and veggies sautéed well, because the cooking stops when you add the water. What you have then will be what you get when the rice is done. The rice will cook, but be prepared for a mushy rice the first few times. When you bring the mixture up to a boil, the longer you cook it, the gummier and mushier the rice will be. This isn’t a problem for most folks, but if it bothers you then keep in mind that after adding water, bring up to boil quickly and as soon as it does, cover, turn off, and let the magic happen.
Edit spelling
Prestige Import Group Acrylic Cigar Jar https://www.amazon.com/dp/B003V0OT2G/ref=cm_sw_r_cp_apip_COR472AbrPeZh
Sistema Klip It Collection Rectangle Food Storage Container, 29 Cup https://www.amazon.com/dp/B00284AG5U/ref=cm_sw_r_cp_apip_YASDnJYGbazvb
IRIS 74 Quart WEATHERTIGHT Storage Box, Clear https://www.amazon.com/dp/B00PKNWVZY/ref=cm_sw_r_cp_api_hKUlzb309MDZ1
Caliber IV Digital Hygromter by Western Humidor https://www.amazon.com/dp/B00JXOKQVW/ref=cm_sw_r_cp_apip_pOrWz9na6zdLh
Spanish Cedar Cigar Tray https://www.amazon.com/dp/B00B9234HE/ref=cm_sw_r_cp_api_3nSOyb6BZZT89
Boveda 65-Percent RH Retail Cube Humidifier/Dehumidifier, 60gm, 12-Pack https://www.amazon.com/dp/B00CPPG228/ref=cm_sw_r_cp_api_xoSOybB110T1K
New too. Unless you’re compulsive and tend to go all out, I would say get a tupperdor. That’s what I did (see recent post).
Container - https://www.amazon.com/dp/B00284AG5U?ref=ppx_pop_mob_ap_share
Hygrometer - https://www.amazon.com/dp/B072XHJLFD?ref=ppx_pop_mob_ap_share
Cedar tray - https://www.amazon.com/dp/B0733TYGWX?ref=ppx_pop_mob_ap_share
Try this!! http://www.amazon.com/Wabash-Valley-Farms-25008-Whirley-Pop/dp/B00004SU35
You're an adult now, just cook. It can be tough cooking for just one person
becausebut it's doable.Learn some basic, cheap recipes and get comfortable eating leftovers.
Here's one for you:
Hamburger Gravy
Ingredients
1 pound ground beef (get the cheap stuff 75%/25%, you're a poor student)
1 1/2 cup white rice (uncooked)
1 family size can of Campbell's Cream of Mushroom soup, (low sodium is healthier but doesn't taste as good).
Cooking
I cook my rice in an Instant Pot, it's very fast, easy, and requires no supervision. Takes about 10-13 minutes depending on how much rice I'm making. I used to have an amazing Zojirushi Fuzzy Logic Rice Cooker that was the most amazing thing ever, but an ex-girlfriend stole it, so... Use the Instant Pot, it's cheaper and faster anyway.
Rice cookers and Instant Pots typically come with a cup for measuring rice which actually measures about 3/4 of a cup, and the inside of the cooking vessels have graduated measuring lines showing you how much liquid to add for the amount of dry rice you're cooking.
Put the two "cups" of rice (1.5 cups actual measure) into the Instant Pot and fill it with water to the "2" line. Close it up and make sure the pressure valve is closed (I've failed to properly cook my rice too often because I am dumb and don't check this). Once everything is set, just hit the "rice" button.
While the rice is cooking put the soup in a sauce pan along with a can full of milk, any milk works but I prefer whole milk myself. Put the sauce pan on the stove, medium low and stir frequently.
Now that the rice is cooking and the soup is warming put the ground beef in a skillet. I like a good [cast iron skillet] (https://www.amazon.com/dp/B00006JSUA/) myself, they're cheap and indestructible, and because of the heat transfer properties of iron they tend to cook foods evenly without burning.
Cook the beef on medium high until it's browned, then drain all the water/grease out into a Tupperware container, do not pour grease down the drain! you can seriously make life hell for yourself and your neighbors if you do.
Add the beef to the soup, increase the heat to medium/medium-high and continue to stir frequently. You want the soup hot enough to bubble a bit, but not a full boil.
By now the rice should be just about done. Let the pressure out, take the lid off, wait a few seconds for the steam to abate then, with a large plastic spoon (you don't want to scratch the bottom of the Instant Pot), "fluff" the rice, just scoop and turn the rice in place, loosening it up, and letting more steam out.
To serve, scoop some rice on a plate, ladle some soup onto the rice, season with a touch of black pepper, and eat.
The rice is enough for 2-4 servings depending on your appetite, while the gravy is enough for maybe twice that. Typically it would be enough for two dinners for me, a 6'4", 225 pound man) and my girlfriend who is pretty petite.
Cost:
Beef: get the cheap stuff, depending where you go and the quality you get, this can be between $2-$5/lb. If your super poor, get a 10 pound tube of ground beef at Smart and Final for like $25, then break it up into 1 pound portions and freeze, otherwise it's about $5/pound most places. So let's say $5.
Rice: the cheapest food on Earth, and it's healthy too! You should probably plan on this being about $1/pound. Get a 10 or 25 pound bag and you'll be set for at least a quarter. Pro-tip: rice goes with literally everything. Add it to all of your meals for some good, clean carbs. Pair it with smaller portions of what you'd normally eat to get the same caloric intake but healthier and cheaper. Anyway the rice in this recipe has a marginal cost of maybe $0.15.
Soup: I think Ralph's usually has the family size can of Cream of Mushroom soup for $2-$3.
So, all in for one person, you could probably make at least 5-6 servings for $8, and it takes maybe 15 minutes to cook.
Store the rice and gravy separately in Tupperware in the fridge for up to 3-4 days. Mix together in a bowl and b reheat in the microwave for 90 seconds to 2 minutes for leftovers. I prefer to make fresh rice each day, but making one larger batch then reheating it works as well.
Alternatives
There you go, cheap, quick, not totally unhealthy home cooking.
Sure thing! Zojirushi SL-JAE14SA Mr. Bento Stainless Steel Lunch Jar
Toddy Maker.
https://www.amazon.com/Toddy-THM-Cold-Brew-System/dp/B0006H0JVW/ref=sr_1_3?ie=UTF8&qid=1538083255&sr=8-3&keywords=cold+toddy
​
I've had this for years. It works great and produces a concentrate that can be used several ways. The concentrate keeps well in the fridge up to two weeks.
so I suppose you would hate living with someone that owns THIS
I'm not in school, but I throw everything in a bag then in my basket. I also had a Mr. Bento that had a carrying case that I slung on my back and rode in with.
Here's a quick howto
This is the cold brewing rig I use. It's fairly inexpensive and the filter can be washed and reused forever (as far as I can tell). For your first time, of course, I recommend you improvise something instead of spending money.
This is why I always liked Alton Brown on Good Eats. He would always try to pick recipes and find ways around such extravagances. Want to have more edges on your brownies to get that extra crunch? You could go buy a $37 specialty pan, or maybe just go ahead and make them in the cupcake tin you already have. Does the recipe call for an incredibly expensive mushroom grown only in Svenborgia? Sure, but many local markets for international cuisine have something nearly identical for almost nothing.
[are you sure about that?] (https://www.amazon.com/dp/B000MMK448/ref=cm_sw_r_cp_apa_oDoMybAK377K8)
I'm not OP, but I bought mine here. They are dishwasher and microwave safe!
Ok so the black 3 section container is from Amazon, you can get a set of like 15 for around $15 and it's been lifechanging!
Planners:
Time Management:
Budgeting:
Might I suggest getting a wake up light? https://www.amazon.com/dp/B00F0W1RIW/ref=cm_sw_r_cp_apa_i_xgdCCbG6MHHW3
I bought one a couple of years ago because I got blackout blinds for my bedroom for the summer months, which lead to a VERY dark room in the winter mornings.
A wake up light honestly changed how I feel about mornings now. I used to absolutely dread waking up because it took my forever to get energized for the day. Now it's actually kind of nice to wake up to a simulated sunrise.
We have one of these suckers: https://www.amazon.com/Philips-HF3500-60-Wake-Up-Light/dp/B00F0W1RIW/ref=pd_sbs_hpc_4?ascsubtag=49b3606fa05361a57d24b138aa949f3cde65ca00&rawdata=%5Bt%7Clink%5Bp%7C1535668863%5Ba%7CB00F0W1RIW%5Bau%7C1136306622
The whole gradually getting brighter until its a seething ball of light-fuelled hate glaring balefully through your eyelids to the back of your skull, is genuinely a brilliant thing for getting you out of bed before the screeching of a thousand vengeful harpies screams like a medical klaxon if you are still hiding in bed after 30 minutes.
(And we just use a small plug adapter as the transformer supports 100-240v)
Purchased the Lavatools a couple months ago and have used it on a handful of brews since. Perfect choice for my needs. https://www.amazon.com/Lavatools-PT12-Javelin-Thermometer-Chipotle/dp/B00GRFHXVQ/ref=sr_1_20?ie=UTF8&qid=1488199480&sr=8-20&keywords=kitchen+thermometer
You should get an instant read thermometer to check for doneness so you don't have to cut into them like that.
People like this one, but I haven't used it. I use a Thermapen:
https://www.amazon.com/Lavatools-PT12-Javelin-Thermometer-Chipotle/dp/B00GRFHXVQ/ref=sr_1_1?ie=UTF8&qid=1499449239&sr=8-1-spons&keywords=instant+read+thermometer&psc=1
There are some organizational things you can get for kitchen cabinets.
I have one of these for my spices so that I can see what's in the back.
Something like this can help, too. I have a full size lazy susan in my pantry, because I have a habit of pushing stuff to the back and letting it sit there for a decade or two.
You can add extra shelves with something like this.
Good luck!
https://www.amazon.com/pcs-Asian-Exfoliating-Bath-Washcloth/dp/B004C8DR1U 👍
Something like this or this is what I use, some Asian markets have them in the soap section.
These are Italy towels. They're more like rough little mitts than actual towels. https://www.amazon.com/dp/B004C8DR1U/ref=cm_sw_r_cp_api_UU-xzbQ6F60ZE
They're meant to be used on skin that's been soaked in a bath or long hot shower. They're very good at getting rid of dry skin, but they're pretty intense stance you're supposedly to really go at your skin with them. You can see your dead skin actually roll up and fall off. Totally disgusting but also very satisfying. They're washable and reusable so they last forever. I bought the pack of 8 in Feb and have only had to replace on so far.
https://www.amazon.com/pcs-Asian-Exfoliating-Bath-Washcloth/dp/B004C8DR1U
​
You can thank me later.
8 pcs Asian Exfoliating Bath Washcloth - Red & Green https://www.amazon.ca/dp/B004C8DR1U/ref=cm_sw_r_cp_apa_i_X13XDb90M705M
Hopefully someone else can speak to laser hair removal (I'm super curious myself as I've heard a lot of mixed things) but in the meantime while you are pricing things out and the summer approaches, I have a few suggestions. I also have thick dark leg hair and am prone to bad ingrown hairs. I use a Japanese exfoliating towel with some bath gel on my legs/bikini line before I shave, shave, then exfoliate again with the towel/more bath gel. And once out of the shower, I rub this magic on the areas I'm prone to getting ingrowns. It's more or less completely eliminated my ingrown hair problem. If you haven't tried either it might be worth the $15 just to see if it'll help a bit before you can get the laser removal.
I posted this in your LPT thread, I think it is worth reading so here.
A few years back, and even some today, I set out to find out how to make popcorn like at the movie theaters. Alton's recipe does not sound terrible and uses items most people will have on hand. However to make it better (read: more like movie theater popcorn) You will need to buy a few items for this.
All total the items are under $40 (excluding popcorn) and all but the coconut oil will last a long time. Flavacol is a must have for this to work. I have not been able to find it locally near me. the 35oz carton will last you just about forever.
The coconut oil is a bit on the messy side just because of the container, you can get different amounts which will come in a different container. I have noticed some differences in taste of some coconut oils and the one linked is the brand I am currently using.(note: Coconut oil solidifies at about 76F)
If you are just toying with the idea of better popcorn, try Alton's method of popping. It cuts the total price in half and for a test run\proof of concept it should work. I have tested several poppers and settled with the whirley pop or similar design. Some outdoors shops sell these but charges about $10 more for them. Note: Yes it has a turn handle, but the gears are made of plastic, so do not hulk smash it.
As for popcorn, not all popcorn is created equal. The artisan fancy colored stuff generally does not pop well in my experience. I have experimented with many different kinds and have mostly settled with Orville Redenbacher. This can be purchased off the shelf at most grocery stores or from Amazon. You can try others to find one you like better.
**
As a note
I do not have a set amount for any 1 ingredient. I just eyeball it, maybe one of these days I will get this down to a science with numbers and such. When starting out follow Alton's recipe but substitute the above items in it.
Buy a whirley pop, cheap and works great.
http://www.amazon.com/Wabash-Valley-Farms-25008-Whirley-Pop/dp/B00004SU35
Thats why i got one of these.
https://smile.amazon.com/Presto-03430-Pizzazz-Plus-Rotating/dp/B00005IBXJ/
Passing out and waking up to cold cooked slowly rotating pizza in the morning is better than walking up to burnt pizza and the smoke alarm in the middle of the night.
Also great for nachos.
Can someone tell me if I'm doing something wrong? Bought this Lodge Cast Iron about 7 months ago. Cook in it almost every day. Lots of bacon. Generally my method of seasoning is after I finish cooking I wash the skillet in hot water and use my scrubber, dry with a paper towel, put back on the stove until it heats up a bit, and then rub in a thin layer of some standard vegetable (soybean) oil. A few days I spent oiling the skillet and heating it in the oven at 525 degrees about 3 times a day for a few days. It is definitely a little bit seasoned but just not the way I want it. After I wash and dry it it seems a bit dry. From what I've read I am not getting the same results and I would think after all this time it would be better. Any advice?
These were the things I initially bought when gathering cookware.
Enameled cast iron dutch oven
Cast Iron Wok or a carbon steel wok.
Stainless steel cookset
Pressure Cooker
Cast Iron skillet
Stainless steel roaster
*Pyrex Bakeware
Just get one. It's totally worth it. If you cook soups, stews or braise meats you can use them for that too. Multipurpose, baby! I use mine all the time. I got mine for bread but have since moved on to baguettes so I use it more for the stuff mentioned above.
I recommend [this one](Lodge EC6D43 Enameled Cast Iron Dutch Oven, 6-Quart, Island Spice Red https://www.amazon.com/dp/B000N501BK/ref=cm_sw_r_cp_apa_3Q4oybQAKHVA5)but you might be able to find it cheaper other places. I think I got mine for $59 a few years ago.
Here is a good setup that doesn't cost much at all, right around $40. The next thing you need are cigars.
Sistema Tupperware
Boveda 65% rh 4 pack
Tupperware Though this has been cheaper at Target. Ship to store there might be worth it to you.
Hygrometer 1 or 2 depedning on what you like.
Boveda You will need two per container you get. They also have 4 packs. I would suggest 65% RH with a tupperdor.
Hey there, welcome!
I do want to warn you, there are a lot of Cuban Cigar (CC) fakes out there. Likely if you bought from a shop and they aren't Cohibas, you're probably fine, but you may want to check out habanos.com (looks like their standard map is down however) and see if the map isn't there.
That said, CCs aren't terribly hard to get in the US and there's a few sites that ship them by the box to the states. We have regular box splits on here (one person buys a box and ships it out at cost to other people in smaller batches, say 5 cigars each), and there's plenty of folks on /r/CigarMarket that will provide you some CCs if you search, or you can check out /r/cubancigars too. Funny enough they're usually much cheaper than what you paid in Canada because basically no taxes.
Honestly, I don't think there is much "working up" needed to smoke a CC. They're relatively mild compared to Dominican or Nicaraguan tobacco (in the grand scheme of things... of course there's bold Cuban and mild Dominican). Now, if we were talking about a Padron or a La Flor Dominicana, then yes, I'd say you'd need to smoke for a few months before you can be sure that the nicotine won't make you literally sick (rare but it can happen). Cubans? Nah, totally great for a newbie to smoke.
Also if you're new to cigars, don't let those things sit out. Get yourself a tupperware container and a boveda pack: https://www.amazon.com/Sistema-Collection-Rectangle-Storage-Container/dp/B00284AG5U/ref=pd_bxgy_201_img_2/135-6339489-8039356?_encoding=UTF8&psc=1&refRID=74QK8XTVDEZSBPPK0WZ3 and https://www.amazon.com/Boveda-65-Percentage-Individually-Wrapped-Humidity/dp/B00FWPQ8WC/ref=pd_sim_79_2?_encoding=UTF8&psc=1&refRID=MYA4CBWYAZRPR8N5JEKH
If you don't store the cigars in an airtight container with humidification, they'll dry out and not be the tasty smokes you were expecting.
Now, if you do want to keep your first CCs as a special smoke, I totally understand. Do keep them humidified though. Without humidification they will wither and eventually the oils will dry out and they won't be recoverable at that point (years without humidification but that isn't out of the question when you buy them and save them) But overall, they're not hard to get, smoke great, and are totally fine for a beginner to smoke. I say light 'em up! You can replace CCs easily enough.
Both. This is the one I have, and you can use it on the stove or in the oven.
You can also try putting some distilled water around the lip of the lid to see if that helps. It will swell up some and may seal better. It could just be leaky and letting your RH out. 63% is still a good RH to store them at. A lot here do 62-65%.
Did you check the hygrometer is a sealed bag with a boveda to be sure its reading right? It may need calibrated. Put it in with 72% pack and be sure it read right around 72% after 24 hrs.
A sealed Tupperware may work better. This is a popular choice.
Get 1 of these: https://www.amazon.com/Sistema-Microwave-Collection-Noodle-31-7oz/dp/B00284AG5U
1 of these: https://www.amazon.com/Mantello-Spanish-Adjustable-Divider-Humidors/dp/B079V3KYT7/
1 of these: https://www.amazon.com/s-s-Storage-versatility-Adjustable-Divider/dp/B0733TYGWX
Get some 65 or 69% Bovedas and a digital hygrometer and put the Mantello on top of the Fess.
Here's my advice since I literally just started a few weeks ago. This is exactly what I wished I knew before I spent money on random cigars from various sites.
Hopefully this helps.
Edit: Many edits to fix errors and add additional info.
Tupperware and trays, you can also get bovedas from Amazon or most places that sell cigars.
The pupperdor is a gofund business with the following timeline "As we start to approach our fixed goal - production will begin!" They are currently at 3.6% so would be faster to buy your own parts.
Don't be jealous, I used to have this one and it's not very good. The lid warped and wouldn't shut properly after a few months, there's no temperature control so you have to measure the temp manually, and it doesn't heat up as quickly as most kettles. The light on it is pretty awesome though, I will give it that.
I ended up upgrading to this Hamilton Beach kettle,and it is so much better. Has temp control, has a clock feature on the base that you can also setup so it automatically starts boiling at whatever time you set it for(I set it for right before I wake up in the morning so that by the time I wake up my water is already done heating up), the water heats up much faster, has a feature that automatically heats itself back up to the set temp when the temp drops(which is nice for long gongfu sessions), and just feels much more well-made overall.
What you want is a digital thermometer like this one: https://www.amazon.com/Etekcity-Lasergrip-1080-Non-contact-Thermometer/dp/B00DMI632G/ref=sr_1_1?ie=UTF8&qid=1473889665&sr=8-1&keywords=digital+thermometer+infrared
Is this still happening when you turn the bike on today?
To confirm it's only running on one cylinder, check the temperature of the exhaust headers while it's running. I use this thermometer, but you can just hover your hand over and figure it out.
Yeah basically what u/gormand0 linked
I have a bit cheaper version because I’m broke and wasn’t sure if this would work for me. Turns out even this version helped me out a lot.
https://www.amazon.com/Philips-Wake-Up-Simulation-HF3500-60/dp/B00F0W1RIW/ref=mp_s_a_1_1_sspa?keywords=wake+up+light&qid=1550601698&s=gateway&sr=8-1-spons&psc=1
I have the Javelin by Lavatools, (amazon link) that is currently $25.99. I've had it for over a year, use it for brewing and cooking (with good sanitation practices) and haven't had an issue. Some report the hinge breaking though. Lavatools also makes a stick version for less than half the price and has the same precision.
Speed/accuracy, but cheaper alternatives are catching up quickly.
I have not used the one you linked to, but I use this guy and it is only slightly slower than a thermapen and plenty accurate. A couple years ago, thermapen was by far the fastest "instant" read thermometer. That is no longer really the case, and now they are overpriced compared to the competition.
eh, its probably a throw away. I personally use the Lava Tools Javelin, both for brewing and grilling.
https://www.amazon.com/Lavatools-PT12-Javelin-Thermometer-Chipotle/dp/B00GRFHXVQ/ref=sr_1_1?ie=UTF8&qid=1496853976&sr=8-1&keywords=lavatools+javelin
Many great ideas here. I have a suggestion for containment. I have this Japanese style Bento lunch container. All fits into one and will keep items warm or cold. Easy to carry in its own bag and comes with a spork. I did much research and this suited my needs. I love it.
Zojirushi SL-JAE14 Mr. Bento Stainless Steel Lunch Jar https://www.amazon.ca/dp/B000246GSE/ref=cm_sw_r_awd_EcUrub05ZDQYS
I got this Bento contraption (https://www.amazon.com/Zojirushi-SL-JAE14-Bento-Stainless-Steel/dp/B000246GSE) a couple of years ago and have been brought hundreds of lunches to work in it. Nearly all the meals I've brought in are vegetable based, so I'm not sure how safe or for how long it will hold meat.
It's got 4 small containers, 2 of them intended to maintain temperature. A typical lunch would be a pureed soup in one heated container, sauteed vegetables over quinoa in the other heated container, and then baby carrots and hummus in the other two.
This is totally worth the investment. All you need is ground coffee and water:
http://www.amazon.com/Toddy-T2N-Cold-Brew-System/dp/B0006H0JVW/ref=sr_1_1?ie=UTF8&qid=1372607856&sr=8-1&keywords=toddy+cold-brew
You get about 10oz of coffee concentrate that you can mix with milk or just ice water. I've only ever mixed it with milk, but you use about 1 part coffee concentrate for 3 parts milk (25% extract, 75% milk). You can mix sugar or sweetener but I never use sweetener.
You can also use the extract in hard drinks. Adding a bit of rum to an iced coffee is amazing.
EDIT: Forgot Link
Amazon
> futuristic looking lasagna trays?
It's actually a brownie pan... here's the link
Is a hand blender really essential? I would add these things:
non-stick skillet
enameled dutch oven
normal kitchen tools
stockpot with steamer insert - many other options for this kind of thing too
And then probably a couple of normal saucepots.
If you want to roast poultry it's nice to have a roasting pan, too.
A heads up for people shopping for meat thermometers on Amazon. There's a lot with fake reviews that make them look better than they are.
Use a site like Fakespot to make sure the reviews are legit. I found this one that has honest reviews and works great.
You're talking about two completely different issues here.
For weight, the only thing to consider is calories. Compute your TDEE, buy a kitchen scale, and use MyFitnessPal to accurately track your intake.
Reduce your TDEE by the amount you want to lose. 3500 is one pound, so set your limit to your TDEE - 500 per day to lose one pound a week, etc.
As long as you're honest with your tracking, it's extremely accurate.
For nutrients, you generally don't need to think about it if you have a typical American diet. Multivitamins are a complete scam.
Your doctor will tell you if you have any deficiencies. I assume that's how you found out about your iron level. Just work some high-iron foods into your diet. A cup of spinach is great, but even a single hamburger will have 5x the amount of iron as the same size piece of fish.
Oh oh I love coffee! Some cool products to check out on the cheap:
Hario Mini Mill Slim Hand Coffee Grinder: It's a hand crank grinder, but it's a burr grinder so it produces a more consistent grind which in turn produces a better cup of coffee.
Chemex 3-Cup Classic Glass Coffee Maker: Not as cheap as the french press, but since it uses a paper filter so there isn't as much sediment in the cup. I find that I prefer it over the french press.
Bodum Brazil 8-Cup French Press Coffee Maker: Classic french press.
Optional:
Etekcity Digital Kitchen Scale: Scales are helpful in getting a consistent cup every time. You can measure out the water and coffee and dial in the perfect ratio.
Also check out Pinewood Roaster's coffee. I think they're on Franklin and 11th in the same building as Alpha Omega. Grab a bag of Ethiopian Beriti and enjoy!
Freshware Meal Prep Containers [15 Pack] 3 Compartment with Lids, Food Containers, Lunch Box | BPA Free | Stackable | Bento Box, Microwave/Dishwasher/Freezer Safe, Portion Control, 21 day fix (32 oz) https://www.amazon.com/dp/B01GH5KQLO?ref=yo_pop_ma_swf
And
Evolutionize Healthy Meal Prep Containers - Certified BPA-free - Reusable, Washable, Microwavable Food Containers/Bento Box with Lids (7 Pack, Single Compartment, 28 Ounce) https://www.amazon.com/dp/B0128YT76S?ref=yo_pop_ma_swf
https://www.amazon.com/gp/aw/d/B01GH5KQLO/ref=psdcmw_3744021_t1_B01I97JQ28
I use these for lunches. I like those for breakfast
I got them from amazon. Yes, they're reusable, and dishwasher safe.
They work really well, I do recommend them.
Freshware 15-Pack 3 Compartment Bento Lunch Boxes with Lids - Stackable, Reusable, Microwave, Dishwasher & Freezer Safe - Meal Prep, Portion Control, 21 Day Fix & Food Storage Containers (32oz)
Whirley-Pop all the way! It has a thin aluminum bottom that distributes heat evenly but doesn't retain heat so that as soon as it's done popping, you can take it off heat and the popcorn on the bottom won't burn. The swirling arms also make sure that you get pretty much 100% poppage and that everything pops at the same time. It's amazing because normally in a pot or a wok, there's a gap of maybe a minute or so between when the first kernel pops and the last one does. With the whirley-pop, it all shoots off at once. Like, a five second interval start to finish. It also makes distributing melted butter very easy.
Pro-tip: clarify your butter. The water content is what will turn popcorn soggy.
I buy bay leaves, yeast, and an assortment of dried chilies in bulk and freeze. They are always in my freezer.
Then get the right pot.
I'm personally a fan of the Whirley Pop since it goes right on the stove, and you can control the heat more directly. I've never tried this one though, so it might work too. Only thing I would be concerned about would be if you wanted to make kettle corn. Not sure how well this would work with that. Maybe some other people can share their experience
In the last place I lived, my roommate had one of those stovetop popcorn things. It's amazing. Throw some popcorn kernels in, pour in just enough canola oil to lightly coat (I mean lightly). When it starts to pop, turn the handle. When the popping slows down and starts to stop, pour it into a bowl. I used melted butter and white cheddar seasoning. Probably not the most healthy way, but it's delicious.
They're not even expensive. It takes a little work to get it seasoned at first, but nothing monumental. 100% worth the effort.
Here's the link for those interested in this deal
​
https://smile.amazon.com/Lodge-Skillet-Pre-Seasoned-Skillet-Stovetop/dp/B00006JSUA?keywords=lodge+cast+iron&qid=1537280771&sr=8-5&ref=sr_1_5
I think that was the Lodge ones https://www.amazon.co.jp/dp/B00006JSUA/ Haven't bought one yet but certainly will do in the future
Lodge cast iron Skillet. I know you said you don't like the weight, but you also said you are a student and it's hard to beat $15 for something that will last forever. https://www.amazon.com/gp/product/B00006JSUA
If you need something smaller, they also make smaller ones.
If you really need something lighter though, look into carbon steel. Lodge also makes those, but I don't have any experience with them.
Pot:6.5qt Enamled Dutch Oven $50
Pan:Lodge 12" Cast Iron Frying Pan $19
Knife:Henckels 7" 4 star Santoku $75
People bag on Henckels for being expensive but they have a lifetime warranty so if i break it (or chip it) i can get a new one for free.
If it were me, I'd probably go with something like this:
Total: $85, leaving you some headroom for another saucepan or a specialty pan (cake pans, roaster, casserole etc.)
That said, I'd take a good look around thrift stores, craigslist and the like too.
Looks like a Lodge.
Here is a checklist to track your amiibo collection: http://amiibochecklist.com/ (most popular) or https://www.scribd.com/mobile/document/341048988/iJustine-s-Amiibo-Checklist-2017
Buy NEW amiibo from: TRU is the best retailer with a diverse group of amiibos. Other than that: Target, Walmart, Best Buy, Game stop and Nintendo store. To get more rare amiibos, Beat the Bomb is an Australian retailer that ships to the US. The Australian dollar is worth less than US dollars so when you convert the prices, it is competitive. There is also NinNin but that one is more expensive and shipping is high.
Buy resale/used amiibo: Craigslist. Other places similar to Craigslist: Facebook marketplace, OfferUp, and Let Go. People have also reported being successful on Amazon Warehouse.
Use r/amiiboswap to view and exchange amiibos.
Twitter accounts to follow for more amiibo info: @AmiiboAlerts and @AmiiboNews
If you’re looking for ideas on how to display amiibos: Bat cases at Michael’s are pretty popular https://www.michaels.com/studio-decor-baseball-bat-display-case/10174362.html. Three tier rack on Amazon (I just use a spice rack from Bed Bath and Beyond) https://www.amazon.com/dp/B0036OQU56/ref=cm_sw_r_cp_api_5we8ybSAV243Z. Or a picture ledge at IKEA http://www.ikea.com/us/en/search/?query=MOSSLANDA+Picture+ledge
You want to exfoliate first! Get an Italy Cloth, Scrub Gloves, or if you want to go non-AB, one of these. The next time you shower, scrub yourself down & any lotion you end up choosing will absorb much better.
Ahhhhhhhh, that's probably the key then. I'm really impatient with applying fake tan haha. I just bought these because I read in another thread that they are supposedly better than the gloves :O I can't wait to be a smooth baby hahaha.
this is a very popular flower piece i think youd like its very smooth hits
https://www.amazon.com/Fancy-Bridal-Glass-Fliter-14-5mm-Transparent/dp/B075CTGFLN/ref=sr_1_194?s=arts-crafts&ie=UTF8&qid=1511838449&sr=1-194
also this grinder fits in the budget and has a high review score
https://www.amazon.com/dp/B00700W0TW/ref=psdc_289781_t2_B00W18BAVM
Cali Crusher- $24.95
Chromium Crusher - $15.95
Ballin' on a budget 4 pc - $4.62
Did you change anything in your routine that might've caused it? I dealt with butt (cheek) acne for a while too, and I realized that the onset coincided with the period of time that I started working out a lot (sweaty gym tights and sharing gym surfaces = grossness). So I tried to be more diligent about showering as soon as I finished working out, and I also started using one of those Japanese exfoliating cloths to make sure to get rid of any build up. I also tried a butt acne clearing lotion, but I'm not too sure if it made much of a difference. I think there are also body washes with benzoyl peroxide, salicylic acid, or tea tree oil that you could try, but I think the exfoliating cloths were what really helped clear it up.
Here you go! The price has gone up a lot since I bought them apparently. You can get one by itself for like $5.50.
http://www.amazon.com/gp/aw/d/B007IAE5WY/ref=pd_aw_sims_3?pi=SS115&simLd=1
YES. I use secret or dove clinical strength because I'm sweaty af but I swear that shit never comes off. It's slightly worrying.
Anyway specifically exfoliating my armpits pretty much deals with it for me. I used to just wash them like the rest of my body but to get rid of the ghost of deodorants past I put some soap or body wash on one of those korean exfoliating towels and scrubby scrubby a few times a week.
I have a Hamilton Beach electric kettle from Walmart. I've been using it for a year or more and I love it.
Hamilton Beach 40996 Programmable Kettle, 1.7-Liter https://www.amazon.com/dp/B0083I7THI/ref=cm_sw_r_udp_awd_PajZtb1DHM8386CF
I've had this Hamilton Beach kettle for a few months now and I love it. It has pre-programmed temperatures, the ability to program your own temperatures, and will hold your temperature for up to an hour (I don't remember if you can set it for longer or not). It has a clock and it has a neat feature where you can set a time that it will turn on and heat your water- so you can have your water ready when you wake up in the morning or ready for you when you get home from work.
http://www.amazon.com/gp/aw/d/B0036OQU56/ref=mp_s_a_1_1?qid=1421054678&sr=8-1&pi=AC_SX200_QL40
http://www.amazon.com/gp/product/B0036OQU56/ref=oh_aui_detailpage_o01_s00?ie=UTF8&psc=1
Re: KP, quitting dairy (and going vegan) will probably have a bigger environmental impact than all zero waste habits combined ;) So that certainly won't hurt!
I personally use an Italy towel for exfoliation on my KP and found that using that plus a heavy moisturizer (like various oils, haven't found shea butter package-free but that's another option) has been the best. My italy towels did come in plastic packaging but they can be reused over and over again, probably forever. It's what korean spas use to exfoliate. I have a green one and pink one, and the pink ones are supposedly more gentle so I gently use it on my face and it works too.
I'm still phasing out my old skincare, but right now I'm doing: oil cleansing --> cleansing w soap --> exfoliating w towel --> using my old moisturizer (will try evening primrose or jojoba oil next) --> sunscreen.
Here are some other ZW ideas, from Paris to Go. More for fun, I think, though :)
For my KP routine, I am scrubbing myself with Exfoliating Bath Washcloth and applying Amlactin Ultra or Excipial 20% Urea after shower every morning and evening. The bumps have gone down significantly, but I am still struggling with the red discoloration all over the body.
Any suggestions/comments on what I might be doing wrong/right?
If you're looking for something of a higher quality but willing to spend more money, check out the two other commenters recommendations.
If you're on a budget, the Amazon Chromium Crusher is a great little grinder. I've had it for about 2 years now and it has never failed me. A little bigger (2.5 inches) but well worth the value. I bought it as a temporary until I was of age and could get a good one at a head shop but once I got it I didn't feel the need to upgrade.
Link
I'm assuming you don't want to spend that much so here:
A super cheap one: http://www.amazon.com/Piece-Tobacco-Pollen-Grinder-diameter/dp/B0023WXZ1O/ref=sr_1_2?ie=UTF8&qid=1406656505&sr=8-2&keywords=grinder
Slightly more expensive one but it'll probably get there sooner than a month: http://www.amazon.com/Piece-STYLE-Tobacco-Pollen-Grinder/dp/B0023X32MA/ref=sr_1_1?ie=UTF8&qid=1406656505&sr=8-1&keywords=grinder
And lastly, this is the one I have. Its pretty nice IMO but I've had the others too and they're not that bad. Just preference and how much budget you have: http://www.amazon.com/Chromium-Crusher-Tobacco-Lifetime-Warranty/dp/B00700W0TW/ref=sr_1_3?ie=UTF8&qid=1406656505&sr=8-3&keywords=grinder
I use salux before I shave my legs. Most Asian stores do carry them or order it on Amazon.
Using these exfoliating wash clothes and using stridex in the red box helped me so much. I now only need to spot treat with stridex when I get an occasional break out.
I'm pre-HRT, but here's my skincare routine, with links to the exact products I use. I tried my best to define any skincare terminology. I recommend doing this before bed. Make sure to do the steps in the order listed.
Night time skincare routine
1) Exfoliate. This removes dead skin and other crud. Without exfoliating, you'd be applying skincare products on top of your layer of dead skin, which wouldn't be as effective. I use a Salux brand exfoliating cloth in the shower, lathered with Dove brand bar soap. You should only exfoliate and shave 2 to 3 times a week because it's abrasive. Other steps can be done every night. Side note: if you've never exfoliated before, I highly recommend trying it once. You will feel cleaner than you've ever felt after showering.
2) Shave. If you need to shave, now is the time to do it. If you've had laser hair removal, or simply don't have much body hair, move on to the next step. I don't have specific recommendations for shaving products. The most important thing is to use a clean razor. If you are reusing a razor, wash it with soap and hot water, and use rubbing alcohol to kill any leftover bacteria. Exfoliating before shaving can reduce razor burn because you're cleaner, and therefore less likely to get dead skin and bacteria into the "micro cuts" caused by shaving. Even if you don't cut yourself deeply enough to bleed, dragging a metal blade across your face is always slightly irritating. (Side note: I can't effing wait to get laser.) If you cut yourself shaving, you may apply some 70% rubbing alcohol, only to the cut. I've seen sources that recommend applying rubbing alcohol everywhere after shaving, to kill bacteria and therefore reduce irritation. I don't recommend this because rubbing alcohol is harsh and will dry your skin.
3) Toner. This step cleans your skin further. Similar to exfoliating, the idea is to remove as much dirt and dead skin as possible, so that the skincare products can actually absorb into your skin. I pour some Thayers brand alcohol-free, rose scented witch hazel on a cotton ball and apply to my face and neck. Another reason why the order of the steps is important: This toner contains witch hazel, which is an astringent. This means it tightens your skin. Using witch hazel after shaving may reduce irritation by causing any micro cuts to contract. Let your skin air-dry before moving on.
4) Serum. Now that you're clean, it's time for products that will actually be absorbed by your skin. There are many types of serum available. I typically use retinol, which tightens your skin and prevents wrinkles. I apply a few drops of retinol serum to my face and neck and rub it in. I wait a few moments to let the serum dry before the next step.
5) Moisturizer. Last step. This hydrates your skin and keeps you looking young. I use CeraVe moisturizing cream. It comes in a white tub with a blue label. Most nights I just apply to my face and neck. On the nights that I exfoliate, I use moisturizer on my whole body. The main reason is that it can be time consuming, so I only moisturize my whole body after exfoliating, when my skin will better absorb the moisturizer. Additionally, I use this moisturizer on my hands several times throughout the day (especially after washing my hands because soap can be drying.) This makes a significant difference in reducing dry skin, especially noticeable in the winter. If you only get one skincare product, I recommend this one.
Other important things
That's my nightly skincare routine, but wait, there's more! Any day there's a chance you'll spend time in the sun, wear sunscreen!! This is probably more important than all the other steps put together. You can apply sunscreen on top of your moisturizer, or use a moisturizer that includes SPF. Recently I've been experimenting with using this SPF moisturizer on my face every morning.
Last thing: some people think skincare is all about applying products to your skin, so they'll buy fancier and more expensive products. This is like pulling harder on one lever without realizing there are many other levers available. Diet, exercise, hydration, sleep, having fun, and avoiding stress are all important too. Drink water!! Like, drink a little more water than you think you need.
Edit: Can't believe I forgot this. Don't smoke, and don't use hard drugs. Please don't drink alcohol at your age because it can cause brain damage. When you're older, if you choose to drink, do so in moderation. I don't want to come across as "no fun allowed," but please learn from my experience. Binge drinking is not only bad for your skin, it will make you feel like complete poop the next day. Not worth it.
Edit 2: Fixed formatting, and added details.
Good luck, sis!
This goes a couple of dollars above $50, but if I were buying a gift to myself with these criteria I'd get myself:
A Hamilton Beach programmable kettle for $38.
A Finum double-walled Hot Glass System for $14.
I actually own both of these items and think quite highly of them.
You can get this variable temperature hamilton beach kettle for about the same price. It may not look as nice, but it is very convenient for white/green/wulong teas. If you drink anything other than black teas I would strongly recommend something more like this.
For a goose-neck kettle I recommend the Bonavita 1.7L Digital Variable Temperature Gooseneck Kettle BV382518V. If you don't care about it being goose-neck I have a Hamilton Beach that has lasted awhile now. Don't think they make it anymore but I think the brand is good. Hamilton Beach 40880 Stainless Steel Electric Kettle, 1.7-Liter $23.08. Fount this one Hamilton Beach 40996 Programmable Kettle, 1.7-Liter $29.99. I cannot speak for other brands. I just know that Hamilton Beach is over 5 years old and did not cost that much.
So far as I know, anodizing is a process that doesn't work on stainless steel pans - anodizing is basically induced oxidization ('rust') of aluminum. The anodized surface is kind of non-stick, though many anodized pans are also coated with additional non-stick materials. Anodizes surfaces can scratch pretty easily, too.
Both pans are 'safe' to use over high heat, though thermal shock can warp or crack them - one of the reasons that cast iron is preferred for intense heat. Slow to heat, slow to cool (never from the range to a sink, for instance) will help prevent damage. That's pretty much the same advice for any pan, however.
There are concerns (read: arguments about) how some of the pans with additional non-stick coating handle high heat, the material may degrade and (here comes the controversial part) offgas some material that you don't want to be inhaling.
If cast iron pans cost $100 in Oz, I'm going to start exporting them. They're relatively cheap in the States - you can buy a decent quality 12" Lodge pan for less than US$20, including shipping...
http://www.amazon.com/Zojirushi-SL-JAE14SA-Bento-Stainless-Silver/dp/B000246GSE
Zojirushi makes a vacuum-insulated one and costs less than the Kickstarter donation. =/
I use the Zouirushi Mr Bento set
It's convenient as hell, especially if you don't have a fridge.
seconding the bento; if OP wants food at hot/cool temps, an insulated bento would be good.
I know it’s expensive but I got one of these when I used to more construction field work. Been using it for a few years now. It’ll keep everything nice and hot and gets ya a good variety.
https://www.amazon.com/Zojirushi-SL-JAE14SA-Bento-Stainless-Silver/dp/B000246GSE
I'm a huuuuge fan of bento canisters like this and this. If you refrigerate containers overnight (or prime them with hot water before adding hot foods), they'll stay good for hours. Plus it's kind of comforting to have all your food sectioned out. :)
I have a this : https://www.amazon.com/gp/aw/d/B000246GSE/ref=mp_s_a_1_1?ie=UTF8&qid=1479099554&sr=8-1&pi=SY200_QL40&keywords=bento+thermos&dpPl=1&dpID=41p5bbuAleL&ref=plSrch
I absolutely love it. The bottom two are great for warm food while the top two are good for colder food like fruits or other type snacks like that. You can even have soup!
Definitely something that might suit what you want.
There is and it is awesome:
http://www.amazon.com/Toddy-T2N-Cold-Brew-System/dp/B0006H0JVW/ref=sr_1_1?ie=UTF8&qid=1341951225&sr=8-1&keywords=toddy
(I know it is not exactly the same, but it is very cheap and does a great job)
Butting in uninvited to say I have a Toddy which tastes absolutely amazing. Once brewed it's a coffee concentrate that lasts up to two weeks in the fridge.
Short answer: you can't. Cappuccinos require espresso and a steam wand, which, in turn, require an $80+ grinder and a (bare minimum) $100 machine.
Long answer: You kind of can. But not really. But sort of.
If you get one of these, you can make a rich, concentrated coffee that resembles espresso for a fraction of the cost. If you have a french press, you can 'foam' milk in that, although with much poorer results than a true steam wand. I've also heard of people putting hot milk in a small container and shaking the hell out of it, but I can't vouch for the effectiveness of this. You could also try a milk foamer, but I doubt you'll be able to get a stiff enough foam to make a capp.
The bottom line is, you can make a thick coffee with foam on top with a sub-$40 budget, but it won't be a cappuccino, and it won't be nearly as good as one. Your best bet is to find a good coffee shop near to where you live, and get cappuccinos there. Hope that helped!
have you ever seen this
A bit more tricky to remove...but...all fucking edge piece.
Dutch oven!
At that point, get an enamel dutch oven. http://www.amazon.com/Lodge-Color-6-Quart-Dutch-Island/dp/B000N501BK
I use my dutch oven for everything I used to use my slow cooker for, since I don't really leave my slow cooker unattended either. You get much more control, and it's much more versatile. If I had to go down to one pot or pan, it would be an enamel dutch oven.
The expensive brands in that same price range:
All-Clad, Le Crueset, Henckel, and Mauviel.
This five piece set is worth it's weight in... well, copper. Cuz copper is super expensive.
At a much more reasonable price range you've got Cuisinart, Calphalon, Lodge, Victorinox and a few others.
-------
Here's a list of things they could get (an entire kitchen revamp) for under $1000:
A $300 knife set with 4 steak knives (note: the 7 piece classic set is available from Costco online for only $80 if you have a membershit, same blades, no fancy handles. The steak knives can be got for $10-15 each, so the entire set is like $130 if you don't want rosewood)
Anova sous vide cooker for $110. Toys are fun.
Lodge enameled dutch oven for $60
Mauviel carbon steel pan for $40 (needs to be seasoned), or a pre-seasoned Lodge for $20
Lodge cast iron for $10-20 (depending on 8 inch or 10 inch).
Scrapers (super important!) and maybe silicon handles for $10
and the most important thing they'd want, is the Calphalon tri-ply set for $225 (which I think is also cheaper over at Amazon).
An Instapot (combined pressure cooker + slowcooker + ricecooker, this thing is like a slowcooker on crack). You can also opt for just a regular $30 slowcooker, too.
If they don't care about fancy looking handles, the Fibrox handles actually have a great grip, and Victorinox knives are sharp as shit.
Other things:
OXO good grips tools/spatulas/measures/everything for about $100 depending on what they want.
The Costco membership would probably be worth it just so you can buy the Victorinox knives (and I think also the Calphalon pans?)
---------
Total price: ~$1000 if going with the rosewood handles (I personally didn't bother), and instapot (I would highly recommend the instapot, though!)
If going with regular handles and instapot, $850 <--- my choice
If going with regular handles, instapot, but no sous vide, $750 <--- probably most economical choice
If going with regular handles and regular slowcooker, and no sous vide ~$650
Just regular Victorinox Fibrox knives, and Calphalon Tri-Ply set and one cast iron skillet: ~$400
Le Creuset is a bit overrated. I've cooked with dutch ovens like this and this and there is very little difference other than the price tag.
Most are ceramic coated cast iron which retains heat just like the plain cast iron ones. Lodge makes a great ceramic dutch oven at a very reasonable price.
They're just as good for browning and deglazing - if not better as acidic liquids (vinegar, tomato sauce) can be used to deglaze without any concern.
Yeah, it is enameled. It's very much the same item:
https://www.amazon.com/gp/aw/d/B000N501BK/ref=mp_s_a_1_1?ie=UTF8&amp;qid=1479674762&amp;sr=8-1&amp;pi=SY200_QL40&amp;keywords=lodge+dutch+oven&amp;dpPl=1&amp;dpID=41UmRh4zzOL&amp;ref=plSrch
I haven't purchased a lot from TNT, but I think you'd probably be better served buying some name brand sticks you'll be able to get in the future. TNT isn't really well known for high quality cigars. If it's between those two options, definitely grab some sticks from Shad. Lots of other good places as well, with name brand sticks.
As for the Humidor, honestly, wood Humidors are more trouble than theyre worth. Grab a gasketed Tupperware like this as well as some 65% Boveda packs and you'll be in great shape. These will keep your cigars in perfect shape, with the least amount of maintenance.
Someone sent me this tuppedor set up:
https://www.amazon.com/Sistema-1870-Collection-Rectangle-Container/dp/B00284AG5U/
www.amazon.com/gp/aw/d/B004LHQEOY/ - the 65% version
That's the easy and practical way. It's also a great long term overflow if you do end up getting something fancy down the road.
My pleasure.
This is what a bunch of people use including my self. I do have a real wood burl humidor but I find this so much easier.
https://www.amazon.com/Sistema-Microwave-Collection-Noodle-31-7oz/dp/B00284AG5U/ref=sr_1_1?keywords=Sistema+KLIP+IT+Rectangular+Collection+Food+Storage+Container%2C236+Oz&amp;qid=1569968747&amp;sr=8-1
And for the Boveda people usually use between 65% and 70% I recommend this.
https://www.amazon.com/Boveda-2-Way-Humidity-Control-Large/dp/B004LHSOBK/ref=sxts_kp?keywords=boveda+67&amp;pd_rd_i=B004LHSOBK&amp;pd_rd_r=7b646bb8-358c-4cf6-a16c-a33cbe3765ab&amp;pd_rd_w=BR0KH&amp;pd_rd_wg=td0lO&amp;pf_rd_p=81d99bd4-f902-4b23-8928-b05d50fd5b3c&amp;pf_rd_r=TKJPQR38W0MAYQX607YQ&amp;qid=1569968891
Two of these cigar trays fit into this Tupperware perfectly, throw in a Boveda and a hygrometer and you've got everything you need shipped to your door from Amazon
https://www.amazon.com/gp/aw/d/B00284AG5U/ref=yo_ii_img?ie=UTF8&amp;psc=1
+
https://www.amazon.com/gp/aw/d/B00B9234HE/ref=yo_ii_img?ie=UTF8&amp;psc=1
I found something similar on Amazon. It's not great since you can't see the entire kit if it's on the second or third level, but I don't have a proper display case or anything. This guy really saves me a lot of space on my desk.
Edit: I forgot to mention, Masurao's on the stand that came with the kit.
Here's one for $40 that has 5 preset temperatures and an alarm feature. I have the same kettle, except mine allows me to choose the temperature in 5° increments from 160°F to boiling. I haven't tested the alarm feature since I don't get up at the same time every day, but it is a good kettle.
>First off, how do you store your teas air-tight? I have one tea that doesn't have a seal, so I just keep it in a ziploc bag inside the paper box.
I do the same. Put the tea in something that blocks out light, then put that in a ziploc bag to keep out air.
>Also, how do you approximate the temperature of water in a kettle? I know it's important to have the temperature right, so how do I get the temperature right for non-black teas with a kettle?
I use this kettle, which has a variable temperature control. Before that I boiled water in a pot and used a cooking thermometer, which was more work, and before that I just estimated based on the size of the bubbles in the water.
If you’ve only had her for 6 days and have tried feeding 3 times, it’s way too much. On top of being in a new environment, having food presented over and over is stressful. When bringing a new snake home, you should leave them completely alone for a week- no handling- and then offer food. From now, wait a week before you offer food again, and don’t handle her between now and then. You should make sure she’s eaten at least 2 times in a row before handling, and wait 48 hours after she’s eaten so she has time to digest.
In the meantime, make sure her enclosure is set up correctly- correct temperature (78-80 cool side, 88-92 hot spot) with heat sources controlled by thermostats, humidity at least 60% or higher, at least 2 secure hides and other clutter like fake plants and branches. As others have mentioned, aspen is bad for holding humidity- cypress mulch or coco fiber/chip is better. Read through the care info in the group stickied post if you haven’t already.
Both of my BPs ate F/T right away despite being fed live at the breeder. To warm it up, thaw in the fridge overnight in a ziplock bag. When it’s thawed, fill a bowl with the hottest water from the tap and put the mouse (still in the bag) in the water. I usually have to change the water out a couple times as it cools. Warm it like this until the temperature measures at least 100 degrees measured with an infrared temp gun like this one . I would also use feeding tongs not your hand.
Hope this helps, congrats on your new baby. 😊
Hey Dave - I picked up one of these for measuring track and tire temps. Any thoughts on the adequacy of it for that purpose?
I've used your advice and typically adjust tire pressures based on temperature 3x a day: 9AM session 1 , 11AM session 3, 1PM session 4. This is the wear I shoot for - any suggestions? I have been running 31/32 in the AM and 33/34 in the afternoon.
I've started using a light alarm clock and I find it really helps. The light gradually turns on starting 30 min before the alarm is set for, then when it goes off it's at full brightness. I find I wake up a bit with the light and it gives me time to work myself into fully waking up when the alarm sounds.
Philips HF3500/60 Wake-Up Light https://www.amazon.ca/dp/B00F0W1RIW/ref=cm_sw_r_cp_api_tBVEybX3TQNG0
Have you considered getting a Phillip's sunrise simulator alarm? It gradually becomes brighter for 30 minutes before your alarm goes off so you wake up naturally. It also has a regular alarm that goes off too. I have the basic model but there are fancier ones you can get.
Philips Wake-Up Light Alarm Clock with Sunrise Simulation, White (HF3500/60) https://www.amazon.com/dp/B00F0W1RIW/ref=cm_sw_r_cp_apa_zgk1Ab92QVKHR
Get a light alarm. I have this one and it's fucking amazing, especially since the sun doesn't rise until around 9 am right now.
(PS: I don't know why it's so expensive. My fiancee bought ours and I didn't ask the price but I refuse to believe she spent $700 on it)
EDIT: Asked the future-wife. She bought for around $70. We're guessing maybe it's discontinued or something, there are newer models for $130 like this one or $50 for this one.
Try the Screaming Meanie. Truck drivers use it to wake up because their sleep schedules and pretty much everything about truck driving makes it both very difficult and very important to wake up. It has the added bonus of being portable.
There's also the Sonic Boom Bedshaker Alarm Clock, which is made my a manufacturer of alarm clocks for deaf people. It wakes you up by vibrating your bed and, optionally, beeping really loudly (not as horrible as the meanie though, and more precise volume adjustments.) I have one of these and it works great!
I've also seen the SmartShaker, which is a Bedshaker that connects to your phone via Bluetooth. Personally haven't tried it and I doubt that something that runs on batteries could shake me awake, however, but it could be worth a try.
If you have trouble with going back to bed after waking up to an alarm or turning off alarms in your sleep, I recommend getting an app that requires you to take pictures or scan barcodes. If you need the phone's ringer to be louder for the alarm, try hooking it up to a speaker.
You might also consider getting an old fashioned [Analogue Alarm Clock](
http://www.amazon.com/gp/aw/d/B00PD38UDI/ref=mp_s_a_1_9?qid=1448166430&amp;sr=8-9&amp;pi=AC_SX110_SY165&amp;keywords=sonic+boom+alarm+clock). Those fuckers are loud and percussive and and don't have a snooze button. There's nothing like actual metal clanging together to wake you up in the morning.
If you have some money to spend, maybe a Sunlight simulation alarm would work for you. It simulates the gradual rising of the sun, but at whatever time you need the sun to rise and without having to leave your blinds open at night, with street lights bothering you and such.
Finally, I've found that the very best way for me to wake up is for my husband (or anybody really) to bring me a cup of tea. He can get still-mostly-asleep me to sit up and take the tea, and then I have to wake most of the way up to avoid spilling hot liquid all over myself, and then I fully wake up as I drink it. Obviously, this one is dependent on living with another person and having morning schedules that work together, which may not work for you.
Anyways, as a fellow heavy sleeper, I give you all I know about not sleeping through being a functioning member of society. :)
If you're not already, try and keep good sleep hygiene.
I also use one of these illuminating alarm clocks and it has helped me improve wakefulness.
The last thing I'll say is that I wouldn't assume working EM doesn't necessitate switching sleep cycles (except in residency which is probably the case with most residencies). If you're willing to go out of major metros, you can probably get good terms on your contract and work how you want to work.
Now that I do BIAB, I would highly recommend everyone starts at BIAB over extract, personally. It's not much harder, and requires barely any extra equipment, if any. And you get much more control when you want it.
Well, where do you plan to brew? Can you do an outdoor propane burner for 5 gallon batches, or are you limited to your stove? If you have to stick to the stove, I think you can really only do 2.5 gallon batches.
I personally do 5 gallon batches on a propane burner, so I can give you a rundown of what I use, at minimum:
Boil Kettle: 10 gallon minimum. I have an 8 gallon, get 10 or bigger
Propane burner (like a turkey fryer)
Propane tank
Thermometer, digital prefered. I have the Javelin
Stainless steel spoon or mash paddle
6.5 Gallon Glass Carboy, but you can start fermenting in buckets
Bottling bucket
Auto siphon
bottling wand (spring tip recommended)
Wing capper to start, bottle capper if you keep brewing
Bottles and bottle caps
StarSan sanitizer
PBW cleaner
Hydrometer w/ test tube
Other: hose for siphon/bottling wand, airlock, funnel,
https://www.amazon.com/Lavatools-PT12-Javelin-Thermometer-Chipotle/dp/B00GRFHXVQ
I like this one. Gets the temp fast and not as expensive as the Thermapen. I checked it in ice water and boiling water when I got it and it was accurate.
Whirlypop is great for the stove https://www.amazon.com/Wabash-Valley-Farms-Stovetop-Popcorn/dp/B00004SU35. I just use vegetable oil with some flavacol. I should probably try a healthier oil though..
you need to get a whirley-pop.
I make kettle corn all the time and this allows me to not need to take the pan off of the burner and it coats evenly every time.
Microwave corn sucks and it has some really weird chemicals in it. Recommend that you switch to this and control what you eat....save some $$$ too...
http://www.amazon.com/Wabash-Valley-Farms-25008-Whirley-Pop/dp/B00004SU35
I'm pretty sure they're referring to the tiny, open-air, oven-like, heated turntable used for cookies and pizzas and such...
https://www.amazon.com/dp/B00005IBXJ/ref=asc_df_B00005IBXJ5104642/?tag=hyprod-20&amp;creative=394997&amp;creativeASIN=B00005IBXJ&amp;linkCode=df0&amp;hvadid=167141308073&amp;hvpos=1o22&amp;hvnetw=g&amp;hvrand=4851772427046228630&amp;hvpone=&amp;hvptwo=&amp;hvqmt=&amp;hvdev=m&amp;hvdvcmdl=&amp;hvlocint=&amp;hvlocphy=9006754&amp;hvtargid=pla-275333809581
But bigger?
here you go buddy: http://www.amazon.com/Presto-03430-Pizzazz-Plus-Rotating/dp/B00005IBXJ
Got 15 bucks? Lodge L8SK3 Cast Iron Skillet, Pre-Seasoned, 10.25-inch https://www.amazon.com/dp/B00006JSUA/ref=cm_sw_r_cp_apa_FL-CybYXPF8PK
You really need to get yourself one of these skillets they are the BEST!!! I no longer need one since /u/Utinni was sweet enough to gift me mine for my birthday yesterday.
Seriously though, you NEED one!
Good luck with your move!
Different surfaces for different things.
One decent nonstick pan is great to have for things like eggs, but isn't great at high heat applications like searing meat. You'll never build a good fond in nonstick, and having pots lined with nonstick coating is just unnecessary. A couple of pans -- a larger one for cooking fish or day-to-day "I'm just browning some ground beef" kind of stuff, and a smaller one for fried eggs or whatever -- will be plenty. You don't want to spend too much on a nonstick pan, though, because by their nature their lifespan is limited.
One cast iron pan is great to have because it's great at really high-heat applications, but can also be used for any number of other things -- you can sear a roast in it, you can bake a deep-dish pizza in it, or brown off some chicken and then braise it in the same pan. It can become pretty nonstick over time, with the right care, but that's a long-term process. Cast iron is heavy, though, and requires different care than other pans (it's not difficult to take care of, just... different. You can't chuck it in the dishwasher and walk away.)
For an all-purpose workhorse, look for stainless steel. It's good in a wide range of applications, and can do almost anything reasonably well. It's a little more prone to sticking (which is a good thing in many cases), but it's also durable enough that you can scour the fuck out of it on those occasions when you need to.
More important than the surface of a pan, IMHO, is the base. Avoid anything with a thin base; over time, it'll warp, and that creates hotspots and wobbles that make cooking a pain in the ass. You want pans that have a pretty thick base. If you can get something that has a layer of aluminum sandwiched in, that's great. Aluminum conducts heat better than steel, so pans will get hot faster with some aluminum included. You don't really want to cook directly on aluminum, though, so something with steel and aluminum layers in the base is ideal.
You're probably not going to find one single set that covers absolutely everything; I'd advise one base set of stainless steel, and then a few add-ons as time/money allows. I know Cuisinart does a pretty nice set of tri-ply stainless steel pots and pans that runs under $200, and goes on sale for even less regularly. Add a T-fal nonstick pan or two, and one good Lodge cast iron skillet, and you'd be well-equipped for most things.
Hilariously it's cheaper straight from Amazon and if you have Prime, Amazon will get it to you in 2 days free.
https://smile.amazon.com/dp/B00006JSUA/
http://www.amazon.com/Lodge-L10SK3-Pre-Seasoned-Skillet-12-Inch/dp/B00006JSUB
They look pretty thin to me, and I don't like the idea of a riveted joint. this is my favorite, and Cook's Illustrated agrees - they rated it their number 1 cast iron skillet.
I agree. I have this one and love it.
The kit isn't bad, however, I'm not crazy about the scale, it can only hold 3kg. I'd much rather see you get a scale that will hold 5kg. (they're not expensive).
Also not crazy about the "blend of oils". You'll get much more for your money if you choose a recipe that has some common oils used and buy them separately (olive, coconut, shea butter, palm/castor).
Also you will certainly want a stick blender, which is $15-20. This is a must have, not sure why the kit doesn't include it.
Anyway, if you think this is something that you will stick with and want to make more, I suggest buying your own quality stuff.
Stick Blender - $15 (Proctor silex at Walmart)
Digital scale $12 (linked above)
Digital Thermometer - $9 (Taylor waterproof - look on Amazon)
Goggles - $2 (amazon)
Isopropyl Alcohol - $3 (Walmart)
Spoons/silicone spatulas/bowls/cups - Dollar store - maybe $7?
Gloves (box of disposables) $4 (Walmart)
Mold $12 (Amazon)
Lye $10
Distilled water $1 (Walmart)
Oil will cost you less per oz if you buy in quantity, but even "regular" sizes of olive/coconut/shea butter/palm (Palm oil is a bit controversial because of sustainability concerns, all you can really do besides avoiding it altogether is buy from reputable companies that state that their Palm oil is RSPO certified) will cost you around $50 (Walmart and Amazon).
All told you're still under $100 and you've got a great kit that's got a lot more in it (more oil, blender, thermometer, bowls, etc).
It doesn't come with fragrance or lavender buds, but you can add some essential oil for a few dollars more and for what it's worth, I strongly suggest your first batch should be scent-free and color-free. Get your basic soap recipe the way you want it, then add scent, color, etc.
This is my list:
Total = $620 (no tax)
add in an awesome workbench table for 300 and you are good to go.
My favorite thing about coffee as a "hobby" is that, like some have said, it's a hobby that isn't just a waste of money. Fresh beans are a huge 1st step, they really just have tons of flavors that change almost as you work through the bag, and sometimes I feel like the first sip of a french press is different than the middle, etc. For me the different methods I use just work better for different beans, I'm still figuring that out myself. I prefer to french press african beans, pour over on more typically "harsh" beans, and I'm still dialing in aeropress, but I feel like it takes a lot out of the coffee so it seems to work best if I'm like "hmm I'm not sure I like this bean", aeropress... oh nevermind it's great.
You could buy:
Good grinder ~$140
Scale $15
Kettle $25
And three interesting and different types of brewers:
Aeropress ~$30
V60 ~$20
French Press ~$20
That's all the gear for now, you're SET until you become a crazy coffee nut, but for me 90% of the coffee I make is in one of those 3 methods. I have a moka pot, and they're cool too. But that's $250 for gear, and you could probably save a bit with different grinder options but plan to drop the biggest amount of that.
Add in $20 for some high quality beans (S&W is great and their reddit discount is on this page somewhere) and you're around $270 to be brewing great coffee a few different ways. Now you have 4+ different coffees, 3 ways to make it, and the equipment to make sure you're doing it "right".
Okay that's a lot and I hate this "if you buy a cup of coffee a day" crap, but let's just say you drink work swill most of the time, but get a cup of coffee out 3x a week. At $3/cup maybe you tip a quarter each time, you pay off this stuff in 6 months and these things pretty much last forever.
The point is, yes, some of the costs of entry (specifically the grinder) can be a little daunting, and sometimes we get carried away, but overall, the cost of making great coffee at home is significantly less than going out. You're actually getting BETTER coffee too, trying different ways to make it, and enjoying yourself. Wow, okay rambling there. Good luck!
I picked up a pack of 15 containers with lids for less than 20$ on Amazon prime now. Microwaveable and dishwasher safe. I’ll post a link if I can find it again.
Here they are
Looks like these https://www.amazon.com/dp/B01GH5KQLO/
After 2 years of using takeout containers from GFS, I upgraded my meal prep containers to these and I'm stoked. No more multiple containers, no more insulated grocery bag just to carry 2 meals to work. My usual portion of veggies doesn't quite fit, so I had to chop them up a bit more, might get a food processor and try my hand at cauliflower rice.
I don't know about OP, but I have had these in my Amazon wishlist for when I run out of my dollar store cheapies.
I have this one.. which works very well and is 1/6th the cost of a thermapen.
I have the same problem. I love to cook and hate to clean. I don't have a dishwasher either. I bought some food trays with lids. They can be microwave, dishwasher, and freezer safe. I buy in bulk twice a month. Precook meals for the week and put them in the containers. I also bought a food saver to seal and freeze extra food. Here is a link to trays. https://www.amazon.com/dp/B01GH5KQLO/ref=cm_sw_r_cp_api_P8Ityb8WSQB8A
I have the same ones from Amazon, they are great:https://www.amazon.com/gp/product/B01GH5KQLO/ref=oh_aui_detailpage_o05_s00?ie=UTF8&amp;psc=1
Amazon here
I really like them, but I did get them previously and had to return them because they were damaged. They feel pretty heavy duty and are dishwasher safe.
http://www.amazon.com/Lodge-Color-6-Quart-Dutch-Island/dp/B000N501BK/ref=sr_1_1?ie=UTF8&amp;qid=1331392165&amp;sr=8-1
Get this, it's $50 and works wonders.
My parents' house burned down around Thanksgiving and they asked me for pot & pan recommendations as they rebuild. Here's a list I sent them of things that ought to last forever but won't break the bank (no Mauviel, Staub, All-Clad, Le Creuset, etc). #1 on the list is a 12" Lodge skillet, just like the one we have. :)
Le Creuset = enameled cast iron. Lodge = bare cast iron, at least until recently. Bare cast iron requires seasoning and all that jazz, while enameled cast iron does not. Thus the apples to oranges line.
Lodge's enameled products are roughly half to a third the cost of Le Creuset's stuff, but they're made in China, while Le Creuset stuff is exclusively made in France, as far as I can tell. Is there a difference? I don't know, but they seem to get fine reviews on Amazon.
To that point, make sure the container has an actual seal in the lid and isn't just a snap on.
I use a Sistema container, similar to this: https://www.amazon.com/Sistema-1870-Collection-Rectangle-Container/dp/B00284AG5U/ref=sr_1_1?keywords=tupperdore&amp;qid=1564065025&amp;s=gateway&amp;sr=8-1
There are essentially two companies selling cedar trays on Amazon. After reading through reviews one company has a bunch of "mold" reviews, wherein the trays ARRIVED with mold already on them. Mold will obviously destroy your cigar habitat. The trays listed below are ones I purchased and came in great condition.
&#x200B;
This is the setup I have.
The container:
https://www.amazon.com/gp/product/B00284AG5U/ref=oh_aui_detailpage_o02_s00?ie=UTF8&amp;psc=1
Hygromter:
https://www.amazon.com/gp/product/B00JXOKQVW/ref=oh_aui_detailpage_o02_s00?ie=UTF8&amp;psc=1
Boveda Packs:
https://www.amazon.com/gp/product/B004LHSOBK/ref=oh_aui_detailpage_o01_s00?ie=UTF8&amp;psc=1
Cedar tray (optional):
https://www.amazon.com/Spanish-Cedar-Tray-HUMI-TRAY-Cigar/dp/B00B9234HE/ref=pd_bxgy_79_img_2?_encoding=UTF8&amp;pd_rd_i=B00B9234HE&amp;pd_rd_r=JS6RQJY49RAXMS0VRDF6&amp;pd_rd_w=vNV6l&amp;pd_rd_wg=ZB7Ip&amp;psc=1&amp;refRID=JS6RQJY49RAXMS0VRDF6
TO ALL NOOBS looking to build a tupperdore. Or seasoned guys looking to build yet another: [Here is a great piece of tupperware](https://www.amazon.com/gp/product/B00OW0Y000/ref=oh_aui_detailpage_o00_s00?ie=UTF8&amp;psc=1] on amazon. I recently got it and I couldn't be happier. Great size, great seal, and even has a moisture tray (I just put my boveda packs under that).
Here's a great Humidity/temp gauge
For humidity, Boveda packs are the way to go. A lot of the guys here suggest 65% humidity. Mine is at 69% but I may cut back, we'll see.
Also smoke a Drew Estate - Undercrown. Medium bodied cigar with great flavors and a really nice sweet taste throughout. (Sorry if you've seen me say this many times, it's a great cigar haha)
EDIT Here's another, cheaper tupperware option suggested by /u/nicknameisnub
Do a tupperdor!
Sistema KLIP IT Rectangular Collection Food Storage Container,236 Oz https://www.amazon.com/dp/B00284AG5U/ref=cm_sw_r_cp_apa_i_hBJZDbVSVZHE1
Mantello Solid Spanish Cedar Cigar Tray, Adjustable Divider, Fits Large Humidors, 12.5"x7.5"x2.25" https://www.amazon.com/dp/B079V3KYT7/ref=cm_sw_r_cp_apa_i_SBJZDbQCF8AAM
Under $30 for one of the most effective and low maintenance setups you're gonna find. Holds 50 cigars easily.
Use either the 65% or 69% (boveda recommends 69% for tupperdors) packs and you're good to go. 2 60g packs will be more than sufficient for this container.
Get one of these: Spanish Cedar Cigar Tray,... https://www.amazon.com/dp/B00B9234HE?ref=ppx_pop_mob_ap_share
One of these: Sistema 1870 Klip It Collection Rectangle Food Storage Container, 236 Ounce https://www.amazon.com/dp/B00284AG5U/ref=cm_sw_r_cp_api_i_ZoqQCb9PMRR8N
And some Boveda 72 packs and you will be golden. Cheap, effective and low maintenance.
I can't speak highly enough about the Sistema containers:
https://www.amazon.com/gp/product/B00284AG5U
They have an actual gasket in the lid rather than just relying on plastic to plastic contact. Also have locks on all 4 sides rather than just 2. Provides an absolute air tight lock.
Search "Tupperdor" on Amazon. Should get a few hits.
This Sistema Tupperware Box fits two of these Cedar Trays
Add a Hygrometer and some Boveda Packs and you're good to go...
This right here works great. I'm
notnow using a mixture of of a couple of containers off amazon and I just rinse them out with some baking soda with a little water then let them air out a bit.I'm using these and these and they both work great. I really like the little ones for singles because it's a perfect shape.
You can find them on Amazon for $8 a piece at the following link: https://www.amazon.com/Copco-2555-0188-Non-Skid-Cabinet-Organizer/dp/B0036OQU56.
I've bought quite a few for my collection and absolutely love them. In my opinion, these are a very cost-effective way to display large collections given that each display holds 18 amiibo comfortably.
OH wow i totally misread your question xD
i have totes seen tiered displays like that on amazon. since i was so useless with my last comment and deserving of downvotes, here's a similar one, usually "tiered spice rack" works, and there's nice clear acrylic tiered displays that i've seen people use in the detolf shelves too.
I've used these for the same purpose.
Kinda pricey now and no longer sold direct by Amazon for some reason. They were $7.99 when I bought them.
But you can search for "shelf organizer" or "spice rack" and find plenty of similar shelves, though they might not be as pretty as the Bandai versions.
EDIT: The 10" version is really cheap so that's a better option than the 15" one I linked above.
I imagine they’re mostly not double stacked and are on a riser something like this
Oh my gosh, this sounds super stressful! I actually have horrible skin on my legs (scars easily) and am so bad about scratching bites. Let's see what we can do.
Lastly, try to just let it go on the day of and feel confident and beautiful. You're already super brave for doing the shoot and your FH is going to love it no matter what! If something really bothers you, ask your photographer what you can do. If your back is really bothering you, for example, could you stick with a men's button down shirt over a bra? Or not include poses of your back?
I'm guessing no one actually enlarged your photo, since it's hosted like it's 2004. To host in a way the RES (Reddit Enhancement Suite) can display here you must post an url that ends in ".jpg" or whatever file type. Imgur is the best free site for this.
Second Your grind is bad. I don't want to make you feel bad, but you are severely limiting the performance of your box by using herb like this. It should be ground as close to kief consistency as possible.
This picture Demonstrates what your grind should look like. The grind on the left is from a normal 4 piece, the grind on the right is from the Finishing Grinder. Basically Kief. Think it's like $20 on Amazon.
This picture shows a normal 4 piece grind, upside down 4 piece and the FG grind. Just without comparison objects.
As you can see an upside down 4 piece is nearly FG quality grind. Less consistent, but totally usable. If I held the grinder upside down for longer I could probably get all the way there. Or very nearly.
Alternately people will put herb in a pill bottle with a coin and shake it up, to get a fine grind.
If you don't have a grinder This is a great 4 piece that is about as affordable as fancy coffee.
/u/mflbninja we REALLY need a stickied grind post in this sub man. with example pictures. Let me know if there's anything you want me to do in order to help.
I got this for $15:
https://www.amazon.com/dp/B00700W0TW/ref=cm_sw_r_awd_4Pzuub0DXC057
Time for a new grinder! I just got a new one and within a couple of weeks I had a ton of kief. Heres what I bought and its only $10. http://www.amazon.com/Chromium-Crusher-Piece-Tobacco-Grinder/dp/B00700W0TW
Product name: Salux Cloth
Price (range): $3.73/cloth
Country of purchase: USA
Skin info: All skin types
Ingredients: Nylon
Special info: 4.6 out of 5 Stars on over 1,200 Amazon reviews.
Experience & opinion: I use it with a moisturizing body wash for my body and it exfoliates better than any loofah or scrub I’ve ever used. For the price, you more than get your money’s worth because you can machine wash and dry them when you think they’re dirty. I occasionally will use it for my face, but I prefer Rodan & Fields Microdermabrasion Paste. I originally found it because I was searching for how to treat keratosis and never looked back. I give them as gifts to all my friends. For about $4, definitely worth a try.
I love using [these] (https://www.amazon.com/dp/B007IAE5WY/ref=sxbs_sxwds-stvp_1?pf_rd_m=ATVPDKIKX0DER&amp;pf_rd_p=2972357942&amp;pd_rd_wg=FKkbI&amp;pf_rd_r=3P5S2BS4C2MPCSJ3P9WV&amp;pf_rd_s=desktop-sx-bottom-slot&amp;pf_rd_t=301&amp;pd_rd_i=B007IAE5WY&amp;pd_rd_w=vFhtc&amp;pf_rd_i=Nylon+wash+cloth&amp;pd_rd_r=9Q3KY68WZ2T4VCJJ9YD0&amp;ie=UTF8&amp;qid=1500386078&amp;sr=1) on my legs and bum. It really smoothes out my skin.
Since those are out of stock, here's what I use.
I use this GENTLY to exfoliate a day or two before. Honestly, exfoliation makes more of a difference than anything else. Then I shave with the grain with a normal razor and hair conditioner, rather than shaving cream, as it's nicer to my skin. I grew to accept that I cannot shave against the grain without an itchy, bumpy mess.
I used to apply tea tree oil afterward which helped, but I no longer do that. Instead, I do the same exfoliation a couple days after shaving. I haven't had bumps in a long time with this method, however I would like to point out something: my hair is thick, coarse, and dark down there, and I can still see my hair follicles even immediately after shaving. It doesn't look as pretty and smooth as others due to my hair type and because I don't shave against the grain. I want to try waxing one day but haven't brought myself to do it yet. I just wanted to point out that it'll never look fully smooth if your wife has hair like mine. I hope my description helped.
I will have to agree with what u/Pumpkinsweater said. Last year my girlfriend and I were in the same boat, but we decided to get a french press and use a cheap $40 grinder with not-so-great results.
We then got the Hario Slim hand grinder, which made a huge difference, but was just a bit too much work for the mornings.
We now have a Baratza Encore grinder and an Aeropress; a $150 (USD) total investment. We still use cheaper beans because we are on a budget, but properly ground and pressed cheap coffee, to me, is still quite nice.
The cool thing about the Aeropress is it makes coffee at double strength, which you then dilute down to "regular" strength or whatever you want. If you want a latte-STYLE, just use the double strength and finish with an equal volume of milk/creamer/whatever. You get a ton of variety from one little Aeropress. It's quick too, I can have a cup made (after the water is already heated, of course) in just under 4 minutes.
The Baratza Encore grinder will work across whatever you want to try. They say it's not great for french press, but I find it perfectly fine. Aeropress, French Press, Pourovers, or grinding for a cheap-o drip coffeemaker, it works for them all.
Oh, that's one thing, you will need a hot water kettle. We've had the Hamilton Beach temp controlled w/ timer since last year and it is awesome. You can program a time for it to turn on, so your hot water is ready, and also set the temperature (I brew coffee at 195-200 degF, then I can vary it for teas). http://www.amazon.com/Hamilton-Beach-40996-Programmable-1-7-Liter/dp/B0083I7THI/ref=sr_1_3?ie=UTF8&amp;qid=1418247900&amp;sr=8-3&amp;keywords=hamilton+beach+hot+water+kettle
Anyway, good luck in your ventures!
If you don't feel like spending the money on a variable temperature kettle (I own this one which is generally the cheapest variable temp kettle you can buy), I recommend purchasing an instant read thermometer. They're typically $15 or less. That's what I did before I got a programmable kettle and I'm glad I upgraded.
This was my list for a previous, similar post -
I would buy the following items in this order, if it were my $80:
From there I'd get a solid set of pots and pans and/or a dutch oven. A rice cooker also is pretty helpful. I use mine constantly. Good luck!
I'd get a Mr. Bento and then cook away!
how to pack
comfort food
more recipes
or, just any thermos and a hearty soup? You can pack a lot into a minestrone, or, a "stoup" or chili.
I love my Zojirushi Mr. Bento
https://www.amazon.com/Zojirushi-SL-JAE14SA-Bento-Stainless-Silver/dp/B000246GSE/
The outer container is a vacuum bottle so if you fill it with boiling water and let it sit for 5 mins, then dump out the water and put in your containers of hot food, they will stay hot well past lunch time.
Check out these things. They work quite well at keeping food hot/warm. Takes an extra 10 min in the morning to warm everything up, but last for awhile and you can portion things out for easy calorie count.
https://www.amazon.com/gp/aw/d/B000246GSE/
A Zojirushi sounds like it might be a good fit. I have this system and I am very happy with it and it's quality. The Ms. Bento is the smaller version of the zojirushi.
A Toddy is only about $30 and is perfect for making cold brewed coffee. You brew 12oz and it will usually last me about a week.
http://www.amazon.com/Toddy-T2N-Cold-Brew-System/dp/B0006H0JVW/ref=sr_1_3?ie=UTF8&amp;qid=1417011307&amp;sr=8-3&amp;keywords=toddy
This is my every day coffee. This is what I use to make it. I've been doing this for three or so years now. Best damn coffee, and everyone gets the strength they want.
FYI, they make all-edge pans.
https://www.amazon.com/Bakers-Edge-Nonstick-Brownie-Pan/dp/B000MMK448
Happy Zambambo!
I hope you have a loverly birthday and thanks for the contest c:
Why would I want a brownie pan that puts all the brownies at the edge? Am I the only one who prefers the gooey center brownies?
Sounds like you need one of these: https://www.amazon.co.uk/Bakers-Edge-Brownie-Pan/dp/B000MMK448/
I'm not sure you understand what I'm saying, and I don't know what you're trying to say. The edges and bottom cook differently because they're in direct contact with the metal pan, which transfers heat more effectively and allows moisture to escape. The brownie pan in the video puts more of the batter in direct contact with the metal. This is the one mentioned: http://www.amazon.com/Bakers-Edge-Nonstick-Brownie-Pan/dp/B000MMK448 Maybe the second-to-last picture there will help you understand.
While you're there, take a look at the reviews and see if people who've actually used the pan think it doesn't work, or that the extra metal "does little" as you said.
Also this one.
I use one of these and I've been pretty happy with it. Not quite Le Creuset, but works just fine.
Thanks! I was having trouble sleeping and my thoughts were kind of jumbled.
I forgot to mention, if you don't have a traditional kettle popper, a whirlypop-style stovetop popper makes great popcorn. This is also the best choice if it's for only you or for a small group because the kettle style are a pain to clean.
There are lots of knockoff whirlypops but I've heard the the crank/gearing on some are very cheap and break after not too long. I think even whirlypop had QC issues for awhile. There are some good copycat brands, though.
Find the right heat/gas setting on your stove through trial and error and always stick to it for a consistent result. Also, you will get the best result with slow, even stirring as opposed to fast, occasional stirring. Anyway, once the test kernel pops it only takes a few minutes to pop a batch, so you're not handcuffed to the popper for very long.
It's a stovetop popcorn cooker.
This is the reason I own a Pizzazz It shuts off automatically.
We used this holy grail recipe for the crust. Topped it with this amazing carb-friendly Mid's Homestyle Pizza Sauce (only 4g), mozzarella, a sprinkling of parmesan, freshly ground pork sausage with fennel, basil, salt, pepper, and italian seasoning... and of course, pepperoni.
All cooked up on the greatest kitchen utility ever created, the Presto Pizzazz Pizza Cooker. We ran the bottom burner for about 5 minutes to get the bottom of the crust cooking first, then switched on the top burner. Cooked the crust until starting to get golden brown, then added toppings and finished it off with both upper and lower burners.
It was perfect.
So I have one of these rotating pizza ovens. It has two heating elements. One on top for bubbly cheese, one on bottom for crispy crust. And a selector switch for top, bottom, or both. It can spin a weak frozen pizza into the dank. Especially if you grab some fresh mozzarella and some prosciutto and throw it on. Also the best reheating option I've found.
A Pizza Pizzazz! I've had one for about 10 years. I use it for way more than just frozen pizza. One time just to prove a point to my skeptic roommate, I baked cookies with it. They were incredible, just like I expected.
Edit: http://www.amazon.com/gp/aw/d/B00005IBXJ?pc_redir=1409137881&amp;robot_redir=1
I think these skillets are amazing and I want one so bad! Everyone should definitely own one!
https://www.amazon.com/Lodge-Skillet-Pre-Seasoned-Skillet-Stovetop/dp/B00006JSUA/ref=sr_1_3?ie=UTF8&qid=1538510630&sr=8-3&keywords=lodge+10.25
This is a little over 15$ but if your mom cooks cast iron pans are awesome! 😂
here
Or this one. Never buy another pan and leave it to your descendants.
Lodge. I'm a little confused as to what you meant by your second question, but I needed a cast iron skillet, that's what they had at City Target, and I'd heard good things about Lodge! I've been using a lot of olive oil, but it's making lovely food.
Cast Iron will give you what you are looking for:
http://www.amazon.com/Lodge-L10SK3-12-Inch-Pre-Seasoned-Skillet/dp/B00006JSUB/ref=sr_1_1?ie=UTF8&amp;qid=1341688485&amp;sr=8-1&amp;keywords=cast+iron+skillet
They do require a bit of care but its not bad at all. Never use soap on it.
https://www.amazon.com/Etekcity-Lasergrip-1080-Non-contact-Thermometer/dp/B00DMI632G/ref=sr_1_2?s=hi&amp;ie=UTF8&amp;qid=1467908210&amp;sr=1-2&amp;keywords=infrared+thermometer
I use mine all the time, and it has lasted for years.
Refined avocado oil does actually have a high smoke point. I personally use Safflower oil, which also has a very high smoke point.
I would recommend getting an infrared thermometer (this is the one I have) so you can more accurately control the temperature of your pan.
Get a "Brew in a bag" bag, if you want to do BIAB. They're resilient and worth the extra money. You won't find them on Amazon.
If you want to start going to all grain you can buy a large Coleman / Igloo cooler (60 quart is what I use, can do up to 10 gallon batches). Ball valve and fittings, some pipe tape too. Don't forget a pulley to help get the bag out of the cooler!
You can get a flask, stir bar, and everything else you need to start making yeast starters.
Grab a large spoon and/or a flask wisk to help mashing.
Amazon also sells immersion chillers to help with the post boil. I bought mine for $50 and I think it's the 25' one. Works like a charm for 5 gallon batches.
Get a good pair of insulated gloves for your brew day!
Amazon also sells thermometers to help track mash temperatures. I have this one and this one. They're both great. An IR thermometer is great to have for yeast starters too...but definitely not needed. Would put that at the bottom of my purchase list.
Oh! A sterile siphon is also awesome. Bought that from Amazon too.
And so I don't keep rambling, Homebrewfinds as a good list of filler stuff from Amazon. Things like campden tablets, hop bags, pieces to make hop spiders....etc. http://www.homebrewfinds.com/homebrewing-related-amazon-fillers
Congrats on your new baby! Since you're new to the world of beardies, please read up on their care with these wonderful guides:
Comprehensive Care Gudie, Nutrition Guide, A wonderful Cheat Sheet!
You will want to get in an Infrared Temp Gun for the most accurate readings for your basking/warm/cool areas. The sticky thermometers on the side are severely inaccurate. This will help guarantee your beardie's temps are where they need to be for proper digestion and health.
I cannot tell from the picture, but mealworms should be avoided until your dragon is over 6 months old as they're very hard to digest and can cause compaction- as should adult superworms.
Micro super worms, pheonix worms/black soldier fly larva, dubia roaches, silkworms, and crickets are all safe options for your baby.
What does your lighting setup look like?
Finland gets very little sunlight in the winter, so bright therapy lamps are popular here. You could try those.
Here's a quick example of such a lamp: https://www.amazon.com/NatureBright-SunTouch-Light-Therapy-package/dp/B000W8Y7FY
There are also alarm clock models if you want it to turn on as you're waking up, here's an example: https://www.amazon.com/Philips-Wake-up-Simulation-HF3500-60/dp/B00F0W1RIW/
It exists, and not only does it exist, it also uses gradually increasing light as well as sound to wake you up.
Edit: It's down to 53 bucks on amazon
Wait, Home Depot sells homebrewing specific items? Awesome! And congrats on the first brew, looks great. Welcome to the addiction!
Edit: for the thermometer, I highly recommend a Javelin or Javelin Pro. Great thermometer and significantly cheaper than the competition. You'll find other folks on here singing their praises as well. I love mine.
Charcoal grilling is great! The only additional purchase I would make is for a chimney starter, if you haven't already. Weber makes a great one that will last you a while and is like $15. You can use newspapers, balled up paper towels, or the little chimney lighter cubes to start the chimney, whichever is easiest for you. I like the cubes, they're very consistent and easy.
This article from Serious Eats talks about several different two zone charcoal setups. They're all fairly basic, but they are good to know.
When you purchase charcoal, don't buy any of the stuff with the lighter fluid on it. And don't add lighter fluid. If you get the chimney starter right you'll never need it. It imparts a yucky chemical flavor in the meat. I prefer briquettes. They are more consistent for me and they are much cheaper where I live. Lots of people love lump charcoal but it's a lot harder for a beginner I think.
Learn where your grill vents are. They're much more important to charcoal grilling since they are how you control the heat.
These are all great resources that have been posted. Read through them and keep coming back here! This is a great community.
Edit: If you don't already have an instant read thermometer, you should definitely buy one. It's one of my most used tools in the kitchen and on the grill. There are a ton out there. I've had the Lavatools Javelin for a while now and love it. It reads the temp quickly, it isn't crazy expensive, and it looks nice. It really stepped up what I was pulling off the grill.
I use this Hamilton Beach kettle. It can be set to between 150 (I think) to 212 degrees, in 5 degree increments. My only real complaints are that it is kind of loud, and there's no alert to let you know it's done heating (although it gets much quieter once it's finished).
I use the Hamilton Beach Variable Temp. Electric Kettle . I drink a lot of varietys of tea that require different temperature. If you just drink black tea, or just aren't that serious about tea, a tea kettle would be fine. You can find simple ones at super markets. And you do not put tea in tea kettles. Those are tea pots. And sometimes they arent even required. When I drank loose leaf tea casually (without any gongfu (chinese) teaware) i just used two cups, poured the water in one cup with the tea, and poured the water out with a strainer into the other cup.
I've used this almost every day for a year without issue. Variable is the only way to go.
I have this one:
http://www.amazon.com/gp/aw/d/B0083I7THI/
I actually bought one of the Amazon warehouse ones for like $28 or so. They come and go.
So far, it heats the water quickly and works pretty easily. I haven't verified the temperature independently, but I'm honestly not that exacting (/r/coffee blasphemy, I know).
The LCD interface to set the temp and other things is pretty confusing. I pretty much just fought through it, set the temp to 195 (what I like my aeropress at) and then have left it alone. Now I just hit the on button, it heats up and holds for an hour.
Possibly my only complaint is a gooseneck would be nice, but I mostly do aeropress, not pour over, so I just am careful with the pour and don't have any issues.
Hot is one of the more subjective words in the dictionary. What's hot to you may be warm to me. Fortunately, they make a thing called a laser thermometer that will tell you exactly how "hot" your grasshopper is. Here's one for example. Take measurements of the parts in question.
Get an infrared thermometer. Not perfect, but it gives a ball park pan temperature.
Link
I’ll link what I use.
For water.
https://www.chewy.com/zoo-med-digital-thermometer/dp/154874?utm_source=google-product&amp;utm_medium=cpc&amp;utm_campaign=hg&amp;utm_content=Zoo%20Med&amp;utm_term=&amp;gclid=EAIaIQobChMIgoWLsNql4wIVUYezCh0pQQS7EAQYASABEgJScPD_BwE
For basking area.
https://www.amazon.com/Etekcity-Lasergrip-1080-Non-Contact-Thermometer/dp/B00DMI632G/ref=mp_s_a_1_1_sspa?keywords=temp+gun&amp;qid=1562602149&amp;s=gateway&amp;sr=8-1-spons&amp;psc=1
> Would that be powerful enough to heat a 75 gallon tank? I read that the basking spot also needs to be at least 100 degrees farenheight.
You won't know until you check it with an accurate thermometer- you want the ambient air in the basking spot to be around 90ºF and the surface of the basking spot itself to be 105-110ºF for a juvenile.
You want to measure these temperatures accurately with a digital probe thermometer or a laser temperature gun- the guns are cheap.
Once you check the temperature then you adjust the light until you get things perfect but you can't just guess. If it's not warm enough you can simply raise his basking area via a taller platform, rock, or branch.
How are you fixed for his UVB light? That is equally crucial!
Care Guide.
Sturdy step stool ($40) - not the rickety tubular kitchen chair ones, I mean one where you can stand on the top. a Buy it for Life item, not inexpensive, but safe. https://www.amazon.com/Louisville-Ladder-AS3002-6966014-2-Foot/dp/B00182TWL2
Leatherman multi tool (around $50), which i keep in the junk bowl because I can never find a screwdriver fast enough. Pricey new, less expensive when you buy it second hand or in a pawn shop. they don't really break, but you do have to clean and oil them once a year. https://www.amazon.com/LEATHERMAN-Wingman-Multitool-Stainless-Steel/dp/B005DI0XM4/
Cordless drill (under $50), mine basically has the screw driver bit in it 90% of the time. the rest of the time I drill lots of pilot holes. pay attention to the battery... if you can get one with a battery that is shared by other tools in the line, then it is easily replaceable and if you buy another tool in that line you can swap batteries. I like to have 1 battery in the charger and one in the device. https://www.amazon.com/BLACK-DECKER-Cordless-Driver-BDCDD12C/dp/B0111N8L7I/
Spirit, bubble or torpedo level. (under $10) the Hanging kit usually contains just the wires and hooks, but you need a small spirit level for hanging pictures and shelves evenly. doesn't matter the brand they all work the same https://www.amazon.com/WilFiks-Leveling-Resistant-Different-Visibility/dp/B07M62GJYP/
Small tool boxes vary in quality. I don't know if this is for you or someone else. But don't buy anything unless it's a NAME BRAND, cheap metal tools bend and can break with too much torque. Even the Stanley line that Walmart sells isn't fabulous, but it's better than a nameless brand. I don't like SETS of tools, but you need to start someplace, buy GOOD tools one at a time, I love finding $$$ tools at thrift stores. https://www.amazon.com/STANLEY-94-248-Piece-Homeowners-Tool/dp/B000UHMITE/(i bought a cheap socket set 4 years ago to replace my stolen ones and they already have rust)
Bucket organizer. (around $15) If you buy a SET of tools, take the plastic blow molded container and put it in the recycling. You will never bother putting the tools back in and when you get more tools they won't fit. Bucket Organizers are pockets that fit around a 5 gallon bucket. You shove your tools into the pockets and everything else in the middle. And keep it in the bottom of your closet and carry it to where you need the tools. https://www.amazon.com/Bucket-Boss-10030-Bucketeer-BTO/dp/B00GK4TOWK
Tack Hammer. (under $15) You won't need a big 22 oz hammer, but a smaller 16 oz one with a normal handled and then a Tack hammer, these have a narrow head and sometimes are magnetic and hold the nail in place. Tack hammers are easier to use for hanging things exactly where you want them. https://www.amazon.com/Stanley-54-304-5-Ounce-Magnetic-Hammer/dp/B00002X1XD
Stud finder.(under $20) uses a battery, and lets you know where the studs are behind drywall. BEST PURCHASE EVER. https://www.amazon.com/Upgraded-Stud-Finder-Wall-Detector/dp/B07VLDTVFQ/ any brand will work fine.
Digital Infared Thermometer (under $20) Non-contact Digital Laser Infrared Thermometer Temperature Gun - ALSO BEST PURCHASE EVER... works in the kitchen for food and oven temp, fridge temp, and for locating drafts and cold spots around doors and windows. https://www.amazon.com/Etekcity-Lasergrip-1080-Non-Contact-Thermometer/dp/B00DMI632G
Toilet Plunger - the sort with the extra bit on the end. https://www.amazon.com/Get-Bats-Out-Plunger-Bathroom/dp/B00ODD5MD0 you do NOT want to be waiting around for someone to unblock your toilet. It may be disgusting but scoop out some of what's in the toilet before you start plunging, it's less disgusting than having to mop it off the floor. You want the plunger that makes a seal around the bottom.
BUCKET. (under $10) mine is constantly in use, i keep it in the tub and toss wet things into it. I have gone through EVERY TYPE on offer...I was so sick of plastic buckets, that warped and stained, where the handles ripped out. But the BEST and cheapest one I have ever found is a flat back duraflex bucket for watering horses. Not kidding. Made of a hard polyethylene these things are designed to be flung around and stepped on by 2000 lb animals. https://www.amazon.com/LITTLE-GIANT-Flat-Back-Dura-Flex-Plastic/dp/B000HHLHPS/ these are cheap if you buy them in a feed store, but even with the shipping on Amazon it is WELL WORTH the money. You will need a bucket when you empty the back of the toilet tank to change the flushing flapper or gasket, and you will need it when you empty the commode itself, if you have to change out the wax seal underneath.
Blanket hangers. (6 for $27) yeah this is obscure, but when I moved I lost a LOT of storage space. These saved my sanity. I use them to hang up quilts and sleeping bags in the back of the closet OFF SEASON. I also use them to hang blankets, sheets curtains and stuff once they come out of the laundry aren't quite dry. I didn't even know there was such a thing before now I wouldn't give them up. https://www.amazon.com/Stock-Your-Home-Comforter-Organization/dp/B00EUG51JU
Flashlight. ($30-50) I've written about these before. Until I bought a GOOD one, I had no idea how bad the others were. Cheap flashlights are great to have scattered about in the cellar, or in the junk drawer. but if you really want TO SEE, get a great flashlight. I gifted myself one for christmas one year and I love it. It hangs by the door and if I am going to be out very late or the weather is bad, I shove it in my bag. It will also illuminate Well past the end of the porch and into the yard if I hear a noise. https://www.amazon.com/Pelican-Carded-SabreLite-Flashlight-Yellow/dp/B01CKAIYV4 any very good brand will do, but I found Maglites to be dangerously useless.
I highly recommend one of those laser guns that takes temps. Oven/hotpot temps are notoriously +-50 degrees. or even more. https://www.amazon.com/Etekcity-Lasergrip-1080-Non-Contact-Thermometer/dp/B00DMI632G/
We just got a laser thermometer like this, and have found it great so far. There is a slightly cheaper model as well. Good luck!
https://www.amazon.com/Etekcity-Lasergrip-1080-Non-contact-Thermometer/dp/B00DMI632G/ref=sr_1_3?ie=UTF8&amp;qid=1487966083&amp;sr=8-3&amp;keywords=laser+thermometer
Model #332 $ 349 - click order online - http://visionproducts.us/vp12wp/?page_id=18
Herpstat 2 $195 - http://www.spyderrobotics.com/index.php?main_page=product_info&amp;cPath=1&amp;products_id=26
80 watt radiant heat panel $89.99 - http://www.reptilebasics.com/80-watt-radiant-heat-panel
Ultratherm Undertank Heater $19.99 - http://www.reptilebasics.com/ultratherm-undertank-heater-uth-11-x11
Large Hide Box $6.99 x 2 - http://www.reptilebasics.com/large-hide-box
Large water bowl $3.99 - http://www.reptilebasics.com/large-water-bowl
Reptile Prime substrate $15.99 - https://www.reptileprime.com/purchase-here
Tweezer 18 " - $9.99 - http://www.reptilebasics.com/tweezer-18
acurite 06066m temperature and humidity probe $49.99 - https://www.amazon.com/AcuRite-06066M-Temperature-Humidity-Monitor/dp/B01MD1DJPY
Etekcity Lasergrip 1080 $18.88 - https://www.amazon.com/gp/product/B00DMI632G/ref=ox_sc_act_title_2?smid=ATVPDKIKX0DER&amp;psc=1
Just to throw in some decoration...
Koyal Wholesale Grapewood Branch $20. 89 https://www.amazon.com/Koyal-Wholesale-Grapewood-Branch-24-Inch/dp/B00C0PCK2O/ref=pd_lpo_vtph_199_tr_t_2?_encoding=UTF8&amp;psc=1&amp;refRID=HWE88KCVEHPM6K9ZW057
Rounding up to the whole dollar this comes out to around $781 before taxes and shipping so yes, less than the price of a biopod grand (these are not even shipping yet)
$999.95
https://www.thebiodude.com/products/biopod-grand-price-does-not-include-freight-shipping
more sites with prices
https://www.reptiles.swelluk.com/biopod/
https://www.indiegogo.com/projects/biopod-world-s-first-smart-microhabitat-animals-pets
Just posted this in another thread, if it doesn't work you either are using the laser to aim, which doesn't work, or you got one that doesn't go to a high enough temp. Anyways heres the post:
I have this. Turn off the laser and aim with the big hole. You can easily find them at a depot store in your town too instead of waiting on shipping. Just ask for infrared thermometers.
http://www.amazon.com/Philips-HF3500-60-Wake-Up-Light/dp/B00F0W1RIW/ref=sr_1_1?ie=UTF8&amp;qid=1411568655&amp;sr=8-1&amp;keywords=wakeup+lamp
There you go... ;)
It's $39.99 only after you clip the $10 coupon - link
my bad it's prob this one http://www.amazon.com/Philips-HF3500-60-Wake-Up-Light/dp/B00F0W1RIW/ref=sr_1_2?s=hpc&amp;ie=UTF8&amp;qid=1414126596&amp;sr=1-2&amp;keywords=philips+wake+up
There is a cheaper version if you don't want to spend $100 on an alarm clock: https://smile.amazon.com/dp/B00F0W1RIW/_encoding=UTF8?coliid=I3Q6DA5OFYQ1WS&amp;colid=17X88L7Z1IRW2
Buy an alarm clock. They are super cheap. Plug in across the room from you or in an attached bathroom. Cue obnoxious old school alarm sounds and having to get up to turn it off.
They also make "dawn simulator" alarm clocks that are on my wish list.
There's a cheaper version with fewer extra options. It just has a light of one color that slowly increases over time. I don't have DSPD but my partner does, and it helps us both wake up.
How about a wakeup light?
http://www.amazon.com/gp/product/B00F0W1RIW/ref=s9_dcacsd_bhz_bw_c_x_1&amp;ppw=fresh
Not OP but I use this one. http://www.amazon.com/gp/aw/d/B00F0W1RIW/
I also find that making it warmer in your bedroom when it's time to wake up helps.
There are clocks that ease into the annoying beeping.. I have one, doubt remember what it's called, but it slowly lights up before the alarm goes off, to create the illusion of sunrise. And then the beeping starts quietly and progressively gets louder. I think my boyfriend got it from amazon. And I know it's made by Philips.
EDIT: found the clock! http://amzn.com/B00F0W1RIW
I have the Lavatools Javelin. Absolutely no complaints a year in.
https://www.amazon.com/Lavatools-Javelin-Digital-Thermometer-Chipotle/dp/B00GRFHXVQ
https://www.amazon.com/Lavatools-PT12-Javelin-Thermometer-Chipotle/dp/B00GRFHXVQ
Ive got these but it looks like they're not on amazon anymore. I think most well rated quick read thermometers should be just fine though. I'm not a huge fan of the fork style, they don't seem as quick as the ones like I just linked. this one looks great, but ive never used one
For grilling or cooking in the oven I use my iGrill all the time. I had an original and it broke on me, but then I picked up the 2 after seeing them at CES (before Weber bought them) and hearing how it was all new etc. etc. and its been rock solid for me since. Ive picked up a few minis for friends for Christmas as well and they all unanimously love them. I see the 3 is out now, but I have no experience with that.
Edit Looks like the igrill 3 is just crappier and only works with some grills. How dumb is that. If you're going to get one in that case, get an iGrill 2 or a mini
I use this quick read one. It’s similar to ThermoWorks, which is what people with money to spend buy. It’s just a little slower and less fancy I guess.
https://www.amazon.com/Lavatools-PT12-Javelin-Thermometer-Chipotle/dp/B00GRFHXVQ
For long smokes though, I will admit, I use a Fireboard. And it’s the Cadillac of wireless temperature monitoring.
Buy this: http://www.amazon.com/Accurate-Water-Resistant-High-Performance-Digital-Thermometer/dp/B00GRFHXVQ
Use it.
Damn near as good as a Thermapen costs like 1/4th the price on Amazon.
If your meat's not juicy, it's almost certainly because you are overcooking it. As others have pointed out, cubed chicken takes very little time to cook. It's probably better to cook them as larger pieces and then cut them up.
BTW, cooking to correct temperature doesn't mean that long cooking times are bad. For example, when stewing beef or chicken, it's entirely possible (and sometimes required for tougher cuts of beef) to cook for hours at a time - but the key is that this is done at a low simmer.
For burgers, you want to cook them at a relatively high heat so the outsides get a nice brown crust while the center is a nice medium rare. Some people will say "only flip it once", but I think that is a myth. I've flipped steaks and burgers multiple times without any ill effects. In fact, my preferred method of cooking steak is to use a lot of oil, flip it every 30 seconds while basting it continuously in the oil with a big spoon.
Another important point if you are forming your own burgers. DON'T OVERPACK THEM. If you are squishing them together very firmly, you will end up with hard bricks of meat. Just enough pressure to hold them together (at least a half inch thick. I like them thicker) and you will get nice juicy crumbly burgers.
Lastly, let the burgers rest for 5 minutes (longer for big cuts of meat). Otherwise, a lot of the juice will leak out when you cut into it.
Get something like this thermometer to help you cook steaks and burgers.)
Edit: I've never read this book, but America's Test Kitchen is an awesome resource. LINK. I think I'll buy this myself!
What I used:
Cabinet - http://www.ikea.com/us/en/catalog/products/10119206/
Lighting - http://www.ikea.com/us/en/catalog/products/20119418/
Stands - http://www.amazon.com/Copco-2555-0188-Non-Skid-Cabinet-Organizer/dp/B0036OQU56/ref=sr_1_1?ie=UTF8&amp;qid=1458739913&amp;sr=8-1&amp;keywords=spice+rack+copco
Setting up the lights was not difficult. There's a predrilled hole at the top of the cabinet where I ran each cable for the lights. I zip-tied the cables inside the cabinet on the shelf frames. On the next one, I might try out a different Ikea light kit. I used LED strips on this one and the front row of figures on each shelf aren't lit as well. It looks fine when the room light is on so it's not a big issue.
I'm thinking of getting a small table or something to set this on so the bottom shelf will be more visible. I have more figures to put in there but since it's on the bottom, I didn't bother and just put the belt in instead. I have an IC belt to put in as well. That will have to wait until the next Ikea trip :D
I use this on my shelf. Works great.
I've been using this to display my loose figures on my tv stand:
http://www.amazon.com/Copco-2555-0188-Non-Skid-Cabinet-Organizer/dp/B0036OQU56
It fits 18 perfectly, which is enough for waves 1 and 2 completely. Not sure what I'm gonna do when wave 3 hits, but it was 7 bucks or so at bed bath and beyond, and I think it looks pretty good for a low cost solution:
http://i.imgur.com/B7qzf4p.jpg
I don't have it myself but from what I've seen they hold about eighteen, six per tier.
Example
These are a lot cheaper, by the way.
Edit: I didn't see at first that the one you linked is expandable so what I said doesn't completely answer your question, but two of the shelves I linked put together would be cheaper and wider than one of the shelves you linked to so I would go with a couple of those instead.
Here you go buddy.
http://www.amazon.com/gp/product/B0036OQU56/ref=oh_aui_detailpage_o00_s00?ie=UTF8&amp;psc=1
I actually had cases like these when I started getting into anime in high school for trading and capsule figures. I will say they are nice but they start to show their age pretty quickly if you are constantly getting in and out of them. They can attract fingerprints like crazy, and will get fine scratches like a cd/dvd on the clear plastic. Personal opinion, I would go with this simple 8 dollar spice rack.
Link: http://www.amazon.com/gp/product/B0036OQU56/ref=oh_aui_detailpage_o00_s00?ie=UTF8&amp;psc=1
The shelf is the cheapo Room Essentials cheapo bookcase from Target ($29.99 on sale when I bought it, very Ikea-esque) and the little stairs are actually custom-made using two of these, some poster board, some cheap red fabric, and some packaging tape!
this one?
Here's a link for italy towels on Amazon!
https://www.amazon.com/dp/B004C8DR1U/ref=cm_sw_r_cp_apa_DU8LybJYW1AH3
Sit in a hot water bath for at least 20-30 minutes and then scrub your skin. Rolls of skin will come off, don't stop scrubbing until these don't come up any more. Then moisturize your legs after you towel dry. If this isn't a solution, I recommend seeing a professional or ask some family/friends.
Just sending you some love here--it's allegedly such a common issue, but I've got it worse than anyone I've met IRL.
I've had really good luck with Korean exfoliating cloths and Retin-A applied immediately after. Caveat being...that's on my body, I don't have it on my face.
Best of luck, friend. Don't despair yet. Don't let putting on makeup make you feel less masculine. It's no different than putting on sunscreen or any other product.
This appears to be keratosis pilaris, and there are a lot of things you can do to improve the appearance of your skin.
Edit: There are increasingly more invasive treatments you can use if the first basic approach doesn't work-- for example: stronger chemical peels, retinols, ultrasonic skin scrubbling, and microneedling. These are usually only used for either deeper acne/burn scarring or the pursuit of absolute perfection in one's face. However, if you combine a basic skincare routine with any sort of fasting, your skin will probably drastically improve.
Remember to patch test
Maybe try those exfoliating towels like the Salux ones or the Italy Towels ?
I’ve heard that the Italy Towels are more powerful and a little tougher than the Salux ones, but neither one should be used on the face.
I've recently started using a korean italy towel and it's been working great. They sell on amazon. In a good soaking or long shower it'll do a good job of taking off scales.
I got this one a few months back - no complaints! http://www.amazon.com/Chromium-Crusher-Tobacco-Lifetime-Warranty/dp/B00700W0TW/ref=sr_1_1?ie=UTF8&amp;qid=1404247532&amp;sr=8-1&amp;keywords=grinder+chromium+crusher
Nah. They are 100% legal. This Chromium Crusher is pretty good, I can attest to its durability and general quality Chromium Crusher
Edit: If you are really worried you can look up your county's paraphernalia laws but I'd say dont bother. Also, Im assuming you are in the US
Chromium Crusher 2.5 Inch 4 Piece Tobacco Spice Herb Grinder - Gun Metal https://www.amazon.com/dp/B00700W0TW/ref=cm_sw_r_cp_api_XxwKybBGCMTA5 I feel you man, I bought this grinder over a year ago and she still works like a charm
Why not get a grinder?
CHROMIUM CRUSHER
I've owned two of these things and they are the shit.
Sharp, durable, tight screen, magnetic lid, cheap...
I can't really find any downsides with it other than after awhile of usage the outside turns from silver to copper... big whoop.
Chromium Crusher - $11 on Amazon. Have had it for years and I have no complaints!
Chromium Crusher 2.5 Inch 4 Piece Tobacco Spice Herb Grinder - Gun Metal https://www.amazon.com/dp/B00700W0TW/ref=cm_sw_r_cp_apip_XepYEUkxuNkaP
Here you go
https://www.amazon.com/dp/B00700W0TW/ref=cm_sw_r_other_awd_HPePwbECCDRYY
http://www.amazon.com/Chromium-Crusher-Piece-Tobacco-Grinder/dp/B00700W0TW/ref=sr_1_3?ie=UTF8&amp;qid=1449185667&amp;sr=8-3&amp;keywords=grinder
I dunno how to do stuffs on mobile. But the chromium crusher is absolutly amazing.
https://www.amazon.com/gp/aw/d/B00700W0TW/ref=mp_s_a_1_3?ie=UTF8&amp;qid=1473830073&amp;sr=8-3&amp;pi=SY200_QL40&amp;keywords=grinder&amp;dpPl=1&amp;dpID=5136GIfe1AL&amp;ref=plSrch
Bam.
I'm going to recommend Amazon. that's where I've bought my last 3 grinders.
Heres one that has lasted a while for me. https://www.amazon.com/gp/product/B00700W0TW/ref=oh_aui_detailpage_o06_s00?ie=UTF8&amp;psc=1
A long time ago, I started using one of these Asian scrubby wash towels and my life was changed forever. I will never buy anything else. Exfoliating without being too crazy abrasive. Soap rinses out quickly and completely and it dries fast. It's about 3 feet long, so you can easily wash/exfoliate your whole back. I've never had my back scratched better. Approaching orgasmic. I use liquid soap or bar soap.
I use a Japanese nylon washcloth, which are a bit more abrasive than normal cloths (definitely not for faces!).
I lather it with any salicyclic acid body wash (Dial, Neutrogena, etc.). Post-shower, I use Cerave lotion (in the tub).
My bottom used up look like yours, but I've had maybe two blemishes this summer since starting this regimen.
Wash cloths and loofahs? Naww.
People, school yourselves:
http://www.amazon.com/Salux-Nylon-Japanese-Beauty-Yellow/dp/B007IAE5WY/
I'm no professional, but I've spent some time researching this subject, and lurking in the skincaretalk forums lightening community. There's a lot of noise to filter through, but I managed to find a few things that worked for me in getting rid of my own perma farmer's tan.
The first, and most important step of getting rid of a perma tan is SAP (Sun Avoidance and Protection). This literally cannot be emphasized enough, and aside from getting rid of a perma tan it's good for your skin's overall health. It looks like you've taken steps toward this, so snaps for you. Though it tends to leave a white cast, physical sunscreens (containing titanium dioxide and zinc oxide) are the best choice if you want to protect your progress, and prevent yourself from tanning again. Unless you're sitting directly in a sunbeam while you're inside, or in the path of direct reflections of sun, I wouldn't worry about sunscreen while inside. I personally wear long sleeves and sunscreen to combat against incidental sun exposure on the daily. If I know I'm going to be outside for more than a few minutes I have a UV umbrella that I use to protect against the sun. Do I look silly? Probably, but at least my skin won't look like an antique football when I'm older
As for actually getting rid of the tan, the first phase should be exfoliation, which it seems you've already started on. Look for products with AHAs like glycolic or lactic acid. Some readily available options you can buy at walgreens/CVS are Alpha Skincare Body lotion (12% glycolic) or Amlactin (12% lactic). The sidebar has recommendations on products more suitable for facial use if you'd prefer a gel or liquid option for this purpose. Do this for 6-8 weeks, and if your tan doesn't budge then add in active lightening ingredients into your routine.
Another user already mentioned some lightening ingredients to look for, and all these serve the purpose of inhibiting your melanin production and shouldn't make you lighter than whatever your lightest natural skin tone is. I personally used Kojie-San soap (containing Kojic acid) with a Salux cloth to great success on my body. I haven't used it, but I've heard Marie France soap has a higher concentration of acid and thus works more quickly than kojie-san. I used a combination of dermatologist prescribed Retin A and 4% hydroquinone on my face and neck, as the soap was too drying to use on my face. I have friends and relatives who have used Maxipeel #3 (which contains both Retin A and hydroquinone) successfully to get rid of their own face/neck tan, as well as acne scars as a bonus. Kojie-San, Marie France and Maxipeel are Filipino products, but in general, lightening products from Asian countries tend to be more trustworthy than products you may find from sub-Saharan African countries, which in my experience and research, stand a larger chance of having steroids in them. Wherever they are from, if you go for foreign products be sure to do your due diligence on the product itself and wherever you're getting it from. Amazon is usually a safe bet, but check the reviews.
There are some American creams available at the drugstore containing hydroquinone Ambi, with 2% hydroquinone, and Nadinola with 3% hydroquinone, the highest you can get commercially without a prescription in America), though without Retin A, these percentages will be largely ineffective for your purposes.
Getting rid of a perma tan will be a commitment, and progress will be slow, but as long as you are consistent and practice SAP, you'll get there.
I bought it at my local Daiso store, but you can get it off Amazon for about the same price:
http://www.amazon.com/Salux-Nylon-Japanese-Beauty-Yellow/dp/B007IAE5WY/ref=sr_1_1?s=beauty&amp;ie=UTF8&amp;qid=1413253999&amp;sr=1-1
For the back acne: Another thought is possibly a backpack that's a bit too snug that could be causing this. For me, staying dry as possible and wear moisture wicking clothes helped. Perhaps change wife beaters throughout the day if sweat is a problem?
This subreddit also recommends Salux if you don't have it yet, helps with the back washing considerably compared to a regular loofah in terms of reaching spots.
As for the dry skin, try using Cerave in the tub or anything with cermamides about 10-15 minutes after applying BP? It helped me considerably but your mileage may vary.
Good luck!
Adagio has a pretty good teapot/tea sampler to start out with. This:
http://www.adagio.com/gifts/holiday_ingenuiTEA.html
is what I use. I also recommend buying a programmable electric kettle since different varieties of tea require different water temperatures. I have this:
http://www.amazon.com/Hamilton-Beach-40996-Programmable-1-7-Liter/dp/B0083I7THI/ref=sr_1_52?s=kitchen&amp;ie=UTF8&amp;qid=1395218831&amp;sr=1-52&amp;keywords=electric+kettle
and it's been amazing. I drink mostly Oolong and green teas, so I wanted something that had temperature control.
The best way to find what your preferences are, and to understand your palate is to try what sounds appealing to you. Adagio is a pretty good place to start. :)
Hey there--if this lucky individual is really into tea and interested in learning more/expanding his/her palate, then I'd highly recommend starting with something like this ["Discovery Collection"] (https://redblossomtea.com/products/discovery-collection) or the ["Green & White Collection"] (https://redblossomtea.com/products/green-white-collection) from Red Blossom Tea Company, based out of California. Pair it with a cheap tea basket from Amazon (~$10.00USD) and call it a day! If you're really feeling generous, then I'd also pick up this ["Hamilton Beach Programmable Kettle"] (https://www.amazon.com/Hamilton-Beach-40996-Programmable-1-7-Liter/dp/B0083I7THI/ref=sr_1_13?s=kitchen&amp;ie=UTF8&amp;qid=1511811952&amp;sr=1-13&amp;keywords=variable+temperature+kettle) from Amazon if he/she doesn't already have a kettle. Hope this helps!
A lot of people like this one from Hamilton Beach if you can spend about $10 more. https://www.amazon.com/Hamilton-Beach-40996-Programmable-1-7-Liter/dp/B0083I7THI
Quick Google search returns this one. It also has some preset temperatures and a hold function. I haven't tried it but it was the first thing that came up.
Google "programmable kettle" and you'll get some options.
You could also go with a smart plug and put a timer on that, just plug into the outlet (outlet turned off), turn on the kettle and set the plug to turn on at a certain time. If you get a smart plug with power monitoring it can also notify you when it's done.
http://www.amazon.com/Hamilton-Beach-40996-Programmable-1-7-Liter/dp/B0083I7THI/ref=sr_1_1?ie=UTF8&amp;qid=1420989185&amp;sr=8-1&amp;keywords=programmable+kettle
your mug is fine just the way it is, but it is better to heat tea in a kettle (electric or stovetop) to avoid superheating it and causing an explosion of water in your face.
https://www.youtube.com/watch?v=1_OXM4mr_i0
http://www.amazon.com/Finum-Brewing-Basket-medium-black/dp/B000I68NCS/ref=sr_1_1?ie=UTF8&amp;qid=1420989221&amp;sr=8-1&amp;keywords=tea+filter+basket
these are highly recommended.
.
https://www.davidstea.com/
Davids tea has AWESOME "dessert teas" which is what I think you are looking for.
They also have some KICKING tea mugs with stainless steel infusers that are similar to the finium, but they also come with a lid doubling as a coaster for the filter.
I don't typically sweeten teas unless they scream for it, so i can't help you there.
https://www.amazon.com/Hamilton-Beach-40996-Programmable-1-7-Liter/dp/B0083I7THI/
I use this one and it gets the job done
You could always get something like this http://www.amazon.com/Hamilton-Beach-40996-Programmable-1-7-Liter/dp/B0083I7THI
It's probably not very quiet but it has a timer and you could literally pour a cup of tea when you wake up.
When I was looking for a new digital thermometer, I was a little put off by the price of the Thermoworks. I think they are great devices but I just didn't want to spend $100. I also was weighing the difference between the models, like you.
But then I found the Lavatools Javelin.
https://www.amazon.com/gp/product/B00GRFHXVQ
It had everything I wanted and was only $25. I gave it a shot and it's been in my pocket while cooking ever since.
I've got one, but it's from back when they called it Thermowand. Got it in 2014 and it's still doing fine.
Oh, and the price seems to be down to $25 on Amazon now.
I recently had to replace my old scale - I swear by using a scale. Its unreal how much of a difference some things are (weight to volume)
https://www.amazon.com/Etekcity-Multifunction-Stainless-Batteries-Included/dp/B0113UZJE2/ref=sr_1_1?ie=UTF8&amp;qid=1485870813&amp;sr=8-1-spons&amp;keywords=food+scale&amp;psc=1
This is the one I bought, its been weeks since, and my fiance and I both use it daily, with no problems. So far its been incredible, and the price point is absolutely perfect!
I would suggest getting two of them:
https://www.amazon.com/Etekcity-Multifunction-Stainless-Batteries-Included/dp/B0113UZJE2/ref=sr_1_5?s=kitchen&amp;ie=UTF8&amp;qid=1518359747&amp;sr=1-5&amp;keywords=food+scale
https://www.amazon.com/American-Weigh-Signature-AWS-1KG-SIL-Digital/dp/B003STEJ4S/ref=sr_1_11?s=kitchen&amp;ie=UTF8&amp;qid=1518359787&amp;sr=1-11&amp;keywords=food+scale&amp;refinements=p_n_feature_keywords_three_browse-bin%3A7932983011
Note, it doesnt have to specifically be those two, but those two illustrate what you want to look for.
Basically, it comes down to accuracy. The first one is for large weight type things. If you are weighing how much ground beef to put in your weekly meal prep chili, you want a scale with a large weight limit. This scale has an accuracy of only 1g, so if the scale reads 10g it could really be somewhere between 9.5 and 10.4g, but that is close enough for big volume items.
The second scale is more for small weight type items, like if you are measuring out your salt substitute for your ketorade. That scale has a 0.1g accuracy, so if the scale says 10.0g it is really somewhere between 9.95 and 10.04g, which is super accurate. but when you increase the accuracy, you reduce the weight capacity, so it isnt practical to use this type of scale for measuring your ground beef.
note that I do own and use both of those scales. they work fine, but there are many other products in the market that can fill their roles.
Something like this is more than sufficient. All you need is to make sure that you can set grams, ounces, and tare.
Etekcity Digital Kitchen Scale Multifunction Food Scale, 11 lb 5 kg, Silver, Stainless Steel (Batteries Included)
I like this one because the numbers are backlit, it’s easy to clean, and most importantly the batteries last forever.
Calories in, calories out (CICO). The best method is to count calories, and make sure that you're at a calorie deficit. Use a calculator to figure out your daily caloric needs. If your only goal is to lose fat, you might want to start at /r/loseit/wiki/faq.
Beyond that, everyone has their own preferences. The key is to find foods/methods that allow you to stay at a calorie deficit. For example, eating veggies, full fat dairy, and things with high fibre will make you feel full, while high sugar/carb foods like candy and chips won't. Another example is doing intermittent fasting, in order to (among other benefits) control your intake.
Focus on your diet first, and make small changes to your lifestyle.
A few things to get you started:
That's all I can think of right now.
I have this food scale which I love... scale
A full size mirror was helpful before i fell off the wagon(got sick and was put on medications) because even if the body scale wasn't showing progress the mirror does. I know you probably share finances, but it may be helpful to get her a gift card for the grocery store or costco or something because I know it was hard for me to splurge on ingredients and foods i needed to stock my pantry because the initial cost is pretty high. the giftcard will help because she won't feel guilty 'treating herself' to these foods! A wok was also helpful!
Grab a digital kitchen scale like this one:
https://www.amazon.com/Etekcity-Multifunction-Stainless-Batteries-Included/dp/B0113UZJE2/
Batch cook: weigh out ingredients and save them as meals in the MFP app. It's super easy to recall the meal when you eat it and all the macros are auto-entered.
When it comes to dining out, as others have suggested, you can search the MFP database using the name of the restaurant and dish.
Side note: if you want results, cut out most dining at chain restaurants and make 90%+ of your meals yourself.
https://www.reddit.com/r/fitmeals/
https://www.reddit.com/r/MealPrepSunday/
...are great resources too. :)
This is just a generic one on Amazon.
Etekcity Digital Kitchen Scale Multifunction Food Scale, 11 lb 5 kg, Silver, Stainless Steel (Batteries Included) https://www.amazon.com/dp/B0113UZJE2/ref=cm_sw_r_cp_api_To3JzbA859S8S
I bought mine at a local Walmart. You turn it on, place the food on, and it can spit out the exact ounces or grams of your food for accurate tracking.
For example I can only have 8oz of ground meat for my first meal. If I eyeball it, I will probably go over or under. The food scale helps me measure out the 8oz before I cook it. You would be surprised how much you over/underestimate food weight without a scale. Highly recommended if you want to get serious about tracking macros.
The ones I have specifically are no longer available, but get a kitchen scale and a fish\luggage type hanging scale.. The hanging scales seem harder to get an as accurate reading (well mine seems to move by .1 oz) but are helpful for large heavy things, such as total pack weight or if you want to find the weight of your old heavier traditional backpacking tent. Helps to verify accuracy of all items individually.
This is the one I use. Cheap and works. Has 4 different measurements, and tared easily.
I use this https://www.amazon.com/dp/B0113UZJE2/ref=cm_sw_r_cp_api_1f4IzbCDEF5BT
And a big bowl and weigh 5 lbs at a time. Works great and is cheap
FWIW: https://www.amazon.com/Etekcity-Multifunction-Stainless-Batteries-Included/dp/B0113UZJE2
Highly rated and $10 on Amazon today.
Food scale made a huge difference for me. Blew through my previous stall when I actually started weighing out what I was eating vs eyeballing or using measuring cups/spoons. You can get a decent small one on Amazon for like $10 and I promise it will make a difference.
ETA: I have two, but this one is my favorite of the two: https://www.amazon.com/gp/product/B0113UZJE2/ref=oh_aui_search_detailpage?ie=UTF8&amp;psc=1
Hmm... not sure where you're getting that number. As you can see here it's 2939 for maintenance:
https://tdeecalculator.net/result.php?s=imperial&amp;g=male&amp;age=30&amp;lbs=320&amp;in=72&amp;act=1.2&amp;f=1
Don't overthink the foods you're eating at the beginning. What you mentioned is fine, really. If you're truly at 2200 cal per day, then you're definitely going to lose weight. You have to be tracking that accurately, though. You may want to invest in a food scale as somoene else mentioned for when you prepare your own food. I have this one:
https://www.amazon.com/gp/product/B0113UZJE2/ref=oh_aui_detailpage_o09_s00?ie=UTF8&amp;psc=1
Also, our bodies aren't robots. You may not see results right away, but be careful and stick with it, and you definitely will.
Definitely get a digital kitchen scale. I have this one and it works fine. Weigh everything when you cook, including oils and sauces. The volume-based or per-package calories on items can be pretty inaccurate so it's best to go by weight when possible.
MyFitnessPal can scan barcodes to look up nutrition information. You can also save recipes, add up the ingredients and divide by the number of servings.
The other option is the clever coffee dripper at $19-$22 depending on whether you get a small or a large. Gooseneck not needed, common filters, fairly forgiving on grind size, and a kitchen scale isn't perfect but can be cheap.
Yes they do!
https://www.amazon.com/gp/product/B0113UZJE2/ref=oh_aui_detailpage_o03_s00?ie=UTF8&amp;psc=1
I bought this one because it's cheap and it measures in everything I would need to measure in oz, mo, g, lb.
And the company is REALLY customer friendly, so if you have any problems they are quick to help you and replace your possibly broken scale if you're having problems with it.
I picked up these and they work pretty good.
3 Compartment
https://smile.amazon.com/Freshware-Containers-Compartment-Stackable-Dishwasher/dp/B01GH5KQLO/
2 Compartment:
https://smile.amazon.com/Freshware-Containers-Compartment-Stackable-Dishwasher/dp/B01IIINCRS/
There are all kinds of things out there. I have something similar to these on Amazon but my wife and I picked them up from Costco for pretty cheap. They are reusable and we have washed them in dishwasher quite a bit.
https://www.amazon.com/Freshware-15-Pack-Compartment-Bento-Lunch/dp/B01GH5KQLO/ref=sr_1_3?ie=UTF8&amp;qid=1500493398&amp;sr=8-3&amp;keywords=meal+prep
They seem to be the 3 compartment mealprep containers. Possibly these
Links to the meal prep containers.
Meal Prep Containers | 2 Compartment https://www.amazon.com/dp/B071ZXT9JF/ref=cm_sw_r_other_apap_pA6nGbmClbiMW
Freshware 15-Pack 3 Compartment https://www.amazon.com/dp/B01GH5KQLO/ref=cm_sw_r_other_apap_SerhXFIxPgLeu
https://www.amazon.com/Freshware-15-Pack-Compartment-Bento-Lunch/dp/B01GH5KQLO
These are the ones I got and if I can say, I am quite pleased with them. They don’t seem to stain and are odor resistant.
https://www.amazon.com/Freshware-Containers-Compartment-Stackable-Dishwasher/dp/B01GH5KQLO/ref=pd_lpo_vtph_79_bs_t_1?_encoding=UTF8&amp;psc=1&amp;refRID=SAXPHTYNNZJ57GEJYNQE
I use these, but there are many different kinds available. I've been using mine going on 5 months now, so I am really surprised at the quality.
Freshware 15-Pack 3 Compartment Bento Lunch Boxes
got those for $11 on prime day
Maybe consider a set of these?
I notice I tend to eat better when I've already made 5-10 healthy meals in advance, ready for nuking. It's also a time saver. Home cooking in bulk is economical and expeditious.
I use these
https://www.amazon.com/gp/product/B01GH5KQLO/ref=oh_aui_detailpage_o00_s00?ie=UTF8&amp;psc=1
I've found they work pretty good so far (:
They were actually lodge brand. I have the same blue one.
Lodge EC6D43 Enameled Cast Iron Dutch Oven, 6-Quart, Island Spice Red https://www.amazon.com/dp/B000N501BK/ref=cm_sw_r_cp_apa_WXtdzbQ7A931Y
https://www.amazon.com/dp/B000N501BK/ref=cm_sw_r_cp_awdb_t1_xqMUBbW7TSQEQ
https://www.amazon.com/dp/B00063RWYI/ref=cm_sw_r_cp_awdb_t1_hrMUBb7XNG2YA
Comparatively cheap and good quality. I use the first.
7.5 quart blue enameled dutch oven comes out to $79.99 shipped. (the link defaults to 6qt red, so make sure to select the blue 7.5qt). You won't find a larger capacity enameled dutch oven for less, so you have to compromise on capacity or enamel (there's a bare cast iron lodge 8qt for ~$65).
http://www.amazon.com/Lodge-Color-Dutch-Island-6-Quart/dp/B000N501BK/ref=sr_1_1?ie=UTF8&amp;qid=1344730369&amp;sr=8-1&amp;keywords=lodge+dutch+oven
Alright, so the way to get from where you are now to this is to use a cast iron pot and follow Jim Lahey's directions here. Go to the library and get his book, both that one and the new My Pizza are awesome. The cast iron pot traps steam which combined with the high heats lets you get good 'spring' and a nice rich crispy crust. I've done this recipe with lots of diffent flours and they have much less of an effect on the overall outcome than good technique. It can be a bit scary handling a 500 degree cast iron pot but after a few attempts it gets pretty easy. A Lodge cast iron dutch oven like this will work great but I suggest replacing the knob on top with a metal version found here. Good luck!
I have a big 6-7 quart lodge dutch oven that has become my go-to for pretty much everything. All cast iron works with induction.
It’s like $60 on Amazon and will last forever if you treat it right.
Lodge 6 Quart Enameled Cast Iron Dutch Oven. Classic Red Enamel Dutch Oven (Island Spice Red) https://www.amazon.com/dp/B000N501BK/ref=cm_sw_r_cp_api_i_HVNRCb36A2J04
I have a Lodge dutch oven that works really nicely and is very inexpensive compared to Le Creuset: http://www.amazon.com/gp/product/B000N501BK/ref=pd_lpo_k2_dp_sr_2?pf_rd_p=486539851&amp;pf_rd_s=lpo-top-stripe-1&amp;pf_rd_t=201&amp;pf_rd_i=B00006JSUF&amp;pf_rd_m=ATVPDKIKX0DER&amp;pf_rd_r=1MP0B87KHG10R83F04M1
A Dutch oven is a large pot made of cast iron which can be coated in enamel. It can go on the stove and in the oven.
https://www.amazon.com/gp/aw/d/B000N501BK/ref=mh_s9_acsd_top_b1DOU_c_x_1_w?pf_rd_m=ATVPDKIKX0DER&amp;pf_rd_s=mobile-hybrid-4&amp;pf_rd_r=XB3PMKW1HBDWD48NQB3P&amp;pf_rd_t=30901&amp;pf_rd_p=85eb1b4d-f0d2-5d34-b279-fb67ac2b2298&amp;pf_rd_i=289818
I have 2 of these https://www.amazon.com/dp/B00284AG5U?ref=yo_pop_ma_swf
They fit 2 cedar trays perfect. Looking for something a little bigger. Yours looks like a great option. How big a boveda do you need for yours? 320g
AHA I see the confusion now.
No it's rare that anyone uses your simple "leftovers" type tupperware since they're small.
I have two of these https://www.amazon.com/dp/B00284AG5U/ref=twister_B01LZTCKQ1?_encoding=UTF8&amp;psc=1 in the 232oz size and one in the 168oz size.
So generally you can get them holding similar amounts to what you'd get a humidor for. Really for me Humidors are all about looks/presentation. And that doesn't matter for my purposes so I went cheaper/easier with the tupperdors :)
To chime in with the other people suggesting food storage or travel humidor type products:
Food storage is cheap and offers lots of sizes. My personal favorite is the Sistema Klip It as they have separate hinges (as opposed to molded in "living hinges") and a gasket that can be removed for cleaning.
The downside to any food storage option is durability and how secure the cigars are inside. Unlike dedicated cigar products, they won't have the grooved foam to help secure your cigars in the lateral direction.
Travel humidors are basically hard plastic cases. One brand used to be owned by OtterBox, if that gives you a sense for the material. Many of them look like Pelican cases, but they tend not to have the pressure relief system or be of the same quality plastic as a Pelican. Some common brands are Cigar Caddy and Herfador. They are certainly more rugged than food storage but are more expensive for their storage space. However Field Supply has fairly regular sales on some similar cases.
[Here](http://www.fieldsupply.com/blackwatch-case-layered-foam-1.html] is an example of the 40-count travel humidor they sell. It went on sale for $20 instead of the $32 it is normally at a bit back, but at the time I decided that I didn't need another travel humidor, so I bought the Two-Pistol Case instead. If you notice, they are the exact same case, just with different foam. It's a nice case, although I will say that the material is not up to the same level durability of a Pelican/SKB/ect level of case, but it was also about 1/3 to 1/4 of the cost.
Just keep in mind that while travel humidors give a listed number of cigars, that only holds true for a certain ring gauge and below. Larger cigars will take up more space and you'll lose capacity.
Tray +
Tupperware
Obviously the capacity is dependent on the size of the 'gars, but I'll probably keep it to 25 max as that's the recommended limit for one large boveda pack.
Sistema 1870 Klip It Collection Rectangle Food Storage Container, 236 Ounce https://www.amazon.com/dp/B00284AG5U/ref=cm_sw_r_cp_api_oR38BbBVG7BAC
Spanish Cedar Cigar Tray, Adjustable Divider, Fits Large Humidors, Made with Solid Spanish Cedar, by Quality Importers https://www.amazon.com/dp/B00B9234HE/ref=cm_sw_r_cp_api_XR38BbE0CTEK8 X2
Boveda 65% RH 2-Way Humidity Control for Cubans, Oily Wrapper Cigars & Wooden Humidors, 4 Count 60-Gram Packets (Humidifier/Dehumidifier)-by Boveda Inc https://www.amazon.com/dp/B077KVC1VY/ref=cm_sw_r_cp_api_oS38BbFS9D5MD
Inkbird ITH-10 Digital Thermometer and Hygrometer Temperature Humidity Monitor https://www.amazon.com/dp/B0140UC9XQ/ref=cm_sw_r_cp_api_MS38BbMD8GPNV
That should do it, cedar trays are optional but I found that they helped keep things organized
When starting out always go for the tupperdor route. It doesnt matter what the environment is the cigars remain the same rh.
The default setup for a new cigar smoker is this: Systema container | cedar tray | Boveda 65 | Hygrometer. You could get away with not buying the hygrometer as long as you use the Boveda's but It's always good to know the rh. Other recommendations: The Cuban Crafters Perfect Cutter and another great tool to have is the PerfecDraw, not cheap but worth every penny.
Sistema 1870 Klip It Collection Rectangle Food Storage Container, 236 Ounce
https://www.amazon.com/dp/B00284AG5U/ref=cm_sw_r_cp_api_i_xak2BbAQVTK1E
https://www.amazon.com/Sistema-Collection-Rectangle-Storage-Container/dp/B00284AG5U/ref=sr_1_1?ie=UTF8&amp;qid=1503683479&amp;sr=8-1&amp;keywords=sistema+29
and 2 of these
https://www.amazon.com/Spanish-Cedar-Tray-HUMI-TRAY-Cigar/dp/B00B9234HE/ref=pd_bxgy_79_img_2?_encoding=UTF8&amp;psc=1&amp;refRID=3YGCGA1TVC6CC7YW1124
with a couple boveda and you're all set. There has been some bru-hahah about moldy trays but mine arrived just fine.
Here's what I use. Saw some recommendations here, and skimmed the Amazon reviews to see lots of people using this setup too.
Container https://www.amazon.com/gp/product/B00284AG5U/ref=oh_aui_detailpage_o07_s00?ie=UTF8&amp;psc=1
Spanish Cedar Trays https://www.amazon.com/gp/product/B00B9234HE/ref=oh_aui_detailpage_o07_s01?ie=UTF8&amp;psc=1
And two 65% Bovedas
https://www.amazon.com/dp/B00FWPQ8WC/ref=twister_B00P2HIJ2C?_encoding=UTF8&amp;psc=1
This setup will easily hold 50+ cigars. You can fit two of the trays, and the Bovedas fit on each end. I haven't had more than 27 cigars at a time in it yet, but they all fit in the top tray along with my hydrometer with some room for a few more. Right now, the bottom tray has air packets to help regulate humidity by reducing empty space.
Here's a pic: http://imgur.com/PsDM8oQ
You do not want to use regular cedar. Reason spanish cedar is used on cigars is because it is mold resistant and second aroma. That being said you could get away with an old cigar box or pieces of one but it's not really necessary in a tupperdore. A lot of people including myself are using the below container with the below trays. I will caution you it is hit or miss with the trays. Half will arrive either broken or covered with a dust that looks like mold. I usually order twice what I meet and return the defective ones. As far as hygrometers I suggest not going cheap although with tupperdores it's not even really necessary as long as your container is tight and boveda not expired. I just like being able to look in and see because of my ocd.
https://www.amazon.com/Sistema-Collection-Rectangle-Storage-Container/dp/B00284AG5U
https://www.amazon.com/Spanish-Cedar-Tray-HUMI-TRAY-Cigar/dp/B00B9234HE
www.amazon.com/Caliber-Digital-Hygromter-Western-Humidor/dp/B00JXOKQVW
As u/DavisEcho mentioned, Sistema + spanish cedar trays are very efficient,
Sistema 1870 Klip It Collection Rectangle Food Storage Container, 232 Ounce https://www.amazon.com/dp/B00284AG5U?ref=yo_pop_ma_swf
Spanish Cedar Cigar Tray, Adjustable Divider, Fits Large Humidors, Made with Solid Spanish Cedar, by Quality Importers https://www.amazon.com/dp/B00B9234HE?ref=yo_pop_ma_swf
Most will recommend the Sistema 1870.
You can optionally get a Spanish Cedar Drawer for organization.
You will need a hygrometer.
And finally Boveda. Most people will recommend 62% or 65% for a tupperdor setup.
Like the other commenter said, tupperware containers provide very good seals. You want one with a gasket.
Sistema KLIP IT Rectangular Collection Food Storage Container,236 Oz https://www.amazon.com/dp/B00284AG5U/ref=cm_sw_r_cp_apa_i_3edTDbM9D4P5G are pretty popular and they almost exactly fit two spanish cedar trays that you can also find on Amazon. The trays arent required, but look and smell nice. That will fit two boxes of cigars, so say 30-50 loose ones
Boveda packs are little packets that absorb or release moisture to bring the air to its stated humidity level. They are very widely used in humidors, especially tuperware. A 65% pack or two and you're good to go.
For like 20-30 bucks you can have a setup that will preserve cigars for years. Just keep it in a cool area of your house like the basement. I think 65-70 degrees is ideal.
Hygrometers will report the temp and humidty. You can get an electronic one off amazon for like 10 dollars. Its not required as I've never heard a boveda pack failing.
Check out this post of mine. $7 at Walmart and will hold 20-25 sticks depending on size. If you need more space later, you can order this container and this cedar tray both from Amazon.
Yup. If you need specific recommendations, I started with a Sistema 236 oz, which will hold 2-4 boxes and a ton of singles, then pretty quick I moved to a Container Store 46 qt, which will likely hold 15+ boxes.
Would you consider a trade for this Dunhill Rhodium Lucite Humidor? HMU!
For a humidor, I would get a Sistema Container and a couple of these trays. This setup has worked great for a number of people, myself included. It seals very well.
Hey fellow Angelino welcome! That's not a bad buy for that price especially for a starter set. The sticks are just to help you get your feet wet there are a few in there that are decent for beginners. I can't say much about the humidor but usually when they combine them in a cheap set like that they aren't the best quality. If you don't care for aesthetics I would recommend getting a tupperdor and throwing in there some 65 RH bovedas. You just stick the cigars in there and a boveda or two and you are golden! Also check out r/cigarmarket for future buys it's a great place if you are looking to get samplers at a great price people will help hook you up!
Hope you enjoy your stay!
P.S. What school do you go to?
I just set up my first tupperdor. Here's the Tupperware box I bought. Looks plenty big for 50 cigars.
I can fit 2 of these trays in this Sistema 7.4 qt.
&#x200B;
cc: u/eldude
&#x200B;
edit in case these disappear from Amazon: The tray is called "F.e.s.s. Fess Storage versatility Cedar Tray with Adjustable Divider"
http://m.imgur.com/XFrXNNe
When I was looking for tupperware on amazon this showed up with the cedar tray often purchased with it. About 30 cigars in it now, guessing it will hold 60 to 100 depending on width. Cost me $27.
https://www.amazon.com/gp/product/B00284AG5U/ref=oh_aui_detailpage_o01_s01?ie=UTF8&amp;psc=1
https://www.amazon.com/gp/product/B00B9234HE/ref=oh_aui_detailpage_o01_s01?ie=UTF8&amp;psc=1
These are the trays I'm using: https://smile.amazon.com/gp/product/B00B9234HE/
There was a thread somewhere (that I can't find right now) that highly suggested these and that 2 of them will fit almost perfectly in the tupperware I bought for the project (https://smile.amazon.com/gp/product/B00284AG5U/).
Spice racks from amazon.....I use them myself. They're catching on so well with figure collectors the reviews are more figure than spice.
https://www.amazon.com/Copco-2555-0188-Non-Skid-Cabinet-Organizer/dp/B0036OQU56/ref=pd_sim_79_4?_encoding=UTF8&amp;pd_rd_i=B0036OQU56&amp;pd_rd_r=Q58BG3PWD9Q3HAF4PFHK&amp;pd_rd_w=lSUdk&amp;pd_rd_wg=GvC9p&amp;psc=1&amp;refRID=Q58BG3PWD9Q3HAF4PFHK
I also like these, two models though they're a bit more expensive.
https://www.amazon.com/DecoBros-Expandable-Cabinet-Spice-Organizer/dp/B00OLH0TGI/ref=pd_sim_201_14?_encoding=UTF8&amp;pd_rd_i=B00OLH0TGI&amp;pd_rd_r=E56K62B5GMSNVK4TQVCD&amp;pd_rd_w=3iZkP&amp;pd_rd_wg=QLUU3&amp;psc=1&amp;refRID=E56K62B5GMSNVK4TQVCD
and
https://www.amazon.com/YouCopia-SpiceSteps-Cabinet-Organizer-24-Bottles/dp/B01DM7WL8G/ref=pd_sim_79_9?_encoding=UTF8&amp;pd_rd_i=B01DM7WL8G&amp;pd_rd_r=Q58BG3PWD9Q3HAF4PFHK&amp;pd_rd_w=lSUdk&amp;pd_rd_wg=GvC9p&amp;psc=1&amp;refRID=Q58BG3PWD9Q3HAF4PFHK
https://www.amazon.com/Copco-2555-0188-Non-Skid-Cabinet-Organizer/dp/B0036OQU56/ref=pd_yo_rr_bia_t_2?ie=UTF8&amp;psc=1&amp;refRID=EP8DGXPVX53BY7Y3MKHC
They're cabinet organizers you can find them on amazon Copco 2555-0188 Non-Skid 3-Tier Cabinet Organizer, 15-Inch https://www.amazon.com/dp/B0036OQU56/ref=cm_sw_r_cp_api_0Fv7xbS7FRHKJ
Butter microwave popcorn smells like sweatsocks/gymlocker to me for some reason.
&#x200B;
I can make real popcorn with a WhirlyPop just as fast as microwave.
If you're going to make popcorn, do it right.
cheapest
something i really want
Secrets to theatre style popcorn:
get a whirley pop & it won't be.
Get a stovetop popper for about $20 and find real popcorn salt.
I also have a $500 Sam's Club popper but this is easier, less cleaning, and faster. The downside to the $20 popper is that it isn't quite as good, maybe 8/10 instead of 10/10, and you have to turn it manually.
Edit-also day old popcorn is better and what you get a lot of the time in a theater.
Tell me about yours. We eat a lot of popcorn. We use the whirley pop popper.
https://smile.amazon.com/Wabash-Valley-Farms-Whirley-Pop-Stovetop/dp/B00004SU35/ref=sr_1_1?ie=UTF8&amp;qid=1501115995&amp;sr=8-1-spons&amp;keywords=whirley+pop+popcorn+popper&amp;psc=1
I can't say I have ever heard of someone popping popcorn in the oven.
Next time get some paper bags for the kernels in the microwave, use a pot and some oil on the stove, or pick yourself up a whirley pop, or something similar.
i like the whirley-pop it is quick and simple. no nonstick anything, and the popcorn tastes much better than air pop or microwave. and its cheap!
it looks like this
If you're looking to re-create theatre-style popcorn, then a spice/salt you're looking for Flavacol! My go-to recipe is a heaping tablespoon of coconut oil, a half-cup of popcorn kernels, and a teaspoon of Flavacol, all put in a Whirley Pop over medium-high heat. Three minutes later, you've got a pot full of popcorn!
I've taken to cooking them on a Pizzaz
Link in case you don't know.
seem to have good reviews.
http://www.amazon.com/Presto-03430-Pizzazz-Plus-Rotating/dp/B00005IBXJ
http://www.amazon.com/SodaStream-Fountain-Maker-Starter-Silver/dp/B00EPEALEM/ref=sr_1_1?ie=UTF8&amp;qid=1456962867&amp;sr=8-1&amp;keywords=soda+stream
Try it on this. https://www.amazon.com/Presto-03430-Pizzazz-Plus-Rotating/dp/B00005IBXJ
This
The pizzazz is almost as good as this.
Link
http://www.amazon.com/Presto-03430-Pizzazz-Pizza-Oven/dp/B00005IBXJ/
$50, free shipping.
Blue Print of Delorian
Pizza Oven
A subscription to Spotify to listen to 80s pop music
Pizzaz!! i cook lots of stuff on it. http://www.gopresto.com/products/pizzazz/
http://www.amazon.com/Presto-03430-Pizzazz-Pizza-Oven/dp/B00005IBXJ
You could get your very own pizza cooker for 48 bucks and free shipping on Amazon. It has a 5 star rating with 844 customer reviews here. Part of reddit knows about it, specifically the members of /r/TheBestofAmazon , I personally own one and it kicks ass and can be used to heat up frozen foods at a better consistency than a toaster oven or microwave.
I bought this as a gag gift, but ended up getting one for myself because it ended up making perfect frozen pizza
To be honest, I hardly use my oven anymore. Ever since I got one of these: http://www.amazon.com/gp/aw/d/B00005IBXJ?pc_redir=1409137881&amp;robot_redir=1 highly recommend it. Cooks a frozen pizza in 18 mins flat start to finish.
dude a brand new cast iron pan is only like 16 bucks. Why would you even bother with the Shittily designed Farberware for the same price?
I cook almost everyday, and usually, at least twice a day. The only kitchen thing that I cannot live without is a Lodge cast-iron skillet. I use it to cook everything. Steak and all the breakfast stuff! I think it is a must have for everybody who cook a lot or like to cook. The 10-inch one is perfect for individuals. Go with the 12-inch one for batch cooking or cooking for the family.
Let's do it in the kitchen.
Amazon!
Your order needs to be over 25$ for free shipping. May I suggest my proven Amazon free-shipping order booster?
omnomnom
Fair enough.
So as a premise, I'm going to give you the /r/cooking answer (which I'd argue is the 'right' answer,) but a lot (most?) people in the US use a non stick for just about everything. Then again, most people cook bad food, so...
Anyway:
>for things like eggs, bacon, burgers etc
So right there I'd stop you and say that a true non-stick (either a Teflon pan or anodized / ceramic) is really best just for things like eggs, melty cheese, etc. Some people (rightfully) claim that eggs can be cooked in a really well seasoned cast-iron; they sort of can, but you have to use so much grease I argue it's more shallow frying than anything else. Properly cooking eggs in a true non-stick pan, like a Teflon coated pan, requires zero butter / cooking spray, etc. You actually shouldn't use it.
For things like burgers, bacon, etc, most of us would argue for either stainless steel (my preference) or cast iron. Cast iron (CI from now on) has some advantages, mainly relating to heat retention for giving awesome sears (like on a steak.) Stainless Steel (SS) can also do that pretty darn well, but not quite as well as CI. SS has the advantage of being more 'reactive;' If you turn the heat up or down, the pan reacts much faster than CI. CI is a diesel truck, SS is a Chevy 2500.
Neither SS or CI 'stick' when 1) properly heated and 2) properly used. Most people just don't know how to properly cook with those types of pans. Start here, and watch this vid on how to properly heat a SS pan. If you do that (and it's actually super easy once you've done it a few times,) you're 80% of the way there. So then your pan is hot, and you put in some oil (I prefer canola.) From then, your meat (like chicken breast, bacon, burgers, steak) goes in the pan and you don't touch it! If you put it in, and then 30 seconds later get all grabby-pokey-lifty, you're going to get really grumpy that that idiot on the internet convinced you to use SS, because it's going to be very stuck to the pan. If you're patient, and simply wait, the meat will get a perfect sear, and release on it's own in about 3-4:00. From there, give it a flip and repeat.
Here's where the advantages of stainless really shine: So after you've seared both sides (let's say of your chicken) you pop the whole pan in the oven for about 13 minutes or so to finish cooking the meat to the desired temp. Then you pull the pan out of the oven, pull the meat out to rest, and then deglaze your pan, toss in some chopped shallot or onion and garlic and maybe mushrooms, let it reduce aminute or two, holy crap get ready to blow the minds of anyone you're cooking for. Drizzle the sauce over your now sliced chicken, BAM.
So that was a bit of a divergent answer, but I felt it was important. When evaluating cookwear, it's not so much just a matter of 'Can this pan cook things,' it's more a matter of 'How do you use your cookwear to get the results you want.
If what you want is a properly good non-stick pan for eggs and cheesy stuff and omelettes, buy this. That'll last 2-3 years if you treat it well (ONLY wash with a washcloth, non-stick safe utensils, etc) For all your other stuff, I'd suggest a tri-ply stainless steel pan, like this or if it's in your budget, All Clad really sets the standard. This guy in 10 or 12" is pretty much the default CI pan for most people.
Feel free to ask questions. As for the pans you mentioned: I've seen really, really mixed reviews on them. I've never cooked with them, but I've handled them and they seem extremely light and thin (that means hotspots, inconsistent heating, and crazy fast reactivity (temps varyingw ildly up and down.) They seem to be jack of all trades masters of none, and I'd personally pass.
You can't go wrong with a #8 (10.25") or #10 (12") Lodge skillet. They are both pretty cheap on Amazon or at Walmart.
Do read through all the great tips and information in the FAQ. Cast iron is different than most other modern cookware, so learning cooking, cleaning, and care tips is important.
For searing steaks, I like to use the "reverse sear" method, and Alton Brown's method works great.
BACKPACK
Better Pan
Here's a Lodge on Amazon for $15.
Stay away from the non American-made pans as there are reports of some Chinese cast-iron containing high amounts of lead.
The regular is on sale as well
http://www.amazon.com/Lodge-Pre-Seasoned-Cast-Iron-Skillet-10-25-inch/dp/B00006JSUA/ref=pd_sim_k_5?ie=UTF8&amp;refRID=1F1Z9E5Q7FY5PGKYRCYC
Cast iron skillets are pieces of cookware.
Cast iron cook ware comes in a multitude of forms for various applications.
https://www.amazon.com/gp/aw/d/B00006JSUA/ref=mp_s_a_1_1?ie=UTF8&amp;amp;qid=1494513171&amp;amp;sr=8-1&amp;amp;pi=SL75_QL70&amp;amp;keywords=cast+iron+skillet
This is the standard issue skillet.
The absolute best bang for your buck.
They're like $15 on Amazon...
Tried to think of a gifts in that price range.
Oops, I just remember that America's Test Kitchen reviews products! Someone put together a list on Amazon of their 2012 Best products. See also one of their books.
Note: Sometimes you can't view their content because it's behind their paywall.
Do cast iron skillets have to be so expensive? I've seen them for reasonable prices on amazon, such as this one: http://www.amazon.com/Lodge-L10SK3-Pre-Seasoned-Skillet-12-Inch/dp/B00006JSUB/ref=sr_1_1?ie=UTF8&amp;qid=1393865220&amp;sr=8-1&amp;keywords=cast+iron+skillet
And its pre-seasoned...
Is it good, or is it cheap because its crap?
Yup. Get a good cast iron or carbon steel skillet.
https://www.amazon.com/dp/B00006JSUB/?tag=atkyoutube-20
and it should only cost you $20 tops. maybe 25. but definitely not 30.
edit: Are we talking the 12 inch skillet?
I bought my 12" cast iron skillet at Target for...I can't remember...but it was really reasonable. It's a Lodge, really heavy, and it was already pre-seasoned. I've had it about 9 months and it performs great, haven't had any issues yet.
You don't have to wait for your granny to die!
Edit: I found it on Amazon
Get this
I've been putting together a birthday/Christmas gift list...
this will carry you far, young one.
I really enjoy my take on Hamburger Helper:
1 lb ground beef
1 package of Shirataki noodles
1 small onion
2tbsp powdered cheddar (any cheese will do here)
4 oz of heavy cream.
In a 12" cast iron skillet, brown the meat on high. Reduce to medium heat, add onions until they are translucent. Turn to low heat, add cream, cheese, and drained noodles. Simmer and stir often for 5-10 minutes.
PS Everyone needs a good cast iron skillet. Get one ASAP and never wash it with soap :)
You're probably better off not getting a set (there are usually a few nice pieces you want and a bunch you don't), but they can be a decent way to save some cash. Cooks Illustrated has great cookware reviews and tend to like All Clad a lot (money no object I agree, but shit it's a lot of money). They recommend a Calphalon set that is pretty reasonably priced and I know they make good stuff. But besides that, I'd definitely get some cast iron into the mix. Both a skillet and a glazed dutch oven. Two of my favorite pans right there.
I recommend this all the time: https://www.amazon.com/Zojirushi-SL-JAE14SA-Bento-Stainless-Silver/dp/B000246GSE/ref=sr_1_1?ie=UTF8&amp;qid=1483758166&amp;sr=8-1&amp;keywords=mr+bento
Keeps hot things hot or cold things cold, has 4 separate containers inside so you can have a main and a few sides and they won't all run together. It's pricey, for a glorified lunch box, but I love mine and it's been totally worth it for me.
If you can fit it in another bag that you're already carrying, that's probably both the handiest and most stylish option.
Otherwise, you just have to find the least bad-looking lunchbox you can. I used to use the Zojirushi Bento set, but it doesn't work well for all types of food. You can also brown bag it, but again, might not work depending on what you typically eat.
I have this in black. It does work well as it's basically a thermos. The key is to put the bowls in the correct order so they benefit most and it's properly sealed. But, you can't mix and match hot and cold foods. You either have the main bowls with cold foods or with hot foods and the side bowls at room temperature.
So, if you've made something that will keep in a thermos, it will work.
So this isn't cheap at all, but it's probably worth the money if it helps with portion control: Mr. Bento. I have the Ms. Bento which is their smallest size and my boyfriend has the classic bento box, which is larger than the Mr. Bento. He probably should have bought the Mr. Bento because the classic is a little bit too big unless you pack a lot of leafy greens and other light calorie foods that aren't energy dense. We've had them for about a month and have been very happy!
Zojirushi's Mr. Bento is pretty good, and has a container with a screw top lid that will even carry soup, no problems. The capacity is quite large and might be surplus to requirements, though. Zojirushi also makes a Ms. Bento has a similar arrangement that's smaller capacity.
Vacuum flask: http://shopstanley-pmi.com/detail/TCL+10-01254-001
There are bento boxes/flasks that can keep food warm or cold: http://www.amazon.com/Zojirushi-SL-JAE14-Bento-Stainless-Steel/dp/B000246GSE/
I doubt it would last for life but with care it should last a very long time.
Bento Box.
Edit: Snazy thermos
Mr. bento: http://www.amazon.ca/Zojirushi-SL-JAE14-Bento-Stainless-Steel/dp/B000246GSE/ref=sr_1_1?ie=UTF8&amp;qid=1405704658&amp;sr=8-1&amp;keywords=Mr+bento
I have, and love, this one: http://www.amazon.com/Zojirushi-SL-JAE14SA-Bento-Stainless-Silver/dp/B000246GSE
Zojirushi SL-JAE14 Mr. Bento Stainless Steel Lunch Jar https://www.amazon.ca/dp/B000246GSE/ref=cm_sw_r_cp_apa_i_7kyYDb4R24GXQ
I use one of these.
I quite like it. You would have to cut up your pizza into smaller pieces to fit tho.
Office lunch options:
Jerky and kale chips
Avocado and canned tuna (halve avocado and remove seed at work; heap tuna in the hollows and eat it out of the avocado skins with a fork)
Leftover diced meat mixed with guacamole (needs a tightly sealed container and an insulated sammich bag with an ice pack... or an office fridge)
Sammich ingredients with a couple of big romaine or chard leaves to make a wrap
High-quality lunch meat and hard-boiled eggs
Deviled eggs stuffed with guac (yes, okay, I love avocados damnit)
Chilled soup like gazpacho or carrot soup (or hot soup if you have a microwave or a Mr. Bento)
That's off the top of my head, and mostly limited to keto-friendly stuff. If you're not carbo-phobic, there are an even wider array of options.
Look at the Toddy. It's not a push button but it's a dump water, dump grounds and then wait kind of operation. You do have to deal with the used grounds when it's finished but it makes a concentrated coffee that you mix with water, milk, etc and a carafe will usually last me about 2 weeks.
https://www.amazon.com/Toddy-T2N-Cold-Brew-System/dp/B0006H0JVW/
My sister bought me a Toddy for a wedding present. It makes a coffee concentrate and its perfect for iced coffee.
I used the Toddy system, but that's just because it was given to me by a friend. It worked out pretty well, but you can easily re-create the setup with a large mason jar, just pour through a pour over cone at the end.
Another tip which may seem obvious but I didn't think about at the time: don't be afraid to do some test brews before committing to a batch of coffee. I had never brewed coffee this way before and it came out a tad over-extracted, which came through in my stout.
I've done both. From a process standpoint, not a huge difference.
Coarse grind, leave it for a bazillion hours, filter, enjoy.
Toddy is great because it's significantly more capacity. My French press will produce about half to 65% of the concentrate as the Toddy. I get about a literish of concentrate when all is said and done (you add like 7 cups of water, so 1.6 liters). Compared with my 1L French Press which gets me just over a half a liter.
It's also super easy to use and clean. Let it brew, pull the plug into the decanter that's fit for the top.
looks like it's $28 on amazon which is the lowest I've ever seen it. If you're gonna jump, do it now!
http://www.amazon.com/Toddy-T2N-Cold-Brew-System/dp/B0006H0JVW
I assume you mean this one. Does that provide any benefits over simply making cold brew in a french press? (which is how I've been doing it)
Gloria Jean's several years ago sold what they called iced toddy which they made in a cold brew system. I bought one myself and duplicated the taste exactly. I was never able to get the right taste from normal hot brewed coffee. Their cold brew stuff tasted more like an iced latte to me.
I've only ordered once from them since they changed names from Supersonic to AKA Coffee, but they follow the Nordic style of roasting. I assume they'd have something up your aisle.
Iced coffee is really easy, albeit a long process >12 hrs, to make, but the concentrate is good for a couple weeks, so you don't have to do it very often. All you need is coffee beans, a grinder, a jar/container, and a fine strainer or something like this if you want the simplicity.
Oh...the Toddy (sorry I didn't link earlier, was on mobile) is not a pour over system either. You put in grounds and water and it steeps at room temperature for 12-24 hours, then filters out the grounds to produce a coffee concentrate. Of course you can DIY cold brew without any of this, but the Toddy is just a really convenient system for it. A lot of coffee shops use an industrial-size Toddy system.
I have tried pitchers like the one you linked, but I've found that because it's not truly immersing the coffee in the water it makes a lot weaker of a cold brew, so you get less mileage for your amount of grounds, if that makes sense.
If we want to turn this into an /r/frugal thread about the absolute cheapest way to make coffee - you can get a cold brew setup at home for less than $50 (Toddy is "the original"; OXO makes a similar system). Cold brew tends to be more forgiving of low-quality beans than hot brewed, and the resulting concentrate can be kept in the fridge for at least a week before it goes bad.
I use two cold brew bags with this cold brew toddy system instead of the felt filters that come with it (they tend to clog). A pound of course ground coffee and it's delicious. Unfortunately everyone at work is now addicted to my coffee.
<--- Barista here! I second the Moka suggestion. Unless you have thousands to shell out on a shop quality espresso machine, this is the next best thing. A good grinder is key, and burr grinders are best. This is mine. Also, steaming wands on cheaper machines never work very well and are horrible to clean. All you really need to get that nice foam easily is one of these nifty milk frothers.
Most retail coffee "machines" aren't built to last and make mediocre drinks. Low-tech almost always produces a superior tasting beverage. I have a Chemex(for normal coffee), a french press(for stronger coffee), a Toddy(for iced coffee) and a Moka(for espresso).
Also, if you can, seek out a roaster that is local to your mother. They will direct you to their best beans for espresso, and it will most likely be very fresh. All the roasters I have worked with are always happy to help customers troubleshoot and tweak to their tastes as well. It's a really worthwhile relationship for a coffee enthusiast.
So, Moka, burr grinder, frother wand, a pound of beans, and you're set. She'll love it. If you have some extra cash, and she likes normal coffee, throw in that Chemex. 10 times better than an auto-drip, and uses less beans as well. :)
Get one of these Toddy Cold Brew things. Starbucks brews their cold brew in a larger one of these and it is awesome at home. Makes a cold brew concentrate, so you cut it with water when you are wanting a glass of it, so you can adjust how strong you want it. It is worth every penny and makes it a simple process. I let it brew anywhere from 16-24 hours and it is always great. Can buy cheaper beans for it too, which is nice.
I can’t refrain from commenting on this since I’ve been having the exact same thought process. As of now I cannot afford an actual espresso machine and other proper gear, and since I only have a French press, I’m considering the Moka pot. Here’s my take on this:
I’m very much a coffee nerd and I love espresso-based drinks, particularly a latte or a cappuccino. To make a good espresso shot with lovely ‘crema’ on top, you’d need around 9 bars of pressure, which can only be supplied by a proper espresso machine. Even certain ones (worth, say, $100) advertised with more than 10 bars of pressure are not very good because they lack the pressure regulation to maintain 9 bars throughout the whole 20ish second shot. The Moka pot, of course, cannot supply such pressure either. Most Moka pots gravitate around 1.5 to 2 bars of pressure, which is significantly lower than what you need. That being said, I do recommend getting one until you can have a professional setup because:
Without doubt, I would recommend to go for a Bialetti such as these:
Bialetti 6-cup stove pot espresso maker
Bialetti Venus Induction coffee maker
Happy coffee making!
I almost missed it! I've got a few upgrade from my last post! Here is my gear.
From left to right:
What's next you ask? Well with my neck paycheck, I'm buying the following:
Any recommendations for other gear? Specifically, scale recs?
Edit: Added Amazon links for anyone interested.
Get a Moka pot!!!
I brew my own coffee! I have this stovetop espresso and I buy ground coffee beans from Peet's coffee in UTC. I usually get medium french roast. Sometimes I'm in a rush and buy coffee from Peet's (their americano is better) but I can do starbucks too :|
You could probably even get by with a Moka Pot, a solid burr grinder, and an electronic milk frother for when you want a hot mocha instead of iced. $30 for the moka pot, $150 for the grinder, and another $120 for the milk frother (optional) and you've got a setup cheaper than a superautomatic (albeit, more manual effort required).
I'm a strong advocate against pods, because the single-use pods are incredibly wasteful (from an environmental perspective), and price-per-pound of coffee, very overpriced. You could buy a re-usable capsule, but I feel that kind of defeats the purpose of the "convenience".
\ A moka pot doesn't produce "true" espresso, but you can make a very concentrated cup of coffee with it. And considering how quickly Starbucks pulls their espresso, you're probably not far off in flavour.
Same exact thing here. Drinking a cup of coffee after a night of whiskey was a coin flip as to whether or not it would trigger a full blown panic attack, which I'd deal with by--you guessed it--pouring myself a drink, even if it was before noon.
Very much enjoying the ability to enjoy a nice cup of tar-black Italian roast every morning.
Also if you've never had one of these before, invest in one. It's a pain in the ass to make coffee with it, but it's PHENOMENAL:
https://www.amazon.com/Bialetti-6-Cup-Stovetop-Espresso-Maker/dp/B000CNY6UK
I took this review from Amazon for when I purchased my first moka. This is the only way I ever use my moka and it is delectable!
http://www.amazon.com/gp/aw/review/B000CNY6UK/RAK1DGKYEF0GQ/ref=mw_dp_cr?cursor=1&amp;qid=1408335688&amp;sort=rd&amp;sr=8-5
Generally for a Moka Pot, the Bialetti 6-cup is touted as the standard here. Spotted that there will be a "lightning deal" on it on Amazon tomorrow (in 17 hours). Just dropping the link here so if someone is interested in trying it out, it may be a good time to do so.
http://www.amazon.com/gp/aw/d/B000CNY6UK
Hopefully this doesn't clash with bullet #4 as I don't want to make a thread about it. Otherwise, feel free to share Moka recipes.
with something like this
This is the ultimate brownie pan to solve this very problem.
Amazon sells them as well, a few bucks cheaper if you factor in shipping. I've been wanting to get one of these for a while. They also sell lasagna pans in the same shape. Looks like a great way to make a deep dish pizza.
Right? Meanwhile the rest of us are finding ways to get all crispy edges
The edges are chewy and I like that. I like gooey too but I prefer chewy.
The perfect brownie pan
https://www.amazon.com/Bakers-Edge-Nonstick-Brownie-Pan/dp/B000MMK448/ref=mp_s_a_1_3?ie=UTF8&amp;qid=1540247846&amp;sr=8-3&amp;pi=AC_SX236_SY340_FMwebp_QL65&amp;keywords=all+edges+brownie+pan&amp;dpPl=1&amp;dpID=41TpFxp9GRL&amp;ref=plSrch
It is a thing! My ex stole mine lol.
Edges are the one true religion.
All Edge Brownie Pan.
I know you can order that lasagna pan on Amazon
Baker's Edge Nonstick Edge Brownie Pan https://www.amazon.com/dp/B000MMK448/ref=cm_sw_r_cp_apa_i_u5E-AbA7H0R5N
Here's the Amazon product page for the brownie pan..
$35 USD hrm
Maybe one brownie tray per person?
Edit: To make it fully legit the $13 spatula probably needs to be bought also
I'll just leave this here.
Buy the Lodge 5 qt double Dutch Oven, it's designed to be used for baking like that.
But also buy a Lodge enameled dutch oven, for stews and roasts and the like.
It's enameled cast iron. here are some examples.
http://www.amazon.com/Lodge-L10SK3-12-Inch-Pre-Seasoned-Skillet/dp/B00006JSUB/
fac ut guadeam
my favorite hobby by far is definitely drawing. I really love anything to do with art (painting, sculpting, etc) but my real passion is to draw. Usually I'll get an idea in my head of what I want to do and proceed to tell myself that it's too difficult and will come out like crap. This leads me to feeling like its coming out crappy the entire time. Then I look at the finished product and I'm usually very pleased and proud of myself. haha weird I know. If I win this please
thank you for the contest. ps- what does the phrase mean?
As little as possible. The more crap you have, the more it weighs you down.
That said, every home needs some necessities to get by. For me those generally involve cooking, sleeping, and repairs. I just finished watching Parks & Rec and am in a bit of a Ron Swanson mood.
For the kitchen (all recommended by America's Test Kitchen):
Victorinox 8" Chef's Knife
Victorinox Paring knife
CDN Instant Read Thermometer
Lodge 12" skillet - cheap and will last you forever
Crockpot, 6qt - the one kitchen appliance I'd cheat with. Easy delicious meals. Toss in a cheap cut of meat (chuck roast, etc), salt, pepper, garlic, onions, carrots, whatever. Let it sit for 6-8 hours. Dinner for 3 meals.
Tools:
I'd probably just pick up a cheap set of craftsman stuff (screwdrivers, hammer, sockets, pliers). Splurge on the ratchet and any power tools you need:
Bahco 3/8" ratchet - same as snapon F80 at 1/2 the price
Other misc. tools that are quite handy:
Magnetic stud finder - in a new place you're going to be hanging pictures, installing shelving, and mounting curtain rods. These are dirt cheap and super convenient.
Multimeter - Flukes will last you for life. If you need to do any electrical work, these are great. If you don't want to splurge up front just borrow them or buy a cheap $15 one at home depot.
Bedroom:
Get comfortable pillows and nice sheets. Don't get all caught up in the 1000 thread count crap, it's a hoax. Just get at least 400tc or so, and preferably egyptian or pima cotton. My favorite sheets are actually a super cheapo brand that are 60% cotton 40% polyester. I prefer them because they feel more "smooth and cool" rather than "soft and warm".
Obviously get real furniture: dresser, bed with headboard, etc.
Electronics
I won't go into too much detail here, but consider cutting the cord (/r/cordcutters).
A cheap Roku3 + netflix + an OTA antenna can go a long way.
If you have a lot of pictures/media/etc, don't forget about backups. I'd look into an inexpensive NAS, or at least a USB harddrive. They are dirt cheap and worth the insurance.
Insurance
Lastly, don't forget renters or homeowners insurance. If you are renting, you can get rather good coverage for quite cheap. I just paid around $50 for 12 months of coverage on my apartment ($15k coverage, $1k deductible). I shopped around at 5 different places and Amica came out the cheapest by FAR.
Other than that, you don't need much. Buy less crap. Don't buy some $50 automatic electronic wine opener when a $1 wine key will do the job. Same for a can opener.
Yep, I was able to cook them just on the skillet. Highly recommend forming smaller meatballs (1.5" diameter) so they cook faster. I also use a cast iron skillet, so the heat is perfectly distributed. Definitely get one if you don't have one.
I cooked the meatballs on medium heat for 5 minutes and then simmered for 5 minutes after adding the curry sauce ingredients.
I literally bought something similar a few days ago. I obviously can't vouch for how much of a BIFL purchase it is, but they make it clear what should go in what container, such as soups, cold foods etc. and it also states that you shouldn't tilt the tiffin box either - so the instructions are pretty clear. So far I'm enjoying it. No spillage. My food stayed warm. No complaints.
I was unusually excited to pack my lunch this week.
Yes it’s this one Zojirushi
Day 1 and I love it. Kept the food nice and warm! I’m sure you’ll enjoy it. $4-5 for lunch vs. $12-15.
Bento Boxes: like these
Not under $15, but you should still look at the Mr. Bento.
I second the hot food thermos. The mr. bento works mint if you want to have hot and room temperature goods in different containers. https://www.amazon.com/Zojirushi-SL-JAE14SA-Bento-Stainless-Silver/dp/B000246GSE
I have a Mr. Bento which I don't see much of in this subreddit but it works for me. :) I'm totally lazy when it comes to making my lunch look pretty so I kinda just throw stuff in the bento.
This is my flickr album of some of my bento lunches. I added description of the food below the individual pictures. I haven't added any pictures lately because I've been a little busy.
One thing that helped me out for healthy snacks to put in the Bento was paying for Graze. It's a small box of snacks I would get in the mail at 5 bucks a pop once a week. I'm not sure if they increased the price though because I stopped the service when I planned to travel for a few months earlier in the year. This is a picture of one of my Graze boxes I received in the mail.
I hope I can help a little but I'm no bento pro myself.
Your rice drying out is more problematic than being clumpy. Sushi (aka short grain/Calrose) rice is sticky. This is actually great if you're planning on eating with chopsticks. Since you can't heat up your lunch you do have a few options.
You can always:
My main concern would be that jasmine and basmati rice are types of aromatic rice. Their taste is distinct and it will change the flavour of the dish you're making if it calls for simple white rice. If it were me, I'd just bite the bullet and buy a bag of short grain/Calrose rice. Hope this helps. Good luck with your bento!
Breakfast: yogurt + granola + fruit. Or I'll make a breakfast casserole and portion that out for the week.
Lunch: animal protein + vegetable (usually salmon and spinach, steak and broccoli, or chicken and green beans), some type of curry + rice, or a 1/2 sandwich and vegetables. I like to make different chilis, stews, or chicken fajitas in the crock pot and eat that throughout the week as well.
I usually do fruit, vegetables or crackers + hummus, or chocolate for a snack.
I also make bentos when I'm craving Japanese or local Hawaii food. I have this container which is actually the best insulated lunch container I have ever owned. If I pack hot food, the temperature will remain in the safe zone for hours so I don't have to be awkward in the work kitchen to heat up the food. It also comes with a travel bag and spork.
I got this one and I like it:
http://www.amazon.com/Zojirushi-SL-JAE14SA-Bento-Stainless-Silver/dp/B000246GSE/ref=sr_1_3?ie=UTF8&amp;qid=1413822780&amp;sr=8-3&amp;keywords=Zojirushi+Bento+Jar
My wife is a subscriber to happyherbivore.com meal plans/groceries list and does lunch cooking on sunday (she is the bomb). I drive to work on mondays with 5 lunches and snacks and stuff them in the fridge. I swear it must way 45 pounds with the pyrex containers. I eat cereal or oatmeal for breakfast at my desk, a healthy carb filled lunch, a snack at my desk in the afternoon, and then ride home and have dinner. I have lost 15 pounds this season and get to eat 4 times more than anyone else in my office. This may not be the most helpful for you OP, so let me suggest a little jem from my amazon wishlist that I haven't tried yet, the bento box
Mr. Bento
Its a bit pricey, but you can keep both hot and cold things in it. The trays are liquid seals when seated together so soup isn't a problem. Why buy lunch meat when he could be eating higher quality, but cheaper cut, meats like pork shoulder (who doesn't like pulled pork) or marinated flank steak for lunch!
Check out these. I picked one up for ~$20 at a flea market in perfect condition.
I have a few different lunch boxes depending on what I'm going to eat that day. I really like the Zojirushi Mr. Bento because it has multiple smaller containers that can hold different things including one for soup. Other times if I am only bringing something liquidy I will use a Stanley Adventure Food Jar. If I am just bringing a sandwich I will use a soft insulated lunch box with some tupperware-style containers inside.
Get yourself a cooler like /u/ScarlettsLetters says or a lunch box with the ice packs and take sandwiches or food you can eat cold/don't mind cold.
If you want hot food I'd say invest in a bento that can store hot foods. I use this not the biggest one available so if you are a hungry person or eat big portion look for a bigger one. I can supply better pictures of the container sizes for this one if you want. I also found a nice food thermos at walmart for the winter months were I make oatmeal in the morning or I just put oats in there and when I get access to hot water I make it for a later snack/meal.
Otherwise you are kinda stuck just making sandwiches in the morning and tossing in some chips. You don't have to be making Rubens or masterwhiches everyday but it sure beats fast food in terms of nutrition. Buy bulk chips from costco/sams club/BJ and toss some in a ziploc bag or a container. Or pasta. fills you up and its just noodles and w.e sauce / meats/veggies you want. Just give yourself maybe 10-20min in the morning to make food.
I use a PackIt Lunch Bag when I'm just doing a sandwich and chips for lunch and a Bento Box when I'm bringing what I slow cooked the night before
Wow. I just ordered this. Until today I was ignorant that these even existed. Glad I checked out this thread. Thanks for posting that.
Reusable tote bags and veggie bags for the farmers market.
I've found some really great recipes in this cookbook, if he cooks: http://www.amazon.com/The-Great-Vegan-Bean-Book/dp/1592335497
For coffee, if he doesn't already have any of these: a French press, a pour-over (http://www.amazon.com/Hario-VDC-02W-Ceramic-Coffee-Dripper/dp/B000P4D5HG), or an insulated coffee mug. I think stumptown coffee does a coffee club subscription thing.
Random, but a bento lunch jar could be cool if he has to take lunch to work. Reduces packaging, plastic sandwich bag use: http://www.amazon.com/Zojirushi-SL-JAE14SA-Bento-Stainless-Silver/dp/B000246GSE
https://www.amazon.com/Zojirushi-SL-JAE14SA-Bento-Stainless-Silver/dp/B000246GSE
We bought these for our kids lunches. You can keep hot and cold items separated. Watch the videos for full explanation.
I just want my lunch to be packed and stay fresh...its the little things in life!
bc
http://www.amazon.com/Zojirushi-Bento-Stainless-Steel-lined-Silver/dp/B000246GSE/ref=wl_it_dp_o?ie=UTF8&amp;coliid=I3GDIRFC4Z8XZ2&amp;colid=8M1SB7284ZIG
http://www.amazon.com/Zojirushi-SL-JAE14-Bento-Stainless-Silver/dp/B000246GSE
You need to get yourself a few of these Mr. Bentos :)
http://www.amazon.com/Zojirushi-SL-JAE14-Bento-Stainless-Silver/dp/B000246GSE/ref=sr_1_1?ie=UTF8&amp;qid=1347641847&amp;sr=8-1&amp;keywords=mr+bento
I'm a fan of bento (sorta) type lunchboxes and I have been using a zojirushi for a few months and really enjoy the compartments. There's different sizes so I'm just linking you to the biggest size: https://www.amazon.de/gp/aw/d/B000246GSE/ref=mp_s_a_1_3?__mk_de_DE=ÅMÅZÕÑ&qid=1483552879&sr=8-3&pi=AC_SX236_SY340_QL65&keywords=mr+bento&dpPl=1&dpID=41p5bbuAleL&ref=plSrch
The best strategy is to make a quick dinner and make 2-3 extra portions. Store your leftovers in some tupperware, and put one of the servings into a lunch jar (http://amzn.to/1aiZsJ4). Leave it in your fridge to grab on the way out the door in the morning.
Ta da! $2-3 lunch.
The instructions say it isn't dishwasher safe. I've washed it on the top rack without issue. The vacuum jar and the one insulated lid shouldn't go in the dishwasher, though.
Worth it IMO, some of the smoothest coffee you can make. Stains your teeth less because it's less acidic . Here's the brewer I use, Takes an entire 12 ounce bag, 24 hours to brew and it usually lasts me six days in the fridge.
Cold brew at home is pretty easy to tackle.
There are a number of cold brew contraptions you can buy to ease and simplify the transition between steeping and drinking.
Alternatively, if you own a french press, then the results from that are just as good. Throw the grounds in, add water, plunge after X hours.
General steps:
---------
Resources:
See the comment from /u/dreamer6 - on how to create the vanilla cream and syrup
Blue Bottle - guide and recipe
Stumptown - guide and recipe
NYTimes - blurb article and recipe
I do, and it’s SUPER easy. I bought a [Toddy Cold Brew System] (www.amazon.com/dp/B0006H0JVW/ref=cm_sw_r_sms_c_api_i_fxKkDbMPE83QH) from Amazon and use that. It has instructions and everything. But basically, I grind 6oz (half a bag) and add it to the brewer with 3.5 cups of water. I let it set (steep or brew, if you will) for about 24hrs. Then drain it, add it to my storage bottle and pop it into the fridge. It lasts 7-10 days, having a 16oz coffee every morning. It’s a concentrate, so you then pour some to your cup, add water and ice. I dont have an exact measurement, as I eyeball the pour. But it’s probably around a 1/4 cup of concentrate? It’s up
To your tastes and how strong you prefer it.
In a pinch, I’ve done it in a mason jar and then Strained through cheese cloth and then a coffee filter. But it’s messier and I don’t like it as much. I love my Toddy system!
Another important factor is finding a coffee bean that you like. I personally find I prefer a medium-dark Roast. I tried various roasts and “flavors” until I found a blend I liked best!
I recommend the Toddy cold brew system. Makes about a week's worth for my wife and I.
Edit: [Link] (https://www.amazon.com/dp/B0006H0JVW/ref=cm_sw_r_cp_api_65KJxbBHC1R07)
Get yourself a Toddy, thank me later.
http://www.amazon.com/Toddy-T2N-Cold-Brew-System/dp/B0006H0JVW/ref=sr_1_2?ie=UTF8&amp;qid=1394333810&amp;sr=8-2&amp;keywords=cold+brew+coffee
An amazing way to make iced coffee is to use a Toddy Brewer. You can find them on Amazon for about $30. It is a room-temp brewing system that makes this wonderful double-strength coffee concentrate. And it cuts the acidity of the final product by a ton. Just add water and ice and you have the best cup you can imagine.
http://www.amazon.com/Toddy-T2N-Cold-Brew-System/dp/B0006H0JVW/ref=sr_1_1?ie=UTF8&amp;qid=1398144084&amp;sr=8-1&amp;keywords=Toddy+brewer
I used to work at a Scooter's Coffeehouse in Omaha, NE. We used this style toddy maker, using 1lb of our dark roasted Guatemalan ground coarse and 9 cups of water soaked 12 hours. IIRC the procedures for making sure it got an even soak were to add 5 cups cold water, half a pound of coffee, 2 more cups cold water, let sit for 5 minutes, then add the last two cups of water. I still do this at home (but with better beans now that I'm back in Oregon), and it works well for me.
"Blend into submission" is just another way to say "blend the shit out of it" or "blend until smooth." Nothing fancy there.
I use this to make cold brewed coffee. You could just use regular coffee that has been cooled; it will work perfectly well. I prefer cold brewed because it's much less acidic so it doesn't irritate my stomach.
Nothing really fancy. I just use my old Toddy and filtered water. It's really about the quality of the coffee.
I bought my mom a Toddy cold brew machine for Christmas last year. She can make her own super delicious cold-brew coffee concentrate, and it makes a great iced coffee when combined with water, almond milk, or what have you.
A different spin is going for some cold brew action. We make a batch of extract that lasts a week. Coupled with our hot water machine, we have instant non-bitter coffee.
https://www.amazon.com/Toddy-T2N-Cold-Brew-System/dp/B0006H0JVW
Yeah! It actually makes an amazing cup of cold brew coffee. You let the coffee brew in cold/room temp water for 12-24 hours and it takes all of the acid out of the coffee so it's a really mild, but highly caffeinated cup. One batch usually lasts me about a week's worth of morning coffees in the summer! :)
I was using mason jars or glass bowls until I got a Toddy last Fathers Day. While it's really just a plastic bucket and a glass carafe, it streamlines the process. With jars, I'd have to strain the coffee through a colander lined with cheesecloth. Not exactly onerous, but removing those steps is a nice plus. Plus, it makes a nice sized amount at once.
Its not fancy and electronic, but for the cash, and if I wanted my coffee over ice, I'd buy one of these babies - http://www.amazon.com/Toddy-T2N-Cold-Brew-System/dp/B0006H0JVW - make coffee once a week overnight and keep it in the fridge and use it when needed. And I'd use the money I'd saved to buy some nice coffee beans. Or maybe something else nice for myself.
The Toddy is a bucket with a hole in the bottom and a cloth filter. You put the filter in the bottom, put a plug in the hole, add ground coffee and water, let it sit overnight, then pull the plug and set it on a vessel to catch the resulting coffee. It comes with a bucket, but where I work we just put it in a pitcher.
Toddy Cold Brew System
Try a Toddy. It's a cold brew coffee maker. I hate black coffee, because it always tastes bitter and burnt to me. With a Toddy, you mix your coffee and water in the big white thing, let it steep for ~12 hours (so yeah, you'll wanna do that ahead of time), and then filter it into the decanter. It makes a bunch, and you can add more water if it's too strong, or sugar or cream or whatever. I seriously haven't gone back to hot brews since we got our Toddy a few years ago. \m/
I don't really understand the method you're using to make cold brew but most of these concentrates are made with a cold brew slow dripper (like a Toddy or a Yama tower) to get an extremely high concentration of coffee in the water. That's how they're able to use a 1:1 dilution ratio.
I just found out about THIS amazing espresso maker last year. I'm literally drinking one right now. Great for camping trips too.
I actually do something like this. Venti Americano (4 shots) plus a extra shot... with half the water... So this is really about 5 shots of espresso with the same amount of water added (10 oz total, so i can add some cream). I've been drinking this every work day for about 4 years.
On the weekends I use a Moka pot with Texas Pecan coffee.
If you're around Houston, check out ProudPie.com; I had their Pecan coffee and it was amazing; obviously their pies are good too but I'm more about coffee.
Oh, it is. I'm also living with my parents and they would murder me if they'd smell weed in the kitchen lol
I've also heard that the technique with the Mota Pot, or a regular italian coffee maker is pretty smell free.
There are some good pieces of advice in this thread on how to get something like a latte from your French press. But I want to take a moment to explain why you can't get a true cafe latte without an espresso machine.
There are three basic categories of coffee brewing methods:
Each style of brewing results in a signifcant difference in the character of the resulting cup; a difference that's much greater than the various methods within each category.
Since most familiar milk drinks use an espresso base, it's going to be extremely challenging to approach the same sort of flavor and richness from a non-pressure brewing method like a French Press. In fact, espresso is such a high-pressure brewing method that even other pressure methods can't really duplicate its flavor, which is why a true cafe latte really needs a true espresso.
But you can get close. If you're on a budget (since decent home espresso doesn't come cheap), you'll probably want to use something like a Moka pot. It won't quite be the same as true espresso, but getting into the same "family" of methods will help a lot.
This Bialetti is a good balance of price and quality—cheaper Moka pots are available, but it's a bit of a crap shoot whether you'll get decent quality or something that either can't build pressure and/or doesn't last.
Very exciting, I hope you enjoy the hell out of it for many years. I've written about this before but you might be surprised when you get out there how little you need any kind of formal system. KISS, at least to start. :) To wit:
> Ideally we'd like enough power to power 1 or 2 led nights [sic] at night, maybe a small 32in TV etc. If there is enough power, a coffee maker maybe.
All that said I may not even get to my place next week and if I do I may die in the cold there, so there is the downside to just winging it. Do you have any pictures to post of what you got?
In that price range, you're stuck with stovetop espresso pots.
https://www.amazon.com/Bialetti-6-Cup-Stovetop-Espresso-Maker/dp/B000CNY6UK?th=1&amp;psc=1
I use the 3 cup one for personal use. And I have the 6 cup one in case i have to share. And by "cups", its more equivalent to a shot.
Also, something to note, they don't make the modern standard of "true" espresso. However, it is close enough for an affordable alternative and can be used to make most espresso based drinks.
Coffee Bean Direct and Red Bird Coffee have good espresso for around $10 a lb.
I was big on the Aeropress and Moka Pot, but people are enamored with the Chemex pour-over.
You might be thinking of a Moka Pot. Besides online, you can usually find them in homeware stores, but they're often cheap (they leak and taste bad, I wouldn't bother with them).
Yeah, if someone wants an all in one brewing system for the stove top, the only one I would recommend is a Moka pot.
Their stainless 6 cup and the aluminum 6 cup are both great.
This is by far the easiest and cheapest way to make “fancy” coffee. Coffee snobs can spend hundreds to thousands of dollars on all this equipment that really isn’t necessary for regular people who would be happy with a Starbucks latte.
Here is a spice grinder that can be used for grinding coffee because fresh ground coffee tastes way better and you can control how fine it’s ground.
I suggest looking up a photo of how ground coffee should be for the “Moka pot”
https://www.amazon.com/dp/B00004SPEU/ref=cm_sw_r_cp_api_i_xH02DbEBEGM6D
Here is the “moka pot” I’ve found it’s the cheapest and easiest way to make something close to espresso. (It’s stronger than regular drip coffee but weaker than espresso, and it doesn’t have the brown foam that come on top of espresso)
https://www.amazon.com/dp/B000CNY6UK/ref=cm_sw_r_cp_api_i_2F02DbAZHNRY3
Here is the milk frother that is a easier and cheaper way of making “steamed milk” (this isn’t exactly steamed milk because usually you need to put a steam wand into milk and use a technique to steam milk properly and it’s expensive and takes practice)
You just push a button and a minute later it’s done.
https://www.amazon.com/dp/B07V9HHMZM/ref=cm_sw_r_cp_api_i_xG02DbC0AG7B5
The thing that really effects the flavor the most is getting good coffee! Maybe you could splurge on more expensive coffee that you save for dates, special occasions or when you want to feel fancy!
Buy a Bialetti, some cans of Illy Moka and Lavazza espresso and now you got some good Italian coffee for cheap. I use mine everyday. I also bought a plug in milk frother for when I'm feeling fancy (for like 9 dollars or something).
https://www.amazon.com/Bialetti-6-Cup-Stovetop-Espresso-Maker/dp/B000CNY6UK/ref=sr_1_3?s=kitchen&amp;ie=UTF8&amp;qid=1501852139&amp;sr=1-3&amp;keywords=bialetti
I am not sure of what you already have or what you would need, I am listing a few things on top of my head:
Based on your incredibly specific description of your sister, I have in the last minute figured out what decades of knowing her prevented you from seeing.
She wants a copy of this book and a Moka Express
You could go crazy and get an espresso machine, but have you ever tried a moka pot? I swear by mine.
Get yourself a percolator. Either electric or stovetop, they're inexpensive, practically indestructible, don't require paper filters, and make coffee that is far superior to anything that could come out of a drip machine. Then it's just a matter of finding the BIFL burr grinder and good beans, and you'll have some serious gourmet shit.
Get one of these. It says espresso but it's really just coffee.
&gt; if I were to use this, would the metal mesh screen capture all particles, even the finely ground ones?
Steel will let some fines through, but the mesh is a lot tighter than on my French press... The fines have never been enough to bother me, basically large enough to see, but small enough that I don't feel then when drinking.
The main difference between paper filters and steel ones is the oils. With paper you get a cleaner cup, the flavors pop a little more. With steel you get more of the oils, and it is a richer cup similar to French pressed coffee.
&gt;how much can I make in one press?
Basically a small cup. Personally I think it's strong enough that you can easily top of a large mug with hot water and still have a good cup of coffee... Definitely still stronger than a basic drip pot makes.
&gt;mostly going to be coffee and water, don't even know what other kinds to make, really. (yet)
Coffee and water are pretty much the appropriate ingredients. Really is a matter of trying different beans, different grinds, different steep times.
&gt;is this a chore for daily coffee making, or is the flavor worth the extra hassle?
For me it's worth the hassle on the weekends. Personally I prefer my Moka pot on weekdays before work, but that's actually more effort (though I cheat and use pre-ground coffee.)
It's definitely not set it and forget it, but it definitely makes better coffee. It is more effort, but if you've got an extra few minutes in the morning is a much better way to start your day. For me it's the difference between "I need coffee" and "I'm going to thoroughly enjoy my morning coffee".
Quick edit: I did use my Aeropress every day until this last Christmas when I got the Moka pot. The Moka pot makes coffee that resembles espresso. The Aeropress makes very strong coffee that doesn't really resembles espresso. Different device, different purpose.
I own a Moka pot and love it, but I'm kinda a noob to the whole coffee thing and don't have a lot experience to compare it to. I can tell you it makes very strong coffee. I mean, I think it would be fair to call it espresso, but probably not the same consistency as an expresso from a machine due to using less pressure.
This is the one I own. The picture can be deceiving as it is pretty small, and this is one of the larger ones they sell. It makes 12oz of expresso which I have found is about enough for 2 cappuccinos or lattes.
At least 442 people do.
that's the best part!
https://www.amazon.com/Bakers-Edge-Nonstick-Brownie-Pan/dp/B000MMK448
Thought you could use this.
Baker's Edge Nonstick Edge Brownie Pan https://www.amazon.com/dp/B000MMK448/ref=cm_sw_r_cp_apa_i_dhYqDbXHWY0MH
The brownie pan for you:
http://www.amazon.com/Bakers-Edge-Nonstick-Brownie-Pan/dp/B000MMK448
I can’t even.. tap it!
Edit: for mobile users with huge fingers: https://www.amazon.com/Bakers-Edge-Nonstick-Brownie-Pan/dp/B000MMK448/ref=sr_1_3?ie=UTF8&amp;qid=1509829278&amp;sr=8-3&amp;keywords=all+edges+brownie+pan
You would probably like this: https://www.amazon.com/Bakers-Edge-Nonstick-Brownie-Pan/dp/B000MMK448
I just saw this on a rerun of Shark Tank, and I could totally imagine it hanging in your kitchen somewhere causing me anxiety
https://www.amazon.com/Bakers-Edge-Nonstick-Brownie-Pan/dp/B000MMK448/ref=sr_1_5?keywords=brownie+pan&qid=1568995643&s=gateway&sr=8-5
Pssh, imma gonna send you this: https://www.amazon.com/Bakers-Edge-Nonstick-Brownie-Pan/dp/B000MMK448
That means you're using the wrong pan to solve your problem.
Welcome to hell
Every piece has crust. That tray is awesome.
https://www.amazon.com/Bakers-Edge-Nonstick-Brownie-Pan/dp/B000MMK448
I'll just list everything that I can, how's that?
The bakers rack on the left is This
The left most skillet is an AUS-ION
They're made in Australia and so smooth. Some nice touches of the piece are the very detailed cut-out of Australia on the handle and another nice engraving on the bottom.
Then there's the Stargazer. My first expensive piece. It's also very smooth. It's had a hard time keeping its seasoning, and I've admittedly been babying it by seasoning and seasoning it with flaxseed oil and a Crisbee puck.
Then there is the Finex group. It starts with the 10" grill pan. Then there's the 12" and 8". I just love the different geometric shapes of them.
All the way to the right is the Lodge Sauce Pot
I haven't used it a whole lot other than to make a few dips.
Between the big hanging skillets are some Lodge 4" and 5" skillets that I thought just looked cool and rounded out my collection.
The griddle is just a double sided griddle from world market. It's my go to pancake tool.
Then there is an A1 Chef pizza pan that I honestly don't use very much. I tend to just use some cheap aluminum pans with holes on the bottom because they're easier to form the crust on.
On the middle shelf from left to right are my 10" and 12" lodges. The 10" was my very first cast iron skillet. They've both been stripped and reseasoned and are much smoother than factory. I don't see myself giving up my first two skillets. I still use them a lot.
In the middle is the 10" grill pan from Lodge. I honestly hate cleaning the grill pans and have found that the lines in the meat aren't really worth the scraping. There's also some cheap fajita skillet that I don't think I've ever used.
And on the right is the Lodge enameled dutch oven but in the light grey. I love this thing, and got it for a song on Amazon one day.
On the bottom shelf on the left is the Lodge Wok I have definintely not used it. It seems like it would be better on a gas range, which I don't have. This was an impulse buy, and I don't know how to really cook any asian food, so who knows.
Then last but not least is the regular Lodge Dutch Oven
Many a roast has been made in this. The drip spikes on top does the basting for you. I just got a sous vide setup, so I'll probably be using it less and less, but sometimes I know I'll want the smell of a roast wafting through the air all day on a cold Autumn day.
Bonus pieces Kitchenaid Stainless Steel cookware set on top with All clad non-stick pans to the right of those.
Then there are some Lodge Stonewear on the other bakers rack
ok i will offer you two BIFL versions. the first one being BIFL on a budget and the second being a much higher dollar BIFL cost.
quality on a budget- http://www.amazon.com/gp/product/B0000CF8YO/ref=cm_ciu_pl_B0000CF8YO_mo1ZWCPZP5I7S3B
http://www.amazon.com/Lodge-Color-EC6D43-Enameled-6-Quart/dp/B000N501BK/ref=sr_1_1?s=home-garden&amp;ie=UTF8&amp;qid=1371857337&amp;sr=1-1&amp;keywords=lodge+dutch+oven
http://www.amazon.com/Victorinox-4-Inch-Fibrox-Straight-Paring/dp/B008M5U1UE/ref=sr_1_1?s=home-garden&amp;ie=UTF8&amp;qid=1371857377&amp;sr=1-1&amp;keywords=victorinox+paring
http://www.amazon.com/OXO-Grips-Wooden-Spoon-3-Piece/dp/B008H2JLP8/ref=sr_1_2?s=home-garden&amp;ie=UTF8&amp;qid=1371857407&amp;sr=1-2&amp;keywords=wooden+spoon
http://www.amazon.com/Lodge-L10SK3-12-Inch-Pre-Seasoned-Skillet/dp/B00006JSUB/ref=sr_1_1?s=home-garden&amp;ie=UTF8&amp;qid=1371857459&amp;sr=1-1&amp;keywords=lodge+cast+iron
higher dollar items include-
http://www.amazon.com/Global-G-2-inch-Chefs-Knife/dp/B00005OL44/ref=sr_1_1?s=home-garden&amp;ie=UTF8&amp;qid=1371857561&amp;sr=1-1&amp;keywords=global+knives
http://www.amazon.com/Shun-Premier-Chefs-Knife-8-Inch/dp/B003B66YKA/ref=sr_1_2?s=home-garden&amp;ie=UTF8&amp;qid=1371857613&amp;sr=1-2&amp;keywords=shun+knives
http://www.amazon.com/Wusthof-Classic-2-Inch-Paring-Knife/dp/B00005MEGH/ref=sr_1_3?s=home-garden&amp;ie=UTF8&amp;qid=1371857640&amp;sr=1-3&amp;keywords=paring+knife
http://www.amazon.com/Le-Creuset-Signature-Enameled-Cast-Iron/dp/B0076NOGPY/ref=sr_1_2?s=home-garden&amp;ie=UTF8&amp;qid=1371857680&amp;sr=1-2&amp;keywords=le+creuset+dutch+oven
http://www.amazon.com/Lodge-L10SK3-12-Inch-Pre-Seasoned-Skillet/dp/B00006JSUB/ref=sr_1_1?s=home-garden&amp;ie=UTF8&amp;qid=1371857717&amp;sr=1-1&amp;keywords=lodge+cast+iron
I own the cheaper BIFL items i listed and they have been AMAZING so far. you really cant beat the quality/ price ratio for the cheaper things i listed. if you want a better chef knife all the options i gave you would be excellent but just know that you could go crazy looking at all the different brands.
Go with the Lavatools Javelin. You really can't beat its price/performance.
http://www.amazon.com/dp/B00GRFHXVQ/
They also have a pro version which is a bit larger and even faster.
http://www.amazon.com/Lavatools-PX1-Javelin-Thermometer-Chipotle/dp/B00NMQGAT4/
Javelin thermometer, best thing in my kit and I use it though out the kitchen
https://www.amazon.com/dp/B00GRFHXVQ/ref=cm_sw_r_cp_apa_rE8VAbF1HFB4G
Any NSF dial thermometer should be suitable but you will need to calibrate an analogue thermometer in ice water. It's not difficult, you just need a pair of pliers. That said, this is the best thermometer I've ever used and you can use it in your kitchen for other things: https://www.amazon.com/Lavatools-PT12-Javelin-Thermometer-Chipotle/dp/B00GRFHXVQ/ref=sr_1_1_sspa?ie=UTF8&amp;qid=1505350802&amp;sr=8-1-spons&amp;keywords=lavatools+javelin&amp;psc=1
Last minute effort? Defrost in cold water (running water will make them defrost even faster). Marinade for 30 minutes; I usually do a combo of olive oil, S&P, lemon juice, chopped garlic/garlic powder, chopped onion/onion powder, and oregano or thyme. Grill or pan fry on medium-high heat, reduce heat to low when you've achieved your desired outside sear and cook until 155-160. Invest in a thermometer, it's definitely worth it... I love this one: http://www.amazon.com/Ultra-Accurate-High-Performing-Digital-Thermometer/dp/B00GRFHXVQ/ref=sr_1_8?s=kitchen&amp;ie=UTF8&amp;qid=1426294198&amp;sr=1-8&amp;keywords=meat+thermometer
I'd recommend an inexpensive thermometer like this, rather than the probe--I'm not sure quite how warm a probe can get, but I'd be surprised if it's over 100 F. https://www.amazon.com/gp/product/B00GRFHXVQ/ref=oh_aui_search_detailpage?ie=UTF8&amp;psc=1
https://www.amazon.com/gp/aw/d/B00GRFHXVQ/ref=mp_s_a_1_15?ie=UTF8&amp;qid=1473558392&amp;sr=8-15-spons&amp;pi=AC_SX236_SY340_QL65&amp;keywords=Lavatools&amp;psc=1
We have this one and it has worked perfectly for us. Relatively low cost, accurate, and will give you your temp in seconds. We have tested it with outside temperature against what the weather is and it is always correct. We also tried inside versus our thermostat and there to it is correct. For 25 dollars you can not beat it. Have had it since fathers day so I can not attest to years of use, but you could buy multiple and it would take a while to equate to the same cost as a thermapen.
Picked up this probe therm for $15, orig $24.99: Lavatools PT12 Javelin Digital Instant Read Meat Thermometer (Chipotle)
I almost bought it previously but didn't love the price. Put it on the Honey drop list and received an email notification today.
or this
First of all, your mother was wrong for doing that and it's really common in raisedbynarcissists homes, though I'm not sure that she is a narc...because this is only one small example and could be applicable to non-narcs. That being said, it's never too late to learn how to cook. I was in the same boat as you were and was really frustrated by youtube videos because they taught things from a perspective of already knowing cooking basics and I didn't even know that much.
I'd strongly recommend this cookbook because it teaches you the basics to the basics. It actually shows you how to cut veggies properly and what brands to buy based on testing and gives it's reasoning and logic as to why. The recipes are easy to follow with lots of pictures and clear instructions and always come out as restaurant quality (for the record, I got this book in December 2018 and 2019 was the first time I ever cooked in my life) and have been able to make quite a few showstopping recipes (I started out by setting aside one day to try a new recipe, for example, I would decide ahead of time what I was making each Sunday which was when I would cook from this book as I have a full-time job and a child). So it depends on you how much time you have but honestly, one recipe a week has taught me so much about cooking in general.
I can't express how good the food is. My fully British bf loves Indian food (has all his life, of course) and we made a Chicken Tikki Masala from this book..he told me he's had this made gourmet at his favorite restaurants and that there was no way it would turn out as well for us (we were cooking together and he was trying to convince me to deviate from the actual instructions) unless he added stuff. I stood firm and told him that he had to try it their way first and to just try it before trying to change it...it ended up being so good that both of us now have a new favorite Chicken Tikki Masala recipe lol.
I'd also recommend a small scale if you don't already have one because it makes it much easier to cook meats if you actually cut them down to the right size. For example, if it say's 6-8 ounce chicken breasts, I buy chicken breasts and cut off all of the fat until it's close to 6-8 (usually closer to 8.5 but close enough). Because then when the recipe says cook 4 minutes on each side, you can literally follow that exactly and it should come out perfectly every time. Hope that helps but please let me know if you have more questions/anything else that I can help with! I linked the one we use but it's up to you, of course.
https://www.amazon.com/Complete-Cooking-Two-Cookbook-Everything/dp/1936493837/ref=sr_1_3?keywords=cooking+for+2&amp;qid=1563201487&amp;s=gateway&amp;sr=8-3
https://www.amazon.com/Etekcity-Multifunction-Stainless-Batteries-Included/dp/B0113UZJE2/ref=sr_1_7?keywords=small+scale&amp;qid=1563201838&amp;s=gateway&amp;sr=8-7
I'm glad you read the wiki, but you need to do more than 'keep in mind' that calorie counting is king. It's really the only way to lose weight - eating fewer calories than your body loses. Don't bother with the miniscule amounts of walking - the time would be much better spent weighing your food and counting calories.
I'm going to be blunt - if the doctor said you have to lose weight, you don't have a choice. Buy a food scale, weight out everything you eat, and I mean everything, and put it all into myfitnesspal.
You need to calculate your TDEE, which you can find calculators online. Be conservative with how much exercise you put into the calculation. Set your intake to be 650 calories below your TDEE each day, and you'll lose 10 lbs in a month.
From there you need to be honest with yourself. If you snack, you have to count those calories. You have to weight everything out accurately. Possibly change your diet to more filling foods (protein/fats/fiber over carbs) if you're feeling hungry. It's not easy, but it's very achievable.
Here is one from Amazon with Prime for $10.88.
Here is one from eBay for $8.95 with free shipping.
Cheers!
I have this at home
and this one at my BF's house.
I like the one I have at home better, and it also used to be cheaper (like $8). I recommend getting one with a raised platform, because it makes reading what the screen says easier. I don't use a food scale all of the time, but when trying to make weight for a meet, it's definitely a great thing to have.
You said you live at home, so you can't control all the food; that's fine. You can still do it, it'll just take some more willpower!
I echo everyone on meal planning. Every Sunday I make my lunches for the week (black bean soup this week), and I usually have the same breakfast (overnight oats) everyday (except this week I made a loaf of lemon blueberry poppyseed oat bread, yum!). Invest in a food scale (you can get a great one for under $30; here's mine) and take an hour or two on the weekends to plan meals. This way you don't have to worry about overeating or what your days are going to be like. This should help stop the anxious fasting. You do all the work at once and then have breakfast/lunch everyday ready for you.
As for snacks, do you get a say in what snacks are "yours?" I freaking love potato chips and would get a bag every week. Once i started getting more serious about making a change, I started getting the reduced fat kind. Then I tried pop chips. Now I don't eat so many chips at all, and I have reduced my snacking. Just gradually make healthier choices until it's not too hard to say, "I don't need chips today." I also keep cookie dough in the freezer, the kind that are individual cookies? So if i want a cookie i have to wait about thirty minutes for the oven to preheat and the cookies to cook. This also saves me from just reaching in the pantry.
I've got plenty of gluten free recipes if you are interested! My husband isn't gluten free, but he doesn't complain. Most of my recipes just use regular ingredients so it's not like you miss gluten. Also I prefer recipes with lots of protein to keep me full longer.
Lemon Poppyseed Oat Bread (8 slices) Adapted by reducing honey to 3 tbsp, Poppyseeds to 2 tbsp, used 2% Fage greek yogurt, and added 1.5 pints of blueberries. (237 kcal, 35.3 Carbs, 6.1 Fat, 11 Protein)
Overnight Oats
I was using Bob's Red Mill Muesli, but now I'm making my own blend with oats, pepitas, sunflower seeds, dried cranberries, and coconut. You can tailor it to what you like! Mix together and let sit overnight; I usually eat it with diced apples.
1/4 cup Muesli (or your own mix)
80 ml Coconut/almond milk (I use Califia Farms)
60 grams Fage 2% Greek Yogurt
1/2 tbsp ground Cinnamon
1 tsp chia seeds
(278 kcal, 27 Carbs, 11 Fat, 19 Protein)
Here's the soup I have in the slow cooker now! (5 servings)
I used chicken broth instead of veggie broth, so it's not vegan. I'm still debating about cooking some lean ground turkey to add in, but i'll decide after it's done! (305 kcal, 65.5 carbs, 2.1 Fat, 21.7 Protein)
Hope these help a bit!
*Edited links
Etekcity Digital Kitchen Scale Multifunction Food Scale, 11 lb 5 kg, Silver, Stainless Steel (Batteries Included) https://www.amazon.com/dp/B0113UZJE2/ref=cm_sw_r_cp_apa_oNo.ybJ3Y3ZC6
Affordable, accurate, durable, and repeatable measurements. Best one I've used!
I have this one from amazon $12.99
http://www.amazon.com/Etekcity-Digital-Multifunction-Stainless-Kitchen/dp/B0113UZJE2/ref=zg_bs_678508011_3
but I've seen some people find cheaper scales at walmart, target.
Good luck!
Etekcity I think it's called? here is the Amazon link!
That's a good one. I had one just like it that lasted me a few years until the display died last week. I replaced it with one of these, just to mix things up.
https://www.amazon.com/gp/aw/d/B0113UZJE2/
Both of these scales are fairly small and low profile, which is generally a good thing, but be aware you can't really use a full sized dinner plate on them. The plate will extend past the display and make it hard or impossible to read. Bowls or small plates only.
Auto Drip
&#x200B;
Pour Over + Carafe
&#x200B;
Electric Gooseneck Kettle
&#x200B;
Grinder
&#x200B;
Scale
&#x200B;
it's not left to right but it's what is there.
https://www.amazon.com/gp/product/B0113UZJE2/ref=oh_aui_detailpage_o06_s00?ie=UTF8&amp;psc=1
Simple, accurate and cheap. I love it.
Get a small kitchen scale. Way easier.
I do the 87g of powder (400 calories) and 12oz of water per "meal". You can mess with the water amount to get it thinner or thicker depending on how you like it, but 12oz seems pretty good for me.
This is the scale I bought, but i'm sure any is fine.
Have this one here: https://www.amazon.com/gp/product/B0113UZJE2/ref=oh_aui_detailpage_o03_s00?ie=UTF8&amp;psc=1
Works well.
Here you go. Freshware 15-Pack 3 Compartment Bento Lunch Boxes with Lids - Stackable, Reusable, Microwave, Dishwasher & Freezer Safe - Meal Prep, Portion Control, 21 Day Fix & Food Storage Containers (32oz) https://www.amazon.com/dp/B01GH5KQLO/ref=cm_sw_r_cp_apa_QrLLxbM1SRYX8
Hubby bought them through Amazon here's the link:
https://www.amazon.com/Freshware-15-Pack-Compartment-Bento-Lunch/dp/B01GH5KQLO/ref=cm_cr_arp_d_product_top?ie=UTF8
Yes. Usually for five days.
I bought a set of 10 3-partition meal prep containers. Like these: https://www.amazon.in/Freshware-Compartment-BPA-free-Food-Containers/dp/B01GH5KQLO/ref=sr_1_2?ie=UTF8&amp;qid=1539288078&amp;sr=8-2&amp;keywords=meal+prep+containers+3+compartment
Usually prep in the form of carbs-protein-fats/veggies. So far have made, rice-rajma-brocolli, noodles-chicken-brocolli, chicken wraps, rice-chicken-salad and so on.
Also helps to have jeera rice instead of plain boiled rice. Adds to the taste.
If it's hard for you to be constantly tracking (I'm working on being strict personally but wow am I bad about it), maybe try meal prep bento boxes? I have these from amazon, and they're really useful in keeping portions where you want them. A decent rule of thumb is about a palm size of meat/chicken/fish/assorted protein accompanied by lots of keto-friendly veggies. If repetition/lack of surprises doesn't bother you, pre-enter meals into your chosen tracker app the night before in some down time, and just eat according to that the next day. Some ketoers like that it helps keep you on track too!
Freshware 15-pack 3 compartment Bento lunch boxes with lids
I obviously just started using them but have no complaints so far!
These meal prep containers are excellent for packing lunches. I use them to separate the parts of sandwiches or hamburgers I pack for lunch so that the bread doesn’t get soggy and the veggies stay fresh. You can also make your own protein packs with them by packing hard boiled eggs, hummus and veggies, cheese meat and crackers, etc. You can also save money and room on ice packs by freezing bottles of water or Gatorade and using them to keep your food cold and have a cold drink at lunch time.
You can buy meal prep containers on Amazon that work perfect for meal prepping.
Freshware 15-Pack 3 Compartment Bento Lunch Boxes with Lids - Stackable, Reusable, Microwave, Dishwasher & Freezer Safe - Meal Prep, Portion Control, 21 Day Fix & Food Storage Containers (32oz) https://www.amazon.com/dp/B01GH5KQLO/ref=cm_sw_r_cp_api_i_LgmSCbC8QX9AB
https://www.amazon.com/Freshware-Containers-Compartment-Stackable-Dishwasher/dp/B01GH5KQLO/ref=sr_1_13?keywords=lunchable+containers&amp;qid=1554697157&amp;s=gateway&amp;sr=8-13
These 3-compartment containers are pretty popular around here
Here they are! They are holding up great, other than when the boyfriend throws them around or steps on them in the car. I've never had a problem: https://www.amazon.com/gp/product/B01GH5KQLO/ref=oh_aui_detailpage_o03_s00?ie=UTF8&amp;psc=1
These are the ones I ended up buying:
https://www.amazon.com/gp/product/B01GH5KQLO/ref=oh_aui_detailpage_o01_s00?ie=UTF8&amp;psc=1
https://www.amazon.com/gp/product/B01GH5KQLO/ref=oh_aui_search_detailpage?ie=UTF8&amp;psc=1
You can wash and reuse. Use the top rack in the dishwasher though, I think I screwed up a cover washing it on the lower rack.
https://www.amazon.com/gp/product/B01GH5KQLO/ref=oh_aui_detailpage_o02_s01?ie=UTF8&amp;psc=1
Amazon. Here's a link to the ones I use. I put them in the freezer, microwave and dishwasher.
We have these ones which are convenient 3-compartment meal prep containers, and also something similar to this Snapware set that we got on sale from Costco a while back. Lots of different sizes and shapes for different kinds of foods! They also have a glass instead of plastic version. Both options are microwave safe!
I got them from amazon. They have decent sales on those, and the single compartment ones pretty regularly.
Here is what I use, and I love it. This strainer actually lets the loose leaf tea expand, unlike little tea balls. It's also easy to clean. I get a pot because I like to brew 2-3 cups at once. I pour one in an insulated mug so it's drinkable by the time I finish the first. This set also comes as a brew-in-cup system for singles.
Infusing
1:Water temp. Either get an electric kettle like this that you can set to heat to a certain temperature, or bring to a boil and let cool to the right temperature. For greens that is always BELOW boiling. 170-190 degrees F, and it can vary by the type of tea.
2: Preheat your brewing vessel, be it cup or pot, by swirling some of the water inside and dumping that out. Starting with a preheated pot keeps the water temp. stable during brewing. You want a lid for the same reason.
3: Add loose tea leaves to the infuser.
4: Pour in your water.
5: Let steep. For green tea that is going to usually be 2-3 minutes, but it can vary by strain. Overbrewing green tea makes it bitter.
6: Remove the infuser. A good quality loose leaf tea can be brewed 2, and sometimes three, times! Let it cool between brewings, and you want to use it the same day.
7: Pour and enjoy! I like to brew in one cup/pot and drink from another. Pouring into a cold cup drops the temp of a green tea to almost drinkable right away.
Brands
I tend to order online and in bulk. I like to buy 8-16 oz of loose leaf at a time. I've enjoyed Republic of Tea, though they can be expensive and some of the flavors are a big miss. Their Vanilla Almond is to DIE for! Right now Rishi Tea is my favorite. They do greens very, very well. I recommend the Green Flight sampler pack to get started. The name is a play on taking a vacation across regions of the world by sampling greens from each.
I just ordered some Numi jasmine green tea, but I haven't gotten it yet. I'll update you when I do.
http://www.amazon.com/Hamilton-Beach-40996-Programmable-1-7-Liter/dp/B0083I7THI/ref=sr_1_8?s=home-garden&amp;ie=UTF8&amp;qid=1367686511&amp;sr=1-8&amp;keywords=hamilton+beach+tea+kettle
This one is the best bang for buck IMO, one of the cheaper ones with electric temperature control and it's really well built.
It's digital and works as a thermometer as well, I always boil my water and then cool down from there by aerating the water, so I go from a large measuring cup to the kettle and back and forth and by putting it back down I can see the temp each time.
It's pretty much all stainless but there is a bit of plastic I think, and then the mesh filter has some plastic around it (you can take that out, I broke mine so it's off)
You should consider getting an electric kettle. This is the one I use at home and the only one I can really recommend from experience. The temperature controls can be a bit fiddly at times, but once you get used to them its super easy to get the temperature you want. This is another popular programmable kettle which I've heard a lot of good things about. You can also surf around on Amazon and read some reviews, there's a large variety of electric kettles around. Another option is to keep boiling your water on the stove then letting it sit and cool and using a meat thermometer to gauge the temperature.
As for brewing, get a gaiwan! One, Two, Three, Four, Five, and there half a million more options out there. This is an awesome simple guide to using a gaiwan. Look up some tutorials on youtube or google for some more detailed info, or search around /r/tea a bit.
Next on the checklist, SAMPLES! Don't order 100 grams of a tea that you've never tried. Here's some basic sampler packs: One, Two, Three, Four. Plenty of other great sites offer samples too, check out /r/tea's List of Retailers on the sidebar.
Hope this helps, and sorry if this was too rambling and in-cohesive, I've had a lot of caffeine.
Also, I want to leave you with this guide. It's an incredibly well done piece. Good luck!
I don't have anything too fancy! Just a Hamilton Beach programmable one: https://www.amazon.com/Hamilton-Beach-40996-Programmable-1-7-Liter/dp/B0083I7THI/ref=sr_1_9?ie=UTF8&amp;qid=1527110277&amp;sr=8-9&amp;keywords=electric+kettle+hamilton+beach
This Cuisinart one is normally highly recommended though: https://www.amazon.com/Cuisinart-CPK-17-PerfecTemp-1-7-Liter-Stainless/dp/B003KYSLNQ/ref=sr_1_3?ie=UTF8&amp;qid=1527111212&amp;sr=8-3&amp;keywords=cuisinart+kettle
I was also debating between buying a couple of the more expensive kettles on amazon, but I ended up getting a cheaper one and I'm glad that I did.
The kettle I bought is this Hamilton Beach one. It's $37 right now and I've been using daily for over a month with no issues or rust.
This one has worked out very well for me. Dunno if it's the 'best' but I like it.
$42 for this one. Bought it recently for work, works great. Keep warm by way of triggered reboils for an hour, has a programmable turn-on with a clock, and a thermometer that always displays the unit's temperature. My only small complaint is that the water sometimes gains an additional 5 degrees when the heating element stops depending on the amount of water in the pot.
Etekcity Lasergrip 1080 Non-contact Digital Laser Infrared Thermometer Temperature Gun -58℉~1022℉ (-50℃~550℃), Yellow and Black https://www.amazon.com/dp/B00DMI632G/ref=cm_sw_r_cp_apa_i_3P14AbZ9RCK9B
This is the one I've used for over a year for my dab setup and it works flawlessly. $17 on Amazon, elegible for prime
Get one of these and find out just how hot dryer is getting. If either the Thermal Limiter or the High Limit Thermostat is bad you usually can't tell by looking.
You should always have temps available on the warm and cool side.
If you don't have fixed thermometers I highly suggest spending the extra $$ on a battery powered infrared thermometer.
Something like: https://www.amazon.com/Etekcity-Lasergrip-1080-Non-Contact-Thermometer/dp/B00DMI632G/.
Depending on age, their basking spot should be 95-100(fahrenheit) for adults, a little warmer for juveniles, 100-105. The ambient temp of the basking side will naturally be higher than the cool side.
The cool side should be noticeably different in the 80-85 degree range.
&nbsp;
Hope this helps, please provide an update!!
Pleaaaase get a thermostat. Snakes move substrate and burrow and do weird snakey things, and uncontrolled temperatures can burn your snake, have it go off its feed, cause it to regurgitate, or even crack the glass of your tank. Most tank heating pads fluctuate in temperature, so even if it's reading 108 right now, most reptile pads can spike to 120-130F.
I use this thermostat for all of my tanks, for all of my species. https://www.amazon.com/MTPRTC-Controller-Thermostat-Germination-Reptiles/dp/B000NZZG3S Cheap and prime-eligible!
Also, I recommend getting a laser thermometer if you have any reptiles at all-- specific temperatures are vital to your snake's husbandry if you want it to thrive, and being able to check surface temperatures is super important (in addition to a temp prob that can measure ambient temp in the rest of the cage). I use this one: https://www.amazon.com/Etekcity-Lasergrip-1080-Non-contact-Thermometer/dp/B00DMI632G/ref=sr_1_1_sspa?s=lawn-garden&amp;ie=UTF8&amp;qid=1510799376&amp;sr=1-1-spons&amp;keywords=temperature+gun&amp;psc=1 It works like a charm!
Alright! So that fixture itself isn't bad, but the UVB bulb that is in there probably isn't great. There is a bunch of research that suggests those coil style UVB bulbs aren't great for our beardies and don't cover the tank in enough UV. This hood is what we use along with this bulb. This light should be on during the day and turned off at night. General consensus is at least 12 hours on. That hood may come with a bulb already, but if it does, it's probably the 5.0 which isn't strong enough for bearded dragons. That why I gave the link to the 10.0 version. This bulb should be replaced once a year even if still illuminates, as the capacity to produce UV diminishes after about a year.
The other thing in the fixture may be a CHE (ceramic heat emitter). If it just generates heat but no light, then that is what that is. You really only need that if the tank temperature drops below 75-70 degrees F. Make sure not to use any red or any lights at night as bearded dragons can see color and it will disrupt their sleeping.
Finally, it sounds like you don't have a basking light. Even though your house stays pretty warm, beardies still need a basking spot of around 105 degrees F. In the now empty spot where your old UVB bulb was, you can use one of these. Some people just use flood lights from Home Depot or elsewhere, just make sure it's not an LED one. You can use this light dimmer to control the light output to get the basking spot to the correct temperature. I would recommend this infrared temperature gun to check for the correct temperatures during the day and at night.
Lighting is one of the biggest things for bearded dragons and can take some time to get set up correctly. It's good to ask questions and research! I still learn new things about beardies all the time. I'll get pictures of our setup tomorrow and show you. I would tonight, but our babies are already sleeping!
One last thought, as some others have said, if you have an exotic vet nearby, it certainly wouldn't hurt to have Ember checked over. They can check for parasites or other issues before they become a problem.
I like using laser thermometers
Once you have a under tank heater, it will probably be warm enough that you won't need the lamp. I'd also get a thermostat, in my experience heat pads will be 10-20 degrees above where I want them depending on what substrate I'm using (With slate tile it's 95 on full blast, with paper towels/news paper it will get up to 110). You could also just use a lamp dimmer from Lowes/Home Depot attached to the UTH.
Lamps will raise the ambient temperatures more and UTHs will directly heat the ground, which is what leos need, so they're always the best choice. You'll want to get a reliable thermometer that measures ground heat. So, a digital thermometer with a probe or a temp gun. Temp guns are great and can be bought at home improvement stores (but they're cheaper online). The warm side should be around 90 and the cool side should be around 75.
Do you know their sexes? Leos can only be housed together if they're both females and very similar in size. Males will fight and males with females can breed and/or fight. Even if they are both females, I'd be very careful. Bullying can happen even with females, and sometimes it's hard to see the signs because reptiles' social cues are way different than humans. They really always do best when housed alone. If you do choose to house them together, I'd double your hides. Two cool hides, two warm hides. The more hides there are, the less chance of fighting there is.
edit: forgot to say, yes that UTH should be fine. A rule of thumb is that it should cover about a third of the bottom of the tank.
Here's a cheap IR thermometer that would probably do the job.
https://www.amazon.com/Etekcity-Lasergrip-1080-Non-contact-Thermometer/dp/B00DMI632G/ref=sr_1_1?ie=UTF8&amp;qid=1474470595&amp;sr=8-1&amp;keywords=infrared+thermometer+amazon
I'd check the air temp coming out of the vent in the hot room vs. the temp coming out in other parts of the house. It might be that the ducting in that part of the house doesn't have enough insulation and is losing a bunch of coldness on it's way to that room. Or it just might be the farthest from the air handler. In any case, cool air coming out shouldn't be any more than around 60-62 at the worst.
It's also worth checking the temperature differential in the air handler between the temp going in and the temp going out. It should be in the 20-30 degrees range at least, i.e. 85 degree air comes in, 55 degree air goes out. You can usually do this with a cheap probe thermometer and is a standard test done by any AC guy that checks out the system.
Home Depot, Lowes, and even Amazon have these handy infrared thermal temperature readers. They are relatively cheap and you can scan the mobo to see if you have any components getting too warm. I would check with that that to see what's going on and then go from there.
Edit: Etekcity Lasergrip 1080 Non-contact Digital Laser Infrared Thermometer Temperature Gun -58℉~1022℉ (-50℃~550℃), Yellow and Black https://www.amazon.com/dp/B00DMI632G/ref=cm_sw_r_cp_api_OCRrzb8HTB27T
2 more things. If that heat lamp is resting on metal mesh cut a hole around where the light bulb is. The mesh on the cage could create a mini oven and have your bulbs burn out in half the time. Second, get a heat temperature gun to test that spot. Its the only accurate way of testing a basking spot. https://www.amazon.com/Etekcity-Lasergrip-1080-Non-contact-Thermometer/dp/B00DMI632G/ref=sr_1_1?ie=UTF8&amp;qid=1497757240&amp;sr=8-1-spons&amp;keywords=temperature+gun&amp;psc=1
Get a deep fry thermometer. They should have one in the kitchen gadget aisle at your grocery store. Or grab one cheap off Amazon. For a few more bucks, you can get a handheld infrared thermometer which is infinitely more fun to use (and doesn't require cleaning).
You and I are probably similar. I had never cooked before spontaneously deciding I was going to cook all of my own food from scratch on my 37th birthday. I also spent HOURS slaving away on often so-so dishes and felt discouraged. I pushed through that initial 2-3 month window of crappiness and now I'm 2.5 years into cooking 6 days a week and it's been life changing. That said, I still don't LIKE cooking, but I don't mind it, and I love the feeling that I finally know what I should be eating.
I think it was J. Kenzi Lopez Alt who said that good food is the result of:
Good recipes: I can't believe there's 41 comments and no one's mentioned Budget Bytes. She is the queen of pragmatic, low cost, fast-enough, from-scratch, healthy weeknight dinners. For your first couple of months of cooking try focusing on just her recipes. They're beginner friendly and very well written.
At least until you develop the sense of what makes recipes good, avoid YouTube, gif recipes, Pintrest, and the obnoxious blogs full of too-well-staged-photos. They're interested in views and shares, not cooking.
Here's some other sites that produce consistently good food:
Here's some confidence building fantastic recipes:
Good Ingredients: In the beginning I found that cooking was often way more expensive than I'd ever imagined. That was in part because I hadn't built up much of a pantry (oils, vinegars, spices, other condiments), but the main reason was because I was shopping a supermarket. For both cost and quality reasons, each week try finding a new market in your area. In particular, look for ethnic markets frequented by people of the biggest ethnic culture in your area. The asian, mexican, and middle eastern markets in my area have better quality food for quite seriously 50-75% less than a supermarket. The closest supermarket charged $7/lb for prepackaged ground beef. The mexican place nearby charges $3/lb for ground beef they grind themselves.
Speaking of ethnic markets, try to find an ethnic market with a dry goods section where you can scoop out as much of an ingredient as you want into bags for cheap.
If you live in a metropolitan area find a Penzeys. They sell spices that are much higher quality than a supermarket for about 25-50% less than supermarket prices.
You're going to need tons of chicken broth. Until you inevitably start making your own large batches in a pressure cooker a year from now, stick with Better Than Bouillon(https://www.betterthanbouillon.com/wp-content/uploads/2018/06/BTB_Package_8oz_Roasted_Chicken_Base-2017.png). It's cheaper and better than the crap you get from a can or carton.
Good Equipment: The most important thing is a sharp knife. Here's the $27 knife everyone usually recommends. Even if you already have a knife, it's probably dull if it's not new and you haven't sharpened it; get it sharpened or buy a new one for now. Learn to hone it before or after each use.
Go to a kitchen supply store, Smart & Final, or Amazon and get a couple of 1/4 sheet trays ($4?), ten or so bar towels ($1 each), and a prep bin ($4) so that your prep area looks like this. Also get a bench scraper ($5). The 1/4 sheet trays keep your ingredients organized and ready to go. The prep bin saves you from having to keep a trash can nearby and keeps things tidy. The bench scraper is a time-saving godsend for moving stuff around. A proper prep station alone will probably cut your cooking times by 10-20%.
Good Technique: Once you have an organized prep station and you get your workflow down, the biggest time saver is going to be knife skills. Onions & garlic will be your most commonly chopped items, so watch several videos and make sure that each time you chop one of those it's meaningful practice. To avoid cutting yourself: get a sharp knife, while cutting always consider what would happen if your knife slips, and every time something awkward/unusual happens, take a small pause before you continue cutting.
The art of home cooking by recipe really comes down to heat management. Get an infrared thermometer for $20, they're incredibly valuable when starting out. For the vast majority of sauteing, turn your pan to medium high (just guess) and measure your pan with that thermometer until it's around 300 then pour in whatever oil you're using. Keep checking them temp with the thermometer until that oil is around 330-360 then toss in your meat or vegetables. If you wait a few seconds, slide the food out of the middle of the pan, and check the temp again you'll see it's in low 200's because the food saps the heat out of the pan. Your goal is to keep that heat in the 300's. Note that as the food heats up the pan will get hotter quicker, so as you're learning keep monitoring that pan and get used to the sounds it's making so eventually you'll manage heat through sound & instinct.
The last thing is: use more salt. If you're cooking a recipe that looked great, and got great reviews, and it doesn't seem like you made any big mistakes yet it's still bland, it's because you didn't add enough salt 100% of the time. It took me a while to realize that when I add salt to a dish someone else has made, they had already put a good amount of salt in it. So when salting a dish that makes four portions, you're not going to just shake in some salt from a shaker, you're going to pour in a teaspoon or more.
I have a little temperature gun. I'm constantly measuring the ambient temp, water temp, and dough temp. I don't have any formulas but I think it helps develop a feel for how temperature affects the process. For example this time of year my kitchen is typically 65-68 degrees which is pretty cold for room temp, so I decided to put my dough in the oven with the light on (about 75 degrees) between folds for the bulk fermentation. I think that helped.
I think the best advice, though, is not to fret over it too much! It's a lot like yoga, you just have to let go and enjoy your own journey. Embrace the ebb and flow of gradually improving with practice. There are so many variables to play with and no perfect loaf.
Hmmmm...If you know the name of the shop that did the work, they should keep records on the mileage. You could then call them and confirm that it indeed "has not been driven that much." I know dealerships will do this, but I'm not sure about small shops.
I truly doubt it's the belts, but I wouldn't discount it. The only thing I can think of that would make them slip is if there is oil or some other slippery fluid lining the entire inside portion of the belt, which you can easily look for.
http://www.amazon.com/Etekcity-Lasergrip-1080-Non-contact-Thermometer/dp/B00DMI632G/ref=sr_1_5?ie=UTF8&amp;qid=1453141132&amp;sr=8-5&amp;keywords=temperature+gun
$15, hold it as close as you can to the spot you're measuring. This will allow you to see if your sensors match the actual temperature.
What are you looking to do?
If just walking out to the field and taking temp measurements: Any digital thermometer will work. In my truck, I've got both a temperature gun and a digital instant read (not these exact units, but pretty similar).
If you want crazy cool/hi-tech, you can go with something like John Deere's FieldConnect. It's will give you moisture and temp readings, as well as send the readings to you.
Here you go: http://www.amazon.com/Etekcity-Lasergrip-1080-Non-contact-Thermometer/dp/B00DMI632G/ref=sr_1_4?ie=UTF8&amp;qid=1451344205&amp;sr=8-4&amp;keywords=infrared+thermometer
Some of my favorite things.
Have this one and it's great. Used it originally in my silkscreening class actually to watch temps on the shirts. https://www.amazon.com/gp/product/B00DMI632G/ref=oh_aui_detailpage_o04_s00?ie=UTF8&amp;psc=1
I would say the light is completely unnecessary. It'll hurt the eyes, especially if the gecko is albino, plus I think 75w is probably going to be too hot in addition to the heating pad. The heat gradient should be fine if you have a heating pad that covers 1/3rd. I would recommend ditching the light.
I use this one
Avoid screens for an hour before bed. I started that and it has been a huge help. Read a book (preferably dry/boring) or if you must use a screen install something like F.Lux to adjust the color temperature.
Oh also check out a light alarm clock. It's life changing if you have to get up before dawn.
A Sunrise alarm clock may be easier.
https://www.amazon.com/Philips-Wake-Up-Sunrise-Simulation-HF3500/dp/B00F0W1RIW/ref=sr_1_2_a_it?ie=UTF8&amp;qid=1467120921&amp;sr=8-2&amp;keywords=phillips+sunrise+alarm+clock
Someone I know was like you but they did start exercising and lost a bunch of weight but still didn't help as much as she liked. She picked up a wake up lamp and it's made a world of difference!
I linked one below just in case you wanted to see one or are too lazy to google one :)
https://www.amazon.com/Philips-Wake-Up-Sunrise-Simulation-HF3500/dp/B00F0W1RIW/ref=sr_1_2_a_it?ie=UTF8&amp;qid=1474327993&amp;sr=8-2&amp;keywords=wake+up+lamp
I had really good experiences with a sunrise alarm clock. This specifically is the one I have, but I feel like it was a lot cheaper when I bought it, maybe only $60 at that point. Maybe I got it on sale.
Unfortunately, that alarm clock also wakes up my husband who doesn't need to get up for another hour, so I cannot use it now except on a really low setting. But when I lived alone, it was fantastic and I lived in Houghton, MI which is pretty damn far north (at least for North America) so the days were very short.
Also, I got a lot of daylight bulbs and used them in everything save the lamp I used at night. This also helped me stay more active.
If you do want to splurge, amazon.ca (for us canadians) is selling the lower end philips for $70 right now, which is a decent deal.
... well at least according to the RFD thread
I swear by this alarm clock. It has made me actually get up right away, which I thought was impossible. The key for me was to set it far away, so I have to walk to it to turn it off. It gets so bright (you can adjust the settings on this) that distance does not matter. It also helps me wake up more gradually, so the sound of the alarm isn't so jarring. Another morning thing that has helped me is giving myself something to look forward to while I get ready -- like listening to my current audiobook. It is also nice to start the morning not feeling rushed or guilty about sleeping in. Remembering the positive feels it gives me has made a big difference!
https://www.amazon.ca/Philips-HF3500-60-Wake-Up-Light/dp/B00F0W1RIW
This one specifically, the HF3500. But in hindsight I wish I'd gotten the one with the battery. And the ability to set multiple schedules.
Probably your phone can do it too with the right app, but this one is super bright.
Here's a newer model of the one I have.
this is the one I got
I wasn’t sure if this would work for me so I bought a cheaper one first off of Amazon
Philips Wake-Up Light Alarm Clock with Sunrise Simulation, White (HF3500/60) https://www.amazon.com.au/dp/B00F0W1RIW/ref=cm_sw_r_cp_api_i_8F7PDbP3DEY00
I got it when it was about Au$65 and yes it definitively helps but isn’t perfect. I am planning on upgrading to a more expensive one but am glad I got a cheaper one first so that I don’t feel guilty dropping a couple hundred on a better one, my husband is planning on putting the cheaper one on his side of the bed when we get a better/brighter one.
There are alarm clocks made specifically for this purpose. Clock with dimming LEDs that can simulate sunrise and sunset on your schedule. I have the Philips version that was about $50 but there are numerous others on Amazon for around $30.
Philips Wake-Up Light Alarm Clock with Sunrise Simulation, White (HF3500/60) https://www.amazon.com/dp/B00F0W1RIW
>I'll sit and absentmindedly play with the Internet for way too long
Turn off your computer before you go to bed. Do not turn it on in the morning.
>Also, I will sometimes turn my alarm off without realising.
Put your alarm clock someplace that you can't reach from your bed. I have two alarms. One's on my phone, and the other is like this - not that exact one, but it's an alarm clock/lamp that turns on in the morning. I find that not having to stumble through the dark reduces the temptation to stay/get back into bed.
I also have a cat who needs to be fed in the morning. She's too polite to be useful as a backup alarm, but just knowing that she needs her breakfast gives me a little extra motivation to get out of bed. I'm not going to suggest that you get a pet, but if you already have one try feeding them in the morning.
>I do as much as I can the night before including finding my keys, shoes etc.
This is good.
>I'll be fully dressed, washed, fed and realise I'n ten minutes late because I've been watching YouTube videos or even just sat still obsessively thinking.
I set a series of alarms. 7:00 - wake up. 7:30 - eat breakfast. 8:00 - brush teeth. 8:30 - leave for work. I picked those things because they're the only things that I have to do in that order, but you can pick different ones, and you can set more alarms if you have to. Just figure out what time you have to leave for work to make it on time, and then set some alarms leading up to that time to keep you on track.
Not sure if you saw this other guys post, but I have the same one.
www.amazon.com/Philips-HF3500-60-Wake-Up-Light/dp/B00F0W1RIW/
I got one of these an it's pretty good. It's a wake up light that slowly brightens about half an hour before your alarm is scheduled to go off and then starts beeping. And for a limited time its 2% off!
I'm actually ordering a second one for my mom right now.
So let's say you're crazy like me and want to wake up at 5 am every day. You set the alarm for 5 am and go to sleep with plenty of time. This is only for health issues, obviously, but even if you go to bed at like midnight or 1 am it will still wake you up. You'll just be super tired thrgouhout the day.
So you set the alarm for 5. At 4:30, when you're nice and comfy in bed asleep the light on the alarm clock will come on. It's dim and gentle at first, but over the next half hour it will be slowly getting brighter and brighter.
By the time 5 am rolls around you have already been exposed to light for 30 minutes. A gentle alarm comes on and beeps to wake you up, and you're up! It;s pretty easy.
I like to combine this with Sleep Cycle as it gives me the best of both worlds and I like to take a look at my sleeping cycles.
You can buy the basic form of the alarm clock here, it's $50.
So I got a really cheap one on amazon and it was horrible. Then I ordered the cheapest phillips one, and it had a $20 off coupon, for $50. This was just earlier this week so the coupon may still be there, here it is: https://www.amazon.com/gp/product/B00F0W1RIW/ref=oh_aui_detailpage_o04_s01?ie=UTF8&amp;psc=1
https://smile.amazon.com/gp/product/B00F0W1RIW/ref=oh_aui_detailpage_o02_s00?ie=UTF8&amp;psc=1
The Maverick is a great choice for a "leave in" thermometer than monitor your smoker and meat temps independently. I also like Pthe Javelin instant reads. Almost as fast as the ThermoPen and a third the price.
https://www.amazon.com/Maverick-732-Remote-Smoker-Thermometer/dp/B004IMA718/ref=sr_1_4?ie=UTF8&amp;qid=1483915378&amp;sr=8-4&amp;keywords=maverick+thermometer
https://www.amazon.com/Lavatools-PT12-Javelin-Thermometer-Chipotle/dp/B00GRFHXVQ/ref=sr_1_1?ie=UTF8&amp;qid=1483915319&amp;sr=8-1&amp;keywords=javelin+thermometer
If you can't spring for that though, the Lavatools Javelin gets pretty good marks, and it's only $25.
The only downside is the probe is only 2.75" long.
In tests, it's about .5 seconds slower than the thermapen in a baked chicken test, although a full 5 seconds slower for a boiling water test, so it may not be the best choice if your primary use is frying.
Nice set up! I've been oggling pour over supplies for forever but haven't bit the bullet yet. We use this thermometer. It's a knock off thermapen. It's probably a few miliseconds slower, but it's been more than fast enough for us and is also significantly cheaper.
http://www.amazon.com/dp/B00GRFHXVQ
> What kind of spices go with what? Right now, I'm just putting some salt, MSG, soy sauce, garlic powder, and red pepper flakes into most all meats I make because I really enjoy it. I'd like to know what else is good and for what purposes. Also I'm really sad that I haven't been able to use my cinnamon.
http://www.spicesinc.com/p-510-what-spices-go-with-what-meat.aspx
>Why does my chicken get sticky when I cover the skillet while it's frying? It's great and all, but I just want to know why and whether or not I can apply the same principle to other meats.
Not sure what you mean, generally what happens when you put a lid on is that your chicken starts steaming and frying at the same time. The excess moisture in the air would make the chicken skin go soft. Perhaps that is the 'sticky' you are talking about? I will often put the lid on something that isn't cooking well in the pan and needs heat from all sides. It is fairly rare I will ever put the lid on frying meat. I will usually put the lid on sauces to stop them evaporating more water and thickening.
>Right now I'm limited to ground beef and chicken breasts for meats. I was wondering if anyone could recommend some cheap/quick recipes using those that I could steal to diversify my cooking.
Steak is easy, sausages are easy, fish fillets are easy, cubed chuck for stews/curry/casserole is easy, slow cooker recipes are generally really easy (foolproof) and come with excellent results. Just google recipes, if the picture looks delicious then read the recipe steps and if you think you can do it then give it a go. Cooking is fairly forgiving of mistakes so don't be afraid to try.
>Also, does anyone have any good guides to dealing with dough? I've been meaning to experiment and have fun with dough (noodles, breads, pastries?).
I don't like making dough so I'll let someone else field this one.
>And a guide for pork. My better-cook-than-I-am friend keeps telling me I'll literally die if I don't cook pork right, but he's a pansy, and I like pork.
Pork is fine. Get yourself an instant read thermometer and use that to avoid over and under cooking meats. After a while you'll just be able to tell it is cooked by poking the meat with your finger. Use the thermometer until then.
http://www.amazon.com/Fastest-Accurate-Water-Resistant-High-Performance-Thermometer/dp/B00GRFHXVQ/ref=zg_bs_289809_4
http://www.fsis.usda.gov/wps/portal/fsis/topics/food-safety-education/get-answers/food-safety-fact-sheets/safe-food-handling/safe-minimum-internal-temperature-chart/ct_index
>Is there a way I can use potatoes in my frying pan adventures? From all that I've read, people seem to want to boil them before using them for anything.
Generally a good idea to bake/boil/parboil before frying. There are some dishes you don't need to do this like a potato latke. They are easy and yummy. Look up recipes on google.
This is the one I use.
https://www.amazon.com/Lavatools-PT12-Javelin-Thermometer-Chipotle/dp/B00GRFHXVQ
I got a Lavatools PT12 for $25 which is like the budget version of a thermapen. It's accurate to +/-1F and has a 3-4 second read time. Its probably got everything you need from a food thermometer and more, no reason to spend double the price for something marginally better.
Time to upgrade! Go digital, you'll be glad you did. After going through a few cheapo $10 digital thermometers from the grocery store, I got one of these and couldn't be happier. https://www.amazon.com/dp/B00GRFHXVQ/ref=cm_sw_r_awd_ByCXub1Z946FX
If anyone is interested, I have owned both and this thermometer is better (more water resistant) and cheaper too
https://www.amazon.com/Lavatools-PT12-Javelin-Thermometer-Chipotle/dp/B00GRFHXVQ/ref=sr_1_3?ie=UTF8&amp;qid=1501868342&amp;sr=8-3&amp;keywords=javelin+thermometer
These are the common ones I see posted/used here:
Copco Non-Skid 3-Tier Cabinet Organizer
Azar 326043 12-Inch W by 8.5-Inch D Three-Tier Acrylic Step Display
Seville Classics 3-Tier Expandable Bamboo Spice Rack Step Shelf Organizer
BIGGEST HUGEST tip is don't accumulate too much stuff! I definitely do, so I have to discipline myself to purge once in a while.
I recently went through my lotions and bath stuff and I only even cared about maybe 25% of them. So I threw out whatever didn't have much left inside, the rest went into a storage container with a lid and tucked under all the folded towels. (This is so I don't start dragging things out later...I already decided I have too many. When friends or friends with teenage daughters visit, they can take as much of it as they want.) So now I have a reasonable amount of this stuff, but it still looks cluttered on the shelf so I went to the dollar store and got something like this, so I can see everything at once and not knock over a bunch of stuff if I want to pull one item out (this shelf is about at eye level).
De-stashing means I actually use what I love more often, because I can see it (and remember to use it) and I know exactly where it is. It also slows down future purchases (doesn't stop them, but I at least consider where it would fit on my shelves if I bought something because they look so nice now).
Repeat with other areas: books & magazines, clothing, dishes & cookware, toys, etc. Take it slow, it's a lifestyle not an overnight switch.
Also beware of arbitrary storage containers. I've bought plenty of these and it's perfectly okay to just stop and repurpose or donate them when you realize something's not working for you. Like I bought baskets to keep the towels in for the bathroom closet and later realized how much space they were wasting. You don't need to keep using it just because you're thinking of the money you spent on something. Push that from your mind and prioritize your quality of life.
Thank you! I use these. Definitely beats lining them up behind one another.
Copco 2555-0188 Non-Skid 3-Tier Spice Pantry Kitchen Cabinet Organizer, 15-Inch, White/Gray https://www.amazon.com/dp/B0036OQU56/ref=cm_sw_r_cp_api_i_MEI3BbPB2GVWV
You can't hide it from me.
These bad boys. They're nearly perfect for the Ikea Detolfs.
http://www.amazon.com/Copco-2555-0188-Non-Skid-Cabinet-Organizer/dp/B0036OQU56/ref=lp_510136_1_17?s=kitchen&amp;ie=UTF8&amp;qid=1422043608&amp;sr=1-17
These are some cheap 15" wide risers that fit into a detolf perfectly.
http://www.amazon.ca/Copco-2555-0188-Non-Skid-Cabinet-Organizer/dp/B0036OQU56
No real reason other than me having a 10Ft long mirror and a counter top that's just as long under it with the sink built in, so it literally just fits there. It's out of the way from everything else, and I usually put on cologne after shaving or before leaving the house, which involves me looking at the mirror to make sure everything looks ok.
It's the joined master bathroom, it's not like it's randomly in a bathroom in the house, it's connected to my room.
I know my ex used to keep her perfume on top of her drawer and my father keeps his in his closet that he had built with drawers inside, the bathroom just works for me, plus it allows me to display all of my fragrances without taking up space in my room.
I also have 2 of these now which helps keep everything extra neat.
https://www.amazon.com/dp/B0036OQU56/ref=cm_sw_r_cp_apa_i_VjcXCb91FH4Q3
http://www.amazon.com/Copco-2555-0188-Non-Skid-Cabinet-Organizer/dp/B0036OQU56/ref=sr_1_10?s=kitchen&amp;ie=UTF8&amp;qid=1367907854&amp;sr=1-10&amp;keywords=plastic
Might buy this for my amiibos
Used two risers: 15-inch and 10-inch that I bought off of Amazon. They fit the space I had perfectly!
If you're going for cheapest
Each of these displays a decent number (9-15 crowded) of Pops depending on your comfort level with blocking ones directly behind another and costs 8 and change
https://www.amazon.com/gp/aw/d/B0036OQU56/ (8-12 Pops, opaque, but the black has a pseudo industrial look)
https://www.amazon.com/gp/aw/d/B001KOTJTS/ (5-9 pops, clear)
https://www.amazon.com/gp/aw/d/B001E2864K/ (5-15 Pops bamboo, 13$, expands)
All 3 show review photos with Pops if you want to see em in action.
Edited this a couple times to get the Pop display numbers right for curious folks.
Here
http://www.amazon.com/gp/product/B0036OQU56?psc=1&amp;redirect=true&amp;ref_=oh_aui_detailpage_o02_s00
These guys. Inexpensive but great. I'll end up getting a couple more as the collection expands.
http://www.amazon.com/gp/product/B0036OQU56?psc=1&amp;redirect=true&amp;ref_=oh_aui_detailpage_o03_s00
http://www.amazon.com/gp/product/B0036OQU56/ref=oh_aui_detailpage_o00_s00?ie=UTF8&amp;psc=1
Don't buy the two pack, its cheaper to get two singles
Ah no sorry I should have included a link-- here!
For around 10 years now! I haven't perfected anything, and ymmv as always, but here's what I've found and tried
So I've managed to limit the new bumps for now, but the PIH from KP is real. I'm casually experimenting with vitamin c and retinol (on different nights or with at least 30 minutes between application), but I think it's gonna take time. Niacinamide is also supposed to help so I sometimes sprinkle some of my Scinic Honey AIO. Let me know if you do find something that works for this because I hate it!
I've been exfoliating with a sugar scrub and/or viscose cloth, dropping on a little vitamin c serum, slathering on a bunch of coconut oil, and then putting my hands into regular plastic gloves and going to sleep.
I'm not sure if every step is necessary or even really contributes, but it's a nice bedtime ritual. My hands and cuticles have never been happier! Plus I can still use my phone and laptop in my gloves... so it doesn't interrupt my normal insomniac routine : D
Link for you!
Let's see if I got this right
8 pcs Asian Exfoliating Bath Washcloth - Red & Green https://www.amazon.com/dp/B004C8DR1U/ref=cm_sw_r_cp_apa_Em7MBb5B3SFXE
I use these
Korean Italy Towels are great for exfoliating and stupid cheap.
8 pcs Asian Exfoliating Bath Washcloth - Red & Green https://www.amazon.com/dp/B004C8DR1U/ref=cm_sw_r_cp_apa_QcMIzbX08RQAY
Chemical and physical exfoliation!
My preferred method is Exfoliating Asian Wash Cloths in the shower and Stridex afterwards. Works like a charm.
Sure thing: https://www.amazon.com/pcs-Asian-Exfoliating-Bath-Washcloth/dp/B004C8DR1U
And for good measure: https://www.vogue.com/article/korean-exfoliating-wash-cloth-mitt-dermasuri/amp
These are the ones I got
http://www.amazon.com/gp/product/B004C8DR1U?psc=1&amp;redirect=true&amp;ref_=oh_aui_detailpage_o05_s00
Which were recommended by someone else in r/AB haha
I have mild KP, but my bumps are completely gone since I started using these towels. They're also called Italy towels, Turkish towels, Hammam or Hamam towels, or Kese mitts. But these are the cheapest ones.
It's really gross seeing all the grey balls of dead skin come off you but oh so satisfying. They make my skin feel softer than a baby. They're also great for staving off ingrown hairs in the bikini area. They keep my elbows and knees from looking dark or ashy, help lotion sink in better...they're just awesome.
Just soak in the tub or stand under the shower for ten minutes or so, and use these before you soap up in a back and forth motion. I use them about twice a week.
http://www.amazon.com/gp/product/B004C8DR1U/ref=oh_aui_detailpage_o01_s00?ie=UTF8&amp;psc=1
I got it from Amazon! Pretty good price if you ask me, you get two packs and there's 4 in each, so there's 8 pieces. And yeah, I used to be able to see skin flakes/dust whenever I rub/scratch my legs (tmi sorry) but now I don't get that anymore.
For a "scrub," I have eschewed various "scrubby" products, and use a Korean scrub glove. You can get a package of 4 at Amazon for like, $6.00 USD. here: https://www.amazon.com/gp/product/B004C8DR1U/ref=oh_aui_detailpage_o09_s00?ie=UTF8&psc=1 (not affiliated). Bought a set for my sister, too, who constantly complains about rough knees/elbows. Anyway, these are cheap and they are simply wonderful. I've been a dry-brusher for decades, and I've replaced that with these. Easier to use, you can sort of choose how "scrubby" you want to go, and my skin feels like the proverbial baby's bottom. HIGHLY recommend.
yes
http://www.amazon.com/Chromium-Crusher-Tobacco-Lifetime-Warranty/dp/B00700W0TW/ref=sr_1_2?ie=UTF8&amp;qid=1405044468&amp;sr=8-2&amp;keywords=grinder
ah got it... Couldnt really tell from the picture if it was set up like that or not. Something like this is what you need to use the coin trick.
http://www.amazon.com/Chromium-Crusher-Tobacco-Lifetime-Warranty/dp/B00700W0TW/ref=sr_1_3?ie=UTF8&amp;qid=1395767635&amp;sr=8-3&amp;keywords=3+chamber+grinder
Things like this are a dime a dozen at your local head shop and a decent one can be found for $20 bucks. I will say the coin trick increased my kief production astronomically... what used to take me an entire O now only takes a few bowls (the stuff had a decent amount of crystals and wasnt as sticky as it used to be). This has also helped with my tolerance... I do this during the week and only consume the herb which has a far lesser potency without all the kief on it and use the kief on weekends. ;)
Good luck!!
Chromium Crusher, best grinder for that kinda dough
I got my Chromium Crusher off of Amazon for around $21 after shipping. It's made of Zinc alloy and it's a four-piece grinder. I mean he should definitely get a Space Case if he can afford it, but then again not everyone has that kind of moolah.
I got mine off amazon
https://www.amazon.com/dp/B00700W0TW/ref=cm_sw_r_taa_Zlklxb2QGZ5S0
also this but its only 2.5 inches
I had that same problem with a grinder. It scrapped it and ended up forcing me to either start allowing metal pieces in my ground herbs or throw it away.
Unfortunately i decided on the second part. I do have some good news for you if you arent already using it. www.amazon.com/Chromium-Crusher-Tobacco-Lifetime-Warranty/dp/B00700W0TW Is only a few bucks and is one the best grinders on the market for your money.
this is the one i just ordered
Not just longevity - fine pieces of the plastic can grind up with your weed and then you're chiefing a bit of plastic :/
Definitely had it happen with cheap plastic grinders in the past, and the all-metal one I have now I've had for many years without the same problem. It's a Chromium Crusher.
this is a pretty great 4 piece grinder that is super affordable too.
http://www.amazon.com/Chromium-Crusher-Tobacco-Lifetime-Warranty/dp/B00700W0TW
Don't go overboard. Just buy a $10-20 spoon pipe, a nice grinder(this and this are both good ones in different styles), and an eighth of some good weed. Don't go overboard immediately. If you want a bong just get it off DHgate or bongoutlet.ca (most of the bongs you'll find in headshops are the same exact pieces for 500% more). If you want to get a vape the Arizer solo is amazing for $120 and the MFLB is decent for $80. Since it's a legal state there's really no reason to bother with joints unless you really like them. Any papers / grinders / rollers you can get on amazon really cheaply.
Also get some of these screens for the bowls, they basically stop all weed from getting sucked in
http://www.amazon.com/Glass-Flower-Daisy-Screens-Container/dp/B00J1U26AC/ref=sr_1_4?ie=UTF8&amp;qid=1412465537&amp;sr=8-4&amp;keywords=daisy+glass
Yeah for real. 15$ for a nice Chromium Crusher
i was actually looking at that one in particular for a while, specifically this one:
http://www.amazon.com/Chromium-Crusher-Piece-Tobacco-Grinder/dp/B00700W0TW/ref=sr_1_1?ie=UTF8&amp;qid=1418716628&amp;sr=8-1&amp;keywords=chromium+crusher&amp;pebp=1418716631073
I would probably get a smaller one than the 2.5 but it seems like its great quality even though it sounds like its bulky, but ppl complained of the magnet being too weak for the heavy lid and screen defect complaints, hows the screen/magnet on yours?
The "Smart crusher" off Amazon is sturdy and cheap. Been using it without fail for years.
Same thing under a diff name
Honestly, I wouldn't stress finding a specific triangle tooth shape. Either way you cut it, its going to get ground up. If you like the triangles just for aesthetics, there's that.
I got a chepo off of amazon, fully stainless steel, 4 piece, very similar to this one
You should have a great time with that one. It should also last a long time. I've had mine for 4 years, no plans to get a new one.
Best one you can get.
http://www.amazon.com/Chromium-Crusher-Piece-Tobacco-Grinder/dp/B00700W0TW/ref=sr_1_2?s=kitchen&amp;ie=UTF8&amp;qid=1426254375&amp;sr=1-2&amp;keywords=grinder
So does mine http://www.amazon.com/Chromium-Crusher-Piece-Tobacco-Grinder/dp/B00700W0TW
Rolling Tray Bundle
Chromium Crusher Grinder
Scale
Tightvac Container
I have this one, great buy
http://www.amazon.com/gp/aw/d/B00700W0TW/ref=pd_aw_sbs_1/188-7477194-9473305?pi=SS115&amp;simLd=1
I recommend this one on Amazon: http://www.amazon.com/gp/aw/d/B00700W0TW
It has held up really well for me and is a nice size. Also has a kief chamber.
Depending on how much you have to spent I would try and go with a small 4 piece metal grinder. You can find them for cheap try and get at least a 2.5" grinder like this one
https://www.amazon.com/gp/aw/d/B00700W0TW/ref=mp_s_a_1_5?ie=UTF8&amp;qid=1496256225&amp;sr=8-5&amp;pi=AC_SX236_SY340_QL65&amp;keywords=herb+grinder+4+piece&amp;dpPl=1&amp;dpID=51nM4mWlRlL&amp;ref=plSrch
I'm going to agree with the above poster. Products with urea (I use Eucerin Advanced Repair) and Stridex help a loooot. Eucerin does not specify how much urea they use for this one, but there are other lotions on Amazon that definitely do. I would second those recommendations. I also use a Salux cloth sometimes, but its VERY rough. I can only use it for a lil bit.
Probably ingrown hairs. Does that sound about right? If so, try exfoliating. Scrub daily with something (like a Salux bath towel), and chemically exfoliate with Stridex. Greatly improved my legs, to be sure!
I see that you are dealing with eczema, so a hydrating cleanser instead of soap would be much better for you. Moisturize right after you get out of the shower, even better is your skin is still damp. The trapped water will give you extra moisture. If your moisturizer is not enough, add a few drops of Jojoba Oil to your hand with a dollop of the moisturizer.
Once a week, use an exfoliating cloth likeThe Salux Towel, it gets rid of dead flaky skin.
If you don’t mind extra exfoliation, once a month I use these Hammam Exfoliating Gloves for deeper exfoliation. They are not for everyone but They give amazing results if you soak in a warm bath for a few minutes before hand.
Don’t forget to use a pumice stone on your heals too.
Going to 1-up you with a Salux cloth. I dry brushed for a LONG time but it just didn't cut it and then I found a reddit thread on these things. They work SO well.
I prefer mitts like these https://www.amazon.com/dp/B00LGLOKLM/ref=cm_sw_r_cp_apa_TAtDAbRNGRPRN
My sister likes the cloths like these https://www.amazon.com/dp/B007IAE5WY/ref=cm_sw_r_cp_apa_PmEDAbSV90WQ3
I was actually lucky enough to find the real ones at my local asian supermarket that possessed all the markers of the authentic ones as described by the distributors/sellers of the salux wash cloth, http://saluxshop.com/.
You can purchase it directly from their website OR their ebay store, http://www.ebay.com/itm/Original-Real-Salux-Japanese-Exfoliating-Nylon-Bath-Wash-Cloth-Discount-Bundles-/120805336805. You can also get it from amazon as well, http://www.amazon.com/Salux-Nylon-Japanese-Beauty-Yellow/dp/B007IAE5WY/ref=lp_2600026011_1_1_a_it?srs=2600026011&amp;ie=UTF8&amp;qid=1456908663&amp;sr=8-1
If you're interested, here is an in-depth post from them that tells you how to differentiate from the fake ones to the real ones haha: https://saluxshop.wordpress.com/the-imitations/
It's actually really not that hard to discern from the real ones to the fake ones. You will see. haha
Hope that helps! :)
Exfoliating is to scrub the skin, so the dead skin falls off, and it can pull out ingrown hairs, and so on.
Depending on the area of skin, you may want to be more or less gentle. So a face can be exfoliated with a face scrub and/or face brush. The bottom of your feet, use a pumice stone. And for areas you shave, having a washcloth or brush can do it, it can be tricky finding something that is comfortable, yet effective, and not too rough. I'm satisfied with this.
Salux Nylon Japanese Beauty Skin Bath Wash Cloth/towel (3) Blue Yellow and Pink
I'm on my phone
For me, the biggest difference is ease of use. I imagine you get a similar exfoliation from both. Since the towel is easy for me to wrap around my back and scrub without contorting my arm, it's much easier for me to use. It also lathers up extremely well and is super fast to clean and dry.. which can sometimes be an issue for me with a loofah.
Here is the one I use, I just get them from Amazon if I'm not visiting any Asian grocery stores soon. They are usually WAY cheaper if you can get them at a grocery.
https://www.amazon.com/dp/B00P1PHI6I/ref=cm_sw_r_cp_api_m47OBbM3YP2QK
https://www.amazon.com/dp/B007IAE5WY/ref=cm_sw_r_cp_api_C77OBbXXK373N
Both of these I’ve used! I like the 2nd for its length (easy back reach) and the 1st for its efficiency (I think it’s scrubbier if that makes any sense).
The greatest thing I've seen for this is the Salux Cloth. It is beyond amazing and they're super cheap. Read the reviews. I actually threw out my Clarisonic after buying these.
http://www.amazon.com/Salux-Nylon-Japanese-Beauty-Yellow/dp/B007IAE5WY/ref=sr_1_1?ie=UTF8&amp;qid=1417835289&amp;sr=8-1&amp;keywords=salux+cloth
I use an exfoliating towel this exact one
This doesn't. It's not so much a cloth as a long sheet of "fabric" made from nylon. This:
Salux Nylon Japanese Beauty Skin Bath Wash Cloth/towel (3) Blue Yellow and Pink https://www.amazon.com/dp/B007IAE5WY/ref=cm_sw_r_cp_api_UWZtybAJTWSWW
you need one of these, blows my mind these aren't more common. It's just a really long wash cloth so you can grab the ends and scrub every inch. The Japanese really know what they're doing.
https://www.amazon.com/Salux-Nylon-Japanese-Beauty-Yellow/dp/B007IAE5WY/ref=sr_1_1_a_it?ie=UTF8&amp;qid=1481058755&amp;sr=8-1&amp;keywords=japanese+wash+towel
omg yes this is what I actually use
So I actually like the original cream but I have sampled the gel cream. The great thing about La Mer is you can get samples when you order from their site. But yes, it is very pricey. For me a 2 oz. thing of the creme will last almost a year though.
I'm not sure if it's strictly the vitamin c, but I have noticed a difference in the lotion I use that incorporates both vitamin c and retinol! I honestly just love this because it is very lightweight and doesn't leave a greasy feeling on my skin.
I also forgot to mention that I try to moisturize rough areas (knee caps, elbows, hands, feet) with coconut oil and put the tiniest amount on the tips of my hair sometimes! I also have pretty long hair so the ends can dry out, especially if I'm due for a trim...
I keep wipes in my gym bag. If I know I can't get a shower right away, I clean my acne prone spots with the wipes to at least get some of the sweat and dirt off.
I use the Stridex red box pads too. I don't find body washes with salicylic acid very effective for me, it just doesn't stay on my skin long enough. The Stridex pads are better, imo.
Physical exfoliation seems to help too. I buy [salux](Salux Nylon Japanese Beauty Skin Bath Wash Cloth/towel (3) Blue Yellow and Pink https://www.amazon.com/dp/B007IAE5WY/ref=cm_sw_r_cp_apa_10EVzb2EXJS8P) cloths on Amazon. They're kindof like an unraveled loofah, but better, because they're machine washable.
I’ve used exfoliating gloves after waxing to prevent ingrown hairs. But I recently switched to a Salux cloth from the Asian grocery. It’s bigger and easier to use than the gloves, and I can even scrub my own back with it- can’t do that with gloves!
My waxing lady said wait 2 days after waxing to start exfoliating, so I don’t know if it’s the same for epilating or not, ymmv. You can also try doing the scrub cloth before epilating, and then follow up with some of the lotions and chemical exfoliators other people recommended.
exfoliating gloves- Amazon link
Salux Japanese bath scrub towels- Amazon link
That looks a lot like keratosis pilaris. I have it too and there really is no "cure". I found exfoliating with a [salux cloth](https://www.amazon.com/dp/B007IAE5WY/ref=cm_sw_r_awd_1tIfvb0RSA5NV
https://www.amazon.com/dp/B007IAE5WY/ref=cm_sw_r_awd_1tIfvb0RSA5NV) in the shower and moisturizing after has helped reduce their appearance
I got them off Amazon Prime!
It's not a miracle product but I'm seeing some nice results with the Trader Joe's Tea Tree Body Wash. It's super cheap so I figured why not try it and I'm so happy I did.
I've also started clipping my hair up (in the shower) after washing it so it's not touching my skin at all when I scrub my back. I'm using these to do the scrubbing: https://www.amazon.com/gp/product/B007IAE5WY/ref=oh_aui_detailpage_o02_s00?ie=UTF8&amp;psc=1
yes!
http://www.amazon.com/gp/product/B007IAE5WY
http://www.amazon.com/gp/product/B00AYN96HQ
I don't have the electric kettle you're referring to, though I do have one from Hamilton Beach. Mine doesn't whistle, though you can hear the water boiling at higher temperatures, and it can produce a lot of steam out of the spout. The Breville IQ seems very similar to mine, so I'm guessing it won't whistle like a stove top kettle. Even so, the sound of the water boiling and the production of steam might be an issue in a cubicle environment (at least when the water is being heated to a higher temperature).
I don't blend teas, but according to this thread, it might be better to go by the preferred water temperature and steeping time of the more sensitive tea (in this case, the green).
Personally, I own both, and I much prefer this one. The problem with the Bonavita is that it tries to get the temperature on point exactly every time, which means that when it gets anywhere close, it starts shutting on and off, slowly increasing the temperature. This is nice if you need the temperature to be perfect initially for some reason, but I'm not sure why that would be the case. Compared to the strategy of the Hamilton Beach, which is, full heat until it reaches the set temperature, then shut off. This will result in a perfect temperature at capacity (1.7 L), about 5 degrees higher at 1L capacity, and about 10 degrees higher at .5L capacity. Therefore, it's simple to just set it lower and then use it, and it's much quicker. You also loose the gooseneck spout, but that really doesn't matter unless you're doing coffee pourovers. Combine that with the fact that the Hamilton Beach is about half the cost, and I think it's a clearly better product.
http://www.amazon.com/Hamilton-Beach-40996-Programmable-1-7-Liter/dp/B0083I7THI
This is the one I have but it appears to be discontinued, though is still available from third party sellers:
https://www.amazon.com/Hamilton-Beach-40996-Programmable-1-7-Liter/dp/B0083I7THI/ref=sr_1_29?m=A2L77EE7U53NWQ&amp;s=warehouse-deals&amp;ie=UTF8&amp;qid=1544024690&amp;sr=8-29&amp;keywords=electric+kettle
Here's one in the same price range ($24) that gets good reviews:
https://www.amazon.com/Gourmia-GDK260-Electric-Rotates-Cordless/dp/B01MD0D5IH/ref=sr_1_4?rps=1&amp;ie=UTF8&amp;qid=1551041059&amp;sr=8-4&amp;keywords=variable+temperature+electric+kettle&amp;refinements=p_85%3A2470955011
It looks like Hamilton Beach has two new models of variable temperature kettles, both of which are really pretty, one is copper and one is glass, but they're both around $50.
I found a Hamilton Beach Programmable Kettle at Walmart that allows you to set the temp and a timer. I wake up to 180°F water at 7 every morning! It also keeps it at your set temp for an hour after initial boil. I highly recommend it.
Edit: this one. Hamilton Beach 40996 Programmable Kettle, 1.7-Liter https://www.amazon.com/dp/B0083I7THI/ref=cm_sw_r_awd_OrhEub0C68BAE
I got a Hamilton Beach. Found it a few years back at my grocery store on sale for about 30-40. It's stainless steel, but programmable, start-timer, and keep warm functions
I've been using this Hamilton Beach kettle since I started brewing tea. Works very well.
You can get a cheap probe thermometer for around $15 on Amazon. I would do that if you don't want a kettle, they are excellent kitchen tool anyways. I have 3 for cooking (though I own the more expensive ones as the read out is only a couple seconds).
Though really, there's a temp kettle on for $40 and another for $28 on amazon. In the end to save time, you'll want to have a variable temperature kettle anyways.
10 year theater veteran checking in...
You need both proper seasoning and a proper device to make it in.
To make the popcorn, you'll need a popcorn maker that agitates the kernels. Most have this as a manual function. That means that, yes, you have to actually turn that knob for like three minutes. However, you'll get a great batch. This is the most important piece. Every commercial movie theater popper operates that exact same way, albeit in an automated mechanical fashion.
The second thing you need is proper seasoning. You can get pretty good taste with standard salt, but for authentic flavor you'll need butter salt.
So, toss in a cup of kernels and about four tablespoons of canola oil. Then put in a spoonful of butter salt. Turn on high and agitate at a consistent speed. Once popping starts, keep agitating until there are around three to five seconds between pops. Remove from heat and place in a bowl. Enjoy.
Is it the Whirley-Pop? My parents have one, too, and they swear by it.
I grew up on popcorn made in this. Absolutely loved every second of it.
Hot air is tasteless. Get a Whirley Pop and some kernels from Amish Country Popcorn. I suggest Rainbow Ladyfinger, but they are all good.
Try a Whirley Pop, use coconut oil and 1/2 tsp of Flavacol, you'll never go back.
Here's your starter kit:
>https://www.amazon.com/Wabash-Valley-Farms-Whirley-Pop-Stovetop/dp/B00004SU35/ref=sr_1_1?ie=UTF8&amp;qid=1495559034&amp;sr=8-1&amp;keywords=popcorn+popper+stove
>https://www.amazon.com/Gold-Medal-Products-Flavacol-Seasoning/dp/B007HN5KNA/ref=sr_1_2_a_it?ie=UTF8&amp;qid=1495559045&amp;sr=8-2&amp;keywords=popcorn+flavor+salt
>https://www.amazon.com/Natures-Way-Organic-Virgin-Coconut/dp/B00J51RB3E/ref=sr_1_1?ie=UTF8&amp;qid=1495559064&amp;sr=8-1-spons&amp;keywords=coconut+oil&amp;psc=1
>https://www.amazon.com/Snappy-Yellow-Popcorn-4-Pounds/dp/B003832GRQ/ref=sr_1_10_s_it?s=grocery&amp;ie=UTF8&amp;qid=1495559074&amp;sr=1-10&amp;keywords=popcorn
>https://www.amazon.com/Amish-Country-Buttery-Popcorn-Topping/dp/B00AX6JGI8/ref=sr_1_4_a_it?ie=UTF8&amp;qid=1495559107&amp;sr=8-4&amp;keywords=popcorn+topping+butter
You only need a little bit of salt at a time, so that'll last you years. I like the Orville popcorn topping, but couldn't find it cheap on Amazon. Anyways, this is a good set so you don't have gallons of stuff in your house, but still get authentic movie theater taste.
I got it at Bed Bath and Beyond, but they have them on Amazon, too. There's a few different brands, I think this is the one I used.
I know this is getting to you a few days late, I make cheese popcorn all the time. Really you need the cheddar powder and something for it to bind together (popcorn topping, butter, etc.)
My method, with links to things I use:
You don't have to use most of these things, but I've made popcorn that has gotten a ton of rave reviews with either that method, or minor changes to it. Get some of the cheddar powder and go from there. It can also be used to make mac and cheese, au gratin, or any dish that could use a little cheese flavor if you don't want to just use grated cheese. The powder also sticks on the popcorn crevices, making it amazingly tasty.
You can buy a pretty cheap stove top popcorn maker. The kernels are super inexpensive at the store. It takes about two minutes from thinking "gee I'd like some popcorn" to having a full pot of it: you add a cup of kernels with a spoonful of coconut oil, heat it up and spin it around, then apply butter and salt as necessary when you're done.
I got this one for my birthday six months ago and honestly now when I go to the movies I have zero desire to buy their ridiculously expensive popcorn.
Get a Whirley Pop. I love mine. Use it every night, or at least every other night.
http://www.amazon.com/Wabash-Valley-Farms-25008-Whirley-Pop/dp/B00004SU35/ref=sr_1_3?ie=UTF8&amp;qid=1334062742&amp;sr=8-3
nevermind, found it.
2nd question: how much bean does he throw in?
I just Whirley-pop it
As long as you heat it up gradually, turn the heat up once it starts browning, and then cool it very very quickly, you'll end up with a good end product.
Turn the crank at about 2-3 revs/second on medium - medium high heat, and you'll be done in roughly 18 minutes.
TIL what a whirley pop is: http://www.amazon.com/gp/aw/d/B00004SU35
a hand crank stovetop popcorn popper, olive oil and Jane's Krazy Mix Up Salt
Pizza Pizzazz?
As far as cooking frozen pizza, reheating leftover pizza, and a lot of other things, the Pizzazz is the way to go. I've had the same one for 10 years now and it's fantastic.
The Pizzazz is the only way I've found to bring fries back to full crispiness and flavor. They sell it by saying it cooks a pizza in 2/3 the time, which is awesome, but they don't tell you it can cook so many other amazing things.
(Presto 03430 Pizzazz Plus Rotating Oven)[http://smile.amazon.com/Presto-03430-Pizzazz-Plus-Rotating/dp/B00005IBXJ]
I thought the same thing, but then I remembered.... I prefer scrambled eggs and sausage. CAN IT DO THAT!!!!! EH?!
Btw.... I almost bought a presto pizzazz pizza oven ... anyone own one & does it work well? I eat frozen pizza pretty often.
This is spot on. Only thing is make sure you & your roommate have a Pizzazz and mini-fridge.. That thing saved my life in more ways than I can count. Most RAs won't give a shit. I'm sorry if you get the one that would.
it's a pizza cooker
they rule
http://www.amazon.com/Presto-03430-Pizzazz-Plus-Rotating/dp/B00005IBXJ
Needs a Pizza Pizzazz or maybe a toaster over for pizza rolls.
This! Better than a microwave for pizza. Can also heat up some chikin wangs
Cast iron skillet is relatable to bombs in that if the bomb is ever dropped you are going to need versatile things. This can serve as a nice heavy hat to protect your head from zombies or other mutations. It can cook your meal, and its a great impromptu weapon as well, it also makes a nice Bong sound when struck, which kinda sounds like bomb!
Change jar
I'd consider the 5 quart Lodge Cast Iron Dutch Oven and a skillet. I have the dutch oven but haven't bought the skillet yet. Reviews suggest that the lid from the 5 qt dutch oven fit the 10.25 inch skillet
I was actually starting to draft a little cooking ideas post like this. This is just what I found value in and will ramble because I haven't really edited it down at all. So if anyone reads it and has notes please let me know, it's fairly directionless at the moment. It is also from the perspective of and aimed towards young single people but not exclusive to. I am also well aware a lot of you folks are good cooks or at least have a functional kitchen and I in no way want it to sound like I'm more knowledgeable than anyone with an hour to watch youtube videos.
&#x200B;
TL:DR Make sure your skills are on point before getting convenience tools as you might not need them, a cast iron or good stainless steel skillet and a good couple of knives can do most things in a kitchen, plan meals before you shop to avoid wastefulness.
&#x200B;
This post is big, flawed, and broken into two main sections. One is purely skills based, stuff you can totally do for free and can start doing right this moment. That's a big part of minimalism for me, gaining skills and getting good at some things rather than owning and being okay at a ton of things. The second section is more of a buy guide, again all from my experience.
&#x200B;
First off is to focus less on the equipment and more on the technique. Fundamentally, knife skills, understanding of cook times, heat, and technique, creativity and planning are some terms I like. In addition I have thoughts on tools and ingredients
&#x200B;
First, learn your knife, do drills, practice good form constantly. When I started in a fast-food-y sandwich shop when I was 16, the manager (who was a line cook for years) suggested I practice things like chopping a carrot as thinly as possible, or celery, or breaking down onion and garlic. Then I got to work with the prep team (which was cool because they taught me Spanish) to learn basic stuff like sauces and cooking meats. The result is a few years later, I have a decent knife. Not as good as a legit cook or anything but enough that I can confidently use a sharp knife to do anything a home cook would ever need to.
&#x200B;
Cook times. It's way less intimidating to work on food when you know "okay my chicken will take this long, oven takes this long, rice needs this much time", and so on. From a minimalist perspective, this will help you cut down on some tools such as a plug-in type grill, rice cookers, stuff that times or cooks food for you. Learning how to use heat also really improves the versatility of something as simple as a cast iron pan. Technique will allow you to make staple dishes or at least be able to take a guess at how to prepare just about anything, and the most valuable tip for that is look up how to make individual components of dishes rather than just recipes over and over. This becomes relevant in the next portion as well.
&#x200B;
Creativity. As some people are mentioning, "aspirational groceries" cause clutter and waste in the form of garbage and money. Creativity helps solve this when paired with planning. When shopping, I found it valuable to plan out meals for the week. Buy what you need, make a note of what isn't used, and refine. That's planning. Creativity is ending up with some random ingredients and Macgyvering it together so you don't waste or overspend. That is made much easier by having solid cooking techniques so you have a bit of a starting off point for creativity.
&#x200B;
Now into the stuff. I personally think a couple things are fundamental. Babish from YouTube has a great List . First off, get a good 7" to 8" Chef knife. I use a Gyuto but that's more because I impulse bought one when I first moved out and had all the money in the world from not having any expenses and was talked into it by a very nice saleswoman at the knife shop in town. Wusthof is a great name in knives and if you can get a hold of an 8" one of those, a bread knife, and maybe a pairing knife (I don't really use mine much but some people do) you will be able to do most things. I'd avoid buying a knife set just because you're more than likely paying for an extra 3 or so knives you won't use, and they're cheap for a reason. But to each their own, it is very convenient to have the steak knives, honing rod, and scissors that most of them include. No judgement here. Plus they're really really affordable.
&#x200B;
Now as to everything else, I'm not as researched. I think a good cast iron skillet is fantastic from a minimalist perspective as you can do most things that you'd really ever need to do on it, from frying to saute to some baking. Kent Rollins is first off a joy to watch but more importantly uses very limited tools. He does have his specialized "bertha" stove but for the most part it's just him with either open fires or a hot stove cooking in cast iron pans and dutch ovens. If you want to know more, I'd just watch the babish video above, he talks more about why he has what he has, such as this expensive but amazing set of pots and pans. Off the top of my head: baking sheets, a large cutting board, a meat thermometer (safety), measuring cups and spoons, box grater (or one coarse grater and one microplane grater), spatulas, tongs, etc.
&#x200B;
Like I said this is mostly ranting, and I'm going to research and trim it down for the future, but these are my thoughts at the moment.
For whatever it's worth, you can get a similar set of Lodge pans from Amazon for about $12 more (but only one silicon handle cover instead of 3):
&#x200B;
Lodge 12 inch with silicone holder: https://www.amazon.com/dp/B00G2XGC88
Lodge 10.25 inch: https://www.amazon.com/dp/B00006JSUA
Lodge 8 inch: https://www.amazon.com/dp/B00008GKDG
&#x200B;
&#x200B;
Lodge Logic L8SK3 10-1/4-Inch Pre-Seasoned Skillet
Just do it. 15 bucks.
Do you have a cast iron pan? People rave about them, so I think we should try them! There's a 10.25 inch one with Prime for $16.
Get a Lodge pan from Amazon. Despite being a great brand they are really dirt cheap.
http://www.amazon.co.uk/Lodge-26-04-Pre-Seasoned-Skillet-Frying/dp/B00006JSUA
Or maybe you're looking for enamelled?
A skillet is just a frying pan. In the US they use skillet, frying pan and fry pan pretty interchangeably. In the UK we often use skillet for non enamelled cast iron frying pans as they will likely have been imported from the USA (or were made for the US market, or were inspired by it) so keep the name, e.g., "Lodge 26.04 cm / 10.25 inch Cast Iron Round Skillet/Frying Pan" on Amazon UK is made in the USA so keeps the name.
I mentioned "non enamelled" because we still call Le Creuset enamelled ones frying pans here even though they are skillets in the US, e.g.,
Le Creuset Signature Iron Handle Skillet (Amazon US) vs CAST IRON FRYING PAN (Le Creuset UK).
A "cast iron griddle pan" is just a "cast iron griddle pan" or maybe "grill pan" if you prefer. It's a frying pan with ridges.
Lodge Cast Iron Skillet
Bought mine from Amazon. It was $30 and free shipping.
http://www.amazon.ca/Lodge-L8SK3-4-Inch-Pre-Seasoned-Skillet/dp/B00006JSUA/ref=sr_1_1?ie=UTF8&amp;qid=1348407507&amp;sr=8-1
One example.
Amazon was a bit less than $30CAD when I ordered it for a 10" Lodge preseasoned shipped to my hands. It's been excellent. I'd imagine it'll be cheaper in the states.
EDIT: Oh I see you're a Canuck! Also check out the camping section of Canadian Tire. I saw a fantastic size I want there 7" which is awesome for when I work nights and I can cook myself breakfast like a brekky wrap or shakshuka or whatever, it was like $15.99, but I can't remember how much the bigger ones were.
So something like this?
https://www.amazon.com/Lodge-L10SK3-Pre-Seasoned-Skillet-12-Inch/dp/B00006JSUB
Now this is a conversation I can get in on.
Let's begin with my stainless steel measuring cups. I bake a lot so these are so useful. The 1/8 cup comes in so much more use than I ever imagined it would. And they're just so much nicer than plastic ones. I want to get a set of stainless steel measuring spoons but haven't yet.
Next, I would probably say my French Press. Coffee is important, and my French Press makes some delicious coffee.
I absolutely love this skillet. Works like magic.
I also recommend this 3 tier cooling rack to everyone. It's so useful and stores so well.
In the fall/winter I use my crock pot a whole lot. I also find having large mason jars to be useful for storing food, though I also have this tupperware.
Finally, my KitchenAid stand mixer. Self explanatory. It's fucking awesome. I just want to spend every waking moment putting it to good use and baking everything under the sun.
Let's do it in the kitchen.
I decided to stalk /u/call_mecthulhu's wishlist. Fun fact about /u/call_mecthulhu, they have a lot of the same interests as me and I even added some items (SFW and NSFW) =P to my wishlist because of their wishlists. =D
I noticed this was listed as a highest priority, but since that is practical and not fun...I'll also say this or this.
...I always feel like somebody's watching meee...
For anyone who is curious, Amazon has a pretty cheap pre-seasoned pan, goes around $16-$20 and is a very good pan if you learn how to take care of cast iron. It's not hard but like knives, takes a little care.
I don't use it too much because I cook mostly for myself and don't need to use such a large pan for the majority of dishes, but there are smaller sizes that are even cheaper out there. I prefer my somewhat lighter hard anodized pans that don't stick and keep a nice even heat.
I'm sure all clad are nice but way too expensive, because you're paying for the name brand and they know it. As for in college, unless you're living in a shared house you won't have a good enough kitchen to use them in and they'll probably get dropped or misused if they're left anywhere that someone else can use them.