(Part 2) Best household paint & primers according to redditors
We found 1,160 Reddit comments discussing the best household paint & primers. We ranked the 437 resulting products by number of redditors who mentioned them. Here are the products ranked 21-40. You can also go back to the previous section.


since this is a shit advice thread, next time use paint sealant. archival safe and prevents uv fading, which means it has spf and is really great for your skin, right?
thank you!
It was pretty simple. I used painters tape + an exacto knife to mask the underside, and used two coats of my go-to spray paint.
Blue ring is just as bright as before. I took great care to not directly spray into the crevice, and I think it worked well!
After two weeks, I’ve measure a mean signal loss of 1.2db. In the same timeframe I’ve pushed 6TB of data through it and haven’t noticed a difference.
I’ll most likely be doing this to a few more in the near future and can post a more detailed process with pics, if anyone is interested.
I’m also curious about, and me being me, will likely experiment with aerosol rubber, and vinyl.
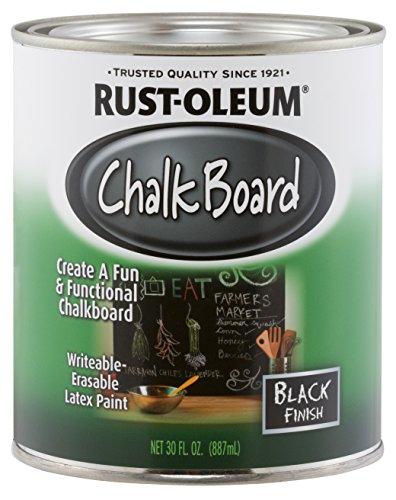
What about chalkboard paint?
https://www.amazon.com/Rust-Oleum-206540-Chalkboard-Brush-30-Ounce/dp/B0006BAEI6
This would keep the doors movable for any repairs, but would make the space look more purposeful with a contrast color.
You'r forgretting FM, AM, TV, GPS, IOT networks and many other type of electromagnetic radiations, they all pass throught you.
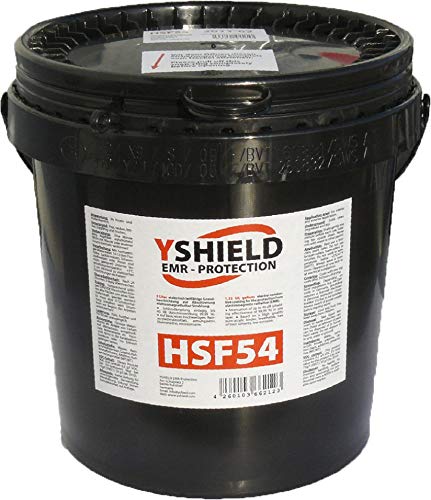
https://www.amazon.com/YSHIELD-EMF-Shielding-Paint-HSF54/dp/B007A0RTES
This is what i used and it seemed to dry completely: Rust-Oleum 249087 Painter's Touch Multi Purpose Spray Paint, 12-Ounce, Matte Clear https://www.amazon.com/dp/B002BWORZE/ref=cm_sw_r_cp_api_i_eoIpDb9090GGB
I already tried the 3m rubberized undercoating with automotive paint next and then the clear coat on top of that on an old final mouse to test it out and it turned out GREAT looks and feel wise ... but I made the mistake of trying to coat the side buttons as well and ended up making them too bulky to fit through the hole...also I think I just did too many coatings of the undercoating in general on the entire body which made the side button hole smaller as well....so I just sort of stopped messing with it for the time being seeing as I can’t really order replacement side buttons from FM..
I will definitely be trying it out on another old mouse soon though to perfect what I learned the first time around and tweak that before I do it to a mouse I actually use. I’ll post a picture of my fm in a bit though...
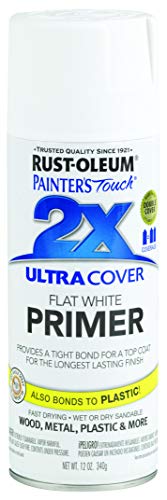
Use spray paint that also advertises as a primer. It will make no observable difference if it blobs up or runs a bit.
http://www.amazon.com/Krylon-51315-All-Purpose-Interior-Decorator/dp/B001B73WCO?ie=UTF8&*Version*=1&*entries*=0
Don't get too hung up if it's flat white, gloss etc. That only has to do with the amount of diffused reflection versus spectacular reflection. It does not make that much of a difference if the light source is close to the plant. It will make a difference if the light source is further away from a plant where you would want a more specular reflection.
For very high reflectance use white paint with barium sulfate added. It will beat most all other white reflective sources.
http://www.triticeaecap.org/wp-content/uploads/2011/12/Barium_Sulfate.pdf
http://www.amazon.com/Pyro-Chem-Source-Barium-Sulfate/dp/B00JGDLLR8
Gonna build a [Faraday cage](
https://en.m.wikipedia.org/wiki/Faraday_cage) around my bedroom, then my house.
Ooo! EMF shielding paint!
Anti RF Christmas quilts!.
My cell phone will never ring again!
Are they allowed to do this? Yes and no.
They cannot employ jammers. That's a huge fcc violation (if you're in the US).
However, there's plenty of other ways of preventing cell phone use, and all of those are legal. The easiest one would probably be "turn off the femtocell"
Commercial buildings are a nightmare for cell signals. The concrete would be bad enough, but the it's rebar inside that does the most damage. Most commercial buildings are basically faraday cages and special care is needed to ensure you get good enough signal more than a few feet from the wall or in direct line of sight to a window. Toss in sheet metal walls and endless grids of metal shelves and warehouses are especially bad.
The most common way to get around this problem is to have the cell companies install what are effectively iddy biddy cell towers inside the building. Depending on the size of the building, multiple might be used. These can either be linked with a bigger antenna on the roof which interacts with the cell network at large or go through an internet connection.
But lets say they didn't have femtocells but still wanted to block cell phones? In most applications, EMF paint, faraday wallpaper or even just installing a wire mesh on the exterior walls will attenuate the signals to the point of uselessness.
Things I've learned starting out:
Wash the miniatures. I found the easiest way was those little ziploc plastic containers. Warm dishsoapy water in them, throw a few minis in, scrub them with an old toothbrush, rinse them off and toss them into a second ziploc container filled with plain water. Then drain and refill that a few times to get all the soap out. Be careful you don't dump them down a drain.
Take them out of the warm fresh water and put em onto a plate with a paper towel or something to dry. I like to organize them into which model belongs to what at this point.
I invested on a sprue cutter and it has been WONDERFUL for me to remove pesky mold lines and the bigger tags sticking out of models. Also an xacto knife helps.
I got some cheap needle files from Harbor Freight and they've helped get the flash lines flush without any weirdness.
After your stuffs all pretty and moldline free I tend to toss it into a sonic cleaner because I work at a lab. It might be placebo but the industrial strength badass one at work seems to get clean and I mean... why not? But you can do the water and rinse again. Or even just do it once, after the mold line removal. (Side note: sonic cleaners are PRETTY RADICAL for removing paint from miniatures with some simple green. I love it. Saves me a lot of scrubbing.)
Anyway once its dry I personally use this glue and some stuff called green stuff to fill in gaps. Heres a tut showing the basic idea
Once they're assembled I use some good ol elmer's white glue on the bases and dip em in sand and shake them off. Tutorial that shows that
Then prime your stuff. Tons of tutorials about it and tons of everyone saying which is their favorite primer, spray or brush on, different types of primer, different brands. Some stand by Army Painter or Citadel. I've had good results with Rustoleum Ultra Cover 2x White primer. I've recently picked up some TAMIYA WHITE which I hear good things about. Trying them on some Morats tomorrow.
Lots of other good info has been posted too! I also just started probably, shit, 6 months ago, so this is stuff I've had to pick up and learn as I go.
My suggestion is forget the wax. Strip the remaining wax out, and get a product called Envirotex. It's a simple two part epoxy, is food safe, and you can put pretty much any liquid in the horn after. When you do it, there are some procedures (which I can elaborate on if needed) that will ensure a good coating, and will even protect that edge from further chipping.
Now, that said, this post isn't really suitable for this sub. It's not really about heathenry. My suggestion to you is to either PM me if you need more help than this answer, or go ask on /r/SCA. They'll have your answer there for sure if you want other opinions. I'll leave this post up for a short time because I know your problem is a frustrating one to have, but I'm going to have to delete it soon unless you delete it first.
Suit: Cosplaysky Medium. Jacket (Under the vest thing) was short. Didn't tuck into the pants well. I rolled it up and put it under the vest. Under shirt was too small and hood too big so I used a scuba hood. Belt was too large as well, had my mom sew it to make it shorter. I'm 5'7, 40" chest, 32" waist for reference.
Helmet: Xcoser (Paid $30 for it on eBay. Came with a flaw so ended up with 2!). Painted it Rustoleum wine and black. I liked the black face so kept it. 2 coats of flat clear coat. Lenses are made from a soda bottle and car tints then I glued them in.
Chain and gun were from Amazon.
Kept the boots and gloves from my black suit Daredevil from last year.
Happy how this turned out. Won second place in a cosplay contest!
I'll need to revisit the eyes in the future. These were done with scraps at home.
I posted this guide in the comments section on my post on /r/smashbros , just in case anyone is interested.
Take apart the controller, obviously, and separate the top and bottom shells. Use a tri-wing screwdriver, I found mine on amazon for less than a dollar (shipping included, the price is subject to go up). I've read about people using a small phillips screw driver, and sort of forcing the screws to turn. If that works for you, great. I wouldn't try it, though. Why damage the screws when you can do it the right way?
Good luck and post pictures! /r/customcontrollers & /r/smashbros
I would strip the bubbled area with acetone or some paint stripper. There’s no need to completely strip off the coat, it’s a pain in the buttstock (Get it? buttstock instead of butt). Spray light coats with matte camo paint. I have painted 20ish firearms and I prefer this paint.
Rust-Oleum 269038-6 PK Specialty Camouflage Spray Pack, 12-Ounce, 6-Pack https://www.amazon.com/dp/B009ROI59I/ref=cm_sw_r_cp_api_i_WCupDbDG9TNMW
Let dry outside about 30 minutes per coat. After 4 or 5 coats the rifle should be good as new. Let the paint harden for 24-48 hours before going to the range.
Actually, first scan it. Then I would suggest use an acid free spray on it. Notebook paper, newsprint, and other cheaply made paper we use and throw away contains acid which is what causes paper to yellow and become brittle. Acid free spray takes the acid out to make the document archival. Instead of laminating it I would suggest an acid free document bag. I don’t know if some laminations may yellow over time but I do know once it’s laminated it’s in there for good. You can find document bags at art supply and photography shops.
If you frame it, use UV glass. You can get it cut at the hardware store, and some readymade frames come with it. Light is the enemy of paper. Otherwise store it in a dark dry place. Only saying that because I’ve met people who’ve lost important art and keepsakes to wet basements and garages
Ugh, yeah, that sounds annoying. Repeat after me: "Thank you for making that suggestion. I appreciate that you always share your experience and knowledge with us. Let me write this down to discuss this with FH, since it is his wedding, too, and I want to include him to make for a good partnership and marriage." Take a pen and write down her suggestion. Toss the idea, secretly.
For the deck boards: cut / saw them into the shape you wish for, write whatever you want to write on them and spray paint them with 'clear finish' (acrylic paint, like this). Then dip all edges into wood glue and glitter. It won't be ridiculously expensive, but it will look finished and upscale IMO.
https://www.amazon.com/Rust-Oleum-269038-Specialty-Camouflage-12-Ounce/dp/B009ROI59I
GW sprays have a very high cost, and people have had numerous complaints about how runny they are.
http://www.games-workshop.com/gws/catalog/productDetail.jsp?catId=cat470015a&prodId=prod1200064
It's always been suspicious that GW is very reluctant to ever call their sprays "primer" even though that's the advertised intent of the sprays. They call them "spray paints" and "undercoat", but never primer... even on the bottle itself.
Even more odd is that their sprays used to be labeled "primer". They dropped that ever since they revamped the cans. The White spray they have on their site is an image of the old can, you cannot get sprays that have that labeling anymore:
http://www.games-workshop.com/gws/catalog/productDetail.jsp?catId=cat470015a&prodId=prod1200062
Again, opinions of course. If you want inexpensive yet good, I've heard good things from Krylon primers:
http://www.amazon.com/Krylon-51315-All-Purpose-Interior-Decorator/dp/B001B73WCO/ref=sr_1_1?ie=UTF8&qid=1367785170&sr=8-1&keywords=krylon+primer
If you want expensive yet (arguably) great, I use and love Army Painter primers. The nozzle never clogs, and the spray is really really strong and clean. I've found that even when I spray too closely and seem like I've obscured the model details, the paint dries and everything is fine.
http://www.amazon.com/Army-Painter-Matte-White-Primer/dp/B004VEO5FM/ref=sr_1_cc_1?s=aps&ie=UTF8&qid=1367785212&sr=1-1-catcorr&keywords=army+painter+primer
red: https://www.amazon.com/gp/product/B078WM76Q4/ref=ppx_yo_dt_b_asin_title_o04_s00?ie=UTF8&psc=1
clear: https://www.amazon.com/gp/product/B002BWORZE/ref=ppx_yo_dt_b_asin_title_o03_s00?ie=UTF8&psc=1
Because it is!
They make paint that will turn any surface into a chalkboard. It really works too, when I was little my parents painted a whole wall with it and it was pretty neat.
Here's a link:
http://www.amazon.com/gp/aw/d/B0006BAEI6
I rattle-canned my rifle and for the first week or so it felt a little sticky, but apparently it was because the paint hadn't fully cured yet. After that first week it felt great for me, you just have to be sure to do multiple light coats. I would do a light coat and wait for half-an-hour before doing another coat. I used Rust-Oleum Specialty Camouflage and the colors are all pretty matte.
Looks solid and I like that those labels allow full bleed printing, too!
If you get any bleeding, get the Krylon spray for a fast top coat.
Most painters have their preferences. I prefer Citadel but it's pricey. I've been using it ever since they were the only ones to offer spray primer and at this point I'm just used to how it reacts and know how to work with it well and IMO it's better quality. Army Painter spray primer is fine too though.
To my surprise, when researching primers on Amazon, I found that the Army Painter primer is only one dollar cheaper than the GW Citadel primer so in that case I would definitely go with Citadel. It has two negative reviews by people who haven't bought it and think it's too expensive even though the AP primer costs basically just as much, but I guess that's the anti-GW circlejerk for you.
Wow thanks guys! Basically I disassembled what I could and then taped off everything I couldn't and I didn't want to be painted. Then I used this spray paint https://www.amazon.com/gp/product/B009ROI59I/ref=oh_aui_detailpage_o00_s00?ie=UTF8&psc=1 . and I went over it from about 10 inches away pretty lightly. Then I repeated that till it looked clean.
Thank you! I've put some of this on.
I think rust oleum has a "chrome" can.
Like this
Thanks! For the Thomas helmet, I started with a chrome motorcycle half helmet as the base. Then I used chrome (mirror) vinyl to cover the visor and stuff (that's the really shiny part).
The chrome spray paint I used on the ear pieces can be found at any hardware store (rustomleum, krylon, etc.--something like this: http://www.amazon.com/Rust-Oleum-7718830-Bright-Metallic-11-Ounce/dp/B000Z8DGXK)--but it's not as "mirror" like as the helmet or the vinyl. It's more "silver" than chrome.
Hope it helps!
18 KARRIT GOLD PLAT! LIK MAH GRILZ!
http://www.amazon.com/Krylon-1000-Premium-Metallic-Spray/dp/B000BZX3H6
Just use mailing label sheets, design your labels in your software of choice, and then spray the printed labels with something like this product
Use spray primer not paint.
I use this stuff: https://www.amazon.com/Army-Painter-CP3001-Base-Primer/dp/B005WH3LVG
It's generally fine.
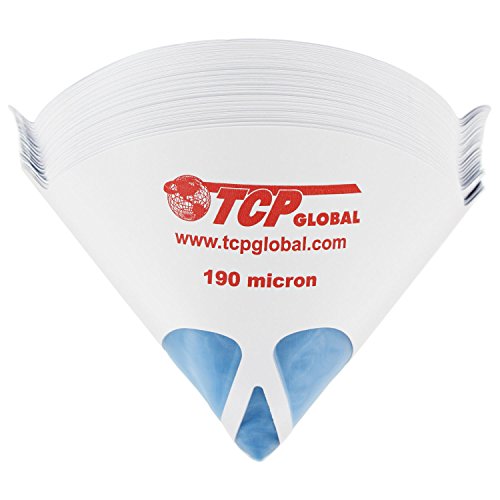
I use these:
https://www.amazon.com/TCP-Global-Strainers-Micron-Filter/dp/B000PA09V0/ref=sr_1_2?ie=UTF8&qid=1492969699&sr=8-2&keywords=paint+filter
Yes, there are topcoats specifically for blocking UV. Here's an example.
Yeah, most spray enamel will work for wood/plastic/metal. Just check the can..you can usually pick it up at any home improvement location. https://www.amazon.com/Rust-Oleum-249087-Painters-Purpose-12-Ounce/dp/B002BWORZE/ref=asc_df_B002BWORZE/?tag=hyprod-20&linkCode=df0&hvadid=193184886406&hvpos=1o2&hvnetw=g&hvrand=8150720537796560605&hvpone=&hvptwo=&hvqmt=&hvdev=c&hvdvcmdl=&hvlocint=&hvlocphy=9030984&hvtargid=pla-308030796454&psc=1
Here's black.
Make sure you get the "flat" colors (see the bottom right of the picture on the label).
Here's Krylon, it works too if you can find it.
I use these to strain it for re-use. I go through a lot of oil for tailgating and thanksgiving turkeys every year.
Disposing of it properly is the harder part. Most of the time I can get a local restaurant to let me dump it in their oil tub (for recycling). The other times it goes into a sealed container and out with the regular garbage.
I love painting the hero forge minis; sounds like you did yours in the new high detail plastic.
I've done a few of those recently and once you get them primed, it's not much different than painting die cast minis.
i dont think you need any liquid sander, i'd just was the case with soap and water, dry well then wipe down with isopropyl alcohol.
Hit it with a plastic primer (white so you dont need as much paint to cover up the black. this will also help smooth out the texture so you get a smoother shinier finish
http://www.rustoleum.com/product-catalog/consumer-brands/specialty/plastic-primer-spray
get some krylon fusion paint (its maid for plastic specifically) and spray it. it should already be pretty smooth and glossy if you want to got a step further get a spray on clearcoat gloss http://www.amazon.com/Krylon-2444-Fusion-Plastic-Clear/dp/B001TNMWBM you can add a couple layers of this to help protect the paint give you a super glossy finish.
Give me a minute, I can link you to a comment I found explaining it in depth
EDIT: I'm just gonna paste it here. For reference, I,believe priming is coating it in a thin layer of paint to act as a base. Use black primer for darker results and white for lighter. Credit to u/pyrese
I love painting the hero forge minis; sounds like you did yours in the new high detail plastic.
I've done a few of those recently and once you get them primed, it's not much different than painting die cast minis.
Well I don't know that it effects me, or that I'm aware of any effects. But I do make sure all cellphones are on airplane mode and at the far side of the house when I sleep.
Also, there's paint for your house which is supposed to block EM frequencies.
Maybe avoid wifi in your house or turn it off at night.
My neighbor had something special done to her wiring to avoid EMF but I don't know what it's called.
Rust-Oleum 249087 Painter's Touch Multi Purpose Spray Paint, 12-Ounce, Matte Clear https://www.amazon.com/dp/B002BWORZE/ref=cm_sw_r_cp_apa_i_h4KXCbX4BP3TT i found this to work splendedly for a topcoat. And is bigger and cheaper than testors. Another good idea might be getting a top coat for air brushes and airbrush one on.
I made one but I decided that I was going to go balls deep and try one of the most difficult designed mau5 heads out, the disco head. Long story short it cost me about ~$300 to make, not counting 2 others that I messed up on.
Materials:
-Head
-Eyes
-Head Mount
-Mouth Mesh
-[2] Led lights for coloring the eyes
-Superglue for mouth
-[2] Plastic glue for Headmount
-About [6-10] Rhine stone glue bottles
-[3] bags of Rhinestones
-Foam Ear material ---> With Ear template
-Washers -[4] Threaded Rods -Wing nuts
-Chrome Spray paint
-Lastly, Insulation Strips [White]
+++++++++++++++++++++++++++
Stuff I had: Dremel, stubbornness, no life, sharpies, too much free time.
+++++++++++++++++++++++++++
Use any of the above tuts to get the general idea.
The template for the ears, (mine are huge).
Once the mouth is cut and you accounted for the eyes (pop the eyes in half and trace them on.)
Spray paint the whole head chrome, in light mist layers. The more layers the smoother the finish.
Once that's done, enjoy the 90+ hours of putting each rhinestone on, one by one.
Profit.
Should it not dry to your liking, use the glue again and do NOT dilute it with water. Then use something like this over the dried glue, because without it the shade will be a dust magnet. The spray will make it easier to clean.
I use burned pieces of wood with all sorts of cracks and imperfections http://imgur.com/xkuVfVG and what I use and stand by is http://www.amazon.ca/gp/aw/d/B000LNS9CW that.
Get a few different sizes of brush and you'll be set.
I always use primer. It really helps in all the ways previously mentioned. After some experimenting, I really like the Krylon range https://www.amazon.com/Krylon-51315-All-Purpose-Interior-Decorator/dp/B001B73WCO
Just hold the models about 1.5 - 2 feet away, and go in short bursts. Never let the can stay still while spraying. All you need is a very thin, even coat all over the model. Don't worry if it doesn't look good, the worst thing you can do is go overboard and start filling in details. Shake the can often between sprays as well.
countertop epoxy resin
e.g.
http://smile.amazon.com/Environmental-Technology-16-Ounce-Pour-On-Finish/dp/B000LNS9CW/ref=sr_1_1?ie=UTF8&qid=1404959896&sr=8-1&keywords=countertop+epoxy+resin
Yes there is a clear coat you can spray on. It's cheap and easy and you get what you pay for (not as good as a real polishing).
You can use any clear lacquer. I've used this before on rocks
I have refinished a few tabletops using this method:
Good Luck!
rit dye != vinyl dye. Coming from the Nerf hobby, vinyl dye is the best thing for you, just remember to apply it in thin coats. Rit dye will simply not take to ABS, I can tell you from personal experience.
You could always try a UV spray maybe like this Krylon Preserve It! aerosol. I would make sure to try it on something that you don't mind damaging first to test how it takes, but it claims to have UV protection.
I keep my games in a set of shelves in our "office" space, along a wall. There's a window in the room, but since the office is hardly used, the blinds remain shut, so the light in there is very filtered. The only downside to this is that the games are upstairs, in a room where we don't play them. It's nice to have the games somewhere central.
i personally used one of krylon’s “premium metallic” series. (https://www.amazon.com/dp/B000BZX3H6/ref=cm_sw_r_cp_api_i_NANzDbHV3CS3Y) i’m pretty sure i used the 18k version that i linked. i got it in the intent of making the gold parts like shiny and anodized, but it came out pretty well anyways. i washed the runners with dish soap and semi-warm water, and then painted them on the runners. if you need to cover up the nub marks, just use a gold gundam marker. but it shouldn’t be too obvious without it though. i personally painted the parts while they were on the runner, because it was just way easier than painting one part at a time considering how small they all are. just make sure whatever you use is what you want, so really if you really want to make sure that you’re going to paint a part a specific color, cut out a rod from the runners to be sure.
so far i brush, i tend to use different varnish depending on where im using it, gloss on lenses semi gloss on armor flat on dirt ect. I do hope to get an airbrugh before christmas comes though, have a drop pod i need to paint and im just not happy with how brushing the base color is looking, no matter how thin or how many coats i cant get a nice even tone to work from
try this for primer, ive absolutely love using it, goes on super thing but nice and solid, doesnt fill in details
I'm a really big fan of liquitex paints from hobby lobby. Big bottles are great and you can just dump a ton of paint on it. They're actually pretty good quality acrylics, and I use them for larger monsters/minis... although the pigments aren't small enough to use with small detail work.
https://www.hobbylobby.com/Art-Supplies/Painting-Supplies/Acrylic-Painting/Liquitex-Basics-Acrylic-Paint-Set---6-Pieces/p/80855309?gclid=CjwKCAjw7anqBRALEiwAgvGgm1hefM4EKJg1N9jPOgKUT9oZ4Kfx8dB1YrgIencoSQwYghpiOmeFGhoCwRsQAvD_BwE
​
Also, I almost always just base my terrain with either black, gray, or white primer. Then apply my paints in layered highlights until I get the effect I want. It works well enough and saves a significant amount of time.
https://www.amazon.com/Rust-Oleum-249058-Painters-Purpose-12-Ounce/dp/B002BWORRW/ref=asc_df_B002BWORRW/?tag=hyprod-20&linkCode=df0&hvadid=198077767340&hvpos=1o3&hvnetw=g&hvrand=7988992819377697018&hvpone=&hvptwo=&hvqmt=&hvdev=c&hvdvcmdl=&hvlocint=&hvlocphy=9019109&hvtargid=pla-343196559114&psc=1
(The red primer is actually a nice brown, and I use it as my basecoat for most things wooden. I just apply a highlight of a light brown acrylic and I'm done)
EDIT: I just realized this is Terraino subreddit. Careful with this paint on foam as I've only tested it on 3D printed and injection molded parts.
http://www.amazon.com/Rust-Oleum-7578838-Professional-Performance-15-Ounce/dp/B000PIEWLA/ref=sr_1_5?ie=UTF8&qid=1398391364&sr=8-5&keywords=black+spray+paint
http://www.amazon.com/Rust-Oleum-249058-Painters-Purpose-12-Ounce/dp/B002BWORRW/ref=sr_1_7?ie=UTF8&qid=1462834803&sr=8-7&keywords=rustoleum+spray+primer
this seems really expensive though. You should be able to get this for $4-$6 at a big box store. Walmart might have it in their sotres as well.
I am linking this Chalkboard Paint. And I think it would be just fabulous because it is currently snowing in NY (which one could argue is just colder rain) and I am in the mood to paint a fun & functional wall somewhere in my house. I also kind of want to paint a big chalkboard for my office for the kids to use. They definitely don't have real chalk boards in school anymore. Plus it's under $10 and prime eligible.
Rust-Oleum 206540 Chalkboard Brush-On, Black, 30-Ounce by Rust-Oleum http://www.amazon.com/dp/B0006BAEI6/ref=cm_sw_r_udp_awd_3SYetb1J8HNJV
The old man in snoring
Awww yeah
I used rustoeleum spray paint. Sanded the body down first and then applied 3 coats. The black looks great. I also used a glossy red which hasn't held up nearly as well. PM me for a picture.
You'll want to use a primer! Don't worry, it took me forever to figure that out. Basically acrylic paint isn't made to stick on plastic, and it'll come off super easy. Primers are paints made to stick on things like plastic. That means that you're coating your model in a material that accepts your acrylic paint better than plastic. You can get primer from any home improvement store, but here's some links to some on amazon. They all work just fine, you just need to make sure it says "primer" somewhere on the can.
​
https://www.amazon.com/Rust-Oleum-249846-Painters-Purpose-12-Ounce/dp/B002BWOS94/
https://www.amazon.com/Army-Painter-CP3001-Base-Primer/dp/B005WH3LVG/
https://www.amazon.com/Citadel-Colour-Chaos-Primer-Undercoat/dp/B000A5CHHE/
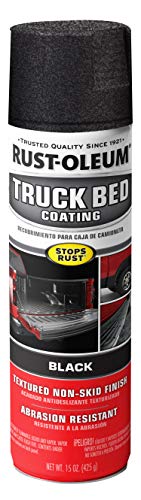
I second the use of spray on rubber, or even truckbed liner
It's painted on. You can make the board any size, shape, etc. I plan to do this for our son when he gets older.
It is. And I used a can of gold metallic paint. Don’t forget to cover the stones before painting.
Krylon Metallic Gold Paint
This is what I was thinking of: Krylon 51313 Satin Finish Crystal Clear 11 Ounce Aerosol https://www.amazon.com/dp/B000VKY3I4/ref=cm_sw_r_cp_api_C.pZBbK7DTVWF
It sprays on shiny, but clear.
They sell them on amazon, something I googled at random https://www.amazon.com/TCP-Global-Strainers-Micron-Filter/dp/B000PA09V0
The goal is the same to filter out any tiny bits of hardened goo. So any fine strainer is likely okay to use.
Krylon K05131307 ColorMaster Acrylic Crystal Clear, Satin, Clear, 11 oz. https://www.amazon.com/dp/B000VKY3I4/ref=cm_sw_r_cp_apa_i_hWU3CbYZKKJJC
I sprayed it on half at a time so it would dry without any marks
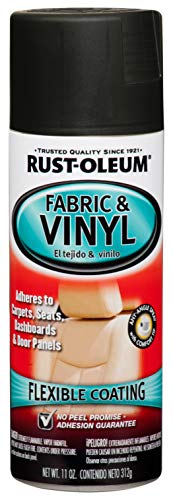
I'm doing to door cards and rear bench in black. Using this vinyl paint, though I would not do the same for leather. I'd just look into a leather dye for that.
That's what I'm going for, but the rest of the wall was painted years ago, and I'm patching small holes. Not sure if it's worth it.
Does this stuff work on walls?
Tamiya fine surface primer is a really thin primer that I'm using for my resin minis, does a good job of not filling in all the fine details.
https://www.amazon.com/dp/B0000WS01E/ref=cm_sw_r_em_apa_i_Ef6TDbK9HYY3F
I would suggest using some of that whiteboard paint or chalkboard paint for the top. Minimizes the number of pieces that can be lost by the drunks.
The only thing I can think of is getting a lycra wetsuit (cheapest I've seen for a full body one was $40) and then giving it a few coats of vinyl and fabric spray paint.
The burgundy doesn't have a gloss finish and I think it's closer to Deadpool's color.
Thanks! I used this 2 coats of this one: https://www.amazon.com/Rust-Oleum-249087-Painters-Purpose-12-Ounce/dp/B002BWORZE
I think it’s a great buy!
TL;DR -- I did not use a primer, and I did completely paint the inside and outside of both panels. No fitment issues, only issue due to extra thickness from the paint was the screws struggling a little bit during re-installation.
Satin Black
Satin Clear
Those are the paints I used. I did not use a primer. I went with satin on both because I was after a matte look like the main black body on the stick. I didn't want them glossy like the original white panels. I did paint the entire surface of the panels. The only thing I noticed was the screws struggled a little bit during re-installation but that was to be expected and really wasn't an issue. I didn't and haven't noticed any other fitment issues from the paint.
For preparation, all I did was wash the panels to remove any dirt/oils and then used the finest sandpaper I had on hand to sand/scuff up both panels to help the paint stick better.
If I remember correctly, I did two (maybe three? sorry it was a while ago) coats of each the black paint and the clear top coat. You will want to spray a good distance away from the panel you're painting, at least 8-10 inches, and nice smooth motions, you kind of want the paint to fall onto the panel lightly, if that makes sense. It helps to avoid runs and imperfections.
I used a paper clip in the screw holes to help me manipulate and hold the panel up as I was spraying so I avoided finger prints and also keep it propped up during drying so it didn't stick to the cardboard box I was using. Between coats check the entire panel for runs or clumps and if there are any, wet-sand those areas smooth with the finest grit sandpaper you have before you apply the next coat.
Once I was satisfied with the look/finish, I let it dry for 72 hours. I just wanted to be sure that everything was DRY before securing them back on the stick. Obviously, you can still use the stick during this, it just looks weird without the panels.
Doing it this way was not 100% ideal or correct I'm sure, I'm not a painter and haven't had much experience with it to be honest. There are one or two imperfections, which I suppose I could wet-sand and repaint, but I don't notice them. They are small, and i don't feel like doing that process again for one or two small imperfections. I am very happy with the look and outcome of the little project and happy I did it. They look so much better black than they did white.
Hopefully this post is of some help. Good luck, you will be very happy you did it. It is worth it, the stick looks so much better.
on my most recent bouquet i used this and so far so good with it! although in the past i've honestly just used regular hairspray and that's worked just as well.
just remember that they will be brittle no matter what so i suggest putting them in a plastic box if you're just wanting to store them or a glass display case (like this or this - or even a shadow box that can be found at most craft stores!) if you want them on display!
if they've made it this far, putting them in a protective case is probably your best bet overall because the moisture is already dried out & they're more at risk of being damaged by being bumped & moved than anything else really.
hope this was somewhat helpful & best of luck!! :)
I used this to finish all of the spray painted pieces.
Krylon Satin Finish Crystal Clear Interior and Exterior top coat.
https://www.amazon.com/gp/product/B000VKY3I4/ref=oh_aui_detailpage_o04_s00?ie=UTF8&psc=1
​
It feels the same as a regular store bought controller to me. I see the indentations but I don't really feel them on the painted vs unpainted ones. They pretty much feel the same to me overall. There's 1 or 2 spots on the purple one I missed with the clear finish that I may redo at a later time but it's kind of where your left index finger sits below the L and ZL buttons so I'm not super worried about it.
I would try something like this. You can also get it from Home Improvement stores, or Walmart/target/wherever.
Krylon 7027 Preserve It Aerosol Spray, Matte
https://www.amazon.com/Krylon-7027-Preserve-Aerosol-11-Ounce/dp/B00AQ72JHE
If you're not into painting - the first bundle is fine if you're willing to put the money into it, the other bundles are too much for a beginner IMO
Something like:
https://www.amazon.com/Miniatures-Highlighting-Miniature-Army-Painter/dp/B01MTXRU2L/ref=sr_1_4?ie=UTF8&qid=1518146756&sr=8-4&keywords=army+painter+kit
Is a cheaper entry point - look for something in the same category as this, the primary colours + a few extras, a shade and a standard sized paint brush
This way you can try out painting and if you enjoy it, you can add to it from there, while not investing as heavily as the suggested bundles in the link are asking
Another option ~
https://www.amazon.com/Games-Workshop-60-22-Base-Paint/dp/B00KOCXDT4/ref=sr_1_2?ie=UTF8&qid=1518147023&sr=8-2&keywords=citadel+paint+kit
Any paints from Army painter/Citadel/Vallejo are great places to start, just get whatever's got the best deal on at the time.
Only other suggestion would be to get a spray undercoat such as
https://www.amazon.com/Army-Painter-CP3001-Base-Primer/dp/B005WH3LVG/ref=sr_1_1?ie=UTF8&qid=1518147186&sr=8-1&keywords=miniature+undercoat+spray
Undercoat sprays make painting a mini MUCH easier and MUCH quicker, however, if you are only painting the bases and not any detail on the mini, you can get away with no undercoat spray
(You can get cheaper sprays but I find when you're new, picking one model paint brand and sticking to it to start with makes things easier to manage)
I've just grabbed links from Amazon, but you can find these products all over the place
Shake it and strain it (either order). If it's already in your vat, put a funnel and strainer on the bottle and pour it back in. Or use an extra bottle and collect it first and shake it, it should help it strain better.
​
https://www.amazon.com/TCP-Global-Strainers-Micron-Filter/dp/B000PA09V0/ref=sr_1_3?keywords=paint+strainer&qid=1563463430&s=gateway&sr=8-3
​
https://www.amazon.com/Pack-Multi-Purpose-Funnels-Reaching-Transfer/dp/B07B3LMQ8P/ref=sr_1_5?keywords=plastic+funnel&qid=1563463681&s=gateway&sr=8-5
I was thinking of using linseed oil (though I don't know if i'm supposed to mix it with turpentine and vinegar like some say?) But I think linseed oil gives the wood a shine and it yellows over time. I was also looking at dead flat/ matte finishes like this or this or this. I guess it doesn't have to be waterproof, though I have another project that I need to waterproof some wood and though i should get something that works for both lol. Mostly curious if anyone has any specific recommendations.
Harry potter is life
Thanks for the contest!
I think the biggest thing that makes me happy lately are my 2 puppies. They've been there for me through a lot of hard times and are always up for cuddles. I love them and they are pretty awesomleyfantasticsauce! :)
this would make me happy because I love all things chalkboard! YAY!
:D
http://www.amazon.com/Krylon-1000-Premium-Metallic-Spray/dp/B000BZX3H6
+
Corsair fan rings.
Don't breathe the dust.
they are so cheap i say just go for it. No idea too crazy!
remember the goal is rain resistant not fully waterproof.
here's some ideas
neverwet
or maybe just a clear coat?
some sort of box around it?
if you do paint it just tape over the emitters and receiver
just make sure to use a power supply that will shut down if their is a short or over current and everything should be ok.
edit:
also this.
Doesn't look that waterproof to me but there it is. I assume they mean just the black sensor but if you enclose the rest of it, should work ok
you can use those "artist" acrylic paints for model paints. I know quite a few local GK builders who do. The problem with those is you have to filter them first either through a paint strainer http://www.amazon.com/50-Mesh-Fine-Paint-Strainer/dp/B000PA09V0/ref=sr_1_1?ie=UTF8&qid=1318825639&sr=8-1 or through nylon stockings(make sure it goes through 3 layers of stockings though. You can then either use Windex, 91% rubbing alcohol or wind shield wiper fluid(the kind without anti-freeze) to thin it. You're going to want to go for a consistency of milk when you do thin. So when you swirl it around in the jar it's going to flow about as much as milk does.
Thank you! Yes, I use acrylics and then I spray it all with a Clear coat spray paint for plastic. I personally recommend this one if you are intersted.
n_n No problem! I hope you have fun. Please please please share how you paint him when you get to him.
Reiterating what the other commenters have said, you'll want to stick the caps down somehow because when you pour the self leveling epoxy over them, they'll want to float and you'll end up with an uneven surface.
I used this stuff: https://www.amazon.com/Environmental-Technology-16-Ounce-Pour-Finish/dp/B000LNS9CW
Source: Have made that mistake myself.
Use Rustoleum plastic primer and Rustoleum chrome or metallic silver. If you read the instructions and practice on something else to get the hang of it, you should get a really smooth finish.
Thanks so much!
Poured on two layers of this epoxy, sanded to 400 grit between each, let them both cure and they came out super glossy so I put down a really thin layer of minwax satin poly. The epoxy definitely brought out a lot of beautiful color and helped fill all the imperfections without covering them up.
> now I get little specks/chunks of paint
Did you filter the paint when you pour it into the sprayer? Homedepot, lowes both sells something like this that you need to use
https://www.amazon.com/TCP-Global-Strainers-Micron-Filter/dp/B000PA09V0
​
> Also, the other annoying thing is I have a spray booth and I use a hanger with hooks attached to the cabinet door but the spray gun is very powerful and blows the door around.
Yup, this is a common problem. Personally I don't like that method because of that. I just lay the door down flat on 1 face, paint all the doors, let them dry, flip them over then paint the other side.
That's an interesting idea. Whether you plan on painting the reso bass head or actually just re-coating your batter heads to save money, this stuff is a good place to start: https://www.amazon.com/Rust-Oleum-249058-Painters-Purpose-12-Ounce/dp/B002BWORRW/ref=sr_1_1?keywords=rustoleum+2x+primer+flat+white&qid=1562532126&s=gateway&sr=8-1
There might be other more textured sprays you can get, but before you spend a bunch of time and a tiny bit of money re-coating old beat up heads you might just consider how nice a brand new head would sound.
You could also seal it with a clear spray when you're done, just to be sure.
i haven't tried it myself but my research found this to be aquarium safe.
So for a frame like the PG strike freedom, if I wanted to paint the inner frame so that it isn't crap gold, I'd prime that and then spray it with gold paint? Can I do it with inner frame assembled or would that run the risk of the joints getting too stiff?
And does it matter what color the primer color is, be it gray or white? I assume the tamiya primer is ideal (as linked below):
https://www.amazon.com/Tamiya-Surface-Primer-White-180ml/dp/B0000WS01E/ref=sr_1_4?ie=UTF8&qid=1487211789&sr=8-4&keywords=tamiya+primer
And a side question, someone told me acrylic paint is ideal for beginners as its less of a pain to work with. However I assume this is regarding brush painting. I notice stuff like the tamiya gold spray is lacquer. Does it matter? And is it bad if you primer, lacquer gold, and then paint some sort of acrylic on top of the gold?
Sorry for all the questions, but thanks for taking the time to answer!
So I'm looking into my first project that's more than a straight build. Specifically I'm thinking of a recolor of a Kyrios from orange to green (college/workplace colors, and fortunately white is our secondary).
The right order is Primer, paint, panel line, topcoat right? And then just topcoat for the pieces I don't recolor?
Also on topcoating, do you spray that on each external piece individually, or on the whole unit assembled?
Lastly, if I get into weathering effects, that's after painting and before topcoat right?
My batch of cheap Leos finally came in, so I have a few grunt units to mess with.
I used Rustoleum Pro line flat black on mine. No peeling. I don't know if that is what you are looking for though.
EDIT: Don't know if that is the texture you want, and it does chip after a while. Look into getting an etching primer before you lay down the bed liner, it might stick better
Which one of these sprays should I get to coat it?
1. 2, or 3?
this would work better. The high heat needs really high heat to "bake" on and cure.
>EDIT 2: I haven't yet ordered any primer. Any advice on what colour to use (White/Grey/Black?) and what brands would be best?
Army Painter is a common spray primer that a lot of people use.
Another tip that I have is to not forget the model base. You will often see photos were people didn't even bother to fix the random blotches caused when painting the figure, which is distracting and makes the whole model look worse. It's very easy to just paint the base black, but it's also very easy to glue some junk on there and take your model up a level. Even just some dirt/sand, bits of leaves or bark & small rocks. You don't need to buy stuff. Just go outside with a couple baggies. Get some glue put down and stick the stuff on, maybe with some tweezers. The stuff won't stick where you didn't put glue. Here's a good example of basic sand & rock basing which is very achievable by a novice.
So, I'm planning to fully paint my next kit (HG Barbatos) and I'm wondering what paint product to use. Is this Tamiya TS-27 Matte White the typical white gundam color, like on the barbatos? Does it matter if it's matte or not, or is there a regular white color for the spray paint?
Also, I plan to use this white primer. Is this okay? It says "fine", but the gray tamiya primer doesn't say that so is this different in an important way? I hand paint in acrylics if that information is important.
Also, bonus question, should you use white or gray primer before hand painting/spraying on red? I assume white?
Thank you for the help friends, sorry for yet another barrage of questions, but it is much appreciated!!!
It's chalkboard paint.
I actually just sprayed my Thomas helmet with Rust-Oleum Bright Coat Metallic Finish and, while it didn't come out nearly as good as a chrome would (I wanted to be sure that it would be done by halloween), it does look pretty good. Here's what it looks like with that metaillic spray paint without any sanding which would have done a world of help (don't zoom in too far, I had to crank up the iso since my apartment is so dark, so they're pretty noisy).
Here's the full build album, if you're interested. I've still got a ton more work to do, such as finishing fiberglassing the inside and applying bondo to the outside.
I'll second "use a hobby primer", though I am much less specific about it than /u/DathNader26. I use Army Painter primer, though I've used Citadel and Privateer before too. The only real rule is that if you use a color besides black or white, you must use a matching color to touch up any exposed areas. Citadel Dawnstone and Army Painter Uniform Grey are different enough that I can notice them if I change greys over a model. If you spray with Dawnstone, that needs to be your only grey paint for that model.
As far as other paints, once again the rule of consistency applies. I started painting with Citadel paints, so I mostly use Citadel so that my army looks consistent.
Since you're starting new, I may recommend Army Painter. I use a couple of their paints. They are as good as Citadel and substantially cheaper. The only Citadel product that I would strongly recommend is their ink washes. They are kind of pricey, but they are great and have awesome effects. It took me years to discover the magic of ink washes, so let me strongly point you in their direction right now.
Since no one has actually answered your question, I used grey Rust-Oleum primer for my Gloomhaven minis (Amazon link).
Now, I'm not 100% sure if this is the exact same one that I use, but it looks awfully similar. All I know is that it goes on smooth, doesn't obscure tiny details (as long as you don't heavily spray a single area), and dries nicely. I also have a white can of Rust-Oleum primer, but I'm not too impressed with that one. I'm thinking about giving the white Tamiya primer a try. Maybe that'll be better.
I tape the bottom of my figures to a paint stirring stick and then spray the primer on to them in quick, short bursts, spraying about 6 inches away from them and moving in a lateral sweep. Turn and rotate the stirring stick so that you hit all angles on the mini. Once finished, set aside in a dry room for at least 24 hours before you begin painting.
Clean your screen as good as you can. Cover everything but the screen and lightly hit it with this clear coat spray until you get a clean finish. It will fill in all of the cracks and give you a new finish. It will last for a couple months too while providing protection against further damage.
There is no way to permanently fix scratched glass.
This build will be able to play anything at 1080p 60fps high settings:
PCPartPicker part list / Price breakdown by merchant
Type|Item|Price
:----|:----|:----
CPU | Intel - Pentium G4560 3.5GHz Dual-Core Processor | $79.44 @ OutletPC
Motherboard | MSI - B250M PRO-VD Micro ATX LGA1151 Motherboard | $54.89 @ OutletPC
Memory | G.Skill - Ripjaws V Series 8GB (1 x 8GB) DDR4-2800 Memory | $65.99 @ Newegg
Storage | Crucial - MX300 275GB 2.5" Solid State Drive | $97.88 @ OutletPC
Video Card | Gigabyte - GeForce GTX 1060 3GB 3GB Windforce OC Video Card | $216.89 @ SuperBiiz
Case | Fractal Design - Focus G (White) ATX Mid Tower Case | $44.99 @ Newegg
Power Supply | EVGA - 450W 80+ Bronze Certified ATX Power Supply | $34.97 @ Amazon
| Prices include shipping, taxes, rebates, and discounts |
| Total (before mail-in rebates) | $605.05
| Mail-in rebates | -$10.00
| Total | $595.05
| Generated by PCPartPicker 2017-08-07 00:58 EDT-0400 |
If you want 4k 60fps high settings, you're going to have to significantly increase your budget:
PCPartPicker part list / Price breakdown by merchant
Type|Item|Price
:----|:----|:----
CPU | AMD - Ryzen 5 1600 3.2GHz 6-Core Processor | $197.88 @ OutletPC
Motherboard | ASRock - AB350M Micro ATX AM4 Motherboard | $59.99 @ Newegg
Memory | G.Skill - Ripjaws V Series 16GB (2 x 8GB) DDR4-3000 Memory | $124.99 @ Newegg
Storage | Crucial - MX300 275GB 2.5" Solid State Drive | $97.88 @ OutletPC
Video Card | Gigabyte - GeForce GTX 1080 8GB WINDFORCE OC 8G Video Card | $514.98 @ Newegg
Case | Fractal Design - Define Mini C with Window MicroATX Mid Tower Case | $69.99 @ Newegg
Power Supply | EVGA - SuperNOVA G2 550W 80+ Gold Certified Fully-Modular ATX Power Supply | $72.98 @ Newegg
| Prices include shipping, taxes, rebates, and discounts |
| Total (before mail-in rebates) | $1148.69
| Mail-in rebates | -$10.00
| Total | $1138.69
| Generated by PCPartPicker 2017-08-07 01:01 EDT-0400 |
Edit: Here is the stuff you'll need to paint your case orange:
https://www.amazon.com/Sandpaper-Assortment-Automotive-Furniture-Finishing/dp/B01MZALAD9/ref=sr_1_5?ie=UTF8&qid=1502082191&sr=8-5&keywords=sandpaper
https://www.amazon.com/Rust-Oleum-280715-Primer-American-Accents/dp/B00KZ6LLZW/ref=sr_1_1?s=hi&ie=UTF8&qid=1502082223&sr=1-1&keywords=white+primer+spray+paint
https://www.amazon.com/280698-American-Accents-Orange-12-Ounce/dp/B00KZ6LVUW/ref=sr_1_2?s=hi&ie=UTF8&qid=1502082246&sr=1-2&keywords=orange+spray+paint
https://www.amazon.com/Oleum-280702-American-Accents-12-Ounce/dp/B00KZ6LYMM/ref=sr_1_1?s=hi&ie=UTF8&qid=1502082271&sr=1-1&keywords=spray+paint+gloss+finish
I used this: Rust-Oleum 248914 Automotive 15-Ounce Truck Bed Coating Spray, Black https://www.amazon.com/dp/B003CT49B2/ref=cm_sw_r_cp_api_U6UPAb7WD5K2Y
You can also find it at Home Depot or Lowe’s.
Rustoleum bed liner?
https://smile.amazon.com/Rust-Oleum-248914-Automotive-15-Ounce-Coating/dp/B003CT49B2/ref=sr_1_2?ie=UTF8&qid=1481008368&sr=8-2&keywords=rustoleum+bed+liner
Thanks! It really isn't hard to keep clean. Rags get caught on it so a medium or soft brush when washing it usually takes care of the bugs. This is what I used on the flares, although I think I used a "heavy duty" version on the bumpers, but I can't find it online and only found 4 cans at one store in town when I did it originally But the linked stuff is basically the same stuff from what I can tell. The main thing remember is to prepare the surface of the chrome. Rough it up real good ;). I've only had a couple small chips to touch up in 8 months, so I'd say it's held up well.
http://www.amazon.com/Krylon-2444-Fusion-Plastic-Clear/dp/B001TNMWBM
Make sure it the FUSION kind. I have not put this items in my tank yet, but I have read on multiple forums that the ingredients in the Fusion spray become inert after the cure for 48 hours. I've seen fish keepers use this spray in their aquarium on separators before too. I'm letting mine cure for longer than that just to be on the same side.
I also did two coats on everything!
Thanks! The bases (Pic here: http://imgur.com/aFChvwH) are filled with Envirotex Lite, but any epoxy resin would have worked. The blue color came from a few added drops of acrylic paint.
Thoughts on this? The Army Painter Color Primer, Matt Black, 400 ml, 13.5 oz - Acrylic Spray Undercoat for Miniature Painting https://www.amazon.com/dp/B005WH3LVG/ref=cm_sw_r_cp_apa_i_BGyRDbSSZ88E8
https://www.amazon.com/Rust-Oleum-248919-Automotive-11-Ounce-Fabric/dp/B003CT4ASE
This will help:
http://www.amazon.com/Krylon-1000-Premium-Metallic-Spray/dp/B000BZX3H6
I used this paint pack: https://www.amazon.com/dp/B009ROI59I/ref=cm_sw_r_cp_api_i_.aEWCbCDEW3EA
Cut up one of these for pattern: https://www.amazon.com/dp/B007K63U8Q/ref=cm_sw_r_cp_api_i_7bEWCbEAD11GB
I said it before but I’d practice on mags first to get the pattern down, I did I pretty shit job on the first gun I painted cause I didn’t practice it.
I would spray it with cheap bedliner
make some chalkboards and have plenty of colored chalks.
linkin logs are way more fun than makes any sense, and very low mess. hurts less to step on than lego, and can be used as fuel in case of emergency.
Honestly, you already know what you could have done that you didn't. That said, they're pretty good for a first timer. If you're going to paint Reaper minis, priming them is key. I have used the Master Series paints that are designed tip work with the Bones line, and even though Reaper says you don't need to prime, you do. I use their black paint on primer, and I have good results. I wish I had a decent camera to take pics of my work.
Enjoy the hobby, and nothing else. Your free time and money just found a new place to go...
**oh! Nearly forgot. If you decide to go the route of spray on primer, I've used with great results, Krylon primer. Buy it local, it's cheap.
This would be the one!
A long time ago, my boss in the C suite wanted something similar - termination of signal propagation for a sensitive use-case.
https://www.home-biology.com/electromagnetic-shielding-guide/how-to-shield-your-house-from-eleectromagnetic-fields
http://www.lessemf.com/fabric.html
https://www.amazon.com/YSHIELD-EMF-Shielding-Paint-HSF54/dp/B007A0RTES
https://www.mgchemicals.com/products/emi-and-rfi-shielding/
http://www.jemic.com/
You'll likely need to investigate above to determine which are, or aren't snake oil.
Well, look. There's a simple and complex answer to your question:
The simple answer is: for a white stormtrooper, you want white primer. This is what is highly regarded: https://www.amazon.com/Tamiya-USA-TAM87044-Surface-Primer/dp/B0000WS01E
After that, you'd have him paint it white (using the vallejo paint), and black, or whatever color the joints are. You can also use gray as the primer, Tamiya makes it in that color, but for obvious reasons, it makes painting the white final layer harder.
Then I'd gloss coat it, in this case, using a wide brush and this stuff:
https://www.amazon.com/Johnson-Pledge-Floor-Multi-Surface-Finish/dp/B000ARPH4C/ref=sr_1_3_a_it?ie=UTF8&qid=1525394737&sr=8-3&keywords=pledge+multi+surface+floor+care
I recommend this stuff because it's one of the few gloss coatings that can be brush painted with relative ease. If there are decals, I'd apply them after the gloss coat dries.
Then, I'd apply the wash. There are several varieties, including prepacked versions:
Tamiya Panel Liner (But you'd need some kind of enamel or whatever thinner they recommend to remove the excess)
Or, more typical for many is an enamel wash (I think Mig AMMO makes those), or oil paint with turpenoid.
If you care about non-toxic (relatively speaking), watercolors will work in a pinch, but like I said, put a drop of alcohol or soap to break surface tension. It's not as good as oil paints for most people.
And then you can spray it with a final coat of matte varnish. I have an airbrush, so I'm partial to this stuff:
https://www.amazon.com/Acrylic-Bottle-Testors-Testor-Corp/dp/B004I0EVK8
Again, it's one of the flat coatings that can be brush painted rather than sprayed, if you know what you're doing.
The way to think about primer and matte/gloss coating is this :
All three come in spray and non-spray varieties. Future however is a household product with no spray version.
I appreciate the feedback so far!
I'm still doing some research. When I went to JoAnn's earlier I explained the situation and had someone recommend the following:
https://www.amazon.com/Environmental-Technology-16-Ounce-Pour-Finish/dp/B000LNS9CW
I thought that what's essentially a varnish of sorts was an odd idea, but bought the box as I had a 60% off coupon, and figured I could return it if I end up not using it.
Does anyone have any experience using a product like this? Would it do the job?
I got back into painting after about a 25 year hiatus, and got the following:
this primer,
https://www.amazon.com/gp/product/B002BWORRW/ref=ppx_yo_dt_b_asin_title_o08_s00?ie=UTF8&psc=1
this paint kit
https://www.amazon.com/gp/product/B07DWMTNDJ/ref=ppx_yo_dt_b_asin_title_o01_s00?ie=UTF8&psc=1
And this wash:
https://www.amazon.com/gp/product/B0189BIERC/ref=ppx_yo_dt_b_asin_title_o00_s00?ie=UTF8&psc=1
Really happy with all these products.
I used this Rust-Oleum Clear Coat . I know it's cheap but this paint has been drying a long time.
Yeah, I couldn't be much happier with how it turned out. Watch the spray tip on the Montana paint, mine gummed up a bit and caused a little blob on the right controller (which was my first/test one).
Primer: https://www.amazon.com/gp/product/B00KZ6LLZW/ref=oh_aui_detailpage_o01_s00?ie=UTF8&psc=1
Base:
https://www.amazon.com/gp/product/B005JZINNC/ref=oh_aui_search_detailpage?ie=UTF8&psc=1
Seal:
https://www.amazon.com/gp/product/B000VKY3I4/ref=oh_aui_detailpage_o03_s00?ie=UTF8&psc=1
If I do ABS (which I doubt...PETG is fine for what I do) I will vent the fan through the wall into the garage as well as sealing up the cut outs. The fan sucks out the back. For the paint I went with spray cans...2 of this https://smile.amazon.com/gp/product/B001B73WCO/ref=oh_aui_detailpage_o04_s01?ie=UTF8&psc=1 and three of these https://smile.amazon.com/gp/product/B00KZ6LYFO/ref=oh_aui_detailpage_o04_s01?ie=UTF8&psc=1. It is more of a satin finish than semi gloss which I prefer and I lightly sanded between coats. Thanks for the compliment and happy printing!
If you can actually broadcast a signal strong enough to make cell phones useless inside the building then it'll be strong enough to cause problems outside the building. If you shield the building sufficiently to where this isn't the case then you don't need the jammer anymore in the first place. The proper way to make RF denied environments is with shielding like RF blocking paint. There also isn't some exemption to the FCC regulations for prisons. An easier method of fixing this would be cooperation from cell carriers or something like a stingray.
There isn't a way to do it without having seam lines, and you, being the one that made it, will always see them. Some people may not notice them for a while, but upon close inspection they will become obvious.
All props that I have made have peen printed, assembled, finished, in that order. If you want to keep the stainless steel pla visible, there isn't really anything I can think to do. In terms of part assembly I trust nothing but Krazy Glue. It dries in about 10 seconds, and another 30 seconds or so and the bond is stronger than the later bonds of PETG, which is known for its layer strength. Absolute nightmare if you mess up. If you do mess up, or are not confident on the seam, separate immediately.
If you're looking to go the painting route then I would assemble it, fill the gaps with some Bondo. Wait for it to dry, sand it flush, use some Filler Primer, then spray paint it. Once painted, cover in a Clear Coat so the paint doesn't rub off.
If you have any more questions feel free to ask and I'll get back to you.
Some sort of metallic spray paint might do it. You can't re-shine it, it's just a thin fake finish.
http://www.amazon.com/Krylon-1000-Premium-Metallic-Spray/dp/B000BZX3H6/ref=pd_sim_hi_4
will review, thanks
http://www.amazon.com/gp/product/B003CT4ASE
i think my "vinyl" is not really vinyl,
just some sort of leather texture painted cushion.