Best household painting supplies & tools according to redditors
We found 988 Reddit comments discussing the best household painting supplies & tools. We ranked the 520 resulting products by number of redditors who mentioned them. Here are the top 20.


As a someone who detail cars.. This WILL scratch the shit out of your clear coat, especially if there is a lot of snow on the tarp as you drag it off. I wouldn't suggest this to anyone who cares about their cars appearance, if you drive a beater tho.. Have at it.
Edit: A lot of people are making suggestions about if they can use this or that instead to avoid scratches, so I'll just give my best advice. Winter is tough on cars in many regards, so your car and it's paint is going to take a bit of a beating no matter what. The most important thing you can do to care for your car in snowy climates (besides regular maintenance) is to wash it frequently, and when you go through a car wash pay the extra buck or two to get the under carriage. Salt and rust is far more damaging to a car then some scratches so that's first (Note: Go to reputable car wash to minimize scratches) . Honestly you're going to get scratches no matter what you do, so all you can do is try your best to minimize them. Using a tarp is a bad idea because as you remove it will drag the dirt and grim that's on your car along the paint. If there is snow on the tarp it will add weight digging into the paint even further. General purpose tarps are also harder then your paint and by itself could causing nasty swirls and scratches. If you'd like to use a cover use one that is designed for cars, they're typically made of a softer materiel that causes less scratches, but still remove the snow prior to trying to pull it off.. this defeats the purpose of this LPT tho. The fastest way to remove snow from your car with doing the least damage is to use regular snow brush or brum. They will cause some light scratching as anything would, but it will be significantly less then a tarp and you might not even notice them. If you want you can even put your wipers up if you can to make clearing your window easier. Best scenario is to garage the car when you can or use something like a leaf blower to blow the snow off, but that's not always possible/practical..and in all honesty a bit overboard for most cars. Also if you own a black car..your're screwed swirls and scratches are the bane of glossy black paint.
Third edit: Get your car waxed, if your cars paint is properly maintained (i.e wash polish & Wax etc) the snow/water will bead up and slide of easier reducing the amount of scratches.
Second edit: Buy a shitty winter beater(that runs decent) slap some winter tires on there and not give 2 fucks about it.
Gold for me!? Haha, why thank you generous person.
We used to order it in the 55 gallon drums at my old shop.
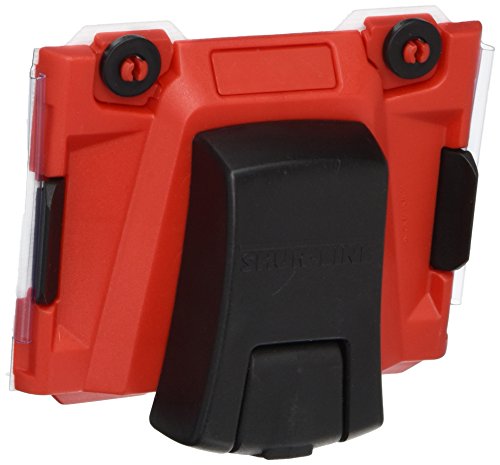
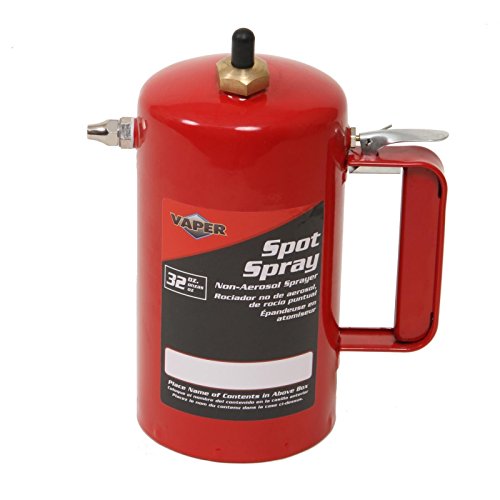
Pump some in to a SureShot container, pressurize it with the air chuck and you're good to go!
https://www.amazon.com/Vaper-19419-Spray-Non-Aerosol-Sprayer/dp/B0035FH906/ref=sr_1_1?ie=UTF8&qid=1522672918&sr=8-1&keywords=sureshot
If you want that specific bag to have water resistance, you can add a hydrophobic coating to it with this [Rust-Oleum spray.](Rust-Oleum 278146 NeverWet 11-Ounce Outdoor Fabric Spray, Clear https://www.amazon.com/dp/B00KRHF8E4/ref=cm_sw_r_cp_api_AuQ-zbEF5DKD1) Then it'll be perfect for everything but extended submersion.
There's also a multipurpose variant in [a can.](Rust Oleum 274232 Never Wet Multi Purpose Kit https://www.amazon.com/dp/B00DNQBFAW/ref=cm_sw_r_cp_api_EvQ-zbMNGXTYW)
Hydrophobic coatings have been a thing for a while. You can do the same thing for much, much cheaper.
I LOVE mine (imposter model apparently). a fabricator buddy turned me onto them. We both keep acetone in them for cleaning. So nice, so, so nice. And a decent price for them too, not out of reach for an amateur
https://www.amazon.com/gp/product/B0035FH906/ref=ppx_yo_dt_b_search_asin_title?ie=UTF8&psc=1
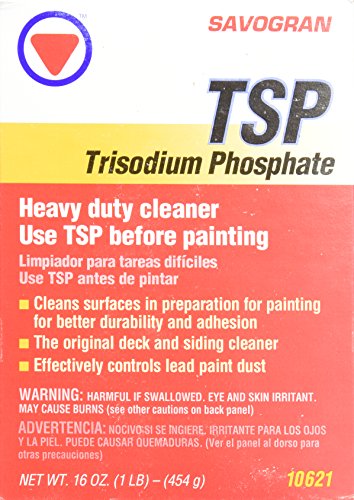
TSP or trisodium phosphate Is the magic solution
http://www.amazon.com/Savogran-10621-Trisodium-Phosphate-16oz/dp/B0001GOGQW
I've done most of the smoothing techniques.
XTC-3D does not work on larger flat surfaces. It only makes flat surfaces wobbly uneven. It works great if you have a lot of curves. Don't expect to sand this easily. It's a pain in the ass to hand-sand with sandpaper. If you have a file, it works much better. You don't have to wait the entire day. It sets non-sticky hard in about 6 hours. Another downside of XTC is that you have limited working time. It starts to harden after 20 minutes and its hard to spread even after that.
The best method is to spray everything with filler primer spray can. Sand it light with 80 ~ 100 grit sandpaper. Anything higher is harder to sand.
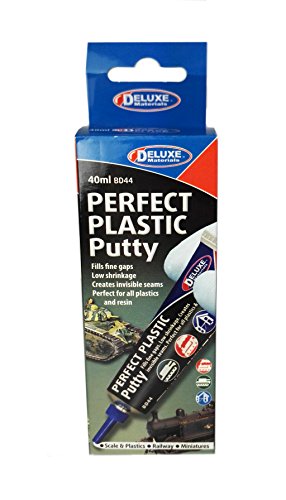
Then use this to fill gaps/uneven places: https://www.amazon.com/DELUXE-MATERIALS-DLXBD044-Perfect-Plastic/dp/B0076LAVFK
Sand with 200 grit paper. Repeat if you still have uneven places. Finish everything with 800 grit paper. It will come out so smooth you want to rub your face against it.
Best thing to do if it's been used for food and has absorbed any grease, wax, sealer, etc. is to use cabinet scrapers and try to get as much of the gunk off so that you can sand dry wood. I made the mistake of trying to sand a used BB cutting board and wasted a lot of time just gumming up the sandpaper. The cabinet scrapers would probably do a lot to minimize airborne bacteria as well.
$5.24
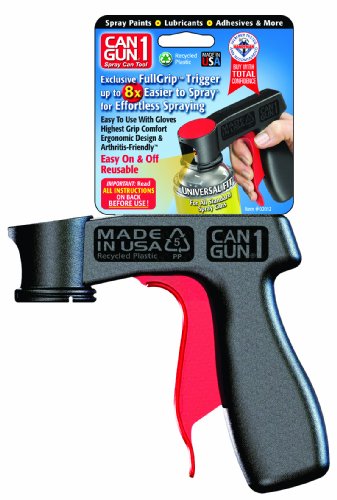
https://www.amazon.com/Can-Gun1-2012-Premium-Aerosol-Spray/dp/B002EQEE82
My scraper has a brush side, and on that same side also has a rubber like bar that I can use on my car and paint will be fine. Then of course the other end is a scraper.
Like this
A picture of the cabinets, inside and out would help greatly. I painted the cabinets in my house about 2 years ago and they are holding up great. I painted inside and out using the following method.
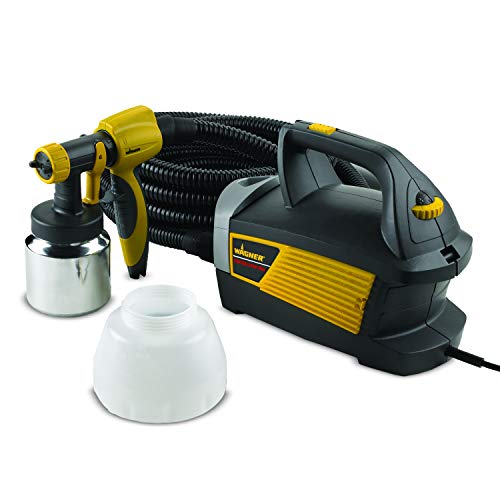
I used Zinsser's Bullseye 1-2-3 Primer, and Benjamin Moore Advanced Paint. The BM Advanced is a waterborne alkyd paint and dries hard as nails. It is modern paint designed to lay flat, and dry hard. If you take any advice, it's to use BM Advanced. It turns the finished product into a factory like finish. The Paint AND Primer were applied with a basic Wagner HVLP Sprayer. While under $100 this tool transformed my project and made painting the cabs cake. You can dial in flow and air volume with the sprayer. I had never used one before and learned very quickly. To prep, I cleaned with TSP and did a light sanding in areas that will see more wear and tear to give the paint/primer a little more bite. Do removed your doors, hardware and hinges. I replaced my old exposed hinges for Euro soft close Hinges by Blum at the same time.
Otherwise, letting them dry between coats is prob the hardest part since the sprayer really speeds things up. The BM Advanced did not need any sanding or anything between coats, its unbelievable how flat it lays / dries. BM Advanced does have a long open time! I let my finish cure, untouched, for around 1.5-2 weeks, but now load up my cabinets with plates, pots pans, sheet trays with no nicks or peeling paint what so ever. I am blown away at the results. In total, I'd say I did 3 coats of primer, and 3-4 coats of BM Advanced, applied over the duration of a week after work. Also, clean up is ALL water based, just literally run water thru the paint gun, done.
Edit: Photos Yo!
if you need to clean up flat top surfaces try a small cabinet scraper like this
https://www.amazon.com/Crown-376-Cabinet-Scraper-Gooseneck/dp/B001C06BLE/ref=sr_1_2?ie=UTF8&qid=1524097457&sr=8-2&keywords=small+cabinet+scraper
Here is a list of things that people will always need, I understand you can't stock everything as overhead is an issue with retail, and storage as well, but most of these are small enough that they can occupy the shelf space you currently have. As for the larger things, like the 2020 extrusions, you could sell them in common lengths of 500mm and 1000mm and let the customer cut them down to the size they need, or just don't carry these at all. It's not a niche item, but for a retail store like you it would be hard to store and maintain, but man, would it be nice to be able to get those locally if i needed a piece for a project instead of having to wait on mail order.
this is just a basic list, others have listed other things as well, Steppers, Belts, Pulleys, Bearings etc. If you want 3d printing as a reason for other people to go to your store, these items will satisfy the need. Just keep prices fair, I have no issue paying a bit more compared to amazon to get it today.
Add a little bit of TSP to the detergent cup every time you wash. TSP is pretty much pure phosphates. Only do this is your municipality allows phosphates in the water supply, though.
TSP on Amazon: http://www.amazon.com/Savogran-10621-Trisodium-Phosphate-16oz/dp/B0001GOGQW
Trisodium Phosphate
It's in the paint section at Lowes/Home Depot. You might find it elsewhere. I've never used it personally, but I know it has a shit-ton of uses.
wiki entry
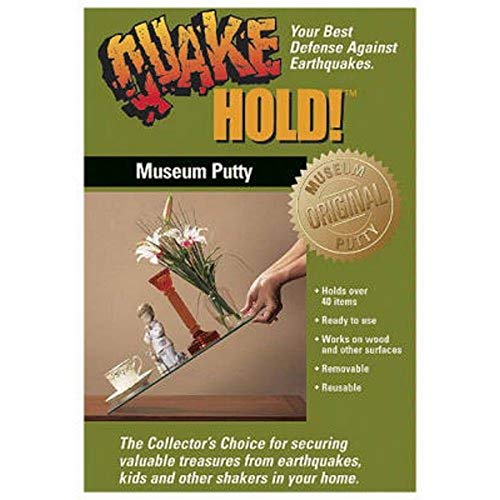
We SoCalians invest in Museum Putty. : )
https://www.amazon.com/Quakehold-88111-Museum-Putty-Neutral/dp/B0002VA9NA
Amazon, most hardware or automotive stores would have some variant. It goes by a bunch of different names. This is one example:
https://www.amazon.com/gp/product/B000TPC7HU/
Check out Never Wet. I've heard good things!
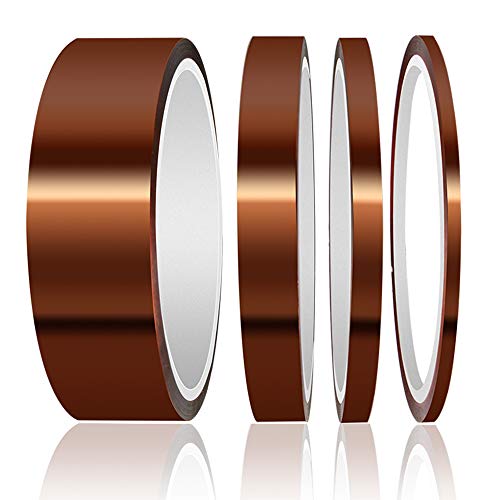
As /u/kent_eh pointed out, Kapton tape is frequently used for this because it’s heat resistant. But if you’re trying to position a large component body or a cable, you might want something more like helping hands. You could also use ceramic modeling clay (not polymer clay) if you want something that behaves more like sticky tack. It won’t be as sticky, but it’d be easily deformed to hold a part in place and won’t melt with heat.
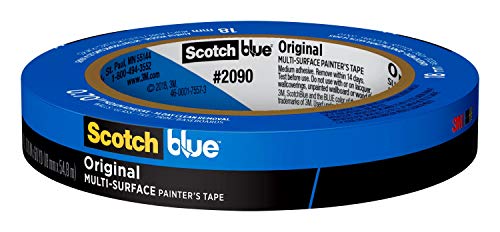
https://www.amazon.com/ScotchBlue-Painters-Multi-Use-70-Inch-60-Yard/dp/B00004Z4BB
I have a very curious cat, and I also have some sentimental, breakable items that I'd like to keep in once piece, but also have out on shelves. I invested in some museum putty, and every single thing in my home that isn't food has survived his antics. https://www.amazon.com/Quakehold-88111-Museum-Putty-Neutral/dp/B0002VA9NA/ref=sr_1_1?ie=UTF8&qid=1493008406&sr=8-1&keywords=quakehold
Not glue, museum putty.
Some kind of museum putty or blu tack?
museum putty helps with this
Must be this stuff.
Bam - nuclear duct tape.
"* Ideal for applications in the shipbuilding, nuclear power plant and stainless steel industries"
I'm an automotive test engineer at a desert proving ground, where ambient temperatures can reach 115F and vehicle interior temperatures can climb well over 200F in localized areas, and I've always counted on 3M Nuclear Grade Duct Tape. It's certainly not a laboratory-grade solution, and I'm sure it doesn't offer the best precision, but it gets the job done in the ranges I need it for, and I can leave it on for several months and still remove it cleanly. I just take a 2x2 inch square of tape, slap it behind the thermocouple, and plug it in. Sticks to glass no problem, and has no trouble holding the weight of the thermocouple wire if I need it to.
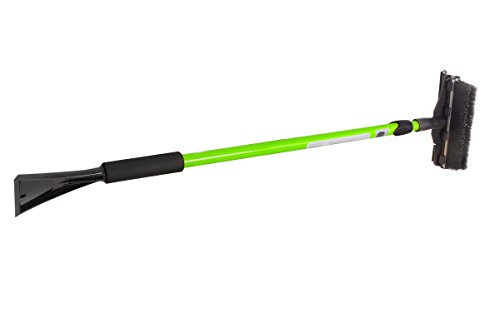
Yup, totally agree. They seem like a good idea, until that bitch is frozen to the car and you have to chip it out with the ice scraper anyway. More often than not if you have to use the cover the rest of the car will be covered and you're back to using the scraper/brush again. The best thing you can get for you car in the winter is a solid scraper with a nice extender like this guy.
I have found that getting a spray can trigger makes a huge difference for me. It changes the angle at which I hold the can to something more natural for me and the trigger makes pressing the spray button smoother and more consistent.
3m VHB 5952 is what you want
Unfortunately everything I find comes on rolls with far more than I know what to do with. On the plus side you shouldn't run out any time soon.
If you have any questions about getting the Photon going, give me a holler. I made all of the regular mistakes, so can probably help.
I will say the following:
Leveling the plate is the most important thing you can do. My process is a lot like the generic instructions, but I take it a step farther: When I level the very first time, I loosen the top screw, and the four build plate screws as well. I then use the paper method (Get a regular piece of printer paper under the plate and gently .01mm lower the plate from 0 until the paper can be pulled out, but not pushed back in. I then hold the plate in my hand and don't let it move as I tighten down the 4 plate screws in an X formation. I then check the paper, and usually have to lower it a few .01 mm at a time until it's back to being tight. Then I hold the plate again by hand and tighten the center screw. Finally, I hold the square head and tighten down a quarter turn or so more to really lock it in place. At that point, I try to leave it alone until it gets moved, or prints get weird. I haven't had to re-level this since then.
For the Thumb Drive: Seriously, replace the one it comes with. I fixed a lot of problems by spending $10 at Frys. Resist temptation to get a large drive. You don't need it, and it can mess up on the Photon. I got a 16GB Sony, and it works really well. I still have occasional issues where I've ejected the drive, and will have to put it back in the computer, and re-eject. This happens about 1/6 or so times. A little irritating, but not a huge issue.
Download Chitubox. Use it. Forget the included Photon Slicer, which is simply an older version of Chitubox, and is inferior in every way.
Don't be afraid to use 3rd party resin. Like I said, I use Elegoo grey. It's a little thinner, but that doesn't seem to give me any less in the way of prints, but it does make it a little easier to get off of the build plate.
Invest in some plastic putty knives. By some, I mean a lot. They're about $1 each at Home Depot, or you can buy in bulk from Amaozn. I also sometimes use a [plastic razor scraper ] (https://www.amazon.com/gp/product/B076BBW1WM/ref=ppx_yo_dt_b_asin_title_o05__o00_s00?ie=UTF8&psc=1), but honestly, the plastic putty knives work great. I never use metal on the build plate.
Stir your resin between prints.
Don't overfill resin.
Inspect your print basin every few days for leaks. A leak onto your LED screen is a bear to get off.
Buy a big pack of nitrile gloves, a bunch of 99% IPA, and some jars or bins where you can rinse off resin.
You can buy a $11 UV nail curing station from Amazon that'll work beautifully to cure your prints. It actually works great, and there's no real reason to buy something more expensive, except for convenience.
Anyway, I could go on, but this is a basic overview based on all of the mistakes I've made, and hopefully learned from!
Edit : thanks for the gold!
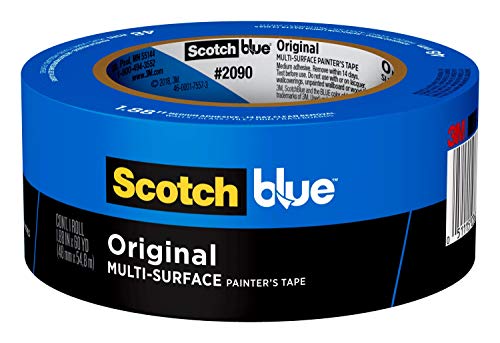
This stuff, aka painter's tape, for those that don't wanna click.
Edit to add - vinegar also helps remove rust, and if you're afraid steel wool will be too abrasive, use aluminum foil as your scrubber. Foil and vinegar is a long-standing rust removal tool, but use only tiny amounts of vinegar, you don't want it to drip down along the side of the pole inside the pickup.
Add'l edit to add - anything that removes the rust is going to make it go somewhere - I read that having a vacuum running while you do it is a good precaution to keep the tiny rusty bits being removed from getting everywhere.
You can still buy TSP and add it yourself if you hate the environment but love clean dishes: https://www.amazon.com/Savogran-10621-Trisodium-Phosphate-16oz/dp/B0001GOGQW/ref=cm_cr_arp_d_product_top?ie=UTF8
You can find it at home improvement stores as well, but make sure you don't buy the useless TSP-PF (phosphate free) in the green box. I bought mine for homebrew cleaning but I don't remember why, maybe for disgusting bottles.
Supposedly phosphates may not be responsible for the algae bloom issue.
Meta-hobby! I've only been back into collecting for about 3 months. I have about 60 at the moment.
My washing method (3rd time I posted this today...I should probably just make it a post :) is as follows:
The technique:
Pan 1 has the water, tergikleen (just a few drops) and rubber washers. Pan 2 has clean water for rinsing
I fill pan 1 just deep enough to cover the rubber pads and the top of a record when placed in.
I then place in a record, submerge it, then take the paint pad and do a few laps in one direction, then a few in the other. The rubber pads allow you to wash the record right in the pan without hurting the underside of the record. It also prevents the LP from 'sticking' to the pan due to suction.
Flip the record over, repeat.
Give it a bath in the rinse water.
Dry with the towels.
Prop up on a shelf to finish air drying.
Works great.
In fact the first search result for museum putty is called Quakehold so there you go.
Instead of PB Blaster, try ATF mixed with acetone. I used that while doing mine and it made the work much easier than PB Blaster did.
I just pour the mix in [This] (https://www.amazon.com/gp/product/B0035FH906/ref=oh_aui_detailpage_o09_s00?ie=UTF8&psc=1) and shake before I spray. It really helps with really tight and stuck on bolts.
Here you go. I apply these on my 350's, and with any other nice shoe I have. Perfect if you wanna resell like new, or just be rest assured the bottoms will be clean.
edit: Here's a youtube video showing how to apply.
Search for "3M VHB Black". You can get a roll and cut it to size.
Example https://www.amazon.com/3M-Scotch-5952-VHB-Tape/dp/B01BU7038A/
This is more than you'd need, but its general purpose adhesive that will come in handy for other purposes. This is the same adhesive used on gopros mounts.
If you don't wanna spend so much, get this and trim it a bit. https://www.amazon.com/Adhesive-Pads-Gopro-Helmet-Mount/dp/B00EFTP2YQ/
3M VHB tape. This stuff will stick to anything and will go down to sub zero temps. Make sure everything is dry when applying and prep all the surfaces that the VHB tape sticks to with 3M 94 tape primer.
​
https://www.amazon.com/3M-Scotch-5952-VHB-Tape/dp/B01BU7038A/ref=sr_1_4?ie=UTF8&qid=1549918879&sr=8-4&keywords=3M+VHB+tape
​
https://www.amazon.com/3M-Primer-94-02oz-Vinyl/dp/B005LDKTV6/ref=sr_1_1_sspa?ie=UTF8&qid=1549916087&sr=8-1-spons&keywords=3M+94+primer&psc=1
​
This is more for anyone else that needs it, but this tape has a size that fits it about perfect. Also while I believe pin #3 is the only one required for it to work, pins 1 and 2 can also be covered without causing any issues.
You want plastic razor blades.
https://www.amazon.com/FOSHIO-Scrapers-Contoured-Refillable-Application/dp/B076BBW1WM/ref=sr_1_2_sspa?keywords=plastic+razor+blade&qid=1568816210&sr=8-2-spons&psc=1&spLa=ZW5jcnlwdGVkUXVhbGlmaWVyPUEzSlc0M0NQTkkzSFJDJmVuY3J5cHRlZElkPUEwNjI3NDg5M09TSkVBOTJJV1pIOSZlbmNyeXB0ZWRBZElkPUEwNjM2MzYwM0xLREs0T05IVjhJUCZ3aWRnZXROYW1lPXNwX2F0ZiZhY3Rpb249Y2xpY2tSZWRpcmVjdCZkb05vdExvZ0NsaWNrPXRydWU=
Definitely tape the fretboard off with painter's tape! It's specifically designed to seal/stick well and release cleanly/easily. Aside from using it to tape off guitar necks, as a former roller derby ref we used it to tape down tracks on top of expensive roller skating rinks floors. Always came up easily!
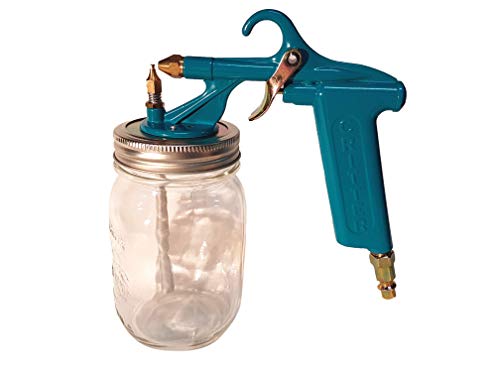
We've done a bunch of furniture with latex paint with this guy. I think I also add some Floetrol the paint to help it go on smoothly. And you need an air compressor.
https://smile.amazon.com/Critter-Spray-Products-22032-Siphon/dp/B00006FRPJ/ref=smi_www_rco2_go_smi_g2609328962?_encoding=UTF8&%2AVersion%2A=1&%2Aentries%2A=0&ie=UTF8
https://www.walmart.com/ip/Flood-Floetrol-Latex-Paint-Conditioner/21987608?wmlspartner=wlpa&selectedSellerId=1194&adid=22222222227016818525&wl0=&wl1=g&wl2=c&wl3=51806713511&wl4=pla-83209389911&wl5=9003439&wl6=&wl7=&wl8=&wl9=pla&wl10=112550058&wl11=online&wl12=21987608&wl13=&veh=sem
One day I'll bite the bullet and upgrade! Right now I'm using this little guy: https://www.amazon.com/Critter-Spray-Products-22032-Siphon/dp/B00006FRPJ
Which works decent enough but adjusting the pressure takes some patience.
I painted my stairwell this weekend and used this. http://www.amazon.com/gp/aw/d/B0001MQI9E. worked great.
Edit: I also used a 10 or 12 ft extension.
https://www.amazon.com/Quakehold-88111-Museum-Putty-Neutral/dp/B0002VA9NA
Stock up! 1 package was good for me for about 100 figures. I'd post my display but my friends could identify me from it and I'm a horrible nasty person on reddit.
https://www.amazon.com/Quakehold-88111-Museum-Putty-Neutral/dp/B0002VA9NA Makes a huge difference... not sure if it would hurt the tea things though
Fellow southern Californian. This product might be useful:
Quakehold! 88111 Museum Putty Neutral https://www.amazon.com/dp/B0002VA9NA/ref=cm_sw_r_cp_apa_NqvVAb0CS82N0
Mobocrat707, meet Quakehold. Quakehold, meet Mobocrat 707
Don't forget some nuclear-grade duct tape to patch any holes.
This is the stuff I use:
http://www.amazon.com/ISC-Racerstape-com-Paint-surface-guard/dp/B000TPC7HU?
I live in an area with heavy snowfall and prefer this type of brush since it removes a lot of snow quickly. Not necessarily recommending that specific model- mine is one my dad bought at some random auto parts store.
I painted 4 dozen mason jars. I used chalk board spray paint it worked great. 2 coats was best. Also one of these things helps a lot.
http://www.bombingscience.com/graffiti-shop.htm
I had ordered a grab bag of tips from them awhile back on a kick to try my hand at painting with spray cans. When I went to dip I just found one that fit and sprayed fat.
Handle: http://www.amazon.com/dp/B002EQEE82/ref=wl_it_dp_o_pd_nS_ttl?_encoding=UTF8&colid=2BEIJEESJKGKN&coliid=ILZ4R4YQQXXPM
http://www.amazon.com/Wagner-0518080-Control-Spray-Sprayer/dp/B003PGQI48/ref=sr_1_1?s=hi&ie=UTF8&qid=1421887062&sr=1-1&keywords=airless+paint+sprayer&pebp=1421887075490&peasin=B003PGQI48
At this point there's not that much I would do unless you feel like repainting it, and you already decaled it. Unless you have spares, it's not worthwhile. Just learn from it.
I might be wrong, but are you from the UK? A manufacturer in your country makes a nice putty, called Perfect Plastic Putty, by Deluxe Materials. I just recently bought some of theirs and it works quite nicely. While wet, it can be cleaned with water, and is a good filler.
PVA can be used as a filler in small quantities; it might work in this case.
In the future though, you should putty these things and test-fit before you paint, so you can solve the problems before it starts.
Other fillers that I have used include Squadron White Putty, which you can smooth out with nail polish remover (which must contain acetone), tamiya filler, which you have to sand, and Mr. Surfacer 500, which is more like thick primer. (It wouldn't work for what you're trying to do).
In this case, if you had to do something, I'd use white glue and slowly build up the seam. However, white glue doesn't sand well either, so you're unlikely to get it to blend without sanding it, destroying the finish, and removing the decals.
In the future, fill gaps prior to painting. It's easier and shows you what you need to work on.
And when i say "excess" plastic, that's not always flash or residue from the molding process, or the attachment points on the sprues. Sometimes, kit parts are too thick or something, and I shave the inside of the parts so that it will mate with the part on the model better.
The putty I mentioned is here:
http://www.amazon.co.uk/Deluxe-Materials-Perfect-Plastic-Putty/dp/B0076LAVFK/ref=sr_1_1?ie=UTF8&qid=1394322259&sr=8-1&keywords=perfect+plastic+putty
Also, with putties, you almost always have to either clean up the seam with some kind of solvent (e.g. nail polish remover for Squadron White, or alcohol for Mr. Surfacer), or sand it to fit, unless you are so good at applying putty that you get exactly what you need exactly where you need it. I usually have to sand my stuff. To do that, cheap wet and dry sandpaper from the hardware store will do. Get one lower grit one, and a medium grit sheet, and then the finest one you can get. (The grits I use respectively are 320, 600, and 1500; I would get higher but that's what the store sells, and it costs less than a dollar per sheet). So putty is not a magic solution, you need to wet sand it afterwards to remove the excess. On older model kits with raised lines, this will obliterate the detail; the only way around this (in my experience I'm sure others have something else to say) is to tape off the areas with raised detail, and then carefully sand in the area that you don't have masked.
Also, thick superglue is also used for filling gaps, but it will craze clear parts, so don't use that here. (Recall episodes of CSI where they get the fingerprints from the drinking glass or clear object with some superglue in gaseous form? That's the same process that clouds the clear styrene if you just superglue on it.
This was recommended to me a little while ago, Perfect Plastic putty.
Best filler I've ever used, it goes on, however you want it, then you just let it dry for a few minutes to an hour or so, then you can use a damp cloth or a damp cotton swab and wipe down the excess since it cleans up with water. It's very similar to milliput, but it seems finer to be and its easier to use since it's just a paste, not two solids you have to mix.
I find this type of putty is the absolute best kind, because it requires no sanding at all to clean up, meaning you won't destroy panel lines or any raised details.
here ya go
Oops my bad I’m at work so just skimming. No me and my roommate work in body shops and we each got one from our shops lol. We use plastic blades to peel off decals and bumper stickers and whatnot.
FOSHIO 2PCS Plastic Razor Scrapers Knife with Contoured Grip + 100 PCS 1.5 inch Refillable Double Edge Plastic Razor Blades Ideal for Auto Window Tint Vinyl Tool Application https://www.amazon.com/dp/B076BBW1WM/ref=cm_sw_r_cp_api_i_T0GjDb9ZB50AX
>duct-tape or similar items at the hardware store.
No! It'll DESTROY the surface. Use this stuff
It appears to be painter's tape which doesn't leave a residue.
http://imgur.com/a/EMEaU
This is a christmas light I printed as a gift for my Grandma on a Rostock V2 Max.
I used cheap white PLA from bgastore on ebay (link later).
I designed the file in Autodesk Inventor 2017 Student Version and in Meshmixer. I also used Meshmixer to create the custom supports for the model. http://www.thingiverse.com/thing:1914863
The model was printed on Blue Tape with no glue or bed heat.
Support removal took around 3 hours, I started with the middle, then went around the text and then finished up at the top of the model. I used needle nose pliers and wire cutters I would not recommend printing this unless you have both.
Afterwards I used acrylic paint to paint over the text. The surface was rough if you’re planning on painting this model I would recommend sanding it first.
The print can be kept as a christmas tree ornament or as a light. It’s possible cut a hole in it to fit a large lightbulb in or order a small one off of amazon. Make sure the bulb doesn’t touch the sides of the print as it can melt the plastic.
Cura Settings:
Layer Height: .3mm
Line Width: .5mm
Wall Line Width: 1mm
Top/Bottom Thickness: 2mm
Infil: solid
Print temp : 205
Build Plate: 0
Retraction speed: 50mm/s
Extra Prime amount: .1mm
Minimum Extrusion Distance Window: 6.5mm
Speed: 30mm/s
Wall Speed: 15mm/s
Initial Layer Speed: 8mm/s
Combing mode: all
Z hop when travelling: 2mm
Cooling: fan 100%
No support, the meshmixer supports are enough
Brim: 1mm
Link to plastic:
http://www.ebay.com/itm/like/391087201228?lpid=82&chn=ps&ul_ref=http%253A%252F%252Frover.ebay.com%252Frover%252F1%252F711-117182-37290-0%252F2%253Fmtid%253D1588%2526kwid%253D1%2526crlp%253D145795696709_324272%2526itemid%253D391087201228%2526targetid%253D265536273303%2526rpc%253D0.08%2526rpc_upld_id%253D91336%2526device%253Dm%2526mpre%253Dhttp%25253A%25252F%25252Fwww.ebay.com%25252Fulk%25252Fitm%25252Flike%25252F391087201228%25253Flpid%25253D82%252526chn%25253Dps%2526adtype%253Dpla%2526googleloc%253D9005779%2526poi%253D%2526campaignid%253D672333784%2526adgroupid%253D29658622530%2526rlsatarget%253Dpla-265536273303%2526gclid%253DCj0KEQiA08rBBRDUn4qproqwzYMBEiQAqpzns6jXyE4PiaoJpcMmUbU6nRO9XAd2FxXUSDttHbQfGFAaAjGt8P8HAQ%2526srcrot%253D711-117182-37290-0%2526rvr_id%253D1127005495389&ul_noapp=true
Tape:
https://www.amazon.com/ScotchBlue-Painters-Multi-Use-70-Inch-60-Yard/dp/B00004Z4BB
https://www.amazon.com/3M-ScotchBlue-Painters-Tape-Multi-Surfaces/dp/B00004Z4BB?th=1
This stuff is an absolute godsend for dorm walls
Actually all I ever used is this:
3M ScotchBlue 2090-2A Ruban Adhésif de Masquage Peinture 48mm x 55 m https://www.amazon.fr/dp/B00004Z4DU/ref=cm_sw_r_cp_api_i_YA8YDbX87P7MH
It’s cheaper, durable, you can do whatever masking with it and cut it to shapes, never had any issue whatsoever with deteriorating paint underneath.
https://i.imgur.com/CT68Clh.jpg
Also i don’t have to bother maintaining stock of vmultiple rolls of varying width. Give it a try you won’t be disappointed
so im looking to get into 3d Printing, and unless someone has some better option, im going with the MP Select Mini.
My question is on the other things i need. Here is the list of the things im looking to buy along with the printer:
I have a set of exacto knives and a screw bit set. Is there anything else im missing?
Lots of good reviews on the Ryobi brad nailer, and cordless/(no air hose) is certainly very appealing.
Pneumatic nailers are still a little smaller than the cordless ones, so a little better for getting into tight corners when doing baseboard (inside corners under cabinet toe kicks, etc).
The pneumatic tools are also just so inexpensive once you have the compressor. I thought I mainly needed a brad nailer, but the 1/4" stapler has been very handy as well. Just replaced the carpeting on the cat tree, and the stapler made it a breeze. The Harbor Freight 2-in-1 nailer/stapler has poor reviews so I'd avoid it, but the separate tools have been great. I had a bad experience with the HF staples, but Dewalt staples in the HF stapler have worked well.
18ga brad nails are fine for most trim, but I feel like they are just barely enough for baseboards. I just got a 16ga nailer and I like them much better for baseboard. I feel like 18ga is perfect for light trim up to 1/4" or 3/8" thick, and 16ga is better for 1/2" or thicker, especially if it is dense like MDF.
I really like Flexzilla air hose; very soft and flexible with no kinking. Also put a swivel connector on the guns.
Pancake compressor will definitely not be enough for an HVLP sprayer. Would work for an airbrush, or possibly a small sprayer like the Critter spray gun.
Compressor can be pretty noisy and annoying indoors. Either look at the quiet ones like California Air Tools or HF's new quiet ones, or just buy 100ft of hose so you can leave the compressor outside while you work inside.
Get a box of TSP. Mix according to directions, if you have sensitive skin, feel free to wear gloves, I never bother and it has had no impact on my skin. Wash the walls down good with that before painting, it'll remove grime, and the shine from previous coats. Don't forget to let it dry completely before painting. Unless you are somewhere very humid a half hour is sufficient.
This will allow your new paint to adhere to the wall much better.
This is most likely a problem with the soap. Since they took phosphates out of our dishwasher and laundry detergents, these products have been more likely to leave a residue. Using even less soap is one way to go, or you could buy some trisodium phosphate online and mix it in with your soap. My parents had been complaining about their dishwasher leaving a residue on all the dishes, so I bought this. I mixed it into their detergent such that it was 6% Na3PO4 by mass. They no longer have any residue problems.
It's worth mentioning that they took phosphates out of our detergent because they contribute to algal blooms when they make their way into our lakes or rivers. Take that as you will.
TPS also works well as a degreaser.
This tool helped a lot for edging in our house. We didn't even have to tape for it. Just kept a damp rag on hand for quickly wiping up mistakes.
It does need an actual hard edge to work well though. If your baseboards end in a soft curvy finish, you'll probably still want to tape them.
Hello!!! [This] (http://www.amazon.com/Shur-Line-500-Premium-Paint-Edger/dp/B0001MQI9E/ref=sr_1_1?ie=UTF8&qid=1369052429&sr=8-1&keywords=paint+corner) is the BEST thing I bought when I was painting. If you're going to do a lot of painting... I highly recommend!
Museum putty:
http://www.amazon.com/Quakehold-88111-Museum-Putty-Neutral/dp/B0002VA9NA
I've always had good luck with [Earthquake Putty] (https://www.amazon.co.uk/Quakehold-Earthquake-Preferred-product-stabilizing/dp/B0002VA9NA/ref=sr_1_1?ie=UTF8&qid=1467150201&sr=8-1&keywords=earthquake+putty) It seems to hold a bit better than the blue stuff. Maybe you can pair it with something like [this] (https://www.amazon.co.uk/Newest-Colorful-Multipurpose-Organizer-Smartphone/dp/B016KF3M44/ref=sr_1_7?s=shoes&ie=UTF8&qid=1467150308&sr=8-7&keywords=cable+tidy) for the actual cables to run through.
I'd actually recommend Museum Putty. It doesn't leave a residue like standard blue sticky tack and it'll provide just enough hold to keep components from blowing away. Additionally, it won't obstruct the front of the components.
We use it to prevent cat-lateral damage, but if you kept a slab of this at the table within easy reach I think it would serve you well.
If you don't want to use adhesives, museum putty works too. https://www.amazon.com/Quakehold-88111-Museum-Putty-Neutral/dp/B0002VA9NA
https://smile.amazon.com/Quakehold-88111-Museum-Putty-Neutral/dp/B0002VA9NA/ref=sr_1_3?crid=3GSDWI8M67Q2R&keywords=earthquake+hold+museum+putty&qid=1557850809&s=gateway&sprefix=museum+earth%2Caps%2C154&sr=8-3
As an out of box collector I have come to rely on museum putty, cheap and very effective. http://www.amazon.com/Quakehold-88111-Museum-Putty-Neutral/dp/B0002VA9NA/ref=sr_1_1?ie=UTF8&qid=1457246633&sr=8-1&keywords=quake+hold
Get some Quake Hold from Home Depot
This stuff
http://www.amazon.com/Quakehold-88111-Museum-Putty-Neutral/dp/B0002VA9NA
This stuff is really nifty for keeping stuff from falling.
Quakehold! 88111 Museum Putty Neutral
https://www.amazon.com/dp/B0002VA9NA/ref=cm_sw_r_cp_api_bWTPAbWX379DW
One option is furniture securing straps. If you live somewhere prone to earthquakes, you've probably seen them before.
The same people also make special putty for securing stuff to shelves. That was very helpful for childproofing at my house.
All three are pretty sturdy actually and don't require any careful positioning. Try different surfaces as well. And if all else fails, use display putty.
Museum putty is made for this exact application.
Why not invest in some quality duct tape?
Damn, I really want some of that Nuclear Duct Tape! Too bad it's $19 a roll.
You're also going to need this.
you can use helicopter tape/racers tape to prevent that.
You can get clear 'helicopter' tape from Amazon for a reasonable price to replace that, and maybe add some to the underside of your downtube, too, if it doesn't already have it.
As an example (I've never used this - I'm not specifically recommending this brand):
https://www.amazon.com/ISC-Racers-Tape-HT2128-Transparent/dp/B000TPC7HU?ref_=fsclp_pl_dp_3
FYI helicopter tape is pretty useful for covering up areas where paint can chip from rocks, debris, and chain-slap. It’s the same stuff used to protect phone screens from wear and tear, and apparently helicopter blades. This roll is way cheaper than the made-for stuff.
Just finished taping up my new bike about 2 hours ago.
https://www.amazon.com/gp/product/B000TPC7HU/ref=oh_aui_detailpage_o01_s00?ie=UTF8&psc=1
Used that stuff. Never really bothered before other than the chain stay to protect it from chain slap but new bike is carbon and pricey. It went on easy using the soapy water method. Only real issue I have is it is glossy and the frame is matte so it is fairly obvious. I also used some 3m 2228 mastic tape in areas it would be a pita to use the other stuff and more likely to take heavy hits.
Or https://www.amazon.com/gp/product/B000TPC7HU if you don't like black ;-)
I'd also recommend taping the entire bike with it anyway because paint chips even more quickly when you bikepack haha. (Or at least, the down tube and the chainstays in addition to where the bags touch the frame)
Maybe a curved cabinet scraper?
https://www.amazon.com/Crown-376-Cabinet-Scraper-Gooseneck/dp/B001C06BLE
A sharp, fine file and burnisher will keep / make a nice sharp rolled edge on them.
welcome! if you want a regular set, i have this one and i'm very happy with the quality and performance of them.
Amazon sells these. Among other scrapers.
I'm not an expert, but if it were me, the first thing I would try is using a card scraper.
They are cheap no matter what (whether you make one or buy one), you can buy them in all kinds of different shapes from places like woodcraft or online.
I've also used putty knives (like the kind you use for dry wall) to make card scrapers. I can't personally tell a difference in the effectiveness doing it this way vs buying them (and at this point I've done it both ways).
here is an example of a set you can buy on amazon... https://www.amazon.com/Crown-376-Cabinet-Scraper-Gooseneck/dp/B001C06BLE
the curvy one would probably make the most sense for the fine work here.
basically you sharpen them with a file and a screw driver (make sure it's hard metal going all the way up the shaft like an old craftsman screwdriver or the like, also it should be round and not some weird hexagonal shape.
there are lots of videos on how to sharpen a card scraper, so you should watch them, but basically you file the edge flat across, then use the screwdriver (which should be made of harder steel than the scraper which is why this works), to turn a hook onto the edge of the steel.
Any woodworking store will carry them, probably not Home Depot or Lowe's. Amazon has them at https://www.amazon.com/Crown-376-Cabinet-Scraper-Gooseneck/dp/B001C06BLE, I think I got mine from Busy Bee in Canada.
50/50 mix of Acetone and ATF beats damn near anything. If it's really stuck, hit it with a torch first and let it sit for about 15 mins.
ATF is filled with all kinds of detergents and dispersants. The Acetone thins it down to let it flow better and help it wick into the threads. I keep it in a spray can like this and use it all the time. It's cheap as all get out too.
After that there are a lot of things to try, In no particular order.
6 point wrench and a sharp strike, like with a hammer.
6 point wrench and strong constant force.
try tightening it first, sometimes you can break the bond that way
heat the nut with a torch, and cool the bolt rapidly. I've used a can of dust off turned upside down to cool.
strike the head with a hammer.
Breaker bar with a length of pipe slid over the handle. anyway to increase your leverage.
I have a Wagner that’s very similar to the one you’re looking at and actually really like it a lot. I’m just a weekend warrior, so it works very well for me. If you plan on using this thing daily, then you can’t go cheap. Get a better sprayer. But for quick, smooth, and easy painting at a good price, you can’t beat these sprayers.
As far as clean up, I use hot water immediately after I’m done and have never had issues. You’ll need to take it apart and use a toothbrush too. You may need to clean it with diluted paint thinner every now and then, so keep some handy. And learn how to thin paints. It makes a world of a difference once you start using the correct viscosity for the paint/stain/finish you’re using.
I dunno, if you do it yourself, it can be pretty cost effective.
https://www.amazon.com/Scotchgard-Clear-Paint-Protection-60-inches/dp/B004VG6QYS
This place sells bike specific kits, and they ship to the US
Or you can buy some 3m clear film in bulk on Amazon and have some left over for repairs to the wrap.
Lay some of this clear 3M vinyl down on the roof.
Perfect Plastic Putty $13: https://www.amazon.com/Delux-Materials-BD44-Perfect-Plastic/dp/B0076LAVFK/ref=sr_1_1?ie=UTF8&qid=1496352210&sr=8-1&keywords=perfect+plastic+putty
Hobby Syringe $9: https://www.amazon.com/Delux-Materials-DLMAC8-Point-Syringe/dp/B005EP5K0Q/ref=sr_1_3?ie=UTF8&qid=1496352210&sr=8-3&keywords=perfect+plastic+putty
I use wet & dry paper starting with 400 grit, ( i print at .12 whenever possible) then 800 grit then 1000 grit, then primer and paint, i use THIS putty to fill any joins etc, i find it to be very good,
before sanding i use files a lot , a small mini file set, i use this one, id be lost without it !
Made just for that
https://www.amazon.com/DELUXE-MATERIALS-BD44-Perfect-Plastic/dp/B0076LAVFK
It's just usually called "green putty". There are several different brands. GW carries a two part putty, but it's the same as other brands, but way more expensive.
This is a two part that's really good. You can also use it to mold and sculpt parts, like purity seals and the like.
This plastic putty has a nozzle so you can control the bead.
Tamiya and Squadron both make white/green putty that's good for filling small gaps and cracks.
There are hydrophobic sprays, which might make a deck last a little longer. It will be immediately destroyed on the nose/tail when you pop off the ground, but it might slow down waterlogging.
My guess is that it wouldn't do much, but it might be worth a shot if you're desperate.
$29 for 4 ounces. Rustoleum Neverwet is only $15 for 18 ounces and does the same thing.
What about some of this stuff: http://www.amazon.com/Oleum-274232-Never-Multi-Purpose/dp/B00DNQBFAW
If you read the packaging, on the upper left it says "FROSTED CLEAR".
If you read the description of the product on their website, it states "Sprays clear and dries to a flat light haze"
The frosted hazing is normal.
Yeah nothing out there on that...thought about doing a video but too lazy X).....I used painters tape on bottom of the headlights and over the blinkers. and just sprayed the whole front fascia(using a large piece of cardboard to protect any stray spray from getting on the rest of the car)....it does kinda puddle up and drip if you put too much in any one area. Worked perfectly everywhere so i'd say you just need a nice thin coat...again not sure how long it'll last, it does seem to wipe off fairly easily as it's not permanent. Also due to all the snow on the road I couldn't use auto drive much so not a big deal...I bought this, and just used the top coat per recommendations: https://www.amazon.com/Rust-Oleum-274232-Repelling-treatment-top-coat/dp/B00DNQBFAW/ref=sr_1_4?keywords=neverwet&qid=1574971342&sr=8-4.....did a section of concrete stairs with the base and top coat that worked really well to prevent icing so i'll probably buy some more for that.
$31 on Amazon for 18oz
Amazon has it.
I used this to mount my CF spoiler on my vehicle. Outdoors in hot/cold weather, 120+MPH speeds. This shit sticks.
https://www.amazon.com/3M-Scotch-RP25-VHB-Tape/dp/B00WX1P0GS/ref=sr_1_2?ie=UTF8&qid=1469217575&sr=8-2&keywords=vhb+tape
3M RP25/GRY055 Scotch RP25 VHB Tape: 1/2" x 15 ft. https://www.amazon.com/dp/B00WX1P0GS/ref=cm_sw_r_cp_apa_i_KZmnDb1NGC7ZH
I bought this. It worked real good.
Try this 3M double-sided tape[https://www.amazon.com/dp/B00WX1P0GS/ref=psdc_228921_t2_B004BN81LC] instead of the regular electric tape. Its more flexible and strong. Just wrap up the whole cable with this and you'd be happy for couple of years.
Look for 3M Scotch 5952 VHB Tape: 1 in. x 15 ft. (Black) https://www.amazon.com/dp/B01BU7038A/ref=cm_sw_r_cp_apa_i_CgH3CbR1PN0F6
Its exactly what you want.
This is the same tape but you get twice as much material for $2 more
Ok - please - stop colorizing these things blue! Neither Meridiani Planum nor the Martian Sky look like that.
This research : http://pancam.sese.asu.edu/projects_1.html
And these images : http://pancam.sese.asu.edu/true_color.html represent the best 'color' from Opportunity.
What you're doing with this kind of colorization is making it worse. I mean -the cable right infront of the camera is wrapped in kapton tape - which is definitively orange and yet your video is editing it to be blue. I get what you're trying to do - but it's not working and is both confusing people and stoking conspiratorial nonsense.
That's an odd failure mode. Sounds like the clutch ring got stuck or something. Either way, the new one should be with you for a long time~
As for wobble, I did the tape fix, and it was dead solid for a little while, but I've since noticed the nib clicking on the inside of the barrel again while I'm writing. I'm planning to try Kapton tape instead of the clear packing tape that's currently on there, and I'm gonna try adding in an o-ring at some point once I either decide to buy 99 more than I need at that link or find a source for smaller quantities (gonna try Home Depot, they're size A005), for what that's worth.
Havent done the IPS Mod but here’s a link to where I bought my kapton tape:
https://www.amazon.com/dp/B072Z92QZ2/ref=cm_sw_r_cp_api_i_dhmYDbF7RR2PG
I just recovered from this exact same thing this week with PLA (printing something right now actually). Get the hot end hot and pick away at the material with pliers or scissors (toenail clippers work great). You don't want a jerking motion, you want a crushing/cutting motion - don't put stress/force on the printer. Use a heat gun to soften the material if you need to. DONT SHRED THE RED AND WHITE (black?) WIRES ON THE RIGHT SIDE. Destroy the Kapton tape & insulation (yellow) and order some more on amazon. You might have to take the hot end off. The real question is if you can separate the wires from the material. If you can do that everything else on the hot end is durable and you can scrape it off. Dont heat it up if you remove the thermocouple wire.
Pack of new insulation: https://www.amazon.com/gp/product/B0725WLM1N/ref=oh_aui_detailpage_o00_s00?ie=UTF8&psc=1
Kapton Tape (you'll need to fix the insulation on the hot end): https://www.amazon.com/gp/product/B072Z92QZ2/ref=oh_aui_detailpage_o01_s00?ie=UTF8&psc=1
This is after i got all the material away from teh wires. You can then unscrew the white wires and get them away from the hot end and go to town: http://imgur.com/a/zwTQR
For vat removal, I got this from an earlier recommendation. FOSHIO 2PCS Plastic Razor... https://www.amazon.com/dp/B076BBW1WM?ref=ppx_pop_mob_ap_share
Works way better than the provided scraper and it is plastic so less chance of damage than a metal one.
ScotchBlue Original Multi-Surface Painter’s Tape, .70 inch x 60 yard, 2090, 1 Roll https://www.amazon.com/dp/B00004Z4BB/ref=cm_sw_r_cp_apa_i_11y6CbB0P2K7S
I believe I have finally decided on my first Gunpla, the HG Age II Magnum and want to make sure the items I have added to my Amazon cart are ideal or not for a beginner/future use for HG and MG kits. The list is as follows:
I know that this sub has a list of tools and tutorials, but because I'm trying to budget, I was thinking no more than $100 would be ideal for me to start with. Since I'm beginning with HG models, I don't think I need a full set of Gundam markers, but if it's needed/required/highly suggested, I might pick them up as well.
So I have read and seen that top coating and panel lining are essential for MG models to make them pop. Are they just as essential for HG model kits? Looking at pictures of the Age II Magnum I'm planning on getting from Amazon, it doesn't seem to have a lot of indents for panel lining. Of course, I could be wrong and be blind as a bat. If I don't do any sort of panel lining, is it still a good idea to add a top coat regardless?
Also, how soon can one get into MG kits? I was originally going to jump straight into either the MG GM Sniper II or the RX-78-2 Ver 3.0 but after doing some research over the past few days, I've decided I'll be doing a few HG's to begin with as I haven't built model kits since I was like 7 or 8 with my dad. I'm thinking after the Age II Magnum, I was thinking about getting either the HG Double O Diver or the HG 00 Shia Qan[T]. Maybe after I complete the 3 HG's I've listed, is it possible to jump to the the GM Sniper II?
TL;DR:
There's a lot of ways to approach stenciling. I just started about 5 months ago and have a decent number of pieces completed, but i'm still learning each time I cut and paint.
I'll be happy to share a list of what I use, but just keep an open mind and remember that there's not just a single way to do this.
[] Materials []
(https://www.amazon.com/X-ACTO-Designer-Hobby-Craft-X3254/dp/B002A2QTGK/ref=sr_1_22?ie=UTF8&qid=1501185899&sr=8-22&keywords=xacto+11+knife)] [link]
[] General Tips []
Hope this is helpful, remember to share your pieces!
Try the name brand. It worked for me
https://www.amazon.com/gp/product/B00004Z4DU/ref=oh_aui_detailpage_o01_s01?ie=UTF8&psc=1
Why not get something like this and then use mason jars?
Everything is stored in glass and seals, plus you can use it to spray.
I've used Critter sprayers for over a decade. Hard to beat those things for reliability and ease of use.
Fun fact: An ingredient in Lucky Charms is trisodium phosphate, which is also used as a heavy duty cleaner.
It's a product as well as ingredient
https://www.amazon.com/dp/B0001GOGQW
In any hardware store by the paint. Or here: http://www.amazon.com/Savogran-10621-Trisodium-Phosphate-16oz/dp/B0001GOGQW/ref=sr_1_2?ie=UTF8&qid=1426228415&sr=8-2&keywords=tsp
This would be a handy add-on!
I loved this article. It was definitely bizarre and the picture is adorable. Somehow a baby anteater was born even though there was no male in the enclosure.
How bizarre
Have a great day!
Same item, but desktop site:
Shur-Line 500 Premium Paint Edger
Check out Museum Putty. It is what museums use to hold down artwork and secure it from small earthquakes. Easily removed.
https://www.amazon.com/Quakehold-88111-Museum-Putty-Neutral/dp/B0002VA9NA/ref=sr_1_1?ie=UTF8&qid=1485061346&sr=8-1&keywords=museum+putty
Also cats generally hate sticky stuff. It may not be the most attractive option but apply some double sided tape to the surfaces of the dock. They will soon learn to leave it alone. Expecting parents with cats put double sided tape on cardboard and leave it in the crib and other surfaces they don't want cats to jump on.
In addition to your aquarium, anything extremely fragile and valuable (display china plates, heirloom vases, that sorta stuff) that would fall over in a bigger quake, you may want to use Museum / Earthquake putty. http://www.amazon.com/Quakehold-88111-Museum-Putty/dp/B0002VA9NA/ref=sr_1_1?ie=UTF8&qid=1314809160&sr=8-1
Earthquake insurance is very expensive and not really worth it, especially if you are living in an apartment and have renters insurance (i.e. don't need to worry about rebuilding a home in a worst case scenario). The building codes and the 1989 Loma Prieta quake basically make it so that unless you are living on fill there is nothing to worry about your home falling down. If you're very unlucky your foundation may crack (thus the reason for earthquake insurance), but most likely even in a big quake any building you are in will at worst have cracks in the walls.
So that being said taking small, simple precautions is worth it, but no one thinks or worries about earthquakes on a daily (or even yearly) basis.
+1 for board-mounted pots, or board-mounted-something-that-also-attaches-to-the-enclosure.
But for stripboard builds I've been using a few little balls of this putty stuff on the back of the board, it works both to insulate and keep the board in place.
Quakehold! Museum Putty
My wife swears by Quake Hold putty.
Museum putty. That shit is magic.
edit: link
It's actually this stuff called "Quake Hold", which is reusable/stickable putty to hold stuff down during earthquakes and such. It's easy to ball up and manipulate to any size and it wont leave residue on the caps. Does a great job holding knick-knacks on shelves too =)
Quakehold! 88111 Museum Putty Neutral
https://www.amazon.com/gp/product/B0002VA9NA/ref=oh_aui_detailpage_o01_s00?ie=UTF8&psc=1
Something like this should be fine.
https://www.amazon.com/gp/product/B0002VA9NA/ref=ppx_yo_dt_b_search_asin_title?ie=UTF8&psc=1
You can also use the cheaper blue sticky tacky for posters, I guess, but I haven't tried that.
I prefer Nuclear Duct Tape.
10 rolls of this might reduce the noise to an acceptable level.
https://www.amazon.com/3M-Performance-Nuclear-48-Millimeter-54-8-Meter/dp/B000NG3ZKI
It is Nuclear Grade duct tape
While this can't fix the existing scratches, if you are serious about protecting your frame then consider applying some helicopter/racer tape to the most vulnerable areas.
It's basically a thick version of protective films they use on electronic screens. UV stable and can take a beating. Bonus is that it peels off without hassle or marks. A lot of the guys in my area use it to protect their carbon frames. Just clean the application area well with alcohol before putting the tape on.
http://www.amazon.com/ISC-Racerstape-com-Paint-surface-guard/dp/B000TPC7HU
I just got a new bike and felt the same way for a while. After some research I found this: ISC Racers Tape/Helicopter Tape. A number of people online seem to like it.
After getting used to the fact that I will probably bang up my bike a good bit more and I might as well get over it, I decided to buy a little anyway. I'm going to put it on a few spots I worry about i.e. to prevent chainslap and where the bike touches my bike rack. Might as well make a small effort to help the resale value if I ever want to sell it.
It's a little pricey, but I've heard good things about helicopter tape:
LINK
I'm using this tape to cover the back for now, and it is a lot grippier than the bare aluminum, the back glass, or even my plastic screen protector. If they use a similar material it should have some grip. "Self-Healing, flexible, tough, military-grade thermoplastic urethane, designed to absorb impact" sounds grippy. Good point about peeling. Maybe clear adhesive film for the back plus a bumper case would be a good combo.
I have Thule Atmos X3 case on my old phone, and it's awesome. It's thin and unobtrusive (adds maybe 2-3mm thickness), but it protected that phone every time I dropped it. It's made of high quality co-molded materials with a subtle design and variety of textures. Too bad they seem to have given up on Android phones.
I use ISC Racers Tape.
https://smile.amazon.com/dp/B000TPC7HU/ref=cm_sw_r_cp_apa_i_595SCbRDHK3ZP
Not just water, but slightly soapy water. It breaks the surface tension on the water allowing it to completely cover the adhesive so you can easily position it on the frame. Lots of soapy water. You can't use too much. Be careful not to get water on the backing paper before peeling off the tape. It has a tendency to pull apart and stick to the tape if you get it wet. If your hands are wet with soapy water you can handle the adhesive side without leaving fingerprints. I use a dish towel to squeegee and dry around the edges. It won't start to stick well until it squeegees out and dries. If it slips when your squeegeeing splash more soapy water on it and have another go at it.
I just wrapped a new steel hardtail in 1", 2", and 4" tape because it's gonna take a thrashing.
This is the exact thing I got.
Kind of pricey but it seems like the roll will last for every bike I ever own.
Make sure your windshield wiper fluid is freeze proof to -20F (If you bought it in CA, then it will not be)
Buy a good ice scraper for your windshield for defrosting in the morning. I use this one: https://www.amazon.com/Hopkins-2610XM-Subzero-Extender-Snowbroom/dp/B0016GRTVU
Extendable ice scraper, https://www.amazon.com/gp/aw/d/B0016GRTVU/ref=mp_s_a_1_4?ie=UTF8&qid=1484070791&sr=1-4&refinements=p_n_feature_keywords_browse-bin%3A4718393011&pi=AC_SX236_SY340_FMwebp_QL65&dpPl=1&dpID=31RvFRZrSiL&ref=plSrch
http://www.amazon.com/gp/product/B0016GRTVU/r
Could it be used as a scraper for the concave surfaces of mouldings?
An adjustable version of https://www.amazon.com/Crown-376-Cabinet-Scraper-Gooseneck/dp/B001C06BLE/ref=sr_1_1?ie=UTF8&qid=1492648700&sr=8-1&keywords=cabinet+scraper+set
Card scrappers are good for getting glue off. They even work well in corners.
I would consider using a cabinet scraper (just sand a little after you remove the bulk of the finish) and a scratch stock. This will be AGES faster than sanding or stripping and a lot easier to clean up. It may take a while to get the profile perfect on the scratch stock, but it will save you hours of nasty chemicals or lots of dust and gummed-up sandpaper. Chances are, even if you do end up changing the profile of the handrail slightly in your efforts to remove the finish with a scraper, no one will know or care.
If you do decide to sand, a toothpick or sharpened dowel with sandpaper wrapped around it tightly might help you get into the grooves.
As for the gaps...You can do a total repair by cutting the sides clean with a dovetail saw and then gluing in a shim, which you would then sand to match the profile. Or you could go the lazy route and fix it with a filler paste; I would recommend mixing up some sawdust and glue, rather than using a store-bought product (they tend to be chalky and don"t last long).
Good luck and let us know how it turns out!
https://www.youtube.com/watch?v=qtkBZHLJyD0
Here's a way to use the router to flatten a piece. I adapted this to smaller use by finding to boards I knew to be flat and making the sled ride on top of them.
If you still have some ridges after this, or just generally needs some smoothing, get a card scraper ( i got these https://www.amazon.com/gp/product/B001C06BLE/ref=oh_aui_detailpage_o07_s00?ie=UTF8&psc=1) to knock them down and then follow up with some sanding up to 220 grit.
Awesome.. thanks for that info, much appreciated. I may try the grille swap myself using this guide.. I have done stuff like this on my old accord and altima but heard its trickier on these cars.
But thanks for the guide, I am going to look it over when I get out of work.
They sell these handles you can put over the plastidip can to give it a more even coating and helps the back and forth motion as well as your finger from pressing on the spray tip.
https://www.amazon.com/Can-Gun1-2012-Premium-Aerosol-Spray/dp/B002EQEE82/ref=sr_1_6?ie=UTF8&qid=1466530359&sr=8-6&keywords=plastidip
Works really well and can use it for other spray bottles too.
Def keep me updated with pics and thanks again!
If you can't get an airbrush anytime soon, something like this can improve your use of a spray can.
seems to me one of these would make life easier as well. not sure if this specific model will fit on the can you choose but it looks like you'd make nicer passes with this than the can by itself.
https://www.amazon.com/Can-Gun1-2012-Premium-Aerosol-Spray/dp/B002EQEE82
I'm considering plasti dipping my entire car as well. Me and a buddy ran the numbers the other night and I can't remember it all, but it seemed really reasonable. I think buying the spray gun will be one of the more expensive parts, but once I have it, I have it. And then if someone else decides they want theirs done, I can do it for them for a slight cost ;)
It does look the same as far as I can tell. From what I read, plasti dip has a little rougher of a finish, where this doesn't. But I can't say for sure because I've never used the plasti dip.
Yes, I just used a spray can for the rims, I suggest buying one of the contraptions that you put on the can that makes spraying easier though. My fingers went numb 20 minutes into doing it. It's been over 48 hours now and I still have no feeling in either of my index fingers. I'm not exaggerating in the least. http://www.amazon.com/Can-Gun1-2012-Premium-Aerosol-Spray/dp/B002EQEE82 Something like that is what I mean.
I'm thinking it will hold up very well, there's one spot I need to redo. It's where they put the wheel weights on the outside of the rim. One of the wheels didn't take to it well so it peeled a tiny bit. Just going to cut the section out and spray it again, it's only about an inch long.
A friend plasti dipped his motocross rims, apparently sprayed it right over dirt and everything, his has been on there for 3-4 years now and he says it still looks great. So take from that what you will, but it should last a long time if you do it well. Even if you have to touch a few things up after a year, it's cheap and easy to do!
> Most importantly you should invest in a spray handle because your hand is going to get tired without one and you risk bad coats.
Can't recommend this highly enough. Just dipped my rims this past weekend, and two days later, my finger is still completely numb from spraying all that plastidip.
Planning to redip at least one of the rims (probably two), and ordered this sprayer from Amazon for the next time (http://www.amazon.com/gp/product/B002EQEE82/), after my hands have recovered!
No glossifer, just 6 cans of color. One can per wheel, and 2 for mudflaps.
https://www.amazon.com/gp/aw/d/B00E975LQ8?psc=1&ref=ppx_pop_mob_b_asin_title
Though I did purchase the spray gun, and I highly recommend that. It worked amazingly well!
https://www.amazon.com/gp/aw/d/B002EQEE82?psc=1&ref=ppx_pop_mob_b_asin_title
https://www.amazon.com/Vaper-19419-Spray-Non-Aerosol-Sprayer/dp/B0035FH906/ref=sr_1_1?ie=UTF8&qid=1523903457&sr=8-1&keywords=brake+cleaner+can we started using something like this at a shop I worked at for our press wash; it worked great.
Yup, OP needs one of these and one of these.
latex paint works best with an airless sprayer, but those will run you $300+.
I picked up a wagner https://www.amazon.com/Wagner-0518080-Control-Spray-Sprayer/dp/B003PGQI48/ref=sr_1_3?ie=UTF8&qid=1469559938&sr=8-3&keywords=paint+sprayer
works ok for such things. it cant quite vaporize the paint, even after thinning with some floetrol and water. But it works better than a brush.
Its certainly faster, but it does waste a fair amount of paint.
Still, I hate painting, Ive gotten my money's worth IMO. Though with the amount Ive used it, I wish i had gotten an airless sprayer.
I was curious too, I think it might be this one: http://www.amazon.com/Wagner-0518080-Control-Spray-Sprayer/dp/B003PGQI48
That makes sense. I have the one in the Wiki!
https://www.amazon.com/Wagner-0518080-Control-Spray-Sprayer/dp/B003PGQI48
I was looking at this one. any thoughts?
Hi guys,
I want to do some painting. Lots of painting.
In my house:
Outside:
I want to use a paint sprayer and hopefully use Behr Ultra Premium Plus (undiluted) where at all possible. My choices are the following sprayers:
Paint for ceiling(s):
Which should I get, given the scope of the work? I may choose to roll the ceilings (I hate rolling and I suck at it), but I want to spray everything else.
https://www.amazon.com/gp/product/B003PGQI48/ref=oh_aui_detailpage_o08_s00?ie=UTF8&psc=1
Buy that. I have one and it's awesome. Use that with lacquer from Sherwin Williams. It was a total game changer for me. I may never brush on a finish again.
I recently bought and used this to build some cabinets for my utility room. It worked pretty well once I figured out the settings/paint consistency.
Ultimately, you are buying a $100 paint gun, more likely than not it will not work perfectly. I will say I was pleased with my purchase though.
http://www.amazon.com/gp/product/B003PGQI48/ref=oh_details_o07_s00_i01?ie=UTF8&psc=1
here is my HLVP...the reviews are probably better than I can do. I like it.
whether or not its worth it???? YES.....spraying the corners and fronts was sooooo much easier than using a brush....in fact, I cant imagine using brushes for this
https://www.amazon.com/Scotchgard-Clear-Paint-Protection-60-inches/dp/B004VG6QYS
I would primer and paint then we use this in Florida. Put it on any leading edge of your bike. When/if you want to remove it then just pull it off. No harm to any finish, paint chrome or other wise.
All prints are straight off the print bed. I hate sanding so I've worked really hard to get the printer dialed in. And when the printer isn't as dialed in as I'd like, I have found a wonderful putty that will fill gaps, holes and even join two parts of a print together ... it's Perfect Plastic Putty ( https://www.amazon.com/DELUXE-MATERIALS-BD44-Perfect-Plastic/dp/B0076LAVFK/ref=sr_1_2?crid=1DRCN7LC5IRMS&keywords=perfect+putty&qid=1573437609&sprefix=perfect+putty%2Caps%2C169&sr=8-2 ). It's great stuff! Unfortunately I don't get a share of the profits but I'm impressed with it enough to recommend it anyway!
I was just turned on to Perfect Plastic Putty https://www.amazon.com/gp/product/B0076LAVFK/ref=ox_sc_act_title_3?ie=UTF8&psc=1&smid=A1BKVSJG1RNAQO
Sounds like exactly what you need.
Perfect Plastic Putty made by DELUXE MATERIALS
http://www.amazon.com/gp/product/B0076LAVFK
Here is a link to Amazon. Looks like something similar. Might be a little easier to get there.
It's at the big box hardware stores also.
I use double-sided tape, like [this one](3M Scotch RP25 VHB Tape: 1/2 in. x 15 ft. (Grey) https://www.amazon.com/dp/B00WX1P0GS/ref=cm_sw_r_cp_api_0zBEAbQDWXD9D). I usually put 4 pieces on, one over each screw that secured around the processor. Holds really well. This is what most of the modders I follow use.
Sweet. I was looking at this, but yours has better reviews. I'll give it a shot. Thanks!
3M VHB tape is the best
VHB stands for Very High Bond, it sticks amazingly well to smooth surfaces like a kwad frame but when you want to remove it you can peel it off pretty easily. It isnt going anywhere when you fly. It is also a little foamy so it provides a little cushion bten the carbon fiber and electronics.
https://www.amazon.com/dp/B01BU7038A/ref=cm_sw_r_em_apa_i_hQ4jDbV2SB64H
Did you save it, or is it gone? It can be reattached if not lost or damaged. Get some of this stuff to replace the original tape.
You could use double sided tape like this: https://www.amazon.com/3M-Scotch-5952-VHB-Tape/dp/B01BU7038A/ref=sr_1_3?s=industrial&ie=UTF8&qid=1517867355&sr=1-3&keywords=3m+vhb
The con is that you might not be able to remove it so easily. This stuff is pretty extreme.
>... I just reenter it and it stays.
Have you tried using some 3M double sided tape on the sides to improve adhesion? Just those three small strips hold that thing down like an anchor.
It is 3M double sided mounting tape. Specifically, either this: Scotch Extreme Mounting Tape, 1-inch X 400-inches, Black, 1-Roll (414-LONGDC) - 414-LONG/DC https://www.amazon.com/dp/B00FUEN2GK/ref=cm_sw_r_cp_apa_i_SDlGDbQE76Q91
Or
3M Scotch 5952 VHB Tape: 1 in. x 15 ft. (Black) https://www.amazon.com/dp/B01BU7038A/ref=cm_sw_r_cp_apa_i_qElGDbGTXMETR
FTFY:
It is 3M double sided mounting tape. Specifically, either this: Scotch Extreme Mounting Tape, 1-inch X 400-inches, Black, 1-Roll (414-LONGDC) - 414-LONG/DC https://www.amazon.com/dp/B00FUEN2GK/ref=cm_sw_r_cp_apa_i_SDlGDbQE76Q91
Or
3M Scotch 5952 VHB Tape: 1 in. x 4.6 meters. (Black) https://www.amazon.com/dp/B01BU7038A/ref=cm_sw_r_cp_apa_i_qElGDbGTXMETR
_____
^(I'm a bot) ^| ^Feedback ^| ^Stats ^| ^Opt-out ^| ^(v5.0)
I had a problem with the original PS tape as well, it stuck for about 20 mins before it came off. I work in an automotive test lab and we use 3M’s VHB double sided tape for sticking instrumentation and other stuff inside and out side of cars. It sticks even inside of hot cars and outside in cold weather. This is what I use on my pop socket and leather case. Just use an alcohol wipe to clean the surfaces.
3M Scotch 5952 VHB Tape: 1 in. x 15 ft. (Black) https://www.amazon.com/dp/B01BU7038A/ref=cm_sw_r_cp_apip_mI8CZO4gVAsfR
That stuff works wonders. I used 4 strips and it is up there haha.
If you use 3M's VHB tape, it has an rating for 90° C during use. It's the same tape used for putting up some road signs. It's also the same adhesive use on the Dual Lock Reclosable Fastener (Heavy Duty Velcro) to attach electronic toll collection tags to car windshields.
“Kapton tape” /Polyimide Tape
From Wikipedia: Due to its large range of temperature stability, and its electrical isolation ability, Kapton tape is usually used in electronic manufacturing as an insulation and protection layer on electrostatic sensitive and fragile components.
https://www.amazon.com/ELEGOO-Polyimide-Temperature-Resistant-Multi-Sized/dp/B072Z92QZ2
Use a plastic razor
https://www.amazon.com/FOSHIO-Scrapers-Contoured-Refillable-Application/dp/B076BBW1WM/ref=asc_df_B076BBW1WM/?tag=hyprod-20&linkCode=df0&hvadid=309805457405&hvpos=1o1&hvnetw=g&hvrand=2768152868600843908&hvpone=&hvptwo=&hvqmt=&hvdev=m&hvdvcmdl=&hvlocint=&hvlocphy=9029703&hvtargid=pla-570646761565&psc=1
It should be thin enough to atleast take a bit out and If not you could sandpaper it down
I think you can still order the paint from Porsche, they still carry Guards red, but it's expensive. $23 for a paint marker the size of my finger... I can't imagine the cost worth a whole car.
With paint that old the new paint may stand out too much and you'll be unhappy with it even if you did a perfect job.
There are some plastic razor blades you can buy off amazon and use to scrape the paint can splatter- I'd try that before a thinner. For cost effective (and time) I would use a paint marker from porsche for the scratches if it doesnt bother you to do it that way. If you want to fill every scratch, nick and ding with bondo then you may as well repaint the whole girl when you're putting in that much effort
​
Amazon razor blade example:
https://www.amazon.com/FOSHIO-Scrapers-Contoured-Refillable-Application/dp/B076BBW1WM/ref=sr_1_1_sspa?crid=2JQ4C968XSF5X&keywords=plastic+razor+blade&qid=1571288437&sprefix=plastic+razo%2Caps%2C320&sr=8-1-spons&psc=1&spLa=ZW5jcnlwdGVkUXVhbGlmaWVyPUFCSDRPS1pQMTBSOUEmZW5jcnlwdGVkSWQ9QTAwNzUzMjIyM1NQWVoxNVEwUTJIJmVuY3J5cHRlZEFkSWQ9QTA2MzYzNjAzTEtESzRPTkhWOElQJndpZGdldE5hbWU9c3BfYXRmJmFjdGlvbj1jbGlja1JlZGlyZWN0JmRvTm90TG9nQ2xpY2s9dHJ1ZQ==
good video. you should check out plastic razor blades. super helpful in peeling acrylic!
https://www.amazon.com/FOSHIO-Scrapers-Contoured-Refillable-Application/dp/B076BBW1WM/ref=sr_1_4?keywords=plastic+razor+blades&qid=1574494005&sr=8-4
I use plastic razors as a first “scrape” pass and then Gorilla clear tape as a “clean up” pass.
I use this tape which is just 2 inch wide blue masking tape. I got it at Target but they sell it a lot of places. I don't know if there's a better kind, that's just what I had on hand... how wide is the stuff you use?
You can find the black Mazda badges here and here.
Yellow Frog tape is meant for delicate surfaces, like uncured paint. They still recommend a minimum of 24 hours before applying tape.
I've never used one, but I used to sell tons of these:
https://www.amazon.com/Shur-Line-2000874-Premium-Paint-Edger/dp/B0001MQI9E
You'll still want to wait as long as possible for the first color to dry before running this tool up against it. If they work as well as people tell me you won't need tape.
Really, you get what you pay for, but in the end I'd still recommend doing it yourself. I feel that in this day and age we rely so heavily on others to do things for us (paid or unpaid) that we end up losing basic knowledge of simple things. I do home remodeling and handyman work for a living and though I'm getting paid to do the work, sometimes it just amazes me to get paid for doing some of the most simple of tasks. And when it come to painting, cutting lines, double (or more) coats and making sure you don't get paint on the floors is really the only issues. That can be solved by patience and careful planning. And personally, I use the edger plus to cut the lines. Follow the instructions and maybe do two coats, you'll be fine.
http://www.amazon.com/3M-8979N-Performance-Nuclear-Slate/dp/B000NG3ZKI
Do you have one of those telescoping jobbers? I'm also short and the telescoping variety was a game changer for me.
YES. I know that I'm going to get downvoted to hell because everyone on here says not to do it. And I don't have any experience using a professional sprayer.
BUT, I do have this Wagner sprayer with it's own mini-compressor (not attached to the gun, this is important) and it's awesome! I've used it to paint my whole house (interior). I've had very minimal (if any) overspray. I just tape off the molding and lay some paper down where the wall meets the floor and go to town. I actually bought one of those trim tools someone else suggested and add some Floetrol or water to make it easier to spray.
For 100 bucks, it's been a worthwhile investment. Taping off takes the most time...I find that I can paint a room in about 30min. It really makes up time in the cutting in, rolling, rolling, rolling, dipping the roller back in the pan, rolling some more. You just move your arm and spray until the container is empty.
Edit: All of you guys are pussies. There are a bunch of stay at home mommy bloggers who use paint sprayers and do just fine.
problem solved
> FWIW, I was born and raised in Rochester, learned to drive literally in the snow, and have never had snows, always all seasons. The most important things are knowing the limits of your car and yourself, keeping an appropriate speed, and being able to correct if things start to go south.
Don't listen to this poster. You can know the limits of your car and yourself, trundle along at 5 MPH, and generally do everything perfectly, but none of this will help when some other idiot careens into you going 30 MPH in foot-deep snow on all-seasons because "they literally learned how to drive in the snow!"
GET THE SNOW TIRES
My snow-driving anxiety levels went down by orders of magnitude when I bought my Jeep Patriot (with 4x4, naturally) and Blizzak snow tires to put on them. I literally went from being a nervous wreck whenever a snowflake appeared in the sky to "Meh, better text my boss and tell him I'll be a little late to work because it's snowing again. Hm, do I want to play it safe and take the thruway or have some fun on the back roads..."
GET THE SNOW TIRES
edit: And if you've got a truck or SUV, for the love of FSM, invest in a telescoping rotating snow brush (example) to clear the snow off the top of the vehicle (as required by law, but also because you don't want to cause an accident for the people behind you who suddenly get whiteout'd from the snow billowing off the top of your car).