Best industrial drill bits according to redditors
We found 68 Reddit comments discussing the best industrial drill bits. We ranked the 29 resulting products by number of redditors who mentioned them. Here are the top 20.
We found 68 Reddit comments discussing the best industrial drill bits. We ranked the 29 resulting products by number of redditors who mentioned them. Here are the top 20.


General advice, some obvious, some not, in no particular order -
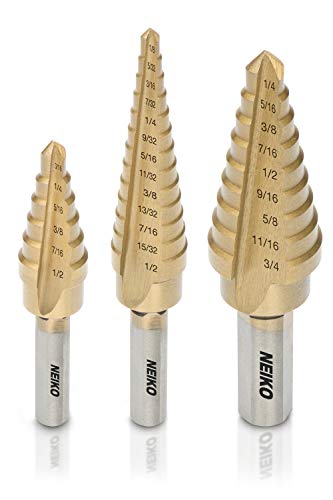
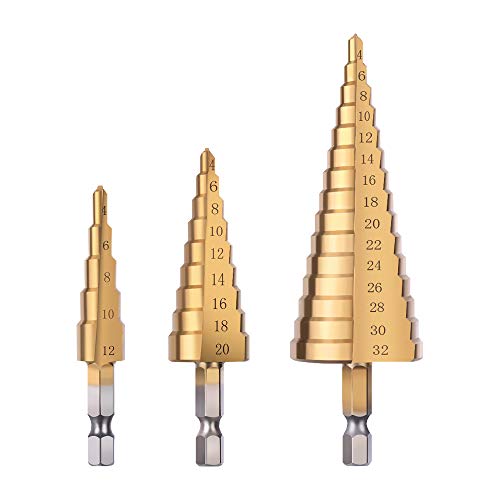
Get a step bit. I can recommend this set of 3, which is $9 shipped -
http://www.amazon.com/Neiko-10193A-Titanium-Drill-3-Piece/dp/B001OEPYWK
They are great for aluminum. If you want to drill through something harder than aluminum, they will do the trick but use a drop of WD40 or oil where you drill.
Drill BEFORE you paint and sand as it's easy to hose your paint job if you drill after painting. If you must drill a painted enclosure, drill through blue masking tape so the little curls of aluminum don't cut spirals through the finish.
Measure a lot and make sure your stuff is going to fit and be centered. Pencil and a ruler and blue tape are helpful. If you are doing it a lot you can make a wooden drill template.
Make a starter dent with a punch as mentioned below.
Clamp your enclosure in place before drilling. If you're using a drill press and value your fingers you really gotta do this.
That's all I got. Good luck!
You're going to have a hell of a time keeping the hole round with a dremel. If you don't have a drill press available, hand sand it with some coarse (80 grit or coarser) sandpaper, it'll take a while, but it's much easier to control. Another option is to drill it out with a drill press, clamps and a forstner bit; just have to be sure it's clamped down well and you have it perfectly centered before you start drilling. Easy way to do it is to start with a step drill bit, knock down the top lip to the size you want and drop the forstner bit into the recess at the top before you hog the rest out with the forstner.
River Country!!! To install in the WSM, I had to purchase a unibit and drill out the hole to 13/16" to fit it in, but this thing is affordable and bang-on accurate!!!! Stole the idea from T-Roy Cooks on youtube. Additionally, there's a set-screw type deal in the back where you can calibrate it - so if you wanted it to sit in the hood like I have but actually read what the temp is at the grate level, you can stick a probe in at grate level and calibrate the River Country to read what that reads- so even though it's placed in the top of the smoker, it will read the correct transcribed temp from the grate level. Couldn't recommend this therm enough.
River Country Therm
Unibit Set for drilling
Just drilled holes in the same kettle.
I used this step bit along with some 3 in 1 oil. It was a breeze! Nowhere near as hard as I had anticipated.
Start out drilling a small pilot hole. For the pilot hole I used a faster drill speed and a small amount of pressure. After that the step bit will easily get through the stainless steel. For the step bit, drill slowly, take breaks to add oil, and use a decent amount of pressure. Each rotation should be making progress, otherwise you are just heating and hardening the steel. Finish stepping up the correct size drilling from the inside of the kettle, this will deburr and flatten the hole.
Good luck!
You can either drill a 10mm hole and file it out, or get a step drill to widen it.
https://www.amazon.co.uk/dp/B073QSPND1/ref=cm_sw_r_cp_apa_rfRLBb3H0BKJC
Big shout out to the /u/beasthoss guide in the sidebar. Worked like a charm first time. Induction heating really makes the already awesome dynavap experience even better. All parts used are listed below for anyone interested. I did use some t-taps I had laying around but no solder.
Induction Heating Module
Power Supply
Glass Adapter
Momentary Switch
Project Enclosure
Drill Bit
Edit for parts list.
Warm the surface up. I use a heat gun for a few seconds, but a hair dryer will work as well. It cracks because the plastic is brittle. Give it a little heat and it gets a little more pliable. Not too far or you create a whole different problem. There are also different drill bits you can use. I've had great luck with Forstner Bits
and an almost perfect record with Step Bits
As u/FungalScripture (great name BTW) says, go slow. Keep pressure on the tool very light, and some support on the back side of the plastic you're drilling through can help too. Best of luck.
Should be using a stepper bit anyhoo.
Or a reamer.
Or even a file.
Auger bits are for drilling holes, not enlarging holes. Especially in sheet metal / tubing.
I applaud the ingenuity and OP should be happy they got the job done, but others should consider best practices.
I've used knockout punches to great effect. You may also be able to use a stepper bit. I'd prefer the former, personally, as it's cleaner. Edit: the latter is probably a bit cheaper. Use oil and don't let it get too hot, it can discolor the steel.
This kit has both but you can find them separately. https://www.amazon.com/dp/B01KWI5MKW/ref=cm_sw_r_cp_apa_mCUnzb3B06CJ9
I used a stepped drill bit designed for cutting through sheet metal to cut my NMO mount in the roof of my pickup. Like, one of these:
http://www.amazon.com/dp/B000FZ2UOY/ref=cm_sw_r_tw_dp_9p94tb0NVTVVW
Way easier than trying to align a punch, and no bending of the edges, etc. Took about 10 seconds to line it up and step it out to the right size.
Hey friend. you're on the right track with your idea to drill a hole and plumb it to a larger tank. Be careful when you choose the spot to drill. You don't want to drill in to a very round side, as that will be harder to make watertight. i would recommend trying to find a nice flat spot, just below the max fill of that unit's tank, and then drilling a hole for a bulkhead fitting(so that its watertight) and then just attach a hose to the drain end of the fitting and you can just set the other end of the hose in to a 5 gallon bucket below the unit or something.
a 1/2 bulkhead fitting is less than 5$ on amazon(also might not hurt to look around for a smaller sized one of these, as a 1 1/2" hole may be kind of big for this small tank) i only looked around for a second.
https://www.amazon.com/Lifegard-Aquatics-Standard-Threaded-Bulkhead/dp/B0002Z7U1K/ref=sr_1_15?keywords=bulkhead+drain+with+gasket&qid=1565284477&s=gateway&sr=8-15
If you go with this route, i would get a step bit (drill bit for drilling a precise hole by gradually widening it)
https://www.amazon.com/Knoweasy-Sizes-Titanium-Drill-Drilling/dp/B07NKXLTCB/ref=sr_1_1_sspa?keywords=step+bit&qid=1565284634&s=gateway&sr=8-1-spons&psc=1&spLa=ZW5jcnlwdGVkUXVhbGlmaWVyPUEyMEU0WExMM0Y1NUNZJmVuY3J5cHRlZElkPUEwMDQzOTM5RjNOQkZRRFgzUVFXJmVuY3J5cHRlZEFkSWQ9QTAwODExNDgyUEtUR1lBS1NJNzM4JndpZGdldE5hbWU9c3BfYXRmJmFjdGlvbj1jbGlja1JlZGlyZWN0JmRvTm90TG9nQ2xpY2s9dHJ1ZQ==
then you would just need a female 1/2 thread to 1/4" barbed fitting and some 1/4 tubing to run to the bucket. I have similar setups to this for top-off tanks in my hydro systems. If you need any help figuring it out and sourcing parts, just shoot me a message!
Best of luck!!
For those interested, here's a pic of the inside.
Here's a list of my mods.
Check out the sight glasses at Brew Hardware. I've purchased many items from Bobby, and have had good experiences.
Assuming a weldless application, you'll need a step bit for your drill. The one linked worked great for me. When drilling, use oil to cool the bit and go SLOW or you'll harden the steel.
Bobby's install/calibration videos can be found here and here.
Good luck!
There are tools specifically designed to remove stripped screws, but they typically are not as small as a computer/laptop screw. They look like https://www.amazon.com/Drillpro-Damaged-Remover-Extractor-Screwdriver/dp/B017BKZG0A
The only other thing is the rubber band trick, but you've already tried that.
I'm planning on using this step bit. I have various hole saws, but I've been instructed to use this instead.
I used a crack injection kit to fix a similar crack in my basement. Took me an afternoon and hasn’t leaked a drop since.
Simpson Strong Tie 9oz CRACK-PAC FLEX H2O KIT W/ACCESORIES (CPFH09KT) https://www.amazon.com/dp/B00QKZEWW6/ref=cm_sw_r_cp_api_DqcXBb05WKZ5Y
Best to use a step drill like this: https://smile.amazon.com/dp/B07DB6CG2Z/ref=cm_sw_r_other_apa_i_KEz3DbNXHZKFA
Step Drill
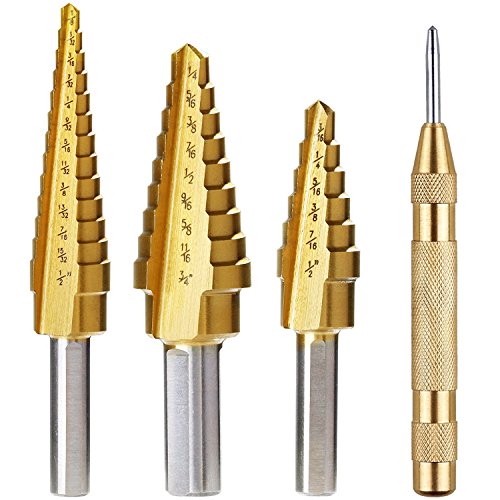
Both of these sets work well. You do get what you pay for....keep that in mind.
Expensive
Norseman Uni-Bit Set https://www.amazon.com/dp/B0036YZWLE/ref=cm_sw_r_cp_api_PdTyzb1GGBTKB
Cheap
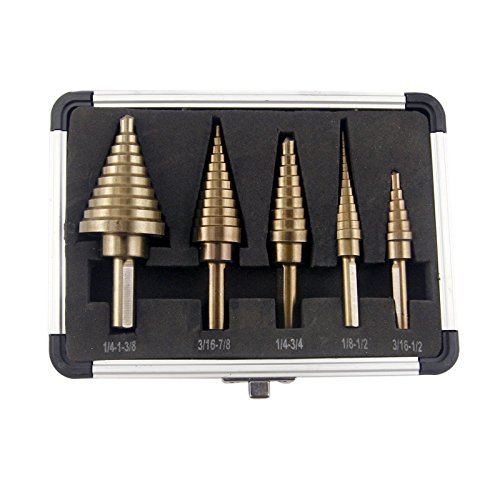
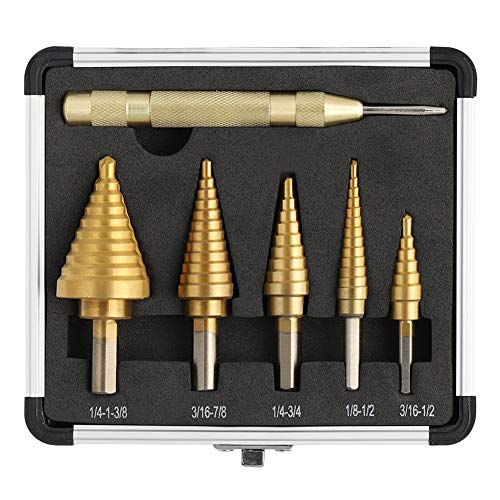
CO-Z 5pcs Hss Cobalt Multiple Hole 50 Sizes Step Drill Bit Set with Aluminum Case https://www.amazon.com/dp/B0177PN6SI/ref=cm_sw_r_cp_api_reTyzbBCBYFH1
or 100 bucks on amazon.ca https://www.amazon.ca/Greenlee-36414-Multi-8-Inch-Green/dp/B001M0MDIE
I use a step drill bit like this one:
Neiko 10184A Titanium Step Drill Bit Set, High Speed Steel | 1/4" to 3/4" | Total 9 Step Sizes https://www.amazon.com/dp/B000RP5Z1W/ref=cm_sw_r_cp_api_i_MoS0DbXAXTTZ3
It's easy to do yourself. If you don't have drill, find a friend who does. Definitely don't pay someone to do it though. it will take 5 minutes. stepbit drill
friction fit tips are something like a cherry vapes cloud chaser or the ones I got on ebay. It just depends if you like it really airy or not, some don't. Here's the underside of 3 of my tips, the ones with the smaller holes are standard and the same size as the hole in the Stillare. The big hole is a Cherry Vape tip, the hole happens to be around 5/16, so I opened up the stillare to match. Just make sure the hole in the stillare is the same size as your tip, or the top cap will be the limiting hole. To do the actuall drilling I used the long skinny bit from these bits
Truthfully, that is all you need. If you don't have a way to make proper holes in your pot you'll also need a step bit.
On my pot, the rubber that came with the element was enough but you may need separate o-rings (AS568A Dash Number 217).
That's all!
I didn't drill any holes in the plastic. I drilled and mounted the pass-through fittings to the metal frame on the top, so the plastic covers go on like normal and hide the fittings. You gotta remove all the plastic panels to get to that part of the frame because they all lock together.
I wouldn't mount pass throughs to the plastic cover. You'd have to cut out all the metal underneath it to be able to tighten down the fittings. And the plastic is kinda thin and flimsy.
I used this step drill to drill the holes in the metal frame. A step drill is the easiest way to get clean holes that size (20mm).
edit: if you want holes in the cover just for easy access I'd still use a step drill. A regular drill bit that size would leave some shitty looking holes. A holesaw might work good too.
You could try a step bit.
http://smile.amazon.com/Neiko-10194A-Titanium-Drill-Speed/dp/B000FZ2UOY?ie=UTF8&keywords=stepper%20drill%20bit&qid=1464629613&ref_=sr_1_2&sr=8-2
Stop bit. I think it was the 11/16 or 3/4" bit that did it.
https://www.amazon.com/gp/product/B0746FZT52/ref=oh_aui_detailpage_o01_s02?ie=UTF8&psc=1
Bud-boxes, some step drills, and a hand nibbler. Done and done.
Get this. Use the one that has the max width of 20mm. Perfect
I bought these:
CO-Z 5pcs Hss Cobalt Multiple Hole 50 Sizes Step Drill Bit Set with Aluminum Case https://www.amazon.com/dp/B0177PN6SI/ref=cm_sw_r_cp_apa_i_3utODbTY8GTG0
And turned them by hand or very slowly in a drill.
I highly suggest picking up a step drill bit for making holes in cabinets. Makes a cleaner hole then a hole saw and easier too,
https://www.amazon.com/Neiko-10194A-Titanium-Drill-Speed/dp/B000FZ2UOY/ref=lp_256287011_1_4?s=industrial&ie=UTF8&qid=1573329070&sr=1-4
*A hole that would take me 10 min of frustration with a hole saw is basically as easy as drilling a normal hole with a step drill bit.
Here's a picture of a hole I drilled with that same bit at work. The top "hole" was done by whoever did the installs here. The bottom hole was with that drill bit I linked.
https://photos.app.goo.gl/zMBmttDrVssS6h63A
You drill a pilot hole then use a step bit to drill the holes for the pass through fittings. The ekwb pass through fittings I used had a 20mm outer diameter so I just stopped drilling once the 20mm step was through. A tip is to use painters tape to mark the bit where you need to stop in order to prevent over drilling. I used a drill/tap combo bit and some m3 screws and nuts to drill and tap the screws for the res mounts on the mounting plate.
Xilko 3Pcs High-Speed Steel Step Drill Bit Set Power Tools Cone Titanium Coated Metal Hole Cutter 1/4" Hex Shank Drive Quick Change 4-12mm/4-20mm/4-32mm
https://www.amazon.com/dp/B074NNZR4L?ref=yo_pop_ma_swf
Haha sure thing, its a rather simple mod. All you need is a through hole fitting.
Basically, it allows you to create a pass through on the case where you can screw any type of G1/4 threaded fitting into it. For the plug, you can use any type of G1/4 stop fitting.
The best way to drill the hole is to use what is called a step bit. So you drill a pilot hole with a standard 1/4" bit, and then you use this step bit to step up the size of the hole. If you are only going to be doing it for this build, I would recommend getting the link I provided as most of these bits go for $55 at your local hardware store.
All in all it's easy-peasy. Just be sure you know for sure where you want the port to be before you drill ;).
I've looked but i don't see much in those particular proportions.
So, still easy, need to buy a tool though (oh darn, another home depot run!). You're going to want to find a piece of metal that would work there and an NMO mount with no bracket. Then you need to pick up what is called a step bit.
NMO mount: https://www.amazon.com/Browning-WSPBR1015-Enclosed-Hole-Mount/dp/B00BLCLUJ6/ref=sr_1_3?s=electronics&ie=UTF8&qid=1503520890&sr=1-3 (many brands just an example)
So, how this works is: You drill a 3/4" hole. The outer ring of the NMO mount unscrews, and the rest of it pops up into the 3/4" hole from the bottom. Then you spin the large part on, tighten it down and you're done.
Step bit: https://www.amazon.com/ABN-Titanium-Step-Drill-Bit/dp/B00H3Q6KOY/ref=lp_256287011_1_3?s=industrial&ie=UTF8&qid=1503520934&sr=1-3
They're very easy to use and make clean, precise holes. Put it this way, I DIY'd two NMO mounts in the trunk of my 5 series with a step bit and measure-twice-cut-once. Couldn't be happier.
Links to the items used in this build:
https://amzn.to/2SDTHmE Breadbox - available in many colors!
https://amzn.to/2Yd5ARK Multi Charger
https://amzn.to/30OXCjw XT60 Charging Cables
https://amzn.to/2LGBcgH LiPo Balance Boards
Tools to cut the tidy holes:
https://amzn.to/2LGYqTQ Drill Bit
https://amzn.to/2LNxIJF Knockout Punch Kit
Yes. A cordless Ryobi drill is only around $50. Drill bits and a step bit another $25. A drill is something everyone should own anyway so it would be a worthwhile investment.
Now that I’m home and have a minute to type, here’s how I made it:
-I used a step drill bit to cut two 3/4” holes in the mason jar lid. I kept the lid on the jar while drilling, held the jar with one hand and the drill with the other and it worked just fine (I marked the holes with a sharpie before drilling)
-I put in one hookah hose grommet and one “downstem grommet” (I get these from my local ace hardware. You just ask for a rubber grommet with an inner diameter of 1/2”, an outer diameter of 31/32”, and a 3/4” groove, I think the stock number is 55059) in the holes I drilled
-downstem time. I get them from a local smokeshop and I use just regular ol’ glass on glass downstems that work with a 14mm bowl. Before you fit it into the grommet, lube them both up with whatever cooking oil you have on hand (I use coconut oil). Getting the downstem in is the trickiest and scariest part to me but it goes relatively easy if you coat it in oil first
-all set, just put in a 14mm bowl in the downstem and a regular hookah hose in the hookah grommet and you’re good to go
Eta link for hookah grommet
DN 32 - 1¼ - 1.660 in (42.16 mm)
Would be a 1 1/4" hole punch like.
https://www.greenlee.com/products/DIE%2540c-RD-1%2540.250-(43%2540c2)-CONDUIT-(735).html
https://www.amazon.com/Greenlee-730BB-1-1-Standard-Knockout-4-Inch/dp/B002NQZ0J0
Are you soldering in or using a bulkhead fitting on your boiler? You could use a step bit to drill out a hole.
https://www.amazon.com/Neiko-10194A-Titanium-Drill-Speed/dp/B000FZ2UOY/ref=sr_1_3?s=hi&ie=UTF8&qid=1518546407&sr=1-3&keywords=step+bit+for+stainless+steel
Depends on the material the face plate is made of. If it's metal get a step bit, a decent drill and a drill guide
https://www.amazon.com/Neiko-10194A-Titanium-Drill-Speed/dp/B000FZ2UOY
https://www.amazon.com/wolfcraft-4525404-Muilt-Angle-Attachment-Drills/dp/B000JCIMEA/ref=sr_1_5?s=hi&ie=UTF8&qid=1519142267&sr=1-5&keywords=drill+guide
those should work.
If it's plastic I'd get some forsner bits depending on what size buttons you want
Do you think this set would be alright for me starting out? Comes with a center punch: https://www.amazon.com/Vastar-Titanium-3-Piece-Automatic-Center/dp/B01DU3UWXI/ref=lp_256287011_1_4?s=industrial&ie=UTF8&qid=1519217788&sr=1-4
If it's mostly for metal and up to an inch, why not get the unibit? https://www.amazon.ca/Greenlee-36414-Multi-8-Inch-Green/dp/B001M0MDIE. I use this one most of the time. Drill a 1/4" pilot hole, add a little cutting fluid and done! For anything bigger use the hole punch kit.
FWIW, I love my Tall Boy kettle, but I did have to invest in a step bit, a bit of cutting oil, and a bulkhead, ball valve, and thermometer and install them myself. Rough total ~$200 and some elbow grease. I also added a whirlpool return and etched some volume markings with this little guy. But I'm a big DIY-er. (and sorry for all the links)
Oh, guess I misread it. I'm gonna buy one of these but I can't swing it until friday. Any chance you have any green meters left?
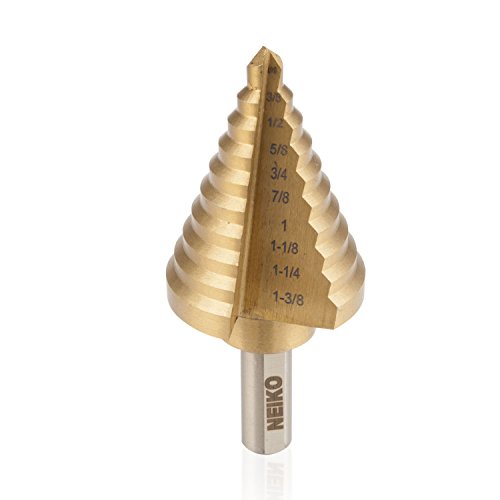
http://www.amazon.com/Neiko-3-Piece-Titanium-Drill-Steel/dp/B001OEPYWK/ref=sr_1_2?s=industrial&ie=UTF8&qid=1411584929&sr=1-2 Is this step drill bit good enough? I have everything else unless a simple single-setting plugged in=on soldering pen isn't good/accurate enough and I need something fancier.
I did something similar a few months ago, but I used a drill press. They're kind of expensive so I'd ask around for one you can use. You need a step drill bit. Just mark out where you want your holes to be and make sure the cymbal is clamped down nice and tight, then drill away.
I like these types of drill bits, step drills for small metal projects.
They are great for thin metals, especially since I don't do lots of drilling into metals, I can have many different sizes on a few bits.
Depending on how big a hole you are making, it might be easier to do it yourself. If you have a decent drill (preferably corded by a nice cordless one will also work), you can get a step drill bit and some cutting oil. You do not need a punch unless you are doing a ton of holes or are doing something very large.
I'd give something like one of these a try.
https://www.amazon.com/dp/B009K8HNOE?psc=1
https://www.amazon.com/Simpson-Strong-CRACK-PAC-ACCESORIES-CPFH09KT/dp/B00QKZEWW6/ref=sr_1_1?ie=UTF8&qid=1493124180&sr=8-1&keywords=crack+pack
Drilling the hole is super simple. You just need to know the OD of the drain valve and then get a step drill bit https://www.amazon.com/Neiko-10194A-Titanium-Drill-Speed/dp/B000FZ2UOY?ref_=Oct_BSellerC_256287011_0&pf_rd_p=0c52eddb-bf3e-5079-a600-1a1baeabeb0f&pf_rd_s=merchandised-search-6&pf_rd_t=101&pf_rd_i=256287011&pf_rd_m=ATVPDKIKX0DER&pf_rd_r=FYR4GJFVCFM1TC7P2MP3&pf_rd_r=FYR4GJFVCFM1TC7P2MP3&pf_rd_p=0c52eddb-bf3e-5079-a600-1a1baeabeb0f
That will give you a perfect circle hole for the size that you need.
Not the best picture, but posting here if anyone is interested.
Here is my setup:
Fogs: H16 XTREME LED PRO FOG LIGHT BULB - YELLOW
Low: H11 HID KIT | XTREME HID | Philips 4300K
Hi: 9005 XTREME LED PRO HEADLIGHT KIT | WITH DRL LED OPTION
Install was pretty easy. The most involved one was the Low beam HID because you need to drill a one inch hole into your dust caps to feed the light and wire through. To do this, I would recommend a stepped drill bit like this one because then you can make the hole slightly smaller than one inch to get a tighter seal. I also used some silicon to really make sure it was sealed to keep moisture out.
If anyone decides they want to do a similar swap and you have questions about the install, just reply here or shoot me a PM.
Get a 42mm step bit?
The following are the parts I'll be purchasing for this build. I think I've covered everything, but as this will be my first custom loop if someone could give it the once over and make sure I'm not forgetting something it would be GREATLY appreciated!
Link to current build
Item | Vendor | Price | Quantity |
---|---|----|----|----
[CE 280](https://www.ekwb.com/shop/ek-coolstream-ce-280-dual","EK-CoolStream CE 280) | EK | 75.99 | 1 |
[PE 360](https://www.ekwb.com/shop/ek-coolstream-pe-360-triple#ow_alert_box","EK-CoolStream PE 360) | EK | 79.99 | 1 | 1
Corsair SP 120 2-pack | Amazon | 27.99 | x2 |
EK 140 Revo D5 | EK | 163.99 | 1 | text
EK Supremacy EVO | EX | 78 | 1 | text
EK Pump Bracket | EX | 13.49 | 1 | text
MSI GTX 1080 Sea Hawk EK| Newegg | 569.99 | 1 | text
ATX Bridging Plug | EX | 2.49 | 1 | text
Alphacool Silicon Bending Cord | Amazon | 8.49 | 1 | text
EK-CSQ Plug | EK | 3.49 | x2 | text
EK-AF 6mm M-M Extender | EK | 2.99 | x2 |
EK Ball Valve | EK | 19.99 | 1 | text
EK X Splitter | EK | 8.99 | 1 | text
Heat Gun | Amazon | 17.71 | 1 |
Step Bit | Amazon | 10.85 |1| text
Pipe Cutter | Amazon | 7.99 | 1 | text
EK-HDC 16mm Gold Fitting | EK | 8.99 | x10 |
EK PETG 12/16 Tube | EK | 8.49 | x4 |
Not OP, but you just need a set of set drill bits and a cordless drill to drill through enclosures. Takes a few seconds to drill through to your desired size!
I picked up a WinWare aluminum boiling pot for $40 last year, drilled a hole in it (I think that the bit was $20) and installed a $20 valve. Since purchasing it, I've used the bit for two valves, a thermometer, and two sightglass installs.
Edit: The pot
The Bit
The valve
Holiday Deal Valve Alternative
You might be able to find better deals on Cyber Monday, though.
All you need is a drill gun and dish soap (the soap is a nice lubricant so you don't wear the bit down quickly)
I'll agree with skunk in that I think the sanitary fittings was a bit overblown. I use threaded fittings on everything and have never had a problem. I take them apart about every 5 batches or so to clean them more thoroughly, but they stay pretty clean.