Best abrasive & finishing products according to redditors
We found 392 Reddit comments discussing the best abrasive & finishing products. We ranked the 187 resulting products by number of redditors who mentioned them. Here are the top 20.
We found 392 Reddit comments discussing the best abrasive & finishing products. We ranked the 187 resulting products by number of redditors who mentioned them. Here are the top 20.


It's not that much stuff - Here's the cheapest things on Amazon. For sure a lot better deals if you just go into Harbor Freight though.
Torch - $17
Mallet - $9
Jeweler Saw - $14
Tiny Files - $10 or A rotary tool - $15
​
A regular file - $8 (optional)
​
If you want to process the silver yourself you need a
Crucible - $15
That torch again
Tongs - $9
Welding Gloves - $9
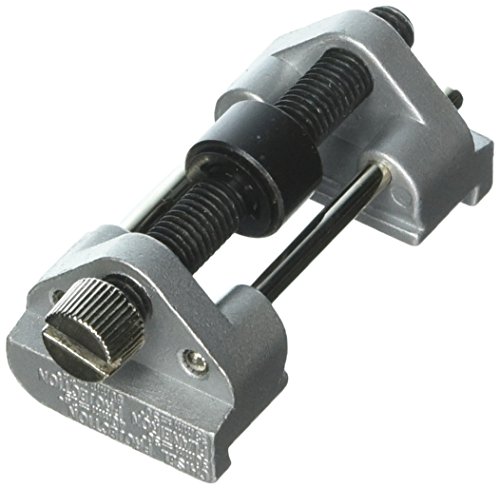
Jewelry Rolling Mill - $169
Use a file card.
>a whetting stone
Well, that's problem 1, IMHO. If your single stone is too rough, you'll never get a good edge. If it is too fine and your knife is dull, you'll never remove enough metal. Do you know the grit of your stone?
You probably need 4 surfaces to get a knife really sharp. A coarse stone to repair a nicked or damaged blade, and a few more successively finer stones/strops. Get one of these and some of this on an old belt, and you'll have the right tools.
Now, for feel. Yes, there is a very specific feel and sound when you are doing it right. To find the right angle, place your knife edge on the stone, and slowly rotate to the side, pivoting on the edge. At some point, you'll find a second point of contact on your bevel, and then your knife will rotate around that bevel, lifting the edge. Go back to where you found 2 points of contact. You want the knife resting on those 2 pivot points - that's the angle of the grind of your knife, and that's the angle you want to hold the knife at when you sharpen it.
If you sharpen at the correct angle, the knife will move smoothly along the surface (unless your stone is really rough), and it should make a hissing-type sound, not unlike what you hear in a movie when someone pulls a knife out of a holster. You won't get a good hiss if your stone is too rough though.
What kind of grind do these knives have? If they are hollow ground, you can't recreate that on a flat stone, take the knives to a pro sharpener with the right tools. Are they "scandi," flat, or high flat? If they are, they'll be extra easy to find the right angle. If they are convex, you'll probably have to work the 'hardest' to find the right angle, but just look for the sound and feel feedback.
This sounds daunting, but it really is a task that takes an hour to learn and a lifetime to master. Even with just an hour of the proper technique down, and the right tools, you should be able to get any blade to go from crap to tomato slicing in 20 minutes or less.
I recommend going slow with hand tools. Buy them one or two at a time, and then learn to use, sharpen, and care for those before buying more. This will help you get the best stuff for you while spending as little as possible. Let your projects guide your tool purchases.
Amazon isn't a great place to buy hand tools. Most people shop at either Lee Valley, Lie-Nielsen, or eBay for planes, chisels, saws, rasps, etc. That said, there's a surprising amount of stuff you'll need that's not the tools themselves. Personally, I wouldn't want to saddle myself with an inferior tool just to use a gift certificate.
Anyways. Stuff you SHOULD buy on amazon:
Hand Tools
Clamps
Measuring/Marking
Sharpening Gear
Consumables
Safety Gear
Here's a copy-paste I put together that might be useful.
Equipment Essentials
Honing Supplies for Restoring a Few Straights
To hone:
First, you need to flatten your stone, making sure you've removed the top 1/64th or so of stone material to reach the true grits (the top is a bit rough on Nortons especially).Make sure your stone is perfectly flat. Use the DMT or the sandpaper I described above for this.
Next, clean your SR in soap/warm water. Dry it, and put a piece of electrical tape along the spine and fold it over (like a book binding) if you'd like (not necessary, and I don't do this, but some prefer the look of the end product).
I like to clear the edge of possible errand burs before I hone, so I drag the shaving edge against my thumbnail or a glass bottle. These burs can cause issues, and may make for a rough feeling edge. I've found that this is a good way to remove them. It may be unnecessary for some/most blades, but it's part of my bevel setting routine, and by doing this, I've notice good things and increased consistency when I hone.
Now, to hone. You're going to get your razor sharp in these stages:
Setting the bevel:
While all steps are important, this step is foundational. Place your razor on your bevel setting stone, keeping the razor spine and edge completely flat on the surface togehter. Do tiny circle strokes (circular motion down the hone) so you do about 30-40 tiny circles as you move own the bottom hone. Repeat on the other side of the razor, moving up the hone in the opposite direction (and counter-wise circle direction). Now do 15 x strokes. This is a set.
Repeat doing these sets until you can shave hair on your arm or leg by very slowly grazing over the tops of the hair - it should catch and cut with a bit of a tug.
It will take many many of these sets with a 4k stone, and less with a 1K.
Once you can shave hair on your arm or leg all along the bevel (toe to heel) with uniform sharpness and cutting, you may be set. Do another 10 or so x-strokes, very lightly, very perfectly as a final sharpening for your bevel. See if this helps your edge.
Once you're happy with your bevel, strop it and shave. If it's painful, it's likely your bevel isn't set. If it's decent, you're ready to move on.
Polishing the bevel
Now move up to polishing. On the 4K and do 35 light x strokes. Go to the 8K and do 35 light x-strokes. Repeat this back and forth going 4K 30, 8K 30. Now keep this up, decreasing the stroke number by 5. When you're at 10 strokes, just do 25 on the 8K.
Always check for sharpness along the edge by trimming a bit of arm hair. You'll learn a lot from an edge by doing this.
Following the grits up in this fashion should give you a fairly polished bevel. It's best to go higher than 8K with a high grit chinese hone from a woodworking store, or a naninwa 12k, but 8K will do for now.
Truing the edge:
Strop about 30 passes on your chromium oxide, clean the blade, and the perform 200 passes on leather - all spine leading, done very lightly.
The Shave
After all this, you should have a great edge. Give it a test shave and compare it to your pro honed blade.
While honing, you'll likely get frustrated, but keep at it! If you're getting aggressive with the razor, just give it a break, and come back later. If the shave is no good, post back here and we'll help you diagnose.
Some thoughts:
I tired to present information that's very searchable. Straight razor place has archived many of the ideas that I just presented. I highly recommend researching on your own and reaching a personal conclusion. What follows are my personal opinions.
This equipment I suggest is not necessarily the best, nor is it bad at all. It's great way to get started and find out what you like in a stone/routine. Some ideas to consider if you upgrade your set:
The back and forth honing I recommend is a honing series called pyramid honing, where you go between two different grit hones to ensure you don't form a wire edge or a bur. I like to recommend this for folks getting into honing since this is one of the most documented methods for get a razor to shave ready from a bevel set. A quick google search on pyramid honing will give you plenty of reading. I don't hone this way any more.
I highly recommend honing your razor as sharp as possible on one stone, strop as I've outlined, and give it a shave. For example, sharpen as much as you can at the 4K stage, and strop it 200 times. If it shaves ok, you're on the right track. If not, you've got more work to do at that level of stone. You'll be amazed that such a low grit can shave so well. If it's painful to shave after your lowest stone.... you're not done, and moving up the stones will not benefit your edge. Repeating this process of shaving up all the stone grits (4K, 8K, 12K) will help you get a feel for what honing at the different levels provide. Shaving off my 1K bevel provided me the biggest leap in edge quality while learning.
Don't limit your techniques. Once you can confidently bring a restored razor to shave with consistency, I'd recommend playing around and experimenting. Though this, I've developed some strokes that are critical to my routine, and used effectively with every blade I sharpen.
I feel you. What an awful bitch. May I suggest hiding your tp and replacing it with a roll of sandpaper?
I thought I was the only one with this experience! My Ndad would only take horrifying, nasty dumps in my bathroom, too. Even worse? He had to walk through my bedroom to get to it, would leave the door open, and would consequently stink up my bedroom.
He also loved to "borrow" my car for road trips when I was a teenager. He believed he was entitled to it, as he paid for the insurance (he forbade me to pay for my own insurance, despite my attempts to do so). He would completely trash the interior with food, garbage, and mud, and would leave cups or bottles of pee in it amongst the garbage. OPEN containers of urine in a car when we lived in the South and regularly experienced 90+ degree weather. That jackass made my car smell like foul, fermented piss for weeks at a time, a smell that lingered even after I meticulously cleaned my car. The one time I told him HE should clean my car since HE trashed it, he vehemently lectured me about respecting him and said I needed to practice responsibility by keeping my own car clean. Yes, he continued to "borrow" my car and my brainwashed self was too scared to say anything about it again.
I did get back at him somewhat. If I got warning (advanced notice was rare) that he'd be using my car, and I was feeling a little brave, I'd run out, tune my radio to the local rap station, and crank the volume and bass to maximum. The resulting boom of sound and surprised shrieking when he started my car were totally worth the eventually blown speakers.
Seriously, though: sandpaper. Like so:
PORTER-CABLE 740000801 4 1/2-Inch x 10yd 80 Grit Adhesive-Backed Sanding Roll https://www.amazon.com/dp/B0000223SI/ref=cm_sw_r_cp_apa_0xc6ybA32TXSX
Edit: clarity and formatting
There's no simple chemical fix.
There are tons of products on the market, and almost everyone thinks they have the uber-secret ultramegarustfix technique using some kind of special blend of obscure chemicals. "It worked for my Uncle's friend's brother, it's definitely the best!" Don't waste your time.
Short of dipping the entire rack in a tank of acid, the best possible way to fix any rust is to mechanically remove it, then properly prime the clean bare metal and top coat it to prevent corrosion in the future.
I'm assuming you don't have a full shop of tools to work with, but you can probably find a battery drill. Get a wire wheel like this there on Amazon or at basically any hardware store. Put it in the drill and go to work. Just remove all visible rust. Use a maroon paint prep scuff pad to scuff the surface of the rest of the rack. Wipe it down with wax and grease remover.
If you don't want to go with the drill and wire wheel, just use 180 and then 320 grit sandpaper. That will take care of it. I just prefer rotary tools whenever possible because hand-sanding always sucks.
Your choice in top coat paint will determine the best course of action following removal of the rust. I'm an automotive painter, so I always recommend going with 2k catalyzed automotive materials for the absolute best in durability other than powder coating, which is much more expensive.
You don't have a lot of rust there, so not much will be bare metal. You can get away with simple non-catalyzed self-etching primer rather than epoxy, which is tougher. Spray a light coat or two of etch primer over the bare metal, let it dry, then scuff with the same maroon pad. Wipe down the surface with wax and grease remover again, then top coat.
I'm assuming you want the rack black again, so I'll recommend a catalyzed chassis black paint.
That's exactly how I'd do it. You'll end up with a very durable, good looking surface.
Well I’m personally a MG builder, and would want to recommend you an MG, but they can be complex for a new builder so an HG might be a better choice. I hear the 1/144 HGUC Gundam Revive is a easy starter kit. If you’re feeling up for an MG (or want a bigger sized kit) the Gundam X is a great starter.
As for tools you’re going to need a decent pair of nippers. The Gundam Planet Nippers are the best bang for your buck. Known as the second best nippers around. Besides that the Tamiya nippers are ok compared to those.
After that you’ll need a hobby knife. This Is the one I use. Comes with a lot of replacement blades, and it’s pretty cheap.
The next thing you’re gonna want is panel lining pens. Here is a decent priced set.
It’s also recommended to get a good sand paper set. Get a 600, 1000, 1500, and 2000 grit paper. Here Is a pretty good set. You don’t have to get this right away, but if you don’t want nasty nub marks this is a must.
Those are the bare minimum things you need to start. There’s other things you’ll want down the line like top coat to make your kits look nicer, Gundam markers to paint small details, a kraft mat to build on/cut decals out on, mark setter/softener to make water slides look better, and an airbrush for serious painting. Those are all more advanced thing you don’t have to think about until later when you want to pursue them. For now the things above are starter essentials
I use these guys
https://www.amazon.com/dp/B000CDR5K8/ref=cm_sw_r_cp_apa_i_VEyBCbTMWC1TE
3m metal cleaning attachment for a power drill after a little degreaser soak. I'd just use elbow grease but 75 to 100.... go to home depot and spend 10 bucks, grab a power drill and unleash the fury dude.
Forney 72729 Wire Cup Brush, Coarse Crimped with 1/4-Inch Hex Shank, 2-Inch-by-.012-Inch https://www.amazon.com/dp/B000TG60GS/ref=cm_sw_r_cp_apa_i_p-EwDbTYE43E4
The culprits:
1k King Stone
6K King Stone
leather strop
bar of green stuff
And thank you for the compliment
Invest in some good side cutters and some sanding sticks. . Don’t stress if you make mistakes, just do your best to finish the model. You’ll learn a lot just by getting it finished as best you can. Then try another kit.
> I want to break in the gun properly
Give it a basic cleaning as the manual istructs, then shoot it a lot.
> Also, what should I use to polish the metal bits?
Jeweler's rouge and a soft cloth. You can also use a rotary tool on a low speed setting with a cotton wheel and jeweler's rouge, just go slow.
If you go hand tools, you can start with Rennaissance Woodworker’s minimum tool list. You can go with a lot of vintage tools to save money, but for fun I priced out all new tools of good quality. Many tools were recommended here. I've added a workbench and some reference books and videos too.
MINIMUM TOOL LIST
$169 Jack Plane Woodriver
$125 Hand Saw backless saw ~26″ in length
$28, $30, $35 - 1/4, 3/8, and 1″ chisels Ashley Isles MK2
$79 Back Saw Veritas Crosscut Carcasse
$12 Coping Saw Olson
$18 Marking Gauge Beech Marking Guage
$12 Square IRWIN Combination
$149 Some kind of sharpening set up (stones, sandpaper, whatever) Norton Waterstone Woodworker Package
$592 Subtotal
NICE TO HAVE
$13 Honing guide Eclipse style
$13 Marking knife Veritas
$22 Mallet Thor
$15 Book to learn from Essential Woodworker Book
$63 Subtotal
WORKBENCH
$27 Workbench plans Naked Woodworker
$123 Materials for Naked Woodworker, costs from Mike Siemsen
$35 Holdfasts Gramercy
$185 Subtotal
GRAND TOTAL
$840
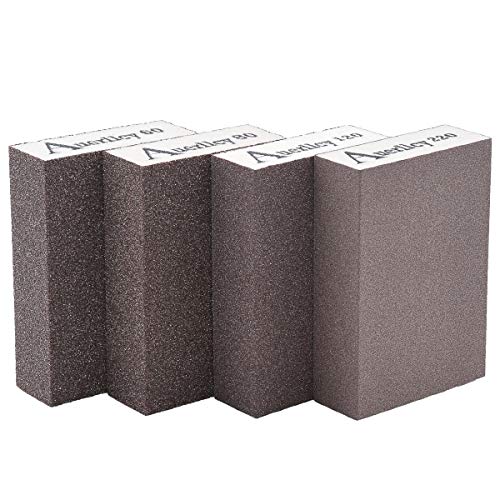
Things happen, so light scratches are normal. Some folks like it "gives character, tells a story" and some think of polishing, no right answer. I've used these Polishing pads from Amazon with some success for light marks. I only use the last two finest grades.
​
I use CA finishes a lot on smaller turned items, but I hate wearing gloves. As a consequence I have new fingerprints all the time.
If you want to take that to the next level, wet sand with micromesh up to 12,000 grit then hit it with some HUT Ultra Gloss plastic polish
Or he rubbed someone the wrong way.
This guys list is pretty much what I was going to say.
So for some recommendations:
I've restored an antique 1930s No 5. Bought it for 45, and it is best for those on a budget. Any pre WWII Stanley just needs some light restoration work and a reworking of the blade and it will do 20x better than a harbor freight plane and roughly same as modern Stanley sweethearts at 1/3 the cost. It may not be as good as woodriver or lie Nielsen, but it's a 1/4 or 1/6 the cost respectively.
Paul sellers recommends Aldi Chisels, I got Narex instead for an additional $20. I love them, and will only upgrade out of them once I get enough money to go for some veritas or lie Nielsen. I got a set of 4 with imperial measurements for $60ish. I'd put any extra money into sharpening systems than upgrading them.
I bought David Barron dovetail guides and the Japanese pull saws he reccomends. Gyokucho 372 Razor Saw Dotsuki Takebiki Saw. Look at Amazon for the narex chisels I reccomend and the 'people who bought this also bought' section and you'll find it easily. While there you can find some leather for stropping and the green compound you need with it. Also while looking at these, you'll see a reccomendations for the Stanley disposable knife and the replacement blades. This is what Paul sellers recommends, and it works well. Stays ridiculously sharp, and can be rehoned with little effort and the blade cheaply replaced once it becomes to much work top get the thing sharp. Cutting layout lines is much more precise and helps prevent tearout. I bought narex marking knife and love it. I don't mind trying to hone it every so often. Ditto the scratch awl.
Basically took around the Amazon other bought recommendations and you'll find a bunch of fairly cheap quality things to get you up and running.
Of course! All those canvases usually say they are “primed” which means gessoed HOWEVERRRRR once you do it yourself you’re gonna be like “what are they even talking about this canvas isn’t prepped at all” lmao. I was shook in college when I learned all this stuff. A good one is Liquitex gesso. You can honestly just buy the gallon of it if you end up liking it. It’ll last foreverrrrr
Gesso: Liquitex Professional White Gesso Surface Prep Medium, 32-oz (5332) https://www.amazon.com/dp/B000KNPLXI/ref=cm_sw_r_cp_api_i_6OUBCbYGG08ZG
Brushes: Value-Pack 10-Pc Foam Paint Brush Set - Wood Handles by Industrial Tools https://www.amazon.com/dp/B003UHJDAS/ref=cm_sw_r_cp_api_i_WPUBCb9GYJ791
Sand paper: Sanding Sponge,Coarse/Medium/Fine/Superfine 4 Different Specifications Sanding Blocks Assortment,Washable and Reusable. https://www.amazon.com/dp/B0752VGHG6/ref=cm_sw_r_cp_api_i_rQUBCbQ2295YF
And then eventualllllllyyyyy, way off in the future:
Stanley Hand Tools 20-600 Clamping Miter Box & Saw https://www.amazon.com/dp/B0791J472B/ref=cm_sw_r_cp_api_i_uUUBCbAX7GEM0
Stanley TR45K Light Duty Staple Gun Kit https://www.amazon.com/dp/B000NIFL80/ref=cm_sw_r_cp_api_i_xVUBCb1HTF3N9
Art Alternatives Canvas Pliers 8in https://www.amazon.com/dp/B004MASEW0/ref=cm_sw_r_cp_api_i_9XUBCbJF0J5ZC
Nasco 1100424 Fine Arts Unprimed Cotton Canvas Roll, 6 yds x 62" https://www.amazon.com/dp/B00EJSJKFK/ref=cm_sw_r_cp_api_i_hZUBCb3PN5W7Y
Also, occasionally I like to go to a thrift store, find a wacky printed dress or dress shirt, and stretch that over a wood frame. For that, or if you paint on wood, you can use clear gesso (my personal favvyyyyy as I almost always paint on wood and looooove wood grain to be incorporated into my paintings...or on canvas stretched over wooden boards)
Now, I don't want to give the impression that any of these items are spectacular or needed to get this sharp. The point of this was to show that it is obtainable with cheap stuff.
Also I would like to note that the knife was sharpened to 10 degrees on both sides, a rather unrealistic angle for most uses except the single beveled knives.
That being said:
similar diamond plates
10k stone
fake leather
rouge
knife
get a honing guide - http://www.amazon.com/Robert-Larson-800-1800-Honing-Guide/dp/B000CFNCKS/ref=sr_1_1?s=hi&ie=UTF8&qid=1450064426&sr=1-1&keywords=honing+guide
I use these pins. Proper size so they don't get stuck in primer holes. Package is 2.5lbs so you have enough for both drums and a bit extra for when you lose them over time.
Also comes with a sample of detergent that I thought worked really well. Lemishine and dish soap are cheaper, which is the only reason I didn't buy more.
Watch this video: https://www.youtube.com/watch?v=_wPR55HoN_M
That guy has great information and tips. I use Rustoleum. Doesn't matter if it's gloss, satin, or flat, it all comes out looking good as long as you sand the enclosure as he does in the video. You can always spray clear coat on top to make it shiny, or leave it flat. Bake it in a dedicated toaster oven for 30 minutes on about 175. Not one that you will be cooking food in as the chemicals will leach into your food. The toaster oven is not necessary but it sure helps dry and cure the paint. To remove paint, I bought one of these: http://www.amazon.com/gp/product/B004UUADHQ?psc=1&redirect=true&ref_=oh_aui_search_detailpage and attach it to my drill. Lay the drill on it's side on a sturdy table, wear leather gloves, and strip away.
I have bought both. Just save up a little longer and buy the veritas. It's a better long term investment.
That said, if you are really on a budget, realize that these honing guides are practically all copies of each other. I would not be surprised if they're made from the same factory. You can save a few bucks by buying this.
http://www.amazon.com/Robert-Larson-800-1800-Honing-Guide/dp/B000CFNCKS/ref=sr_1_1?ie=UTF8&qid=1370329190&sr=8-1&keywords=honing+guide
after that build yourself a jig that lie nielsen suggest
http://www.lie-nielsen.com/pdf/AngleSettingJig.pdf
They look good. Well done. If I could suggest something, give these a go for the next kit
If you work with XPS a lot, a hot-wire table is a big convenience. It's certainly not a requirement though.
Really though, all you need is the 'obvious' stuff. A straight edge of some sort and a utility knife is sufficient for most cuts. The same knife will work for whatever other carving you'll be doing. Beyond that, the rocks and wire brushes others have mentioned are good for adding texture.
A couple small, cheap things I find handy:
The 3lb would work, but if you can get a deal on the 6lb one, I'd get it. I have the 6lb one(dual drum) and if I remember correctly, I do 50 cases of .308 or 7.62x54r cases per drum, each works out to be about 1lb of brass. For 9mm and 45acp, I weigh out a pound on a kitchen scale.
I do 1lb brass, 1lb stainless steel pins, 1 lb water, a squirt of laundry soap, and a 9mm case worth of lemishine.
I deprime before cleaning with a Lee depriming die.
I tumble for 30 min to an hour, then separate from the pins, rinse, and let dry.
I also load on a single stage about once a month, and it works great for me.
If you have any questions, you can PM me.
I have been doing woodworking for upwards of 40 years. I recently bought a course DMT diamond plate
http://www.amazon.com/DMT-D8C-Dia-Sharp-Continuous-Diamond/dp/B0001WP1L0/ref=sr_1_3?ie=UTF8&qid=1398809883&sr=8-3&keywords=DMT
some Norton water stones.
http://www.amazon.com/Norton-Japanese-Style-Combination-Waterstone-8-Inch/dp/B0006NFDPI/ref=sr_1_5?ie=UTF8&qid=1398809928&sr=8-5&keywords=waterstone
and
http://www.amazon.com/Norton-Japanese-Style-Combination-Waterstone-8-Inch/dp/B00067ZSM2/ref=sr_1_16?ie=UTF8&qid=1398809974&sr=8-16&keywords=waterstone
Along with a sharpening guide.
http://www.amazon.com/Robert-Larson-800-1800-Honing-Guide/dp/B000CFNCKS/ref=sr_1_2?ie=UTF8&qid=1398810023&sr=8-2&keywords=sharpening+guide
And could not be happier with the results.
The major purpose of the diamond plate is to keep the water stones flat.
Even if you go the sandpaper route make sure that you get a guide and when you get one get your bevel-T square and a protractor (from Rite Aid) to check that the distance for the stop blocks is correct.
Files are okay but I preferred filing sticks staring with coarse and then moving up through till you get to a fine finish
Sanding stick set Coarse Medium Fine Extra Fine Tri-grit # 30506 https://www.amazon.co.uk/dp/B000CDR5K8/ref=cm_sw_r_cp_api_i_k.TvCbVEXY7JZ https://i.imgur.com/HBIUU8r.jpg
I use the green bar: https://smile.amazon.com/Woodstock-D2902-1-Pound-Buffing-Compound/dp/B0000DD35C/
For maintenance I do maybe 10 strokes on the strop free hand on the bevel side, then one on the back to remove the (microscopic!) burr.
Put a bolt thru it tighten it with a nut and put it in a drill chuck.
Should look/work like this.
I have found that the easiest (and cheapest) way to up your model kit game is to panel line them. It makes the color separation pop way more, and helps define the proportions of a kit much better. A three pack of the panel linking markers are on Amazon for 5-7$ usa (link below). I recommend using the gray marker for white parts, brown for red orange gold and yellow parts, and black for blue gray and silver parts. The markers last a very long tine as well.
Another way is to buy some sanding sticks (10$ roughly for a 4 pack) and work on carefully removing nub marks. It will really improve the final presentation on the finished model. Start with a lower grit stick to remove the nub, and then increase the grit to polish away the scratches. If done correctly (I'm still working on this too) it will look like the nub was never there.
I Hope this helps, from one modeler to another.
Panel lining markers:
GSI Creos Gundam Marker Value Set -GM01&02&03- (Black, Gray, Brown) https://www.amazon.com/dp/B00HY93GHY/ref=cm_sw_r_cp_apa_i_xt-2DbKF7CZZR
Sanding sticks:
Squadron Products Value Pack Sanding Stick https://www.amazon.com/dp/B000CDR5K8/ref=cm_sw_r_cp_apa_i_AC-2Db3ZFSJ3K
Edit: also the panel lining will help the paint job pop. In addition I'd saw use multiple coats from the gundam makers if possible.
The first thing you're going to find on the internet is this fetishism of sharpening chisels. The Youtube rabbit hole on sharpening is deep.
What I found, and you might find something else you like better, is actually fairly simple, easy, and low cost to setup. 1) Scary Sharp --which is just sharpening your tools on a flat surface (glass, marble, MDF, jointer or table saw feed table) and graduating levels of taped down sandpaper: https://en.wikipedia.org/wiki/Scary_sharp. The second thing that is wildly useful is a $12 sharpening guide: http://www.amazon.com/Robert-Larson-800-1800-Honing-Guide/dp/B000CFNCKS/ref=sr_1_1
There are kits for hundreds of dollars involving stones and guides and apparati and I've used some of my friends' stones and setups and they work --probably as well as Scary Sharp and a guide. But, $12 for a guide and a few dollars for sandpaper is low barrier to entry and works and is pretty fast. (The soles of hand planes may take a bit longer if you're planning to do those the same day.)
Good luck on whatever you choose.
I have one but they're a little rough for model kits.
I use something similar to these: http://www.amazon.com/Squadron-Products-Value-Sanding-Stick/dp/B000CDR5K8
Files are one of those tools that should not be bought at Harbor freight or similar. They are a cutting tool and quality is especially important
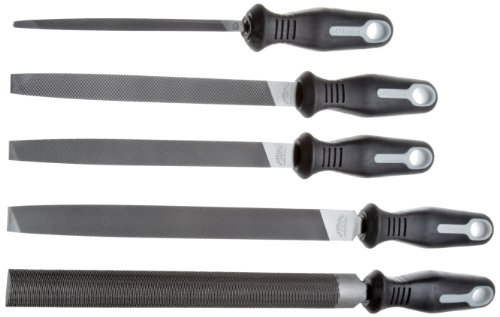
Nicholson is a great brand, this 5-piece set is ~$35 US.
E: Instead of a round file, this set includes a different size of the fine flat file. Fools. Round is needed more than a different size of one you already have, especially for a general purpose set.
Your shop teacher should have supplies on hand but the link I gave you mentions compounds as well. Aluminium can happily be polished with Car cutting compound they use for paint, so that's a budget option to consider. https://www.amazon.com/dp/B0009SOB9O/ref=nosim?tag=finishingcominc
The absolutely best way to clean them is in a tumbler with stainless steel pins. I started doing this with my stainless steel baffled cans and it saves Soo much time and effort on my part.
Buy this from harbor freight with a 20% off coupon:
https://m.harborfreight.com/dual-drum-rotary-rock-tumbler-67632.html
Then buy something like this:
https://www.amazon.com/gp/aw/d/B00IER21M6/ref=mp_s_a_1_3?ie=UTF8&qid=1517851599&sr=8-3&pi=AC_SX236_SY340_FMwebp_QL65&keywords=stainless+steel+pins
Put about 1-1.5" of pins in the bottom of the drum. Place baffles in the drum, fill to just covering the baffles with water and a couple drops of soap. Add Lemishine to the mixture. Run overnight and the baffles will come out as close to factory looking new as they possibly can. Don't put aluminum in the drum however.
You can choose to split up the baffles between the two drums if it's too full or buy a bigger drum that replaces the two separate drums with one big one.
https://rocktumbler.com/barrel.shtml
On this page it's the last drum for sale, the tumble-bee 4lb drum. I run my pistons too with no issues.
Hope this helps!
If you want to make spoons then that set isn't really want you need.
What you need is a hook knife for carving the bowl and a straight knife for all the other cuts.
It would be great to have a hatchet to rough out the shape of the spoon so it doesn't take you all year. I've seen lots of people do the roughing with a band saw though. You could use a coping saw if you don't have one.
I don't love the hook knife I have. If the wood is a little dry it kinda hurts my hand. It's this one https://www.amazon.com/gp/aw/d/B00343VCCK/ref=mp_s_a_1_1?ie=UTF8&qid=1487362012&sr=8-1&pi=AC_SX236_SY340_QL65&keywords=mora+hook+knife&dpPl=1&dpID=31qGjXQoECL&ref=plSrch
I wound up grinding the bevel off mine to make a smooth curve and it worked a little better than new. But it works ok as is.
I've also got this straight knife https://www.amazon.com/gp/aw/d/B005IW5YN8/ref=mp_s_a_1_3?ie=UTF8&qid=1487362243&sr=8-3&pi=AC_SX236_SY340_QL65&keywords=mora+carving+knife&dpPl=1&dpID=31CuaoTEJGL&ref=plSrch
They have a shorter version that would probably have given more control, but I'm ok with it.
You'll also want to make a strop to maintain the cutting edge. You'll need a block of wood, a piece of leather and stropping compound. https://www.amazon.com/gp/aw/d/B0000DD35C/ref=pd_aw_fbt_469_img_3?ie=UTF8&psc=1&refRID=YGCVJKF34JWCTN2MNFPV
Can't say about this compound. I got mine from lee valley.
All in all, if I did it over again I would have bought higher quality knives, but the ones I wanted (from a guy named Nic Westerman) were out of stock. And since you're on a budget they would fit in your price range.
Sandpaper ranging from 80 to 2000 grit and a piece of granite countertop that a local countertop maker let me dumpster dive for. I fold and tear full sheets of sandpaper into 4 strips longways (they are useful for sanding blocks this way too) and either tape them or just hold them down with my fingers and sharpen away. The blade is held by one of these guys.
Ya know, if you really wanna take off sprue marks, that's not that hard. I recommend these micromesh pads. Start with the roughest pad, work until you cant feel the sprue (being careful not to take off any additional material.) Then work your way through the pads from coarse to the finest. The grit on the fine grit pads is so fine it will essentially polish as you go. They're handy to have for anything plastic-y.
​
If you want to be more frugal, a carefully used fingernail file, along with some polish after could work fine too. That's how I did warhammer minis for a while, although I benefitted from applying paint after the sanding.
These may be of some use to you.
Be gentle sanding as well, you dont want to take off any detail. Ive done that :(
Yes, there were a few parts that just took way too much sanding to get to size. I updated those parts to reduce the amount necessary and will be paying close attention to feedback from those building it to see if there are any parts I missed.
There were other surprises too, but none that required design changes (that I recall). One was that I initially was using a flat black paint for automotive that I got from the auto parts chains that I had a lot of trouble with. At first I thought it was environmental or my skill, but I eventually tried a flat black Krylon from a hardware store that worked beautifully.
I used Bondo spot filler putty to fill gaps, a filler primer to fill in layer lines that were left after sanding, many different grit levels of sand paper (mostly 120, 320, 400, and 1500 -- the last two used with wet sanding), and matte and gloss clear coats. I really liked the sanding sponges I used for wet sanding https://www.amazon.com/gp/product/B003ELH7AI/
I've had to remove hard foam from a hot tub before so I'm not sure how well it works with the foam insulation you were working with but I was able to remove it pretty well with this on a drill. Makes a mess but it tore through the insulation pretty fast.
If you do pursue diamond stones, here is a list of what I have.. I am not sure if this the be-all-end-all, and I can definitely recommend trying lots of things, because sharpening seems to be something so personal. Just wanted to collate in one place what I have settled on thus far.
This is one of the cheaper setups. I think it would be interesting to try ceramics at the top end, and better leather for a multi-strop setup.. Just ran out of funds after trying several failed other methods ;)
OP gave you some good advice about research. I'd add that if you can somehow find someone local who can show you what sharp really is, that would be a big bonus. I haven't found that person yet myself, because I am a hermit.
Stones:
Paddles:
Stropping:
Sandpaper:
an hr?? jesus that sounds like hell. I'm not sure how you are sharpening the blades but my 3 side arkansas with a honing guide can get me some nice shavings in a few minutes.
http://www.amazon.com/Robert-Larson-800-1800-Honing-Guide/dp/B000CFNCKS/ref=sr_1_1?ie=UTF8&qid=1395892808&sr=8-1&keywords=chisel+sharpening+guide
but yes, one day I will splurge for a Norton!
Contact Adhesive - super glue.
basically, you get super thin CA. Use a folded piece of paper towel below the pen and dribble CA over the top (make sure you lay something over the lathe base to protect it). After you have applied the coat spray a very light activator (aerosol that causes the CA to instantly harden). I do about 10 coats of this.
Next, use ~200 grit sandpaper and sand it until it is flat (you will see "clear" marks in the sanding if there are troughs, this means you need to keep going). Next take whatever sand series you use (I use these) and sand the coat until it is crystal clear.
What you'll end up with is a crystal clear coat that shines, and is extremely durable.
Try this:
Osborn International 75116SP Steel File Card, 3-3/4" Brush Area Length https://www.amazon.com/dp/B00J06IPQG/ref=cm_sw_r_cp_api_9SIdAb6EFSEE2
If that doesn’t work some grill cleaner will do it. No kidding. Thanks Pop.
tl;dr: don't waste time with old, worn-out files.
One lesson I learned the hard way is that old used files just aren't worth it (maybe they are if you can easily tell how sharp a file is by hand-feel, I can't).
I brand new nicholson file is going to be less than $20, and it's like night and day. (here's a set for $32: http://www.amazon.com/Nicholson-Ergonomic-Handles-American-Pattern/dp/B001T49R7S/ref=sr_1_2?ie=UTF8&qid=1464460472&sr=8-2&keywords=nicholson+file)
If you want to give wet tumbling a try you could do what I did. I got a dual drum tumbler from harbor freight and 2.5 pounds of stainless steel media off of amazon. Put about a pound of of media in each drum fill the drum about 3/4 of the way full with brass then add 50/50 water and white vinegar with a dash of dish soap and lemi-shine (sp?). I usually run it for two hours then rinse and dry my brass. You cant do huge amounts with it but you can build your own drum for better capacity and it's a good low cost way to see if you like wet tumbling. I have done over 1000 rounds this way and they all have come out great. I remove the primers before I tumble and it gets them really clean and shiny.
Link for the tumbler: http://www.harborfreight.com/dual-drum-rotary-rock-tumbler-67632.html
Link of the media: http://www.amazon.com/Stainless-Steel-Tumbling-Media-Pins/dp/B00IER21M6/ref=sr_1_2?ie=UTF8&qid=1409188995&sr=8-2&keywords=stainless+steel+tumbling+media
I use these sanding sticks a lot. I also use foam sanding blocks which make it a lot easier. I use really coarse like 80-100 grit and a light touch to knock down the layer ridges. Then I prime with the filler-primer and go back with 120 and then 400 grit paper.
Wet-sanding can get you an almost glass-like finish if you want, but it's a lot more time.
I generally sand/prime/paint individual pieces that are seperate colors. I leave some PLA exposed for some two-part epoxy which is AMAZING for holding PLA.
I've linked to AMazon but Home Depot/Lowes will have the sanding blocks and your local hobby-shop will have the epoxy, sanding sticks ad two-part epoxy.
For wood PLA I had to go a little lower than usual with my nozzle, it printed really well at 190°C and I had to print slow about 30mm/sec.
I don't use the same topcoat you used so I can't say how many coats is enough. Because of issues with odors, I only use water-based products like polycrylic. I use seven to eight brushed on coats. But I've been doing this for more than a decade so I know how to rub it out and I know the things I can be tempted to do while sanding that's going to make big trouble for me. I would do the rubout and go as high as you can (1200). If you aren't satisfied with that, then buy the higher grit abrasives. Abralon used to sell a mixed package of one each 360, 500, 1000, 2000 and 4000. Here it is on Amazon https://www.amazon.com/Mirka-Abralon-Assorted-Silicon-Polishing/dp/B014Q3EAXO/ref=sr_1_2?ie=UTF8&qid=1492993178&sr=8-2&keywords=abralon . You could hand sand with these. Please note that this is what I do on the product I make; it is what works for me. I am not saying it is the way everyone should do things or that these are the products they should use.
Definitely get a good pair of hobby side cutters. This is what I use, and I've had it for a year and a half and it's still really sharp and leaves almost zero stress marks right against the plastic. There's cheaper ones out there, but you'll need to cut farther away from the piece and then use an exacto knife. Then use sanding sticks to get everything flush.
Sorry if you know all this, just saw the nail clipped comment and they're definitely not the best idea on a kit, especially if you just spent 80 bucks on one.
Get a wire cup brush. Forney 72729 Wire Cup Brush, Coarse Crimped with 1/4-Inch Hex Shank, 2-Inch-by-.012-Inch https://www.amazon.com/dp/B000TG60GS/ref=cm_sw_r_cp_apa_i_.Jg2CbCJF1RXX
80 grit self adhesive sandpaper would cover it.
I ordered some sanding stick but it only say medium fine and coarse https://www.amazon.fr/Sanding-stick-Coarse-Medium-Tri-grit/dp/B000CDR5K8/ref=mp_s_a_1_1/259-8678765-4734753?__mk_fr_FR=ÅMÅZÕÑ&qid=1549117488&sr=8-1&pi=AC_SX236_SY340_QL65&keywords=sanding+stick
Btw will it remove the stress mark too?
Sure thing.
https://www.amazon.com/Green-Chrome-Oxide-Compound-oz/dp/B003E65XYU/ref=sr_1_1_sspa?crid=3F3GNHSZK257I&keywords=green+chrome+oxide+compound&qid=1551133808&s=gateway&sprefix=Green+chrome%2Caps%2C418&sr=8-1-spons&psc=1
Woodworking with power tools revolves around the table saw. If you go that path, get the best one you possibly can. But used so your money goes father.
Woodworking with hand tools needs a few things:
I'm a big believer in starting small and cheap and working my way up. With a few hand tools, you can get started for under $200 and have everything you need to make good quality stuff. The skills you learn with those tools will transfer to every project in the future, no matter how big. Fine joinery is the same, whether the boards are cut with a hand saw or a table saw, and you will never learn to read wood with a power jointer, planer and table saw like you will with a handsaw and bench plane.
As you reach competency with these tools, you can decide how you want to expand your tools to achieve more. That may be more hand tools like a dovetail saw, additional planes, cabinet scrapers, etc, or it may be power tools with a table saw, band saw, dust collector, etc. Or it may be somewhere in the middle.
Personally, I do this for relaxation, so a quiet shop and a face free of respirators and face shields is much better to me. Since I am in no hurry to finish projects, I use primarily hands tools (I have a few power tools from a previous life that I'll pull out on very rare occasions. I think often about selling them).
If getting stuff done drives you, though, power tools are a great way to do that. It changes woodworking a little because it becomes a skill of setting machines up correctly (not a trivial skill!) to get the correct cut.
The Wood Whisperer, who coined the phrase and, literally, wrote the book, Hybrid Woodworking, does a pretty good job blending hand and power tools. If I cared more about getting things done (and had the space and money to devote to it), that would be the path I would follow.
Amazon Link
dry,
https://www.amazon.ca/Ocr-Concrete-Diamond-Grinding-Grinder/dp/B01CQQR3DW/ref=asc_df_B01CQQR3DW/?tag=googleshopc0c-20&linkCode=df0&hvadid=292953024923&hvpos=1o7&hvnetw=g&hvrand=8380050951177615494&hvpone=&hvptwo=&hvqmt=&hvdev=c&hvdvcmdl=&hvlocint=&hvlocphy=1001920&hvtargid=pla-493842304061&psc=1
I haven't used one on a regular corderite shelf. Only silca carbide. I suspect you'd need to be a lot more careful with corderite. That said, I use silica carbide for bisque firings too, they're more expensive but it's worth it.
I always get the pure green compound (ex: amazon y un mas)
Since stropping removes that little bur formed from use (or sharpening) and restores a keen edge, you should be stropping every time. It doesn't remove much material and doesn't take any amount of time. Only after hard or extended use should you need to revisit the stones.
Ideally you strop more often than hone and hone more often than grind.
If I'm hand-planing I don't strop my chisels, just like I don't pay bus fare when I drive me car :)
All the crappy farm tables and diy projects on r/woodworking a your post gets removed, wtf.
I have a rikon half speed 1850 rpm 8" grinder with a 80 grit CBN cubic boron nitride wheel and a veritas tool rest. Shapton ceramic 320, 1000, 5000, 12000 stones. A 36"x6" 3 cm thick piece of granite and use adhesive backed sandpaper rolls. I wax the granite to allow the paper to come off the granite easily.
grinder
cbn wheel
tool rest
stones
320 g
1000 g
5000 g
12000
sand paper
Typically you store planes either on their side or just make a little shelf with a lip at the back so that when you set it down the back of the plane is raised up a bit keeping the blade from contacting the shelf.
A simple honing guide, a combination stone, and a basic strop is all you really need to sharpen plane irons. You can use sandpaper instead of the stone if you are really on a budget, but a decent combo stone is worth having in the shop. You can spend hundreds of dollars on diamond stones, higher end waterstones, sharpening jigs, grinder wheels, etc, but with proper technique, a bit of practice, and about 10 minutes work improving the honing guide the 3 items above will get any plane iron or chisel razor sharp. Grinder is mostly used for lathe tools and to speed up major regrinding or damage repair in a wood shop.
Here's a video on how to properly sharpen a plane iron with the guide.
I like to apply paste wax to the sole and other exposed steel surfaces of my planes (and most other tools in the shop) to prevent rust. I like johnson's paste wax.
Basic Honing Guide
Fancier Honing Guide
I've used and like both. The Veritas certainly makes some things easier but you pay for that convenience. I'd probably get the basic version and see if you feel the need to upgrade. Also you'll probably need a basic one anyway to sharpen spokeshave blades.
Thanks for the tip, I’ll keep that in mind. Right now, I’m starting at the feet and working my way up.
As for the sanding sticks, they’re Squadron brand . They’re inexpensive but they’re fantastic. The only downside is that they don’t have a grit rating on them. But it comes with a Coarse, Medium, Fine, Extra Fine, and a Tri-Grit, which is good for finishing. The amazon pack shows that it comes with a finishing stick, but it doesn’t. It instead has an Extra-Fine grit stick. I find myself using the medium, fine, extra-fine, and tri-grit sticks pretty often. I’ve yet to need the coarse one.
I’d highly recommend the brand. They’ve served me well and I plan to get more when these wear down.
I mean in theory that should work out. Might not be the easiest way to handle it haha. I just have a little stroping block I use. It's like a 4 inch X 12 inch piece of leather on a block of wood. I've heard you can use stropping compound on cardboard as an alternative to leather but I don't have personal experience with that. Either way you would want stropping compound I use this
http://www.amazon.com/Nicholson-03762N-Flat-Bastard-12-Inch/dp/B002M8TWOI/ref=sr_1_1?ie=UTF8&qid=1451716468&sr=8-1&keywords=double+cut+bastard+file
You'll want to get a full set. Here's a link to the Micro-Mesh 3 x 4 Soft Touch Pads that I use. Wet each pad and go over the stems one pad at a time from coarse to fine. I like to finish with obsidian oil as a protectant.
Thanks for the tip!
​
It looks like there is a 3 pack of black PETG for the same price:
https://smile.amazon.com/OVERTURE-Filament-Consumables-Dimensional-Accuracy/dp/B07PGYL6SV
Also if you want to expose aggregate you'll want a grinder wheel like this. Even at 50 grit the it will take you forever to expose aggregate. This one will uncover aggregate in about 5 seconds. It will attach to any 5/8-11 polisher. https://www.amazon.com/Ocr-Concrete-Diamond-Grinding-Grinder/dp/B01CQQR3DW/ref=sr_1_4?ie=UTF8&qid=1479154313&sr=8-4&keywords=diamond+cup+wheel
Paul Sellers put out some youtube videos for sharpening woodworking tools (chisels and handplanes) that are not completely applicable to kitchen knives, but there are a few details that do apply.
I made it.... I got some old Nicholson files off ebay..... I think I paid $30 for 10 different files.... Then I annealed it by throwing it in the coals/ashes of a brush pile that I was burning and let it air cool overnight.... Cut out the size and blade tip with a hacksaw (tiring process) Used a belt sander to shape it down until I got the profile I liked and the blade was about the thickness of a dime. Drilled out the holes on my drill press. Used a makeshift kiln with a MAPP gas torch to get it to cherry red (about 25 minutes of torch time, I'll use charcoal next time) and quenched it in motor oil. Threw it in my shop toaster oven at about 425 for an hour to temper it, then quenched in water. I used Padauk wood for the handles ( I had some scrap leftover from a picture frame and gun rest that I made) I used a 5 minute epoxy, http://www.amazon.com/gp/product/B000ALJ4NS/ref=oh_aui_search_detailpage?ie=UTF8&psc=1
Which setup in about an hour and a half. And 1/4 brass rod,
http://www.amazon.com/gp/product/B000FMWZ5Q/ref=oh_aui_search_detailpage?ie=UTF8&psc=1
Then shaped the handle with my bandsaw, belt sander, and lots of hand sanding (to try and get all the bandsaw marks off)
Finished off with Boiled Linseed Oil which helps make the wood really pop with it's natural color.....
Then used a Gatco system to sharpen it,
http://www.amazon.com/Gatco-10005-5-Stone-sharpening-system/dp/B001DB9CQS/ref=sr_1_1?ie=UTF8&qid=1422323386&sr=8-1&keywords=gatco+knife+sharpener
And honed on a strop with some green compound
http://www.amazon.com/Woodstock-D2902-1-Pound-Buffing-Compound/dp/B0000DD35C/ref=sr_1_3?ie=UTF8&qid=1422323451&sr=8-3&keywords=honing+compound
and now I have to make a sheath...
I'm no pro, but here's my suggstion.
Marking and measuring are important. Get a knife of some sort. This marking knife is cheap and well regarded. Get a combination square (lot available at all sorts of price points). For a longer straight edge, you can use extruded aluminum or angle aluminum which is cheap, lightweight, and straight enough. Then learn to create a knife edge and a handsaw (either western push style, or japanese pull style) and you can cut wood accurately to size.
You're planes will then get you to flatten and surface your boards (you can use the aluminum as winding sticks). Lots of resources available for rehabbing planes. Then the next step is joints. For this, chisels and a comfortable mallet are great (and a rabbet plane if you can find/afford one). To make life easier, a coping saw and a drill (electric or brace and bit) can clear out waste for you. It makes life easier. But the key here is keeping your planes and chisels sharp. I don't know of a budget way to do this. I've got a few Ezelap diamond stones (coarse, fine and extra fine) that I use, but there are other methods as well (sandpaper on glass, waterstones, oil stones, tormeks). But sharpening is critical to handtool woodworking happiness. You might want a sharpening guide as well. The cheap ones work great (I'm not sure why these are so expensive. I think I paid $8 for mine). Then build one of these and you're all set for sharpening. Finally, you need stuff to stick together, so glue and glue applicators are worth looking into. I also use my cabinet scrapers quite a bit, but that's just me. They're cheap so I think everyone should have one.
After that, you can spend all sorts of money on other stuff as you progress. But most anything square can be built with this setup.
I bought this for my files: https://www.amazon.com/gp/product/B00J06IPQG/ref=oh_aui_detailpage_o03_s00?ie=UTF8&psc=1
For the knife, you can probably sand off the rust and polish with a polishing cloth.
I use a King 250/1000 and a strop with some buffing compound.
Amazon is having a sale on PETG, $10/Kg. https://www.amazon.com/gp/product/B07PGYL6SV/ref=as_li_ss_tl?smid=A3M6OB6YPLO1C&psc=1&linkCode=ll1&tag=reddit21-20&linkId=2894277437834334bffa69ba6ef949d1&language=en_US
After sanding down my pans I can tell you that I would never want to do it by hand. It would probably take you hours and hours of sanding.
Might be better off asking a friend or relative if you can borrow their sander for a day.
Or if a drill is more in the realm of something doable, I linked to some stuff in an earlier comment.
> If you want to go with another method outlined here you can use a regular drill. Tons of uses for a drill other than sanding down your skillet.
> Drill $30
> Coarse Wire Brush attatchment $9
> * Fine Wire Brush attatchment $6
> Total of $45
I use 3 different grades of sand paper to get them off. I don't know exactly what the grades are but the super fine grade gets it shiny again. I also use a swatch of a shirt I cut up to quickly buff it.
EDIT: These are the sticks I have.
I use Squadron sanding sticks from Amazon. They're like polishing blocks, but they're in stick form and come in a variety of grits. They are a god send for me.
So I also own a few planes. I tried freehand sharpening on a stone and got good results, but I could never get that "sharp enough to shave your arm hair", I could get a few strands but not enough. THen I bought the honing guide (https://www.amazon.com/Robert-Larson-800-1800-Honing-Guide/dp/B000CFNCKS/ref=sr_1_3?ie=UTF8&qid=1472754117&sr=8-3&keywords=plane+iron+jig). This bad boy gets the blade sharp, then you use the "scary sharp" method by wetsanding with very fine grit sand paper glued to a tile. Now I can take an entire patch of hair off with a single slide of the blade on my arm.
In my opinion the most efficient way to sharpen in terms of both cost and time is to use a bench grinder to hollow grind your edge then use diamond plates to hone it. The grinder will allow you to quickly remove any damage to the edge, reset the bevel and create a hollow grind. A hollow grind means that the bevel is slightly concave. This means that when you put the bevel flat on a stone to hone it material will only be removed from the outer edges making it faster because you don't have to remove much steel. It's also easier to sharpen without a honing guide because you don't have to use a micro bevel. This image demonstrates what I mean. Here's a good video on using a bench grinder. You only need to grind the bevel once the hollow becomes too small to efficiently hone the edge or you chip or dent the edge. A good bench grinder should cost $80-120. This Rikon is a pretty good deal because comes with the right type of wheels unlike most other grinders.
After grinding I like to use diamond stones to hone the edge. I like diamond stones because they're low maintenance and a bit cheaper when compared to waterstones. I personally have Eze-Lap Coarse/Medium and Fine/Superfine doublesided plates. Some people prefer the single sided plates in which case go for the Coarse, Fine and Superfine. I went for the double sided plates because you get an extra grit for the same price and I don't mind flipping them over. A few strokes on each grit will remove the grinding marks and bring the edge up to a near mirror polish. To give the edge a final polish I use a strop and charged with green honing compound. I made the strop out of some scrap leather and a piece of scrap hardwood for free.
To go from a chipped dull edge to razor sharp takes me less than 5 minutes. I usually only grind the bevel when the hollow starts to become to small. Most of the time I can just hone the edge on the diamond stones then polish it using the stop which takes me 30-60 seconds. I've tried out systems such as waterstones, ceramic stones and the worksharp but in my opinion this is the fastest and most efficient way to sharpen. The setup cost is about $250-$270 which I think is fairly reasonable and you don't have any ongoing cost like the scarp sharp system or the worksharp. A set of quality waterstones is $200-300 alone and the power sharpeners like the tormak are quite expensive and don't really save any time.
So something like these? https://www.amazon.ca/Squadron-Products-Value-Sanding-Stick/dp/B000CDR5K8
Did you mean to post a picture of the saw?
A rubber mallet is no good for chopping mortises (all of the energy is lost to recoil). You'll want to get a wooden chisel mallet or a dead blow mallet.
You will have to sharpen your chisels. There are different methods to sharpen a chisel. You won't ever find a consensus on which way is best. If you want a cheap way to start, google "scary sharp". You'll use sandpaper and a flat surface like a piece of granite or plate glass. It works just as well as any other method, but it's not a long term solution. I use diamond whetstones and a leather strop with buffing compound to sharpen. You can buy a jig (like this one https://www.amazon.com/Robert-Larson-800-1800-Honing-Guide/dp/B000CFNCKS/ref=sr_1_sc_1?ie=UTF8&qid=1468777145&sr=8-1) to help you sharpen the chisel or freehand sharpen. You may want to buy a protractor gauge to check your angle, which should be around 30 degrees. You can find many Youtube tutorials on this. Paul Sellers is a popular teacher of freehand chisel sharpening.
The wire brush suggested by WWD should work. I had the same problem with the paint in the small grooves and brushing them looked tedious to me. So I used a wire brush attachment on a drill and saved some time/elbow grease.
Mirka Abralon 8A-241 Assorted Silicon Carbide Sanding/Polishing Pads, 5-Pack https://www.amazon.com/dp/B014Q3EAXO/
This is the answer. Worth every penny. These are soft pads that conform to the shape of the tubing and leave an even finish.
When I refinished my stock that was poop I just used Citristrip and then I wanted a darker wood so I used a stain conditioner then stain, followed with shellac I mixed up from Shellac.net. Lightly sanded at the beginning just to knock down a rough edge.
Another rifle got the same treatment but ended up using Linspeed for that one since it was a Yugo Mauser. Didn't like how shiny it was so for the last coat I knocked down the shine with some 0000 Synthetic Steel Wool, really happy with how that came out.
This is doable for much less than $600. When I started shaving w a SR I figured it would take about 2 years of shaving to pay off the initial cost. Although if I am being honest I probably spend more now on razors than I did before.
For the most basic of kits you will need a:
That's the basics really. You can spend more on aftershave, preshave, synthetic brushes, creams whatever. If you know how to sharpen/strop I would definitely recommend a used razor off ebay ( a nice one you don't have to restore). If you don't know how to sharpen I recommend you get some stones and learn anyway it isn't very hard. Though you may want a cheap $10 razor to practice on just in case. The hardest part is choosing a brand (or buying just one razor). For used razors you have some things to consider:
You may also want to try a double edge (DE) razor but then you still need blades (although they are very very cheap) I am not sure if that is a requirement here or not.
I bought a buck Bros from HF for $10 and it actually works pretty good after flattening and sharpening. On the same day I went to a few pawn shops and got a No.4 and a 78 for $30 each. I recently got a 45 off of ebay for $45 and 12 cutters off of craigslist for $35. I suggest the re conditioning route. You need to be able to take it apart and put it back together in order to really see how it works. IMO.
I am a newb too but if you are going to get into this hobby with hand tools you are going to have to learn to hone and sharpen your chisels and irons. Most planes and chisels are not sharpened and or flattened. I have Wood River chisels (Wood Craft) and they are pretty flat but sharp, not at all.
I suggest getting a cheap honing guide off of amazon. I got this one. http://www.amazon.com/Robert-Larson-800-1800-Honing-Guide/dp/B000CFNCKS/ref=sr_1_1?ie=UTF8&qid=1398874279&sr=8-1&keywords=honing+guide and one of these to verify your angle. http://www.homedepot.com/p/Empire-Plastic-Protractor-Angle-Finder-2791/202035328
As for sharpening I am doing the "Scary Sharp" Method and it works well. You can either DIY it or you can buy the pre made kit from Rockler.
http://www.amazon.com/Lansky-Diamond-Standard-Sharpening-System/dp/B000B8JDRC/ref=sr_1_8?s=hi&ie=UTF8&qid=1320462335&sr=1-8
http://www.amazon.com/Woodstock-D2902-1-Pound-Buffing-Compound/dp/B0000DD35C/ref=sr_1_1?s=hi&ie=UTF8&qid=1320462373&sr=1-1
Use the Lansky system, it's awesome. Then take a section of an old leather belt and glue it to a paint stick. Load it up with the green rouge and strop away. I use Flitz polishing compound on an old belt with fantastic results.
My Typical nub removal process looks like this:
It takes a bit longer, but it typically gets rid of all of the stress marks and nubs and you avoid cutting too deep. I just had to refinish my Denial Gundam because of deep cuts I made 6 months ago when I just used a knife.
Thanks! I think I will try the wood burning. I'll try it out on a scrap piece first just to check.
I haven't bought a leather strop but I cut up and glued a piece of my old jeans onto a 8" block of wood and bought this:
(https://www.amazon.com/Woodstock-D2902-1-Pound-Buffing-Compound/dp/B0000DD35C/ref=sr_1_1?ie=UTF8&qid=1468086393&sr=8-1&keywords=green+sharpening+compound)
So far it seems to be working well. My knife still can pass the paper test. I have had a few nicks in the knife after dropping it once but I used a Accusharp Knife and Tool Sharpener we had at home:
(https://www.amazon.com/AccuSharp-1-001-Knife-Sharpener/dp/B00004VWKQ)
It made it nice and sharp again without the nicks but I don't know if it's good to use for the knife. I'd like to learn how to use a wetstone eventually to sharpen my knife but will probably practice on my Leatherman's knife before I try it on the Mora just so I don't mess it up.
I got this set (though, I got mine from Lowes - most hardware stores should have them. Heck, even Walmart probably has 'em). They're not great, but they're really impressive for the price. If you use them a lot, you'll probably want better chisels (i.e. the Narex ones everybody has mentioned. Those have been on my shopping list for a while now).
Also make sure you get something to sharpen them with. Chromium oxide paste/bar and a strop is also really helpful for quick touchups (My strop is a scrap of denim glued to a scrap of wood - doesn't have to be fancy). This isn't necessary to start, but it's inexpensive and something to keep in mind.
It is rust, basically.
Works like a champ. I was summoning lels with my abbreviation.
The bottom budget (or lowest you could go without blaming your sharpening equipment for failure) would be a Norton combination India stone or King combination water stone, plus some honing compound and a scrap of denim or leather glued to a block of wood for a strop.
Use a honing guide like this if you aren't comfortable trying free hand.
A tool is sharp when two surfaces (the back/face and bevel) meet at a sharp corner with ~0 radius. The edge is honed/refined on finer and finer stones to get a better surface finish and better edge retention.
Here are some tutorials with and without a honing guide. I recommend watching both, because each covers a different aspect of initial chisel prep.
On top of your sharpening equipment, work from both sides and use knife lines to prevent blow out.
if you're wire brushing much of anything you'll want a power brush. something like this in a drill works decently. Next step up is a cheap angle grinder and a cup wheel.
either one will be far far far quicker and easier than doing it by hand.
yea i don't plan on painting, i might do a clear gloss or clear pearl gloss though later one. so do you think it is worth sanding still even if i don't plan on painting?
​
is there a sandpaper stick pack you recommend then? is the following link better? like i said i don't want to paint aside from the clear coat i might get later on
​
https://www.amazon.com/TAMIYA-Sanding-Sponge-Sheet-4-type/dp/B00MCM21P6/ref=sr_1_2?keywords=tamiya+sanding&qid=1564010996&s=gateway&sr=8-2
​
what grit would i start and end with in that one if you think its good?
Ream it to the wood and then give it an alcohol dip, run some pipe cleaners through til dry and then let it dry out, and you should be good to go. Apply some carnuba wax to the bowl and stem and use a dremel with a buff pad to buff out to a shine, or get one of those shoe polisher machines and use it to buff it out. Red Jewelers rouge can be used to buff out scratched, teeth jitter marks, and polish silver collars and such. Red rouge is soft, green will cut stuff up to much, it's way to rough. You can get it off Amazon for $2.00
http://www.amazon.com/oz-Jewelers-Rouge-Polishing-Compound/dp/B0009SOB9O
My best friend used to own a Tobacco Shop in Texas Called J.Morgan's Tobacco, and I had the run of the place and learned a lot there. I was one of the few allowed to use the buffer. If you're not careful though you can fling a pipe across a room and really hurt yourself or someone with it.
I just use waterstones (1000, 3000, 8000) and a piece of MDF with honing compound on it. I have to admit that I did buy the Veritas honing guide (for chisels and planes). It's amazing (even if it's a bit pricy).
The MDF with honing compound really does make a big difference in how sharp my chisels get. It also is a very quick way to tune them up free hand (takes <30 seconds). A good honing between uses can double the time between sharpenings.
Also, a honing board is darn near free. . . $12 for enough to last you for years and years (extra fine green)
https://smile.amazon.com/Woodstock-D2902-1-Pound-Buffing-Compound/dp/B0000DD35C/ref=sr_1_1?ie=UTF8&amp;qid=1483338609&amp;sr=8-1&amp;keywords=green+honing+compound
Note: deprime before tumbling for the extra clean primer pockets if you were to load precision. For mass loading of 9mm i do not bother.
Here are some links in case you're interested:
Stanley 10" bastard with one safe edge
Nicholson file set I bought
File card and brush
Round file I bought
Will this do?
Stanley 21-106 8-Inch Mill Bastard File https://www.amazon.com/dp/B004EBMXZG/ref=cm_sw_r_cp_apa_CLUVBbY02V4YB
I don't have a vice though.
Best sandpaper grit to prep parts before painting?
So I looked at a kit I snapped together some time ago, and want to paint it -- but it has some imperfections. Small nubs, etc.
What grit sandpaper/sanding sticks would I need to smooth out the surface for it to be good enough to paint. I don't care for stress marks or anything like that -- just has to end up looking nice when it's painted.
I also found this product, and wonder if the grits are fine -- https://www.amazon.com/TAMIYA-Sanding-Sponge-Sheet-4-type/dp/B00MCM21P6/
Thank you!
so im looking to start seem line removal and i have checked a few tutorials as well as the sticky, and i cant seem to figure out what types of sandpaper/ sanding sticks to get. this has good reviews on amason. do yall think thos would be fine ? Squadron Products Value Pack Sanding Stick https://www.amazon.com/dp/B000CDR5K8/ref=cm_sw_r_cp_apa_N4gpzbYNR9N5S
Honestly, just use a drill and wire wheel. Anything else is overkill unless the calipers are incredibly pitted, in which case you’d almost certainly do better to just replace them.
One of these and one of these or go nuts and get one of these and save yourself some time. (Obviously you should order more than one wire wheel at $4/each)
You can combat this with these. I use a 600 grit that I get from a local hobby shop, then in this pack, I use the fine stick, and then the ultra fine stick. It brings back that glossy sheen.
&#x200B;
Also, keep in mind that a matt top coat will hide a lot of these sanding marks.
The cheapest way? If you're using a Gough jig, you can use a protractor to rig your angle, and tightly wrap your file in 220 grit sandpaper (you can also use a piece of flat steel for more precision). Then progress through the grits, raising a burr each time. Use the rough side old leather belt (I stole one of my husband's) as a strop. Green Polishing Compound on an old belt after using 2500 grit sandpaper will get you plenty sharp.
I sharpened our kitchen knives for a couple years before starting bladesmithing using this method. It'll easily create a good shaving edge, and is much faster than a lansky
Thanks! I hope there was something helpful in that post.
I really think a diamond plate is overkill, at least to start off with. I got really frustrated with how not-flat my stones were, but I couldn't justify spending a huge amount of money on a flat piece of metal. So I went to Menard's and bought a 3/32 pane of glass. I figured that was thin enough that it would still flex, so I put it on top of a piece of 3/4 MDF, and then put the sandpaper on top of the whole thing. It worked really well, and the total cost was under $5. Thin glass is really cheap, apparently.
The Veritas honing guide is really nice; I definitely want to get it eventually. But in the mean time, I'm using this $10 guide from Woodcraft, and I'm getting good results with it.
Finally, you really don't need anything fancy for stropping. Literally a piece of MDF with some compound will work. You can use something like this, which costs $6.50.
So you really don't need to invest more than maybe $20 to get from where you are to the place where you can get much better results.
If you go the sanding route (which may not be the best way to go), you do NOT want to use diamond polishing pads. Those are for polishing, as in turning smooth concrete into mirror finish concrete. Not for something as aggressive as what you're looking to do.
You'd want a diamond grinding cup like this one:
https://www.amazon.com/dp/B01CQQR3DW/ref=cm_sw_r_cp_apa_i_I1eCCbNMJCFJW
With an angle grinder. It'll grind the concrete down to a finish that's smooth to the touch. It will go quick, less than an hour.
It will be MESSY. Grinding concrete creates a bunch of fine concrete dust that gets in your face, eyes, nose, etc. You'll want goggles and a face mask.
1/4, 1/2, 3/4 will get you started, you can fill in as you go. I bought my first 'real' set of chisels only a few months ago too, and I saved some money without sacrificing on quality by buying old Stanley chisels, you can find them online and sometimes at antique stores, but make sure you know what they're worth, antique stores like to charge an arm and a leg for broken tools. I was lucky to find a complete set at an antique store at a fair price.
Right now I'm lusting after the Veritas PM-V11 bench chisels: http://www.leevalley.com/US/wood/page.aspx?p=69619&amp;cat=1,41504. I'm doing mental gymnastics trying to convince myself how I might be able to justify their price.
When you get a good set of starter chisels I suggest you watch Paul Sellers' video on sharpening chisels: https://www.youtube.com/watch?v=Ki8tt-VjwqI. You can do it completely with sandpaper and a homemade strop rubbed with chromium oxide.
You can get enough chromium oxide to last you a lifetime for less than $15 on Amazon: http://www.amazon.com/Woodstock-D2902-1-Pound-Buffing-Compound/dp/B0000DD35C/ref=sr_1_1?ie=UTF8&amp;qid=1418003499&amp;sr=8-1&amp;keywords=chromium+oxide
You'll rub that stuff on a homemade strop, you can me one for less than $5 or you can buy a $30 one that is quite literally the same thing at woodcraft. To make one just go to a craft store like Hobby Lobby and buy a bag of their cheap strips of leather (less than $5), you'll find them usually by where they sell moccasin making kits, not the bolts of fabric. You want the strips that are a little rougher. Then you'll just take it home and glue it to a piece of 2x4. Polishing your chisels on a leather strop primed with your buffing agent will make mirror chisels.
The cheapest way to get a super sharp edge is wet/dry sandpaper on glass with a honing guide.
>I would like to maintain the blade through continual touch ups rather than redoing one. With the strategy, will I have trouble maintaining the proper angles?
Some. Touch up will help maintain an edge for MUCH longer, but you will still eventually have to actually sharpen the knife.
I would go with this if you can't put any more money into sharpeners. You may have trouble with s30v or anything harder, but it should work for MOST of your blades just fine.
Also, look into making a good strop. You only need some stropping compound and some cardboard or better a good piece of leather glued to a piece of wood. That will be the easiest way to maintain your edge to shaving sharp.
I'm pretty sure this is it
I tried an assortment of brake dust cleaners and even brake parts cleaner with no luck so I resorted to a relatively soft wire brush attachment for a drill.
This was a last resort for me. It was between this and new wheels. I’m very happy with how they turned out.
Forney 72729 Wire Cup Brush, Coarse Crimped with 1/4-Inch Hex Shank, 2-Inch-by-.012-Inch https://www.amazon.com/dp/B000TG60GS/ref=cm_sw_r_cp_api_i_pxnYDbWFA2K9V
It didn’t scratch the wheel at all. I even used it on the front of the wheels and it didn’t scratch the paint. Turned out 1000x better than anticipated. Took about 2 hours for all 4 wheels including the time it took to jack the vehicle up and down.
Side note: If you wet the wheel down first it seems to work better.
haven't seen anyone mention a bastard file yet...so, a bastard file works - at least it did for me after some other modelers I know suggested it. My Tamiya cutters were definitely sharper after filing them against the bastard file. You can get one for pretty cheap on Amazon: https://www.amazon.com/Stanley-21-106-8-Inch-Mill-Bastard/dp/B004EBMXZG/ref=sr_1_2?ie=UTF8&amp;qid=1481836807&amp;sr=8-2&amp;keywords=bastard+file
I've seen the x-acto chisel blades recommended for nub removal. The standard diagonal ones have been a bit less effective than I'd like. Should I just bite the bullet and go with sandpaper/sticks though? And if so what should I get? There's the sanding stick set here that I've seen used, and the sandpaper set recommended on the link on this wiki's lowest grit is 1000, where I've seen starting with 400 and working your way up on nubs recommended, so should I look at a different set?
I have this. I've only every used it for plane irons so I can't agree or disagree with the reviews about how it sucks for chisels. I like it for plane irons though.
Is this the honing guide you are referring to? How high of a grit on sandpaper do you need to go? I have not been able to find a higher grit than 400. And what is the winded for?
Edit: how many of those questions are answered in Paul sellers video? I have not watched yet.
I bought the 8 inch DMT diamond plates. 250 grit, 600 grit and 1200 grit. I think they are called coarse, fine, extra fine. Found this comparable item on Amazon.
I built the holder from a discarded IKEA chest of drawers. The strop is a piece of leather from an art supply store glued to an offcut mahogany. The buffing compound is chromium oxide.
I will surely share the finished bench here. Since I am vlogging my progress, I forget to take photos, so I will remember to do that.
The site seems to be out of the Chromium Oxide. Pursuant to this conversation I just ordered this:
http://www.amazon.com/Woodstock-D2902-1-Pound-Buffing-Compound/dp/B0000DD35C/ref=sr_1_12?ie=UTF8&amp;qid=1343430484&amp;sr=8-12&amp;keywords=strop and this
http://www.amazon.com/A-z-Automatic-Woodturning-Handled-2-Sided/dp/B0037MM830/ref=sr_1_4?s=hi&amp;ie=UTF8&amp;qid=1343430551&amp;sr=1-4&amp;keywords=strop
You could get by with rubbing the CrO on a piece of MDF, or getting a cheap piece of leather scrap and gluing it to a block of wood/MDF.
Do work your chisels to be flat. A simple piece of 400 grit sandpaper glued with contact adhesive to a small glass plate will do wonders for you.
Happy sharpening!
Yea, same idea. If you hone the edge correctly, you'll almost never have to completely regrind it. I like this little thing to hold the chisel at the correct angle, but you can certainly do it by hand.
First I'll answer your last question, no, there is nothing wrong with not painting or going all out on a model. Like you said, you have only been at this for a few months and it is always best to start small. If you keep at it, who knows, months down the road you may be making your own custom models. That being said, lets see what I can suggest for getting the best out of your model without putting a ton of time (or money) into it. The first few things I would pick up are:
http://www.amazon.com/Elmers-XZ3601-X-ACTO-Knife-Cap/dp/B005KRSWM6/ref=sr_1_4?ie=UTF8&amp;qid=1451350392&amp;sr=8-4&amp;keywords=hobby+knife
http://www.amazon.com/Squadron-Products-Value-Sanding-Stick/dp/B000CDR5K8/ref=sr_1_2?ie=UTF8&amp;qid=1451350756&amp;sr=8-2&amp;keywords=squadron+tri+grit
http://www.amazon.com/Uni-Pin-Fineliner-0-05mm-Black/dp/B00A7BSEKK/ref=sr_1_fkmr2_2?ie=UTF8&amp;qid=1451351047&amp;sr=8-2-fkmr2&amp;keywords=uni+pin+.5+fine+liner
http://www.amazon.com/Krylon-53530-Acrylic-Interior-Exterior/dp/B001C42OXY/ref=sr_1_1?ie=UTF8&amp;qid=1451351086&amp;sr=8-1&amp;keywords=flat+top+coat
The most important part is have fun with it, and do what you like.
3 Diamond Plates and honing compound on a strop.
The diamond plates are true and flat and will last a life time with depending on use. They will sharpen effectively for a very long time (life) unless used by multiple people for multiple edges daily.
There are many brands here's one of them.
http://www.leevalley.com/en/Wood/page.aspx?p=67660&amp;cat=43072
Honing compound to be used with a piece of leather (strop).
http://www.amazon.com/Green-Chrome-Oxide-Compound-oz/dp/B003E65XYU
TIL synthetic steel wool is a thing.
https://www.amazon.com/3M-10119NA-Synthetic-Steel-Wool/dp/B00004Z4AE
Here is an example of a "side cutter":
https://www.amazon.com/Integy-Hop-ups-Precision-Modelers-Plastic/dp/B00W4172V8/ref=sr_1_2?ie=UTF8&amp;qid=1505567090&amp;sr=8-2&amp;keywords=side+cutter
Liquid glue (random sales listing I chose, unsure if cheapest):
https://www.amazon.com/Tamiya-87038-Extra-Thin-Cement/dp/B000BMYWYC/ref=sr_1_2?ie=UTF8&amp;qid=1505567173&amp;sr=8-2&amp;keywords=tamiya+extra+thin+cement
Example of sanding sticks (prices will vary, more than one brand available probably):
https://www.amazon.com/Squadron-Products-Value-Sanding-Stick/dp/B000CDR5K8/ref=sr_1_4?ie=UTF8&amp;qid=1505567224&amp;sr=8-4&amp;keywords=sanding+stick
I use hard Wave sticks too and love them. They sand very flat (something I liked files for) but are quite gentle on the plastic in terms of deap scratches. BUT for some reason the 800 grit is disconnected like in your link. Anyone know where else you can get it?
In terms of files I have the Tamiya basic , Tamiya fine basic , and a (hopefully) nicer plastic hobby file on order just to try. Files are nice for larger jobs like serious molding flaws (not common in Bandai kits) and the fine ones are OK for nubs but still quite rough compared to any sanding stick. Although, as you know I'm sure, files last forever and require much less effort and time to chew through plastic. I'm hoping the plastic file is the Holy grail and is a good balance. I bought a set of needle files and diamond files from harbor freight and they blow. The trash just don't grip or cut don't waste your $3.
And as a reference I own Revell, squadron , nail buff sticks, and have made my own sticks from automotive sand paper. The nail files are way too rough imo, making my own is a pain, and while the squadron sticks are nice I mainly only used the tri-grit while I used all the Revell except the roughest and are probably the best value imo. I still use the other more flexible kinds but dramatically prefer wave. Wish the 800 grit still were available.
Long post sorry. Hope it helps
Edits: spelling, phrasing, and lots of links
I bought a pound of green compound from amazon years ago. I've barely even scratched the surface of it and I have strops strewn about my house. I don't know how consistent the quality is (cheaper buffing compounds tend to vary a bit in grit size) but it puts a scary sharp finish on my blades.
https://www.amazon.com/Woodstock-D2902-1-Pound-Buffing-Compound/dp/B0000DD35C/ref=sr_1_2?keywords=green+buffing+compound&qid=1554569951&s=gateway&sr=8-2 This is the stuff I bought back in 2015. My brick looks a bit different, but the quality should be the same. (just make sure you get the extra fine green).
honestly if you're not looking to get into all the ins and outs of sharpening then the spyderco sharpmaker is a pretty solid choice and it can get you a hair shaving edge. i'd also recommend picking up some untra fine ceramic stones, a strop, and some green compound. for more in depth info check out this thread as well as the sidebar over at /r/knives. i hope this helps you out.
Remove the hammer and hammer spring
Clip one leg on the trigger spring then bend up the other so the trigger itself has very light, but noticeable pull. The trigger NEEDS to be able to reset.
Get some jewelers rouge and apply it to the sear/ trigger interface.
While keeping the trigger from impacting the mag well and bolt catch work the trigger over and over, apply more rouge if needed. Once the gritty feel has been removed from the trigger disassemble everything, clean out the rouge, reassemble it, lube it up and put the rifle together. Do a function test and if the rifle passes go to the range and enjoy the long, but smooth trigger pull.
I've done this and more aggressive trigger work on my AR-15's. This has always helped while the more aggressive stuff has had mixed results.
You can get a cheap small vise for $5-10 at a flea market. I got a really nice old vise for $25 at a tool swap meet and it wasn't the old one. If you have a tool swap in your area it's worth going to. On CL it seems everybody thinks an old vise is worth $200.
Large Nicholson bastard file will get you going. This one for instance. You'll need some way to clamp it down to your bench, you can't do much with the blade clamped vertically in a vise.
A round file of some sort will be useful, but you can use a dowel and sandpaper in a pinch.
Lots of sandpaper. You want the wet/dry stuff (not so much to use wet, but because it holds up to steel better). Get lots of 100 grit, lots of 220, some 320, and some 600.
Watch CL like a hawk for a 2x42 Craftsman belt sander. I got mine for $35. $50 of belts later and you've got yourself a versatile grinder.
this
And this
Are the only two stones you need.
I also recommend you get this
To use with this
I recently bought this one for my very first plane (A Stanley #5 Sweetheart, woot!), and use it with a waterstone. It's very nice, except that my waterstone is exactly the same width as my blade.
I found a video...somewhere...about using this on the cut side and then using a very thin metal ruler as a stop for a very find back bevel, works great.
I still need to finish reprofiling my blade though, for which I'll probably use the sandpaper method.
There's a green compound good for stainless steel. I don't know what works for carbon.
http://www.amazon.com/gp/aw/d/B0000DD35C/ref=mp_s_a_1_1?qid=1464535370&amp;sr=8-1&amp;pi=AC_SX236_SY340_FMwebp_QL65&amp;keywords=Green+compound
Here's the set I bought
5 Pack Veriety 500-4000 Grits Here
This is one I made a little while back. Compound Loaded Side and Smooth Leather Side
One side is just plain smooth leather which I wet sanded with 120-Grit and then massaged a lot of mineral oil into the leather. I like a strop which has more drag to it, some people prefer smoother and dryer ones.
On the other side I used this green compound. Through trial and errors on previous strops I found the best way that works for me is to put mineral oil into the leather (rub it around) and then start rubbing the buffing compound on it (like coloring in with crayons). I also keep light heat on the strop with a heat gun. After I have everything "colored in", I stop the heat and keep massaging the green in (be careful...once I kind of burn't my skin a bit).
Do note a lot places had recommended putting the compound on the suede side, I however went with the smooth on it.
>PS: In hindsight I wish I just made two separate strops, instead of using both sides. I always have to put something underneath when the compound side is at the bottom cause I don't want small pieces mixing in to our cutting boards etc.
I have one of those fairly honing cheap guides-
http://www.amazon.com/gp/product/B000CFNCKS/
I am tempted to get the Veritas guide, but I really don't want to drop another $140 on stuff right now. The ability to do the cambered edges and easily add microbevels seems valuable, though, over what this cheap guide offers.
https://www.amazon.com/gp/product/B000CFNCKS/ref=oh_aui_detailpage_o00_s00?ie=UTF8&amp;psc=1
I doubt it is a pressure issue. It's always off on the same side, and I even tried to favor the long side, and it was still cutting mostly on that one side.
If anyone was curious about some of the things Paul was using (especially if you had in mind that it might be nice to do things yourself, and on the cheap), he says in one of his other videos that the plates were EZ-lap plates. You can spend a significant amount of money on those plates, or you can some smaller ones off of ebay for pretty cheap:
then pick up a strop somewhere, and buy some chromium oxide. The stuff is pretty cheap, I bought a giant block here
for only like $10. With some practice, I've been getting my chisels sharp enough to cut off hair on my arm / cut pieces of paper with very little effort. It's fun!
Using a flat needle file is easier on you fingers and a lare of primer before paint will even it out. If you plan on doing a OOB using sanding sponges works just fine. Links:
Files: https://smile.amazon.com/gp/product/B00CE3L96K/ref=oh_aui_search_detailpage?ie=UTF8&amp;psc=1
Sponges: https://smile.amazon.com/gp/product/B00MCM21P6/ref=oh_aui_search_detailpage?ie=UTF8&amp;psc=1
Green polishing compound. It's the paste that I load my strop with for honing.
http://www.amazon.com/gp/aw/d/B0000DD35C#Ask
I've seen polished to a mirror using super fine sandpaper
Looks cool,
To strip the paint, I'm not sure if this is the best way, but I'd use a grinding brush attached to a powerful drill.
Make sure to use a good mask, old paint dust is nasty stuff.
Apply some rust killer and repaint it white like the old one.
Have fun
Here is the mobile version of your link
Scrape it out with a metal spoon.
Heat it in the microwave to melt it.
Wire brush on a drill.
a wire wheel http://www.amazon.com/Forney-72729-Crimped-2-Inch----012-Inch/dp/B000TG60GS/ref=sr_1_11/185-6920570-4868405?s=hi&amp;ie=UTF8&amp;qid=1417352093&amp;sr=1-11&amp;keywords=wire+wheel+brush+for+drill