(Part 3) Best industrial & scientific according to redditors
We found 29,159 Reddit comments discussing the best industrial & scientific. We ranked the 11,986 resulting products by number of redditors who mentioned them. Here are the products ranked 41-60. You can also go back to the previous section.

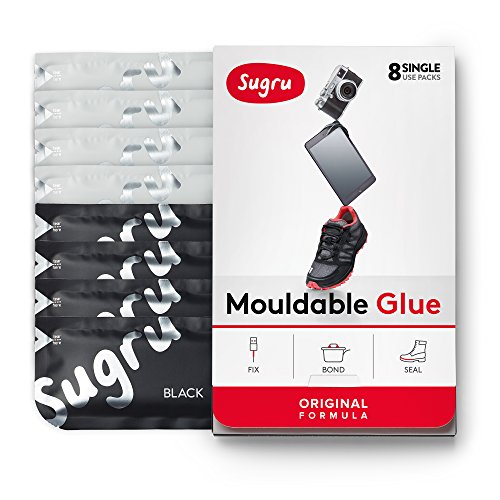


https://sugru.com/
Sugru Moldable Glue - Original Formula - Black & White 8-Pack https://www.amazon.com/dp/B00EU7DBNM/ref=cm_sw_r_cp_api_i_N2zaBbSDF3BMP
Here's the 2014 Water Quality Report. It's a good read.
The bulk of the water testing takes place directly at the 3 major water facilities in SD. As you may already know the lead contamination in Flint did not happen at the water treatment facility, but rather in the pipes that lead to homes. The city
inadvertentlychanged the water pH and failed to add an additive that would prevent the old pipes from corroding.The way the city of San Diego test for these metals is by sampling the water in 50 homes. According to their results, we are good and the water is safe. If you want to do your due diligence, buy one of these cheap drinking water tests that include testing for iron, lead and copper among other things.
I did, and confirmed some of their results.
-----------
EDIT 2: Perchlorate is more of a health concern, and it's not mentioned on the report. Is it regulated by the city?
EDIT: Lead and copper results from 2014.
> Lead and Copper:
>
> Lead and copper enter drinking water primarily through plumbing materials. Exposure
> to lead and copper may cause health problems ranging from stomach distress to brain
> damage. In 1991, the EPA published the Lead and Copper Rule to control lead and copper
> in drinking water. The rule requires us to monitor drinking water at customer taps. If
> lead concentrations exceed an action level of 15 ppb or copper concentrations exceed an
> action level of 1.3 ppm in more than 10 percent of taps sampled, i.e. the 90th percentile,
> we would be required to undertake a number of additional actions to inform the public
> and control corrosion.
>
> In 2014, 57 customers provided samples from their taps to the City of San Diego for lead
> and copper analysis. The results of these tests are presented here; for each parameter,
> one of the 57 sites had a result above the Action Level. Because less than 10 percent of
> our results were above the Action Levels for Lead and Copper, no additional actions are required.
> Lead and Copper Rule monitoring must be conducted every three years – our next
> study will be conducted in 2017.
>
> If present, elevated levels of lead can cause serious health problems, especially for pregnant
> women and young children. Lead in drinking water is primarily from materials and components
> associated with service lines and home plumbing. The City of San Diego is responsible for
> providing high quality drinking water, but cannot control the variety of materials used in
> plumbing components. When your water has been sitting for several hours, you can minimize
> the potential for lead exposure by flushing your tap for 30 seconds to two minutes before
> using water for drinking or cooking. If you are concerned about lead in your water, you may
> wish to have your water tested. Information on lead in drinking water, testing methods, and
> steps you can take to minimize exposure is available from the Safe Drinking Water Hotline or
> at epa.gov/safewater/lead
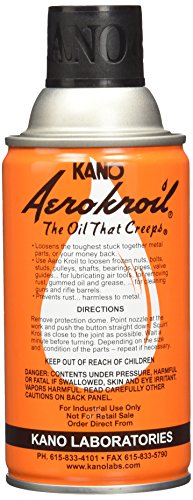
> PB blaster
Allow me to introduce you to Aero Kroil. I used PB Blaster for years, then a machinist friend introduced me to this stuff. You'll never look back.
Use this
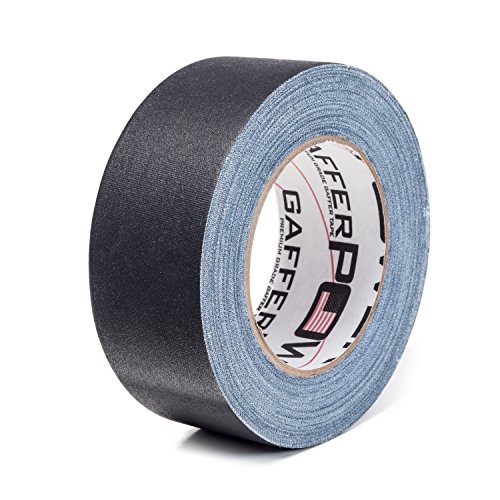
Tip: When that tape wears off, try using real Gaffer Tape. The tape you're using is closer to proper Duct tape, which may annoy you when it comes off (stick and stuff)
This is the tape that road crews use to tape cables to the ground (tile, carpet etc). It's slightly pliable and wont leave any residue when you remove it. It's actually amazing stuff, i use it for all sorts of things
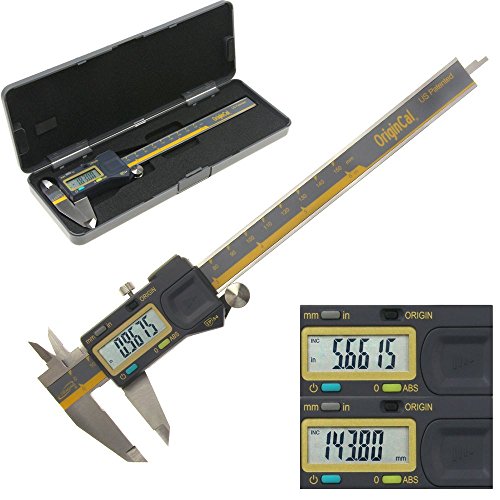
Mitutoyo is absolutely the best, but just in case you want to pickup a few calipers that are very near the same quality at budget pricing, I can highly recommend: iGaging ABSOLUTE ORIGIN 0-6" Digital Electronic Caliper - IP54 Protection / Extreme Accuracy https://www.amazon.com/dp/B00INL0BTS/ref=cm_sw_r_cp_apa_02MAyb2RWWRKM
I have purchased several of these for our engineering department and they are leaps and bounds better than other cheap units. The sliding action is smooth with no slop. The display updates very quickly. Accuracy and repeatability have been tested to be comparable to the Mitutoyos.
Not sure what exactly Amanda’s tape looked like but.....This is the kind of tape that Kim Kardashian uses for her boobs.
Turn the volume down.
Since it sounds like you are already abusing your ears, get a db meter and keep it between 60 and 80db. You need to re-calibrate your brain.
Protip (literally): when doing a final mix, turn the volume down until it's just barely audible and then do a pass. If you pay attention, you'll be amazing how how the mix completely changes.
Volume is like MSG for your ears.
>a whetting stone
Well, that's problem 1, IMHO. If your single stone is too rough, you'll never get a good edge. If it is too fine and your knife is dull, you'll never remove enough metal. Do you know the grit of your stone?
You probably need 4 surfaces to get a knife really sharp. A coarse stone to repair a nicked or damaged blade, and a few more successively finer stones/strops. Get one of these and some of this on an old belt, and you'll have the right tools.
Now, for feel. Yes, there is a very specific feel and sound when you are doing it right. To find the right angle, place your knife edge on the stone, and slowly rotate to the side, pivoting on the edge. At some point, you'll find a second point of contact on your bevel, and then your knife will rotate around that bevel, lifting the edge. Go back to where you found 2 points of contact. You want the knife resting on those 2 pivot points - that's the angle of the grind of your knife, and that's the angle you want to hold the knife at when you sharpen it.
If you sharpen at the correct angle, the knife will move smoothly along the surface (unless your stone is really rough), and it should make a hissing-type sound, not unlike what you hear in a movie when someone pulls a knife out of a holster. You won't get a good hiss if your stone is too rough though.
What kind of grind do these knives have? If they are hollow ground, you can't recreate that on a flat stone, take the knives to a pro sharpener with the right tools. Are they "scandi," flat, or high flat? If they are, they'll be extra easy to find the right angle. If they are convex, you'll probably have to work the 'hardest' to find the right angle, but just look for the sound and feel feedback.
This sounds daunting, but it really is a task that takes an hour to learn and a lifetime to master. Even with just an hour of the proper technique down, and the right tools, you should be able to get any blade to go from crap to tomato slicing in 20 minutes or less.
If it spontaneously separated, it may be due to a bulging battery, and could be risky to put back together. :(
If not, you could try Sugru adhesive. I think /u/PTR_BatterySwaps has shut down his Pebble repair business, but may have some words of wisdom here (/u/foofad might also).
From the looks of the spaghetti on the floor there, it looks to be 14 gauge.
There appears to be a mix of one 14x4 and two 14x2 wires.
This only looks like where the previous owner spliced and extended the wiring. 14 guage should be enough unless its a really long run.
You need to find where both ends terminate. One end should terminate where the speakers are located and the other terminate where the reciever or amp terminates.
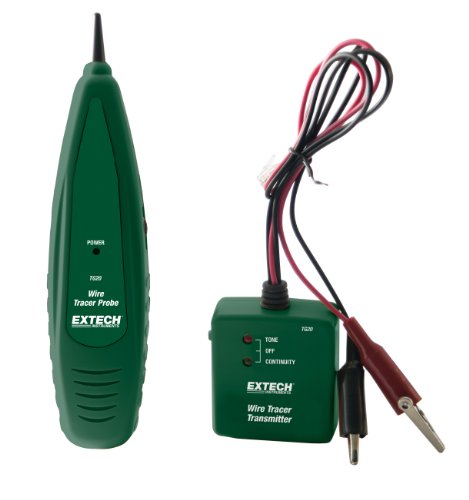
You can use an app or a battery to test, but the easiest way to see where each goes is to use a tone generator.
I used a tone generator to find the wires I put in after my idiot contractor drywalled over all of them and it worked like a charm finding where they ran under the drywall.
Somthing like this would do the trick
https://www.amazon.com/Extech-TG20-Wire-Tracer-Generator/dp/B00APD16D2/ref=mp_s_a_1_4?keywords=tone+generator&qid=1564597096&s=gateway&sprefix=Tone+gene&sr=8-4
Here's a copy-paste I put together that might be useful.
Equipment Essentials
Honing Supplies for Restoring a Few Straights
To hone:
First, you need to flatten your stone, making sure you've removed the top 1/64th or so of stone material to reach the true grits (the top is a bit rough on Nortons especially).Make sure your stone is perfectly flat. Use the DMT or the sandpaper I described above for this.
Next, clean your SR in soap/warm water. Dry it, and put a piece of electrical tape along the spine and fold it over (like a book binding) if you'd like (not necessary, and I don't do this, but some prefer the look of the end product).
I like to clear the edge of possible errand burs before I hone, so I drag the shaving edge against my thumbnail or a glass bottle. These burs can cause issues, and may make for a rough feeling edge. I've found that this is a good way to remove them. It may be unnecessary for some/most blades, but it's part of my bevel setting routine, and by doing this, I've notice good things and increased consistency when I hone.
Now, to hone. You're going to get your razor sharp in these stages:
Setting the bevel:
While all steps are important, this step is foundational. Place your razor on your bevel setting stone, keeping the razor spine and edge completely flat on the surface togehter. Do tiny circle strokes (circular motion down the hone) so you do about 30-40 tiny circles as you move own the bottom hone. Repeat on the other side of the razor, moving up the hone in the opposite direction (and counter-wise circle direction). Now do 15 x strokes. This is a set.
Repeat doing these sets until you can shave hair on your arm or leg by very slowly grazing over the tops of the hair - it should catch and cut with a bit of a tug.
It will take many many of these sets with a 4k stone, and less with a 1K.
Once you can shave hair on your arm or leg all along the bevel (toe to heel) with uniform sharpness and cutting, you may be set. Do another 10 or so x-strokes, very lightly, very perfectly as a final sharpening for your bevel. See if this helps your edge.
Once you're happy with your bevel, strop it and shave. If it's painful, it's likely your bevel isn't set. If it's decent, you're ready to move on.
Polishing the bevel
Now move up to polishing. On the 4K and do 35 light x strokes. Go to the 8K and do 35 light x-strokes. Repeat this back and forth going 4K 30, 8K 30. Now keep this up, decreasing the stroke number by 5. When you're at 10 strokes, just do 25 on the 8K.
Always check for sharpness along the edge by trimming a bit of arm hair. You'll learn a lot from an edge by doing this.
Following the grits up in this fashion should give you a fairly polished bevel. It's best to go higher than 8K with a high grit chinese hone from a woodworking store, or a naninwa 12k, but 8K will do for now.
Truing the edge:
Strop about 30 passes on your chromium oxide, clean the blade, and the perform 200 passes on leather - all spine leading, done very lightly.
The Shave
After all this, you should have a great edge. Give it a test shave and compare it to your pro honed blade.
While honing, you'll likely get frustrated, but keep at it! If you're getting aggressive with the razor, just give it a break, and come back later. If the shave is no good, post back here and we'll help you diagnose.
Some thoughts:
I tired to present information that's very searchable. Straight razor place has archived many of the ideas that I just presented. I highly recommend researching on your own and reaching a personal conclusion. What follows are my personal opinions.
This equipment I suggest is not necessarily the best, nor is it bad at all. It's great way to get started and find out what you like in a stone/routine. Some ideas to consider if you upgrade your set:
The back and forth honing I recommend is a honing series called pyramid honing, where you go between two different grit hones to ensure you don't form a wire edge or a bur. I like to recommend this for folks getting into honing since this is one of the most documented methods for get a razor to shave ready from a bevel set. A quick google search on pyramid honing will give you plenty of reading. I don't hone this way any more.
I highly recommend honing your razor as sharp as possible on one stone, strop as I've outlined, and give it a shave. For example, sharpen as much as you can at the 4K stage, and strop it 200 times. If it shaves ok, you're on the right track. If not, you've got more work to do at that level of stone. You'll be amazed that such a low grit can shave so well. If it's painful to shave after your lowest stone.... you're not done, and moving up the stones will not benefit your edge. Repeating this process of shaving up all the stone grits (4K, 8K, 12K) will help you get a feel for what honing at the different levels provide. Shaving off my 1K bevel provided me the biggest leap in edge quality while learning.
Don't limit your techniques. Once you can confidently bring a restored razor to shave with consistency, I'd recommend playing around and experimenting. Though this, I've developed some strokes that are critical to my routine, and used effectively with every blade I sharpen.
Gaffer's Tape
Table top facade
Easiest way to fix it. Go to wal-mart or target and buy this or order it from amazon. clean the edges and follow the directions. works perfectly. I did this for 3 of my pieces that broke. It's very clean and will be as good as new. Make sure you don't overapply it so that it oozes out inside. Might be bad for the downstem. It's the cheapest and easiest way to do it. Best of luck! toke on
Edit: Epoxy does not melt or dissolve by acetone so you can clean it with acetone after fixing it too! Source
>There are two broad classes of plastics, thermosets and thermoplastics. A thermoplastic can readily be dissolved or melted, while a thermoset cures and changes. Once cured, it forms a tough, crosslinked network which resists solvents and will degrade instead of melting. Epoxy is a thermoset. The advice to trim or slice it off is good. Solvents like acetone or whatever, unless extremely powerful and dangerous, will have little effect on a cured epoxy. Things that easily swell and dissolve epoxies will do the same with rubber or plastic gloves or portions of your anatomy.
A dresser: $350
A circular saw: $100
Gorilla glue: $5
A face-cord of firewood: maybe $100 delivered, unless you have a chainsaw, in which case probably free.
Brutally ripping off your customers: priceless
Although yeah 3d printing isn't the cheapest hobby, it doesn't have to be too pricey either. Unless you were aware of it already, I wanted to let you know you can get a decent printer these days and a set of tools and filament, at least enough to get started comfortably, for under $400 total. And if you are fortunate enough to have more cash than that, you can find your bang-for-buck scales pretty linearly above and beyond, there are many great printers out there for people of all income levels.
Back when I was in college, I paid ~$350 for just the printer kit I had to assemble, being able to buy a (mostly) assembled printer for just two-thirds the price that has over 8x the build volume and a heated bed is awesome.
It is a hobby that is accessible to almost anyone who can scrap together a one-time cash investment and has some spare desk space at home. It's very cheap to design and print small models, a single spool lasts quite awhile as long as you don't do anything too crazy. Although it's fair to say while it can be cheap to operate in dollars, it can be quite time expensive!
Not to mention if you're clever it can save you money in the long run if you use it to repair your stuff, although I wouldn't expect it to pay for itself right away unless you break things a lot :)
Do not use electrical tape. Use gaffer tape
I dunno, I look online at my local stores inventory and I see "black duct tape" and some that say "no residue" but I dont know if they are actual gaffers tape (which is more like a cloth and not shiny plastic) like I would use at a show.
Ill have to see in person next time I go, if so it would make things easier for me to get it in a pinch for work.
Like if you check lowes or homedepot I dont see anything called gaffers tape or gaffe tape available here. If you go to guitarcenter.com you do.
I dont know if its just a labeling thing or not though.
You may already know this (sorry if so) but this is what Im talking about
https://www.amazon.com/Premium-Gaffer-GafferPower-Available-Multiple/dp/B00GZE3UJ8/ref=sr_1_1?ie=UTF8&qid=1527720749&sr=8-1&keywords=gaffer+tape
its a cloth tape that leaves no residue and is very easy to tear
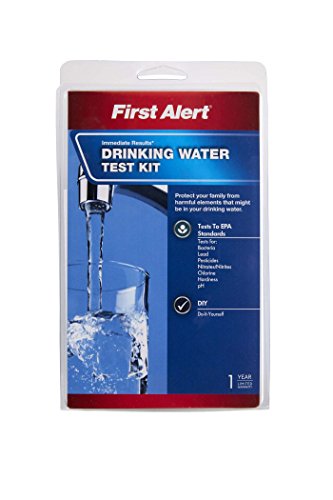
Test your water for lead if you are worried about it. That's really the result you care about. There may be small sections of pipe or solder that contaminate the water even if you don't have large sections of lead pipe.
https://smile.amazon.com/First-Alert-WT1-Drinking-Water/dp/B000FBMAVQ/ref=pd_sim_79_5?_encoding=UTF8&psc=1&refRID=BNCFD5MHAKWG0RD9Z30X
It cost like $15 to buy a water test. I drink a lot of unfiltered water so I got one. The test said I'm all good. Worth buying and seeing if you should invest in some type of filtration system.
Try finding someone that you don't like, see which bike makes their ears bleed.
Short of that, buy this.
https://smile.amazon.com/Kano-Aerokroil-Penetrating-aerosol-AEROKROIL/dp/B000F09CEA?sa-no-redirect=1
Top rated one on Amazon is $16.71. I guess it might depend on what you mean by "a decent sized roll", but I have one and it's the size of a regular roll of tape, so I would call it "decent sized".
I use and recommend this one for USB-A. https://www.amazon.com/dp/B00J3JSEG6
If you don't mind going the DIY route, you could probably come in under $100 for parts for the strips:
Instead of the flat channel, you might be better off with angled channel for mounting the strips above the cabinets, since they'll throw more light on the wall, which is what you'll actually see - https://www.amazon.com/LEDwholesalers-Aluminum-Mounting-Installations-1901-V/dp/B00PJSSD7K/
There's a ZWave RGBW controller but it's more expensive than the wifi one and can take some more configuration: https://www.amazon.com/Fibaro-Micro-Controller-Z-wave-Strips/dp/B00P1N68FW/
If you get the snap-on connectors, I recommend putting a small amount of solder on all of the pads where you'll be connecting them on the strips, so that they make a good connection.
As for the puck lights, you could probably get something like this and wire the distributor to the wifi/ZWave controller, instead of plugging it into the controller it comes with: https://www.amazon.com/Changing-Christmas-Furniture-Ambiance-Lighting/dp/B01N2I47VH/ref=sr_1_2
Here is a list of things that people will always need, I understand you can't stock everything as overhead is an issue with retail, and storage as well, but most of these are small enough that they can occupy the shelf space you currently have. As for the larger things, like the 2020 extrusions, you could sell them in common lengths of 500mm and 1000mm and let the customer cut them down to the size they need, or just don't carry these at all. It's not a niche item, but for a retail store like you it would be hard to store and maintain, but man, would it be nice to be able to get those locally if i needed a piece for a project instead of having to wait on mail order.
this is just a basic list, others have listed other things as well, Steppers, Belts, Pulleys, Bearings etc. If you want 3d printing as a reason for other people to go to your store, these items will satisfy the need. Just keep prices fair, I have no issue paying a bit more compared to amazon to get it today.
I got one of these:
https://www.amazon.com/gp/product/B00VB1U886
Super thin edge gets under the edge of prints without damaging the print or the buildtak.
Build some! Get some hard plastic irrigation tubing from Lowes or Home Depot, a few connectors, and some duct tape/grip tape or sand paper. If you know someone with a saw, great, if not you'll want to get a pipe cutter. Building your own is fun and while it seems spendy, I've gotten at least 5 hoops from a roll and have been able to downsize at will. You'll probably want to tape the hoop for added weight, and while gaff tape is nice and great for grip, duct tape is a bit cheaper and does a good enough job.
Congratulations on 3 months sober, it's inspiring to hear hooping has helped!
https://www.amazon.com/dp/B00HZVYAVM/ref=sr_ph_1?ie=UTF8&qid=1485705289&sr=sr-1&keywords=ultrasonic+jewelry+cleaner
It was a few bucks cheaper when I bought it. Doesn't have a timer, so sometimes I cut it short or run it a few times in a row.
You can pick up a spool of Cat5e or Cat6 at Lowe's along with the RJ-45 crimping tool and a jar of RJ-45 connectors. I highly suggest also getting a cable stripper while you're at it. Your total outlay will be around $20-$25 for the tools, and about $55 for a spool of cable plus the jar of RJ-45 connectors.
After that, the important things to know:
Don't cut the insulation on the individual wires inside the cable. Don't try to strip the individual wires, don't nick them when you cut the jacket, DON'T don't don't! :) The crimping tool will squeeze them down hard onto sharp blades on the inside of the RJ-45 terminators to make the connection right through the insulation.
If you get a stripping tool - only rotate it ONCE, lightly, around the jacket of the cable. It should require some resistance to pull the cut bit loose. Strip a good six inches or so off the end of the cable - you'll want some extra length in the exposed pairs to arrange them properly.
Untwist the exposed pairs down to the jacket. Straighten them out completely. Now arrange them in the proper pinout: orange-white, orange, white-green, blue, white-blue, green, white-brown, brown. This is "T-568B" layout, and it's IMPORTANT. You might think you can wire it up any old way you want, as long as it's the same on both ends, and have it work - if you think that, you're WRONG WRONG WRONG. The order is important because the structure of the cable prevents crosstalk on pairs, and if you split the pairs up, you will have RF crosstalk and it will completely suck so don't do that.
That T-568B layout up there? It goes in with the locking tab on the RJ-45 connector facing DOWN, repeat, DOWN. Left-to-right, locking tab facing DOWN, orange-white orange white-green blue white-blue green white-brown brown. Learn it, live it, love it.
Consider a cheap cable tester to add to your arsenal. You may have trouble sourcing this at a Lowe's or Home Depot - frequently they either have no testers at all, or only have "pro" testers that cost hundreds of bucks. For your purposes, something like this: https://www.amazon.com/Tonor-RJ45-Network-Cable-Tester/dp/B00OUFX38W/ref=zg_bs_tab_pd_mw_1?_encoding=UTF8&psc=1&refRID=TJ654JVCX7SM9J4YE3GJ at $9 is fine, and can save you a lot of hassle.
Before you feed your nicely untwisted and properly laid out pairs into your RJ-45 terminator, snip them off cleanly about 1/2" from the jacket. Slide them all the way, carefully so they don't cross over on you but FIRMLY onto the exposed pairs, and so that the bottom of the RJ-45 slides OVER the jacket on the cable itself. When you crimp it down - hard, like you're shaking your girlfriend's dick-bag ex's hand - the little bar on the inside of the RJ-45 should clamp, firmly, ONTO THE JACKET, not just onto the pairs.
If you possibly, possibly, CAN remove the crimped RJ-45 from the cable by pulling on it... you did it wrong. Cut it off, re-strip, re-arrange, do it again. A properly crimped RJ-45 connector can hold your weight off the ground. Yes, seriously. THIS IS IMPORTANT, don't fuck this up.
I think that pretty much covers it. Oh, and you can pick up surface-mount raceway to run cable through while you're at Lowe's, if you want. It's square rubbery stuff that comes in 6' lengths (typically) and has sticky stuff on the back if you peel the paper off, so it'll stick directly to a wall, ceiling, etc. Stuff like this: https://www.amazon.com/Medium-Latching-Cable-Raceway-500/dp/B002DO164K/ref=sr_1_3?s=electronics&ie=UTF8&qid=1486775258&sr=1-3&keywords=raceway+cable
I will give you my background before my opinions. As everyone has different goals, opinions, and experiences.
I got my printer near the end March of this year. I have something like 2500m of filament run though it, and no idea how much print time.
When I received my printer, my test prints failed and I was pissed. But this community helped improve my Cura settings and started producing usable parts. I then went nuts and printed out a BUNCH of mods. This is by far my most favorite thing. There's always something I can print to improve the quality of the prints.
THe down side is I went too far and got to a point where I couldn't produce anything of quality. So, 2 weeks of tweeking and researching later I'm printing in PETG with beautiful quality and very minimal visible layers.
My most recent project in PETG:
http://i.imgur.com/sVf7S2D.jpg?1
So, now to answer your question...
> How do you like your Maker Select?
I love it. It allowed me to buy a cheaper printer (One of the cheapest at the time @ $350) that produced amazing results. It also has upgrades you can purchase or print to improve the quality, so investing smaller amounts over time to make it better and better. I highly recommend it to anyone who is starting because it does require tweaking which forces you to learn and understand how exactly 3d printers work. A major plus was that this community has a lot of Maker Select users for support, which was a MAJOR plus for me.
As of today, I've purchased the following upgrades:
So, in the last ~3 months I've spent an additional $264... Oh god, don't tell my wife! All are totally not necessary, mind you. The only thing I'd 100% recommend you do are print out the following to mods:
DiiiCooler along with buying the 50mm blower fan. There are cheaper options out there, I just wanted it faster so I bought it through Amazon to get free 2 day shipping.
z-Brace - This is key, and will run you maybe $15 worst case scenario to get enough M4 screws and the threaded rods.
Edit: Forgot a couple more things I bought.
That's another $59, so $323... I have a problem. again, 95% of this is NOT NECESSARY. I'm just addicted to modding.
The culprits:
1k King Stone
6K King Stone
leather strop
bar of green stuff
And thank you for the compliment
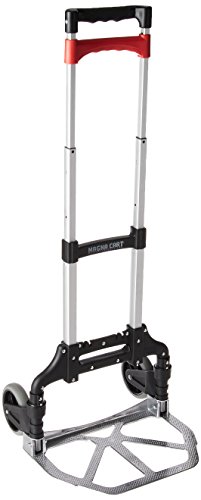
Magna cart!
http://www.amazon.com/gp/aw/d/B000HVVSDU?pc_redir=1405042072&robot_redir=1
Seriously though, cheap folding dolly that I've used for the last 4 years.
I just bought a chest freezer off of craigslist for $80. Then I bought a STC-1000 from amazon for $25.
I wired up the STC-1000 with a 4x4x2 junction box, an extension cord, and an outlet (all from Lowe's).
I completed everything 2 nights ago and it has been working great. The controller will both heat and cool if you live in a colder climate. And the whole setup will allow me to ferment Ales and Lagers at proper temperatures, longer term lagering, and store beer or freeze food if I need to. No mods are done to the freezer, so I can unplug the controller and sell it off later if I choose to.
One warning: The STC-1000 is Celcius only, but just print out a conversion chart and you're good to go.
This guys list is pretty much what I was going to say.
So for some recommendations:
I've restored an antique 1930s No 5. Bought it for 45, and it is best for those on a budget. Any pre WWII Stanley just needs some light restoration work and a reworking of the blade and it will do 20x better than a harbor freight plane and roughly same as modern Stanley sweethearts at 1/3 the cost. It may not be as good as woodriver or lie Nielsen, but it's a 1/4 or 1/6 the cost respectively.
Paul sellers recommends Aldi Chisels, I got Narex instead for an additional $20. I love them, and will only upgrade out of them once I get enough money to go for some veritas or lie Nielsen. I got a set of 4 with imperial measurements for $60ish. I'd put any extra money into sharpening systems than upgrading them.
I bought David Barron dovetail guides and the Japanese pull saws he reccomends. Gyokucho 372 Razor Saw Dotsuki Takebiki Saw. Look at Amazon for the narex chisels I reccomend and the 'people who bought this also bought' section and you'll find it easily. While there you can find some leather for stropping and the green compound you need with it. Also while looking at these, you'll see a reccomendations for the Stanley disposable knife and the replacement blades. This is what Paul sellers recommends, and it works well. Stays ridiculously sharp, and can be rehoned with little effort and the blade cheaply replaced once it becomes to much work top get the thing sharp. Cutting layout lines is much more precise and helps prevent tearout. I bought narex marking knife and love it. I don't mind trying to hone it every so often. Ditto the scratch awl.
Basically took around the Amazon other bought recommendations and you'll find a bunch of fairly cheap quality things to get you up and running.
Now, I don't want to give the impression that any of these items are spectacular or needed to get this sharp. The point of this was to show that it is obtainable with cheap stuff.
Also I would like to note that the knife was sharpened to 10 degrees on both sides, a rather unrealistic angle for most uses except the single beveled knives.
That being said:
similar diamond plates
10k stone
fake leather
rouge
knife
if you're new and you just want an easy kit:
field manual with pictures if you're really new to AR's something like this is super valuable to have.
Otis Cleaning Kit includes everything you need to clean it.
solvent You probably don't need a solvent on a new rifle but its damn handy to have around. this stuff is for ultra deep cleaning.
Lube Everyone has their favorite Lube, mine is ballistol, you can dump it on pretty much everything, and it makes it work together smoothly
scrapper for when your bolt carrier group gets all fuckered.
EDIT: almost forgot, you're def going to want one of these puppies too, a chamber brush
Cleaning tools usually come down to personal preference, cost, and how effective you can use them to keep your gun rust free and preforming well. I have had a great experience with all the tools i linked, and have used them to keep my AR 15 clean and functioning for a few thousand rounds. I think the largest benefit to this set up is that all these tools will easily fit inside of any range bag.
Have a good one and keep shooting!
Might be worth doing a test of your water. Any alarming results could be taken to Public Works to hopefully find a solution to the problem.
https://www.amazon.com/First-Alert-WT1-Drinking-Water/dp/B000FBMAVQ/ref=sr_1_4?ie=UTF8&qid=1540909874&sr=8-4&keywords=tap+water+test+kit
This one's worked fine for me in the past, it gave me no false positives. I knew I could trust it because the region in which my old houses were located was notorious for its incredibly hard water, and that was the only factor for which my results came back as positive.
Amazon sells well water test kits. Tests for a number of things - lead and other metals, bacteria, etc.
Edit: I think this is the one I used.
folding dolly's work just as well
edit I've seen these at Costo for pretty cheap and work well at triggering the sensor
This is the one I have: http://www.amazon.com/Magna-Personal-Capacity-Aluminum-Folding/dp/B000HVVSDU
Reasonable price, decently sturdy, and folds up small enough to fit in any trunk or whatever. Would recommend short bungee cords though. Saves you from having to borrow one or killing your back lugging stuff around.
I bought this collapsing handtruck from Amazon. It's excellent, and a mere US$35, with free shipping. http://www.amazon.com/gp/product/B000HVVSDU/ref=oss_product
I bring this up because this design focuses on hinging the foot and uses extendable frame rods to get portability. It's a vertically-collapsing design, whereas yours seems to be collapsing horizontally.
Two part epoxy does the trick!
This is what I use:
https://www.amazon.com/Gorilla-Epoxy-Minute-ounce-Syringe/dp/B001Z3C3AG/ref=sr_1_4?crid=1BBHFWDACZ0G9&keywords=two%2Bpart%2Bepoxy&qid=1564781122&s=gateway&sprefix=two%2Bpart%2Bepo%2Caps%2C202&sr=8-4&th=1
It looks like you have male RJ-45 ends on them. One option would just be to buy a switch and plug them all in that way. Plug your router/modem into the switch as well and they should all become active.
If you want a cleaner look, you could get a patch panel and terminate those cables to that and run patch cables to a switch.
If you want to find out what cables go where, I would suggest something like this toner to trace out the cables.
Get a tone tracer http://www.amazon.com/Extech-TG20-Wire-Tracer-Generator/dp/B00APD16D2
Normally used for telephone work. Cross connect wiring in a phone central office is usually all the same blue and white wire... Thousands of them from rack to rack. Tone generator sends out a signal. Receiver picks it up, gets louder as you get closer.
Multimeter and tone generator are going to be a must here.
Something cheap like this https://www.amazon.com/Extech-TG20-Wire-Tracer-Generator/dp/B00APD16D2/ref=sr_1_4?ie=UTF8&qid=1525382409&sr=8-4&keywords=tone+generator+and+probe&dpID=41weL%252BldgUL&preST=_SY300_QL70_&dpSrc=srch would do the trick nicely.
What you do is put the aligator clips on the panel end of a wire and then take the probe out to the different devices and listen for the tone. If you put the tone generator on a wire and you can't get a tone, switch it to the continuity setting. If the wire is showing continuity, then you'll want to open doors and windows one at a time until you see the continuity go away. You've just identified that wire.
Once you've identified where each wire goes, you'll need to identify where they're supposed to be tied into the DSC system. You'll need to look in the programming for that.
http://cms.dsc.com/download2.php?t=1&id=13598 is a direct link to the manual for your panel in PDF.
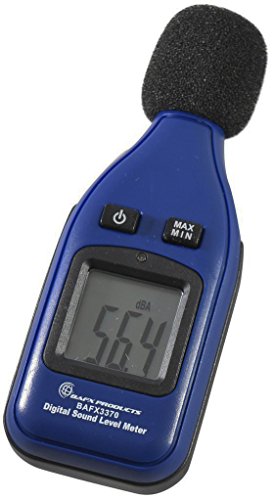
Is there a usable portable SPL meter on amazon that I can buy that's decently priced? I'm looking at this one.
Here's the rant
The fix, use Cura's "Pause at Height" plug-in, but after changing the filament home the printer before hitting resume.
No where does it say to do this, and in none of the tutorial videos does it say to do this. So simple, but no where is this ever mentioned or shown.
STL
Printer
Filament
They're surprisingly affordable; the Ender 3 is a great printer, for only $250. So long as you don't mind assembling it yourself.
Great printer, the Ender 3 is very popular right now because it is fully open source. Which means if you have any questions, then there is lots of community support for it right now.
Out of the box everything is great, the only thing I would suggest is to spend a few bucks and upgrade the bed springs right off the bat. I've had mine a few months. Once I got my bed level it has been running great.
Also buy a few roles of PLA filament, because it only comes with enough to get a few test prints. Oh, and replacement nozzles, because they will eventually wear down and need replaced.
> Mostly, it’s keeping the bed leveled that’s the hard part
I got you fam https://www.amazon.com/FYSETC-Motherboard-Accessories-Compression-Creality/dp/B07GXC1G2B/
The TL:DR answer is "gaffer's tape, gaffer's tape, gaffer's tape" specifically for the Replicator+
Don't bother with blue painters tape or glue sticks. Neither works with the awful flex build plate grip surface that comes with the newest MakerBots.
I run a campus makerspace with three MakerBots. It's been a year since we got them, and we've only just NOW (read: within the last few months) figured out how to cut down on about 95% of the warping. Lots of the solutions on /r/fixmyprint might come from folks who aren't too familiar with MakerBot printers and the true shittiness of the flex build plate grip surface. For reference, our machines are used by a campus of about 10,000 students, so the machines are running 9 hours a day, every day. We ran into the warping problem a lot.
First and foremost, if you're within the 30-day return window, return yours. MakerBot machines have become absolute garbage, and if it wasn't for the $250 restocking fee that MakerBot charges after that 30 days, I'd return my three MakerBots in a heartbeat. Both the extruders and the build plates for the Replicator+ are truly awful. The proprietary MakerBot Print software leaves very little in the way of customization, so you can't really expect to even modify some of the slicer settings to test out what some of the folks on /r/fixmyprint might suggest. At any rate, you should always print with a raft, because of the lack of a heated build plate.
MakerBot Customer Support, in their infinite wisdom, will typically recommend the following things over and over. I've spent more hours on the phone with them than hours at my job, and I'll preface this by saying none of their solutions worked in the long-term for any of our machines:
The solution that worked for us was buying gaffer's tape. Another redditor recommended it, and we purchased this gaffer's tape. Since then, not a single print has failed due to warping issues. We can spread objects across the build plate with little regard for orientation or arrangement without much issue. Granted, on extremely large prints that take up the entire print volume, we might see a slight (maybe 5% at the corner, warping up about 1 or 2mm from the plate) warping issue, but it's nearly perfect compared to before.
We've only had to redo the gaffer's tape laid down two months ago once so far. I can't understate the amazing value of gaffer's tape.
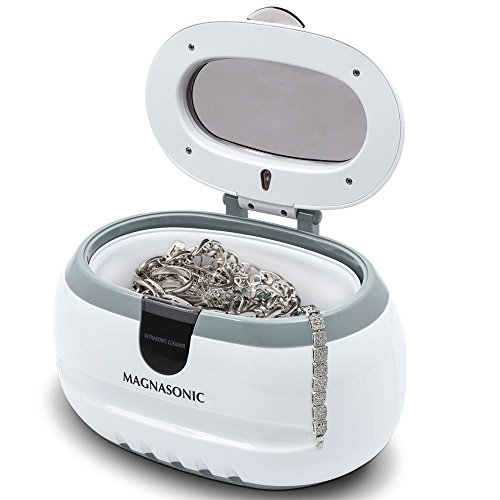
i would invest into a $25~35 ultra sonic cleaner on Amazon. They are great for glasses, other jewelry, etc. I plan on using that the morning of the wedding or something. This is what I have [here] (https://www.amazon.com/Magnasonic-Professional-Ultrasonic-Instruments-CD2800/dp/B00HZVYAVM/ref=sr_1_1?ie=UTF8&qid=1491254960&sr=8-1-spons&keywords=ultrasonic+jewelry+cleaner&psc=1) works amazing
edit: trust me, the ring is most likley dirtier than you think. the before and after is SO different.
For that particular one it is a deal. I found it at amazon for $60.
However, there are others on amazon with better reviews for less.
https://www.amazon.com/gp/product/B00HZVYAVM?keywords=ultrasonic%20cleaner&qid=1461543910&ref_=sr_1_3&sr=8-3&pldnSite=1
This one used to be cheaper on amazon. I think you can look it up on camel camel camel to see its price fluctations. It's been recommended quite often on here over the years. If you have the patience maybe you can wait until the price drops on this bad boy. But most of these jewlery cleaners, at least the ones with the similar dimensions, are rebrands. Kind of like those TDS and PH meters you get for your pool, there's a ton of them on amazon and ebay etc. most will perform fairly similar. (you get what you pay for).
Add one of these and you can see how much USB power is coming out!
https://www.amazon.com/DROK-Multimeter-Voltmeter-Capacitance-Charging/dp/B00J3JSEG6/ref=sr_1_1?ie=UTF8&qid=1469735078&sr=8-1&keywords=usb+amp+meter
I have a plaster and Lath walls. I got a Thermal Camera and used that to see the studs when I hung a heavy TV on the wall.
Ahhh, well since you give me a great link to the molding side of it, maybe I can help you on the controller side.
Fibaro RGBW Micro Controller Z-wave, Works with RGB/RGBW LED Strips
Now, I know what you'll think, because I thought it too - $70 for a dinky Z-Wave LED light controller? WTF?!
But it's actually so much more. Besides DC in (BTW, it takes 12 or 24volts, too) & Ground there's "IN1", "IN2", "IN3", "IN4", "R", "G", "B", "W". And the manual is odd too. You connect the LEDs up, then you have to wire switches into it too, etc etc - I haven't totally figured it out, but it's kinda neat. Also you can get it running on SmartThings. I've just migrated from ST to Home Assistant with a Aeotec Z-Wave stick and a deConz Zigbee stick.
The 4 "IN"s can be used for multiple sensors - which I might have to give a shot.
Anyway, what I've done is hookup 2 light strips to the controller - one is RGB, the other cold white (It's what I have at hand, and I like the color reproduction etc etc, haven't played with many RGBW lights). I typically use a white LED strip with 60 LEDs/meter, and then the RGB is 120 LEDs/meter.
You can control almost an unlimited number of strips with the one Fibaro controller - the secret is to add in RGB LED Amplifiers when the colors start going wonky. Honestly, they're cheap enough I do it between every set of LEDs I intend to connect together.
In testing, I found I like the look for the RGB LEDs closer to the wall, and then the White strip.
So there you go - hope I didn't confuse you there, trying to bang this out and get back to running ethernet throughout the house. Let me know if you have any questions.
http://www.amazon.com/ToyBuilder-Labs-Print-Removal-Tool/dp/B00VB1U886?ie=UTF8&psc=1&redirect=true&ref_=oh_aui_detailpage_o03_s00
sharpen the tip.
https://www.amazon.com/Roland-JD-XI-JD-Xi/dp/B00VHFOV3E/
+
https://www.amazon.com/dp/B014M8ZO8S?ref=emc_b_5_t
+
https://www.amazon.com/Premium-Gaffer-GafferPower-Available-Multiple/dp/B00GZE3UJ8/
I'm only half joking.
I prefer to cover the bottom of the pedals with gaffer tape — there are YouTube videos (which is how I found out about this) but I do it a little differently:
Edit: the gaffer tape should come off clean in most cases so this is also a great way to attach velcro to new/mint pedals and be able to easily get it off later when you want to sell but leave the pedal in mint condition.
Most cheap calipers are fine for measuring prints for accuracy. If you want to get something a little better than the cheapest but not spend too much, I'd recommend these. They're probably not more accurate than other digital calipers in the $20-$25 range, but the absolute origin feature makes them easier to use since you don't have to zero-out each time you use them.
https://www.amazon.com/dp/B00INL0BTS/ref=cm_sw_r_other_apa_i_pLbZDbZK580M6
Had mine for about 2 years. It has been reliable and repeatable. I haven't put it on a calibration block set but everything I've used it for has fit together as expected.
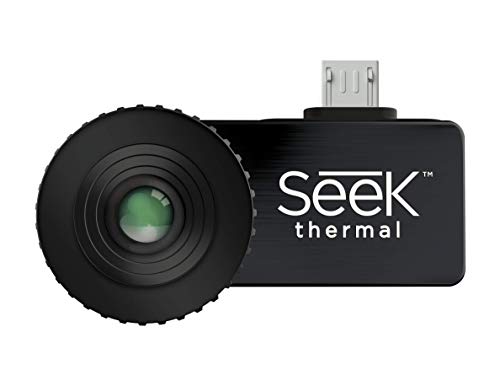
Yea well Amazon pricing fluctuates, so retail vs sale is a tough metric. The $150-160 price was the big sale, but they frequently drop below the $200 mark. Regardless my point was price of these thermal things is getting quite low compared to where they were 2-3 years ago. Went from a 500-600 dollar investment to try to justify down into the "cool toy" range.
Andriod one:
http://camelcamelcamel.com/Seek-Thermal-Compact-Imager-Android/product/B00NYWAHHM
iOS one:
http://camelcamelcamel.com/Seek-Thermal-Compact-Imager-iOS-Apple/product/B00NYWABAA
You probably should punch down those ends on a "better" patch panel like this:
https://www.amazon.com/TRENDnet-Unshielded-Wallmount-Rackmount-TC-P24C5E/dp/B00008AWL3/ref=sr_1_3?s=electronics&ie=UTF8&qid=1466713111&sr=1-3&keywords=patch+panel
It doesn't have to be the exact one, it's just for reference. Keep in mind to keep interference down that can mess with your transfer rates that you will want to keep the amount of wiring that is untwisted to a minimum. Once you are punched down you can get a ton and probe kit, relatively cheap to check that you punched down the wire correctly and that it is terminated correctly on the other end as well, presumably in a keystone jack for a wall. This will also allow you to find which wires go where in your house. Also, you will have to determine which standard for wiring was used, T568A or T568B. You can check this before punching anything down by taking a wall plate out and investigating how the cat5e was terminate at the wall plates.
You can get a cheap line tester like this that will do the job fine.
https://www.amazon.com/Tonor-RJ45-Network-Cable-Tester/dp/B00OUFX38W/ref=sr_1_18?s=electronics&ie=UTF8&qid=1466713437&sr=1-18&keywords=tone+and+probe
I've actually used this exact one at home when I've left my commercial fluke equipment at work. It feels cheap, but it does the job. Good luck, once it's done and done correctly it's very nice to have a wired home with the ability to add wireless access points throughout your home.
You can go cheap on the opening tools without being penalized.
Laptops and the like aren't cars - they don't require tons of force but you DO need the right bits and/or shims to get them open without stripping heads or damaging plastics.
Something similar to this which has a bunch of bits, magnetized pickup, and "guitar" style plastic pry tools should do fine.
https://www.amazon.com/dp/B073ZWY386/ref=twister_B07FMWPBKN
A portable multimeter is always useful, I like the ones that fold in on themselves so you can throw them in a bag.
https://www.amazon.com/Digital-Multimeter-Ranging-Pocket-Tester/dp/B06Y4RZY45
Get some Cat5e clips, put them in a ziploc, and throw them in your bag along with a crimping tool, needle nose pliers, and wire stripper. You will be surprised how often you need to re-crimp a cable or make a new one on-site.
Note - if you don't know how to make a cable, definitely practice that first!
Get an ethernet/phone continuity tester. You don't need a Fluke CableIQ (they're nice though!) but a basic continuity tester will let you (laboriously) trace any ethernet jacks that need tracing. And you can test those cables you just made or just fixed.
I have one basically identical to this and I've used it for over 10 years now I think. Money well spent.
https://www.amazon.com/Tonor-RJ45-Network-Cable-Tester/dp/B00OUFX38W
As mentioned before, something to read a drive(s).
Any multi sd-card reader will do but instead of a dock you may want something like this since it is more portable. Yet another thing I've had for over 5 years and used countless times.
https://www.amazon.com/AGPtek-Drive-Adapter-Converter-External/dp/B00BIE996S
None of the below links are affilliate.
If you're getting into more network layer stuff, you'll want a cable toner, RJ-45 Ends, Cat 5 or 6 Cable, RJ-45 Crimper as well.
https://www.amazon.com/dp/B00P1N68FW/
I spent a little time looking into lighting one room in my house solely with LED strips last year. I was primarily looking at cheap, 5-meter strips on Amazon, and thinking of controlling them with something like Fibaro's Zwave controller. Some things might have changed in the last year, but probably not much:
LED strips (generally) aren't as efficient as LED bulbs. It's hard to pin down numbers on this, and I may be wrong, but that's the impression I got after a lot of reading.
Low-voltage DC wiring over long distances has significant problems: Voltage drop and current limits are a function of the length and diameter of the wire, respectively. A 3 volt drop is insignificant for 120V AC power, but is 25% of 12V system. Power (watts, which will correspond to lumens) is a function of voltage and current. If you reduce the voltage by a factor of 10 (120 to 12) you lose 90% of the power you can shove through a given wire. You can compensate by using thicker diameter wire (expensive) or running higher voltage DC power (24 or even 48 volt).
You already touched on the price and length issue: With LED strips, you generally determine the length of the strip by the length of the wall or ceiling you want to run the strip along (even if a meter of LED strip provides enough light for the room, you don't want a single meter of LED strip in the center of the ceiling - that would just look weird).
I do have some LED strips in my house - they're fantastic for above and below cabinets, and I also have a couple strips above my workbench - it's almost impossible to cast a shadow on my workbench now.
Edit: I forgot to mention Wife-Approval-Factor - my wife absolutely refused to have "exposed" LED strips anywhere in the main living areas. And she has a point - they're not the most aesthetically-pleasing light sources. That limits you to indirect lighting (which you already specified) and means fewer lumens go to lighting the whole room, and you have to figure out tasteful way to hide the strips.
Anyway, that's my ramble on LED strips. Hopefully some part of it was useful.
Good luck with your new house!
You should redesign this and remove that as you call it 'fancy switch' and get a proper home automation system. I use Vera a vera Lite
Then you can do so much more. For example I use this on my RGBW light strips.
As for the power yes as other have said you need to use the existing outlets to power a 12 volt power supply. I use these for that.
Now that you have the Zwave hub then you can start to automate many other lights in the house.
Check out r/homeautomation/ for more ideas
Hanging LEDs strings around the screened patio (using this). The plan is to use smart lighting controls with LED strips around the ceiling in every room, but the screened porch is the testbed. The one thing I'm not sure on is how to camouflage the strips. My idea is to paint them white. My concerns are that will be even worse on non-white walls, the light won't look right and/or the paint will cause them to over heat.
Also much gardening between rain and unpacking.
LEDs were from https://www.ledworldlighting.com. Any controller would work, but the Z-wave I used is the Fibaro. http://www.amazon.com/gp/aw/d/B00P1N68FW/ref=mp_s_a_1_1?qid=1451773341&sr=8-1&pi=SX200_QL40&keywords=fibaro+rgbw&dpPl=1&dpID=41tT0RMfMlL&ref=plSrch.
Sorry for the long links I'm on mobile.
Not just from prusa, pick and choose. URLs for examples.
Digital caliper, 12" https://www.amazon.com/gp/product/B000EJUBBU/ref=oh_aui_detailpage_o02_s00?ie=UTF8&psc=1
Extra brass nozzles.
Hardened steel nozzle, 0.4mm to 0.6mm for printing abrasive exotics (wood, glow in the dark, carbon fiber etc)
Print removal tool https://www.amazon.com/gp/product/B00VB1U886/ref=oh_aui_detailpage_o02_s01?ie=UTF8&psc=1
Locktite blue bolt-fixer (Walmart, Home Depo, Lowes etc) to stop bed sensor from moving.
High temp anti-seize for nozzle threads https://www.amazon.com/gp/product/B0053ZS1Z8/ref=oh_aui_detailpage_o02_s01?ie=UTF8&psc=1
Raspberry Pi 3, 5v Pi 2A Power wart, Micro SD card, & Webcam for octoprint monitoring.
Relay board for Pi/octoprint to power up & down printer remotely. https://www.amazon.com/gp/product/B0057OC5O8/ref=oh_aui_detailpage_o04_s02?ie=UTF8&psc=1
1lb of silica gel to keep filament dry.
Filaments, various.
Fire extinguisher rated for electrical fires.
Dedicated smoke alarm.
I'm a mechanic, this is your best bet. It's oil that foams for a short while after being sprayed so it expands up into the mechanism and cleans it out. I wouldn't use wd-40 as it tends to collect dirt and cause the same problem more than simple oil will.
edit: When the spray out fails the next step is an overnight bath in a gentle solvent. Barring that you'll need a new shifter.
You may have luck with an impact screw driver like this, but you may want to start by adding a small amount of penetrating lubricant like this. Safety is a big deal with a panel, so either have the meter removed while you work on it, or be extremely careful while you work. If the money isn't a huge issue it would be worth swaping that federal pacific panel out for something newer and more safe if possible. Best of luck to you.
Well, IF the brass used has lead in it (not all brass does, and it is used less and less in brass) the small amount of mineral scale tends to form a nice barrier preventing it leaching into the water. A few flushes should work. If you are worried, test it. https://www.amazon.com/First-Alert-WT1-Drinking-Water/dp/B000FBMAVQ/ref=sr_1_3/141-8508703-2370814?ie=UTF8&qid=1502944258&sr=8-3&keywords=water+lead+test+kit
I really enjoy my NeoTech straps. Very adjustable. It seems the price has gone up quite a bit since I grabbed two pair years ago, so you might want to wait until more are in stock as the Amazon price seems to fluctuate according to availability.
---
I use a gig bag for my accordion. So long as you know it will be safe in a soft bag, it's much easier to transport than a hard wood shell case.
I've also used a collapsible dolly in the past to move my amp. You can get them pretty cheap in a lot of places. I think I may have gotten mine at Wal-mart. I've never used it for my accordion, but it could definitely work if you want to transport it in the hard case.
---
As for cleaner playing... practice slower. Use a metronome. You can often hide how bad your time is by playing too fast and usually you aren't actually in control when doing so. Practice slowly enough that you are able to be absolutely conscious of time and your movements. It should be very intentional. Even with a song you think you know... try practicing it at half tempo with a metronome and you'll likely find that you don't actually know it very well.... you're just relying on a sort of auto-pilot. That sort of auto-pilot can fail spectacularly.
But if you practice with control at a lot of varying tempos then you eventually even things out. Being a rush to get something fast and make it "sound like a song" usually just means you'll pick up bad habits along the way. When you do this you have spend more than double the time fixing a bad habit than you would if you'd just been patient and practiced slowly to start with.
When you only practice correctly, that's basically all your body and brain know how to do. When you practice faster than you can control and do so erratically and inconsistently... you actually train yourself to be better at being inconsistent... and then you have to break fix those hard learned mistakes.
Over time a lot of this stuff will go on relative auto-pilot, but not that sort of blind finger memory that so many people rely on where their fingers are ahead of their brains. Instead, you get to a point where your body just responds to whatever you're thinking... like speaking or typing (if you type well). You don't have to think about how to move your mouth to make each word. You think words and they just happen. But you're still in control mentally. It's just that there's no longer a huge delay between thought and action. That eventually happens with playing a musical instrument.
It's thought that this has to do with myelin sheathing if you want to look into the mechanism that governs this. But it takes lots of practicing correctly rather than incorrectly. Also, if you aren't actually being mindful of what you're doing and just letting fingers fly for 100s of brain dead repetitions, you aren't actually supporting this process in any meaningful way.
Like /u/stargazertony, I've got a heavy instrument with a hard case (30-some pounds altogether). I tried carrying it around for a little while once and nearly dropped it after about 30 minutes. My solution was to get one of these, though; I can put the case on there and roll it around quite easily.
Check your local LANs at http://lanpartylist.com/ or as another commenter posted, google "LAN Party" + your state/region. I don't recommend searching by city since you might miss out on a sweet LAN only a few more miles down the road.
Generally speaking for most public LANs, assume that a chair and 3-4 feet of table space is provided for you, and nothing else. Cables are generally a cointoss, so always assume you'll need your own. You should bring the following at minimum.
The LAN host will generally post a list of "the community's favorite games" or possibly even a schedule with specific games. Install all of these in advance and make sure they're fully patched the night before game day, since bandwidth may be limited or non-existent even. Put Steam into offline mode until you know it's safe to go online.
Do NOT bring:
Have fun!
STC-1000 is always a safe bet. link
No idea what style of beer your brewing but 58-60 ° fits most yeast, Build yourself a son of a fermentation chiller about $25 for foam and glue and a STC 1000 and no worries then.
What about something like this?
http://www.amazon.com/Extech-TG20-Wire-Tracer-Generator/dp/B00APD16D2/ref=sr_1_2?ie=UTF8&qid=1413756891&sr=8-2
Cool experiment, OP!
I have a couple of suggestions.
First, why not pick one or two very popular (and therefore most people will know them) songs from the 80s, 90s, 2000s, and recent Top 40 hits. That way almost everyone who participates in your experiment will have some idea of the song structure, rather than have to wade through an esoteric song they are unfamiliar with.
Second, get one of these. It's cheap, but useful, and will allow you to adjust the volume of each listening station (and song) so that the lossy and lossless songs are of equal volume (folks tend to think that the louder of 2 versions of a song is "better", so by using a decibel meter you prevent that particular bias)
Third, you may want to pick a very lossy version of a song (something like 96k mp3 (lossy) and have folks compare it with flac. Many people may be able to tell the difference. Now have them compare flac with something like 320k mp3. You may be surprised by the results.
And finally, if you are using M50Xs, it is only fair to pick a good dubstep song that wakes up the listener and slaps them around a bit. You know, something like this :-)
Sugru. I've used it on every helmet and it holds like cement.
I've been using these: https://smile.amazon.com/FYSETC-Motherboard-Accessories-Compression-Creality/dp/B07GXC1G2B
Comgrow Creality Ender 3 Pro 3D Printer with Removable Build Surface Plate and UL Certified Power Supply 220x220x250mm https://www.amazon.com/dp/B07GYRQVYV/ref=cm_sw_r_cp_api_i_GB21Db61MBXR2
Good luck and thank you!
Again, I am a super novice...
​
I switched out to a glass bed simply because my stock bed was warped. The tip could touch on the corners and a sheet of paper would slide right through in the center. Once you get the bed level though, I don't think your adhesion problem will be as much of an issue. The magnetic bed it actually pretty nice. I actually ended up turning my bed down a little, to like 55. I was at 60, and it was working, but I was having adhesion problems as well and figured it might be a combination of speed and filament being too hot to stick with a temp that high. I also run my PLA at 210.
​
These springs made leveling the bed much easier. Springs
This was the bed I went with. I like it a lot.
When setting your springs make sure you wind them all the way tight and then back off two turns.
Also upgrade to the yellow springs. https://www.amazon.com/FYSETC-Motherboard-Accessories-Compression-Creality/dp/B07GXC1G2B
Ender 3 Pro on Amazon for $259.97
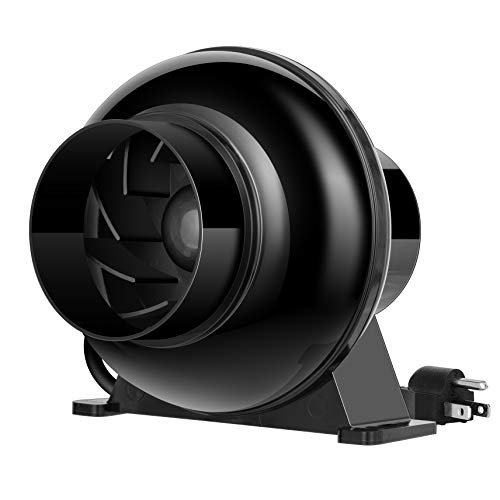
I bought this ikea cabinet My plan is to cut a hole in the top with a 4in hole saw and put in a duct fan like this and run the duct out the window. The only problem is getting the printer out of the cabinet when the print is done but I figure it's easy enough to build a sliding platform for that.
Nutes: https://www.amazon.com/gp/aw/d/B006XTQGLO?psc=1&ref=yo_pop_mb_pd_t2
Few packages of these to hang lights and filter:
https://www.amazon.com/gp/aw/d/B010DD743O?psc=1&ref=yo_pop_mb_pd_t2
Extension cords
Plenty of options
Lights
https://www.amazon.com/gp/aw/d/B01B4GQ6MO?psc=1&ref=yo_pop_mb_pd_t2
Fabric pots:
https://www.amazon.com/gp/aw/d/B00TF9E6XE?psc=1&ref=yo_pop_mb_pd_t2
Air control
https://www.amazon.com/gp/aw/d/B01H1R0K68?psc=1&ref=yo_pop_mb_pd_t2
Fans
https://www.amazon.com/gp/aw/d/B001R1RXUG/ref=yo_ii_img?ie=UTF8&psc=1
Outlet timer:
https://www.amazon.com/gp/aw/d/B06XC7GTCN/ref=yo_ii_img?ie=UTF8&psc=1
Tent https://www.amazon.com/gp/aw/d/B01731MNJE/ref=yo_ii_img?ie=UTF8&psc=1
Carbon filter
https://www.amazon.com/gp/aw/d/B01CJ5D4AG/ref=yo_ii_img?ie=UTF8&psc=1
4 inch duct
Can find anywhere
Jewelers loop (super important)
https://www.amazon.com/gp/aw/d/B00K0BGNNC?psc=1&ref=yo_pop_mb_pd_t2
To dry your buds
https://www.amazon.com/gp/aw/d/B01GXHQIKO?psc=1&ref=yo_pop_mb_pd_t2
Surge protectors and ext cords
Find anywhere
Inline fans
https://www.amazon.com/gp/aw/d/B01M7S46YZ?psc=1&ref=yo_pop_mb_pd_t2
Soil probe
https://www.amazon.com/gp/aw/d/B017GQ9VVY/ref=yo_ii_img?ie=UTF8&psc=1
A few other things I got locally from grow shops. Quality seeds are important. Greenpointseeds.com is always having bomb sales, ship from Colorado, and are top quality. Soil from local grow shops but can also buy from online. I went cheaper on light, but I wouldn't do that again. Get good quality lights.
The Ender-3 and Ender-3 Pro are good budget first printers. I would advise to buy the Pro over the standard Ender 3 since it has a Mean Well UL Certified power supply, rather a generic one. If you can afford it.
Recommend to buy it from Amazon for good customer service or Banggood and Aliexpress if you want the best price.
Ender-3: https://www.amazon.com.au/Comgrow-Creality-Ender-Aluminum-220x220x250mm/dp/B07BR3F9N6/ref=sr_1_1?keywords=ender+3&qid=1573525773&sr=8-1
Ender-3 Pro: https://www.amazon.com.au/Comgrow-Creality-Printer-Upgrade-Certified/dp/B07GYRQVYV/ref=sr_1_3?keywords=ender+3+pro&qid=1573525812&sr=8-3
There are other printers in that price range such as the Anycubic i3 Mega, Anet A8 and the Monoprice Select Mini, the Ender 3 is the most popular and easily available in Australia.
> Also wanting to know other than a printer what would I need to start 3d printing. i.e. what sort of computer programs and other periferals
You will need to install a slicer on your computer, which will convert 3D models into instructions for your 3D printer. If you don't want to have your printer plugged into your computer while it is printing, your computer will need to have an sd card slot, if not purchase an adapter.
Highly recommend reading through the Getting Started guide for this subreddit.
Also here is a guide on how to build the Ender 3: https://www.youtube.com/watch?v=me8Qrwh907Q
And the Ender 3 Pro: https://www.youtube.com/watch?v=ibsOYzXduYc
Hope that helps
Even if your printer would have arrived with all 4 springs, one of the best, cheapest, and easiest upgrades for the Ender 3 is installing these Yellow springs
What you absolutely MUSTTTTTTT!!!! order? Nothing. The printer works as is. But if you want to do yourself a favour, here's a list of what I consider essentials:
- New springs, both bed and extruder. I don't have a link for an extruder one as I upgraded my entire extruder drive frame and that came with a better spring
- A new removable bed. Creality glass bed or glass with a PEI sheet is my bed of choice
- Thermal pad to avoid the annoying bed clamps. Cut squares out of it, lay them in a checkered pattern alternating between thermal pad and nothing and place your bed on top. They will hold the bed in place and help with heating
- Stepper dampers if your printer is anywhere near where you spend your time, it sounds like a bloody jackhammer right out of the box
- New tube fittings, the stock ones are terrible and will give out in a matter of weeks at best. They also barely hold onto the tube
There are a ton of other great upgrades, but I think a good idea is to get a feel for it yourself.
What you can do, however, is check out some printable upgrades. I have this thread where people contributed with their choice of printable upgrades. It's a great list you can refer to later. Essentials on that are the fan guard and LCD back cover simply because the Ender 3 as is has the fan and back of the LCD exposed and that makes it crazy vulnerable to dust and gook damage
Sugru or moldable plastic. Save what you don't use for another fix.
Real Premium Grade Gaffer Tape By GafferPower Made in the USA Black (Also Available in Multiple Colors) 2 Inch X 30 Yards Heavy Duty Gaffer's Tape https://www.amazon.com/dp/B00GZE3UJ8/ref=cm_sw_r_cp_apa_i_Pun4CbSXM3219
I got one of these form amazon for 35 bucks and it works great https://www.amazon.com/Magnasonic-Professional-Ultrasonic-Instruments-CD2800/dp/B00HZVYAVM/ref=sr_1_6?ie=UTF8&qid=1500573408&sr=8-6&keywords=ultrasonic+cleaner
I actually bought a magnasonic jewelry cleaner to use at home for like $35 and it works like a charm! i just bought some cleaning solution to mix in with the water and i clean my rings every couple weeks and they sparkle like they're brand new! jewelry cleaner
thanks! this is what I used to clean my caps...Was it worth the wait? nah, prob not but I was impressed how clean they came out of the machine after it was all said and done. I did 0 when it came to scrubbing my caps clean :) just running water over them after the ulrta sonic cleaner had them looking new
I used this machine. This USC does its job but I do wish I got one with a programmable timer, instead of one that only runs in 3 minute intervals. I didnt use any cleaner because they didnt need the extra help. All of the pens were inked at some point this semester, and still started immediately. My process was to run the converter and feed under tap water until I didnt see any ink coming out, and then to run it in the USC. Using this process I was able to get all of the sections and converters clear. The reason I picked up a USC was because after cleaning the Prera section with tap water, I could still see ink left over in several pockets and knew it would dry there. About 9 minutes in the USC and it was sparkling clear.
Edit: /u/abraxart and /u/mitch_romley
If I were in your position, I would definitely shoot for a big ticket item such as the sawstop PCS (36" T-glide) with 1.75hp motor. That will eat up your entire budget (plus $219 more). I cannot imagine a hobbyist woodworker who would not be happy with it.
OR you can do lots of little stuff: (take out the things he may already have)
Sharpening: this this this this and this
Chisels: here
Japanese saw: this and this
Caliper: here
Exceptional quality hand plane set every woodworker would love to have if they don't have it already: here. Conversely, you can get the Lie Nielsen 60-1/2 block plane and get the #4 and #5 from Lee Valley (I prefer their version).
If he doesn't have a planer, this is a great one: here
As for festool products, I would highly recommend the Rotex 150 with Dust collector combination
I'm sure i'm missing a couple of stuff here and there but I hope the list helps you get started.
I have had VERY good results with the iGaging Absolute Origin found on Amazon Here: https://www.amazon.com/iGaging-ABSOLUTE-Digital-Electronic-Caliper/dp/B00INL0BTS/ref=sr_1_5?ie=UTF8&qid=1498694071&sr=8-5&keywords=digital+calipers
There are a number of reloaders (much deeper into reloading than I) using this piece of hardware with very good results.
Here is the video that sold me on buying it: https://www.youtube.com/watch?v=1yqZx_FNbSs
I use these: https://www.amazon.com/dp/B00INL0BTS/ref=cm_sw_r_cp_tai_tu9KBbW7NBX32
>Harbor Frieght calipers
Whenever I hear/see someone using these, I show this alternative.
They're no B&S or Mitutoyo, but they are soooo much better than those HF jobs while being cheap enough that you can travel with them without (monetary) fear of them getting damaged/lost/confiscated.
Twice your price range but I have these.
There is a great comparison video of several different calipers in the reviews. Some of which I think are in your price range.
30mm dia. base Source 510 from Stealthvape turned down to 25mm. Threads weren't damaged from being chucked in a 3-jaw. Used a carbide cutter and took light cuts, about 0.05mm per pass. Also wet sanded the top base 600-2500 grit (I should have started with a lower grit, still some tooling marks)
http://www.stealthvape.co.uk/SOURCE-30MM-FLAT
/u/IsABot /u/vapescaped you guys want one let me know
A prior thread asking about 25mm 510s: https://www.reddit.com/r/OpenPV/comments/5gnnbf/25mm_510_connector/
If anyone needs some digital calipers, these are great: https://www.amazon.com/gp/product/B00INL0BTS/ I was using some from Harbor Freight prior and was becoming frustrated with them. Started looking around and these were quite highly recommended and well reviewed. Well machined, few smooth action, maintains zero. Was considering dropping $200 on Mitutoyo calipers until luckily finding these
http://www.harborfreight.com/6-inch-digital-caliper-47257.html (when on sale or with coupon for ~$10-$12)
http://amzn.com/B00INL0BTS
http://amzn.com/B00KDUD67G
I just let my timelapse script run last night until the 1500mAh battery powering it died. It probably wasn't fully charged, but a Pi model B with just a USB camera attached taking pics every 10 seconds went for 2.5 hours.
There's ways to turn off nonessential accessories on the pi to save power including the HDMI & USB ports. Also, shutting the pi down correctly instead of letting it die will help keep the sd card from being corrupted, some good info here. I've got one of these on the way to really tell how much power I'm using before I figure out a battery solution. Mopi is another option to manage power and automatically turn the pi off before it dies, and I think the mopi can turn the pi off and turn it back on at certain times to extend battery power even further with the addition of a real time clock.
I bought one of these to see when it was actually charging: USB Meter, DROK Digital... https://www.amazon.com/dp/B00J3JSEG6?ref=ppx_pop_mob_ap_share
I just keep plugging the gotcha into the cord until I get a reading on the screen.
you can measure resistance with a regular multimeter using the 4-wire method. If you have a regulated digital power supply (like a lithium battery charger with lcd) it's as simple as putting a constant current relatively high amp load on the wire, measuring the voltage drop and dividing by current. you could also use a good quality USB power meter ($10, amazon), or a dedicated ~15 watt meter. i've used an incandescent light bulb for this and got fairly accurate results.
you can also use the same process to test USB cables' resistances. I'll use 2x usb power meters (one on each end of the cable) and a powered off cell phone//other electronic as the load. most modern power banks will also display voltage out and current.
edit: here's some more info, and is quite accurate if done correctly.
I'll give a dollar to the first person who hooks up with one of these and reports on the open-circuit voltage, voltage under load, and whether it does at least 2A.
Quite a few reasonably inexpensive thermal image attachments for cell phones on the market that cut the cost significantly over all in one solutions. Maybe not quite to the point of buying it just for giggles, but easily justifiable from a business standpoint.
Seek Thermal
or
FLIR One
We're dealing with a similar problem (water coming out a light fixture in our dining room that's below the sliding glass door to the balcony). We haven't solved it yet (it hasn't rained enough again for us to see the path of the water), but one thing we got that seems promising is an infrared camera that attaches to a phone. This is the one we have: https://www.amazon.com/Seek-Thermal-Compact-All-Purpose-MicroUSB/dp/B00NYWAHHM
https://smile.amazon.com/Seek-Thermal-Compact-Imager-Android/dp/B00NYWAHHM/ref=mp_s_a_1_17?ie=UTF8&qid=1543241356&sr=8-17&pi=AC_SX236_SY340_FMwebp_QL65&keywords=flir+thermal+imaging+camera
And it's on sale.
Buy a seek thermal camera for your phone (make sure to buy the correct one for your phone, also you can knock $100 off the price by going used/reboxed), and go around looking for holes in your house, sealing them with a caulk gun. Make sure you buy the COMPACT, because it actually works better for this task, whereas the XR is more for spotting deer half a mile away but sucks at 10'. Alternatively, you can rent a thermal imager at big orange for $60 for 4 hours...
This might seem expensive to solve a little spider problem, but what you are really doing is improving the energy efficiency of your home by a ton. It's easier to see cracks when the temperature difference is large, like when it's very hot and you have the A/C on, or it's very cold and you have the heat on.
If you seal all these holes, the only place I'd put any Permethrin is around the cold air intake inside your home (or where it leads outside, or both). It looks like a 4" to 6" flexible hose with a u-bend coming into your furnace room. This should have a lot of free air flow, so don't put a screen over it or plug it, doing so could cause carbon monoxide poisoning as the furnace burns up all the oxygen in your home. If you really hate the air-intake, you can get an air-to-air heat exchanger for a few grand.
It is! Example (leaky front door): http://imgur.com/B65sYfy.jpg
Anyway this is what I have: https://smile.amazon.com/gp/product/B00NYWAHHM/
It was $195 when I got it, looks like the price has gone up a hair.
For value you can't beat something like this. I have used a similar one from L-com for years and have not had any issues for the ~100 home runs I have done.
Anything that will qualify the cable as cat6 is probably $1,000+.
> Any ideas on what I could be missing?
There is something inside the wall or somewhere it's connected to that you are missing. The best thing to do would be buy a cheap cable tester like THIS and after you wired to B standards then test it, it will tell you what is broken or even if there is connectivity at all.
I don't know anything about the LIFX, but if you have (or plan on getting) a zwave controller, I'd go with the Fibaro LED Controller. With that, you could easily use any led strip you wanted.
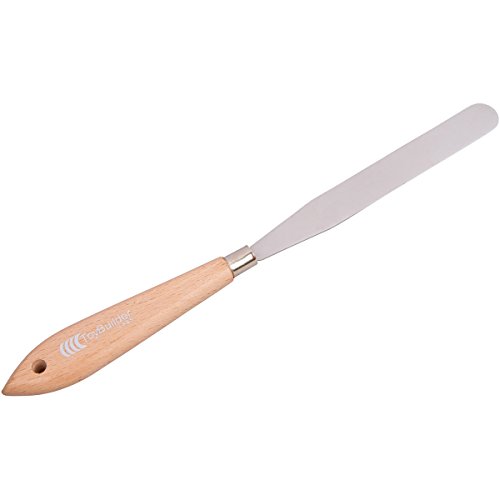
Hey, I highly recommend this spatula
the one that came with my 3d printer was dollar store garbage and would have gouged my buildtak if I hadn't had the lucky foresight to buy this one first.
This one is so thin that it can easily get under parts, just don't "pry" upwards or it'll bend it! (I bent mine but it still works like a champ)
> Thanks in advance for answering my questions.
I purchased it last August. (781 hours logged) It's almost litterly been printing out of the box since day one. The only issue I had out of the box is that the one screw on the build plate got bent as a result of the 2 free spools bouncing into it. I ordered a box of them from McMaster and had it fixed by the end of the week. I contacted Lisa on their google chat form and from what I understand, they now come with the screw as a result of my support ticket. This was an annoyance yes, but I've had more issues with my reprap and that costed me more than this pritner when I bought it. (I originally had a Makergear Prusa)
Most: I love the fact that it prints 100% of the times I try to print something. I rarely, and I mean RARELY have a failed print. I love that I can hit print before I go to bed and wake up to a completed part in the morning.
Least: This is small, and it took a while but I have since out grown the build platform (9x6x6 inches). I recently ordred an 8x12 plate from McMaster and that arrives on monday and we'll see how that works. (PSA this requires removing one of the extruders - if you want more info on this let me know)
Yes, no issues. Just close up the printer with the included panels.
No, I use a glass build plate and a thin coat of purple glue stick. I then spritz water on the plate before each print. I never have a sticking issue and I never have warpage. I personally prefer PLA though since Hatchbox has come to light and makes GREAT PLA
Like I said just above, I use a glass build plate, so I haven't had any warpage issues with the bp. Leveling the bed is a bit of a challenge but I'm fussy about it and I want it within 0.0005 or less so it takes me a while. The reason I'm fussy is because I've only had to level the bed 2 or 3 times since owning it.
The first was when I got it
The second was when I added the glass build plate
The third was when I removed one extruder and added an aluminum carriage.
That's it. It never lost it's level and it's gone through 3 moves (like I moved apartment to apartment)
The only experience I had was with that screw initially. I contacted Lisa on their Google Chat forum and she handled it mostly. Sadly, it wasn't as 'perfect' as I wanted since their solution was to send the printer back instead of sending me a new screw. Never the less, they did try to help on the matter and told me how I could go about getting money for the screw if I so desired. In the long run, it's a screw and I just ordered them from McMaster. I have zero regrets from it and I think I know my printer a bit beter because of it.
single extruder carriage (PSA: their single extruder block is not FF compatible.
My Thingiverse for example prints
Some things I would buy shortly after getting the printer:
Spare Extruder fan : I tend to slip and put a screw drive in the path of this, shattering the blades. If you're a clutz like me, get it. I've needed 4 so far. ::hangs head in shame::
Glass Build Plate : Best purchase I've made for my FF. Works great, easy to install and use. Also get thermal sheets and purple elmers glue, and print the spacer found on my Thingiverse page under "Flashforge Upgrades". Also get a spatula, and dikes
Simplify3D : A lot people tend to spend $X,XXX on a printer and then try to use free software with it and complain when it doesn't print right. To me that's like buying a car without tires. A Corvette ain't shit without a decent set of tires. It's kind of pricy compared to free, I know, but at real CAM programs (which is what this basically is) cost $8,000 or more. It truely is a great printer program and I wish I had purchased it much MUCH sooner than I had.
Last and most importantly, get the an active cooling fan. I originally printed this, and purchased a 12v power supply and added some fans to it. I have since moved on to the offical one from FF. It's not as good but I haven't really ran into an issue. If I had to print from my right extruder, it would be an issue though. What I liked about it, is that it's a plug and play added on. No "modifications" needed to added.
TL;DR / Closing thoughts: I would buy this printer again in a heartbeat. ESPECIALLY if they came out with one similar to the Replicator 2 with the 11.9" build plate. Instead it looks like they went a different way judging by CES but oh well, there's always next year. Further more, I think this is a great entry level printer for someone looking to have a printer help with projects and not be one of them. That doesn't mean you can't mod it or upgrade or whatever, it just means you don't have to if you don't want to.
Hope this helps and answers any questions you might have. Feel free to ask more though!
I use [these] (https://www.amazon.com/dp/B06XWFM1HJ/ref=cm_sw_r_sms_c_api_i_OYE.AbP0JQ8X9) brushes for cleaning filament off of the extruder because you will inevitably have prints that leave filament all over the hotend. [These] (https://www.amazon.com/gp/aw/d/B00VB1U886/ref=mp_s_a_1_2?ie=UTF8&qid=1526590824&sr=8-2&pi=AC_SX236_SY340_QL65&keywords=3d+print+removal+tool&dpPl=1&dpID=31vIt7tpDfL&ref=plSrch) are really cheap and good for removing prints from the bed. One of them should last you several months. You’ll also eventually need to clear out a clogged nozzle so some [nozzle cleaners] (https://www.amazon.com/gp/aw/d/B072JJ7H5P/ref=mp_s_a_1_3?ie=UTF8&qid=1526590910&sr=8-3&pi=AC_SX236_SY340_QL65&keywords=3d+printer+nozzle+cleaner) will come in handy.
Do you have anything that resembles this with a thin "blade". https://www.amazon.com/gp/aw/d/B00VB1U886/ref=mp_s_a_1_1?ie=UTF8&qid=1483243443&sr=8-1&pi=AC_SX236_SY340_FMwebp_QL65&keywords=Printer+removal&dpPl=1&dpID=31vIt7tpDfL&ref=plSrch
If you do you can try to slide the thin part under the part. If you don't have something like that you can remove the bed and put it in a freezer and it should just pop off or you could take off the tape with the print attached.
I haven't heard of anyone doing that. I guess it could work, but how effective would it be? I can't say. If you wanted to experiment, maybe get some P100 filters and test it out on some alcohol or acetone fumes.
What I do to vent fumes, and I suspect what most people do, is to simply run a duct with a fan to a window. Any 4" or 6" inline duct fan will work well. They're easy to mount, they're cheap, and they're very powerful.
This 6" inline fan is the one that I use. I have it plugged into a speed control because I rarely need it's full 400 CFM sucking power. I usually use it at about half power. I mounted it under my workbench with the output duct permanently installed in an adjacent window. I keep the input duct retracted under the table so I can pull it out when I need it.
I don't have any fancy system for this. When I'm cleaning a part and I need to vent the fumes, I just pull out the duct from under the table and rest it on the workbench next to the cleaning vats (being careful not to suck up any paper towels or nitrile gloves... for the tenth time). It's a bit ghetto, but it's very effective. I usually can't smell anything when the fan is running. Even isopropyl alcohol fumes get sucked away faster than they can reach my nose.
Hope that helps.
https://www.amazon.com/wholesalers-Hydroponic-Scrubber-Ledwholesalers-GYO2305/dp/B005HT0GZ8
https://www.amazon.com/VIVOSUN-Inch-Inline-Ventilation-Blower/dp/B01M7S46YZ/ref=asc_df_B01M7S46YZ/?tag=hyprod-20&linkCode=df0&hvadid=198099432697&hvpos=1o5&hvnetw=g&hvrand=11339173752191949168&hvpone=&hvptwo=&hvqmt=&hvdev=m&hvdvcmdl=&hvlocint=&hvlocphy=1027632&hvtargid=pla-350510992464&psc=1
Get this (or something similar, might be cheaper other places) and run it next to your space bucket. For one plant in a bucket this should be more then enough to keep smell out. Just set this up next to your bucket. Pull air through the filter and push it out the top of fan.
I think you’re “done” with this bud. Many a threads are on here with “what to do” ideas.
Look to set this up ASAP and next run to get humidity in the 45%.
Vent: VIVOSUN 4 Inch 195 CFM Inline Duct Ventilation Fan Vent Blower for Grow Tent https://www.amazon.com/dp/B01M7S46YZ/ref=cm_sw_r_cp_api_i_rlPRDbJH6MVKB
Humidity monitor/controller: Inkbird Humidity Controller IHC200 Humidistat Mushroom Greenhouse Pre Wired Outlet Dual Stage Humidifier Dehumidifier https://www.amazon.com/dp/B01J1E5LWM/ref=cm_sw_r_cp_api_i_4mPRDbN62PRW4
Set the controller to 45%, plug the fan into it, and she’ll watch the tent 24/7
I use the green bar: https://smile.amazon.com/Woodstock-D2902-1-Pound-Buffing-Compound/dp/B0000DD35C/
For maintenance I do maybe 10 strokes on the strop free hand on the bevel side, then one on the back to remove the (microscopic!) burr.
If you want to make spoons then that set isn't really want you need.
What you need is a hook knife for carving the bowl and a straight knife for all the other cuts.
It would be great to have a hatchet to rough out the shape of the spoon so it doesn't take you all year. I've seen lots of people do the roughing with a band saw though. You could use a coping saw if you don't have one.
I don't love the hook knife I have. If the wood is a little dry it kinda hurts my hand. It's this one https://www.amazon.com/gp/aw/d/B00343VCCK/ref=mp_s_a_1_1?ie=UTF8&qid=1487362012&sr=8-1&pi=AC_SX236_SY340_QL65&keywords=mora+hook+knife&dpPl=1&dpID=31qGjXQoECL&ref=plSrch
I wound up grinding the bevel off mine to make a smooth curve and it worked a little better than new. But it works ok as is.
I've also got this straight knife https://www.amazon.com/gp/aw/d/B005IW5YN8/ref=mp_s_a_1_3?ie=UTF8&qid=1487362243&sr=8-3&pi=AC_SX236_SY340_QL65&keywords=mora+carving+knife&dpPl=1&dpID=31CuaoTEJGL&ref=plSrch
They have a shorter version that would probably have given more control, but I'm ok with it.
You'll also want to make a strop to maintain the cutting edge. You'll need a block of wood, a piece of leather and stropping compound. https://www.amazon.com/gp/aw/d/B0000DD35C/ref=pd_aw_fbt_469_img_3?ie=UTF8&psc=1&refRID=YGCVJKF34JWCTN2MNFPV
Can't say about this compound. I got mine from lee valley.
All in all, if I did it over again I would have bought higher quality knives, but the ones I wanted (from a guy named Nic Westerman) were out of stock. And since you're on a budget they would fit in your price range.
PB Blaster or Aerokroil
https://www.amazon.com/Kano-Aerokroil-Penetrating-aerosol-AEROKROIL/dp/B000F09CEA/ref=sr_1_1?ie=UTF8&qid=1519242522&sr=8-1&keywords=areo+kroil
Used Aerokroil on a stuck body mount bolt and ten mins later it was on the floor.
Step 1: aerokroil
Step 2: handle puller
Another product is Kroil, tapping lightly on the end of the handle with a hammer can help shake it loose, heating and cooling in the oven can also help.
First Alert WT1 Drinking Water Test Kit. I live in a 100-yr old building with original plumbing so I bought this and tested the water. Everything came out well within EPA standards. Our city water (San Francisco) is among the best in the country so your mileage may vary.
Thanks. I live in an old building. I basically want to do a test for things that will kill me in the short or long run.
I found this.
https://www.amazon.com/Watersafe-WS425B-Drinking-Water-Test/dp/B00005AUHX
and this
https://www.amazon.com/First-Alert-WT1-Drinking-Water/dp/B000FBMAVQ/
Hopefully it's enough.
I realize this sounds crazy considering 99% of tap water is safe to drink (according to the comments in this post). I'd rather be paranoid then dead.
http://www.amazon.com/First-Alert-WT1-Drinking-Water/dp/B000FBMAVQ/ref=sr_1_1?ie=UTF8&qid=1453321747&sr=8-1&keywords=lead+water+test+kit
I'm also on a cistern and use commercial whole-house filters in 2 stages. Stage 1 is a "pre-clean" sediment filter and stage 2 is a carbon filter that helps remove cysts and odors. The pre-filtering helps the more expensive carbon filters last longer. I also have an automatic chlorinator and contact tank for added disinfection (could also use UV) and a RO filter for drinking water. The RO is overkill since water tests fine from the tap (good idea to test periodically!), but peace of mind and all. To maintain a good flow rate, I use 2 filters in parallel for each stage (4 total). It's all easily put together with PVC. I don't have first flush and water can get pretty dirty, but after filtering it's very clean and odor free. Filters typically last about 3 months before the pressure drops too low (for 2 people, so maybe 1 month for you?) and have to be replaced. High efficiency sink and shower fittings help reduce water usage and the effects of the lower pressure. I have the pump run up to 60psi to max out the filter life.
This one, First Alert WT1 Drinking Water Test Kit. The guy at the environmental test company said those kits aren't really sensitive enough to get more than a "that's pretty good" or "that's pretty bad" despite the results you get. He said they tend to be consistent, though, so if you get good results you should be good, and if you get bad results, you should call someone like him. If you get fuzzy results, it comes down to how strongly you feel about getting it officially tested.
The monitor carrier is a great idea to protect the screen. BUT, for the cpu I suggest getting a cart like this and bungie cords to tie it all down on while traveling through the airport instead of trying to lug the case and monitor physically. I have used one of these for years, it was worth every penny.
Other suggestions:
If you have the original boxes for both, I highly suggest that you ship them via Fedex or UPS instead in their original boxes.
If you are going to fly with them, and you want to chance checking them to fly in the underbelly of the plane, I suggest you pull out your Graphics card(s) and Hard Drives, and place them in your carry on luggage, I've seen the end results of the TSA taking apart computers to inspect these part and then just tossing them back into the case willy-nilly.
https://www.amazon.com/Magna-Personal-Capacity-Aluminum-Folding/dp/B000HVVSDU
They come in handy. You can grab one at Costco!
Ditch the stroller and get something like this that you can strap the car seat to: Brica Roll 'n Go Car Seat Transporter https://www.amazon.com/dp/B0074JKQ0Y/ref=cm_sw_r_cp_apa_i_i2CiDbM7MEPRB
Then you can gate check them all. We actually used a Magna hand cart and bungee cords last time we flew https://www.amazon.com/dp/B000HVVSDU/ref=cm_sw_r_cp_apa_i_15CiDb9G4KKB5
Car seats that are FAA-approved should fit in the plane seats.
I don't have that but I do have this Personal Dolly.
I live in an apartment and walking from the apartment to office to pick up my packages is way easier with this when I know I'm getting some heavy package or big box.
I also lend it to new neighbors moving in. They always appreciate saving their backs and make the job take half the time.
Super Glue will either frost look or not glue to painted points.
I use http://www.amazon.com/Gorilla-Glue-4200101-Epoxy/dp/B001Z3C3AG put a dot of glue -- enough to not smoosh out then wrap a rubber band the head. Let it set for how ever long the written directions say for. Thats how we glue parts on GKs but minus drilling a hole and putting a pin joint to glue it steady, but I don't think its necessary at the moment.
Gorilla 2-part Epoxy Clear
I guess you can use Super Glue if you are not comfortable with epoxy. Maybe better would be the gel type of super glue. It's just that super glue by nature is not as sturdy when it comes to "shock" strains like should it get dropped or of you slam the detolf door hard enough. Just make sure the superglue is well and dry before putting it in the detolf case as superglue has a tendency to fog up glass.
lead weights
glue
Alternatively, you can just buy the epoxy and glue the toaster to the table.
depending on how rough it feels I would suggest starting with an 80g or 100g and then finishing with 120g and 220g. You can skip the first one if it is not super rough. Get one of those sanding sponges with the different angles on them. That will be easier on you hand than just sand paper. Becasue of the shape you'll want something that you can wipe or spray on. Use 4-5 thin coats. The easiest/cheapest option would be a wipe on poly or even better an Aerosol Spar Urethane. EDIT Also, sand lightly in between coats with 220 or higher. This helps the next coat stick.
You might also consider trying to fix a few of those larger cracks by filling them in with a two part epoxy
Good luck! It will be a nice surprise for her when she returns.
I made one but I decided that I was going to go balls deep and try one of the most difficult designed mau5 heads out, the disco head. Long story short it cost me about ~$300 to make, not counting 2 others that I messed up on.
Materials:
-Head
-Eyes
-Head Mount
-Mouth Mesh
-[2] Led lights for coloring the eyes
-Superglue for mouth
-[2] Plastic glue for Headmount
-About [6-10] Rhine stone glue bottles
-[3] bags of Rhinestones
-Foam Ear material ---> With Ear template
-Washers -[4] Threaded Rods -Wing nuts
-Chrome Spray paint
-Lastly, Insulation Strips [White]
+++++++++++++++++++++++++++
Stuff I had: Dremel, stubbornness, no life, sharpies, too much free time.
+++++++++++++++++++++++++++
Use any of the above tuts to get the general idea.
The template for the ears, (mine are huge).
Once the mouth is cut and you accounted for the eyes (pop the eyes in half and trace them on.)
Spray paint the whole head chrome, in light mist layers. The more layers the smoother the finish.
Once that's done, enjoy the 90+ hours of putting each rhinestone on, one by one.
Profit.
this was the epoxy we tried, this is another kind we have on-hand that is just too unwieldy/thick to do a job like this.
Is this the kind you're referring to that does work? I never really tried it, thinking it would be similar in effect to the epoxy glue. There's just so much torsion on that location, I worry about how well it would hold.
I should also mention that this is a college help desk and we provide our services 100% free of charge--the only thing the students pay is for the actual cost of parts. It's all about getting them back up and running as economically as possible, since most of the students are broke and just want it back to a functional level so they can write papers, skype, and facebook again. So while negative goodwill (badwill?) is something I'd like to avoid, it's not like we're worried about losing profit or anything as a result.
I put one of these in my fridge and it works perfectly. Also a humidifier and humidity controller.
This is a useful guide
I've got three STC-1000s that I've ordered from multiple places and they have all been flashable - so I guess I've been lucky. The first two I bought from Amazon and the last one I bought from Alibaba although it took about 6 weeks to arrive. Mats has this link set directly on his Github page for the software so I figured this would be a really safe bet and it worked fine.
The flashing is pretty easy and there's a great instructional video on the blackboxbrew.com website. You'll need an Arduino Uno and some jumper wires which cost me about $20 at a specialty electronics shop. Best thing to do would be to ask around your homebrew club or brew shop if anyone has one that you could borrow. One guy brought his to a brew club meeting and flashed a whole bunch of peoples all at once.
Good luck with the build and feel free to hit me up for any questions. Go Leafs!
I based it on the Son of Fermentation Chiller plans but made modifications to the dimensions to allow it to fit two carboys. Originally I just had a cheap thermostat from Home Depot and only cooling, but had some issues in the winter months with the beer getting too cold at night and the yeast dropping out before it reached the targeted FG. So eventually I upgraded the temp controller to the STC 1000 which does both heating and cooling and picked up a 4" duct fan, some 4" duct, foil tape, and cut up an old brew belt I had laying around. I would highly recommend building one if you have the resources. It's probably the single biggest improvement to my brewing process I've ever made.
I'll see if I can grab one when I get home.
Danby dcr412 Fridge.
6G Better Bottle:
Therm-well stopper: https://morebeer.com/products/hood-thermowell-3-5-6-65-gallon-smooth-neck-carboys-15.html
Fermwrap heater: https://morebeer.com/products/fermwraptm-heater.html
STC-1000 temp control unit: http://www.amazon.com/All-purpose-Temperature-Controller-STC-1000-sensor/dp/B00862G3TQ
The only picture I have of the inside is with a plumb wine I was doing last year. http://i.imgur.com/WXFK5XX.jpg?1
Use one of these to find and label each end.
http://www.amazon.com/Extech-TG20-Wire-Tracer-Generator/dp/B00APD16D2/ref=pd_sxp_grid_pt_0_1
I've had to diagnose a few mystery circuits in my house, too. Turn off the power, check with your non-contact tester to make sure it's not hot, then you can use a wire tracer like this:
https://www.amazon.com/Extech-TG20-Wire-Tracer-Generator/dp/B00APD16D2/ref=sr_1_10?ie=UTF8&qid=1495645071&sr=8-10&keywords=continuity+tester
Take pictures of the wiring of every switch you take apart, so you can return things to the way it was before, if need be.
The Beats Solo 2 are excellent starter headphones. So much better than what I started this journey with. I was surprised that the packaging of the Beats was that high quality. Must be Apple's influence.
Do yourself a favor and don't listen too loud! I made that mistake, and now I have some annoying tinnitus, which is constant high pitched ringing in my ears. You can use a dB meter to measure the volume, just put the mic end into the headphone's cup and try to seal the cup with your hand or a rag. Keep it around 80dB or lower and you're good to go.
Get an SPL Meter Put the subwoofer on your couch where you sit and start playing bass sweeps then walk around your room with the SPL Meter and you'll start to see where the bass gets boomy and where is cancels out. What you want is pretty even response across all frequencies, meaning there is a very little dB level difference between the the various frequencies.
That is where you want to place your sub. Older article but still relevant
If you are using speakers to play the tome you could get a cheap sound level meter.
http://www.amazon.com/BAFX-Products-TM-Decibel-Battery/dp/B00ECCZWWI/ref=sr_1_1?ie=UTF8&qid=1414958244&sr=8-1&keywords=sound+level+meter
You could try Gorilla glue, then (after it dries) use Sugru to seal that up.
https://www.amazon.com/Sugru-Moldable-Glue-Original-Formula/dp/B00EU7DBNM/ref=sr_1_1_sspa?keywords=sugru&qid=1564676960&s=gateway&sr=8-1-spons&psc=1
Surgu + spray paint + varnish
https://www.amazon.com/Sugru-Moldable-Glue-Original-Formula/dp/B00EU7DBNM
Looks like Sugru. I used one of the 3M mounts and then filled in the gaps with Sugru on my old lid. That reminds me I need a new GoPro.
http://www.amazon.com/Sugru-Moldable-Glue-Black-White/dp/B00EU7DBNM
https://www.amazon.ca/Sugru-Mouldable-Glue-Original-Formula/dp/B00EU7DBNM
If you do pursue diamond stones, here is a list of what I have.. I am not sure if this the be-all-end-all, and I can definitely recommend trying lots of things, because sharpening seems to be something so personal. Just wanted to collate in one place what I have settled on thus far.
This is one of the cheaper setups. I think it would be interesting to try ceramics at the top end, and better leather for a multi-strop setup.. Just ran out of funds after trying several failed other methods ;)
OP gave you some good advice about research. I'd add that if you can somehow find someone local who can show you what sharp really is, that would be a big bonus. I haven't found that person yet myself, because I am a hermit.
Stones:
Paddles:
Stropping:
Sandpaper:
I always get the pure green compound (ex: amazon y un mas)
Since stropping removes that little bur formed from use (or sharpening) and restores a keen edge, you should be stropping every time. It doesn't remove much material and doesn't take any amount of time. Only after hard or extended use should you need to revisit the stones.
Ideally you strop more often than hone and hone more often than grind.
If I'm hand-planing I don't strop my chisels, just like I don't pay bus fare when I drive me car :)
I mean in theory that should work out. Might not be the easiest way to handle it haha. I just have a little stroping block I use. It's like a 4 inch X 12 inch piece of leather on a block of wood. I've heard you can use stropping compound on cardboard as an alternative to leather but I don't have personal experience with that. Either way you would want stropping compound I use this
I made it.... I got some old Nicholson files off ebay..... I think I paid $30 for 10 different files.... Then I annealed it by throwing it in the coals/ashes of a brush pile that I was burning and let it air cool overnight.... Cut out the size and blade tip with a hacksaw (tiring process) Used a belt sander to shape it down until I got the profile I liked and the blade was about the thickness of a dime. Drilled out the holes on my drill press. Used a makeshift kiln with a MAPP gas torch to get it to cherry red (about 25 minutes of torch time, I'll use charcoal next time) and quenched it in motor oil. Threw it in my shop toaster oven at about 425 for an hour to temper it, then quenched in water. I used Padauk wood for the handles ( I had some scrap leftover from a picture frame and gun rest that I made) I used a 5 minute epoxy, http://www.amazon.com/gp/product/B000ALJ4NS/ref=oh_aui_search_detailpage?ie=UTF8&psc=1
Which setup in about an hour and a half. And 1/4 brass rod,
http://www.amazon.com/gp/product/B000FMWZ5Q/ref=oh_aui_search_detailpage?ie=UTF8&psc=1
Then shaped the handle with my bandsaw, belt sander, and lots of hand sanding (to try and get all the bandsaw marks off)
Finished off with Boiled Linseed Oil which helps make the wood really pop with it's natural color.....
Then used a Gatco system to sharpen it,
http://www.amazon.com/Gatco-10005-5-Stone-sharpening-system/dp/B001DB9CQS/ref=sr_1_1?ie=UTF8&qid=1422323386&sr=8-1&keywords=gatco+knife+sharpener
And honed on a strop with some green compound
http://www.amazon.com/Woodstock-D2902-1-Pound-Buffing-Compound/dp/B0000DD35C/ref=sr_1_3?ie=UTF8&qid=1422323451&sr=8-3&keywords=honing+compound
and now I have to make a sheath...
I use a King 250/1000 and a strop with some buffing compound.
That is also my general understanding of how to ventilate.
If your winter temps don't drop below freezing, I believe you can vent year around (someone please correct me if I'm wrong here), but closing off the vents in cold weather doesn't just protect your pipes, it helps cut down on your heating bill a tad (but probably not by much really since the R value of a foundation is fairly low).
As far as getting your current vents to work, I have used liquid wrench penetrating oil and achieved great results and I haven't tried it but have heard great things about Kroil.
In your case, I think that you REALLY need to get down a vapor barrier under your house--that will cut down on the stale smell, and I am pretty sure it also reduces exposure to radon (if you are at any risk).
This video does a good job of showing a well executed install of vapor barrier.
My house was built in 2001, so I'm guessing somewhere around then.
Something like this maybe?
So when I discovered pb blaster, it was amazing. Stuff worked so much better than the other products I used. Then I got into the trades and a couple of the old timers swore by a product called Aero Kroil. I refuse to use anything else now. Literally works 20x better than pb blaster. Stuff is amazing. I have never had it fail to break anything loose.
http://www.amazon.com/Kano-Aerokroil-Penetrating-aerosol-AEROKROIL/dp/B000F09CEA
Also they make Sili Kroil which adds a silicon type lubricant, which works 10,000 times better than WD40 for lubricating.
http://www.amazon.com/SiliKroil-Penetrating-Solvent-aerosol-SILIKROIL/dp/B0003041WK
There is a penetrant you can buy called Aerokroil that Ford recommends specifically for removal of stuck spark plugs. It is recommeded by name in the factory training video for removal of the 3 piece spark plugs that get stuck in the triton engines. This stuff is amazing.
Before you break it off, get a can of this and let it soak in for an hour or so. The plug will probably come right out.
http://www.amazon.com/Kano-Aerokroil-Penetrating-aerosol-AEROKROIL/dp/B000F09CEA/ref=sr_1_1?ie=UTF8&qid=1393988347&sr=8-1&keywords=aerokroil
Kroil.
I've won bets with a can of Kroil and a Knipex Cobra.
WD-40 is a terrible penetrating lubricant. He'll want to use something like PB Blaster or AeroKroil. WD-40 was designed for water displacement, not lubrication, and it doesn't penetrate much at all.
Kroil: http://www.amazon.com/Kano-Aerokroil-Penetrating-aerosol-AEROKROIL/dp/B000F09CEA/ref=sr_1_1?ie=UTF8&qid=1420942400&sr=8-1&keywords=kroil
I recently did an accidental long term storage test on my guns. I didn't have nearly the same amount of rust you do but... /u/moveman61 recommend Kroil to me. It worked wonders.
Steps:
Strip 870 (stock included)
Spray Kroil on affected areas
Let sit for 10-15 min
Use brass brush
Wipe clean
From here you have 1 of 2 choices
A: Apply oil to prevent future rust
B: degrease and paint it
In the past I have used black spray paint that is meant to go on grills. Its a cheap (bubba) solution compared to more expensive paints and it has worked quite nicely for me in the past. I wouldn't use this method on a nicer gun but for the standard black 870 it works great. If you're worried about matching colors just go ahead and clean/paint the barrel as well. As long as you do a decent spray job nobody will even notice. I even had one guy ask me how I kept the finish so nice over the years. It took him a second to realize there was paint on it.
I bought a knife for 2 bucks that was a little less rusted then that, but still very rusty. Don't forcefully open it, but if it opens without too much effort that's ok. Before opening or trying anything soak it in WD40. If you have a type of penetrating oil (like Kroil) that would be good too. Once the WD40 has gotten as much rust off as it can, you will want to take some kind of metal brush too the blade. If you have a wire brush and a drill, you can carefully try that too (just on the really bad parts). Once you've gotten it down to where you can see more metal then rust, take some #000 steel wool and some WD40 and get to work. As for the handle, I would suggest starting off with #000 or even #0000 steel wool as it is really fine and can remove the lighter rust with ease. Once you've got it de-rusted take some metal polish and a towel and get rubbing. If that isn't working fast enough, take some of the #0000 steel wool and use the metal polish with that. At this point you should have a pretty shiny knife, but there will likely still be dips in the knife with rust in them. Not a whole lot you can do about that, but hopefully the worse of it won't be on the blade (or edge of the blade). At this point you will want to clean the knife with isp alcohol to make sure no wd40 or polish is left on the knife, and then go ahead and sharpen it.
If you can get some Aerokroil. This shit is amazing, it will loosen just about anything.
If it still doesn't come out, spray it down with Aerokroil and let it sit overnight to soak in. Next day use a torch to heat up whatever the bolt is threaded into, while cooling the actual bolt with some ice. This will cause the the metal to expand and shrink, loosening the fit on them.
Aeokroil is the best I've ever used
Supposedly This is the best over the counter penetrating oil you can buy. I've never used it. I personally use This.
Yes, there are those but you mentioned filters. I find the big bottles of water to be overwhelmingly more common, and you can just flip a coin as to whether the company that bottles it follow regulations. I'm actually taking this back from meiguo to make sure the company my school buys from is okay, as I've noticed the plastic circles you punch through have become almost too easy to open recently and one was already opened when it was delivered.
First Alert WT1 Drinking Water Test Kit
https://www.amazon.com/dp/B000FBMAVQ/ref=cm_sw_r_udp_awd_OXL5tb0YNPYD8
This kit will let you test for all sorts of common contaminants, including lead.
I don't know how well I can answer your questions, as I'm new to lead issues and abatement. You've probably educated yourself on a lot of what I'm going to say, but I'm going to throw it all in this comment, anyway.
I live in a 110 year old house that is basically a ball of lead. The plumbing had lead joints, the service line is old and lead, the windows have lead, the doors have lead, the walls have lead, and the city is concerned that our water mains are shedding lead. And now, my child has a very slightly elevated lead level. Prompted by her most recent blood test, we are attempting a sensible lead abatement plan for our home.
First, figure out where the lead is. You can pick up water testing kits as well as swabs for surfaces. Once you know where the lead is, you can assess your risk and choose an abatement plan.
For instance, we have a small amount of lead in our water, which is likely a consequence of the service line. We got a bid for replacing it, and that was about $10k, plus the cost of fixing the yard that would be torn up. We went with a 10 year filter for the whole house, and that was about $900 including tax and installation.
Use the surface swabs on your windows that were installed before 1980, and if you have woodwork that was painted white, check that, too. It became popular to paint dark woodwork white in the 50s/60s to brighten up houses, and people used lead paint. We have solid wood doors and a ton of trim that is absolutely smothered in many coats of paint, and sure enough, it's super leady.
With windows, the act of opening and closing the windows can cause friction on the paint, which produces inhalable dust. If your family isn't experiencing significantly elevated lead levels, you have the option to simply wipe down the windows with a damp cloth to remove the dust. If you are more concerned, have the budget, or just want new windows, you can replace them. Check to see if your local municipality has a lead abatement grant for windows. In my city, they offer a $350/window grant to replace windows that test positive for lead (along with a few other qualifiers), and that really puts a dent in that cost.
With other painted surfaces, you're likely to be fine with encapsulation, which is a fancy way of saying painting over it. Lead is only really dangerous if you inhale the dust or eat the chips, so if you paint over it, it can't create dust. This will likely mean that you'll need to do a little scraping, which will obviously create dust, so you need to use a quality mask, and then clean like mad when you are done. Wet mop, dry dusting/sweeping is not good enough.
I'm in the process of restoring the woodwork because I prefer a stained finish, and for all the trim that isn't especially decorative or historically significant, I'm just replacing it. For our lovely doors, I sent them out to be dip stripped because it just wasn't worth the risk of my daughter sucking in all the dust while I removed the paint.
Because I have a young child, I'm not fucking around with lead, but the majority of people with lead paint in their homes are going to be just fine if they don't sand lead paint, carefully wipe up the dust with a wet cloth in areas that have lead paint (like windows), and prime/paint over the lead paint.
This is the kit http://www.amazon.com/First-Alert-WT1-Drinking-Water/dp/B000FBMAVQ
Yeah, the "flammable tap water" thing was from up in my area, Weld County. The situation was that all of these folks used well water for their houses, and they had higher-than-normal levels of methane gas in their water. It was a big hit with the local media, but the kerfluffle died out not too long afterwards.
I think you'll find a lot of information if you check out Denver Water's page on Water Quality - they provide information on the treatment process and the results of their tests. You can probably also request the water test results in print (In Greeley, we get them once a year with our water bills).
All in all, I've lived here a long time, and I've never had a problem with our water anywhere. In my opinion, it seems like municipalities in Colorado are much more concerned with water and water quality than in other places in the US I've lived previously. Heck, Coors even advertises that their beer is brewed with fresh "cold Rocky Mountain water"!
Feel safe with your water. If you're still concerned (or want to prove to your mom that the water's safe), you can always buy a water testing kit, although I don't know how accurate or effective they are, never having used one myself.
As far as you know.
When's the last time you tested your tap water?
All? Every store in my area has a water refill station. In my area it's near the coffee section. I'm not sure how much it costs, but it's way cheaper than buying bottled water.
That being said, why not just get water from the tap? If you're worried your water might be unsafe (most likely it's just fine), then test it. A quick search found this affordable test kit, which will tell you if you need to get a more comprehensive test done. Most likely you'll be well within safe standards and can safely use your city water.
Personally, I use a filter at home because I don't like the taste of our water. We have hard water, and there are still traces of something after our water softener. Our water is perfectly safe to drink, but a filter makes it much more palatable, so we use one. It's way cheaper than bottled water and way more convenient.
I got a Magna cart for this thought:
http://www.amazon.com/Magna-Cart-Personal-Hand-Truck/dp/B000HVVSDU/ref=sr_1_2?ie=UTF8&qid=1407268857&sr=8-2&keywords=magna+cart
Here’s the link on amazon.
Magna Cart Personal 150 lb... https://www.amazon.com/dp/B000HVVSDU?ref=ppx_pop_mob_ap_share
Sorry, it’s $35 not $30. The handle folds down and the flat part you load stuff on folds up. I’ve put 3 cases of water on that thing with no problem. Best investment I’ve made for this job.
You're not going to want to give DK2 demos running on a machine that can't output 75 fps, unless you want to get all the newbies sick. I'd invest in either a PC case for LAN use , or a simple hand truck to cart your rig to and from meetups/demos.
re: beach cart
I have one of these, collapses super small and could fit two 5 gallon bags I would guess. https://www.amazon.com/gp/product/B000HVVSDU
I've had a few pairs of shoes do this to me, including a pair of platform Demonias. I found that epoxy (this stuff) worked really well to keep the sole on. When mine did it, only the sole came off, and the bottom part of the place where you put your foot stayed whole. Hopefully yours didn't rip or anything. If they did, I don't think epoxy will help without creating uncomfortable bumps under your feet. Good luck!
I'm currently using this in combination with this to get exacting temps. The sensor that comes with it is not really that good, but I use a infra-red temp gun on the inside of my chamber and increment the temp on my controller and I can get it within 3 - 5 degrees F of what I want.
I'll admit ordering from china can be costly but if you buy an enail and maybe some other equipment in the same order it becomes worth it in the end.
If you're up for a little diy you could always build an STC 1000 and hook a heating pad up to it. It should only cost you about $30 to build the STC 1000 and you can get a heating pad pretty cheap at CVS or on Amazon if you don't already have one.
Edit: These are the instructions I used to build my STC 1000.
It depends on how much you want to spend, but the easiest way to control temps is with a dedicated fermentation fridge with a temperature controller to regulate the temperature. I generally only need to regulate down (i.e., cool the fermenter to keep it from getting too warm), but some climates require a dual regulator to be able to either increase or decrease temp, especially depending on the seasons.
The cheapest regulator that's gained a lot of popularity in the community in the last few years is the STC-1000. There's a bit of DIY involved in connecting this controller to an actual electrical outlet. But it does dual control for around $30 total (once you buys the outlet, etc.).
If you're less handy but have the money, you can get a controller like this Ranco. There are tons of other options, so just Google "refrigerator temperature controller" or something.
There are also much less robust, but also much less expensive options. Google "fermentation swamp cooler" or "son of a fermentation chamber" for some good, low-cost, DIY options.
http://www.amazon.com/AGPtek®-WH8040-Digital-Humidity-Controller/dp/B009VXXBCQ
Here is good temp controller:
http://www.amazon.com/Digital-All-purpose-Temperature-Controller-STC-1000/dp/B00862G3TQ
Seconded. I bought one of these on Ebay and wired it to a standard two-outlet receptacle in a project box from Radioshack. Cold phase supplies power to mini-fridge compressor and the hot phase runs to a FermWrap. Can go down to 40s in the summer and 70-80 in the winter...just in case I feel like a saison in December.
Looks to me like that edge cover should come off allowing you to remove screws or clips to bring down the speaker. You could then see what wires are connected to them and use one of these to trace them back to the termination point.
maybe try getting a tone generator and then sniff out where all the lines lead and label them.
basically get one with the aligator clip and attach it to the cable in question, then go around to all of the outlets in your house with the sniffer and it will make a noise telling you where the signal is coming out.
you'll want to take the splitters off so it doesn't split the tone on to multiple lines.
http://www.amazon.com/Extech-TG20-Wire-Tracer-Generator/dp/B00APD16D2/ref=pd_sbs_indust_7?ie=UTF8&refRID=0XQB5G5BZ1A4G36TP4W3
at least once you have everything labelled you'll know where its all going.
Can you get your hands on a wire tracer? https://www.amazon.com/Extech-TG20-Wire-Tracer-Generator/dp/B00APD16D2?ref_=fsclp_pl_dp_5
You'll need to verify the circuit dead then just attach it and follow the wand. If you want to go totally fool proof just open your main disconnect.
No that's not a tone generator, that's just a voltage detector. It's good for confirming a circuit is dead before touching bare wires and for making sure there's not a wire in a wall when you are about to drill a hole.
This is a tone generator:
http://www.amazon.com/Extech-TG20-Wire-Tracer-Generator/dp/B00APD16D2/ref=sr_1_2?ie=UTF8&qid=1464230762&sr=8-2&keywords=tone+generator
The problem is almost certainly not behind a wall, unless someone put a junction under drywall which is not supposed to be done, or someone put a nail through one of your cables and severed a wire. But that stuff is rare compared to other kinds of problems that don't require ripping out walls.
For the breaker that does nothing, check to see if there's even a wire in it. I would leave it turned off if it was off when you found it, otherwise. You never know if someone left a live wire hanging somewhere stupid.
Also keep in mid that in most cases, when an apartment complex is set up with the ONTs in a common location, like yours, there is typically a Cat5e cable run from each apartment to the ONT room for landline phone purposes. This is very easy to repurpose for Ethernet. Just identify it (you may need a tone and probe kit for this), attach a punch-down Cat5e keystone jack to the end in your apartment, crimp an RJ45 plug onto the ONT end, plug it into the ONT, and call Verizon to have the ONT switched to Ethernet. I did just this for my brother's previous apartment.
No problem!
If you ever need help, feel free to PM if you'd like. I like fixing electrical problems :) Sometimes you need a toner tracer to find where a wire goes. These work by clipping the toner box to the bare wire, which injects a signal into the wire, and the tracer will beep like a metal detector over the wire it's clipped to. Not saying it's a necessary tool, but can be very handy.
Yeah should do if it's something like this:
https://www.amazon.co.uk/Extech-TG20-Wire-Tracer-Generator/dp/B00APD16D2
You might have to be literally touching the drywall though.
I would think that a thorough search of all lights and outlets in the vicinity would solve the mystery. check that the switch is off, find outlets that are off, flip the switch to see if they come on. Seems like you're done that but not exhaustively?
I've got a box similar to this - I could pull the switch out, clip on the generator and literally follow the wire through the wall to its destination. Make sure the switch is off so you aren't tracing supply. And, still sometimes the wire goes right up the wall into the attic and you end up wandering from device to device hunting for a signal.
>I have a home built in 1959 and I believe it must have had a doorbell at some point
Based on what info? Not all houses had doorbells, some had knockers in lieu of doorbells.
>I see some small gauge wiring that looks like doorbell wire going roughly toward the door in the since-finished basement ceiling, but I've not been able to find out where it terminates at either end.
Low voltage wiring could be doorbell, alarm, speaker, irrigation, thermostat......just because you see small gauge wire doesn't mean it was a doorbell wire.
If you're sure that wire isn't used for anything else, I would get a wire tracer, cut the wire in the middle and see if you can find one or both ends. Be prepared to splice it in a junction box if you determine it's being used for something else.
https://www.amazon.com/Extech-TG20-Wire-Tracer-Generator/dp/B00APD16D2/
This is wonderful. I was able to trace a wire through a wall to find a buried junction box in an unexpected location. It's also only $20.
They may even just be hanging behind drywall somewhere. Installers do that sometimes.
You should pick up a wire tracer if you can't find the ends. http://www.amazon.com/Extech-TG20-Wire-Tracer-Generator/dp/B00APD16D2/ref=sr_1_1?ie=UTF8&qid=1414521740&sr=8-1&keywords=wire+tracer
I would look harder for a sort of junction box for the cables for the rest of your house. Get a tool like this one: https://www.amazon.com/Extech-TG20-Wire-Tracer-Generator/dp/B00APD16D2/ref=sr_1_2?s=hi&ie=UTF8&qid=1488242973&sr=1-2&keywords=tone+generator+probe So you can trace where (2 of) the wires are actually going.
If you're having trouble finding them, connect the black lead to a ground wire and you'll start broadcasting the signal, and make it easier to find your tone.
Pickup one of these to trace out the wires. They likely drywalled over them.
Get a wire toner: Extech TG20 Wire Tracer and Tone Generator https://www.amazon.com/dp/B00APD16D2/ref=cm_sw_r_cp_apa_i_Qf4MDbP9GV1ME
(This was the cheapest one, never used it, but I used the cheapest one at harbor freight)
Clip it to the wires at the doorbell button location and turn the sending unit to tone and take the receiver and turn it on and volume up and follow the wire through the walls by following the sound received from the wire
Something such as this, you clip it to a pair of the wires in the room, in the central location use the probe to touch the wires and it will make noise the strongest when you are on the correct wire. Label both ends and then move on the the next drop.
Extech TG20 Wire Tracer and Tone Generator https://www.amazon.com/dp/B00APD16D2/ref=cm_sw_r_sms_c_api_i_-73YDb7XV6KCC
This is a cheap set, but if all you are doing it this one thing, it should work fine.
Here you go. $18.
Dude, I did the same thing! and then I got one of these guys. Its much better, lol
http://www.amazon.com/BAFX-Products-TM-Decibel-Battery/dp/B00ECCZWWI/ref=sr_1_10?ie=UTF8&qid=1407346303&sr=8-10&keywords=db+measure
This would be a good start. :)
https://www.amazon.com/BAFX-Products-Pressure-30-130dBA-Warranty/dp/B00ECCZWWI/
Hello, reddit,
I think I can break a world record for the... wait for it... loudest pop of the lips. I can create an extremely loud pop with my lips, but I'm sure I need a calibrated, official way to measure that. I don't really know much about the technology of audio, so here's where I ended up. Would a cheap decibel meter record a short instance of sound like that, or would I need something else?
Would a product like THIS help to get the WR for loudest pop of the lips: https://www.amazon.com/BAFX-Products%C3%82-Decibel-Reader-Battery/dp/B00ECCZWWI
Thanks, sound people.
Whenever there's probable noise issues, I recommend being objective. When you're in love with the house, it may not seem "that bad" or "we'll get used to it" but then a year later you're half-insane with the noise.
Buy an SPL Meter and take actual measurements outside and inside the house, write the highest results down. At 60db, it's definitely intrusive. At 70db, you might have to ask your partner to repeat themselves from time to time over the noise. At 80db, it's absolutely annoying, like a running chainsaw. I'd recommend taking measurements at different times of the day, but I don't know if you'll get to do that with a house that you don't already own.
http://www.amazon.com/gp/product/B00ECCZWWI?keywords=decibel%20meter&qid=1450290723&ref_=sr_1_1&sr=8-1
This is what I used
I was thinking of getting one of these http://amzn.com/B00ECCZWWI and doing my best to seal the headphone cups around it and figure out what a safe listening volume sounds like while using something like this as a guide http://www.dangerousdecibels.org/education/information-center/decibel-exposure-time-guidelines/
I am cautious about my hearing at times because I have 15-30% hearing loss in my left year (varies with frequency) and it was quite debilitating when it first happened. I can tilt the audio balance in my headphones to compensate somewhat but it's not even close to the same fidelity as my good ear. 15-30% doesn't sound like much but it's roughly the equivalent of putting a finger in your ear, go ahead try it, see what it's like to be me, lol. The most disturbing thing for me is that I can no longer determine the source of a sound around me. Since the hearing is uneven I can no longer unconsciously distinguish which ear is receiving a direct signal and which is receiving a delayed/decayed reflection and therefore have no idea what direction to look most of the time.
Best ear health tip I ever received was from my ear doctor, he recommended peroxide in the ear canal until it stops bubbling followed by white vinegar whenever my ears are feeling stuffy or a little sore to keep the ears clean and free from infection. I wish he had told me that 20 years ago before my eardrum got all scarred up from infections and caused the hearing loss.
TIL about self setting silicone. Very cool.
you need Sugru, moldable glue
Sugru Moldable Glue - Original Formula - Black & White 8-Pack - I000467
Have you thought about sugru, or polymer clay and glue? Polymer clay is probably the cheaper option, but you'd have to cut large to account for baking, and then sand down.
The electric tape is the cheap option, but if you want to splurge a little on the cable's maintenance, this might be worth a look.
Not gonna lie, really enjoyed the video on the Amazon page.
I'd say the yellow bed springs are worthwhile. They're about $5 on Amazon, I bought these:
https://www.amazon.com/gp/product/B07GXC1G2B/ref=ppx_yo_dt_b_asin_title_o04_s00?ie=UTF8&psc=1
They help keep the bed from going out-of-level as quickly, vs the stock springs. They're easy to install, and cheap, which is nice.
There are loads of other upgrades you can consider. A glass print bed surface, as one example, or a PEI print bed. Either can help provide a flatter print surface, vs the stock magnetic one (which will more-readily follow any distortions in the heated bed surface, making your print surface uneven).
I got my Ender 3 Pro about a month ago, performed some upgrades and ran into a few problems, but with some weird caveates.
I'm trying to print multiple miniatures on a single print, but seem to be getting a lot of oozing or stringing issues, but when I test with retraction tests, the test comes out perfect with identical settings. Additionally, when googling around, I couldn't find anything except for potentially a nozzle clog or potentially hydrated filament (possible, I'll test this later)
​
I've tested a few other prints as well, a benchy and a testcube, they print fine. Really curious about what's going on. Do I need to spread the prints out more, use different settings, or is it more of a mechanical issue?
​
I'd appreciate any help you guys have to recommend!
​
So, lets get down to it:
Printer: Creality Ender 3 Pro
Surface: Creality Glass surface
Upgrades: Aluminum extruder upgrade
Capricorn Tubing
New bed springs
In addition to these, I've tightened the X and Y bolts on the runners to reduce wobble -- there's no more wobble, maybe they're too tight? I don't think so, I've had good prints with these settings, but not with a few things.
Settings:
Basically the same as the "normal" settings for the Ender 3 on Cura 4.0.0
But in addition: (And what I think may be important is bolded)
adhesion_type = raft
layer_height = 0.12
support_tree_enable = True
support_type = buildplate
brim_outside_only = False
fill_outline_gaps = True
infill_pattern = cubic
infill_sparse_density = 25
material_final_print_temperature = 180
material_initial_print_temperature = 180
material_print_temperature = 185
optimize_wall_printing_order = True
raft_margin = 10
retraction_amount = 7.5
retraction_speed = 20
speed_print = 30
support_angle = 40
support_conical_enabled = True
support_infill_rate = 50
support_interface_enable = True
support_pattern = lines
** NOTE ** Standard supports are turned off, I'm using the tree supports
support_tree_collision_resolution = 0.15
travel_avoid_supports = True
travel_compensate_overlapping_walls_enabled = False
wall_thickness = 1.2
https://www.amazon.com/gp/product/B07GXC1G2B/. These are a game changer. They are so stiff and leveling the bed is so much more accurate.
If you are only using butane torches and a pickle pot, you may be able to get away without one, but it is healthier if you use ventilation. You are going to inevitably burn oils and other contaminants and that should not be going into your lungs.
A 200 CFM, 4" duct fan can be used with a dryer hose and a 'vent periscope' box to make a permanent in-window vent system. Add some duct insulation and it won't bleed heat. The basic setup is about $60.
https://www.amazon.com/VIVOSUN-Inch-Inline-Ventilation-Blower/dp/B01M7S46YZ/
https://www.amazon.com/Whirlpool-4396037RP-Inch-Vent-Periscope/dp/B001AAEG6S/
My periscope box installed: https://imgur.com/MIJTJDY
My vent setup: https://imgur.com/tNHUJ8X
I'm using Acetylene, and that gives off soot, so I *need* a vent system. I will probably add a stove hood from the remodelling surplus store just for better smoke collection.
These are the ones I bought.
They aren't much $ anymore..a printer that can print these padeyes just like this cost under $300 nowadays..the creality ender 3 is a great starter 3d printer
The stock Ender 3 extruder is mostly plastic, and the spring in it is very weak. Often the extruder will crack or break, and the filament ends up digging a groove into the arm.
As for bed springs, something like this will do:
https://www.amazon.com/FYSETC-Motherboard-Accessories-Compression-Creality/dp/B07GXC1G2B/ref=sr_1_1?keywords=3d+printer+spring&qid=1554171742&s=gateway&sr=8-1
For same price you can get a ender 3 new or the pro for 20 more. Cheaper if you wait for a sale.
https://www.amazon.com/Comgrow-Creality-Printer-Upgrade-Certified/dp/B07GYRQVYV/ref=mp_s_a_1_3?keywords=comgrow+creality+ender+3+pro+3d+printer&qid=1567803109&s=gateway&sprefix=comg&sr=8-3
https://www.amazon.com/gp/slredirect/picassoRedirect.html/ref=pa_sp_phone_search_atf_aps_sr_pg1_2?ie=UTF8&adId=A10468883U8DGA2KT7B3I&url=%2FComgrow-Creality-Ender-Aluminum-220x220x250mm%2Fdp%2FB07BR3F9N6%2Fref%3Dmp_s_a_1_2_sspa%3Fkeywords%3Dcomgrow%2Bcreality%2Bender%2B3%2Bpro%2B3d%2Bprinter%26qid%3D1567803109%26s%3Dgateway%26sprefix%3Dcomg%26sr%3D8-2-spons%26psc%3D1&qualifier=1567803109&id=4584317094790537&widgetName=sp_phone_search_atf
Become your own source. Cut out the middle man. Destroy Unicron. Kill the Grand Poobah. Eliminate even the toughest stain.
The Ender 3 is $250. The Anycubic Photon is out there for $450 if you want higher quality for more trouble and messier process.
Welcome to the hobby. I like to use Hatchbox PLA. Your gonna want to check out r/PrintedMinis r/3Dprinting and I like 3D Printed Tabletop.
Hey everybody, I'm relatively new to the 3D printing scene as far as the printers themselves are concerned. I've been looking around for a sub $500 printer and I found the Creality Ender 3 Pro on Amazon for ~$260. Wanted to know if anyone has one and what they think of it or if there are suggestions for others.
Any feedback is helpful and much appreciated and the link to the printer is below. Thanks!
Creality Ender 3 Pro: https://www.amazon.com/dp/B07GYRQVYV/ref=cm_sw_r_cp_apa_i_0DEYCbVJH97DS
3d printing is a pretty niche process, but it has some incredibly cool applications. I use mine for printing custom parts for DIY projects, special items for Cosplay, and little minifigurines for tabletop games. They'll probably never replace injection molding, but for small scale projects they're fantastic.
As for the quality of the printers, it depends a lot on what you're talking about. Something like an Ender 3 is a great machine, both inexpensive and decent quality, but still essentially a hobbyist tool. More expensive brands like Makerbot do lots of little proprietary things to their machines to make them more capable of high quality prints, though in my experience you can usually get pretty close to professional using hobbyist machines as well.
Some printers are also just produced with higher quality parts, which makes them print better and operate more reliably, but still essentially are the same basic design as the cheaper versions. Compare the Ender I posted earlier to something like this which has a plastic frame. The plastic can warp and bend, leading to issues printing, wheras the ender has a metal frame which is more rigid. That simple change makes a huge difference in print quality, and other things like that can be done, from changing the extrusion method to using higher quality electronics, all of which changes the price and quality, but ultimately not how the printer actually "works".
[Here’s one](Comgrow Creality Ender 3 Pro 3D Printer with Removable Build Surface Plate and UL Certified Power Supply 220x220x250mm https://www.amazon.com/dp/B07GYRQVYV/ref=cm_sw_r_cp_api_i_EXX1DbYEDMC60) on Amazon that’s legitimate: https://www.amazon.com/dp/B07GYRQVYV/ref=cm_sw_r_cp_api_i_EXX1DbYEDMC60
Hello all, just found this subreddit for the first time tonight!
Looking to order my first 3d printer.
I’m in the USA.
I can build a kit.
Honestly it will just be used to play around and make small prototype like parts.
Budget is around $300+-
I think I’ve narrowed it down to these two:
Creality Ender 3 Pro
https://www.amazon.com/gp/aw/d/B07GYRQVYV/ref=sspa_mw_detail_2?ie=UTF8&psc=1
Or
The AnyCubic Mega S
https://www.amazon.com/gp/aw/d/B07J9QGP7S/ref=sspa_mb_hqp_detail_mobile_aax_0?ie=UTF8&psc=1&smid=A1A5FQE7R5RISB
Any thoughts on the two of these for a newb.
I’m a tinkerer, and machinist, right now I own a Shapeoko CNC router, but have programmed and created many things over the years.
I appreciate the help!
I’d like to order tonight!
I used plastic ones on two bath renovations, very quiet, and wont rust.
VIVOSUN 4 Inch 195 CFM Inline... https://www.amazon.com/dp/B01M7S46YZ?ref=ppx_pop_mob_ap_share
A charcoal filter works for indoor use. I printed this adapter on my ender 3:
https://www.thingiverse.com/thing:2877754
And I ran it through a filter with these things:
It works great for me, and I'm very sensitive to the resin fumes.
Hello there, I recently started growing and purchased all new items. The fan you chose simply won't work. You will be very disappointed in the performance. I was going to use that fan as an inflow booster with a pre-filter. I quickly returned it because it just did not move enough air. The fan could not create positive pressure in the tent. I then tried this fan: https://www.amazon.com/gp/aw/d/B01M7S46YZ/ref=mp_s_a_1_3?ie=UTF8&qid=1495901534&sr=8-3&pi=AC_SX236_SY340_FMwebp_QL65&keywords=4+inch+inline+fan&dpPl=1&dpID=41G0I96VBVL&ref=plSrch
I ended up returning that one as well because it was advertised as 200cfm and it was not moving anywhere near the same air amount as the first fan I bought. I then broke down and bought the same fan I originally purchased as my outflow fan and filter. I bought just the fan for 56.00 as an inflow fan and put a pre-filter on it.
https://www.amazon.com/gp/aw/d/B00D7M6692/ref=mp_s_a_1_1?ie=UTF8&qid=1495901249&sr=8-1&pi=AC_SX236_SY340_FMwebp_QL65&keywords=4+inch+inline+fan+carbon+filter+combo&dpPl=1&dpID=51REkA1uNbL&ref=plSrch
I have a duct fan blowing into a carbon filter. It does a great job keeping the smell down.
I used this one:
https://www.amazon.com/gp/aw/d/B01M7S46YZ?psc=1&ref=yo_pop_mb_pd_title
Along with a 3d printed duct for the back at the machine, with the blower positioned at the end of the hose. Works great.
I see these
https://www.creality3donline.com/creality-2pcs-cr-10-ender-extruder-spring_p0153.html
Or should I buy some yellow ones from amazon?
FYSETC 3D Printer Motherboard Accessories 0.31 in OD 0.78 in Length Compression Springs Light Load for Creality CR-10 10S S4 Ender 3 Heatbed Springs Bottom Connect Leveling - 10 Pack
https://smile.amazon.com/dp/B07GXC1G2B/ref=cm_sw_r_cp_apa_i_9YFnDb0DV66V4
FYSETC 3D Printer Motherboard Accessories 0.31 in OD 0.78 in Length Compression Springs Light Load for Creality CR-10 10S S4 Ender 3 Heatbed Springs Bottom Connect Leveling - 10 Pack https://www.amazon.com/dp/B07GXC1G2B/ref=cm_sw_r_cp_api_i_92l7CbYBEGJYC
https://ultimaker.com/en/resources/20441-manage-profiles
Here's the springs:
https://www.amazon.com/FYSETC-Motherboard-Accessories-Compression-Creality/dp/B07GXC1G2B
I'm not familiar with the product you're talking about and google returned a product called "sugru" instead of surgu. This is what you're talking about right?
I personally use Sugru for of my oddly conforming curved surface type mounts. http://www.amazon.com/Sugru-SBW8-Setting-Rubber-8-Pack/dp/B00EU7DBNM Holds up like a champ.
Amazon
https://www.amazon.com/dp/B00EU7DBNM/ref=cm_sw_r_cp_awdb_VlDRzbK6G66YM
Sugru Maybe
Sugru sul casco (per appiattire la superfice e far aderire tutta la base) e non cade nulla.
Comunque o di lato, o chin mount se il casco lo permette.
You could try Sugru or some silicon sealant before you buy a replacement.
https://www.amazon.com/gp/aw/d/B00EU7DBNM/ref=mp_s_a_1_1?ie=UTF8&qid=1501875543&sr=8-1-spons&pi=AC_SX236_SY340_QL65&keywords=sugru&psc=1
"A gaffer in the motion picture industry and on a television crew is the head electrician, responsible for the execution (and sometimes the design) of the lighting plan for a production. The term gaffer originally related to the moving of overhead equipment to control lighting levels using a gaff. The gaffer's assistant is the best boy.[1]
Sometimes the gaffer is credited as Chief Lighting Technician (CLT)."
-Wikipedia
Side note: that's why the black tape used to secure/hide cords is called gaffer's tape
"In US and Canadian filmmaking, the key grip supervises all grip (lighting and rigging) crews and reports to the director of photography.[1]"
-Wikipedia
So the Key Grip is similar to the Gaffer, but has a focus on things like dollies, cranes, vehicles, etc.
Heads up, the only issue I've had with my pressure pad in the past 8 or so months (range/ fun time weapon, not a work gun) is that your run of the mill gaffer tape shits a huge amount of slime onto the pressure pad, but even then, goo-gone gets rid of it
Yes, there is a way:
Edit: This disables sending clips to Tesla, but it might still be recording. If it really comes to it, gaffers tape?. I'd just ask the gate guards if they know of anyone there has a tesla. If they say yes, there is obviously something that can be done....
You might be interested in QLC+ (it's free and open source) and an Enttec DMX USB Pro mk I (same company as the DMXIS, but a hundred bucks less). I've programmed a show for a buddy's band to their click track and had a generally positive time with it. I'm a professional lighting nut, so I thought it was a bit restrictive, but that's more of a problem I have with preprogrammed shows than with the software.
Take the $200 you'd save with this control scheme instead and spent it on safety cables, velcro cable ties, a storage bin for your cables, computer, and DMX adapter, gaff tape, and pizza for when you get together to program and jam the first time!
Those links probably aren't the best options for each thing, I just wanted to link examples.
Hello, I somewhat specialize here.
What you can do is use gaff tape to secure the phone to the headset. use it around all the edges, at your discretion. you MUST use gaff tape because it leaves very little sticky residue... some may stay because of the heat, but its very easily cleanable. The strength of duct tape without the mess.
https://www.amazon.com/Professional-Premium-Grade-Gaffer-Power%C2%AE/dp/B00GZE3UJ8
*This comes in many colors, even white, which may suit better to be less noticeable.
After that, you can secure the black cover plate to it to cover up the phone... if you care more about security than aesthetics, go ahead and secure the black cover plate to the headset as well with the gaff tape...
alternatively, you can configure an anti theft pull box to the phone and/or headset. anti theft kits will most likely leave some sort of mark on either device so use with caution.
http://www.cissecuritysolutions.com/Anti-Theft_Pull-Boxes.html
Gaffer's Tape, not what you're talking about though. It's aluminum wire backed duct tape. The God tier of all tapes.
Gaffer tape
The magic tape you seek is gaffer's tape.
https://www.amazon.com/Professional-Premium-Grade-Gaffer-Power/dp/B00GZE3UJ8
Do yourself a favor and pick up some Gaffer Tape and place on the printing surface(Tray). It helps the first layer of a print adhere to the surface much better. I used to struggle with starting a print almost every time but after I started using the tape I haven't had a problem since.
Gaffer's tape and a sledgehammer oughta fix it.
You could probably get away with just doing everything mentioned, but just using a Tupperware container and gently shaking it every 10-20 minutes or so within an hour of soaking with the denture tablets. Ultrasonic cleaners are pretty cheap though, especially compared to HP switches: https://www.amazon.com/Magnasonic-Professional-Ultrasonic-Eyeglasses-Instruments/dp/B00HZVYAVM
This is the one I bought and it works great; There are many on Amazon like it. I use 1/2 tablet of denture cleaner (I use target brand) in the ultrasonic cleaner morning and night.
They aren't that expensive, bought mine for 30 bucks and works like a charm. Here's the Amazon link
I just got a magnasonic on Amazon. It was this one https://www.amazon.com/gp/aw/d/B00HZVYAVM?psc=1
Right about $35. I just opened it up last night. It seems well built but I don't have anything to compare it to. I haven't run any coils through it yet but it did clean the jewelery that I tested it out with. This one has the auto 3 minute timer that someone mentioned. So if you want it to run longer, you have to press the On button again after it shuts off.
Vodka or rubbing alcohol. Or denatured alcohol. It may dry the o-rings out some, but otherwise you'll be good to go.
May also want to give a cheap ultrasonic cleaner a try. I used distilled water in that to clean everything. Works pretty well.
Digital Calipers
Bought this one and works wonderfully.
Funny coincidence... my <$20 caliper suffered a tragic "accident" in the shop today and is now NFG.
Here's a video that compares a bunch of digital calipers. If you don't want to spend $120+ on a Mitutoyo caliper, it sounds like the iGaging calipers are almost as good for less than half the price.
I just ordered the iGaging Absolute, expecting it to be decent.
I have one of these (https://www.amazon.com/iGaging-ABSOLUTE-Digital-Electronic-Caliper/dp/B00INL0BTS) as well as a Mitutoyo (along with the piece of crap in the gif).
The iGaging is absolutely amazing for the price and feels pretty much the same quality as the Mitutoyo.
But without a doubt if you have some cash to splash, get the Mitutoyo Digimatic.
Mitutoyo is the right answer. You can't go wrong there.
If you want a cheaper solution, I've heard good things about these:
https://www.amazon.com/dp/B00INL0BTS/ref=cm_sw_r_cp_apa_02MAyb2RWWRKM
I've used many pairs of $10 calipers and sometimes they work fine. When they don't it's pretty disappointing. What might you waste/ruin by cutting something the wrong size? How long would it take to make back the extra $30? $100?
I like the igaging stuff. iGaging ABSOLUTE ORIGIN 0-6" Digital Electronic Caliper - IP54 Protection / Extreme Accuracy https://www.amazon.com/dp/B00INL0BTS/ref=cm_sw_r_cp_tai_ZQERAbVQDZTS9
It’s won a lot of caliper shootouts on YouTube.
Chamfer/deburr - the two you have listed fit on a case prep machine that I don't see listed. One like this, made by every manufacturer, is all that is needed https://www.midwayusa.com/product/465641/rcbs-chamfer-and-deburring-tool-17-to-60-caliber or https://www.midwayusa.com/product/171844/hornady-deluxe-4-blade-chamfer-and-deburring-tool
For a bench priming tool, this one https://www.midwayusa.com/product/457599/rcbs-automatic-bench-priming-tool is more highly reviewed, and the one I use now. First 15 yrs I primed on the RockChucker press. Or get a hand-primer as suggested. Got extra space on your bench, get it. Wanna watch TV and prime, get a hand tool. Up to you really.
And get the shorter handle for the press https://www.midwayusa.com/product/528383/forster-co-ax-single-stage-press-short-handle , much easier to work with. I do 7mag, .270, 30-06, and haven't felt the need for the unwieldly standard longer handle yet.
This guy makes a much better set of jaws for the press. https://www.youtube.com/watch?v=9BpFD7NbvL8 . Worth it? Take Forsters jaws on/off a few times. Then you'll say YUP. I'm honestly surprised Forster hasn't bought this guy out or designed their own like this.
One thing I have found with the Forster press vs O-ring presses, is that the Forster forces you to sit more in front of it, to facilitate 2 handed operation, and thus slightly farther away from the workbench. The O-ring style presses are more open to your left hand placing and picking up cases. Lefties gotta work at it with O-ring presses. I managed to angle my press slightly on my bench to minimize this realization.
As u/unrulywind mentioned, a decapping die is nice to have so you can remove the primer, clean the case, then get to work without getting any grit into your dies, my choice https://www.midwayusa.com/product/211699/hornady-universal-depriming-and-decapping-die
As for neck sizing dies, they are something you could get later if you find a need for it. I'd wait until you are more familiar with the process, and then go with a bushing bump neck die like Forster makes https://www.forsterproducts.com/product/bushing-bump-neck-sizing-dies/ , or a Redding https://www.midwayusa.com/product/1018049293/redding-type-s-bushing-full-length-sizer-die . If you're going down this rabbit hole you would probably want to get a good neck turner/reamer https://www.midwayusa.com/case-neck-turners-and-reamers/br?cid=10455 . But going down this rabbit hole this early on is not necessary. Most never do. Aren't most of the bench-rest guys going with full length sizing now?
And as u/-RicFlair mentions, the comparator tools would be more useful to you earlier on than the neck sizing/reaming tools. This is the comparator body with bullet ogive inserts. https://www.brownells.com/reloading/measuring-tools/bullet-comparators/lnl-comparator-body-w-14-inserts-prod36535.aspx . You should be able to find just a body and a .30 cal insert. And then these fit the same comparator body but measure shoulder bump https://www.brownells.com/reloading/measuring-tools/bullet-comparators/sinclair-bump-gage-insert-prod35265.aspx . Just for clarity, all this paragraph attaches to your caliper tool, so as u/-RicFlair also mentions, this is a reason to have 2 or more calipers. I have one dial caliper (never needs batterys) and one electronic which makes it easier to zero-out the comparator body + insert, so you're getting true lengths without having to perform subtraction, or re-zeroing a dial caliper.
This electronic caliper has been found to be accurate and inexpensive and the one I use https://www.amazon.com/iGaging-ABSOLUTE-Digital-Electronic-Caliper/dp/B00INL0BTS/ref=sr_1_1?ie=UTF8&qid=1525514664&sr=8-1&keywords=origincal . Keep extra 2032 batteries around! They give an extra battery in the case, but you don't want to be caught without. It matches up with my more expensive Brown & Sharpe dial caliper exactly, so far.
All my new cases also get prodded once with this tool https://www.midwayusa.com/product/729748/lyman-flash-hole-uniformer-tool . And after every firing (or 2) with one of these https://www.midwayusa.com/s?userSearchQuery=primer+pocket+cleaner&userItemsPerPage=48 . Note that the steel pin wet tumblers will clean this debris out, but the tool is so cheap why not have a manual version for those once off/extra dirty times.
Case cleaning: 4 choices in approx $ low-\>high - wipe by hand cloth - dry media tumbler - sonic solution wet vibe - steel pin wet tumbler. The last one is the latest invention and the one to go to if you want/need shiny clean. https://www.cabelas.com/product/shooting/reloading/case-cleaning/pc/104792580/c/104761080/sc/104661180/platinum-series-rotary-tumbler-l/1811194.uts?slotId=0 Does an amazing job. Do you want to wet tumble every time? Perhaps not, so one of these is the original standby https://www.cabelas.com/product/shooting/reloading/case-cleaning/pc/104792580/c/104761080/sc/104661180/thumlers-tumbler-ultra-vibe-tumbler/705516.uts?slotId=8 . Still using the one i got since um lets see 1972ish, so wow, yeah 46 yrs ago. LOL. I won't recommend any other dry media tumbler.
Powder measure - can't go wrong with something like this https://www.midwayusa.com/product/759813/redding-match-grade-3br-powder-measure-with-universal-metering-chamber . You might need a stand to go with https://www.midwayusa.com/product/552580/redding-rs-6-powder-measure-bench-stand . I see that Redding has come out with a few more powder measures since I last gandered at them, so pick what u want.
Powder Trickler - https://www.midwayusa.com/powder-tricklers/br?cid=9212 your pick, they all should be decent, but I'd pick the Frankford first, RCBS 2nd. $20 ish. The Redding is too short, don't know why they haven't realized it yet. Still good, but theres better for your money.
Powder funnel - https://www.midwayusa.com/s?userSearchQuery=powder+funnel&userItemsPerPage=48 . You can buy the pricey aluminum ones if you must have the best of the best, but the $5 jobbers have been doing the same job for a long time too, for the other 99.5&#37; of us.
Scale - find an old used Lyman M5 or RCBS 505/510/1010 on ebay. Seriously. The ones that were made in good ole USofA. If it doesn't work to your satisfaction, there is a guy here that will re-tune to better than original. http://bulletin.accurateshooter.com/tag/scott-parker/ . Or get an elec/batt scale. People seem to like the RCBS ChargeMaster https://www.cabelas.com/product/RCBS-reg-ChargeMaster-Combo/741110.uts?slotId=0
Pick up another couple reloading manuals, Hornadys and Noslers. You can find bullet/charge weights online too, but say power or internet goes out, you've nothing to do, so may as well reload some. You want to pick another load to work up. What do? One manual is not enough.
Also useful to find an older volume of the same manuals at gunshows/shops in your area. I think Hornady is up to 10th ed. Find a 2nd or 3rd ed. to see how much the lawyers have caught on to our game.
I know Forster is still made in USA. I think Redding and Hornady too. But RCBS has left this shore and it shows. Thats why my money goes to the first 3. You can't go wrong swapping their versions for what I've suggested here.
When you have another wad of cash burning a hole in your pocket, and you've digested what you're doing thus far, there are other gauges/accessories/rabbit holes to fall into and spend your hard earned dough on. Hit me up, I've got more suggestions.
Gotta like spending other peoples money !!!!
This is the caliper that I bought:
https://www.amazon.com/gp/product/B00INL0BTS/ref=oh_aui_detailpage_o07_s00?ie=UTF8&amp;th=1
I wish I bought a 3mm hexdriver so that I did not have to use the hex key.
My biggest tip would be to pre-install or thread the screws in first when installing any screw to the frame. The threads need to be cleaned of the powder coat. This will make installing anything to the frame go much smoother.
Other than that use the online manual read the directions clearly and read the comments, they are very helpful.
I've got these at work, they lay flat.
https://www.amazon.com/gp/aw/d/B00INL0BTS/ref=mp_s_a_1_7?ie=UTF8&amp;qid=1517528088&amp;sr=8-7&amp;pi=AC_SX236_SY340_FMwebp_QL65&amp;keywords=Digital+caliper&amp;dpPl=1&amp;dpID=51r2J68iW3L&amp;ref=plSrch
EDIT: I really suggest staying away from plastic calipers. There are metal calipers that are similarly priced and will last much much longer and are higher quality.
I usually recommend these from Harbor Freight because they do fractions:
https://www.harborfreight.com/6-in-digital-caliper-with-sae-and-metric-fractional-readings-63731.html
And these from Amazon because the quality is much higher for a very good price, but they don't do fractions.
https://www.amazon.com/gp/product/B00INL0BTS
I use both depending on what room I'm in.
I started with a pair from harbor freight, but then decided I wanted something a little more substantial, so got these off of Amazon - https://www.amazon.com/gp/product/B00INL0BTS/ref=oh_aui_search_detailpage?ie=UTF8&amp;psc=1 and moved the HF pair out to the garage. These iGaging ones do feel more substantial.
OP, it’s possible your current sensor isn’t getting data through properly. How fast does it actually charge? It may be useful to pick up a cheap USB current & voltage meter. I got a nice one and I have used it countless times.
[Cheap](USB Meter, DROK Digital Multimeter USB 2.0, Multifunctional Electrical Tester, Capacity Voltage, Current Power Meter Detector Reader with Dual USB Ports, LED Displahttps://www.amazon.com/dp/B00J3JSEG6/ref=cm_sw_r_cp_api_i_ss8IDbE6C7JCJ)
[The one I have with unlimited useful tools. ](AVHzY USB Meter Tester Multimeter USB Load Current Tester Voltage Detector DC 26.0000V 6.0000A Test Speed of Charger Cables Capacity of https://www.amazon.com/dp/B073R7YRM9/ref=cm_sw_r_cp_apip_Gc6nVKprYh32G)
It sounds like you need a USB meter.
Can you move to a different port? Maybe the RTL is drawing too much power? These's a USB test tool that will show you the voltage/current of a device. I use https://www.amazon.com/DROK-Digital-Multimeter-Voltmeter-Capacitance/dp/B00J3JSEG6/ref=sr_1_6?ie=UTF8&amp;qid=1492270966&amp;sr=8-6&amp;keywords=usb%2Bvoltage%2Bcurrent&amp;th=1
Usually different USB ports on the same external battery have completely different amperage outputs. I guess just make sure that you are always using the highest amperage output. One thing that you could do is buy a voltage and current meter from Amazon they're like $7 to watch the power flow through your USB and you could test.
DROK&reg; Dual USB 2.0 Digital Multimeter Ampere Voltage Capacity Power Meter 7 Modes Monitor for Fast Charging Data Sync DC 3.2-15V 0-3A Volt Amp Charger Detector Mobile Solar Panel Alignment Tester https://www.amazon.com/dp/B00J3JSEG6/ref=cm_sw_r_other_awd_XzJDwb5JV4VB4
You mentioned the basics... how about electricity? I'm specifically thinking of a portable solar arrays, and some multipurpose chargers, batteries devices. Here are a few links of interest:
Super portable 21Watt version that has USB outs:
http://www.amazon.com/dp/B012YUJJM8/
Bigger model but capable of charging 12Volt batteries (I'm thinking trickle charging a car battery):
http://www.amazon.com/Charger-Backpacking-Battery-Foldable-Cellphone/dp/B00VBSFT74/
Multimeter for displaying power output:
http://www.amazon.com/dp/B00J3JSEG6/
(useful for positioning the solar cells for best power)
ThruNite U1 charger and battery; acts as not only a charger for NiCad, NiMH, and Li-Ion cells of varying sizes, but also (drum roll) can be used as a USB powerpack:
http://www.amazon.com/ThruNite-Charger-1x3400mAh-Multifunction-Portable/dp/B00WFXWUOE/
Then, standardize on lights that use 18650 cells as they're way, way better than NiMH (higher power, better capacity, longer life):
http://www.amazon.com/Bundle-Nitecore-Rechargeable-Flashlight-EASTSHINE/dp/B00VG1J8S2/
Oh, random idea... small stove that'll burn wood and comes with a backup alcohol burner:
http://www.amazon.com/dp/B0088FVZZI/
These are pretty handy and not too expensive.
https://www.amazon.com/gp/aw/d/B00J3JSEG6/
The hub working simply just as a hub, adding more ports and a conduit for the signals, is different from powering external devices. And so any hub will work with the pi. That being said, I run non powered $4 4 port hubs on a pi zeros and it can run keyboard, mouse, wifi dongle and web cam. I have never needed a hub for my B+, 2's and 3's doing all that as well. Short of running a dvd burner or charging other devices how much power do you really need? You can figure it out with one of these DROK meters. So all hubs work with the pi, the question is really how much power you actually need.
Get yourself one of these if you want to know what your charger is doing. Use a current monitoring widget to see if it is getting to the phone. I have had good luck with Anker chargers in general, but for a Quick Charge capable device it has to be the real thing. Qi chargers are cool, just watch the temperature. They can get hot. Letting you phone sit around at 100% too much is not great for the long time life of your battery.
Thermal optics are now $200
http://amazon.com/dp/B00NYWAHHM
The FLIR One is upcoming as well, probably for a similar sort of price.
Here you go.
Thermal cameras are decently inexpensive when paired with a phone.
Seek Thermal Camera
It won't have the clarity of the picture you posted, but it'll give you an idea.
I would not be surprised if this still happened but this practice was outlawed in the US in 2001 by US Supreme Court decision under the 4th Amendment as an illegal search.
https://en.wikipedia.org/wiki/Kyllo_v._United_States
The problem now was that since infrared cameras were not commonly used in the late 1990's by the public when the bust was made in the case that the search would be "presumptively unreasonable". Today thermal cameras for a phone starts around $200 and are becoming popular.
https://www.amazon.com/Seek-Compact-Thermal-Imager-Android/dp/B00NYWAHHM
A few thousand watts can still be reasonably hidden if the exhaust from the lights is vented underneath the house if one were that paranoid. It's really not an issue for small to medium sized grows.
I've purchased those in the past and was disappointed with the results. I don't think it is worth slapping onto a nexus 7. You mention IR filters in a reply. You need a special sensor to get an IR image beyond what is found in most mobile devices. There's this:
https://www.amazon.com/Seek-Thermal-Compact-Imager-Android/dp/B00NYWAHHM
But, it's a pricey bit of tech.
you can rent a thermal imager from home depot in brooklyn or buy this http://www.amazon.com/Seek-Compact-Thermal-Imager-Android/dp/B00NYWAHHM
Based on the watermark, I would assume he has a consumer device like this: https://www.amazon.com/Seek-Thermal-Compact-Imager-Android/dp/B00NYWAHHM
Maybe it's this thingy? https://www.amazon.com/Seek-Thermal-Compact-Imager-Android/dp/B00NYWAHHM
FLIR is a brand, a thermal camera is what you want. FLIR makes a mobile phone attachable units, but I personally went with the Seek brand and have been happy with it.
(I bought this model for $168 but it has gone up drastically since then. I'm guessing there's a newer model that is in the same price range?)
https://www.amazon.com/gp/product/B00NYWAHHM
As another user suggested I’d get a FLIR cam and see exactly where heat loss is occurring. You can get ones fairly cheap that connect to a smart phone.
https://www.amazon.com/gp/product/B00NYWAHHM/
I'd buy or rent one of these, turn on circuits, pull off cover panels on junction boxes and look for hot spots.
You might want to get one of these then: https://www.amazon.com/Tonor-RJ45-Network-Cable-Tester/dp/B00OUFX38W/ref=sr_1_1?ie=UTF8&amp;qid=1474654003&amp;sr=8-1&amp;keywords=ethernet+tester
It's cheap and it will tell you if the pins are still connected. Hopefully if it's broken, it's at one of the terminations and not somewhere in the wall.
Get a cable tester, and find out where the issue is. I have this one
It is either the switch, the line to the patch panel (if you have one), the line in the wall between the switch or patch panel to the office outlet, the line from the outlet to the PC, or the PC itself. Rule them out one by one. Once you find where the issue is, you can try to figure out what the the issue is (bad cable, loose connections, improper termination etc.)
Yeah, I can see what you are trying to do now a bit better. That would work and the connector you found will do the trick. I think it is a great idea. As long as you know that the cables are put together with that junction box and when it comes time to do anything that might disturb them be careful, there's nothing wrong with using them. I might even try to find a place in the attic to screw them down, keep it up out of the insulation and out of the way of storage. When running the cable to the office, give yourself about 5 to 10 ft of slack so you can move the junctions if you need to in the future.
The only concern I would have is the cable the contractor is running, is it spliced anywhere? If it is intended for phones, is it terminated and daisy chained (no problem for phones but bad for data but would probably still work just cause problems every now and again) anywhere?
There are some very cheap cable testers on the internet ($5) , I would get one and see what I was working with. Those testers will let you know if there is a break in any of the 8 wires inside a ethernet cable. Plus you can rule out the cable if something isn't working.
Edit: cheap cable tester
If you aren't even getting Blinkenlights on multiple devices, the cable is either unplugged at the router end, or dead. If you want to be 100% sure, you can grab a cheap RJ45 Cable tester off amazon for $10. Ethernet cables, especially long runs that are getting moved around and aren't properly sent through the walls, do go bad from time to time.
It's possible not all 8 of the wires are making proper contact.
Networks try and be resilient: if there's a blockade, try and route around it, if there's a network cable problem, try and use what you do have left.
Cat 5e has 8 wires. To get full 1000mbit/s speeds, you need all 8 of those intact and working to spec. If you're missing one or several, the speed will fall down to 100mbit/s or slower.
A simple cable tester like this only costs a few bucks and is absolutely vital when running your own network cable.
More than once, I've dealt with contractors (I'm a sysadmin) who check to make sure that a network drop is working simply by plugging a laptop into one end and a switch (which is usually already present) on the other, and see if it connects. More than once, I've given them a simple cable tester like that, after showing them that the local network only supported 100mbit/s (instead of 1000mbit/s) because e.g. only 7 of the 8 wires were making proper contact.
Alternatively, it's possible that the "bridged router" (whatever the fuck that is) has issues. Why not just get a simple gigabit switch (like this) if you want to connect the cables?
By the way, if you're worried about the cable being too long (100m is the absolute hard limit, according to the spec), just put a simple switch halfway, that'll reset that limit, in this case giving you e.g. a 40m cable and a 60m cable, either of which are fine.
If there are no problems with your cables, you should have zero packet loss. If you're staying within spec (no cables longer than 100m) and your cable isn't broken anyway and the plugs are connected properly, you should have zero packet loss. Especially when staying on your own network (e.g. pinging the router or another (wired) computer in the same house.
I've been using this one for months with no issues. It's cheap and easy to use.
Correct me if I'm wrong, but you have your modem in another room, where you get 110 Mbps, and then you have a wired connection to your room where you only get 42Mbps?
Well, to answer your question in the edit, no degradation is supposed to happen over 100 ft of cable. Maybe it's wired wrong, I would get a cheap cable tester to make sure there aren't any crossed wires.
If you are running CAT cable around the house, you will probably want to run all the cable to a common point where they can connect to your patch panel, switch(es), servers/NAS and routers. Most people locate this place out of the way in a basement, to hide the clutter.
If you are running CAT cable you should really use CAT6A which is certified for 10G speed. CAT6 is not a standard. CAT6A is. I used shielded CAT6A. You should buy a spool of solid CAT6A wire that you can cut to specific lengths.One end gets wired to a keystone jack that is usually mounted in the wall of where you need to connect something. The other end is wired to the patch panel. The patch panel has normal jacks that you would use with regular premade patch cables to connect to switches which then connect to the server/NAS/router, etc.
Examples and tools needed:
CAT6A structure cable: https://www.firefold.com/064-series-cat6a-shielded-cable
Patch Panel: https://www.amazon.com/gp/product/B00AQL46TY/ref=oh_aui_detailpage_o06_s01?ie=UTF8&amp;psc=1
Small Rack to hold patch panel and switches (servers would need bigger rack):https://www.amazon.com/gp/product/B000VDPBXM/ref=oh_aui_detailpage_o06_s00?ie=UTF8&amp;psc=1
keystone jacks: https://www.amazon.com/gp/product/B00CLVAJCK/ref=oh_aui_detailpage_o06_s03?ie=UTF8&amp;psc=1
Wall plate mounting bracket: https://www.amazon.com/gp/product/B003JQL0S8/ref=oh_aui_detailpage_o05_s00?ie=UTF8&amp;psc=1
Keytone wall plate cover: https://www.amazon.com/gp/product/B0072JVUPG/ref=oh_aui_detailpage_o06_s02?ie=UTF8&amp;psc=1
Tools:
Punch down tool:https://www.amazon.com/gp/product/B0000AZK4D/ref=oh_aui_detailpage_o06_s02?ie=UTF8&amp;psc=1
LAN Cable tester: https://www.amazon.com/gp/product/B00OUFX38W/ref=oh_aui_detailpage_o06_s02?ie=UTF8&amp;psc=1
I just bought one of these: https://www.amazon.com/Fibaro-Micro-Controller-Z-wave-Strips/dp/B00P1N68FW
Really pleased with it so far.
This is pretty much the best option for LED strips. You can set up 4 different sets from this one z-wave device.
https://www.amazon.com/Fibaro-Micro-Controller-Z-wave-Strips/dp/B00P1N68FW
Works great.
https://smile.amazon.com/ToyBuilder-Labs-Print-Removal-Tool/dp/B00VB1U886/ref=redir_mobile_desktop?_encoding=UTF8&amp;dpID=31vIt7tpDfL&amp;dpPl=1&amp;keywords=3d%20printer%20knife&amp;pi=AC_SX236_SY340_QL65&amp;qid=1493570144&amp;ref=plSrch&amp;ref_=mp_s_a_1_1&amp;sr=8-1
https://www.amazon.com/ToyBuilder-Labs-Print-Removal-Tool/dp/B00VB1U886/ref=sr_1_1?ie=UTF8&amp;qid=1491502589&amp;sr=8-1&amp;keywords=3d+print+tool
I'm not sure how much help I'll be, but I also use a Flashforge Creator Pro...
1: If you're sick of dealing with abs, just put some blue painters tape on the bed and print PLA, once you open up the thing enough and modify your settings it does PLA perfectly well.
2: PVA glue stick, (though it looks like you are already using this) helps with bed adhesion with ABS and also gives you a bit of an ablative layer for when you are scraping things back off.
3: get a print removal tool like https://smile.amazon.com/ToyBuilder-Labs-Print-Removal-Tool/dp/B00VB1U886/ref=sr_1_4?ie=UTF8&amp;qid=1494526580&amp;sr=8-4&amp;keywords=print+removal+tool to help pry things off the bed without destroying the sheet.
4: rafts, these really help with getting things off the bed, you waste quite a bit of plastic, but it's much easier to get things off.
5: bed level (and height) adjustment (and this really should be number 1) the little plastic sheet they give you to slide under the nozzle is of no real value, you may just be printing the first layer way too close to the bed, and absolutely squishing the filament into the bed. It is far more useful to just print a leveling pattern and then see where the bed needs adjustment and how it's extruding than to even bother with pulling the sheet out from under the head. I use this one http://www.thingiverse.com/thing:97151 and generally will tweak things until the strands are attached but will come off with my fingernails.
Of course man, also here is a list of the other parts I bought.
MyLifeUNIT 3 Way Duct Connector, Duct Splitter for Exhaust Fan Dryer Vent Hose, 4 Inch Dia. (Y Shape) https://www.amazon.com/dp/B07K2YKGWB/ref=cm_sw_r_cp_apa_i_0IHuDb9WEW7WN
VIVOSUN 4 Inch 195 CFM Inline Duct Ventilation Fan Vent Blower for Grow Tent https://www.amazon.com/dp/B01M7S46YZ/ref=cm_sw_r_cp_apa_i_LKHuDb1CNH3RQ
iPower GLDUCT4X25C 4 Inch 25 Feet Non-Insulated Flex Air Aluminum Dryer Vent Hose HVAC Ducting, 4", Silver https://www.amazon.com/dp/B07HMHCTWR/ref=cm_sw_r_cp_apa_i_xLHuDbGHERVSB
I have a 2x2 tent and a Can Fan S-400, which was what my hydro shop recommended when I was getting started. There are no doubt cheaper 4" fans on Amazon, but it seems very well made and has a 5 year warranty. I also have a Vivosun 4" fan, which I run freestanding with an extra carbon filter attached to scrub the air during harvest. It works, and isn't especially noisy, but feels very cheaply made.
I've heard people say that a 6" fan turned way down can quietly move a lot of air, but haven't tried it, and a 6" fan on full speed could suck in the tent walls too much or even tear them. (I get pretty strong negative pressure with my 4" fan on full!)
I haven't used any fans with an integrated speed controller, but the external fan speed controllers that actually reduce voltage are vastly superior to the cheap ones that just rapidly flip power on and off -- depending on the fan motor type, the latter can damage the motor or produce loud buzzing as you slow it down past a certain point. When I tried one with mine, anything below 80% or so started buzzing. The better controllers cost a bit more ($70 vs. $15), but since it's actual industrial equipment it should have good resale value.
My tent is in my home office and I don't find the noise problematic, if that helps.
For a 2x2 tent, it's probably more effective to control humidity in the surrounding room, rather than putting a dehumidifier in the tent.
You could do a space bucket style build if you are lacking space and dont mind some DIY.
But if you want a tent style this is kind of like mine
Tent just used this size as it is standard some companies will make smaller ones.
Lights good for a 2x2 tent
Inline fan exhaust
Booster fan good for air in
Filter wont need this until flower
https://www.amazon.com/Humidity-Controller-Inkbird-Humidistat-Pre-wired/dp/B01J1E5LWM/
and this
https://www.amazon.com/VIVOSUN-Inch-Inline-Ventilation-Blower/dp/B01M7S46YZ
will clear your humidity out in a minute or two. get a cheaper humidistat if you want, just needs to turn on and off at a set point, but the inkbird is a good value.
https://www.horticulturelightinggroup.ca/collections/all/products/hlg-100
But thats still a lot of money for 4 square feet of canopy.
You could throw a 600w HID kit into a 4x4 tent for a few hundred $$ and get a ton more bud
This https://www.amazon.ca/iPower-Digital-Dimmable-System-Reflector/dp/B008H15WFM/ref=sr_1_3?ie=UTF8&amp;qid=1541266480&amp;sr=8-3&amp;keywords=600w+hid+grow+light
with this https://www.amazon.ca/Upgraded-Window-Hydroponic-Indoor-Growing/dp/B075CF47H6/ref=sr_1_1?ie=UTF8&amp;qid=1541266513&amp;sr=8-1&amp;keywords=4x4+tent
and this https://www.amazon.ca/VIVOSUN-Inch-Inline-Ventilation-Blower/dp/B01M7S46YZ/ref=sr_1_3?ie=UTF8&amp;qid=1541266589&amp;sr=8-3&amp;keywords=4+inch+inline+fan
to replace your tent, light and fan. Less than $150 more than you spent on those things, but grows 4x the cannabis at a time
4in fan
Ducting
It’s this tent vented with this fan with a carbon filter attached. They’re both pretty cheap but seem to be working fine so far.
https://www.amazon.com/Sugru-Moldable-Glue-Black-White/dp/B00EU7DBNM/ref=pd_lpo_60_bs_t_2?_encoding=UTF8&amp;psc=1&amp;refRID=FQGSJGRJ8AW4RGETHD4G
I know it's a bit late but if you have gaps in the adhesive on the curve of the helmet use SUGRU to fill them in, it dries like rubber and its solid af.
https://smile.amazon.com/Sugru-Moldable-Glue-Black-White/dp/B00EU7DBNM
In a pinch, I've been known to use a quarter and some Sugru. Works pretty well until you need a quarter for something.
The bung did not want to stay in initially. I think because I had pulled it from the sanitized water so to make sure it wasn't going anywhere and ruining the works I secured it with some gaffers tape.
Unrelated pro tip from photo and video experience. Decent gaffers tape is much better for securing non paper items than duck tape. It wont leave a sticky mess and its just as strong if not stronger than duck tape.
This is what I use and love
No, that is gorilla tape, that's double thick duct tape.
Gaffer's tape is matte black and comes up with little to no residue.
https://www.amazon.com/dp/B00GZE3UJ8/
I run a 50' ethernet cable from my living room into my bedroom. I just pulled it tight, and secured it with a roll of Gaffer's Tape. Once it's gaffed down you can stick it under a rug or what have you. For two cables put them side by side, pull tight, and gaff a foot at a time
Gaff tape sticks to everything
REAL USA Professional Grade Gaffer Tape By Gaffer Power, Made in the USA, Heavy Duty Gaffers Tape, Non-Reflective, Multipurpose. (2 Inches x 30 Yards, Black) https://www.amazon.com/dp/B00GZE3UJ8/ref=cm_sw_r_cp_api_i_cvR0Db5P2XRNQ
http://www.amazon.com/gp/product/B00GZE3UJ8
It's great stuff!
Ultra sonic cleaner on amazon is $30 shipped. Worth every penny to keep you vape gear clean! Bonus you can speed steep the odd bottle of juice with it.
Personally I use this ultrasonic cleaner. When I go to change coils I throw it all in there and put on a few cycles and it comes out surprisingly clean ( seriously, these things are like magic ) . When my driptip looks a little funky I just throw it in solo and it's good to go.
The only way I clean my chain is taking it off entirely and putting it into https://www.amazon.com/Magnasonic-Professional-Ultrasonic-Cleaning-Eyeglasses/dp/B00HZVYAVM/ref=as_li_ss_tl?ie=UTF8&amp;qid=1466917068&amp;sr=8-3&amp;captcha_verified=1&amp;&amp;linkCode=ll1&amp;tag=zvnfhlebcd-20&amp;linkId=79dfc5fc5c178effaf6c8cc181f80787 one of these with whatever cleaner you like, I've used a citrus degrease and simple green, both seemed great. Nothing has done as good of a job.
Once clean and dry, I drop the chain https://www.amazon.com/Finish-Line-Teflon-Bicycle-Chain/dp/B001C65JTI/ref=as_li_ss_tl?ie=UTF8&amp;dpID=41o1%2B61WiNL&amp;dpSrc=sims&amp;preST=_AC_UL320_SR228%2C320_&amp;refRID=K1R5QAN4QBMDASZA7E1S&amp;linkCode=ll1&amp;tag=zvnfhlebcd-20&amp;linkId=234fed43a001a1ff9268cc524ceea17e into this and shake the chain around with the lid on tight. I then hang the chain over the container with the ends of the chain just over the opening of the bottle, a funnel can help here but I never needed it.
Chains come out super clean, extremely well lubricated, and I absolutely love this lube. The only thing I've liked better is paraffin wax in certain respects but much sooner reapplication is needed which can be annoying.
You can fit cassettes in these ultrasonic cleaners as well, does a great job.
I use an ultrasonic cleaner ($30 on amazon) with just plain water. A few seconds is all it takes. With a splash of simple green added, they're also very useful for cleaning & stripping models, cleaning airbrushes, etc.
If you don't want to spend the money, an old toothbrush and some water should do the trick.
I use a little one from amazon: http://smile.amazon.com/Magnasonic-Professional-Ultrasonic-Eyeglasses-Instruments/dp/B00HZVYAVM/ref=sr_1_4?ie=UTF8&amp;qid=1458135108&amp;sr=8-4&amp;keywords=ultrasonic+cleaner
I use it with heated water and just a little bit of degreaser if needed. Sure it takes a few batches and a few runs to do everything, but it's only $30 and things come out super clean.
I actually got it from Vapexhale, but I think it was a limited run because it's been a while since I've seen it on the website. For an ultrasonic cleaner you can do something like this. I soak the nails and baskets in the ultrasonic cleaner filled with the highest concentration isopropal alcohol I can find. Usually soak them overnight or for a day, but it doesn't have to be that long, and I'll just turn on the ultrasonic cleaner here and there during that time.
&#x200B;
Then when I'm ready I'll take them out, brush them off good to remove the remaining stains, soak in clean iso for a bit, dry off, and then finally burn them off in the vape with it set to the highest temp (in case it needs to be said, always be careful with iso around heat, otherwise you might lose some hair or go boom).
I've worked for a retail jeweler for years in the past. Just walk into a jeweler and ask them to clean it, they will clean it free. When I was working there our main idea to keep people in the store to try and sell something was to offer to clean all the jewelry they had on and while they sit in the machine cleaning we would offer our help. But you dont have to be helped if you just want it cleaned.
Get on Amazon and buy some Gemoro cleaner. Or buy a machine, it shocks all the dirt and crud off here is a cheap one that will work, or give you an idea of what you want, if you want to do it at home. Just let it sit in machine for a minute to a couple mins depending on how dirty it is. But if you buy the machine please buy the cleaner chemicals to go with it so it will clean properly. You mix the chemicals with water based on the chemical brands instructions. Be sure to do some googling on what stones and metals can go into those machines. Stones like opal are precious, soft stones, that should not be placed in those machines. A lot of birthstones shouldnt be placed in those machines. They will discolor them and ruin them.
Edit: If its diamonds and real gold wear it whenever you want. The only thing that will degrade is the gold. But you can "re-dip" the gold whenever it starts to degrade or discolor. White gold will become more "matte" or not as shiny. When it comes to that just spend 25-40 bucks on dipping it. Yellow gold will start to turn into a white gold color, so dip it then. With yellow gold there is silver metals mixed into it so that's why itll turn white-ish after a while.
I hope this helps you. I recommended the machine incase you dont want to be hassled in the jewelry store, they're ruthless because sales are low 98 percent of the year. I recommend going to a local jeweler because you're helping your local community jeweler stay in business and they wont bombard you like retail will, like with credit card applications and all the bs. Good luck and congratulations!
Edit 2: Also, if its gold and diamonds, dont be so tough on yourself. Just was your hands in public with the ring on. Dont risk loosing it or forgetting it because you hear people say it messes the ring up or whatever cause of soap. It really wont mess it up like that. Just take it off when you put on lotion, sunscreen, etc.
There's this machine that uses ultrasonic vibrations and some solution to clean it. People use it for jewelry too. https://www.amazon.com/dp/B00HZVYAVM/ref=cm_sw_r_cp_apa_xQgPBbC2FV6JC
cant do much besides switch juice if you want them to gunk less. however, and amazing tool to clean them is an ultrasonic cleaner. just dry burn and rinse off. plop the entire deck into the cleaner with some soap and water for 5-6 mins, rinse well, wick, vape.
http://www.amazon.com/dp/B00HZVYAVM/ref=cm_sw_su_dp
they are also amazing at cleaning all your vape stuff as well.
http://www.amazon.com/Magnasonic-Professional-Ultrasonic-Eyeglasses-Instruments/dp/B00HZVYAVM/ref=sr_1_3?ie=UTF8&amp;qid=1449262049&amp;sr=8-3&amp;keywords=ultrasonic+cleaner
$30 ive never regret spending, run 3-4 cycles and it'll clear up any kind of dried up/caked in paint
Thanks! Looks like this is cheap enough.
I bought a jewelry cleaner machine like this....http://www.amazon.com/gp/aw/d/B00HZVYAVM/ref=mp_s_a_1_2?qid=1456890117&amp;sr=8-2&amp;pi=AC_SX236_SY340_FMwebp_QL65&amp;keywords=jewelry+cleaner+machine
Best thing I found so far... I wish they made a tiny fuzzy brush to really get in the nooks
pair of calipers. pretty cheap on amazon and should be a standard tool for 3d printing.
here is a pair for $13 shipped
https://www.amazon.com/SE-784EC-Digital-Caliper-Metric/dp/B003MA08VQ
personally I would go with something better.
These are well reviews and liked and come with a case
https://www.amazon.com/gp/product/B00INL0BTS/
$40
Electronic calipers are super useful too. A bit more than $30 but I really like these.
I have some of their black body calipers and while I agree with you 100% I'm not sure they still cary them. At my store they now only carry the silver body and the one I bought ended up in the trash. It was really bad. You can get an igaging 6" caliper on amazon for $40.00. That's the route I've been going.
caliper
I use this model from iGaging. It's for home use so I didn't need to buy a Mitutoyo or anything but the 4.6 star reviews on amazon are well-deserved. I'm impressed with them.
What WayGroovy said.
I picked up This Pair
They are pretty nice and affordable. I would stay away from the 20 dollar throwaways. They are more trouble than they are worth.
I've used some Fowler calipers at work and... I will never purchase a pair for myself. They're almost always inaccurate, I have to constantly zero them, even after calibration.. just.. ugh.
It's true that Mitutoyo tools are expensive, but part of that price is longevity. I've had the same Mitutoyo Mic for 2 years now and it works just as well as the day I got it. I've had other brands that only worked well for 4-6 months of regular use, and it just isn't worth the hassle.
Honestly, though, with a .002 tolerance (Which compared to my tolerances at work, that's massive), you could get away with an eyegaging or something similar. I used These for about 8 months when I was starting out and they were adequate.
been using and abusing these guys for years, and the batteries last forever
So with your scope of use, reloading might not be the path best taken given the monetary outlay. There's plenty of scary good factory ammo (I'm a fan of the Hornady SuperPerformance line) where it does almost as good as my reloads, minus the hassle and labor. If you said you were shooting 69/77gr match stuff, I could almost definitely tell you to fire up the press.
If you intend to reload for other centerfire, especially large bore, or rimmed stuff, then the decision to grab a press is almost a given.
I suppose this homeassistant needs speaker, microphone, maybe a screen or lights? You want to make sure that EVERYTHING drawing power from a 2.5A supply fits within that at all times, and try to keep a margin like 2.3A max just to be sure. There are some nice USB power meters that can help confirm this.
I don't have a complete time from 0-100%, but I did measure the current draw using one of these when I first took the phone out of the box. The phone itself was around 60% charged and I charged it using a Samsung 2A charger, a thick micro USB cable, and a micro USB to type C adapter. When I plugged the phone in, the multimeter showed that it was drawing 1.8A. It's possible that the phone might draw more current if I use a charger with higher output, but I haven't tested that yet. I plan to test the draw with the OEM charger and cable when I drain the battery enough, but I tend to leave my phone on the charger when I'm not using it, so I haven't had the opportunity yet (this is only my second day using the phone).
I saw in this review that the OP3 starts substantially limiting the Dash charging rate when it reaches about 80% (or 2400mAh out of the total 3000mAh for the battery). If we apply the same charging curve to non-Dash charging, then it would take about 80 minutes to charge from 0-80% at 1.8A.
Try powering off your phone and charging it. This will all but rule out a software problem. Also, one of these things might come in handy; I haven't found Ampere to be too accurate.
This is the particular one I used... https://www.amazon.com/dp/B00J3JSEG6/ref=cm_sw_r_cp_tai_1os3Ab1K742KB
Can you borrow someone else's charger to test with? Perhaps your charger is losing its strength and needs replacing.
There are inexpensive little gadgets that you can plug into the USB to show the voltage and current. It would show if the power is "drooping" lower than what the 2i2 likes.
USB Meter: https://www.amazon.com/dp/B00J3JSEG6/
The Bosch solid state voltage regs aren't all that expensive, CIP1 has them for $20.99
Sounds like the camera is a little flaky, but in theory the usb adapters should be protecting it.. might pick up one of these and see how well the USB adapters are doing delivering the 5V they're spec'd for.
Could always try one of these, I don't think those dashcams typically draw too much power.
Adapters have different amp ratings. Purchase one of these usb testers to know exactly what’s going on.
I use it all the time on chargers attached to my iPad, iPhone and watch. It’s interesting how different they all are.
> My Pi has connected 1 USB mobile 3g modem, 1 motion sensor over gpio, and (hopefully) 2 i2c sensors.
I'll assume you don't have a USB inline meter doodad to measure the current draw? (they can be had for $3-4 if you can wait 4-6 weeks for shipping from China)
In that case, could you please provide the manufacturer/model numbers for the 3G modem, the motion sensor and the i2c sensors so I can find their datasheets and figure out their maximum current draw?
I'm hopeful 24 hours is doable with a cheaper USB battery, say in the $25 range rather than $50.
USB Volt/Ammeter's are surprisingly useful.
Just something to consider.
Try and plug your Wyze power adapter into a different electrical circuit in your home and also try a different brand of charger into other electrical circuits not controlled by the same circuit breaker. Sometimes a home electrical outlet may not have 110 volts due to various issues, which would result in a lower power output for two Wyze cams to operate when chained together with the line-losses from the two usb cables.
To verify, you need a device to measure the USB power with under load conditions.
Something like this:
From Amazon
USB Meter, DROK Digital Multimeter USB 2.0, Multifunctional Electrical Tester, Capacity Voltage, Current Power Reader with Dual USB Ports, 7 Modes
https://smile.amazon.com/DROK-Multimeter-Multifunctional-Electrical-Capacity/dp/B00J3JSEG6/ref=sr_1_6?keywords=USB+voltage&qid=1574890447&sr=8-6
I wound up buying this one. I think it's the older model, but was about the same price, had a ton more reviews and showed voltage on same screen.
https://www.amazon.com/gp/product/B00J3JSEG6/
5 should be safe. 10 probably work ok too. The elite-c has the same chip as a Pro Micro, it will draw the same amount of current.
I have one of these cheap USB power meters. https://www.amazon.com/gp/product/B00J3JSEG6 Useful to see how much power is being drawn.
Ours ran $185, which is about as cheap as they get. It's not absolutely awful, but still high for a niche device.
EDIT: For those curious, this is the one we use. Cheapest we could get with decent functionality, works rather respectably for our purposes.
OK. For the moment, I'll tenatively sit corrected.
It's got good and OK ratings and that's for the old camera.
https://www.amazon.com/Seek-Compact-Thermal-Imager-Android/dp/B00NYWAHHM
The rest of my original comment is below:
Yeah, but the resolution sucks ass. What is good though is that it overlays the image onto the traditional video signal, so this helps to get more information into the area of interest.
One thing that you all can do to see what I mean when I say, "the resolution sucks ass," is to rent a FLIR from Home Depot's tool rental department about 1 hour before closing and then keep it all night, and return it 1 hour after they open. That should cost you about 45 bucks and get you a few hours where you can see how effective the IR is at a distance and how big the sensor size is.
http://www6.homedepot.com/tool-truck-rental/Thermal_Camera/FLIR_i7/
Now granted, Home Depot rents the Model # FLIR_i7, which has a 120 x 120 pixel (yes, that's right) sensor on this $2,500.00 unit.
This is not a 500 dollar unit, it's 2500 dollars. A 500 dollar unit would have to do some serious tricks to be better than one that sells for 5x more and even then, even though the article says it has a 320 x 240 sensor, my impression is that it's not likely that it would be much better than 120x120 (most interpolate to get higher resolution) be or any good at a distance.
Here's hoping that I am 100% wrong.
Caveat emptor.
At this point, there are roughly three categories:
The bottom category is how most of us with thermal systems to mess around with have them.
I was going to go with the $999 standalone version but it has issues. I got the 5s version for now but they are coming up with new products and might show stuff at CES 2015. They were offering $100 discount on that iPhone case. I have an old iPhone that I test apps on, so I thought why not put it to good use.
I first ordered Seek for Android (http://www.amazon.com/Seek-UW-AAA-Thermal-Connector-Black/dp/B00NYWAHHM/) but returned it for a FLIR
Aww jeez, Rick. That doesn't look good. I think the technical term for that is "cratered".
My guess would honestly be that the chip itself overheated due to the high current. This is a problem for a heatsink and maybe a fan. I hesitate to say this though, because both the trace AND the chip are utterly destroyed. Maybe a bad solder joint on the chip caused it to overheat?
Are you willing to sacrifice another channel of that board? Might be worth hooking up a stepper in such a way that it's permanently stalled and just running it until it pops, while carefully monitoring the board's temperature. You should at the very least be able to tape down a thermocouple with kapton, and they sell cheap dual K-type thermocouples with a digital readout on Amazon. I've personally had this one to over 700C, and while it DEFINITELY didn't like it and the insulation burned up, it still works. The best solution here is definitely a thermal camera, and if you can afford it you'll be able to pinpoint where the heat is coming from - the traces or the chip.
A good experiment would be to get a thermometer or thermal camera, and hook up one channel with a heatsink and one without. Monitor both chip's temperatures and see how hot they get, again with the motor stalled. The A4983 is supposed to be good to 150C before it detonates according to the datasheet, although it definitely won't be performing well at that temperature. If you see it getting close (within 20C or so) of that temperature, it's likely just not dissipating enough heat.
Would be very interested to see the redesign, if you decide to do one. If you haven't yet read Dave Jones' PCB layout tutorial, I suggest you do. Lots of really great information there, particularly about making your circuit boards neat and professional, not just so they work.
Minor edit: just thinking about the traces, remember that the ACTUAL current can be much higher than intended when you're working with motors or other large inductive loads. A "2A" limit can turn into 20A if something causes a large acceleration on the motor (like a robotic arm hitting a stop and stalling). That'll fry your trace if you specced it for 2A. Make the power traces big and fat. Bigger. Unless you're squeezing the other traces thinner (not just closer), you can go very large with your power traces. You're paying a flat rate for the amount of copper on the board, use it all. Don't squeeze out the ground plane (it's just as important) and don't squeeze the other traces too thin, but if there's any feel free to use it.
See if you can rent, borrow, or even buy a thermal camera:
https://www.amazon.com/Seek-Thermal-Compact-All-Purpose-MicroUSB/dp/B00NYWAHHM
It will tell you exactly where your problem areas are.
http://www.amazon.com/Seek-UW-AAA-Thermal-Imaging-Connector/dp/B00NYWAHHM
and this thing
http://www.amazon.com/FLIR-ONE-Thermal-Imager-iPhone/dp/B00K0PXFB6
I just searched for 'flir'
Or spend a mere $180 on amazon https://www.amazon.com/gp/aw/d/B00NYWAHHM
The advantage of using Ubiquiti stuff is the amount of info available: https://www.youtube.com/results?search_query=ubiquiti+nanostation+ptp
PtP means Point-to-point, which is the kind of link you want to do. You will need some outdoor ethernet cable and a crimp tool + connectors. A simple cable tester would be useful too to make sure the cable is OK.
Also, Ubiquiti uses passive PoE. Plug your injector correctly or it will fry your computer's network card!
Don't hesitate to contact me if you have any more questions!
get yourself a cheap cable tester, something like this.
http://www.amazon.com/Tonor-RJ45-Network-Cable-Tester/dp/B00OUFX38W/ref=sr_1_2?ie=UTF8&amp;qid=1462121743&amp;sr=8-2&amp;keywords=cat5+cable+tester
Check that all 8 wires are connected correctly.
Could always pick up a cheap line tester from amazon.
The tester also shows if a signal is weak. Every LED light up brightly.
The tester is this one:
https://www.amazon.com/Tonor-RJ45-Network-Cable-Tester/dp/B00OUFX38W
If the lines are terminated you can use one of these.
Use a toner/cable-tester to see how the wires are connected from the room to the patch panel. Something really cheap like this will work.
For Tone gen, Fluke makes the gold standard. They also have a cheaper version.
You didn't mention a probe, so maybe you are looking for a cable certifier?. That's super expensive though. if you just have to test that there is continuity and not certify the cables, you can use this, or this if you want to look like a pro.
As for Screwdrivers, Wiha makes the best screw drivers, hands down. I have this set for working on electronics & laptop repair. Magnetic tool-kits are fine. This isn't the 80's anymore. There aren't too many magnetically sensitive items inside a computer anymore. especially with the advent of SSD drives.
As for a toolbox, depending the work, I prefer a tool bag or pouch.
Good luck, hope that helps. What helped for me when I started was to go to harbor freight and just get an assortment of tools. As I worked I slowly replaced the stuff I used all the time with quality gear, and didn't have to burn myself buying expensive tools and gear that I would never use.
I'm pretty sure that's how VOIP works.
Okay but seriously, you can technically daisy chain phone lines, so one of those lines is providing service to another phone jack. It sounds like your guess is probably correct. If you don't need service in the basement then disconnect it. Im not sure if it's worth it to you, but one of these would be useful: https://www.amazon.com/gp/aw/d/B00OUFX38W/ref=mp_s_a_1_1?ie=UTF8&amp;qid=1469014796&amp;sr=8-1&amp;pi=SY200_QL40&amp;keywords=cable+tester&amp;dpPl=1&amp;dpID=51Bu0GxKXML&amp;ref=plSrch
Check your wiring with something like... http://www.amazon.com/gp/aw/d/B00OUFX38W/ref=mp_s_a_1_1?qid=1462143785&amp;sr=8-1&amp;pi=SY200_QL40&amp;keywords=cat+5+cable+tester
Using one of these.
https://www.amazon.com/gp/product/B00OUFX38W/ref=oh_aui_detailpage_o01_s00?ie=UTF8&amp;psc=1
RJ45 tester
wall plate mounting bracket
keystone wall plate
keystone f/f jack
CAT6 ends
The setup from your diagram should work.
Edit: the wall plate has various options for the number of jacks.
Specifically, for North Americans.
https://www.amazon.com/Fibaro-Micro-Controller-Z-wave-Strips/dp/B00P1N68FW
Check this guy out.
https://www.amazon.com/Fibaro-Micro-Controller-Z-wave-Strips/dp/B00P1N68FW
https://www.amazon.com/Fibaro-Micro-Controller-Z-wave-Strips/dp/B00P1N68FW
What voltage do they need. 12 volt maybe 24 volt.
MY guess is you could hack in one of these
Qubino makes one, as well as Fibaro
Firago..Fibrago? Has a Zwave controller for RGB(W?)
Edit: Fibaro!
I agree with everyone else, any speakers you want and connect it to the dot. what kind of light strip do you have? Or are you looking for one? Amazon has the Sylvania one on sale right now.
https://smile.amazon.com/SYLVANIA-ZigBee-Starter-SmartThings-Assistant/dp/B00R1PB80I?sa-no-redirect=1
Great thing is you can buy a cheap Chinese Led strip to extend it for cheap, just make sure it's a 5 pin strip.
If you are looking for a zwave controller I would go with the Fibraro micro controller:
https://smile.amazon.com/Fibaro-Micro-Controller-Z-wave-Strips/dp/B00P1N68FW?sa-no-redirect=1
Of course you would then need a hub. I personally use smartthings but if you are more technically inclined and want everything to stay local you can use it with HASS, you'll just need to pick up a zwave/zigbee stick.
I use one of these for the LED's behind my TV.
https://www.amazon.com/dp/B00P1N68FW/ref=sr_ph_1?ie=UTF8&amp;qid=1495035763&amp;sr=sr-1&amp;keywords=fibaro
connects to smart things, can be auotmated.
I haven't had the greatest success though in controlling it via voice (i use echo).
For some reason when i try to rename the device in smart things, it no longer connects.
However having it part of a 'routine' works very well.
Turn on/off at certain times or as part of a macro like "good night" or what not.
I think he may be referring to this one... Fibaro RGBW Controller
PS: Do you have a link for the Fibaro dimmers? I'm looking but don't seem to see them, only a black box - no switch.
Sorry if there are formatting errors and such I am on mobile.
Basics
You should really consider a better HUB/products if you want this level of automation. You are going to want an offline hub such as Vera or Homeseer (what I use). Homeseer I know will interface with the echo Vera should. Hubs like wink/SmartThings end up not working when...
Similarly, you should NOT get a nest (or EcoBee). I have a nest and while I love the design it is fickle. I would instead recommend a z-wave thermostat. With a z-wave thermostat you can do almost everything nest can (no auto scheduling).Already Purchased&nbsp;
You should seriously consider a different HUB
Dimmers and Wall Switches
Here is a good place to start. Lutron dimmers are fantastics although they can be a bit pricy (I don't think you mentioned a budget...). Other options include the GE 12724 for dimming if you want to go z-wave over Lutron. And, the GE 12722 for regular on/off. Or Homeseer is releasing new switches soon that look fantastic (Also z-wave)!
Here's some more info. 1 2 3 4
Garage Opener
Chamberlain is great!
Security
If you cannot change/return your system that fine but I would recommend a DSC power series system as they almost universally integrate with automation systems Homeseer has a plugin as does Vera.
Audio
Sonos is fine. It can be controlled via Homeseer/Vera (Think announcements). Or you can get an Echo Dot and connect it to the sonos connect via an audio cable. GET a WHA controller (Check the Outdoor speaker section for recommendations)
Front Door Cam/Doorbell
Either Doorbird a doorbell and camera (expensive) or a normal doorbell with an IP camera with motion record. The integrated solution is better but of course more expensive. If you end up with IP cameras you should consider Hikvison they seem to make the best cameras for the money.
Outdoor Light
Just install the smart switch of your choice.
Fan's
Not sure sorry. :-( GE has a fan controlling switch but I doubt it would work as you mention remotes...
Under Cabinet Lighting
Hue lightstips, Aeon lightstrips or a WIFI / Z-wave LED controller with regular strips. (Will edit later with links)
Outdoor Speakers
The Daytons are fine you could also go with Yamaha NS-AW150. For integration you could connect them to the MONOPRICE 6 Zone Controller and AMP. You could also connect the Sonos CONNECT to the monopice and have outdoor audio + sonos audio and send audio to any other zones you have!
&nbsp;
PM me or comment if you need any more info :-)
&nbsp;
*Will edit and add more info when I get to a keyboard.
Thank you so much! This is very useful information. My plan was to use one of the following 2 z-wave controllers, but whether I can use 1 or if I"ll need more will depend on the actual power requirements of these strips.
Fibaro
Qubino
I'm going to email the seller to see if they can clarify the power information.
edit: The seller responded and they said 85 watts is correct. Ultimately doesn't matter since I overlooked the fact that they are not outdoor rated! Any recommendation for quality affordable strip lights? I'm looking at something like this now.
LEDENET RGBW
You could look at something like this
https://www.amazon.com/Fibaro-Micro-Controller-Z-wave-Strips/dp/B00P1N68FW/ref=sr_1_1?ie=UTF8&amp;qid=1503774345&amp;sr=8-1&amp;keywords=zwave+led
or
i have several of these in the office they work well
https://www.amazon.com/gp/product/B00MGTVORQ/ref=oh_aui_detailpage_o01_s00?ie=UTF8&amp;psc=1
Did you know Amazon will donate a portion of every purchase if you shop by going to smile.amazon.com instead? Over $50,000,000 has been raised for charity - all you need to do is change the URL!
Here are your smile-ified links:
https://smile.amazon.com/Fibaro-Micro-Controller-Z-wave-Strips/dp/B00P1N68FW/ref=sr_1_1
---
Never forget to smile again | ^^i'm ^^a ^^friendly&nbsp;bot
http://www.amazon.com/Fibaro-Micro-Controller-Z-wave-Strips/dp/B00P1N68FW/ref=sr_1_1?ie=UTF8&amp;qid=1452027496&amp;sr=8-1&amp;keywords=led+zwave+controller
I'm using cheap LED strips off of Amazon.
I have one strip controlled by a Fibaro RGBW controller.
The others are controlled by Raspberry Pis, with custom scripts to handle fades, strobes, etc.
They are very bright when it's dark out. We could see them very clearly from about 2/10ths of a mile away. I have one setting that looks like strobes from a police car. I haven't tested that one outside yet though. The plan is to use it if someone comes around licking door handles.
The picture I posted is from the blue being set at 100%.
Oh, and a video of police mode inside.
I use a Fibaro RGBW microcontroller to control mine (under cabinets). It can be added to a simple momentary switch in the wall as well so you get the benefit of controlling it via a wall switch, and/or through your home automation system (it's a z-wave device so it works with both devices you named). The micro controller is a bit more expensive, but then you can spend a lot less on the actual RGBW strips.
https://www.amazon.com/Fibaro-Micro-Controller-Z-wave-Strips/dp/B00P1N68FW/ref=sr_1_1?ie=UTF8&amp;qid=1479334032&amp;sr=8-1&amp;keywords=zwave+rgbw
Hallelujah - I'm stoked on that RGBW light controller. Wish it was cheaper than that but that controller + 32 feet of light strip is still cheaper than 6ft of Phillips FOH strip.
Edit: I ordered a RGBW controller - I'll update when I receive/install it. (Wed 19th)
Edit 2: I don't like that your charge more for Amazon :( I understand it costs you more but I still don't like it.
Other Z-Wave LED strip controllers include Fibaro Qubino RGBGenie.
I didn't realize the Hue line included LED strips. I apologize for any confusion.
Buy this
I've got two of these: https://www.amazon.com/ToyBuilder-Labs-Print-Removal-Tool/dp/B00VB1U886/
Work great.
These have sharp edges that will damage your bed. Use this one instead:
https://www.amazon.com/ToyBuilder-Labs-Print-Removal-Tool/dp/B00VB1U886
Look at something like this :https://www.amazon.com/dp/B00VB1U886?ref=yo_pop_ma_swf
I used to just wreck prints trying to get it off with the stock scraper they send with the printer. It’s a thinner edge so it really seems to pop it off the bed a lot easier. I got that second one I linked a few posts back and I don’t use one of the tools but the longer one I’ll use after using the first tool on big prints outside of that this one really seems to get under prints with out to much effort.
Another solution that I have heard good results with but I not personally use is this stuff: https://www.amazon.com/dp/B01N2JGTWJ/ref=cm_sw_r_cp_api_xQdWAb79FZS82
It’s on my list to try but my current printer doesn’t really need anything to help with binding or release from the bed. Now I did pick up a bed surface called geckotek : www.geckotek.co it’s supposed to be a bed pad like on the printer already but is supposed to just release prints after the bed cools down. Might run around $20 so it’s not to bad of a loss not sure when I’ll get around to installing it but could be better than the current surface it has now.
For a camera/smart switch look into a octopi setup. It uses a raspberry pi but it acts as a print controller. From what I heard is you can start/stop prints as well as upload prints you sliced and just run it from there. But you are supposed to be able to remote view it with a camera as well. I just never got around to setting one up but I do have everything if I ever need it. I normally run my long prints on the days I know I’m home but I normally don’t have to many issues though I have failures in the middle of the night but with me being close by I can catch it before any chance of damage. I do have my printer on a ups but I think it’s on the end of its life span so I will most likely need to replace it or the batteries later this year.
I just slide this along the edge and it pops up. I don't know why a razor wouldn't work the same, unless you're cutting into the PEI. The tool has blunt edges, but anything rigid and thin should work the same. I only print in PLA, though, so maybe it's different with other materials.
This is what I'm using and it's been fine for the past 6 months; glossy finish. I think what Prusa includes is closer to 7 mil though.
I'm sure there are some differences in heat transfer properties or something with regards to using a thinner sheet; but the only things I've noticed are that the screen printing can distort the surface slightly (visible dimple, but can't feel it) and I need to be more careful with my removal tools so I don't accidentally scratch through it and into the heat bed. I had been using a super sharp putty knife, but switched to this recently (basically a thin metal kitchen spatula, with rounded corners).
you're doing something wrong, i've owned a FFCP for years and only once damaged the bed.
The key is not to try to get under the bed, but to apply a horizontal pressure with a wedge onto the print right where it touches the bed. I use this print removal tool:
https://www.amazon.com/ToyBuilder-Labs-Print-Removal-Tool/dp/B00VB1U886/ref=sr_1_3?ie=UTF8&amp;qid=1494530501&amp;sr=8-3
What usually causes this?
I've had my printer long enough to use up my first roll of filament and besides a mess up calibrating it (dug a little into the bed on one side), it's pretty clean and flat still. I use This tool to remove my prints.
Or is replacing your bed a common thing? I'm still getting used to everything.
I use these when leveling a heated bed so that it's trammed when hot and stable. Once the bed is trammed, I dial the screws down consistently to set the final elevation.
Disclaimer: we're the seller.
Here is the mobile version of your link
Sorry I can't answer all of your questions, but here's a few suggestions. Number one, a better part cooling fan. Just buy a cheap blower fan like this one, and print a radial cooling fan like this one. This should help a bit with your bottom screw holes being messy. For bigger prints this is a necessity. When it comes to getting prints off of the beds, I use a glass bed with a gluestick for adherence, and to remove prints I use this thing. Incredibly, incredibly useful. It's thin enough to get under prints without denting them, and the long design lets you move it underneath prints to free the whole this. The end is also sharp enough to scrape glue off of the printbed. Works a lot better than the scraper included with the printer.
I use a thin metal spatula for removing prints from the bed. It often tears the masking tape, but that's OK - That encourages me to put down fresh tape, and fresh tape makes for better prints.
I use this on my PEI sheet and it seems to work pretty well:
https://www.amazon.com/gp/product/B00VB1U886/ref=oh_aui_detailpage_o05_s00?ie=UTF8&amp;psc=1
I usually pull things off when the bed is 40-50C.
Using a vivosun 195 https://www.amazon.ca/VIVOSUN-Inch-Inline-Ventilation-Blower/dp/B01M7S46YZ got mine on fleabay. It's ok, I don't know if its bearings or bushings, its quiet ish. Cheap as fuck, the casing has no seal so it leaks, I fixed by using metal duct tape on the joint. 195 cfm is the unrestricted flow from the outlet. So after resistance of the ducting its reduced. Also the resistance of the filter (has to push or pull through) it drops even more. I'm 2x3 x 6.5, on hot days I dont get the airflow so I had to put in a second extract. I expect colder weather will be perfect for it in my particular circumstances.
https://www.amazon.com/VIVOSUN-Inch-Inline-Ventilation-Blower/dp/B01M7S46YZ
https://www.amazon.com/dp/B071KXHCK3
pot growers run these for years at a time... literally non stop 24/7 for years.
if you need to duct any of it, you can use dryer hose for the outlet, but get something more rigid for the intake so it doesnt collapse.
Sorry it should be inline fan
Here is one
VIVOSUN 4 Inch 195 CFM Inline Duct Ventilation Fan Vent Blower for Grow Tent https://www.amazon.com/dp/B01M7S46YZ/ref=cm_sw_r_cp_api_i_1vfrDb7H5Y14V
So really this should do the trick?
https://www.amazon.com/VIVOSUN-Inch-Inline-Ventilation-Duct/dp/B01M7S46YZ/ref=sr_1_11?ie=UTF8&amp;qid=1509647629&amp;sr=8-11&amp;keywords=vivosun+fan
So I made this thread recently about a clone I bought on 4/20/19.
&#x200B;
Now, a bit of time has passed and it's grown a bit more, but unfortunately still under very inadequate lighting. The temp and humidity were wrong this entire time, but I seem to have stabilized that. I plan on ordering this grow tent, just ordered this LED light, and am looking at this (or this) in combination with this to bring it all together. Anyone see any reason why this wouldn't be enough?
I wouldn't sleep while it's running. But the one you linked won't ship to me.
But i found a similarly powered exhaust fan.
This one
I've already found tubing and a filter to use.
As for noise I also have a FDM printer in my room that I run occasionally, so I'm sort of conditioned to it.
It’s possible because there is no airflow, also it will cool your tent down. I bought 2 fans and some 4” ducting from amazon and probably paid about $50.
Here is a link if you would like to check them out.
https://www.amazon.com/VIVOSUN-Inch-Inline-Ventilation-Blower/dp/B01M7S46YZ/ref=mp_s_a_1_3?keywords=grow+tent+fan&amp;qid=1569681479&amp;s=gateway&amp;sr=8-3
How many of your side vents are open? Do you have any fans inside your tent moving air around? I have a 4 in PVC pipe that is inserted into one of the 4 inch opening in my 3x3, to allow unrestricted air into my tent.
For 25 dollars, you could buy one of these, and have it pull fresh air in.
https://www.amazon.com/VIVOSUN-Inch-Inline-Ventilation-Blower/dp/B01M7S46YZ/ref=sxin_2_ac_d_rm?ac_md=0-0-aW50YWtlIGZhbg%3D%3D-ac_d_rm&keywords=intake+fan&pd_rd_i=B01M7S46YZ&pd_rd_r=5d336609-c5ad-445b-a21f-c89c781d81f7&pd_rd_w=BhXBo&pd_rd_wg=CXN0U&pf_rd_p=2938a786-9bec-4d37-8c06-456e3edce5d1&pf_rd_r=V4C0YMY222M5QAW6T1EB&psc=1&qid=1570843257
In my opinion the most efficient way to sharpen in terms of both cost and time is to use a bench grinder to hollow grind your edge then use diamond plates to hone it. The grinder will allow you to quickly remove any damage to the edge, reset the bevel and create a hollow grind. A hollow grind means that the bevel is slightly concave. This means that when you put the bevel flat on a stone to hone it material will only be removed from the outer edges making it faster because you don't have to remove much steel. It's also easier to sharpen without a honing guide because you don't have to use a micro bevel. This image demonstrates what I mean. Here's a good video on using a bench grinder. You only need to grind the bevel once the hollow becomes too small to efficiently hone the edge or you chip or dent the edge. A good bench grinder should cost $80-120. This Rikon is a pretty good deal because comes with the right type of wheels unlike most other grinders.
After grinding I like to use diamond stones to hone the edge. I like diamond stones because they're low maintenance and a bit cheaper when compared to waterstones. I personally have Eze-Lap Coarse/Medium and Fine/Superfine doublesided plates. Some people prefer the single sided plates in which case go for the Coarse, Fine and Superfine. I went for the double sided plates because you get an extra grit for the same price and I don't mind flipping them over. A few strokes on each grit will remove the grinding marks and bring the edge up to a near mirror polish. To give the edge a final polish I use a strop and charged with green honing compound. I made the strop out of some scrap leather and a piece of scrap hardwood for free.
To go from a chipped dull edge to razor sharp takes me less than 5 minutes. I usually only grind the bevel when the hollow starts to become to small. Most of the time I can just hone the edge on the diamond stones then polish it using the stop which takes me 30-60 seconds. I've tried out systems such as waterstones, ceramic stones and the worksharp but in my opinion this is the fastest and most efficient way to sharpen. The setup cost is about $250-$270 which I think is fairly reasonable and you don't have any ongoing cost like the scarp sharp system or the worksharp. A set of quality waterstones is $200-300 alone and the power sharpeners like the tormak are quite expensive and don't really save any time.
This is doable for much less than $600. When I started shaving w a SR I figured it would take about 2 years of shaving to pay off the initial cost. Although if I am being honest I probably spend more now on razors than I did before.
For the most basic of kits you will need a:
That's the basics really. You can spend more on aftershave, preshave, synthetic brushes, creams whatever. If you know how to sharpen/strop I would definitely recommend a used razor off ebay ( a nice one you don't have to restore). If you don't know how to sharpen I recommend you get some stones and learn anyway it isn't very hard. Though you may want a cheap $10 razor to practice on just in case. The hardest part is choosing a brand (or buying just one razor). For used razors you have some things to consider:
You may also want to try a double edge (DE) razor but then you still need blades (although they are very very cheap) I am not sure if that is a requirement here or not.
http://www.amazon.com/Lansky-Diamond-Standard-Sharpening-System/dp/B000B8JDRC/ref=sr_1_8?s=hi&amp;ie=UTF8&amp;qid=1320462335&amp;sr=1-8
http://www.amazon.com/Woodstock-D2902-1-Pound-Buffing-Compound/dp/B0000DD35C/ref=sr_1_1?s=hi&amp;ie=UTF8&amp;qid=1320462373&amp;sr=1-1
Use the Lansky system, it's awesome. Then take a section of an old leather belt and glue it to a paint stick. Load it up with the green rouge and strop away. I use Flitz polishing compound on an old belt with fantastic results.
Thanks! I think I will try the wood burning. I'll try it out on a scrap piece first just to check.
I haven't bought a leather strop but I cut up and glued a piece of my old jeans onto a 8" block of wood and bought this:
(https://www.amazon.com/Woodstock-D2902-1-Pound-Buffing-Compound/dp/B0000DD35C/ref=sr_1_1?ie=UTF8&amp;qid=1468086393&amp;sr=8-1&amp;keywords=green+sharpening+compound)
So far it seems to be working well. My knife still can pass the paper test. I have had a few nicks in the knife after dropping it once but I used a Accusharp Knife and Tool Sharpener we had at home:
(https://www.amazon.com/AccuSharp-1-001-Knife-Sharpener/dp/B00004VWKQ)
It made it nice and sharp again without the nicks but I don't know if it's good to use for the knife. I'd like to learn how to use a wetstone eventually to sharpen my knife but will probably practice on my Leatherman's knife before I try it on the Mora just so I don't mess it up.
I got this set (though, I got mine from Lowes - most hardware stores should have them. Heck, even Walmart probably has 'em). They're not great, but they're really impressive for the price. If you use them a lot, you'll probably want better chisels (i.e. the Narex ones everybody has mentioned. Those have been on my shopping list for a while now).
Also make sure you get something to sharpen them with. Chromium oxide paste/bar and a strop is also really helpful for quick touchups (My strop is a scrap of denim glued to a scrap of wood - doesn't have to be fancy). This isn't necessary to start, but it's inexpensive and something to keep in mind.
The bottom budget (or lowest you could go without blaming your sharpening equipment for failure) would be a Norton combination India stone or King combination water stone, plus some honing compound and a scrap of denim or leather glued to a block of wood for a strop.
Use a honing guide like this if you aren't comfortable trying free hand.
A tool is sharp when two surfaces (the back/face and bevel) meet at a sharp corner with ~0 radius. The edge is honed/refined on finer and finer stones to get a better surface finish and better edge retention.
Here are some tutorials with and without a honing guide. I recommend watching both, because each covers a different aspect of initial chisel prep.
On top of your sharpening equipment, work from both sides and use knife lines to prevent blow out.
I just use waterstones (1000, 3000, 8000) and a piece of MDF with honing compound on it. I have to admit that I did buy the Veritas honing guide (for chisels and planes). It's amazing (even if it's a bit pricy).
The MDF with honing compound really does make a big difference in how sharp my chisels get. It also is a very quick way to tune them up free hand (takes <30 seconds). A good honing between uses can double the time between sharpenings.
Also, a honing board is darn near free. . . $12 for enough to last you for years and years (extra fine green)
https://smile.amazon.com/Woodstock-D2902-1-Pound-Buffing-Compound/dp/B0000DD35C/ref=sr_1_1?ie=UTF8&amp;qid=1483338609&amp;sr=8-1&amp;keywords=green+honing+compound
The cheapest way? If you're using a Gough jig, you can use a protractor to rig your angle, and tightly wrap your file in 220 grit sandpaper (you can also use a piece of flat steel for more precision). Then progress through the grits, raising a burr each time. Use the rough side old leather belt (I stole one of my husband's) as a strop. Green Polishing Compound on an old belt after using 2500 grit sandpaper will get you plenty sharp.
I sharpened our kitchen knives for a couple years before starting bladesmithing using this method. It'll easily create a good shaving edge, and is much faster than a lansky
Thanks! I hope there was something helpful in that post.
I really think a diamond plate is overkill, at least to start off with. I got really frustrated with how not-flat my stones were, but I couldn't justify spending a huge amount of money on a flat piece of metal. So I went to Menard's and bought a 3/32 pane of glass. I figured that was thin enough that it would still flex, so I put it on top of a piece of 3/4 MDF, and then put the sandpaper on top of the whole thing. It worked really well, and the total cost was under $5. Thin glass is really cheap, apparently.
The Veritas honing guide is really nice; I definitely want to get it eventually. But in the mean time, I'm using this $10 guide from Woodcraft, and I'm getting good results with it.
Finally, you really don't need anything fancy for stropping. Literally a piece of MDF with some compound will work. You can use something like this, which costs $6.50.
So you really don't need to invest more than maybe $20 to get from where you are to the place where you can get much better results.
1/4, 1/2, 3/4 will get you started, you can fill in as you go. I bought my first 'real' set of chisels only a few months ago too, and I saved some money without sacrificing on quality by buying old Stanley chisels, you can find them online and sometimes at antique stores, but make sure you know what they're worth, antique stores like to charge an arm and a leg for broken tools. I was lucky to find a complete set at an antique store at a fair price.
Right now I'm lusting after the Veritas PM-V11 bench chisels: http://www.leevalley.com/US/wood/page.aspx?p=69619&amp;cat=1,41504. I'm doing mental gymnastics trying to convince myself how I might be able to justify their price.
When you get a good set of starter chisels I suggest you watch Paul Sellers' video on sharpening chisels: https://www.youtube.com/watch?v=Ki8tt-VjwqI. You can do it completely with sandpaper and a homemade strop rubbed with chromium oxide.
You can get enough chromium oxide to last you a lifetime for less than $15 on Amazon: http://www.amazon.com/Woodstock-D2902-1-Pound-Buffing-Compound/dp/B0000DD35C/ref=sr_1_1?ie=UTF8&amp;qid=1418003499&amp;sr=8-1&amp;keywords=chromium+oxide
You'll rub that stuff on a homemade strop, you can me one for less than $5 or you can buy a $30 one that is quite literally the same thing at woodcraft. To make one just go to a craft store like Hobby Lobby and buy a bag of their cheap strips of leather (less than $5), you'll find them usually by where they sell moccasin making kits, not the bolts of fabric. You want the strips that are a little rougher. Then you'll just take it home and glue it to a piece of 2x4. Polishing your chisels on a leather strop primed with your buffing agent will make mirror chisels.
The site seems to be out of the Chromium Oxide. Pursuant to this conversation I just ordered this:
http://www.amazon.com/Woodstock-D2902-1-Pound-Buffing-Compound/dp/B0000DD35C/ref=sr_1_12?ie=UTF8&amp;qid=1343430484&amp;sr=8-12&amp;keywords=strop and this
http://www.amazon.com/A-z-Automatic-Woodturning-Handled-2-Sided/dp/B0037MM830/ref=sr_1_4?s=hi&amp;ie=UTF8&amp;qid=1343430551&amp;sr=1-4&amp;keywords=strop
You could get by with rubbing the CrO on a piece of MDF, or getting a cheap piece of leather scrap and gluing it to a block of wood/MDF.
Do work your chisels to be flat. A simple piece of 400 grit sandpaper glued with contact adhesive to a small glass plate will do wonders for you.
Happy sharpening!
I bought a pound of green compound from amazon years ago. I've barely even scratched the surface of it and I have strops strewn about my house. I don't know how consistent the quality is (cheaper buffing compounds tend to vary a bit in grit size) but it puts a scary sharp finish on my blades.
https://www.amazon.com/Woodstock-D2902-1-Pound-Buffing-Compound/dp/B0000DD35C/ref=sr_1_2?keywords=green+buffing+compound&qid=1554569951&s=gateway&sr=8-2 This is the stuff I bought back in 2015. My brick looks a bit different, but the quality should be the same. (just make sure you get the extra fine green).
this
And this
Are the only two stones you need.
I also recommend you get this
To use with this
There's a green compound good for stainless steel. I don't know what works for carbon.
http://www.amazon.com/gp/aw/d/B0000DD35C/ref=mp_s_a_1_1?qid=1464535370&amp;sr=8-1&amp;pi=AC_SX236_SY340_FMwebp_QL65&amp;keywords=Green+compound
This is one I made a little while back. Compound Loaded Side and Smooth Leather Side
One side is just plain smooth leather which I wet sanded with 120-Grit and then massaged a lot of mineral oil into the leather. I like a strop which has more drag to it, some people prefer smoother and dryer ones.
On the other side I used this green compound. Through trial and errors on previous strops I found the best way that works for me is to put mineral oil into the leather (rub it around) and then start rubbing the buffing compound on it (like coloring in with crayons). I also keep light heat on the strop with a heat gun. After I have everything "colored in", I stop the heat and keep massaging the green in (be careful...once I kind of burn't my skin a bit).
Do note a lot places had recommended putting the compound on the suede side, I however went with the smooth on it.
>PS: In hindsight I wish I just made two separate strops, instead of using both sides. I always have to put something underneath when the compound side is at the bottom cause I don't want small pieces mixing in to our cutting boards etc.
If anyone was curious about some of the things Paul was using (especially if you had in mind that it might be nice to do things yourself, and on the cheap), he says in one of his other videos that the plates were EZ-lap plates. You can spend a significant amount of money on those plates, or you can some smaller ones off of ebay for pretty cheap:
then pick up a strop somewhere, and buy some chromium oxide. The stuff is pretty cheap, I bought a giant block here
for only like $10. With some practice, I've been getting my chisels sharp enough to cut off hair on my arm / cut pieces of paper with very little effort. It's fun!
Green polishing compound. It's the paste that I load my strop with for honing.
http://www.amazon.com/gp/aw/d/B0000DD35C#Ask
Kroil is much better than PB Blaster. Get a can and use it sparingly. https://www.amazon.com/Kano-Aerokroil-Penetrating-aerosol-AEROKROIL/dp/B000F09CEA/ref=sr_1_1?ie=UTF8&amp;qid=1518798021&amp;sr=8-1&amp;keywords=aerokroil
A good quality ratchet can be better than a cheap breaker bar at times. However, a good breaker bar is a very valuable tool. Also in this case, the proper tool would have been a crows foot and a breaker bar. You don't need crows feet very often, but when you need them you need them, and they really aren't too expensive.
Get yourself some Kano Kroil from Amazon and spray it down liberally. Wait 24 hours and then try to take the bolt off. I use said spray consistently at work to free up bolts that have rusted solid on 2000° boilers. It is worth every penny.
Kano Aerokroil Penetrating Oil, 10 oz. aerosol (AEROKROIL) https://www.amazon.com/dp/B000F09CEA/ref=cm_sw_r_cp_api_i_rQ.IDb8RWT79K
UV-5R, small axe, 3/8 socket set, random pipe, water bottles, tow strap, mosquito repellant, hi-lift jack with liftmate, moving blanket, tarp, paracord, aerokroil
if I had to pick three things it would be the UV5R, blanket, socket set, paracord. see what I did there?
Kroil is where it's at. It's fucking dark magic how well it works.
http://www.amazon.com/Kano-Aerokroil-Penetrating-aerosol-AEROKROIL/dp/B000F09CEA
Get some kroil
Shut off the water supply to the house. Turn on the sink faucets. Turn on any faucets below the sink if possible, such as a spigot outside, downstairs sink, bathtub, etc. The water will flow out. It should not take more than 5 minutes.
Put a bucket/pan\towel under the sink as usual. Then you can swap out the sink fixture and leave the hot water valve open.
Alternately, get some Kano and spray it just below the handle on the valve, where the post goes into the housing, and let it sit overnight.
Then put one wrench on the valve handle, and a second wrench on the valve housing (below the stem) and twist. The second wrench will keep you from twisting the valve right off the pipe as the pipe is generally soft and easy to damage if you twist it too hard!
I run into locks that have been unused for years. I have two key blanks: a Kwikset and a Schlage. If the key blank has a hard time entering the key way, I use Aero Kroil to loosen it up for picking. It works great.
http://www.amazon.com/Kano-Aerokroil-Penetrating-aerosol-AEROKROIL/dp/B000F09CEA
Penetrating oil. I like this stuff.
You don't want that getting into the system though, so once it's free, soak the area in dish soap and water.
That sets your ball up for corrosion again, so spritz it with Pam or some other food grade oil.
There are test kits you can buy. For example:
http://www.amazon.com/First-Alert-WT1-Drinking-Water/dp/B000FBMAVQ
Make sure you find one that tests for the things that concern you. There are also labs that you can mail water to but I didn't quickly find a link.
one product. https://www.amazon.com/First-Alert-WT1-Drinking-Water/dp/B000FBMAVQ/ref=sr_1_2?ie=UTF8&amp;qid=1468425084&amp;sr=8-2&amp;keywords=lead+testing+strips
In a previous water related thread, someone posted this one
Ah. Test the water?
e: https://www.amazon.com/First-Alert-WT1-Drinking-Water/dp/B000FBMAVQ/
Hmm, I'd be shocked if one of us discovered a substance we could get at home that would create an as-of-yet-undiscovered precipitation reaction that would precipitate chloramine out of water! The reaction with citric acid you mentioned, is another one I now remember I've heard. All the points you make are right on, so if you figure something out, let us know! BUT the first step in my mind is finding a way to verify any potential results, so we're back to a cost effective way of measuring chloramine levels in a given water sample.
The cheap test strips for drinking water and aquariums seem to only test for chlorine (http://www.amazon.com/dp/B000FBMAVQ/)($13), and the expensive ones seem to indicate they CAN be calibrated to check for chloramine (http://www.amazon.com/dp/B00I4TFU1I/) ($1,099). This seems made specifically to test for chloramine, but it's unavailable (http://www.amazon.com/dp/B00R3EF7ZY/).
I'll bet small quantities of citric acid are fine, and small amount of humic acids are definitely beneficial (humic acid is naturally occurring in compost and is great for soil). How much is too much, idk, since I don't add any directly/intentionally.
Here's a simple and cheap one: http://www.amazon.com/First-Alert-WT1-Drinking-Water/dp/B000FBMAVQ/
Here's a more expensive and more complete one: http://www.amazon.com/Watts-Premier-173006-All--Water/dp/B002XISS4C/
Here.
You may want to test for lead in
Paint
and Tap Water
How bad are these? http://amzn.com/B000FBMAVQ
Collapsible hand truck. Magna Cart Personal 150 lb Capacity Aluminum Folding Hand Truck https://www.amazon.com/dp/B000HVVSDU/ref=cm_sw_r_cp_awd_ELSjxb8VFWX8H
This is the one I have (this is NOT an affiliate link either) you can get cheaper ones but I wanted to make sure it didn’t fail me when I needed it.
The instacrates you can get from Costco usually, I’ve never not seen them there. Also, they’re only $7.99 at Costco and double that from amazon.. Hope that’s what you were after..
I found these.
https://www.amazon.com/dp/B002M3SP14/ref=cm_sw_r_tw_awdb_t1_x_cfyDDbQ33CAKZ
And this which doesn’t have a basket but you can bungee cord things to. https://www.amazon.com/dp/B000HVVSDU/ref=cm_sw_r_tw_awdb_t1_x_OdyDDbRYKJD4V
Hey this was my shipping accessories I use.
https://www.amazon.com/Magna-Personal-Capacity-Aluminum-Folding/dp/B000HVVSDU
https://www.amazon.com/gp/aw/d/B01KPW8YWS/ref=mp_s_a_1_2?ie=UTF8&amp;qid=1495113854&amp;sr=8-2&amp;pi=AC_SX236_SY340_FMwebp_QL65&amp;keywords=clevermade%2Bcooler%2Bbag&amp;dpPl=1&amp;dpID=51EpcSKOcbL&amp;ref=plSrch&amp;th=1&amp;psc=1
I use most of this stuff when not working instacart so it's a win win for me.
Alas. I guess I like the idea of a drum truck or hand cart. I got one of these and it's very useful. http://www.amazon.com/Magna-Personal-Capacity-Aluminum-Folding/dp/B000HVVSDU/ref=lp_553520_1_1?s=hi&amp;ie=UTF8&amp;qid=1422146592&amp;sr=1-1
Just get one of these. They are VERY strong, and compact. We have two at the office, and I liked them so much I bought one for the house.
In a pinch I used a large hard laundry basket from target to carry a bunch of stands, tripods, skrims, and crap. I have this hardware cart to carry my drum/cymbal stands so I would personally use that for future shoots with lots of hardware since it's available to me already. There's probably a similar cart of some kind: direct from a camera manufacturer might be expensive so get creative with a hand cart like this (I also have that cart to carry around a set of 80-100lb scuba cylinders and it's a beast).
try something like this
Yeah, I'm not going to try that. I've already had a drop scare and I don't think my heart can take another one of those. :)
I'm thinking of purchasing a cart on which I can load up the mount and carry it. I can just use the same box and styrofoam that the mount came with (reinforce the box with duct tape). Load up the box on the cart, and the weights and tripod on top of the box.
It sucks basically. I'm not sure about the registration part, but I think that's if you haven't already bought tickets online and dpn't have your paperwork/passes, etc ready to go.
You definitely want a cart if you have a tower, the first year me and my friends went we finagled my local friend dropping us off and we stayed with his comp at the center (I think that's how that went down, lots of alcohol since and during) and we got an XL Uber to get back home when we were ready to leave the BYOC.
FYI, when we left late at night the main entrances to the convention center were closed, so we had to go out another exit... Down stairs.... That was fun.
Second year was more of the same except I bought a laptop for QuakeCon and this kind of stuff so it was less stressful than lugging a tower and monitor around, but basically you've gotta huff your stuff in someway or another.
I remember sitting out waiting for our turn into the fried chicken place nearby (it's good check it out) and a poor guy was walking down the street carrying a monitor, that's no bueno, you wanna get an uber, a ride or something, just so they can pull up and drop you off at the best entrance.
So yes, get a cart like this like I've used:
https://www.amazon.com/Magna-Personal-Capacity-Aluminum-Folding/dp/B000HVVSDU/ref=sr_1_1?ie=UTF8&amp;qid=1527810216&amp;sr=8-1&amp;keywords=magna+cart
And plan to have a way to drop you off at the entrance, I for sure didn't want to wheel my tower through the Austin streets and hope nothing pops loose, etc, and breaks on the way.
edit: well from what someone else has said it appears the badges weren't mailed this year, so if I were you I'd plan to get in line for registration with your computer, get your badge, then go on to the BYOC from there. If they do it like QuakeCon does, someone will come down the line and give people tags and stuff for their computers to streamline the process. Good luck!
haha wow, just checked on amazon. Apparently I got this April, 2015 and it still works great for me. It's been used a ton, thrown around, etc and it's still holding up good enough.
https://www.amazon.com/gp/product/B000HVVSDU/ref=oh_aui_search_detailpage?ie=UTF8&amp;psc=1
Hmm... yeah it sounds like a dowel won't work. The only other thing I know of that would fill a cavity, bond two surfaces, and hold a screw would be epoxy. Depending on the situation, you may need to do this in steps, and I would definitely pre-drill for the screw, but not sure how to do that if you don't have a drill. I've personally never used epoxy, but something similar to this should work for you:
https://www.amazon.com/Gorilla-Epoxy-85-oz-Clear/dp/B001Z3C3AG
You might be able to find a video or other tutorial showing the use of epoxy on furniture repairs.
I'll definitely make a post and show it off once I'm done, I think it's going to look pretty badass if it turns out like I'm hoping.
Also just went ahead and ordered a tube of this...
https://www.amazon.com/dp/B001Z3C3AG
Not sure I trust the name as much as JB Weld or Loctite, but it supposedly dries crystal clear and I like the idea of that.
This one stupid trick will actually protect you against all exploits spread by USB devices.
this
Epoxy gorilla glue, https://www.amazon.com/Gorilla-Epoxy-Minute-ounce-Syringe/dp/B001Z3C3AG
I waited 24 hours after application to move her.
https://www.amazon.com/Gorilla-Epoxy-Minute-ounce-Syringe/dp/B001Z3C3AG/ref=mp_s_a_1_1?ie=UTF8&amp;qid=1541767455&amp;sr=8-1&amp;pi=AC_SX236_SY340_FMwebp_QL65&amp;keywords=gorilla+glue+5+minute+epoxy
Its kinda expensive so i dont recommend for large terrain. But it dries crystal clear. Adding a drop of paint will give it more than enougj color and make it much easier to pour
they basically used the equivalent of this on a priceless ancient Egyptian artifact.
I'm not sure what he used. There's a ton of them out there. You could try the Gorilla Epoxy for example.
If the arm is about to break after only one day, your best bet would be to contact the seller and see if they'll arrange for a replacement. If the toy is breaking after a day, you could argue that it was defective.
If you really want to fix the toy yourself, your best bet is to use something like Gorilla Epoxy.
https://www.amazon.com/Gorilla-Epoxy-Minute-ounce-Syringe/dp/B001Z3C3AG
This will make a much stronger bond than any superglue.
You'll want to lightly sand the peg and the surrounding area, and then mix up a small amount of epoxy and coat the peg (not the ball). Use a toothpick or something to apply the epoxy to the peg. Let it dry and it should be stronger, but you'll need to be careful with it going forward.
like this? https://www.amazon.com/Gorilla-Epoxy-85-oz-Clear/dp/B001Z3C3AG/ref=sr_1_1?ie=UTF8&amp;qid=1482113709&amp;sr=8-1&amp;keywords=two+part+epoxy
Would something like this do the trick? http://www.amazon.com/dp/B001Z3C3AG
Some kind of epoxy maybe, but when it comes to gluing things, the materials involved are really important.
Some sort of epoxy might work.
https://www.amazon.com/Gorilla-4200101-Epoxy-85-oz-Clear/dp/B001Z3C3AG/ref=sr_1_3?ie=UTF8&amp;qid=1525929780&amp;sr=8-3&amp;keywords=plastic+epoxy
Would this work?
https://www.amazon.com/gp/product/B001Z3C3AG/ref=s9_acsd_top_hd_bw_bHLAlv_c_x_1_w?pf_rd_m=ATVPDKIKX0DER&amp;pf_rd_s=merchandised-search-3&amp;pf_rd_r=RRZQ030G27SHF15P8SYW&amp;pf_rd_t=101&amp;pf_rd_p=0a3c6581-feb2-509a-bd74-91d7d12a5759&amp;pf_rd_i=256244011
This sounds like you only had one problem - you don't have epoxy - you should always have, if anything else, a little dual squeeze tube of locktite (or any) two part oil resin based epoxy. This is basically a pantry item, like (quality) duct tape or super glue
https://www.amazon.com/gp/aw/d/B001Z3C3AG/ref=mp_s_a_1_1?ie=UTF8&amp;qid=1487817131&amp;sr=8-1&amp;pi=AC_SX236_SY340_FMwebp_QL65&amp;keywords=epoxy
Use an epoxy that can withstand high temperatures. i. e. Gorrila Glue Epoxy
If that's the case might I recommend a fermentation chamber? It's not going to fit a conical fermenter but I can easily put 3, 6.5 gallon, carboys in there.
https://www.homebrewtalk.com/diy-fermentation-chamber.html
The Inkbird is usually on sale for about $30 on Amazon. Follow http://homebrewfinds.com to get one on the cheap!
I built mine using an STC1000, but I had to go to Radio Shack and grab a project box to make it look pretty.
For the heating unit, I purchased a $12 mini heater from Amazon and also installed a 12V fan that is on 24/7. Eventually I tossed a unit to help with moisture in there as well. I can't remember the name of it...found it on Homebrewfinds.
I'd run outside to take photos of my build but it's raining something hard right now ;(
It's an STC-1000. I have the cool side going to an outlet on the back of the keezer then it plugs into itself. It's got built-in short-cycle protection so it will wait a minimum of 3 minutes between turning the compressor off and turning it back on again. And you can't beat the price.
Yep, wire in a new STC 1000 to the power circuit, run the probe in through a hole and forget about the existing thermostat in my opinion.
Realistically its amazing this machine still runs and freezes after 65 years. This STC1000 will allow you to wire it to AC voltage, and the power of the fridge to the STC1000, it will turn the fridge power on or off based on a set point decided by that temperature probe. Best bet would be wire it all up, attach the STC1000 to the back externally, and place the probe inside a small tube of water mounted internally.
Look up STC1000 fridge mods, there are guides for beer fermentation chambers all over google that perform almost exactly what you'll be doing.
http://www.amazon.com/AGPtek-All-purpose-Temperature-Controller-STC-1000/dp/B00862G3TQ
I was going to get this one https://www.amazon.com/dp/B00862G3TQ/ref=wl_it_dp_o_pd_nS_ttl?_encoding=UTF8&amp;colid=OKWRRIZTGC8S&amp;coliid=I3LGI3WXJWR5S1
for $15 (but requires a tiny bit of wiring) and use with a turkey roaster oven (that I would have to buy) but the anova went on sale around halloween and was 3 miles away at target and easy to handle/store so I ended up with that.
Haha fancy. So you have this connected to, which lasko ceramic heater exactly? I think I'm just going to emulate your setup if you don't mind.
Distilling helps a bit, i.e. boiling and catching/condensing the vapour in a separate vessel, but not enough to get it clear. You could get clear ice in a freezer without a cooler/insulation if your set the freezer between 0°C and -1°C (you'll probably need a PID controller like the the STC-1000 (available on Amazon). It will turn the freezer on/off to keep the temperature steady at just below the freezing point, which should result in very slow freezing and larger ice crystal formation.
EDIT: only the most obsessive will do this.
Do you just want a kegerator/keezer for under 600 or a whole brew setup plus kegerator for 600?
If just a kegerator and assuming you are in the US then it is totally feasible.
STC-1000 $17.98
Keg, Faucet, Shank, Regulator CO2 tank $251.99 but cheaper if you use a picnic tap
7.1 cu ft Freezer $178
Total of $447.97
You could possibly get a CO2 tank of CL cheaper and a keg cheaper. I have paid well less then $100 for a keg and 5lb CO2 tank. But the point is a kegerator takes a bit of an initial investment but you can upgrade as you see fit once you make the initial jump.
before I got my anova I was going to make a diy sous vide rig out of a big crock pot or turkey roaster using the below $15 temp controller. put the probe into water turn crockpot on high and it will read the probe and keep it exact temp. You would need to maintain some level of liquid in there though.
https://www.amazon.com/dp/B00862G3TQ/_encoding=UTF8?coliid=I3LGI3WXJWR5S1&amp;colid=OKWRRIZTGC8S
of if you don't want to wire it yourself + mount it in some kind of box, for $35 there's this one: https://www.amazon.com/dp/B011296704/_encoding=UTF8?coliid=ISIXJ4NHGY6W5&amp;colid=OKWRRIZTGC8S
Really though if you have the $150 for an anova that's a purpose built thing that I think I'm the 3rd person at least to think sounds like it would do exactly what you want. If you don't want to use bags you could probably stick a heavy pot in a cooler or rubbermaid tub of water and the anova and there's your temp controlled slow cooker there. It costs more than the temp controller and a crock pot for sure but it will do some extra stuff that if you have the cash you will surely appreciate in the future.
I suggest a son of fermentation chiller . It will keep the fermenter at a constant temperature even in the garage. Temperature Control or a stc1000
And for Heater. I started with this setup last year and the outside ambient temperature was about 8° c inside my garage was about 11 °
I plan on building a dual-stage temp controller using a STC-1000 in the next week or so to replace my current analog controller. You could build always yourself a new one or I could sell you my analog controller for cheap as soon as I don't need it anymore.
Buy an stc-1000
http://www.amazon.com/Digital-All-purpose-Temperature-Controller-STC-1000/dp/B00862G3TQ
http://mostlyharmlessales.files.wordpress.com/2013/08/temp-controller-wiring-diagram.jpg
Cool, thanks! Do we know the difference between this and the one you got, which is 5 bucks cheaper?
buy one of these
http://www.amazon.com/Extech-TG20-Wire-Tracer-Generator/dp/B00APD16D2/ref=sr_1_2?ie=UTF8&amp;qid=1463422577&amp;sr=8-2&amp;keywords=tone+generator+and+probe+kit
It's how they made the lightsaber sound, and is best bzzzzz
I bought a tone generator and learned how to use it by watching youtube videos. worth very penny.
Extech TG20 Wire Tracer and Tone Generator https://www.amazon.com/dp/B00APD16D2/ref=cm_sw_r_cp_apa_i_tswiDbBG6KJZY
>A continuity tester or tone generator with alligator clips will allow you to clip the leads on the bare cable and then take the wand and touch it to the cable, it will start screaming when the wand is touching the right cable.
Like this?
Here's a cheap one :
amazon
So the "data" portion of the MDX88300 is probably because of the satellite and probably phones. I am guessing you can tie it in with a security system? But it will be a no-go for internet.
Those Cat5 cables, however, should still work fine. You would just have to cap the ends with a standard RJ45 connector cap, and make sure it is wired correctly at the jack in the room. Then you can just plug it directly to your router at this point, IF you're going to place your router in that closet/room.
Or you can get a real patch panel and wire them directly into that, but you will need a punch tool for that. I only recommend that if you need to wire like 10+ computers to a network.
As far as the tone tester goes, I use this one for work. It's probably Chinese made and might break in a year, but it was cheap and I tested it....it works. You plug the little transmitter into the Ethernet port in the room, flip the switch to "Tone". Then go to your server closest, turn the wand on, and touch each cable until you hear a beep from the wand. That indicates which cable runs to that room. Then you cap it with the RJ45 connector, Mark it (with tape and sharpie), and move on to the next room.
Honestly, if you care about audio as a hobby and preserving your hearing, get a real spl meter. Even a cheap one will be miles better than a phone app: https://www.amazon.com/BAFX-Products%C2%AE-Decibel-Reader-Battery/dp/B00ECCZWWI/ref=sr_1_3?ie=UTF8&amp;qid=1472860855&amp;sr=8-3&amp;keywords=decibel+meter
Get something like that, use it to calibrate your phone app, then always bring hearing protection when you go to concerts. If you don't want to invest in an spl meter, always assume the app reading is lower than actual volume. My phone app was 15db below the actual db level.
Here
I listen at around 70-75 decibles
I just purchased one of these but I haven't received it yet so I can't vouch for it.
What about one of these?
BAFX Products - Decibel Meter / Sound Level Reader - W/ Battery! https://www.amazon.com/dp/B00ECCZWWI/ref=cm_sw_r_cp_apa_v54CAbRMDDVVE
Or the advanced which measures dba and dbc and samples many more times per second:
BAFX Products - Decibel Meter / Sound Level Reader - W/ Battery! (Advanced Sound Meter) https://www.amazon.com/dp/B00P1D84N6/ref=cm_sw_r_cp_apa_r64CAb3QAJARN
Does anyone have suggestions for a good but cheap/simple spl Meter? I’m getting into comparing components but I’m finding it’s really hard to do so without at least (somewhat) accurate volume matching
Would something like this work
https://www.amazon.com/BAFX-ProductsÂ-Decibel-Reader-Battery/dp/B00ECCZWWI/ref=pd_aw_sim_469_2?_encoding=UTF8&amp;pd_rd_i=B00ECCZWWI&amp;pd_rd_r=ac92f1da-da45-11e8-b1e4-5f3ea650bb69&amp;pd_rd_w=khZ0j&amp;pd_rd_wg=EnD1y&amp;pf_rd_i=mobile-dp-sims&amp;pf_rd_m=ATVPDKIKX0DER&amp;pf_rd_p=57b46099-d750-4d74-83ee-63ad64b310a4&amp;pf_rd_r=SC12YWX12MFQAB592965&amp;pf_rd_s=mobile-dp-sims&amp;pf_rd_t=40701&amp;psc=1&amp;refRID=SC12YWX12MFQAB592965
As you said, loudness not only depends on the amp and headphone pairing, but also the individual track gain. It is safe to say that anything below the 12 o'clock position is safe for prolonged listening.
If you really need a rough estimate of how loud you are listening you will have to buy a dB meter and place it between the earcups while playing music
This is the cheap meter I got. Works just fine for making sure you're not monitoring too loud.
https://www.amazon.com/dp/B00ECCZWWI/
have fun. point at your speakers from listening position.
If you meant that you want to measure the level (in -db) of the actual files being played:
http://www.darkwooddesigns.co.uk/pc2/meters.html
this is what you need
Get a sound meter and balance your speakers.
If you can't adjust per channel levels on your receiver get whatever receiver supports the technologies (HDMI, AirPlay, etc.) you want as long as it has Audyssey.
they are cheap my friend, https://www.amazon.com/BAFX-Products-Decibel-Reader-Battery/dp/B00ECCZWWI/ref=sr_1_3?ie=UTF8&amp;qid=1480617836&amp;sr=8-3&amp;keywords=decibel+meter
This is my build which I posted on Facebook a few days ago, before I add subwoofer, so far less than $500, I'm still building it ..
--
Tonight's window-shopping shopping cart for my first audio upgrade from 2016 WRX base OEM audio. Includes amp, speakers, and noise suppression. This seems like a really good starter build for less than $500. Looking for feedback.
DS18 SLC1800.4 DS18 Select SLC-1800.4 1,800 Watts Four (4) Channels Amplifier
http://www.amazon.com/gp/product/B00IDI0D3K/ref=as_li_tl?ie=UTF8&amp;camp=1789&amp;creative=390957&amp;creativeASIN=B00IDI0D3K&amp;linkCode=as2&amp;tag=headsense-20&amp;linkId=TLRSTER62FWVZ4YI
Package: Pair Alpine Sps-610c 6.5" 2 Way Pair of Component Car Speakers + Alpine Sps-610 6.5" 2 Way Pair of Coaxial Car Speakers
http://www.amazon.com/gp/product/B0059AK2T0/ref=as_li_tl?ie=UTF8&amp;camp=1789&amp;creative=390957&amp;creativeASIN=B0059AK2T0&amp;linkCode=as2&amp;tag=headsense-20&amp;linkId=PXNDF7S6RPBZPEKP
Rockford RFK4X 4 AWG Complete Amplifier Install Kit
http://www.amazon.com/gp/product/B0012BYOSK/ref=as_li_tl?ie=UTF8&amp;camp=1789&amp;creative=390957&amp;creativeASIN=B0012BYOSK&amp;linkCode=as2&amp;tag=headsense-20&amp;linkId=2GAGDGGKMRWMHURO
Metra 72-8104 Speaker Connector for Select Toyota Vehicles
http://www.amazon.com/gp/product/B0002BBP7Y/ref=as_li_tl…
50 Sq Ft Noico Self-adhesive Foil & Butyl Mat 50 Mil Automotive Sound Deadening Insulation for Cars & Truck (Audio Dampening & Deadener Installation)
http://www.amazon.com/gp/product/B00URR4O5I/ref=as_li_tl?ie=UTF8&amp;camp=1789&amp;creative=390957&amp;creativeASIN=B00URR4O5I&amp;linkCode=as2&amp;tag=headsense-20&amp;linkId=Q7FJEOPI6QOBHJKL
Noico Metal Barrel Roller Installation Tool
http://www.amazon.com/gp/product/B015WJH4ZW/ref=as_li_tl?ie=UTF8&amp;camp=1789&amp;creative=390957&amp;creativeASIN=B015WJH4ZW&amp;linkCode=as2&amp;tag=headsense-20&amp;linkId=WNEQ67NXUPTXMY4T
BAFX Products® - Decibel Meter / Sound Level Reader - W/ Battery
http://www.amazon.com/gp/product/B00ECCZWWI/ref=as_li_tl?ie=UTF8&amp;camp=1789&amp;creative=390957&amp;creativeASIN=B00ECCZWWI&amp;linkCode=as2&amp;tag=headsense-20&amp;linkId=UV3UKNSI24GV7E3Q
Dayton Audio iMM-6 Calibrated Measurement Microphone for iPhone, iPad Tablet and Android
http://www.amazon.com/gp/product/B00ADR2B84/ref=as_li_tl?ie=UTF8&amp;camp=1789&amp;creative=390957&amp;creativeASIN=B00ADR2B84&amp;linkCode=as2&amp;tag=headsense-20&amp;linkId=XCRDPQNFVK6NFAAN
Sugru is a pretty good adhesive that's flexible. Not quite sure if it would have proper adhesion on that foam though.
https://www.amazon.com/dp/B00EU7DBNM/ref=cm_sw_r_sms_apa_i_T9zGDbVC50THW
Get some Sugru moldable glue and mold it around the charger port with the cord in it. Let it dry and you're set. Don't use a cheap cord in case it stops working correctly. Amazon
Is this the thing you're talking about? https://www.amazon.co.uk/Sugru-Mouldable-Glue-Black-White-x/dp/B00EU7DBNM/ref=sr_1_1?ie=UTF8&amp;qid=1493041567&amp;sr=8-1&amp;keywords=sugru
Not really, about $10 for a 3 pack or $20 for an 8 pack
https://www.amazon.com/Sugru-Mouldable-Glue-Original-Formula/dp/B01BFE0KNQ/
https://www.amazon.com/Sugru-Moldable-Glue-Original-Formula/dp/B00EU7DBNM/
The frayed wire is one of the standard use cases for this stuff.
I suppose you could mold your own replacement out of Sugru moldable glue
I wonder if you could use Sugru to mold a new one?
All 3 as they are really cheap.
Bowden Tube
Aluminum Extruder
Bed springs
Budget: soft limit of $400, hard limit of $600
USA
Assembly is fine
Features needed: just looking for a general purpose printer. I'm a beginner so I'm not too picky. Looking at the Ender 3 Pro or the Prusa Mk3
&#x200B;
https://www.amazon.com/dp/B07GYRQVYV/
Is this the right one? If not, where should I get it?
https://www.amazon.ca/gp/product/B01M7S46YZ/ref=ppx_yo_dt_b_asin_title_o02_s00?ie=UTF8&psc=1
&#x200B;
bought this with some duct and a carbon filter
Looking to buy my own printer for whatever comes my way. I like to 3d print random stuff I make or things i find online from moving parts to figures. Was looking around amazon and saw this [Comgrow Creality Ender 3](Comgrow Creality Ender 3 3D Printer Aluminum DIY with Resume Print 220x220x250mm https://www.amazon.com/dp/B07BR3F9N6/ref=cm_sw_r_cp_apa_i_XxgODbQCRC3R1) but also found [this](Comgrow Creality Ender 3 Pro 3D Printer with Removable Build Surface Plate and UL Certified Power Supply 220x220x250mm https://www.amazon.com/dp/B07GYRQVYV/ref=cm_sw_r_cp_apa_i_GzgODbTQ6ZNAJ) which looks identical for a higher price. I don't see a difference. My budget would be around 300 to 400ish. I'm looking for one that'll either be enclosed or be easy enough to enclose since I'll be in a college dorm, so I don't want my roomate to be bothered by the smell if left alone. Any wireless features would be neat, but I'm fine with plugging my laptop and leaving it there. The more safety features or safer in general it is, the better.
Hello everyone, I am currently in the market for my first 3D printer, and was hoping to get some advice on what printer would best fit my needs. I would like to spend no more than 300 USD max, and I live in Wisconsin in the United States. I am willing to build a printer from a kit, and I have limited electronics experience (though I am very willing to learn and my brother has a lot more experience). With the printer I would like to print a variety of things, such as pieces for props I am making, a lightsaber, probably some miniatures for DnD, and any other stupid things I can think of and design. I don’t really have any extenuating circumstances. Currently I am looking at 3 different printers, all around the same price:
Monoprice Maker Select V2: https://www.amazon.com/dp/B018GZBC3Y?tag=thewire06-20&linkCode=xm2&ascsubtag=AwEAAAAAAAAAARPY
Anycubic Photon: https://www.amazon.com/ANYCUBIC-Assembled-Innovation-Off-line-Printing/dp/B07TVW9HGH/ref=mp_s_a_1_1_sspa?adgrpid=61744442371&gclid=Cj0KCQiA-4nuBRCnARIsAHwyuPr9qUkHk3c-bjztvPtoPCnQfwmJiur43IW5Sqo_gLb2kfWEBrmndEMaAusvEALw_wcB&hvadid=274732107337&hvdev=m&hvlocphy=9018836&hvnetw=g&hvpos=1t2&hvqmt=e&hvrand=1205846483522208665&hvtargid=kwd-409136528305&hydadcr=21036_9428322&keywords=anycubic+photon&qid=1573068757&sr=8-1-spons&psc=1&spLa=ZW5jcnlwdGVkUXVhbGlmaWVyPUFZUVVYT0NERzhRTFImZW5jcnlwdGVkSWQ9QTEwNDE5NjlRMUFTUlBNR1ZRNksmZW5jcnlwdGVkQWRJZD1BMDUzMDYwN1BBOEZWNFRKU01GVyZ3aWRnZXROYW1lPXNwX3Bob25lX3NlYXJjaF9hdGYmYWN0aW9uPWNsaWNrUmVkaXJlY3QmZG9Ob3RMb2dDbGljaz10cnVl
Ender 3: https://www.amazon.com/Comgrow-Creality-Printer-Upgrade-Certified/dp/B07GYRQVYV/ref=mp_s_a_1_2_sspa?adgrpid=56791742355&gclid=Cj0KCQiA-4nuBRCnARIsAHwyuPpuBebDhMzsbSGWKX2y-Dq2wg37UXSEJqeqqEfB5I6zU-MDqdo4q8QaAiFfEALw_wcB&hvadid=274684426752&hvdev=m&hvlocphy=9018836&hvnetw=g&hvpos=1t3&hvqmt=e&hvrand=5031503050646445943&hvtargid=kwd-446200976551&hydadcr=14671_9484359&keywords=ender+3+3d+printer&qid=1573068855&sr=8-2-spons&psc=1&spLa=ZW5jcnlwdGVkUXVhbGlmaWVyPUEyNlJNRVZTSEVBVkdHJmVuY3J5cHRlZElkPUEwMDY2NTcxMVlVNjFBVExFSTZWUCZlbmNyeXB0ZWRBZElkPUExMDIzODY4V1BDMkY5UUpZR0NMJndpZGdldE5hbWU9c3BfcGhvbmVfc2VhcmNoX2F0ZiZhY3Rpb249Y2xpY2tSZWRpcmVjdCZkb05vdExvZ0NsaWNrPXRydWU=
I am open to other printers, these are just the ones that were on my radar, so feel free to suggest other options.
Thanks for the help and sorry for the long links!
I want to recommend this product at Amazon.com
FYSETC 3D Printer Motherboard Accessories 0.31 in OD 0.78 in Length Compression Springs Light Load for Creality CR-10 10S S4 Ender 3 Heatbed Springs Bottom Connect Leveling - 10 Pack
by Fuyuansheng
Learn more: https://www.amazon.com/dp/B07GXC1G2B/ref=cm_sw_em_r_mt_dp_U_gPhXDbWZMATD3
Where to start with my update.
I began collecting the parts for the controller. I am using a BME280 for the temp and humidity sensor, this little screen for reading conditions at the chamber, 8 channel relay to control the various electronics, this fan and this filter for fresh air.
Here is an album of updated photos. The first is a blast gate controlled by a servo to control the fresh air flow. When the fan turns on the servo will open the gate and allow the fan to suck air out (more on that later). Next up is the freezer with the collar on. Its not put together properly yet but just a rough test fit shows its looking good. Then I have two inside shots of the chamber itself.
After talking with someone who understands air flow much better than I do, I changed the position of fan and filter as well as direction. The fan is going to suck air out from one side and the other will have the filter on it. This will keep the lid down, where as if the fan pumped air in it could lead to a pressure build up and the lid may crack open slightly. The elbows are put in so its not just the top air that is circulating. I am thinking of turning them so they don't point straight down but for now its good.
The inside shot show the slots made to hold up to 7 bars. I am going to seal in the collar with a piece of wood on the top then fill it with spray foam insulation and silicone it to the freezer.
The other thing that has changed since I last posted was that I was going to try to do the code myself. As I got parts in and tried to put something together it became clear there is no way I can do it. After searching around I put out a bid on upwork.com and now I am working with a friendly fellow from Nepal. We haven't gotten to far but I am excited by his proposal and he will be adding the ability for me to control it from a webpage.
Anyway that is it for now. I can see there isn't much activity on this post or another related post but I am going to follow through with the updates because in my searches for this project I cam across a lot of half finished ideas and projects. RemindMe! 2 months
Stock springs are cheap and not well under tension. They caused me a lot of balance issues
https://www.amazon.com/FYSETC-Motherboard-Accessories-Compression-Creality/dp/B07GXC1G2B/ref=mp_s_a_1_3?crid=3G99LZGFOMNBI&amp;keywords=ender+3+bed+springs&amp;qid=1556590607&amp;s=gateway&amp;sprefix=ender+3+bed+&amp;sr=8-3
this is the one im thinking of pulling the trigger on today. What do you think?
Worth it, or should i save some money and just woot it?
https://www.amazon.com/gp/product/B07GYRQVYV/ref=ox_sc_act_title_1?smid=A2ALB3RMNIRLH8&psc=1
I have changed out the nozzle and checked the filament, but I'm not sure what is wrong still. The print will come out initially, but barely. For reference, I am using the Ender3 Pro. (https://www.amazon.com/gp/product/B07GYRQVYV/ref=ppx_yo_dt_b_asin_title_o04_s01?ie=UTF8&amp;psc=1)
Printing at 235 degrees for the nozzle, 75 for the bed. Adherence to the bed is fine so far, so I have that ruled out
I'm looking to buy an Ender 3 pro
https://www.amazon.com/gp/product/B07GYRQVYV/ref=ox_sc_saved_title_1?smid=A2ALB3RMNIRLH8&psc=1
But have seen it for cheaper on eBay, and am curious if it's safe to go the eBay route?
Here are two of the eBay sellers I saw:
https://www.ebay.com/itm/Creality-Ender-3-Pro-3D-Printer-Thermal-Runaway-Protection-220x220x250mm-DC-24V/223131248691?epid=14027539696&hash=item33f3a8a833:g:CS8AAOSwXFFbljwA
&#x200B;
https://www.ebay.com/itm/Used-Creality-Ender-3-Pro-3D-Printer-220X220X250mm-Mean-Well-Power-DC-24V-PLA/153401984963?epid=4029954280&hash=item23b77887c3:g:p~AAAOSwCy5cgIVX
That's exactly what happens. I too would watch it and think its fine and then come back later and its floating. Go ahead and check the bed leveling as well. It may need to be adjusted anyway.
Side note: If you find yourself constantly adjusting the bed every few prints or so, change them out for some better ones. These are the springs everyone goes for.
I was just bout to post asking if this is good. Buy sounds like I need to check out ender.
https://www.amazon.com/dp/B07GYRQVYV/ref=cm_sw_r_sms_apa_i_2FYvDbH50QSX1
Replace the springs as well. They are questionably adequate for the stock bed, let alone one with a glass sheet attached.
List of mods on my Ender 3 Pro:
I use Cura for my slicer, and use the default setting there for the Ender 3.
Hey I also new on this, got my printer a month ago, I was super exited as everyone here when receive their printer, I read a LOT while waiting for the printer, so I heard that the stock bed springs are crappy, so I ordered this ones FYSETC Bed springs, also ordered the Aluminium Extruder feeder, and read about the leveling, the paper sheath method, which I think you should already heard about, I did it at the first time the printer gave me a nearly perfect first print (demo dog) , after a few prints and on my third print I came home just to find a mess on my printer, so I did my research again, find out it was bed adhesion, and find out that the best way was glass bed + PEI sheet was the best option, while waiting to arrive I tried to clean the stock bed sheet with mineral spirits (did have rubbing alcohol) but it worsened the adhesion, so I used one adhesion sticker that comes with the overture filament, and again flawless adhesion, at least for the first 4 prints, then again the frustration, I tried some glue stick and worked but it leaves a mess on your print so I decided to try painters tape directly onto the aluminum bed (which lucky for me it is perfectly flat) this is the best adhesion I have tried, problem is also makes a mess with the down face of the print, Finally mi Gass-PEI arrived, (3 days ago), it has a great adhesion but is not perfect, also you have to raise the Z limit switch to compensate the 5~ mm of Glass-PEI, find out that it isn't perfectly flat it has a good adhesion and leaves a very smooth down face, but at some section it does't sticks well and leaves artifacts on the down face, I'm currently working to fix this.
Sorry for the long post, need to talk about my frustration and let you know you are not alone on this, once you manage to make a good print is very satisfying, I have a PETG filament waiting to be used but I don't think is a great idea to try it until a learn more about 3D printing and the Ender.
Ender 3 pro.
Creality magnetic build surface.
Black matchbox PLA at 200 C
Print bed at 60 C
Using the most recent version of Cura.
I'm using the "Normal" 0.15 mm layer height preloaded setting in Cura. I'm guessing that this is a bed leveling problem, as the only thing that changed between the first 2 pics is that I installed [new bed springs] (https://www.amazon.com/gp/product/B07GXC1G2B?pf_rd_p=f3acc539-5d5f-49a3-89ea-768a917d5900&amp;pf_rd_r=N121Q03JSDJ7ST88QJ8M). I did have a hell of a time getting them back to being level after the install, but I thought I had it.
Any thoughts?
Hey, my birthday is coming up in a couple of weeks and I was trying to think of something to ask for when a 3D printer crossed my mind. I've always thought they were pretty cool and I have a bunch of ideas for stupid little stuff to print out.
The only issue is that I know absolutely nothing about them and what I should be looking for in one or even if it's worth it for me to get one anyway. I don't mind having to put one together myself since it looks like that's the case with a lot of them after a quick Amazon search (very precise, I know).
My budget is under $300 and I'm in the US. I did find this one and it looks like it's pretty deece but want the experts to give me an educated opinion on it. [It's this one right here](https://www.amazon.com/Comgrow-Creality-Printer-Upgrade-Certified/dp/B07GYRQVYV?ref_=Oct_BSellerC_6066127011_1&pf_rd_p=471a90b9-8a34-5dd9-a6f0-17598d2f0fae&pf_rd_s=merchandised-search-6&pf_rd_t=101&pf_rd_i=6066127011&pf_rd_m=ATVPDKIKX0DER&pf_rd_r=P83BAX28P3Y3BW4VJ6YZ&pf_rd_r=P83BAX28P3Y3BW4VJ6YZ&pf_rd_p=471a90b9-8a34-5dd9-a6f0-17598d2f0fae)
I just plan on using it to print out cool stuff others post online but may take a crack on designing my own stuff eventually. Nothing too big or fancy. Like I said before, I know what 3D printers are but that's about it, lol. I'm just hoping someone here can point me in the right direction.
Comgrow Creality Ender 3 Pro 3D Printer with Removable Build Surface Plate and UL Certified Power Supply 220x220x250mm https://www.amazon.com/dp/B07GYRQVYV/ref=cm_sw_r_cp_api_i_T4WxDbRVFW44B
I have this one too
Official Creality Open Source CR-10 3D Printer All Metal Frame 12x12x15.5 Inch Build Volume and Heated Bed Includes Glass Bed https://www.amazon.com/dp/B07LG2K55Q/ref=cm_sw_r_cp_api_i_w5WxDbQ11Q2XH
Or cheaper
ADIMLab Gantry 3D Printer 90% Assembled 310X310X410 3D Printing Size with 24V15A Power Heat Bed Glass Control Box Filament Detector, Nozzle Light, Modifiable to Upgrade to Auto Leveling https://www.amazon.com/dp/B07CPQQ57D/ref=cm_sw_r_cp_api_i_r6WxDbR5B2PCQ
All pretty good units
Well if you ever end up with an extra 260 dollars you should consider getting the Ender 3 Pro.
https://www.amazon.com/Comgrow-Creality-Printer-Upgrade-Certified/dp/B07GYRQVYV
and if you run into problems the ender 3 subreddit is always there /r/ender3/
It's hard to describe how tight it should be, but I believe I only loosened the arm about a quarter of a turn after screwing it in.
My apologies, I was a little unclear. The bearing should be able to move freely in the air when you push against the lever arm. When you push the lever arm in (like when you change filaments), you should be able to rotate the silver bearing in the air by hand without any trouble.
If you cannot spin the bearing, then it needs to be loosened a bit.
For your extruder spring, are you using a silver spring, similar to the stock bed/extruder springs, or a yellow spring that's commonly recommended as upgrades?
These should work. or just search 3d printer bed springs on Amazon and pick one you like. They're super common, and basically all the same. Nothing too special.
Had these for a while and they’re great
FYSETC 3D Printer Motherboard Accessories 0.31 in OD 0.78 in Length Compression Springs Light Load for Creality CR-10 10S S4 Ender 3 Heatbed Springs Bottom Connect Leveling - 10 Pack https://www.amazon.com/dp/B07GXC1G2B/ref=cm_sw_r_cp_api_i_O-MLDbD1EA96T
Improvements/add-ons
• Filament Roller Guide. You will thank yourself later to further prevent the filament from grooving an indentation where it feeds into your extruder. It utilizes bearings but its a fantastic design. I had mine for ~2 months when I started noticing the groove already being made.
• XT60 Connector clips - if you want a little "cable management"
• LCD Cable Clips - Also if you want a little "cable management". There is also an LCD Cover for the PCB to keep dust and whatnot out.
• Any fan covers you find that suit your style as you dont want filament going into the box in the bottom left (not entirely too sure what it holds).
>
>
>
Physical Upgrades
• Upgrade the bed springs as my originals started to sag a little. Not exactly sure on what the technical name for those springs are but those are the ones I purchased and I have been happy with them.
• Borosilicate glass bed. I use to use the stock mat, tape method, and hairspray method. All of those worked for a little bit but were a complete pain and mess to deal with from time to time. All I do now is use some isopropyl alcohol and clean my glass bed every once in a while but past that I require NO adhesion for my bed outside of tiny pieces that require a brim, skirt or whatever support needed to keep it adhered. As long as your print bed is leveled as best as possible (have a nice filament "squish") you will have no issues.
• Some other things you could look into if you plan to print with other kinds of filament outside of PLA would be: Micro Swiss steel nozzle, Capricorn tubing and an upgraded extruder like the e3d. Keep it simple for right now though while you learn your rigs because I strongly feel no ender 3 works the same and my preference for which program (MatterHacker, Slic3r or Cura) depends on how I feel how the model appears and how its coming out. Also, grab yourself a handful of replacement nozzles if you continue to use the brass ones. They CAN wear out if you use the printer like crazy, so its always good to have spares (also can get a variety of sizes too - standard being the 0.1mm I believe?). I snagged a pack of 10 for $5-8.
>
>
>
Last but not least, run a few bed level test prints as well. The best one that I have found which helps me dial in my printing was CHEPs bed level STL file. Video & G-Code file. I use it religiously if I ever find that my bed is out of wack.
There are a handful of other mods/add-ons you can find on Thingiverse and another website (one which we arent allowed to link to unfortunately).
Budget: $100-$300
Country: US
Kit: Sure, experienced with electronics and soldering
Uses: looking to print mechanical keyboard parts (cases, keycaps, etc) and anything else I might need to print parts for.
I'm currently looking at a few different printers and most are from Creality. The Ender 3 and Ender 3 pro specifically are what I'm going for. What's the best place to actually buy one though? There's a ton of different sites with different prices and it's pretty overwhelming.
There's the one from eBay supposedly direct from the seller for $237
Amazon from Comgrow (?) for $279
And straight from Creality (I think) for $259
I'm leaning towards buying directly from the seller because I've read some things about the warranty not being fulfilled directly from creality if you buy from another source.
Other ones I'm looking at are the da Vinci 1.0 pro, regular Ender 3, or any other really. Any help would be greatly appreciated.
Here's the extruder: https://www.amazon.com/dp/B07B96QMN2/ref=cm_sw_r_cp_apa_i_uSFjDbRH4ZQE4
Here's the springs: https://www.amazon.com/dp/B07GXC1G2B/ref=cm_sw_r_cp_apa_i_DTFjDb1KAPZ15
There's tons more. All you need to do is search Amazon. Glad I could help.
I was originally going to buy an ender 3 as my first 3d printer. I have zero experience but after lurking here a bit I thought I knew what to buy. However amazon currently has some good deals on some of these printers. so my options are now:
Ender 3: $229.99
Monoprice Maker Select v2: 239.99
Ender 3 pro : $259.99
Monosprice Maker Select Plus: $289.99
&#x200B;
I'm sort of leaning toward the Maker Select v2. But having no experience I'm hoping you guys will know better. I don't think building an Ender kit would be an issue, but for my first one I think Monoprices may be easier. I'm mostly looking to start with some minis and maybe randon little knick-knack type things. Although I think this may be something I get really into down the line, so as long as they're versatile I will probably build anything and everything I can :-p
I’m not sure about that one, but I just bought this one : https://www.amazon.com/Comgrow-Creality-Printer-Upgrade-Certified/dp/B07GYRQVYV 2 weeks ago and it has the 1.1.4 board, removable magnetic bed, it may have had thermal runaway protection out of the box, but I flashed the newest marlin firmware to get some other options, so I know I have it now.
Yeah, that's a big problem. They call it knuckle busting for a reason. For stuck nuts and bolts, my go to is a product called "Air-Kroil" I've never used a better creeping oil that this stuff. It's worth it. We use it in industrial settings all the time. If you can stand on a cheater bar, then you can probably get an impact driver on it. Black and Decker makes on for 60 bucks. You need a bit of clearance for it, probably 8 inches or so. There's also a MAPP gas torch, of course be careful not to catch shit on fire, have a fire extinguisher on hand, clean up the area before hand as well, heating it helps to bust stuck parts sometimes. So does cooling it, in inverted Airduster can sprays that liquid that'll freeze shit.
I have some cheaper temp controllers I have used for brewing beer, I wonder if these would work? They are accurate down to the degree.
http://www.amazon.com/AGPtek-All-purpose-Temperature-Controller-STC-1000/dp/B00862G3TQ
To anyone interested, similar multimeters go on sale for $1-3 every now and then. I've gotten two from different brands from watching SlickDeals.
Yes, but I only need something cheap to do OCCASIONAL water damage.
What's a good fluid to use with it? Just ordered this one:
https://www.amazon.com/gp/product/B00HZVYAVM/ref=oh_aui_detailpage_o00_s00?ie=UTF8&amp;psc=1
Think it's half decent for $30??
$9 and it works.
https://www.amazon.com/dp/B00OUFX38W/ref=psdc_7701919011_t1_B0000AZK08
It looks a lot like Gaf Tape.
https://www.amazon.com/dp/B00GZE3UJ8/