Best masonry tools according to redditors
We found 49 Reddit comments discussing the best masonry tools. We ranked the 35 resulting products by number of redditors who mentioned them. Here are the top 20.
We found 49 Reddit comments discussing the best masonry tools. We ranked the 35 resulting products by number of redditors who mentioned them. Here are the top 20.


No its just bright fluorescent string. Here and Here are the ones I used. I have blacklights in this room, which is the reason the strings look like that. As for a tutorial, I kind of found a way to connect the patterns without needing to cut the string. Here is the pattern that is repeated.
you could always get a trowel. http://www.amazon.com/MARSHALLTOWN-Premier-46-114S-Pointing/dp/B003A83GK0/ref=pd_sim_hi_2?ie=UTF8&refRID=1YADPR01634PQY8F11F2
I just embarked on this journey and I'm having a great time.
With the help of some members of this sub, I purchased 5 planes on eBay -- 2 Stanley #4's (both Type 13), 2 Stanley #5's (Type 9 Record and Type 17), and a Keen Kutter 4. I then asked a bunch of questions here and did a bunch of research on plane hunting and restoration. Special thanks to /u/abnormal_human and /u/Graphus for their comprehensive and helpful answers. Once they are all complete, I plan to use them all a bit and then pick two to keep and resell the rest.
Some sites that helped me a bunch were:
http://www.hyperkitten.com/tools/stanley_bench_plane/start_flowchart.php (Dating & Typing)
http://www.supertool.com/StanleyBG/stan2.htm (Basic Info -- Numbering and such)
And here are some video's that carried me through the process in a playlist I made: https://www.youtube.com/playlist?list=PLi-n7reKpXtVQzwcksAUsVg8wbeLRrH2u (pay special attention to WOmadeOD's video. It's 2 hours and the entire process.)
And here's a set just for sharpening: https://www.youtube.com/playlist?list=PLi-n7reKpXtVbQcKXTppUb8vpS6Eal11h
Some important tools and materials are:
I decided not to refinish the wooden bits on the planes and instead just clean them up because I wanted to keep some of the age look to the planes. I re-painted the beds and sides of the frogs if the plane's original color was black and it was in poor condition.
I had planned to fill in all the albums with descriptions and make a post sometime this week when I am completely done but I might as well share what I have now.
The cleaning, derusting, and painting are done and I've completely finished all the planes. I've started on another set of 10 planes now. I'll group them all and make a post directly to the subreddit once they're all 100% complete.
Albums
-------
For some tips on picking a used plane, /u/abnormal_human told me:
> Generally, the most desirable "types" for stanley bench planes are 11-15, but I wouldn't have an issue with a nice 9 or 10.
> Looking at the timeline[1] again, it's type 12-15 that I like.
> Type 9 is when the better frog/body interface shows up, which makes it easier to adjust the frog. I'm not interested in anything earlier than this.
> Type 12, you get a bigger brass adjustment wheel, which I like.
> Type 16 was the beginning of the end--the ogee shaped frog + the kidney shaped hole in the lever cap appears at this point. This is when I tune out.
> That's not to say that you have to be this picky. There are lots of usable planes outside of what I'm looking for. > There's just so many moderately priced planes out there that it's easy to pick+choose and get what you want if you pay attention to the details.
> ... the dating chart works pretty well for the common bench planes (#3-8).
It is common for plane restorers to purchase a replacement blade, sharpen and use it, and keep the original in a safe place for collect-ability. For replacement blades as per /u/scewikea:
> This is the answer I got when I asked before -- a few people around here swear that the Woodriver blades are really good.
Here is a quick run-down of the restoration steps I took. I plan to embellish and elaborate more on them when everything is 100% complete in a full post to this subreddit:
Now, I have a set of 9 more planes -- a Dunlap #5, another Stanley #4 Type 19, an unbranded #4, and 4 Stanley Block planes (110, 2 x 220, 9 1/2, and an unmarked baby one), and a Sears block plane -- that I'm in the middle of restoring. After they're done, I have a nice Stanley #7 Type 13 Sweet Heart waiting to begin the restore. It's a great facet of this hobby!
--------------------------------------------
I'd be glad to share anything I've learned and answer any questions I can. If you wanna shoot me a PM, we can chat on gchat?
I use a brass brush like the one included in this set:
www.amazon.com/gp/product/B0037UUZRS
But really just about anything will work if you heat up the extruder to whatever temperature you use to print that filament.
Generally, I only really worry about cleaning the nozzle. When I opened this thread I was expecting some giant amounts of solid filament to be stuck your extruder, but what is shown in the picture is like nothing, I wouldn't even bother cleaning the sides of the extruder probably unless/until the build up got worse.
Don't count on paint to fill in anything.
And don't trust your eyes necessarily to notice what will or will not stand out.
Trust your fingers. If you can feel changes in topography as you drag your fingers across the wall, it will definitely show through your paint.
Intense option on skim-coating is to thin down some all purpose compound and apply it with a roller, then skim it off with a wide trowel.
These guys are kind of gimmicky but I can attest that for an amateur they really help. I found one locally at the Sherwin Williams store. Might have even been cheaper than Amazon.
Not a garden trowel, more like a bricklayer's trowel, shaped like so.
Your coils in both shots have a significant patina and your cotton looks too used and slightly burned, both of which will severely affect flavor. I'd recommend getting these brushes and once every two days or so (unless your juice is very very sweet) pulling out your cotton, and gently brushing down your coils to remove the gunk while rinsing under cold water. You'd be surprised at how much better your vape will taste!
I dealt with a similar issue when removing paneling from level 1 drywall in my home, and found a method that worked for me. Remove as much adhesive as possible with a scraper (a little damage to the facing is okay as long as you don’t gouge down to the gypsum). Then use a drywall sander with a 36-grit disk like this one and take it down a bit more to smooth things out.
WEN 6369 Variable Speed 5 Amp Drywall Sander with 15' Hose
https://www.amazon.com/dp/B01HRL9XYI/
Do any needed patches and repairs (gouges, holes, etc) and then roll the surface with a primer sealer (I used PPG). A good tip is to have some black added to the primer to add contrast. Then skim coat the surface with thinned out compound to get back to a nice, smooth finish. Prime and paint.
In my case it was more labor than doubling up or replacing the Sheetrock, but I just decided I didn’t want to deal with hauling all that drywall if I didn’t have to. For a ceiling I think it would probably be a worthwhile way to go (my shoulder doesn’t like taping overhead anymore).
For the skim coat, I rolled thinned premix on with a half inch roller, and scraped with a squeegee trowel like this (I used the 14” and 22” ones)
https://www.amazon.com/dp/B00CCGEDOE/
Glaze on the shelf will liquify again and again. Covering little drops with kiln wash might overwhelm the glaze with its refractory properties, or some of the glaze might seep a little and attach to pots. You would need to grind the foot or sand the pot to get the glaze off. The bottom line is there is going to be some work either in preparation before the firing, or fixing some pots after the firing.
Buy something like this product (probably cheaper at your local hardware supply). Wear a respirator when you scrape your shelves.
https://www.amazon.com/MARSHALLTOWN-RB192-6-Inch-3-Inch-1-Inch/dp/B003A83G8M
You should be able to clean off the pads, re-tin them, and re-solder new wires to them.
 
You'll need a few tools:
 
Clean and tin the soldering iron tip:
 
Remove the solder from the pads on the heat bed:
 
 
Add some solder to the pads - you'll want a little bit of solder to cover the whole pad, with enough to make a small bump.
 
Tin the wires:
 
Attach the tinned wires to the tinned solder pads on the heat bed:
 
Also: You can use some isopropyl alcohol (rubbing alcohol) to clean up the excess rosin paste - it can get sticky.
 
Hope this helps!
I don't think it matters per se, but what I used was:
https://www.amazon.com/BikeMaster-3-Piece-Brush-Set-173163/dp/B0012TRJ9I
That I found at my local motorcycle shop. Was happy with it
> In the description it says that there are some minor plating issues. Rust is not a minor plating issue imo.
In the seller's defense, he did show a picture of the inside of the head. Pictures count as a part of the description. But from the picture, it is hard to tell exactly what kind of crud is in the inside of that head. So if you wanted to return it on that basis, I could see your argument too.
Regarding the rust, the razor itself cannot rust. It's made from brass and nickel plating, so there's no iron to form any actual rust. If it is actual rust, it could be from any blades left stored in the razor for a long time. If it's not rust, it could be another type of corrosion--typically corrosion of the razor itself will show itself as green buildup. Regardless of the cause, you can remove it using a brass-bristled brush.
While wera are nice (I own both some normal screwdrivers and a kraftform kompact r). you may want to look into the wiha 26inone screwdrivers if you are looking for a multi-bit. Their quality is often said to be equal to wera's. Here is the technicians version, the industrial version and the tradesman version they are pretty reasonable for a multi bit driver.
Absolutely!! I actually didn’t know what they were called at first, spotted them in a nursery where a whole tray of plants was sitting on top of another tray with water and the little plants all had strings out of the drainage hole and in the water. By the way, googling “string from bottom of nursery pot” didn’t get me anything useful. Lol. Eventually, I stumbled upon a vacation wicking article and had an aha moment!
It’s a little magical string that pulls water up into the soil from a container of water. The awesome benefit is that it won’t overwater, once the soil is good and moist, it stops pulling up water. (So says the internet.) Use very cautiously with plants that like a dry period between watering. (I’m looking at you, pussy ears aka Kalanchoe tomentosa.)
There’s probably some nice houseplant articles about this, I’ll just summarize my methods. :)
SETUP
I’m using a synthetic nylon string, feeding it out thru the drainage hole, leaving about 4 inches out, then the rest I’m seating snuggly into the plant’s rootball. I usually wrap it around in middle-ish area close to the roots or try to run it thru the center. (Depends on which method won’t be too invasive to the poor thing.)
Idea is very similar to self watering pots that use capillary action, except my ball of nylon cost way less and literally turns any pot into self watering while I’m away for week+. The wick has to be synthetic (nylon or something) and not cotton because mold and etc can live in cotton. Yuck!
This is what I’m using: The Premier Line ML339 Mason's Line 500-Foot Fluorescent Yellow Braided Nylon https://www.amazon.com/dp/B001RJ6YSK/ref=cm_sw_r_cp_api_i_iANzDbA9ZJHQ9
SOIL
Type of soil should not impact wickability. I’ve got a few mixes in the works. Have been trying to switch everything to organic mix and organic fertilizers (keeps microbes alive) instead of synthetic or peat. (Turns out there’s some environmental issues with peat being abused and not renewable at the rate it’s dug up.) I haven’t used sand, I’ve got perlite mixed in quite a bit.
I’m pretty sure I’m repotting things more than necessary. So far though no one has dropped dead or gone to shock. Yay happy plants in good dirt!
VACATION
On a regular day, the wick is hidden under the pot in the saucer. On vacation day, I’ll set everyone up with their own cup/Tupperware/bucket of water and sit the pot on top with wick in water.
Biggest wicking test was being away for 10 days. I came back and everyone was happy and watered! Biggest vacation problem was actually my plant locations didn’t have optimal lighting. They were quite unhappy, I’ve started using a light meter app now and being more generous on sunlight.
REGULAR WATERING
I have also been experimenting with using wicks to regularly water, because this may help prevent overwatering or under-watering. Starting with my very moisture loving plants (ferns, ivies), I’ve setup rocks in the saucer and wick is touching the bottom, when I water I’ll fill up the saucer with water and let the wick pull up proper amount instead of me guessing. (I’m still top watering a little bit, but not the full run until water comes from drainage hole.) I’m not keeping constant water in the rocks, but I will fill them up as needed to water these plants. For ferns, this literally seems to be constant water. Lol. I think that helps raise humidity too and I’m not worried about some water evaporating instead of wicking. I water in morning and check back in evening to make sure wicking worked!
ISSUES
There has been some discrepancy in effective watering depending on how young the plant is. I think that’s because the wicks do need to be near the roots or maybe my yarn isn’t thick enough. I’m leaning toward my installation being the issue though. Because some of these were setup using chopstick method (take wick, wrap around chopstick and gently stick up a drainage hole) rather than actual proper planting with the wick. I will fix these in spring, don’t want to disturb my babies so close to winter.
Overall, I’m super happy with my wick setup. Only plants that don’t have them are succulents.
Hope you find this useful!!!
I have a set of 3 brushes like this one except my bristles are steel. They come in 3 different grades of coarseness. Use fine for small details or you risk rounding the corners off. Sometimes the medium is needed for more stubborn finishes. The coarse brush is what I used to strip rust off of metal. Don't use that. You also need to be sure the bristles are moving parallel to the lines on the furniture. These brushes have a larger surface area than the wheels which I find too aggressive.
These are a tool that I bought for a single project and use pretty frequently. I just refinished a bench on the patio with them. That coarse brush is going to help me repair some rust on my barn.
I am happy with this ones
They had a machine to lay it, and then used a form like this:
https://www.amazon.com/Curb-It-Yourself-Concrete-Trowel/dp/B01MZAWYI6
Good luck!
I picked these up. I give it a little brush in between each bowl and I don't have a problem with caked on tobacco.
Surprised there has been no love for Wiha's 26in1 till your post.
Has Trades, Tech, and Industrial bit sets.
https://www.amazon.co.uk/dp/B00MJUA2BQ/
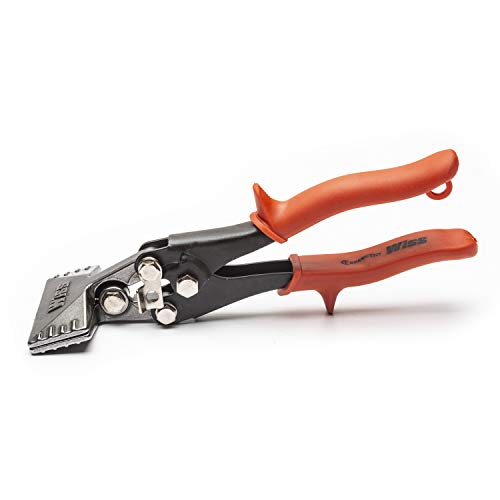
Here you go (Everhard Fairmont Tongs & Wiss Tongs):
https://www.amazon.com/MT14000-Fairmont-Seamers-Straight-Handle/dp/B000PW5FLM?ref_=bl_dp_s_web_19330565011
https://www.amazon.com/MT14010-Fairmont-Seamers-Offset-Handle/dp/B000PW747A?ref_=bl_dp_s_web_19330565011
https://www.amazon.com/Wiss-WS3N-Straight-Handle-Seamer/dp/B0711SV5KP?ref_=bl_dp_s_web_3050571011
https://www.amazon.com/Wiss-WS4N-3-Offset-Handle/dp/B06XCD6HMC?ref_=bl_dp_s_web_3050571011
I do keep 2-3 sharpies in my box, and half a pack in my tool bag as well.
Regarding the center punch, I have one in my truck but I'm not doing a lot of fabrication so it only comes out 5% of the time if that (my box is damn heavy as it is).
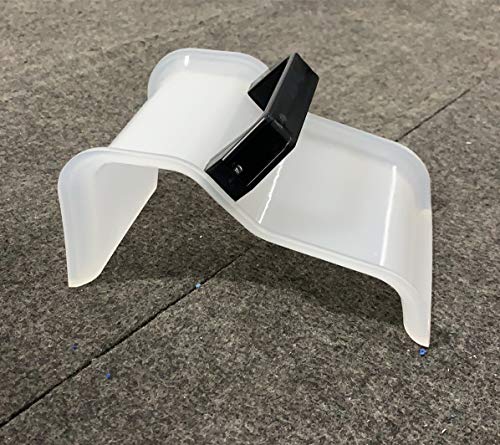
Bought a pre-made silicone mold off amazon. [Link] (https://www.amazon.com/dp/B00FEQLAAE/ref=cm_sw_r_cp_apa_ifdNzb49WR8D0)
I guess this could be a viable option, but it seems like a pain to try to find and mark all of your ceiling joists so you're getting screws into something solid. Let alone holding it flush against the ceiling while doing so (unless you also want to rent a drywall hanger).
I know I already mentioned it, but seriously consider skimming it. Worst case scenario, it's terrible and you can go back to your new 1/4 inch veneer plan. But I don't think it's really that hard.
You could even try one of these: https://www.amazon.com/15-432-18-Inch-Trowel-Drywall-Smoother/dp/B008JBQCVS
I would skim over every area that's rough or cracked. You can go back and sand it if you can't get it even with the trowel. Use drywall mudd and thin it down with water to a consistency that works.
http://www.amazon.com/15-432-18-Inch-Trowel-Drywall-Smoother/dp/B008JBQCVS
Absolutely! You can get one here
Awesome! Great video, thanks for doing that. Now I have something to link people to when I bring it up. Two tips:
To get the alignment of the connector and drawer mechanism perfect on the first try, you plug the 72pin connector into the mainboard and then set the drawer in place on top of it. You screw in the 6 screws, but only a couple turns to get them started. Then insert a cart and lock it down into place like you were going to boot the system up. This aligns everything naturally. With the cart still locked down into place, tighten up all 6 screws and you're done.
To clean carts that you've cleaned a dozen times but still don't work, you need a brass brush. Brass is a nice soft metal (you probably have a brass soldering iron tip cleaner) that works great at cleaning other metals. Spray the contacts down with some of that cleaner you've got, and then scrub back and forth across the pins. Don't be afraid to apply some pressure. This roughs up the surface of the goldfingers, removing all sorts of oxidized crap that alcohol and even contact cleaner can't dissolve. I had one Intellivision cartridge from the 1970s that was so corroded I didn't think it would ever boot, but came right back to life after a brushing. Here's a link to some brushes I bought on Amazon: http://www.amazon.com/TEKTON-7064-Mini-Brush-3-Piece/dp/B0037UUZRS/ (The nylon one is great for cleaning console exteriors, and the steel one can be used to clean your BBQ grill.)
As a side note, it doesn't matter if the connector sits on the bottom the whole time. The surface temperature of the bottom of a pan full of water boiling at 100C is going to be within a couple degrees of 100C itself. Sort of counter-intuitive. You'd expect the pan bottom to be really hot, but it's not. There's actually a fun science fair thing you can do that shows this in action: boiling water in a paper cup. Check it out: https://www.youtube.com/watch?v=I9gKzea3Cno
First of all, let me begin by saying that I like black floors. Ok, sorry. Second of all, from the look of your pics on some of the painted white floor boards, you can see the drills indentation around the hole, where they drilled in order to put in the nails. Those drilled holes are the only reason that oak is not all split up. And removing those pieces without the oak splitting up would prove difficult, if not impossible.
Question: Are the nailed cut boards moving when stepped upon? Or are they quite solid?
Because if they are solid, or near that, you can place some masking tape over the gaps between the boards, in order to keep a wood filler product from falling through, and just fill up the entire sloping area the best you can. Or you can caulk all of the gaps the day before you put down the filler, with construction glue. Construction glue might prove the better solution, to solidify and strengthen the area as much as possible before the putty becomes part of your floor.
Get something like this and mix it up, easy on the water.
And use something like this to smooth out the product.
Doing drywall doesn't take a lot of specialized equipment. There are tons of videos on youtube. I don't have one that's better than another, maybe someone else will chime in as well. A couple of ladders, a couple of screwguns, a utility knife to cut it. You can get a drywall square, but a straight board will work as well. You'll want a couple of blades- a 6" and a 10-12" should be fine. You can get drywall mud online, but the shipping is crazy. You'll need drywall tape. A jab saw will help to cut out for electrical boxes, etc. Screws would probably be ebtter purchased there also. You'll also want corner bead. A cornering tool is also helpful. You can buy more specialized equipment, but this should cover the essentials, except for the drywall itself. Best wishes to you, stay safe.
This should be an easy pour for you. You call it a step, but we'd call it a pad.
We cantilever with steel brackets to the building foundations when we're dealing with relatively new excavations, because the ground hasn't had time to settle properly. It can take years, even if you're mechanically compacting it.
If you've had some base wash out, then your next step is to remove the old step and compact with crushed rock and sand. You can rent a plate tamper at some hardware stores. 4"- 6" should do, and wet it down when you tamp to help tighten it up.
If the sides of the step will be visible, then build your base up higher than the existing, and angle them on the sides so when you pour, you'll have a 'thickening' all the way around, and it'll help keep the pad from shifting.
Use expansion joint where the pad meets the existing foundation, and leave it 1/2" or so lower than the door sill. That way it won't mess anything up if it starts to heave in the winter (I guess that depends where you live, I'm in Canada)
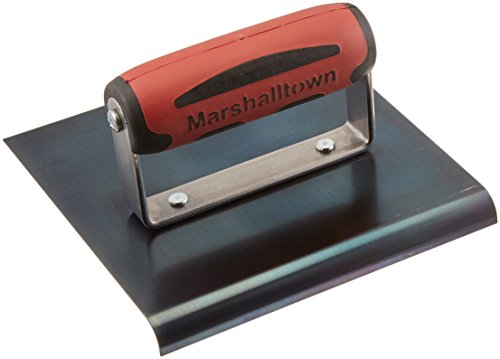
One more thing. With what you're trying to do, you don't need to take the forms off, if you do the inside repair and the pad separately. The edges are done with one of these
, and as long as you kick or vibrate the sides, it'll release the bigger air bubbles and avoid 'honeycombing'. Hell, you can just tap it with a hammer.
Let me know if you have any other questions
I don't understand what it is you are not getting. I bought a set of wire brushes from Amazon that look like tooth brushes but are just a bit bigger. They come in a set of three. Here is the actual [site] (http://www.amazon.com/gp/product/B0037UUZRS?psc=1&redirect=true&ref_=oh_aui_detailpage_o02_s00). You get three brushes for $4.65 each one is a different bristle.