(Part 2) Best oils & fluids according to redditors
We found 2,243 Reddit comments discussing the best oils & fluids. We ranked the 753 resulting products by number of redditors who mentioned them. Here are the products ranked 21-40. You can also go back to the previous section.


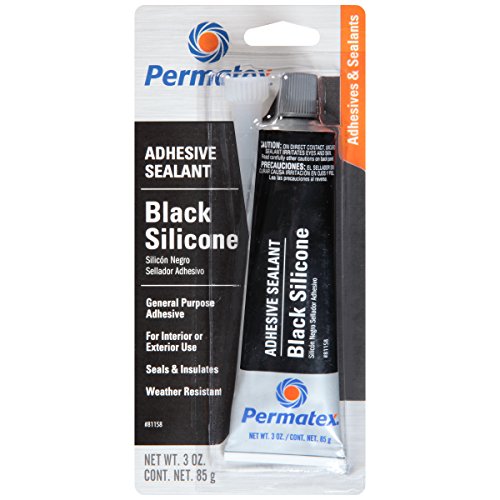


Yes! But I fixed mine permanently with a little application of Permatex 81158 adhesive sealant silicone (just a few squirts into the weather seal, evenly spaced, on each side of the truck).$3 from Amazon
$47 for the oil and $13 for the filter. Labor is free because I usually do it in the parking lot of any auto store and then drop the oil into their free oil dispense containers. lol
Lithium Grease, you can find this at your local hardware store.
or
http://www.amazon.com/Lucas-Oil-10533-Lithium-Grease/dp/B004X70LZA/ref=sr_1_2?ie=UTF8&qid=1394548507&sr=8-2&keywords=lithium+grease
Fascinating. I'm wondering if Subaru recommends and approves only one type of "stop leak", something they call a coolant conditioner, such as this, https://www.amazon.com/Subaru-SOA635071-Coolant-System-Conditioner/dp/B00IGZP2UE
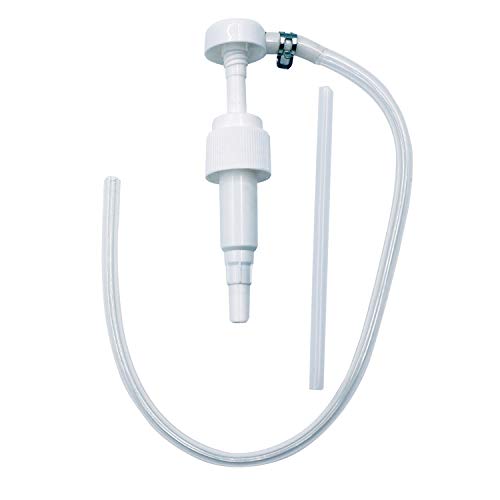
Don't know if GCs are special, but generally yep, that's exactly it. Just make sure to do it on level ground. Have a fluid pump ready to go though; sometimes you don't have enough space to properly tip a bottle. I use this one for lots of stuff:
https://www.amazon.com/gp/product/B000BQW5LK
Make sure to clean the slide pins and their holes well. Then apply brake grease on the pins and in the hole. That should solve the issue.
This is what I use
https://www.amazon.com/Lucas-Oil-10533-Lithium-Grease/dp/B004X70LZA
You can probably get it cheaper at your local Walmart or auto parts store.
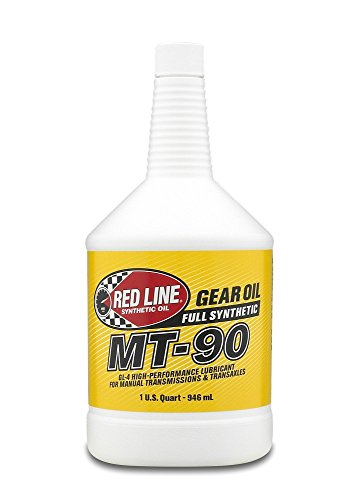
That is extremely poor advice. All lubricants breakdown over time, and should be changed out with fresh fluids. This probably come from people putting the wrong fluid in. You need to replace it with GL-4 gear oil. Most gear oils you'll find at local auto shops is GL-5 and not safe for the syncros. If you need to change it, get some MT-90 from Amazon. You'll need to buy 4qts. Also, a pump will help out a lot.
I live overseas. There are a lot of items that Amazon won't ship overseas. Example
I will give you my background before my opinions. As everyone has different goals, opinions, and experiences.
I got my printer near the end March of this year. I have something like 2500m of filament run though it, and no idea how much print time.
When I received my printer, my test prints failed and I was pissed. But this community helped improve my Cura settings and started producing usable parts. I then went nuts and printed out a BUNCH of mods. This is by far my most favorite thing. There's always something I can print to improve the quality of the prints.
THe down side is I went too far and got to a point where I couldn't produce anything of quality. So, 2 weeks of tweeking and researching later I'm printing in PETG with beautiful quality and very minimal visible layers.
My most recent project in PETG:
http://i.imgur.com/sVf7S2D.jpg?1
So, now to answer your question...
> How do you like your Maker Select?
I love it. It allowed me to buy a cheaper printer (One of the cheapest at the time @ $350) that produced amazing results. It also has upgrades you can purchase or print to improve the quality, so investing smaller amounts over time to make it better and better. I highly recommend it to anyone who is starting because it does require tweaking which forces you to learn and understand how exactly 3d printers work. A major plus was that this community has a lot of Maker Select users for support, which was a MAJOR plus for me.
As of today, I've purchased the following upgrades:
So, in the last ~3 months I've spent an additional $264... Oh god, don't tell my wife! All are totally not necessary, mind you. The only thing I'd 100% recommend you do are print out the following to mods:
DiiiCooler along with buying the 50mm blower fan. There are cheaper options out there, I just wanted it faster so I bought it through Amazon to get free 2 day shipping.
z-Brace - This is key, and will run you maybe $15 worst case scenario to get enough M4 screws and the threaded rods.
Edit: Forgot a couple more things I bought.
That's another $59, so $323... I have a problem. again, 95% of this is NOT NECESSARY. I'm just addicted to modding.
You can wait until 10K according to VW's Engineers who are way smarter than you or I, or probably most other people on this board.
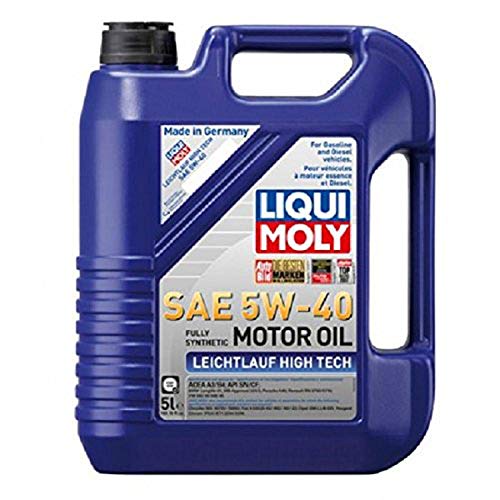
That being said, I did one at 5k and switched from OEM Castrol to Liqui-Moly https://www.amazon.com/Liqui-Moly-2332-Leichtlauf-Engine/dp/B00LIC29H6/ref=sr_1_2?ie=UTF8&qid=1506552725&sr=8-2&keywords=liqui-moly+5w-40
Napa has it cheaper FYI if you want to buy it locally.
You didn’t mention what bike you had, but if you have carburetors be sure to drain all the fuel lines and the carb float bowls also. Treat your first tank of gas with something like seafoam and hopefully you’ll be OK.
https://www.amazon.com/dp/B0002JN2EU/ref=cm_sw_r_em_api_c_6NKYAbKYPQ8AH
I dunno. Maybe engine cleaner will work. It’s a long shot, though.
Thank you! I followed this guide as closely as possible: https://www.autogeekonline.net/forum/how-articles/50352-how-detail-your-engine-like-professional.html
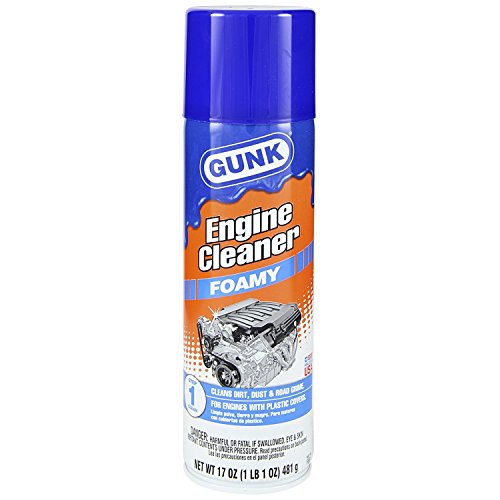
Basically first used saran wrap around and electrical, lightly hosed off everything, sprayed with cleaner (i used Gunk Foamy Engine degreaser which was 5 bucks at auto zone), let sit for 10-15 minutes, used brush to scrub everything, sprayed off again with water, let it dry, then sprayed with Gunk Engine Shine
Take your headlight out, remove bulbs/wires/screws, bake it in the oven for 20mins at 200degrees, pull it apart, and reseal.
Then place it back in the oven, same temp, for 10 minutes to warm it up and squeeze the two pieces nice and tight.
I recently painted the chrome trim of my headlights and the process wasn't hard. I used this black silicone sealant to make sure water stayed out.
Long flexible hose works wonders for those awkward fillings. Something like this.
I've changed the fuel filter 3 times now and I always use a borrowed VCDS. Here are some helpful links.
Message me with any questions.
You can buy it on amazon.
Redline gl4, the "I give a fuck about this transmission enough to spend $60 on it."
or stalube cheapo for the "whatever, it's GOOD ENOUGH"
I've used both and the transmissions keep on truckin'
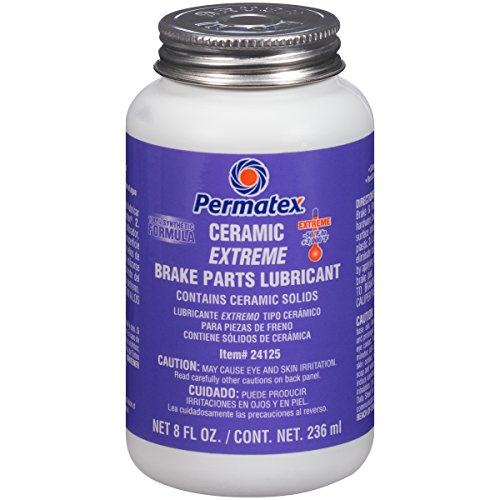
This is what I use. I can't think of anything better. Permatex 24125 Ceramic Extreme Brake Parts Lubricant, 8 oz. https://www.amazon.com/dp/B0018PSASU/ref=cm_sw_r_cp_apa_AOgOyb0Y4T5SS
I would go to ex500.org and register on the forums first. Anyways here's my top mods:
http://www.amazon.com/Berryman-0996-Chem-Dip-Carburetor-Cleaner/dp/B00DSMEL2A
Try dipping your carb. This stuff worked pretty well for a Solex & and an Edelbrock in my last two project vehicles, managed to make the "go-at-it-with-a-pick-and-brush" phase way easier.
Hard to beat the price and shipping of Amazon IMO.
Lube every stab, even if you have only basic lubes. Safe to use and available locally (especially auto parts stores) would be super lube or white lithium grease.
yes, it is normal, you could use grease to reduce friction see this.
In my opinion, the best grease is Nyogel 767A
Another option is to replace, remove or mod the spring.
personally, I like much more the tension on the warthog than the chewing gum feeling of other joysticks.
The octane level of the gas should not affect the idle. You could try changing out the fuel but I'd bet there is some other issue. I had a '72 cb350 myself for several years and never saw any difference in the running condition based on the gas type.
The idle jet inside each carburetor has a very small hole that allows gas to pass through. More than likely there is some small debris blocking one of the idle jet passageways.
Can't tell from your picture, but you should definitely have an in-line fuel filter that keeps debris from the gas tank from getting into the carbs.
I have heard of people having luck with running Seafoam through their tank to clear out the carbs. But in my experience owning a CB350, removing and cleaning the carbs was a process I inevitably had to do a couple of times a year. It really isn't that difficult to do.
Edit:Spelling
I don't know how much access you have to commercial goods right now, but there's a product called "Sea Foam" that worked wonders on my lawnmower. It was having problems, choking out when I first started it or when the motor was under heavy load (thick grass).
You use an ounce or two per gallon, and it helps dissolve gunk in the engine. After two treated tanks (roughly 1.5 gallons worth), the lawnmower was running like new.
It might work, it might not. If you can get a hold of some, it's worth a shot. You should be able to find it in auto parts stores or home improvement stores (if there's any to be found)
IMO these are way, way easier:
https://www.amazon.com/Plews-55001-Lubrimatic-Standard-Bottles/dp/B000BQW5LK/ref=sr_1_2?ie=UTF8&qid=1498616106&sr=8-2&keywords=oil+pump
screws right on to the bottle of oil. pump till it's empty and swap to the next bottle until fluid runs out the fill hole.
I have one of these for each car/fluid type.
The biggest mistake I see mechanics do when changing the brake pads is how they deal with the brake caliper 'slide pins.' The slide pins being clean, rust free, and lubricated with the proper lubricant is very important to longevity of the pads.
What I see most mechanics do is either leave the slide pins alone or just use a petroleum-based 'brake grease' for the slide pins when they relube them. This will not do well, because the slide pins need a silicone-based caliper grease that will not eat the protective rubber boots that cover the slide pins. Many brake greases say "rubber safe" on the label when they actually are not (example Permatex Green Ultra brake grease). 3M's Silicone Paste is great for these pins, as well as Motorcraft XG3-A. Either one will do. Many times the boots will be swollen (due to petroleum grease eating away at it)
Also make sure he bleeds your brakes thoroughly to get that old dirty brake fluid out of the system. Many mechanics not do this when doing a cheap quick brake job because it means cracking open the bleeder screws (and possibly breaking them!) and dealing with that associated headache. Old fluid absorbs water and water rusts your brake lines from the inside out, as well as cause premature brake fade during heated stops.
It might be wise to also bring him the brake pad hardware (associated clips and shims) to go along with the pads and rotors.
Finally, find out what the pad manufacturer recommends for breaking in the brakes (bedding the brakes). Doing this is pretty important to proper smooth operation throughout its life.
>
>
>
>
> If indeed you are not a professional yourself, I'm sure you'll understand why the professional's recommendations would probably be more persuasive to the average reader.
I've been using the Permatex Ceramic brake lube on all of my stuff lately. It's expensive but it seems to work well. I put that on the pins, and over/under the contact pads, then use the red disk-brake-quiet on the back of the pads.
Most decent pads come with little packets of grease you can use, or you can buy a big bottle of the same stuff. Example:
https://smile.amazon.com/Permatex-24125-Ceramic-Extreme-Lubricant/dp/B0018PSASU/
Having struggled with more rusted brake caliper hardware and rusted on drums than I care to talk about, I'm definitely in the school of mo-grease. This is my current favorite.
Just get this:
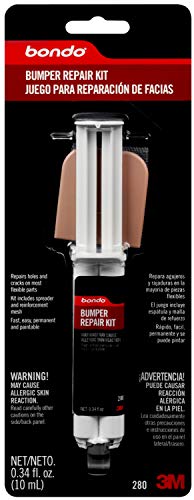
https://www.amazon.com/Bondo-280-Bumper-Repair-Syringe/dp/B0046VN8JO
Then get a can of this:
http://www.paintscratch.com/touch-up-paint-directions/tricoat.htm
The issue with tri coats is it is almost impossible to blend within the color which white is hardest since it gives off the most hues.
If you ran over a tire the underneath of your car is the bigger issue. That underbody shield can actually cost quite a bit to replace and if you ever get an oil change they are going to wonder where it is.
So I would just get a paint scratch kit and then worry about repainting the whole bumper later.
The tri coat paint costs more in a can but its not like BMW prices and if a shop gives you an issue about blending to the rest of the car I would just say fuck it. I have never seen a tri white that was perfectly blended even from the factory and on white its harder to blend but its harder to tell a bad job too.
This might help in giving you some direction, though I'm not sure if it's exactly what you're looking for: http://www.amazon.com/Bondo-280-Bumper-Repair-Syringe/dp/B0046VN8JO/ref=sr_1_1?s=automotive&ie=UTF8&qid=1373148270&sr=1-1&keywords=bumper+repair+kit
The mesh is used as the backing to reinforce the split, the epoxy is basically used like bondo for plastics, sandable with low grit sandpaper.
I used it when I removed some emblems on my rear bumper and needed to fill in the holes, it worked perfectly. The bumper itself was pretty messed up, with random marks and divets where other drivers have gone into the rear, license plate first. The epoxy worked great as a filler, I was able to restore the shape and make it smooth without much effort. That said, I'm not sure how well it'll work if you're stitching together 3-4 inches of side skirt together, though I can see it holding its shape together, especially if it's not in a high traffic area.
I would apply a thin film of white lithium grease. You can buy it almost anywhere.
https://www.amazon.com/Lucas-Oil-10533-Lithium-Grease/dp/B004X70LZA
I second Super Lube.
I do, however, use the silicone compounds on the compression train. Silicone grease is a little bit lighter than the synthetic, leads to less of the "suction" effect.
For high speed setups: Oil
For much more longevity: Grease
A quality white lithium grease works great for the drive train as well.
I suggest avoiding nearly all "airsoft" rebranded grease/oils, they're heavily marked up/ repackaged industrial standards.
The same product on Amazon, with shipping to Australia.
I use Inox MX6, which you can get from Jaycar or BCF, at the recommendation of someone on here a few months back. It works well.
MTB have used the WD-40 lithium grease spraycans in some of their videos, so they at least don't have a problem with using aerosols. I've also seen some people suggest silicon sprays, like this one.
Just understand that the xr650l is really restricted from factory for emissions reasons. If you buy a 100% stock xr650l like I did, expect to spend money/time on doing a couple things. Which, is was fun in my case, built not bought.
If the bike you buy doesn't have these things, expect to do these right off the bat:
REJET! The xr650l runs lean from factory for emission reasons. Running lean is bad for engine overtime (can make engine run hotter than it should and doesn't allow for enough gas to help lubricate the cylinder walls). If anything, make sure this is done first.
Air filter: don't buy the K&N filter. It allow a lot of air flow because it has bad filtration. Yes, it's bad for your engine. Either keep on the stock filter, or go with a UNI foam filter (like I did, and I suggest it)
Again, the engine is restricted from factory, change that exhaust slip-on. Stay with the stock header at first, it's sufficient. I got the EVO-R Big Gun exhaust (loud and proud)
Desmog: You buy a desmog kit off of ebay for like $16. Take off all the emission bullshit and the bike will behave a little better. Takes weight off the bike and looks a lot better without all that clutter
xr650r front stroke or the other one /u/Kilroy_1911 mentioned. If I could go back in time I would get the one that the guy on ADVRider is selling on ebay. The xr650r sprocket doesn't fit perfectly, I had to get an old router bit and grind off some of the inside of the xr650r sprocket for the retaining clip to go on. I went with the Moose xr650r front sprocket
WPS rear brake light. The factory rear brake light thing looks bad IMHO. drill holes and zipties the license plate to the fender. Read the reviews. The stock bulb that comes with it is garbage. Go ahead and order the one they talk about in the comments.
__
That's my "xr650l stage 1 upgrade" suggestion.
Other strong suggestions:
Get some bark busters. They will save your levers and perches. I waited too long to do this and ended up have to replace my clutch perch and clutch/brake levers because dropping the bike on the trail. So, procrastinating on bark busters ended up costing me a little bit of money. Bark busters are a go
If you plan on doing serious trail riding, D606 rear tire is great. Don't get D606 front tire
Changing oil before you drive a vehicle gives you 5+hp, or was that Gran Turismo 3 A Spec? Either way, the manual says to use Honda's GN4 (dinosaur) oil, but lots of people go with Rotella T6 synthetic oil. Without getting into the debate, synthetic oil is better, especially for oil cooled engines, as oil is just as much as a coolant as water in a water cooled engine, and synthetic will cool an engine better than Dino oil will. So, go with T6 oil.
Here's my old write up on my mods (it's outdated to where I'm at with mods)
Yes, you need to use Subaru Super Coolant if you don't flush all of the old coolant out.
You can order it on amazon.
https://www.amazon.com/Genuine-Subaru-SOA868V9270-Super-Coolant/dp/B007NLOZAU
Catback with diffuser - 450
Flossy knob - 120
Smoked side markers - 30 (Markers: 25+5 for amber bulbs)
Swede dash wrap - 70
--------------------------------------------
Total: $670
other junk:
$24 - mini repair kit and some metric wrench sockets.
$10 - digital tire gauge.
$30 - tire pump that runs on the cigarette lighter and fits under the mat with the spare tire.
$30 - a jug of Subie Super Coolant.
$17 - a phone mount (don't recommend it)
Stuff I dont care to price out:
-------------------------------------------------------------------------
On the list to come:
that bike's bearings are likely in great shape, but dry. the original schwinn bearings are better than any modern (chinese) replacements you can buy, other than NOS schwinn parts found on ebay.
i think the biggest problem you're going to have with that particular bike, as a novice, is the brake and derailleur removal, replacement, and adjustment. not impossible, but they can be problematic.
the best way to clean the bearings before repacking them is to soak them overnight or longer in a can of carburetor cleaner. then pack them with actual wheel bearing grease.
schwinn-specific tires are required. tubes are interchangeable, but tires are not.
If you don't have record of the last time the coolant was changed, change it. To play it safe I'd use Subaru Super Coolant (blue) with Subaru Cooling System Conditioner (Holts Radweld).
In the event you need to do the head gasket, Speed Academy has an amazing video I used to do mine.
Call me crazy, but when I blew my engine I elected to keep the car. Subaru has engineered a family sedan way better than it has to be for the market and it shows.
I need to do some digging to find the invoices of parts I purchased; I'll update this reply as I find them.
Oil
Filter
I'm in France too and I bought the Nyogel from Amazon and got it for 35$ (with shipping)
I'm assuming you're confused, they were talking about this https://www.amazon.com/Sea-Foam-sf-16-Motor-Treatment/dp/B0002JN2EU
That seems dangerous considering what Sea Foam is...
Sea Foam.
This stuff chews through carbon. It's startling. Some Sea Foam, an eyedropper for the receiver and turkey baster for the barrel and my guns require a much smaller amount of Ballistol (or Hoppe's 9 for those that swing that way).
Hmm, okay. This is what I purchased, exhaust manifolds is one of the product applications. Should be okay, right?
Normally you fill the gap with high temperature silicone sealant. Liquid tape usually can't handle the heat from being that close to the die.
I use this: http://smile.amazon.com/Permatex-81878-Maximum-Temperature-Silicone/dp/B0002UEOPA
Sometimes the hot wax melts the hot glue and then the wick travels which can get mighty dangerous.
I did try some fuel injector cleaner, found here. I forgot to mention that, my bad!
This is the one you want
"clean the fuel system and flush"
Unless they're removing the injectors and running them through an injector cleaning machine (strongly doubt it), I suspect they're just dumping a $13 bottle of Techron in the tank and charging you $180 for it.
The Mazda3 does not have a replaceable fuel filter. So unless they're dropping the tank, removing the pump, and replacing the filter mesh (which would probably cost well over $180), they're absolutely fleecing you. I suggest finding a different shop.
BTW, the fact that the Mazda3 doesn't have a replaceable fuel filter (just a mesh screen in the tank) should stand as encouragement to use Techron or a similar fuel cleaner additive at every oil change.
Foamy to degrease
https://www.amazon.com/Gunk-FEB1-Foamy-Engine-Cleaner/dp/B000ABGA6W/
Shine to finish
https://www.amazon.com/Gunk-CEB1-Ounce-Automotive-Accessories/dp/B0002KL6JM/
Do not go to a dealer for detailing work, ever. Dealer detailing departments are some of the worst things out there. I'm speaking both as someone who has 2 friends working at a BMW dealer, and someone who had a Ford dealer's detailing dept put scratches in the rear bumper of a brand new 2016 Mustang GT that won't come out.
I like using this stuff, you're going to need a few stiff bristle brushes as well
​
https://www.amazon.com/Sonax-543200-755-Engine-Cold-Cleaner/dp/B00OA1QJZU
​
if you need to go hard core
​
https://www.amazon.com/Gunk-FEB1-Foamy-Engine-Cleaner/dp/B000ABGA6W/ref=pd_lpo_sbs_263_img_1?_encoding=UTF8&psc=1&refRID=V91WZBBEDC95KC20P14J
​
join up on /r/autodetailing as well
This is the stuff you need.
https://www.amazon.com/Permatex-81158-Silicone-Adhesive-Sealant/dp/B000AL6WLA
In case you ever need to delid it again. It'll come apart just like the stock stuff.
This is a great write up - love seeing this type of content.
To others thinking about doing this work yourself - it is extremely easy and can be done in the comfort of your driveway with some jack stands. The lift makes your life easier, but it's very doable without. Pay particularly close attention to loosing the the fill bolt before you loosen the drain bolt to save yourself the potential of calling a flatbed to bail you out of that jam.
Here's the fluid pump I bought that works great: https://www.amazon.com/Plews-55001-Lubrimatic-Standard-Bottles/dp/B000BQW5LK/
My suggestion is this, since you have no idea how well the car was taken care of or if it was changed at all, change it one time and drive it for a week. Then change it again and see if it helps. From there you can try 3rd party alernative if you want but these transmissions prefer OEM fluid. Not sure on this year but you typically remove the fill bolt first, then the drain bolt. Be sure to get new crush washers and clean off the debris from the drain plug. I use this pump to make it a breeze to get the fluid in with no mess. When the fluid starts to drip out you are done.
https://www.amazon.com/Plews-55001-Lubrimatic-Standard-Bottles/dp/B000BQW5LK/ref=sr_1_3?ie=UTF8&qid=1505605976&sr=8-3&keywords=Fluid+pump
Slow and smooth when letting the clutch out. Also, Allow the RPMs to drop to avoid the jerking/jolting. Pretty much treat it Zohan. Make it silky smooth
Being a 2017, i'd assume you're still in the break in period (or around there), which doesn't help matters.
I'd recommend the removal of the clutch spring as well to provide more driver feedback, making things that much easier.
If none of that helps.... maybe try a different oil like Motul 300 or Red Line MT-90
Works like a charm
This stuff expanded the rubber anti rattle sleeves on my pins and caused it to seize. Do not use. Spend the extra money and use silicone.
https://www.amazon.com/gp/aw/d/B000HBNV6W/ref=mp_s_a_1_2?ie=UTF8&qid=1473264236&sr=8-2&pi=SY200_QL40&keywords=permatex+brake+grease&dpPl=1&dpID=51EWEeZ9GHL&ref=plSrch
If the rotor is rubbing against the caliper bracket it has a distinct metal on metal sound, however if the hub is walking out what you might be hearing is the inside of the tire rubbing against the rear shock absorber casing. Maybe it is more noticeable when wet? Look at the shocks absorber for rub marks and also look over the tire itself for rub marks. (If you see wear on the inside part of the tire tread, that is a clue that your hub is walking out and needs to be replaced).
The sound could also just be the bearings themselves being bad and grinding down, but not sure why moisture would affect it.
But since the noise goes away after touching the brake pedal, it is most likely a caliper not sliding correctly. This often happens after pads are replaced and people use the wrong lubricant on the caliper pins and/or the pads. The pads need a synthetic grease, the caliper pins need a silicon paste.
I wrote a huge comment here on how to refurbish a stick, but it was a reply to another comment that was deleted. The deleted comment mentioned Kitsch-Bent brand replacement gears, which I would recommend for sure. You can find them on google and on eBay. (And for the record I'm not associated with Kitsch-Bent, I've just used their product and I don't know of any competitors.)
Keep in mind they're not quite as good as brand new gears, but you can get a pack of 10 controllers' worth for significantly less than you'd spend on a single brand new controller.
In addition to this, here's how you refurbish the rest of the stick: I would highly recommend buying a jar of ceramic grease and applying it to the insides of the stick using a toothpick, or with a q-tip with the end cut off. This is the stuff I use.
You're only going to want to use a little bit. This jar will be enough for every N64 controller you ever repair. Seriously. The other bonus is that the ceramic microparticles embed themselves in the plastic, so instead of the assembly being dry plastic on plastic (which will rub itself to dust, literally) it becomes greased ceramic rubbing against ceramic. Theoretically it'll last forever, and practically it'll most certainly last "long enough."
You want to take the whole joystick assembly apart, keeping in mind the order and orientation of everything. Then you want to actually clean all of the parts as good as possible. (If you replace the gears then just throw the old ones out — don't bother cleaning them). There shouldn't be any plastic dust on them before you continue.
DO NOT REMOVE THE ROUND BLACK GEARS WITH SLOTS ALONG THE EDGES FROM THE WHITE BOWL. These gears are precision designed and are meant for sensing the displacement of the stick. If you fuck them up, your joystick is garbage. Heed my warning.
Now that the parts are all clean, put them together and grease them in this order:
As long as you followed this carefully and made sure to not get any grease anywhere near the optical sensors, nor anywhere near the slots they sense your joystick should be as good as can be.
I've purchased two brand new OEM N64 controllers, and I did this to both of them.
That's probably your brake pad ears rubbing against your brake clips. I had new pads and rotors installed and had the same problem until I took the pads out and lubed the clips and pad ears. It's about $18 a bottle and lasts forever. You might also want to pull your caliper pins and lube them up as well otherwise your caliper might be stuck pressing your pads into the rotors (use a different lube for that). Most dealer brake places don't do it, but good auto shops do (here's a South Main Auto brake change video).
sure
use this method
https://www.youtube.com/watch?v=No4G88iqDss
with this product
http://www.amazon.com/Bondo-280-Bumper-Repair-Syringe/dp/B0046VN8JO/ref=sr_1_1?ie=UTF8&qid=1462824821&sr=8-1&keywords=bumper+repair
1x https://www.fcpeuro.com/products/bmw-engine-oil-filter-11427583220
2x https://www.amazon.com/Motul-007250-X-cess-Synthetic-Gasoline/dp/B004LEYIQ8
OEM oil filters are so cheap there's no reason not to use them, in my opinion. Amazon sells a six pack of them for $27.
Also, the oil could be burning because it's too thin. I have been using Motul 8100 xcess 5w40, which my tuner Yimisport recommended, in my 2012 STI and I've had basically zero consumption over the last two years.
Finally, a big step toward solving oil consumption is using an air-oil-separator. The stock configuration returns oil to the engine via the intake, which ends up getting in your intercooler and ultimately burning in the combustion cycle. An AOS strips the oil from this air and returns it via a drip back into the engine block. It never needs emptying like an oil catch can either. Crawford and Perrin both make them now. Grimspeed makes a cheaper, smaller design but I've read it doesn't work as effectively.
Motul 8100 X-Cess 5W-40.
http://www.amazon.com/Motul-007250-X-cess-Synthetic-Gasoline/dp/B004LEYIQ8/ref=wl_it_dp_o_pd_nS_nC?ie=UTF8&colid=2G1KNLIESDI4I&coliid=I2PTVL0XKSDALG
Rotella used to be the go to but they changed their formula. Now I use Motul 8100 paired with a Subaru oem filter and crush washer and have had no issues at all and the car seems to enjoy it.
Edit: spelling, and I get the filter from a dealership as well as the crush washer which I believe is around $7-$8 for the pair
https://smile.amazon.com/gp/aw/d/B004LEYIQ8?psc=1&ref=ppx_pop_mob_b_pd_title
This right here
We've got a tube of this that works wonders on all sorts of gearboxes.
Indeed... Shell Rotella (550019921) T6 5W-40 Full Synthetic, Heavy Duty Diesel Engine Oil (CJ-4) - 1 Gallon https://www.amazon.com/dp/B005CHT4W6/ref=cm_sw_r_cp_apa_wGMOyb36R3SYD
[oil] (https://www.amazon.com/Shell-Rotella-550019921-Synthetic-Diesel/dp/B005CHT4W6)
I get the filter from napa. The gold filter. Been using this oil in my 09 tsi for years and in cold buffalo winters.
Go to the dealer and ask for super coolant. It's blue and it cools things.
I've never heard of that, but I do know the Subaru blue coolant is recommended..
https://www.amazon.com/Genuine-Subaru-SOA868V9270-Super-Coolant/dp/B007NLOZAU
Subaru Super Blue
> Compaq Presario CQ5320Y
Ok, perfect. So your motherboard is a M2N68-LA. Here's the page I just looked at to find out this.
Per the HP site, that board supports up to 95 watt CPUs which means the Phenom II X6 1065T is the best CPU for your motherboard. You can probably (I'm 99% sure) put 2 8GB sticks of PC3-10600 (DDR3-1333) RAM in there as well.
But to your other questions. For installing a new CPU, or just cleaning an old one, I like this product. And this is my go to thermal paste. Lastly, just to dust a computer, I use canned compressed air. I think most of us on here do. Also, I personally will wipe down almost any part of my case with windex and a paper towel. Obviously don't get windex on any electrical component, and if you do, let it fully dry.
I used artic mx4 too, seems to be working well, might want to get some thermal paste remover too to get the factory stuff they use off. Make sure to post what Lenovo says for your country too so other people can have another reference on this, the entire viability of repasting is going on the word of just one lenovo support person so far.
XTU does indeed work perfectly, not sure how they decide what laptops it works on. Being able to use it to undervolt is super useful though I haven't figured out how to get a persistent profile working.
It only works for the CPU though, I have no clue how you would undervolt or downclock the GPU though I'd be quite interested in knowing as well.
I'm so grateful for pop os, I wish there was a way for me to donate money to them without having to buy a system76 laptop, where did you see the info on nvidia optimus? That would be useful, till now I've just consoled myself with knowing that if I wanted to do something with the GPU I'd just restart into windows anyways generally.
I got them for free, so it's what I use.
https://www.amazon.com/Arctic-Silver-Arcticlean-Material-Purifier/dp/B0087X738E
There are products specifically for that purpose. Looks like a large paint can, but will say "Carburetor and parts cleaner" or something similar on it and you can find it at any autoparts store. Like this, for example.
yup. I soaked my bell-crank in a can of Chem-Dip until the new cable arrived. Took it out and gave it a good scrubbing, lubed it up, worked like a charm.
if he paid $800 for carb dip/clean/setup/etc/. the shop saw him coming.
depends on what "dipped" means.. taking 4 carbs apart and dipping in Berryman's and re-assembly? $150.
https://www.amazon.com/Berryman-Chem-Dip-Carburetor-Cleaner-Basket/dp/B00DSMEL2A
taking apart 4 carbs cleaning and ultrasonically cleaning and replacing everything whether it needs it or not with 4 new carbkits ($50)
$250-$300?
http://www.ebay.com/itm/4-X-CARBURETOR-CARB-REPAIR-REBUILD-KIT-77-HONDA-CB750K-750-FOUR-/322539601700
for $800 , the shop should include a full carb setup/tune and a initial fill of baby tears in all 4 bowls.
I think this is what I'll go with. Also looks like Amazon price matched https://www.amazon.com/Mobil-120760-Synthetic-Motor-0W-40/dp/B00HG76A9A/ref=sr_1_1?ie=UTF8&qid=1484927714&sr=8-1&keywords=Mobil+1+Full+Synthetic+0w40
https://www.amazon.com/Mobil-120760-Synthetic-Motor-0W-40/dp/B00HG76A9A
Hey, you're right. Thanks, no reason to head to Walmart anymore. Oil was the only thing I bought there. I despise Walmart, but at $15-20 cheaper a jug they got to my sellout point.
You're getting ripped off at $2000, so $3,000 is astronomical.
My local subaru shop "not a dealer" does HG replacements starting at $900. There are often a few extra parts needed, so it can go up to $1,300, but that isn't often. They do great work and specialize in Subaru... I'm sure there is a similar shop in your area
With a new HG and some Subaru Coolant System Conditioner it should run 200,000 MORE miles.
Honestly, if you picked up a Subie with 78K for less than $3k, boy did you score... It's totally worth the REASONABLE HG replacement.
Nice! As preventative maintenance Subaru sells this stuff. It is rebranded Holt's Radweld. Small bottle. I threw some in my daughter's Subie just in case. Can't hurt I guess. If the headgaskets on the replacement motor were original units then it is probably just a matter of time before they go too. But, you never know. This magic Subie juice is supposed to help.
​
https://www.amazon.com/Subaru-SOA635071-Coolant-System-Conditioner/dp/B00IGZP2UE/ref=sr_1_3?crid=3GZ6ZTJOIDK4X&keywords=subaru+radiator+conditioner&qid=1554864612&s=gateway&sprefix=subaru+radiator+%2Caps%2C328&sr=8-3
Just stick with Liqui Moly on amazon. I've never seen any European oils in autozone.
https://www.amazon.com/Liqui-Moly-2332-Leichtlauf-Engine/dp/B00LIC29H6/ref=sr_1_4?s=automotive&ie=UTF8&qid=1543619530&sr=1-4&keywords=Liqui+Moly+Leichtlauf+High+Tech+5W-40
10L of synthetic oil + oil filter? I mean it's also $100 in Canadian dollars if that makes any difference. It's actually low when I look up actual prices.
Liquimoly, which I prefer, is listed at $66 for 5L on Amazon Canada. So I'd need 2 of those, which is $132. Then a filter which is about $10.
A $142 (call it 150 w/ taxes) isn't out of range for a vehicle that originally retailed for a bit over $100k (Canadian).
If you understand the ratings then get the bottle that has VW 502 AND 505 on it. Just because it’s 5w-40 doesn’t mean it is what Audi requires. Stop trying to save a few dollars at Walmart and just get LiquiMoly like the rest of us. Liqui Moly 2332 Leichtlauf High Tech 5W-40 Engine Oil-5 Liter, 169.05 Fluid_Ounces https://www.amazon.com/dp/B00LIC29H6/ref=cm_sw_r_cp_api_i_Arz2DbD5QCHX7
If you want to use what Audi dealers use, get Castrol Pro: Castrol Edge PRO OE 5W-40 Quart 502 00 https://www.amazon.com/dp/B077SY4DTN/ref=cm_sw_r_cp_api_i_Vsz2Db2HSCFQT
Amazon is ALMOST a Canadian supplier:
https://www.amazon.com/Lubricant-Grease-Nyogel-50g-Tube/dp/B00W6KWK1Y
This is enough for three or four lifetimes...
Only thing magic about it is the dampening effect. If you don't care about smooth drag, like a throttle, there are cheaper solutions.
https://www.amazon.com/Lubricant-Grease-Nyogel-50g-Tube/dp/B00W6KWK1Y seems in stock but I've used https://www.amazon.com/Permatex-80345-White-Lithium-Grease/dp/B000HBNV58/ref=pd_lpo_vtph_263_bs_lp_img_1?_encoding=UTF8&psc=1&refRID=9JBBKWHAVF09F98QKWYP in a pinch without issue
If your bike has a fuel filter (I don't know, mine doesn't) inspect or replace. Check fuel line for kinks. Replace the spark plug. You might also run a little SeaFoam through your carb. Gasoline can turn to varnish in some of the small passages of a carb.
Sea Foam comes right to mind.
Its a pretty amazing product.
Its a gas additive and stabilizer that you can also just straight up run your engine on with zero gas. In fact, that is the SOP for cleaning the crap out of old engines at the place I used to work.
You can get it at any auto-parts store.
I have used Seafoam for 20 years in over 10 vehicles with great success. I pour in 1/4 of a can about every season (so, four times a year) and if I winterize my bike, I use it as a gas stablilizer.
I have run gas that sat in a tank with seafoam for THREE YEARS and the gas was good, bike fired right up and didn't even smoke.
https://www.amazon.com/Sea-Foam-SF-16-Motor-Treatment/dp/B0002JN2EU/ref=sr_1_1?s=automotive&ie=UTF8&qid=1497560686&sr=1-1&keywords=seafoam
Here is a video showing what it can do. 1:33 you can hear the before. 9:16 is the sound after.
https://www.youtube.com/watch?v=agAWXnT4-EQ
I have seen numerous vehicles "restored" like the one in the video above.
Try cleaning your throttle body and run a can of Seafoam in a half tank of gas and see if that helps. Also you might get one of these Blue Tooth OBD2 readers that you can use with smartphone apps like Torque. You can check error codes and watch realtime data from many of the sensors on your engine.
On my Big Green Egg I used a Rutland gasket and adhered it with Permatex ultra copper. This is a popular combination in Big Green Egg land. Many use 3m Super 77 spray adhesive instead of the Permatex.
The BGE is ceramic, not metal, but I don't see any reason why it shouldn't work. As with sticking anything to any surface, the most important thing is that the surface is clean.
Put a Rutland gasket on with permatex ultra copper rtv. You’ll never have to put another gasket on
Rutland Inc Gasket Kit Tape 7'x5/8" 95-6 https://www.amazon.com/dp/B000MIPB6S/ref=cm_sw_r_cp_api_i_H-DxDbD9RZRZZ
Permatex 81878 Ultra Copper Maximum Temperature RTV Silicone Gasket Maker, 3 oz. Tube https://www.amazon.com/dp/B0002UEOPA/ref=cm_sw_r_cp_api_i_l.DxDbSSQRWPR
This:
https://smile.amazon.com/dp/B0002UEOPA/ref=cm_sw_r_cp_ep_dp_Z6dMAbCVK6JPM
was mentioned in this thing:
https://www.thingiverse.com/thing:2811140
It's leaking from under the under the gas block and around the gas tube. If it's leaking while it's new, it will only leak more over time. High-temp RTV would be a temporary fix. Don't get any in the gas port or inside the gas block. You can remove the gas tube and put some around the tube. Don't get any inside the tube.
I'm curious as to whether the barrel was dimpled for the set screws. Anyways, if the gas block and the barrel are not a good fit, your best bet would be to go with a clamp-on gas block--my preference over set-screw. There are a lot of options at just about every price range.
I would still check to see if there are any other issues with the gas system. Is the gas key staked? Is there any leakage between the gas key and the bolt carrier body? How tight are the gas rings between the bolt and the cylinder wall of the bolt carrier? If they're too tight, it might take some more shooting before they loosen up.
thanks for pointing me in the right direction.
http://www.amazon.com//dp/B0002UEOPA
Pro Tie 33529 SAE Size 48 Heavy Duty All Stainless Hose Clamp (Pack of 4), 2-9/16" to 3-1/2" https://www.amazon.com/dp/B00W6MBQIK?ref=yo_pop_ma_swf
LEDAUT 2" x 50' Titanium Exhaust Heat Wrap Roll for Motorcycle Fiberglass Heat Shield Tape with Stainless Ties https://www.amazon.com/dp/B011B99B0I?ref=yo_pop_ma_swf
Permatex 81878 Ultra Copper Maximum Temperature RTV Silicone Gasket Maker, 3 oz. Tube https://www.amazon.com/dp/B0002UEOPA?ref=yo_pop_ma_swf
Nothing like a test run to find out. If it fails try this instead.
You're doing a good job. I'm the only owner of my 2010 prius. Got it with 3 miles. One of the first ones to hit the US soil. Besides oil changes, tire rotations, filter changes, wipers, etc... I haven't done anything special. I did get the trans fluid drained and replaced around 60K and the brake fluid replaced a little after that probably.
If you want to keep your internals clean run a bottle of Techron through your car once every 5K miles or so. https://www.amazon.com/Chevron-65740-Techron-Concentrate-Cleaner/dp/B00092893E/ pour it into your gas tank before filling up and let it do its job. You can find it at Walmart or any auto parts store.
https://www.amazon.com/Red-Line-Complete-System-Cleaner/dp/B000CPI5Z0/ This is better but I can't find it anywhere locally and have to order it.
I don't think it really matters, but people say to use these before oil changes so any gunk that is broken up from using them will be removed when the oil is changed. I don't think that matters though since it gets thrown out of the exhaust anyway.
Good luck!
I second the 40PSI tires, new plugs, wires, rotor, air filter, and maybe a few tanks of injector cleaner. Most is snake oil but this brand has some science and mechanic support http://www.amazon.com/Chevron-65740-Techron-Concentrate-Cleaner/dp/B00092893E
Edit: Oh - and play with lighter weight oils like 0w-30. Just watch to be sure it's not burning it too fast.
Techron Concentrate Plus: https://www.amazon.com/Chevron-65740-Techron-Concentrate-Cleaner/dp/B00092893E
It's also sold as KIA part# UM011 CH056, as a 12oz bottle. Just get the 20oz for same price (or cheaper) and use the whole thing.
This stuff?
http://www.amazon.com/Chevron-65740-Techron-Concentrate-Cleaner/dp/B00092893E/ref=cm_cr_pr_product_top
You could try a fuel injector cleaner before anything else. I've heard many people say it fixes their fuel level gauge, and in addition, cleans your injectors.
Most recommend this brand - Chevron Techron - https://www.amazon.com/Chevron-Techron-Concentrate-System-Cleaner/dp/B00092893E
I was going to suggest fuel filter, but it looks like that one has only the screen in the tank, no filter in the line going to the engine.
Before worrying too much, I'd run a bottle of "Techron complete fuel system cleaner" through it. https://amzn.com/B00092893E (not because you should buy it there, but for a picture of what you'll be looking for at your FLAPS or discount store (Walmart, etc.). The only other cleaner I'd consider would be BG 44K, but that's harder to find and a lot more expensive. Do not use any cleaner with alcohol in it (SeaFoam in particular), as that can cause more problems than it solves.
Vacuum leaks (like intake gaskets) tend to make it run lean at idle and low load (high vacuum) conditions, not at full throttle.
It's dangerous to go alone, take this.
You're a tad over which fine. Looks clean too, you're set.
Your engine bay is dirty. Not gooda for the engine to handle its heat. Also not good for the seals and rubber tubing. Disconnect the battery and go at it with this:
https://www.amazon.com/Gunk-FEB1-Foamy-Engine-Cleaner/dp/B000ABGA6W/ref=mp_s_a_1_2?ie=UTF8&qid=1538632190&sr=8-2&pi=AC_SX236_SY340_FMwebp_QL65&keywords=engine+bay+cleaner
A messy bay can eventually warp the hood from the heat. And damage the engine.
I know this smell. I went through the same thing when i brought my 2017 Mazda 3 home. I opened the hood and check everything.
I can see liquid in the small gaps around the air filter cover. I used cotton swabs to soak up the liquid and check to see what it is.. The dealer used those "engine cleaner" cans under the hood.
​
I guess is they tried to make it look new for cars that have been sitting for a while.
​
https://www.amazon.com/Gunk-FEB1-Foamy-Engine-Cleaner/dp/B000ABGA6W
I've used this on before with good results
This stuff: https://smile.amazon.com/Permatex-81158-Silicone-Adhesive-Sealant/dp/B000AL6WLA?sa-no-redirect=1
I use it quite frequently to fix holes and cuts in regular tires.
For the light, you want a silicone sealant. Something like this: http://www.amazon.com/Permatex-81158-Silicone-Adhesive-Sealant/dp/B000AL6WLA/ref=sr_1_2?ie=UTF8&qid=1419374300&sr=8-2&keywords=black+silicone+sealant
Be careful on the door. Are there screws behind that strip? If so, and you glue something on, you'll never be able to remove the door panel. I'd just do a bit of double stick tape, but not so much that I couldn't remove it.
I have my X2 enclosers sealed up pretty tight with https://www.amazon.com/gp/product/B000AL6WLA but I am still going to limit my rides as much as possible once we get into the winter snow/ice/road salt season. Like others have said, my main concern is going through patches where salt or brine has been applied to road and trail surfaces because it is majorly corrosive to _all_ materials. Nothing worse than salt + moisture.
I Delided my 7700k and lost a solid 15c and I use a NZXT AIO Cooler.
I used these 2 things and worked like a charm.
Thermal Grizzly Liquid
And this Helpful tool
You can go the extra mile and use plain nail varnish to help with protecting the resistors and a little tiny bit of [This] (https://www.amazon.co.uk/gp/product/B000AL6WLA/ref=oh_aui_detailpage_o08_s00?ie=UTF8&psc=1)
My next step is for a custom water loop but planning to do it in an itx case when I upgrade next.
Hopefully this was of some use.
Those work too.
I prefer this type: https://www.amazon.com/Plews-55001-Lubrimatic-Standard-Bottles/dp/B000BQW5LK
Lift the jeep as high as you can. Rest frame on jack stands and let the axle droop. Then hit it with one of these.
https://www.amazon.com/Plews-55001-Lubrimatic-Standard-Bottles/dp/B000BQW5LK
I will never try and fill the rear end with out one again
Your flywheel is going to be fucked from driving so long with a slipping clutch. Shame on you OP for driving that long like that. You should replace that shit when it starts slipping to avoid damage. Your bell-housing is probably dinged up on the inside too. You're gonna want to drain the trans oil and inspect it for metal flake and then when you replace it (assuming there's no metal) you should probably go with Red Line MT-90.
Yea most just stock gl-5 fluid so they use that. Gl-5 was created for differential use so it is much slippier. Slippier is not good for your synchros since they need to be able to grab.
My old 2006 m/t corolla had same issue. Manual even said you could use gl-4 or gl-5. Swapped to gl-4 and buttery smooth shifting.
Heres a DIY
And some manual trans fluid
Thanks all for replying!
As far as I can tell, the shifter does not drain to the transmission itself, at least not in my car.
I ended up removing the reverse light switch with an adjustable wrench. I'd guess it's about 20 mm. The switch is about level with the fill plug, only closer to the front of the car.
Once you have the switch loose, empty out the old oil from the drain plug. Loosen it with a 1/2 in square recess. Clean off any metal shavings caught in the plug's magnet and tighten it back on after the oil is out. Don't be a gorilla about torquing anything down. Before fully removing the reverse switch, make note of the two wires and disconnect them.
I used a hand pump to add the gear oil, but you could probably feed a long hose above to the engine and fill using a funnel. I added 2 quarts of Red Line MT-90 (75W-90), which is a touch under how much the manual calls for (2 liters). Clean the area after you're done, and dispose of the junk oil responsibly.
So, the car is back on the road again, at least until I try to fix (break) anything else. There's a bit less transmission noise now, and shifting is slightly smoother. The biggest difference is the transmission tunnel temperature. Before, the shift lever and ash tray area would get almost too hot to touch. Everything runs much cooler now, so I'm happy!
Hope this helps anyone that may search through here in the future!
So then the fluids are the same?
I'm having trouble understanding the difference between this and this.
Is this just marketing from the company?
Yeah, I plan on buying these fluids myself in the future and having the mechanic do it, I just wanted to be sure I didn't put something where it didn't belong.
Thanks for the help, man. Solid advice as usual :)
Speaking to the AX15, mine refuses to engage properly, especially in the Colorado winters, without be filled with MT-90. I thought I was going to have to do full rebuild, but just that MT-90 made it good enough. 190,000 miles and only other maintenance has been clutch, flywheel, throwout bearing and slave cylinder (all done together).
I have the 6 speed and the torsion LSD.
I'm looking at doing my transmission lube and rear differential. I'm looking at
Red Line (50304) MT-90 75W-90 GL-4 for the transmission and
Red Line 57904 (75W90) GL-5 for the differential.
Would this work ok or should I just go with the GL-5 all around? Also am I correct that the transmission takes 2 quarts and the differential takes 1?
This stuff:
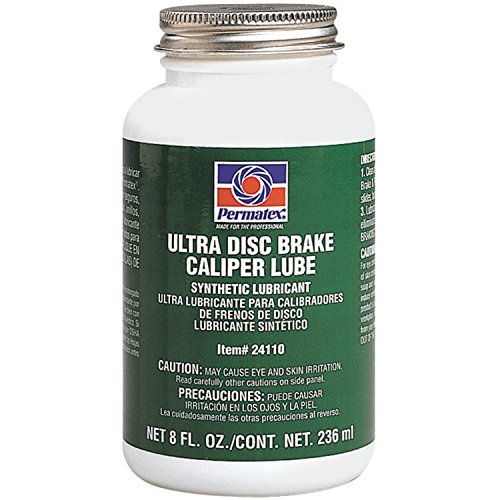
http://www.amazon.com/Permatex-24110-Ultra-Brake-Caliper/dp/B000HBNV6W
I think you're thinking of the silver stuff? The permatex stuff for caliper pins I get is a green synthetic grease. Link: https://www.amazon.com/Permatex-24110-Ultra-Brake-Caliper/dp/B000HBNV6W/ref=mp_s_a_1_2?keywords=permatex+synthetic+brake+parts+lubricant&qid=1559278638&s=gateway&sprefix=permatex+sy&sr=8-2
You talking about this stuff which I was told to put on the slide pins and "ears" of the brake pads? Or this other stuff which clearly advertises stopping squeaks but I've never used and really don't know where I'm supposed to apply it?
Also where am I supposed to apply it and what is the difference between them? Could I use both? Also can I use it on my motorcycle because the front brake squeaks constantly even tho the pads are fine?
If those slide pins end up seizing, you'll probably end up with uneven brake pad wear and random noises coming from your brakes (this is caused because the brake pads are still in contact with the rotor even if you release the brakes Those pins are what guides the pads to the rotor at the correct angle. If they're seized, you'll end up with stuck calipers that grind even if you're not braking. The grease is cheap, so there really isn't a reason not to do it. The bottle below will last a lifetime. Also, make sure those rubber boots are intact, if they're ripped, replace them.
https://www.amazon.com/Permatex-24110-Ultra-Brake-Caliper/dp/B000HBNV6W
The only time I ever had an issue with my elite was after having it for a long long time(about five years as well) chances ate it's the same issue I had which was the pancake motor not spinning well more and more each day.
I went online and asked if I could grease it up with WD40, but was told because of how fast the discs spin it would evaporate real quick. Got suggested to use ceramic brake grease because of it's high temp tolerance.
Permatex 24125 Ceramic Extreme Brake Parts Lubricant, 8 oz. https://www.amazon.com/dp/B0018PSASU/ref=cm_sw_r_cp_apa_i_TnWpDbR9N4XCM
Hadn't had a disc problem since. All you need to do is take the part that disc sits on off of the motor, grease up the lil rod, put it back together, and you should be fine.
Also you should be able to get the grease in an auto parts store really cheap, usually up by the registers in little test packets.
Mine have been quiet. MUCH better brakes than my previous Acura. The Acura didn't stop as well and had much more of a "pulsing" feeling. The only downside to the Volvo brakes is they do generate a LOT of black brake dust. But just wash your car and it's gone!
If you're getting a squeak when breaking then I'd suggest cleaning and re-lubricating the brake hardware. You can have a shop do this, or if you do it yourself, this is a great lubricant: https://www.amazon.com/Permatex-24125-Ceramic-Extreme-Lubricant/dp/B0018PSASU
http://www.amazon.com/Permatex-24125-Ceramic-Extreme-Lubricant/dp/B0018PSASU
Between the rim and the rotor. ;)
https://smile.amazon.com/Permatex-24125-Ceramic-Extreme-Lubricant/dp/B0018PSASU?sa-no-redirect=1
---------------
The front caliper piston on most vehicles do move in and out, but the back piston generally needs to threaded back in, and would need a tool.
A generic clamp of any kind is fine for retracting a push-in piston, you just need to be slow and patient with it. Don't crank the clamp all at once, turn it about 1/8th of a turn and wait 20 seconds, and again. Make sure to use something which won't harm the piston face; Wood works well. Make sure the clamp is straight and the piston is going back in straight.
If rust is an issue in your area get some penetrant like PB Blaster or something and try to get the bolts soaking before it's time for the repair, if possible.
Make sure you have the proper lubricants, and the proper grease for the slider pins. Lube the piston mating surface(s) and the ears of the pads with a film of quality ceramic/synthetic brake grease. Not a GLOB, a film.
Make sure to clean up the shims and replace them if they are at all damaged or deformed. A film of grease where the shims mate to the caliper bracket is a good idea as well.
Be sure to avoid getting the grease/lube on any braking/friction surfaces such as the rotor or pad faces. Rotors can be cleaned with a rag and brake clean.
Make sure the tattle-tale, if present, is going in the correct direction. Make sure the pads are mounted properly. Try to reference the pads your removing first.
If you're replacing Rotors and/or replacing pads with a different compound, you should follow a "bed in procedure." A general bed-in is a few very light brakes from low speed like stop and go traffic, a few stops from 10-20 mph sort of riding the brakes holding them till you roll to a stop, and then one or two good "emergency stops" with a firm foot planted from 20-30mph. This will help ensure that friction material is transferred into the rotor surface which helps ensure proper stopping power.
I hope this helps.
FYI you can repair the bumper if you still have the pieces with bondo, mesh and clamps, works really well if you put the prep work in.
Bondo 280 Epoxy Bumper Repair Syringe Kit - 0.34 fl. oz. by 3M http://www.amazon.com/dp/B0046VN8JO/ref=cm_sw_r_udp_awd_gwbkub0EM035B
This is the bondo you would recommend? https://www.amazon.com/Bondo-280-Bumper-Repair-Syringe/dp/B0046VN8JO/ref=sr_1_1?ie=UTF8&qid=1517862027&sr=8-1&keywords=bondo+epoxy
Would the 3M or JBweld epoxy work as well?
You can fill chips and this hole with body epoxy and sand then wrap over the top of that. Most automotive pait stores have it. Amazon link
Like the others have said, pull the pumper cover off, and take a heat gun and push them out. From personal experience though, it doesn't take much heat to make that plastic malleable, so take it slow. If you can't get it perfect, this Bondo bumper repair kit is great too. Just put it on, let it cure, sand it down and finish it with some glazing putty. This formula worked well for me and I repaired a puncture with it. Also, if you need paint, Sherwin Williams automotive seems to be significantly cheaper than any of the online color match sellers.
Then you can try Bondo 280 Epoxy Bumper Repair Syringe Kit
Don't use regular Bondo though, your bumper needs a certain amount of flex. Regular Bondo would be too hard.
doesn't look too bad. try this with some creativity and color match paint. wont be perfect, but way less than $700
I've had good luck with this coupled with a fibrous backing like fiberglass.
Also, the correct answer is zip ties. Chicks dig scars, but whatever.
I personally run [this](Motul 007250 8100 X-cess 5W-40 Synthetic Gasoline and Diesel Engine Oil - 5 Liter Jug https://www.amazon.com/dp/B004LEYIQ8/ref=cm_sw_r_cp_apa_i_Y9bsDbMKPH5RA). What I ended up on after going through a few forum threads on the main veloster turbo form. I'm at a convention and don't have a ton of time atm, but when I can I'll see if I can find some of those articles and link them to to you.
This is what I do on my MK6. You cannot beat the price!
Motul 007250 8100 X-cess 5W-40 Synthetic Gasoline and Diesel Engine Oil - 5 Liter Jug https://www.amazon.com/dp/B004LEYIQ8/ref=cm_sw_r_cp_taa_DR8Izb3RH6NR0
Mann-Filter W 719/45 Spin-on Oil Filter https://www.amazon.com/dp/B002UZGCSW/ref=cm_sw_r_cp_taa_.T8Izb5JM5AKP
Sure....46
http://www.amazon.com/gp/product/B004LEYIQ8/ref=oh_aui_detailpage_o03_s00?ie=UTF8&psc=1
You should be able to find it in a squeeze tube at any auto parts store, that's probably better then a tub for this anyway.
https://www.amazon.com/Lucas-Oil-10533-Lithium-Grease/dp/B004X70LZA/ref=sr_1_1?ie=UTF8&qid=1496931353&sr=8-1&keywords=lucas+white+lithium+grease
A lot of Turbo Subaru guys seem to swear by Rotella T6 and report reduced oil consumption compared to other oils. I've been thinking about trying it on my FXT once the weather improves.
I'm using the T6 synthetic and working smooth. I use subscribe and save from Amazon with a buddy and we buy a few 4 quart jugs every 6 months.
We are using it in a 96 cherokee with 120kand 2 96 grand cherokees with 200k+ miles
https://www.amazon.com/Shell-Rotella-550019921-Synthetic-Diesel/dp/B005CHT4W6/ref=sr_1_2?ie=UTF8&qid=1465582556&sr=8-2&keywords=t6
Also - now that I'm reading more about Rotella T6, it seems like it's for heavy duty engines and diesel engines. Am I looking at the right product? http://www.amazon.com/dp/B005CHT4W6/ref=wl_it_dp_o_pd_nS_ttl?_encoding=UTF8&colid=KVJUPJ7Q9EN0&coliid=I2S2373MP63RJ4&psc=1
Here.
The noisy clutch is due to shrunken, dried out rubber dampeners in the clutch basket. There are repair kits available.
Believe it or not, the preferred oil for these bikes is actually [a diesel oil.](
http://www.amazon.com/Shell-Rotella-550019921-Synthetic-Diesel/dp/B005CHT4W6)
To elaborate, Shell Rotella t6 is JASO MA certified.
From Wikipedia:
> For four-stroke gasoline engines, the JASO T904 standard is used, and is particularly relevant to motorcycle engines. The JASO T904-MA and MA2 standards are designed to distinguish oils that are approved for wet clutch use, with MA2 lubricants delivering higher friction performance.
What do the spark plugs look like? Are they fouled at all? If they are clean, you are most likely running completely fine.
The throttle response on 1.8 liter engines is a lot slower than you're used to with a 1.6. It's one of my main points when the classic 1.6vs1.8 threads pop up. I prefer the 1.6 because it's happier to rev and responds quicker. Other people prefer the power.
When you start your car in the video, it sounds healthy. It seems to take quite a normal amount of time to crank and start, and seems happy to do so. I don't think you have a problem there.
Rotella T6 is a well known oil in the NB Miata community. Many people swear by it. It's Shell's high detergent oil. (Yes, it's "Heavy Duty Diesel", but its within the acceptable range of viscosity as well as has API SM qualification for gasoline engines. Plus, hundreds of people here use it)
http://www.amazon.com/Shell-Rotella-550019921-Synthetic-Diesel/dp/B005CHT4W6/ref=sr_1_1?ie=UTF8&qid=1463093322&sr=8-1&keywords=rotella+t6
https://www.amazon.com/Genuine-Subaru-SOA868V9270-Super-Coolant/dp/B007NLOZAU Use prime shipping/ get rush delivery. Still probably cheaper than whatever the dealer is charging.
If that is the level immediately after you've been driving it for an hour, it does seem your car has lost coolant abnormally quickly for just 5k miles. Before topping it off, I would bring it by the dealership so they can check for leaks. As long as your reservoir isn't bone-dry, you're not going to be in danger of running low on coolant.
In terms of topping off the coolant, be sure to use Subaru Super Blue coolant (http://www.amazon.com/Genuine-Subaru-SOA868V9270-Super-Coolant/dp/B007NLOZAU). Mixing with another formulation (color) will decrease its lifespan. Just pour into the reservoir tank you see in your picture.
The blue stuff is premixed 50/50 with distilled water so you're fine. Here's a link on Amazon but you can just grab it from the local dealer as well. http://www.amazon.com/Genuine-Subaru-SOA868V9270-Super-Coolant/dp/B007NLOZAU
Here's the Toyota version they use for the FR-S/GT86: http://www.amazon.com/Genuine-Toyota-Fluid-00272-GTBC1-Coolant/dp/B00AKYP114
Using Articlean with coffee filters. One or two drops of each bottle is enough for removing completly thermal compound.
Well, it covers the center part, which emits most of the heat, but overall its purpose is to fill all the tiny gaps between the surface of the CPU and the surface of the cooler block. Your TIM looks really thick and did not spread very well.
 
I would strongly suggest that you replace it in the near future.
 
Get something like this to clean off the CPU and the Cooler block, and then apply a good Thermal Paste like this one. Keep an eye on which one you buy though, some of them conduct electricity. You don't want to apply to much of these ones, since they can short your board if not applied correctly.
Good to check =D.
I used this to clean my CPU when I swapped out my case. Makes it easy, but other ways to do it too: https://www.amazon.com/Arctic-Silver-Arcticlean-Material-Purifier/dp/B0087X738E
If the fan is in the way, it can be repositioned on the cooler. Just move it a few "rungs" up. I have a similar Noctua cooler, and that's what I've done, but my RAM is much taller than yours. You really shouldn't need to. Let me know if you need any pictures or further explanation. You don't really want to be taking off that fan. Also, just FYI, the Noctuas have little arrows in them showing the direction they push air, so make sure they're facing the right way.
Keep in mind that when you're removing the cooler, you must completely clean all thermal compound from the CPU and cooler (use 99% isopropyl rubbing alcohol, or even better something like this ArctiClean solution, and a lint-free cloth), and reapply thermal compound.
In other words, you can't just take it off and put it back on the correct way. Apologies if you already knew that, just wanted to make sure!
This stuff is magic it softens and removed the oldest and driest thermal paste with ease.
https://www.amazon.com/Berryman-0996-Chem-Dip-Carburetor-Cleaner/dp/B00DSMEL2A
Something like this. Your local auto parts store should have something similar.
Depends. If any passages are completely clogged, the Seafoam won't get in to the clog and do its thing. If all passages have some flow, the Seafoam can get in and work.
It also depends on how the gas/Seafoam ratio, and how long you let the Seafoam sit and work. It also depends on how hard the deposits are, and how long they've been there.
I had a Yamaha Maxim 550 (GREAT bike!) whose previous owner let it sit for 11 years with gas in the carbs. Seafoam, Berryman's B-12 Chemtool, ultrasonic cleaning, carb cleaner in a can--none of that worked. What finally worked was a gallon can of carb cleaner, aka a carb dip: http://www.amazon.com/Berryman-0996-Chem-Dip-Carburetor-Cleaner/dp/B00DSMEL2A
Oof.
Your future. It contains this: https://www.amazon.com/Berryman-Products-996-Chem-Dip-Carburetor/dp/B00DSMEL2A
Good luck :)
https://www.amazon.com/Mobil-120760-Synthetic-Motor-0W-40/dp/B00HG76A9A
I think the GM-LL-A-025 spec is technically obsolete and replaced by the Dexos requirements. Anyways, I source my 0w40 Mobil 1 Euro car formula on Amazon Prime.
https://www.amazon.com/Mobil-120760-Synthetic-Motor-0W-40/dp/B00HG76A9A/ref=sr_1_1?ie=UTF8&qid=1502915673&sr=8-1&keywords=0W40
$22.88 for a 5 quart jug. My 200,000 mile 2.0t seems to like the oil just fine, although I've never ran an oil analysis.
Thanks for the answer! This is the first time we've been met with a car that recommends a variety of oils. We've only owned Chevy, Jeep, and Toyota in the past and they all have a pre-set oil viscosity they want irregardless of your climate.
I'm in New England USA which means its fairly moderate. Warm summers, chilly winters but rarely anything into the extremes.
Our cars mostly run 5W-30 which is why I was hoping we could get away with using that if it is a direct place in.
I'm thinking of using the Mobil 1 European Formula
https://www.amazon.com/Mobil-120760-Synthetic-Motor-0W-40/dp/B00HG76A9A/ref=sr_1_1?ie=UTF8&qid=1478619568&sr=8-1&keywords=mobil+1+european+car+formula+0w-40
http://www.mercedesmedic.com/how-to-change-oil-mercedes-benz-diy-instructions-video/
Because that website recommended it. But I see it nowhere listed on the MB 229.5 page. Only general Mobil1 shows up there
Thanks!
Edit:
Got the Castrol 0W-40 :) all good
I have been using this for years on my Minis and never had a problem with it. It was originally recommended to me on the northamericanmotoring.com forums. I highly recommended it too.
So $50 in oil and a $10 filter. Yep confirms what I said to someone looking at a boxster, Porsche mechanics are highway robbers.
Do you have a small leak anywhere, and was the water pump changed the last time the timing belt was done? As others have mentioned the thermostat is a good place to start. Also Subaru makes a coolant conditioner that should be used when not using genuine Subaru coolant. It's a small bottle that can easily be found on Amazon here: https://www.amazon.com/Subaru-SOA635071-Coolant-System-Conditioner/dp/B00IGZP2UE
http://www.amazon.com/Subaru-SOA635071-Coolant-System-Conditioner/dp/B00IGZP2UE
Not low on coolant √ So that sounds promising. I already have a new thermostat and will replace tomorrow. I just didnt want to drain the whole system again. Is the Subaru Coolant Conditioner something I should add as well?
Will check on the heater core hoses and update.
Thanks so much for your help!
A little off topic but if you haven't tried it yet, try switching to luqi moly oil. I made the switch to it coming from oem oil and the car is quieter and smoother! This is the one I put in my car. It's a little more expensive but it's straight from germany made for german cars. All the indy's around me use this oil.
Yes. This is the 5 Liter jug Liqui Moly Synthetic Leichtlauf High Tech 5W-40 and this is the link for the 1L bottles
Edit: Here’s my post about Liqui Moly Synthetic Leichtlauf High Tech 5W-40 Motor Oil
I got this one https://www.amazon.com/Lubricant-Grease-Nyogel-50g-Tube/dp/B00W6KWK1Y
I heard it's a common issue and you can get this lubricant for it to fix the issue.
Didnt know this one, Thanks!
https://www.amazon.com/Lubricant-Grease-Nyogel-50g-Tube/dp/B00W6KWK1Y
Black RTV works well.
http://www.amazon.com/Permatex-81158-Silicone-Adhesive-Sealant/dp/B000AL6WLA/ref=sr_1_1?ie=UTF8&qid=1343347050&sr=8-1&keywords=black+RTV
Did you change out your coolant with Subaru coolant and put in the Subaru coolant conditioner after your head gasket job? The conditioner is very important.
Example:
http://www.amazon.com/Subaru-SOA635071-Coolant-System-Conditioner/dp/B00IGZP2UE