(Part 2) Best power finishing tool parts & accessories according to redditors
We found 416 Reddit comments discussing the best power finishing tool parts & accessories. We ranked the 180 resulting products by number of redditors who mentioned them. Here are the products ranked 21-40. You can also go back to the previous section.


most definitely possible. you can either use an EF-E mount adapter like metabones or sigma, OR my preferred method to get the best quality (requires some DIY), is to get a set of these, lightly and i do mean LIGHTLY taper out the mount to the right shape of the lens mount. Tapping the end of the tool with one of these, for stubborn spots. Don't worry if you slip a bit and hit the sensor. Anything that shows up in your images, you can crop out in post.
Clean it up and polish it down with this. Best stuff in the business.
​
You'll be 🔪🔪☠KILLING IT 🔪🔪☠ in the photography game afterwards. All you pics will be 🔥🔥LIT🧯🧯!
My PC:
I built this PC back in 2017 and the CPU temps have been terrible since day 1.
With my daily driver overclock of 4.8 Ghz, 100% utilization for more than 10 minutes would push CPU temps into the mid 90's. Heavy gaming (~50% utilization) would regularly cause temps in the upper 70's or low 80's.
After browsing around here and Youtube I found that the problem was likely Intel's thermal paste under the IHS, so for just over $30 I bought:
I then delidded my CPU, spent over an hour sanding down my IHS, then applied liquid metal under the IHS and Artic MX-4 above (which I had laying around). I chose not to re-seal the IHS after reading some comments here.
Now my CPU temps idle in the 30's, stay in the 40's while gaming and rarely ever hit the 50's.
For CPU temps to break into the 60's, I have to run 100% utilization for over 15 minutes (as shown), which doesn't even happen in my day-to-day use.
So pretty happy overall.
u/petthedino and /plotzkea here is the best way I could break it down. I tried to keep it simple but still detailed. If you have any questions just let me know!
Background: I have had this putter since I was 8 years old, we bought it from Edwin Watts brand new in Dallas and every member of my family has putted with it at some point in time. I looked into getting it refinished by the Scotty Custom Shop but it was going to run me over $300 to get it done. I figured I would give it a go myself I have absolutely no experience doing any kind of this stuff, this was my first ever attempt
Tools/Materials needed: I had or was able to borrow almost all of these before starting, which helped keep cost down.
Process
It's important to note my putter had no paint finish. It was oil can so the only paint I really had to remove was the logo's. If your putter is entirely painted you might have to adjust the steps accordingly
My steps were broken up by days. I worked a little after work each day and it made for a good week! If you guys try it and have any questions please message me!
Edit: several edits for clarity.
Edit: Before you read, these two pieces of wood started the same. The one on the left is the "bad" version based on how I used to finish things.
I'm absolutely no finishing expert, but I've spent the past couple of months getting ready to finish a major project. I have used a lot of shellac and other varnishes in the past, but generally like oil-based poly. Here's now I do it.
This advice probably applies to all woods, but I've been working with Walnut and Maple recently.
http://i.imgur.com/ZywuN6X.jpg This is a bit of a bad example as I didn't fill the grain (and haven't really polished yet), but this shows why sanding matters. If you don't want ridges where the grain is, you have to sand. Again, not the best picture, but sanding and putting on thin coats, slowly, will get you the finish you want.
I'm absolutely not an expert. Just someone that's been frustrated sharing what I've learned. Here's my latest table-top with coat #2 on it.
http://i.imgur.com/DpqiIvO.jpg
Finally, not all sandpaper is the same. For 320, this is the best stuff around. Lasts forever and doesn't clog: https://www.amazon.com/gp/product/B00PPD1CYA
There is always an unanodized option
Just an option - instead of gluing on sanding sleeves, maybe consider just buying your sanding sleeves and fit them to your custom collars?
https://www.amazon.com/WEN-6510SPC-Assorted-Spindle-Sanding/dp/B01HD4E7WM/ref=sr_1_1?ie=UTF8&qid=1500644001&sr=8-1&keywords=spindle+sander+sleeves
ive done a handful of mirror finishes, or close to it, with sandpaper, and i strangely really enjoy the process. i cant imagine how challenging it would be to do on the stones. i guess if you have really flat geometries... with sandpaper it only really takes a couple hours, depending on how fast, and how fussy you are. i would recommend a practice with a cheap knife to get the feel, but it isnt hard. you just need to work patiently through a succession of grits. i typically start at 800 grit (depending on the existing finish), onto 1000, then 1500, 2000, 3000 and then 5000 for the last step. i really like these trizact pads for my 3000 and 5000 steps- https://www.amazon.com/gp/product/B00LIXEWXO/ref=oh_aui_detailpage_o05_s01?ie=UTF8&psc=1
i stop there but you can keep going on pretty much forever if you want.
work each grit at a different angle from the last, and sand until all lines from the previous grit have disappeared. do not skimp here.
i dont recommend big jumps in grits until you are in the higher ranges.
also as ref gent said above watch your tip and heel so that you dont blunt your points. areas near the handle can be challenging and you can easily scratch your handle, so i would use a little tape to protect it.
Here is the Paul Sellers video I'm referring to.
The 750 grit diamond stone, and the 1000/4000 grit water stone.
Also, here's the sandpaper I uses for those interested.
Thanks to /u/stalemunchies and /u/respighi who recommended to use a hand plane on my hard-headed end-grain piece - inspired me to go hand-plane hunting!
I used this pack.
https://www.amazon.com/dp/B01MZALAD9/ref=cm_sw_r_cp_apip_eFlQOZv7B25tE
I believe I started with a course grit around 400ish, and went all the way down to 3000
Aluminum tends to be fairly difficult to torch braze by hand, because the melt temperature of the filler versus what you're trying to bond is typically pretty small. I've been lighting metal on fire for near a decade now, and I wouldn't (and don't) touch aluminum if I don't have to.
Stainless is IMO super easy to braze in comparison, so long as you have a fairly reliable flux. The problem with these bernzomatic torch nozzles you're looking at is they can be somewhat underwhelming in the heating department, and it can take quite awhile to get things to temp, which can overcook your flux and then things oxidize and no filler sticks.
At the sizes you're talking about, the wall thickness would be somewhat important. If your tubing is thick, it could be difficult to braze. If it's fairly thin, you should be able to get it done, and you can clean oxides or extra silver braze with a dremel wheel or sandpaper. I use the dremel wheels.
BAg-7 has a pretty low solidus/liquidus, and should be achievable with the torch. If you want good corrosion resistance, BAg-24 has 2% nickel, but the temps go up a bit. Should still be achievable with this torch. I like boron added flux, I find it is way easier to tell when it activates, because it clarifies.
Micromesh sanding pads work but polishing compound is the same. Only difference is that the abrasive is attached to paper instead of in a medium.
micromesh
He is referring to the fact that aluminum almost instantaneously forms aluminum oxide at its surface from an oxygen atmosphere.
Aluminum oxide, Al2O3, in its most common form also known as corundum, has a mohs hardness of 9, close to diamond, and it can readily scratch glass, which has a much, much lower hardness. Alumina is therefore a common material used in sandpaper, which you can easily buy on Amazon. If you had heard of it you would have probably asked the same question as him.
The layer of alumina that forms may not be thick enough (it's very thin) or of the right composition to form corundum, but if enough of the aluminum is rubbed off and oxidized, he is proposing that it's possible the aluminum will form into particles of corundum, which can scratch glass.
I have no data to say that this actually happens, but it's not just a crazy idea where he is questioning the wisdom of the materials science gods and their table of things that will absolutely never scratch other things.
Try to find the flexible sand paper sheets that are meant to be hand-used. I found them in Loews 3m brand, this is the exact type of sheets i use: https://www.amazon.com/3M-COMPANY-28320SB-UF4-320G-Sandpaper/dp/B00PPD1CYA/ref=sr_1_7?s=office-products&ie=UTF8&qid=1527015867&sr=8-7&keywords=sandpaper+320+grit+3m
I use these cloths on the LCD screen and the resin vat FEP sheet. After cleaning the resin vat FEP sheet and the LCD with paper towels, I give them a nice polish with the cleaning cloth to remove any other smudges or dust. Make sure to have a cloth dedicated to ONLY the LCD screen, as you want the keep the LCD screen pristine and free of dust and smudges.
You'll also want a print curing station to harden the prints once they have been cleaned. I bought:
I actually just went through this, I'm certain I'll regret my choices later on when I buy something nice but this is what I did just to see if I'd like using chisels.
harbor freight chisel set. multi-pack of wet automotive sandpaper. 2 of the flatest granite tiles I could find at menards. The cheapest honing guide I could find.
spray adhesive the paper to the stone, mount the chisel in the guide and go to town. Use water liberally. I did maybe 20 swipes on each and flattened the back. Maybe 25 bucks spent in total and I have 4 pretty darn sharp chisels.
I would recommend a better honing guide, that 5 buck one sucks.
I use this stuff if you want to give it a try. The price is right.
That's the honing guide, I filed mine down just google for "Larson guide modification" and follow the instructions using a guide. If you don't have a file they are like 6$ for ,4, but whatever, it will still work.
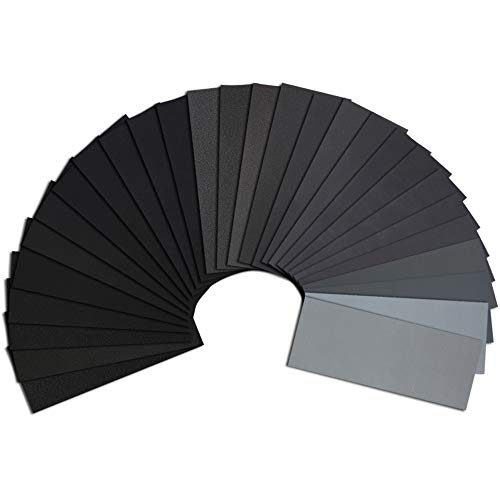
As high as you want to go. Here is an example, but it's just the first result for "wet dry assortment sandpaper" and it will last a while but there are only 3 sheets of each so you will go through lower grits fast. WINDEX
Is for the sandpaper to help clear the metal shavings from the grit.
42 Pcs Wet Dry Sandpaper 120 to 3000 Grit Assortment 9 3.6 Inches Abrasive Paper Sheets for Automotive Sanding, Wood Furniture Finishing, Wood Turing Finishing https://www.amazon.com/dp/B01K22Q9R8
Is this better? https://www.amazon.co.uk/dp/B01B2SWZ9W/ref=cm_sw_r_fm_apa_u6dGzbVBHXEK0 nothing below 400 but slightly cheaper than the other deal
you can just wet sandpaper you have already but here is the variety pack i mentioned on Amazon. You're definitely gonna need higher grit as you go along, start at like 240 and then end with either 400 or 600 grit to polish. Good luck!
This is about as affordable as it gets.
Just letting you guys know, you can accomplish the same thing as this device was designed for, but with better results by using Trizact 5000 grit wetsand paper. Then shine it back up with some good polishing compound and a soft cotton cloth. Just a bit of info.
For sanding I think I’m using this one, and also this one. For the hammer, I use this one, gently.
https://www.amazon.co.uk/gp/aw/d/B00GY4F3RQ/ref=mp_s_a_1_1?ie=UTF8&qid=1467065572&sr=8-1&pi=SY200_QL40&keywords=belt+sander+cleaner&dpPl=1&dpID=41K%2BSv7sdmL&ref=plSrch
This works really well, it's like a big eraser.
Wow! Thank you so much! Do you know where I can find a "sanding belt cleaner" in Sweden? How are they called in Swedish? I found this on amazon but the shipping costs almost the same as the product itself https://www.amazon.de/gp/product/B00GY4F3RQ Any idea if I could find these at a local hardware store like Biltema or such?
EDIT: grammar
Not sure if you have a menards in your area, but [this] (https://www.menards.com/main/tools/power-tools/sanders/performax-reg-1-1-amp-corded-5-bench-top-disc-sander/jd2504/p-1489990860962-c-10088.htm?tid=-333651309580431715&ipos=1) sander is what i was recommended. You can have the sander vertical or horizontal, based on your preference, and it's relatively cheap!
So, since this sander take PSA pads (pressure sensitive adhesive), and the available micromesh pads are hook and loop (think velcro), you need a few parts to convert it.
This is the PSA to Hook and Loop Conversion pad
This is a Hook and Loop Soft Pad. I'm not sure why I need this part, but it was apart of what was recommended to me for this whole thing to work.
And these are the micromesh pads. Same grit sizes as your standard micromesh variety, so it should get the job done.
All of the parts I needed for this are coming in today, so I should be able to test it out tonight! Let me know if you have any other questions.
Cutting the basic shape out of a fence panel or 2x8 is pretty simple. Then clean the edges with a hand-planer then sand it down and finish with linseed oil. Keep it simple. Your local lumber yard will have tons of scrap wood you can mess with (ask for a harder wood like oak, maple or darkwood). needed tools;
There is a method used in woodworking... its called Scary Sharp and really just amounts to getting NICE FLAT surface (usually glass) and affixing higher and higher sandpaper grit sheets. I'm not referring to what you can find at your home improvement center (they usually top out at 400). You need a few sheets that go well into the thousands for a mirror edge.
Method: https://www.google.com/search?q=scary+sharp+method&rlz=1C1CHBF_enUS755US755&oq=scary+shap+m&aqs=chrome.1.69i57j0l5.6864j1j7&sourceid=chrome&ie=UTF-8
High grit paper options: https://www.amazon.com/Paxcoo-3000-5000-Sandpaper-Assortment/dp/B075H8KSHJ/ref=sr_1_3?ie=UTF8&qid=1522769712&sr=8-3&keywords=high+grit+sandpaper
Here's what I sent to the couple of PMs I got asking similar questions...
I ordered these from Amazon:
Dupli-Color BFM0360 Dark Shadow Gray Ford Exact-Match Automotive Paint - 8 oz. Aerosol https://www.amazon.com/dp/B00407TU5U/ref=cm_sw_r_cp_api_i_4DxwDbP62JVFE
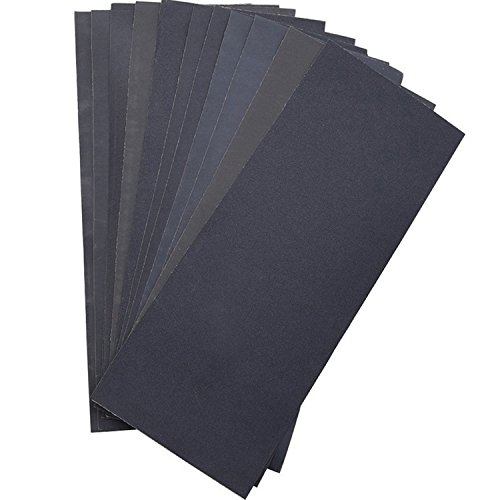
Sandpaper, Premium Wet Dry Waterproof Sand Paper, 45PCS 120 to 5000 Assorted Grit Sanding Paper for Wood Furniture Finishing, Metal Sanding and Automotive Polishing, 9 x 3.6 Inches. https://www.amazon.com/dp/B07KV3VX97/ref=cm_sw_r_cp_api_i_NHxwDb65VSTCX
From there I started off using a 1/4 piece of one of the 240 grit pieces of sandpaper and spent about 5 minutes sanding off all the jagged edges of the curb rash. (Side note for your question: Pressure was about what you'd use with a scrubby sponge to get some stuck on food off a plate for all the sandpaper sheets, regardless of grit.)
Next I tore off a similar sized piece of 400 grit sandpaper and spent another 5 minutes sanding it down further to smooth out some of the larger damaged area into smaller issues.
Repeat another 5 minutes with 600 grit. Then 5 minutes with 1000, and finally 5 minutes with 1500.
Once you are done the damaged area should be shiny bare metal that should feel smooth to a light touch with your finger. (And leveling out the area is not really a problem. As bad as curb rash looks, it's mostly just jagged metal sticking up that gets sanded off. It's really not that deep that you end up with valleys and craters once you are done sanding. Technically, yes, the rim is "thinner" where you sanded, but it's a fraction of a millimeter so, and not really visible to the eye unless you get down real close and look for it.)
Next I cleaned it all off using nothing more than some Windex and a soft rag.
I then used a new small piece of 600 grit and lightly went over the whole area to make some tiny rough areas to help the paint stick to the metal better, and wiped clean the dust.
I then taped the tire and undamaged area of the rim to keep the paint off those parts, and sprayed on the paint using the instructions on the can. (Three light coats 10 minutes apart)
That's pretty much it. Someone else mentioned clear coat but I didn't use it. I though the result I got was pretty dead-on and didn't want to risk a clear coat make it look off or too shiny, then have to do the rest of the wheel to make it uniform - which would have made me then have to do the other three tires in clear coat to make them match as well. But if I down the road I change my mind, adding clear coat is as easy as the painting.
Anyway, it's time and labor intensive, but it's easy. Good luck!
Instead of sandpaper try 3m Sanding sponges. I use fine and superfine grade pads before I prime or paint. They really shine on curved or irregular surfaces.
http://www.amazon.com/3M-916DCNA-Contour-Surface-Sanding/dp/B00004Z49L/ref=sr_1_1?ie=UTF8&qid=1313506209&sr=8-1
http://www.amazon.com/3M-Contour-Surface-Sanding-Sponge/dp/B00004Z49M/ref=pd_bxgy_hi_text_b
I'm relatively new in building Gunpla so can you guys please help me in giving your thoughts and suggestion? I've built a variety of 1/144 HG Gundams which i completely turned it into crap ... So I'm planing on buying sandpaper , paneling pen and a snipper in approving the quality. These are some of the things that i found on Amazon.
Snipper:http://www.amazon.com/Tamiya-74035-Sharp-Pointed-Cutter/dp/B0131XZ92G/ref=sr_1_sc_2?ie=UTF8&qid=1463094875&sr=8-2-spell&keywords=tamyia+snipper
Sandpaper :http://www.amazon.com/Abrasive-Waterproof-Sandpaper-Furniture-Improvement/dp/B01B2SWZ9W/ref=sr_1_2?ie=UTF8&qid=1463094900&sr=8-2&keywords=1000+grit+sandpaper
Panel Lining Pen : Uhm i need help in finding a gray and black panel lining pen.
Would this 3K-5K SiC sandpaper work for the CC4 and this 7K to 15K SiC sandpaper work for a Spyderco ceramic or maybe 2?
Let me start by saying that this would be the bare minimum. This is assuming that you have all the experience to use these tools effectively as someone who has the appropriate skill and knows to do things like not bear down on a saw when cutting, keeping everything square, how to mill boards by hand, how to not kill sandpaper in a few strokes, how to tune and sharpen a hand plane, ETC.
2x$8.69Vise grips Two vise grip clamps. Clamps can be universally adjusted and clamped in almost any direction with some quick thinking. One is never enough.
$9.99Cheap set of chisels Everyone needs a chisel. These will be made from a milder steel, but it's better than nothing.
$22.00Generic ryoba saw A ryoba saw will double for crosscuts and ripcuts. They go as far as you can take them provided you treat them right.
$18.62Bench Plane You need to be able to take down material in terms of thickness. A simple bench plane will due for now.
$20.61Block Plane A block plane will help slightly with end grain smoothing where the bench plane cannot.
$3.47Bundled Sandpaper You need to finish your products somehow. I would get a generic bundle of sandpaper and use it sparingly and tenderly.
$12.85Square Keeping things square is vital.
$6.79Mallet Hammering your chisels is going to be very important since you cannot use a 2x4 reliably.
$3.47Wood Glue Need to be able to glue things together.
$11.80A set of card scrapers Remove material smoother and faster. You don't want to waste sandpaper if you don't have to, and these are quite versatile.
$8.06A bastard file A bastard file will do for now when it comes to heavier shaping and sharpening your card scrapers.
$15.92A small drill viseKeeping something secure in place is very important. A small vise will accommodate small and narrow pieces of lumber and can be bolted to a bench.
$3.97Assorted finer sandpapers You need something to keep your chisels constantly sharp, especially when it is such a mild steel as a set of 9.99 chisels.
$15.59Wipe on polyurethane You need to be able to finish your products somehow.
Comes to $170.52 I would use the rest to make a bench and two sawhorses out of some 2x4's.
Amazon offers better prices. Example:
https://www.amazon.com/LotFancy-5-Inch-8-Hole-Sandpaper-Assortment/dp/B01LS2JGX0/ref=sr_1_3?crid=26Q5K0AQZA094&keywords=sanding+discs+5+inch+8+hole&qid=1562290592&s=gateway&sprefix=sanding+dis%2Caps%2C177&sr=8-3
Yeah its probably stupid of me to help people play more comfortably if I ever want to get top 25% in Agendastats2.
Maybe I should autograph/get the GA logo printed on these...mousepads and sell them:
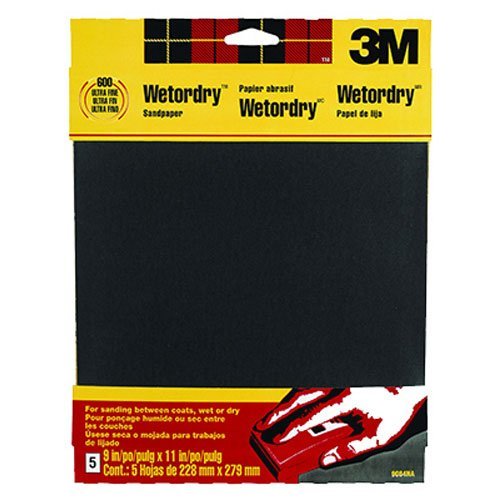
http://www.amazon.com/3M-Wetordry-Sandpaper-11-Inch-Assorted/dp/B001449TPS/ref=sr_1_5?ie=UTF8&qid=1409346251&sr=8-5&keywords=sandpaper+sheets
I used a black & decker sander with this sand paper. Then I spray painted it with flat black rustoleum. Thanks!
If the paint is chipped and there's a difference in thickness between normal paint and the metal, you'll need to sand it down. Which you should do anyway to get the paint to properly adhere.
But if the panel isn't smooth (i.e. your fingernail catches on the edge of the chip) the damage will show up even after you paint.
Get a wet sand kit (cheap on amazon) and work your way through most of the grits until the surface is smooth. And if you're OCD about this, you can wet sand after applying the base coat, and then after applying the clear. Probably the proper way to do it, but it's more or less necessary depending on how much paint spatter/runs you get.
As for spraying- it's better to do multiple light coats, rather than a single heavy one (reduces runs, which are time consuming to sand down).
I bought a dremmel last year and I use these scuff pads to clean my clubs.... It works really well, but leaves a eggshell finish - http://www.amazon.com/Dremel-511E-Coarse-Finishing-Abrasive/dp/B000FBF3OM/ref=sr_1_13?ie=UTF8&qid=1394972219&sr=8-13&keywords=dremmel+bits
get a 3m super smooth sanding pad and sand them down
https://www.amazon.com/3M-Contour-4-5-Inch-5-5-Inch-1875-Inch/dp/B00004Z49L/ref=pd_lpo_vtph_60_lp_t_2?_encoding=UTF8&psc=1&refRID=3M64W5NEH9FSMGH0KR8Y
SECTION | CONTENT
:--|:--
Title | Mirror Polish Your Spinner: Level 2
Description | Today we try our hand a little more involved spinner polishing. We aren't just polishing flat surfaces y'all! Want to get in on the action? Quick links down below. Assorted set of Sandpaper: https://www.amazon.com/dp/B01LZVWBT0/ref=cm_sw_r_cp_tai_pbTlzb65TH4NK Higher grit sandpaper: https://www.amazon.com/dp/B013W44ESY/ref=cm_sw_r_cp_tai_vcTlzbJ5S0QN3 Flitz Metal Polish: https://www.amazon.com/dp/B00MUG95UI/ref=cm_sw_r_cp_tai_yGkpzbNPZ3GRY
Length | 0:11:58
****
^(I am a bot, this is an auto-generated reply | )^Info ^| ^Feedback ^| ^(Reply STOP to opt out permanently)
I use these sand blaster
Not that brand and they're expensive but, when I need to weld on the body of my project truck before my SO starts finding things for me to do, it takes the paint off super quickly, then I use a wire wheel to get in the crevices.
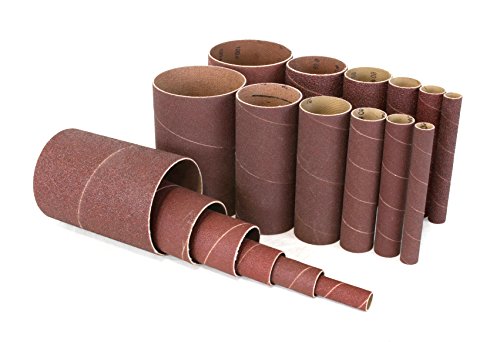
I get access to all the machinery so it's more than just the square footage. The spindle sander is great. It's so much faster than trying to hand sand the contours of the things I'm making. It's pretty cheap, has lots of different spindle sizes, and has a dust extraction port that fit my rigid vacuum. Just make sure you grab the multipack of different sizes/grits to make sure your maximizing the machine, it's only $15.
WEN 6510SPC Assorted Grits Spindle Sanding Sleeves (18 Pack)
https://www.amazon.com/dp/B01HD4E7WM/ref=cm_sw_r_cp_tai_RnjizbT21FBRZ
I also picked up a sanding pad/belt cleaner. I don't know how much it's really helping anything but it's only $10.
Vermont American 17889 Sanding Belt / Pad Cleaner
https://www.amazon.com/dp/B0002YUOT6/ref=cm_sw_r_cp_tai_FojizbBZS5T0K
Not so bad. Depending on how perfect you want it, you might just paint it without sanding. Problem is you CAN'T test the colors they have in stores without buying. You can get an idea from the cap color, but they do have that dark Al / gunmetal color.
If you sand, I like these: https://www.amazon.com/Dremel-511E-Coarse-Finishing-Abrasive/dp/B000FBF3OM/ref=sr_1_10?ie=UTF8&qid=1494880198&sr=8-10&keywords=dremel+sanding
Use blue painters tape to tape off any area you don't want to sand and also to keep the tire clean. I apply the paint with a fine brush, not spray.
Seems like an angle grinder with the appropriate attachment would make this easier and not cost too much. Something like this http://www.amazon.com/3M-SandBlaster-9681-2-Inch-Clean-N-Strip/dp/B000BQURDI#productDetails or a wire wheel might do the trick.
This build will be able to play anything at 1080p 60fps high settings:
PCPartPicker part list / Price breakdown by merchant
Type|Item|Price
:----|:----|:----
CPU | Intel - Pentium G4560 3.5GHz Dual-Core Processor | $79.44 @ OutletPC
Motherboard | MSI - B250M PRO-VD Micro ATX LGA1151 Motherboard | $54.89 @ OutletPC
Memory | G.Skill - Ripjaws V Series 8GB (1 x 8GB) DDR4-2800 Memory | $65.99 @ Newegg
Storage | Crucial - MX300 275GB 2.5" Solid State Drive | $97.88 @ OutletPC
Video Card | Gigabyte - GeForce GTX 1060 3GB 3GB Windforce OC Video Card | $216.89 @ SuperBiiz
Case | Fractal Design - Focus G (White) ATX Mid Tower Case | $44.99 @ Newegg
Power Supply | EVGA - 450W 80+ Bronze Certified ATX Power Supply | $34.97 @ Amazon
| Prices include shipping, taxes, rebates, and discounts |
| Total (before mail-in rebates) | $605.05
| Mail-in rebates | -$10.00
| Total | $595.05
| Generated by PCPartPicker 2017-08-07 00:58 EDT-0400 |
If you want 4k 60fps high settings, you're going to have to significantly increase your budget:
PCPartPicker part list / Price breakdown by merchant
Type|Item|Price
:----|:----|:----
CPU | AMD - Ryzen 5 1600 3.2GHz 6-Core Processor | $197.88 @ OutletPC
Motherboard | ASRock - AB350M Micro ATX AM4 Motherboard | $59.99 @ Newegg
Memory | G.Skill - Ripjaws V Series 16GB (2 x 8GB) DDR4-3000 Memory | $124.99 @ Newegg
Storage | Crucial - MX300 275GB 2.5" Solid State Drive | $97.88 @ OutletPC
Video Card | Gigabyte - GeForce GTX 1080 8GB WINDFORCE OC 8G Video Card | $514.98 @ Newegg
Case | Fractal Design - Define Mini C with Window MicroATX Mid Tower Case | $69.99 @ Newegg
Power Supply | EVGA - SuperNOVA G2 550W 80+ Gold Certified Fully-Modular ATX Power Supply | $72.98 @ Newegg
| Prices include shipping, taxes, rebates, and discounts |
| Total (before mail-in rebates) | $1148.69
| Mail-in rebates | -$10.00
| Total | $1138.69
| Generated by PCPartPicker 2017-08-07 01:01 EDT-0400 |
Edit: Here is the stuff you'll need to paint your case orange:
https://www.amazon.com/Sandpaper-Assortment-Automotive-Furniture-Finishing/dp/B01MZALAD9/ref=sr_1_5?ie=UTF8&qid=1502082191&sr=8-5&keywords=sandpaper
https://www.amazon.com/Rust-Oleum-280715-Primer-American-Accents/dp/B00KZ6LLZW/ref=sr_1_1?s=hi&ie=UTF8&qid=1502082223&sr=1-1&keywords=white+primer+spray+paint
https://www.amazon.com/280698-American-Accents-Orange-12-Ounce/dp/B00KZ6LVUW/ref=sr_1_2?s=hi&ie=UTF8&qid=1502082246&sr=1-2&keywords=orange+spray+paint
https://www.amazon.com/Oleum-280702-American-Accents-12-Ounce/dp/B00KZ6LYMM/ref=sr_1_1?s=hi&ie=UTF8&qid=1502082271&sr=1-1&keywords=spray+paint+gloss+finish
They're strip & clean disks. Here's a like to one kind: https://www.amazon.com/dp/B000BQURDI/ref=cm_sw_r_cp_awdb_t1_D5UYDbP2B9SJ1
When it's time to polish the metal, head to your local version of Walmart or Amazon and pick up some aluminum polish. I use Mother's. It's strong enough to work on the metals harmonicas use, but also pretty gentle. Just rub that on and if your cloth starts going black it's working. Get that elbow grease going and every few minutes wipe it off so you can see your progress. Repeat until fine scratches are gone and it's shiny new.
If you have deeper scratches, then you'll need to use sandpaper in increasingly finer grades first. 120 -> 220 -> 400 -> 1000 -> aluminum polish will take a seriously messed up cover plate to shiny new in about 15 minutes total. It's pretty easy to do.
This pack of sandpaperwill do hundreds of harps
Mother's polish
I'd take the rail off, go outside and grind the paint off with a stripping pad or a wire wheel chucked in a drill. A new pad will probably tackle the whole rail in about 3 minutes total.
Edit: even better if you have an angle grinder, you'd probably be done in about 1-1/2 minutes with this
I haven't had the chance yet. I cut them last summer/fall but until recently has been too cold to work outside. I cut them using a circular saw and a trickle of water so the cut isn't jagged or anything, but I vacillate between dry sanding with my DA orbital and just getting a cheap diamond polisher. If you do YouTube search for "DIY marble countertops" you can find some pretty informative vids. A couple of multi packs like this and this you can get a pretty passable finish with a palm sander. Just be patient and make sure all the scratches are out before you move on to the next grit.
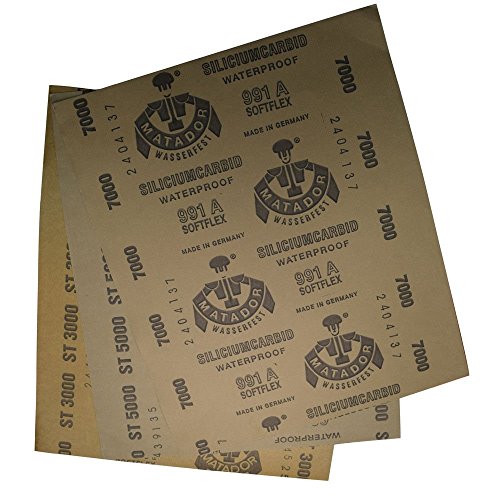
You can use Puma metal polish paste, rub it with a clot and it should be fine, you have to rub quite hard because it is steel, this polishing paste works well for shiny metals too. Maybe try some fine sandpaper first then go to stropping or polishing (the black dots in the blade are pits, you can't really remove them, polish the blade then maybe dip in in some vinegar to get a new uniform patina on all the blade. https://www.amazon.com/Precision-Polishing-3000-5000-7000/dp/B013W44ESY/ref=mp_s_a_1_5?keywords=7000+sandpaper&qid=1558612593&s=gateway&sr=8-5