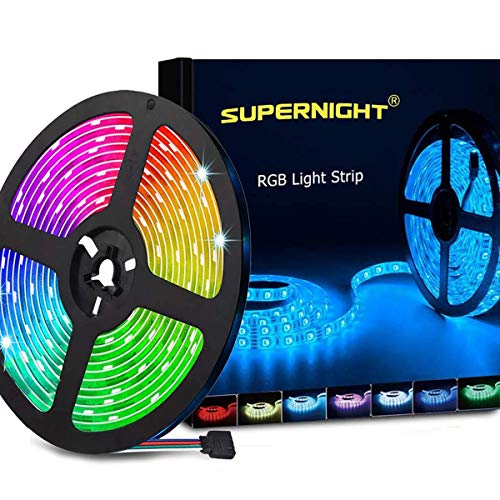
Best rope lights according to redditors
We found 624 Reddit comments discussing the best rope lights. We ranked the 178 resulting products by number of redditors who mentioned them. Here are the top 20.
We found 624 Reddit comments discussing the best rope lights. We ranked the 178 resulting products by number of redditors who mentioned them. Here are the top 20.


FAQ from previous post:
No input lag, everything is the same as when the desktops were on the desk.
I used 50ft hdmi cables running through conduit i installed in the walls for video, my older monitors required an hdmi booster: http://www.frys.com/product/6926477?site=sr:SEARCH:MAIN_RSLT_PG
I ran long usb active extension cables to each station and added a powered usb hub here: http://www.amazon.com/gp/product/B006KSLF6E/ref=wms_ohs_product?ie=UTF8&psc=1 and http://www.amazon.com/gp/product/B00JEOWV14/ref=wms_ohs_product?ie=UTF8&psc=1
These are the LED lights, make sure to buy double sided tape because the sticky backing is worthless on them, but still worth it: http://www.amazon.com/gp/product/B00ASHQQKI/ref=oh_details_o06_s00_i00?ie=UTF8&psc=1
Price breakdown, purchased most everything over the course of 5 years:
My battle station: 2500
My wifes: 1000
The server: 2000
The rack and accessories: 400
Cables, mounts, LED's, UPS's, etc: 1000
PVC: 100
The TV: 550
Soundbar: 100
My surround monitors: 250/ea
My ultrawide monitor: 450
My wifes monitors: 150/ea
Electrician: 150-200
HTPC's: 500 each
Switch: 100
Router: 100
HDHomeRun: 100ish
Dozens of hours to set it up: priceless
Here are the server cases i used: http://www.amazon.com/gp/product/B004GCOY3M/ref=wms_ohs_product?ie=UTF8&psc=1
Everything is split across 3 810w UPS's, each is at about 25% load. I tested them recently and i can get around half an hour of backup power to all of the electronics in the house, included the TV's.
If you have any questions feel free to ask, it was an exceptionally fun project and the results were perfect. I was pleasantly surprised how well everything works after it all turned on the first time.
I used these light strips which have adhesive and stick under my bed and behind my desk :) Also IKEA is great for this type of look! I hope you have access to one somewhere close to you.
https://www.amazon.com/gp/product/B078N9HJFV/ref=oh_aui_detailpage_o04_s00?ie=UTF8&psc=1
Instructions and parts are linked below. To incorporate the LEDs wasn't difficult, just required a router to create channels on the backside of the letters and about 80 point to point solder connections.
Instructions: (Not Mine)
https://www.instructables.com/id/Wood-and-Metal-NASA-Sign/
LEDs:
https://www.amazon.com/Compatible-Maxonar-Multicolor-Waterproof-Controlled/dp/B075FRFBKG/ref=mp_s_a_1_1?ie=UTF8&qid=1541353963&sr=8-1-spons&pi=AC_SX236_SY340_FMwebp_QL65&keywords=alexa+led+light+strip&psc=1&smid=A1WU736W1PHVH9
Very nice. Also curious why you didn't just use an off the shelf LED strip which is like $30 for a reel of 300. Here's an example from amazon that has the LEDs closer together: https://www.amazon.com/CHINLY-Individually-Addressable-Waterproof-waterproof/dp/B01LSF4Q00/
But any of the WS2812b LED strips will work. There are also multiple different strips that are either enclosed in a silicon tube, or bare strip.
You also could have made the holes closer together on your 2x4 soldering jig so that you wouldn't have to bend the wires. Kinda negates the entire point of the 2x4 soldering jig lol. Hindsight on that i'm sure.
Strip of 300 waterproof, color-changing LEDs for less than $20 on Amazon.
But I'll just be happy if they can finally make sure they have signs on the inside of the damn cars telling you where you're going and what stop you're at.
It gets pretty tiring having to answering the same tourist questions over and over again since the train operators rarely announce the stops they way they're supposed to and since the signage in the stations is totally inconsistent and placed in awkward spots where it's hard to see from inside the tinted windows of the trains.
I used this fairly affordable LED strip: https://www.amazon.com/gp/product/B07PLNDJ2N/ref=ppx_yo_dt_b_asin_title_o00_s01?ie=UTF8&psc=1
EDIT: forgot to link the LEDs I used behind the monitor https://www.amazon.com/gp/product/B072QWJRBS/ref=ppx_yo_dt_b_asin_title_o00_s00?ie=UTF8&psc=1
I'll list a bunch of the stuff i've gotten from Amazon.
Color Changing Lightbulb with remote
Light Strips for behind TV or Desktop screen with remote
Light Strips for walls with remote
LED Neon Signs (There are a lot of different designs and colors so look around)
Glowing Moon Lamp
Star and Galaxy Emitter, TONS of different light options to choose from this ones a must
LED Charger just cause
Glowing Balloons for trips
Quality Christmas Lights
Powerful Blacklight
Color Changing Fairy Lights
Plasma Ball
Lava Lamp
I used a led strip like
https://www.amazon.com/CHINLY-Individually-Addressable-Waterproof-waterproof/dp/B01LSF4Q0A/ref=mp_s_a_1_4?keywords=ws2812b&qid=1562179299&s=gateway&sprefix=Ws&sr=8-4
Paired with a esp32 (basicly a faster arduino since a normal arduino was a little slow)
https://www.amazon.com/VKLSVAN-ESP-WROOM-32-Development-Dual-Mode-Microcontroller/dp/B07T6J3PXZ/ref=mp_s_a_1_1_sspa?keywords=Esp32&qid=1562179449&s=gateway&sr=8-1-spons&psc=1
Lights:
1x Laser Projector
2x 24" blacklight
1x LED Strip
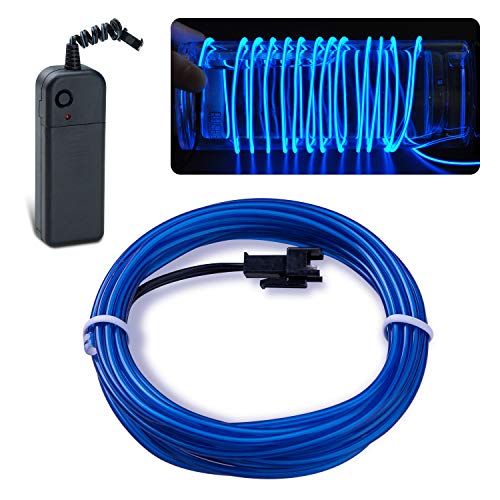
For a costume like this you don't want LED's. You want EL Wire
http://www.amazon.com/Light-Battery-Parties-Halloween-Decoration/dp/B00EENNHMM/ref=sr_1_2?ie=UTF8&qid=1414607288&sr=8-2&keywords=el+wire
I don’t want to spoil it but it has Phillies red...let’s say sixers red, flyers orange etc. even Philly soul blue...jk but no it actually does. Nice.
Led Strip Lights 6.56ft for 40-60in TV, PANGTON VILLA USB LED TV Backlight Kit with Remote - 16 Color Changing 5050 LEDs Bias Lighting for HDTV https://www.amazon.com/dp/B072QWJRBS/ref=cm_sw_r_cp_api_i_a93sDbZYCX16S
No need to be rich! There are super cheap:
https://www.amazon.com/gp/product/B072QWJRBS/ref=ppx_yo_dt_b_asin_title_o09_s00?ie=UTF8&psc=1&utm_source=share&utm_medium=ios_app&utm_name=iossmf
http://www.amazon.com/dp/B00ASHQQKI
^ Exact same thing but a couple bucks cheaper and way more reviews.
This is the strip I have in the back of my desk, easy to use and set up. The adhesive isn’t always the best so you might wanna use tape or push pins to help hold it up but this strip works great
https://www.amazon.com/SUPERNIGHT-Waterproof-300LEDs-Changing-Flexible/dp/B00DTOAWZ2/ref=mp_s_a_1_7?ie=UTF8&qid=1524633224&sr=8-7&pi=AC_SX236_SY340_QL65&keywords=rgb+light+strip&dpPl=1&dpID=511DpqZdCCL&ref=plSrch
I'm using seperate wifi controllers for each strip, works really well especially considering how cheap they are!
https://www.amazon.com/gp/aw/d/B0722VLVRR?psc=1&ref=yo_pop_mb_pd
2wayz 15FT Pack (10FT+5FT) of... https://www.amazon.com/dp/B072QWJRBS?ref=yo_pop_ma_swf
here are the UV strips and here are the LED strips i use.
Detolf is cheaper but fits less figures. This bookshelf with the doors and glass shelf's costed around $300 back in 2016.
Led strips are Dimmable LED Strip Lights, MINGER White Strip Light LED Mirror Lights Kit for Vanity Makeup Dressing Table 6000K Bright White Daylight, 300 LEDs, 16.4FT Under Cabinet Lighting Strips for Kitchen https://www.amazon.com/dp/B07CVRVPRM/ref=cm_sw_r_cp_apa_i_3GqXCbNZ1CP3V
The risers for the nendoroid are from:
https://hlj.com/search/go?ts=custom&w=Model%20base
I got custom ones cut longer and used the metal poles from that kit
The Arc Reactor is from Thingiverse with some minor modification from me (light choice). I designed a chest holder for elastic straps and made a small back piece to keep it all together.
Between lights, copper, elastic and all that, it cost me about $15 to make.
I used el glow wire from Amazon. Just one would have been fine for this.
Copper is just small gauge jewelry wire, and I glued everything instead of trying to hunt down some screws. The ones in the picture are printed bolt heads just for the look.
Multi-color LED strip lights ~$25. You can set the lights to any color including a comfortable 'soft white' or have them continuously cycle or blink through every color in the rainbow.
They are super fun, effective, and cheap. Comes with a remote too. I used to think something like this cost hundreds of dollars.
http://www.amazon.com/SUPERNIGHT%C2%AE-Waterproof-Flexible-300leds-Changing/dp/B00ASHQQKI/ref=sr_1_2?ie=UTF8&qid=1415075720&sr=8-2&keywords=led+strip
This is the el wire- excuse mobile
Lychee Neon Light El Wire with Battery Pack, 15 Feet, Blue https://www.amazon.com/dp/B00EENNHMM/ref=cm_sw_r_cp_apa_wb-.zbMXQ6FDS
And I'd recommend using some scotch or painting tape with a fifteen foot string to trace out the path you want to glue down. It will make it much easier, but it does take a while.
Also, use gel glue. It's shock/water proof. I'd recommend 2 of those if you're using a full face helmet
Loctite Ultra Gel Control Super Glue 4-Gram (1363589) https://www.amazon.com/dp/B003Y49R7G/ref=cm_sw_r_cp_apa_qe-.zbFH9CXFF
Put them on a base, not on your skin. You will dissolve the adhesive and they won't stick to you, a plastic mask would be pretty easy to rig up. Also those are 5050 leds, which are kind of terrible in my opinion since you can only power the whole strip at once, you can't control segments. Go with ws2812b or ws2811 which are the individually addressable and controllable type. The 5050s can be controlled by an arduino board but not very well. For the board, go with a 5v Trinket or Nano, small and easy to control.
This strip has a higher light density and is generally easier to work with: https://www.amazon.com/CHINLY-Individually-Addressable-Waterproof-waterproof/dp/B06XNJSKXN
To;dr: I spent a whole bunch of time putting together some custom lights for my setup. If you want to know more, read on. If you want to see the pretty pictures, click the links. Here’s one that shows the setup from the back of the room, and here is one from the front.
Intro
Some of you might recallmy last post. Well, I have finally found the light (forgive the bad dad jokes) at the end of the tunnel.
I took me basically the entire summer and a bit of the fall to get my system back up and running. Thankfully I have a old ‘65 Maggie in my living room that I spin from time to time when I’m desiring nostalgia. It took me as long as it did because I have a pretty busy life, but also because like Billy Joel, I go to extremes.
Like I said in my last post, I decided to replace all of my kallax because they apparently discontinued the natural color. I decided to go with a 3x4 and two 4x4s so my collection would have some room to grow. Since everything was boxed up, I also decided it would be a good time to wire in lights and stoppers.
Selection
I started to look at rope lights, but ultimately decided against them for a few reasons. First, I bought some, tested them, left them on for a while and felt that they were just putting off too much heat. Second, I really wanted them in the front, illuminating from above, and I didn’t just want to string them across the entire front. I like to put new records, favorite records or records I want to remember to listen to in front of the others for display. That and album artwork is fucking awesome. I quickly decided I wanted something to come from the back of the cabinet inside each cubby to just light up that top lip. I looked a bit, but wasn’t really finding exactly what I was looking for, so I figured out that I would probably be doing it on my own.
It was about this time that I decided that if I was going to put time into this, I may as well go for smart lights (Alexa already controls most everything in my house) and I may as well do color (that also reacts to the music, does strobes...). Because, well, it kind of matches the inherent extravagance of records collection itself.
I ended up going with these lights. .
Issues / Creating
Honestly, there’s a shit ton of variations for these lights, but they’re all probably made in the same shop, so I recommend buying one and testing it out. One thing I’ve learned after spending a decent amount of time with smart home stuff is that sometimes people in reviews have no idea what they’re talking about. “Didn’t work at all” or couldn’t get it to connect usually means “I know nothing about WiFi and therefore didn’t know that most of this stuff won’t run on a 5ghz channel, and my network isn’t set up so it will connect to 2.4. That is all to say that I noticed a number of bad reviews, bought them anyway (knowing Amazons return policy) and had absolutely no problem.
So, my plan was to use the junctions, clips and wires to build harnesses that would run all the power on the back of the kallax, with a wired clip running to the location that I wanted each light, and the remaining lights on the sides of of the stereo equipment, and then across the tops illuminating the box sets and legos.
Here’s where pain in the ass #1 comes in. The clips work well with the strips and the junctions, but they don’t connect directly to the wires. This was especially awesome because the wire that I bought fucking came with clips. Oh well. What that means is soldering, and a ridiculous amount of it.
I don’t mind soldering. In fact I find it therapeutic. However, this is 42 strips that each connect to at least one junction, in addition to jumpers between sections so they could all be controlled by two WiFi controllers. Next, the connections are all really small, and there are four of them for every single one. All in all, I believe that it ends up around 400 soldered connections.
So, one strip accepts the power from the controller. At the end of that strip is a clip with wires soldered. At the end of those wires is either a four way junction with wires either going to another strip, or to another junction that powers two more strips. That would do one vertical section of the kallax. One of the strips that is powered from that would have another clip and wire connected to the other end that jumped to another vertical section. Heres a photo showing a section being built and strips being powered at different sections.
To create each individual strip, the roll can be cut at certain points, and the rubber coating can be peeled and cut so it can be inserted into the clips. It’s obvious where to cut because there is a metallic connection with a dotted line through it. Every so often there is on that, rather than the copper connection, it’s a soldered and sealed connection. That can be cut and stripped like the others, but you’ll need to invest in a cheap solder sucker or wick to desolder that point or it won’t fit into the clips. I planned on doing this tutorial when I started to work on the project, and tried to remember to take pictures to illustrate. For some reason, this was the only one I took of a clip being soldered to a wire, and it’s the shittiest job, I’ve ever seen, so I’m going to assume it was done at the end of a session where many connections were created, and many beers were consumed.
Tips
I thought I would try to make this as a DIY thing, but it’s also soldering, which is more of a DIY after you practice sort of thing. That being said, it is something that anyone can do with the right patience, tools and a couple of hints.
Tip #1. Constantly test everything. If you test every connection immediately after making it, you can address your mistakes immediately. If you wait until you do a whole bunch, you end up having no idea what’s causing the problem.
Tip #2. Tin everything. This is the first thing you learn when learning to solder. Basically, this means you apply solder to both thing you want to join before you join them. This is me tinning a junction and some wires before connecting them.
Tip #3. Tape everything that you can. Whenever you solder things you want to make a physical connection (wrap the wire around what you’re soldering to). You can’t really do that here, so the tape helps in making the connections a little stronger. In the case of the junctions, the tape also insulates. The voltage is pretty minimal, but you still need to cover that up.
Installation
The strips have a self adhesive backing. which actually works pretty well. The wires running along the inside I decided to just use electrical tape. This has proven to have some mixed results, especially in the fronts where I was covering the white clips. I may eventually use them more like straps, stapling the ends.
Pain in the ass #2 - the clips pretty much just suck in general. I’ve run into a number of situations where the contacts aren’t holding against the strips tight enough, and they flake out a bit. This causes a bit of tinkering from time to time. Also, the space where the connection is made is pretty small, so a small shift and you lose one (blue being on one end).
This brings me to the big thing I would have done differently. I would have skipped the clips entirely and soldered the wires directly to the strips. I was avoiding doing this because I thought that I could run into situations where a strip would eventually go bad, and this would make it so I could switch it out. I think now that headache would have been minimal compared to the headache of setting them all up.
All in all, I’m pretty happy with it. I don’t use the color functions too often, but I have turned it to the sound reaction setting, and it’s pretty cool. I just need to get the remaining pictures and art on the wall and my basement will be ready to go (until I get around to finishing the bedroom and bathroom stubbed in the unfinished portion).
Thanks for reading if you made it this far. Hope it’s helpful for someone. I’ll be glad to fill in any details that you’re curious about.
Not sure about op, but this is what I ordered. If your tv has usb ports, plug it in there. If not, you can use a cheap phone power brick charger.
PANGTON VILLA Led Strip Lights 6.56ft for 40-60in Television USB TV Backlight Kit with Remote, 16 Color 5050, HDTV Bias Lamp https://www.amazon.com/dp/B072QWJRBS/ref=cm_sw_r_cp_api_zoSXBbYPD0W02
The El Wire I used: https://www.amazon.com/dp/B005Q5WVBU/ref=cm_sw_r_other_apa_i_5CTYDbD9JHQQ7
String:
https://www.amazon.com/dp/B000IGEBSS/ref=cm_sw_r_other_apa_i_eFTYDb58P80HW
The El Wire worked pretty well, but when I put it on flashing they flashed at different speeds. Though it did have a neat effect.
Good luck!
Thanks man. There are a ton of different options, but they are NOT the Ikea ones. Those are over-priced and quite a mess to hook up.
Incase anyone is wondering how bright they are, it still adds a good deal of light under normal lighting as well. Here is a picture with my hanging lamp on WITH the LED's on.
http://imgur.com/TA7w1MH
You can get this setup in different lengths to fit your desk.
http://www.amazon.com/SUPERNIGHT%C2%AE-Waterproof-Flexible-300leds-Changing/dp/B00ASHQQKI/ref=sr_1_2?ie=UTF8&qid=1408795973&sr=8-2&keywords=led+strip
I am not aware of a way to wire a switch in a headboard that is up to code. You would probably need to attach the bed to the wall/floor so it is considered part of the structure, and any exposed wire would need to be in conduit. Can you put the switch in the wall?
Let me give you a simpler option if you want the switch on the headboard.
I have used these LEDs on a few projects. They are cheap and you can buy additional strips to extend them, or you can cut them shorter. Just make sure your power adapter has the current for the length you attach. They come with a remote which can turn them on and off and set the color and brightness. However, they remember the state they were in. So you could set them to a cool blue or pink or whatever she likes and forget about the remote. Then, with the wireless switch I linked, she can easily just turn them on and off. (you could always turn them on and off with the remote, but it's nice to have a switch because it is always in one place.)
This is what I'm picturing in my head. Maybe put the speakers and sound system underneath the TV then place the plant on the corner table. ditch the stool thing. Then take some LED Strip lighting and place it on the back of the poles and on the floor behind the speakers. Then have some artwork on either side and either of the poles and either a large decorative clock or horns or a some type of 3D decor you can hang on the wall above the TV. Then get a rug it'll really tie the room together. Also fuck that lamp.
I like it, but would you think going with this strip:
https://www.amazon.com/dp/B00HSF66JO/ref=oh_aui_detailpage_o00_s00?ie=UTF8&psc=1
Similar to your suggestion, but waterproof.
Not sure if that’s your referral code, but I tried to copy it over just in case.
I used this: Led Strip Lights 6.56ft for 40-60in TV, PANGTON VILLA USB LED TV Backlight Kit with Remote - 16 Color Changing 5050 LEDs Bias Lighting for HDTV https://www.amazon.com/dp/B072QWJRBS/ref=cm_sw_r_cp_apa_i_jVw1DbCJZ87RM
https://www.amazon.com/gp/aw/d/B072QWJRBS
Led strip from amazon https://www.amazon.com/gp/aw/d/B072QWJRBS?psc=1&ref=ppx_pop_mob_b_asin_title
https://www.amazon.com/gp/aw/d/B076767MLZ/ref=ya_aw_od_pi?ie=UTF8&psc=1
This is what I used. It's a good kit.
Thank you!
I got the LED strip light off of Amazon.
Here's the exact one I purchased.
https://www.amazon.com/dp/B079B834PB/ref=cm_sw_r_cp_apa_i_XiTwDb9659SP7
Thank you! Those are standard RGB strips 5050 waterproof 300smd like this one: https://www.amazon.com/Waterproof-Epoxy-5050-Strip-Light/dp/B0085IXEYS
Something like this:
http://www.amazon.com/SUPERNIGHT%C2%AE-Waterproof-Flexible-300leds-Changing/dp/B00ASHQQKI/ref=sr_1_3?ie=UTF8&qid=1411490570&sr=8-3&keywords=LED+Light+Strips
This is the kit I got. They run off 12v, so I basically cut the adapter and spliced it so I could run it into the accessory on my bike, which is always on unfortunately, but they're controlled by an IR remote, so that's what I use to turn it on and off. The adhesive on it is terrible, so I would advise getting a thing of 3m double sided mounting tape, and using it every 4-6 inches.
It's usually just some sort of LED rope light (like this: http://www.amazon.com/SUPERNIGHT%C2%AE-Waterproof-Flexible-300leds-Changing/dp/B00ASHQQKI/ref=sr_1_2?ie=UTF8&qid=1420735558&sr=8-2&keywords=RGB+rope+light ) that you set to whatever color you want
https://www.amazon.com/Waterproof-Flexible-Daylight-Gardens-Kitchen/dp/B00HSF66JO/ref=sr_1_2_sspa?ie=UTF8&qid=1519883907&sr=8-2-spons&keywords=12v+led+light+strip&psc=1
those are self adhesive even. Just used some on my 3d printer. they even have color changing versions, and some can react to sound....
Honestly seems like something out of a different aesthetic though... a bit too techno on a machine making the most of mechanics.
https://www.amazon.co.uk/gp/aw/d/B06XYZ56HG/ref=yo_ii_img?ie=UTF8&psc=1
They're very good. All the colours and loads of modes.
Some additional photos can be found HERE. Full specs are below:
Rig on the right:
Rig on the left
Desk
Zitrades EL Wire Kit 9ft, Portable Neon Lights for Parties, Halloween, Blacklight Run, DIY Decoration (5 Pack, Each of 9ft, Red, Green, Pink, Blue, White) https://www.amazon.com/dp/B005Q5WVBU/ref=cm_sw_r_cp_api_i_uZF7Ab8ESM39X
I think this will take more custom work than you think it will. This is the datasheet for the ICs in that LED strip, you will need a DMX decoder that will send the proper data stream over the bus. It would not be difficult with something like an Arduino if you have experience in that sort of thing, but the hard part then would be getting the Arduino to decode the DMX for each pixel.
The DMX decoder you linked only outputs PWM, so it will not work for those LEDs.
Edit: What WILL work is if you get a standard RGB LED strip like this one, then that decoder will work with one channel per color (which it seems is how it was intended to work to begin with).
I used a 16.4 foot (5 meter) roll and ended up cutting off about 2.5 feet, so probably close to 14 feet.
Here's a link to the lights I use:
http://www.amazon.com/SUPERNIGHT-Waterproof-Flexible-300leds-Changing/dp/B00ASHQQKI/ref=sr_1_2?ie=UTF8&qid=1405091074&sr=8-2&keywords=led+strip+lights
light strip
Wi-Fi controller
I see, sorry did not know that. It is a string of LED's, like this one but only 8 ft https://www.amazon.com/SUPERNIGHT-5-Meter-Waterproof-Flexible-Changing/dp/B00ASHQQKI
These but without everything but the LED strip.
Dioders are quite pricey and I highly recommend going with these LED Strips since it is much better, longer and you can cover all of your Detolf with it. As I did with mine. I can get you a picture of both displays with LEDs on after work if you want
Also the by going with the LED Strip it's on Prime Shipping plus it has changeable lights and a remote switch!
And if you find Acrylic Cubes at IKEA I'd like to know aswell! :P
Here is one of the LED strips that I use. When you open up the packaging hold your breath as you get a nice smell of the factory the thing came out of, and it is depressing. leaving it over night to air out.
https://www.amazon.com/dp/B00ASHQQKI/ref=twister_B07GKRQT3K?_encoding=UTF8&psc=1
The LED track I currently use for the frame
I purchased some good adhesive backed Velcro from Big Box store and cut everything to fit the bike frame for easy install and removal if a light strip goes out.
https://www.amazon.com/gp/product/B00ME3ZH7C/ref=oh_aui_detailpage_o06_s00?ie=UTF8&psc=1
I use this battery pack for the bike frames and the smaller ones they sell for the wheels.
https://www.amazon.com/gp/product/B00ME3ZH7C/ref=oh_aui_detailpage_o06_s00?ie=UTF8&psc=1
There are some basic extender clips off amazon for the LEDs that "work" to connect the frame parts together but short of soldering all the extender clips are hit and miss, so find what works for you.
For the wheels you can do one of three things for installing.
1
Buy lots of strong adhesive ( a glue gun doesn't work that well and can melt/boil the glue tape the strips come on) and physically fit a square into a round hole. Glue the strips to the wheel frame so the lights are facing to the center but at an angle of the wheel. While the strips are bendable they are only bendable going up and down not side to side so parts of the strip start to bow-out but those spots can be forced into place with enough adhesive. The strips will start to separate from the wheel frame because physics dictates this can't work. It is what I did first to both wheels. The front side didn't work out but the back wheel has been holding together for the past couple of months.
2
Buy some clear flexible tubing from local box mart and some zip ties. Keep the protective adhesive tape on the LED strip so it can still slide into the tubing and use the zip ties to attach the tubing to the spokes. It will look like shit but it gets the job done. Also cut zip ties are sharp so it kind of turns the wheel into a shitty chainsaw.
3
buy a 3D printer to make clips to hold the LEDs to the spokes.
As for the power supply I temporary have some Velcro holding them to the wheel spokes, that I am trying to fix.
It is probably the dioder from IKEA since it looks like an IKEA desk. Could also just be something like this off of Amazon that he set up.
I have two of these strips, one behind the desk and one under: http://www.amazon.com/SUPERNIGHT-5-Meter-Waterproof-Flexible-Changing/dp/B00ASHQQKI/ref=sr_1_1?ie=UTF8&qid=1453786593&sr=8-1&keywords=led+strips
and I have 3 of these bulbs, two behind the monitors and one in my lamp: http://www.amazon.com/Flux-WiFi-Smart-Light-Bulb/dp/B00SGLKWQW/ref=sr_1_2?ie=UTF8&qid=1453786682&sr=8-2&keywords=flux+light+bulb
It look DYI.
It looks a lot like my desk. I used to of these
https://www.menards.com/main/kitchen/countertops-laminate/view-all-countertops-laminate/customcraft-trade-6-ft-miter-standard-laminate-countertop/p-1444427696466-c-3629.htm?tid=3665618330554909790
and ordered some LED muticolor lights from amazon
http://www.amazon.com/SUPERNIGHT-5-Meter-Waterproof-Flexible-Changing/dp/B00ASHQQKI/ref=sr_1_2?ie=UTF8&qid=1453918649&sr=8-2&keywords=Led+strip+lights.
If you don't have menards where you live a lot of the big box improvement store have them for about the same price or you could call a countertop company and see what they can do for you.
I can recommend Phanteks fans easily. I'm running six of them and am very happy with the noise level. They're available on Amazon in a 9-blade configuration in 3-pin and a 7-blade in PWM.
When you get into this price range (~$20) you have a lot of good options though. I've had a few Noctua fans through the years and loved them. Their color scheme always put me off, but they have black and gray available now.
The blades on the Phanteks just pop off, though some force must be applied. No washers or screws of retaining clips to deal with. I've painted a few of those myself.
I've not worked with the r5 myself so I can't answer how doable your strip idea is, but I can highly recommend this LED strip. Over 16 feet long, cuttable every 3 LED sections, RGB and comes with a wireless remote that you can use to change your colors one step at a time in any of the three color shades and save color profiles. For $28 it's hard to beat. I used it in a mod I made for Quake Con last year, but I made the mistake of getting the waterproof version. The silicone covering on those is very thick and makes bends difficult and has to be scraped off to make any solder joints.
As for things to keep in mind, if you're handy with a soldering iron I'd cut the strip at your corners and solder the ends with some small-gauge wire to make your bends. Flat strip isn't made to bend along it's narrow axis like that. Alternatively, they have pre-made LED strip corners, though I've never used them.
Good luck and can't wait to see it!
Not sure why this is such a good deal when you can get same thing on Amazon with remote control for about the same?
These are the same but use 3528 leds for $16 https://www.amazon.com/gp/aw/d/B00BP4GNRY/ref=mp_s_a_1_1?ie=UTF8&qid=1467419174&sr=8-1&pi=SY200_QL40&keywords=rgb+led+strip&dpPl=1&dpID=51hQb-dcRUL&ref=plSrch.
This one is 5050 rgb led and comes with everything you need for $20: https://www.amazon.com/gp/aw/d/B00ASHQQKI/ref=mp_s_a_1_12?ie=UTF8&qid=1467422946&sr=8-12&pi=AC_SX236_SY340_FMwebp_QL65&keywords=Rgb+led
Just wondering why this is getting so much attention because I'm in the market for one of these for a pc molex case mod.
My lighting setup contains 2 SUPERNIGHT Strips
1 Flood Light
and 2 USB LED Strips in my PC
I have on SUPERNIGHT Strip on the trim of my Window. The other is behind the desk and wraps back under the desk.
The Flood Light is just sitting behind my monitor facing the blinds.
These are a popular choice
Not always. There is a remote to change colors/patterns. Here's the kit I bought.
http://www.amazon.com/gp/product/B00ASHQQKI/ref=pe_153920_162745740_em_1p_0_ti
I've used a kit like this in one of my tanks. It looks good. The way these kits work is you have an LED chip with one red, one green, and one blue led. Turn them all on and you have white! So I'm not sure what the other posters are talking about "not having white".
After all R+G+B=W.
Get something like this one in which you can control how much red, blue, green, etc you put out, it gives you a lot of control so you can get a perfect white.
-Hedgie came from a great breeder
http://www.welovehedgehogs.com/index.html
-KALLAX Shelving unit, high gloss white
http://www.ikea.com/us/en/catalog/products/20305745/
-Stanley Hardware 40-3426 1/4" X 6' Plastic Track in White Coated
by Stanley Hardware Link: http://amzn.com/B000NHLJE6
-SUPERNIGHT 5-Meter Waterproof Flexible Color Changing RGB SMD5050 300 LEDs Light Strip Kit with 44 Key Remote and 12V 5A Power Supply
by SUPERNIGHT Link: http://amzn.com/B00ASHQQKI
-Prime-Line Products 191928 Self-Adhesive Medicine Cabinet Pull, Clear, 2-Pack
by Prime-Line Products Link: http://amzn.com/B002YGNDAW
-Coroplast Model # CP4896S Internet # 205351385 Store SKU # 1000118572 48 in. x 96 in. x 0.157 in. White Corrugated Plastic Sheet
http://www.homedepot.com/p/Coroplast-48-in-x-96-in-x-0-157-in-White-Corrugated-Plastic-Sheet-CP4896S/205351385
-Model # 80077-ZWS77CM1 Internet # 202081502 Store SKU # 748867 1-1/4 in. x 2 in. x 84 in. Vinyl Brick Moulding Set (3-Pieces)
http://www.homedepot.com/p/1-1-4-in-x-2-in-x-84-in-Vinyl-Brick-Moulding-Set-3-Pieces-80077-ZWS77CM1/202081502
-Veranda HP Model # H120AWS6 Internet # 205309788 Store SKU # 1000052907 1/2 in. x 48 in. x 8 ft. White PVC Trim
http://www.homedepot.com/p/Veranda-HP-1-2-in-x-48-in-x-8-ft-White-PVC-Trim-H120AWS6/205309788
-DAP Model # 00688 Internet # 100128841 Store SKU # 686064 2.8 oz. Silicone Aquarium Sealant
http://www.homedepot.com/p/DAP-2-8-oz-Silicone-Aquarium-Sealant-00688/100128841
-One Day Glass - Peninsula Glass Company
https://www.onedayglass.com/
Type: Tempered Glass
Shape: Square/Rectangle
Thickness: 1/4"
Tint: Clear
Edgework: Flat Polish (a,b,c,d)
Width: 28"
Height: 11 1/16"
I got these: https://www.amazon.com/SUPERNIGHT-Waterproof-300LEDs-Changing-Flexible/dp/B00DTOAWZ2/ref=pd_sim_267_2?_encoding=UTF8&pd_rd_i=B00DTOAWZ2&pd_rd_r=TYE278B5D6CVA7PBTQ84&pd_rd_w=mHO46&pd_rd_wg=afNG2&psc=1&refRID=TYE278B5D6CVA7PBTQ84
http://www.ebay.com/itm/281854002969?_trksid=p2057872.m2749.l2649&ssPageName=STRK%3AMEBIDX%3AIT
More details and video of it in action at the bottom of the page: https://ancapistanvan.blogspot.com/2017/05/conversion-equipment-appliances-and.html
LEDs: https://www.amazon.com/dp/B00DTOAWZ2?ref=ppx_pop_mob_ap_share
WiFi led controller: https://www.amazon.com/dp/B01JZ2SI6Q?ref=ppx_pop_mob_ap_share
I have this led strip and then a lamp behind my monitor on the left. For the led strips to get that effect I got one of these.
Because I'm a fuckin' genius and no one can stop me! That's how!
But for real, I have some LED light strips and a box with a mic that syncs with the beat mounted sneakily in my ceiling.
Looks like el wire
http://www.amazon.com/gp/product/B00EENNHMM/ref=pd_lpo_sbs_dp_ss_2?pf_rd_p=1944687762&pf_rd_s=lpo-top-stripe-1&pf_rd_t=201&pf_rd_i=B003J99JW4&pf_rd_m=ATVPDKIKX0DER&pf_rd_r=0RK2D6KV6E0T1BNMHXTQ
Roll #1
Roll 2
connector between both rolls
Given that is looks like mine, I'm going to assume they are:
https://www.amazon.com/gp/product/B00HSF66JO/ref=oh_aui_detailpage_o03_s01?ie=UTF8&psc=1
https://www.amazon.com/Adapter-Transformers-Supply-Output-Listed/dp/B00DKSI0S8/ref=pd_bxgy_60_img_2?_encoding=UTF8&pd_rd_i=B00DKSI0S8&pd_rd_r=ET8Y5X5FM7Q06TP33QBH&pd_rd_w=Xw11o&pd_rd_wg=ZQTfN&psc=1&refRID=ET8Y5X5FM7Q06TP33QBH
To install: https://www.reddit.com/r/AnimeFigures/comments/7psgup/dioder_alternatives/dsjy59n/ (Follow the pictures in the chain)
Sorry the pictures were supposed to have descriptions with them, it was my first photo post and I got it slightly wrong.
The panels are all replaced with VE Grade 3mm acrylic, optically looks clear but is virtually opaque in UV, Perspex amongst others make it, a full size sheet 2x1mtr is expensive so I would google for somewhere that will cut to size and sell you an off cut large enough to be cut into all 4 panels, (if you want to replace all 4). I used the oem panels as templates, the acrylic drill fine with a wood backing and I used a dremel like tool with a cutting wheel to cut out the panels, I would recommend protection as bits of hot acrylic tend to spin off the blade.
The lights are a couple of pieces of this, https://www.amazon.co.uk/gp/product/B00HSF66JO, they can be cut every 3 LEDs and wires soldered to the ends. To fit them they have adhesive tape and are taped in the near corners. The proper way to route them would be to strip the printer down and file a slot in the base at the 2 corners, or drill holes big enough in the base to thread the cables through, or the naughty way, remove the screws in the corners, make sure the the sides are not glued with resin or anything. refit the screws and lever a small screwdriver down the side to make a slight gap, enough to route the cables down. Remove the base and fit a suitable switch, I used https://uk.rs-online.com/web/p/push-button-switches/7346750, discrete and latches. Solder and heatshrink the wiring together and connect to the main connector on the motherboard.
If anyone is interested I can put the stl of the tool holder on thingiverse.
I dont think it would be that hard, and its a really neat idea. Found these on amazon and the frame could be made out sheet plastic or pvc.
LE 12V Flexible RGB LED Light Strip Kit, Color Changing, 150 Units 5050 LEDs, Non-Waterproof , Remote Controller and Power Adaptor Included, LED Tape, https://www.amazon.com/dp/B01EWBZW0A/ref=cm_sw_r_cp_apap_qhu8iJFD9oS2C
Sorry was at work, cheers
The 3M command hangers are great for hanging things around your room or closet. And I would recomend some led lights like these: Flexible RGB LED Light Strip Kit
My room was dark and this really brightened it up
I got this kit from Amazon during Prime Day. It has a 3M adhesive back on it to stick onto the desk. It comes with a remote to change the color and has some cool fade and jump color features. I think I only ended up using half of the LED strip it comes too lol.
https://www.amazon.com/gp/aw/d/B01GJ3O0J8/ref=mp_s_a_1_7?ie=UTF8&qid=1510015304&sr=8-7&pi=AC_SX236_SY340_QL65&keywords=wentop+led+strip+lights&dpPl=1&dpID=51Z1u%2BUfRxL&ref=plSrch
These are the lights I used in my Eskimo Wide 1 inferno. I wired up a power box with 4 switches and put a strip on each pole. They are nice and bright when they are all on but the switches allow me to turn them on individually.
Yeah, absolutely, here's what I send to people who ask:
LED: CHINLY WS2812B 5v (300 LED count) I bought a couple of brands for experimenting, and these are by far the brightest and more reliable LED's that I found. Powering them is trickier because they're double density; 300 led's per 5 meter instead of 150 per 5 meter.
https://www.amazon.com/gp/product/B06XNJSKXN/ref=od_aui_detailpages01?ie=UTF8&psc=1
Controller: Advatek Pixlite 16 MK2, This was the more expensive one. I bought it because I wanted NO limitations. It can control approximately 16,000 LED's plus 4 DMX universes. It works like a charm. There is a cheaper one called the PixLite 4.
http://www.advateklights.com/pixlite-control/
Software: LightJams There is definitely a learning curve with this program, but it was the best that I found to do what I wanted. It can control any type of fixture, and is a very good price. I chose it because it can send ArtNet signals and sACN. This was important to me because I want to use the DMX universes, but the PixLite Controller cannot use the DMX outputs with ArtNet. All other software only uses ArtNet, but I needed sACN support so I can use both LED's + DMX. You can download the trial and use the trial to design all your setup and then buy a license (or rent a license for cheap!) when you're ready. There is a Google group where the developer will answer any questions. He is very helpful.
http://www.lightjams.com/ https://groups.google.com/forum/#!forum/lightjams
I was able to build 4 x light poles on PVC (3 rows of 87 LEDs for a total of 1,044 LEDs), with 3 power supplies, PixLite controller, software license, wires/cables for less than $800USD. I can continue adding more poles as I wish. Each pole costs about $60USD to make not including the controller or software.
I got it from amazon dude: https://www.amazon.co.uk/ANSCHE-Backlight-Background-Decoration-Waterproof/dp/B06XYZ56HG/ref=sr_1_1?s=kitchen&ie=UTF8&qid=1536849575&sr=1-1&keywords=ANSCHE+150cm%2859inch%29
I bought these.
Nexlux LED Strip Lights, WiFi Wireless Smart Phone Controlled 32.8ft Waterproof Light Strip LED Kit 5050 LED Lights,Working with Android and iOS System,Alexa, Google Assistant https://www.amazon.com/dp/B0722VLVRR/ref=cm_sw_r_cp_api_i_jz3qDbK9B6786
They are pretty solid. You can cut the strip and buy extra power cords and WiFi modules. They are cheaply made but they get the job done.
Super cheap Amazon lights:
https://www.amazon.com/PANGTON-VILLA-Led-Strip-Lights/dp/B072QWJRBS/ref=mp_s_a_1_3?keywords=tv+led+strip+lights&qid=1562246916&s=gateway&sr=8-3
The adhesive is really crappy though so I cut down some double sided tape to keep the strip in place.
Led Strip Lights 6.56ft for 40-60in TV, PANGTON VILLA USB LED TV Backlight Kit with Remote - 16 Color Changing 5050 LEDs Bias Lighting for HDTV https://www.amazon.com/dp/B072QWJRBS/ref=cm_sw_r_cp_api_i_IuBWDbR9TX0FH
These from amazon! I put them behind each one of them and just hit the strobe setting and it looks awesome. Added more flare
[Here you go!] (https://www.amazon.com/dp/B075FRFBKG?ref=ppx_pop_mob_ap_share). It connects to an app on your phone where you can control the colors, brightness, speed, modes, saturation, etc. It has an adhesive backing which I used to stick it to the underside. These also came in handy for getting it from the bottom half to the top half without it looking shitty. [Here’s how I wired it] (https://i.imgur.com/K3pMA7S.jpg)
Little different than what you're looking for but I use generic RGB LEDs I got off Amazon. They plug into a plug next to the fridge. Has a remote that turns then many colors. Also works with Google home. These are what I got.
LED Light Strip Kit for $8.99!
Enter the promo code at checkout; VETTALED
https://www.amazon.com/gp/product/B07CVRVPRM/ref=as_li_ss_tl?smid=A2KZ7X05DCDJDL&psc=1&linkCode=sl1&tag=6502503-20&linkId=3136a200cda5a45c0021e5ceab304a09&language=en_US&utm_content=buffer2638f&utm_medium=social&utm_source=twitter.com&utm_campaign=buffer
Okay I am creating my spare room into a studio and dark room. I am curious if safelights have something special to them or if it is just a red light? I am thinking about putting something like this in the upper wall side by the celling. I am curious if I turn it to red, will it work as a safelight?
I bought 2 16ft led strips from amazon. They were around 16-17 dollars each and have remotes. Do be warned though if you have a tv in your room the radio signals from those remotes do sometimes change the lights colors.
Link is here: https://www.amazon.com/dp/B079B834PB?ref=ppx_pop_mob_ap_share
Just a simple led strip wrapped around the top of my wall.
https://www.amazon.com/MINGER-Waterproof-Lighting-Controller-Decoration/dp/B079B834PB/ref=mp_s_a_1_1_sspa?keywords=led+light+strip&qid=1554578773&s=gateway&sr=8-1-spons&psc=1
I did a little digging and found these they are full RBG and WiFi enabled i didn't initially set out for RBG lights but i decided last minute to get them and i don't regret it. not that the "16.4 million colors" aren't great but i more prefer it for the subtle different types of white i can have (warmer, cooler, ect.)
highly recommended as well because customer service was great. nothing was wrong with mine and i didn't even contact them. they sent me a nice little follow-up email making sure everything was ok.
This build will run the games you want to play at nice settings. If anyone has any changes please comment them. There’s not too much RGB but if you want more you can buy a strip of them for $18 off amazon. RGB strip lights
PCPartPicker part list / Price breakdown by merchant
Type|Item|Price
:----|:----|:----
CPU | Intel - Core i5-8600K 3.6GHz 6-Core Processor | $237.99 @ SuperBiiz
CPU Cooler | Cooler Master - Hyper 212 EVO 82.9 CFM Sleeve Bearing CPU Cooler | $24.89 @ OutletPC
Motherboard | MSI - Z370-A PRO ATX LGA1151 Motherboard | $89.99 @ Newegg Business
Memory | G.Skill - Trident Z RGB 16GB (2 x 8GB) DDR4-3200 Memory | $208.99 @ Amazon
Storage | Kingston - A400 120GB 2.5" Solid State Drive | $41.50 @ Newegg
Storage | Western Digital - Caviar Blue 1TB 3.5" 7200RPM Internal Hard Drive | $43.85 @ OutletPC
Video Card | EVGA - GeForce GTX 1060 6GB 6GB SC GAMING Video Card | $299.99 @ B&H
Case | Cooler Master - MasterBox Lite 5 RGB ATX Mid Tower Case | $63.44 @ Newegg
Power Supply | EVGA - SuperNOVA G3 550W 80+ Gold Certified Fully-Modular ATX Power Supply | $53.98 @ Newegg
Operating System | Microsoft - Windows 10 Home OEM 64-bit | $92.89 @ OutletPC
Monitor | MSI - Optix G24C 23.6" 1920x1080 144Hz Monitor | $225.19 @ Newegg Marketplace
Keyboard | Corsair - K55 RGB Wired Gaming Keyboard | $47.99 @ Amazon
Mouse | Corsair - Harpoon RGB Wired Optical Mouse | $27.99 @ Amazon
| Prices include shipping, taxes, rebates, and discounts |
| Total (before mail-in rebates) | $1508.68
| Mail-in rebates | -$50.00
| Total | $1458.68
| Generated by PCPartPicker 2018-05-03 16:25 EDT-0400 |
Zitrades EL Wire Red Blue Green White Pink Neon Glowing Strobing 9ft Electroluminescent Wires 4 Modes Battery Operated For Cosplay Dress Halloween Christmas Party Decoration Indoor Ourdoor https://www.amazon.com/dp/B005Q5WVBU/ref=cm_sw_r_cp_api_6A4XxbZ20APHW
Coming in hot! link
These are the ones I used, cheap and effective.
Edit: link
The battery should have a high amp-hour rating. Basically a 100 amp hour battery will supply a 1 amp load for 100 hours OR it will supply 100 amps for 1 hour.
Figure out the continuous power draw from your light system [for instance if the LEDs draw 10 amps at 12 volts, a 100 amp hour battery will last 10 hours at that load]. LEDs are pretty efficient you might get more life than in my example.
Next you will want a 12 volt LED controller that you will need to wire the + & - terminals of the battery to. What needs to be considered here is the fact that car batteries actually put out about 14 volts when fully charged. Now, 2 volts may not make a big difference but you want to make sure the LED controller will be happy with an extra 2 volts going through it. My guess is that you will be fine but just an FYI.
This controller: http://www.amazon.com/TaoTronics-TT-SL204-Activated-Controller-Plug-And-Play/dp/B008BD4734/ref=sr_1_5?ie=UTF8&qid=1395765292&sr=8-5&keywords=led+controller accepts a 12V power input, is sound activated, comes with a color remote and you can wire two 5050 LED strips directly into it.
Here is an example of the LEDs that work with this controller: http://www.amazon.com/SUPERNIGHT-TM-Waterproof-Epoxy-Strip/dp/B0085IXEYS/ref=sr_1_1?ie=UTF8&qid=1395765867&sr=8-1&keywords=5050+LED+strips
The rest is up to creativity!
Here you go
It's pretty long, but I have these behind my entire desk, annnddd it's kind of awesome.
Something like this I think. If you search led strip kit on amazon there's cheaper options.
These leds are what i use. They are really bright have every color you can imagine. it does come with 16 feet, which i did manage to use in a full size tower. It has sticky tape on the back which is ok i still ended up having to use some 3m double sided tape. ive used these in 4 builds and i love them. ive tried cathodes its hard to get them into small spaces and behind stuff without either being able to see them or them not fitting. my cathodes also only lasted just over a 2 years where leds should have a longer life span.
Geovanni Velasquez SUPERNIGHT 5-Meter Waterproof Flexible Color Changing RGB SMD5050 300 LEDs Light Strip Kit with 44 Key Remote and 12V 5A Power Supply https://www.amazon.com/dp/B00ASHQQKI/ref=cm_sw_r_cp_api_i_prR5Ab3W3ARD3
Yeah I was thinking of getting these for behind my desk and these for inside my case. The RGB ones can be programmed for new colors and different patterns and they arent that expensive. And the ones for inside the case are dirt cheap. Just got a ssd a month ago and its awesome!!
http://www.amazon.com/SUPERNIGHT-5-Meter-Waterproof-Flexible-Changing/dp/B00ASHQQKI/ref=sr_1_1/189-8845736-1915363?s=musical-instruments&ie=UTF8&qid=1457032572&sr=1-1
http://www.amazon.com/SUPERNIGHT%C2%AE-Waterproof-Flexible-300leds-Changing/dp/B00ASHQQKI/ref=sr_1_2?ie=UTF8&qid=1412745668&sr=8-2&keywords=LED+strip
This exactly. It has an adhesive side. I have a board screwed into the wall, it's wrapped around the board. The monitor mounts are mounted to the board. I'll try and get a picture of it.
This is the specific LED strip that I purchased. However if you have the know how you can try to purchase something off of this listing.
Something like this might be better for you if you are not comfortable with soldering. You always get the benefits of selecting whatever color you want.
http://www.amazon.com/SUPERNIGHT%C2%AE-Waterproof-Flexible-300leds-Changing/dp/B00ASHQQKI/ref=sr_1_4?ie=UTF8&qid=1419023917&sr=8-4&keywords=5050+rgb+strips
This is the strip I am looking at, I think this is non-addressable?
I have these lining my desk...
http://www.amazon.com/SUPERNIGHT-5-Meter-Waterproof-Flexible-Changing/dp/B00ASHQQKI/ref=sr_1_4?ie=UTF8&qid=1452994405&sr=8-4&keywords=5050+led+strip
Love the huge art piece. I want that. And I've always had a thing for those ikea wall mounted tv stands. Very sleek.
+1 for Narvinye's comment on the curtains.
My suggestion would be to add accent lighting behind your tv and along the top of the upper cabinet. That would look AMAZING in your already nice space.
You can use something like this.
http://www.amazon.com/SUPERNIGHT-5-Meter-Waterproof-Flexible-Changing/dp/B00ASHQQKI/ref=sr_1_4?ie=UTF8&qid=1453398649&sr=8-4&keywords=led+strip
Here's an example of led strips used effectively:
http://st.houzz.com/simgs/8a61520401e6b2c5_8-7450/contemporary-media-room.jpg
I used something like this and glued it to the back of the desk:
http://www.amazon.com/SUPERNIGHT-5-Meter-Waterproof-Flexible-Changing/dp/B00ASHQQKI/ref=sr_1_4?ie=UTF8&qid=1454278435&sr=8-4&keywords=led+strip
I bought 2 of these and use them in my room. The adhesive backing is worthless, but if you can figure out a better way to attach it, there probably isn't a better answer.
http://www.amazon.com/SUPERNIGHT%C2%AE-Waterproof-Flexible-300leds-Changing/dp/B00ASHQQKI/ref=sr_1_2?ie=UTF8&qid=1427177633&sr=8-2&keywords=LED+strip+lighting
Data Repeater RGB Signal Amplifier
Power Supply
2.1 mm breakout adapters
Or just buy this here and have everything in one kit
https://www.amazon.com/gp/aw/d/B00ASHQQKI/ref=yo_ii_img?ie=UTF8&psc=1
Here's the LED strip I used - https://smile.amazon.com/gp/product/B00ASHQQKI/ref=oh_aui_detailpage_o09_s00?ie=UTF8&psc=1
Yep. https://www.amazon.com/gp/product/B00ASHQQKI/ref=oh_aui_detailpage_o05_s01?ie=UTF8&psc=1
http://www.amazon.com/gp/product/B00ASHQQKI/ref=oh_aui_detailpage_o06_s00?ie=UTF8&psc=1
I used this LED strip
The strip is 16 feet long, so i measured out a rectangle for the top of my case, and the front length of the case. I then cut the strip into sections so i could run the cable how i wanted.
I used these adapters to connect each of the sections i made
For the connection from the front left cable to the front right cable, i spliced one of the connectors with some white spare cable i bought, and ran it across the bottom of the case (seen in one of the pictures. Then i mounted everything with 3M mounting tape, which is highly recommended. Let me know if you have other questions, as I made some mistakes which cost me some length of LEDs but was overall not too hard.
LED strip lights, bunch of them on Amazon. They usually come with adhesive backs, can be waterproof, come in any number of colors and can even be color changing. You can also get them remote controlled, or get a remote control adapter. They can be cut to desired length as well.
​
Here's an example, but there are a bunch
https://www.amazon.com/SUPERNIGHT-Waterproof-300LEDs-Changing-Flexible/dp/B00DTOAWZ2/ref=sr_1_48?keywords=led+waterproof+strip+lights&link_code=qs&qid=1567554384&s=gateway&sourceid=Mozilla-search&sr=8-48
Here is what you will need- this is double density LED strip. Prices for these strips have dropped dramatically in the past two years, and you want to get them directly from Amazon or eBay from a well rated seller to avoid paying way more than you have to than from a company who is in America and is just importing the goods to mark them up.
The last time I did a large LED strip project, I bought at least one spare item of each type to ensure that I had no Chinese failures. You may want to do the same.
4x
SUPERNIGHT (TM) 16.4FT 5M SMD 5050 Waterproof 300LEDs RGB Color Changing Flexible LED Strip Light https://www.amazon.com/dp/B00DTOAWZ2/ref=cm_sw_r_awd_Y8asub14V6WY0
3x
LEDJump DMX512 4A 3 Channels Decoder Controller Dimmer for RGB LED Light Strip DC12V-24V https://www.amazon.com/dp/B00KQ3NY5E/ref=cm_sw_r_awd_j-asub002J3CY
3x
New Universal Charger AC Power Adapter Laptop Notebook USB/10 Tips 12V-24V 90 Watt Max https://www.amazon.com/dp/B006FD71P8/ref=cm_sw_r_awd_5cbsub1Y1Z1W3
You will need to be prepared to solder and to strip wires. Have some extra wire handy for leads.
Think about where you want to place the power supplies and DMX boxes, and ensure that you have enough wiring to do so.
Run the laptop charger at 12V.
You may want to use these as a drop glow, and not have them directly visible. If you have them directly visible, you may want to diffuse them some more to avoid looking at individual LEDs.
Consider putting in a quarter round 1/2 inch molding on the lip of your platforms, and adhering this to the underside of it to illuminate the face of your platform.
Good luck!
This is my next project...
https://github.com/steve228uk/homebridge-magichome
SUPERNIGHT WIFI Wireless LED Smart Controller Working with Android and IOS System Mobile Phone Free App for 16.4ft 300 LEDs RGB LED Light Strips https://www.amazon.com/dp/B01JS0KEBW/ref=cm_sw_r_cp_api_XJn-ybKJ9WEBS
Alightings 4pin LED Connector Connect Wire to Strip, Applicable for 10 mm 5050 RGB Waterproof LED Strip Lights, 22 - 20 AWG Cable Without Stripping the Wires https://www.amazon.com/dp/B01I8CDF58/ref=cm_sw_r_cp_api_jKn-ybEXT5PVQ
EvZ 4 Color 10m RGB Extension Cable Line for LED Strip RGB 5050 3528 Cord 4pin https://www.amazon.com/dp/B00DPQMKBS/ref=cm_sw_r_cp_api_yKn-ybSYT4318
EPBOWPT 12V 5A Power Supply AC Adapter for 5050 3528 RGB LED Strip Light Low Voltage Device https://www.amazon.com/dp/B01KT20TNG/ref=cm_sw_r_cp_api_OKn-ybWC82QCH
SUPERNIGHT (TM) 16.4FT 5M SMD 5050 Waterproof 300LEDs RGB Color Changing Flexible LED Strip Light https://www.amazon.com/dp/B00DTOAWZ2/ref=cm_sw_r_cp_api_4Kn-ybSM88NFB
Hey Hvy-
I used about 15m of RGB LED Tape connected to a wireless (remote controlled) RGB controller. In the video was the test mount, but I ended up installing them under the hull/deck joint so they give a softer glow and aren't in your face....
http://www.amazon.com/Cooligg-Wireless-Remote-Controller-12-24v/dp/B00GWFH46A/ref=sr_1_2?ie=UTF8&qid=1426871084&sr=8-2&keywords=rf+rgb+led+controller
http://www.amazon.com/SUPERNIGHT-Waterproof-300LEDs-Changing-Flexible/dp/B00DTOAWZ2/ref=pd_bxgy_MI_img_y
Best part is, the lights are already 12v, so no voltage modifications.
A cheap and easy way to start with LED lights is the IKEA dioder: http://www.ikea.com/us/en/catalog/products/50192365/
The transformer is a step down to 12v, so just cut that off and wire it in!
Huh? Elwire is about a cheap as you can get.
$11 from Amazon
https://www.amazon.com/dp/B00HSF66JO/
If you have that kind of space I would get a greenhouse tent /kit
like this
along with a humidifier, humidity controller, a couple small fans, a few rolls of led strip lights and a timer. You can put together one of these automated setups for pretty damn cheap (less than $200?) and you will never have to mist and fan again, and will allow you to go out of town etc and not worry about the constant misting and fanning. Additionally you can grow some culinary mushrooms (lions mane and to a less extent king oyster does well with cubensis), which if youre interested in doing this long term or bulk really helps cover your ass.
As mentioned below you should transition to bulk after this grow. Look into making liquid culture from fruits you grow this round which can be used to quickly make grain spawn and thus bulk tek grows.
This is similar to what I have. There is a link on that page for the power supply also.
https://www.amazon.com/Flexible-Waterproof-Christmas-Kitchen-Daylight/dp/B00HSF66JO
You can cut it to the length you need.
https://www.amazon.com/gp/aw/d/B00HSF66JO/ref=mp_s_a_1_1?ie=UTF8&qid=1499821699&sr=8-1&pi=AC_SX236_SY340_QL65&keywords=waterproof+white+led+strip&dpPl=1&dpID=51URXvmY%2BXL&ref=plSrch
I tried these and a GE set from Home Depot and both became much dimmer and yellow after 2 months.
So basically I used a 16" wire wreath frame and wrapped tin foil around it to reflect the light better, and stuck on the LED Lights! They don't come with a power adapter so I bought this one.
Simple, adjustable, you can cut them to size, two strips of these light up my yard for Halloween. Putting them around the bezel of the monitor should be more than enough lighting.
LE 12V Flexible RGB LED Light Strip Kit, Color Changing, 150 Units 5050 LEDs, Non-Waterproof , Remote Controller and Power Adaptor Included, LED Tape, Pack of 16.4ft/5m https://www.amazon.com/dp/B01EWBZW0A/ref=cm_sw_r_cp_apa_1nESzbKFSPPV8
you can just get something like
https://www.amazon.com/Flexible-Changing-Non-Waterproof-Controller-Included/dp/B01EWBZW0A/ref=sr_1_12?ie=UTF8&qid=1482857116&sr=8-12&keywords=rgb+led+strip this. Just hack up the powersupply and connect it to molex coming out of your power supply. Do it only if you're familiar with electrical stuff. Its way cheaper but takes a little work.
This is the strip I have. It was plenty long but the adhesive isnt the best for a textured wall. I havent noticed any flickering but I haven't had them very long.
Amazon LED strip lights
These are just an example. There's tons other ones if you just type in LED strip lights into the amazon search bar
I used this light strip from Amazon. I'm really happy with them. Installation was a breeze. I bought a splitter and L-shape connectors to make things easier.
Not OP, but have done some vehicle/trailer lighting/wiring before.
​
Working with 12V DC is relatively safe, just make sure not to short the ends. You can, of course, disconnect the battery if you're worried about it (if you're not worried about it, just leave the outside light switch off or find the fuse that goes to it and flip it off). I've wired up a good bit of stuff in 12VDC with it live and haven't ever been shocked, though that's not to say there isn't risk. At a minimum I'd recommend shutting off the light switch.
​
You should be able to use something like these here:
https://www.amazon.com/gp/product/B007SXGS94/ref=oh_aui_search_asin_title?ie=UTF8&psc=1
​
but those aren't the *greatest* at staying put on, so you may try something like these:
https://www.amazon.com/WenTop-Waterproof-Flexible-Lighting-Bathroom/dp/B01GJ3O0J8/ref=sr_1_7?keywords=12v+led+strip&qid=1554391819&s=gateway&sr=8-7
​
What you're looking for are 12V LED Light strips.
​
I'd recommend getting some waterproof, and adhesion would be my main concern as I'm driving down the highway, I wouldn't want them blowing off.
You want to use 24v strip in these cases in order to not have to deal with power injection, which is where novices can easily get into trouble. With 24v you can run up to 10M, or 32.8ft, and is such often sold in 10M reels. Purchase four of these and cut each down to the length of it's respective wall, being sure to only cut on the line in the center of the copper pads every 6 LEDs.
{With addressable strip, the pixel "size" is TYPICALLY determined by voltage, so for 24v strip, each 6 LEDs will act as a single "pixel," when playing back patterns, 12v strip is 3 LEDs, 5v is 1.}
After cutting the strip to length, you will want to remove the connectors from the cut off ends and solder them to your new ends. IT IS IMPORTANT FOR THIS SCENARIO TO NOT solder on the RED (+24v) wire, as it will be safer to use 4 smaller power supplies, you are only wanting to interconnect the green Data wire and white Ground wire between each strip. If using IP68 waterproof strip, don't forget to remove the silicone endcap from your cut end, replacing it on the new end with a dab of silicone sealant.
Attach the 2.1mm socket adapters to the RED (+) and White (-) bare wires at the beginning of each strip using a jewelers screwdriver. Connect the 3-pin connectors between each strip, and tape off the bare wires with electrical tape, then connect the PSUs to the last three strips. For the first strip, connect it's PSU to the 2.1mm splitter, plugging one end into the strip and the other into the controller. Wire the 3pin connector included with the controller to the Data and Ground of the controller, again in this case, DO NOT CONNECT THE RED (+24v) WIRE to the controller; just wrap the end in electrical tape. Finally, connect the 3-pin connector from the controller to the first strip and power up your PSUs. From here it's just configuring the controller with your phone or tablet.
4x: https://www.amazon.com/Waterproof-Visdoll-Flexible-Addressable-Programmable/dp/B075GCKPHB?th=1&psc=1
4x:https://www.amazon.com/gp/aw/d/B074GJ22P6/ref=ox_sc_act_image_1?smid=A325274ZEF9XYZ&psc=1
1x: https://www.amazon.com/ALITOVE-Controller-Individually-Addressable-Programmable/dp/B01LW1J10W/ref=mp_s_a_1_1?ie=UTF8&qid=1541825064&sr=8-1-spons&pi=AC_SX236_SY340_QL65&keywords=4+output+ws2811+controller&psc=1
1x: https://www.amazon.com/Chanzon-Female-Connector-Security-Adapter/dp/B079RCNNCK
1x: https://www.amazon.com/dp/B00G6G5DJ0/ref=sspa_dk_detail_1?psc=1
Alright, I’ll do my best to explain what I did. First off, material list:
4 x WS2811 5m 30LEDS/m addressable LED strip 12V in IP67 waterproof tube
https://www.amazon.ca/gp/product/B01CNL6EG2/ref=oh_aui_detailpage_o00_s00?ie=UTF8&psc=1
1 x 12V 30A DC power supply
https://www.amazon.ca/gp/product/B01EWG6YT8/ref=oh_aui_detailpage_o00_s00?ie=UTF8&psc=1
1 x Magic LED Bluetooth controller
https://www.amazon.ca/gp/product/B01LW1J10W/ref=oh_aui_detailpage_o00_s00?ie=UTF8&psc=1
1 x Sound activated controller
https://www.amazon.ca/gp/product/B0792T73VB/ref=od_aui_detailpages00?ie=UTF8&psc=1
10m (cut in half to get 20m) of Gorilla Mounting Tape Clear (link is for black, but I bought clear)
https://www.canadiantire.ca/en/pdp/gorilla-glue-mounting-tape-black-0671081p.html#srp
14 gauge wire
https://www.canadiantire.ca/en/pdp/southwire-30-metre-in-wall-speaker-wire-yellow-14-2-0529814p.html#srp
18 gauge wire (brown thermostat wire)
Can’t find a link, but I had it in my garage from another project
There is a strip that holds the soffit in place on the far side from the house that was a perfect channel for the LED strip. You can buy white aluminium channels for LED strips with nice frost glazing that diffuses the light. I would have bought them, but soffit and house trim are all brown and I could not find it in brown. I cleaned the surface of the house, then suck the tape to the strip and ran a knife down the side to cut it in half. I then attached it all to the house. 20m fit perfectly around the lower level trim on my house.
I have built-in shelves all around the inside of my garage. So I put the power supply on an upper shelf near the centre of the strips. I picked 12V strips over 5V strips to minimize voltage drops. There are numerous online voltage drop calculators, I used this one:
https://www.calculator.net/voltage-drop-calculator.html
My electrical engineering friends tell me I need to size the wire for no more than a 3% voltage drop. That might be a bit overkill for low-voltage LED lights, but that’s what is in the CEC for building wiring. I ended up using 14-gauge wire and ran power to each strip. It worked out to be a bit more than a 3% loss. I used the brown thermostat wire to tee off the main line indoors and ran it through the wall to power the strips. Each connection was done using crimp-style splice connectors that I had left-over from wiring a stereo in my boat.
On the far end I mounted the Magic LED Bluetooth controller (inside) and ran an extra run of the thermostat wire for the data signal. The controller worked great once I put in the right settings. I also set the wiring up so I can connect the sound activated controller outside. On Halloween I plan on setting up some singing pumpkins and have the lights dance to the music.
I hope this helps and good luck with your project. A key thing to keep in mind is you need to run power to each strip, otherwise, you will have too much line-loss, generate lots of heat, and the colours will be different on the far end. It can, and should, come from the same power supply, but just run additional power lines out to each strip.
Gladly! I based my builds on one developed by Ulrich Radig, who makes his source code pretty freely available on his forums and on github. He's got an (older version) assembly and demonstration on that first link, towards the bottom.
Basically, you lay out strips of WS2812 LEDs to form a grid of lights, say 13x13, depending on how many letters wide your clock face needs to be. These LEDs can be controlled individually by a signal from a microprocessor, so you can turn on just the necessary lights instead of the whole strip. For a controller, we use a NodeMCU 12-E or similar ESP-8266 board, which is a low cost (8 euro) microcontroller that also has wifi built into it and which can be programmed in the same manner as an Arduino. You then put a grid between the LEDs to mask the lights and to prevent the light from lighting up the letters around it, since you just want one letter per LED to be lit up. Ulrich used water jet cut foam for his, my first one was cardboard, but I now have a 3d printer and will print something for it. Over the grid, you put a face plate with the letters etched, cut, or painted on it. Ulrich used a silkscreen method on glass. I used painter's tape on a opaque plexiglas, traced and cut out the lettering, then a couple of coats of black spray paint over that. I carefully peeled out the tape and it left a negative of the letter for the light to shine through. This time I'm going to maybe do something nicer, laser cut metal or wood (haven't quite decided). The whole device is run on 5v power, so a simple 2A USB style cell phone charger is all you need for power.
Ulrich did most of the heavy lifting with his code, where he created a sort of library that stores the "addresses" of the LEDs in a big matrix, then created reference functions to the matrix. Calling the function "Es" lights up LEDs numbered 1,2. Calling "ist" lights 4,5, and 6. This is set up for all the other words as well. He also built in a time lookup service to sync the time over the internet, and he included a web server function so you can connect to the clock over wifi and control the colors, brightness, and so on. I have mostly just adapted his code on my previous projects, but I hope to go a little further on this one, to add in a battery powered back up clock module, and if I have time, to refine the web server that Ulrich made.
I have one of these, it's pretty decent.
Here it is:
https://www.amazon.com/dp/B072QWJRBS/ref=cm_sw_r_cp_apa_i_FExwDbQGW1SEJ
It's really neat! Highly recommend
That part has USB in the name, you can 'assume' that it's USB compliant, and runs off the same power USB provides.. However, there's no reviews, so quality control would be your biggest concern imo.
https://www.amazon.com/Lights-40-60in-Pangton-Villa-Backlight/dp/B072QWJRBS/ref=sr_1_2_sspa?s=electronics&ie=UTF8&qid=1524056975&sr=1-2-spons&keywords=usb+led+strip&psc=1
That has many more reviews, and is also USB.
That's awesome. I'd like to see a picture of one. They sell ones that you wouldn't need any tech knowledge for. They just plug in and you use a remote to control them
Here's an example https://www.amazon.com/dp/B072QWJRBS/ref=cm_sw_r_sms_apa_i_tsAFDb0W5567E
Oh crap didn't realize it went all the way back. Ignore my suggestion about the monitor stand (unless you want to drill a hole in your desk..)
Actuallyyy that would be one way to get the cables out of site. drill a hole behind your monitor.. But if you didn't want to do that you could try a cable sleeve like this maybe? Just run it along the bottom edge? https://www.amazon.com/Alex-Tech-10ft-Protector-Sleeving/dp/B07FW3GTXB/ref=sr_1_6?keywords=cable+sleeve&qid=1550156179&s=gateway&sr=8-6
Also the fact of the desk means my RGB idea wouldn't work either. But you could put them on the back of your monitor and that could be cool. I literally just bought these and am very happy with the qualilty. They worked better than the first ones I got from Wall mart...https://www.amazon.com/PANGTON-VILLA-Led-Strip-Lights/dp/B072QWJRBS/ref=lp_18423905011_1_1?srs=18423905011&ie=UTF8&qid=1550156289&sr=8-1
They plug in
There are lots of options online. Just find the ones you like
If you got a detolf, you can buy these lights and stick them one per shelf.
I'm using mine like this.
Also now you don't need to solder.
These lights come with a little strip to connect more lights together.
Thanks! I’m an old gamer, my first FPS was Wolfenstein followed my all time old school favorite Doom! They are just LED lightstrips.
The ones that go around my big painting is this:
PANGTON VILLA Led Strip Lights 32.8ft 10m, High Brightness Multicolor 5050 RGB with with 24 Keys IR Remote and 12V 3A Power Supply, for for Christmas, Halloween, Home, Kitchen DIY Decoration https://www.amazon.com/dp/B07K8898JN/ref=cm_sw_r_cp_api_i_-8o0CbKFJD3D2
The ones that go around my desk, my shelves, my Destiny Titan Shield, and my Warglaives are these:
Led Strip Lights 6.56ft for 40-60in TV, PANGTON VILLA USB LED TV Backlight Kit with Remote - 16 Color Changing 5050 LEDs Bias Lighting for HDTV https://www.amazon.com/dp/B072QWJRBS/ref=cm_sw_r_cp_api_i_d-o0CbBXD53YT
Here is my completed battlestation. I've been wanting to build a desk like this for a few years and I finally did it!
​
I plan to revisit cable management at some point, but for now I think it's fine.
​
Parts List:
Alex Drawer Unit - x2
Barkaboda Countertop
Adils Leg - x2
Signum
LED Light Strips - x4
Led Strip Lights 6.56ft for... https://www.amazon.com/dp/B072QWJRBS?ref=ppx_pop_mob_ap_share
Peripherals:
Misc:
I picked these up on Amazon because I have sensitive eyes and having my TV as the one point of light in my bedroom at night could get painful. They reduce eye strain and make the blacks on your TV look black in the dark (they're more dark grey otherwise). They also look pretty cool and you get a full color gamut, the ability to dim, and cycle through all the colors.
Yes! got them from amazon https://www.amazon.com/gp/product/B00V27VX7E/ref=ppx_yo_dt_b_asin_title_o01_s00?ie=UTF8&psc=1
https://www.amazon.com/gp/product/B072QWJRBS/ref=ppx_yo_dt_b_asin_title_o00_s00?ie=UTF8&psc=1
Is something like this too long? It’s rgb but you can control the color temp of white. I have one on my tv.
https://www.amazon.com/dp/B005Q5WVBU/ref=sxts_hf_cd_wol_1?pf_rd_m=ATVPDKIKX0DER&pf_rd_p=3311817862&pd_rd_wg=kXo9B&pf_rd_r=NKWX0WHGS7TQPCPHD3F9&pf_rd_s=desktop-sx-top-slot&pf_rd_t=301&pd_rd_i=B005Q5WVBU&pd_rd_w=qpYEd&pf_rd_i=el+wire&pd_rd_r=b2112fba-0fa6-454f-b165-ae12cec7467d&ie=UTF8&qid=1510247458&sr=1
This is what we use. I just clip the battery pack on the back of the inside of the band and use binder clips to run it around the top of the band, you can also just wrap it around it and hook the end into an s link on the basket. we've been using the same batteries for 6 weeks now and they stay on for the whole round. We do two rounds of 9 holes.
I bought at the store. They had them in blue and orange. Considering it's only a small step up from a dollar store, I wouldn't have much faith in their online offerings.
From the looks of it, I think this pack on amazon is the exact same thing, judging by the shape of the control box. The wire is much longer, too. The only thing it's not is orange. There's this thing, which has a different controller box.
Probably [this](
https://www.amazon.com/dp/B005Q5WVBU/ref=cm_sw_r_other_apa_i_v6mSDb501XTTX)
Or you can buy 5 different colors for just a few bucks more.
https://www.amazon.com/dp/B005Q5WVBU/ref=cm_sw_r_cp_apa_fF6nybH9QG4NP
Yeah I had to learn to how to sew too and avoided any soldering, I was recommended these
I bought these when they were $25 but I've been really happy with them.
http://www.amazon.com/gp/product/B005Q5WVBU/ref=oh_aui_detailpage_o07_s00?ie=UTF8&psc=1
The 5 pack of EL wire I ordered just got here yesterday and I was actually giving the other 4 out to my crew so our packs can be dope AF. EL wire looks a lot better in low light situations since it isn't a strip of lights but rather the entire strand is lit so it isn't as annoying to others o_O
I haven't secured mine yet but either pins or tape will be my go to.
I dont know how this guy did it but you could use something like this with a controller like this. You could use amazing goop or something similar to attach them to the board. The glue on the led strips is very poor. After that, all you need is a 12v power supply and a connector to the RGB controller. I have a lot of lipo batteries from RC stuff so that is what I would use for power. I would try a 1000 mah 3s for starters and either velcro it to the binding or my pants leg. for connectors I use JST.
the header cant plug into the stand alone control box? id almost want to recommend plugging one strip into the aura header to see if it will just take control of the box, but im not entirely sure this is a safe idea that wont damage your board or lighting
also fyi, the asus aura feature didnt need specialty led kits, it works with standard 5050 rgb led strips that have a max power usage of 12v 2a. if it doesnt work the way you want it to then i would just return it and go with something like this instead
It was definitely a fun project.
I used these for a project recently, they worked just fine. You'll probably also need some little 4 pin conectors and some rgb wire as well for whatever you want to do with them.
~$23 for 16 feet
OP might want to consider something like this.
http://www.amazon.com/SUPERNIGHT%C2%AE-Waterproof-Flexible-300leds-Changing/dp/B00ASHQQKI/ref=sr_1_2?ie=UTF8&qid=1411668881&sr=8-2&keywords=led+strip
They are pretty bright but my camera phone makes it look blurred more than it actually is
you could do something like this
https://www.amazon.com/SUPERNIGHT-5-Meter-Waterproof-Flexible-Changing/dp/B00ASHQQKI/ref=sr_1_4?ie=UTF8&qid=1468604805&sr=8-4&keywords=led+light+strip
they can be cut and use jumpers and splice in wires to cover multiple strips from the reel in different spots.
they would all have to be the same color though, or you could buy multiple sets to have more than 1 controller, but thats gets pretty wasteful for a few 1' long strips.
https://www.amazon.com/SUPERNIGHT-5-Meter-Waterproof-Flexible-Changing/dp/B00ASHQQKI/ref=sr_1_3?ie=UTF8&qid=1468804583&sr=8-3&keywords=led+strip These, they're great led's.
I've been using these lights for a while now, and they look idential to the picture. maybe im wrong, but im guessing these are it.
I need outlets because the lights I'm using come with plugged control boxes.
But I'm curious why you think I need 12/4 as that gets to the heart of my question.
Anyone have Multi-colored Led strips on their board? I wanna put something like This on my board, and i wanted to know how well it works. Thanks for any help
No worries, a quick Amazon search for LED RGB got me this which is pretty much what most people tend to use:
https://www.amazon.com/SUPERNIGHT-5-Meter-Waterproof-Flexible-Changing/dp/B00ASHQQKI/ref=sr_1_4?ie=UTF8&qid=1474044197&sr=8-4&keywords=led+rgb
I don't know what country you're from though, so I can't say much about where you could get some.
These are the ones I use
Like these? http://www.amazon.com/SUPERNIGHT-Waterproof-Flexible-300leds-Changing/dp/B00ASHQQKI/ref=sr_1_2?ie=UTF8&qid=1406593189&sr=8-2&keywords=5050+rgb+led+strip
This is where I bought mine, and they have an adhesive back
http://www.amazon.com/SUPERNIGHT®-Waterproof-Flexible-300leds-Changing/dp/B00ASHQQKI
Maybe a half inch apart?
This is what I got. The power supply and controller are not waterproof, but I tucked them up under a gutter where they wouldn't be exposed. They make addressable strips, where you can program multiple colors like red, white, and blue, but they are more expensive.
This one is not a lamp, but strip: http://www.amazon.com/SUPERNIGHT%C2%AE-Waterproof-Flexible-300leds-Changing/dp/B00ASHQQKI/ref=pd_sim_hi_15?ie=UTF8&refRID=00ZJ6ET1TH30WSD1X1JT
I had a lot of luck with it though
Yes one min,
Edit: SUPERNIGHT 5-Meter Waterproof Flexible Color Changing RGB SMD5050 300 LEDs Light Strip Kit with 44 Key Remote and 12V 5A Power Supply https://www.amazon.com/dp/B00ASHQQKI/ref=cm_sw_r_cp_apip_CWqUYBpXlQQYQ
This one is great and cheap the remote and hues are awesome and it's really bright! Fits perfectly in my S340 elite!
Oh man!.. that would be sweet to have a setup like that... I only have a cheap setup of some LED strips, some imitation Par can lights that rotate (were like $4) and a rotating dome light lol... none of us are willing to roll with the black light out due to the fact that we actually want to sit on the sofa and floor without the possible "oh wtf is thatttttttt?!?!"
http://www.amazon.com/SUPERNIGHT%C2%AE-Waterproof-Flexible-300leds-Changing/dp/B00ASHQQKI/ref=sr_1_2?ie=UTF8&qid=1412276921&sr=8-2&keywords=led+strip
https://www.amazon.com/dp/B00ASHQQKI/ref=cm_sw_r_cp_awdb_t1_dEpwCbGKK4CF2
Thanks for all the information! This is all really helpful, especially that diagram, and I appreciate you taking the time to work with me on this.
I'm looking at grabbing these LED strips, which come with the power supply, and I've already got the raspberry pi. As for the PWM outputs this looks like it should be fine right?
I would also need, for each stair that I'd be working with, one of these. Would this be good? And am I missing anything?
To begin with you need to install a Celling Gypsum design that is suitable for LED lighting ... I recently fixed something like this ...
Then you need to install a power source inside the opening so no one will see it ... at the end you buy a LED strip and connect it to the power source ... LED strips come in different types and prices ... Amazon has variety ... this one is waterproof and changes colors ... once you hide the strip into the opening you can control the light with a wireless remote ... like this ... so the first thing you need to do is find a good gypsum celling contractor and finalize the design and work with an electrician in parallel .. good luck
I got this strip and slapped it to the back of my desk.
Well, I used these LED strips I bought off amazon. They can be a pain in the ass because the adhesive isnt very good, so I bought some clear adhesive tape and thats solved the problem.
http://www.amazon.com/SUPERNIGHT®-Waterproof-Flexible-300leds-Changing/dp/B00ASHQQKI/ref=sr_1_4?ie=UTF8&qid=1418691604&sr=8-4&keywords=RGB+strip&pebp=1418691613886
http://www.amazon.com/SUPERNIGHT%C2%AE-Waterproof-Flexible-300leds-Changing/dp/B00ASHQQKI/ref=sr_1_2?ie=UTF8&qid=1418354012&sr=8-2&keywords=led+strip
Yes, it is. Will this kit work? Does the colour change according to the screen?
You might want to look into LED strips like this.
http://www.amazon.com/SUPERNIGHT%C2%AE-Waterproof-Flexible-strip-Changing/dp/B00ASHQQKI/ref=sr_1_5?ie=UTF8&qid=1451031074&sr=8-5&keywords=rgb+led+strip
I used 1 of these and another 16ft extension. It was super easy to put up. I do recommend doing a test run of the stuff first to make sure it will work where you want it.
Are these Supernight or similar RGB LED strips (non-addressable)? I've seen that a bunch of times; some in the middle will be a slightly different color, nothing shorted or broken.
If that's the type of strip you have, the strip is in segments of 3 LEDs each. You should be able to cut out that part (down the middle of the copper pads) and splice together the two pieces on either side with a little soldering.
Otherwise, you can replace it cheaply with those Supernight ones I linked, unless you have some setup where it echoes the colors on the TV or does addressable patterns.
You could use cuttable led strips and do all sides. http://www.amazon.com/SUPERNIGHT-5-Meter-Waterproof-Flexible-Changing/dp/B00ASHQQKI/
I assume that this is what you were looking for: http://www.amazon.com/SUPERNIGHT-5-Meter-Waterproof-Flexible-Changing/dp/B00ASHQQKI
(These are what I have anyway)
http://www.amazon.com/SUPERNIGHT-5-Meter-Waterproof-Flexible-Changing/dp/B00ASHQQKI/ref=pd_bxgy_60_img_3?ie=UTF8&refRID=0G4XT6QE17MC9FNVMSF6
This looks to be comparable to the one in the video.
I bought it from a local store in my country, but they look exactly like these. http://www.amazon.com/SUPERNIGHT-5-Meter-Waterproof-Flexible-Changing/dp/B00ASHQQKI/ref=sr_1_2?s=musical-instruments&ie=UTF8&qid=1451733226&sr=1-2&keywords=led
If you want a bit more of a DIY solution go with these:
http://www.amazon.com/SUPERNIGHT%C2%AE-Waterproof-Flexible-strip-Changing/dp/B00ASHQQKI
For the same price you get:
color changing(you can make them warmer so they match the light where the furniture will live)
4x the length
a remote
plus you can add more strips for ~$10
I am using these ones http://www.amazon.com/SUPERNIGHT-5-Meter-Waterproof-Flexible-Changing/dp/B00ASHQQKI/ref=sr_1_3?ie=UTF8&qid=1451586056
While I don't have experience with the NZXT Hue I will say I did something similar with this. https://www.amazon.com/dp/B00ASHQQKI/ref=cm_sw_r_other_awd_wVFzwbR1CBPZ5
About $25 for 16 feet (more than any computer case will ever need) comes with a nice remote, is super bright (but adjustable) and in general makes things look really cool. Only downsides are that you'd need an adapter to plug it into your PSU (luckily I already had one) and the adhesive on it sucks but you can pull it off easily and get better stuff.
Believe it or not, Amazon is also quite awesome -- not just for your everyday car parts but for cool raw materials. One of the accidental finds I came across was an LED strip that gives my new edge that ambient lighting affect found in newer fords and other brands -- and the color is configurable (so of course, I did yellow to match the rest of the car!).
http://www.amazon.com/SUPERNIGHT-Waterproof-Flexible-300leds-Changing/dp/B00ASHQQKI/ref=pd_sim_hi_31
It comes with a 12v power supply that you just cut away and wire into your light power source. Run the strip starting at the passenger side of the car around the console at the bottom edge and back up around the drivers side -- wire into the power source for your lights and suddenly, with a low amount of effort, you have footwell lighting that's color configurable!
I'll have to do a write-up of this now... damn.
If I where you, I would use this
Just cut to whatever size you want and solder the strips back together, has a nice remote to choose color and even has some cool effects. Pretty cheap too.
Friendly bit of advice, you can get RGB cut-able LED strips with adhesive backing, power adapter, and a remote for around $20/piece on amazon, cheaper for shorter lengths and only a single color.
http://www.amazon.com/SUPERNIGHT%C2%AE-Waterproof-Flexible-300leds-Changing/dp/B00ASHQQKI/ref=sr_1_5?ie=UTF8&qid=1420231110&sr=8-5&keywords=rgb+led+strip
Great work, btw.
Basically this.
http://www.amazon.com/SUPERNIGHT%C2%AE-Waterproof-Flexible-300leds-Changing/dp/B00ASHQQKI/ref=sr_1_2?ie=UTF8&qid=1427163414&sr=8-2&keywords=led+strip
If you want to do a liquor cabinet, here's how I would do it.
Find a place around you that will either:
Tempered glass could run you a few hundred for 2 shelves, but will be safer. If you are really lucky, do a search on Ikea.com or other similar sites that sell furniture, and you may find some tempered shelves that may fit. You want them to fit inside your firebox there.
Next, the brick is really cool and you should show it off. Remove all the fake stuff, and if the underlying brick is painted white, I'd take a steel brush attachment for a drill to it, and distress it, then paint it with a high gloss to really show it off and protect it.
Run a new switch somewhere nearby. Run a line from it to the interior of the firebox. If you have access from above, that will be easiest(drop it down the existing vent), or see if you can come from below. Hide this new wire if you must, with a false back in the firebox. Wire this line to some led pucks or color change led strip if you like.
http://www.amazon.com/SUPERNIGHT%C2%AE-Waterproof-Flexible-300leds-Changing/dp/B00ASHQQKI/ref=pd_cp_MI_0
Next, drill holes for pegs for your shelves. Insert your glass shelves. Looks like this space could handle 2 of them. Make sure you put some masonry adhesive in the holes with the pegs, because under weight, they may break down the old brick.
If you want more storage, you could add any type of floating shelves to the exterior. A wrap around type might look nice on the corners. Just remember if you want them to support any kind of weight, IE liquor bottles, you better use some beefy anchor sleeves to screw them to the brick. Something like this:
http://www.lowes.com/pd_17671-10457-7721_4294690613__?productId=3444570&Ns=p_product_qty_sales_dollar|1&pl=1&currentURL=%3FNs%3Dp_product_qty_sales_dollar|1&facetInfo=
I don't like risking weight on normal Tapcon screws when you can use an anchor sleeve.
I may be grossly underestimating how low this thing is though. Is it even going to be comfortable to use as a liquor cabinet at it's current height?
Just be careful with those lights in the enclosed box. Read some reports of similar lights overheating. Especially bad in an enclosed box.
Here is the product & review, I know they are a different brand, doesn't mean they didn't come out of the same factory.
Waterproof Flexible 300leds
Used this and only needed ~120 LED's to cover my bike
What would you recommend? Already went through two of these and they barely lasted 3 months before dying.
Just needs the correct male plug.
Just some cheap LED strips I found on Amazon
http://www.amazon.com/gp/product/B00ASHQQKI/ref=oh_details_o01_s00_i00?ie=UTF8&psc=1
Really easy to cut to length!
https://www.amazon.com/gp/aw/d/B00ASHQQKI/ref=mp_s_a_1_2?ie=UTF8&qid=1467401630&sr=8-2&pi=SY200_QL40&keywords=led+lights&dpPl=1&dpID=51I81qkiPIL&ref=plSrch
This is the exact kit. You can use tons of different colors too.
http://www.amazon.com/gp/product/B00ASHQQKI/ref=oh_aui_detailpage_o08_s00?ie=UTF8&psc=1
I know some people that use these: http://www.amazon.com/gp/product/B00ASHQQKI/ref=oh_details_o06_s00_i00?ie=UTF8&psc=1
Personally I can't get them since I have to order from the .co.uk version of amazon and these lights aren't for sale there :(
http://www.amazon.com/gp/product/B00ASHQQKI/ref=oh_details_o06_s00_i00?ie=UTF8&psc=1
Just a standard 12V led strip with power supply and remote
https://www.amazon.com/gp/aw/d/B00ASHQQKI/ref=mp_s_a_1_8?ie=UTF8&qid=1523639242&sr=8-8&pi=AC_SX236_SY340_FMwebp_QL65&keywords=led+power+strip+12v&dpPl=1&dpID=51b39TuzLvL&ref=plSrch
http://www.amazon.com/gp/product/B00ASHQQKI/ref=oh_aui_detailpage_o06_s00?ie=UTF8&psc=1
I ordered the same strip from amazon as well. Has the same remote and same white box and same power supply. It's complete shit imo. The tape doesn't stick at all, and was in fact peeling off of the back so that there was no sticky side at all.
Even worse, they had sent it with all female connectors. 3 other amazoners posted a question with the same problem, with others answering that theirs had a male end and to send it back. Luckily I know how to solder, so I just cut the ends and soldered it all together. The green and blue wire was switched around for some reason though. I'm pretty sure that was a mistake as well, considering the wires are red green blue and black.
I bought the LED strip like a week ago, so this timing is really odd. I complained to amazon and they gave me a refund and didn't even ask for me to ship it back, I don't think. Please complain and get this shit taken off of amazon. It pissed me off enough that I didn't even complain expecting a refund, I just wanted the sellers to be punished somehow.
The lesson here is that cheap china shit shouldn't be trusted when you're dealing with potential fire hazards. You should be fine ordering something that isn't really cheaply made in china. Definitely not the LED strip itself's fault though, sounds like a short or something in the control box. You'd be fine buying something a little more expensive and higher quality.
Picture of my DIY soldering
and the amazon link
I can't believe Amazon sells such cheaply made shit with Prime. Prime to me means that it's verified by amazon as being at least halfway decent. Knowing that it nearly burned your place down makes me even more mad about this.
I got this one here.
The strip itself has 4 pins: Ground, Red, Green, Blue. I was going to power it with iether the supplied adapter or another one, with some transistors controlled by an arduino. Arduino will be connected via USB.
Show me what you did! I'm interested to see how you pulled it off.
I was also considering using python to do it instead of processing.
The link is under the first picture, but here you go: http://www.amazon.com/gp/product/B00ASHQQKI/ref=oh_details_o02_s00_i00?ie=UTF8&psc=1
Maybe something like this. Can set many different colors, dimmable.
I used this for under cabinet lighting in my kitchen.
http://smile.amazon.com/gp/product/B00ASHQQKI?keywords=led%20light%20strips&qid=1450218869&ref_=sr_1_3&sr=8-3
Amazon
thanks man, I planned on getting this LED kid for the cabinet since there is no inner lighting to begin with (I'd need glass shelves too). But this kit is programmable so I'd be able to set different colors to different sections to make it look like the laser beams actually gave off light. That'd be awesome to use like a neon/glow in the dark paint for the laser blasts so they would glow when the lights were off or glow with the lights being dim that way they pop out more... agh I want to go home from work now and start on this now hahahaha
EDIT: fixed link display cause I'm retarded
I'm using this one: http://www.amazon.com/gp/product/B00ASHQQKI?psc=1&redirect=true&ref_=oh_aui_detailpage_o05_s00
I was initially going to use these for under kitchen cabinet lighting but decided against it. If I were to buy some for the TV backlighting, I would purchase USB powered ones. However, the ones Im using are controlled with SmartThings so I have access to it via home automation.
sure! Supernight LED Light strip.
Amazon link
The ones behind the desk are these ones that I got off Amazon. Pretty cheap and sometimes the controller gets messed up to where it doesn't pick the right color when you click on it but overall I think they're worth it for the price.
The Nanoleafs are the small triangles that I combined to create a larger triangle above the computer. Those can be found here if you want to take a look.
I believe the entire thing would be the same color as the rest. I'm using this http://www.amazon.com/gp/product/B00ASHQQKI/ref=oh_details_o01_s00_i00?ie=UTF8&psc=1
Could you explain parallel strips?
These
http://amzn.com/B00ASHQQKI
I'm using two of these: https://amzn.com/B00ASHQQKI
One for each desk
http://amzn.com/B00ASHQQKI
i use two different sets of LEDs:
https://www.amazon.com/SUPERNIGHT-Waterproof-300LEDs-Changing-Flexible/dp/B00DTOAWZ2/ref=sr_1_7?ie=UTF8&qid=1518332468&sr=8-7&keywords=rgb+led+strip
https://www.amazon.com/gp/product/B01LWMIT4P/ref=oh_aui_detailpage_o00_s00?ie=UTF8&psc=1
RGB you say? I found these strips on amazon, I'd recommend them for the incredible value. I will say though that they need a controller, (or an RGB LED header on your motherboard)so keep that in mind. https://www.amazon.com/SUPERNIGHT-Waterproof-300LEDs-Changing-Flexible/dp/B00DTOAWZ2/ref=sr_1_3?ie=UTF8&qid=1509408840&sr=8-3&keywords=rgb&dpID=511DpqZdCCL&preST=_SY300_QL70_&dpSrc=srch
Just make sure the rope lights are RGB and controlable by your dial Like this
It's a LED RGB strip I purchased from Amazon 3 years ago (https://www.amazon.com/dp/B00DTOAWZ2/ref=cm_sw_r_cp_api_A3xyxb8Y0DWKW).
The one behind the TV is a RGB LED strip connected to the USB port (https://www.amazon.com/dp/B015R44RZC/ref=cm_sw_r_cp_api_44xyxb5TAQ4Y3).
Thats exactly what I needed to know thanks so much. Do you think this set would work well? Based on what I've read I'm assuming I also need a RGB strip connector and transistor array so I can provide 12V to each color channel.
SUPERNIGHT (TM) 16.4FT 5M SMD 5050 Waterproof 300LEDs RGB Color Changing Flexible LED Strip Light https://www.amazon.com/dp/B00DTOAWZ2/ref=cm_sw_r_cp_api_raD7xbMSPV9ZW
These are awesome. Use them and they are quality.
Inside the computer its the NZXT HUE +
Behind the monitor are the Vansky USB RGB LED Strip
behind the desks are the Super Night RGB 5050 Lights
https://www.amazon.com/gp/product/B00DTOAWZ2/ref=oh_aui_detailpage_o03_s00?ie=UTF8&psc=1
https://www.amazon.com/lights-Vansky-Lighting-Powered-Backlight/dp/B01N21BGJT/ref=sr_1_1?ie=UTF8&qid=1524347750&sr=8-1&keywords=vansky+lights
SUPERNIGHT (TM) 16.4FT 5M SMD 5050 Waterproof 300LEDs RGB Color Changing Flexible LED Strip Light https://www.amazon.com/dp/B00DTOAWZ2/ref=cm_sw_r_cp_api_uNWDAb5EQKMAZ
This is where I’m fuzzy about it. It’s a 12v strip that’s 16.4ft. I plan to cut it down to six so it’s 3ft up and 3ft back down. Does this change the voltage? What type of battery would be best for that, and how do I need to implement resistors? I don’t know very much so any help would be super appreciated. I’ll put the link right here.
https://www.amazon.com/SUPERNIGHT-Waterproof-300LEDs-Changing-Flexible/dp/B00DTOAWZ2/ref=mp_s_a_1_8?ie=UTF8&qid=1550106168&sr=8-8&pi=AC_SX236_SY340_QL65&keywords=rgb+led+strip&dpPl=1&dpID=511DpqZdCCL&ref=plSrch
Get yourself one of these, tape it to the back of your monitor, set up some daylight (warm) white presets, and thank me later.
This is the "Amazon choice" as an example
https://www.amazon.com/dp/B00DTOAWZ2/
The first pic shows it having a female and male end and it's just the string of lights, so if you want to do anything with what's left after cutting down to size you will have to buy some other pieces or a kit.
So shop around to find what suits you.
When you get it it should be as easy as unwind, cut, and plug the end into the RGB header. The strip should be clearly marked which pin is R, G, B, and 12V, be certain to line those up with the same pins on the header. After that, power on and install the RGB software from your motherboard.
The LED strips that come with the Hue+ are kinda weird. They look like a standard 5050 strip and act like it too. But if you plug a standard 5050 strip into the Hue+ it will not work.
I would air on the safe side and just keep your Hue+ kit intact.
5050 strips of RGB LEDs are dirt cheap anyway:
https://www.amazon.com/SUPERNIGHT-Waterproof-300LEDs-Changing-Flexible/dp/B00DTOAWZ2/
They are even cheaper if you order from a Chinese seller on eBay and are willing to wait 2+ weeks on shipping.
First off, apologies as I'm sure this has been discussed to death, but I haven't quite been able to find be answer I'm looking for, just some round about answers.
I'm wanting to install some led strips under my railing, basically these, (SUPERNIGHT (TM) 16.4FT 5M SMD 5050 Waterproof 300LEDs RGB Color Changing Flexible LED Strip Light https://www.amazon.com/dp/B00DTOAWZ2/ref=cm_sw_r_cp_api_VOsUzb103WH2F)
Now, my question is providing power to these. I have a few thoughts. I have two outlets outside, one right next to the door on the deck and one at ground level a few feet in front of the deck (it's about 6 foot elevated deck) where a deck/pool used to be with previous owners. First thought was buy a transformer, swap out a in use plug by the door and mount the transformer underneath the deck and wire the leds into this. Second thought was move the ground level outlet underneath the deck and either same thing or buy a waterproof box to house the power supplies/controllers? I'm limited in electric knowledge but my dad is helping/showing me how to do these things so no worry there, just not familiar with terminology so apologies again if wrong terms used.
Any feedback/tips/helpful info greatly appreciated.
It's currently out of stock so it redirects me to the crappy one. It was basically this though.
When dealing with LED strips check for 5050 RGB SMD 300 LED and make sure it has a power supply and remote, if it doesn't have a remote/supply you can buy one seperate. The LED's can usually be cut to the length too.
I'm using cheap LED strips off of Amazon.
I have one strip controlled by a Fibaro RGBW controller.
The others are controlled by Raspberry Pis, with custom scripts to handle fades, strobes, etc.
They are very bright when it's dark out. We could see them very clearly from about 2/10ths of a mile away. I have one setting that looks like strobes from a police car. I haven't tested that one outside yet though. The plan is to use it if someone comes around licking door handles.
The picture I posted is from the blue being set at 100%.
Oh, and a video of police mode inside.
Here's the led info, I also have a similar strip, but only in white.
SUPERNIGHT (TM) 16.4FT 5M SMD 5050 Waterproof 300LEDs RGB Color Changing Flexible ... https://www.amazon.com/dp/B00DTOAWZ2/ref=cm_sw_r_sms_awd_xs_q4rjybJJBG7WB
Thanks for the info!
Edit: After more thought I'd like to use the raspberry pi, then later I could add some internet features like hooking up recipes on ifttt.com.
Here's a cheaper version of those LED lights
My first thought would be to get these:
https://www.amazon.com/gp/aw/d/B01MG9KYCD?psc=1&ref=yo_pop_mb_pd_title
https://www.amazon.com/gp/aw/d/B00DTOAWZ2?psc=1&ref=yo_pop_mb_pd_title
https://www.amazon.com/gp/aw/d/B00XFSNKXS?psc=1&ref=yo_pop_mb_pd_title
https://www.amazon.com/gp/aw/d/B00D7CWSCG?psc=1&ref=yo_pop_mb_pd_title
You’ll get 10 DMX channels of RGB control that can support 10ft of LED strip each. Put a few inches of LED in each lantern then connect to the next, so you’d be able to link together about 15-20 lanterns or more on a single channel. Won’t be “individually” controllable, but you’ll have control over the groups of lights that are connected. Do this for each of the 10 channels and you could easily fill a room.
Super interested to hear everyone else’s approach for this
Some crafty placement of RGB strips! These are the light strips and controller we got on Amazon.
RGB LED Strip
WiFi Controller
https://www.amazon.com/gp/aw/d/B00DTOAWZ2/ref=mp_s_a_1_13?ie=UTF8&qid=1499236430&sr=8-13&pi=AC_SX236_SY340_QL65&keywords=led%2Bstrip%2Blights&th=1&psc=1
If you can find the ones that aren't waterproof for cheaper go for it. If those LEDS are getting wet you're going to have much bigger problems to worry about.
I have one strip around the back of my TV, and a separate one underneath my desk and along the back side of the desk. I can control each strip independently.
When youre setting them up and get to a corner, press the strip down hard and then put a bit of clear tape over it. Also the receiver part has holes in it for nails, so I just nailed them to the bottom of my desk.
Super cheap way to add a lot of flavor to your battle station
Controller and 12 adaptor should be on suggested list here
Hey. you are correct for your approach for the cage. You need something sturdy to form the cage. For the lights, you will needs this
I would suggest dangling the string vertically. use fishing wire to attach it to the threads.
They sale just white if that's all you want. I did my own - watched a few youtube videos and bought some of the raw materials myself and saved some money, learned a few things, and made the bike's lights the way I wanted.
led $8
remote module $ 19
power distribution module $12
Other than that, a little bit of 2-channel wire and electrical tape (or I used heat shrink), and if you wanna go the distance and solder (which I did that too) will get you where you want to be. My problem with those kits were you get a few feet of led strips for ~$40. The raw spool I bought gave me 16+ feet. I was able to use the excess for the cabs in my garage. Anyway, I hope this helps. Nice ride by the way!!
Cheers!
You can get one of those flexible LED strips and glue them to your old hood. http://www.amazon.com/Waterproof-Flexible-Lights-3528-Daylight/dp/B00HSF66JO/ref=sr_1_4?ie=UTF8&qid=1451956418&sr=8-4&keywords=flexible+led+strip+light
I hope your experiment in simple living is rewarding. I've gained a lot from the short amount of time I've spent away from civilization. Being secluded from humans and immersed in nature is gives you a different perspective on life to say the least.
LED's will probably be the best option because they run on DC, and besides that they are by far the most energy efficient form of lighting. If you buy LED's get a light that runs on 12v and isn't wired with a switching adapter to run on 110v AC - if it's wired with a standard 2 or 3 prong wall plug you know this is the case. This is important in your situation because the process of converting power from one phase to another wastes power in the form of heat - the process isn't efficient. Using an LED wired for 110v would be bad because you'd be switching the power, with efficiency losses, twice. If you can get a setup that's all DC you'll use your electricity in the best way. A 24v DC to 12v step down converter will consume much less power than an inverter will.
There are a lot of options as far as strip lighting goes. This strip uses smaller LEDs and draws 25w, but has the same amount of LED chips and is the same length. Less wattage spread over the same area.
https://www.amazon.com/gp/product/B00HSF66JO/ref=oh_aui_detailpage_o03_s00?ie=UTF8&psc=1
https://www.amazon.com/gp/product/B013OGI29C/ref=oh_aui_detailpage_o03_s00?ie=UTF8&psc=1
and then i bought a dimmer switch from lowes
Here’s what I got. All you need besides is a drill and some screws.
https://www.amazon.com/gp/product/B00HSF66JO/ref=oh_aui_detailpage_o07_s00?ie=UTF8&psc=1
https://www.amazon.com/gp/product/B000I1E9U8/ref=oh_aui_detailpage_o07_s01?ie=UTF8&psc=1
https://www.amazon.com/gp/product/B01LSETT30/ref=oh_aui_detailpage_o05_s00?ie=UTF8&psc=1
Sorry, was asleeping. LED strip here
Power supply: here
Shoutout to /u/squadz , got the idea from his thread a while ago.
I can't find it in my amazon history, but this one looks identical: https://www.amazon.com/Flexible-Changing-Non-Waterproof-Controller-Included/dp/B01EWBZW0A/ref=sr_1_1_sspa?ie=UTF8&qid=1518667859&sr=8-1-spons&keywords=led+color+changing+light+strip&psc=1
https://www.amazon.com/Flexible-Changing-Non-Waterproof-Controller-Included/dp/B01EWBZW0A/ref=sr_1_15?ie=UTF8&qid=1497369732&sr=8-15&keywords=rgb+led+strip
this is what I was looking at
So I have an off the wall suggestion. Try picking up a strip of led lights for extra FX.
LE 12V Flexible RGB LED Light Strip Kit, Color Changing, 150 Units 5050 LEDs, Non-Waterproof , Remote Controller and Power Adaptor Included, LED Tape, Pack of 16.4ft/5m https://www.amazon.com/dp/B01EWBZW0A/ref=cm_sw_r_cp_apa_9aMozbC8F4DWH
I just bought these for making a custom ring* light and they're super bright and you can position them in very custom ways. These ones are also by no means the only brand out there, just look it up, but for the price point I guarantee you'll get a few cool ideas from using them. Could maybe do some indoor stuff you didn't consider before.
Other than that, I'd just try to up your game staging wise. What you're doing now is awesome (I followed on ig ) but I think you're looking for a way to break out from that, and the best way to do that is to think outside of your comfort zone.
What's the most intimidating idea you have had? Do that.
Thanks! Just a strip of LEDs
https://www.amazon.com/Flexible-Changing-Non-Waterproof-Controller-Included/dp/B01EWBZW0A/ref=sr_1_15?ie=UTF8&qid=1502221746&sr=8-15&keywords=led+strip+light
Better off with a pre made strip or matrix.
For the interior look for a 12v RGB led strip (<$20 for 3m). This will allow you to run off the battery directly. Rather than set up an arduino I'd suggest a led RF receiver/controller with a remote (they're like $5)
https://www.amazon.com/gp/aw/d/B01EWBZW0A/ref=pd_aw_sim_201_1?ie=UTF8&amp;psc=1&amp;refRID=PC9996N023FVYG6E25VR
Cheaper than I thought. To separate cut on perforations, solder on wires and run it to the next area. To power I'd splice off the radio power 12v that turns on when the car is turned on, or from a cigarette lighter.
For the exterior I'm not sure what would work best. It depends on location and how you're incorporating it with existing wiring.
I want to install this or similar LED strip lighting along the perimeter of the roof inside my garage. I'm looking at about 75 feet total and was wondering if it's possible to use one single AC adapter to light the whole thing without a problem.
A typical 60 LED/meter strip runs on 12V and draws about 4 Watts/meter. A battery of (8x) AA cells or (3x) 18650 cells will make about 12V and 30Wh. So one meter of LED strip will run for about 7.5 hours (30Wh/4W). Two meters of the LED strip would run for half that time, and so on.
definitely a route to explore.
some LED strip lights could give you enough lighting
https://www.amazon.com/WenTop-Waterproof-Flexible-Lighting-Bathroom/dp/B01GJ3O0J8
something like this for the outside
https://www.amazon.com/Litom-Outdoor-Wireless-Waterproof-Security/dp/B01JS285JS
this looks like a possibility
https://www.amazon.com/MicroSolar-Super-Bright-Lithium-Adjustable/dp/B00E5TP2VY
Hi everyone! If you liked the electronics enclosure you can download the design files here -
And here's the part list!
QUANTITY | COMPONENT NAME | LINK / COMMENT
:---------:|----------|----------
1 | 7I76-5I25 PLUG-N-GO KIT | http://store.mesanet.com/index.php?route=product/product&amp;product_id=215
1 | DROK LM2596 Analog Control Step-down Regulator Module | www.amazon.com/gp/product/B019RKVMKU
1 | DC Fan (120mm x 120mm x 25mm 24V) | www.amazon.com/gp/product/B01FBPQMXW
1 | Mesh Dust Filter for 120mm Fan | www.amazon.com/gp/product/B01M0A2UH0
3 | DIN Rail | www.amazon.com/gp/product/B015E4EIOK
1 | IEC320 Inlet Power Socket | www.amazon.com/gp/product/B00ME5YAPK/
4 | KL-5056 Stepper Motor Driver - 32 bit DSP Based | www.amazon.com/gp/product/B00O6DC8PW
1 | Emergency Stop Button Switch | www.amazon.com/gp/product/B0094GM004
25ft | 4 Pin Cable | www.ebay.com/itm/20M-4-Pin-5050-3528-RGB-LED-Strip-Light-Wire-Extension-Connector-Cable-Cord-Line-/282110056592?hash=item41af11d890
1 | Antek Linear Power Supply - 500W 30V 16A Peak 25A With Passive Filters / EMI-RFI Filters and Suppressors | https://www.ebay.com/itm/PS-5N30-500W-30V-16A-Peak-25A-Stepper-Motor-Antek-Linear-Power-Supply-/371664502398?hash=item5688ee3e7e
3 | Wall Outlets from Home Depot | Find ones you like / feel are safe enough using
16ft | Led Strip Lights | www.amazon.com/gp/product/B01GJ3O0J8/
1 | Misc. Hardware | Nuts, Bolts, Standoffs, Crimp Connectors, Spare Fuses, 2 Extra Limit Switches
2 | Ogrmar SSR-25 DA Solid State Relay with Heat Sink | www.amazon.com/gp/product/B074FT4VXB/
1 | 18 AWG Gauge Stranded Hook-Up Wire Kit | www.amazon.com/gp/product/B00N51OO7Q
~30pc | Heat Shrink Tubing | www.amazon.com/gp/product/B00OZSL8UE
1 | Shop-Vac | www.amazon.com/gp/product/B00EPH63K0
7 | Uxcel 16mm Thread 4-Pin Panel Mount Wire Connector | www.amazon.com/gp/product/B016FCZ5SS
2 | 8 Circuit 20A Terminal Block | www.amazon.com/gp/product/B000S5Q2VS
Best of luck! Feel free to PM me or comment with any questions or feedback!
Thanks for the reply. So let’s say I bought 4 of these CHINLY 16.4ft WS2812B Individually Addressable LED Strip Light 5050 RGB SMD 150 Pixels Dream Color Waterproof IP67 Black PCB 5V DC (Black PCB 16.4ft 150leds waterproof) https://www.amazon.com/dp/B01LSF4Q00/ref=cm_sw_r_cp_api_lsGHAbSH2EMKY
What power supply would I need to buy just for these and what control board would be best?
Mobile Users: This is pretty photo heavy.
&#x200B;
I've worked on this over the last two and a half weeks in the evenings and on weekends. I've probably got around 50-60 hours in so far.
The project is complete, there are just some other things I'd like to eventually do with the programming for the LEDs.
Tools
Exacto/razor blades
Heatgun - for heat shrink, you can just use a lighter
Soldering Iron
Phillips Screwdriver
Laptop/Computer for programming with Arduino or CircuitPython
Printer - laser or inkjet
&#x200B;
Supplies/Parts
Various Rustoleum Spray paints - $20 total
Multi-Strip - $15
Masking tape and paper - $10-15
Extra razor blades - $5
Printer sticker paper - $15
Electrical Tape - $1
3m double sided foam tape - $4
Heat Shrink - Not sure, maybe $5 new for the assorted kit?
Adafruit Trinket: https://www.adafruit.com/product/3500 - $8
5v 4 amp Power Supply: https://www.adafruit.com/product/1466 - $15
White LED On/Off switch: https://www.adafruit.com/product/917 - $5
White LED Momentary Switch: https://www.adafruit.com/product/558 - $5
DC Power Jack: https://www.adafruit.com/product/373 - $0.95
Small Perma Proto PCB Board: https://www.adafruit.com/product/1608 - $3
50 feet (I used about 15 feet) 4 pin RGB extension wire: https://www.amazon.com/dp/B07GFW6ZB3/ref=pd_luc_rh_sspa_dk_huc_pt_expsub_2?psc=1&spLa=ZW5jcnlwdGVkUXVhbGlmaWVyPUExUlMwQ1ZSRzJSQ0tUJmVuY3J5cHRlZElkPUEwNTQzMzg2M1FSRk9TSUFIMllNMyZlbmNyeXB0ZWRBZElkPUEwMzEzNDU5QlQ3MFBCSTZKRUVDJndpZGdldE5hbWU9c3BfaHVjX21yYWkmYWN0aW9uPWNsaWNrUmVkaXJlY3QmZG9Ob3RMb2dDbGljaz10cnVl - $10
50 pair (lol) JST Connectors: https://www.amazon.com/gp/product/B00NBSH4CA/ref=ppx_yo_dt_b_asin_title_o00_s00?ie=UTF8&psc=1 - $11
16.7 foot reel of addressable LEDs: https://www.amazon.com/gp/product/B01LSF4Q00/ref=ppx_yo_dt_b_asin_title_o03_s00?ie=UTF8&psc=1 - $21
&#x200B;
I think that's all of it, I'll update if I think of anything else.
I'd say this is a pretty ambitious first project, but what better way to learn than to fail until you succeed. I did this project for a friend on a 75" tv. Honestly to do this for your computer you wouldn't use a raspberry, you would use your computer as the "brain" instead of a pi. Here's the links i used to do the tv project, there's youtube guides for pc using an arduino, you can reverse engineer these links to get you somewhere.
https://www.youtube.com/watch?v=ZCVfZb4UoO4
https://www.amazon.com/Aclorol-100V-240V-Switching-Converter-5-5x2-1mm/dp/B07CMM2BBR/ref=sr_1_fkmr1_4?ie=UTF8&amp;qid=1531773371&amp;sr=8-4-fkmr1&amp;keywords=DIANQI+power+supply+50W+5V+10A
https://www.amazon.com/Movcle-Splitter-Adapter-Powered-Certified/dp/B0180PPTNO/ref=sr_1_2_sspa?s=electronics&amp;ie=UTF8&amp;qid=1531772622&amp;sr=1-2-spons&amp;keywords=HDMI+Splitter&amp;psc=1
https://www.amazon.com/Cingk-Converter-Adapter-Supports-Chromecast/dp/B01N0YDDI3/ref=sr_1_2_sspa?ie=UTF8&amp;qid=1531772653&amp;sr=8-2-spons&amp;keywords=HDMI2AV+Converter&amp;psc=1
https://www.amazon.com/Switch-Remote-Famirosa-Switcher-Selector/dp/B075K3X64T/ref=sr_1_1_sspa?ie=UTF8&amp;qid=1531772702&amp;sr=8-1-spons&amp;keywords=HDMI+Selector&amp;psc=1
https://www.amazon.com/August-VGB100-External-Composite-Transfer/dp/B008F0SARC/ref=sr_1_2_sspa?ie=UTF8&amp;qid=1531772765&amp;sr=8-2-spons&amp;keywords=USB+Grabber&amp;psc=1
https://www.amazon.com/CHINLY-Individually-Addressable-Waterproof-waterproof/dp/B01LSF4Q00/ref=sr_1_2_sspa?ie=UTF8&amp;qid=1531772536&amp;sr=8-2-spons&amp;keywords=WS2812B+RGB+LED&amp;psc=1
https://www.amazon.com/Arduino-Uno-R3-Microcontroller-A000066/dp/B008GRTSV6/ref=sr_1_3?ie=UTF8&amp;qid=1531772580&amp;sr=8-3&amp;keywords=Arduino+Uno
mmh both products seem ok, but VERY expensive... look around on ebay or even Amazon.. https://www.amazon.com/CHINLY-Individually-Addressable-Waterproof-waterproof/dp/B01LSF4Q0A/ref=sr_1_3?ie=UTF8&amp;qid=1500484866&amp;sr=8-3&amp;keywords=addressable+5050 are a quarter of SuperBrightleds pricing...
With this set up will I run the power from the buck converter to each strip individually or run it through each strip into the next? I'll be using this strip cut to size: https://www.amazon.com/dp/B01LSF4Q0A/ref=nav_timeline_asin?_encoding=UTF8&amp;psc=1
And could you link me to a buck converter like that? I'm not failure with best sites to buy that, other than amazon.
Which Arduino do you think I should use? I plan on using these LEDs for the project. Do you think the Molex cable power the whole thing?
Thank you so much for your response! I was thinking that the Pi wouldn't be feasible on it's own for just that reason.
&#x200B;
For the driver, would something like this be able to run all 8 strips separately if I were to run the output signal through an 8-way splitter?
&#x200B;
check out the controller in the "frequently bought together" for the color legend:
https://www.amazon.com/ALITOVE-Controller-Individually-Addressable-Programmable/dp/B01LW1J10W/ref=pd_bxgy_267_img_3?_encoding=UTF8&amp;psc=1&amp;refRID=W2RF1W1QSN92WMD0XDSX
Really appreciate the info, I am working on a project similar to this one, and this one but with much less LEDs. Ideally I'd like to run 900 individually addressable LEDs, all controlled by a Teensy using these LED strips. I know it's a bit ambitious for my skill level, and I am slowly working up to assembling the project. Got any advice for me before I fry myself?
Thanks! They can go a variety of different colours! ANSCHE 150cm(59inch) TV Led Backlight Kit, 20 Modes Colours Bias Lighting USB Led Strip RGB for TV Desktop PC, Stick-on LED Rope Color Changing Background Ambient Lighting Decoration Mood Lights Waterproof https://www.amazon.co.uk/dp/B06XYZ56HG/ref=cm_sw_r_cp_api_9drYAb91ZWN6M
https://www.amazon.it/gp/product/B06XYZ56HG/ref=ox_sc_act_title_9?smid=ALMYP3YX7TASF&amp;psc=1
Troppo tamarro?
It's hard to just dim the brightness from a switch, though. LED dimming is not something that has a widely adopted standard. Each manufacturer usually has their own system for matching a dimmer with bulbs.
Can you find a smart light strip instead?
https://www.amazon.com/Nexlux-Wireless-Controlled-300leds-Waterproof/dp/B0722VLVRR/ref=sr_1_4?rps=1&amp;ie=UTF8&amp;qid=1504043435&amp;sr=8-4&amp;keywords=smart+light+strip&amp;refinements=p_85%3A1
Not sure where you’re using them but we needed some for a quick show. This worked great. Nexlux LED Strip Lights, WiFi Wireless Smart Phone Controlled 32.8ft Waterproof Light Strip LED Kit 5050 LED Lights,Working with Android and iOS System,Alexa, Google Assistant https://www.amazon.com/dp/B0722VLVRR/ref=cm_sw_r_cp_api_i_x8u1DbYMKBYVK
https://www.amazon.com/gp/aw/d/B0722VLVRR?psc=1&amp;ref=ppx_pop_mob_b_asin_image
They have their own proprietary app. But I'm planning on controlling then with IFTTT. When I turn in my smart switch, it will turn them on.
https://www.amazon.com/PANGTON-VILLA-Led-Strip-Lights/dp/B072QWJRBS/ref=mp_s_a_1_2_sspa?keywords=sticky+lights+for+tv&amp;qid=1563560963&amp;s=gateway&amp;sr=8-2-spons&amp;psc=1
I use these, $13, work like a charm
PANGTON VILLA Led Strip Lights 6.56ft for 40-60in TV USB Backlight Kit with Remote 16 Color 5050 Bias HDTV for 40-60 https://www.amazon.com/dp/B072QWJRBS/ref=cm_sw_r_cp_apa_i_orZvCbKSJYK76
It's an LED bias lighting strip I bought on Amazon. It adds a nice effect when watching in the dark. https://www.amazon.com/PANGTON-VILLA-Led-Strip-Lights/dp/B072QWJRBS/ref=mp_s_a_1_1?keywords=led+bias+lighting+for+tv&amp;qid=1558885429&amp;s=gateway&amp;sprefix=led+bias&amp;sr=8-1
Keyboard and mouse: https://www.amazon.com/dp/B07KC8TJ5K/ref=cm_sw_r_cp_apa_i_BPY4CbPVEC77W
LED strips: https://www.amazon.com/dp/B072QWJRBS/ref=cm_sw_r_cp_apa_i_RRY4CbS42RSBW
75hz monitor: https://www.amazon.com/dp/B07CVL2D2S/ref=cm_sw_r_cp_apa_i_uTY4Cb30NECD7
Mouse mat: https://www.amazon.com/dp/B077KSGDKJ/ref=cm_sw_r_cp_apa_i_uVY4CbFJKC4GM
Like this
I actually bought the LED strips off of the same website that I got the PC from and they installed the lights for me. But I do know, my father bought just a normal LED strip of lights from Amazon, and put them around his monitor and then on the inside wall of the case. (He has a glass panel around his too). He just used a adhesive puddy to attach it to the case, that can be removed very easily with no stains.
I tried to add a link below, I hope it works!
PANGTON VILLA Led Strip Lights 6.56ft for 40-60in Television USB TV Backlight Kit with Remote, 16 Color 5050, HDTV Bias Lamp https://www.amazon.com/dp/B072QWJRBS/ref=cm_sw_r_other_apa_bN1WBbQ9PJGM6
Yeah wow. There's too many things that might be dead about that sign.
Here's my suggestion: Buy something like this or this and call it done.
They do change color! It comes with a remote where you can choose what color and brightness. They just stick on the back of the tv and are powered via USB.
Here’s the link:
Led Strip Lights 6.56ft for 40-60in TV, PANGTON VILLA USB LED TV Backlight Kit with Remote - 16 Color Changing 5050 LEDs Bias Lighting for HDTV https://www.amazon.com/dp/B072QWJRBS/ref=cm_sw_r_cp_api_i_.W9ADbQ8QAA63
Now if you wanna get real fancy with it, Philips makes a light kit as well. Stronger light and you can control it with your phone and there’s a TON of customization options too.
Philips Hue Play White & Color Smart Light, Single Base Kit, Hub Required/Power Supply Included (Works with Amazon Alexa, Apple Homekit & Google Home) https://www.amazon.com/dp/B07GX9YG1H/ref=cm_sw_r_cp_api_i_i19ADbEZJ8Y3J
LED strip lights.
They are RGB strips
Led Strip Lights 6.56ft for 40-60in TV, PANGTON VILLA USB LED TV Backlight Kit with Remote - 16 Color Changing 5050 LEDs Bias Lighting for HDTV https://www.amazon.com/dp/B072QWJRBS/ref=cm_sw_r_cp_apa_i_tvPZDbF90E31Y
And it can be yours for $13!
Led Strip Lights 6.56ft for 40-60in TV,Pangton Villa USB LED TV Backlight Kit with Remote - 16 Color 5050 Leds Bias Lighting for HDTV https://www.amazon.com/dp/B072QWJRBS/ref=cm_sw_r_cp_apa_aSzTAbHE8KM7S
Thank you!
I was very inspired by friends and people here and over at r/battlestations.
I didn't want to spend a ton on a philips hue lightstrip ($80), so I found this alternative on Amazon https://www.amazon.com/gp/product/B072QWJRBS/ref=oh_aui_search_asin_title?ie=UTF8&amp;psc=1
It's worked great for me so far! Have to use a remote instead of being able to use my google home to control it but for $65 cheaper that's a no-brainer for me.
Behind my laptop I have one of these: https://www.amazon.com/gp/product/B01E7684I2/ref=oh_aui_search_asin_title?ie=UTF8&amp;psc=1
That's how I got the two-tone look. I like it a lot.
These!
https://www.amazon.com/gp/product/B072QWJRBS/ref=ppx_yo_dt_b_asin_title_o00_s00?ie=UTF8&amp;psc=1
There you are. They're pretty nice for $14. And if you buy more than one, they can all be controlled with the same remote. It's limited in it's colors but it does the basics pretty well. There's also a newer version that I have not tried.
I mounted mine on a wall. I got a piece of wood and slid it through the wrist strap and the place where your actually grab with your hand. I put 2 command hooks on the wall and rested the piece of wood on the two command hooks.
https://reddit.app.link/LKXQgmaI5W
Also bought some string lights off Amazon (https://www.amazon.com/dp/B075FRFBKG/ref=cm_sw_r_other_apa_i_SXS7Cb0HWYDQ1) and glued those to the back, hooked it up to Alexa. I tell her to start my gaming session and she turns off my lights, turns this and a fortnite blueshield on, turns on my xbox and e-nail. What a time to be alive
https://www.amazon.com/MINGER-Waterproof-Lighting-Controller-Decoration/dp/B079B834PB/ref=sr_1_4?crid=2HFNBZ5S8ZI2R&amp;keywords=led+strips&amp;qid=1556123003&amp;s=gateway&amp;sprefix=led+strips%2Caps%2C180&amp;sr=8-4
I got them from amazon! honestly any of them would work fine
I am planning on adding an LED strip also. I don't have my CR-10 yet, but I have other printers that I have added LED's on. From what I can tell, there is no 12v pins available on the CR-10 board. So you would have to either tap into the power supply or plug it in separately. I saw someone else tapped into the 12v line for the fan that cools the heat break but I don't think that's a very good idea.
You can buy a strip that includes a power supply and a remote control for $17 on Amazon.
If you go with something like this, you need to cut the strip to fit on the CR-10. Then you will need to solder 4 wires to the end of the strip where you cut, and connect them to the control box. Then that plugs into the LED strip and you can turn it on and off with the remote. There are better strips out there than the one above, because those LED's are spaced a little further apart. Here is another but it's more expensive.
Yours looks fantastic! Don't sell yourself short. See how it looks if you put it in front of a window. Or get some lighting to run along the inside frame.
I've been looking into lights for my mirror too. I've been leaning towards something like this as it's flat, easy to install, bright, and not very expensive. There's tons of these strip light sets on amazon, just make sure as you're scrolling through to read reviews and pick up an adapter (the one I've linked actually comes with one). The one I've linked is also dimmable!
Thanks! I'm using these for my Detolfs.
https://www.amazon.com/dp/B07CVRVPRM/ref=cm_sw_r_cp_apa_i_KrukDbCR67Z5B
Check out my IG to see more =)
www.instagram.com/eujin209
Something similar to this. I originally got mine from a friend for my bar, but I have no idea where they got it from.
This is the one I bought. Pretty simple and has a small remote to control it. the corners can be a bitch because you have to link them to round it so I bought these. You can trim them where you need and make a 90° angle without a weird kink
These are the ones I used. I have a CR-10 Mini and they fit inside the grooves perfectly, with just a tiny bit of clearance.
Just like /u/DictatorShadow suggested, I recommend the remote-controlled cheap ones. I have these behind my desk and they look great.
Full video of build: https://www.dropbox.com/s/tlj74b3qcetd6c4/DIY%20-%20Standing%20Desk.MOV?dl=0
I wanted to build a standing desk, but with a custom look. I went with the popular IKEA Karlby counter top for the surface and trimmed it a few inches (Home Depot) due to landlord (wife) requirements. For the legs I chose the iMovr Freedom standing leg base - for me that was the best combination of good reviews and reasonable cost. I made a number of trips to a local woodworking store to learn about what type of sealant to use, etc. The highlight of the desk was incorporating a hidden wireless phone charger which I’m very proud of. More details below:
Happy to share more details. If you have any questions, just DM me!
MINGER LED Strip Light Waterproof... https://www.amazon.com/dp/B079B834PB?ref=ppx_pop_mob_ap_share
MINGER LED Strip Light Waterproof 16.4ft RGB SMD 5050 LED Rope Lighting Color Changing Full Kit with 44-keys IR Remote Controller & Power Supply Led Strip Lights for Home Kitchen Bed Room Decoration https://www.amazon.com/dp/B079B834PB/ref=cm_sw_r_cp_apa_i_u5y3CbMPD0KN5
MINGER LED Strip Light Waterproof... https://www.amazon.com/dp/B079B834PB?ref=ppx_pop_mob_ap_share
AC Infinity AXIAL 8038, Quiet... https://www.amazon.com/dp/B009OXTWZI?ref=ppx_pop_mob_ap_share
The AC Infinity fans are nice and are standard wall plug NEMA 5-15P.
Thanks!
this one
they also have a non-wifi version that is half price
Led lights underneath that I can use Alexa to change the colors of.
https://www.amazon.com/gp/aw/d/B078N9HJFV?psc=1&amp;ref=ppx_pop_mob_b_pd_title
It’s actually this kit:
Nexlux Led Light Strip, WiFi... https://www.amazon.com/dp/B078N9HJFV?ref=ppx_pop_mob_ap_share
A fraction of the price compared to Phillips Hue, but works perfectly with Alexa. Just a slightly narrower color spectrum
Strip: https://www.amazon.com/Nexlux-Wireless-Controlled-Non-Waterproof-Assistant/dp/B078N9HJFV/ref=mp_s_a_1_1/141-3618799-0249308?ie=UTF8&amp;qid=1538564435&amp;sr=8-1-spons&amp;pi=AC_SX236_SY340_QL65&amp;keywords=nexlux+led+light+strip&amp;psc=1
Bulb: https://www.amazon.com/IVIEW-ISB600-Multi-Color-Dimmable-Compatible-Assistant/dp/B0736DTSH9/ref=mp_s_a_1_4?ie=UTF8&amp;qid=1538564530&amp;sr=8-4&amp;pi=AC_SX236_SY340_QL65&amp;keywords=alexa+light+bulbs&amp;dpPl=1&amp;dpID=31u1TayEcvL&amp;ref=plSrch
Both of these items work with Alexa and smart phones, when you set the strip up on your WiFi you need the magic home app on your phone, and for the bulbs you need the iView iHome app. I would also highly recommend you get some sort of Alexa device.