Best sculpture modelling tools according to redditors
We found 36 Reddit comments discussing the best sculpture modelling tools. We ranked the 21 resulting products by number of redditors who mentioned them. Here are the top 20.
We found 36 Reddit comments discussing the best sculpture modelling tools. We ranked the 21 resulting products by number of redditors who mentioned them. Here are the top 20.

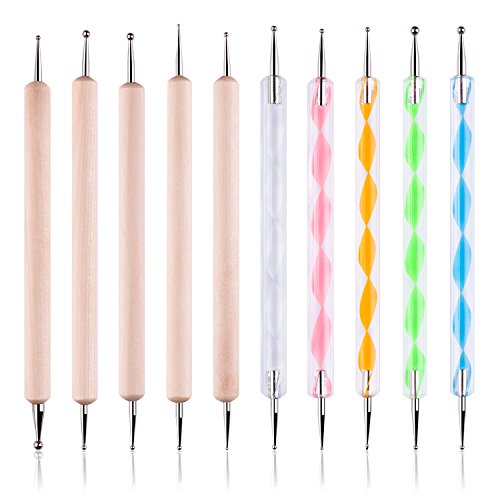


They're for doing art work on nails when painting them
Edit: like these https://www.amazon.com/10PCS-Dotting-Embossing-Stylus-Painting/dp/B07BQMMZJP/ref=mp_s_a_1_7?ie=UTF8&qid=1541420098&sr=8-7&pi=AC_SX236_SY340_FMwebp_QL65&keywords=nail+art+tools&dpPl=1&dpID=413SRNsYX9L&ref=plSrch
This should do the trick. You can watch the general process of creating a sculpture by watching his other videos. Also searching for polymer clay on google and checking the video section should yield plenty of results.
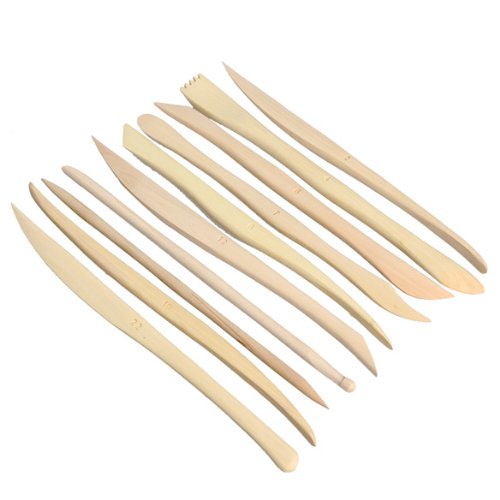
I myself work with "Super Sculpey Firm", but I'd probably recommend starting with the softer version "Super Sculpey". I highly recommend this tool set or any other similar looking ones that Amazon recommends, you mostly find a favorite tool and use that for 95% of the work. For many years I used to work exclusively with toothpicks to sculpt, before I got the money to spend on tools.
Also, if you haven't already, you can check the Album I mentioned in my comment to see the process of making this exact sculpture. What I didn't capture in the photos, is that the leafs actually have a small wire going through them, to hold them up like that.
I can't help you with gingerbread cookies, though I'm sure someone here has a great recipe for them. :)
As for royal icing, everyone has their own preferred recipe. I use Antonia74's Royal Icing Recipe. I cut the Cream of Tartar in half, because I don't like the aftertaste, and I usually add about 1 tbsp of Almond Extract.
I would recommend watching a few youtube tutorials on royal icing to decide how you want to go about it. There are so many different options for icing consistency, recipes, flavors, and colors, that you really need to play around and find what works best for you.
To start, I'd recommend Haniela's video on royal icing consistency. Also, Sweetambs has a good tutorial, as well. And Julia Usher has a very in-depth video about icing.
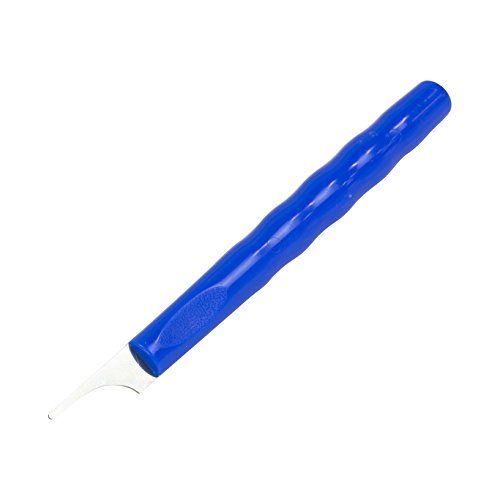
If you have a small table-top fan, it will go a long way towards helping with cratering, which is when icing caves in on itself, and is the bane of my cookie decorating experience. Also, a needle tool is excellent for smoothing out icing and getting rid of bubbles. If you don't have one, toothpicks will work. :)
Let me know if you have any specific questions. Hope this helps!
You totally need to invest on 2 playdoh kits http://www.amazon.com/gp/product/B00B7YPK76/
My kid uses them at therapy, they are pretty spiffy. As long as the mess stays in school or therapy - I'll supply them.
Third one
Wax Carving/Modeling Tools
Here's an example set. The photos show some of the many possible uses.
No problem. :)
I'd recommend these too if you wanna get finer details in.
I'd also invest in some fine grain sand paper.
For nurgly greenstuff there's a few things that will help. Get some metal, not plastic sculpting tools from amazon. You will want something that makes dimples, something shaped like a trowel, something pointy, and something that looks like a spatula for smoothing edges down to the model so the transition is without a seam.
Keep your fingers and the tools damp. As greenstuff starts to dry it will pick up fingerprints or drag. Keeping surfaces damp ensures that you'll keep from ripping.
As greenstuff goes from freshly mixed to hard it slowly starts to harden, making it less pliable as time passes. This can work to your advantage but what I recommend is that you don't mix up a large chunk at once. Mix bits that are marble sized that you can deal with in about 5-10 minutes. If something looks great, stop messing with that spot and return to it in a couple hours after it sets up.
To make depressions, use the tool that looks like a round ball on the end of your tool. To make boils, find something with a nice round hole - I use different parts of pens that have been taken apart. You press down with the opening, making a raised round area with a depression around it, then you press down in a circle around your boil with the spatula tool, or other one for a different effect.
I also would practice before you touch up a knight or other large piece. That Rhino is a great idea. I have found some janky ones on Ebay that are perfect for corruption. I don't mind taking something that looks rough if the idea is to cover it with corruption. Grandfather is pleased with this.
If you're going to convert, take some time to google image search ideas, get a folder together. A herald bell I always thought was very cool on a Nurgle knight.
Greenstuff also makes their own tentacle maker. You could wing it with something home made but its not expensive and with a little practice you can make really great tendrils and corrugated tubes.
Amazon stainless steel sculpting set $11.65
SE DD312 12-Piece Stainless Steel Wax Carvers Set https://www.amazon.com/dp/B000SVRSRY/ref=cm_sw_r_cp_apa_i_GAPFDbPW0RSP7
Apoxie Sculpt 1 lb. White, 2 Part Modeling Compound (A & B) https://www.amazon.com/dp/B0013UDWXI/ref=cm_sw_r_cp_apa_i_9APFDb4BZREHF
Sand Detailer Finishing Kit, Finer Grits, 24 piece https://www.amazon.com/dp/B0039ZCQAK/ref=cm_sw_r_cp_apa_i_BCPFDbBV5SSGW
SERONLINE 24pcs Ball Stylus Dotting Tools, Polymer Modeling Clay Sculpting Tools Set Rock Painting Kit for Sculpture Pottery https://www.amazon.com/dp/B0776SN7Y5/ref=cm_sw_r_cp_apa_i_JDPFDbTH56VM0
Monster Clay Premium Grade Modeling Clay (5lb) https://www.amazon.com/dp/B0722NKKYF/ref=cm_sw_r_cp_apa_i_dEPFDb1WPY7K2
For those interested in how to make your own miniatures:
1/ I start by finding/drawing a pic of what I want to make, and then twist thin wire (paperclip sized) around into an [armature](http://en.wikipedia.org/wiki/Armature_(sculpture%29). I use 19 gauge galvanized wire, but I know people use copper wire also.
2/ I've been using Super Sculpey FIRM as my clay. It is a plastic clay that hardens when baked in low heat. (Pro-tip: Michael's is often kind of expensive, but they do have regular printable coupons for 40% off one item. I've been getting a pound of sculpey cheaper than anywhere else from them.) You can use Sculpey III (comes in glow in the dark and other cool colors), but it is not as nice to work with. Pro's use a 2 part clay called green stuff that cures (hardens) on its own after a few hours.
3/ Sculpt! There's a few techniques I've discovered about how to get arms/long legs to stay on (the clay likes to crumble if it is too thin), but you'll probably learn much faster by just doing. You'll probably want at least a flat, clean surface, a needle shaped object, and good lighting. I've really liked using this silicon tipped paintbrush to model details/push clay around/wipe out fingerprints.
It is not widely discussed, but Sculpey can actually be re-fired (baked) with new pieces on top. So you can sculpt the skeleton or torso, fire it, and then add details, fire it, add arms, fire it, add weapons, fire it, add hands and more details, fire it, etc. The upside to doing this is that you avoid messing up soft details you've already made, the downside is that it takes forever and wet clay doesn't like to blend in nicely with fired clay (so it works better for large limbs or small details that can just rest on top). Once fired, Sculpey is very hard (and brittle), so it is pretty much impossible to remove material at that point.
4/ Fire it! Takes like 15 minutes at 275 or something. It says on the box. You can beef of large structures by using aluminum foil balled up inside. This will save you money on materials and baking problems.
5/ Painting, which is a whole nother story.
Edit: Oh, also, if you're trying to save money (and your time is valuable), this probably is not the way to go. Each one took me several hours to sculpt and paint, which works out to way more than just working minimum wage somewhere and buying a bunch of minis. Still, it is fun to do and have custom ones.
If you like to dot, two things:
Buy some inexpensive ($6.99) dotting tools (like what is used for nail art) and then check out Rachel’s Rocks on YouTube. She does a number of great tutorials that are easy to follow and then adjust and make your own.
example tutorial for Rachel’s rocks on YouTube
amazon link to dotting tools
I have these, these, and something like this and this. Head down to your local ace and pick up some dowels or a drill set of varying sizes for rolling.
Had to search about it. I had no idea that there were tools specific for painting dots on rocks!
https://www.amazon.com/Meuxan-Dotting-Painting-Pottery-Modeling/dp/B0761WTC2Y
I used sculpey clay and sculpted it over a pbt cap and it hardens in the oven (don't use ABS plastic or it might melt). And just some basic clay sculpting tools from Amazon. https://www.amazon.com/gp/product/B0776SN7Y5/ref=ox_sc_act_title_7?smid=A18KJ1DUGA3EYY&psc=1
https://www.amazon.com/10PCS-Dotting-Embossing-Stylus-Painting/dp/B07BQMMZJP
I started by using a plastic fork, until it was time to up my model making game and I purchased a set of Amtech tools. Not the best quality, but they work really well for the price that I paid.
Here are the ones that I purchased: https://www.amazon.co.uk/Piece-Stainless-Steel-Wax-Carving/dp/B000V6MTDO/ref=sr_1_fkmr0_1?ie=UTF8&qid=1493756622&sr=8-1-fkmr0&keywords=clay+moulding+tools+amtech
Amazon option:
Modelcraft Saw Set for Modelling and Craft (8 Piece Set) https://www.amazon.co.uk/dp/B07FXVX2W8/ref=cm_sw_r_cp_apa_i_am56CbXMM59VQ
Edit:
Forgot to say, these are what I use! They go through old metal minis with ease so plastic will be simple.
no prob bro.
this is the same style that i have, they are sooo perfect. i’ve been smoking dabs for like 4-5 years and have NEVER had to replace it.
Grade 2 Titanium Cap Wax Tool https://www.amazon.com/dp/B07JW215VZ/ref=cm_sw_r_cp_api_i_7M3oDb09AG24M
My son would really love to have These playdoh tools! His Wishlist is here :) They would really help with his fine motor skills! He loves playdoh and has had to make do with my castoff kitchen gear that is safe for him to use (a giant spatula and a wooden spoon lol) to use with his playdoh!
My funny christmas story is about the year we tried to book a cabin in a ski village and booked via their website. When we arrived, we found that it was not at all a cabin (should have realized when the price as so low) it was instead a crappy strip motel that had 1 cabin attached to it and had used those photos to display the room. So instead of a crackling fire, we had a rattling radiator, and since we didn't have a kitchen, we ate at the Chili's next door. It sounds sad, but it was actually funny because it was just the hubs and me making do with a strange set of circumstances and it made us more in love than ever!
This thing u/randomisation linked me is pretty nifty, I plan to pick one up for myself here soon.
You could get him Winsor and Newton Series 7 or Raphael 8404 sable brushes if he doesn't have some already.
Depends on how much you want to spend really, there are big collection boxes of paints from both Reaper and Vallejo you could get to give him a near complete collection of paints.
Airbrush is an option, there are actually very quiet air compressors, you just have to make sure you get a silent compressor, I use mine in a room directly next to another person through the early AM's without any problems.
Could buy him a wet palette to help keep his paint wet while and after he's painting.
They sell nail polish racks on amazon for like 30 bucks that are great for storing/displaying your paint.
It depends on the country whether you can send it in the post, you use to be able to get it at any local hobbyshop, or diy center etc. In the UK you can get it on Amazon but different countries have different laws about sending compressed cans in the post.
I am a utter novice myself! Never touched polymer clay really until the day before yesterday! Personally I am using this tool set which /u/shawnusaurus got me. It's awesome and while I don't know how to use half of them yet, I don't think my sheep could have been made without it!
I've only used fimo soft really so far but it seems good! Super malleable and easy to use!
Thank you! that means a lot to me. Simple sculptures are just as nice as complex ones though! If you need help making complex sculptures though, there's a lot of clay tools that help with detailed work. I religiously use clay shapers for every single sculpture I do. Every. Single. One. If youre having trouble with detail work that doesn't just look like flat chicken scratch on the clay, clay shapers help give some subtle depth. Use the tip of the round ones and roll them onto the clay to give depth or blend clay together.
If you're having trouble with keeping proportion symmetrical and correct, I recommend buying a clay conditioning machine. I also use this thing religiously. While sculpting Sans' head, I wanted to keep it very symmetrical. I just flattened out the clay in the conditioning machine and cut out equally sized pieces in it. Placed them on where the bottom jaw was supposed to form gradually while using the clay shaper to blend them in. For the stitches in his hoodie and such I just used a clay needle and drew them in at about a 45 degree angle.
If clay tools still don't help, then I'm sorry to say but all that I know of that can help is practice. When I first picked up clay for a high school class I had to sit and make dozens of 1" human faces out of the Sculpey and it was extremely painstaking practice. That was about 3 years ago and my face sculpting techniques still aren't terrific. But they have improved! If I hadn't sculpted all of those faces (which in my beginning stages couldn't stop becoming old men/women faces, don't know why that kept happening) I wouldn't have been able to sculpt Sans' face the same way I did now.
Try sculpting a ton of faces if you want really rigorous practice! A lot of the techniques sculpting faces apply to other sculpture subjects anyway.
What you have looks great.
For making good wood effects in Popsicle sticks use an X-acto or any other kind of knife and lightly cut the wood vertically, some deep and some shallow cuts, looks great once you paint and dry brush it. For foam you can do the same thing, use a stiff grill brush, or use a little tool that I like to use which can be found Here its the metal tool on the far right. Just scrape that over the foam and instant wood effects.
You only need a cutting mat (I use this one), a decent knife (mine again) and a metal ruler. Some designs are intended to be assembled without glue, but some basic paper adhesive can be helpful anyway.
Patience is pretty important; sometimes I rush a cut and it ends up drifting away from the ruler, which has resulted in having to reprint something.
YOu can find silicone clay shapers, like these, in small sizes that I find very useful and do most of the detail and smoothing of my clay with those. My small ones have a width on 2mm I think.
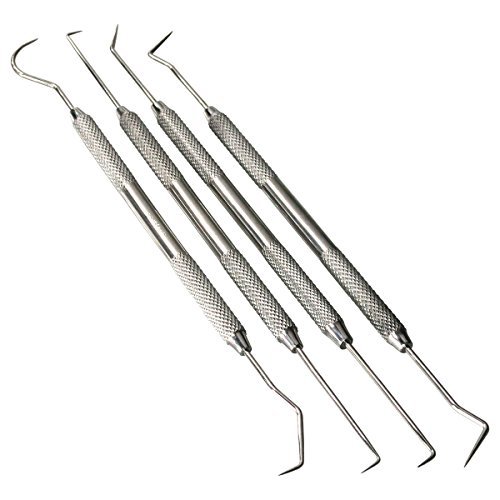
I also have steel tools, like these which I use for rougher work. These are really similar to dental tools which are great if you can get a hold of them too.
Of course I have a few very sharp hobby knives with replaceable blades (something like this but I don't know what brand for cutting clay and and making fine detail.
Other than that, I mostly use homemade tools. I have a few sewing needles and pins which are useful for fine detail. I also have a few hyperdermic needles, the end of which is like a tiny, super-sharp blade, for the finest of details.
To make tools with them, I usually drill a small hole into the end of a disposable wooden chopstick and superglue the needle into that. I fill around the edges with milliput to fix it firmly in place.
Trovarion, Redditor and YouTuber, has a cool video on how to make homemade tools, too, that you may find helpful.
Also, there is a whole book by G. Schellert on homemade mini-sculpting tools, but it mat be too in depth for most peoples needs.
Any two-part epoxy with a smooth finish can work. Kneadatite from Polymeric Systems is what most people end up using; usually referred to as Greenstuff. You can order it online through Amazon or find it at most hobby stores that carry miniatures. I use Polymeric's QuikPlastik because it's cheaper and available at larger DIY stores. Milliput is also a popular choice.
Any way you go, be careful to mix it thoroughly and not to use too much. While you can trim it back with a sharp knife, it's easier to add more if you need to. You may also want to get some sculpting tools or dental picks to shape the putty and sculpt details into it. Then you can use it to repair damaged models, fill in gaps in larger metal pieces, and even to make custom parts.
That’s Sculpture Geek’s video, he uses NSP hard. At a certain point he rakes the clay and little pieces fall off. If the clay isn’t hard enough you can’t rake it. I don’t think any clay smells so strong it would leave an odor on fabrics. Roma smells the worst, like sulfur, but it’s probably the closest thing to water based clay. I love working with it but really dislike the sulfur smell. My recommendation is super sculpey. It will always stay workable and if you want to finalize a piece you can bake it in an oven. I’d get the original or medium. Here is a mat you can use. https://www.amazon.com/DAFA-Professional-Self-Healing-Double-Sided-Compatible/dp/B00P6KPKBI/ref=mp_s_a_1_5?keywords=cutting+mat+craft&qid=1558533396&s=gateway&sr=8-5
Here is a set of tools https://www.amazon.com/Vktech-Sculpture-Pottery-Sharpen-Modeling/dp/B00CHH1P9E/ref=mp_s_a_1_11?keywords=sculpting+tools+wood&qid=1558534139&s=gateway&sr=8-11
You can sand down and customize the tools as you like. You can also watch live sculpting on Twitch. https://www.twitch.tv/cnotbusch He’s there almost every day.
I used a recipe from Montreal Confections on Youtube.
Royal Icing Recipe:
Note that this recipe makes quite a bit of icing. I made a large batch of cookies (50 or so cookies) and I had more than enough. You may want to cut the recipe in half.
She also has another video on how to get correct consistency.
I worked with mine until I got close to a "20 second icing" so I could pipe and flood with the same icing.
Also, I highly recommend purchasing a scribe needle tool to smooth out the icing.
I actually use one of these bad boys. http://www.amazon.com/Kemper-Tools-Professional-Needle-Tool/dp/B0023ATIM6 It's great for getting into tight places, or working out beads if you mess up.
well in that case a quick amazon search for 'moldline removal tool' found this
Morhty demands:
Akeleie demands:
Super awesome contest! :D