(Part 2) Best soldering & brazing equipment according to redditors
We found 2,378 Reddit comments discussing the best soldering & brazing equipment. We ranked the 447 resulting products by number of redditors who mentioned them. Here are the products ranked 21-40. You can also go back to the previous section.


What a beautiful shot! Sometimes sacrifices must be made haha.
If you dont mind me making a small suggestion, I would try using an abrasion resistant polycarbonate infront of your lens because its the least likely to scratch or pit from debris. You can get just basic polycarb for like $5 so you could also just buy 10 and use them as disposable parts. It would save you a lot of money in the long run, and polycarb is the least likely to warp your image and if you get the thin stuff (under 0.5") it will have minimal effect on your light.
As for dew, you really just need to make sure youre above the dew point. If you have a power source, I would just buy a heat gun and point it at the edge of the poly carbonate, about a foot away. This way air is traveling along the surface of the polycarb and the lens. This would whisk away anything on them, heat them above the dew point preventing any of it, and wouldnt blow any dust in the way.
Anyway, great to read these detailed accounts from first hand photographers. Than you so much for sharing!
I would only suggest doing this mod if you are extremely comfortable with a soldering iron. I'm not responsible if you mess up your Joy-Con. With that being said below are the things I used to make this possible:
Parts
Steps
More pictures
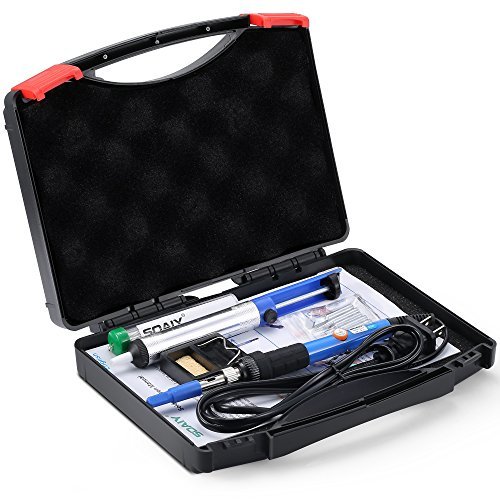
It’s a part from this soldering kit.
https://www.amazon.co.uk/WELLER-SP23LK-25-Watt-Soldering-Iron/dp/B0009ZD2AG
A couple of things come to mind:
A) Cool.
B) Instead of drilling through your stencils, I recommend using a finishing nail or an awl and banging pilot divots. This centers and guides the drill bit, and keeps you from killing your stencil, just in case.
3) Try heat shrink tubing. It's not terribly expensive, it's fun to use, and it makes you look clever.
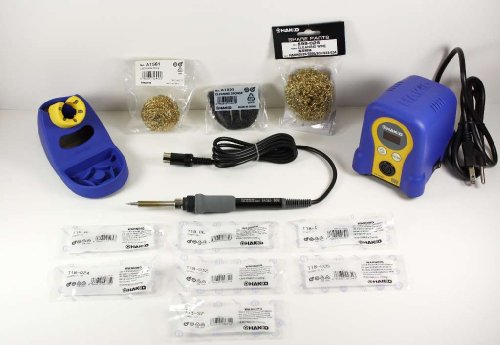
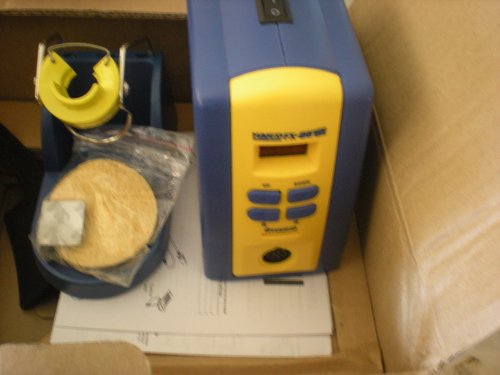
D) In the event that you ever want people to think that you are very clever, get a decent soldering iron. If you have a lot of extra money to throw around, get a fancy Weller station. If not, I recommend the adorable Hakko FX-888. Now that the analog version has been discontinued, it's hard to find on sale, but... they're fantastic. If you want to feel fancy, you could get something like this. Look at all those bits! I don't know either!
So damn irritating. The old model had a simple dial. Same form factor. Now they don’t make them with a dial and you basically need to dig up an instruction manual to figure these things out.
OP, is there any advantage to the new one besides the fact that it led me to find the TS100 ?
Surprised nobody mentioned the cold joints, but when you redo the soldering, you can fix that as well. Basically, use your iron to heat the pad and wire together and then touch the solder to the joint. The metal will melt the solder, and it will flow right in and make a "hot" joint, which will be much more mechanically sound. It also has the benefit of guaranteeing that the flux melts; if you're not using rosin core solder, get a flux pen. The flux will etch the oxide layer off the metals, and also help the solder flow into the joint. No-clean flux is nice, but you can always clean it off with some rubbing alcohol to be safe.
If your iron has an adjustable temp, shoot for 300° C at minimum for leaded solder, I prefer 320° personally. Lead-free solder will need a higher temperature, but it's a moot point since you shouldn't ever bother with that stuff. If your iron isn't temperature controlled, make it a priority to replace it. The TS-100 is popular for good reason, but you can find a perfectly good adjustable iron for less than $30. I think. My last cheap iron was like 15 years ago. ¯\_(ツ)_/¯
Also, you might want to tape the motor wires to the arms so they can't find their way into the props.
I wish there was a very clear answer that isn't a
thousand823 words. But there isn't, so bear with me. Or is that bare with me? Regardless, beer with me.Okay, as far as I know there are three ways to do a battery swap (as long as you aren't trying to keep your saves on the game. Then there are wires, lots of prayers, and it is a pain in the bottom). The first two methods are the guide you linked to and soldering the battery. The last is finding a tabbed battery.
As your guide shows, and as both of the first methods will follow, you need to break the connectors off the battery. Don't bust out a soldering iron just yet, these aren't soldered. They are spot welded. Unless you have a spot welder (and you don't - don't lie to me and say you do, I doubt any of us have one) you won't be able to get it back together the same way it was. You need to break the connections in order to get a fresh battery in there.
Grab your finest razor blade in order to sever the connections, and a handful of bandaids in order to stop the bleeding from your accidental cuts. It is bound to happen, maybe not the first time, hopefully not every time, but you will be poking and cutting your hands. It will suck. A sharp razor won't hurt you as much, but try to be careful anyway.
After you clean your blood off the circuit board, you can choose which of the first two methods to go down. You can use the soldering iron or tape / wire glue. Wire glue is, as far as I've been told, basically iron mixed into elmer's glue. It is suppose to hold well, but it wouldn't hurt to tape after using it. Mix it up well before using it, or else you might not get a very conductive result.
The issue with using glue or tape to hold your battery is when you get to Gannon in the dark world, or maybe battling Giygas, or vanquishing dracula, your method of holding the battery will fail. Maybe you'll bump the cart just the right way, or maybe the dog will run in and knock the SNES down, then you'll lose all that time. And be upset at the dog that just was super excited to see you, because he only knows a few people and he loves you so very much. He won't understand why you are angry, and it will break his tiny little heart.
Don't break your dogs tiny little heart. If you don't own a soldering iron, use good electrical tape and use the glue, and make sure it is as secure as possible. Some people will add hot glue in there to hold that sucker in place, and it isn't a bad idea.
So, you love your dog and you are thinking you should use a soldering iron. Well, it is going to be hard to play fetch with fido when you are blind, and you might get angry at me if I don't mention it. Hot things and batteries aren't a good combination. They can pop, spray acid, and ruin your day. Wear safety glasses at the very least, and try to keep the iron on the battery as little as possible. A soldered battery will hold in place much better, but it still isn't great.
So, you've arrived at option 3. I like to call this the expensive option, but it is the right way to do it. You need to find the batteries (and without spending a bunch of time researching, there is a pretty good chance it is one of the ones in this list )then you need to have a soldering iron, and some solder. A desoldering iron would be really handy, but soldering wick could be used in its place, or you could just not use anything and probably be okay. Buy a/some tabbed batteries, remove the old battery by heating up the tabs through the board and pull it out. A desoldering iron can be used to suck the solder away, which will make this easier for you, and a wick can be used in a similar fashion. Pop the old one out, put the new one in, solder it in place, and you'd be good to go. The batteries aren't going to be cheap, and you can't ship them (easily) via USPS because they are lithium.
As for soldering, you might need to practice the basics. There are cheap little kits at Radio Shack. Make a FM radio or something using one of them. Take your time, be careful, and keep some burn ointment on hand. Seriously, there isn't a method here that won't lead you to some sort of minor injury.
Good luck, and tell your Dog I said "Woof!"
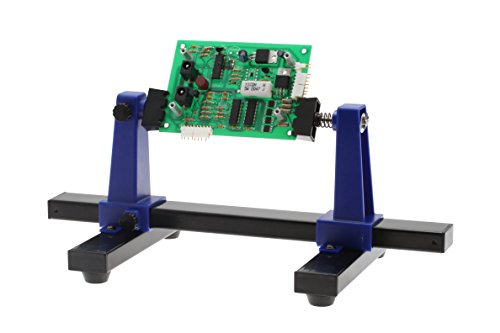
Aven 17010 Adjustable Circuit Board Holder https://www.amazon.com/dp/B00Q2TTQEE/ref=cm_sw_r_cp_apa_mFZ-BbDJWGWJ4
Butane torch, various uses. I.e. shrinking heat shrink tubing.
Blazer GB2001 Self-Igniting Butane Micro-Torch https://www.amazon.com/dp/B000VML7KO/ref=cm_sw_r_cp_apa_4NH2BbCTQR2TV
As cute as that is. My god the hits are going to be harsh! Try using a soldering iron for clean vape hits!
I did a BYOC kit over a year ago.
It can be difficult if you don't have the right tools. I got a board holder that made my life so much easier.
I also suggest getting a very fine/narrow solder tip. The one I used was a little big for the job.
The most difficult part was soldering the switch. Pisses me off just looking at it.
In the end the pedal had a huge volume drop, so I fucked something up along the way.
I bought this a while ago, which has been fantastic for filling boards and soldering components. It gets tough if you have components really close to the edges, but that's why I also use a regular old helping hand tool.
I run this instead of a Dremel brand tool. I have had a couple Dremels die on me over the years, so I tried this one and it has lasted 4 years so far! I also got a lot of my bits from harbor freight. I use the cuttoff wheels (ALWAYS WEAR FACE PROTECTION WITH THESE), Sanding Drums, and grinding stones the most. Use the cutoff for cutting out large swaths of material, sanding drums for tighter areas, and grinding stones to debur and smooth it all out. Most work that needs a dremel can be done with hand tools for better control. Coping saw, files, and flush cutters can go a long way. A lot of the "pros" don't use Dremels because they can jump out of control and hit a part of the blaster you planned on leaving stock and leaving a huge gash.
As for soldering Irons, I've heard wonderful things about this model, but cheaper models will work fine. TBH, I'd grab something in the $10 range and see if he sticks with the hobby. Maybe for christmas you can get him a nicer one if he's still going at it. I use a super duper old school Weller soldering station, so really anything will work. The issue you'll get with the cheaper soldering irons is the tips will tend to not last long and the heating element might crap out after a few months. Don't go cheaper than $10 here as some of them are meant for wood engraving, not soldering and wont get hot enough to melt solder. Any size solder is fine. I personally use lead/tin solder and just avoid breathing fumes as well as wash my hands when I'm done modding. Lead solder is MUCH easier to work with and requires less heat. Look for "Rosin Core solder" as it's easier to work with as it has flux in the center of the solder.
Good flush cutters, hobby knife, wire strippers, heatshrink, wire, loctite, etc are all valuable modding supplies. We sell some on our shop (shameless plug). I would recommend for plastic to plastic bonds he use Devcon Plastic Welder (make sure it contains Methyl Methacrylate as this acts as a solvent weld to bond the plastics together chemically instead of a weak adhesive grip like putty). Putty should be used as a filler material. I use two different putties. Free form Air for large amounts of gap fill, it is 6 times less dense than normal putty so it wont make the blaster weight 8 pounds when done. It is VERY easy to sand, but sometimes requires a thin layer of bondo over top of it to leave a perfect finish. I also use Apoxie Sculpt which is a direct replacement for normal putty for gap filling purposes. It's MUCH easier to sand than JB Weld putty, and leaves a nice smooth finish when sanded down.
Speaking of sandpaper, get various grades of sandpaper from 100 down to 600 grit (I go as far as 1000 if I want a gloss sheen on something).
Other than all of that, the tools I have on my bench that I would hate to mod without now are: Helping hands (for soldering), various different sizes of needle nose pliers, numerous sizes of small to medium screwdrivers, silicone lubricant, hot glue (for securing wires inside the shell), Electric Screwdriver, and various tweezers.
For basic soldering, a $6 Walmart iron works just as well as a $25 one from Amazon. You'll only notice a difference when you start moving up drastically in budget. You'll get finer controls and a more sophisticated workstation.
Whichever iron you end up with, soldering accessories make your life so much easier.
Again, most of this is optional, but really reduces effort / mistakes along the way. You should be able to get most of this stuff bundled together on Amazon.
-----------------------------------------------------
Off-topic, but if you're going to bivert, using solder wick and the pick (from this dental kit) makes the installation quite a bit simpler.
I solder for a living and am shocked at the price of this thing. I might get one to try out on some shit boards because, if this can match anything near the performance of my FM-203 or my FX-951 I'll be shocked and thrilled.
Extreme overkill probably, but if you really want to spoil him...Best investment I have made tool-wise.
If he is just getting started I doubt he will need the hot-air rework side of things, but after a while soldering I wanted one for a long time before I actually got around to picking one up...
Mainly posting this here because I am a big Aoyue fan and everything here is Hakko and Weller.
For a soldering station I would consider new unless you find a great deal on something... For example, I use this at work, it's never given me a problem and it's used quite often (we're a semi conductor manufacturer and I share the lab with another)--granted we use a set of Wellers for most of the soldering, but the Aoyue gets high use for the heat gun and occasionally the soldering iron. I liked it so much that I bought one for home, yeah it's a bit high, but if you're doing SMD or other soldering stuff you will appreciate some of the features and included items.
I'm not sure about power supplies, but one good thing there is that age is usually not a big issue, and if you're just needing standard supplies you can probably get away with a decent 12V supply and then build a few regulators for lower voltages.
I've heard that Rigol oscilloscopes are a great value, and that that the lower rate units can be firmware hacked to higher rates. Personally the trouble I have is that after using $5000 Tektronics scopes at work I can hardly even stand to step down to a $2000 Tektronics, so I can't imagine what using a $350 Rigol would feel like... but if you have nothing, this isn't bad.
I'd also check out ham radio flea markets. BTW I have to say that if you are into electronics and what to make a life/career there is no better place to be than into amateur radio. the ARRL handbook alone is an amazing reference. As a personal responsible for documentation at my work I'm blown away by the quality of the writing for those handbooks. Even older copies are great and they're usually cheap. I have a 2003 copy at work and reference it regularly for either the information I need or a great starting place for researching a topic.
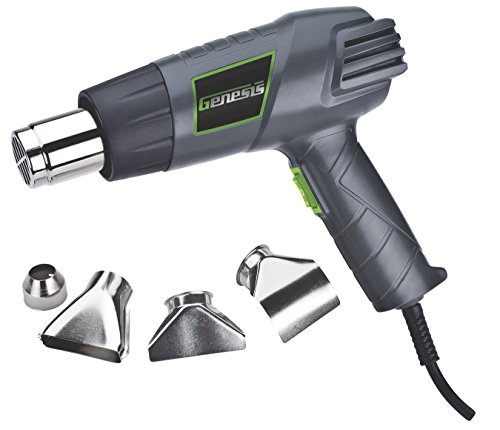
Genesis GHG1500A Dual Temperature Heat Gun Kit with Four Metal Nozzle Attachments https://www.amazon.com/dp/B00EU2T8GG/ref=cm_sw_r_cp_api_i_KJ6XCb0YS1FW2
This is the one I got, for less than $20. Great buy.
I've been using this: https://www.amazon.com/dp/B00Q2TTQEE/ref=cm_sw_r_other_awd_K3x8wb1ZQJWX1
It works great. You can easily flip your project over and see both sides of the board. I'm not sure how much smaller it is that the one you're looking at though.
I like this type because they are small and take disposable lighters as a fuel cartridge so you can pick up a refill just about anywhere.
SRA-Solder has items on Amazon, they sell Aoyue products in the US.
this would blow your whole budget, but would set you up so you could solder almost anything.
Here are some rules to keep in mind:
Start with a pair of wires... Just twisted together wires, like a "Western Union" or "Lineman's" splice.
http://en.wikipedia.org/wiki/Western_Union_splice
It's how I usually install car stereo equipment when putting the car and radio harness together.
Next, you can move up to kits. I wish HeathKit was still selling shit... Velleman seems to sell small trinkets for less than US$10 and you can find them on Amazon. They're fairly easy to assemble, single layer board kits.
http://www.vellemanstore.com/en/minikits
Mainly, it's practice, practice, practice.
You don't even have to spend a whole bunch on an iron... Either of these is quite acceptable and I work on electronics on a daily basis:
http://www.amazon.com/Weller-SP25NUS-Standard-Soldering-Black/dp/B00B3SG70K/
http://www.amazon.com/Weller-SP40NUS-Medium-Soldering-Black/dp/B00B3SG6UQ/
The first one is a 25 watt unit and better suited for smaller circuit board jobs. The second one is a larger 40 watt unit and more suited for wiring type jobs. But both should be acceptable for both types of jobs.
EDIT: Also, as someone who works on electronics almost daily... The was James May should have repaird this was to bend a hook in the end of the wire he was soldering. That way, it'd hang on the terminal strip without the need for a third hand. Iron in one hand, solder in the other.
I'm still pretty new to this myself, but like you I have some electronics experience in the past. I just got this Weller 40w iron station with a desolder braid/sucker and a solder tip cleaner. Oh and a more precise tip for the solder iron
I'm really happy with it all so far, and couln't imagine needing more for a while. A heat gun would be nice for de-soldering and reflowing premade boards (like modding Boss pedals), but that can also be done with a regular solder iron as far as I know. You can get the above for about $60 total, so it's a nice way to get your feet wet without a huge investment. Then you gotta add on components/enclosures/pots/switches etc. Maybe get a helping hands and/or circuit holder if you need
Oh and get a good multimeter. I went a step up from the $20 ones and got this one which I'm also really happy with.
That Weller has power settings, not heat settings, it is as unregulated a $5 Harbor Freight one. It looks like the one OP has is actually temperature controlled.
Here is a similar one to the OP's. It takes Hakko 900M series tips and is actually temperature controlled. I've used one that a friend bought and it did just fine.
> Weller WD1
Seriously? If you're going to be dropping $400+ on a soldering station, then you buy some quality HW. JBC > Weller in precision soldering equipment.
OP is looking for something like a TS-100, or a FX-888
OP can buy cheaper if they're not planning to get into the hobby, but I'd suggest investing in a station with adjustable heat as a minimum.
My cord craft kit
Detail of select tools
DIY Fid, Finished paracord end, Kleen-Kut Paracord scissors & buoy wrap scissor cover
I've accumulated quite a few tools in my years as a knotter/rigger but you really don't need very much to get started in the hobby. When I first started tying, my most commonly used tool was the Dr. Slick Spring Creek Clamp, 5", Black, Straight. You'll find many less expensive "hemostats" on Amazon, this just happens to be the one I picked up at an outdoor outlet many years back. It served as a fid, a "pusher" and a puller. I don't use them for tying much any more, I "thread" with a fid more than I pull through these days, but I do use them for finishing the ends of paracord — see below.
As I said, I now use "fids" or lacing needles regularly. My first fids were homemade — machined by spinning an aluminum Chicago screw in a drill press and shaping it with a file. I progressed to using a pair of the Tandy Leather Long Jumbo Perma-Lok Needle 1193-05 that I'd modified by shortening and shaping the tips to be more needle like. I wouldn't bother these days because purpose made fids are readily available: 3 1/2" Stainless Steel 550 Paracord Fid, Lacing, Stitching Needle. I have fids and Perma-Lok needles in a variety of sizes to accommodate different cords — I don't use 550 exclusively.
Though not completely necessary I do find the Knotters Tool II (Stainless Steel) w/ 3 Different Size Stainless Steel Lacing Needles by Jig Pro Shop to be handy and it includes three fids. An aluminum version is available too, but I'm never one to shy away from investing in a tool that will last. I also use a 4 3/4" Paracord Tucking Tool (Stainless Steel) for tucking and smoothing. You can probably find a similar tool at the local pharmacy, and maybe even at a dollar store.
The best cutting tool I've found for paracord are the Kleen-Kut scissors sold by Paracordist.com. Unfortunately, the store is currently down so I can't supply a link. You can use good quality flush-cutters, bandage scissors or a good, sharp pair of "Fiskars" (or similar scissors) and they will all work. However, I tried everything I could to avoid buying the "special" scissors and, in the end, wish I'd just done it sooner.
My technique for finishing the ends of paracord: Clamp the end of the cord at a 45 degree angle with the hemostats. Cut the cord flush with edge of the clamp. Run a lighter along the edge of the cord to seal. While the cord is still warm, remove the clamp and, if necessary, re-clamp to the very end to squeeze and seal the end. Tuck the end back into the workpiece. If the end is going to be exposed I will sometimes remove a small length of the core first, then trim and seal just the jacket for a flatter, neater finish.
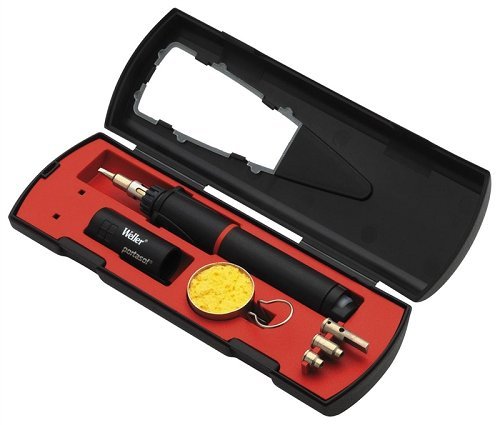
I do sometimes use a hot knife for finish work. Most often the Weller P2KC Professional Self-igniting Cordless Butane Soldering Iron. If I'm at my bench I do have an Engel Heat Cutter HSGM Hot Knife w/ Type R Blade available (used for "big rope" and purchased when I was rigging boats professionally) but it's total overkill for paracord work. I am intrigued by the Hand Held Electric Hot Knife Rope Cutter Set - 100 Watt, Cutting Blade (HHHK-HS18. The tool is probably not as durable as the Engel, but if one isn't using it all day, every day it's likely suitable. One Advantage of these "rope guns" is that they heat up almost instantly but, truthfully, the Weller doesn't take very long to come up to temperature and it's much more portable. Whichever you choose, it’s easy to mar your piece with the hot knife so I generally use the hemostats as a shield. (And again, I'm more often just using the lighter/hemostats for paracord work.)
I also keep a needle case with sail-makers needles and whipping twine (wrapped around the needle case) handy for stitching and whipping. (In a pinch, a single strand of 550 core makes a decent twine, particularly if you pass it along a block of wax.)
I want to emphasize that you don't need all of these tools, you might not really need any of them, but I do find that assembling a good kit and having the right tool available can help overcome tricky problems. I'd say that the Knotter's tool (admittedly, my attachment to this tool may be due to my love for marlin spikes in general) with it's fids—or barring that, just a set of fids—the hemostats, a good pair of scissors and a lighter would make a decent field kit. Add the rest of the stuff to your knotting bench over time. Or not.
I'll also say that there was a certain satisfaction to making and improvising my tools in the early days but now that there are so many quality purpose made tools available via Amazon I don't find it's worth my time any more. (I have a wooden bracelet/collar jig that I made but I recently acquired the aluminum jig from Acid Tactical and I think it's just brilliant and even assigning a lower value to my time than I normally would, much cheaper to buy than build.) I do have a plan to machine a set of Delrin fids and pushers for low-profile air travel "one of these days"
Hope this helps.
I would be careful using that in a computer. For electrical hobby kits and simple circuits it might work, but I would be wary of using it for anything else.
Here's a similar product with widely varying reviews. Some of which seem to confirm my fears. Others say differently, but I wouldn't risk it.
If you're able to solder, you're better off doing that, but it's your computer.
You certainly can use that soldering gun but it won't be fun or easy because it is so large (that's what I started with and used for a few years). I'd suggest picking up a Hakko FX-888D or Hakko FX-951 if you have a desire to continue with electronics.
Definitely add more solder because it has flux in it which will clean the oxides and allow the solder to flow out. You will also need to use a bit of solder wick/desoldering braid to clean up the pad before fixing it. You'll want to get some Kester leaded solder to work with.
Watch these Pace soldering tutorials before you begin to understand the basics. Heat the pad and wire then touch the solder wire to the joint. If you add it to the tip of the gun/iron the flux will burn away and it will start to oxidize. Doing it that way certainly has it's place but it isn't for this type of work as you'll need to add extra flux to protect the joint.
Soto Pocket Torch
Like this? Seems like one of those things that's not very economical or functional...
For anyone that might be interested, from Amazon: Soto Pocket Torch
I'd check the tip of your iron; if it's silver and shiny, it's fine; black and pitted, it probably doesn't conduct heat as well, and it's time to get a new one.
There are also other irons, like this Hakko that are higher wattage for about half the cost of the mentioned station.
I'd suggest switching to silicone hobby wire; a lot of the nerf stores like OutOfDarts, FoamBlast, and Containment crew carry it. It will handle high heat will, but is still pretty reasonable to strip by hand. You can also check out PVC coated wire; it's cheaper and a little thinner (though a bit less flexible), but it will burn much sooner than silicone.
Lead Free soldering is a bit more challenging, but it's certainly doable.
the most popular opinions you're about to get will cost around $100
This one is $37
https://www.amazon.com/gp/product/B006MQD7M4/ref=oh_aui_search_detailpage?ie=UTF8&psc=1
I doubt you can find anything actually decent under $30. While I was in high school, I made do with a dollar store soldering iron, replacing it every few weeks wasn't too bad.
You wanna sear your steaks with a heat gun? I've melted butter and the like with one, I've even heated up food out of the fridge with one, so it should work. This is the one I used, on the highest setting. When I read the output temp with a thermometer it showed about 550 degrees F. https://www.amazon.com/gp/product/B00EU2T8GG/ref=oh_aui_search_detailpage?ie=UTF8&psc=1
you may need a 3rd hand
https://www.amazon.com/QuadHands-Helping-Hands-Third-Soldering/dp/B00GIKVP5K/ref=sr_1_1_sspa?ie=UTF8&qid=1511884159&sr=8-1-spons&keywords=soldering+holder&psc=1
I have found this one to be much, much better.
I havent built that model but to answer your second question...Be cautious of build guides (or lack thereof). The one you linked has a really good guide. Step by step, clear pictures, and in color. So far, I've found Befaco, AI Synthesis, and Trogotronic to have really good guides.
Also, take your time. Its better to go slow and be sure of your work than rush. Tape! Tape helps me a lot by holding small pieces in place. If you can, get this circuit board holder. I got this magnifying headband for free (that style, not that specific one) and its been really helpful as well.
Here are my go to recommendations for beginners.
Trogotronic VCA
Trogotronic Power System
AI Synthesis
Thanks for your interest!
The acrylic case comes with a plate, and I'm working on my next order of aluminum plates to go with those. If you want an acrylic plate you can get that now. You are correct that the aluminum plate sold separately is for the aluminum case.
I'm not currently offering soldering for LED's, but I may in the future. You can get someone on /r/mechmarket to do that, or you can pick up some quite reasonably priced soldering irons on amazon. It's cheaper than my assembly fee. :)
The layout you want to do has been physically verified on my Danger Zone board: http://i.imgur.com/Le0hEpH.jpg
The middle layer is hard to do because it's 0.34" thick, which is an unusual size. I can get orange for other layers, and in fact have been considering it lately.
That carbon mockup is looking pretty sweet.
I'm using Amazon links as requested, but if you have a local big box tool stop you can get the store brand of most all these items for the same price or less. I know from personal experience, that from the tools I've listed all but two of the items are cheaper in store than on Amazon.
Everyone needs a knife! (~$7 home depot)
Razor blade
Where are you going to keep everything? (~$10 home depot)
Utility Sack
You'll need a good all around screw driver. (~$8 home depot)
6-in-1 Reversible Screwdriver
Need some basic general maintenance pliers? (~$20 home depot)
Pliers Set
Ratcheting screwdriver for those repetitive screw jobs. (~$20 sears)
Ratcheting Screwdriver
Where the hell did I put that T6?
Magnetic Precision Screwdriver Set
Where did that damn screw go?
Flashlight
Extra stuff!
I recommend the ball end ones specifically if you don't have a good angle on what your trying to get at (cough towel bar cough cough).
Long Arm Ball End Hex Key Wrench Set
For those damn pesky wires and that damn lack of a third hand.
Helping hands
When duck tape and gum wont cut it.
Beginners soldering iron kit
I have used all of these specific items extensively besides the ball end hex keys, and that specific helping hands.
This is the one I use (and really really like).
https://www.amazon.com/Weller-WES51-Analog-Soldering-Station/dp/B000BRC2XU
To be honest, it would be overkill for just hobby use (I am heavy into drones and other electronics that require a lot of soldering on a very wide range of wires and parts).
This is a great little kit that will get you started;
https://www.amazon.com/dp/B01C9P7HDQ?psc=1
tl;dr I would not spend much more than about 20-30 bucks for your first one, if you use it a ton and get into electronics, you can always upgrade and keep the first one as a travel iron.
That's a little tool to help hold wires and components when soldering.
Example: https://www.amazon.com/dp/B0009ZD2AG/ref=cm_sw_r_cp_api_i_xxa5AbJP0EBTK
As far as soldering irons go, I've had relatively good luck with the 25W Wellers. I would ask your local hardware store if you can buy a box or half a box of them for a discount.
I would also look at structuring your projects so that they build on each other and have a low / cheap parts count. There are deals to be had.
That soldering iron heats to 925 degrees F according to the packaging, and about 650 to 750 degrees is more appropriate for PCB work. However, if you're quick you could probably get away with using it. You shouldn't be holding the iron to anything on the PCB for "a few seconds". Also, your solder wire (which I can see in the picture of your iron) is too thick. What is it, 0.062"? 0.020 to 0.025" is ideal for most PCB work, and I wouldn't go any bigger than 0.032".
You don't need an adjustable temperature iron. If you want to play it safe, you can just get a lower wattage non-adjustable iron, i.e., 15 to 25 watts. Those will reach equilibrium at a lower temperature than your 60 watt iron will. Something like this for example - https://www.amazon.com/Weller-SP23LK-25-Watt-Soldering-Iron/dp/B0009ZD2AG - which reaches equilibrium at 750 degrees. It also comes with a couple of chisel tips, which is what you should use to most efficiently transfer the heat (due to having a lot of contact area) so you can solder quickly. With high end irons like the 13.56 mHz Metcals, small conical tips work perfectly (especially the bent ones), even for relatively large joints, but those work on a completely different principle than inexpensive, conventional irons.
I would not generally use a soldering gun for circuit boards.
Here's a 12w iron on amazon.com. Only $13. Weller is a good brand.
This 25w kit seems to include a small roll of solder. For electronics, you want something like 60/40 rosin core. I've used Kester brand solder since 1970. I'm happy with it.
If you also need to remove solder, get a sucker and some desoldering wick. Wick comes in different widths; order various widths, or guess at the optimal width for your circuit boards.
That is for car stereos. It will drop blobs of solder on the board and ruin it. You need one specifically for circuit boards. Weller is a little higher quality and still inexpensive. But you might consider a soldering station.
http://www.amazon.com/Weller-SP23LK-25-Watt-Soldering-Iron/dp/B0009ZD2AG/ref=sr_1_8/178-0341211-8873629?ie=UTF8&qid=1426782390&sr=8-8&keywords=circuit+board+soldering+kit
Soldering Station
http://soldering-store.com/
I doubt the pencil torch puts out enough heat to solder a heavy ring. I regularly use this for smaller items without too much trouble, sometimes using a pair of them if I need the extra heat. This one is even better in terms of output but again I've used two simultaneously on occasion.
Copper is filthy and really sucks up the heat--you might want to switch to a paste flux like Handy Flux to eat up the oxides that are keeping your solder from flowing.
Your soldering surface is important--you'll have less trouble with something heat-reflective like a Solderite pad or a charcoal block.
If you want one that will last for years and years of use? Get a Weller Portasol. I have them and they are awsome little tools.
https://www.amazon.com/Weller-P2KC-Professional-Self-igniting-Soldering/dp/B000WOHSHM/ref=sr_1_1?ie=UTF8&qid=1505077296&sr=8-1&keywords=Weller+portasol
I like weller:
https://www.amazon.com/Weller-P2KC-Professional-Self-igniting-Soldering/dp/B000WOHSHM/ref=sr_1_6?s=hi&ie=UTF8&qid=1520028231&sr=1-6&keywords=butane+soldering+iron
How long does this thing need to run? Using AA or even a 9 V is very heavy, a LiPo is expensive.... Do you really need it to last a week?
The 5 V pro micro consumes 19.9 milliamps in active mode, so using 6 SR416SW watch batteries (8 mAh) in series will provide an operating life of (8 mAh / 19.9 mA) = .4 hr = 24 minutes. Using 6 watch batteries of a higher capacity (SR44SW) could get you up to 8.8 hours of operating time. Using AA batteries would get you over 100 hours at a significant cost in weight.
There's no sense in carrying any more battery than required. You can always use solder-glue to connect wires to the batteries, which is probably easier than figuring out how to hold the batteries in some sort of clip.
When finding batteries you just need to take the battery capacity in mAh (current*time) and divide it by the current draw you plan on giving it - the quotient will be the operating life of your device in whatever unit of time you chose to do the math in (probably hours).
Your strategy should be to start with a desired operational lifetime, and then from this number work backwards to find a battery capacity that suits your needs. Don't forget to add some margin - so maybe buy the size up from the battery your math specified.
Tape. Just about any Tape will work. Don't any of you know about Led Throwies?
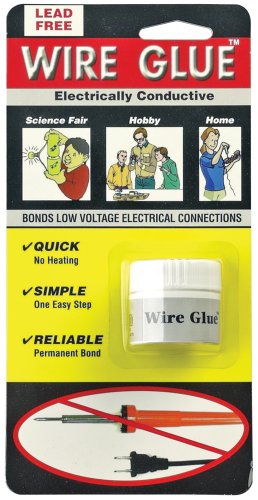
You can also buy (Wire Glue ) or make conductive glue (Elmer's Glue and powdered graphite).
proper way is to re-crimp like the rest of the folks said.
janky way is to use conductive glue
https://www.amazon.com/Sciplus-Electrically-Conductive-Soldering-Wire/dp/B000Z9H7ZW
if this is part of the heater, it wont work, but if it is a limit switch or something else, it should be fine.
Actually, I'm really excited to try something ...
I want to lay out the board in plastic, maybe 1mm, with grooves for wires to run. Then, I want to leave holes, probably 2mm diameter, that will fit two wires, or 1 wire and one pin. If I can design it on one layer, or at least with minimal overlap, I can make a second piece that glues down to it, and make all the solder connections with solder glue (http://www.amazon.com/Sciplus-Electrically-Conductive-Soldering-Wire/dp/B000Z9H7ZW/ref=sr_1_1?ie=UTF8&qid=1426020527&sr=8-1&keywords=wire+glue)
So, ideally, I could spend all my time in design, and end up with something that can be printed/assembled in about an hour.
I'm thinking I could use the 3D printer to emboss the logo over the battery-cover, and leave the micro-controller and Flash chip bare.
Like I said, I think I've probably gone too far down the rabbit hole on this one. I've got the whole thing laid out in my head. I'll probably just order parts this week, and start working as soon as they get here.
This is beyond your budget (it is $200+), but this is what we use in our high-tech firm for general-purpose work:
Hakko FX-951
However, if you ever use lead-free solder, you absolutely have to use something like this. It lowers the tip temperature significantly when the iron is in the holster. This is critical for extending tip life - the lead-free stuff corrodes the tips VERY quickly otherwise. Our lives became much easier once we figured this out and moved to these soldering stations.
Anyway, lead-tin solder is still available in North America, but the whole industry is moving to lead-free...
There is no local place that I have found that sells the top quality stuff. I do macbook logicboard Repair’s. Phones and random crap as well. Microsoldering etc. Amazon is where I typically grab parts. Or if you wanna help out an awesome guy that has countless YouTube videos on repairing MacBooks http://store.rossmanngroup.com to buy like me the quick hot air station. Here’s a wire I use very very thin great for jumping bad vias
Remington Industries 44SNSP.125 Magnet Wire, Enameled Copper Wire Wound, 44 AWG, 2 oz, 9975' Length, 0.0022" Diameter, Natural https://www.amazon.com/dp/B076CB54ZR/ref=cm_sw_r_cp_api_i_NpvDDbAFK1ZHD
Great solder station. And then buy the micro pencil
Hakko Soldering Station, FX-951-66 https://www.amazon.com/dp/B0012B8NW8/ref=cm_sw_r_cp_api_i_OfvDDb1QAAF78
Yup.
https://www.amazon.com/SOTO-ST-PT-14SB-Soto-Pocket-Torch/dp/B0046UZRNU/
https://www.amazon.com/gp/product/B0046UZRNU/ref=oh_aui_detailpage_o03_s00?ie=UTF8&psc=1
I never fly without it!
One more question... do you personally use wicks or a pump for desoldering? If you prefer a pump, can you recommend one?
Might go with this newer version because it comes with more tips.
Heres my baby .. ZERO COMPLAINTS
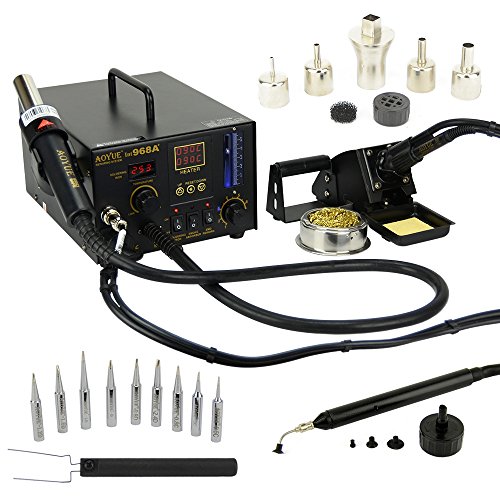
http://www.amazon.com/gp/product/B006FA481G/ref=oh_details_o09_s00_i00?ie=UTF8&psc=1
I have an aouye 968A+, it has very precise controls for both the heat gun and pencil. great value. amazon and sra soldering have complete kits including parts, it's better to buy from them than on ebay.
http://www.amazon.com/gp/aw/d/B006FA481G
Not the one I have...
http://www.amazon.com/gp/product/B006FA481G/
I recently bought one of these for myself and I couldn't be happier as a DIY hobbyist:
Hakko Dial type temperature limiting soldering iron FX600
I only use it for hobby stuff such as Quadcopters, 3D printers and electronics kits but it's way better than the 8watt USB powered I was using before.
Pair it with this and this and you should be good for a while and roughly within budget.
https://www.amazon.com/dp/B006MQD7M4/ref=psdc_3207126011_t1_B00FZPSX3G
Get a Hakko. If you plan on doing soldering at all more than just once or twice, it's a worthwhile investment.
Hakko makes good ones. My dad's experience with Wellers are they die fast. (He solders all day for his business/I do it as a hobby). There is one that has a temp adjustment on the unit itself, which is pretty good. https://www.amazon.com/gp/product/B006MQD7M4/ref=ppx_yo_dt_b_search_asin_title?ie=UTF8&psc=1 this is the one I got him. he has been using it for four months, daily and all day. Still on the same tip.
I'm legally blind and I have no problems soldering, so long as I don't get my nose too close. :P
Seriously, though, the smaller the component the harder it will be, but soldering key switches is pretty easy. Just don't rush and be patient/careful. The trick is getting the right amount of solder, which just takes practice to get a feel for (and having your iron the right temperature really helps here).
You can pick up soldering practice kits for around $10 if you want to give it a try. If you've never soldered before, I'd definitely recommend that before you dive right in to working on a $100+ keyboard.
I recommend not using the cheap $10-15 irons though. They can be a great source of frustration and put you off of the whole experience. If you don't want to sink the money into a full soldering station, something like this would probably be a great place to start.
I would add that the soldering iron must have a pointy tip! I've been trying to replace my modules, but the stock tips are huge (for the intended work) I could not reach the spots to melt.
The one i'm using https://www.amazon.com/gp/product/B00B3SG6UQ/ref=oh_aui_detailpage_o00_s01?ie=UTF8&psc=1
Also, be sure that the Torx are Security Torx! They have the hollow star shape and also an inside round tip. https://www.amazon.com/Screwdriver-Security-Wireless-Controller-Disassembly/dp/B004YUB6ZU/ref=pd_sbs_469_5?_encoding=UTF8&pd_rd_i=B004YUB6ZU&pd_rd_r=Z51XSKAB8PX325052JVR&pd_rd_w=jAo1O&pd_rd_wg=DYMkI&psc=1&refRID=Z51XSKAB8PX325052JVR
I can't really say anything about this soldering iron, but do know that you always get what you pay for. I'm sure this will last for at least several soldering jobs for you. If you have to replace it even once, you're only $20 away from a nice unit. But I understand you have to budget your funds appropriately.
If you're going to to go with a budget soldering iron, you'll be better off buying something without a bunch of extra bells and whistles (more junk you're paying extra for).
Something like this is cheap, and inexpensive, but will get the job done, without spending extra dollars on extra tidbits that are unnecessary.
If you're gonna go cheap, go cheaper!
https://www.amazon.com/Weller-SP40NUS-Medium-Soldering-Black/dp/B00B3SG6UQ
I use something very similar to this, except it's 30 watts:
https://www.amazon.com/dp/B01HSXVR3A?ref_=ams_ad_dp_asin_2
That's probably the cheapest thing you'll find. I wouldn't recommend it unless you're going to solder once or twice a year. Believe me-it's a pain to do anything with an iron this cheap, and I'm getting a new one to replace it. I'm tired of buying extra-cheap stuff.
I've used this before, and it's actually not too bad in my opinion: https://www.amazon.com/Weller-SP40NUS-Medium-Soldering-Black/dp/B00B3SG6UQ/ref=sr_1_7?ie=UTF8&qid=1481862872&sr=8-7&keywords=soldering+iron&refinements=p_89%3AWeller
For $40, these two stations look pretty enticing:
https://www.amazon.com/Weller-WLC100-40-Watt-Soldering-Station/dp/B000AS28UC/ref=sr_1_5?ie=UTF8&qid=1481862523&sr=8-5&keywords=soldering+iron
https://www.amazon.com/Stahl-Tools-SSVT-Temperature-Soldering/dp/B0029N70WM/ref=sr_1_11?ie=UTF8&qid=1481862673&sr=8-11&keywords=soldering+iron
Disclaimer- I have never repaired a synth before.
This is what I use to repair old consoles
Weller SP40NKUS 40-Watts Soldering Iron Kit https://www.amazon.com/dp/B00B3SG7F0/ref=cm_sw_r_cp_apa_i_5koSCbHNHK4S6
It's inexpensive and works great.
All you need is some solder and wick and this will literally only take a couple mins and you have a fixed Atari
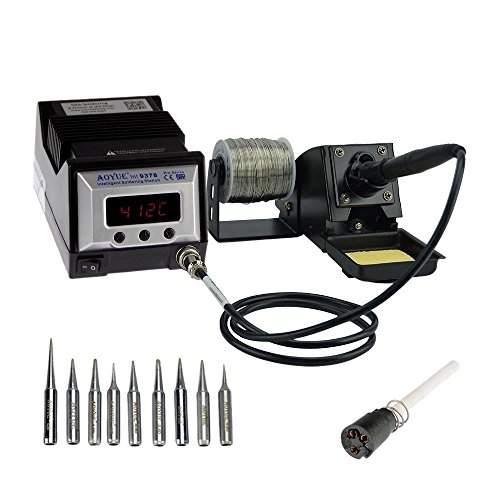
That is not an electronics soldering iron. Depending on your budget, i'd recommend either this aoyue at $30 or this aoyue at $90 if you want a nice high quality station. The nicer one has the advantage of exact tempature measurements and also comes with a ton of extra sized tips.
As for the frame, its really not common to break arms as a beginner. Its REALLY hard to break an arm and you have to be going really fast and hit something really hard. The reason you may have read about arms breaking is because most beginners start with some cheap frame built with bad/thin carbon. The QAV250 wont break easily (although i've heard of the skinny part in the top frame breaking, but that can just be glued/taped back together).
I would stay away from the cheap no-name all in one solutions. They tend to be pretty crappy. Look at some of the nicer options from Hakko or Weller. You really only need a 100$ish soldering iron to do incredible work (obviously nicer IS better, but the returns are diminishing). Check out this one from Hakko: Hakko FX888D,T18-B,BL,I,D24,D32,C05,S7,599-029 Soldering Station with T18-B/BL/I/D24/D32/C05/S7/599-029 https://www.amazon.com/dp/B00C2BHTBI/ref=cm_sw_r_cp_apa_i_ohkZDb6WW5TJY
That set meets all of your needs and more. That, plus a cheap air station like this: BACOENG 110V Digital 858D SMD Hot Air Rework Station Solder Blower Heat Gun https://www.amazon.com/dp/B07BRQX15Z/ref=cm_sw_r_cp_apa_i_ojkZDbTDPH5PN
and a cheap extractor, and you are more then set.
For anyone reading this, a standard heat gun has a lot of uses, but is the great for efficiently cleaning the stock of cosmoline.
Edited a profile to get your settings about right, should help.
https://files.fm/u/bbeq5kqk
Also heat guns eat up strings, just use quick passes once the gun is up to temp, if you linger on a miniature for more than 2 seconds you'll probably start to get deformations.
https://www.amazon.com/Genesis-GHG1500A-Temperature-Nozzle-Attachments/dp/B00EU2T8GG/ref=sr_1_1?s=hi&ie=UTF8&qid=1524940417&sr=1-1&keywords=heat+gun&dpID=41o%252BjfZKenL&preST=_SX300_QL70_&dpSrc=srch
Genesis GHG1500A Dual Temperature Heat Gun Kit with Four Metal Nozzle Attachments https://www.amazon.com/dp/B00EU2T8GG/ref=cm_sw_r_cp_api_SerOBbD9N3VW3
Heat guns are cheap.
I think they might even be cheaper at Home Depot.
I highly recommend spending a bit of money to get an actual heat gun, as opposed to a hairdryer. They're not that expensive (here's the one I have for $19), and they blow MUCH hotter than hair dryers. The advantage is that you can just sweep them across the model and the strings will basically vanish before your eyes. With a hairdryer you usually have to hold it in place for a second which can result in the warping
Easy fix. Anyone saying to cut the loop off has never actually strength tested these loops.
Watch the end of this video.
To fix your loop instead of cutting it off, buy polyolefin tubing. 3-5mm should be about right.
Next, buy a heat gun.
Cut a short length of tubing, slide it over the end of your line, and waft the heat gun so the tubing shrinks and the line inside it liquefies but does not burn. Let it cool, then peel the heat shrink back off (use a pair of tying scissors to snip it and get it started so you can peel it).
It'll be good as new. You can also cut that one off and make another if you want a new loop. Fly lines have about 2 feet of level tip material to allow for this kind of cutting.
No knot is as strong as a welded loop. Welded loops were about 3X stronger on average than every knot I tested, sometimes more. Here is my original thread on the tests I did.
Here are the results of my strength tests for the Fly Rod & Reel article:
Knot Break Strength - Tested to failure with Boga Grip using 20 lbs. monofilament
|Knot | Test 1 | Test 2|
|---------|----------|----------|
|Nail Knot (5 Turns) | 10 lbs. | 10 lbs.|
|Albright Knot (5 Turns) | 12 lbs. | 12 lbs.|
|Doubled-Line Nail Knot| (6 Turns) 8 lbs. | 10 lbs.|
|Double Surgeon’s Knot | (20 lb. to 20 lb.) 14 lbs. | 18 lbs.|
|Castwell Knot | 13 lbs. | 12 lbs.|
|Welded Loop | 20 lbs. X 3 attempts (see video)|
Good question, and it pains me a bit that I have a small box of unused tools that were purchased when I began. I'm sure I missed a few things, but here you go:
If links weren't provided then I already had the item.
Would something like this help?
These types of things are generally considered hobbyist level and in all honestly, you are best doing this yourself with a good Weller Soldering Iron, a 56 SMD Desk Magnafier and some helping hands.
If that is out of the question though, I'd recommend checking out Fab Lab. It is a non-profit community space that has all the equipment available to anyone who dabbles in everything from Raspberry Pi to all things electronics. You may be able to consign someone or do it yourself there.Their address is 847 14th Street, San Diego 92101
Hope this helps and good luck!
I've used those, and they're kind of garbage. Once you've used this type, there is no going back.
Here is a comparable one, and OPs is definitely cheaper.
quad hands there are probly better versions but I grabbed this one to be quick about it.
Seconded, also consider this kind of thing: https://www.amazon.com/Aven-17010-Adjustable-Circuit-Holder/dp/B00Q2TTQEE/ - it's invaluable for PCBs. Just populate from one side, add something to hold stuff in place (like gaffa tape, or bend one lead, or clip on a sheet of paper, etc), turn over the PCB and start soldering away. I wouldn't want to miss mine.
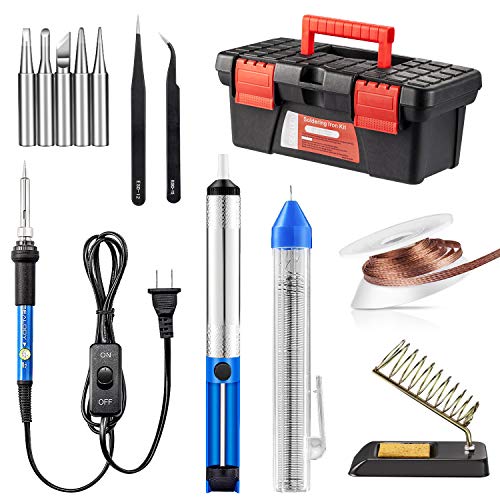
Any soldering iron 40+W where you can regulate the temperature should do, I own a nice station but when I don't feel like breaking it out because it'd take longer to set it up than to do the job I use something like this: https://www.amazon.com/ANBES-Soldering-Iron-Kit-Electronics/dp/B06XZ31W3M/ set to 350°C. Just make sure to clean and tin your tip regularly and it will do the trick just fine Oh, but ditch the solder and get a few spools of good rosin core solder of different gauges, it's not expensive but worth it. In my experience, the solder that comes with kits like that mostly works as a deterrent.
If you're not planning on buying all-included kits also get a few spools of stranded core wire of different colors. You could use solid core wires but those tend to break if they're getting bended from movement without showing it. With stranded core some strands may break but as others don't they'll continue to work. Invisibly broken wires (i.e.) inside the isolation) are a *beeeeep* to debug.
Also, a set of tweezers are great to have, especially the kind that holds stuff together per default, like this one: https://www.amazon.com/Curved-Tweezers-Cross-Jewelers-Soldering/dp/B000OVPG9A/ (only an example, I'd get a tweezers set that contains one like that).
In my experience a tool set like this one is great to have: https://www.amazon.com/Haobase-6Pieces-Double-sided-Soldering-Assist/dp/B01DLX6V3C/ - especially the bending tool is great to have, as it allows eg to bend the leads of a LED without running the risk of breaking the LED itself. It's also great in order to clean up mistakes, helps with desoldering and such
Speaking of desoldering: desoldering braid is a must. A desoldering pump can be useful, too. And yes, practice soldering and desoldering until you can do both without destroying anything.
If you're not going to buy pre-drilled enclosures then you very likely want a) a center punch and b) stepping drill bits. Those let you drill holes in all kinds of sizes without having to buy lots of drills.
Last but not least a wire cutter is a must
The nicest one I have ever used was [this one by Otto Frei.](
http://www.ottofrei.com/Store/Soldering-Stations-Third-Hands/GRS-004-570-Double-Soldering-Station-With-2-Third-Hands.html) I really liked it when I borrowed it to do some wire harness and cable modifications, so much so that I looked it up afterward, but I couldn't handle the sticker shock.
For pedal making/modifying, I would recommend a circuit board holder and a typical helping hand (with or without magnifying glass) so that you have both hands available to use the iron and feed solder.
Does anyone have any soldering iron recommendations?
I was going to get this Vastar one, but it doesn't really seem to be readily available in Australia. I'm probably gonna go with this Weller now.
It's probably not gonna get a whole lot of use, mainly just for the Whitefox :\^)
Tools
You'll also need to get a soldering iron. Something like this should work fine (I have a cheap soldering iron I bought from RadioShack 10 years ago that I still use on all my electronics projects).
Good luck! :)
I have one of these. For light duty work, it's served me well.
https://www.amazon.com/dp/B01C9P7HDQ/ref=cm_sw_r_cp_apa_i_gTZdBb0TKEC2V
I personally think you should've gone for one of these. A much better experience and a better price, I use it for everything and is super convenient because of how small it is.
> I've also found an old laptop AC power adapter with a DC output of 19V at 3.0 amp.
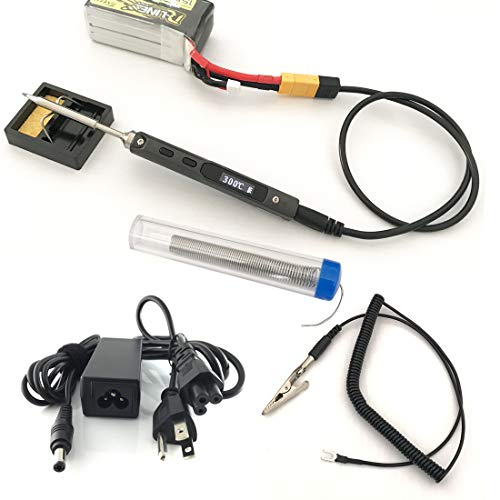
What you have there is an excellent match for a TS100 soldering pencil.
20V is a negligible shock hazard. But at 3A it's enough power to heat up and sometimes even explode components that are connected wrong. So use eye protection and beware of possible hot components and you should be fine.
Hey, best tip i can give you to get better is to find junk printers, motherboards, ect... and just practice de-soldering and re-soldering caps, resistors, anything that just has two pins. Also I would also suggest lowering the temp on the Iron (if you can) I use about 320 C for most of my stuff, and I would also recommend getting a good soldering iron it helps a lot. The soldering Iron I would recommend the TS100 with the D24-Tip, then look online for how to set it up.
If you like you can contact me by discord, and I can help you with what ever you need, (my discord Demi 소금#9026)
One last thing is that Twisting and pre-tinning the wires is almost a must when soldering anything.
Soldering Tip(D24-Tip) : https://www.amazon.com/gp/product/B06XYR3VTJ/ref=ox_sc_saved_title_7?smid=A2FGAWCX62OR7U&psc=1
Soldering Iron: https://www.amazon.com/NovelLife-Mini-TS100-Soldering-Digital/dp/B07D35B75T/ref=sr_1_2_sspa?crid=1PGZOPAOX1MUO&keywords=ts100+soldering+iron&qid=1557599888&s=gateway&sprefix=ts100%2Caps%2C148&sr=8-2-spons&psc=1
https://www.amazon.com/UY-CHAN-Programmable-Pocket-size-Acceleration/dp/B01MDTO6X7
I've done a few NES console builds and a few more NES cartridge builds. This album isn't mine, but for the port access I HIGHLY recommend using the decora keystone wall plate. You can get a gray one on Amazon that comes decently close to matching, and with some good glue work you'll barely notice it's there. Since you'll be using a dremel anyway to get rid of screw standoffs that are no longer necessary, cutting that opening should just take some patience.
I was a complete idiot with a soldering iron, and after getting some reps with it doing projects like these it's kind of amazing what you pick up. I found this site hugely helpful, since a lot of what I was doing was desoldering USB cables from PCB's (for the cartridge builds) and resoldering microUSB heads. You won't be doing a lot of desoldering, however everyone makes mistakes and sometimes fixing those mistakes involves removing solder. There are plenty of youtube vids out there for soldering, but all you need to get started is something like this. It's not the best iron in the world, but it's temperature controllable and something cheep to get you started. The only thing I'd add to that is a little flux, it will help tinning wire ends immeasurably.
Something else that's going to help you out a LOT for the console build: RELOCATE THE MICROSD CARD. Buy one of these, I routed mine to the left side of the cartridge opening, set vertically against the opening and at an angle so i can get the SD card in and out. You really don't want to rip apart 6 screws to open and close the unit, and if the SD card gets corrupted or you just want to change something on there that's exactly what you'll have to do. Move that sumbitch to the front and you'll never have to worry about it.
i came up with this so far (still doing this as an exercise to determine value, i havent decided against the GK64 yet):
 
 
Total: $222
this one? if so then you should be at about 350 on the dial on the iron. the solder in that kit is leaded, for reference.
yeah surface mount stuff is a little tetchy at first. did you add a blob of solder to one of the pads and then tack the mosfet in place or something else?
It's a little out of my price range. I doubt this will be my last soldering project, but it certainly won't be something I do every week. What do you think about Sywon 60W ESD Soldering Iron Station Kit with ON-OFF Switch Temperature Adjustable, Soldering Stand Holder, 5 Extra Tips and 104 Inch Power Cord https://www.amazon.com/dp/B01N4571Q6/ref=cm_sw_r_cp_apa_yi5MybQ1S7WEZ
This is a good point regarding the pointy tip. I have several different tips that my soldering iron came with. Not using the pointiest but still is coming to a point. Here's what I have, works pretty well. https://smile.amazon.com/gp/product/B01N4571Q6/ref=oh_aui_search_detailpage?ie=UTF8&psc=1
If I think of any others, I'll add them, but that's a good start from me.
I've been a hobbits soldering for about 25 years now, but have done a bit in the professional field. For about the last 15 years I've used a Weller WM120 as my primary hobby iron with a super low end SP23LK 25 watt iron for heavier duty things. On my bench in the office I used a Hakko 936 which is a great unit, but it's pretty spendy for a home gamer.
About two months ago I saw an EEVBlog video on a chinese replicate of the Hakko936 and Dave had a lot of really good things to say about it during his teardown. Clive has also done a video on this same iron, and uses a Yuhua soldering station as his regular bench unit. This prompted me to buy one from Hobbyking about two weeks ago and I've been very happy with it so far.
Some notes: The station slides around on my plastic covered table, as does the iron stand. This was easily resolved by adding a couple little rubber feet to the bottom of both. Also, the iron stand is VERY light and easily picked up when you're attempting to retrieve the iron, but simply adding a little bit of weight in the bottom resolved that. For $30 shipped to my house, It's pretty legit. Can use Hakko tips on it as well.
I have been looking for the same thing as you, and here have been some of the ones I've been considering:
https://www.sparkfun.com/products/10707
http://www.amazon.com/Aoyue-937-Digital-Soldering-Station/dp/B000I30QBW/ref=sr_1_1?ie=UTF8&qid=1369866027&sr=8-1&keywords=aoyue+937
http://www.amazon.com/Weller-SP23LK-25-Watt-Soldering-Iron/dp/B0009ZD2AG/ref=sr_1_4?ie=UTF8&qid=1369866094&sr=8-4&keywords=weller+soldering+iron
The first two are temperature adjustable which is a huge plus, however the Weller would suffice. Hope this helped!
Looks like you've started down the road to learning how to make your own cables, and you need some guidance while you're practicing.
This page has a nice picture of good, bad and ugly results. Yours are not bad for a beginner but ... ugly.
This set of search results will provide lots of information. Read as much as you can.
Here's what I use for guitar cable soldering tools. The links are for explanation. You don't have to get them at Amazon. An electronics store will have them. You may decide it's less expensive to buy the patch cables. But, if you are a do it yourself type, the tools will pay for themselves.
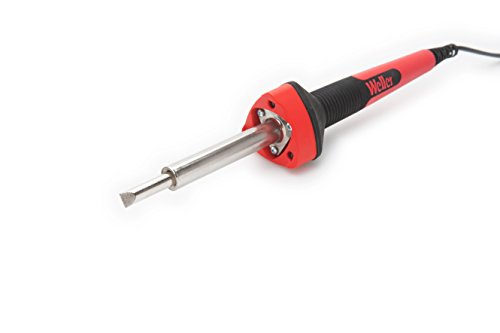
Weller 25W iron Get some extra chisel tips. They get destroyed quickly by noobs.
Helping hands
Wire stripper
Solder sucker
Brass wool solder iron cleaner
63/37/resin core .6mm solder
I've had this torch for 4 years now and it still works like the day I bought it. It's also very good on butane.
MAPP would be a bit unwieldy, imo.
I use this guy: http://www.amazon.com/ALL-PURPOSE-LARGE-BUTANE-TORCH-SOL-310-00/dp/B0058EDUYG
It works great. Gets plenty hot, nothing on it has melted even though I'm right up in the action with it, easy to refill but doesn't go through the butane too quickly, and has an adjustable flame (which is really key for a lot of things). Eventually I'll upgrade to acetylene, but for now it works great.
If you want a step up from that the Blazer gets consistently good reviews - http://www.amazon.com/Blazer-GB2001-Self-Igniting-Butane-Micro-Torch/dp/B000VML7KO/
http://www.amazon.com/Blazer-GB2001-Self-Igniting-Butane-Micro-Torch/dp/B000VML7KO
i have one of these and have used it like a stove burner to boil water by putting it between two rocks and putting a pot of water on top. it's also good for starting fires, etc... and it's just a really good torch to have around. it's easily refillable with normal butane canisters.
I would advise against trying to fix that one and just get a new one
https://www.amazon.com/Blazer-GB2001-Self-Igniting-Butane-Micro-Torch/dp/B000VML7KO
I'll second Blazer, I've been using this one daily for 11 months and it's still going strong.
I've always been a big fan of the performance of the Blazer GB2001 Plus it looks cool!
Psh. That stuff is child's play. Try this.
http://www.amazon.com/Blazer-GB2001-Self-Igniting-Butane-Micro-Torch/dp/B000VML7KO/ref=sr_1_2?ie=UTF8&qid=1344476173&sr=8-2&keywords=welding+torch
I like the portasol https://www.amazon.com/Weller-P2KC-Professional-Self-igniting-Soldering/dp/B000WOHSHM
because you can adjust the heat to do small or large jobs. and because you dont need an extension cord, its perfect for car work.
but just keep an eye on the tip so you dont burn it. if it turns blue, back it down. you just want it hot enough to get the work done.
Yeah, so far this is the frontrunner. Thanks for the comment!
I have only used it on my bike a couple times, but I love my Weller Portasol
It heats up fast, solders well, and the little butane exhaust port on the tip works perfectly for shrink tube.
Soldering is easier then you think and that's coming from someone who is pretty crappy at it. Lots of good Youtube videos on it.
I suppose you could probably use conductive wire glue too, but that looks messy.
Okay, I've never tried this but I would recommend trying to use 1206 SMD LEDs, they're about 1/8x1/16 of an inch. The one I linked makes a red-orange when lit and runs about $10 for 100 LEDs. Since you need it to look like trailer lights I'd connect them with hard steel, like a paperclip bent/cut how you need it. 1206 is pretty big for SMD LEDs, but in case you can't solder it you can use electrically conductive adhesive. Just dip the end of the wire in there and get it to stick to the LED or apply with a toothpick.
You can try something like a conductive glue and apply it with a toothpick.
http://www.amazon.com/Sciplus-Electrically-Conductive-Soldering-Wire/dp/B000Z9H7ZW
In the reviews on there some guy talks about how he fixed an internal connector on his phone with it so worth a shot I suppose. I think taking it to a professional might cost you enough to warrant actually buying a second hand replacement phone if you so desire.
You can buy power buttons premade online
If your looking for a cool button you'll need to find one that is a momentary switch so you can hold it in to force power off your pc
A button like this is pretty bitchin http://r.ebay.com/sdBS4d but you would need to find one that is momentary
I don't recommend soldering to the board in case you were thinking that. get a cable that connects to the mb and splice it/connect it to your switch
If your concerned about soldering you can use wire glue: https://www.amazon.com/dp/B000Z9H7ZW/ref=cm_sw_r_cp_awdb_F5OXzbPRZPQG1
They also sell glue which is electrically conductive. I'll try to find a link for you. You might try that.
Here it is: Sciplus 400.
Amazon search terms: electrically conductive adhesive
I was thinking something like this:
http://www.frys.com/product/2931025
but I have not actually done it.
I once broke off the end of touchpad ribbon cable for a laptop -- I scraped the new end with an exacto knife and inserted into connector and another soldered to a board.
they also have conductive greese:
http://www.frys.com/product/4707359
If you do that you would need to put little bit on the traces and then drops of super glue on both sides and between each trace.
Or this on Amazon
http://www.amazon.com/Sciplus-Electrically-Conductive-Soldering-Wire/dp/B000Z9H7ZW
and maybe you can find something like this in the auto parts store
http://www.amazon.com/Permatex-21351-Electrically-Conductive-Defogger/dp/B000HBGKWE
And, oh yeah, that stuff you linked at RadioShack looks good, too.
The scraping part will be hard to do without breaking so be carefull.
Without seeing pictures I don't know if this would help, but they make a conductive glue that might be appropriate.
I use a Hakko 951: https://www.amazon.com/AMERICAN-HAKKO-PRODUCTS-INC-FX-951/dp/B0012B8NW8
It works great, comes up to temp in less than 5 seconds, and stays at the temp you set it at. It is pricey, so not for everyone, but if you are going solder more than just your keyboard, it is definitely worth it. I also recommend the Hakko desoldering tool. I am still a beginner to soldering/desoldering, but with that tool, I was able to desolder an entire keyboard in about 7 minutes. It is a real time saver. Again, its not something you would buy just to use once, but definitely a good addition to any workbench.
This is the one we use at the shop: https://www.amazon.com/AMERICAN-HAKKO-PRODUCTS-INC-FX-951/dp/B0012B8NW8/ref=sr_1_3?s=hi&ie=UTF8&qid=1482558487&sr=1-3&keywords=hakko+soldering+station
But that's probably a little too much for something you're going to use once. Remember, all the soldering iron is going to do is just melt the solder.
Get something like this: https://www.amazon.com/Soldering-Ceramic-Heating-Element-Ergonomic/dp/B00IKMC2N8/ref=sr_1_1?s=hi&ie=UTF8&qid=1482558529&sr=1-1&keywords=15W+soldering+iron
And just practice on some shitty PCB you have lying around.
Right before I graduated from college I was getting into soldering and decided once I got my diplomas I would treat myself to some nice HAKKO equipment using the 30% discount while I was still considered a student. The stuff below is what I purchased. Note that the 30% discount is only applied to the soldering station nothing else. Anyway, if you can splurge, I highly recommend the FX-951-66. It is truly fucking AWESOME. If you are on a tight budget and not sure if soldering as a hobby will stick, get the cheapest HAKKO they sell and it will still be a good unit. I am a huge fan of hakko so clearly I am biased but they are a well-known reputable brand
Hakko Soldering Station, FX-951-66
Hakko T15-JS02 Conical Bent Tip R0.2 / 30deg x 1.6 x 7.9mm for FX-951
Hakko CHP 3-SA Stainless Steel Non-Magnetic Precision Tweezers with Very Fine Point Tips for Microelectronics Applications, 4-3/4" Length
Hakko CHP-170 Micro Soft Wire Cutter, 1.5mm Stand-off, Flush Cut, 2.5mm Hardened Carbon Steel Construction, 21-Degree Angled Jaw, 8mm Jaw Length, 16 Gauge Maximum Cutting Capacity
I am out of town, but can try to help..
Cheap soldering kits make it hard to get a good, consistent temperature on the tip, and the recovery time (time for the tip to get hot again after bringing it down by cleaning, etc) is poor. You'd want to get an adjustable one if possible. You could easily be working too hot and causing yourself problems. Lead free solder is harder to work with. I have a Hakko that I love, but something in this range would be a worthwhile investment and a fine iron.
As for the soldering, you really are just jamming the iron into the two pieces of metal you are trying to join, and then slowly feeding the solder into the junction. Use as little as you need to get a tiny, clean joint, and never a 'bubble'.
Removing solder is a horse of a different color. That is a pain in the ass. For that, you will want a lot of flux and a hot-hot iron (as hot as you can go before you start damaging things/burning down the house like you say). It's not fun to remove these components. Sometimes you get lazy and snip out the old one and try to work out the lead with a needle-nose and the iron (fluxed up hole) at the same time. Helping hands or a good vise can be crucial for this.
I'm no great master at it, but it's really one of those things you can pick up watching a few youtube videos or hearing instructions (with the right equipment) and pick up. I taught a friend the other day for a project they are working on. It really is just practice to get good, and that seems to happen quickly once you get a feel for working the solder.
No problem at all. Just my sense that most that care enough to buy a DuPont would not use a Bic to light a cigar. I also use a Bic (actually have to use Scripto) along with this when traveling.
Thanks for the feedback!
For the water, I agree that I brought too much water. When I went to Olympic last year I only carried a liter of water with me at a time, but for Big Bend there is only a few streams that generally dry up in the summer (can't be relied on) and the Rio Grande. The route we went only came within about 5 miles of the Rio Grande, and the creeks were reduced to stagnant puddles by the time we went. The Big Bend website suggests a gallon per person per day of water, and we brought 4 gallons between us for 3 days, and that was still too much. I am a hyper water conservationist when I backpack, and I think I can get by with about 2 liters per person per day going forward. I had never done a desert trip before, so I went conservative to be safe.
The trash compactor bag is an intriguing idea. I have historically just done the ducks back to keep my stuff mostly dry and the dry sack to keep my sleeping bag dry so I would never freeze to death, but I like the idea of the compactor bag without the dry bag. I think I messed up my sub kilo by using a compression sack for the first 6 years that I owned it.
I have been eyeing those thermarest xlite pads. My current thermarest is about 10 years old and not very thick.
The rain jacket umbrella combo is something I have been testing recently. The Patagonia jacket I have is essentially a wind shirt, so anything more than a drizzle goes straight through it. So without an umbrella, I would be almost without rain gear. The umbrella has some other benefits like being a wind break, allowing easy night time bathroom breaks, and makes it easier to check maps while its raining and such. I think I will get an OR Helium at some point and bring that whenever it is a low chance of rain, or for particularly long trips.
I searched a bit for a torch style lighter, and these are the only ones that I have found:
Soto Which just loads generic bic style lighters into it for fuel.
Gizga Which requires you to buy separate fuel and recharge it.
I tried the Gizga one time, and I could only get a tiny bit of fuel to charge it, so it only lasted a day or two. I might have a defective unit, so I may try getting another one.
Thanks again for the advice! I will definitely test your ideas out!
$20 from Amazon. Seems like a lot of money, but I think I'm in anyway.
I was having the same issues, likely related to my filling technique. I stumbled across the Soto pocket torch. It uses any non-bic cheapo lighter. When the lighter is empty you open the torch, throw it away and put a new one. I got 20 lighters for $10.
Soto Pocket Torch https://www.amazon.com/dp/B0046UZRNU?ref=yo_pop_ma_swf
The flask miss_mchammerpants is pretty solid. Another neat tool I've not seen around often is this converter kit for lighters. It turns a normal cigarette lighter into a mini torch. Happy holidays!
I know this is over your budget but I think it's worth it http://www.amazon.com/Updated-Aoyue-Digital-Soldering-absorber/dp/B006FA481G/ref=sr_sp-atf_image_1_3?s=hi&ie=UTF8&qid=1407708595&sr=1-3&keywords=aoyue+soldering+station
Aoyue makes a few similar rework stations for a lot less money than Hakko or others, like this one: Aoyue 968A+ SMD Digital Hot Air Rework Station. I've found their irons to be nicer than the lower end Wellers for the same price, and almost as nice as the much more expensive Hakko stuff. Just a quick tip for anyone who might find one occasionally useful, but doesn't need one daily.
>a reflow oven costs a lot of money, and a homemade one might burn down the house. A frying pan on the other hand >.>
You can get a decent hot air rework station (with soldering iron) for under $200.
https://www.amazon.com/Aoyue-968A-Digital-Rework-Station/dp/B006FA481G/
Fantastic value at this price.
But I also do suggest, this Aoyue 968A+ SMD Digital Hot Air Rework Station https://www.amazon.com/dp/B006FA481G/ref=cm_sw_r_cp_apa_ql6myb8E4YVGK
Its what i use currently and for the price it's hard to beat with desoldering. I regret getting my hakko after I got this.
Consider [this Aoyue soldering station] (http://www.amazon.com/gp/aw/d/B006FA481G). It's really great for the price. I've been using one for a couple of years for through-hole and surface mount work, and I've been very happy with it.
http://www.amazon.com/gp/product/B006FA481G/ref=oh_details_o01_s00_i00?ie=UTF8&psc=1
Opinions on these three soldering irons? It's only use will be for keyboards, and I don't anticipate building them as often as we all dream, haha. But I do want one that'll do the job well without going over the $100 mark, and preferably under $80 if any of these are decent.
Hakko Dial type temperature limiting soldering iron FX600 https://www.amazon.com/dp/B006MQD7M4/ref=cm_sw_r_cp_api_pBXMAb3DXH857
Hakko FX601-02 Adjustable Temperature Controlled Soldering Iron, 67 Watts https://www.amazon.com/dp/B00FZPSX3G/ref=cm_sw_r_cp_api_UDXMAbYNHEAWS
UY CHAN Upgraded Original TS100 Digital OLED Programmable Pocket-size Smart Mini Outdoor Portable Soldering Iron Station Kit Embedded Interface DC5525 Acceleration Sensors STM32 Chip Fast Heat (B2) https://www.amazon.com/dp/B01MDTO6X7/ref=cm_sw_r_cp_api_CEXMAb7A2CDNW
I use this one at work all the time - Hakko FX-600
For $44, it's a good deal. You want an iron where you can set temperature and change the tips. A cheap chinese soldering station with temperature control will be in the $50-70 range.
$14 link for a solid basic soldering iron.
Here's one that costs a little more, but has more adjustability $39 link.
Anything from Weller is going to be pretty good.
Here's a pretty good basic soldering video.
It's not hard, but takes a little practice to get the feel for it. I would recommend finding a broken electronic that you can pull a circuit board out of and just practice soldering by removing parts from the board and putting them back.
Have fun!
Can't go wrong with this, $19.07 shipped with Prime.
http://www.amazon.com/Weller-SP40NUS-Medium-Soldering-Black/dp/B00B3SG6UQ/ref=sr_1_3?ie=UTF8&qid=1398198851&sr=8-3&keywords=weller+40
If you need something safe for smaller projects as well, this would be fine. $41.19 with Prime
http://www.amazon.com/Weller-WLC100-40-Watt-Soldering-Station/dp/B000AS28UC/ref=sr_1_2?ie=UTF8&qid=1398198808&sr=8-2&keywords=weller+40
I guess I'm a fan of weller products. I've had them at home and a shop. I got one of their higher end soldering stations when I was about 11 to build my own battery packs for my R/C cars and it saw a lot of use. Back then we hardwired the leads from the ESC to the motors and batteries between heats for the lowest resistance. (not to mention deans plugs weren't a thing yet, tamiya connectors would melt together with a hot motor/battery combo) I still have it over 20 years later.
I would say 40 watts is about the standard with typical R/C projects. Also, the lower end brands 40 watt irons don't ever seem to create the heat as something of decent quality.
Also, if you don't have something like this yet, pick one up. $7 shipped all over Amazon. Also available at Harbor Freight for about the same price if you have those in your area.
http://www.amazon.com/SE-MZ101B-Helping-Hands-Magnifying/dp/B000RB38X8/ref=pd_sim_hi_3?ie=UTF8&refRID=0TB7X5RYFKZ3SR4EXY1P
a low-end one is good enough. just to solder the mill-max sockets.
that's what I did and this is what I used - https://www.amazon.com/Weller-SP40NUS-40-Watt-Soldering-Iron/dp/B00B3SG6UQ
just add the set of additional tips, so you have something other than a flat one.
Ended up ordering this:
http://www.amazon.com/Weller-SP40NUS-Medium-Soldering-Black/dp/B00B3SG6UQ
Weller 40W Medium Duty Soldering Iron
For very occasional soldering that doesn't involve small things, a Weller SP40 is a good choice. Also, I've never used it, but if you're after the absolute cheapest, Sparkfun has a very cheap iron.
For more control (smaller tips, better temperature control, etc), I'd take a look at these:
Sparkfun 50W
Weller WES51
Hakko FX888D
this is what i bought
http://www.amazon.com/Weller-SP40NKUS-Watt-Soldering-Black/dp/B00B3SG7F0/ref=sr_1_40?s=hi&ie=UTF8&qid=1465181784&sr=1-40&keywords=soldering
http://www.amazon.com/ATH-M50-ATH-M50s-MDR-7506-Headphones-Replacement/dp/B00PL8BLP4/ref=sr_1_1?ie=UTF8&qid=1465181830&sr=8-1&keywords=mdr+7506+replacement+cord
its the golden aux input thing. when i spin that in whatever hole i put it into then at the right angle the sound comes back into the right ear pad. it stays there even if i move it a little.
I just ordered components to make my first box mod, but have done small electrical work before.
Helping Hands will make your life much easier, may not be necessary if you only intend to make one mod.
a decent digital multimeter is required, as is a Soldering iron.
A Breadboard is very useful to ensure everything works as it should, before you have it all finished and put in the case.
those are all I can think of right now, sure there are others people use regularly though
Dunno about the DA but for keyboards you can. As /u/01111000x said it'll void any warranty you may have with it.
I changed out all my LED's and Cherry switches using the following items:
Weller SP40NKUS - May be too powerful but it got the job done fine.
Solder sucker
Leaded solder with rosin core
Desoldering wick
I guess for Green LED's anything on eBay would work. 2x3x4mm square led's or flangless 3mm will both work. I got mine frome here because im impatient.
Ive been using this for few months. Didnt run in to any issues whether it was for SMDs, Switches, and etc. If you want to try it out for yourself, just remember to take your time with it and you should be fine.
Soldering is really easy but it takes some practice beforehand. Grab something old that isn't being used anymore (or find something that someone left at the corner near their garbage can) and take it apart. Desolder some stuff and practice soldering it back on. Also, don't buy cheap junk, you don't need a $200 iron, but don't get one of the $5 irons off ebay either. I use these:
Weller Iron: http://www.amazon.com/dp/B00B3SG7F0/
Solder: http://www.amazon.com/gp/product/B000G31N8Y/
Desoldering Pump: http://www.amazon.com/dp/B00QTGEL18/
If you are willing to drop a little bit of coin, but don't want to go too crazy this guy is pretty popular: http://www.amazon.com/dp/B000AS28UC/ref=wl_it_dp_o_pC_nS_ttl?_encoding=UTF8&colid=33Z9SEU0RU74U&coliid=I177ELVX243CET
For starting out, and into the foreseeable future, one like this would probably server you just fine: http://www.amazon.com/Weller-SP40NKUS-Watt-Soldering-Black/dp/B00B3SG7F0/ref=sr_1_2?s=hi&ie=UTF8&qid=1421030141&sr=1-2&keywords=weller+soldering+iron
What was it? I need one for replacing blown capacitors and was looking at the Weller SP40.
http://www.amazon.com/Weller-SP40NKUS-Watt-Soldering-Black/dp/B00B3SG7F0
I don't think this comes with a stand. I have the $40 Weller one.
I just ordered 3x digital temp control switch for $10.80 shipped. Also 3x 3 pin fan controllers for $7.17 shipped. Along with a few different 4 pin and 3 pin fan plugs and adapters. New Weller 40w soldering pencil for <$20 after 20% discount.
I'm ready to automate my fans! :D I'm hoping to run 2 thermostats and 2 fans from one DC 12v psu. I'm thinking something like exhaust starts at a lower temp, like 71.6F/22C, and stops at 68F/20C; intake starts at 80F/27C, and stops at 75F/24C. Give or take a few degrees..
I'll just recommend these:
https://www.getfpv.com/ts100-digital-oled-programmable-interface-mini-soldering-iron.html <----- Fantastic portable and desktop but best if you need portable. I own this one.
https://www.amazon.com/Aoyue-Variable-Soldering-Station-Removable/dp/B00MCVCHJM?ref_=ast_bbp_dp60W so you can split the diff.
https://www.amazon.com/Aoyue-9378-Programmable-Digital-Soldering/dp/B00BSW69LI?ref_=ast_bbp_dp <---- I own this one. Works very very well.
Never owned a Weller that I've liked.
I just bought this off Amazon to do soldering related projects with my pi.
http://www.amazon.ca/dp/B00BSW69LI/ref=sr_ph?ie=UTF8&amp;qid=1419892846&amp;sr=1&amp;keywords=aoyue+soldering
I haven't had a chance to test it out yet but the reviews seem good and from the research that I did, the brand is pretty good
If you plan on taking it further than just simple mods a couple times a year, I recommend spending a little more if you can. You don't have to go crazy either. I know that a lot of people go the Hakko or Weller route, but I've been very happy with my Aoyue 9378. Here is the Aoyue 937+ which is cheaper (45w vs 60w and a couple other things). Like others have said, get some wick and grab one of these over the sponge crap.
EDIT: Oh, and pick up some flux. There are flux fans and some that use it sparingly, but just pick it up.
Also, this goes much further than just installing a battery holder, but check out Voultar's videos to watch some technique. He's also a liberal flux / No Clean user and you'll see why.
Can I get your guys opinion on this one?
http://www.amazon.ca/dp/B00BSW69LI/ref=cm_sw_em_r_am_wp_am_ca?ie=UTF8
I've had it in my cart for almost a month now and I'm thinking I might pull the trigger. Currently I'm limping along with a $12 soldering iron from radio shack that's probably 15 years old.
Thanks!
It's a Weller 23w basic iron. I had my eye on this model a while ago, I think it was available for <$100 But it never made the top of my list when I was buying stuff.
You definitely want to get a soldering station. So something that can control the temperature of the of the iron. The reason being is the ones that just plug into the wall usually fluctuate between extremely hot and very hot which can become if you’re trying to solder next to very delicate transistors on the pcb.
I know people say you can get away with the cheapest everything but that’s usually not the case at all and sometimes dangerous to your health.
Getting good solder, tip tinner, brass sponge, flux pen, and a fan with a carbon filter will do you great things.
The fan is extremely important when your desoldering as that will give off a tonne of chemicals.
This is what I personally have
https://www.amazon.com/gp/aw/d/B00BSW69LI/ref=ya_aw_oh_bia_dp?ie=UTF8&amp;psc=1
https://www.amazon.com/gp/aw/d/B074J6R1KQ/ref=ya_aw_oh_bia_dp?ie=UTF8&amp;psc=1
https://www.amazon.com/gp/aw/d/B001W2XZOS/ref=ya_aw_oh_bia_dp?ie=UTF8&amp;psc=1
https://www.amazon.com/gp/aw/d/B00FZPGDLA/ref=ya_aw_oh_bia_dp?ie=UTF8&amp;psc=1
https://www.amazon.com/gp/aw/d/B00NS4J6BY/ref=ya_aw_oh_bia_dp?ie=UTF8&amp;psc=1
The soldering iron is overkill if you’re just using it for trains
Eh, soldering just takes a bit of practice, and there are tons of Youtube videos that explain in detail the best ways to do so.
(I'd recommend this channel https://www.youtube.com/channel/UChbLnX8JcsN9bH4BNgJZ6wA)
Really it's all about not holding the iron on the board too long. Once you get that down, it's easy. Learning the wire gauges and all that is also very easy as most boards have recommendations in the paperwork. (if it carries power, big wire... If it carries signal, smaller wire). These new DNA boards are about the easiest thing ever to work with, and even someone with little to no experience could solder them with ease. (now the DNA20/30/40, notsomuch)
If you're looking for a good soldering iron, you want something with wattage control, and while weller has been the standard for decades, they are overpriced and a bit hardcore unless you are a pro. I'd highly recommend the Hakko FX888D http://amzn.com/B00ANZRT4M which is what pretty much everyone uses, or what I personally use, the Aoyue 9378 http://amzn.com/B00BSW69LI which has served me very well. There are others for considerably less, and if you aren't planning on making this a hobby, then something like the Aoyue 469 http://amzn.com/B00MCVCHJM would be perfectly fine. (60w is about a low as you'll want for a variable wattage iron, so you'll have a little wiggle room)
Is it necessary to clean up flux? Almost never. Is it a good idea to do it anyway? I'd say so. Here's a good article about all things solder and flux to bring you up to speed.
Flux is SUPER carcinogenic, or so I've been lead to believe, and it also causes serious gastrointestinal issues if ingested, in even relatively small amounts. I generally try to leave all the circuit boards I work on clean of big globs of flux, but I'm no perfectionist. Flux is non-conductive, so don't worry if you leave a bunch behind or it looks like the flux might be bridging a connection. I oftentimes leave smaller flux contamination spots on the board, unless it's in a spot where I'd be likely to touch next time I'm handling the board.
Here's a pretty good soldering iron, the Hakko FX-888. It's more than enough iron to last you through all your projects in the foreseeable future, and it comes with extra tips and a tip cleaning canister. To be honest, though, it's pretty expensive, and I totally understand if it's out of your price range. Personally, I use a Chinese clone, which works extremely well, for what I paid for it.
I'd also recommend anyone working on anything with a soldering iron to get a set of helping hands. Finding one which isn't broken or of shit quality is a real crapshoot, but, once you have one that works, you'll wonder how you ever got by without one. Personally, I recommend spending the cash to get one with some sort of LED built in, but here's a link to a cheap and functional set of helping hands.
If you're going to be desoldering things often (or trying to make beautiful solder joints), you definitely want to get yourself some desoldering braid, which is just stranded copper wire filled with flux paste. When you put heat to the top of the braid and put the bottom of the braid on the component, the braid will wick excess solder from the component. Once you master using this stuff, it's a real boon for disassembly (or cleanup of solder blobs). You might also want to look into a desoldering pump, which is okay for some things, but not nearly as versatile as desoldering braid.
Last, but certainly not least, is having the right solder for the job. Personally, I use silver bearing solder, because I've been told it is more resistant to cold joints, and slightly more conductive. Here's a link to a spool of silver bearing solder, which I'd buy, were I in the market for a new spool.
One more link for you... When I was looking for a link to that Chinese clone soldering station, I stumbled on this DIY SMD soldering practice kit. Might be worth your time to invest in one and try your luck. For $2, it's a great way to go from soldering zero to soldering hero in a day or two. Also, check this page for more DIY kit ideas.
Let me know if you have any more questions! My inbox is always available, if you'd feel more comfortable PM'ing me questions, too. (That goes for anyone who needs a hand, not just /u/websurferathome)
This was my first iron, though under a different branding. It's only $16, and it has a knob you can spin that at least loosely correlates w/ the iron's temperature.
I wouldn't recommend it, though. I splurged for a Hakko FX-888D a couple of months later and haven't regretted it once. It truly is a night-and-day difference. Working with my old iron was like pulling teeth. Working with the Hakko is effortless.
I'd definitely recommend an upgrade. If you're un(willing|able) to spend $100+ on a soldering iron, I'd recommend still getting the first one I linked, along with some Hakko tips. Hakko tips are about 10-20x as expensive as their no-name counterparts, and you absolutely get what you pay for.
Easily the most frustrating part of using my first iron was how quickly the tips would oxidize, even though I kept them tinned religiously. Hakko tips, when cared for, will last indefinitely. I wouldn't be surprised if nice tips + cheap (but temperature controlled) iron got you 70% of the performance of the all-Hakko kit.
Here's my suggestion:
How to use it and getting your soldering technique right:
I have this one. Haven't run into any issues. Granted this is NOT a rework station. But it's the same model they are issuing in Fed labs. $135 gets you great soldering iron which wide range adjustable temps, set of various tips, though if you are doing ISP you'll want the very fine tips...I'll have to find the number for the ones I use...The only other thing you would want for ISP is decent magnification to work under.
https://www.amazon.com/Hakko-FX888D-T18-B-D24-599-029/dp/B00C2BHTBI/ref=sr_1_1_sspa?s=hi&ie=UTF8&qid=1525274929&sr=1-1-spons&keywords=hakko+soldering+station&psc=1
I was in the same boat a few months ago. Got this one for $16 on amazon! https://www.amazon.com/Genesis-GHG1500A-Temperature-Nozzle-Attachments/dp/B00EU2T8GG/ref=mp_s_a_1_3?keywords=heat+gun&amp;qid=1551148557&amp;s=gateway&amp;sr=8-3
The following are the parts I'll be purchasing for this build. I think I've covered everything, but as this will be my first custom loop if someone could give it the once over and make sure I'm not forgetting something it would be GREATLY appreciated!
Link to current build
Item | Vendor | Price | Quantity |
---|---|----|----|----
[CE 280](https://www.ekwb.com/shop/ek-coolstream-ce-280-dual","EK-CoolStream CE 280) | EK | 75.99 | 1 |
[PE 360](https://www.ekwb.com/shop/ek-coolstream-pe-360-triple#ow_alert_box","EK-CoolStream PE 360) | EK | 79.99 | 1 | 1
Corsair SP 120 2-pack | Amazon | 27.99 | x2 |
EK 140 Revo D5 | EK | 163.99 | 1 | text
EK Supremacy EVO | EX | 78 | 1 | text
EK Pump Bracket | EX | 13.49 | 1 | text
MSI GTX 1080 Sea Hawk EK| Newegg | 569.99 | 1 | text
ATX Bridging Plug | EX | 2.49 | 1 | text
Alphacool Silicon Bending Cord | Amazon | 8.49 | 1 | text
EK-CSQ Plug | EK | 3.49 | x2 | text
EK-AF 6mm M-M Extender | EK | 2.99 | x2 |
EK Ball Valve | EK | 19.99 | 1 | text
EK X Splitter | EK | 8.99 | 1 | text
Heat Gun | Amazon | 17.71 | 1 |
Step Bit | Amazon | 10.85 |1| text
Pipe Cutter | Amazon | 7.99 | 1 | text
EK-HDC 16mm Gold Fitting | EK | 8.99 | x10 |
EK PETG 12/16 Tube | EK | 8.49 | x4 |
Hand vise: IRWINQUICK-GRIPOne-Handed Bar Clamp, Heavy-Duty, 6", 1964711 https://www.amazon.com/dp/B001VND4X0/ref=cm_sw_r_cp_apap_SKWbD2mBTHRZ9
Steel plates: Round Hot Rolled Steel Plate 1/4" x 4" Diameter Circle (Pack of 2!) https://www.amazon.com/dp/B00YWBU1P2/ref=cm_sw_r_cp_apa_Mdufzb3Q4YDXK
Epoxy: J-B Weld 8297 HighHeat 550 Degree Epoxy Putty Stick - 2 oz. https://www.amazon.com/dp/B007PP26RI/ref=cm_sw_r_cp_apa_ieufzbQD017AS
And turns out my stove is way easier to heat up the steel plates. But if you're interested in a heat gun I bought this one: Genesis GHG1500A Dual Temperature Heat Gun Kit, Grey https://www.amazon.com/dp/B00EU2T8GG/ref=cm_sw_r_cp_apa_pfufzbAPGCZ11
Sorry about the formatting, I'm on mobile
Like 20 bucks or so.
http://www.amazon.ca/Genesis-GHG1500A-Dual-Temperature-Green-1-Pack/dp/B00EU2T8GG/ref=sr_1_8?s=hi&amp;ie=UTF8&amp;qid=1421787663&amp;sr=1-8&amp;keywords=heat+gun
Hi all, my goal is to construct a fluid bed roaster capable of roasting a half-pound of coffee per go.
For the motor, I'm looking at this electric leaf blower, and for the heating element, I'm looking to dissect this heat gun.
I'll use a pyrex baking tube, and a cocktail shaker to cap it off at the base. And then some machining magic to couple it to the mounting pipe.
Does it seem like this will get hot enough to roast a 1/2 pound?
I'm trying to upgrade from my current popper setup which can roast a max of 60 grams at a time (and that's with me constantly agitating with a shish kabob stick).
Edit: One possible improvement could be increasing the wattage of the heater to 2000W. Does anyone have a recommendation for a really cheap blower (or just the element itself)? Or would this water heater element work?
If I reclaim the air from the exhaust back into the pump, would this allow a 1500W heater to work?
Also, If anyone still doesn’t wanna spend that much buy a [heatgun](Genesis GHG1500A Dual Temperature Heat Gun Kit with Four Metal Nozzle Attachments https://www.amazon.com/dp/B00EU2T8GG/ref=cm_sw_r_cp_api_i_rLIbBbSZYN31R
Yes heat guns arent designed for the high heat of roasting. I found this one to be pretty good. The plastic sheath falls off though. I keep a spare and alternate them when back to back roasting. I do a lb at a time in a breach machine. Takes 12-15min or so depending on beans.
https://www.amazon.com/gp/aw/d/B00EU2T8GG
By esteps I mean extruder steps. The number of steps the stepper motor has to turn to push out 1 mm of filament. Generally you can calibrate this by telling it to extrude 100 mm of filament and measuring how much it actually extruded. I don't know specifics of your printer but you should be able to find information about your specific printer indicating if that is something most people do. Here is the procedure for a different printer, it will give you some idea what to look for for yours: https://3dprinterwiki.info/extruder-steps/
To clear out a potential clog take off your nozzle and hold it in front of a heat gun on high with pliers. The filament will pretty much evaporate away. Can use tiny nozzle cleaning drill bits, you can get on amazon or aliexpress, to clean out any that doesn't evaporate.
If you don't have a heat gun you can get them for $10-$20 at Harbor Freight or Amazon. This is the one I bought and it works well (looks like it has went up in price since I bought it though):
https://www.amazon.com/gp/product/B00EU2T8GG/ref=ppx_yo_dt_b_search_asin_title?ie=UTF8&amp;psc=1
> its thicker than I remember
How old is the nozzle? Maybe it is worn and the hole is now bigger than 0.4mm? (brass nozzles are consumables if that is what you are using)
This is the one I have. Have used it several times to fix tops and wet spots and it works great! https://www.amazon.com/gp/product/B00EU2T8GG/ref=ppx_yo_dt_b_asin_title_o05_s00?ie=UTF8&amp;psc=1
I mean use a heat gun like one of these. https://www.amazon.com/gp/aw/d/B00EU2T8GG/ref=mp_s_a_1_3?ie=UTF8&amp;qid=1525443704&amp;sr=8-3&amp;pi=AC_SX236_SY340_FMwebp_QL65&amp;keywords=heat+gun&amp;dpPl=1&amp;dpID=41o%2BjfZKenL&amp;ref=plSrch
This looks pretty decent
https://www.amazon.ca/dp/B00GIKVP5K/ref=cm_sw_r_cp_awdb_f0BCyb94CVFXW
Source: https://youtu.be/gKGjxq96m-o
I have a very similar vise in my workshop. Works great and I love it, but third-hands are amazing if you get a good one. I tried this one out after seeing the amazing reviews on Amazon and was not let down. Having 4 clamps instead of 2, and having them be able to lock down makes a world of difference.
https://www.amazon.com/QuadHands-Helping-Hands-Third-Soldering/dp/B00GIKVP5K
I also have one like this, only not quite as expensive:
https://www.amazon.com/Tools-004-570-Regular-Soldering-Station/dp/B01579QJYO/ref=sr_1_95?s=hi&amp;ie=UTF8&amp;qid=1518811625&amp;sr=1-95&amp;keywords=third+hand
I used to have one of those. The magnifying glass (plastic) broke off almost immediately.
I'd like to get this, but it is way more expensive...
https://www.amazon.com/QuadHands-Helping-Hands-Third-Soldering/dp/B00GIKVP5K/ref=sr_1_6?s=hi&amp;ie=UTF8&amp;qid=1495130651&amp;sr=1-6&amp;keywords=helping+hands
Haha, completely self taught through trial and error, thanks! Having the right kind of paste flux and magnification helps. I’ve also purchased one of these to help keep things steady with this and future jobs.
QuadHands Helping Hands Third Hand Soldering Tool and Vise
https://www.amazon.com/dp/B00GIKVP5K/ref=cm_sw_r_cp_api_Oh.MBb478C70E
My business partner and I just started making our own cables in December. We use Switchcraft connectors (personal preference) and Canare Star Quad cable. It hasn't been too hard to learn on star quad. We use a Weller WES51 which is around $85.
Also recommend a brass sponge and this helping hands tool if you have the budget for it.
EDIT: Neither one of us had really soldered much before, but we did have someone showing us how to do it. So Quad-Core might be tough if you're totally trying to teach yourself.
This one is really good:
https://www.amazon.com/dp/B00GIKVP5K/ref=cm_sw_r_cp_apa_Gx0ryb2535NT7
Shows out of stock on Amazon right now though.
Aven 17010 Adjustable Circuit Board Holder https://www.amazon.com/dp/B00Q2TTQEE/ref=cm_sw_r_other_awd_-VVGwbCQ5C8GA
I got this a while ago and it's pretty good.
Thanks. Here's a link in case helps anyone else. Currently $12.95 and it looks like a gadget that could be used for other one-handed activities. (Now there's a phrase normally used for other activities on Reddit)
Given that this is your first build, I'm wondering whether maybe you're still getting the right tools?
I use this soldering iron from BYOC. It's cheaper than an equivalent Weller, but still works well for me. I previously had a Radio Shack one with a less finely-pointed tip, which was frustrating to use. I also use a circuit board holder from Amazon that makes it easy to put a component in on one side, bend the leads a little to hold it in place, then rotate the board to the other side so I can solder it. I place, solder, and clip the leads for one component at a time. I've tried following some YouTube videos that put in a bunch, tape them down, and then solder through the forest of exposed leads, but that ended up messier than I would have liked.
I'm not sure what you mean about soldering from both sides. Looking at the project doc, it seems to me like all the components (other than the switch and pots) go on the same side. Is it about placing components on one side and soldering on the other?
For an IC socket, I follow these steps:
Given that the Helios has board-mounted pots, you might also find the instructions below (from BYOC) helpful: https://imgur.com/a/6FLzV
https://www.amazon.com/Aven-17010-Adjustable-Circuit-Holder/dp/B00Q2TTQEE/
This is a good list.
For a soldering iron, a good one like a Hakko FX888D is invaluable. It may seem expensive, but if you buy one you'll never know the annoyance of having to deal with a crappy soldering iron.
If you're going to be soldering breakout boards (or just soldering in general) an Adjustable Circuit Board Holder is very handy.
Yes - that Ebay link is probably the same thing. Here's exactly what I bought.
The base rods are steel, so these magnetic arms also work well as helping hands.
The blue uprights of the PCB holder are plastic, and one side is spring loaded. It allows for several different mounting positions. It also allows you to spin the board back-and-forth, which is good for this kind of work. Note that it barely fits the length of the Planck, and if I were doing anything longer I would need to hold it sideways instead, which would mean the flipping wouldn't work.
It's not heavy duty like something from PanaVise, but for this kind of thing and smaller boards it works fine.
Thanks for the tips re: clips and Electrodroid.
Can't picture how using the vice would work... Usually what i do is put the components through, smoosh on the Blu-tack, then use this circuit board holder to spin it upside down for the soldering:
https://smile.amazon.com/gp/product/B00Q2TTQEE/ref=oh_aui_search_detailpage?ie=UTF8&amp;psc=1
Very nice work! Here's a link to the one I got:
https://www.amazon.com/gp/aw/d/B00Q2TTQEE/ref=mp_s_a_1_3?ie=UTF8&amp;qid=1501995047&amp;sr=8-3&amp;pi=AC_SX236_SY340_QL65&amp;keywords=pcb+holder&amp;dpPl=1&amp;dpID=41nBaU-cqqL&amp;ref=plSrch
I got it after starting my Ergodox, and it made it so much easier.
Sorry if the format is off, I'm on mobile.
this little thing has worked great for me.
https://www.amazon.com/dp/B014KBIB3M/ref=cm_sw_r_cp_api_i22IybS6JXTXR
That's what I'm using. I didn't suggest it because Amazon is out of them. You can look for something similar.
I think this is the iron I used.
It is 25w but I would question the efficiency of a 25w soldering iron from the 50s....
If you feel you need one stronger, and don't need the practice boards:
https://www.amazon.com/Vastar-Adjustable-Temperature-Soldering-additional/dp/B014KBIB3M/ref=sr_1_1?ie=UTF8&amp;qid=1465916565&amp;sr=8-1&amp;keywords=soldering+kit+50w
From my tools wishlist. You can make all sort of electronics, if you know how to wire them right.
/u/kerjigger I summon you.
This is under $20. The only other thing I would add is a decent stand with a sponge tray which should be under $10. If you need more solder get 60/40 rosin core. I actually recommend 63/37 rosin core because it reduces the chance of a bad joint due to movement while cooling.
Here's an ARF (Almost Ready To Fly) drone kit that's around your budget ($194) Make sure to add FPV if you want to see what your drone is seeing:
http://www.miniquadbros.com/collections/frontpage/products/miniquadkit?variant=5994973827
__
You're also going to need some other equipment to get you up and running:
OPTIONAL:
The reason why this is optional is because there's two ways of flying a quadcopter.
There's Line-Of-Sight (LOS) flying, where you don't see what the drone sees and fly it from your sight. This can save you money since you don't need video equipment.
Then there's First-Person-View (FPV). This adds so much immersion and fun to your drone! However, you should keep in mind that adding this on will set you up for another $100-150 for something mediocre/beginner.
__
Yes yes I know, the hobby is VERY expensive, even for beginner equipment. But there's a saying that goes like this, "Buy it nice or buy it twice". I've spent easily $750 in my first months of drone building.
If the price puts you off, you can purchase this which comes pre-assembled. All you need is to add your radio receiver and video antennas (if you're doing FPV).
__
Hopefully the amount of information supplied isn't too much. If you have any questions, just PM me! I'll be glad to help :) /r/multicopter
I ordered This $17 Vastar about six months ago and have been very happy with it.
just looked that iron up, says it a 60w, could be BS but more likely didn't wait for the iron to reach temp.
https://www.amazon.com/Soldering-Adjustable-Temperature-Including-Desoldering/dp/B01C9P7HDQ/ref=sr_1_2?s=hi&amp;ie=UTF8&amp;qid=1518835087&amp;sr=1-2&amp;keywords=SOAIY+IRON
The only video I could find of the MOSFET board installation was very long and somewhat unclear to a newbie. It looks like he mounts it under the printer rather than the control box and overall just seemed really difficult.
I just went ahead and pushed the button on my order from Amazon that includes the XT60 Connectors w/ Heat Shrink and the 6-1 Soldering Kit I would have preferred the MOSFET but in hopes of not getting over my head, it was a total of about 30$ and seems doable.
I got this guy a while back. Helped me make a few custom cables, a GH60, and a planck so far. Looking to build a bunch more with it too. It's a great little workhorse
I used this kit with the heat turned all the way down and it melts PLA nicely.
This super cheap one from amazon. To make things worse I used the included solder.
I managed, but it definitely got a little hairy near the end as the tip got wider and pieces started coming off. I have a Hakko on my wishlist, but won't be able to get it until next week. Impatience is bad.
Don't use lead free solder, ever. Use rosin core, use a good solding iron.
Good solder
https://www.amazon.com/dp/B00DKF13JY/ref=cm_sw_r_cp_apa_KQKdAb2SRMP17
Good soldering iron
https://www.amazon.com/dp/B01MDTO6X7/ref=cm_sw_r_cp_apa_8TKdAbNTRP60A
Build Your Own Clone
I doubt you'd keep track of any more websites I could mention above once you find a few kits there. As far as equipment goes, get:
A decent soldering iron ... Alternative (please also get this with the alternative)
Solder
Micro Cutters to trim leads
Hopefully you have a small flat-head screwdriver to set knobs and a small flat pair of pliers to attach hardware to the enclosures.
I doubt you'd need to but if you ever need to get any components that aren't supplied with a kit, go to Tayda Electronics for nearly any part (they tend to be cheapest for hobbyists, you can find anything from passive components like resistors and capacitors, to knobs/switches/audio and power jacks, etc.).
The counterfeit isn't a bad counterfeit, some people even like it more than the original. If you can get it for significantly cheaper then go for it, just don't buy it for anywhere near the price of a non counterfeit item.
There is another one you can get for about 60% of the cost called the TS100, it's a pretty quality iron https://www.amazon.com/Programmable-Pocket-size-Soldering-Interface-Acceleration/dp/B01MDTO6X7/
I've managed to desolder a couple hundred switches now with a $20 kit off amazon and it's still working fine.
If you really just need it for a small project, no need to invest much.
An IC puller (not the cheapest place, but it's fulfilled by Amazon so it won't take forever to arrive at least.) makes releasing the switch from the plate so much easier as well. Just squeeze the tabs at the top and bottom of the switch.
Depending on the kind of solder they used and what's in the way, you may be able to use the method I described here to pop the switches out really quickly as well with it.
But generally watch some tutorials, and never pull too hard. If the switch is really not coming out, don't force it. That's how you rip up pads/traces. Adding more solder to help the heat reach all the way through and starting over is a better solution.
Heres a good middle of tbe road kit I'm thinking of buying myself off of amazon, it even has a desolder pump sucker. It is the Soldering Iron Kit, Including 60W Temperature Control Soldering Iron with ON/OFF Switch, Tips, Solder Sucker, Desoldering Wick, Solder Wire, Anti-static Tweezers and Stand with Cleaning Sponge https://www.amazon.com/dp/B01MR65RJD/ref=cm_sw_r_cp_apa_7ZzHAbYM5ZP5A
https://smile.amazon.com/Soldering-Including-Temperature-Desoldering-Anti-static/dp/B01MR65RJD/ref=sr_1_11?s=hi&amp;ie=UTF8&amp;qid=1495560179&amp;sr=1-11&amp;keywords=soldering+iron this one comes with everything you'll need and then some and gets good reviews.
I have this one https://smile.amazon.com/X-Tronic-3020-XTS-Digital-Display-Soldering/dp/B01DGZFSNE/ref=sr_1_14?s=hi&amp;ie=UTF8&amp;qid=1495560179&amp;sr=1-14&amp;keywords=soldering+iron and absolutely love it, but it doesn't cost a bit more.
https://www.amazon.com/dp/B01MR65RJD?psc=1
if its only for one time...
I decided to setup a spare pc on this desk... many workbenches I've been researching included one and it does make sense.
Just ordered Soldering Iron Kit, https://www.amazon.com/dp/B01MR65RJD/ref=cm_sw_r_cp_api_fzBxzbDWE45QX due to its very high rating and reviews.
The multi tool is still under investigation.
Came with the iron. I believe it is this kit on amazon:
https://www.amazon.com/Soldering-Including-Temperature-Desoldering-Anti-static/dp/B01MR65RJD/ref=sr_1_11?s=hi&amp;ie=UTF8&amp;qid=1520309067&amp;sr=1-11&amp;keywords=soldering+iron
I used these fans:
https://www.amazon.com/gp/product/B071WMHNG5/ref=oh_aui_detailpage_o07_s01?ie=UTF8&amp;psc=1
https://www.amazon.com/gp/product/B009NQLT0M/ref=oh_aui_detailpage_o07_s01?ie=UTF8&amp;psc=1
This soldering iron:
https://www.amazon.com/gp/product/B01MR65RJD/ref=oh_aui_detailpage_o05_s00?ie=UTF8&amp;psc=1
The screws mentioned in the video (bought them, and used the ones that came with the printer)
And I printed off these files:
V2_5015_CR10_tevoEZPrintDuct4
v2_CR10_TevoGeneric_Base
v2_CR10-TevoWireStrain
I appreciate the effort. This seems promising and may be the better idea, the other route I was going to take was the Bardwell kit with some other stuff.
https://store.rotorriot.com/bardwells-budget-build-kit/
https://www.racedayquads.com/products/rdq-series-1300mah-4s-100c-fpv-lipo-battery
https://www.amazon.com/usmile-receiver-Support-FS-iT4S-Evolution/dp/B07FMFG6Q3/ref=sr_1_1?s=toys-and-games&ie=UTF8&qid=1542217789&sr=1-1&keywords=fli14
https://www.amazon.com/Flysky-FS-i6X-Transmitter-FS-iA6B-Receiver/dp/B0744DPPL8
https://www.getfpv.com/new-arrivals/ev-peak-e3-falcore-edition-35w-3a-lipo-battery-balance-charger.html
https://www.amazon.com/dp/B01N4571Q6/ref=as_li_ss_tl?psc=1&linkCode=sl1&tag=fpvknowitall-web-20&linkId=6769f39dd3014cb5619db31a54b18438
https://www.racedayquads.com/products/rdq-quad-solder-38-62-0-8mm-100g
https://www.amazon.com/DOWELL-Stripper-Multi-Function-Tool%EF%BC%8CProfessional-Craftsmanship/dp/B06X9875Z7/ref=sr_1_4?s=hi&ie=UTF8&qid=1542221619&sr=1-4&keywords=wire+stripper+and+cutter
https://www.amazon.com/NEEWER-Titanium-Nitride-Driver-Wrench/dp/B00CP2GGBI/ref=as_li_ss_tl?ie=UTF8&qid=1488911480&sr=8-3&keywords=hex+driver&linkCode=sl1&tag=dre-youtube-20&linkId=d53d845db871ab90fe110b2918f60a7e
$381 no shipping/tax and the build kit comes with accessory kit including motor screws for CL1 5mm thick arms, double-sided tape, FC stack mounting screws, XT60 power lead, zip ties, and heat shrink.
&#x200B;
Your idea seems like it may be "too little" for the project but I am honestly ok with that because I rather get something done then bite off something too big to chew and end up having to figure something out last second and it being a piece of crap.
&#x200B;
So does that flight controller stick right into those frames and then you screw them in or something? You say I only need to solder the the power wires to the camera, where do the motors go? I probably sound like an idiot but I'm not really an electrician or carpenter, I don't build things, other then computers :P. I need to head off now so I can't do so much research right now and I spent all day researching today.. won't have much time tomorrow, we are going to tour a college. Can you recommend a good video that would go along with this build? Tomorrow, I am going to ask the teacher if the TV in the room I am presenting in has analog input, if not we go from there. We have access to a 3D printer but a lot of people are going to be using it most likely and I think its slow but I can definitely get the camera mount printed. Once again, appreciate the effort.
This is a good option from amazon, and compatible with HAKKO 900 series tips if you want to upgrade them later. You can save a few bucks by getting from banggood, same iron, but the stand they include is not as good. The hobbyking $20 station is great too, but unless you're getting other stuff from hobbyking, the shipping costs makes it more expensive than the Amazon one.
i need a new soldering iron bad. I build guitar pedals the current one i have the tip is burning out, have tons of pictures, ive watched reviews on youtube before and alot of them seems like the people have no idea about te product. I will provide a detailed youtube review covering every aspect of soldering iron....I need a grounded one
https://www.amazon.com/Sywon-Soldering-Switch-Temperature-Adjustable/dp/B01N4571Q6/ref=sr_1_15?ie=UTF8&amp;qid=1502776874&amp;sr=8-15&amp;keywords=soldering+station
like this
https://www.amazon.com/gp/aw/d/B01N4571Q6?psc=1
I was looking into this one, how do you think it compares?
Yes, that's how you're supposed to do it. You can try heating it up and using a soldering tip cleaner, but if that won't scrub it off you'll need a new tip.
I second /u/MuffleTheFox's suggestion though, if you're going to get into electronics you should invest a couple bucks in a soldering station. I picked up this one (which
isn't quite a soldering station) and even that's worlds better than a non-adjustable stick iron.
Modify the tip of a solder station to suit your needs. Will need an inverter to run off 12V.
This one only goes down to 392F, with a little searching they can be found lower.
I meant like the one in the video, but I just realized it's probably not your video :/
I'm a bit slow XD
EDIT: Looks to be custom made, this is the base.
Is this a good place to start
Soldering Iron Kit, Including 60W Temperature Control Soldering Iron with ON/OFF Switch, Tips, Solder Sucker, Desoldering Wick, Solder Wire, Anti-static Tweezers and Stand with Cleaning Sponge https://www.amazon.com/dp/B01MR65RJD/ref=cm_sw_r_cp_apa_iJGHAb8XDC58B
You guys are making it sound easier than it is.
SOLDERING is easy. Anyone can do that. Just heat the work and the solder drips right in the hole.
It's DESOLDERING which is hard. And without proper desoldering equipmenet (like an Aoyue or a Hakko), it can be even HARDER and if you do it wrong, you could damage the PCB. You need more than just a soldering iron to desolder. You also need a desoldering pump (vacuum tool pump (NOT recommended unless you have no other choice) or a proper desoldering iron which is $$$).
The key is probably damaged and those are not easy to fix without making the problem worse. If the metal tab is damaged or bent out of shape there's no fixing that. With a switch top remover (from MK.com) you can remove the switch top and the cherry stem, after desoldering the switch (ONLY PCB mount switches can be popped open without desoldering), but if you don't have spare switches, I would just RMA the thing.
A good desoldering pump is https://www.amazon.com/Aoyue-Contained-Desoldering-Internal-Carrying/dp/B00PGFAJWS
But as you can see it's expensive. But it does come with some extra tip tops.
An even better one but more expensive is https://www.amazon.com/Hakko-FR300-05-P-Desoldering-Tool/dp/B00KWM69C4/ref=sr_1_1?ie=UTF8&amp;qid=1490577663&amp;sr=8-1&amp;keywords=Hakko+FR300-05+desoldering+tool
Yes that's $$. And a lot.
A good starter kit, which includes solder and a vacuum pump is https://www.amazon.com/gp/product/B01E1ISGH0/ref=oh_aui_detailpage_o01_s00?ie=UTF8&amp;psc=1 ; not too expensive for what you get.
Once you're ready to move up to higher quality you can buy this:
https://www.amazon.com/Hakko-FX888D-23BY-Soldering-Station-599-029/dp/B00C2BHTBI/ref=sr_1_3?ie=UTF8&amp;qid=1489522270&amp;sr=8-3&amp;keywords=Hakko+FX888D