Best spray paint according to redditors
We found 831 Reddit comments discussing the best spray paint. We ranked the 297 resulting products by number of redditors who mentioned them. Here are the top 20.
We found 831 Reddit comments discussing the best spray paint. We ranked the 297 resulting products by number of redditors who mentioned them. Here are the top 20.


Edit: I'M SO SORRY FOR THE ACCIDENTAL CLICKBAIT, THEY ARE JUST STYLED LIKE A PRO-CONTROLLER, MY FAULT
After seeing the countless posts of other custom shell swaps, I figured I had waited long enough to do my own, but with a little modern twist, in this case making them look similar to the pro-controller. I think it turned out really well!
Parts/Items List
Disassembly
The first thing I did, was obviously taking apart my original (Neon Red) shells to be able to switch the parts into my painted shells. I decided against using the transparent battery trays, and instead opted to spray paint them matte black, as it darkens the whole joy-con overall, and it was a very simple paint job. For disassembly and reassembly I used Spawn Wave's Video as it was the clearest, but most concise video I'd found, but any tutorial works fine. The tool kit I linked works wonders, and has everything you'll need, from tri-point screwdrivers to little pliers. I then took all the disassembled pieces and set them into separate containers so I wouldn't lose anything.
Painting
To start off, I washed all the shell pieces with some water, and let them dry, just so no dust particles got trapped. I made a little spray painting "rig" with some cardboard pieces so I could set the front shells on top and ensure I sprayed all sides evenly. I started with 6-7 fairly light coats of the Tamiya Smoke Dye, and made sure it was the right darkness, before letting it dry a few hours. I waited 3 minutes between coats, making sure I sprayed evenly on all pieces. Only issue I did have with the smoke was that it run out of paint right after the final coat, so be aware of that.
Following the dye drying, I sprayed two coats of the Krylon Matte paint, before again letting it dry for a couple hours. I wish I had gone a little lighter on the matte, as a little more transparency would've been awesome, but I honestly can't complain with the final product.
Wrap-Up
After they had completely dried, I slipped the pieces back into the shells (once again following Spawn Wave's video) and sealed it up. Overall it wasn't too difficult a process, but if there are any tips I'd suggest, I would recommend making sure to apply a fair bit of pressure when unscrewing and screwing on the screws. I was close to stripping the phillips head screws on the analog sticks, but luckily I avoided that entirely. One issue I did have with the shells, was that the plus button isn't quite as clicky as before, but it really is only a minor issue. All-in-all I'm very happy with them, and they've got a great matte texture that feels good on the hands. If you've got any questions or clarifications, let me know and I'll help you out!
since this is a shit advice thread, next time use paint sealant. archival safe and prevents uv fading, which means it has spf and is really great for your skin, right?
Uh, I just used some acrylic paint my wife had in her craft supplies. Didn't seem like anything fancy. And I did clear coat it!
Edit: The bottles looked like this!
Edit2: Missed the part where you asked about clear coating, but this is what I used to clear coat.
This is really awesome. I still have parts of this helmet printed but never finished it (its on the list). I'm a prop maker by trade and I just wanted to give you some tips for further smoothing if you're ever so inclined to do more :D
Several layers of filler primer gets rid of the minor print lines on all surfaces. 3-4 layers with sanding in between gets rid of all of them and they come out crazy smooth. Bondo Spot putty is also amazing for anything else the filler primer may have missed.
Another material I've seen used for smooth is wall spackle! Its a bit easier to manage than Bondo/filler primer and a bit easier to sand. note: It does not like to be wet sanded lol.
For example, here's a mask I finished. printed & finished
here's a mask in different phases of finishing
If any one else is interested, I have a full tutorial on this process here
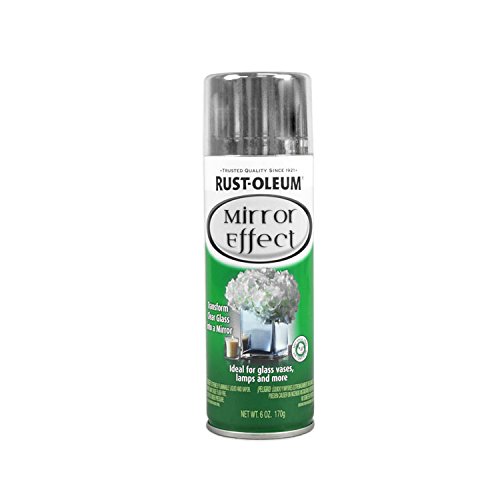
You can buy mirror spray though- that turns glass into mirrors, so you sort of can.
I love charcoal but it takes a bit to understand how to utilize it correctly. In my opinion though, it goes so much faster than full pencil drawings and it gets much more impressive and dramatic results.
One of the easiest techniques is to actually work 'backwards' from a traditional graphite drawing. You may want to pick up some 'Vine' / 'Willow' Charcoal sticks These are very soft but lightly toned pieces of charcoal. You'll scrub one over the entire piece of paper and use a tissue to smooth it resulting in a gray toned background. Here you won't be starting with a pure white sheet of paper.
From there you'll make a gesture drawing of what you'd like to draw with a lighter charcoal pencil (2H or the gray pencil farthest to the right in your drawing tin). After, you'll go in with an eraser and erase out the light areas to almost bring back the white of your paper (those pink rectangle erasers you use/used in school are great for this). After that, you can actually dive in and start shading. You'll start by shading with your lightest charcoal pencils and work your way up to the darkest shades (in your tin work right to left with the gray pencils) Your lightest highlights you can achieve by using a piece of chalk or a white charcoal pencil These will be the absolute lightest parts of the image, so don't go overboard.
From there, just darken and lighten areas until you're satisfied with it.
Some stuff you might want to pick up =
Workable Fixatif - This will help keep the mess to a minimum. You'd spray this after every day that you work on the drawing. (But don't spray it until you've erased out all of the highlight areas!) As the name suggests, it is workable so you can still erase out some of it, but it won't be as forgiving.
Final Fixative
This is the stuff you spray on the final drawing. You're done and you don't want to change anything anymore. You can also use really cheap aerosol hairspray if you want to save money or you don't need a UV-safe protective coating. I've used this in the past - Horrible Hairspray-Great cheap Fixative
Those brown colored pencils and sticks are Conte crayon. They're very similar to charcoal but are made from clay usually. (These are awesome for doing gesture drawings or faces!) I work with these more similar to a graphite pencil rather than charcoal. You can also buy brown toned paper/newsprint to use with them.
Also, I want to add, be careful when you sharpen any of these pencils. Go slowly and be soft with them or you can crack the charcoal inside and it'll just fall out. I've found these work better than other pencil sharpeners when it comes to charcoal. You can also simply scrape the pencil end with an Exacto blade - I've never broken a pencil doing it this way.
Fixative info & Tutorial
Very Basic Charcoal Tutorial - this gives a visual of what I was talking about. The guy does everything in a different order than I usually do, but whatever you find works easiest, just go with that.
More Tutorials Several other tutorials to help you get started.
Sorry for the wall of text, but I hope you enjoy the new media! Give your mom a big hug! Charcoal is great!
If you print them on crack n peel, they won't be able to tear them down so easily.
http://www.amazon.com/Sheet-Diagonal-Compulabel-313053-Compare/dp/B003WZA4B0/ref=sr_1_1?ie=UTF8&qid=1346488693&sr=8-1&keywords=crack+n+peel
You can get it at any office supply shop. It's basically a big sheet of sticker paper. The downside is that it runs when it gets wet. If you're concerned about that, you could probably spray on a coat of clear varnish after you print them.
http://www.amazon.com/Krylon-6-Ounce-Crystal-Acrylic-Coating/dp/B001K65K26/ref=sr_1_1?ie=UTF8&qid=1346488801&sr=8-1&keywords=clear+varnish
The varnish can be found at any arts and crafts store.
___
The downside to all of this is that it costs more (in effort and cash) per flyer.
Art major here, fixative is a really good idea!
That fixative you linked is resin based, and the shadow would still be a little workable/moveable under that fixative. An acrylic-based fixative spray would work better as a final sealant as it would create an almost plastic-like protective finish on the page: https://www.amazon.com/Krylon-K01303A-Crystal-Acrylic-Coating/dp/B001K65K26 is one example.
No matter what fixative you're using, it's important to do a patch test first because fixatives can darken/alter the color of certain mediums. It's also important to work in light layers in a very well ventilated area!
Two-way mirrors are pretty cheap, you can even make some okay ones yourself with some mirror spray paint.
Hey, just saying, if you take off the backplate and coat the face with this artist's spray then it will protect the signatures. I use this stuff all the time and it shouldn't take much to seal a sharpie mark on plastic. You should be able to keep a generally matte finish, while also letting you use it normally.
I would do this whether you want to showcase it or not, since it's also UV resistant and will keep it from discoloring/fading. Just make sure you mask the grills/vents and coat the kickstand separately. You should only need 1 or 2 very light coats. We're talking 30 minutes tops with an overnight dry.
There is a name for the specific ype of spray just to protect "smudgeable" work - "Fixatif"
Here's one from Krylon.
https://www.amazon.com/Krylon-K01306-Workable-Fixatif-11-Ounce/dp/B00023JE7U
People use it when they "finish" a section and want to protect it as they move onto another - but are still able to go back and add additions on top if desired. Its basically invisible.
I imagine once your are totally finished, a flat clear laquer would seal everything and prevent it from ever being changed again.
Keep up the great art!
https://www.amazon.com/Testors-Spray-Lacquer-3oz-Dullcote/dp/B009FF6DN4
I did it on my old snowboard that was not gonna last the whole season.
-Hand Sanded the board with 120-160 grit paper. (my board has originally more of a matte paint on it then the typical glossy coats).
-I cleaned the top of the board throughly.
-I taped with painters tape all around the sides, I cut Q-Tips in half and put them in the binding screw holes to make sure that paint didn't go in.
-Spray painted with black matte with 2 layers.
-I made stencils out of foam paper, I spray with whatever other colors for the stencils
http://www.michaels.com/creatology-value-pack-foam-sheets/M10287634.html .
-After significant drying, I spray painted with a satin clear coat for protection:
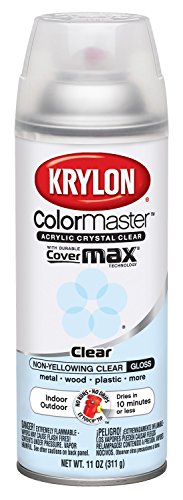
https://www.amazon.com/Krylon-Colormaster-Crystal-Clear-Acrylic/dp/B0009X8LZ4/ref=sr_1_1?s=hi&ie=UTF8&qid=1526492540&sr=1-1&keywords=krylon+clear+coat .
Here is my result:
https://photos.app.goo.gl/hZXQJhVugNizjNel1 .
I would have used perhaps a more glossy finish since the snow stuck on the top of my board more than before with the factory paint. It's not something I would do a newer board personally.
Rustoleom has been making this stuff for like a decade. http://www.amazon.com/Rust-Oleum-214944-Reflective-10-Ounce-Spray/dp/B000LNVC1M
Ive had success with this spray but it comes off fairly easily.
My next project is to install a servo to a switch on the bars that just flips the plates up when going through them.
My recommended buying list for a new painter is:
Tools
Sprays
○ Grey is standard, white if you're painting a majority of light colors, and black if the majority is dark.
Brushes
○ Round 0
○ Round 1
○ Round 2
All in all it should be around $60 USD for the tools and about $40 USD for the brushes. However, this list gives you every tool you will need to get started and to continue with the hobby.
This is just what I like to have on hand, this does not reflect the "perfect list". I hope it helps :)
Retroreflectives are fuckin cool.
Here's some spray if anyone wants to experiment with stenciling, but there's also tape and all kinds of stuff. Fun when everyone has headlamps.
https://www.amazon.com/Rust-Oleum-214944-Reflective-10-Ounce-Spray/dp/B000LNVC1M
These are really excellent for first minis, there's a ton you did right:
It looks like you used some sort of gloss varnish on them, and if I were to offer one piece of advice, it would be to ditch the gloss and use a matte finish like Testor's Dullcote. You can even spray these guys with a matte varnish to tone down their current glossiness.
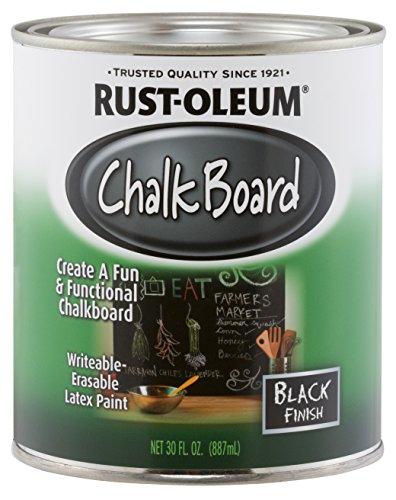
What about chalkboard paint?
https://www.amazon.com/Rust-Oleum-206540-Chalkboard-Brush-30-Ounce/dp/B0006BAEI6
This would keep the doors movable for any repairs, but would make the space look more purposeful with a contrast color.
First off, Welcome to /r/Gunpla and the plastic crack hobby
A few simple things that I think can help make a kit pop for cheap are
1.) Panel lining- basically just drawing in those recessed grooves that are all over. It gives depth and brings out details. The ones i use are like this. Brown for reddish colors, grey for light, and black for darker plastic. Usually $2-4 per marker depending on how you buy em
2.) Nub removal- there are tons of resources for how to do this "properly" and everyone finds their own way. The general consensus is first cut about halfway between the runner (the rounded pipe like stuff that all the parts come in) and the gate (where the runner narrows down and connect to the piece you are actually using).
Then using an exacto knife cut that remaining little bit off and buff the rest with high grit sandpaper 500 or higher works well. Its ok to be a little bit sloppy here because...
3.) Top coat- This stuff will coat the model and make all those sand marks go away. It also makes the model look less "plasticy" and more like the "real" thing. There are primarily 3 types: Matte/flat which is not shiny at all like a military vehicle would be, gloss which is very shiny like a sports car, and satin which is somewhere in between. I prefer matte lke this. Just pop the arms and legs off and spray.
From there you can get into the deeper stuff if you are so inclined such as painting, modding and scratch building. There are plenty of great resources here such as the sidebar guide or falldog's guide which is how I learned.
Sorry for the long post but,
Happy Building!
Special thanks to u/jack2game for the waterslide decal inspiration and tips.
Decal paper (Clear backing, for inkjet printers)
Krylon Topcoat Spray, Clear (Not currently pictured, as these are still drying. I did a test run though and it REALLY takes down the shiny “sticker” look, as well as smooths out all the edges so you don’t feel it beneath your fingers. It also adds a slightly rougher finish, that feels more similar to PBT than smooth ABS.)
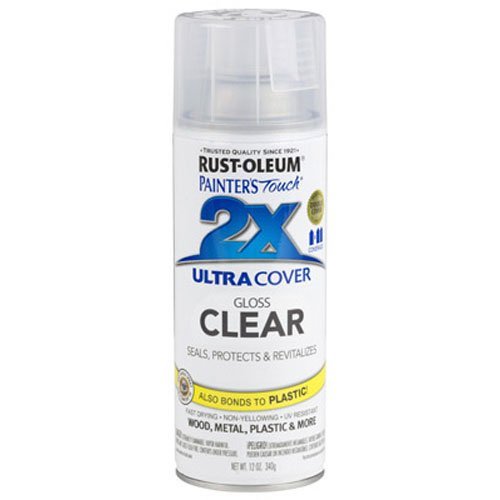
This is what i used and it seemed to dry completely: Rust-Oleum 249087 Painter's Touch Multi Purpose Spray Paint, 12-Ounce, Matte Clear https://www.amazon.com/dp/B002BWORZE/ref=cm_sw_r_cp_api_i_eoIpDb9090GGB
I already tried the 3m rubberized undercoating with automotive paint next and then the clear coat on top of that on an old final mouse to test it out and it turned out GREAT looks and feel wise ... but I made the mistake of trying to coat the side buttons as well and ended up making them too bulky to fit through the hole...also I think I just did too many coatings of the undercoating in general on the entire body which made the side button hole smaller as well....so I just sort of stopped messing with it for the time being seeing as I can’t really order replacement side buttons from FM..
I will definitely be trying it out on another old mouse soon though to perfect what I learned the first time around and tweak that before I do it to a mouse I actually use. I’ll post a picture of my fm in a bit though...
Couldnt resist the sns sale on this pair for about $130. and i knew id be blacking out that boost before i bought. (sorry dont see it available any longer, but its on goat and stockx for 120-160ish depending on size.) i wanted to try the full angelus method since heskicks said it lasted on youtube, and it took me 3 days on and off this weekend.
full photo album progress here with comparison pix in different steps of the method and against "OEM" black adidas boost https://imgur.com/a/5RE2d
STEPS
Day 1 – deglaze and dye. Deglazed before dinner, painted dye layer 1, wait 10 mins then dye layer 2. Let dry overnight.
Day 2 – Dye reducer. Feelgoodkicks on youtube said this was important to eliminate cracking and that purpleish sharpie-like tint, so I tried it. Make sure to very lightly roll a Q-tip over your dye work, otherwise else you can completely remove all your work. Later that day I painted with the flat black paint. Waited 10 mins then did a 2nd layer.
Day 3 – Acrylic Paint. Wait 10 mins and do a 2nd layer. Still looked too glossy to me, so I masked the upper and sprayed with krylon later that day. And a 2nd layer a few mins after as the instructions state to get my finished product. Also added alternate laces and gunmetal grey aglets. Didnt end up using the mink oil since Im worried the boost will gloss up, but I still might try some later.
OVERALL TIPS
With any painting, take your time and do LIGHT layers to prevent chipping/cracking as much as possible.
I didnt mask the upper when painting since i went slowly, but paint brushes are actually easier to use very close to the primeknit than the sharpies were. I normally painted that upper edge first, then used a larger brush to paint the main part of the boost.
Krylon spray was a must. Album has a comparison photo with just angelus finish and its super glossy compared to the krylon finish. Using krylon finish alone, however, the paint rubbed off the boost whenever i touched it. so gotta do both
PREVIOUS POST (sharpie method)
https://www.reddit.com/r/Sneakers/comments/7thl9p/iniki_boost_blackout_oil_based_sharpie_matte/
Since the previous sharpie method rubbed off a bit on my fingers, I retouched with the anglus acrylic finish and then krylon again to get it more matte. Seemed to do the job.
I think for the sharpie method id have to add deglazer and angelus finish. so a total of 4 purchases would be good (deglazer, sharpie, angelus acrylic finish, krylon matte finish)
PRODUCT LINKS
Angelus Leather Preparer & Deglazer 4 Oz - $6.60
https://www.amazon.com/gp/product/B00EU322DQ
Angelus Brand Leather Dye W/applicator - 3 Oz ''Jet Black'' - $6.75
https://www.amazon.com/gp/product/B016QV7XIS
Angelus Acrylic 4 Ounce Paint (Flat Black) - $8.49
https://www.amazon.com/gp/product/B00MPXF6XG
Angelus Brand Acrylic Leather Paint Matte Finisher No. 620 - 4oz - $7.59
https://www.amazon.com/gp/product/B00B5W4LX4
Krylon Matte Finish - $3.47
https://www.amazon.com/gp/product/B005ENZ8CS
Heartybay Nylon Paint Brush Set - $5.98
https://www.amazon.com/Heartybay-10Pieces-Round-Pointed-Nylon/dp/B00V4EG6D6
Much better product: https://www.amazon.com/Testors-Aerosol-Spray-Lacquer-Paint/dp/B009FF6DN4
Nail polish won't hold up in the microwave. It pops/explodes.
I found these two sealants options used for diy painted dishes: Mod Podge Dishwasher Safe and Krylon Crystal Clear. They are both supposed to be dishwasher safe, but I don't think they are microwave safe.
Reflective paint would be harder to prove if pulled over
https://www.amazon.com/Rust-Oleum-214944-Reflective-10-Ounce-Spray/dp/B000LNVC1M/ref=sr_1_1?ie=UTF8&qid=1480431180&sr=8-1&keywords=reflective+clear+paint
I personally swear by Mr Super Clear
Having tried Tamiya, Mr Hobby and Krylon, Mr Super Clear is very forgiving in terms of topcoating. My general experience is that Krylon's particles feels somewhat larger than Mr Super Clear, which will result in a rougher matte finish. While Krylon is easily value for money, it's also meant for larger objects, such as handicraft or table showpieces.
Mr Hobby feels the same as My Super Clear but the small can finishes up quickly. Note that different paint bases may "eat" another layer. For non-painted kits, it's fine but for painted, it's one of the important considerations
Tamiya is also a decent brand but I felt that I needed more coats to achieve the same result as Mr Super Clear.
When I have issues with frosting, a quick layer of Mr Super Clear Gloss will clear the frosting, and I'll matte topcoat it on another day, and the previous frosting will not be noticeable.
An example of my OOB Marasai that was topcoated with Mr Super Clear
The O with the matte coat, doing a decent job hiding the decal edges as well after Mr Mark setter and softer
Don't mind the titanium finish Sinanju, that's uncoated. The Sazabi was matte coated
RG stickers after being topcoated
However, if you're asking for topcoat using an airbrush, I do not have an airbrush set, so am unable to provide any opinion.
Like any hobby the initial cost to start will always be high. You may be tempted to buy cheaper tools but whats the point if you plan on building Gunpla for a while and will end up replacing them. If you only want to build 1-2 kits then you can get away with 2 dollar clippers and a box cutter but it won't give you good results.
Despite the cost these are still the tools I recommend that EVERY Gunpla owner who doesn't plan on painting their kits purchase
A) Tamiya 74035 Sharp pointed side cutters, worth every penny
B) Xuron 410 Side Cutters, very durable at an affordable cost
C) X-Acto X3000, Comfort rubber grip, comes with 2 blades
D) 3 Fine tipped Gundam Markers, Black, Grey and Brown
E) Krylon Acrylic Flat Coat, large can for only $5-6
And that's it.
2)Use the Tamiya cutters to cut the remaining nub, with practice you can get it practically flush to the part.
3)Clean up the nub with a hobby knife. You don't need sandpaper or a file if you did the steps above correctly and the flat coat will mask any scratches.
4)Use the Gundam markers for lining
6)Finally finish with a top coat
Total cost with amazon prime is $65. Yes the Initial cost is high but the tools above will last you for 20+ kits (you will need to buy more blades and flat coat). If you really can't afford that you can save up for the Tamiya sharp pointed side cutters and use the Xurons in the mean time (you will have more work to do).
So $38-65 initial investment to me is really not that expensive
If hairspray doesn't hold it you should try to find a spray on clear acrylic coat like this. Modge Podge would probably smear all of the lipstick.
Thank you so much!
I've only been at it for just over a month now, so I'm no expert by any means, but here's what I found works best for me:
this paper
UV spray
For Cutting
[I use this printer] (https://www.amazon.com/dp/B0798D6XBM/ref=cm_sw_r_cp_taa_.neCDbCF0XZKP)
I started out using regular sticker paper with a cold-press laminate(it was the cheapest route), and they looked and felt really nice...at first. they didn't hold up against weather and water for very long. The laminated part was water proof, but it would get wet under the sticker, and eventually break the sticker apart. They were also hard to make without them getting all scratched up before you even cut them.
I like that vinyl paper a lot. There are a lot of options for it, but that is the most cost effective, and so far, it's been really fantastic. The paper is water resistant, so water doesn't get underneath the sticker and break it apart like the other ones. After I print a page, I spray it with that UV spray. It just gives a nice texture that I like, and keeps them from fading in the sun. I ran a sticker through the dishwasher before I sprayed it. The sticker part held on phenominally well, the ink ran tho. I haven't tried it with the coat, but I don't see myself washing many stickers.
After the spray dries (a couple of minutes), a run it through the Cameo 3. I started out with a Cricut. I actually like the Cricut machine better. It's designed to just work. However, the software is garbage. It's web based, and even worse, it automaticaly arranges your artwork on the page to be printed and cut. That sounds nice, but 99% of the time, it wasted more than half the page. I was throwing out so much paper. There are some workarounds I found online, but they were tedious, innacurate, and not worth the effort. I do not reccommend the cricut until they get their software in line. The Cameo takes a little more fiddling with, but it's more custumizable, and I arrange stickers on the page how I want.
My printer is just that low-end Epson. It works great actually. The only thing I would suggest is getting a printer that you can side-load. I feel like the the paper getting bent through the printer isn't good for the paper, and makes the printing inconsistent (also, it probably has to do with being a cheap printer too). I plan on upgrading, but I already bought a bunch of ink, and I want to get through that first.
MOST IMPORTANTLY, have fun!
Sorry about the novel!
Because it is!
They make paint that will turn any surface into a chalkboard. It really works too, when I was little my parents painted a whole wall with it and it was pretty neat.
Here's a link:
http://www.amazon.com/gp/aw/d/B0006BAEI6
Suit: Cosplaysky Medium. Jacket (Under the vest thing) was short. Didn't tuck into the pants well. I rolled it up and put it under the vest. Under shirt was too small and hood too big so I used a scuba hood. Belt was too large as well, had my mom sew it to make it shorter. I'm 5'7, 40" chest, 32" waist for reference.
Helmet: Xcoser (Paid $30 for it on eBay. Came with a flaw so ended up with 2!). Painted it Rustoleum wine and black. I liked the black face so kept it. 2 coats of flat clear coat. Lenses are made from a soda bottle and car tints then I glued them in.
Chain and gun were from Amazon.
Kept the boots and gloves from my black suit Daredevil from last year.
Happy how this turned out. Won second place in a cosplay contest!
I'll need to revisit the eyes in the future. These were done with scraps at home.
red: https://www.amazon.com/gp/product/B078WM76Q4/ref=ppx_yo_dt_b_asin_title_o04_s00?ie=UTF8&psc=1
clear: https://www.amazon.com/gp/product/B002BWORZE/ref=ppx_yo_dt_b_asin_title_o03_s00?ie=UTF8&psc=1
Buy some clear spray on acrylic. It will take a few coats but you’ll add a lot more life to your pieces.
https://www.amazon.com/dp/B00397STRW/ref=psdc_13399701_t2_B001K65K26
I've heard you can use filler primer for smaller cracks, and bondo for larger cracks/seams.
I would, of course, test how the PLA reacts to the primer, first, though. Wouldn't want to ruin a 20 hour print!
KRYLON DIVERSIFIED BRANDS K01311007 Krylon 1311 Aerosol Matte Satin Finish Spray Enamel 11 Ounce https://www.amazon.com/dp/B005ENZ8CS/ref=cm_sw_r_cp_apa_VVsFAbK6AA0DK
I used this and it was real easy to use. Lol also cause other brands like mr hobby and other brands cant be obtained easily but this was.
One layer of this gloss finish: https://www.amazon.com/gp/aw/d/B013LT5UM4/ref=ya_aw_od_pi?ie=UTF8&psc=1
Then two layers of this: https://www.amazon.com/gp/aw/d/B009FF6DN4/ref=mp_s_a_1_1?ie=UTF8&qid=1502749041&sr=8-1&pi=AC_SX236_SY340_FMwebp_QL65&keywords=testors+dull+coat
After that your paint will never chip and there should be no shine. You could probably use just dull coat but this has been my post painting ritual for a long time now.
Actually, first scan it. Then I would suggest use an acid free spray on it. Notebook paper, newsprint, and other cheaply made paper we use and throw away contains acid which is what causes paper to yellow and become brittle. Acid free spray takes the acid out to make the document archival. Instead of laminating it I would suggest an acid free document bag. I don’t know if some laminations may yellow over time but I do know once it’s laminated it’s in there for good. You can find document bags at art supply and photography shops.
If you frame it, use UV glass. You can get it cut at the hardware store, and some readymade frames come with it. Light is the enemy of paper. Otherwise store it in a dark dry place. Only saying that because I’ve met people who’ve lost important art and keepsakes to wet basements and garages
best markers I've found are POSCA paint markers.
I would do a light sanding with 800 grade sand paper on them, prime them with the backing color you want, and let it dry. Then you can draw on them and clear coat.
I recommend doing it this way, as sometimes if you don't prep the plate first the clear coat can have weird effects.
The items I've used:
https://www.amazon.com/280715-American-Accents-Primer-12-Ounce/dp/B00KZ6LLZW/ref=sr_1_2?ie=UTF8&qid=1491242783&sr=8-2&keywords=Rustoleum+Primer
https://www.amazon.com/Uni-posca-Paint-Marker-Pen-PC-5M15C/dp/B001ANVDMU
The primer you can use black/white/any color for backing, and I use the same brand in a clear matte finish for the clear coat.
Good luck!
The biggest downfall to pencil is it's not permanent, it can so easily be smudged or potentially worn down and you won't be able to read it anymore. However, you could use something like Krylon Spray Fixatif to help preserve it. I mean, there are notebooks and files from decades ago that'd been written in pencil and they're still legible, so if you take care of it, it should be fine.
Don't wait for a particular day or time, start right now!
As for privacy, I'm gonna repeat the advice I gave to someone else. I don't know how old you are, but if you're old enough to make purchases on your own, the company Vaultz makes locking boxes in a bunch of different sizes and they're pretty affordable. You can search on Amazon for "Vaultz lock box." Depending on how many journals you have and the dimensions of the book(s), another option would be a locking bag, the kind companies use for night deposits. Also something you can find on Amazon, I think "locking money bag" should bring up different options. The bag would be easier to hide, you can put it inside your pillow or under your mattress.
I've used this spray in the past to keep makeup in place. I believe I was just drawing on card stock at the time.
I'm using this clear coat spray. It's has a UV sealant added. Will this due?
For me high speed (Dremel/finishing sander) sanding on PLA only made things worse.
The plastic started to melt into the sandpaper, ruining the sandpaper quickly without accomplishing much.
If the details of the print can survive it, the best way to finish PLA is to hide everything under primer paint.
Hit the PLA with 120 and 220 sandpaper by hand. Light and slow are the operative words here--plus patience. 120 may not be needed or may even be counter-productive on 0.1/0.05mm parts.
Do a second pass with 400 grit. The part should be relatively smooth to the touch.
Then I apply filler primer (smaller details, not going to sand, don't want to smother) or sandable filler primer (flat surfaces, larger details, both details and surfaces can be sanded by hand).
Filler primer of either sort works best in many light coats rather than a few heavy applications.
Sand filler primer with 400 (or 220 if there's somehow too much of it). You can even step up to 800, 1000, 1500, and 2000 (I did this to ONE part). Again, light and slow or the sandpaper will quickly pick up paint that is now mashed in, ruining it. Don't bother hitting the PLA with anything above 400 grit--it doesn't work well and eats through sandpaper. You're better off using higher grits on the paint rather than the part.
Finally apply whatever paint or other colors you want on top of the primer.
I highly recommend a competent "shop-vac" to contain dust and lengthen the lifetime of your sandpaper. If you don't sand too "hard" most of the plastic/paint will vacuum right out, greatly extending the lifetime of each piece.
Testors Spray Lacquer 3oz, Clear Coat https://www.amazon.com/dp/B009FF6DN4/ref=cm_sw_r_cp_apa_i_0w51Cb1S127KM
I luckily have a local shop that's a bit cheaper than this but this is good stuff.
Testors Dulcote Spray, little blue spray can, can get it on amazon. Haven’t used another matte spray since! https://www.amazon.com/Testors-Spray-Lacquer-Clear-Coat/dp/B009FF6DN4
Looks solid and I like that those labels allow full bleed printing, too!
If you get any bleeding, get the Krylon spray for a fast top coat.
For anyone interested, I've also used Mr. Color Top Coat and Molotov UV. They're much more expensive, but it works for me since I also use them on my Gundam builds.
https://www.amazon.com/Mr-Top-Coat-Flat-Spray/dp/B0000WS12C
https://www.amazon.com/Molotow-Urban-Varnish-Gloss-Matte/dp/B07214DLBF
Also, for the customizers out there, this is worth the watch. It's a comparison between different top coats.
https://www.youtube.com/watch?v=rKh0nYnivDo
Ok so I havent try this on my Tamas but seeing how the shell is plastic it might work and be a better solution than nail polish. My other hobby is building plastic models and I use a clear plastic top coat to protect them. Needless to say protect the screen with masking tape before doing that, a few light coats should do the trick. Here is what I use:
Mr. Top Coat Flat Spray https://www.amazon.com/dp/B0000WS12C/ref=cm_sw_r_cp_api_i_gkCzCb36VG8ZJ
Also your local hobby store like Michael and Hobby Lobby should have other options. Just make sure they are Flat or Matte not glossy.
You did a watercolor on canvas? Interesting choice, how'd that work out for you? Normally I'd say what you're looking for is a [spray fixative] (https://www.amazon.com/Krylon-1306-Workable-Fixatif-11-Ounce/dp/B00023JE7U) (they sell these at art stores), but I have no idea how they work with canvas. I normally ship larger pieces in bubble mailers, and those clear plastic sleeve bag things work wonders, but I have no idea how thick your canvas is.
[This shipping method] (http://reddotblog.com/how-to-ship-paintings-a-step-by-step-guide-for-artists-and-galleries/) is the approach I would take in your shoes, and if it were me personally I would skip the fixative. Good luck!
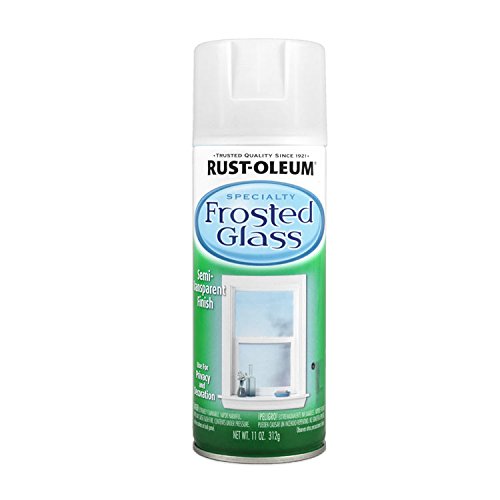
If you already have tubes bent/installed, one thing you could try (was something I considered but didn't end up trying it out) is just applying frosted glass spray paint to them. Could just order a single tube and a can of paint to try it out.
Paint is very cheap too: https://www.amazon.com/gp/product/B0009XCKBA/ref=oh_aui_search_detailpage?ie=UTF8&psc=1
There is reflective spray paint available. I've been thinking about getting it for my foul weather commuter.
http://www.amazon.com/Rust-Oleum-214944-Reflective-10-Ounce-Spray/dp/B000LNVC1M
EDIT: another option is to use reflective glass beads. Process would be something like: paint, coat with beads while tacky, and maybe clear coat.
Plan out your color and drawing first of all. If its something super simple like white, black, red, blue, or yellow, there could just be a primer spray in that color.
So you would just wash the shells with warm water, soap, and one of those yellow/green sponges. as the green scour pad is almost rough enough to remove the top layer of material. Which is about as rough as you want it.
Once theyre clean and dry, hit it with the primer. one good coat from about 12 to 16 inches away should be fine. If you want it really thin, then two single passes (ensuring to cover all of the outside) should suffice.
If the primer is the color you want, then skip this. but if you want a different color, i would suggest Krylon matte spray paints. REALLY THIN COATS, letting it dry in between each one. Until your desired level of color is achieved.
If at any point they begin to "feel" different, you can hit them with a super fine sand paper until they feel nice again.
once your color is down, do your drawing or painting.
Then use a Crystal clear acrylic finish. Similar fashion as to how you applied your primer and paints.
If it goes on too thick, then hit it with a second coat. Let that dry, then hit it with the sand paper.
Clean that off and you can polish it with water and a super fine grit sandpaper.
Not an expert on painting but they make a spray on clear coat that seals, and also adds a shine to whatever you spray it over!
http://www.amazon.com/Krylon-6-Ounce-Crystal-Acrylic-Coating/dp/B001K65K26
Yeah, most spray enamel will work for wood/plastic/metal. Just check the can..you can usually pick it up at any home improvement location. https://www.amazon.com/Rust-Oleum-249087-Painters-Purpose-12-Ounce/dp/B002BWORZE/ref=asc_df_B002BWORZE/?tag=hyprod-20&linkCode=df0&hvadid=193184886406&hvpos=1o2&hvnetw=g&hvrand=8150720537796560605&hvpone=&hvptwo=&hvqmt=&hvdev=c&hvdvcmdl=&hvlocint=&hvlocphy=9030984&hvtargid=pla-308030796454&psc=1
Rust-Oleum 249087 Painter's Touch Multi Purpose Spray Paint, 12-Ounce, Matte Clear https://www.amazon.com/dp/B002BWORZE/ref=cm_sw_r_cp_apa_i_h4KXCbX4BP3TT i found this to work splendedly for a topcoat. And is bigger and cheaper than testors. Another good idea might be getting a top coat for air brushes and airbrush one on.
listen. after you sand and polish. Get this clear coat -- make sure you get GLOSS and makes sure its UV resistant + sticks to plastic. UV is what we're fighting. 3 LIGHT wet coats 2 minutes a part.
This is a before
This is an after with Rustoleum clear coat -- I did this about a month ago and they look exactly the same today. Car washes, rain, hot heat. perfect
full shot
https://www.amazon.com/Rust-Oleum-249279-Automotive-11-Ounce-Filler/dp/B003CT4AM0
For me, I have found this one works the best:
https://www.amazon.com/gp/product/B003CT4AM0/ref=oh_aui_detailpage_o00_s00?ie=UTF8&psc=1
I print PLA. I haven't tested this with ABS, but it probably works just as well.
Need this https://www.amazon.com/Krylon-Aerosol-Matte-Finish-Enamel/dp/B005ENZ8CS
I had the exact same problem when I started painting - I use basic Walmart acrylics, used the testors brush on, and it peeled off a ton of paint. After looking around I saw a bunch of suggestions for Testors Spray Dull Coat, tried it out, and works wonders. Haven't had a problem with peeling paint since. I know a lot of people recommend using gloss coat first for strength and then brushing on matte. That's next on my list to try.
Yep! Also, for the record, Future floor polish is an amaaaaaaaaazing clear coat paint if you have an airbrush.
Materials you need
Duck Brand Silver Mirror tape
Matte finish spray paint. I had left over Dullcote. I would suggest lacquer based spray paint as it has high durability and enamel being next best option.
Not really required. Adhesion promoter from automotive retailer (Autozone/ O'reilly's, NAPA, etc)
****
I'd suggest applying adhesion promoter primer + lacquer/enamel based clear coat for the best results. I kind of regret skipping the primer as my top coat has already been scraped.
I sprayed the entire* case. I didn't like the gloss finish.
Spray multiple light coats and be patient. Don't let anything pool and/or run.
As for the tape, just cut to size and stick it on the bottom. I covered like 90%. You can probably be meticulous and cover more than I did. Now that I write this, maybe sticking some on the bottom of the PCB will help as well. Just make sure not to cover the RGB lights, of course.
After you finish the mini (for example after using a wash, which I highly recommend) matting your miniature will seal in the paint and give it really strong protection from chipping.
I use two light layers of Krylon Matte Finish followed by one light coat of Testors Dullcote both of which you can find at Michaels (and probably Hobby Lobby). It feels slightly like overkill, but you would have a hard time chipping the paint after both.
https://www.amazon.com/Testors-Aerosol-Spray-Lacquer-Paint/dp/B009FF6DN4/ref=sr_1_1?ie=UTF8&qid=1487456377&sr=8-1&keywords=testors+dullcote
I've been using this for the last 2 years with no problems.
Second-ing everything that has been said so far. Primer first, paint it, matte varnish to protect. Personally have been using Testor's Dullcote for years with great success.
If you didn't prime first, I would suggest taking the paint off (stripping) and repainting. If you put the varnish on top with no primer underneath, your paint will still chip off in chunks (got greedy, tried it, didn't end well).
I agree they're definitely too glossy. I've been using Mod Podge Clear Acrylic Matte Sealer, but it doesn't seem to go on matte at all. Maybe I need a few more passes? I also ordered a can of Testor's Spray Lacquer because that's what I saw Sorastro using in some of his guides. Any other recommendations for products that would give me a better matte finish?
Funny you pointed out the black and red, those were the only colors I used straight from the bottle and didn't mix with anything. I'll definitely try to thin them out next time.
Thanks for the critique!
Np, https://www.amazon.com/Testors-Aerosol-Spray-Lacquer-Paint/dp/B009FF6DN4
Edit: make sure you get the right finish i.e. Gloss/Flat
This video uses Army Painter's Quickshade, which also gives the muddy look you're after. While different from a wash, the method is the same if you're treating the entire mini with nuln oil. Keep the shadow areas dark and whisk away shade on the highlighted areas. Or simply darken the areas selectively with the wash.
I'd recommend Testor's Dullcote for a good spray matte varnish. You can find it at most big box and craft stores also.
Just use mailing label sheets, design your labels in your software of choice, and then spray the printed labels with something like this product
Rust-Oleum 267727 Specialty Mirror Spray, 6-Ounce https://www.amazon.com/dp/B00FMRXJW2/ref=cm_sw_r_cp_apa_06L1BbWXAW89Y
Already put in a can by yours truly... Rustoleum
I generally use the black version of this:
https://www.amazon.com/gp/aw/d/B00KZ6LLZW/ref=mp_s_a_1_5?ie=UTF8&qid=1525458432&sr=8-5&pi=AC_SX236_SY340_QL65&keywords=rustoleum+primer+spray&dpPl=1&dpID=411BtTZGTJL&ref=plSrch
It is relatively inexpensive and plastic safe.
Alternatively you can use Games Workshop's spray primers, but they are really expensive.
Well there are a few things that could've gone wrong looks like.
Firstly, which topcoat from Mr Hobby did you get? Did you use an airbrush and used the mr color lacquer line or did you use Mr. Topcoat like this one (Short can same size as a Tamiya sprays) or Mr. Superclear like this one (Tall can same size as Tamiya primer)? Mr. Topcoat is acrylic based, while Mr. Superclear is lacquer based.
If you used the first can, it's actually acrylic based which is also what the gundam marker eraser is designed to remove (acrylic-based paint or alcohol-based paint).
Another issue could've been simply because you rubbed too hard. Regardless if you use lacquer-based or acrylic based paint, if you rub too hard against the painted plastic piece, you'll eventually rub some of the topcoat off.
The major impact is due to the Matte top coat:
Mr. Top Coat Flat Spray https://www.amazon.com/dp/B0000WS12C/ref=cm_sw_r_cp_api_i_DdWuDbQHS4ZJE
They are VERY cheap in Japan but good luck importing them at a good price.
This is Topcoat (cost less than this like 10USD) it makes the plastic less glossy ( makes it look way better without having to paint) also protects the plastic and panel linings
I use this stuff. A bit pricey, but can be found at lower prices than Amazon if you look around. Works great. Nice flat finish. (If you want certain parts to be shiny you will need to go over them afterward with 'Ard Coat or some other gloss medium.)
https://www.amazon.com/Mr-Top-Coat-Flat-Spray/dp/B0000WS12C
You can use a clear acrylic spray. I have used such things on top of paint and on bare wood before. They work pretty well. Something like this (although I haven't used this particular one)
https://www.amazon.com/Krylon-K01303007-Acrylic-Crystal-11-Ounce/dp/B00023JE7K/ref=sr_1_2?crid=30K139CPKTBES&keywords=clear+acrylic+spray&qid=1556910026&s=gateway&sprefix=clear+acrylic%2Caps%2C399&sr=8-2
You could probably spray it with fixative.
It'll keep it from yellowing and smudging.
If you don't want the glossy coat, you can just Amazon search fixative.
I use this to set my decals
Huge improvement! Did you give the whole thing several coats of clear lacquer finish? If not, you should. Make sure you take the panel back off first, of course.
Workable fixatif if you want to work into it anymore
Krylon K01306 Workable Fixatif Spray Clear, 11-Ounce Aerosol https://www.amazon.com/dp/B00023JE7U/ref=cm_sw_r_cp_api_ZGn5ybBP9HY9V
Liquitex spray varnishes for final
http://www.dickblick.com/products/liquitex-spray-varnish/?clickTracking=true&wmcp=pla&wmcid=items&wmckw=01436-1010&gclid=CJfqvqOfjdMCFdgGgQodtDUNdA
I use these almost daily. MFA, teacher, multi media artist.
Oh. I was also walking down my hall and remembered I had a UV archival gloss spray by krylon.
Edited to add spray
The charcoal contrast looks great. I found this video which is very relevant to your drawing. It's a mixed graphite/charcoal drawing of the beautiful Audrey Hepburn. She has jet black hair like Alita in the reference photo.
Yes, use graphite first and then charcoal last. You can prevent smudging by using a piece of paper to rest your drawing hand. When you're finished with your art, you can spray it with a fixative like this which has a matte finish.
Here's a secret weapon to use for values: a value chart. Our eyes deceive us. When dark values are next to semi-dark values, the semi-dark value can appear much lighter than it is. Print out the chart and place it on the reference picture and all areas where the value changes on Alita's face. You'll get a sense of how dark or light the values are in the reference. Then use that value chart on different areas of your drawing and you'll know where you need to darken or lighten.
Here's another secret weapon: the proportional divider. You don't need to use grid lines. Actually you can use none or only a few lines. Some people claim it's cheating, but that's nonsense. You still have to draw the picture and it will improve your sense of proportion. Here's the dirty secret: many portrait artists will use it to check their drawing. They will draw it freehand, but will check the proportions with the divider or compass or pencil. Here's the quick video and here's the longer video by an art teacher.
I don't see many comments on actual technique, but I believe sharing ideas is very important.
conviviality
Working Fixitive
I really would like this because I am super paranoid about smearing artwork. I've been using hairspray, but it can warp and discolor over time. Would love to 'set' my work from session to session.
I haven't used it for makeup, but I've been using this stuff for a few years for art-related projects. One quick coat works like a charm and keeps most of my projects from smearing and transferring. On things that have a lot of pigment, I sometimes use a second coat just to be sure.
Krylon K01306 Workable Fixatif Spray Clear, 11-Ounce Aerosol https://www.amazon.com/dp/B00023JE7U/ref=cm_sw_r_cp_api_i_1Aj.AbWR9QH7B
I've also used AquaNet hairspray in the past and gotten similar results.
If I were to use tape, I'd think just a clear packing tape of sorts could work? Hmm. Now I'm curious. Haha. Regardless, good luck with it all!
If you wanted to stick with pencil/not have to go over that in pen, you can always try [this.] (http://www.amazon.com/gp/aw/d/B00023JE7U/ref=pd_aw_sbs_201_1?ie=UTF8&dpID=41xJ1LuWmgL&dpSrc=sims&preST=_AC_UL100_SR100%2C100_&refRID=08WE7KV5614XDKSG03XR) It's basically sealant to help prevent smudging.
Just thought I'd throw that out there. :)
Hope you find something you like. :)
I just realized I forgot a couple of things, and Amazon is working again, yay!
Krylon setting spray - it's the only setting spray I've ever used, but it sets well, as long as you don't try to change it - quite easy to edit imo (you can look at my recent post, Greyscale portrait, to see that it didn't stop me from editing at all -- and that picture was months old.
Also, I got this lapdesk when I had surgery but still been pretty useful when I want to go outside or color in bed.
My top recs would BV electric eraser and the blending pencils, but I've included everything I consider worth having. :)
I am linking this Chalkboard Paint. And I think it would be just fabulous because it is currently snowing in NY (which one could argue is just colder rain) and I am in the mood to paint a fun & functional wall somewhere in my house. I also kind of want to paint a big chalkboard for my office for the kids to use. They definitely don't have real chalk boards in school anymore. Plus it's under $10 and prime eligible.
Rust-Oleum 206540 Chalkboard Brush-On, Black, 30-Ounce by Rust-Oleum http://www.amazon.com/dp/B0006BAEI6/ref=cm_sw_r_udp_awd_3SYetb1J8HNJV
The old man in snoring
It's painted on. You can make the board any size, shape, etc. I plan to do this for our son when he gets older.
I would suggest using some of that whiteboard paint or chalkboard paint for the top. Minimizes the number of pieces that can be lost by the drunks.
I don't really know that stuff either. This is what I used.
https://www.amazon.com/gp/aw/d/B0009X8LZ4/ref=sxts1?ie=UTF8&qid=1485391722&sr=1&pi=AC_SX236_SY340_FMwebp_QL65
I spray with Krylon clear, let set for 24 hours then finish with testors dull coat.
https://www.amazon.com/gp/product/B0009X8LZ4/ref=oh_aui_search_detailpage?ie=UTF8&psc=1
https://www.amazon.com/gp/product/B009FF6DN4/ref=oh_aui_search_detailpage?ie=UTF8&psc=1
Instant frosted glass. http://www.amazon.com/Rust-Oleum-1903830-Frosted-Glass-11-Ounce/dp/B0009XCKBA And you can use painters tape to make a design.
Call 911, make a death threat. After SWAT busts down your door, file an insurance claim and get a new door.
Less creatively, a can of Rust-Oleum Frosted Glass is $3.67 from Amazon.
https://www.amazon.com/Rust-Oleum-7778830-Enamel-Bar-B-Que-12-Ounce/dp/B0010O0C94/ref=sr_1_3?ie=UTF8&qid=1483941402&sr=8-3&keywords=high+temperature+paint
Unfortunately, repairing porcelain enamel surfaces isn't a DIY job. There are some products for bathtubs and there are high temperature enamel paints, but those aren't porcelain enamel coatings. There are companies that can refinish the item for you, like this one, http://www.ipe-porcelain.com/, no idea if they are any good though.
If this for an oven, and the part doesn't actually touch food, I'd contact Rustoleum, they make high temp enamel paints for grills, I'd imagine an oven a similar enough to be okay, though you might need bake in the finish before cooking food in it. https://www.amazon.com/dp/B0010O0C94/ref=cm_sw_r_cp_awdb_t1_x0J3BbHXPYC45
A high temp barbeque paint would work wonderfully for what you're looking for. You're only painting the handles, which won't be in direct contact with food I assume. There are a few colors available, but pretty limited, so a varied stripe pattern might work.
They're designed for a grill which is near high temperatures and food safely, but not in direct contact with the food. You could check with the customer support at Rust-Oleum to be sure it's safe on kitchen cookware but I can't see a reason it wouldn't be.
Buy a can of stove-black at the hardware store. something like this. Cheap and easy to apply, but do it outside (LFMF).
I've never tried it, but maybe you can use Clear Matte paint. I've used it for paper, so it'll probably work with card stock.
I've had my copy for like 5 years, and it doesn't show much wear..
I'm based out of the US so I don't know what brands are available to you. I've used two brands:
Krylon: I bought a big can like this from a local hardware store for about 3 USD. It does an okay job. It's a sort of flat finish but there's still a touch of shine to it. For bulk spraying it seems like a good deal but it's not the most beautiful finish. I assume most of the clear flat/matte sprays will be roughly this quality. One of these has lasted me through like 4 or 5 HG kits so far.
Testors: I bought some of this from a local hobby shop for about 5 USD per can. It's a lot less spray for a bit more money but the finish on this was great. One of these seems to do one or two HG kits.
If you're painting a model kit, try your best to acquire paints and topcoats specifically for plastic/plastic models. If you're in the US, Testors, Tamiya, and even Krylon can work as good flat coats and each brand has a respective gloss and semigloss spray.
Its all about putting on a coat or 2 of clear acrylic spray paint after painting (like this kind). Another good thing to do is to sand it down with 400 grit or higher sandpaper before painting if you're painting the entire body.
try using a glossy artist fixative, coat the entire glass so it won't chip away, and use two layers of coat minimum. I've used a matte finish before and that lasted three months, if you aren't using the glass then it should last forever.
Hopefully this will work just fine
Artist fixatives help avoid fading from sunlight, and since I see that's a valid concern in this thread I'd be excited to suggest this product. Us drawing types use this to protect pretty much any type of work and it's held up on my own pictures. The glass I mentioned lated for three months, but I think the fault was that I used a workable matte finish rather than and acrylic glossy. It should coat your glass in a thin film that will protect the signature just fine, if you put it in a display case or a trophy stand it ought to last forever! Hope I helped!
Why not just spray coat the parts with some type of clear coating to keep the look of everything? Would something like this work to keep the 'look' including the sticker in place as well as the shellac chips as they are? I'm not too knowledgeable on the paint finishing side of life.
http://www.amazon.com/Krylon-6-Ounce-Crystal-Acrylic-Coating/dp/B001K65K26
Thanks for the input. Is Crystal Clear some sort of varnish/paint/lacquer? Something like this: Krylon Crystal Clear spray, amazon.com
Rather than struggle with print settings, it might make more sense to spray it with a waterproof, clear sealer like this one.
I've used this stuff:
http://www.amazon.com/Krylon-6-Ounce-Crystal-Acrylic-Coating/dp/B001K65K26
or just look up acrylic clear coat
Thanks! I used this 2 coats of this one: https://www.amazon.com/Rust-Oleum-249087-Painters-Purpose-12-Ounce/dp/B002BWORZE
I think it’s a great buy!
I would print at the highest resolution possible. Then use a spray paint enamel protective coating. Apply multiple layers until you get a thick, glossy, smooth coat. I just tried this this past weekend and the results were pretty neat! You can still kind of see the layers, but the surface is very smooth and shiny to the tough. Plus it kept the original color of the PLA.
This is exactly what I got:
Rust-Oleum 249117 Painter's Touch Multi Purpose Spray Paint, 12-Ounce, Clear https://www.amazon.com/dp/B002BWOS5I/ref=cm_sw_r_cp_api_ifBJxbFZ63HHJ
A clear that is UV resistant. Rustoleum makes one that should work
https://www.amazon.com/Rust-Oleum-249117-Painters-Purpose-12-Ounce/dp/B002BWOS5I
If the damage is done by UV radiation, couldn't you just coat the cases with something like this?
https://www.amazon.com/Krylon-1305-Coatings-11-Ounce-UV-Resistant/dp/B00397STRW
There are many ways to do this. If you print with ABS, acetone vapor smoothing is a pretty good option. You can also try a clear coat paint, or simply sand the object with sandpaper. There are also more novel coatings such as xtc-3d, but those tend to be pretty expensive. The method you proposed with gorilla glue might work, though you might want to thin it down with a solvent such as denatured alcohol to make it easier to apply and not have visible brush marks.
An aerosol clear with UV protection
This is what you seek.
https://smile.amazon.com/gp/product/B00397STRW/ref=oh_aui_detailpage_o01_s00?ie=UTF8&psc=1
I usually dont have much to fill, just need to hide layer lines if I choose too. I use a filler primer, usually rust-oleum
Edit: thats not the exact one, just first result on amazon
That's super cool. With your blessing, I might do something similar for a friend's upcoming wedding.
In case you haven't seen it, filler primer is amazing for priming 3d prints for paint. Give it a few coats, hit it with sand paper/files, and you get an amazing, smooth surface, but that doesn't obscure details.
This is what I usually use. Pretty much whatever the hardware store has, though.
Is this what you're referring to
https://smile.amazon.com/KRYLON-DIVERSIFIED-BRANDS-K01311007-Aerosol/dp/B005ENZ8CS/ref=sr_1_1?ie=UTF8&qid=1522899001&sr=8-1&keywords=Krylon+Matte+Finisher
I painted a similar bear and had trouble with glossy fur. To get around it, I sprayed a few coats of Krylon Matte Finish.
Testor's dull coat, after you're done painting and before you put any flock/grass/ w/e down (as it will weight it down and can look bad), just spray them like you would with priming them (short bursts from a distance). Let that set overnight and make sure to do this outside and/or in a well ventilated area as it has a strong odor that will linger. If you have to do it outside, leave them outside for at least half an hour and you'll be good to bring them in with minimal odor to finish curing.
​
After that you can put down any grass/flock on the base.
​
One caveat, if you have a lot of metallics on your guys this will be dulling them (this is matte after all), so gotta weigh durability with shinyness for if you want to varnish them. I usually still do for miniature games like this, as things bump a lot over time and are handled a bunch. The metallics are still metallics and show, just not as nicely as they did before varnish.
It does. This is the one I use, although I'm not sure if there are others.
It offers some level of protection, and I've only had one mishap (too humid). 9/10 would recommend. IMO the only problem is that the cans are too small.
If you want markers for panel lining, I posted in another thread - these are all you'll probably ever need: http://www.amazon.com/Triplus-Fineliner-Pens-Metal-Assorted/dp/B0007OEE7E/ref=sr_1_1?ie=UTF8&qid=1416514362&sr=8-1&keywords=staedtler+triplus+fineliner
They clean up wonderfully. A Q-tip dipped in 91% isopropyl alcohol will swipe off any pigment that shouldn't be somewhere.
I've used nothing but Alclad flat and matte topcoat, but if you don't have an airbrush, Testor's Dullcote is an industry standard: http://www.amazon.com/Testors-Aerosol-Enamel-3oz-Dullcote-Lacquer/dp/B009FF6DN4/ref=sr_1_1?ie=UTF8&qid=1416514426&sr=8-1&keywords=testors+dullcote
Depends if you want a glossier or dull finish, but something like this should be fine. Read reviews & directions. Shake well. Ventilate. Start spraying away from figure, then sweep over figure. Light coats and let dry THOROUGHLY before thinking about another layer. Mess this part up and it’s hard to go back.
Hope this helps!
Those are great tips! I sprayed holding it slightly far away as I didn't want to drown out the detail. I don't think I started the spray off to the side though.
Regarding salvage, would the tackiness go away after I apply a coat of lacquer? I bought this, https://www.amazon.com/Testors-Aerosol-Spray-Lacquer-Paint/dp/B009FF6DN4/
Some other folks here are saying just paint over them. I have no hesitation about doing so but I really don't want them to be tacky forever.
After I paint any mini, I varnish it with gloss varnish, and then, most importantly spray the entire thing with Testor's Dulcote. It makes everything beautifully matte.
https://www.amazon.com/Testors-Spray-Lacquer-Clear-Coat/dp/B009FF6DN4
Testor's spray lacquer is a really good one too and is less glossy... https://www.amazon.com/Testors-Spray-Lacquer-Clear-Coat/dp/B009FF6DN4/ref=sr_1_1?ie=UTF8&qid=1526335596&sr=8-1&keywords=testors+dullcote
A few questions, followed by some suggestions:
Do you use your Citadel paint right out of the bottle? You might lose some of that gloss if you dilute your paint, which is something nearly all good painters recommend. I used the Citadel paints right out of the bottle for years, without knowing that. Thin the paint to the consistency of milk, more or less.
Yes, you should use a sealer, absolutely. Yes it does protect the final finish, but judicious use of it can help in other ways. But a matte sealer is critical. You can spray the entire finished piece with matte sealer, but that can ruin some of your metallic finishes. What I sometimes do is finish the piece, spray the entire thing with one or two LIGHT coats (always) of matte sealer. Then if you have any pieces of armor, or glass, or anything that should be shiny, you can then apply gloss or satin sealer with a brush to those areas to those areas only to bring the shine back. But truly, the matte brush on sealer, (or matte paints) really adds to the "realism" of the piece.
Also get some "flow-aid" and add a drop to your shades and washes. It helps break up the surface tension and helps the paint move around into the crevices. Try
https://www.amazon.com/gp/product/B0009H0HWK/ref=oh_aui_detailpage_o00_s00?ie=UTF8&psc=1
For an excellent spray matte sealer try this one. Been around for years and still one of the best flat finishes out there:
https://www.amazon.com/gp/product/B009FF6DN4/ref=ox_sc_sfl_title_6?ie=UTF8&psc=1&smid=ATVPDKIKX0DER
Finally, go to CMON and download this painting guide if you've got an extra 10 bucks laying around. Very good guide, even for the pro.
https://www.coolminiornot.com/shop/ultimate-painting-guide-link.html
And don't forget to visit https://brokenpaintbrush.com/. Sign up for his newsletter, he sends out free tutorials every week. Also check out his Youtube channel.
Keep it up, nice work!
You could always try a UV spray maybe like this Krylon Preserve It! aerosol. I would make sure to try it on something that you don't mind damaging first to test how it takes, but it claims to have UV protection.
I keep my games in a set of shelves in our "office" space, along a wall. There's a window in the room, but since the office is hardly used, the blinds remain shut, so the light in there is very filtered. The only downside to this is that the games are upstairs, in a room where we don't play them. It's nice to have the games somewhere central.
on my most recent bouquet i used this and so far so good with it! although in the past i've honestly just used regular hairspray and that's worked just as well.
just remember that they will be brittle no matter what so i suggest putting them in a plastic box if you're just wanting to store them or a glass display case (like this or this - or even a shadow box that can be found at most craft stores!) if you want them on display!
if they've made it this far, putting them in a protective case is probably your best bet overall because the moisture is already dried out & they're more at risk of being damaged by being bumped & moved than anything else really.
hope this was somewhat helpful & best of luck!! :)
It's $15 a can but $8 on Amazon
Howdy all,
I'm fairly new to the hobby and been experimenting with painting up an army of salamanders. I tried using black then grey primer but that always made my greens too dark for my taste when using the GW formula or Waagh flesh, Warpstone Hlow, Moot green, they looked more like Dark Angels. I can get the shade I want with white primer, but the base coat is always going on very spotty and uneven. I've tried thinning my paints with more water but that made it worse. I tried only thinning it with the water in my brush and that made it better but it still collected in spots. You can see that in the first picture above marked “1 thin coat”. Another thin coat helps fix this but the paint job is still very uneven. I then have to do another thin coat in spots that are really white to try and bring it out, that is the second picture marked 2.5 thin coats. When I then do the Warpstone Glow and Moot it still runs and puddles in large blotches and doesn't look very even.
Could this be a problem with the primer? I'm using white Rust-oleum 2X ultra cover primer.
https://www.amazon.com/Rust-Oleum-American-Accents-Ultra-Cover/dp/B00KZ6LLZW
I've used the same brand in grey and never run into this issue. Is this just an issue when painting on white surfaces? I know it can be a real pain sometimes. I'm also thinning my paints with clean distilled water and tried various amounts of thinning.
Definitely need new primer then. This or this is pretty good, can't really go wrong with it.
Here's a big fat messy shopping list I made for someone a while ago. You might find it useful too.
http://www.amazon.com/Quickshade-Ink-Warpaints-Army-Painter/dp/B00HC8D80W
Amazon.com: Quickshade Ink Set Warpaints Army Painter
http://www.amazon.com/Pacer-Technology-Zap-Zap-Adhesives/dp/B00SXJJ2QI
Amazon.com: Pacer Technology (Zap) Pacer Technology (Zap) Zap-A-Gap Adhesives, 1 oz
http://www.amazon.com/General-Pencil-Company-Masters-Preserver/dp/B0009RRT9Y
Amazon.com : General Pencil Company The Masters Brush Cleaner & Preserver 2.5 0z. : Brush Soap
http://www.amazon.com/Army-Painter-Wargame-Starter-Paint/dp/B01BJ55UDQ
Buy Army Painter Wargame Starter Paint Set - PLUS Promo Undead figure
http://www.amazon.com/280715-American-Accents-Primer-12-Ounce/dp/B00KZ6LLZW?
Buy Rust Oleum 280715 American Accents Ultra Cover 2X Spray Paint, White Primer, 12-Ounce
http://www.amazon.com/TEKTON-6655-Needle-File-10-Piece/dp/B000NPUKYS?
TEKTON 6655 Needle File Set, 10-Piece
http://www.amazon.com/Xacto-X3311-Precision-Knife-Blades/dp/B0000DD1N4?
Buy Xacto X3311 N0. 1 Precision Knife With 5 No. 11 Blades
http://www.amazon.com/Most-Wanted-Wargamer-Set/dp/B007H4YR8S
Amazon.com: 1 X Most Wanted Wargamer Brush Set
http://www.amazon.com/Xuron-170-II-Micro-Shear-Flush-Cutter/dp/B000IBSFAI
Xuron 170-II Micro-Shear Flush Cutter: Wire Cutters
http://www.amazon.com/Milliput-Standard-2-Part-Hardening-Yellow/dp/B011BO9R5W
Amazon.com: 2 X Milliput Standard 2-Part Self Hardening Putty, Yellow/Grey
Edit: Of, and I used this guide for making my Thinner. http://www.reapermini.com/Thecraft/15 But I'm going to experiment more, because this is not perfect.
This community has been great with answering so many questions but this is the first time I can’t find the question I’m asking
I’m hoping to step up my building with adding paints. So my questions are
1.For now I just want to paint the Master Grades inner frame. From what I’ve gathered, this would be a neat inner frame color but do I need to prime the inner frame ?
2. Assuming the inner frame is spray painted with question 1’s spray can and I go about my regular building process, when I matte topcoat finish with this, will it react it some weird way with the inner frame color ?
I'm planning on top coating some HGs. I'm also using gundam markers for small details and the pour type markers for panel lines. Which top coat would be better: tamiya, mr. hobby top coat, mr. premium top coat spray, or mr. super clear, or maybe anyone have other recommendations?
Hey guys, I'm looking to build my first serious Gunpla here soon (built a bunch when I was a kid) and I want to finish it with a top coat. I've found this item from Mr. Topcoat, which seems good, but I was wondering if there are similar options in larger quantities or for better prices?
I used this on my wing SD and it destroyed my acrylic paint. If you spray it on bare plastic I would spray it slowly and it two or three layers.
Too much lacquer paint on PLC plastic can cause warping if your not careful as well.
I use lacquer top coats only after the gloss coat(gloss coat makes panel lining and decal/stickers easily)
I and a lot of others on here use Krylon, https://smile.amazon.com/Krylon-1303-Acrylic-Crystal-11-Ounce/dp/B00023JE7K/ref=sr_1_2?ie=UTF8&qid=1484763744&sr=8-2&keywords=krylon+clear+coat
It much cheaper and more widely available in brick and mortar.
I've started using spray-on acrylic coating like this on my boxes. It's easier to apply and creates a more even finish than Mod Podge. :)
Krylon 1311 Matte Finish has been mentioned here before as being a good budget topcoat. I picked up a can at Wal-Mart for $4 but haven't tried it yet.
They also have the [1303 Gloss Finish] (http://www.amazon.com/Krylon-1303-Acrylic-Crystal-11-Ounce/dp/B00023JE7K), I assume it's also as good, maybe? I haven't used either so I could be way wrong.
TY for the work and documentation. Not the form factor I was planning on, but might be one I use.
https://www.amazon.com/Krylon-1303-Acrylic-Crystal-11-Ounce/dp/B00023JE7K/ was great to find as your coating, as it's one I own but have, but have never used.
Do you have a link to the linen paper?
Would this be an ok gloss coat?
Krylon K01303007 Acrylic Spray Paint Crystal Clear in 11-Ounce Aerosol https://www.amazon.com/dp/B00023JE7K/ref=cm_sw_r_cp_api_LQLdzbNE36NXP
Which one of these sprays should I get to coat it?
1. 2, or 3?
I would bet you used latex paint. That can interact with the amiibo paint and make it permanently tacky from what I have read.
Use acrylic and something like this to seal it. You could potentially use that spray to get rid of the tacky feeling that's there now. I chose this in Matte rather than gloss.
Best case scenario, use very thin layers, but like three of them. Like dab your paint brush in water first, then layer the paint on.
Okay so would this top coat work? or maybe this one An extra question. Would I place stickers before gloss coat or after gloss and before matte?
I'd have them sign with it sitting on a table or something - a lot of those things will run/drip if you're pressing too hard. Obviously you'll want to test a few different markers or whatever.
Fixer is all I've ever heard it called - some brief research tells me what you're looking for is artist's fixative. Stuff like this, but there's a whole category of them. Different fixers for different mediums (chalk, paint, etc). The main idea being to keep stuff from smearing, but if you plan on putting it up on a public wall or something in the future, you'd cover that later with a topcoat so grubby finger oils won't cause problems.
I use a heavy two coats of Krylon workable fixatif
AMAZON: https://www.amazon.com/Krylon-1306-Workable-Fixatif-11-Ounce/dp/B00023JE7U
haha. Yea, I thought it was a cool element, anyway. :)
Yes, I did! I sprayed it in two coats with Krylon Workable Fixatif. from about 12 inches back.
edit: added link.
http://www.amazon.com/Krylon-1306-Workable-Fixatif-11-Ounce/dp/B00023JE7U/ref=sr_1_1?ie=UTF8&qid=1415663456&sr=8-1&keywords=workable+fixative
It's not really a wax, it's more of a spray. And yeah, gonna be the same style for a while. Was thinking about just trying it out to see what it does on a small section.
This is what it actually is by the way, not at all meant for hair but it's a synthetic wig anyway.
Harry potter is life
Thanks for the contest!
I think the biggest thing that makes me happy lately are my 2 puppies. They've been there for me through a lot of hard times and are always up for cuddles. I love them and they are pretty awesomleyfantasticsauce! :)
this would make me happy because I love all things chalkboard! YAY!
:D
It's chalkboard paint.
make some chalkboards and have plenty of colored chalks.
linkin logs are way more fun than makes any sense, and very low mess. hurts less to step on than lego, and can be used as fuel in case of emergency.
So basically this:http://www.amazon.com/Krylon-Colormaster-Crystal-Clear-Acrylic/dp/B0009X8LZ4/ref=sr_1_1?ie=UTF8&qid=1458077276&sr=8-1&keywords=gloss+spray+paint
And this: http://www.amazon.com/gp/product/B00CSXMDZM?psc=1&redirect=true&ref_=ox_sc_act_title_1&smid=ATVPDKIKX0DER
I searched through the sub some, and found that someone suggested using a light coat of this http://www.amazon.com/Krylon-Colormaster-Crystal-Clear-Acrylic/dp/B0009X8LZ4?th=1&psc=1
I'm still a little hesitant tho because the IDs were $150 and I don't really want to ruin them.
https://www.amazon.com/Krylon-Colormaster-Crystal-Clear-Acrylic/dp/B0009X8LZ4
That is what is currently being used. I don't see how this helps all that much to be honest. They have been doing this for years though.
We also handling the boards to much imo. We get them from our supplier then program them, test them, spray them then mount them. Ideally it'd be nice to find a company that could send them 100% complete to us. If you have any recommendations that would also be appreciated.
http://www.amazon.com/Krylon-Colormaster-Crystal-Clear-Acrylic/dp/B0009X8LZ4/ref=sr_1_3?ie=UTF8&qid=1457397610&sr=8-3&keywords=clear+coat+spray+paint+plastic
That's what I used, it seems to be holding up pretty well too.
It may come down to a difference in printers. Mine dries really quickly and isn't prone to smearing because I have a transparency print setting built in. Yours might use more ink or a different type of ink or something. If the ink continues to be annoying, I highly recommend spraying your sheets with something like this before you put them on the cards.
https://www.amazon.com/gp/product/B0009X8LZ4/ref=ppx_yo_dt_b_asin_title_o02_s00?ie=UTF8&psc=1
Works well on cardboard and plastic, in my experience!
I bought this necklace from COS a while back and the gold finish is rubbing off the chain and it's getting a metallic smell. Does anyone have a great solution for this? After about 30 seconds of research I ordered this Krylon spray but I was wondering if anyone knows of a better solution before I spray it down.
don't know what OP used, but there are spray cans for frosted glass.
http://www.amazon.com/Rust-Oleum-1903830-Frosted-Glass-11-Ounce/dp/B0009XCKBA
I came here to say film too. They also make a spray paint version here.
This is supposed to be for glass, perhaps it'd work for you...
https://www.amazon.com/Rust-Oleum-1903830-Frosted-Glass-11-Ounce/dp/B0009XCKBA
You can try something like this instead of etching, for $5 it's worth a shot.
Rust-Oleum 1903830 Frosted Glass 11-Ounce Spray, Frosted Glass https://www.amazon.com/dp/B0009XCKBA/ref=cm_sw_r_awd_jI.fvb0TYA416
https://www.amazon.com/dp/B0009XCKBA/ref=cm_sw_r_awd_jI.fvb0TYA416
I appreciate all of your insight, but I'm sorry if I made it seem like I was doing anything complex. I don't plan to do any wiring, which is why I bought the wall-ready socket.
Here's the plan:
I was thinking of finding a way to secure the bulb just so it doesn't move around freely, but I'm really just kind of winging all of this.
How about something like this?
Just something like this?
Is this new?
SportBike riders have been putting this stuff on their license plates forever. It makes it look normal all day, but when a cop tails you to get your plate, the camera (and cop) get too much reflection to make it out.
http://www.amazon.com/dp/B000LNVC1M/?tag=googhydr-20&hvadid=48510694836&hvpos=1s1&hvexid=&hvnetw=g&hvrand=5358276887281050394&hvpone=&hvptwo=&hvqmt=b&hvdev=c&ref=pd_sl_4wgq8zht8d_b
Take your time to clean nub marks, it really does make a massive difference at the end, and is totally worth the time it takes.
as for other stuff that really makes a difference, get a panel line marker, they are dirt cheap and make so much difference to a kit.
the final thing is to get some matte clear coat, this gets rid of the "plastic" look to a kit, you will need to get a specialist one for plastic tho, so it get a little more expensive, a can like the one linked would last for 6-7 hg kits easily. if you have a games workshop near you as well, they also sell clear coat, though i would only reccomend this if you cant get mr. super clear or tamita stuff shipped to you, as its more expensive in my experience.
Good luck building your kit and welcome to the hobby!
I love Mr. Super Clear.
I believe I have finally decided on my first Gunpla, the HG Age II Magnum and want to make sure the items I have added to my Amazon cart are ideal or not for a beginner/future use for HG and MG kits. The list is as follows:
I know that this sub has a list of tools and tutorials, but because I'm trying to budget, I was thinking no more than $100 would be ideal for me to start with. Since I'm beginning with HG models, I don't think I need a full set of Gundam markers, but if it's needed/required/highly suggested, I might pick them up as well.
So I have read and seen that top coating and panel lining are essential for MG models to make them pop. Are they just as essential for HG model kits? Looking at pictures of the Age II Magnum I'm planning on getting from Amazon, it doesn't seem to have a lot of indents for panel lining. Of course, I could be wrong and be blind as a bat. If I don't do any sort of panel lining, is it still a good idea to add a top coat regardless?
Also, how soon can one get into MG kits? I was originally going to jump straight into either the MG GM Sniper II or the RX-78-2 Ver 3.0 but after doing some research over the past few days, I've decided I'll be doing a few HG's to begin with as I haven't built model kits since I was like 7 or 8 with my dad. I'm thinking after the Age II Magnum, I was thinking about getting either the HG Double O Diver or the HG 00 Shia Qan[T]. Maybe after I complete the 3 HG's I've listed, is it possible to jump to the the GM Sniper II?
TL;DR:
So I'm trying Mr. Super Clear Matte for the first time and got a couple questions. If Im doing "light" coats how many coats should I do? How much drying time should I allow between each coat? Thanks!
So Axon, just to be sure. I want to paint a certain part a flat Matte color. So I'll use a Flat/Matte Coat. If I paint other parts gloss/metallic I'll coat it with a gloss coat, correct?
Would this be a good brand for a flat/matte coat? https://www.amazon.com/Mr-Super-Clear-Flat-Spray/dp/B000W30PIW/ref=sr_1_2?ie=UTF8&qid=1495418826&sr=8-2&keywords=gundam+matte+spray
And this for a gloss/metallic? https://www.amazon.com/Mr-Super-Clear-Gloss-Spray/dp/B000W2YLGA/ref=sr_1_3?ie=UTF8&qid=1495418918&sr=8-3&keywords=to+coat+gloss+gundam
I apologize for all the questions and ignorance. I'm about to paint for my first time on an RG Aile Strike. :)
2 Questions:
- Mr. Hobby Clear Flat Spray
- Mr. Hobby Clear UV Cut Flat Spray
Thanks for the tip!
I found this one available for my country, is that it?
I'm building a gunpla for the first time after making a few HGs back in middle school a few times, and I'm nearing finishing a kit.
I've seen some guides in Korean and they said "matt spray (I believe this is the right translation for that item)" is important to prevent discoloration. it was about 12 bucks they said, and I thought it would be worth the investment.
I've searched for the item on amazon but
https://www.amazon.ca/Mr-Super-Clear-Flat-Spray/dp/B000W30PIW/ref=sr_1_1?ie=UTF8&qid=1525989482&sr=8-1&keywords=mr+clear
it's almost 80 bucks here....?
do you guys know where I can get it cheaper on NA (or an alternative), this is almost 600% markup @_@;;;
That is all just surface level rust and blemishes. You could clean that up to look new pretty easily or keep it as is and it would be just fine. Just make sure to use the [right kinda paint] (https://www.amazon.com/Rust-Oleum-7778830-Enamel-Spray-Bar-B-Que/dp/B0010O0C94) if you're planning on refacing.
> and best of all you get to avoid all of that unnecessary burning paint.
when you use he right kind of paint, it doesn't burn
Remove the rust with emery cloth, tape the shit out of anything you don't want painted, and use barbecue paint in a rattle can.
Traegers, and in my experience most smokers, do rust. (except maybe the enamel green egg). Sand it and spray paint it with a high heat bbq paint. I do live in a high humidity area and I always keep mine. covered.
Rust-Oleum 7778830 High Heat Enamel Spray, Bar-B-Que Black, 12-Ounce https://www.amazon.com/dp/B0010O0C94/ref=cm_sw_r_cp_apa_qx9-ybAYJE9PG
I'm not sure what you paid for your turn signal , but the aftermarket ones are cheap , (mostly)universal and generally look better. Here is an example
>not to mention a disposable income.
Yah , and it's all disposed of on tires and shit for my race bike...and beer.
>I don't know where to buy exhaust paint from for cheap
You can find a cheap can of matte black grill paint at Home Depot or where ever for a few bucks , or try to just color it in with a sharpie. Here it is on Amazon for $4
As far as the lever goes if it's forged you may be able to bend it back. Here is a good thread on ADV rider on how to bend it back. . If it's a cheapo cast lever it will probably break.
You can use Rust-Oleum High Heat Enamel Spray, Bar-B-Que Black. Not painting the interiors would leave them susceptible to moisture and rust. Nice re-utilization by the way. Happy smokes.
I used to use this a lot for Matte finishes. I could usually find it at my local hardware store for $5-6
Wisix above is in the right direction. Additionally, get some painter's tape to cover parts you don't want painted (like eyelenses). After you put two coats of gloss black paint over the helmet, apply two coats of clear coat gloss for that Vader shine!
or should i even consider these generic brand..I just searched for acrylic top coat flat.
​
https://www.amazon.com/Krylon-K05353007-ColorMaster-Acrylic-Crystal/dp/B001C42OXY
https://www.amazon.com/Aleenes-Spray-Finish-Acrylic-Sealer/dp/B003W0BZHC/ref=sr_1_1?keywords=Matte+Clear+Acrylic+Coating+Spray+Paint&qid=1568356454&s=gateway&sr=8-1
I hear this is good:
Krylon 53530 Flat Acrylic Crystal Clear
http://www.amazon.com/dp/B001C42OXY/ref=wl_it_dp_o_pd_nS_ttl?_encoding=UTF8&colid=3V9RXJZXB2E25&coliid=I2YG2ZWFETWUWO&psc=1
First I'll answer your last question, no, there is nothing wrong with not painting or going all out on a model. Like you said, you have only been at this for a few months and it is always best to start small. If you keep at it, who knows, months down the road you may be making your own custom models. That being said, lets see what I can suggest for getting the best out of your model without putting a ton of time (or money) into it. The first few things I would pick up are:
http://www.amazon.com/Elmers-XZ3601-X-ACTO-Knife-Cap/dp/B005KRSWM6/ref=sr_1_4?ie=UTF8&qid=1451350392&sr=8-4&keywords=hobby+knife
http://www.amazon.com/Squadron-Products-Value-Sanding-Stick/dp/B000CDR5K8/ref=sr_1_2?ie=UTF8&qid=1451350756&sr=8-2&keywords=squadron+tri+grit
http://www.amazon.com/Uni-Pin-Fineliner-0-05mm-Black/dp/B00A7BSEKK/ref=sr_1_fkmr2_2?ie=UTF8&qid=1451351047&sr=8-2-fkmr2&keywords=uni+pin+.5+fine+liner
http://www.amazon.com/Krylon-53530-Acrylic-Interior-Exterior/dp/B001C42OXY/ref=sr_1_1?ie=UTF8&qid=1451351086&sr=8-1&keywords=flat+top+coat
The most important part is have fun with it, and do what you like.
Sorry, I wandered off. That link is more glossy, I like the gloss finish personally, but for a flat coat you want something more like this: http://www.amazon.com/gp/aw/d/B001C42OXY
the crystals will be covering a 36x40" flat surface. i'm def not using nail polish on all of that. it'd take an eternity. alright, well thank you!
edit: I think this will work: https://www.amazon.com/Krylon-6-Ounce-Crystal-Acrylic-Coating/dp/B001K65K26 and I already have a bunch that i use to preserve paintings, so should be good! let me know if you've heard otherwise about acrylic coating.
I think I figured out a way to get the gloss finish by using: Krylon 6-Ounce Crystal Clear Acrylic Coating Aerosol Spray
Amazon's acrylic clear, by Krylon. Likely also found at your local Home Depot, Rona, Wal-Mart, Canadian Tire, and possibly Target
This paper is a-ok
but also use this or something like it. Spray multiple times if you're using a lot of ink.
edit: tl;dr: if you're using gloss or vinyl use acrylic coating.
Maybe something like this could help. At least that's what I would buy. All of the wood varnish I would know needs to be applied with a brush, I don't know if yours is the same way. A spray coating like this will make it super easy to not have drips and get a perfect even coating.
>3D prints aren't typically water-tight
I didn't know what.
Wouldn't clear coat work as well? Something like https://www.amazon.com/Krylon-K01303A07-Crystal-Acrylic-Coating/dp/B001K65K26
I kinda want to make it easy to deal with since I would like to sell some. Part of the reason why I'm making a bunch of models now is because I'm looking at having a $800 printer. I would like to offset that cost and the cost of materials even if it takes a while
If she makes it a semi hobby you may want to test a few products as it probably depends on the disc and plastic used.
Of the several I looked up, something like this may be a good bet
http://www.amazon.com/Krylon-6-Ounce-Crystal-Acrylic-Coating/dp/B001K65K26
It's relatively cheap and acrylic is great as it should prevent nearly everything minus perhaps sun bleaching. It also should be hair thin also making these discs tournament legal.
I have a bunch of F21 jewelry I like. If you're worried about it tarnishing you can use a clear spray, which helps protect the finish. I also love the earrings I got at Gap Outlet, though I'm not sure they have them online.
I have been using mod podge, so that part is good. I haven't been watering it down, though--does that really have any effect on anything?
And as for clear coat, you all mean this, right?
https://www.amazon.com/Krylon-K01303A-Crystal-Acrylic-Coating/dp/B001K65K26/ref=sr_1_10?ie=UTF8&qid=1488255466&sr=8-10&keywords=clear+coat
basically, anyway. I am stupid not to just have figured that out earlier, lol. >_<;. This stuff won't eat my foam, since it has been primed, right?
And I have another question, pertaining to Plasti-Dip:
Can I use regular acrylics on it, and can I apply it OVER mod podge? I have been mod podging everything right now, but I would like to try Plasti-Dip for my elbow armor/over elbow armor, shoe armor, and 'corset' (the armor looks like a corset), so they don't break. Those are the foam pieces I am the most concerned about, because they look like they'd be the most fragile. I have also already put news paper over the elbow piece (there were some areas I needed to fix, so I fixed them, and am using the paper to hide it), and will that work, with the plasti-dip? That is also mod podged, too. Also, does the clear plasti-dip work as well as the other colors? Every video I see uses black, so I thought I'd ask, before buying it.
Also, from what I understand, plasti-dip needs a respirator to be used. I get that. But if I go outside with my work, even if I have one, will the smell get into the house? My mom has respiratory issues, and I am kind of afraid of the smell seeping through the walls because of that.
It looks similar to what I’ve used before. Just be sure it’s an acrylic paint and not urethane-not good to put certain chemicals in your ears :)
Here’s a link to one I’ve used:
Krylon K01303A07 Crystal Clear Acrylic Coating Aerosol Spray, 6 Ounce https://www.amazon.com/dp/B001K65K26/ref=cm_sw_r_cp_api_i_9cyyCb575YMXY
I’m not sure why, but when I did the spray acrylic, sometimes in about a month it would “glaze” or something - like it seemed like it was separating from the IEM. It might work temporarily, or it might work forever. Hard to say. Low risk to try though!
Make a test piece first. Lacquers are typically "hot" paints and it might kill the ink in the signature and make it run. If you can get hold of a similar pen and a piece of plastic or laminate similar to the pickguard, run a test first. Write something on it, let the ink thoroughly dry, the try the clearcoat.
Also, there are different types of clear - matte and gloss.
Best bet might be to go with something like this that's used in photography and art to preserve images and paintings.
Oh I've got a great theme!
Things to huff!
*** I, in no way, condone or suggest the huffing of anything other than air or perhaps the occasional oxygen bar. I do, however, completely condone and suggest the use of shiny spray to seal and make-perfect all works of art pertaining to the use of paints!
Amazon link of what I have used - krylon acrylic clear
eBay UK one
probably just an assload of crystal clear acrylic paint. I have this and it works great.
I was thinking of using linseed oil (though I don't know if i'm supposed to mix it with turpentine and vinegar like some say?) But I think linseed oil gives the wood a shine and it yellows over time. I was also looking at dead flat/ matte finishes like this or this or this. I guess it doesn't have to be waterproof, though I have another project that I need to waterproof some wood and though i should get something that works for both lol. Mostly curious if anyone has any specific recommendations.
Rustoleum "Clear Coat" is what I use if I've sharpied art onto things, but usually they don't have a glossy finish like a guitar.
It looks like there is a gloss version but I don't know exactly how glossy it is; you'd want to test it on a similar surface before trying it on your project.
Like aura_enchanted said, you won't need to mix it with anything. If you already have the Agathrax Earth, then that's fine, but if you're going to order it, actually order this instead. It's much closer to the old Devlan Mud than the new Agathrax Earth is. Edit to Add: Here's a great review/tutorial on using Secret Weapon Washes, look at the example given of the Skaven Clanrat -- that's what I want you to do to this model. You'll be amazed at the results.
And yes, the stuff you linked to is the stuff. You can also use Army Painter's Matte Anti-Shine. If you want the paint to last a long time, spray with a gloss sealer first. But the last step when you finish a model, especially if you wash it, is to spray a light coating of anti-shine. It's amazing how much it improves miniatures and makes them look more realistic.
It is not automotive. It's 2x clear coat. Gloss. https://www.amazon.com/Rust-Oleum-249117-Painters-Purpose-12-Ounce/dp/B002BWOS5I
Does it matter?
I used Rustoleum:
https://www.amazon.com/Rust-Oleum-249117-Painters-Purpose-12-Ounce/dp/B002BWOS5I/ref=sr_1_3?ie=UTF8&amp;qid=1538795644&amp;sr=8-3&amp;keywords=clear+coat+spray+paint+uv
You want one that is glossy otherwise your board will be rough to the touch especially on a bare belly. I used this and it worked well.
http://www.amazon.com/Rust-Oleum-249117-Painters-Multi-Purpose-12-Ounce/dp/B002BWOS5I/ref=sr_1_3?ie=UTF8&amp;qid=1375559214&amp;sr=8-3&amp;keywords=clear+coat
Is this correct? I want a flat coat? This says gloss but I'm not sure if its different from super gloss?
They have UV resistant clear coat here
How often does she unlock you? If it's not real frequent, you can use a clear spray (clear coat paint) like this and reapply periodically
https://www.amazon.com/dp/B00397STRW/ref=cm_sw_r_other_apa_jwPzzb0RN67RK
I'd be dubious about the UV resistant paints, but here are a few:
https://www.amazon.co.uk/Plasti-kote-24000-400ml-Premium-Spray/dp/B006XBT39Y (cheap)
https://www.amazon.co.uk/d/Home-Kitchen/Rustoleum-AE0040001E8-400ml-Crystal-Clear-Gloss/B001W03PRM
https://www.amazon.co.uk/Uv-Resistant-Acrylic-Coating-Aerosol-Spray/dp/B00397STRW (expensive)
https://www.amazon.co.uk/Surface-Sealant-Coating-Repellent-Plastic/dp/B00A3S1RGU - this one actually says how much it filters.
If you want to go opaque and have blackboard paint for writing on, there is this one: https://www.amazon.co.uk/d/ckb/Rustins-250ml-Quick-Dry-Blackboard-Paint-Black/B001GU6GYM
I've used it on a large glass lid so far, did two layers, and am going to be using it on some smaller jars.
(But you don't really need blackboard paint if you want to write on them with liquid chalk markers, because they'll write on glass and glossy surfaces anyway).
After some research I've been spraying my works with a UV protectant spray.
/u/ghostopera You might consider a light spray of UV Protectant Clear Coat, so you don't have to bleach it again.
I have used this on restores. Since you are working on new stock, two coats would work. Use an orbital sander 120, 220, and then 320 grit discs.
https://www.amazon.com/Rust-Oleum-249279-Automotive-11-Ounce-Filler/dp/B003CT4AM0/ref=sr_1_2?ie=UTF8&amp;qid=1495341881&amp;sr=8-2&amp;keywords=high+fill+primer
Curious your bondo workflow. Seems like you can lose a lot of detail . Have you considered using 2-3 coats of this Primer Filler.
Capillary issue hadn't occurred to me before, but it makes sense. But if you are going to acylic matte prime it anyway, I guess trying to fill those layer gaps first is a step worth taking.
Something like a filler-primer: https://www.amazon.com/dp/B003CT4AM0/ref=nav_timeline_asin?_encoding=UTF8&amp;psc=1
I've used both this and this. I prefer the DupliColor because the Rustoleum has a stronger smell. You also need to be careful with the Rustoleum. Whenever I start a new can, it tends to spit blobs of gunk for the first few seconds.
https://www.amazon.com/Rust-Oleum-249279-Automotive-11-Ounce-Filler/dp/B003CT4AM0/ref=sr_1_5?ie=UTF8&amp;qid=1527609462&amp;sr=8-5&amp;keywords=filler+primer
https://smile.amazon.com/gp/product/B003CT4AM0/ref=ppx_yo_dt_b_asin_title_o06_s00?ie=UTF8&psc=1 This is the one I used, hopefully its not too much more expensive but it was $4.70 for me.
Thanks! I printed him with PLA filament and then did a couple of coats of this filler primer
https://www.amazon.com/gp/product/B003CT4AM0/ref=oh_aui_search_detailpage?ie=UTF8&amp;psc=1
Did a lot of sanding with different level grit sandpaper to smooth him out and then once it was all done I started painting him with acrylic paints :)
Probably this.
https://www.amazon.com/Krylon-1311-Aerosol-Finish-Enamel/dp/B005ENZ8CS
But can't vouch for it since I've never used it. Should be available at Wal-Mart and Home Depot stores which are more common than hobby shops.
I'm desperately looking for affordable flat/gloss top coat alternatives to MrHobby.
Does anyone know what type of paint this is? I can never find out whether it is Acrylic, Lacquer or enamel.
KRYLON Diversified Brands K01311007 Matte Finish Aerosol Paint 11 oz, Satin https://www.amazon.com/dp/B005ENZ8CS/ref=cm_sw_r_cp_apa_i_z-V6CbWBGVFXH
Krylon!
https://smile.amazon.com/Krylon-K01311007-Aerosol-Finish-Enamel/dp/B005ENZ8CS
I'm not sure for athletic shoes what to paint with I'd say experiment and see what works, maybe leather paints would work because its good for flexing (I could be wrong I'm not the best) but for finishing use Krylon matte finisher that should do it. https://www.amazon.com/gp/product/B005ENZ8CS/ref=ppx_yo_dt_b_asin_title_o03_s00?ie=UTF8&psc=1
Is this stuff pretty good to use if I want a matte coat? Also, if there are parts I want shiny and parts I want matte, do I just have to break out the painter's tape?
For Testors, is this the product you use? It’s what comes up when I search Dullcote
Testors Spray Lacquer 3oz, Clear Coat https://www.amazon.com/dp/B009FF6DN4/ref=cm_sw_r_cp_api_0y4HAbRN050CW
2. From your description it sounds like you paint the Quickshade on with old brushes as opposed to full on “dipping” the model in the Quickshade which is what is is shown in the guide. This is just for control/reduces amount I’m assuming? Is dipping the mini straight in there too much?
3. I havent had too many issues with mold lines (fingers crossed) thus far, what bothers me is slight gaps, like on the breast/collar bones of my hexwraiths mounts. Would you recommend a sliver of green stuff (haven’t touched it yet) or something for this? I could just be a sloppy gluer but in my experience sometimes these gaps seem unavoidable. Thoughts?
4. It’s funny you mention the palette, I lurked for awhile before jumping in with models and paints and so a wet palette was one of the first this i tried and didn’t use the right materials and it was too thin and so had to do more work/coats than necessary and ended up with not great results anyway :( it’s more correct now. Not perfect but better.
5. I’m pretty well through beating up my first set of brush so I think I’m ready to re-up. I think I’ll go for a few nice detail brushes and a cheaper utility set elsewhere, so if you have any recommendations, lemme know!
6. If I want bases for certain models or to kitbash some graveyard markers, where should I pick those up? eBay is full of knock offs that look untrustworthy or wouldn’t look right. Do you just get them straight from GW?
7. On that same subject, I want a dark if not black resident evil/silent hill style moonlight graveyard basing for my models, Any leads where I could find materials for this? I don’t want the typical tufts of grass or snow or rubble I see elsewhere.
Thanks again!
Edit: bad at words
What could also be done to reduce the shiny effect on the nids would be to hit it with a matte varnish like this
IDK if Citadel makes one specifically, I'm sure they do, but like a lot of their products, you're often better off getting a different brand that's just as good quality (and frequently better) as well as being cheaper.
&#x200B;
What I personally use is Testors clear: https://www.amazon.com/Testors-Spray-Lacquer-Clear-Coat/dp/B009FF6DN4
&#x200B;
You don't have to use a lot, just enough to get an even coat over the whole miniature. Be sure to spray this outside or in a well-ventilated area. Also, don't forget that when you're done coating your models, to hold the spray can upside down and spray the excess for a couple seconds until it's just spraying the medium -- that way it clears out the spray mechanism. If you don't, it'll be clogged up next time you go to use it. This is true for all kinds of spray cans, including primers -- it's a common rookie mistake, so just mentioning it in case you haven't worked with this stuff yet.
You can put a matte varnish on if you'd like. I don't usually because the paint holds up pretty good if you treat it well. If you do a varnish for the whole model definitely go matte to maintain the look. Only use a rattle can version. I've used the tester's one a lot:
https://www.amazon.com/Testors-Aerosol-Spray-Lacquer-Paint/dp/B009FF6DN4
Testors dullcoate
Testors Aerosol Spray Lacquer Paint, 3oz https://www.amazon.com/dp/B009FF6DN4/ref=cm_sw_r_cp_api_zI0NybHY3JBHY
https://www.amazon.ca/Testors-Aerosol-Enamel-3oz-Dullcote-Lacquer/dp/B009FF6DN4/ref=sr_1_1?ie=UTF8&amp;qid=1496321781&amp;sr=8-1&amp;keywords=testors+dullcote
This stuff is the best. Goes on smooth is cheap and easy to use.
Testors Aerosol Spray Lacquer Paint, 3oz https://www.amazon.com/dp/B009FF6DN4/ref=cm_sw_r_cp_apa_qYubzbB3QAGQT
I've been using a clear coat from Testors.
Seems to do the job just fine. I'll use a gloss medium on things like canopies after the clear coat is full cured.
I use Vallejo brush on primer, but I use the grey color. Here is a link. It's a debate on here whether or not their "White Primer" is actually primer, or if it's just the color of their paint. I've heard different things from different people but never used it myself. Also, white tends to be a hard color to get even coverage with, so that might be your problem as well.
As far as your glossy problem, you could always hit your minis with some Testors Aerosol Enamel Paint 3oz-Dullcote Lacquer. This seems to be the preferred spray matte. If you want a brush on matte varnish, I have had good results with the Vallejo matte varnish. I haven't used anything else. Hope this helps!
Did you use Army Apinter Quickshade? Maybe a little lighter with it next time. Otherwise I'd say hit them with some matte varnish to lower that gloss a little and you're good.
I recommend this...https://www.amazon.com/dp/B009FF6DN4/ref=wl_it_dp_o_pd_nS_ttl?_encoding=UTF8&amp;colid=2QL17RCXJFV7R&amp;coliid=I18Q3IT3HOY77J
Ok so is this an enamell or a lacquer it says both on the page? And will this make gundam panel markers run?
https://smile.amazon.com/gp/product/B009FF6DN4/ref=oh_aui_detailpage_o00_s00?ie=UTF8&amp;psc=1
I just use this http://www.amazon.com/gp/aw/d/B009FF6DN4/ref=pd_aw_sim_21_of_11?ie=UTF8&amp;dpID=41qBnpRaiWL&amp;dpSrc=sims&amp;preST=_AC_UL390_SR390%2C390_&amp;refRID=1XX7NKV0SH3TJ88A4Y5W
Hi, would this work as topcoat?
Thank you! The final coat was a Testors Spray Lacquer, Dull Coat. Amazon Link
I use this and it dries matte.
would this be a good flat top coat?
https://www.amazon.com/gp/product/B009FF6DN4/ref=s9_acsd_hps_bw_c_x_4_w
Krylon 7027 Preserve It Aerosol Spray, Matte
https://www.amazon.com/Krylon-7027-Preserve-Aerosol-11-Ounce/dp/B00AQ72JHE
It's a neat look. Rustoleum's spray is called Mirror Effect, and Krylon's is called Looking Glass. I haven't tried either of them, yet, but they seem to have similar reviews.
Ish.
Definitely a phantom.
I'd been using a piece of corrugated plastic as a landing pad, but wanted something that would reflect the phantom's leds. I had a piece of poly-carbonate around and some mirror paint, so I decided to give that shot. Turned out well. Now I just need to get some plastidip to prevent any more scratches on the non-mirrored side.
https://www.amazon.com/Rust-Oleum-267727-Specialty-Mirror-6-Ounce/dp/B00FMRXJW2/ref=sr_1_3?ie=UTF8&amp;qid=1505538563&amp;sr=8-3&amp;keywords=mirror+spray
This is what he's using I believe.
Thanks, so something like this would be fine for the primer?
https://www.amazon.com/280715-American-Accents-Primer-12-Ounce/dp/B00KZ6LLZW/ref=sr_1_1?ie=UTF8&amp;qid=1487959986&amp;sr=8-1&amp;keywords=primer+spray+paint
This build will be able to play anything at 1080p 60fps high settings:
PCPartPicker part list / Price breakdown by merchant
Type|Item|Price
:----|:----|:----
CPU | Intel - Pentium G4560 3.5GHz Dual-Core Processor | $79.44 @ OutletPC
Motherboard | MSI - B250M PRO-VD Micro ATX LGA1151 Motherboard | $54.89 @ OutletPC
Memory | G.Skill - Ripjaws V Series 8GB (1 x 8GB) DDR4-2800 Memory | $65.99 @ Newegg
Storage | Crucial - MX300 275GB 2.5" Solid State Drive | $97.88 @ OutletPC
Video Card | Gigabyte - GeForce GTX 1060 3GB 3GB Windforce OC Video Card | $216.89 @ SuperBiiz
Case | Fractal Design - Focus G (White) ATX Mid Tower Case | $44.99 @ Newegg
Power Supply | EVGA - 450W 80+ Bronze Certified ATX Power Supply | $34.97 @ Amazon
| Prices include shipping, taxes, rebates, and discounts |
| Total (before mail-in rebates) | $605.05
| Mail-in rebates | -$10.00
| Total | $595.05
| Generated by PCPartPicker 2017-08-07 00:58 EDT-0400 |
If you want 4k 60fps high settings, you're going to have to significantly increase your budget:
PCPartPicker part list / Price breakdown by merchant
Type|Item|Price
:----|:----|:----
CPU | AMD - Ryzen 5 1600 3.2GHz 6-Core Processor | $197.88 @ OutletPC
Motherboard | ASRock - AB350M Micro ATX AM4 Motherboard | $59.99 @ Newegg
Memory | G.Skill - Ripjaws V Series 16GB (2 x 8GB) DDR4-3000 Memory | $124.99 @ Newegg
Storage | Crucial - MX300 275GB 2.5" Solid State Drive | $97.88 @ OutletPC
Video Card | Gigabyte - GeForce GTX 1080 8GB WINDFORCE OC 8G Video Card | $514.98 @ Newegg
Case | Fractal Design - Define Mini C with Window MicroATX Mid Tower Case | $69.99 @ Newegg
Power Supply | EVGA - SuperNOVA G2 550W 80+ Gold Certified Fully-Modular ATX Power Supply | $72.98 @ Newegg
| Prices include shipping, taxes, rebates, and discounts |
| Total (before mail-in rebates) | $1148.69
| Mail-in rebates | -$10.00
| Total | $1138.69
| Generated by PCPartPicker 2017-08-07 01:01 EDT-0400 |
Edit: Here is the stuff you'll need to paint your case orange:
https://www.amazon.com/Sandpaper-Assortment-Automotive-Furniture-Finishing/dp/B01MZALAD9/ref=sr_1_5?ie=UTF8&amp;qid=1502082191&amp;sr=8-5&amp;keywords=sandpaper
https://www.amazon.com/Rust-Oleum-280715-Primer-American-Accents/dp/B00KZ6LLZW/ref=sr_1_1?s=hi&amp;ie=UTF8&amp;qid=1502082223&amp;sr=1-1&amp;keywords=white+primer+spray+paint
https://www.amazon.com/280698-American-Accents-Orange-12-Ounce/dp/B00KZ6LVUW/ref=sr_1_2?s=hi&amp;ie=UTF8&amp;qid=1502082246&amp;sr=1-2&amp;keywords=orange+spray+paint
https://www.amazon.com/Oleum-280702-American-Accents-12-Ounce/dp/B00KZ6LYMM/ref=sr_1_1?s=hi&amp;ie=UTF8&amp;qid=1502082271&amp;sr=1-1&amp;keywords=spray+paint+gloss+finish
Yeah, I couldn't be much happier with how it turned out. Watch the spray tip on the Montana paint, mine gummed up a bit and caused a little blob on the right controller (which was my first/test one).
Primer: https://www.amazon.com/gp/product/B00KZ6LLZW/ref=oh_aui_detailpage_o01_s00?ie=UTF8&amp;psc=1
Base:
https://www.amazon.com/gp/product/B005JZINNC/ref=oh_aui_search_detailpage?ie=UTF8&amp;psc=1
Seal:
https://www.amazon.com/gp/product/B000VKY3I4/ref=oh_aui_detailpage_o03_s00?ie=UTF8&amp;psc=1
Try black.
https://www.amazon.com/Rust-Oleum-7778830-Enamel-Spray-Bar-B-Que/dp/B0010O0C94
Thanks dude! And, yeah that's an awesome design, I think it'd make a cool deck too.
I'll let you in on a secret that took me forever to figure out: the best way to make masking / stencils is to get yourself some transparency sheets, like the kind used for overhead projectors in school, and then take a marker and draw what you want to spray through (best way to make stencils). Then take a 'wood burning kit' (which is just a low-heat soldering gun pretty much) and use it to "trace" your lines on the transparancy sheet, do it light and quick and it'll cut the parts out that you want - afterwards you'll be left with a mask or stencil that's much stronger than paper, easy to clean, and the wood engraver allows you to make more detailed and smoother cuts than if you were masking with tape, or cutting out of cardboard or card stock.
When you finish your painting, you'll want to give it a light coat of clear spray finish, and when that dries hit it with a coact of actual clear coat - I use minwax - that''s 'satin' (which is their way of saying 'matte') listed there but I prefer mine to be gloss. It's important that you hit it with the spray finish first, because it'll seal the paint, and the minwax may cause it to run if you don't. I use a lot of markers in my paintings and minwax will absolutely make them bleed and run if I don't seal them first.
You also want to seal it because the acrylic will easily chip off the deck
Like I said, also be aware that painting on a deck is A LOT different than painting on canvas, the deck will cause the acrylic to paint much faster than canvas so you lose that 'wet period' you normally have to blend paint.
Good luck, post a picture when you finish it! And feel free to drop me a line if you have any other questions.
There isn't a way to do it without having seam lines, and you, being the one that made it, will always see them. Some people may not notice them for a while, but upon close inspection they will become obvious.
All props that I have made have peen printed, assembled, finished, in that order. If you want to keep the stainless steel pla visible, there isn't really anything I can think to do. In terms of part assembly I trust nothing but Krazy Glue. It dries in about 10 seconds, and another 30 seconds or so and the bond is stronger than the later bonds of PETG, which is known for its layer strength. Absolute nightmare if you mess up. If you do mess up, or are not confident on the seam, separate immediately.
If you're looking to go the painting route then I would assemble it, fill the gaps with some Bondo. Wait for it to dry, sand it flush, use some Filler Primer, then spray paint it. Once painted, cover in a Clear Coat so the paint doesn't rub off.
If you have any more questions feel free to ask and I'll get back to you.