Best tape, adhesives & fasteners according to redditors
We found 1,290 Reddit comments discussing the best tape, adhesives & fasteners. We ranked the 493 resulting products by number of redditors who mentioned them. Here are the top 20.
We found 1,290 Reddit comments discussing the best tape, adhesives & fasteners. We ranked the 493 resulting products by number of redditors who mentioned them. Here are the top 20.


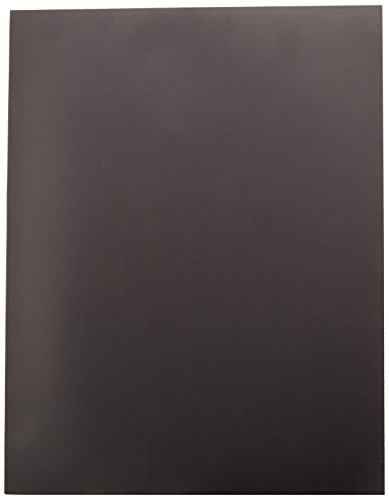

10 Adhesive Magnetic Sheets - 8.5" x 11" - 20 mil Magnet - Peel & Stick
.https://www.amazon.com/dp/B004SOV4NQ/ref=cm_sw_r_cp_apa_2SSBxbMC2ZTA0
I've got a roll of this just for sticking power strips to desks and shit without having to do any planning.
honestly its super easy...
u need
how to assemble:
Thats pretty much it. I kinda just started making it and winged it the whole way. Longest and hardest part is cutting the acrylic but its not that bad. Whole thing took me abt 2 trips to home depot and 3 hours over 2 two days (mirror film take 12 hrs to set). All and all, it was really easy. It helps to have someone help build, but theres nothing u really can’t do by urself. Hope u guys enjoy! reply w questions abt stuff n ill try to answer
ill edit this post later to include the amazon links to the LED strips and include pictures
Edit: Added links
No.... They both have issues recognizing with loud music or sounds playing. You get the same issues with the dot if your speaker is placed near it, or it's built-in speaker is turned up too high.
edit: Here's amazon's placement guide for alexa devices:
> Place your Alexa device in an ideal location
> Make sure your Alexa device is at least eight inches away from walls or other objects that may cause interference (such as microwave ovens or baby monitors).
> If your Alexa device is on the floor, move it to a higher location.
Echo requires more power to power the built-in speaker. They could have opted for USB c but that wasn't a standard when it came out. Google home also uses a proprietary ac adapter, and it came out this year. They also both don't have a 3.5mm because they were designed to be used with the built in speaker that actually sounds good.
Really neither is better than the other, they're designed for different purposes. One is for voice controlled, loud, high-fidelity music playing speaker in one package and another for a low cost have an echo in every room to control your house. (Gen 1 echo dot was a limited manufacturing run, so they limited it to existing echo users to buy. It's a higher quality build too. uses american TI SoC, has stereo speakers (ones from smartphones), has the volume ring from big sister echo, so it was more expensive as well.) (Gen2 is plastic, has buttons for volume control, has a really cheap mono speaker (one you find in a child's toy), uses chinese Mediatek SoC - this is why the price is so low.)
You might want to clean the microphones of the echo (not with compressed air, use something like blutack to remove the dust. be careful and don't use too much pressure. you don't want to get blutack stuck in the hole.), and also unplug and let it sit for a few minutes if you need to shout it at it in a quiet room. That's not normal.
Maybe these vicious, thoughtless vandals used that extremely hazardous, environmetally-toxic substance known as FUN TAK. When this material is used to adhere objects to other objects, it's been known to require TWO FINGERS to separate those objects.
When will these EVIL VILLAINS be BROUGHT TO JUSTICE???@?
3M Command strips work great, they have a variety of configurations to hang just about anything. They are, however, not inexpensive.
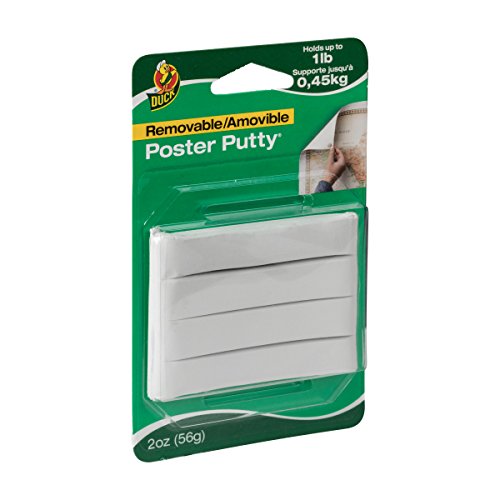
We use poster putty to hang lighter paper things (like posters)
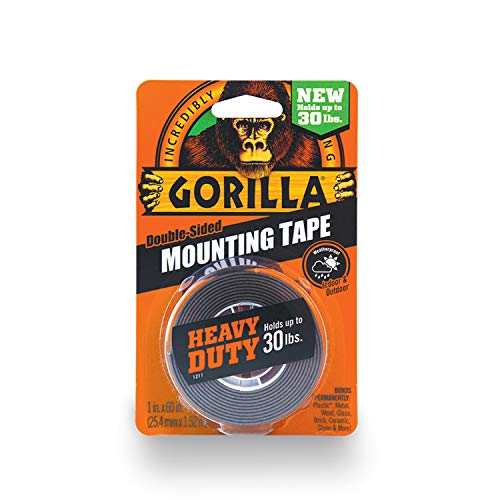
https://www.amazon.com/Gorilla-Heavy-Mounting-Double-Sided-Black/dp/B019HT1U9E
Not OP but I’m assuming It’s the putty stuff you stick posters up with - “blue/blu tack” is the branded Aussie nomenclature (think Kleenex for facial tissue).
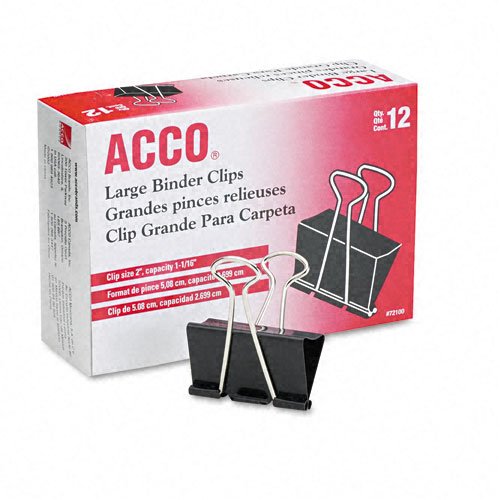
Looks like a binder clip.
ACCO Binder Clips, Large, 1 Box, 12 Clips/Box (72100) https://www.amazon.com/dp/B002VD6BLG/ref=cm_sw_r_cp_apa_i_AephDbP2AZ6KP
https://www.amazon.com/dp/B004SOV4NQ/ref=cm_sw_r_cp_apa_2SSBxbMC2ZTA0
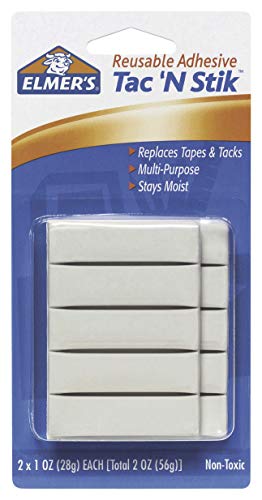
Get some of those reusable tac strips. They’re used for hanging posters and aren’t supposed to leave a residue.
https://www.amazon.com/Elmers-Tac-Stik-Reusable-Adhesive/dp/B001CEMCXQ
If you get the grey outdoor mounting strips, it will take out your drywall before it falls off (that may be a problem to take down but it's easy to install). It's crazy strong after it cures. It's the consumer version of the VHB tape compared here with rivets. We use it in our small batch manufacturing business....
EDIT: Packaging looks like this
edit: made a short video showing off the RGB in glorious 4k. Kick back, relax, and be mesmerized by the Trident Z. https://youtu.be/fSYkdc0yXbY
Hey, thanks for looking! Got my build up and running yesterday.
PCPartPicker part list / Price breakdown by merchant
Type|Item|Price
:----|:----|:----
CPU | Intel Core i7-7700K 4.2GHz Quad-Core Processor | Purchased For $310.00
CPU Cooler | Noctua NH-U9S 46.4 CFM CPU Cooler | Purchased For $60.00
Motherboard | Asus ROG STRIX Z270i GAMING Mini ITX LGA1151 Motherboard | Purchased For $180.00
Storage | Intel 600p Series 512GB M.2-2280 Solid State Drive | Purchased For $162.00
Storage | Crucial MX300 1.1TB M.2-2280 Solid State Drive | Purchased For $252.00
Video Card | EVGA GeForce GTX 1070 8GB ACX 3.0 Video Card | Purchased For $360.00
Power Supply | Corsair SF 600W 80+ Gold Certified Fully-Modular SFX Power Supply | Purchased For $120.00
Case Fan | Noctua NF-B9 redux-1600 PWM 37.9 CFM 92mm Fan | Purchased For $11.00
Case Fan | Noctua NF-B9 redux-1600 PWM 37.9 CFM 92mm Fan | Purchased For $11.00
Case Fan | Corsair ML120 75.0 CFM 120mm Fans | Purchased For $32.99
Other| Trident Z RGB DDR4 3200 2x8GB| Purchased For $135.00
Other| NCASE M1| Purchased For $230.00
Other| Cablemod RGB LED Strip| Purchased For $22.00
Other| 3D printed window mounts| Purchased For $36.87
Other| Tempered Glass Window| Purchased For $46.68
Other| Ensourced Custom Cables| Purchased For $95.25
| Prices include shipping, taxes, rebates, and discounts |
| Total | $2064.79
| Generated by PCPartPicker 2017-02-27 16:39 EST-0500 |
I ordered a custom size piece of tempered glass from onedayglass.com. It is 12 7/8" by 9 1/2" and 1/8" thick and the light gray tint variant. I used the .STL files graciously provided by /u/asone_ and uploaded them to shapeways.com who 3D printed them and shipped them to me. I used this mounting tape to hold the two together. The tape was really thick and a pain to work with and cut to size. You may see some air bubbles in the last few pictures. Hopefully I can work them all out somehow.
The PSU cables are from ensourced.net and are the mind bender blue color. I bought the Corsair Shorty's and custom extensions. The lengths I got were 300mm for the 24 pin, 400mm for the CPU, and 300mm for PCI-E. All of them could be a bit shorter, but I am glad they all reach.
Bought this filter for the bottom intake fans.
I plan on stress testing and overclocking/de-lidding the 7700k in the near future.
Happy to answer any questions!
That looks like Poster Putty. If it's good enough to hang my Monster Energy Drink™ poster on my wall, It's good enough for my car!
I use that shit, it's insane. I tell everyone about it.
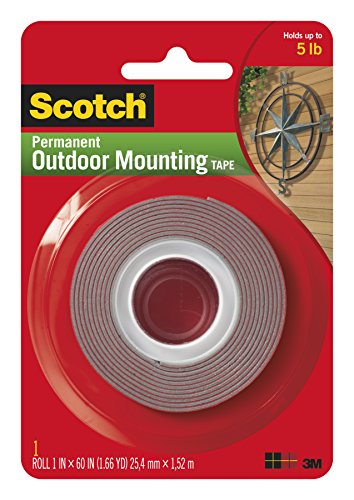
3M Scotch 4011 Exterior Mounting Tape, 1 in x 60 in https://www.amazon.com/dp/B00004Z4BV/ref=cm_sw_r_cp_apa_IrySzbRMNPGWX
poster tack.
stuff like this
https://www.amazon.com/Elmers-Poster-Tack-Reusable-Ounces/dp/B000BKQDB4
Blu-Tack is what you need. This is pretty much exactly what it's designed for.
i have these magnetic sheets from an earlier project. one side has an adhesive backing.
i cut the bags/graphics a bit bigger than i want the final magnet, stick it to the magnet, and trim with an x-acto. if the bag or sticker is paper (not water resistant), i'll add a layer of clear laminate to protect it a bit.
>pop off the the quartz front
if you want to put the quartz back, replace the adhesive with some double sided foam tape https://www.amazon.com/3M-110-3M-Scotch-Mounting-75-inches/dp/B00004Z498 and the jconnect will fit without butchering a $60 cable! :)
i didn't really finish the timing but https://gist.github.com/charlie-x/aba3728313d3da66565e027e048dce1e
just remember to change or remove the lyrics print if you just swap the song that is in there otherwise it'll crash.
3M Scotch 410P "industrial strength" clear double sided tape. Haven't taken it up to highway speeds yet but it stays on fine at 40mph. Unfortunately it covers up the sun visor mechanism so I can't put the sun visor down with the hat attached.
Edit: highway speeds are quite the neck exercise
here is what i used:https://www.amazon.com/dp/B00XJKOCBG/ref=cm_sw_r_cp_ep_dp_5s0HAbREM7Z6Y the lights make sure its set to cool white if you are buying your selfnow the cable for the top most light is a bit short so u can always cut and solder a bit from the bottom light to the top one if you don't want the mess that i havealthough i did try to make it as neatly as possible.for securing the wires i just used clear 4inch zip ties and tucked them behind the frame inside.https://www.amazon.com/Belkin-8-Outlet-Conserve-Protector-F7C01008q/dp/B003P2UMNK/ref=sr_1_sc_1?s=electronics&ie=UTF8&qid=1540851234&sr=1-1-spell&keywords=remote+controll+surge+protector got this surge protector it comes with 6 outlets which are controlled by a remote so you can turn on all the cases with 1 button
https://www.amazon.com/Gorilla-Tough-Double-Mounting-Inches/dp/B00OXVG9FW to secure the lights i used this double sided tape
and a bit of weather seal to keep the dust out on all 4 sides u can pick some up at home depot or fleet farm just make sure its 5/16th size
will be posting a big figure unboxing a bit later and how they all look inside the case.
​
Edit: https://www.ikea.com/us/en/catalog/products/40275846/ forgot to link the bottom shelf so here it is pretty sturdy for the price
A few items that will help with cable management:
You need:
The key for my plan is that the tape must have a peelable cover.
Cut a 2" length of foam sticky off the roll. From that bit, cut off about 1/2" of the foam and one side of cover ONLY. Peel off the other bit.
You should now have a 2" length of peel, 1.5" length of foam together. Stick the foam to the end of your stick, tabby side towards the end of the stick. Make sure it's good and stuck.
Poke a hole on the 1/2" tabby on the 2" peel that's still on the strip of foam. Tie your string to the tabby through that hole.
Shimmy your stick down to your phone. Get it very near your phone with the foam between the stick and your phone.
Pull up on the string to peel away the tabby and stick it to your phone. Wait a minute for the glue to get going.
Pull the stick/foam/phone assembly out and give gold.
3m outdoor double sided tape.
https://www.amazon.com/Heavy-Duty-Exterior-Mounting-Tape-Holds/dp/B00004Z4BV/ref=sr_1_4?ie=UTF8&qid=1535836029&sr=8-4&keywords=3m+outdoor+mounting+tape
I bought some 3M tape off of Amazon, to mount a sign onto brick. It sticks like crazy. I don't see why this couldn't work for you. These new doorbells aren't very heavy. Just try to clean the surface with soap and water before using the tape.
https://www.amazon.com/gp/product/B00004Z4BV/ref=ppx_yo_dt_b_search_asin_title?ie=UTF8&psc=1
Garden Sprayer+Misting Hose+Binder Clips+Canopy
Get hot? Just turn on the "AC." It's easy to go through a ton of water if you are blasting it constantly, but periodic 10 second bursts are really all you need. We never used more than one tank per day, if that. Detach the misting hose and the sprayer then doubles as a camping shower, just invest in a cheapo privacy tent.
We also use one or two tapestries for shade, just make sure to clip them with about a foot off the ground to maintain the breeze.
I love this stuff
We recommend using the 3M or Scotch indoor outdoor Mounting Tape. It's gray with a red peel off backing that you can cut to fit. It can be found at Walmart or your local hardware stores. Below is a link to the tape from amazon:
https://www.amazon.com/3M-Scotch-4011-Exterior-Mounting/dp/B00004Z4BV/ref=sr_1_1?ie=UTF8&qid=1498474461&sr=8-1&keywords=3M+Scotch+4011+Exterior+Mounting+Tape%2C+1+in+x+60+in
3/4" heatshrink to go over the ESC's. 0.25" I think to go over your battery cables. 5/8ths maybe to cover XT60 connectors. Wire sleeves aren't needed. I hold stuff down with double sided tape. or a wrap of electrical.
Thin solder, you'll thank me. Along with a pencil tip for your iron. You'll want ?14G? wire to solder a power lead, confirm this. I also didn't have a 5V step down to power my FC on my first build. You'll want one. Many PDB's have one integrated. That makes it easy.
Purple Loctite or your frame will vibrate itself apart, Real quick. Don't use this on Nylon, and don't get it on the motor shaft, but it is extra important to use on motor mounts though. Just be careful.
A battery buzzer that you can solder onto your PDB is nice. Adhesive velcro is good if you want to use that in addition to battery straps. Either that or hobby foam. A parallel charging board is nice to have so you don't lose an entire day charging batteries. Learn to use it.
I personally replace all my stock hardware with Aluminum Cap screws because I want to cut weight and I hate dealing with stripped hex heads. Not needed though. Zip ties are good to have. A bundle of black ones will work. I've found the colored ones are more prone to breaking. They are good to hold antenna wires.
90deg pin headers are nice. My FC didn't come with those, only straight, and stack height is a real problem with straight pins. Extra props. You'll want those. 8mm socket to remove prop nuts. 3mm allen key. USB to micro USB cable to update your FC. Some XT60 connectors.
Beyond that, I'm sure I'm over looking some things. After a couple of builds you just have extras of stuff so you overlook.
https://smile.amazon.com/gp/product/B000PS9S3M/ref=oh_aui_detailpage_o09_s02?ie=UTF8&psc=1
http://www.fastener-express.com/aluminum-fasteners-nuts-washers.aspx
https://smile.amazon.com/gp/product/B006GOL5CQ/ref=oh_aui_detailpage_o03_s00?ie=UTF8&psc=1
https://smile.amazon.com/gp/product/B0094EJG3K/ref=oh_aui_detailpage_o03_s01?ie=UTF8&psc=1
https://smile.amazon.com/gp/product/B00004Z4BV/ref=oh_aui_detailpage_o01_s00?ie=UTF8&psc=1
I use these lights mounted with this tape along the bottom of the walls (~4" gap between the floor and the floorboards). They're quite bright on the white setting, and underlighting is far less annoying than overheads, since it isn't shining in your eyes while you're on the bench. End result looks like this
All you Britons out there! Start sealing your envelopes with duct tape. Or this incredibly sticky mounting tape. Would be almost impossible to open the envelope without leaving evidence of tampering.
Blu Tack
Blu-Tack Reusable Adhesive 75g https://www.amazon.com/dp/B001FGLX72/ref=cm_sw_r_cp_apa_AuF.ybQGE1KJT
This stuff is great for figures. It doesn't stain and it is pretty good at holding stuff in. I use it all the time with Figmas and nendos, when scales won't stay on there stands, and for BJDs
Dual Lock is what you want. Hook and loop sucks because you have to keep your strips straight, with this, anything goes (and I literally have my 15 lb (7 kg) speakers hanging from the wall with this stuff).
It's magical.
A quick Google search turned up this article from ADL written following a 2015 Supreme Court decision about desperate impact and fair housing.
ADL put together this guide on the subject, it says
>For residents whose display of symbols is purely decorative, application of such a rule [banning the display any religious or secular symbol] does not violate the law. For a Jewish person who observes this religious practice, however, the rule means that he or she cannot buy, rent or remain in the property. This detrimental effect on Jewish residents, called “disparate impact,” also violates the Fair Housing Act.
So VA law, while relevant, may or may not protect you; however federal law apparently does.
The landlord may prohibit nails in a doorframe (especially a metal one) but Scotch Outdoor Mounting Tape is a secure and non-destructive option.
I used these, I break/cut off the plastic locks on them and put these clips on. They are adjustable somewhat
Tear off the old adhesive and apply new adhesive. Use Scotch Extreme, Gorilla , or something comparable. Clean the mount and windshield with rubbing alcohol and clean rag, wait a little while to make sure it's dry, then apply the adhesive.
I ordered some clips off Amazon that I like a lot. Only thing I’ve been able to find that works for me
https://www.amazon.com/dp/B074YMKKLK/ref=cm_sw_r_cp_api_i_.MDBDbHBEP9SC
Required Hardware includes:
Item | Link | Exact Item I Used | Cost ($ CDN)
---|---|----|----
Raspberry Pi kit | link | Close Enough | $78.95
Arduino Nano | link | Yes | $25.99/5
50W 5v Power Supply | link | No| $26.45
5m WS2812B LED Strip | link | Yes | US$24.89
HDMI Splitter | link | Yes | $28.99
HDMI to RCA | link | Yes | $18.89
UTV007 Framegrabber | link | Yes | $17.99
RCA Male/Male | link | No | $2.59
Power Bar | link | No, but I might buy it | $20.85
Double Sided Tape | link | Yes | $6.45
HDMI x3 | | N/A | $10
Mini/Micro USB Cables | | N/A | $10
Total: ~CDN $260
i've been using these :
https://www.amazon.com/gp/product/B00004Z4BV/
https://www.amazon.com/gp/product/B01M7VCYFA/
Let me tell the with gorilla stuff i do NOT doubt bit that it holds 30lbs, the bent ATX case bottom i jacked up trying to pry an SSD off of would be a testament, i'm lucky i didn't break the SSD or bend it's casing.
https://drive.google.com/file/d/0BxpZHHJ8SOpRUVFJdEhfRl9IenM/view?usp=sharing
the 2 in the front and the 2 above the FBDIMMS, 1 stuck to the other and that one stuck to the case, holds a perfect 90 degree angle.
https://www.ukclimbing.com/articles/page.php?id=6193
This is geared towards climbers but has the best section on rehabilitation that I've seen for joint/pip/pulley injuries. If you have had pain for that long you've likely developed scar tissue...this is going to make things tougher and will require GENTLE stretching and massage to gradually break it up while also strengthening the area.
Similar to climbing, most of typing involves using "finger muscles" (which are actually in your forearm) in only one direction (the one used to close your fingers, not open them). Therefore, one of the best exercises to prevent injuries is to do the reverse exercise, which is finger extension with resistance. This is in the doc, though I have to say rubber bands were never sufficient, and I highly recommend a set with variable "weights," for example this one: https://www.amazon.com/Expand-Your-Hand-Bands-10-Pack-Goodbye/dp/B00083B79M/ref=sr_1_1
I actually have one next to my desk right now. As a bonus, if you play golf or tennis this will also help with "elbow" pain, which is really due to tendon strain as a result of lack of strength in the same muscle group.
While you massage, stretch, and most importantly strengthen, do not be afraid to use the offending area. They DO grow back, but you need to get blood there. That means using it. Good luck :)
Yup! I use poster hanging putty (like this one from Loctite) to put into the grooves to clean out the gunk. It's sticky but not too sticky so it picks up the dirt and crud but doesn't leave residue or itself behind.
The dark marks from scratches and dirt are much harder. Prevention works best by using the putty to clean it out regularly as needed.
[Watch] (https://www.omegawatches.com/watches/seamaster/planet-ocean/22015000/)
Phone
Keys
[Knife] (http://www.medfordknife.com/Product_Page.php?pid=72)
[Wallet] (http://www.flowfold.com/product/vanguard-limited-billfold-wallet)
Dead Presidents ["high-end money clip"] (http://www.amazon.com/ACCO-Binder-Clips-Large-72100/dp/B002VD6BLG)
[Gat] (https://us.glock.com/products/model/g43)
[Gat Holder] (http://stickyholsters.com)
Walls
Room
Desk (Left)
Desk (Center)
Desk (Right)
Computer
If you don't like your friend, get him a hard gripper.
Cheap, easy, and safe things might include expansion bands or a wrist roller.
The most practical solution for someone genuinely wanting stronger hands (and not a fidget toy for when they're bored) would be something like an adjustable Ivanko Super Gripper, though they are not cheap.
For better painting, especially on the Stormcast side, do sub-assemblies and for gaming before you have completely finished paintjob, stick the models together with blue-tac/poster putty - get this shit anyways, great for sticking wash pots to table so you don't flip them on your table/carpet etc. Another tip - if you cannot remove remains of the blue tac from model by hand, use a bigger blue-tac ball to remove it.
Subassemblies before painting:
Liberators - Hands with shields kept separate, add with bluetac before model is finished for playing
Retributors - "backpacks" kept separate for better access to back area. Possibly weapons as well for access to the front.
Prosecutors - wings removed if possible for painting them separately (way better handling) and access to the whole model, especially the Prime model has somehow very stupid wing placement.
Lord-Celestant on Dracoth - generaly not really much possibility for subassembly at all :(
Relictor - just glue this shit together, you can access anything on the mini
Chaos - in general I don't think there is any need for sub-assemblies, as the models have generaly open poses allowing great access for painting. However, Korghos Khul might be a good idea to keep him separate from the lord (blue tac) and therefore both models separate from base (blue tac).
By the way, I generally use bluetac to attach models to bases for playing, as bases are usually the last thing I paint/customize to match the whole paintscheme.
Ditch the PVC holders and terminal blocks. Just put a hole through the bulkhead large enough for electric match wires.
When you prep for flight, run the ematch leads through and connect them to your altimeter. Plug the hole with the sticky stuff sold for attaching posters to the wall and put your charge into the corner of a plastic bag, stuff the match head down in, fold it over and wrap it with masking tape.
FWIW, I got the poster putty idea from Kent Burnett, the guy who designed the Talon.
If you're insistent on deconstructing before painting, but want to play a few first, try using sticky-tack or fun-tack to keep the minis together and on their bases. Keep in mind, if painted pieces before gluing and are using a plastic glue or cement, you'll need to get the paint/primer off the contact points before gluing or it won't work properly. Even if you're using regular super glue you should still remove any paint to make a stronger bond.
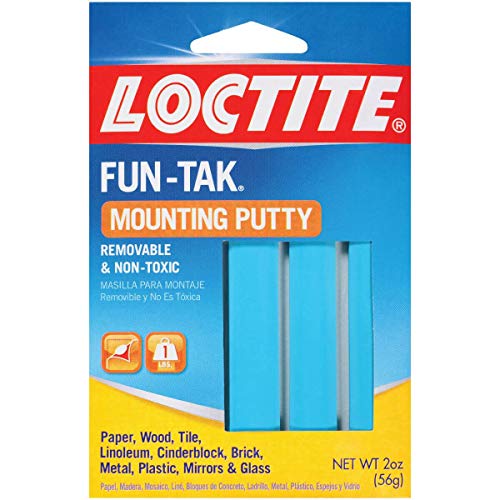
https://www.amazon.com/Loctite-Fun-Tak-Mounting-2-Ounce-1087306/dp/B001F57ZPW
Blu-Tack
Use Blue Tack.
$6.99 for 3 sheets of 8x15:
8 * 15 * 3 / 7 = 51 sq.in. per dollar.
$8.39 for 5 sheets of 8.5x11 inch magnet paper:
8.5 * 11 * 5 / 8 = 55 sq.in. per dollar
This can even get you up to 57 in^2 / $
Never used it, but in my experience, suction cups don't seem to work very well on wood, even polished wood. On top of that, a lot of people are saying this stuff gets dirty pretty easily. I would just use 3m Dual Lock instead. I used velcro before, but it gets worn out, and my pedals tend to move and wiggle a little bit which I don't like.
The 3M Permanent Mounting Tape is great stuff. I used it to reapply molding that had fallen off the outside of my car door, and it has held up for years through New Jersey winters and Arizona summers.
I've been asked this several times haha. I'll do a little explaining now, but I think it's time I put together an album explaining it with pictures.
I used the following wiring harness:
OPT7 Offroad Light Bar wiring Harness Kit (4 Items), 380W - Single Connector https://www.amazon.com/dp/B00K1NS0PS/ref=cm_sw_r_cp_apa_u9hrxb06G38RA
The wiring is in a protective plastic/rubber sleeve. I ran the sleeve up the side of the windshield. On my windshield there's a slight gap between the metal of the body and glass, like the Rubber seal is set in a little bit. I cut a thin strip of 3m exterior mounting tape and used a screwdriver or something to push it into the gap.
Scotch Exterior Mounting Tape, 1-Inch by 60-Inch https://www.amazon.com/dp/B00004Z4BV/ref=cm_sw_r_cp_apa_UaLrxbHN01CVZ
The adhesive tape has held up all winter and about a total of 8 months, so I'd say it works well.
I ran it up the passenger side because the way my light bar was the wiring came out on that side, plus you don't see it easily everytime you get in the car. You could do the drivers side also. The wiring harness I used was basically just long enough. I'd recommend starting from the light and working backwards to the battery, that way you don't have any extra wiring up top.
You can also use some type of adhesive wire clip to guide the wire down the rain gutter thing so it's a little more secure till it gets to the light. I attempted to do this, but I had trouble getting the clip things to stick.I'll probably try to redo it soon.
Like I said, I'll try to get some pictures when I get around to it to help explain it further.
This way is a lot easier and "safer" than drilling through the roof or something.
Scotch Exterior Mounting Tape, 1-Inch by 60-Inch https://www.amazon.com/dp/B00004Z4BV/ref=cm_sw_r_awd_XUNCub14B9Z4N
It never leaves a residue, sticks almost permanently to itself, and can hold quite well to even porous surfaces.
Materials:
Three 5-gallon buckets and one lid (Ace Hardware has white ones for $4, if you don't want orange or blue from HD or Lowe's.) All three cost $12-13.
THESE LEDS from Amazon. $13.59
THIS POWER SUPPLY, the Supernight LED Charger. It is $20.99. You will also need a power cord for it, which I recommend just going to literally ANY thrift store and picking out a nice three-pronged power cord. I'm fairly certain that any three-pronged power cord will work, so if you have one you're not using at home, you can use that.
THIS LED GROW LIGHT, which is 300w and cost $50.99.
TWO of these PC fans. Total cost $10.04.
I bought one of this black duct tape, one of this foil tape (although I recommend buying two, as I ran out with my first roll and had to buy another from the store), and also some double-sided tape, because, if your LED strip is like mine, the adhesive backing is almost nonexistent and the tape becomes necessary.
Oh, and good-quality velcro adhesive patches!
You will also need a power drill and a sturdy box cutter.
I started by taping the entire interior of one bucket with the foil tape, save for the bottom portion where the soil goes. Then I covered the outside with the black tape. Next I drilled holes in the bottom for drainage.
Then I took two of the other buckets and used a ruler's width to mark a cut line right below the lip of each bucket to create spacers. The process of cutting the plastic buckets was definitely the worst part of the process, especially since I didn't have a great cutter, so if you're getting a new one, don't be too cheap. I got this one and it's blade locking function no longer works after this project, so be advised. I lined the spacers with foil tape.
Using the remains of one of the other buckets, I trimmed more of the bucket down so that it's now only the bottom and stands 5" tall. I found some random large screws in my toolbox and drilled them around the circumference, which allows the rest of the bucket to be easily lifted off of the drain pan.
I then drew a circle about 1 cm in from the lip of the lid and cut that out. The light fits perfectly on it. There is lots of light escape at the rim, but it looks pretty cool, so I don't mind it for now.
For the power supply, I cut off the female end of the three-pronged cord I got from Arc Thrift and stripped the wires down a bit. There were three wires inside, green (ground), white (neutral), and black (live), which I then connected to driver. I was certain to unplug during any wire-play and I hope everyone else is, too.
The sidelights were sort of a struggle. I used a scrap of the buckets, like maybe 4-5 inches of bucket from about half-way down to a quarter, so not much. I then lined the inside with the double-sided tape, cutting strips, in an effort to conserve tape, which feels very stable. I drilled a hole and fed the cable through, then determined the best spot to drill a hole on the exterior bucket. It's about at the center of the bucket, or in my case, 13 cm down from the lip. Finally, I fed the LED cable through the exterior hole and the lights were basically in place, where it would sit right above the soil.
I didn't want to have to extend any cords, so I found an ideal spot to place the driver on the exterior so that all cables (LED strip, both fans) could reach their appropriate ports. I fixed the velcro onto the bucket and the driver and tidied the wires with some more duct tape.
Finally, I sealed the edges of both fans, inside and outside, with their respective tapes.
I'm pretty sure that's everything I've done to this point, but if I think of anything else, I'll add it. I'm likely going to black-out the spacers to reduce light leak.
Please let me know if you have any advice, questions, comments!
Thank you /r/SpaceBuckets, for the inspiration and wisdom!
The toggle bolt, or some type of fastener will indeed hold more weight and be a more permanent fix. However, you said you are a renter, which changes things.
In that case you might consider using a foam mounting tape, or the stronger exterior mounting tape.
Just make sure you clean both the back of the phone and the wall thoroughly, and then wipe both down with alcohol prior to tape application. If you put enough mounting tape on that phone, which looks fairly light, your troubles should be over. That's going to be your cheapest option that'll last as long as you are there and not require any special tools or wall surgery. Especially considering that wall looks pretty dodgy in the first place and trying to affix anything through it could be asking for more trouble than it is worth. If you owned it I'd advise different but that is not what you asked. Good luck.
Three possible "avenues of inquiry to explore", to quote Inspector Lewis:
Another option is to reshape the baffles but that's at the next level of modding.
sticky tack works great
I've always called it "Sticky Tack".
Edit: Yup, here's some.
Here's some ideas:
I would focus on decorating by area to make the rest of your home feel festive, if you can't focus around a fireplace like you seem to have in the past.
​
This stuff?
https://www.amazon.com/Loctite-Fun-Tak-Mounting-2-Ounce-1087306/dp/B001F57ZPW/ref=sr_1_3?keywords=blu-tack&qid=1564766773&s=gateway&sr=8-3
or is the brand "blu-tack"? Or is it all the same stuff?
Forgot your other question! It’s actually sticky tack like from the office supply section that would be for putting up posters and such. Loctite Fun-Tak Mounting Putty 2-Ounce (1087306) https://www.amazon.com/dp/B001F57ZPW/ref=cm_sw_r_cp_api_t-tQBbKF8MKKT I use it to stick minis to pop bottles so I can spray paint them to prime them.
Sticky Tak. That soft blue stuff you can find in the office supplies aisles. Test it on a small part of the poster, to make sure it won't cause damage. I've found for many paper materials I've used it to hang things, it hasn't caused any damage yet.
It's just this stuff, maybe it's called something else where you live but it's just something to hold the parts together in a way that can be easily removed so you can check any potential issues before you glue everything. You don't have to have it it's just more convenient than holding the parts together by hand.
Looking at the default loadout the kill teams have on GW's website as an example, I'd definitely leave the shield, the two handed hammer and the heavy flamer separate as they cover up large portions of the marines body and would make things hard to paint. The others I'd probably just paint fully assembled. It's not about how detailed they are, it's about whether or not there are parts to the model that cover up other parts and would make those parts difficult or impossible to paint.
https://www.amazon.com/Blu-Tack-060968-Reusable-Adhesive-75g/dp/B001FGLX72
He's not talking about Tic-Tacs or metal pin "Tacks" LOL
The Blood Rage models are plastic, not resin. I'd recommend getting primer from a hobby store like Michael's or Hobby Lobby. It should be a little cheaper if you get one of their 40-50% off coupons from their websites. This should be fine. As with any primer, you'll want to spray 1-2 thin coats, preferably when the air is dry (less than 50% humidity). You won't lose any detail that way.
As for the wash, you probably could get away with 1 of those bottles. You could either order 1 and then just order another (if you're ok waiting) when/if you run out, otherwise just order 2 right away. If you ever paint other models in the future, you'll use it.
Edit: I'd also recommend getting some Blue Tack to stick on the bottom of your models so you can stick them to some cardboard. It makes it easier to bulk-prime, and if you're just using a wash on them, you don't even have to remove them from the cardboard when you do that.
I bought these large binder clips and had them on my pack. Worked great, never lost socks.
http://www.amazon.com/dp/B002VD6BLG/ref=sr_rp_1?m=ATVPDKIKX0DER&ie=UTF8&qid=1458326097&sr=sr-1&keywords=binder+clips
The BEST bag clips ever made are binder clips. They are metal, but they hold everything well, & come in several sizes.
ACCO Binder Clips, Large, 1 Box, 12 Clips/Box (72100) https://www.amazon.com/dp/B002VD6BLG/ref=cm\_sw\_r\_cp\_taa\_LFB7BbWGKWT3M
You might be already using it. It's this stuff http://www.amazon.com/3M-Scotch-Mounting-5-Inch-75-Inch/dp/B00004Z498
I use as little as possible and take it off with a heat gun or hair dryer to keep it from ripping off the drywall.
Use the 3m clear double sided mounting tape. http://www.amazon.com/Scotch-Heavy-Duty-Mounting-Clear/dp/B00004Z4BU
I have used this for many different body molding/piece applications and holds up really well.
Cut and fit with a razor knife, clean affected area before applying and then use a small clip clamp or anything else to apply a big of pressure to it and let it settle and dry for a few hours, should hold up great.
I have even used it on exterior body moldings and holds up in the summer heat.
Here are some techniques that other customers have used and had some success with.
A. Use a 2" long peace of Monofilament fishing line or dental floss as a saw to cut the 2-sided tape. Place the line between the device and the surface it is stuck to, and saw as you pull the line across the surface.
B. Using a dull butter knife by prying at the corner of the device and slowly work your way around the device while prying a little at a time.
abode does not sell the two sided tape so we recommend using the 3M or Scotch indoor-outdoor Mounting Tape, it is gray with a red peel off backing and you can cut to fit. Found at Walmart and your local hardware stores.
Link to the tape of choice:
https://www.amazon.com/3M-Scotch-4011-Exterior-Mounting/dp/B00004Z4BV/ref=sr_1_1?ie=UTF8&qid=1498474461&sr=8-1&keywords=3M+Scotch+4011+Exterior+Mounting+Tape%2C+1+in+x+60+in
http://smile.amazon.com/Scotch-Exterior-Mounting-1-Inch-60-Inch/dp/B00004Z4BV/ref=sr_1_2?ie=UTF8&qid=1419191264&sr=8-2&keywords=3m+mounting+tape+4011 Use this shiz right here.
Don't use the provided tape. Buy some like this:
​
https://www.amazon.com/Scotch-Permanent-Mounting-Tape-Inches/dp/B00347A8GC/ref=sr_1_18?crid=1L0TL2R82UIAJ&keywords=3m+double+sided+tape&qid=1554233502&s=gateway&sprefix=3m+%2Caps%2C157&sr=8-18
​
Or this one for extra strength:
​
https://www.amazon.com/Heavy-Duty-Exterior-Mounting-Tape-Holds/dp/B00004Z4BV/ref=sr_1_3?crid=1L0TL2R82UIAJ&keywords=3m+double+sided+tape&qid=1554233502&s=gateway&sprefix=3m+%2Caps%2C157&sr=8-3
I use this stuff - http://www.amazon.ca/gp/product/B00004Z4BV?psc=1&redirect=true&ref_=oh_aui_detailpage_o02_s00 to attached a couple of strips of metal or wood to the back of a print, then string a wire between the two and hang the wire on a nail.
You end up with something approximating this mount sold by Posterjack - http://www.posterjack.ca/1.0/STATIC/CONTENT/Photoboard_Tabs/photoboard-hanging2.jpg
Instead of double sided tape, use sticky tac, more pliable and doesnt leave any residue.
Preferably you need the cap to seat the thumb covers properly.
but you could use some thing like Uhu Tac to apply it to the controller and keep it there until you do find a thumbstick replacement.
What do people do for extensor work? Would some work with those mini bands (like these) be enough? How much/often do you do it?
I'm just looking to balance out work from the standard beginner routine in the FAQ. Or, I guess, wondering if I even need to.
edit: I'm specifically for the fingers.
I like the bands better than the individual fingers but YMMV. I have the "Ironmind" brand and I love them:
https://www.amazon.com/IronMind-Expand-Your-Hand-Bands-Authentic-Effective/dp/B00083B79M/ref=sr_1_17?ie=UTF8&qid=1527635369&sr=8-17&keywords=finger+resistance+bands
There was another thread about that the other day https://www.reddit.com/r/dragonquest/comments/cm9a2s/this_dqiii_hero_bring_arts_figure_is_awesome/
They also mentioned the hands, and mine has the same problem so it seems to be the line.
And if you think Erdrick is hard to balance, try Alena. Between the hair, hat and cape she's top heavy and all over the place ith weight distribution.
For standing them, some people use tack. It won't let you do anything with them, but it can make the difference.
Personal suggestion, put packing tape (the thick clear stuff) on the backside of the poster in the corners and maybe a few other places, put a glob of blue sticky tack on the tape, and then mush it up on the wall. The tape on the poster will keep the tack from tearing the poster when you try and take it off.
Although, it would probably be better to take the poster to a copy shop or office (depot/max/whatever) shop and get it laminated. They might have a laminator big enough, call ahead first.
Here is my list I will put links when I can.
Citadel Shades- also known as washes. I would suggest Nuln Oil as your black wash and Reikland Fleshshade as a brown wash. Example you would black wash the probe droids but I would suggest the brown wash for the wookie.
I find these washes great for new painters because you don’t have to do anything to them. Use them right out of the pot.
http://www.games-workshop.com/en-AU/Citadel-Shade
Also the Citadel base paints that have the metal look to them like lead belcher are excellent for doing highlights on metal surfaces like the blasters or the droids.
For all my normal colors I only use the 1$ acrylic paint from normal craft stores. They work just as well as long as you water them down. You pay more for the special miniature paints and Side by side I did not see the difference in my Minis.
For primer I use white for most things even stuff that will be dark. It is much easier to make something darker. It is harder to lighten up it back up. The washes especially the black wash will darken up the mini as well so it is important for the colors to be brighter than you think they will needed to be.
Some talked about having to do more than one coat and for about half my colors I normally do two coats but the white gives me the freedom to just do one coat if I want it to look lighter. Example I have to paint a mini one time that was wearing jeans. I only applied one coat of blue paint then used the black wash over it. This gave the jeans this faded look and was done much easier than having to do the lighter highlights by hand.
For brushes a size 0 1 and 2 would be a good start. For washing I use a side 3-4 as well since that makes it quicker.
Varnishes there is only one to use Testors Dull coat
http://www.amazon.com/Testor-Corp-1260-Spray-Testors/dp/B0035LOUMU
Ok here are items that are just really nice to have that you may not have thought about
You will need something to put the models on while you are painting them. I use corks and you can get those at a local craft store then you pick your brushes up. You don’t want to be holding on the mini while painting as your figures will pull even some of the dry paint off with enough handling.
Best way to attach them to the corks is poster tack. It is reusable and holds them very secure.
http://www.amazon.com/Elmers-Poster-Reusable-Adhesive-E1531/dp/B000BKQDB4/ref=sr_1_3?ie=UTF8&qid=1420900105&sr=8-3&keywords=poster+tac
For priming I have seen a lot of people use a box to prime the minis and I have done this but I find it sometimes hard to get primer over the bottom of the minis. My solution to that is a yard stick. You are going to get paint all over it so make sure it is not one you ever plan on using as a yard stick again. Use the poster tack to minis to the stick. This allows me to flip the minis over completely to be able to get primer even in the hard to reach spots. I can spray about 12 minis at one time.
Edit wanted to add some examples of my work. These are the first minis I ever painted.
http://s750.photobucket.com/user/mrush007/slideshow/Zombicide%20First%20Batch
For next time. :)
I give you... [sticky tack](Elmer's Poster Tack, Reusable, 2 Ounces https://www.amazon.com/dp/B000BKQDB4/ref=cm_sw_r_cp_api_PhHVzbS0QAD20)
After seeing the various customizations out there I decided to take a shot at my own. I'm not a crafty sort (as you can probably tell) but I am pretty happy with the outcome.
This setup lets you see enemy number, HP, and status without having to look at a computer screen or sleeves. How to do it...
UPDATE: Don't buy them- the yellows are defective and you can't easily insert your standees without scuffing them.
https://www.amazon.com/gp/product/B000BQMFEC/ref=oh_aui_detailpage_o03_s00?ie=UTF8&psc=1
https://www.amazon.com/gp/product/B00MDU77YW/ref=oh_aui_detailpage_o03_s00?ie=UTF8&psc=1
Even if you aren't very crafty this is pretty easy to do and it makes updating combat results a breeze. Just rotate the dice and attach status as needed. I'm always looking to optimize, so if you can think of any further improvements, let me know!
> Am definitely thinking contrast paints are the way to go for starters. Do they come in inclusive sets?
​
Depends on if you remember how to paint, really. It's another way to do things. No sets, AFAIK, but they are intended to replace base, shade and layer paints with one paint, so they're overall either cheaper or better value for money, if you didn't do highlights before contrast paints.
​
Supplies:
--Razor knife
​
--Cut mat
​
--plastic glue
​
--*thick* superglue
​
--Spray primer of choice
​
--cheap arts & craft store brushes
​
--sticky tac
​
--gatorade caps
I've started using putty tack, like this. No residue, very reusable, conforms to different component heights. It's worked out very well so far.
Been painting a few years and lurking here forever, here's my advice:
> Mixing Brush: I am told that you should not mix paint with your primary brushes. Where can I buy a cheap brush for mixing, and anything special I need?
If I'm already using a "larger" brush (1 or higher) I'll mix with my good brushes and just be mindful of how far up the ferrule I am or use the back of the brush. If I'm using a detail brush I'll use a super cheap synthetic 2 or 3. Look on amazon or at a local art chain (Michaels) for cheap student grade packs of round brushes. You'll end up using these for terrain, PVA glue, and all sorts of other things.
> More Brushes: My kit came with a 2 flat and 0 round. What other brushes will I need, and what in your opinion is a good brand to buy? Any set that covers all the basics? Although I am new to painting, I'd like something that will last me and be quality. They sell SoHo brushes in my local store, which look like they are great quality. Any users here?
This topic can get pretty involved. Brushes have a lifespan so if you're new to the hobby I wouldn't recommend dropping money on higher end Kolinsky brushes like W&N Series 7 or daVinci Maestro. For a new painter I recommend Winsor & Newton's University series and Army Painter's Wargamer brushes. The W&N University brushes are higher than average student quality acrylic brushes that can be abused. They're great for basecoating with thicker mixes. The Wargamer brushes are a cheap intro into real sable hair so you can get started at layering with thinned paints.
> Primers: This is a big ? for me --- Spray primers, basic black white and grey? Which ones, what brand, etc... Really unsure what is recommended here, as in a store there are so many, but hoping /r/minipainting can help as we are all painting the same stuff. Would love some specific product recommendations here.
For the most part, you have three options: spray cans, brush-on, and airbrush. I can't really recommend spray primers - they require ventilation, have trouble with humidity, and can only be sprayed at one consistency. Many of the hobby spray cans advertised for basing your minis aren't actual primers. Brush-on primers are the most economical but run the risk of losing detail on the mini if applied heavily. Airbrushing is my preferred method using either Mr. Hobby's Mr. Surfacer 1500 thinned with Mr. Color Leveling Thinner for highly detailed minis, or Vallejo Primer for tabletop quality minis. Vallejo Primer's are acrylic and polyurethane so they're more protective but can sometimes take away detail.
> Finish: I saw a few videos where they spray some 'protective' finish on a product, I believe there are matte finishes as well as gloss finishes? Can I get any 'matte/gloss finish' product, or are there certain ones for miniatures?
Same three options as priming. If your minis are going to be handled often, I recommend a glossy coat then a matte coat. Glossy varnishes are stronger than matte varnishes, so this combo will give you the most protection. You are more likely to lose some detail this way. If your minis are for display only you can skip the varnish and just be careful. Dried acrylics are basically thin plastic so they have some durability on their own. Brand-wise I airbrush using Liquitex Professional gloss and matte varnishes, thinned with Vallejo airbrush thinner and a drop or two of Vallejo flow-improver. Vallejo varnishes are also good but Liquitex offers the best bang for your buck.
> Mini Holders: I found this product which looks amazing, but is not available until late 2017 since the Kickstarter has ended. Are there any similar products that someone could recommend, or should I just go with something very simple? Would love to hear some ideas.
I use an old Citadel paint pot and white poster tack to stick to the bottom of the base. If you want to paint individual parts, heat the tip of a needle/pin with a lighter, press it gently into the glue joint of the mini (the hole will be hidden later), then press the other side of the needle into a wine cork or similar.
> Brush Care: I got a "masters" paste from a store that I was told to rinse and swirl my brushes in after painting. Any other tips or is this okay?
Master's is the best option, just make sure you follow the directions and use warm water for best results. You can also get a small bottle of W&N Brusher Cleaner and Restorer to have on reserve if you accidentally let paint dry on one of your better brushes. If it's a cheap or synthetic brush you can clean it with original Windex (WITHOUT Ammonia-D) or Vallejo airbrush cleaner, followed by a wash with Master's.
> Carving/Scraping tools: I know some minis need to be cut from a sheet and some have mold lines that need to be cleaned. How is this done and what tools are needed?
Get a decent pair of sprue cutters - I recommend these. You should be able to find these for $10 at a local hobby store. For plastic minis you should be fine with just an X-acto or similar knife for getting rid of mold lines - just run the blade mostly perpendicular to the line and "shave" it gently.
> Storage Box: For all the little things that come along with painting, what do you use/recommend to store everything in?
A coffee mug works fine as a brush holder. You can try a hardware store for all sorts of containers if you're traveling with paints. Otherwise desk space and some imagination (spice racks) or money (official paint stand) are all you need.
> Paint Agitators: I was told to get some steel balls and put them in every paint bottle I have. It's okay to leave them in there. Would these work, or any concerns?
Please do not use steel ball bearings. You can attempt to buy "marine grade" ball bearings but unless it's reputable and expensive they are still likely going to rust and ruin your paint. I use hematite beads for necklaces for my paints. 4mm for dropper bottles and 6mm for pots. You can get them cheaper at Michaels w/ a coupon and they're inert so they won't stain your paints.
> Flow Improver: Thoughts? I was told to mix this into my washes. How much should I add, one drop? Is this product okay, or is this only for airbrushing?
Flow improver is generally used for airbrushing to extend the drying time and prevent clogs. Fluid retarder in the form of actual art supply from W&N or Liquitex, Vallejo's Glaze Medium, or Games Workshop's Lahmian Medium are what you're looking for. These can all be used to turn a normal paint into a wash (heavy dilution), or can be used to extend drying time for wet blending (light dilution). I can't give you exact ratios as each paint company, each color, and the age of your paints will dictate that. Trial and error is the only method here.
One thing that hasn't been mentioned yet is a wet palette. It will save you a lot of headache when learning to wet blend and will let you save mixed paints for many days. You can get one for cheap and use either the papers that come with it or kitchen parchment paper. Both will yield different results so play around with both. Be sure to use distilled water or you're likely to get some funk from mold after a couple days.
I've made my own from some of this stuff: Locktite Fun-Tak Mounting Putty as I remember that it was a recommended use of another brand my mom used to buy years ago.
Blue tack - this is a semi-sticky putty that is really good at getting the dirt in crevices. Basically you push it down onto the dirty area and then lift the putty and it will take the dirt off with it. It won’t leave residue on your AirPods.
It's called Blu-Tack.
https://www.amazon.com/Blu-Tack-060968-Reusable-Adhesive-75g/dp/B001FGLX72
> Put your mini on something, like in my picture it's tac'd to a piece of 1" pex. A lot of people put theirs on an old pill bottle or something. POINT IS, not to hold the mini with your hand. Keeps oils off and makes it easier to paint.
Blu-tack and a wine cork.
My mother had both of her gen airpods go significantly quieter to literally no sound at all. Literally to the point where we were convinced that it was beyond repair. Then used Blu-Tack on both airpods and it literally goes inside the mesh and sticks to everything and gets everything out. To the point where it sounds like new. Ive been there and Blu-Tack was the solution. https://www.amazon.com/Blu-Tack-S050Q-Reusable-Adhesive-75g/dp/B001FGLX72/ref=sr_1_6?keywords=blue+tack&qid=1571687327&sr=8-6
Blu-Tack Reusable Adhesive 75g https://www.amazon.com/dp/B001FGLX72/ref=cm_sw_r_cp_api_KMKPzb07ZXA7T
I pull off a half-inch piece and use it once a week for 4 weeks. It'll last you a lonnnnng time for almost $7.
Blu-Tack
It's a dream on AirPods too.
Thank you! I will try all those points that you've mentioned! As for the eyes, I wasn't brave enough to paint the black of the eye. Didn't want that guy to end up looking like a lizard.
As for the blu tak, do you mean something like this?
Use these to help hold the belt on the cams once you get everything lined up: https://www.amazon.com/ACCO-Binder-Clips-Large-72100/dp/B002VD6BLG
I think she means these https://www.amazon.com/ACCO-Binder-Clips-Large-72100/dp/B002VD6BLG
Please do. Everyone should know magnetic sheets
I used a combination of [magnetic sheets with adhesive] (https://www.amazon.com/gp/aw/d/B003XNAHMC/ref=ya_aw_oh_bia_dp?ie=UTF8&psc=1) and a PEI sheet. Works like a charm
edit: here's some pics of when I was putting it together: https://imgur.com/gallery/kvChO
I actually used magnetic sheets.
They have an adhesive side but I just stapled them to the wall using a thin caliber staple gun. To be honest I even cut those sheets in half and spaced them about a few inches apart. They are surprisingly strong and could hold more than 1 steelbook easily with half a sheet.
https://www.amazon.com/gp/product/B004SOV4NQ/ref=ppx_yo_dt_b_asin_title_o01_s00?ie=UTF8&psc=1
I used those sheets and cut them into 4 evenly pieces. They're adhesive magnetic sheets so 1 side you use to stick on the wall, and the other side you stick the steel books to.
I used some extra tape to prevent the adhesive tape to fall off due to the weight of the steel books. The magnets themselves are very strong so it really holds them in place.
EDIT: If you need visual aids, I live streamed the entire process minus me cutting the sheets into pieces:
https://www.twitch.tv/videos/498237626
Once in a while you can see the adhesive fail due to the weight of the steel books hence the use of tape for reinforcement.
I have my E6 attached to my Fuze with 3M Dual Lock. Here's a good article from InnerFidelity with some more information.
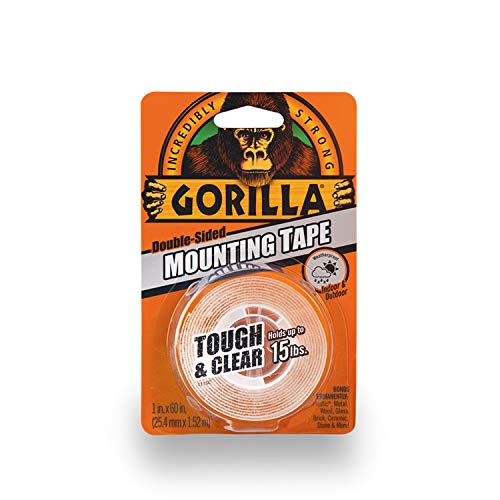
Generally you can use double sided mounting tape. I like Gorilla Heavy Duty Double sided Mounting tape (~$6 USD)
Battery Packs: It is an option, but most don't.
This would power the dash cam + Charge when the vehicle is running, and not effect the vehicle's battery at all.
With battery packs, it may or may not be able to detect if the vehicle is on/off. It really depends upon the setup. With retailers - like Blackboxmycar - They can tell you a lot more about battery packs than I can.
I love the Gorilla Glue double sided tape I use it to hold phone holders on my dash, and dash cams to windshield. Holds up well in hot summer and cold winter.
edit: I linked to the Light weight version, I am using the heavy duty version
heavy duty double sided tape
https://www.amazon.com/Gorilla-Heavy-Double-Mounting-Inches/dp/B019HT1U9E
Just stick the device to the back of the TV and then use some twist ties to manage the extra cable.
Gorilla Heavy Duty Double Sided Mounting Tape, 1 Inch x 60 Inches, Black https://www.amazon.com/dp/B019HT1U9E/ref=cm_sw_r_cp_apa_i_agcKDb57HPFPR
No issues. Use this stuff all the time, holds a lot of weight. I've used this set for 4 months and it survived me going on vacation too.
You can use double sided tape like this, or you can opt for removable hooks and put up canvas pictures.
You could try a speaker mount like this, this or this. I wouldn't recommend drilling into the device to mount to it but it should be light enough that you could 2 sided tape it to the mount.
The pocket clip is a Nite Ize Hipclip and I used Double Sided Gorilla Tape to stick the two halves of the bit kit together.
Dont pay them for another band its a huge rip off.
Get this
or jerry rig something to make it stay on, but its def not worth paying to just replace your band.
Gorilla Heavy Duty Double Sided Mounting Tape, 1 Inch x 60 Inches, Black https://www.amazon.com/dp/B019HT1U9E/ref=cm_sw_r_cp_apa_i_ifYHDbBDFPAP9
Double sided tape failed me too until I bought this one. It's been over a month and it hasn't fallen yet. It's still really solid.
Gorilla 6065001 Tough & Clear Mounting Tape, Double-Sided, 1" x 60", Clear https://www.amazon.com/dp/B00OXVG9FW/ref=cm_sw_r_cp_apa_i_C3laBbWV649ZY
What about something like this: https://www.amazon.com/Command-Picture-Hanging-16-Pairs-PH204-16ES/dp/B073XS3CHV?ref_=fsclp_pl_dp_1
Or this:
https://www.amazon.com/Gorilla-Heavy-Double-Mounting-Inches/dp/B019HT1U9E
Or Hot glue?
Foam tape is the real hero here.
So my internet was having issues and I decided there has to be a better method. So I spent like an hour drawing something up in MS paint (I suck at drawing and can't use PS). Just as I'm getting ready to upload an image of it, I think about discs with a beveled inside grip and how I could make those stay better. So I come up with the idea for a little rubber or maybe some double sided mounting tape for added grip. This tape. Damn it. That's when I realized, that sort of tape with a modified L Bracket (so it looks more like an M) would be all you need, and would hold better than anything else out there. All that work for nothing. :(
This double sided tape is finicky, but sticks VERY well: https://www.amazon.com/Scotch-Permanent-Clear-Mounting-pounds/dp/B00004Z4BU
I'm new to dios too, but the hobby costs so little in comparison to purchasing figures (and comics) that wasting a bit of material in testing and mistakes doesn't make too meaningful an impact on a budget.
Share what you make whenever you make it!
Scotch Clear 3M Mounting Tape
https://www.amazon.com/dp/B00004Z4BU/ref=cm_sw_r_cp_apa_gChwzbA01A1JK
I heat shrink them and then use 3M gel tape (it's super sticky and non-conductive but still removable) I also add a tie wrap over it for good measure even though it's probably over kill for small esc's.
You can drill some holes or use the tape of the gods. This stuff is great to have around regardless.
Regarding fans, it is 4 channels not 4 fans, I'm about to put 12 onto mine.
https://www.amazon.com/Scotch-Heavy-Duty-Mounting-Clear/dp/B00004Z4BU
The power strip is attached with this tape. I used cable clips similar to these but replaced the crappy tape that comes on them with the same stuff I used for the power strip. The ones I actually used I found at Ace Hardware. All of the power bricks are attached with Velcro so that they can be easily removed. I also used these cable ties so, again, everything can be easily removed. I was able to pick it all up at Ace Hardware but if you're not near one of those I'm sure Homedepot or any hardware store should carry most of this stuff. Hope this helps!
Good to know, I'll just go to a cabinet store soon, and this the 3m tape?
3M Scotch 4011 Exterior Mounting Tape, 1 in x 60 in https://www.amazon.com/dp/B00004Z4BV/ref=cm_sw_r_cp_apa_Ju0pzb6J6NH24
I should have just put the link in my original comment... I'm lazy :P
Here ya go... It's even cheaper than when I got mine. Now $3.33 with free shipping. It is NOT a high quality dock, but it definitely works with a (larger) case on the phone. I used some 3M double sided tape. This tape is STUPID strong, and has a variety of uses. I always have a roll in my tool kit.
Try this 3M Scotch Permanent Outdoor Mounting Tape. It last through baking heat and freezing snow. Make the most use of all surface area. Like MrPolymath said, heat the tape first (I sit on it for a few minutes). When you apply it, press on the radio hard for 30 seconds. I think it'll hold.
Mounting tape. Hardware store carries it.
Just be careful with tape, sometimes even that can damage the walls. Personally I'd recommend the tacky puddy to attach to the wall.
https://www.amazon.com/dp/B0000AQODM/ref=wl_it_dp_o_pC_nS_ttl?_encoding=UTF8&colid=OO0Z0WWHBY9B&coliid=I2Q3518UJM0SL4&psc=1
Have you thought about using removable glue pads like these to maybe add more support for the fans and absorb some of the vibration to reduce noise?
https://www.amazon.com/removable-reusable-objects-surfaces-99683/dp/B0000AQODM/
It's basically like slightly sticky Play-Doh, won't do much good on its own but I imagine that it would work pretty well if combined with those zip-ties.
http://www.amazon.com/Saunders-Removable-Adhesive-Putty-99683/dp/B0000AQODM/ref=sr_1_1?ie=UTF8&qid=1369673756&sr=8-1&keywords=patafix
looks cool
I recently started using Scotch Indoor Mounting Tape, 1-Inch x 125-Inches, 1-Roll (314P) https://www.amazon.com/dp/B0007P5G8Y/ref=cm_sw_r_cp_api_2K4ozbBQQ3846 and I've been extremely happy with the hold on heavier metal figs. I have to pop the base off with a knife, but the mini stays put.
Get the 3M brand mounting tape. This is the exact solution I use for my magnetic strip. It works great. Here's a link.
You should get the SF450 with the Node 202. Use double sided mounting tape for the SSD.
You won't be hitting over 300W with most Node 202 build. The SF450 is noticeably better quality, quieter, and is modular. The FD Integra may work for a locked i3/i5 + 1060 or 1050, but anymore than that you should get the SF450.
You should get some kind of wrist extensor training tool to counter the flexor training you are about to do. I use these: https://www.amazon.com/dp/B00083B79M/ref=asc_df_B00083B79M5284604/?tag=hyprod-20&creative=395033&creativeASIN=B00083B79M&linkCode=df0&hvadid=198074695887&hvpos=1o2&hvnetw=g&hvrand=7311871857324905174&hvpone=&hvptwo=&hvqmt=&hvdev=c&hvdvcmdl=&hvlocint=&hvlocphy=1023191&hvtargid=pla-320458756018
I love the CoC training tools, been using them for a while. Recently closed the 1.5 and now the 2 is what I am aiming for. Busting them out at parties to fuck with people is fun as hell
Grip training is tricky because compared to most other forms of strength training, there is much more emphasis on tendon strength. And the thing about tendons is that they don't give you the same kind of feedback that muscles do when they get tired. All this means I've found it's easier to overtrain and injure your tendons, and so it's important to throw in extra rest days here and there, especially as a beginner or when upping the resistance.
Take some time off, stretch your hands, and you'll probably be alright.
Also, don't neglect the forearm muscles used to open your fingers. A lot of grip trainers focus solely on squeeze strength to their detriment, the equivalent of exclusively working out your biceps but never your triceps. For the most effective strength t's important to work complimentary muscle groups. I've been using these after a tennis player friend recommended them to me a few years ago and they're excellent.
Not really gains but for strength: this and this have worked well for me.
These are what I've been using for my marvel legends and black series figures.
http://www.marauderinc.com/mobile/Category.aspx?id=1836
I also use blue tack
Elmer's Poster Tack Reusable Adhesive, 2 Ounces, (E1531) https://www.amazon.com/dp/B000BKQDB4/ref=cm_sw_r_cp_api_d011xb98MDCE3
Related, I got Elmer's Poster Tack and it works well for me. Not sure what the difference is other than being blue.
https://www.amazon.com/Elmers-Poster-Tack-Reusable-Ounces/dp/B000BKQDB4
Response to question block 1
I have yet to play against the AI player ("Alien Player"), and while the Doomsday Weapon scenario is a bit "simple" I find it enjoyable trying to build up and prepare for the onslaught of a superior foe. Then gain, I like the theme and simple play of Ogre (so glad I got the pocket edition when it was $2.95; I can't see paying for a deluxified version of this, but I do know back in the day people did buy minis and those did look pretty awesome).
Close Encounters adds in a challenge against Space Amoebas plus revises the alien AI. Better yet (for me), it adds in a cooperative mode and a way to play that aren't "kill another player".
I haven't even punched my Replicators expansion yet, so I can't comment on it. Nice hex tiles are included through.
 
I do want to note that there are ways to speed up the play of Space Empires: 4X:
The point is you could probably get a fast multiplayer game in, and then as the group gets faster you can start dropping some of these to experience the fuller flavor of the game.
 
Concerning the P500, there are some staple games that GMT will always print. Men of Iron: Volume I failed at P500 and wasn't printed due to costs, but is now back in a tri-pack. Twilight Struggle will always be reprinted despite the P500 number because it will eventually sell (and has made enough to justify keeping a stock on hand). Space Empires: 4X products are between the two, but on the side of "reprint it as it will sell."
 
Response to question block 2
The game board is 21" x 28.75", so it should fit in the 35.5" x 25.5" size - but it may shift around. Solution? Buy some poster tack and tear off little pieces. If you aren't leaving it set up for months, this should clean off nicely. Since you aren't hiding your units from an opponent, they can all be face up with the number indicator next to them (though you might run out of space if you develop large fleets - but then use post it notes and make fleet boards to track... Close Encounters comes with 3 fleets, which is disappointing as Stellar Conquest had 15 fleet counters - so maybe make your own counters).
 
Rather than setting up the board with exploration tokens, get some draw bags and draw as you explore (maybe put a cube or a piece of poster tack on unexplored spaces to mark them... or a piece of post-it note). I like one for each player homeworld color plus one in black for deep space counters. This speeds setup/teardown for me.
Also, get some GMT counter trays to sort/store all those counters and use the tray divider template. I have 4 player trays with all their ships and 1/4 of the number counters on the top two rows divided up into thirds, and this fits the first two expansions in. On the lower half I have full sized bins for all the other counters (MS pipelines, colony ships, homeworld counters, fleets, etc). It works very nicely, but I'll probably have to subdivide a couple more bins once I punch Replicators. The great thing about the trays is they have lids that are fully removable, so quick setup and and quick teardown.
 
With these tricks, I think you should be able to setup, store, restore, and then tear down the game pretty efficiently without too many problems - but still take photos just in case.
**
EDIT: Solo Scenarios
Okay, did a read over the rulebooks to break down the solitaire games.
Solitaire Scenario #1 & #2: Doomsday Machine (**Base Game)
Small or large map. Build up your colonies & defenses to face off against 3 waves of increasingly tougher Doomsday Machines. Basic tutorial on how to build up defenses in light of a statistically superior foe, but won't teach you how to get aggressive and win the game normally.
Solitaire Scenario #3: Base Game Alien Player(s)
Face off against 2-3 alien players. These aliens get CP in a few different categories (defenses, tech, fleet), where fleet CP are not spent until you either move to attack their homeworld or encounter one of their fleets. There are two types of fleets: regular and raider (cloaking). It gives you more of a sense of what it is like to go out an attack while defending yourself against other players, but you don't get to see the same stacks as you would in a multiplayer game.
Solitaire Scenario #4: Space Amoebas (Close Encounters)
Three different giant space amoebas have appeared in deep space. While expanding, you need to research science technology so you can eventually build space vessels (no counters provided, use mine sweepers counters instead). Then you have to go out and survey the amoebas, earning 10 research points to determine how you can attack them. Finally, you build a fleet and go wipe them out. Oh, all the while the amoebas will be dividing and slowly taking over more and more hexes. You can build mines and move them into a hex where the amoebas are to stop the spread that turn, but then there is a chance they will learn to attack the mines and become immune to them.
Your goal is to save your civilization from this encroaching threat. Difficulty determines how soon they start spreading. This is the opposite of the Doomsday Machine scenarios, so you are instead focuses on learning how to build an offensive fleet and how to take the battle to an enemy.
Solitaire Scenario #5: Close Encounters Alien Player(s)
This uses a base game like system but adds in a bunch of extra rules from close encounters, and there are flowcharts to help determine what the alien players does. The aliens now can colonize planets, take over your colonies, build exploration and extermination fleets, might destroy colonies that they can't take with ground troops, get alien artifact cards, and so on.
Solitaire Scenario #6: Close Encounter Alien Player(s) VP game*
Takes the 2 player cooperative variant with a galactic capitol you need to protect and turns it into a solo game. Aliens also now earn VPs, so can also win that way.
 
As /u/grey81 said, it isn't quite the real game. You don't have another intelligent human player moving pieces and developing stacks, you don't see them revealing colonies and building MS pipelines, and you don't see the stacks suddenly shift towards you and ask yourself "is it a bluff or an attack fleet - and do I have tech to defend or should I go on the attack first?" However, the basic game even multiplayer is still "survive the onslaught while figuring out how to attack yourself" and isn't that much different from the Solitaire Scenarios (especially the Close Encounters alien player ones).
Either way, as a solo player I think Replicators isn't too useful to get beyond having some neat components. No solitaire scenarios officially made for it, and I'm not sure you could use the content in it too effectively for a solitaire scenario. Unfortunately, multiplayer solitaire wouldn't work well for this game due to hidden information and a bluffing element... so you'll need to decide if it fits your style. (I personally am glad they have an objective based solitaire mode vs "get your best score" type play you see in Agricola or Subdivision* - but others love that style and hate this battle oriented style of victory.)
If the glue itself is her concern you can use "Poster tack" it's removable and leaves no residue.
https://www.amazon.com/Duck-Removable-Mounting-Poster-1436912/dp/B000BQMFEC/ref=sr_1_3?ie=UTF8&qid=1510170671&sr=8-3&keywords=poster+putty Poster Putty is useful when holding components in place while soldering, for those that dont have a fancy circuit board holder.
i use [poster tack] (https://www.amazon.com/Duck-Removable-Mounting-Poster-1436912/dp/B000BQMFEC/ref=sr_1_3?ie=UTF8&qid=1473540329&sr=8-3&keywords=poster+tack)
Never done it, but I would try something like a padded laptop tray and use some poster putty for the cards to keep them in place.
I don't know the proper name but we call it sticky tack. It's used for hanging posters ect on the wall. You can find it with office/school supplies. It typically comes in blue or grey.
Amazon link
You could, but I've never had any problems using this http://www.amazon.com/Factory-Card-and-Party-Outlet/dp/B000HAZCS8 Plus if you get to putting together many mini's at once it's a lot cheaper to have a pack or two of that than multiple of the stands. The way it works best for me is use a stiff piece of cardboard or plastic as a base, get the mini & tack setup in a way that's going to hold it in the right position, add the glue, and then just set it to the side. (The cardboard makes it easier to move without pulling any pieces apart) It's really handy for those times when the glue decides it wants to take all night and into the next day to dry, and you still have most of a pile of tack left to use on other mini's.
the dude looks like he's jerkin' the gerkin'.
you need environment. a long time ago i had scenes set up where teams would be fighting those big ass sentinels from the Matrix, and Overtkill from Spawn. Get bigger enemies and bases and junk to brace the things on, or get some sticky tack
A tip for the knees and the belt buckle. You can use sticky tack or similar products to mask off parts of the model to make really clean lines if you don't have a very steady hand (I know I don't for some scales).
I've been using kneaded erasers to tack my sample bottles down to the work space, but I imagine sticky-tack would serve the same role.
If you can, grab some poster putty at an office supply store. It'll hold the big gear steady. Have fun!
https://www.amazon.com/Elmers-Tac-Stik-Reusable-Adhesive/dp/B001CEMCXQ/ref=sr_1_2?ie=UTF8&qid=1500529294&sr=8-2&keywords=poster+tack
I use this for all my warriors, Tyrants, ect, way less time consuming than magnets
The slightest nudge will send her flying! I put a little poster putty under the feet of the Star Wars Pop!s that can't stand on their own (K2S-O Maz, IG-88, Hera, Sabine, ME-809) and firmly place them down on a shelf. I have also used it to place some Stranger Things literally upside down on the bottom of a shelf. The putty starts to warp and dry, so it needs to be replaced every few months or so. I take all my Star Wars Pop!s off the stands so they better match my other lines.
I'm interested in how well it saved the print! I've never seen that before. Do you think some Tac 'N Stik would work as well?
https://www.amazon.com/Elmers-Tac-Stik-Reusable-Adhesive/dp/B001CEMCXQ
https://i.imgur.com/fbPUCDG.png
No, it's not messy, it's not like gum, it's made to be reusable. It never really dries out but it's not very sticky. The one I have isn't even actually blue, like this one: https://www.amazon.com/dp/B001CEMCXQ/ref=cm_sw_r_cp_api_i_1qceBbVGTJTQ3
I use Loctite Fun-Tak. Here's Atom Smasher of Tabletop Minions discussing poster tack.
> Once you get good enough, using push pins instead of staples to hold up a paper target on a cardboard backer is cheaper and more convenient (for me).
Locktite fun-tak works great too. http://www.amazon.com/Henkel-1087306-Loctite-2-Ounce-Mounting/dp/B001F57ZPW
Poster tac | Blu tac - I haven't used it first hand (edit: on board games), but I'd be tempted to try this stuff as a something relatively inert, hopefully not going to interact with the inks etc., and non-permanent but will still hold things down/keep them from skittering.
Invest in blu tack. It is gentler on paper crafts than clear tape.
to stick the press on to the stand, use loc tite mounting putty
Loctite Fun-Tak Mounting Putty 2-Ounce (1087306) https://www.amazon.com/dp/B001F57ZPW/ref=cm_sw_r_cp_apa_i_JZt7CbC6S8NRZ
I have the exact same printer - what I've been using is mounting putty, rolling it into small balls, and then placing it under all four legs. The problem with Monoprice's printer is that the metal frame allows for a lot of vibration and shaking during prints (particularly fast ones), since usually one leg seems to always be in the air. Mounting putty dampens a lot of the movement and transfers it onto the table/surface, as long as you can place a small amount of putty on each corner, then press the printer down. Also, I mounted it onto a sturdy faux-granite countertop, which seemed to reduce the shaking to virtually zero.
Here's an example of the putty I use - I found it at a local hardware store for $2 a pack, and you can use it for a bunch of other non-3D printing stuff. It's non-toxic, easy-to-roll, has easy removal, worked in a bunch of temperature conditions, and stays pliable for a long time.
https://www.amazon.com/Loctite-Fun-Tak-Mounting-2-Ounce-1087306/dp/B001F57ZPW
I use this stuff: Loctite Fun-Tak Mounting Putty 2-Ounce (1087306) https://www.amazon.com/dp/B001F57ZPW/ref=cm_sw_r_cp_apa_i_pfp8CbWEJG0HD
I put some on a pops feet when it won't stand to help balance it out. There's probably better solutions out there but this one has worked for me. Hope it helps.
https://smile.amazon.com/Loctite-Fun-Tak-Mounting-2-Ounce-1087306/dp/B001F57ZPW?keywords=poster+putty&qid=1537728855&sr=8-5&ref=sr_1_5
Best thing I have used is blue tack that I got from amazon. It always cleans them really well for me.
https://www.amazon.com/dp/B001F57ZPW/ref=cm_sw_r_cp_api_i_hZXVDbFKDMGT4
Also called Fun-Tak
I've had good luck with fun tack.
http://www.amazon.com/Loctite-1087306-2-Ounce-Fun-Tak-Mounting/dp/B001F57ZPW
Based on reviews though I'd probably go wtih this for posters: http://www.amazon.com/Command-Poster-Adhesive-Value-48-Strip/dp/B001KYSAN4/ref=sr_1_1?s=hi&ie=UTF8&qid=1377529947&sr=1-1&keywords=command+strips
Yeah exactly.
This
You could also just put a post-it note.
I use sticky tack. You know. The poster putty. I do this with all my components too. I hate fiddling with helping hands and pcb holders. This stuff is blue gold.
https://www.amazon.com/gp/aw/d/B001F57ZPW?psc=1&ref=ppx_pop_mob_b_asin_image
As reference. You can get it at a ton of diff places by a ton of diff manufacturers.
http://www.amazon.com/Blu-Tack-Reusable-Adhesive/dp/B001FGLX72/ref=sr_1_1?ie=UTF8&qid=1371585585&sr=8-1&keywords=blu+tack
Blu Tack is the preferred brand I believe. It actually has decent reviews compared to sticky tack.
Interesting project!
I take it that the whole assembly will be mounted vertically on a wall for display purposes?
Would a few unobtrusive pins/ pegs/headless nails into the backboard in strategic places to support the Games/Console work? You could colour them to match the background, or even just make them into some kind of shiny feature?
Alternatively, perhaps some transparent acrylic sheeting made into either a narrow shelf/ shelves or some clips, might be an option which would be near-invisible at any distance....
Or could you bend some thin, stiff wire/ brass rod into supports/clips and fix it to the backboard, as this might also be quite unobtrusive depending on how you do it....
Otherwise, magnets and/ or velcro might be a good 'Plan B,' although be careful when using magnets around electronics! :>)>
A really cheap temporary solution might be a big dollop of Blu-Tack (http://www.amazon.com/Blu-Tack-060968-Reusable-Adhesive-75g/dp/B001FGLX72), but I'm not sure this would hold up very well over time :>)>
Hope that helps, good luck! :>)>
PS - don't forget to make the presentation frame easily openable, for when access to the Console is needed!
I haven't used it but have heard good things about Blu-Tack: https://www.amazon.com/Blu-Tack-060968-Reusable-Adhesive-75g/dp/B001FGLX72
This stuff?
Blu-tack, poster-tack, etc: https://www.amazon.com/Blu-Tack-060968-Reusable-Adhesive-75g/dp/B001FGLX72
A few tiny balls of this stuff under any speaker will keep it from walking. It keeps a light, cast-aluminum enclosure that I have on a glass shelf from dancing, and it scales up just fine.
(It will probably stain. So will anything else with some weight on it. I've had the non-sticky side of foam weather stripping pull layers of baltic birch plywood apart before.)
Recommend using Blu Tack to hold the speakers on the stands: https://www.amazon.com/Blu-Tack-060968-Reusable-Adhesive-75g/dp/B001FGLX72/ref=pd_bxgy_196_2?_encoding=UTF8&pd_rd_i=B001FGLX72&pd_rd_r=T8DVQH7MR5F6T8T55JWY&pd_rd_w=y4G37&pd_rd_wg=p7EBL&psc=1&refRID=T8DVQH7MR5F6T8T55JWY
Most commercially available stands will have 3M or similar two-sided adhesive. I use Blu Tack on mine, and it takes a surprising amount of force to dislodge the cabinets once they've settled. That's a US link, but I'm sure you can find it in Europe.
While I don't necessarily know what's available in your market, I will add that you should take precise measurements before buying anything. If those monitors aren't at ear-level, your sound is likely to be compromised.
Not entering, but I strongly recommend taking blu tack to hang stuff with...
Sorry, yeah tape, but some tape is hard to get off in the end so you can also use some of that Command adhesive solution that they use for frames, should not damage the speakers. Alternatively I personally just used Blu Tack.
I'll let you in on a little secret. Saved many a pretty thing in my house which is filled with cats:
https://smile.amazon.com/Blu-Tack-S050Q-Reusable-Adhesive-75g/dp/B001FGLX72
It won't save everything, but it helps a lot.
You need to put some weight on the hanging film. I use this to hang my drying films, and this on the end of each individual film.
Each film is different also, some tend to curl more than others, or band in the middle. After my film is totally dry I cut them into manageable strips and then inside a nice heavy book overnight, then on to scanning.....
I always go for personal stuff. So my Carcassonne set has the roads and monasteries themed after the Super Mario Brothers 3 world maps. The castle pieces didn't play nice with 8bit aesthetics so I kept the wobbly shapes and just filled them in with things we've done together, movies we've seen, dates we've been on, etc so that when a castle is built it's made out of our relationship. Which is WAAAY more symbolic and sweet than I intended it to be originally when I panicked after my Mario Brothers plan went to shit. Bought a little wooden chest with a latch for piece storage and burned the score track onto the top of it.
Catan will probably be similar in nature. I just haven't sourced out the wooden hexes yet or planned out if I'm using actual Catan cards or getting my own printed, etc. She likes Breaking Bad a lot, maybe I'll make an island based around meth production.
One of the things I found helped me with my versatool was using a large binder clip on the edge of my table. If you squeeze the little shiney wing you can take it off of the body, slip it around the cord, then reattach it to the body of the clip so that it acts like a catch for the rheostat.
8 hours!? YOU'RE AN ANIMAL! A MACHINE! If you've got about $10 go pick up a crappy burner from WalMart and try it out. At the very least you'll be able to identify if your versatool is holding you back or if you just have a slow, methodical pace.
Garbage Can
Large Binder Clips these are great for attaching things to your shade tent.
String, jumper cables, duct tape, mallet, tarp.
I see you have 4" ducting but trust me you're definitely going to want to have this, thankfully 6" ducting isn't to expensive. Also buy these, so much easier than duct tape and these for managing the ducting. This and this too for supporting the inline fan and filter, the inline fan at full power will vibrate very slightly and I feel that the bungee cords help minimize vibration. I usually use zip ties for managing cords but also as a precautionary measure, I have a few loosely secured zip ties on my inline fans just in case a bungee cord were to become unsecured which that has never happened thankfully but you can never be to safe.
Thanks! I have ordered magnet sheets like these ones and they work great. Cheers!
Yep! The Fredde desk, my best friend uses it as well. This is the link for the sheet magnets I ordered -
10 Magnetic Sheets of 8" x 10" Adhesive 20 mil Magnet https://www.amazon.com/dp/B003XNAHMC/ref=cm_sw_r_cp_api_1G2mzbEA12RZY
Yeah that's what I did with my Bernie bumper stickers. I ordered this one and it's still going strong 2 months later
https://smile.amazon.com/gp/product/B003XNAHMC/
What I would up getting was the following:
It is $12.99, and 14 ½x30 ¾. It will fit ten steelbooks, in the format I have shown, or horizontal.
8.5” X 11” sheets, you will get two steelbooks out of one sheet, with some left over; not enough to cover another steelbook though. You will have to cut out to size what you need.
These are 16lbs rated. I placed four on each side of it (top and bottom) and it’s holding well.
I will warn you, the board with the steelbooks is HEAVY.
https://imgur.com/gallery/x2bFz
This is one more photo to show how it looks.
Good luck man!
So, just realized my niece makes custom fridge magnets out of magnetic sheets, and magnetic tape,
https://www.amazon.com/10-Adhesive-Magnetic-Sheets-Magnet/dp/B004SOV4NQ/ref=pd_cp_201_2?_encoding=UTF8&pd_rd_i=B004SOV4NQ&pd_rd_r=f4a40075-bdbc-11e8-baee-c185d6b5ce16&pd_rd_w=vIPx7&pd_rd_wg=y9Rti&pf_rd_i=desktop-dp-sims&pf_rd_m=ATVPDKIKX0DER&pf_rd_p=3f5155f5-5438-4fc3-ab83-bf013cfc8883&pf_rd_r=32XQYT4WA504599VFQBE&pf_rd_s=desktop-dp-sims&pf_rd_t=40701&psc=1&refRID=32XQYT4WA504599VFQBE
could probably buy sheets and use that to make your own magnetic backing.
https://www.amazon.com/dp/B004SOV4NQ/ref=cm_sw_r_cp_apa_2SSBxbMC2ZTA0
This is what I use. You can buy it at pretty much any office supply store, hobby lobby, wal-mart, etc. https://www.amazon.com/10-Adhesive-Magnetic-Sheets-Magnet/dp/B004SOV4NQ
I've been looking for shelves, Magnetic strips for tools, and finally saw the post with the gaming steelbooks and the OP provided a link to these sheets on Amazon.
Magnetic Sheets
Magnetize them; buy a kit for doing so from Amazon...that and a metal used lap desk or playing card surface and you're on your way
Two decks of taro cards, some glue, scissors and patience and you should be able make a magnetic "tarot sandwich", albeit, ending up with a thicker card...
https://www.amazon.com/10-Adhesive-Magnetic-Sheets-Magnet/product-reviews/B004SOV4NQ
> I've heard some people aren't happy with how much exposed cable there is (aerodynamics). Also that there are no top tube mounts.
Both of these are easily remedied with some double sided velcro. I bought the TorHans AeroX bento, threw a couple pieces on the top tube and the box and threw my Di2 junction box in there then heat shrinked the etube wires and brake cables together. It's not perfect but it's wayyyy better than what it originally was.
One thought for an upgrade to replace packing tape. Velcro kinda sucks but 3m makes a great alternative. It holds my throttle down nicely.
3M Dual Lock Reclosable Fastener TB4575 Low Profile Black, 1 in x 10 ft (1 Mated Strip/Bag) https://www.amazon.ca/dp/B007OXK330/ref=cm_sw_r_cp_apa_i_Eti3DbY4RCZKP
It doesn't hold too well with vertical pressure, so might pop off easier than Velcro. But the horizontal strength is rock solid.
Might be a good way to snap your HOTAS in place.
Velcro no... Dual lock yes. This shit will hold anything
http://www.amazon.com/gp/aw/d/B007OXK330/ref=pd_aw_sim_229_2?ie=UTF8&dpID=51q78Sub96L&dpSrc=sims&preST=_AC_UL100_SR100%2C99_&refRID=1QW6DNJM6AH2MEJDBQ2H
A little bit of This
A little bit of That
A few of These
Only one of These
And if you're feelin' frisky, one of These
Scotch Outdoor Mounting Tape, 1-inch x 60-inches, Gray, 1-Roll (411P) https://www.amazon.com/dp/B0083K36KA/ref=cm_sw_r_sms_apa_F9ZOzbH4HQFEQ
I kept the dealership plates, which are made of think cardboard material, underneath my real plates. That prevents mine from rattling.
On my other car I used this: http://www.amazon.com/Scotch-Mounting-5-Inch-75-Inch-110/dp/B00004Z498
Its a thick mounting tape with I stuck to the back (only bottom side) of my plates. That helps from rattling.
This kind, obviously
Something like this?
I guarantee this will not fail you.
http://www.amazon.com/3M-Scotch-Mounting-5-Inch-75-Inch/dp/B00004Z498/ref=sr_1_7?ie=UTF8&qid=1417468989&sr=8-7&keywords=double+sided+tape
THIS SHIT
For posters I think regular ol' blu-tack would work just fine.
I generally use mounting tape though. Probably overkill for posters. Looks like this. You can find them at pretty much any hardware store.
How are you hanging them currently? I have a ton of this stuff up on my wall and I use 3M mounting tape. It hangs like a charm and if I need to move a panel, the tape comes right off, no damage to the wall or anything. I put up a link to the amazon page, but you can get that stuff at Walmart very cheaply
Light is attached to glass, I cut out a notch in the foam. I attached both using this http://www.amazon.com/gp/aw/d/B00004Z498/ref=redir_mdp_mobile/175-5003817-9937017
I used this stuff on popsicle sticks and stuck different grits of sandpaper to them. It works pretty well. I suppose you could also stick a bunch of pieces side by side on sandpaper to make little square pads if you wanted to. They probably sell it at hardware stores or retail stores. Craft stores also sell foam sheets you could cut up and glue or double sided tape sandpaper to.
I have had good luck with 3M double sided glass mounting tape. Its a translucent 1mm thick rubber material with strong adhesive on both sides:
https://www.amazon.com/Scotch-Heavy-Duty-Mounting-Clear/dp/B00004Z4BU
Here is an outdoor type:
http://www.homedepot.com/p/3M-Scotch-1-in-x-1-66-yds-Outdoor-Mounting-Tape-411DC-SF/100575385
Some 1/4" x 1/4" squares of 3m 4010 double sided tape would have helped in that situation.
http://www.amazon.com/Scotch-Heavy-Duty-Mounting-Clear/dp/B00004Z4BU
This. Nothing will every fall off the walls. Ever.
There's one for doors called Magic Mesh. You can also rig one up yourself with super strong tape and a roll of screen from a hardware store, but the magnetic closure is what makes Magic Mesh so convenient. I'd opt for the removable screens noted above.
http://www.amazon.com/Scotch-Exterior-Mounting-1-Inch-60-Inch/dp/B00004Z4BV
or
http://www.amazon.com/Scotch-Heavy-Duty-Mounting-Clear/dp/B00004Z4BU
Both should do the job just fine. The second one is weaker supposedly but I'm pretty sure it's the one I used for my power strips and they've held up well. I always worry about going too strong and trying to remove it later.
https://www.amazon.com/Scotch-Heavy-Duty-Mounting-Clear/dp/B00004Z4BU
https://www.lowes.com/pl/Double-sided-mounting-tape-Tapes-Glues-tapes/4294417407
the good stuff
Could be this tape. It is not exactly the samejet I think 3M is called Scotch in the US. The tape is quite thick and very sticker.
Should be pretty common, would be surprised if Wal-Mart doesn't carry it.
Here is an example of the tape on Amazon (not affiliated with the seller).
> Well shit didn't think about that with the controller. Here is exactly what I ordered.http://www.hobbypartz.com/79p-th9x-r9b-9channel-radio.html
According to the description it comes with a receiver.
> Just bought 2 of the 3S 5500mAh 30-40C
That should do you nicely.
> Any other random things you think we will need
Using amazon links and favoring prime options even if a few $$ more. The most cost effective way to get any of the below would be ebay and slow free shipping.
http://www.amazon.com/gp/aw/d/B00004Z4BU?pc_redir=1407223822&robot_redir=1
this is where I saw the idea:
the tape I told you:
If you can find either of the products, it should work :)
For some of the pieces you're not sure how to attach. Check out this stuff. http://www.amazon.com/Scotch-Exterior-Mounting-1-Inch-60-Inch/dp/B00004Z4BV/ref=sr_1_1?ie=UTF8&qid=1397179250&sr=8-1&keywords=3m+outdoor+mounting+tape
Used it for years in my R/C hobby, And am using it in my 540T and 900D in some spots. Stuff is absolutely awesome.. It's double sticky tape, that fucking works and isn't 1/2" thick.
3m heavy duty double sided tape.
BUT, when taking it down use dental floss to pull it off the wall, otherwise it will pull the paint and maybe drywall off with it. Shit if tough AF.
https://www.amazon.com/Heavy-Duty-Exterior-Mounting-Tape-Holds/dp/B00004Z4BV/ref=mp_s_a_1_7?keywords=3m+double+sided+tape&qid=1567187744&s=gateway&sprefix=3m+&sr=8-7
This is what I used. Heavy-Duty Exterior Mounting Tape, Holds 5 lb., 1"x60" https://www.amazon.com/dp/B00004Z4BV/ref=cm_sw_r_cp_api_xjM3BbXV25CPN
I've always done tape for alarm systems that aren't hardwired. Granted I don't use the included I use this stuff as it's way stronger https://www.amazon.com/dp/B00004Z4BV/
I just used this:
Heavy-Duty Exterior Mounting Tape, Holds 5 lb., 1"x60" https://www.amazon.com/dp/B00004Z4BV/ref=cm_sw_r_cp_apa_R8G4BbHZHE925
Some people also use a Velcro system so they can remove it if they want but this seemed cleaner and it's just as easy to take off with the tape but you'll need to put a new piece on if you do.
SSDs have no moving parts. Half the time I just drop them in the bottom of the case or shove them in 3/5 or 5/25 bays. I don't care where they go. I'm also a big fan of 2-sided tape. That stuff I linked will hold anything inside a case with just tiny bits of it. I've stuck SSDs and HDDs to it, and I've even mounted fans in odd places with the stuff, just tape triangles over the corners.
They are conservative with their estimates. I have a Corsair 200R, the allowable height is 160mm. I installed a glass window on the inside with mounting tape, so the clearance should be 160mm - thickness of the glass - thickness of the mounting tape. I got a 165mm air cooler, it fits.
I'd recommend this stuff rather than any sort of velcro.
this
You should apply it when it's above 50 degrees. Otherwise, warm up the wall, apply and hold for a minute or two to adhere.
I have 3 on my brick wall.
Like these? http://www.amazon.com/Scotch-Exterior-Mounting-1-Inch-60-Inch/dp/B00004Z4BV/ref=sr_1_1?s=hi&ie=UTF8&qid=1453050854&sr=1-1&keywords=Scotch+Exterior+Mounting+Tape%2C+1-Inch+by+60-Inch
I used this to my hold escs, RX, and VTX. Do you think this is up to the task of holding on in a crash, or should I add zipties. Thanks
Thanks! At first I thought I would have to bolt the window in, which I didn't like since it doesn't look as clean. I ended up getting double sided mounting tape from Walmart, I believe it was 3M brand. Similar to this - http://www.amazon.com/gp/product/B00004Z4BV/ref=pd_lpo_sbs_dp_ss_1?pf_rd_p=1944687682&pf_rd_s=lpo-top-stripe-1&pf_rd_t=201&pf_rd_i=B005SRECEU&pf_rd_m=ATVPDKIKX0DER&pf_rd_r=12EFEPSCVZ0AA4M6HESZ
So after I cut the window out with a dremel, I used rubber grommet edging that I bought at Performance-PCs (which is where I bought most of the modding supplies I used in this project) - http://www.performance-pcs.com/solid-wall-polyethylene-grommet-edging-with-adhesive-black.html to line the edge, then apply the mounting tape and set the window in.
https://www.amazon.com/gp/product/B00004Z4BV/ref=oh_aui_search_asin_title?ie=UTF8&psc=1
Have you ever tried these things to "glue" something on the ceiling? Works fine for me for the pulleys.
I don't think a system like the virtuix boom will ever have as less tension as a ceiling setup, since it has only one pulley (I have 5 double pulleys on the ceiling, which might be a bit overdone, but i would recommend at least 3 double pulleys).
A bit of adhesive putty might have removed it, although precision tweezers might have worked better.
It looks like you might not be in the US, so you might not be able to order this, but something like this might work.
https://www.amazon.com/Saunders-Removable-Adhesive-Putty-99683/dp/B0000AQODM/ref=sr_1_1?ie=UTF8&qid=1467036222&sr=8-1&keywords=sticky+tack
It's cheap, and one package should last you quite some time. Just rip off very small bits to stick your board to your battlemat. That should keep it from slipping around.
I'm using this here
It's completely removable.
I'm thinking something like this, like two of these. Super cheap as well.
UHU Tac https://www.amazon.com/removable-reusable-objects-surfaces-99683/dp/B0000AQODM aka poster tac, will stick reasonably light stuff to textured walls and let them come off again pretty well.
you might know it as the white stuff that comes with glow in the dark stars.
http://www.amazon.com/gp/product/B0000AQODM?psc=1&redirect=true&ref_=oh_aui_detailpage_o07_s00
I'm already using this and it works well:
http://amzn.com/B0000AQODM
My question is how to stack them? I was thinking of getting some silver or black legos and making my own rack or something similar.
Double sided tape would work if it's strong enough. Something like this stuff.
What case do you have? You may be better off using the side panel fan as intake so it gives your GPU fresh, cool air.
I just use Scotch indoor mounting tape and attach them straight to a wall. Works very well on most of my patches, although a few stubborn ones from my SpaceX patch collection keep falling off every few weeks or months. If they keep falling, just add more tape to cover a greater percentage of the backing surface area. Other non-SpaceX patches don't seem to fall off as easily, it's something about the iron-on backing material SpaceX uses which doesn't like adhering well to the tape.
I got some kind of command heavy duty roll with no non sticky parts, rated up to 5lbs for huge pictures. Good to know that it works with the actual strips through.
(Edit: this)
I used this double sided mounting tape to put them on the ceiling, link. I cut half inch squares and put three on each panel.
Dude, thanks so much again for the informative response! Going to shoot for higher reps with the Trainer before moving back to the #1.
While I got you here, quick question (since you seem to know what you're talking about); do you have any thoughts on these expander band things?:
http://www.amazon.com/Expand-Your-Hand-Bands-10-Pack-Goodbye/dp/B00083B79M?ie=UTF8&psc=1&redirect=true&ref_=ox_sc_sfl_title_1&smid=A2T23XKLYNBN84
I'm thinking they might be good to do on days I'm not doing grip training to avoid injury and increase flexibility. I'd imagine one could just use strong rubber bands or whatever but they're cheap enough that I'm thinking about ordering them. I noticed some soreness after using my #1 before I got the Trainer and it seemed expanding my fingers (even without the tension of bands) was helpful in relieving it.
Everyone uses the Captains of Crush. These things are no joke—the Trainer model will be plenty challenging if you're pretty strong. Back off to the Sport or Guide if you're not.
The Expand Your Hand Bands are recommended for working the opposing muscles and warding off tendonitis.
Be careful mixing grip training with serious dry fire. It's real easy to flare up some nasty tendonitis in your elbows.
On top of what /u/Glocjt referenced:
Buy these, and get a heavy hammer. Work in some pronator/supinator exercises.
Yes, it will help with the extensors on the top of your forearm.
I bought this pack: http://www.amazon.com/gp/product/B00083B79M/ which I like because it gives you a number of progressively wider bands so you can do progressive overload like in any other strength training.
There's all kinds of options - you can paint a number onto the base of the monsters if you know you're going to use more than two or three, or you could stick a little numbered flag on the mini with poster tack.
Amateur tip from a fellow newbie.
Get yourself some poster tack and an old pill bottle. Use the tack to stick the mini to the top of the pill bottle and hold that when you're painting. You'll get less paint on you, and you'll avoid smudging the beautiful work you just did when you turn to the other side. :)
You can fill the pill bottle with pennies or something to give it some heft so it doesn't fall over constantly. :)
I use this Elmer's stuff, I think it's basically the same stuff. Adhesive and insulation!
This stuff. I use it a lot at work for our safety posters.
http://www.amazon.com/Elmers-Poster-Reusable-Adhesive-E1531/dp/B000BKQDB4
(Also, if you do go the spraymount route, I would spray the foam board, not the poster. This way the sticky is on the board and the poster reamains relatively clean.)
I recommend poster tack, a small disk of it under the base can resist those mild table bumps. http://www.amazon.com/Elmers-Poster-Reusable-Adhesive-E1531/dp/B000BKQDB4 -Q.
Nice job! Try to keep the camera in focus (how blurry or clear the images is and what range it is clear at) and the set stable though.
When I started I had this same issue, but it's a super easy fix.
Get some poster tack http://www.amazon.ca/Elmers-Poster-Reusable-Adhesive-E1531/dp/B000BKQDB4 like this, roll it into small balls and stick it under objects you don't want moving, such as the stationary car I use this on my videos all the time for background objects and under the feet of figures to keep their feet from sliding.
With the focus issue, all you need to do is turn off auto focus, your camera is trying to focus on the car which makes it out of focus for a few seconds while you're taking the picture. All you gotta do is make it so that its on manual focus or MF so that it doesn't attempt to change the focus in the middle of the shots.
Good luck and Happy Animating!
Gage (HonestHatch - https://www.youtube.com/channel/UCSy1co_9jsUHKu3wO-r3ffg)
There's all different kinds of brands of it, but this is the stuff you want. http://www.amazon.com/Elmers-Poster-Reusable-Adhesive-E1531/dp/B000BKQDB4/ref=sr_1_2?ie=UTF8&qid=1376087075&sr=8-2&keywords=poster+tac
I haven't used this yet, but a friend recommended poster tack to block off non straight lines link
I would get a slightly bigger piece for stability. Stick it to the bottom of the desk with poster putty
Poster Putty great when you have delicate items to solder, holds stuff in place without having to mess with grippers and clips.
Gorilla Clear Tape I use it to keep my RX in place and under all my ESCs in combination with zip ties. Some of the stickiest stuff I've found yet and I run a sign shop so I deal with adhesives all the time.
No Its different. But here I found it on amazon for two bucks.
https://www.amazon.com/Duck-Reusable-Removable-Mounting-1436912/dp/B000BQMFEC/ref=mp_s_a_1_5?keywords=glue+tack&qid=1561967090&s=gateway&sr=8-5
This seems needless complex.
Why not skip the thumbtacks? You can just as easily trim the tape around the magnet and apply it directly to the measured points on the wall.
Or better yet, poster putty or something similar. It's cheaper, faster, and from my experience, non-damaging.
https://www.amazon.com/dp/B00006JQ5N/ref=psdc_3236443011_t3_B002DL7VII
https://www.amazon.com/Duck-Reusable-Removable-Mounting-1436912/dp/B000BQMFEC/ref=sr_1_5?keywords=blue+tac&qid=1557435042&s=office-products&sr=1-5
https://www.amazon.com/Duck-Reusable-Removable-Mounting-1436912/dp/B000BQMFEC
Yep. Although this was covering up the walls of my cube that are made for push pins. I'd think for real walls you could get that poster putty stuff so that it won't hurt the walls or anything.
I'm not sure how far you're willing to go, but one of my favorite solutions is poster putty. It seems silly, but this stuff sticks to just about anything. I used it to mount my sensor bar on top of my LCD TV. The best part is that if I don't like/want it anymore, it comes off cleanly.
maybe poster putty?
https://www.amazon.ca/Duck-Removable-Mounting-Poster-1436912/dp/B000BQMFEC
or check this thread
https://www.reddit.com/r/malelivingspace/comments/384m6w/whats_the_best_way_to_hang_a_huge_flag_on_a_wall/
Bam!
Not super cheap but this will do the trick. You can also use poster tack (YMV with different brands). Maybe spray a coat of matte varnish on before applying tape/putty just to be safe.
Masking fluid could work too, but it has some caveats. You need to paint it on pretty thick, and don't let it sit for too long or it will be hard to get it all off. Its better for paint chips and small things, I don't recommend it for hoards of tyranids.
Masking is one of the drawbacks of airbrushing. You might be better off using a brush for the red, then carefully airbrushing highlights with just some quick masking. Then go back and touch up the blue with a brush if needed.
mounting putty. It also works great for cleaning the case and lid.
nice..but for those not wanting a permanent solution, maybe go with putty instead.
No prob. It comes in little bricks and you pull off however much you need
https://www.amazon.com/gp/aw/d/B000BQMFEC/ref=mp_s_a_1_1?ie=UTF8&qid=1519649123&sr=8-1&pi=AC_SX236_SY340_FMwebp_QL65&keywords=wall+tack&dpPl=1&dpID=51xwrPsViRL&ref=plSrch
Use putty to pull that junk out. I use this for my AirPods. https://www.amazon.com/gp/product/B000BQMFEC/ref=ppx_yo_dt_b_asin_title_o00__o00_s00?ie=UTF8&psc=1
I have used this stuff to hold my fridge innards together and while it's not the most elegant solution, it's cheap and it's worked for 2+ years so far.
https://www.amazon.com/Amscan-Sticky-Party-Decoration-Adhesive/dp/B000HAZCS8
was it this.
So, for the weapon slipping out thing, you could try a small amount of blue tack, like you would use to hang posters to make the spot she should be holding a little thicker. I've used this on Gundam models, and it works well.
http://www.amazon.com/CoolGlow-Sticky-Tack/dp/B000HAZCS8
Real talk... I had a similar problem, and on a whim tried some generic Sticky Tack!
Wrap it around the very tip, press slightly to seal. Booom! Easy, resuable, rolls into a ball the size of a penny, doesn't leave a residue, and has no problem taking the heat!
https://www.amazon.com/Amscan-34660-Sticky-Party-Favor/dp/B000HAZCS8
i just really really want to use this sticky tack in order to combine the "my neighbor totoro" blu-ray and dvd together to create the greatest movie experience ever, all while ruining my blu-ray player! :D:D:D:D please oh please Schmad on my add on :p
I have the same figure.
While it does come with some white tack, it sounds like yours is missing, but this still will do the trick: https://www.amazon.com/gp/product/B001CEMCXQ/ref=oh_aui_detailpage_o03_s00?ie=UTF8&psc=1
​
But the museum wax @suddenly_ponies mentioned looks awesome as well and will probably stick better.
I use Elmer's Tac 'N Stik https://amzn.com/B001CEMCXQ
When I was in grade school the teachers used to hang decorations in their classrooms with this tacky blue putty stuff
Found it!
http://www.amazon.com/Loctite-Fun-Tak-Mounting-2-Ounce-1087306/dp/B001F57ZPW
Not sure on the strength with figures
Loctite Fun-Tak Mounting Putty 2-Ounce (1087306) https://www.amazon.com/dp/B001F57ZPW/ref=cm_sw_r_cp_apa_i_54PGDb3VXYEN1
grab some $3 fun tac off amazon. works great.
Damn we’ll at least you fixed it. Next time just use blu-tack Loctite Fun-Tak Mounting Putty 2-Ounce (1087306) https://www.amazon.com/dp/B001F57ZPW/ref=cm_sw_r_cp_api_YGk.Bb5CQJ4DF
It’s like really stiff putty that doesn’t come
apart easily.
I’ve owned my AirPods for almost 2 months and never had to clean them. I just clean my ears a lot more now and I don’t workout with mine. All of my wired EarPods would get clogged but I would just buy new ones. AirPods are too expensive too do that though so I just make sure my ears are clean.
Also you might want to get a case or a skin if you’re worried about ink or stains. I almost had the same thing happen in my work bag but I noticed the pen cap beforehand.
Yep, use locktite [Puddy](Loctite Fun-Tak Mounting Putty 2-Ounce (1087306) https://www.amazon.com/dp/B001F57ZPW/ref=cm_sw_r_cp_api_i_VmDvCbEK0X4A2) for earbuds works like a charm.
I use Loctite Fun Tak to hold the models onto whatever I'm using as a base. I also use it to suspend my brushes *brush down to dry on the side of my desk. Stuff is awesome and a little goes a long way.
Loctite Fun-Tak Mounting Putty Has worked perfectly for me.
Pick up some some blu-tack.
https://www.amazon.com/Loctite-Fun-Tak-Mounting-2-Ounce-1087306/dp/B001F57ZPW
Fun Tak
https://www.amazon.com/dp/B001F57ZPW/ref=cm_sw_r_cp_awdb_OZjLzbKW91QVH
https://youtu.be/arw-OUhx9Rw
yeah I used some kind of putty
http://www.amazon.com/Loctite-1087306-2-Ounce-Fun-Tak-Mounting/dp/B001F57ZPW/ref=sr_1_16?ie=UTF8&qid=1450982665&sr=8-16&keywords=putty
I used this instead because its easier to shape than masking tape, and it can be reused a few times.
The only problem I'm having with these is it takes more effort to remove than masking tape
On the VR lens lab adapters... I'm using poster putty to keep them in place. Works great for me and cheaper than printing a new adapter and getting new lenses.
https://www.amazon.com/Loctite-Fun-Tak-Mounting-2-Ounce-1087306/dp/B001F57ZPW/ref=sr_1_2?ie=UTF8&qid=1479924243&sr=8-2&keywords=loctite+fun-tak
FWIW, I really wish the Rift had been made more friendly to glasses - either with an optional "facial interface" or some mounting posts attached to the lens assembly. I don't blame VR Lens lab - there's just nothing in there to attach anything or corners for a friction fit.
Cheapo solution that I actually use more than my helping hands is just a glob or two of blue tack Just stick whatever you're working on to the putty.
you are only supposed to use one per speaker so maybe your looking at the wrong holes, if they are too close together?
also, that mount is only meant for specific speakers, the majority of bookshelf speakers have no mounting holes and are meant to just sit atop the stands.
some people use fun tak to secure the speakers:
http://www.amazon.com/Loctite-1087306-2-Ounce-Fun-Tak-Mounting/dp/B001F57ZPW/ref=pd_bxgy_hi_text_y
https://smile.amazon.com/gp/product/B001F57ZPW/ref=oh_aui_detailpage_o01_s01?ie=UTF8&psc=1
I use a little ball of blue tack-type stuff. https://www.amazon.com/gp/product/B001F57ZPW/ref=oh_aui_detailpage_o00_s00?ie=UTF8&psc=1
It holds the mini well and comes off clean. And it's reusable as long as you don't somehow get the stuff dirty. I got the idea from a Learn to Paint Kit that suggested using bottle caps or pill bottles to keep your hands off the mini.
hm, i bought this iirc
https://www.amazon.com/Blu-Tack-060968-Reusable-Adhesive-75g/dp/B001FGLX72
It's got like 4 strips of blutak in it and i think i used 1 per magnetized cube
You can use Blue Tack adhesive like these and put a small amount in the peg hole of the weapon to increase adhesion (I believe your MG ARF Kai has trouble holding the huge tactical arms sword?)
Per the Gundam manga series, the ideal enemy suit is the Amatsu Mina. Although I am currently having some problems finding this 1/100 NG from back in the day... Otherwise, the Blue Frame D is a fantastic choice as an antagonist suit.
Blu tack. It's like blue putty. You make 4 or 5 similarly sized balls, and put them under the speaker.
Blu-Tack Reusable Adhesive 75g https://www.amazon.com/dp/B001FGLX72/ref=cm_sw_r_cp_apa_jmIHAb5CSBAKP
I'm thinking you didn't have anything like Blu-Tack on hand? Not that I've had a rubber (pencil, or otherwise) stuck in my ear before, but if I did that would be one of the first extractions methods I'd try using.
This is the stuff you want for masking with putty. I've tried other kinds and had problems with them leaving an oily residue, but never had that problem with Blu-Tack.
How did you airbrush the Vallejo chipping medium? I have some of that stuff and hate it hate it hate it. Like you said, it doesn't brush well. I've tried thinning it with all sorts of stuff and spraying it, or spraying it neat, high pressure, low pressure...whatever. Never found the right combination and just can't get a good even coat with it.
This?
https://www.amazon.com/Blu-Tack-S050Q-Reusable-Adhesive-75g/dp/B001FGLX72
So after a quick google it turns out Blue Tac is an Australian only thing lol.
' Just ask at a store for that clay stuff you tack memos and pictures up with and they should know what ya mean.'
Also known as: Plasti-Tac, Fun - Tac or Clay Strips
https://www.amazon.com/Bostik-Blu-Tack-Reusable-Adhesive-Blue/dp/B001FGLX72/ref=pd_bbs_2?ie=UTF8&s=hi&qid=1231643004&sr=8-2
http://www.amazon.com/Blu-Tack-Reusable-Adhesive/dp/B001FGLX72/
I have 2 (three if you count our collective "work tank") and they do rattle. Worse with the lid on it. I think it's the lid that's the worst part. But i wouldn't say it's a significant amount. I sleep with my head 4 feet from my bedroom tank.
After a few weeks, a little gunk builds up and and that can really help quiet down the lid.
Try something like a few balls of blu-tack. It could really help silence a loud rattle. If it's still noisy, even without the lid, maybe try pulling out the little grey impeller guard and re-seating the impeller. But if it's just the lid rattling, you can quiet that down.
I suggest some putty and use it to grab and pull wax, dirt and grime OUT of the AirPods instead of "jamming" it down in there.
This is personally what I use. Blu-Tack Reusable Adhesive 75g https://www.amazon.com/dp/B001FGLX72/ref=cm_sw_r_cp_api_Cn05yb3WHNPCM.
Great for cleaning out the screen filter and the tight spot just underneath, between the pod and the stem, as well as the inside lid and pod nest of the airpod case.
Was searching for info on the firmware for the mouse and came across this thread/comment:
I've been using blu-tack (http://www.amazon.com/Blu-Tack-060968-Reusable-Adhesive-75g/dp/B001FGLX72) to clean the grips and it works beautifully. I just spread out a layer of the tack and press down real hard and then peel it off and it's as good as brand new.
I got here late, but one of the handiest accessories that I've picked up for board gaming recently is some blu tack.
If you've never used it, it's basically a removable sticky putty which doesn't leave a residue or stick so strongly that items will be damaged. It's great for temporarily sticking things down. You can use it for sticking down folded boards so they lay flat. You can also use it for sticking down small boards which are light or slightly warped and move or spin easily. You can also stick cards to boards, if it's something that will stay there the whole game and interaction with the card (taking pieces on & off) will cause it to move around.
Blu-tack in a few places on the bottom of the base will stick it to a desk nicely, and shouldn't leave any permanent marks on the desk or the stick.
>Blu tack
https://www.amazon.com/Blu-Tack-S050Q-Reusable-Adhesive-75g/dp/B001FGLX72
It's literally called [blue-tack] (https://smile.amazon.com/Blu-Tack-060968-Reusable-Adhesive-75g/dp/B001FGLX72/ref=sr_1_1?ie=UTF8&qid=1492113034&sr=8-1&keywords=bluetack)
The straps are a great idea. I also heard that Blu Tack works well for that, might give that a try. Apparently this accessories4less site is pretty well known, 2nd mention in this thread. I'll give it a shot. Thanks!
https://www.amazon.com/Blu-Tack-060968-Reusable-Adhesive-75g/dp/B001FGLX72
Paracord + bungee is the best. You want to find a bungee that has some weight to it (or you can just tape some additional weights, maybe some of those useless G502 weights) and a good solid base. I use a Zowie Camade, and it's actually the best bungee I've used although pretty overpriced for what it is. The Roccat Apuri is also nice, but it has USB hub functionality that lots of people won't need and won't be able to justify the price.
Worse bungee I ever used was the Razer one. No stability, no weight, just kept flopping around and sliding.
Some people just take some Blu-Tack and stick the cable to the monitor bezel. Basically has the same result.
I haven't used those so can't say. They do look 'fiddly' to me.
Vibrapod cones were recommended here. $8 each...
Some folks swear by a ball of blue tack instead of something ready made. I haven't used these things but they come up repeatedly in my reading.
I haven't had to use it yet, but I hear people post this product for removing debris from AirPods. https://www.amazon.com/Blu-Tack-S050Q-Reusable-Adhesive-75g/dp/B001FGLX72
A clean toothbrush as well
You could place Blue-Tack, which is an adhesive and acoustically inert putty, between the speaker and the stand.
Bring posters, while they may not want holes in the walls from pins you can put things up with Blu-Tack
A link to blue tack? Any will do. Idk what county you're in, but in Australia you can just get it at any supermarket or general convenience store....
Found one anyway
For the mounting of the Elac B6, which I have a set, I am using these stands:
https://www.amazon.com/gp/product/B00092HW9G/ref=oh_aui_detailpage_o09_s02?ie=UTF8&psc=1
and then used blu-tack for adhesive for the speakers, and the speaker stand was knocked over by my mother's dogs which the speaker successfully stayed on the stand.
https://www.amazon.com/gp/product/B001FGLX72/ref=oh_aui_detailpage_o08_s00?ie=UTF8&psc=1
I don't carry cash, just ID and payment cards with one of these, I get 12 for $5 so it's pretty economical.
https://www.amazon.com/ACCO-Binder-Clips-Large-72100/dp/B002VD6BLG
>and banning large clips
Why would you want to ban these
Thing is, your bulk container will invariably be smaller than the bag the lentils or rice or beans came in. So now you end up with beans in 3 containers, a small one, a bulk one, and original packaging.
Instead secure the original packaging using large binder clips like this one
"Free" office supplies are also a source of binder clips ;)
Sure are...
https://www.amazon.com/ACCO-Binder-Clips-Large-72100/dp/B002VD6BLG
I have a bunch of cheap binder clips for holding large pieces in place. If I don't trust the glue, I just remove them individually as I sew.
I use binder clips to weigh down the bags. Like these: https://www.amazon.com/dp/B002VD6BLG/ref=cm_sw_r_cp_apa_0X0NybEKRKBBE
Large binder clips:
https://www.amazon.com/ACCO-Binder-Clips-Large-72100/dp/B002VD6BLG
I use a lot of recycled materials (primarily plastic cups, containers, etc) for paint mixing or creating new tones for my pigments. For example I use a lot of these disposable contact lens containers for paint pots.
​
I find Binder Clips to be helpful sometimes or Alligator Clipsto hold things together.
​
I use blue masking tape a ton by folding it so it is sticking up and holding small pieces so they won't fly away when I airbrush them.
​
Lastly, I love my toothpicks and non-hardening clay technique for painting wheels and other items
​
*OP, just want to say this is a great post and I just bookmarked it/added a tone of things to my amazon wishlist.
I've just been using these hooked on the lip of my dresser and loop the cords through the metal arms.
Not ideal, but you can get by with Binder clips. They give you a flat base to stand the pawns on and are removable. Downside is you'd either need to remove the arms or accept having the art partly covered.
Example of what I mean:
https://www.amazon.com/ACCO-Binder-Clips-Large-72100/dp/B002VD6BLG
They do have a name, but it's not "alligator clips." They're binder clips. Bulldog clips are yet another type of clip.
You can get flat magnetic tape, that might work? Or something like this https://www.amazon.com/Magnetic-Sheets-Adhesive-mil-Magnet/dp/B003XNAHMC/ref=sr_1_16?ie=UTF8&qid=1497610008&sr=8-16&keywords=magnetic+tape
FYI here's 10 sheets for $12.70 or 25 sheets for slightly less ... just in case you're looking
I suppose you could remove the packaging between the shades (after removing them). Then gluing down or using magnetic stickers. I think it would make a beautiful custom palette.
You could use these:
https://www.amazon.com/10-Adhesive-Magnetic-Sheets-Magnet/dp/B004SOV4NQ
https://www.amazon.com/dp/B004SOV4NQ/
maybe this? https://www.amazon.com/10-Adhesive-Magnetic-Sheets-Magnet/dp/B004SOV4NQ
10 Adhesive Magnetic Sheets - 8.5" x 11" - 20 mil Magnet - Peel & Stick https://www.amazon.com/dp/B004SOV4NQ/ref=cm_sw_r_cp_apa_i_hSG8AbHTNXW9T
That's no problem. They also make thin magnetic sheets so you can just place them on the wall, this is how im planning on hanging them. Here's the link on amazon if interested. https://www.amazon.com/gp/product/B004SOV4NQ/ref=oh_aui_detailpage_o02_s00?ie=UTF8&psc=1
So far I've had luck with using squares I've cut from Adhesive Magnetized Sheets to hold plastic infantry to my metal-bottomed toolkit. I add a spot of white glue to help out the magnetic sheet adhesive.
sheets: https://www.amazon.com/gp/product/B004SOV4NQ/ref=oh_aui_detailpage_o02_s00?ie=UTF8&psc=1
I haver never personally tasted them but here you go :
I beg you
3M Dual Lock Reclosable Fastener TB4575, Black, 1 in x 10 ft https://www.amazon.com/dp/B007OXK330/ref=cm_sw_r_fm_apa_i_eQx0DbH235AQH
It's expensive, but this 3M low-profile velcro is awesome and what I've used for everything from cable management on my desks throughout the years to fastening bulky guitar pedals (think around size and weight of a GTX1080) to my pedalboard that went through hell. TL;DR it's good.
https://www.amazon.com/gp/product/B007OXK330/ref=oh_aui_detailpage_o03_s00?ie=UTF8&psc=1
LIST POST:
|/u/Dent7777|Shady Angel Investor|Total|Strictly Necessary Costs
:--|:--|:--|:--|:--
|318.366|212.244|530.61|385.44
|Item|Price|Link|
possible to replace or modify|32G Wheeled Trash Can|20|https://smile.amazon.com/gp/product/B071CZ4BWD/ref=ppx_yo_dt_b_asin_title_o06__o00_s00?ie=UTF8&psc=1|
fabric bags also work|Air-Pruning Pot|13.98|https://smile.amazon.com/gp/product/B01BFISHS2/ref=ppx_yo_dt_b_asin_title_o00__o00_s00?ie=UTF8&psc=1|
|Mylar Blankets|6.69|https://smile.amazon.com/gp/product/B07GLCYR5S/ref=ppx_yo_dt_b_asin_title_o00__o00_s00?ie=UTF8&psc=1|
NSN|Velcro tape|16.49|https://smile.amazon.com/gp/product/B007OXK330/ref=ppx_yo_dt_b_asin_title_o00__o00_s00?ie=UTF8&psc=1|
|Plant Ties|7.99|https://smile.amazon.com/gp/product/B071CZ4BWD/ref=ppx_yo_dt_b_asin_title_o06__o00_s00?ie=UTF8&psc=1|
|Happy Frog Soil|11.95|https://smile.amazon.com/gp/product/B01508YKY8/ref=ppx_yo_dt_b_asin_title_o02__o00_s00?ie=UTF8&psc=1|
|FoxFarm Trio|33.95|https://smile.amazon.com/gp/product/B00D93NIFY/ref=ppx_yo_dt_b_asin_title_o05__o00_s00?ie=UTF8&psc=1|
|Fem Blue Dream Seed|23.68|https://www.seedsupreme.com/blue-dream-feminized-seeds-20604.html|
|2 Free Fem Seeds|0| |
|pH control & testing kit|18.5|https://smile.amazon.com/gp/product/B000BNKWZY/ref=ppx_yo_dt_b_asin_title_o05__o00_s01?ie=UTF8&psc=1|
not strictly necessary (NSN)|Submersible pump|7.99|https://smile.amazon.com/gp/product/B00EWENKXO/ref=ppx_yo_dt_b_asin_title_o02__o00_s00?ie=UTF8&psc=1|
NSN|2Liter bladder|12.99|https://smile.amazon.com/gp/product/B075RWCXWZ/ref=ppx_yo_dt_b_asin_title_o02__o00_s00?ie=UTF8&psc=1|
NSN|Clear Tubing|7.99|https://smile.amazon.com/gp/product/B00W6W10TK/ref=ppx_yo_dt_b_asin_title_o02__o00_s00?ie=UTF8&psc=1|
NSN|tubing switch|7.95|https://smile.amazon.com/gp/product/B07L45TLPK/ref=ppx_yo_dt_b_asin_title_o01__o00_s00?ie=UTF8&psc=1|
NSN|Funnel|10.96|https://smile.amazon.com/gp/product/B00OKXZL8O/ref=ppx_yo_dt_b_asin_title_o01__o00_s00?ie=UTF8&psc=1|
|Humidity & Temp Sensor|12.82|https://smile.amazon.com/gp/product/B0013BKDO8/ref=ppx_yo_dt_b_asin_title_o00__o00_s00?ie=UTF8&psc=1|
NSN|Rechargeable AAs|13.8|https://smile.amazon.com/gp/product/B00JHKSN76/ref=ppx_yo_dt_b_asin_title_o01__o00_s00?ie=UTF8&psc=1|
|Inline Fan|17.95|https://smile.amazon.com/gp/product/B00CQBFOTS/ref=ppx_yo_dt_b_asin_title_o02__o00_s00?ie=UTF8&psc=1|
|Carbon filter|33.99|https://smile.amazon.com/gp/product/B01CJ5D4AG/ref=ppx_yo_dt_b_asin_title_o00__o00_s01?ie=UTF8&psc=1|
|Ducting hose|10.99|https://smile.amazon.com/gp/product/B076S6KHB4/ref=ppx_yo_dt_b_asin_title_o00__o00_s00?ie=UTF8&psc=1|
|ArcMyn Vent|14.99|https://smile.amazon.com/gp/product/B0793HH4GD/ref=ppx_yo_dt_b_asin_title_o01__o00_s00?ie=UTF8&psc=1|
|Axial Fan|11.99|https://smile.amazon.com/gp/product/B009OWRMZ6/ref=ppx_yo_dt_b_asin_title_o01__o00_s00?ie=UTF8&psc=1|
NSN|Fan Speed controller|17.99|https://smile.amazon.com/gp/product/B07B6VV6GL/ref=ppx_yo_dt_b_asin_title_o03__o00_s00?ie=UTF8&psc=1|
|HGL 100w|149|https://smile.amazon.com/gp/product/B07C59J8L2/ref=ppx_yo_dt_b_asin_title_o02__o00_s00?ie=UTF8&psc=1|
NSN|Smart Power Strip|32.99|https://smile.amazon.com/gp/product/B07C1ZSCYV/ref=ppx_yo_dt_b_asin_title_o03__o00_s00?ie=UTF8&psc=1|
may keep for lights, might get rid of it.|Light Timer|12.99|https://smile.amazon.com/gp/product/B00MVF16JG/ref=ppx_yo_dt_b_asin_title_o00__o00_s00?ie=UTF8&psc=1|
Here is the mobile version of your link
Thanks.
I have two cars and three 'projects'.
One underhood project:
Two under-dash projects that are identical, one for each car:
The hard part is figuring out where to get a non-fused 12V supply under the dash. An add-a-fuse circuit is very appealing and I should find places where an extra 5-10A won't pop anything, so I may end up doing one 5-10A-add-a-fuse on an ignition-hot line, instead of a 12v-master-fuse + ignition-hot-relay, as the single master fuse for all these.
Then it would just be a 15A strip terminal instead of a big fat 100A ground bar at the ground side, and a small fuse box at the positive side (with 1A or 2A fuses for each circuit, depending on their needs).
---
I really appreciate your feedback. The only reason I haven't already built all this is because of worries of fucking up and coming back to a smoldering ash heap.
---
I'm also figuring out how to mount all this securely under the hood... I figure these little wire clamps for the wires, and something like this velcro alternative to mount things like the fuse box, except it's hard to tell what temperature they're rated for (and it seems that the 3M stuff I linked will fall off due to heat.) Any ideas there? I want something that is 1) secure as fuck, but 2) that I could potentially remove without damage in the future, maybe using a heat gun or something. I would be mounting it mostly to plastic, but I don't want to drill any holes if possible.
If you do decide to get it, I just have two suggestions for setting everything up:
Anyway, have a great start to your 2017! :D
This works very well - Scotch double sided mounting tape
I would also recommend to buy this:
https://www.amazon.com/gp/product/B01BO473HI/ref=oh_aui_detailpage_o01_s00?ie=UTF8&psc=1
fruit flies tend to get into the faucets and then you'll get one in the first glass of beer that you have.
I know this isn't the most professional and probably not the most popular but I use this tape to mount all my SSDs into 3.5" bays. I've been doing it for years without any problems whatsoever. It doesn't affect the appearance either
https://www.amazon.com/gp/aw/d/B0083K36KA/ref=mp_s_a_1_4?ie=UTF8&qid=1517986552&sr=8-4&pi=AC_SX236_SY340_QL65&keywords=Outdoor+double+sided+tape&dpPl=1&dpID=51F9wufSihL&ref=plSrch
I feel like this is an upside, usually a pain breaking the clasp.
You can go to will call and they probably would give you a replacement for a price.
Or you can buy a replacement like this :
https://www.amazon.com/Festival-Clips-Wrist-Bands-Rainbow/dp/B074YMKKLK
https://www.amazon.com/Festival-Clips-Wrist-Bands-Rainbow/dp/B074YMKKLK/ref=sr_1_1?keywords=SpinSociety&qid=1558031032&s=gateway&sr=8-1
Amazon has Festival Clips, I’m sure there are different styles and colors, if you can’t get those attached.
Would you be able to mount your surge protector under the top of your desk with something like this? And route your wires through the hole in your desk for a cleaner look.
https://www.amazon.com/Festival-Clips-Wrist-Bands-Rainbow/dp/B074YMKKLK
something like this?
Wilson Advantage Tennis Racquet Over Grip . The grip won't stay on by itself so you will need double sided adhesive of some sort. On this mouse I went with Gorilla double sized tape. The double sided gorilla tape is pretty thick. use Duck Brand Double-Sided Duct Tape if you wanted the thinnest possible tape with insane grip.
I don't have that table. I use a 5 foot long plastic table^1 and I attached a surge protector to it with this Gorilla double sided tape ...maybe it's 6ft?
I put tape on the back, covering the whole length of the back so the weight is distributed throughout.
Gorilla Tough & Clear Mounting Tape, Double-Sided, 1" x 60", Clear or many other double sided tapes on the market.
I think that gorilla stuff could support a engine block on a wall, so you might only need the lighter kind. Go to local hardware store, you will see lots of options.
This is the stuff holding my light strip to the back of my tv after the tape that came on the strips failed.
https://www.amazon.com/dp/B00OXVG9FW/ref=psdc_1068992_t2_B019HT1U9E
Make sure you put it where you want it, it's not coming off after that.
You might want to give this stuff a try.
http://www.amazon.com/Gorilla-Tape-6065001-Mounting-Clear/dp/B00OXVG9FW
Im going to buy some for when I setup the lighthouses at work. We are in a brick building so im hoping it will stick well to the brick. It says it does...
Here's the exact stuff I used. It's about twice as thick as the lightstrip but it's much better than any foam tape I've tried.
That's the ticket right here, http://amzn.com/B00OXVG9FW That's the ticket right here
These: http://www.amazon.com/Mainstays-Multi-purpose-Hanger-Clips-Piece/dp/B00GK8OVOC?ie=UTF8&psc=1&redirect=true&ref_=oh_aui_detailpage_o04_s00
They have teeth so when removing them you want to be careful, so as to not tear off threads. I was a bit careless with adjusting one of the clips and it loosened a thread.
The clips are mounted to my wall with http://www.amazon.com/Gorilla-Glue-Heavy-Mounting-Black/dp/B019HT1U9E?ie=UTF8&psc=1&redirect=true&ref_=oh_aui_detailpage_o04_s00 and mounting putty.
Gorilla is just a brand, like this: https://www.amazon.com/Gorilla-6055001-Heavy-Mounting-Double-Sided/dp/B019HT1U9E
Most of their products really are quite good though.
Alright, so I got double sided gorilla tape
Man, I don't know how this stuff works so good, but it is no joke. when you handle it yourself, you're gonna be skeptical that it has any significant grip at all, but you just need to apply some pressure between the surfaces and its on there for good.
This stuff is amazing. I have a radio and 2 small computer speakers mounted to the underside of a shelf on my radio desk. It peels off clean too! Been up there for 5+ years now. Give it a shot!
https://www.amazon.com/Gorilla-Heavy-Double-Mounting-Inches/dp/B019HT1U9E?psc=1&SubscriptionId=AKIAILSHYYTFIVPWUY6Q&tag=duckduckgo-d-20&linkCode=xm2&camp=2025&creative=165953&creativeASIN=B019HT1U9E
This? https://www.amazon.com/Gorilla-Heavy-Double-Mounting-Inches/dp/B019HT1U9E/ref=mp_s_a_1_1?ie=UTF8&qid=1541299551&sr=8-1&pi=AC_SX236_SY340_QL65&keywords=gorilla+double+sided&dpPl=1&dpID=512-EL4LnLL&ref=plSrch
Is this one good?
https://www.amazon.com/dp/B019HT1U9E/
What 3m tape did you use? 3m makes a huge variety of different thickness and stickiness.
I would bet money you weren't using the 4011 kind. This stuff: http://www.amazon.com/Scotch-Exterior-Mounting-1-Inch-60-Inch/dp/B00004Z4BV
Use appropriate tape and you should be fine.
Sticky tack holds your shit up way better than tape and unless your on an uneven surface comes right off (I use command strips if its on something im afraid it won't come off cleanly)
Hmm. I wasn't planning on gluing the mirror to the shower wall. I want the mirror to be able to be removed, without leaving any marks.
Is there an adhesive you recommend, that can be removed from the cultured marble panel, if/when the mirror gets taken down?
I was thinking that I might be able to screw a support block into the drywall that is located above the panel, so that I do not have to drill a hole in the cultured marble. Here's a rough image of what I'm thinking of doing.
Or, I could screw two hooks into the above drywall, drill two holes in the top of the mirror frame, and have the mirror hang by chain. I'd maybe caulk a bit of the mirror to the panel, to keep the mirror from swaying back and forth .
I am also considering waterproof-rated, heavy-duty, double-sided tape (something like this product), but I'm not sure if that will hold up.
You could break off that part and use a wristband clip to keep it on your wrist.