(Part 2) Best tape, adhesives & fasteners according to redditors
We found 1,290 Reddit comments discussing the best tape, adhesives & fasteners. We ranked the 493 resulting products by number of redditors who mentioned them. Here are the products ranked 21-40. You can also go back to the previous section.

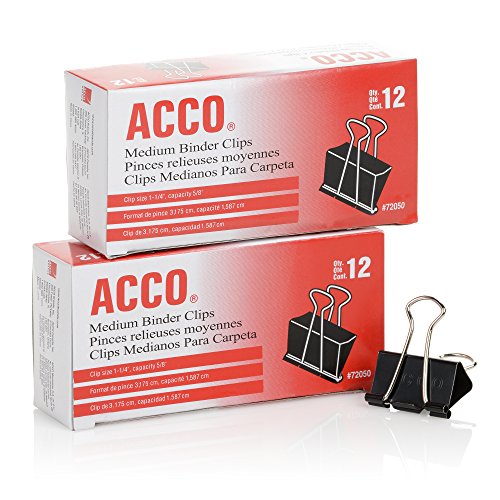


$2 gets you 12 binder clips.
Here is the link to the original light box posted here: click here
Here is the link to biscuitandbook's fantastic pointers that really helped me figure out how to plan this! click here
Here is the run down of things I used:
Procedure
The first thing I did was come up with an idea of what I wanted to draw. I knew I wanted to draw a forest scene and incorporate a wolf and owl. I used Hari & Deepti's works as inspiration and to help me come up with an idea. You can see their work here. I specifically pulled from this piece to find out an idea of how to draw the forest scence.
Next, I sketched out my idea on a piece of watercolor paper. Watercolor paper is best for this because it is very easy to cut, but also allows light through and can support itself. Cardstock was too thick and I found after a few tests that it did not shine through as easily. When I sketched, I tried to create the whole piece and look without worrying about layers, just focusing on the foreground, middle, and background that I wanted. I adjusted as I went. Pro tip: I suck at drawing realistically, so for the wolf and owl I found stock images of them and put the paper on the computer screen and traced. Much easier and so much less stressful!
To begin the layers, I looked at my sketch and started from the top and worked my way back. I eyeballed my sketch as I drew the first layer. To begin, it is much easier if you cut out the general shape first and then work on the small details in each layer. For example, the top layer's tree branches were not cut in the first go. I cut out the ground and trunks, but left the tree branches as a huge piece at the top. It wasn't until I went back and focused on the details that I started to cut branch by branch. If you do trees in yours, I also recommend starting at the top and working down when you cut leaves/branches. The first layer I did from the bottom up and I accidentally snipped off areas for nice branches...
After cutting all of the layers out, I then worked from the back up, that way I could attach the mounting tape as I went. This allows you to have a good visual of what is popping out and what needs more support. For the mounting tape, it is best to keep to the outside edges so you can hide the shadows. Mine generally is only on the edges, except for one piece behind the wolf to make him stand out. A little goes a long way! Especially when you are using the thick kind of tape! (Seriously buy the thick kind, it makes life soooo easy!)
As you build up your layers, you will find it magically starts to come together. Each layer had me so excited...! To keep track of how your picture is coming along, it is really easy to just hold it up in the air in front of a light. I kept holding mine infront of my lamp. The light comes through and shows you where you might need to double up on some of the paper so it is dark where you want it to be.
After that, pop it in the frame and add on some lights to the back! I have yet to add lights to mine as they have not arrived yet, so definitely check out the two original posts I linked to above to help you out! Mine is just tested with christmas lights behind it temporarily.
Seriously, try this out! It looks so complicated but it is sooo fun and I can't stop looking at it! You will find that the layers really do all the work and make a beautiful piece! If you have any questions, I will be happy to help you out as best as I can. :)
• Gucci
• Gucci
• Gucci
• Gucci...
Etc.
Etc.
Rubber band I took off the mail.
Get yourself some ranger bands.
Let's see, I found that Escobar made roughly 420 million dollars a week so he would have made approximately 1.8 billion dollars a month.
I can't really imagine how much he paid for rubber bands or how much money he stacked in each rubber band. I'll assume he made stacks of 10'000 dollars each and that a pack of 500 rubber bands costs 4$.
If he made 1.8 billion dollars a month he would have had to use 1'800'000'000/10'000 = 180'000 rubber bands. Therefore he would have spent 180'000/500*4 = 1'440 $ which is less than 2'800 but still quite significant. The final result could vary widely based on how the money was stacked and how much he spent for rubber bands but 2'800 could actually be true.
Life Pro Tip - we use binder clips in the kitchen to keep those inner bags rolled up tightly and our food fresh.
We use 'em in the freezer, the pantry - everywhere
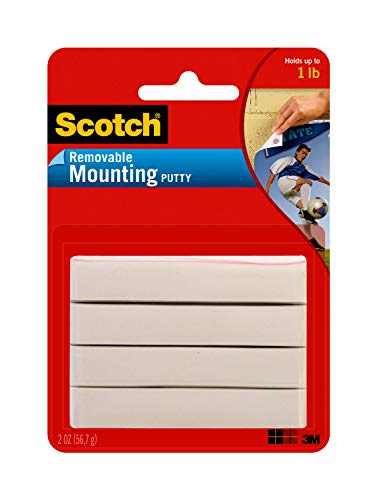
I use Scotch Mounting Putty. As long as you don't use too much, it comes off of walls with no residue or damage left behind.
Fellow Title 1 teacher in MN. I find that preemptively taping book covers REALLY helps a lot. I used to tape the entire cover with scotch tape - which took forever. Then I used packing tape or book tape which also took a long time. Now, I tend to just tape the spine and the sides of the book and they are doing alright. Not nearly as great as fully-taped, but better than nothing. Gorilla glue is a lifesaver for repairing the spines- just be sure you put a binder clip over the spine since it tends to expand as it dries.
​
Taping made my first set of amulet books last around 3 years, if that gives you a general idea of efficacy.
​
Lastly, if you get used books, I highly recommend ones that were at a library since they already have the clear plastic library stuff on them.
Library tape :)
https://www.amazon.com/Scotch-Book-Inches-Yards-845/dp/B00006IF5R
12" silicone X bands
I have been satisfied with these on Dominion, Five Tribes, Escape. Also, I'd read somewhere that the silicone will not degrade over time and stick/melt into the boxes.
The 9" bands do well for Race for the Galaxy, Leaving Earth etc.
Wish I had seen this Assorted sizes pack before now. The small ones are probably great for little games like Chronicle.
Edit: More links.
Try using a bit sticky tack to get the arms lined up as a dry fit before you glue, that way you're not trying to grow 3 extra hands and fidget with alignment that keeps shifting on you constantly. Use the tack to stick the pieces together, then you can adjust and remove the tack point by point when you're happy with their alignment and ready to glue.
Something like this: https://www.amazon.com/Bostik-Blu-Tack-Adhesive-801103/dp/B00I42EOJE/ref=sr_1_4?ie=UTF8&qid=1509542585&sr=8-4&keywords=bluetack
Rubber Cement + printout = indellible sticker.
Newest items first
Taurus 709 Slim: http://www.taurususa.com/product-details.cfm?id=588&category=Pistol
Black Tiger Bicycle Deck: http://www.ellusionist.com/bicycle-black-tiger-decks.html
Spyderco Delica 4 Sky Blue: https://www.amazon.com/Spyderco-Delica4-Lightweight-Ground-PlainEdge/dp/B0052HQPWS
MCPocket Wallet: https://mcpocket.com/en/mcpocket.html
Thorkey - Black leather Key organizer: https://www.amazon.com/Leather-Compact-Key-Organizer-ThorKey/dp/B01DKS65G6
Simple 3M clip for Business Cards: https://www.amazon.com/Brands-Binder-Clips-Medium-A7072050/dp/B00TQ8FDB8/ref=sr_1_4?s=office-products&ie=UTF8&qid=1491008178&sr=1-4&keywords=binder+clip
Caseology Parallax GS7 case for Samsung Galaxy S7: https://www.amazon.com/Caseology-Parallax-Textured-Pattern-Samsung/dp/B01BE993DU/ref=sr_1_8?s=electronics&ie=UTF8&qid=1491008193&sr=1-8&keywords=parallax+case
https://smile.amazon.com/Binder-Clips-Paper-Paper-120-Assorted/dp/B0794VN392/ref=mp_s_a_1_1_sspa?keywords=binder+clips&qid=1565217303&s=gateway&sprefix=binder&sr=8-1-spons&psc=1&spLa=ZW5jcnlwdGVkUXVhbGlmaWVyPUFLWDlLVUtMRDk5WkImZW5jcnlwdGVkSWQ9QTAxMDk4MTAyM1JXMU0zNzNSQTQmZW5jcnlwdGVkQWRJZD1BMDIyNzU1NDNMQ0RGQkFWSjVGTUQmd2lkZ2V0TmFtZT1zcF9waG9uZV9zZWFyY2hfYXRmJmFjdGlvbj1jbGlja1JlZGlyZWN0JmRvTm90TG9nQ2xpY2s9dHJ1ZQ==
If you go to an art supply store, they have special paper tape that you can use - it is virtually invisible and will bring those pages back together. Sample here:
book repair tape from amazon
Or you can buy neutral pH Glue and glue the pages together at the spine very carefully. Should also be available at an art supply store (specialty ones) Product here:
neutral ph glue
Source: I have a degree in printing
When I read these threads, I'm reminded how fortunate I am that I had a dad who was building circuit boards for the Navy and had a soldering iron in my hand when I was 9. Thanks for the reality check. Let me offer some tips.
> Conclusion: should I invest in magnifying glasses? Do you use a magnifying glass? Also, an absurdly bright light in front of you would help.
I would resist(no pun) this as long as possible. Seems like a really good idea, ends up being a crutch that hurts you. I think once you get more acquainted with the iron, the smallness of the components will matter less. I also sometimes use a headlamp to light up specific areas. Looks kinda silly but works a treat.
> Conclusion: fix your helping hands to something. Make sure your elbows can rest on the table to keep your work steady.
Absolutely, even a couple C clamps could do the trick. That being said, I've been using adhesive putty to hold my workpieces, it's great, highly recommended.
> Conclusion: a very pointed pencil tip would help. Some people like knife tips.
I can understand why you might want this, but it's actually going to hurt more than help. A needle tip does not hold or transfer heat like a larger tip. What you'll gain in precision, you'll lose in actually being able to solder something. Instead, a knife or chisel tip(my preference) both still come to a relative point, but have enough mass and surface area to adequately heat a joint. The precision will come with practice.
> Conclusion: keep track of your components, and maybe put them immediately back in the labeled bags. Or in labelled bins.
Reading component color codes should only be a last resort, especially for small components. Even if the colors are easy to see and understand, they only tell you what the resistor should be, not what they actually are. Instead, get yourself a multimeter. Then, you can measure the actual resistance of components, saving the strain on your eyes, and arming you with advanced knowledge about the actual resistance of the component. Honestly, a multimeter is indispensable for myriad reasons, this just being one. It's the actualization of our greatest commandment, Ohm's Law. It's the tape measure of electronics.
> Conclusion: triple check your order.
Yup.
Yup, link worked fine. Lets figure this out.
You've got a M3D, which as /u/Keebie81 said isn't the best. If I understand it has proprietary software which could make things difficult, but we'll see what we can do.
So first off lets get some background information. What kind of filament are you using? ABS, PLA, or something else? Can you get us some idea of what settings you're using? Take screenshots of every setting page you can find so we can see what settings you have now and what extra things we have to tweak.
Just taking a look at it, it seems like you're having adhesion problems (which can be fixed with treating the print surface appropriately and fine-tuning your Z-height) and warping problems (which are usually material and temperature related).
*
We can try to take a crack at adhesion first. There's three big parts to this: making sure you've got a good surface, making sure the surface is treated with the right stuff to get maximum stick, and then making sure your nozzle is close enough to the printer to get the filament down right.
On the first point: painter's tape is a good, cheap bed surface that seems to work great for a lot of people. I use this stuff. There might be blue painter's tape somewhere in a janitor's closet or shop room somewhere, but you might have to go get some yourself. First clean off your bed surface with alcohol and a good cloth that won't leave anything behind, then lay down your strips nice and flat with no air bubbles and as little gap between them as possible. I also use a putty knife to smooth it all flat.
On the second point: getting your bed surface (and z-height) can be enough, but you can get extremely good sticking with a good bed treatment. There are two popular methods: glue sticks or hair spray. (Take a look at the "Customers who bought this also bought..." for the hair-spray, it's not what you'd expect for a beauty product.) I use that hair spray, and spray a cloth which i then wipe onto the painter's tape for a nice, even coat. You can pick some up at CVS, and I'm sure you have glue sticks laying around at school.
Finally: adjusting your z-height. This is going to be slightly hardware dependent so I may not be a ton of help here, but you have to be really precise in where your nozzle homes to. Heat up your printer (so it's thermally expanded to it's "printing" size), take a piece of white printer paper, put it under the nozzle, then land the nozzle. Now grab one edge of the paper with two hands and try to push and pull the paper. If you can easily move it without feeling any resistance from the nozzle, your nozzle tip is too high and needs to be lowered. If the paper is pinched in place and only bunches up when you try to push it, you are too low and need to raise the nozzle. If you can move it but feel a slight resistance** from the nozzle without it actually bunching up, then you're golden.
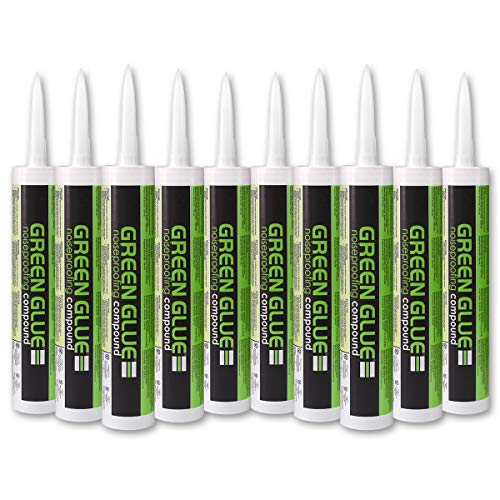
I'm not OP, but it's another layer of soundproofing. You apply it between the layers of drywall.
http://www.amazon.com/Case-Green-Glue-Noiseproofing-Compound/dp/B000SKWD8Y
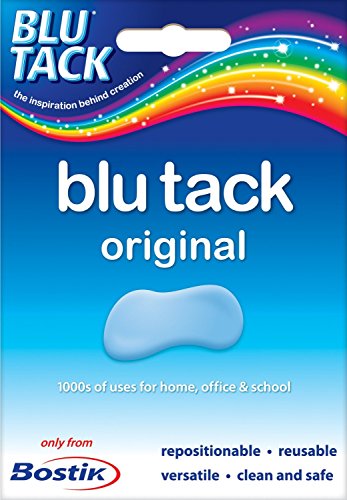
Use Blu Tack! 2 x Bostik Blu Tack Mastic Adhesive Putty Non Toxic Blue approx 60g 801103 https://www.amazon.com/dp/B00I42EOJE/ref=cm_sw_r_cp_api_i_A07TDb049R108
An Apple genius told me it’s what they use and it’s amazing for me. I was so embarrassed to show my nasty AirPods case before. Now I just put this gummy like substance anywhere and it picks anything up.
Before I had stands for my pathfinder pawns I used these
You can put the pawn in the clip and detach the metal bits until you are done.
Loud whistle - https://www.amazon.com/gp/product/B00FOJRF64/
Heavy duty velcro - https://www.amazon.com/gp/product/B001O6T2ZS
Sugru throttle nub - https://www.amazon.com/dp/B01BFE0KNQ/
I liked the recent post with the bicycle bell mod, really anything to enhance safety, especially in NYC, where jaywalkers cross roads diagonally with their heads buried in their phones and then proceed to do the "evade me" shimmy when they finally see you coming.
I use it sparingly, 120 dB is on the human pain threshold for hearing, so it's quite jarring. A quick toot toot tends to resolve most antsy situations, but a nice sustained hard whistle can even help you be heard from inside yellow cabs.
I've seen a few of these built, so I wanted to give them a try. Flew some sorties tonight and pretty happy with them so far. Really nice to have something which can be removed easily when I'm done.
3" Drill Press Vice
Steel brackets
Extreme Velcro
I found this extreme velcro on a whim and it's awesome. It adheres to anything and locks your stick/throttle down tight, yet can still be removed when you are done. I used it to attach my IR clip to the headphones, and it's great there also.
Boards are simply a cheap bamboo cutting board I got at Walmart and sawed in two. Add the bolts and screws and I'd say this whole thing was less than $50.
Maybe be aware the brackets are on the small side, so if you want something that will hang lower, you'll want to look at something different.
Edit: just wanted to say....you'll need to wipe down the vices when you get them. They are covered with a light oil to prevent rusting I'd guess. Take a rag and give them quick wipe all over (the jaws too, they will leave a mark on your desk!)
When I do labels, I have them printed from a PDF at some place that does the color laser printing, onto a good paper stock.
Then I use these - https://www.amazon.com/Elmers-Purpose-School-Washable-0-24-ounce/dp/B001E69WBW/ref=sr_1_5?ie=UTF8&qid=1486578385&sr=8-5&keywords=school+glue
They come off with a simple soak, and do not change or run the color. I don't use my inkjet as the moisture build up from chilling the bottles will cause the ink to run.
Gaffer's tape is the most durable and non-sticky tape I can think of, but it's expensive and mostly comes in black.
Are these pistol mags or do they stick out from the frame? If the latter, you could wrap them with different-colored rubber bands.
make sure to use random colored rubber bands to suspend and tied down everything!
https://www.amazon.com/Flex-Tape-Rubberized-Waterproof-Clear/dp/B07B6F5PJ7
Yeah!
For those interested, I found these awhile back when I had a similar idea:
Chalk
Dry Erase
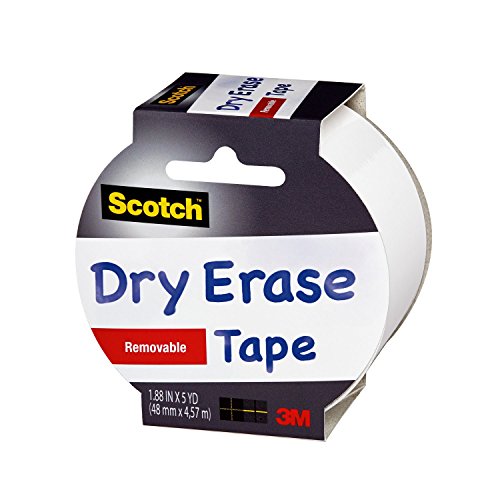
Dry Erase Tape for things you need to erase on your character sheet. My entire crew uses it for HP and we just pass around a wet/dry erase marker.
Make sure to use acid-free tape if you want the poster to last a really long time. If the tape isn't acid-free it'll eventually yellow and eat the edges of the poster.
I do this on book dust jackets, which always seem to get kind of frayed and tattered around the edges otherwise on frequently used books (particularly kids' books). For that I use acid-free book tape, which is also great for repairing books, or reinforcing spines of kids' books.
The toggle bolt, or some type of fastener will indeed hold more weight and be a more permanent fix. However, you said you are a renter, which changes things.
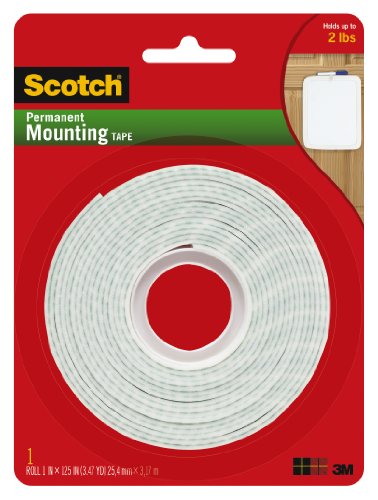
In that case you might consider using a foam mounting tape, or the stronger exterior mounting tape.
Just make sure you clean both the back of the phone and the wall thoroughly, and then wipe both down with alcohol prior to tape application. If you put enough mounting tape on that phone, which looks fairly light, your troubles should be over. That's going to be your cheapest option that'll last as long as you are there and not require any special tools or wall surgery. Especially considering that wall looks pretty dodgy in the first place and trying to affix anything through it could be asking for more trouble than it is worth. If you owned it I'd advise different but that is not what you asked. Good luck.
I used this battle mat
Amazon Link
Some rubber cement
Amazon Link
Also some kind of sanded particle board from Lowes/Home Depot. I can't remember what it was called, but 1/8" thick. At the time I was in college and had access to the school's laser table and was able to cut using that. I couldn't see why a table saw wouldn't work though.
I made all the tiles powers of two (Computer engineer, can't help it). If I remember it was like 1x1, 1x2, 1x4, 2x2, 2x4, 2x8, 4x4, 4x8, and 8x8 tiles. You can do any other sizes or increments, that's just what I am most comfortable with.
From L-R, T-B
EDC
NASC
(not at school carry)
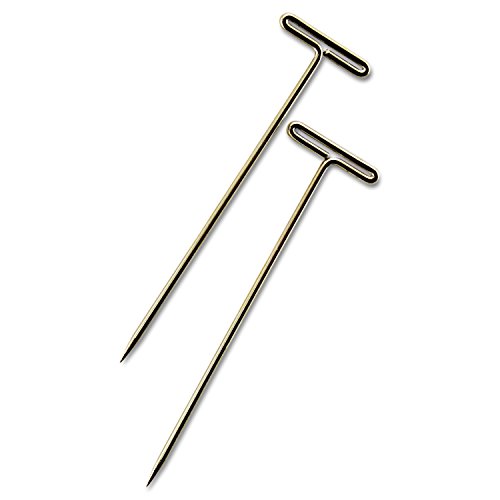
T-Pins! Lightly tap them in with a hammer. Stays up and leaves no mark when you pull them out.
So far the examples with scotch tape have looked pretty good. I'm tempted to do it, but I'm not entirely sure the tape comes in the size of the screen.
Edit: just looked at the matte screen protector. WOW. That looks really tempting.
Edit 2: damn, that example is also scotch tape. I'm gonna start researching giant rolls of scotch tape.
Edit 3: http://www.amazon.com/Scotch-Book-Inches-Yards-845/dp/B00006IF5R/
This stuff might do the trick. Comes in 4" width, so I can try a strip on each eye. That should cover the entire screen. If it's the same structure as the regular scotch tape, it should look pretty good.
> I can make bump stocks for under $50.
Why work? Here's several hundred bumpstocks for $4.87 on Amazon.
I present my new invention: rubber glue
Here you [go] (http://www.amazon.com/Kikkerland-Woodlands-Bag-Clip-Set/dp/B00MS4DM24/ref=sr_1_8?ie=UTF8&qid=1450219864&sr=8-8&keywords=Chip+clips) :)
I regret getting the monitor I used for this because the ports on the back were sticking out like this. This made the frame maybe a half-inch deeper than it had to be.
If I was to do this again, I would pick a dell monitor that doesn't have adjacent ports like the picture. And one with USB ports built in, so when you turn off the monitor, any hardware I have plugged in (like the Raspberry Pi I used for my frame) would turn off with it.
The frame and mirror are sandwiched between the front of the frame and adhesive putty that's pressed into the corners inside the frame. I think corner braces woulda been a solution but I've already been to the local hardware store like 3 times the day I realized this.
Edit1: Actually there may be issues with Dell monitors like power timeouts and data corruption. So scratch that.
Edit2: Sounds like it's only certain Dell models that have may have this issue.
One of the cheapest ways to significantly cut down on sound leakage is to double up the sheetrock on the walls with a layer of Green Glue in between them. Make sure to caulk all corners, joints, and anything that could possibly let air leak through it. If you can, get a door that seals shut when you close it, but if you're on a budget, just try to get a heavy, solid door, and put weather stripping around it, sealing off all the cracks.
As far as filling the walls with insulation, I know Roxul makes some great sound baffling insulations like Safe N' Sound, or other similar ones that will also help you cut down on sound leakage significantly. And if you have the time and effort, I've heard it helps to put staggered cross braces between studs to break up the large number of identical resonant chambers in the walls to several smaller, different sized resonant chambers. Granted, I've never done it before, but adding some cross braces between studs doesn't seem like a whole lot of extra work if there's a potential for it to make the room sound better. Maybe someone can chime in on how effective it really is.
Floating the floor will help a lot for isolating the bass, but you can also build some smaller platforms for things like bass and guitar amps and drum kits. Or you can get something like the Auralex Gramma pads for them if you don't want to build them yourself. They won't isolate as much as an isolated floor, but they'll help.
Then finally work on acoustic treatment to make the room sound "nice" for rehearsal and recording. Make some corner bass traps out of thick rockwool panels or Owens Corning 705/703 (depending on what you can get your hand on), hang some scattered absorption panels on the wall, leave some scattered wall surfaces bare, and maybe add some diffusers to the room to add some natural reflections and break up the big, empty, rectangular space. But acoustic treatment for a live room depends on a lot of things, so that's something you'll probably have to figure out on your own.
Luckily the 15 degree roof pitch will help a lot in taming the room and creating a more acoustically even space, which is convenient. Often studios will design all of their walls and flat surfaces to be at different angles to reduce the prominence of room modes that can create some odd sounding spots in the room. The angled roof won't make it perfect, but it will make it better than a roof that's parallel to the floor.
Don't use the provided tape. Buy some like this:
​
https://www.amazon.com/Scotch-Permanent-Mounting-Tape-Inches/dp/B00347A8GC/ref=sr_1_18?crid=1L0TL2R82UIAJ&keywords=3m+double+sided+tape&qid=1554233502&s=gateway&sprefix=3m+%2Caps%2C157&sr=8-18
​
Or this one for extra strength:
​
https://www.amazon.com/Heavy-Duty-Exterior-Mounting-Tape-Holds/dp/B00004Z4BV/ref=sr_1_3?crid=1L0TL2R82UIAJ&keywords=3m+double+sided+tape&qid=1554233502&s=gateway&sprefix=3m+%2Caps%2C157&sr=8-3
https://www.amazon.com/Flex-Tape-Rubberized-Waterproof-Clear/dp/B07B6F5PJ7/ref=sr_1_25?crid=22X1PICZBXB31&keywords=clear+tape+heavy+duty&qid=1554473098&s=gateway&sprefix=clear+tape%2Caps%2C149&sr=8-25
get some clear tape :)
1” or 2” T-pins work wonders and leave a very small hole. Smaller than a standard thumbtack.
You can move them too.
https://www.amazon.com/ADVANTUS-Gem-1-5-Inch-T-Pins-100/dp/B001PLOM8Y
I use these cross-style silicone bands! They work great for the IP.
I use Elmer's All Purpose School Glue Sticks, Clear, Washable, 4 Pack, 0.24-ounce sticks https://www.amazon.com/dp/B001E69WBW/ref=cm_sw_r_cp_apa_.UmGAbVBPRXYY
Dirt cheap and since using them I've never had a print break loose.
I'm also pretty particular about my books, so I think I understand your friend. If ever you feel like your paperbacks are falling apart at the spine, use [book binding tape.] (http://www.amazon.com/Scotch-Book-Inches-Yards-845/dp/B00006IF5R) You won't ever have to worry about creasing the spine again!
and here's
130120 various sizes for under $8 USDhttps://www.amazon.com/Ranger-Bands-Mixed-35-Count/dp/B079NQSDQJ?psc=1&SubscriptionId=AKIAILSHYYTFIVPWUY6Q&tag=duckduckgo-brave-20&linkCode=xm2&camp=2025&creative=165953&creativeASIN=B079NQSDQJ. $7.99 pack of 35 mixed sizes.
Most modern cases have some sort of 2.5 inch drive mounts as well.
Also, mounting tape works just fine as well.
https://www.amazon.com/Scotch-Permanent-Mounting-Tape-Inches/dp/B00347A8GC/
I'm in Australia and use a blue gluestick, but if you're in the US I've seen a lot of queens using the Elmers purple sticks. I buy the smallest size so that it's not much wider than my brow, so less clean up haha. https://www.amazon.com/Elmers-Disappearing-Purple-Washable-0-21-ounce/dp/B00143UIC2
I know people have answered with the thing you wanted, but if you want a cheap and easy solution for keeping track of base power in in the meantime, dry erase tape affixed to some card stock or cardboard, and a marker.
https://www.amazon.com/Scotch-Erase-White-1-88-Inch-5-Yard/dp/B00NBL3YR6
It's about the same amount of effort to erase and re-write the power as it is to click through the numbers; it is admittedly much less cool looking.
Thanks. :) I use simple Blue Tack, leaves no stain cheap and reusable.
Bostik Blu-tack Original Mastic Putty Adhesive Non-toxic Blue 60g Ref 801103 https://www.amazon.co.uk/dp/B00I42EOJE/ref=cm_sw_r_cp_apa_i_GoJADb7DE3GAM
Get some Blu-tac; it's REALLY inexpensive and it as an excellent vibration insulator. Prevents feedback.
https://www.amazon.com/Bostik-Blu-Tack-Adhesive-801103/dp/B00I42EOJE/ref=sr_1_fkmr0_2?ie=UTF8&qid=1473996518&sr=8-2-fkmr0&keywords=blu+tac+3m
Shower board from a hardware store makes a good, cheap whiteboard for those 2 A.M. sessions. Otherwise I hear they sell whiteboard tape and you can apply it to anything.
Something I found useful as I got farther into math and science. YMMV.
I get all my fleece from JoAnn stores. They often have fleece at 50% off per yard, so you can buy it in bulk and use it as needed. Any large fabric store will have lots of fleece in stock (I just prefer JoAnn because that's the best one I have in the area I live in). I'm sure you know this already, but just in case, please don't use cedar or pine chips as bedding for your rats; it's harmful to them. You can use fleece or aspen chip bedding (but freeze the aspen for 48 hours prior to use to make sure it's free of parasites).
I buy many rat toys on Amazon, and make some myself. If you're buying any kind of wooden rat toy, do be aware that many of them are made from soft woods like pine and cedar, which are super bad for rat respiratory systems. Hardwood toys are usually safe—just make sure it's not a combination wood that also has pine or cedar in it along with the hardwood. I personally do not buy wood toys on amazon, because the products often don't list what kind of wood they're made of. The only wood product I buy on Amazon is bags of untreated apple branch chewing sticks. I'll link you to some rat-safe toys and accessories I buy on amazon below! :)
Kaytee Lava Ledge
https://www.amazon.com/gp/product/B00176F466/ref=oh_aui_detailpage_o05_s03?ie=UTF8&psc=1
15" Chin Spin - Small Animal Exercise Wheel - Handmade in USA (Expensive, but it's the very best and safest wheel for rats.)
https://www.amazon.com/gp/product/B01GJ6SDBQ/ref=oh_aui_detailpage_o03_s00?ie=UTF8&psc=1
Bright Starts Lots of Links Accessory Toy (Great for hanging things up in the cage.)
https://www.amazon.com/gp/product/B001ABZGU2/ref=oh_aui_detailpage_o04_s01?ie=UTF8&th=1
Small Animal Activity Toy Cotton Rope Net For Rat and Ferret Pet Bed for Parrot and Hamster Parrot
https://www.amazon.com/Animal-Activity-Cotton-Ferret-Hamster/dp/B0777NWKT9/ref=sr_1_2?s=pet-supplies&ie=UTF8&qid=1519011945&sr=1-2&keywords=rat+rope+net
Kaytee Igloo Hideout, Large
https://www.amazon.com/gp/product/B00068K132/ref=oh_aui_detailpage_o04_s02?ie=UTF8&psc=1
ACCO Binder Clips, Medium, 2 Boxes, 12/Box (A7072050) (If using fleece as the bedding/liner in your cage, this helps to secure fleece to the Critter Nation pans.)
https://www.amazon.com/gp/product/B00TQ8FDB8/ref=oh_aui_detailpage_o08_s00?ie=UTF8&psc=1
Dr. Bronner's Pure-Castile Liquid Soap - Baby Unscented, 32oz. (I don't use any scented products with my rats since rat respiratory systems are so fragile, so this is the non-scented liquid soap I use to wash my hands and their non-fabric toys.)
https://www.amazon.com/gp/product/B00DAI76TC/ref=oh_aui_detailpage_o09_s00?ie=UTF8&psc=1
Pawliss Teeth Grinding Lava Block for Hamster Chinchilla Rabbit
https://www.amazon.com/gp/product/B01HGHA6VW/ref=oh_aui_detailpage_o00_s00?ie=UTF8&psc=1
Aspen/Booda Corporation BBX56134 Byrdy Cable Cross Bird Toy, Medium
https://www.amazon.com/gp/product/B003WRHTG6/ref=oh_aui_detailpage_o00_s01?ie=UTF8&psc=1
200g(7oz) Apple Sticks Pet Snacks Chew Toys for Guinea Pigs Chinchilla Squirrel Rabbits Hamster(About 50-70 Sticks) by MAIYUAN (The only wood product I buy on Amazon.)
https://www.amazon.com/gp/product/B06WLL641Y/ref=oh_aui_detailpage_o02_s00?ie=UTF8&psc=1
Ware Manufacturing Fun Tunnels Play Tube for Small Pets (Medium.)
https://www.amazon.com/gp/product/B001LUMU9M/ref=oh_aui_detailpage_o02_s01?ie=UTF8&psc=1
Ware Manufacturing Plastic Scatterless Lock-N-Litter Small Pet Pan- Colors May Vary (Regular size, not jumbo.)
https://www.amazon.com/gp/product/B003SLICDA/ref=oh_aui_detailpage_o04_s00?ie=UTF8&psc=1
JW Comfy Perch for Birds (Large, 36".)
https://www.amazon.com/gp/product/B0002AR754/ref=oh_aui_detailpage_o05_s00?ie=UTF8&psc=1
Lixit Critter Space Pod 2 Large (You can hand these on the ceiling of the Critter Nation. My boys LOVE these!)
https://www.amazon.com/gp/product/B002X2NBNQ/ref=oh_aui_detailpage_o05_s01?ie=UTF8&psc=1
Lixit Lbg-16 Glass Small Animal Bottle 16 Oz (16oz is always best for rats because of the bigger water spout. I've found that smaller bottles are a struggle for my boys to get water out of, so I only use the small ones for rat carriers/transporter cages. Tip: filtered water is best for rats, so if you can, get a Britta water filter.)
https://www.amazon.com/gp/product/B002WYCFK0/ref=oh_aui_detailpage_o05_s01?ie=UTF8&psc=1
Yummy Time Tiny Small Stoneware Pet/Dog Bowl
https://www.amazon.com/gp/product/B01NAUMYDC/ref=oh_aui_detailpage_o07_s00?ie=UTF8&psc=1
I buy Harlan Teklad (Envigo) food blocks for my rats, which is one of the top two for rats (the other is Oxbow Regal Rat). Harland Teklad is hard to find though, so I buy mine through this animal rescue:
http://weecompanions.org/healthy-food
If you get these blocks, freeze them to extend their shelf life, and take them out from the freezer as needed to fill your ratties' bowls. Harlan Teklad is great because they have several formulas for rats based on their age, which is super helpful for their health. Young rats up to 8 months usually eat Harlan Teklad 2016 (16% protein), and after 8 months they eat Harlan Teklad 2014 (14% protein).
Also, I don't have a link for this, but the best laundry detergents to use to wash your rats' cloth toys or bedding with is one that's non-scented and is sensitive on skins.
Um, if I think of anything else, I'll add it. But for now, it's already a ton. :P Enjoy!
(And feel free to message me if you have any questions!)
this
Here are the ones i was talking about: https://www.amazon.com/dp/B00MS4DM24/?coliid=I3GXHB1XM9T0Y2&colid=16DLSCUT2G5P5&psc=0&ref_=lv_ov_lig_dp_it
​
Edit: And here are the ones we use at home typically, though we get them from IKEA https://www.amazon.com/Bag-Clips-MiTBA-Sealers-Wasting/dp/B0791MVBHK/ref=sr_1_3_sspa?s=home-garden&ie=UTF8&qid=1539350814&sr=1-3-spons&keywords=bag+clips&psc=1
This is actually a valid question. The lasers do not have a brand that I know of. Just look for a 3 pack from china for $10. It's those:
Laser Pens
http://www.ebay.com/itm/High-Power-5mw-3-Color-Red-Green-Blue-Purple-Laser-Pointer-Pen-Beam-Light-USA-/162544543179?hash=item25d868e5cb:g:Sk4AAOSwPh5ZIR5e
Rubberbands
https://www.amazon.com/BAZIC-Assorted-Dimensions-Rubber-Bands/dp/B000BLJEKU
I use Paper Binder Clips. They come in a variety of sizes and are multi-purpose.
elmers is great, six pack dirt cheap (http://www.amazon.com/Elmers-Disappearing-Purple-School-E1560/dp/B00143UIC2/ref=sr_1_2?ie=UTF8&qid=1453149823&sr=8-2&keywords=elmers+stick)
http://www.amazon.com/Scotch-Adhesive-Putty-Removable-860/dp/B000AN7EW4
These glue sticks would be awesome. My kids go through glue sticks like crazy, especially doing crafts for the holidays, lol.
pay attention in class!
I put at least one of these at each bedside, 2 in the master, one in the living room and mounted it with this to keep it from walking away. Also if an outlet was not easily accessible at the the bedside I put in an extension so there was. Lot of people use CPAP machines now. Got tons on compliments on the setup.
Thanks for the contest! Hosting contests is a lot of fun. I've already done three and I will do more. They can be slightly addicting.
Matts & T- pins I would love to have these because they will make blocking my knitting projects so much easier. And I'll be able to use it to block Christmas gifts too! Yes I am already planning Christmas.
Can you post an album of your setup and maybe under/around your desk? I put a lot of stuff under the desk that I dont nessicarly need to see all the time (USB hub, External hard drive)
Some general things that will help are Velcro Ties or for more permanant situations cable ties.
Also depending on the size or weight of your USB hub some mounting tape may help to keep it in place on your desk.
You will probably need a powered usb hub to connect the drives. Not absolutely necessary but the Pi only has two usb ports (the micro b port is just for power to the Pi) and cannot power notebook drives directly. Plus, the extra ports on a hub will allow you to connect your drives, a mouse, a keyboard, and a Wi-Fi card; all at the same time.
The case I have been using is the [Punnet printable case.] (http://www.raspberrypi.org/archives/1310)
I did not have any heavy card stock to print it on. So I printed the case on regular paper and glued it to some thin cardboard from a box of crackers. To keep the glue from wrinkling the paper, I used a "school glue" style glue stick. You can find glue sticks almost anywhere that sells office or craft supplies. Then I cut it out with scissors and a razor knife.
I don’t have a full kegerator, but I did get one of the Hopsy keg systems. I was trying to find a good way to make a label, and I found a roll of dry erase tape . Works a charm.
Got them on amazon they have different sizes. Here’s the link
Blue-tack.
https://www.amazon.com/Bostik-Mastic-Adhesive-approx-801103/dp/B00I42EOJE/ref=pd_lpo_vtph_229_tr_t_2?_encoding=UTF8&psc=1&refRID=Y2DE49D3TD74PFZQP1BF
I've used it before and it doesn't tear the maps, and you only need a tiny amount.
2 x Bostik Blu Tack Mastic Adhesive Putty Non Toxic Blue approx 60g 801103 https://www.amazon.com/dp/B00I42EOJE/ref=cm_sw_r_cp_api_i_Cli.Ab3Q3918K
so im looking to get into 3d Printing, and unless someone has some better option, im going with the MP Select Mini.
My question is on the other things i need. Here is the list of the things im looking to buy along with the printer:
I have a set of exacto knives and a screw bit set. Is there anything else im missing?
I was in your exact situation and here's what I did.
I ordered 2 of these to fill my 10' x 10' playspace https://www.amazon.com/gp/aw/d/B017HQVOP4/ref=yo_ii_img?ie=UTF8&psc=1
I ordered 5 boxes of these to attach them. 1 in each corner, and 1 in the middle of each tile. https://www.amazon.com/gp/aw/d/B001PLOM8Y/ref=yo_ii_img?ie=UTF8&psc=1
I angled the pins so that they went all the way in and are sturdier.
For mounting the lighthouses, it would be best to mount on a sturdier wall similar to the way I did in my image.
Here's what it looks like. https://i.sli.mg/8ICrPn.jpg
Those bands are Grifiti X bands, designed to keep game boxes closed during transit. I have them on a lot of my games, particularly ones that I take with me more frequently. They're not the best version for storage, because they're a little on the thick side. There are slimmer versions out there, but it's convenient to be able to buy a whole bunch of these in different sizes and colors, and they work well on non-game boxes as well.
heavy duty velcro like this
You gotta clamp it down to the bed, or it'll move during printing. I use the smallest of binder clips on the corners and it works great.
https://www.amazon.com/dp/B0794VN392/ref=cm_sw_r_cp_apa_i_sf9jDbYPTHPDX
Also, I've tried most of the adhesion solutions out there and I've had the best luck with hairspray as an adhesive. Specifically Aqua Net hairspray. Or if you can't find that, some kind of super duper ultra level 10 Hold hairspray. I print PLA, PETG, and even polycarbonate and it works great. I get a nice, flat glossy finish on the bed side of the print.
Yes, the glass is super conductive to heat and I use the same heat temps that I would use if I printed straight to the bed. As a matter of fact I rarely go above 50C on any of the filaments I mentioned above with success. I credit the glass to distribute the heat more evenly across the surface compared to the hot spots /cool spots you'll get with the aluminum bed alone.
Now, one caveat of using glass is that you're adding more weight to the bed and at higher print speeds and with the Y axis jerking back and forth, you'll see imperfections in your print of you don't have the printer's frame good and tight. I don't have all those cool frame upgrades on mine like a lot of folks do because I aim more for finish quality than speed, so I rarely get above 65mm/s on any print on the Anet.
I have a larger CoreXY that I built that I can get up above 100mm/s with good results but I rarely run it that high either. My benefits from it are larger build area.
The only improvements I've made to the A8 aside from a better power supply and Mosfet for the heat bed for safety, is the glass bed, a Bowden extruder, belt tensioners and these little guys :
Base Attachment Anet A8 found on #Thingiverse https://www.thingiverse.com/thing:2123364
Those base clamps produced the biggest improvement in my prints of anything I've done.(As far as frame stability is concerned)
I bought a cheap Ikea table and screwed the A8 down to it and now the whole thing is rock solid.
I get really nice stuff from my little A8 and I've had it 3 years now. I bought it when you could only get them from China, before they were available on Amazon.
If I had it to do over again the only thing i would change is probably the Bowden system. It's a bit of overkill for my needs since I'm not looking for more speed. But it is easier to load filament into than the stock extruder.
Please know these things I've suggested have helped me, but your mileage may vary depending on your printing needs. There are tons of opinions of what is best and what is not as far as upgrades.
Easiest and most cost-effective way is to use this stuff:
http://www.amazon.com/Case-Green-Glue-Noiseproofing-Compound/dp/B000SKWD8Y
If your attic doesn't have existing drywall, you'll need to hang two sheets of drywall with GreenGlue applied (as per instructions) between. Do the same with the floor and whatever door is up there. Don't forget to seal.
If you've already got drywall you'll need to strip the walls to the drywall, clean it, apply the glue, and hang another sheet (then of course refinish the walls and seal).
I would advise against the whole process though. It's going to be absurdly hot/cold in an attic. There will be sound bleed. It'll be cramped. I just don't think you're going to be happy with the results after going through the cost and effort to professionally soundproof your space.
Something like this is intended for use with miniatures, so it'll be similar to the kinds you'd buy once you have minis...
But I would recommend making standees like these. All you need is binder clips and paper. No glue, they just naturally clamp closed around paper. Couldn't be simpler. Printer and scissors. I personally prefer them to minis.
The best solution you can get for printing PETG without any warping is a glass bed with PVA glue. I would highly recommend getting a borosilicate (Pyrex) glass plate. Borosilicate glass has a VERY low coefficient for thermal expansion so it extremely resistant to thermal shock and the breakage that comes with it. I had the piece of glass for my CR-10 cut to size at a local glass shop as glass beds were not offered anywhere for the CR-10 at the time. However now you can go on Amazon and pay a very reasonable price for a nice glass bed. Such as this which is less than half the price that I had to pay about two years ago. Ooof!
Take your glass sheet and attach it directly on top of the metal heated bed that the CR-10 has with binder clips. It is a very simple but extremely effective way to keep the glass tightly attached without issue while also allowing a quick and simple process for removing prints and swapping print surfaces.
Then, it is time for the star of the show, the PVA glue! Now, before you get intimidated by the exotic sounding glue (like I did when I first heard about having to use it), just know that it is literally just Elmer's Disappearing Purple Gluestick. This is seriously one of the BEST tools for anyone who prints somewhat exotic or finicky materials. Uncap the glue and evenly coat the glass with a light coating and you are ready to go. When I say light, I mean just one pass over each spot, do not do more than one coat, that one coat is plenty! The best part is that it is disappearing, so when you apply the glue and it still has a bit of moisture, it is a dark purple, however once it sits for about 30 seconds on a bed that is heating up it loses its color and becomes more translucent so you can see exactly what parts of the bed are coated well and which parts you may need to touch up. When the glue has lost its color and the glass looks like it is a bit hazy or foggy then you are ready to print!
PETG can be a bit tricky to print if you are coming from PLA but it is very rewarding once you dial it in.
I would suggest that you either use a low fan setting of 25% or less (except when bridging which should be 100%) or do not use the fan at all (again unless bridging). PETG is a material that wants to stay hot and slowly cool on its own. It does not like to be hit with a fan instantly after being laid down like PLA. PETG actually fuses itself together at the layers which makes it have extremely strong layer adhesion, whereas a properly formed PETG print cannot be separated at the layer lines because of this fusing effect. (This is why you NEVER print PETG directly onto PEI as it can fuse with the PEI and tear the PEI off of the bed.)
​
I would also suggest that you run a hotter bed temperature. I personally print PETG with a bed temp between 85 and 100, depending on the brand of PETG I am using.
There is one VERY important end of print step to safely and successfully print PETG. When the print is finished, DO NOT let the bed cool to ambient temperature while the print is still attached! You MUST set your end of G Code to reduce the bed temperature to about 60% of the temperature it was while printing. This is a very important step so that your piece does not break your glass bed! This is especially important as the printed pieces get larger and have a larger contact surface with the bed. If you allow the print and glass bed to cool to ambient on their own then you are dramatically increasing the chance that the print will cool too rapidly and shrink while still attached to the glass and end up breaking the glass.
This may seem like a lot of things to do to print PETG but when you see the final result and how strong and beautiful PETG can be printed it is all well worth the effort.
​
One final tip about PETG is that it is very hygroscopic (not as bad as Nylon but still noticeable and much worse than PLA) and needs to be taken care of for it to print well. PETG needs to be stored in airtight bags with desiccant packs while it is being stored. PETG should never be left out in the open air for longer than it needs to be. If the roll is not currently supplying a print then it MUST be stored properly. If you allow your PETG to sit out and absorb the water from the air, it will print very poorly and never give good results. If you are printing PETG and can hear a crackling or hissing sound at the nozzle, then your PETG is too wet and needs to be fixed! The crackling and hissing sound that can be heard is the water that has been absorbed by the PETG being instantly boiled and turned to steam when it hits the hotend. This is most noticeable with Nylon but poorly kept PETG will also exhibit this same behavior.
​
If you have any questions or need me to clarify something please ask and I will gladly do my best to help! PETG is well worth the hassle and learning curve as the results that can be achieved with it are truly amazing.
1.92
sara bareilles
thanks :)
not sure where you are but if you do a basic google you can probably find someone that will make a custom sticker like that or a type of vinyl
also https://www.amazon.co.uk/Elmers-231-Wrinkle-Rubber-Transparent/dp/B000EFQ2I0 is great, its like a non stick glue where you can peel the photos off without ripping the paper once its dry
This...comes off clean too. Make sure you get the putty. Not the transparent adhesive "dots".
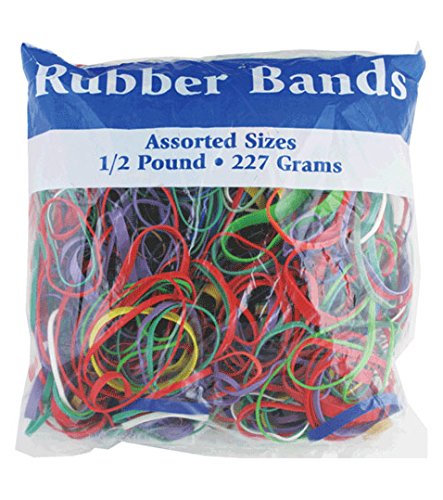
I think you should get her this bag of colorful rubber bands. If she's bored or stressed out, she can create her own rubber band ball! Might sound sorta lame, but I totally did this my freshman year and loved it. :) College Bound, surprise me.
Screwdriver or double-sided tape I find randomly useful. Also, erasable pens.
Codename Duchess What what a great contest! That's some great gifting and very generous! Here's my add ons based on the prices they are today:
=25.47
Thanks for the contest!
I agree. Industrial Velcro is incredibly strong, and if you properly clean the surface before applying the velcro, it'll last forever.
Plus, it has the added benefit of not adding more holes to your boat.
I personally don't like things such as joker reveals or blurred cards, because to me it seems that the spectator would be able to tell that the card is just printed specifically, and while it may give an immediate wow factor won't really leave a sense of magic.
That said, I disagree with the idea that gaff cards aren't useful - using a double facer or double backer or something like Vogt's regeneration gimmick or Houchin's distortion gimmick can create wonders.
So I recommend you buy Blake Vogt's Split Sessions v1 and 2 which will set you back $9 and a tub of rubber cement which will be another $9 and make gaffs to fit your specific needs.
(though of course you may disagree with me completely, and buy the Blue Bike gaff deck - whatever fits your own style is best!)
Here's what I did before I assembled my blocking kit:
0. Buy t-pins
this ?
I go vertical and sometimes keep the lid on with these cross band elastics Grifiti Bands Cross Style 4, 6, 9, 12 Inch Assorted 20 Pack X Shape Wrist, Books, Cameras, Art, Cooking, Wrapping, Exercise, Bag Wraps, Dungies, Silicone Rubber https://www.amazon.ca/dp/B018WQII2A/ref=cm_sw_r_cp_apa_BmfEAbKX20SYK
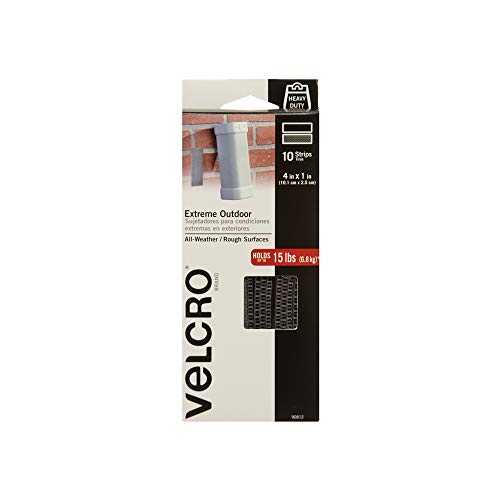
I'm installing some panelboard [1] to use dry erase board in my room, which I'm renting (and thus cannot drill). Will Velcro brand extreme outdoor strips [2] (which I already bought and used for one panel) damage my walls when I remove them? If so, how would I go about semi-safe removal / fixing the wall before I lose my security deposit?
[1] https://www.lowes.com/pd/DPI-47-75-in-x-7-98-ft-Smooth-White-Panelboard-Hardboard-Wall-Panel/3015239
[2] https://www.amazon.com/VELCRO-Brand-Extreme-Outdoor-Titanium/dp/B001O6T2ZS
Yes. It is tape that acts like a dry erase whiteboard. There is also chalkboard tape.
http://www.amazon.com/Scotch-Erase-White-1-88-Inch-5-Yard/dp/B00NBL3YR6
http://www.amazon.com/Scotch-Chalkboard-Black-1-88-Inch-5-Yard/dp/B00NBL3UVG
Elmer's Rubber Cement has worked well enough for me. I like the cap's built-in brush. I glue indoors with meh ventilation.
https://www.amazon.com/Elmers-Rubber-Cement-No-Wrinkle-Ounces/dp/B000EFQ2I0
this stuff https://www.amazon.com/Scotch-Permanent-Mounting-Tape-Inches/dp/B00347A8GC
Is this the tape you used? https://www.amazon.com/Scotch-Double-Dispenser-Inches-136/dp/B00004Z47L/ref=sr_1_8?ie=UTF8&qid=1486773466&sr=8-8&keywords=clear+double+sided+tape
They are called Ranger Bands. Heat resistant rubberbands. You can get them a lot of places. I just got mine off Amazon.
https://www.amazon.com/Ranger-Bands-Mixed-35-count/dp/B079NQSDQJ
don't use tape. use this. put it on the back of the display plate, press onto the wall. donzo.
My female Lovebird breaks out of every cage that has this type of door. Since she started plucking her mates head feathers I had to separate them, which doesn't work if she opens the doors herself.
I used "binder clips" to keep her locked in. She did get the handles of the clips off (not sure how she did that) but the clip itself stayed in place. Not sure if it's helpful with a cockatoo.
I use the silver part of a small binder clip with the prongs bent down.
Warning: Shitty MS Paint diagram
[Double-Sided Tape] (http://www.amazon.com/Double-Sided-Dispenser-Permanent-Inches-Clear/dp/B00004Z47L)
same
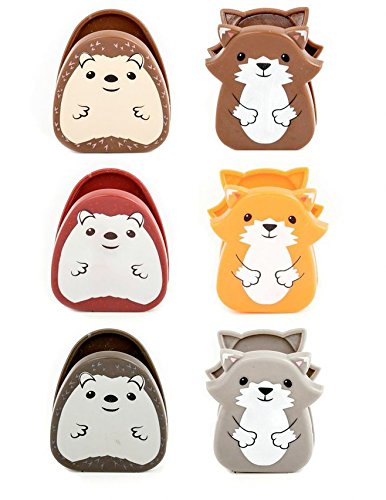
There is a cute woodland creature bag clip set I have on my wish list you might like! They are just so cute!!
Hmmmmm. Try this to get past the grainy-ishness
Hm. This patch kit costs $3.50, and has six patches. The round ones (4) are 25mm.
Rubber cement is $5, though there's also a gallon for $30. The cost of sandpaper for these purposes is negligible. A tube is maybe $5, and probably has enough rubber to make 29 2.5" square patches. Or ~63.5 mm. So plenty big enough to cut down into 146 square 25 mm patches. I'm measuring this based on a Specialized 700C x 28/38 tube, so you could probably increase that by buying the biggest tube you can find.
I can't really say anything about how the sticking power of these patches compare, but when you think about a tube's place in the tire, it likely wouldn't matter.
EDIT: changed some patch math
I added a Nessie ladle to my Amazon wishlist. I also just found these adorable bag clips and I squealed a little. :-P
I use Google Drive to create my icons, as it is the least time consuming method I could think of. The end result is something along these lines, but with a thicker border to allow for easier cutting. Attach them to a binder clip and it works pretty well so far.
It took a little trial and error to get the right size but the icon above fits perfectly within a square grid. And the binder clip can be written on to easily identify the amount of a certain type of monster (5 zombies, for instance).
Quality shouldn't be affected but the cover is there to protect the (relatively fragile) lens on the webcam, it'll scratch more easily than the cover would and the cover will be easier to clean than the lens would. I would say if you have it, fix it, easily done and it will make your new Thinkpad look even better. ;)
If you have one of those epoxies that dries hard (like JB Weld) I'd go with that, some epoxies or quick-cure glues can fog the plastic, which would really mess with the video quality. If you don't want to run the risk of using the wrong glue, you could test a small amount on the cover first, or find some really thin double-sided tape to reattach it (something like this www.amazon.com/Scotch-Double-Dispenser-Inches-136/dp/B00004Z47L/). Just cut a piece to fit in the gap, and very carefully cut out the circular patterns with a fine, sharp blade. If you do go with glue/epoxy, just don't put too much on otherwise it'll ooze out the sides and make a real mess (or even worse, get on the lens.
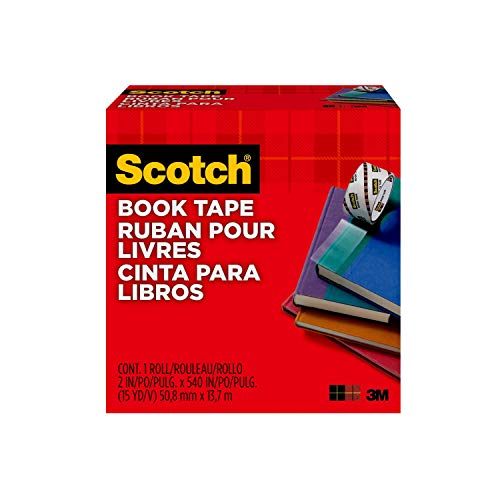
You can get special book tape for that. https://www.amazon.com/Scotch-Book-Inches-Yards-845/dp/B00006IF5R
This is my 10oz luxury kitchen
https://www.traildesigns.com/products/fissure-ti-tri
with wood burning insert and kojin stove
With Evernew 760 mug
EVERNEW 760FD Titanium Cup https://www.amazon.com/dp/B01C6H8KX8/ref=cm_sw_r_cp_api_i_qhRKDbDR8GG4E
and this lid
TOAKS Titanium Lid for TOAKS Cups... https://www.amazon.com/dp/B072BTZ7RM?ref=ppx_pop_mob_ap_share
And this dry baking pan (yes you can!)
https://www.flatcatgear.com/shop/snow-leopard-baking-pan/
this esbit holder
https://www.flatcatgear.com/shop/epicurean-ul15-stove/
This alcohol stove
https://www.minibulldesign.com/productcart/pc/viewPrd.asp?idproduct=301&idcategory=18
This silicone band to hold it all together (just one X band)
Grifiti Band Joes Cross Style 4, 6, 9, 12 Inch Assorted 20 Pack X Shape Wrist, Books, Cameras, Art, Cooking, Wrapping, Exercise, Bag Wraps, Dungies, Silicone Rubber https://www.amazon.com/dp/B018WQII2A/ref=cm_sw_r_cp_api_i_YwRKDbP7626DD
Mug + cone + wood burning insert + esbit holder + baking pan + remote alcohol stove + mini bic lighter + tinder = 10.2 oz and it ALL fits inside the can (yep, all at the same time)
Yes, all up its pretty heavy but you’ll almost never need or want to have all the options on a single trip but you could. More importantly, with this one kit you can adapt for a trip in any environment with any fuel and you can bake stuff in it too
BONUS!
this mug will also fit a BRS 3000T stove, bic lighter, and a 100g butane canister inside (but not at the same time as all the other stuff)
BRS Only 25g BRS-3000T Ultra-Light Titanium Alloy Camping Stove Gas Stoves Outdoor Cooker Outdoor Stove Gas Stove Miniature Portable Picnic https://www.amazon.com/dp/B06XNLSNFR/ref=cm_sw_r_cp_api_i_LsRKDbZ47R6HQ
Oh gosh, my little boy is starting Kindergarten, then my fiancé and I both attend college which is starting back up.
Any of these things would be great! erasers, dry erase markers, or glue sticks
My guesses for your questions. Orange is the new black for the show,maybe Hunger Games for the movie. Animal Crossing for the game, and The Road for the book.
This contest is great. Bill Hader
Happy cake day!!!
1 Rubber spatulas that I would use to mix up my cake, or icing colors which I use to die icings for cakes I make!
2 This one is a stretch but portal socks because Simon Pegg did voices for video games...and Portal is a video game!
3 I don't have any books on my WL. :P but.... I'd like to read this bag while I devour it's contents!
4 Mixing bowls. My SO tends to eat his cereal out of the few I have now >.<
5 Gecko food for our gecko! It even has a picture of one on the label!
6 Purple socks or purple nail polish!
7 Portal companion cube!
8 My (not so guilty) pleasure.
9 Pocket knife!
10 The definition of my childhood!
11 Literally for organizing!
12 My favorite hobby is baking!
13 PlayStation 4 could be geeky to some.
14 Made with 100% natural almonds!
15 Green socks!
16 I can wear these adorable leggings!
17 Funny candles!!
18 NSFW beads...
19 Gardening boots!
20 The item I love is this mixer!
I think you will buy these!
I used rubber cement. I painted the page with it and laid the tissue paper down. I prefer it to glue for journaling - it doesn’t wrinkle.
I did this the other day to my refrigerator, except instead of paint I used Dry Erase Tape.
I put a strip by the front door so I can leave my roommates and self reminders when I walk out the door like "Pick up TP."
So you’re using just normal glue sticks? Like these?
https://www.amazon.com/Elmers-Purpose-School-Washable-0-24-ounce/dp/B001E69WBW
Why not just use a double sided tape like this one. Or look into bookbinding specifically regarding gluing the spine. There is PVA glue designed for stuff similar to this.
I've used binder clips. Put a piece of paper in it, then take off the metal pieces.
Turns out pretty nice ^(not my pic), and the little ones are only about 3/4 inch wide.
For sound dampening, I've read that Green Glue is the best.
ranger bands
Do you own the condo?
In additoon to upgrading the doors and windows, you could tear down the drywall and make sure the insulation is high quality. Then install new drywall by hanging it on whisper clips which separate the studs from the drywall. Then you apply anti vibration green glue and a second layer of drywall.
I'm also battling nylon adhesion on a PEI bed. Best lead I've found so far is PLA glue.
Let us know if you get it sticking!
Scotch Removable Mounting Putty
I'm no sound expert or anything, but the expanding foam is much less dense than whats in the solid core doors, so I'd imagine less effective.
Upon further research, it seems like expanding foam isnt well regarded as a noise dampening solution in general. There is a product called Green Glue (which I could only find in 12 packs for $200...), that some people seem to revere as a gift from the soundproofing gods. Price aside, I'm not really sure how you would apply it inside a door, since it looks pretty thick (would be hard to distribute evenly).
Personally, I'd go with the simple option of a new door. But, you have some options now, and its up to you.
That was a great video, thanks. I've had several recommendations for rubber bands. We'll probably try that next time. Certainly seems easier. I was also considering paper clips like these instead of attaching the combs at the top with string. These would have the advantage of being easier to put in and take out.
I haven't tried the clover clips but I use regular binder clips most of the time. They don't leave any little holes and I'm not about to accidentally have one go under my foot and risk breaking a needle.
If you want to try and repair, you'll need some of this and some of this.
While a helper brings the pieces together to close the gap, cover the crack with the Flex Tape. Now, while still maintaining force to keep the crack closed, cut a piece of strap that will go on the outside of the bend and will reach both PVC flanges. Screw one strip on about an inch above that line on the PVC, using a screw for every other hole. Add a second strip one inch below.
Your helper is STILL applying pressure to keep the crack closed.
Cut another strip of metal, and wrap it around the elbow just next to the flange. Let it overlap 3"-4", then screw it in place. Cut another for the other flange.
That should be enough to hold everything in place.
Obviously, it would be FAR easier to replace the broken section. To do that, determine the diameter of the pipe and get 12"-18" of it (see if the hardware store has a scrap piece you can have for free). You'll need to buy two (2) of these, as you're going to have to cut the current elbow off, and that might not leave enough existing pipe left for the replacement elbow.
So, you'll end up gluing a hub to a small section (say 4") of pipe, and the other end of the pipe goes into the elbow. You'll make two (2) of these, once of each end of the elbow. You can prefit the parts before gluing them to see where you'll need to make cuts on the existing pipe. Make your cuts. Glue up the replacement elbow, small pipe sections and hubs, allow 30 minutes to set up. Apply glue to the ends of the existing pipe and the interior of both hubs, push them into place. Done.