(Part 2) Best tapes, adhesives & sealants according to redditors
We found 2,730 Reddit comments discussing the best tapes, adhesives & sealants. We ranked the 963 resulting products by number of redditors who mentioned them. Here are the products ranked 21-40. You can also go back to the previous section.


As long as this doesn't go in the oven (or get hotter than 180ºF / 80ºC) of course it can be glued, and with fine, strong (but still slightly visible) results.
u/GondorUr is probably right, it would be easiest to return it and that would have the best results, but...
u/pobroin has the right attitude, considering their appreciation of kintsugi, and so do you, I presume, since you are asking about repairing, rather than replacing.
u/BcookieOmonsterB is right, that cyanoacrylate (Super Glue, Krazy Glue, etc.) works well with ceramics, but cyanoacrylate works best on nonporous surfaces, and when the surfaces fit really well with the least possible gap. On ceramics, especially if not fired to the point of being vitreous, there's often a few grains that will get dislodged in the glue, while fitting the pieces back together, that will stand in the way of ever getting a truly close fit. So...
As this job is a nice clean break, and a simple two pieces. It's the perfect job for a two-part epoxy, which is plenty strong and will fill any small gaps with virtually no loss of strength, unlike cyanoactrylate.
Your best option to repair (rather than replace) is a two-part clear epoxy. Since you're asking about this, I assume you haven't worked with glues much, and are unfamiliar with the process, and may be a bit slower than someone more practiced. Different epoxies have different working or handling times, and since you don't want to rush it, look for longer than 5-minute epoxy (this one gives you a full 30 minutes, but that's a lot longer than you should need for this simple job - look for a 10-minute epoxy).
Edit: Yay! Silver! Thanks for the alms, secret Samaritan.
Edit 2: Clarification added to taping procedure
Great project, looks great!
As a suggestion for future work (one I used on my own desk)
look into epoxy. Something like this:
https://www.amazon.com/Clear-Epoxy-Encapsulating-Casting-Gallon/dp/B00IT0APVM
Cheap, easy to use, and gets a great finish with much less sanding/recoating. It can discolor if exposed to UV, but generally, that isn't an issue for indoor applications.
Edit: You made me want to post mine https://www.reddit.com/r/DIY/comments/5nysq1/my_custom_bambooplywood_desk_build/
lol.. just simple food grade silicone to fill the engraving should suffice.
If nothing else works, you may want to just waterproof your electronics with conformal coating. Take apart the Vive to get to the mobo, remove the mainboard, spray one side, put back the mainboard and reconnect, cover-up sensor connectors, spray the other side. Reconnect the sensors and put them back together. Of course, observe the drying times needed.
https://www.amazon.com/MG-Chemicals-422B-340G-Silicone-Conformal/dp/B008O9YGQI/
​
I never did it for a Vive. But that's how you waterproof everything else (super popular DIY for drones since they can crash into water).
It creates a thin silicone layer making it waterproof. It's pretty thin so it's not too hard on the electronics. It does make manually repairing it a bit harder though.
Since it sounds like you have a bunch of broken vives around you can even try spraying it on a broken one just to get the feel of the process.
I have several suggestions:
1st: Whatever enclosure you use, you will have to ensure that it is UV protected, or you will have to paint it with paint rated for outdoor use, such as Krylon or Rustoleum all purpose spray paints.
2nd: if you are in a climate that experiences extremes on one or both ends of the temperature spectrum seasonally, you will want to take precautions.
-If your climate is higher temps but dry, you will want a breathable enclosure.
-If your climate experiences humidity as most do in the United States outside of deserts, you will want to coat the board in a "dry" conformal coating. That is, once applied, the coating dries. You will want to take care to seal or plug any of the ports to protect against corrosion from moisture. After applying this coating to the board, and appropriately sealing or plugging ports, you can use an open enclosure for venting purposes, taking care to only have openings at the bottom of the enclosure to ensure moisture cannot drip in, but can leach out.
-If you decide to do a closed or sealed enclosure, you should do so with a conductive material such as aluminum and flood it with a non-conductive fluid like detergentless motor oil. This will ensure the RPi can cool in higher temps, and all but guarantees no moisture corrosion. Make sure to use standoffs that will make sure the RPI does not contact the inside enclosure surface and keeps the RPi snug. Using 4 drops of non-conductive automotive gasket maker in the corners of the RPi board to create at least 1/8" gap between the board and the enclosure is a simple way to do this. Take care in this option to plug ports you intend on using later such as the HDMI, 2 of USB ports, and any others. You can use a light coating of silicon to seal the SD card, and around the pins on the bus you are using, as well as the power connector. Since motor oil is non conductive, you can leave any non-used ports open. You can use gasket maker or silicone to seal the enclosure and if you drill a hole in the top, a syringe to flood it with oil after closing, then using the silicone or gasket maker to plug the hole. Obviously you would want holes for the leads and power cable to pass through, taking care to seal those too. This is exactly how transformers on telephone poles are insulated against moisture and heat.
3rd: Consider keeping the RPi inside altogether and running leads out to the sign. If you need less than 8 leads, cat5/6/7 cable can accomplish this and you can even drill a 1/4" hole through your wall to route the cable, taking care to seal the gap. If you need more leads, look into circuit designs that can convert the output from the RPi into a serial signal, and have a circuit on the back of your sign, with it's own power supply for turning the serial signal back into something that drives a relay bank, or some other simple LED control.
A spray that instantly sets CA glue.
https://www.amazon.com/Bob-Smith-Industries-BSI-151H-Accelerator/dp/B0166FFCCS?ref_=fsclp_pl_dp_1
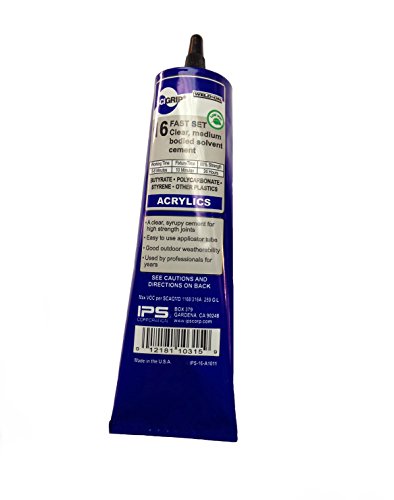
weldon plastic weld. It will melt and mold the plastic into one piece again. You use syringes. It's how they make lexan boxes and display cases, but i've rebuilt snapped ball joints and hinges with it. There's one that just does the weld, and one with acrylic filler to bridge gaps/build up. Takes some practice but worth learning. https://smile.amazon.com/SCIGRIP-10315-Acrylic-Cement-Low-VOC/dp/B003HNFLMY/ref=sr_1_9?keywords=weld+on&qid=1570714265&sr=8-9 and
https://www.youtube.com/watch?v=68wYkXgO8_U
Yeah, this is recommended on another 3d printing thread I'm probably going to buy some and try it out myself :)
Amazon links, you are looking for FDA safe epoxies.
[link1] (https://www.amazon.com/CLEAR-GRADE-Epoxy-Resin-System/dp/B01J16MYSE/ref=sr_1_6?ie=UTF8&qid=1474585448&sr=8-6&keywords=FDA+epoxy)
[link2] (https://www.amazon.com/Alumilite-amazing-clear-cast-resin/dp/B013H6OTPK/ref=sr_1_4?ie=UTF8&qid=1474585448&sr=8-4&keywords=FDA+epoxy)
edit: I wonder if copper infused filament would be food safe? It is naturally antibacterial.
Hey, I JUST came off building a setup and it cost me $750 total. We have 3 plants in there right now. I have the entire list with amazon links or store suggestions.
Item| Price | Where To Buy
---|---|----
Tent| $95| We bought this one, I don't know if it's worth spending a lot on anything more expensive. For a smaller option I just got a second with good reviews but can't vouch for it yet.
Lights/Hood/Ballast| $140| I got the 600W set, but 400W would make cooling MUCH easier and still get a big yield. For LEDs at similar price, Viparspectra 300W x2 or a single 600W eliminates need for extra cooling potentially (not included here, we used fans from around the house)
ph Test+Control Kit | $25| GET THIS. The water must be pH'd properly for your babies' health.
Cloth Pots| $20 | These are better for aeration, water flow, training, etc. Cheap and reusable too.
Nutrients | $50 | I got the Fox Farms Trio, but there are many good options out there.
Fan + Filter | $150 | This is huge and might be overkill for you. Make sure whatever you get fits your tent vents (This one fits the Apollo tent above with 6" vents).
Ducting | $20 | Connect fan to filter, to tent, to wherever. Might want multiple sizes, check tent vent sizes.
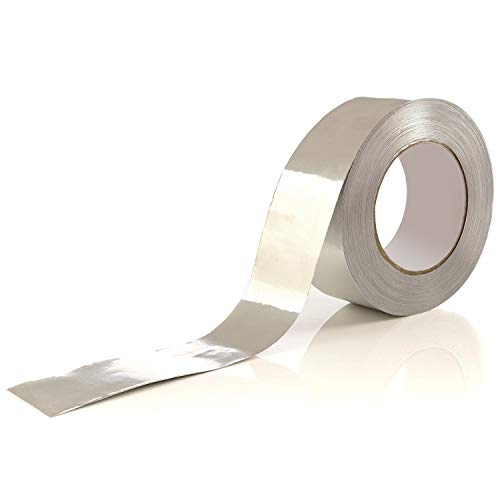
Foil Tape, Metallic | $10 | Here. Metal Duct tape is best duct tape.
Fan Speed Controller | $20 | Useful for if you do get a fan that is slightly overkill!
Fox Farms Ocean Forest | $15 - $40 | You can buy it online and I did for my first 3 bags....then I found it in a local store for $15. There is some controversy with FF lately, it's not organic FYI. There are tutorials on making your own soil if you care, but I like this because I didn't have to use nutes for 3-4 weeks.
Humidifier | $30 | This is the exact one I have. We're in winter so I need it to keep humidity up, you may not.
Dehumidifier | $40 | There are plenty for this much. You may not need this either.
Cal-Mag | $20 | I haven't needed it yet but it's best to have on hand if you do!
Seeds | $75 | I bought from Attitude, chose stealth, and bought like 15 seeds?, so it was expensive. You can get seeds for less.
Jiffy Pellets | $10 | Used to start seeds. There are other options.
Total | $745 | If you buy all this stuff, you have potentially even more than you need to get started, with room for 3-4x more plants than these boxes, and with nutrients to last you for a long long time!
Hope this helps! I'd hate to see you drop so much on it when you don't need to at all.
I had this exact issue
I found out what the service center uses to remedy it. It has been 100% resolved as a result.
https://www.amazon.com/gp/product/B00MWLDALQ/ref=oh_aui_search_detailpage?ie=UTF8&psc=1
Is the stuff. $20 and it completely stopped squeaking.
In fact, I forgot it ever did until I saw your post @yazheinx
Depends on your desk and how permanent you want the solution for ONE layout.
My first choice would be a good cable management channel that can hold it, it's permanent while maintaining flexibility in use, and ease of access if you need to move it. something like this or like this. Depending on your desk, there may be some specifically designed for it.
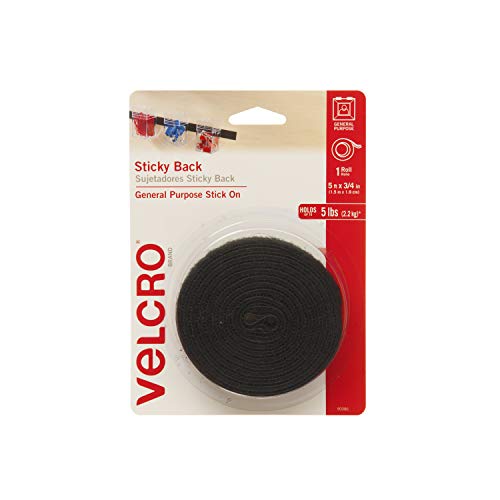
After that I'd go with Velcro is a great option since it is less permanent than
Custom Screw mount is basically the last option I'd go with - it's permanent and not at all versatile, if you need a new brick you might be SOL.
https://www.amazon.com/gp/product/B000LNN11G/ref=ppx_yo_dt_b_asin_title_o00_s00?ie=UTF8&psc=1
Electrical solder is used to solder electrical components. I assume that is what you mean by 'conventional'.
I don't think engineers are in the habit of hacking things together using methods that are dodgy, potentially unsafe, and probably won't work very well.
What you want is some sort of food safe glue that can attach non-ferrous metals to each other and has a good elongation value and medium to high temperature resistance.
I think this might do you:
https://smile.amazon.com/3M-Foil-Tape-3381-Silver/dp/B00A7I5L86/ref=sr_1_2?ie=UTF8&qid=1480465521&sr=8-2&keywords=3m+foil+tape
As for the slip, I've read some people using this type of spray rubber to give grip to slippers. Seems like it would work here too.
https://www.amazon.com/gp/product/B000LNN11G/ref=as_li_ss_tl?ie=UTF8&linkCode=sl1&tag=all07b0-20&linkId=65cc1c513712ba2268a5fcb0cb3cf7e6
I do a back yard show too and I find the board method too cumbersome. I now use the duct tape/bag/stake method.
Not a fan of roman candles. Dont waste your money.
Make sure you test your fuse and know what speed it burns. My white fuse burns super fast. My green fuse burns faster than my yellow. My yellow burns much faster than the Pink. The pink is slower than the Shiny green fuse. That wasn't always the case. My green fuse was always the slowest and yellow was the fastest.
I also don't like the idea of reloading shells during the show. If you must, you can prep them by zip tying the fuses together in groups of 8 or so. Throw 8 in the tubes and light the bunch. Dont put your head over any part. Stick the rest of prepped shells in a ready box. A ready box is designed so it cannot be left open. You lift up the lid, grab a bunch, the box has a string so that closes itself after opening
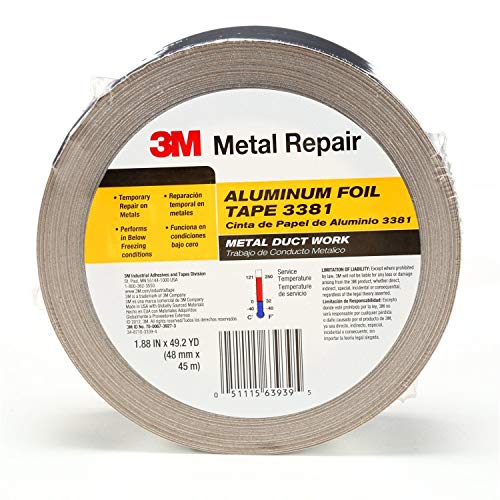
Invest in zip ties and metal tape. Use this to tie your fuse together.
https://www.amazon.com/3M-Foil-Tape-3381-Silver/dp/B00A7I5L86
https://www.amazon.com/Aviditi-CT422E-Nylon-Length-Purple/dp/B00DY98M1I/ref=sr_1_3?s=office-products&ie=UTF8&qid=1525752899&sr=1-3&keywords=4%22+zip+ties
I cant begin to tell you how much I love these fuse cutters. This tool changed my fuse cutting life. I spit on scissors now.
https://www.amazon.com/Craftsman-Edge-Utility-Cutter-9-37309/dp/B0037IX2BG/ref=sr_1_12?s=power-hand-tools&ie=UTF8&qid=1525752808&sr=1-12&keywords=handi+cut
This fuse igniter will change your life. Lighters might as well be flint. Thats how next gen this is. Get some propane or MAPP
https://www.amazon.com/Bernzomatic-TS4000-Trigger-Start-Torch/dp/B00008ZA09/ref=sr_1_3?s=office-products&ie=UTF8&qid=1525753004&sr=8-3&keywords=berzomatic
This headlamp makes flashlights a thing of the past and changes your life. Make sure you get one that doesnt have a third strap along the top. If youre not using it you can wear your headlamp on your neck and not lose it.
https://www.amazon.com/Black-Diamond-Spot-Headlamp-Octane/dp/B06W9HPY25/ref=sr_1_6_twc-13d22461-ce_1?ie=UTF8&qid=1525753147&sr=8-6-acs&keywords=head+lamp&content_id=13d22461-ceea-426c-b620-9fe11db17513&ascsubtag=13d22461-ceea-426c-b620-9fe11db17513&tag=ospsearch-20&widget_name=expert_recommendation&content_provider=osp&ingress=search&content_type=story
Also invest some money in some eye and ear protection. I can't tell you how many times I went to bed with a "reeee sound" in my ears, and have gotten pyro shit in my eyes.
Build yourself some real racks if you're up for it. I just recently built myself some and it was a snap.
https://www.youtube.com/watch?v=-p7J4HV4Gak
Definitely not cheap, but not that expensive.
No, Mars has enough atmosphere that parachutes are used to help landers slow down.
Generally the larger the planet/moon the more its gravity can attract and hold gas. Titan is large enough to have a very thick atmosphere.
My nails went to crap earlier this year, and the free edges were barely visible. I spent a fair amount of time trying to figure out a way to protect my nails while they grew out. And even when they would grow out, they would break and tear again. The Sally Hansen maximum growth polish actually worked, but did nothing to strengthen my nails.
So I went the nuclear route. Using this method, it's kind of a pain, but I haven't torn or broken a nail since I've been using it. Now all of my nail free edges extend 6+mm, and they are practically bulletproof. Plus my nail polish last beyond two weeks, with zero chips. I will actually have to add polish to the inner part of my nail where it grows out a couple of times before I get tired of the color, and change it.
I use a thick super glue to adhere a silk nail wrap to my entire nail plate. I then add a second layer of silk to the very tip of my nails. This makes the nail HARD, and extremely durable, and also increases the thickness at the edge of my nail. The extra thickness, and rounded edges have eliminated inadvertently scratching myself due to the longer nails as they are no longer razor sharp.
I've then round the edge with a nail file, and wrap every coat of nail polish around the edge to the inside, so every bit of the underside of my nail is painted to match the top side of my nail. The nail polish adheres to the silk wrap many, many, many times better than it does my nail plate.
This is also a perfect way to repair a ripped, dented, or broken nail.
Gluing the silk to your nail plate is a tedious task. You don't want any of the glue to get down inside of your cuticles. The thick Super Glue does not set instantly. You have a good 20 seconds to get the silk into place and the excess glue wiped away from your cuticles before you use the accelerator to instantly set everything in place.
Regular nail polish remover will not effect the super glue/silk layer. Pure acetone will. So you can use a regular nail polish remover to remove the polish and repaint. But if you want to remove the glue/silk layer, acetone will be needed.
This is what I've been using. It's from Amazon, but you can also get the same items from Hobby Lobby. 💕E
❗❗ JUST DON'T EVER USE A THIN GLUE ❗❗
Supernail Swiss Silk Wrap Self-Adhesive Tabs, 40 Count https://www.amazon.com/dp/B002MFWH70/ref=cm_sw_r_cp_apa_i_poZVDb2WR7EVW
Bob Smith Industries BSI-157H Maxi Cure/Insta-Set Combo Pack (3 oz. Combined) https://www.amazon.com/dp/B0166FFCHS/ref=cm_sw_r_cp_apa_i_-pZVDbR9TGP00O
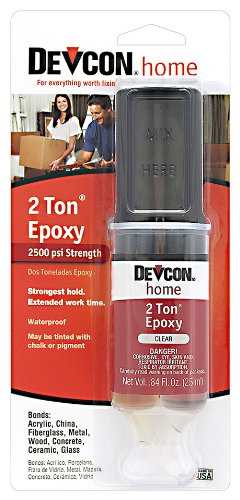
Epoxy. I like Devcon 2 Ton. Bonds anything to anything. Just make sure you don't use too much; a little really goes a long way.
things i use, that you may already have/may not need depending on your application:
I hate to just say "upgraded grub screws" - but i cant recommend enough getting some hex-headed bolts from lowes/home depot. sadly ive forgotten the exact size, (i believe them to be m6x16mm but really want someone to confirm that. you'll need 2 of them, so i picked up 4 just in case). the included grub screws in the build plate locking mechanism are just so soft, and the allen keys just go through them like mush after 5-10 good torques.
painter's tool or similar - some kind of metal/hard plastic that will be able to get the prints off the build plate. the included spatula wont last long and I generally use it to mix resins that have separated in the vat. using it to also get prints off the build plate damages the plastic and increases risk of puncturing the FEP
lots of paper towels- wiping up drips, cleaning off the bottle drips, cleaning rim of the tank, cleaning off the spatula, placing print to dry after alcohol bath.
paint brushes- both medium and small. even with ultrasonic cleaner, ive seen some people say it doesnt get every nook and cranny and need to wipe down with a soft tip brush to get all excess resin off (i dont use an ultra sonic, but rather a "clean" and "dirty" ipa tubs to try and make sure as much of it comes off before curing)
x-acto knife - sometimes the micro-shears are just too wonky/large to clip a support without damaging the print.
sandpaper- 300 or so grit, not ultra needed, but depends on what you're doing. if printing minis i cant recommend some enough in order to get a smooth bottom on the base after all the supports come off
extra paint strainers - believe it comes with some, but go pick up a 50 pack at lowes, and wont need to worry about using the last of the 5 i think they give you for free
extra, opaque tupperware/jars/containers with wide top. i use old sour cream containers. just to pour off and strain resin into (far easier than trying to get it back into the bottle). can even use some as a final "last wash" ipa bath after ultrasonic cleaner.
random extra to consider: 1 mil kapton tape to seal the LCD and prevent spills from dripping down into the unit. ( https://www.amazon.com/Mil-Kapton-Tape-Polyimide-Yds/dp/B006ZFQNT6/ref=sr_1_3?keywords=kapton+tape+1+mil&qid=1574726246&sr=8-3 ) some might call it superfluous, but id rather not have my fep puncture then come to find resin all over the motherboard
- just a side note if doing the ultrasonic, put water in the actual tub, and put ipa in a ziplock bag, and put your print in the ziplock bag and seal it, then put the ziplock bag in the water. Wont have any clean out the ultrasonic tub, reduce IPA required to operate. reduce smell. reduce IPA vapors.
Just a couple of things. DEFINITELY don't use electrical tape. Use Kapton tape. It feels more like a sturdy scotch tape, and is specifically designed for this. More importantly, it won't leave sticky goo like regular electrical tape. I've used this with zero issues:
https://smile.amazon.com/Mil-Kapton-Tape-Polyimide-Yds/dp/B006ZFQNT6
Second thing, that $8 tape roll will last me for any of these I do for myself and any I could possibly do for anyone else. I know it's not a huge amount of money, but I've never heard of a single person having any issues with the tape method. It's not like you will hurt them with the tape, they just won't start if the tape falls off. Easy fix.
Edit: Also, you're not going to talk about where to get "custom" cables? Never even heard of it.
Probably not.
If you're going to shuck them to use internally (duh right, but I have some of mine in my own 4-bay enclosure and they power on fine) then buy a roll of this to tape the pin, don't do any weird bullshit like splicing cables getting molex adapters whatever, this is easiest
syringes? This is what you need man https://www.amazon.com/Clear-Epoxy-Encapsulating-Casting-Gallon/dp/B00IT0APVM
Lube every stab, even if you have only basic lubes. Safe to use and available locally (especially auto parts stores) would be super lube or white lithium grease.
As other people said, spraying on a coat or fifteen might work.
But I think the best option (at least in terms of quality) is gonna be to make a mold one way or another. That's pretty difficult to do with paper, since it's
A: Not totally sealed, so the mold material can get inside and completely ruin the mold.
2: It's not waterproof so it can get just ruined by the liquid in your mold material of choice.
III: Some molds get extremely hot when they're curing, which can damage the mold. And
four: paper doesn't hold up well under weight so you'd be hard pressed to make a two-sided mold that wasn't awful, meaning you could only have something with one totally flat side.
I think the best option would be to find some kind of spray layer that you can apply safely (or paper mache, I've heard that works pretty well at improving structural integrity) and beef up the object with that first, then make a mold of that. Another idea I've toyed with before but never tried was to reinforce the model from the inside. My plan was to go with foam crack sealant, but I haven't had a chance to try it yet.
Alternatively, get yourself some styrene sheets and make it out of those. They're really pretty excelent for model building if you have the patience and care to cut out the sections. I'd suggest cutting out all the external shapes (IE not the internal tabs or anything) from a papercraft model out of the styrene, just a bit oversized, then assembling the papercraft model.
You could then use the model as a reference for how to assemble the styrene (using this glue to seal them together. If you hold it in place for a good couple minutes or have an internal support of some kind, it'll hold its shape remarkably well.) Once it's assembled it'll be pretty damn sturdy, and you can clean up any rough edges with some sanding and fill any gaps with a bit more glue and some scrap styrene slivers. Then you have either a pretty decent hard plastic toy right there, or you can make a mold of it if you want a soft kinda toy of some kind.
Hope that helps!
Our team uses a variety of different types: Gorilla Glue, Titebond, and more. Gorilla Glue is really good, but just be sure that you wipe off the excess or it will expand. Titebond is really reliable but it takes a very long time to dry. Zapagap is pretty pricey but it dries insanely fast and it is really strong.
Here's a link to all of the glues: 1. Gorilla Glue can be found at Home Depot 2. Titebond We put the Titebond in to smaller containers which can be found here 3. Zap a Gap
EDIT: We also use something called InstaSet Accelerator. It should be used only in emergencies along with zapagap.
They do. https://www.amazon.com/CLEAR-GRADE-Epoxy-Resin-System/dp/B01J16MYSE
MAX CLEAR GRADE Epoxy Resin System - 48oz. Kit - Food Safe, FDA Compliant Coating, Crystal Clear, Stain Resistant, Countertop and Tabletop Coatings, Wood Coatings, Fiberglassing Resin https://www.amazon.com/dp/B01J16MYSE/ref=cm_sw_r_cp_api_i_lgB6CbQBNK2DX
Good call! I keep the extra lengths (typically 2-3ft) of my straps tidy with double-sided velcro. Never had a problem with them coming loose.
I have always used 3 cables tied together with these [VELCRO wraps](VELCRO Brand - Sticky Back Hook and Loop Fasteners| Perfect for Home or Office | 5ft x 3/4in Roll | Black https://www.amazon.com/dp/B00006IC2L/ref=cm_sw_r_cp_api_i_mLODDb57DXZ66) cut to size. And I got 3 different colored electrical tapes to have each cable color coded. For the proper input/output. You can even cut a small piece of tape to put on you pedal/amp input/output/send/return to make it foolproof. There are more expensive solutions. But this has always worked for me and is pretty inexpensive. I definitely don’t recommend cable ties as they will damage cables over time.
I got you fam
https://www.amazon.com/Tilos-3mm-Rhinoskin-Velcro-Gloves/dp/B003JPCILC
And
https://www.amazon.com/VELCRO-Brand-Sticky-Back-Black/dp/B00006IC2L
Easy peasy
Devcon 2-Ton
https://www.amazon.com/Devcon-31345-Ton-Clear-Epoxy/dp/B0006O8QQ0
Seriously..
I just tried it myself for the first time and was quite proud of the results...
Imgur
I used 30-minute epoxy to give me plenty of working time and applied just a tiny bit at a time to give it a chance to spread over the entire area I wanted it to cover. Use a toothpick to both apply and remove any excess epoxy.
Here is the tutorial I watched before I tried it myself.
Are the bases raise like the slot bases GW uses? If so I'd test dipping the edges in PVA glue or some sort of varnish. Some 2 part epoxies can dry rubbery. hmmm or something like https://www.amazon.co.uk/Plastidip-Plastic-Rubber-Paint-400ml/dp/B000LNN11G/ref=sr_1_6?ie=UTF8&qid=1495464656&sr=8-6&keywords=clear+rubber
That looks nothing like drugs... this looks like drugs: https://images-na.ssl-images-amazon.com/images/I/51Un3gr%2BKtL._SY355_.jpg (from https://www.amazon.com/Coollaboratory-Liquid-Pro-Thermal-Compound/dp/B001PE5XAC)
It's not.
Check this out: http://www.amazon.com/gp/product/B0045JCFLY
Without risking your CPU, this is the best stuff.
If you are ballsy, you can use liquid metal.
http://www.amazon.com/Coollaboratory-Liquid-Pro-Thermal-Compound/dp/B001PE5XAC
These are just a few I'd recommend, but definitely do your research and see which one is best for your needs.
Thermal Grizzly Kyronaut
IC Diamond 7 Carat
Coollaboratory Liquid Pro
Acrylic glue creates a chemical bond and works great with PLA. Give that a try, or else I've also used some 2 part epoxies that work well.
Edit: this stuff. Work with it above cardboard or something as it's very runny. Chances are, the pressure of the bottle will cause it to start squeezing out the moment you open the bottle for the first time.
https://www.amazon.com/SCIGRIP-10315-Acrylic-Cement-Low-VOC/dp/B003HNFLMY/ref=mp_s_a_1_4?keywords=acrylic+glue&qid=1566941428&s=gateway&sr=8-4
Oh my wolf and his tiny feets haha Sorry about that! Spiders looks great though~
So, I'd go with gluing it back on or using it as a dead wolf mini. Super glue has worked swell for me when repairing minis. This has been recommended to me, and also works great. It is a bit more forgiving than super glue.
https://www.amazon.com/SCIGRIP-10315-Acrylic-Cement-Low-VOC/dp/B003HNFLMY/ref=sr_1_3?keywords=acrylic+cement+glue&qid=1566472844&s=gateway&sr=8-3
Cheers,
Mia Kay
https://www.reddit.com/r/DnDIY/comments/6x7nig/oc_acrylic_flying_miniature_stands/?st=j70mgv4s&sh=0c9743e9
I went and made a post about it, but I'll leave the reply below...
I have, I can post pictures when I get home tonight. I made 2x2 and 4x4 stands, at 2 different heights. They're supported in the corners.
The platforms are acrlyic, and I scored in a grid on the bottom side (so if need be, I could use dry-erase on the unscored side, this has never come up though... lol). The corner post is also acrylic. I purchased everything from McMaster-Carr, but you can get the same materials on Ebay for a bit cheaper, I just had a few other things I was ordering from them at the time.
https://www.mcmaster.com/#plastics/=196icwz
https://www.amazon.com/SCIGRIP-10315-Acrylic-Cement-Low-VOC/dp/B003HNFLMY/ref=sr_1_4?ie=UTF8&qid=1504192570&sr=8-4&keywords=acrylic+glue
I sketched up a 3D model to illustrate how they're assembled. I used an acrlyic adhesive that actually melts/bonds the acrylic pieces together, so it's quite a strong connection. If I were to redo it... I'd maybe go with a 3x3 grid, with a center post, but I've had a handful of metal minis on the edges of the 4x4's and there's hardly any deflection.
Finally, here's a photo of a pirate ship where I used 2 of the 4x4's to elevate the deck, and then the 2x2's to create a lookout's nest. Everything was quite sturdy (the floors of the ship are cardstock).
I think this could work. Or something like it.
http://www.amazon.com/Clear-Food-Grade-Silicone-Sealant/dp/B005XP5HO6
Maybe the nozzle off a silicone filler tube?
After being used, it would have silicone in the nozzle that wouldn't have come out and then solidified.
Hey! No problem
Honestly, using hot air for soldering is very difficult. It's great for desoldering however.
I did this method as a test, all my previous builds were just done with the fine tip iron, and I think I'll go back to the iron for next time. The time spent is about the same, so there's no real savings there, but it's trickier. Maybe if I were doing 3 or 4 at a time I would do this process again. Actually, If I were doing more, I might just order a film stencil and knock these out in 30 minutes.
I have no idea, but even if the one you got has a 3.3V issue, it's not that hard to solve. Here is a nice album detailing the workaround. I would strongly recommend using kapton tape instead of the kind used in the album. It's the ideal tape for the job, since it's basically made to work with electronics. If you're willing to wait a few weeks, you can get a roll perfect for this situation for as little as one dollar. If you're not able to wait, it'll cost you about ten bucks.
The pegs are plastic on those right? If gluing them doesn't work (since the peg will lack lateral stability at the break) you could drill out the broken pegs and use epoxy to put in replacement loom pegs. They might be a different color and shape, but at least you could still use the loom and since the base of the peg would be set in epoxy and surrounded by the loom body, it would have much greater strength against shearing forces.
Alternatively, you could use drywall or self tapping metal screws to just screw into the spot where the broken pegs are. Pre-drill the hole with a bit that is just a tiny bit smaller than the screw to prevent splitting the loom plastic.
I would take it apart and see what the issue is, it may just be a loose piece of wood from the stock stuck in there. You may be able to see the spot that it's pivoting on, it's probably a little smoother or shinier that the area around it. Try sanding that area down a bit.
If you can't see anything like that I know people use foil tape to tighten up the receiver area. It'll last a lot longer than paper.
Or upgrade to a new stock. The Magpul Hunter X-22 is nice, I didn't care for the Hogue overmolded.
Or talk to Ruger about it and see what they say.
What stabilizer lube do I buy? I got confused and ended up buying Super Lube... But it was oil, not grease.
Even specific links to Amazon would be appreciated. I am not good at determining which lube is best despite reading the guides half a dozen times.
Is this "Super lube synthetic grease with PTFE" good enough, for example?
Would it be fine in larger tube form?
How much trouble am I in for using this oil on Cherry and a couple costar stabilizers?
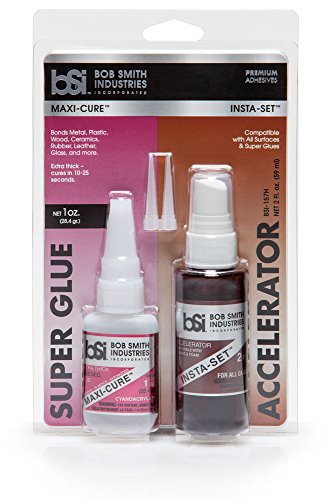
CA glue works well, but buy an "activator." It basically instantly hardens the glue.
Here's a decent set with both the glue and activator.
https://www.amazon.com/Bob-Smith-Industries-BSI-157H-Insta-Set/dp/B0166FFCHS/
Could you provide some photos? I'm a big fan of CA glue, it sets almost instantly after you activate it, and it's super strong.
I just googled food saw epoxy and this one here is supposed to be FDA compliant.
Why did the chemical engineer say he wouldn’t want to eat out of anything with epoxy?
https://www.amazon.com/CLEAR-GRADE-Epoxy-Resin-System/dp/B01J16MYSE
Not just any epoxy. Should be good grade. And if you’re using the glasses from alcohol or acidic drinks, I’d be careful not to use them too regularly, as (I’m not 100% certain) it may degrade the epoxy a bit, and it’s probably not a great idea to ingest those particles.
I put velcro on the batterys and on the area where the battery goes on my RC aircraft, Never have a problem.
As a simple hack, I've used double sided velcro like this one before to help with this, just put one side each on the fabric between buttons and it's magic! You have to replace it after ~5-10 washes but still - better than nothing :)
Couple of thoughts:
You could paint the zippers black.
There exists Velcro tape with adhesive on both sides (like this) and if you look around a bit you can probably find one that has fairly ridiculously strong adhesive. You could cover the zipper with the Velcro, adhering one side (the hook side, say) to the boot and cutting it in half so one half is on each side of the zipper, then adhere a strip of black cloth or black leather to the other side (the loop side, say) so you can use the zipper functionality and then cover it with the Velcro cover. Note that the adhesive will probably start to fail if it gets very wet but you could stitch the hook side on and the stitches wouldn't be visible so wouldn't have to be very pretty.
It doesn’t have to be a pain. Get some of this and a strong pair of scissors.
https://www.amazon.com/dp/B00006IC2L
Cut the lengths you need and you can easily bundle wires together, but more importantly bundle them to those speaker stands, table legs, etc. That velcro roll might even be cheaper somewhere like monoprice, but it’s handy to have around.
The size itself is great. You may have a bit of trouble furnishing it, though. For depth of bedding, you could probably add some simple "tubs" like cardboard boxes with the top cut off or those inexpensive sterilite shoe boxes. Hamsters need about 3-4 inches of deep bedding, but they really only need it for nest, a few fun tunnels, and food storage. A couple hundred square inches of deep bedding with more shallow bedding in other places would be fine.
The ramp is a bit steep, and would be unusable for a sick or old hamster, but you could just replace it with a longer board and glue down some coarse sandpaper for grip.
Secure the top with something better than gravity. Hamsters can lift quite a bit with their wedge-shaped heads. I'd screw a pair of "screw eyes" or hooks onto each front corner and use reusable zip ties to hold it secure. Easy, strong, and cheap.
With wood, there's a chance that a determined hamster could chew a hole through it if they can get a good purchase to start chewing from. The back looks especially susceptible because it seems like masonite or some similar fiberboard. Check it every few days. If you see a danger spot, you can just cover it with aluminum flashing. It's basically super thick aluminum foil for waterproofing the edges and corners of roofing. You can cut it with scissors and bend it to fit nicely on weird shapes. Attach it with cheapo silicone caulk for a bond that will last decades. Aluminum and caulk tube are just a few dollars each. Caulk gun may run you around $10 if you don't have one. But you probably know someone you can borrow from.
Put food and water on both levels because if your hamster gets hurt or sick, you want them to have it. They may be stuck on one floor while they wait for you to notice they have an issue.
Edit: I looked at the reviews by users on amazon, and it looks like this particular hutch may not be worth the money. 170 beaver dollars is too much to spend on something that may not fit together well. With that budget, you can get a 40-gallon breeder aquarium and a nice quality wire mesh lid for it. The floorspace on one of those is wonderful, the bedding depth is perfect, glass is completely unchewable and easy to clean, and you'll never get better visibility for watching your hamster. Just attach water bottles to the inner surface with adhesive velcro tape. I don't trust the other brands unless I can feel them in person.
buy some Velcro tape like this, and only use one side of it to attach to the side already on your bag.
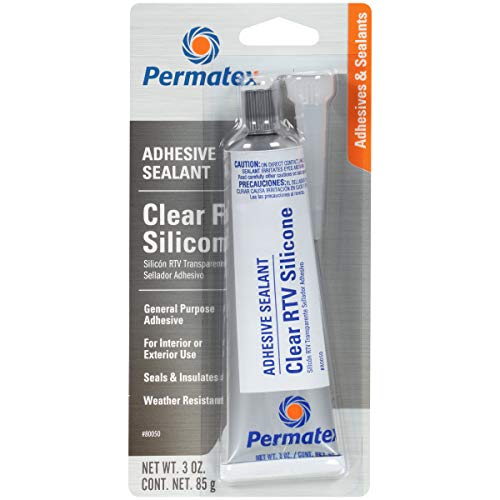
Silicone is a good choice, it is transparent and a very light coating will create an airtight seal.
(not the grease) something like https://www.amazon.com/Permatex-80050-Silicone-Adhesive-Sealant/dp/B0002UEPVI
If your LED strips are encased in a silicone sleeve, I found that using clear RTV silicone like this works well to attach the sleeve to cloth. I tested all sorts of adhesives and this one holds the strongest.
It will be permanent though. You could use it to attach velcro so you could later remove the LED strip.
Have you tried something like this: http://www.amazon.com/Permatex-80050-Silicone-Adhesive-Sealant/dp/B0002UEPVI
Owner of rig here:
Thanks for your suggestions so far, I'm definitely intrigued whether the pump is spreading heat affecting the output tube from the GPU.
I was thinking of adding a silicone adhesive to connections when I rebuild it after the weekend. Does anyone have any experience / tips regarding products like permatex
http://www.mixglo.com/
Most people recomend applying NOA61 adhesive with a syringe which requires a UV light emitter (like the thing they use at nail salons to dry nails) to dry. I'm going to just try clear silicone adhesive as that requires less equipment. I'll let you know how that goes.
https://www.amazon.com/Permatex-80050-Silicone-Adhesive-Sealant/dp/B0002UEPVI/ref=sr_1_3?s=industrial&ie=UTF8&qid=1503161622&sr=1-3&keywords=Silicone+sealant
No, similar but different.
You could get some 2-ton epoxy and carefully apply it around the hinges with a small disposable brush (like the ones that come with kid's watercolor paint sets). This stuff cures to be hard as a rock, clear, it adheres nicely to metal, and should provide the support you need. Don't get 5 minute epoxy because that isn't as strong and turns yellow.
Just be sure to carefully measure out equal parts resin and hardener and THOROUGHLY mix them. I mean mix them for like a full 2 minutes. Otherwise the epoxy may not cure properly and might come out tacky.
The epoxy starts to set up in about 30 minutes after you have mixed it, so you will have enough time to apply it to the hinges. After you apply it however, you will want to keep turning the glasses over in your hands otherwise gravity will cause the epoxy to sag. 2-ton epoxy is frequently used as a protective clear coat on custom fishing lures, and lure builders like myself make "turners" like this to prevent sagging. Obviously you're not going to want to build one but you can accomplish the same thing by slowly rotating the glasses around by hand for a minimum of 30 minutes, an hour would be better. After that is done just let it cure however long it says on the package.
The inexpensive Whippeddog Handle at $6.00 and The Golden Nib Standard Silvertip Badger Knot at 20.95 or any of their other knots would be a good choice. You can glue the knot into the handle with Waterproof Epoxy - Setting a Brush Knot. I have several brushes with TGN Knots, they are great, soft tips and good backbone. A 24mm Silvertip Badger brush for $26.95
EDIT: My first knife BUILD
This was an awesome experience! The most important thing I learned was to make sure to tape far enough down the blade to prevent the epoxy from getting on the blade. :/
Blank: https://www.amazon.com/Condor-Knife-Bushlore-Blade-Silver/dp/B00WTH01K6/ref=sr_1_1?ie=UTF8&qid=1465848087&sr=8-1&keywords=condor+bushlore+blank
Scales: http://www.rockler.com/bolivian-rosewood-by-the-piece-1-4-thickness?utm_source=google&utm_medium=cpc&utm_term=&utm_content=pla&utm_campaign=PL&sid=V9146&gclid=CN7e6_m3yM0CFUFehgodNFUMkA
Epoxy: https://www.amazon.com/gp/product/B0006O8QQ0/ref=oh_aui_detailpage_o00_s00?ie=UTF8&psc=1
Pins: https://www.amazon.com/Unpolished-Finish-Extruded-Standard-Tolerance/dp/B00CNLVD1E
Finish: Natural Danish Oil
It looks like there isn't any screws in that hinge. Whoever made this likely just used an adhesive.
This Devcon glass epoxy dries clear, and is pretty strong for glass to metal joints.
Whichever route you take, please post pics here. I'm interested in it myself
A hardware store. It's this stuff. Not expensive at all.
For me, it was between the Prodigy (ITX) and the 350D (mATX.) For me, ITX won out due to smaller overall size.
That said, man, the 350D is one sexy case. It's my go-to. If somebody asked me, "Name a Micro ATX case you'd recommend to anyone, go." my first answer would be the 350D without knowing anything more about the needs of the user.
Aluminum fronts can have problems with marring from oils in your skin... I wonder how well it would work to cover it in some sort of matte clear top coat like clear PlastiDip or glossy topcoat like Rustolem Clear Automotive Enamel
http://www.plastidip.com/home_solutions/Plasti_Dip Clear is on this page.
Also on Amazon
I did something similar. I recommend giving them a nice coat of PlastiDip's rubber spray to the sides that touch the furnature. It goes on really clear (slight frosted look) but really improves the grip onto those smooth surfaces.
https://www.amazon.com/gp/aw/d/B000LNN11G/ref=yo_ii_img?ie=UTF8&psc=1
Hypothetically, you can take out the WASD keys, spray clear PlastiDip on them then put them back after they dry. However, I have no idea just HOW clear they are or if you can stand the texture.
Was it Liquid Pro by chance?
This one has always been very high at reviews.
It is liquid metal so don't use it on aluminium!
I use it on my i7 950 @ 4.0 Ghz with a thermalright true spirit 140 power and it reaches 60°C under full load.
i used this exact one : https://www.amazon.com/gp/product/B001PE5XAC/ref=oh_aui_detailpage_o09_s00?ie=UTF8&psc=1
https://www.amazon.com/SCIGRIP-10315-Acrylic-Cement-Low-VOC/dp/B003HNFLMY/ref=mp_s_a_1_1?keywords=scigrip+pla&qid=1564958389&s=gateway&sr=8-1
This is the stuff I use and it works great. It only works for certain plastics which has been nice because it peels off anything I accidentally get it on.
I've been meaning to coat some pieces with the stuff because it kind of melts the plastic to weld it together. Doesn't do it enough to disfigured the print but it might be enough to hide the layer lines.
I say YOLO that sucker "The result of these evaluations: FDA for decades has determined that polystyrene is safe for use in contact with food. In addition, FDA has approved styrene as a food additive – it can be added in small amounts to baked goods, frozen dairy products, candy, gelatins, puddings and otherfood." you could add a braid, fittings, etc. with Clear Food Grade Silicone Sealant
Without pictures, I can't give super-specific advice, but I'll try to give some pointers:
First of all, a caution: now that you've pulled up part of a track, heating that track makes it more likely to de-laminate even further. So keep your heating as brief as possible.
Secondly, solder is not meant to be a mechanical connection. Anything you place should be securely taped down so it won't shake loose or put strain on the soldered connections. Similarly, do not attempt to force or strain parts that are soldered down - disconnect, adjust, reconnect.
Next - as for the potential short you have (exposed ground right next to your intended connection point) - we can fix that too.
Use insulating tape (preferably kapton tape - it can withstand high temperatures and you're unlikely to melt it with your iron). to cover up the exposed ground area. Now you can work in that area without fear of an accidental short.
Now you can use standard hookup wire to repair the connections that were once serviced by the now lifted track. In places where you solder down the hookup wire, use kapton tape to reinforce the connection and keep the trace from lifting further. Minimize heating of the broken traces. Once all connections are made and the wire has cooled, you can reinforce those points with something stronger, like electrical tape.
Finally, be sure to test your handiwork before inserting the batteries. Use a multimeter to measure the resistance between the battery positive and negative terminals. It should be non-zero (Above 1k sounds about right).
I hope this helps and good luck!
If you're concerned about shorting something out, you can spray some conformal coating on any contact areas. Another option would be to use kapton tape on the bottom of the hot wheels or where ever you position it. If it's not making direct contact with any components, you should be fine, however, those cars can roll very easily. For this reason, I'd look at maybe using a light adhesive or something to hold them in place. Common sense warning, don't use adhesive on any components.
Link to conformal coating
Link to kapton tape
The is what I recently ordered and used to block pins.
I used a box cutter to slice a small strip and side it into place. It can be a little tricky at first, but it only takes a few minutes.
https://www.amazon.com/Mil-Kapton-Tape-Polyimide-Yds/dp/B006ZFQNT6/ref=mp_s_a_1_6?ie=UTF8&qid=1541983263&sr=8-6&pi=AC_SX236_SY340_FMwebp_QL65&keywords=kapton+tape&dpPl=1&dpID=51B2bKUSrQL&ref=plSrch
It looks like only the solder mask was damaged, which is much more susceptible to abrasion than the underlying copper. A simple square of Kapton tape applied directly to the board to keep the copper from oxidizing would likely constitute a full repair. The only other action that might be needed would be to smooth out any rough edges on the post.
The magnet wire wrapped around a typical toroid is enameled. This enamel is "just enough" insulation for the job it does. Now, assuming the tape didn't pull off any of the enamel, you still need that outer layer to protect the somewhat fragile enamel. Enamel insulation tends to get brittle when the transformer is used, due to heat. Kapton tape is good for this, and there are a lot of other good options.
Just don't use "electrical tape". That stuff will melt right off.
You could make any PCB "water resistant" if you're willing to open it up & spray the board with conformal coating (there are other variants available, including a brush-on type).
Have you looked at silicone conformal spray?
Amazon link:
https://www.amazon.com/MG-Chemicals-Silicone-Conformal-Coating/dp/B008O9YGQI
First saw it used in 3D printing on objects of adult nature.
We've used it on boards for a long time. Had some ducts to an intake fan that had some odd angles that made them difficult to print. Was going to print them in pieces and put them together. Ended up spraying them and being able to keep them in one piece and they sealed up.
May be able to pause then spray, or spray after printing. I haven't really tried it with water. I have used XTC-3D to seal water before, but I think the spray would probably end up cleaner.
Or this. Haven't tried it either.
MG Chemicals 422B Silicone Conformal Coating, 12 oz Aerosol, Clear https://www.amazon.com/dp/B008O9YGQI/ref=cm_sw_r_other_awd_Tx62wbS60TAPP
JB Weld works great, once it dries it is very strong. It has little to no odor.
https://www.amazon.com/J-B-Weld-8265S-Original-Reinforced/dp/B01FWGF9L6/ref=sr_1_11?hvadid=241629233883&hvdev=t&hvlocphy=9024550&hvnetw=g&hvpos=1t1&hvqmt=e&hvrand=4321946538073873986&hvtargid=kwd-581086181&keywords=jb+weld&qid=1550378163&s=gateway&sr=8-11&tag=googhydr-20
The only drawback is it is grey when mixed and it is hard to make it not ooze when you push the parts together. So it can be messy.
They have a clear version but haven’t tried it myself, been meaning to order some and try it:
https://www.amazon.com/J-B-Weld-50112-Clear-0-85/dp/B009EU5ZM0/ref=sr_1_10?hvadid=241629233883&hvdev=t&hvlocphy=9024550&hvnetw=g&hvpos=1t1&hvqmt=e&hvrand=4321946538073873986&hvtargid=kwd-581086181&keywords=jb+weld&qid=1550378453&s=gateway&sr=8-10&tag=googhydr-20
I found the same on my Mini Hilal. I'm going to try using JB Weld.
J-B Weld 50112 ClearWeld Quick-Setting Epoxy Syringe - Dries Clear - 25 ml https://www.amazon.com/dp/B009EU5ZM0/ref=cm_sw_r_cp_awd_PppRwbFNCJ3H8
Damn, too bad. It's too late now, but if there should ever be a next time, opt for air-tight fixtures, or seal them with metal tape before they are installed.
With the increasing popularity of the ultra thin panel LEDs, cans will drop out of favor in the next five years or so. They are easy to install, and do not affect the insulation envelope.
For right now, can you seal from the inside of the can? If so, use this:
https://www.amazon.com/3M-Foil-Tape-3381-Silver/dp/B00A7I5L86
Just off the top of my head, Epoxy Resin. I used it on a bar top and it looks great and very durable. Amazon link
Says you can use it for counters but it's not the easiest thing to apply. You have to be very careful not to get air bubbles while it dries and be careful with the sides.
It's usually something along the lines of bar top epoxy.
hahaha, you can find decent deals I've been using this stuff: https://www.amazon.com/gp/product/B00IT0APVM/ref=oh_aui_detailpage_o07_s00?ie=UTF8&psc=1 which is actually not bad so far. Can't speak to it's longevity yet.
a lifetime supply https://www.amazon.com/Super-Lube-Purpose-Synthetic-Dielectric/dp/B00KU85W4G
All in all the board doesn't look to bad for the price IMHO. Get a cheap set of thick (1.5mm) PBT caps (NPKC is well regarded by community for these), lube the stabs (SuperLube is a great grease for this, although you'll only need a quarter of one of the tubes in the link for a whole KB), & I bet the board will feel pretty decent!
I actually just got a batch of superlube from this: https://www.amazon.com/gp/product/B00KU85W4G/ref=oh_aui_detailpage_o00_s00?ie=UTF8&psc=1
I thought it was too thick to use for switches?
@smaxsomeass - VERY Nice Write-up! Thanks, I'll use this when I switch to glass. Too many problems with the Buildtak.
I have the MP Select V2 version, bought for Xmas ... :-)
I replaced the Y bearings with longer ones. When I pulled the short ones off I found 2 of the 4 were totally crap; noisy and rough. (On mine the X axis already had longer ones and they were smooth)
I used these from BangGood.com:
http://www.banggood.com/LM8LUU-8mm-Long-Type-Linear-Motion-Ball-Bearing-Slide-Bushing-CNC-Part-p-994394.html?rmmds=search
These are less than $2 US DELIVERED! Quality was excellent. I ordered 6, only 1 was SLIGHTLY noisy, but smoothed out right away. Can't beat it for the price.
They (banggood) have MANY 3D and R/C parts and tools.
Shipping was pretty fast, got my order in 7 days, not bad for free.
They also have a several great Temp guns; for $5 more than Harbor Freight's, greater range, better accuracy, and a color screen! This one: http://www.banggood.com/MUSTOOL-MT6550-Digital-LCD-Color-Display-Non-contact-Infrared-Laser-Themometer-Temperature-Gun-p-1080656.html?rmmds=search
As far as oil vs grease. I did use grease at first (VERY sparing!) but later found that oil is preferred, especially for the Z Axis screw gear, since grease will attach and hold dust!
Liberty Oil is my go-to oil, found after MANY hours of light oil & grease research while repairing a grandfather clock. Best all purpose oil there is, WAY better than Super Lube (which I used for years before my research...)!
http://www.amazon.com/Liberty-Synthetic-Lubricating-Grandfather-Clocks/dp/B00AZMGFI4/ref=sr_1_1?ie=UTF8&qid=1486501241&sr=8-1&keywords=liberty+oil
BTW - The most awesome grease for general duty light greasing is DuPont Krytox GPL 205 Grease:
http://www.amazon.com/gp/product/B00MWLDALQ/ref=oh_aui_search_detailpage?ie=UTF8&psc=1
It's bloody expensive, but worth every penny, you'll want to have it's babies. LOL! Doesn't attack plastics and doesn't attract dust. High temps too. A-MAZ-ZING stuff. The GPL 207 is pretty good too and is stable out to 288° C
All the Best, PuterPro
https://www.amazon.com/Acrylic-Plastic-Cement-Applicator-Bottle/dp/B0149IG548
That stuff? Should work great, it forces a chemical reaction that melts the edges of the material so it can rebond. Just let it sit for a day or two before using the block.
ok, since it's pla your solvent choices are limited. Acetone might soften the pla up a bit, making it easier to remove, but since it's only going to work at best partially (it doesn't actually work on pla, only on whatever other additive plastics are present in the brand of pla you have) you really have only a few choices, and they're all nasty chemicals. Tetrahydrofuran, and Ethyl Acetate are the two I know off the top of my head. They're both moderately nasty stuff and possibly cancer causing so take care if you decide to try them. It might be easier and safer to get some of this:
https://www.amazon.com/Acrylic-Plastic-Cement-Applicator-Bottle/dp/B0149IG548/ref=sr_1_1?ie=UTF8&qid=1470760033&sr=8-1&keywords=ips+weld+on+3
from the reviews it seems that it's a pretty effective pla solvent, so letting some of that sit on the glass for a few minutes might remove the discoloration.
Maybe you could use some plastic angle molding on the corners as well? Or something like this?
Edit: Actually here's some acrylic solvent, it basically welds the two pieces together.
Another cheap, quick solution that can look quite nice is styrene. All you need are styrene sheets, an exacto knife, a ruler, some brush-on adhesive (can be had cheaper), and a little paintbrush. Cut two pieces of styrene, hold them together, brush a little adhesive on, and there ya go. Popular with modelmakers.
It's pretty tough stuff, bonds quickly and sturdily, it's very easy to work with, and it can take filler/paint quite well if you want to get fancy.
Use a vice if you've got one, and patience. I put the frontmost part in my Panavise, laid the stick and spring down loose, and put the other plate in. Once I had those pegs in place, i was able to get them close and shove the spring around until it all clicked together. I was lucky that three of the four pegs weren't broken, so my assembly is still pretty solid, and the back plate of the 3DS should hold it down fine, but if it was looking shaky I might try risking CA glue (superglue), just a dab on each of the posts. If you try it, be careful not to let the glue wick into anywhere that it might gum up the works, do the pegs one at a time, and make sure the whole assembly is clamped together nice and tight; it defeats the purpose of glue if it's not holding everything where it needs to go. If you've got kicker on hand, use it; I'd spritz some into a cup or something (far away from the glue!) and drip it on with a toothpick or something, so I didn't get it inside the assembly. This is one of the few times where gel CA glue isn't totally worthless, and they sell it at Walmart, so you could try that; at least then it wouldn't try to make its way inside anything. But depending on how tightly packed everything is inside the 2DS, you might be able to get away with just closing it up.
Also, when you're reinstalling the wipers, pay attention to how they need to go. The metal one goes on the bottom, then the shorter one, then the longer one. The sides of the plate are different heights, so it'll be pretty easy to figure out which one goes where. And double check that the copper contacts are going to line up with the tracks on the PCB. It'll be obvious whether the other bits are in place or not, but this is the one that could make you open it back up and redo everything.
Edit: Just got it all back together, joystick is working fine! Now it's your turn. :p
https://www.amazon.com/Bob-Smith-Industries-BSI-151H-Accelerator/dp/B0166FFCCS/ref=mp_s_a_1_3?keywords=ca+glue+setting+spray&qid=1571069378&sr=8-3
What if you set the super glue faster so it doesn't have time to vaporize and stain nearby material?
https://www.amazon.com/gp/product/B0166FFCCS/ref=ppx_yo_dt_b_search_asin_title?ie=UTF8&psc=1
Sets it in seconds.
So the tools I purchased for my printer are:
Usb sd card reader https://www.amazon.com/dp/B06ZYXR7DL
Microfiber cloth ( I use this with the isopropyl alcohol to wipe the bed down)
A hand held led flashlight
Flush cutters
Bob Smith Industries BSI-157H Glue, works great for multi part prints https://www.amazon.com/dp/B0166FFCHS
Sand paper
Hobby knife
Edit to fix phone autocorrect fail
It's a hot mess at the moment and I don't have a good photo, but here are the pieces:
I put the Amazon links for reference, but shop around. Some of this stuff is much cheaper at Home Depot or other online stores.
I use the foil tape to connect a "boot" directly to the back of the case my mining rig is in. Then connect the flex duct to the boot. Connect the other end to the inline fan. Connect a second piece of flex to the output of the fan and hang the end out of the window.
I've found pulling the heat out works much better than blowing cold air in.
If you have an open mining rig, I've seen people put up small tents like this one: https://www.amazon.com/Valuebox-2x2x4-Small-Indoor-Hydroponics/dp/B01GCHXUVU/ and then just connect the duct to it. That seems to work okay too.
Looks good. May I suggest you go get some aluminum tape for the blade. LIke the link below. Fold it around the blade and smooth it out with your fingers. Gives a good blade effect. Also, the smoother the wood of the blade the smoother the tape.
https://www.amazon.com/Aluminum-Tape-Foil-Ducts-Insulation/dp/B01FROBUXE
I use foil tape and rolled up towels. You can also tape up a piece of plexiglass/lexan/whatever over top of the window to create another buffer.
grab a roll of this with the part.. it'll prob be in the same section
https://www.amazon.com/Aluminum-Tape-Foil-Professional-Contractor-Grade/dp/B01FROBUXE
you can bend/cut the corrugated side and jam it in the hole.. and make it airtight with the foil tape.
I used Aluminium tape, like that: https://www.amazon.com/Aluminum-Tape-Foil-Ducts-Insulation/dp/B01FROBUXE (not exact brand, I purchased the tape at a local shop). The glue on that is MORE than strong enough to hold onto the lid without moving. That type of lid normally has indentations in it, but I filled them with cardboard before putting the tape on top. It also makes for a more even surface, so I could apply the LED strips more easily :3
Find ways of protecting yourself while you're sitting still and sleeping, as that's when you're most vulnerable. I've written about radiosurgery, which is the act of destroying select tissue with electromagnetic radiation. There's a real threat of permanent brain damage. Do what it takes to stay healthy.
What is your budget?
I've tried the following (from /r/emshielding sidebar):
I would recommend instead of the above (which was me prototyping and testing vectors), do it the right way the first time, and build my ventillated sleeping enclosure (~$1,000 for aluminum, plus add'l layers), and coat it with layers of shielding materials (copper flashing > butyl > sheet steel > buytl > sheet lead > butyl), until you achieve complete relief. Don't skimp on the fans and power supplies.
Aluminum Tape may be what you're looking for. People use it for prop making all the time. It can be polished to a pretty good mirror finish.
Edit: Fixed link.
If you haven't done the wheel slip fix then your motor is slipping on the wheel. That's likely the root of your "traction" issues. I bought this tape https://www.amazon.com/gp/aw/d/B01FROBUXE/ref=ya_aw_oh_bia_dp?ie=UTF8&psc=1
You have to take the wheel skin off, wrap about 2 layers of that tape around the motor, then slide the wheel skin back on. Your performance will improve greatly.
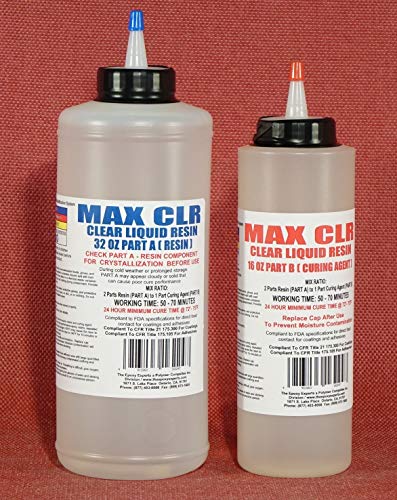
PETG is actually food safe, but the lamination lines will trap food that will spoil.
This epoxy resin is food safe, as are several others
https://www.amazon.com/MAX-CLEAR-GRADE-Epoxy-System/dp/B01J16MYSE/ref=mp_s_a_1_1_sspa?keywords=food+safe+resin&qid=1567106734&s=gateway&sprefix=food+safe+resin&sr=8-1-spons&psc=1&spLa=ZW5jcnlwdGVkUXVhbGlmaWVyPUFPNEk5MjY4MERTTEsmZW5jcnlwdGVkSWQ9QTA5OTA1MjIySTQ3WEpURE5HREREJmVuY3J5cHRlZEFkSWQ9QTAzODQ4NDhLRUM1RDJUSldPSjYmd2lkZ2V0TmFtZT1zcF9waG9uZV9zZWFyY2hfYXRmJmFjdGlvbj1jbGlja1JlZGlyZWN0JmRvTm90TG9nQ2xpY2s9dHJ1ZQ==
I'll take a look. I toyed with the idea of selling cookie cutters on Etsy earlier this year, but got super depressed midway during the design phase and never made it to sealing. I got close to a finished model for a few of my designs, but found the gaps around the edges discouraging.
Something like this should work, but you can probably find a cheaper version at Michaels or somewhere.
I second the PETG idea, though. PETG is usually food-safe (we've got a PETG neti pot we bought at the pharmacy, and that goes in your nose), and it holds up to higher temperatures better than PLA so you could totally throw it in the dishwasher.
The other thing you want to be careful of is the brass nozzles might sometimes leach bad chemicals into your cutter. You can get stainless steel nozzles, but they're a bit pricier? They'd be a lot safer, though if you're extremely worried you might want to do the old "into a pot of boiling water" trick to sanitize them.
You could always coat it with clear food grade resin. Here is on I found on amazon.
Edit- Make sure you read the labels to see what kind of food contact it can have. Some things are fine for dry food but not liquids.
cut a velcro strip
http://www.amazon.com/VELCRO-Brand-Sticky-Back-Black/dp/B00006IC2L
Do you have a link to these on amazon or wal-mart set up where they can be shipped directly to you?
For Example: http://www.amazon.com/Velcro-Sticky-Back-Fastener-Dispenser-90086/dp/B00006IC2L/ref=sr_1_6?ie=UTF8&qid=1377053995&sr=8-6&keywords=Sticky+Back+Velcro
But you will need to create a wish list with a ship to address (hidden) so that we can just add it to our cart and have it shipped right out to you ;)
Just do what you did before but try again. Make it a little nicer looking if you want. Velcro tape is your friend if you'll need to redo it or take out/add cables. https://www.amazon.ca/dp/B00006IC2L/ref=cm_sw_r_cp_apa_i_PmnTDb926W3QT
i'm sure they sell it in your local hardware store. The specific kind doesn't matter much, just get silicone sealant. The stuff i'm using isn't even the 'flowable' kind and it works flawlessly.
https://www.amazon.com/Permatex-80050-Silicone-Adhesive-Sealant/dp/B0002UEPVI/ref=sr_1_2?ie=UTF8&qid=1469542253&sr=8-2&keywords=silicone+sealant
You can also try
Permatex 80050 Clear RTV Silicone Adhesive Sealant, 3 oz https://www.amazon.com/dp/B0002UEPVI/ref=cm_sw_r_cp_apa_zxA7BbVD8X59R
For me, it was part #10 on this diagram:
http://www.hondaautomotiveparts.com/auto/jsp/mws/prddisplay.jsp?inputstate=5&catcgry1=S2000&catcgry2=2005&catcgry3=2DR+S2000&catcgry4=KA6MT&catcgry5=MOLDING+-+PROTECTORS
Philips head screw comes out, and you kind of massage/pull the part out (there's a clip on the other side that you don't have access to. Careful not to bend or break it.
Once removed, I'd pour water under there to verify. If that's the spot, dry it out completely, and Permatex/RTV it liberally at the metal seam and quarter panel:
https://www.amazon.com/Permatex-80050-Silicone-Adhesive-Sealant/dp/B0002UEPVI
Has your car had the quarter panel on that side replaced out of curiosity?
This also works, it just requires a little more patience getting it to be clear of bubbles.
Yeah, that's fine. Pretty much any kind of silicone adhesive will work. I used the cheaper, clear stuff. https://www.amazon.com/Permatex-80050-Silicone-Adhesive-Sealant/dp/B0002UEPVI
Yeah! And they're easy to work with. You can look up how to do it on YouTube. I also recommend you order some weatherproof/waterproof clear rtv silicone such as this because I don't like the black silicone that comes with the lenses. Lastly, a LPT: if you aren't comfortable or don't own a heat gun, use a standard hair dryer. They produce a lot of heat to help you work with plastics and silicone without the dangers of melting parts and paint on your car.
Hope this all helps!
Slow-setting epoxy is an alternative. This one has been serving me well.
I wonder if you could use [Clear plasti dip] (https://www.amazon.com/Performix-11209-Multi-Purpose-Coating-Aerosol/dp/B000LNN11G/ref=sr_1_1?ie=UTF8&qid=1468432364&sr=8-1&keywords=clear+plastidip) to waterproof a pi and keep it with fish.
I got the Peel case this last week. It is pretty slippery out of the box, so I added a couple coats of Plasti Dip to give it a nice rubberized feel and a ton of grip. It comes in a variety of colors, but I went with clear
https://www.amazon.com/Performix-11209-Multi-Purpose-Coating-Aerosol/dp/B000LNN11G/
If you're looking for permanent, I would use automotive clearcoat. It comes as an aerosol, yes.
Otherwise, clear PlastiDip would make a good temporary see-through layer to protect the marker ink from smudges, etc. Grow tired of the design? Peel the PlastiDip off, then clean off the marker ink with isopropyl alcohol, and repeat.
Source
I walked into a server room and thought we had a lot of diabetics working for us.
https://www.amazon.com/Coollaboratory-Liquid-Pro-Thermal-Compound/dp/B001PE5XAC
Just make sure its Liquid Pro, Liquid Ultra, or Conductonaut.... If you're going to do something, do it right.... ;)
What are you talking about insignificant!? Just look at this graph. The bar for the Coolaboratory Liquid Pro is like 5 times smaller than most of the other bars. How are you gonna tell me it's insignificant when one component is 5 times better!?
whooooo
The coolermaster TIM will work fine, but if you want to get the most out of it, I'd recommend this stuff. It will work the best, but it will also bond the IHS to the core after it gets hot enough. There will be nothing else attaching the IHS to the rest of the CPU besides the socket clamp after you do this, you might want the stuff I linked for that reason alone.
I bought mine from:
https://www.amazon.co.uk/gp/product/B001PE5XAC/ref=oh_aui_detailpage_o06_s00?ie=UTF8&psc=1
Not sure if you're in the UK or not?
I'm planning to keep mine as a backup (just in case I didn't put enough on the CPU or something like that!) - sorry!
Most of my learning has come from just working with it, I wish I had some better resources for you. I'd suggest checking out youtube but I dont have specific links. The stuff that I usually get has brand names of either "hyzod" (has a picture of a rhino on it), makrolon, and bayer (has the same bayer logo as the pharmaceutical pills).
Regarding rigidity, i'm using 1/2", so yes its quite stiff. Thinner pieces, say 1/8" or even thinner, is somewhat flexible. The material itself is probably about the hardness of PVC, probably slightly softer.
Bonding. There's the rub. You can buy different glues for it, in different thicknesses:
https://www.amazon.com/SCIGRIP-Acrylic-Cement-Low-VOC-Medium/dp/B005ZH31W2/ref=sr_1_5?ie=UTF8&qid=1517550935&sr=8-5&keywords=acrylic+glue
https://www.amazon.com/SCIGRIP-10315-Acrylic-Cement-Low-VOC/dp/B003HNFLMY/ref=sr_1_3?ie=UTF8&qid=1517550935&sr=8-3&keywords=acrylic+glue
Its honestly more of a "weld" than anything. the water thin stuff (first link) works great, and works FAST, but your joint better be perfect. I use the "fast set" stuff, and initial bonding occurrs within 10 seconds. They even make "very fast" set, i can't imagine how quickly you'd have to work with that stuff. I apply it with a syringe that I got from my dentist. It has taken me a lot of practice to get to a decent level. Don't plan on your joints being optical grade by any means.
Its worth noting that the stuff I get has a scratch resistant coating on it, and the glue WILL NOT WORK on the coating. You have to cut it off with a dado etc.
The stuff is awesome though once you get used to working with it. tools MUST be sharp or it will melt.
If you're bored, check out a few other things I've made with it:
https://imgur.com/gallery/pntR7
https://imgur.com/gallery/1Sv4G
This is what I use. Unbreakable seams.
https://www.amazon.com/SCIGRIP-10315-Acrylic-Cement-Low-VOC/dp/B003HNFLMY
WeldOn 16 in the tube. I use it in my office and no odors.
SCIGRIP 16 10315 Acrylic Cement, Low-VOC, Medium bodied, 5 Ounce Tube, Clear https://www.amazon.com/dp/B003HNFLMY/ref=cm_sw_r_cp_api_i_zvZUCb8SJ1R99
Yep just bought the acrylic from Amazon.
Amazon link
The backing is just about 1/4" higher to keep the water only coming over the front. Use this to fuse the pieces together
What type of glue to use always depends on what type of material you are gluing. For 3d printing it will depend on what type of filament you are printing with. I use PLA+ and have decent results with CYANOACRYLATE, commonly called CA or superglue. It works in holding things together but it does not take much force to separate the parts again.
The best glue is one that welds the two parts together, that means dissolving the PLA a little bit. The best one I have found for this is an Acrylic glue. Read all the cautions before hand as the stuff is nasty and “dries” fast. Here is what I used from Amazon.
I've tried it all. This stuff - SCIGRIP 16 10315 Acrylic Cement is what you want. It welds the plastic together the same way that plastic model cement used to work, back before the goody-two shoes made them reformulate it.
Here are two found without any effort at all:
High temperature sealant
More food grade sealant
Remember that "food safe" is not the same as "food grade". What's "food safe" at room temperatures may not be at boiling!
I did use aquarium sealant on the outside of my electric elements, but they were sealed before I did that anyway with a silicone o-ring and plumbers tape. I doubt any wort comes in contact with it. I didn't "glob it on" per se, but I put a healthy layer on. It's messy. Can't help that.
It could take a while to expand as you suggest, but that would most likely require you to soak both sides of the wood, not just the inside. You could try hosing down to accomplish this, or caking with wet mud to help it stay moist over the time it needs to absorb water. There are dozens of silicone sealers you could use. the clear tub caulk would be fine, but if you intend for the water to be pottable or used for veggies, use something that is food grade like this for example: https://www.amazon.com/Clear-Food-Grade-Silicone-Sealant/dp/B005XP5HO6
You could just buy a regular plastic bucket, use some food grade sealant of some sort, and incorporate it's very own STC-1000 for far far less than this. I just don't see the benefit of having this vs. the cost, even if it is a conical (this is a half-assed conical though isn't it).
edit: or go for a regular carboy with thermowell. Hell, get a few for the same price as this...
Glad I could help, hope you have a blast :)
If you feel like getting arts and crafts-y with your drinking endeavors, here's another tip. Get whatever brand 20 oz water bottles, use a 1/4 drill to bore a hole in it. Fill with whatever clear booze - flavored rums, vodkas, and gins you desire - and re-seal with something like this silicone sealant. You can either reseal under the label or on the bottom of the bottle. I did this for lollapalooza one year, and while the seal was a little leaky when the bottle was squeezed, it worked like a charm.
Kapton tape
should work as well, if you happen to have some, but you might need to wrap it a few times, it's pretty thin. Might be a bit more permanent as well. I don't have shrink-wrap on hand, so I just use the tape.
I actually did a ton or research and took some precautions that I saw no one mention; i.e. covering the area surrounding the CPU die in Kapton tape to prevent any spilled metal from causing a short. It just slipped my mind in the end that the metal block around the cpu wasn't also copper like the heat pipes which look fine Imgur.
There are two types you can use that seem to work well. A Silicon version, and a Acrylic version.
​
https://www.amazon.com/MG-Chemicals-422B-340G-Silicone-Conformal/dp/B008O9YGQI/
​
and:
​
https://www.amazon.com/MG-Chemicals-Premium-Acrylic-Conformal/dp/B06XWGCKX5
​
Both work well. I prefer the Silicone version as the Acrylic version has a blueish tint that bothers some people.
https://www.amazon.com/MG-Chemicals-422B-340G-Silicone-Conformal/dp/B008O9YGQI/ref=mp_s_a_1_2?ie=UTF8&qid=1543569078&sr=8-2&pi=AC_SX236_SY340_QL65&keywords=silicone+conformal+coating&dpPl=1&dpID=41mcAG9pGLL&ref=plSrch Do it.
I dont get it?
https://www.amazon.com/gp/product/B008O9YIV6
is $13 is that out of your price range?
The nice thing about actual conformal coating is that you can solder through the coating or remove it if needed. Had grate luck with it so-fare.
They sell https://www.amazon.com/MG-Chemicals-Silicone-Conformal-Coating/dp/B008O9YGQI its about $5 more though, it is an Aerosol. Never used it before though.
Mitigating dust and humidity?
Using conformal coating. You can buy an aerosol version to test it out on your first run of boards.
This also had some good layout info (i.e pad shapes, etc).
Before you replace it, I would attempt to repair it using 2 part epoxy.
I am partial to the "JB Weld" brand, and this variety is perfect for a repair such as this...
Same here.
Adapter: $8
JBweld: $8
Cheap and horrible case for my phone: $5
JB Weld is my go to for epoxy or adhesives: https://www.amazon.com/J-B-Weld-50112-ClearWeld-Quick-Setting/dp/B009EU5ZM0
I've used epoxy from the same syringe probably 5 or 6 times without issue. Note that you will have to mix the stuff from both sides before use - this is likely why it is reusable.
This:
http://www.amazon.co.uk/J-B-Clear-Quick-Setting-Epoxy/dp/B009EU5ZM0/
Drill some holes on each side of the broken part and file the plastic down to be thinner. Get some 4000psi+ epoxy like this ( www.amazon.com/dp/B009EU5ZM0 ) and shape it to how it should look. Make sure to get it through all the holes you drilled so that it has places to hold onto for strength. Wrap it in wax paper and clamp it to hold the broken part together.
Once it dries just file it down to size.
Maybe look into JB weld, or some kind of epoxy?
https://www.amazon.com/J-B-Weld-50112-ClearWeld-Quick-Setting/dp/B009EU5ZM0
use epoxy, they sell it on amazon for a good $8.
http://www.amazon.com/gp/product/B009EU5ZM0/ref=oh_aui_detailpage_o08_s00?ie=UTF8&psc=1
That is the link to the one I used in my down stem repair on my bong.
http://www.reddit.com/r/StonerEngineering/comments/2f2lpz/repaired_my_broken_downstem_on_bong/
Been using this JB weld epoxy without an issue, but I dont want or need instant seal but a strong seal: https://www.amazon.com/gp/product/B009EU5ZM0/
When you click buy from Amazon it shows the real price
And thou has received link
my niece is obsessed with ducktape and bacon..
Everyone needs duct tape!
Bacon is meat candy, yum!
Ba Co N
Bacon Strips and Bacon strips
Bacon Wallet
Exercise = Bacon
Exercise = Bacon 2
Bacon Strips hoodie
Everything tastes better wrapped in Bacon
Bacon Makes everything Better
Bacon is my Fav Veggie
Got Bacon?
Egg skull and cross Bacon
Come to the Darkside We Have Bacon
This Guy Loves Bacon
Life is Better With Bacon
Bacon Lounge Pants
Bacon duct tape
Bacon boxers
Bc = Bacon the Delicious element
I <3 Bacon sticker
Bacon Mints
Bacon toothpaste
Bacon floss
Bacon Jellybeans
Bacon Tie
Bacon Candy bar
Maple and Bacon Lollipops
Keep calm and Bacon Nom
If Bacon Grew on Trees
Mmmmm Bacon
50 shades of Bacon
I'd wrap that in Bacon
Bacon Soap
Bacon coffee mug
And to Wrap All of these amazing thing up???
BACON WRAPPING PAPER!!!!
Bacon is Meat Candy when it comes to finding things bacon.. I go above and beyond the call of duty.
Some Bacon Band-Aids or Bacon Duct Tape for your husband!!! Bacon is Meat Candy and if I win, go ahead and surprise me!!! P.S. Bacon is delicious.
An Epic Meal Time bacon strips shirt!
And a wallet :D
Duct tape?
50 Shades of Bacon.
And wrap it all in some bacon gift wrap.
Bacon is Meat Candy! Surprise me :)
BACON DUCT TAPE
Bacon Duct Tape
Bacon is Meat Candy
It's a two person job, but my house is laid out pretty well so I had access to most vents easily.
My recommendations are:
-Feed cables down hill as much as possible, gravity is your friend
-Electrical tape around the end of the cable, to protect the contacts and stop the clip from bending and snapping off or getting hung up
-I had some old household electrical wire laying around so I peeled out about 5 feet of the solid stiff ground wire, then bent a hook on one end to help get into corners and tight spots. A coat hanger would work pretty well too
-There was one point that I had to exit through the side of one of the ducts. I drilled a half inch hole in the side of the duct and used some foil tape to patch the hole back up once the cable was through
-Anywhere the cable exited a duct I wrapped about 6 inches in either direction with a few layers of electrical tape for some added protection
If you had any other questions I'd be glad to help!
Those ducts look like they were masticed which is perfect. This was the product I was talking about: https://www.lowes.com/pd/Frost-King-0-125-in-Foam-Plumbing-Pipe-Wrap-Insulation/1081449
One side is sticky, but being out and exposed to the elements might take its toll.
My suggestion is this, I warn it will take some work but it will be very worth it, and not that expensive while yeilding the best r-value bang for buck:
Get some foam board adhesive: https://www.homedepot.com/p/Loctite-PL-300-10-fl-oz-Foamboard-Adhesive-1421941/202020476
And get some sheets of foam board: https://www.lowes.com/pd/Kingspan-Insulation-Common-2-in-x-4-ft-x-8-ft-Actual-2-in-x-4-ft-x-8-Feet-R-10-Unfaced-Polystyrene-Foam-Board-Insulation/999972968
Your outside layer of foam board should be this: https://www.menards.com/main/building-materials/insulation/foam-board-insulation/johns-manville-foil-faced-polyiso-foam-insulation-4-x-8/w-n5075/p-1444438921381.htm
To start you should verify 100% that those duct joints are masticed good, and I mean good, all the joints should be full of it and no holes, no pinholes even. if not get this: https://www.amazon.com/Design-Polymerics-Mastic-Sealant-0-50-Gallon/dp/B0085UZBE2
Once they are 100% sealed you can start. IF you want layers of foam board (more r-value the better) the best thing you can do is use an unfaced foam board for your layers. Your outer layer should be the foil faced foam board. To attach your foam board to your ducts use the duct adhesive, you MUST use this specifically, other adhesives can degrade and "eat away" the foam and eventually the adhesive will fail and it will fall off. Obviously you will need to cut the foam board to spec to fit on the ducting. USe the adhesive to attach it to the ductwork, foil face out. You will then want to cover the seams with silicon or foil faced duct work tape, not duck tape. IF you want additional security for them to hold and not fall off or fly off with wind you can use a metal band strap. or self tapping screws with large zinc washers
metal duct tape: https://www.amazon.com/3M-Foil-Tape-3381-Silver/dp/B00A7I5L86/ref=sr_1_6?keywords=speed+tape&amp;qid=1551224134&amp;s=gateway&amp;sr=8-6
metal strapping: https://www.amazon.com/DIVERSITECH-710-001-Galvanized-Metallic-Strap/dp/B00CD6WON0/ref=sr_1_8?keywords=metal+strapping&amp;qid=1551224293&amp;s=gateway&amp;sr=8-8
metal strapping tension locks: https://www.amazon.com/Tension-Triglides-Webbing-Strapping-Adjustor/dp/B01JG09244/ref=sr_1_17?keywords=metal+strapping&amp;qid=1551224293&amp;s=gateway&amp;sr=8-17
self tapping screws (need to be long enough to go through foam AND the metal duct work): https://www.amazon.com/Self-Drilling-Plated-Finish-Undercut-Phillips/dp/B00GYK2S7I/ref=sr_1_3?keywords=3+inch+self+tapping+screws&amp;qid=1551224214&amp;s=gateway&amp;sr=8-3
Now since its outside the air inside will eventually still change to the outside temperature, but not as fast and less bleed off of temperature in the ductwork due to outside ambient temperature making the ductwork sheathing the same temperature.
I am not even kidding; you need to buy some of this: http://www.amazon.com/3M-Foil-Tape-3381-Silver/dp/B00A7I5L86
Use it to re-do that ventilation system. It is not safe to use "duct tape" for exhaust ventilation. The adhesive can melt, severing the exhaust and causing you to vent hot air into the room with your equipment.
Source: Got the temperature alarm text messages RIGHT after I ordered and paid for my margarita one Friday.
PS - Good work on the cleanup! Sorry to make more for ya :p
I was typing up my list of shit for my second grow. Lets see if I got my Reddit Formatting Correct. :)
The Details
Seeds
Gear
Veg/Flowering
Seedlings
Medium and Nutes
Meters
Pots
Misc
I have the Zoo Med Small UTH and thermostat on my 20 gal long tank 12"W x 30"L and the warm area is only about 6" around the center of the mat. I plan to add a second of the same mat next to it. I came from a 10 gal tank 10"W x 20"L and the small mat would heat about 80% of the tank to my warm temp target (too much). If I had the larger tank to start I would have gotten the med pad. If you don't have a thermostat I would definitely recommend it. I used aluminum duct tape to re-attach the pad which worked well.
EDIT: added some links
Here is a totally off the wall idea. I have never worked with it myself. But what about creating shallow molds and using poured clear acrylic resin to create your own resin sheets? I have no idea if this would work for you, but people make clear countertops out of the stuff.
https://www.youtube.com/watch?v=w0B9O-o5bMs
http://www.doityourself.com/stry/how-to-cast-acrylic-resin
https://www.amazon.com/Clear-Epoxy-Encapsulating-Casting-Gallon/dp/B00IT0APVM/ref=sr_1_2?ie=UTF8&amp;qid=1495379484&amp;sr=8-2&amp;keywords=acrylic+resin+kit
You need what's called an epoxy resin. They usually come in two parts that you mix together and pour before it hardens. They can be a bit tricky to work with too, so you might want to do some research before you dive in. Something like this (sorry for the link, on mobile).
Clear Epoxy Resin for Bar Tops, Encapsulating, or Casting (1 Gallon) https://www.amazon.com/dp/B00IT0APVM/ref=cm_sw_r_cp_apa_wx2SzbZVJH54W
http://www.amazon.com/Clear-Epoxy-Encapsulating-Casting-Gallon/dp/B00IT0APVM/ref=sr_1_3?ie=UTF8&amp;qid=1453945308&amp;sr=8-3&amp;keywords=clear+acrylic+resin This one says for casting.
Superlube works great
That's what I was thinking, wasn't sure if it was any different than the ones on other keeb sites though.
Edit: Would this work?
https://smile.amazon.com/Super-Lube-Purpose-Synthetic-Dielectric/dp/B00KU85W4G/ref=sr_1_30?keywords=superlube&qid=1572638525&sr=8-30
https://smile.amazon.com/Krytox-Grease-Pure-PFPE-PTFE/dp/B00MWLDALQ/ref=sr_1_4?keywords=krytox+205g0&qid=1572638568&sr=8-4
&#x200B;
superlube for the stabs and krytox for everything else. ive lubed 2 sets generously and still have plenty.
https://www.amazon.com/gp/product/B00KU85W4G/ref=oh_aui_detailpage_o03_s00?ie=UTF8&amp;psc=1
Will last you so many boards. Used to buy these off other sites til I realized I could get 10 for 50c/ea vs like $2/ea on other sites lol.
What if I just bought this with HyperX Keycaps and the creams? I want PBT caps. https://www.amazon.com/Independent-Mechanical-Keyboard-Plastic-Aluminum/dp/B07JVMBMNK
https://www.amazon.com/gp/product/B07JDVG4RQ/ref=ox_sc_act_title_2?smid=ATVPDKIKX0DER&psc=1
https://www.amazon.com/gp/product/B00MWLDALQ/ref=ox_sc_act_title_3?smid=ATVPDKIKX0DER&psc=1
https://novelkeys.xyz/products/novelkeys-cream-switches?variant=15400236777565
Also, how would I bind the other keys that I'm missing, for example with the Fn key like on Anne Pros and Ducky's, all the keys have secondary actions. How would I be able to do that so I still "have" the other keys sincet this isnt a TKL chipset?
My guess is probably no, but is this Krytox 205G0? Can't seem to find it's grade anywhere on the page.
https://www.amazon.com/Chemours-Krytox-Grease-Pure-PFPE/dp/B00MWLDALQ/ref=sr_1_1_sspa?crid=1KYYGL6G6U0FB&keywords=krytox+205&qid=1563451185&s=gateway&sprefix=krytox%2Caps%2C136&sr=8-1-spons&psc=1
When you say 205g0 is that the same as the Krytox 205 from amazon ? I don’t see it shows the “g0”
Krytox GPL 205 Grease, Pure PFPE/PTFE, 0.5 oz Tube https://www.amazon.com/dp/B00MWLDALQ/ref=cm_sw_r_cp_api_i_7H.vDbCMAYZNS
It can be hard to describe the difference but the easiest way to describe it that I know of is like rubbing your fingers over perforated leather (more course but subtle) vs textile leather. You will definitely be able to tell a difference, and it's all about "key feel". It's not required at all, it's a just a matter of preference. I personally like it because the sound is more "muted" and the feel is more "fluid" imo.
If you don't know if you should do it, I would recommend trying some out at a meetup or if you have a cheap mech board (well fairly cheap) you can open the switches with an opener (https://mechanicalkeyboards.com/shop/index.php?l=product_detail&p=1363) and some krytox 205 (https://www.amazon.com/Chemours-Krytox-Grease-Pure-PFPE/dp/B00MWLDALQ/ref=sr_1_1_sspa?ie=UTF8&qid=1550882164&sr=8-1-spons&keywords=krytox+205&psc=1).
Questions about liner material and lube...
For liner material, what acoustic differences am I going to find between: neoprene, sorborthane, and rather generic looking "foam" rolls? They're all pretty much the same thickness, about 2-3 mm.
For lube, I'm looking at: Permatex dielectric grease, krytox 205 grade 2, trybosis 3204 and trybosis 3203. What would be good for stabs, what would be good for linears, and what would be good for tactiles? And if possible, is there anything that's a good "all-arounder"? Aka, something that could easily work for both stabs and switches.
Sure! You can get it in very small quantities though and it's not super expensive then. There is a $20 0.5oz (15ml) tube of Krytox here, not sure if the same quantity is available locally to you.
Here is a short build inventory for people who may want to perform this mod in the future:
Lube and replace switches based on WFD's guides. Get two small paintbrushes and a pair of forceps or tweezers to help manipulate the components during the lubrication process. You should also whip up a couple of these guys. They make opening the switches a hell of a lot easier.
This was only my second time desoldering so I learned a lot along the way. Quality, flux-treated desoldering braid and a temperature controlled soldering iron with a chisel tip was the most reliable method I found to desolder. I used the Hakko FX888D soldering iron and station with a 2.4 mm x 14.5 mm Hakko chisel tip. I used Chemtronics' Chem-Wick desoldering braid to remove the solder from the plated through holes on the PCB. You have to take extra care when using desoldering braid not to heat up other components on the board, but with enough practice you will be a pro!
For stabs (stab housing/stem) your best bet is krytox 205, you can get a half oz tube for 20 bucks on amazon.. That is going to yield better results, trust me..
205 is also amazing on linears.. I wouldnt use anything less or any other brand, especially a 'custom mix' that has oil mixed in...oil doesnt last as long.. you want grease because it doesnt have the fluidity of oil, lasts much longer..
https://www.amazon.com/Chemours-Krytox-Grease-Pure-PFPE/dp/B00MWLDALQ/ref=sr_1_3?keywords=krytox+205&qid=1555994639&s=gateway&sr=8-3
For tactiles/clicky 202-204 depending on spring weight
https://www.amazon.com/Krytox-Grease-Pure-PFPE-PTFE/dp/B00MWLDCKA/ref=sr_1_3?keywords=krytox+204&qid=1555994880&s=gateway&sr=8-3
For the stab bar inserts
https://www.amazon.com/Permatex-22058-6PK-Dielectric-Tune-Up-Grease/dp/B000AL8VD2/ref=sr_1_9?keywords=permatex&qid=1555994695&s=gateway&sr=8-9&th=1
I have lubed 65g zealio with krytox 205 grease
this one: https://www.amazon.com/gp/product/B00MWLDALQ/ref=oh_aui_detailpage_o05_s01?ie=UTF8&amp;psc=1
I lubed all the way down the sliders and also the bumps.
Is that okay?
Good to know. I was going PETG to PETG and this stuff was the only thing I could find that worked: https://www.amazon.com/dp/B0149IG548
If it is injection molded plastic I would suggest a solvent based glue like Weld-On 4 Cement. It is very thin like water and will get get in between the plastic parts. This type of glue works by melting the plastic together, making a very strong bond with very little contact area. Apply it with a needle applicator, you can buy it in a kit like this. https://www.amazon.com/Weld-Acrylic-Plastic-Cement-Applicator/dp/B0149IG548/
Hold the button cover on and very carefully flow the solvent from the needle into the seam between the parts. Hold or gently clip (without deforming the parts) for about 5 min the allow to cure overnight.
This stuff will weld it together beautifully:
https://www.amazon.com/Acrylic-Plastic-Cement-Applicator-Bottle/dp/B0149IG548/ref=sr_1_3?ie=UTF8&amp;qid=1502135033&amp;sr=8-3&amp;keywords=Weld+on
There are solvent based glues for acrylic that would avoid some of the issues you had with hot glue (like the random strings). You typically have to clamp/hold in place the pieces until it's set, but they work really well. This is an example.
The bubbles form naturally during the bonding process; it states this on the back of the container. Here is a link to the Amazon page where I purchased the acrylic cement.
> The product you bought might call it weld, but it really, its not.
This is the same product and technique people use to build acrylic aquariums. If it's good enough for them, it's good enough for me.
> Why do you think all mods/pro today use rubber gasket.
Here's an acrylic reservoir made by Swiftech that is joined with cement and not gaskets.
Edit: just responding to your ninja-edit, I use Weld-On 3 because I feel the faster bonding time makes the pieces easier to work with, plus it's one of the most commonly recommended acrylic adhesives along with Weld-On 4.
This Stuff which is great to prevent the issue you mentioned:
>The one in the video (Loctite Gel). But it just sits like a wet gel spot forever. And as soon as you touch it, it superglues your fingers.
This will cause the inverse issue where if you leave your fingers touching the glue and spray then thats it forever. Your skin or your model is breaking after that.
This is the glue I love, I also use insta-set which is a spray that will make the glue dry in seconds so you can keep working on the same part without stopping for a bit, great stuff.
Try getting Gel Superglue (like this). Apply a decent dob in the joints, then plop the arms in there and hold for 15 seconds. You can still move them a tad after, but they won't fall out. Let them set for a few minutes before putting any large amount of tension on them and you should be golden.
Second option is to use an accelerator, like this. Apply glue to the joint, then spray/dip the arm ball in kicker, and put it into the joint. This will set very quickly. It's also exothermic, so if you get glue on your hands and don't notice, then get kicker on there, it can be fairly painful.
Last, a helping-hands can be quite useful if you have it laying around. I use this one for electronics, and it works pretty well holding awkward model parts for letting glue set.
If you are worried about it, you can buy medical grade cyanoacrylate (for veterinarians) on Amazon, but I just use regular ol' super glue and an accelerator (although accelerator's not really necessary unless you're using thicker CA like a gel).
I prefer super glue with an activator these days, I use this stuff. Sets in a couple of seconds and you can use it on places you won't be able to get UV light to cure the resin.
Hey hey!!! I know your struggles, so not many students at my university knew this, but it's a quick way to glue stuff. Buy any cynocralyte glue, good one though like insta cure. Then buy an accelerator preferably one that sets clear. You only need a little bit of glue then as a drop of accelerator. Usually I would have small dab a glue and a small plastic I could put a small amount on bass wood the place and add drop of accelerator. Here is link to some
Bob Smith Industries BSI-157H Maxi Cure/Insta-Set Combo Pack (3 oz. Combined) https://www.amazon.com/dp/B0166FFCHS/ref=cm_sw_r_cp_apa_i_28BGDb1PTXAZ0
I believe most hobby shops will carry it as it's used in model making
Here's the one I was introduced to. Naturally, it worked well, so I have no reason to shop around brands. I'm sure any other brand would work as well, but we are creatures of habit.
https://www.amazon.com/Bob-Smith-Industries-BSI-157H-Insta-Set/dp/B0166FFCHS/ref=sr_1_3?ie=UTF8&amp;qid=1487793551&amp;sr=8-3&amp;keywords=ca+ACCELERATOR
Note: it works with any superglue that is CYANOACRYLATE and you don't need that brand.
Sorry one last favor: could you recommend a CA?
I see the following that I looked up on Amazon, but if there is some other one you recommend, please do:
1
2
3
4
It's just super glue. Sometimes the thicker gel type is more handy; I prefer something that's in between runny and gel. See if you can get some kicker as well to cure it instantly.
I use this for everything: https://www.amazon.com/gp/aw/d/B0166FFCHS/
Also I used this tape to keep the mat attached :https://www.amazon.com/Aluminum-Tape-Foil-Ducts-Insulation/dp/B01FROBUXE/ref=zg_bs_256160011_13?_encoding=UTF8&amp;psc=1&amp;refRID=8MWBZYPB8AWYK1CSQHJK
I would suggest an ultratherm. They are awesome UTH's. But as far as securing this to the tank, whether is the zoo med or the ultratherm, use aluminum duct tape.
Ultratherm - https://beanfarm.com/collections/heating/undertank-heaters (Same company also sells on Amazon)
Aluminum Tape - https://www.amazon.com/Aluminum-Tape-Foil-Ducts-Insulation/dp/B01FROBUXE/ref=sr_1_3?ie=UTF8&amp;qid=1525098985&amp;sr=8-3&amp;keywords=aluminum+duct+tape
After securing the heater to the tank, Insulate at least the back, if not 2-3 sides. The best stuff to use is reflectix.
Reflectix Insulation - https://www.homedepot.com/p/Reflectix-16-in-x-25-ft-Double-Reflective-Insulation-with-Staple-Tab-ST16025/100012574?MERCH=REC-_-PIPHorizontal2_rr-_-100052556-_-100012574-_-N
Doesn't get any better than those three links, IMO. Here is a picture of how my tank uses them. https://imgur.com/mfhU7Tk (this was mid-construction)
Interesting.... I wonder if the insulation aluminum tape would also work. I have this already at home: https://www.amazon.com/Aluminum-Tape-Foil-Ducts-Insulation/dp/B01FROBUXE/ref=sr_1_sc_2?ie=UTF8&qid=1543196012&sr=8-2-spell&keywords=insulatin+tape
https://www.amazon.com/Aluminum-Tape-Foil-Ducts-Insulation/dp/B01FROBUXE
Hard alumium tape with adhesive backing.
You may be able to fill it with epoxy. Find a food-safe one. https://www.amazon.com/CLEAR-GRADE-Epoxy-Resin-System/dp/B01J16MYSE
I mean, can't they change their company name? I guess its probably not cheap, but then this is a problem literally because they have been too successful in their marketing
edit: Maybe I'm wrong, not an expert, but it seems to me they are in this predicament because they advertised their products as Velcro, not Velcro hook and loop.
https://smile.amazon.com/VELCRO-Brand-Industrial-Strength-Strips/dp/B0010HADEA/ref=sr_1_1_sspa?ie=UTF8&amp;qid=1506366556&amp;sr=8-1-spons&amp;keywords=velcro&amp;psc=1
https://smile.amazon.com/VELCRO-Brand-Sticky-Strips-Black/dp/B000TGSPV6/ref=sr_1_2_sspa?ie=UTF8&amp;qid=1506366556&amp;sr=8-2-spons&amp;keywords=velcro&amp;psc=1
https://smile.amazon.com/VELCRO-Brand-Sticky-Back-Black/dp/B00006IC2L/ref=sr_1_6?ie=UTF8&amp;qid=1506366556&amp;sr=8-6&amp;keywords=velcro
https://smile.amazon.com/VELCRO-Brand-Industrial-Strength-Black/dp/B00006RSP1/ref=sr_1_7?ie=UTF8&amp;qid=1506366556&amp;sr=8-7&amp;keywords=velcro
https://smile.amazon.com/VELCRO-Brand-Thin-Fasteners-Tape/dp/B0013AIAQ2/ref=sr_1_10?ie=UTF8&amp;qid=1506366556&amp;sr=8-10&amp;keywords=velcro
None of them list hook and loop anywhere, though to their credit they do list Velcro BRAND very clearly. And one of them does mention the product type as fastener. They should start advertising and packaging them as Velco brand hook and loop fasteners. That way if someone challenges their trademark in court, they can point out that every single one of their product's promotional material clearly separates the product from the company - right now, that's not clear in their own marketing (outside this video of course).
Food grade/Kitchen silicone sealant? Comes in squeezy tubes and caulk-gun cartridges. Lube pot and lid so it will release, lay a bead, close gently and let it set. Ex:
https://www.amazon.com/Clear-Food-Grade-Silicone-Sealant/dp/B005XP5HO6
> from a private gb
Lmao /r/Gatekeeping
Also, can’t you just buy that on amazon? Krytox GPL 205 Grease, Pure PFPE/PTFE, 0.5 oz Tube https://www.amazon.com/dp/B00MWLDALQ/ref=cm_sw_r_cp_api_i_0zMpDb8ZJFHXC
Do yourself a favor and check into different brands of glue: Bob Smith Industries BSI-157H Maxi Cure/Insta-Set Combo Pack (3 oz. Combined) https://www.amazon.com/dp/B0166FFCHS/ref=cm_sw_r_cp_api_i_e4nIDb7KDMA0T