Best temperature controllers according to redditors
We found 914 Reddit comments discussing the best temperature controllers. We ranked the 95 resulting products by number of redditors who mentioned them. Here are the top 20.
We found 914 Reddit comments discussing the best temperature controllers. We ranked the 95 resulting products by number of redditors who mentioned them. Here are the top 20.


i've been paged for my link dump, so here it is. the first three links are detailed care sheets, then a tub tutorial, and the rest are product recommendations. read everything thoroughly, come back with any questions. let me know if any of the links don't work.
glass tanks can be very challenging for ball python husbandry due to the high amount of air flow with the screen top and the total lack of insulation with the glass walls. it's generally recommended to use tubs or pvc reptile cages instead. wood enclosures can also be suitable if they're designed well and sealed properly to protect the wood against moisture. glass tanks can work, but they require a lot of modification and maintenance, which you'll find tips for in the second link. i'll give you product recommendations to cover options for tanks, tubs, and pvc/wood enclosures.
> 40 gal screen top tank
> No thermostat as there is a thick layer of substrate in the tank
/r/ballpython 's worse nightmare. Haha
I see you live in Southern (?) Florida, that's a huge reason why you haven't had an issue keeping the way you have. Decent on/off thermostats like this Inkbird are so cheap there's pretty much no reason not to have one. Check out /r/ballpythons sticky thread. I'm sure you can agree that even if you haven't had an issue in all this time that there's always room for improvement. Here's to 20 more!
Bulk Grain storage lightning deal EDIT:2 looks like these are coming up a few times during prime day.
https://www.amazon.com/gp/product/B004L0Z4HO/ref=ox_sc_act_title_1?smid=ATVPDKIKX0DER&psc=1
Edit: Inkbird controllers going up for lightning deal starting at 6:00 p.m PDT https://www.amazon.com/dp/B07PVBG8K1/ref=gbps_tit_m-6_3b69_801408ea?pf_rd_p=db08f08d-45f1-490b-aa6c-1f4d543b3b69&pf_rd_s=merchandised-search-6&pf_rd_t=101&pf_rd_i=14611812011&pf_rd_m=ATVPDKIKX0DER&pf_rd_r=H6HJTJX7ZZV5HBJ9Z47P
Sounds like you were getting outdated or flat-out incorrect information and those 'experienced snake owners' are likewise misinformed. There are very few snakes that legitimately have evolved to thrive on sand-based substrate (irony being the Sand Boa is not one of them; they live in sandy soil which is very different composition than straight sand). The Ball Python is native to the svannah/jungles of Sub-Saharan Africa. Its dirt, soil, and burrows. Not a majority or even significant amount of sand.
Additionally, if I extrapolate correctly from this singular picture, your BP is also in a glass enclosure and has a log-style hide. The former makes keeping humidity in the 55~80% range a difficult exercise, and the latter, is a stressor as BPs do best with a hide that has a single-entrance or is cave-like; the more points of contact, the better, and a single entrance means they can feel safer.
I'm going to steal _ataraxia's ball python dump and toss it below:
i'm going to dump a bunch of links to get you on the right track. the first three links are detailed care sheets, the rest are product recommendations. read everything thoroughly.
glass tanks can be very challenging for ball python husbandry due to the high amount of air flow with the screen top and the total lack of insulation with the glass walls. it's generally recommended to use tubs or pvc reptile cages instead. wood enclosures can also be suitable if they're designed well and sealed properly to protect the wood against moisture. glass tanks can work, but they require a lot of modification and maintenance, which you'll find tips for in the second link. i'll give you product recommendations to cover options for tanks, tubs, and pvc/wood enclosures.
I've been researching this and I've come to the conclusion that EVERY SINGLE AVAILABLE HEATER has the problem where it can get stuck "on" and boil your fish. Just look at Amazon reviews. It's rare but it happens with every one.
So for my new tank I'm getting a separate temperature controller. The heater will plug into it, and it has its own temperature probe, and if the heater gets stuck on then the controller will still regulate the temperature. this one seems to be good, I'm sure there are others.
I just ordered an Eheim Jager heater. I've had nothing but good luck with these, but check the reviews again -- someone has had one nuke a tank. So better safe than sorry, spend $30 and get a controller.
Also, get a low-wattage heater if you can get away with it (2-3 watts per gallon.) Whether that works depends on the climate control in your house. Some people recommend two half-wattage heaters so that if one of them freaks out it isn't powerful enough to hurt much.
Red light isn't good, you'll want a heat mat (MAKE SURE you have a thermostat for it or it will get too hot) and possibly a ceramic heat emitter (also needs a thermostat) for air heat. What are the temps and humidity and how do you measure them? Glass tanks usually don't hold humidity well and often aren't good for bps. You need at least 2 good hides, one for each side. They should be snug and enclosed with only one opening, preferably identical, half logs don't work.
Someone should come by with a really good care sheet, read it, it has some great info. I know this might be a lot of information, but having a good setup is important and will save you headaches in the future.
Edit: I found the care sheet. Credit to u/_ataraxia.
Glass tanks can be very challenging for ball python husbandry due to the high amount of air flow with the screen top and the total lack of insulation with the glass walls. It's generally recommended to use tubs or pvc reptile cages instead. wood enclosures can also be suitable if they're designed well and sealed properly to protect the wood against moisture. glass tanks can work, but they require a lot of modification and maintenance, which you'll find tips for in the second link. i'll give you product recommendations to cover options for tanks, tubs, and pvc/wood enclosures.
You're going to want to pick up something like this. You set a temperature and an acceptable threshold (i have mine varying by only one degree), and it will automatically turn the heat lamp off and on to keep it at a consistant temperature.
I also have a under-tank heat mat for my hot side, which is the main thing used to warm my snake. I absolutely recommend getting one to put under your tank. Corns like to burrow and will get more benefit to having one on the hot side. I just use the heat lamp to keep the ambient air in the tank at an acceptable level. You will want to get a separate controller for the heat mat.
Edit: I also have an Indoor/Outdoor Thermometer just chilling in the tank to get a more accurate reading inside. Your tank atmosphere is going to usually be a bit different than the atmosphere in your room. I have the "inside" number reading the ambient temp of the tank, the "outside" number reading the inside of the under-tank mat (controller probe goes between mat and glass on the outside, and this prob sticks to the glass on the inside under the substrate), and it also tells me the humidity in the tank.
You want to keep your numbers as consistant as possible. I like to shoot for 85 degrees on the hot side, 75 degrees on the cool side, and between 40%-60% humidty. I hope this information helps. Let me know if you have any questions.
Edit 2: GoHerping does a great care guide video on YouTube, which is where I got most of my setup and care info from. There is also a link to their discord on the YouTube page that is full of friendly people that can answer a lot of your questions.
Edit 3: You're going to be better off using a Ceramic Heat Emitter instead of a bulb. It just produces heat and no light, which will be better with the controller ( you don't want the light isn't constantly turning off and on). Corns don't need UVB either, and do fine with just natural lighting (assuming the light in the room still follows the normal day/night cycle).
Don't do the open refrigerator thing, you will waste a ton of electricity and won't actually be able to temperature control even close to enough to lager with any reasonable degree of certainty. If I had to guess, leaving a fridge with an open door for a month will probably waste far more than $16.
Instead of wasting that $16 in electricity, you can get one of these, which is perfect for a fermentation chamber made from a fridge. A small amount of wiring work is required, but it's relatively easy.
If you aren't willing to invest $16 and an hour figuring out how to wire it together, I would suggest just letting it ride without temperature control (or maybe a swamp cooler or similar). Most lager yeasts will be fine in the low-mid 60s.
Edit to note: it's not too late by any means to get that temp control part now. You could start it warm and chill down in the refrigerator when you have the part, possibly even complete fermentation warmish and then stick in the refrigerator on its highest setting for a few weeks. Or you could start it in the refrigerator on its highest setting and let it warm up a bit more when you have the part. Leaving the fridge open is probably the worst choice you could make out of all the options above.
Double edit: If you don't want to mess with wires, you could get one of these, but it's more expensive. It's basically the same thing as the cheaper one, but with plugs.
Bonus fun fact edit: Refrigerators make the room warmer in general, but peaving the refrigerator door open will make it even warmer. You would be effectively making a really really ridiculously inefficient space heater.
your boyfriend, is incorrect im afraid to say, all heating elements need a thermostat to regulate the temperature. https://www.amazon.com/Inkbird-Max-1200W-Temperature-Controller-Greenhouse/dp/B01HXM5UAC this is a good brand and its only 30 bucks.
My condolences for your loss, it always hurts bad when a pet passes away.
Not having a hot spot would explain the lack of eating, but he shouldn't have starved in such a short time. Was your room super cold? Cold BPs can succumb to respiratory infections, which generally have obvious symptoms - wheezing, drooling, open-mouth-breathing, that sort of thing.
Did his body have any discoloration on the belly? An unregulated heat mat can reach dangerously hot temperatures, capable of burning/cooking a snake. It is possible that your heat mat shorted out after being on "full blast" for too long.
Unfortunately, cases like these are par for the course when it comes to reptiles and reptile equipment sold at chain pet shops. Their snakes are usually not very healthy to begin with - they generally sell the "less desirable" snakes produced by local breeders, and pet shops usually keep them in poor conditions (inadequate feeding, humidity, temps, overcrowding, etc), which weakens them. The quality of most big box heating products (Zoomed, etc) is garbage too.
If you want another snake someday, I would recommend buying from a good private breeder (avoid large-scale operations, like LLL Reptile, BHB, Underground, Big Apple, etc.). Most large cities have a reptile expo once every month or so, if you're up for the drive, or you can buy online and have a snake shipped (it's much safer and less weird than it might sound!). Get a radiant heat panel or a square foot of heat tape, and get a nice thermostat to control the temperature.
I have an older one of these that I acquired second hand because it's the right size for my cellar, allows for great display, and I have a completely dark room with good ventilation to keep it in.
Some caveats if you're looking for one of these:
A big commercial fridge like this looks super cool and is great for some. I love mine. It's done a fantastic job while I've had it, but it's not for the faint of heart. Like an old car, it's a bit of a labor of love.
I have one of those mini fridges, but I haven't messed with the built in temp controller and I wouldn't want to. Instead, I plug the fridge into an Inkbird temp controller. Then I drilled a hole in one of the screw holes for the door and passed the temp probe through that and into the fermenter's thermowell. I have the inkbird set to 68 and the fridge is set to 50. When the fridge turns on again it is still at 50 for me.
First of all. It's very good you recognize that you need help in learning how to care for the snake.
Second, here is a big link dump created by another regular user u/_ataraxia all credit for this goes to her.
the first three links are detailed care sheets, then a tub tutorial, and the rest are product recommendations. read everything thoroughly, come back with any questions.
glass tanks can be very challenging for ball python husbandry due to the high amount of air flow with the screen top and the total lack of insulation with the glass walls. it's generally recommended to use tubs or pvc reptile cages instead. wood enclosures can also be suitable if they're designed well and sealed properly to protect the wood against moisture. glass tanks can work, but they require a lot of modification and maintenance, which you'll find tips for in the second link. i'll give you product recommendations to cover options for tanks, tubs, and pvc/wood enclosures.
Promise you aren't the only one with these questions. As others have said, an evening of research will get you many of your answers.
I'm in a state that "grow your own" legalized a few years ago. Have helped friends get setups going. Feel free to PM me if you aren't getting answers online.
My usual formula, for someone who knows plants a little but hasn't grown weed indoors it:
While the may be refrigerators that can maintain the temps you're going to need out of the box, the correct solution is to use an inkbird with any fridge/freezer. No handyman skills needed.
u/ataraxia has amazing information for ball pythons. You should definitely read it through. Glass tanks are not ideal for Bps, so this should help. Here is her normal dump of information I took from another post.
i'm going to dump a bunch of helpful links on you. the first three links are detailed care sheets, then a tub tutorial, and the rest are product recommendations. read everything thoroughly, come back with any questions.
glass tanks can be very challenging for ball python husbandry due to the high amount of air flow with the screen top and the total lack of insulation with the glass walls. it's generally recommended to use tubs or pvc reptile cages instead. wood enclosures can also be suitable if they're designed well and sealed properly to protect the wood against moisture. glass tanks can work, but they require a lot of modification and maintenance, which you'll find tips for in the second link. i'll give you product recommendations to cover options for tanks, tubs, and pvc/wood enclosures.
Here's an info dump, courtesy of u/_ataraxia. It has pretty much everything you're asking about and more.
The first three links are detailed care sheets, then a tub tutorial, and the rest are product recommendations. Read everything thoroughly, come back with any questions.
Llet me know if any of the links don't work.
Glass tanks can be very challenging for ball python husbandry due to the high amount of air flow with the screen top and the total lack of insulation with the glass walls. It's generally recommended to use tubs or pvc reptile cages instead. wood enclosures can also be suitable if they're designed well and sealed properly to protect the wood against moisture. glass tanks can work, but they require a lot of modification and maintenance, which you'll find tips for in the second link. i'll give you product recommendations to cover options for tanks, tubs, and pvc/wood enclosures.
If you have basic wiring skills you can do it for less than $20 (if you already have a analog/basic crockpot)
STC-1000 on Amazon.com Elitech 110V All-Purpose Temperature Controller+ Sensor 2 Relay Output Thermostat Stc-1000 https://www.amazon.com/dp/B008KVCPH2/ref=cm_sw_r_awd_jq0Wub1M7MB25
https://www.amazon.com/dp/B008KVCPH2/ref=cm_sw_r_awd_jq0Wub1M7MB25
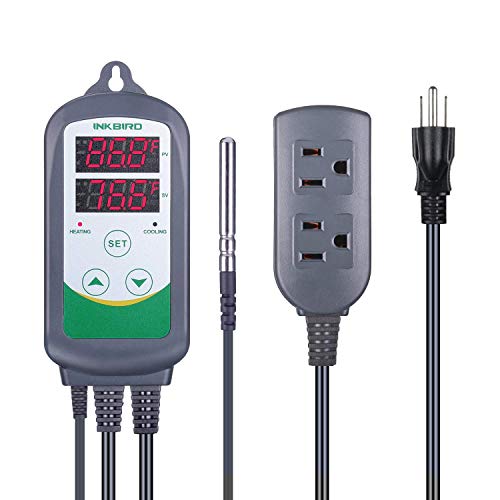
ITC-308 has heating and cooling function, and can be maintained a certain temp range by setting difference values.
US 15% coupon code: CAVDY4S6
ITC-308 With heating and cooling plug
CA 15% coupon code: ZCSTHQJM for ITC-308
An ITC-308 is probably going to be the easiest bet.
That freezer is rated at 1.4 amps at 115 volts. That is 161 Watts if it was a purely resistive load (it isn't; but it gives us a maximum to work with). The ITC-308 is rated for 1000 watts, so we are only at 16% rated capacity... That's a huge safety margin.
This controller also has compressor delay protection, so it's a wise choice in this application. Best of all, it's plug and play!
https://www.amazon.com/Inkbird-Max-1200W-Temperature-Controller-Greenhouse/dp/B01HXM5UAC
I don't use them for this purpose, but I use them for beer brewing and other hobbies. You plug this inline with a heating/cooling source and place the probe in the desired location. Ten years ago I would make them from scratch and build in redundancy in case of failure, but I have two of these that have been working fine for over 3 years of nonstop use.
Tramontina 126-Can Beverage Center $250
7 gal | Brew Bucket Brewmaster Edition $229
Inkbird $35
You may be right. If it got cold enough, you could have frost in a line or faucet. That'll make a nucleation point and draw a lot CO2 out of solution.
You could add a little heater to the fridge and set it with a temperature controller.
Temp Controller
https://www.amazon.com/dp/B011296704/ref=cm_sw_r_cp_api_dYnVAb99AN5JX
Humidity Controller
https://www.amazon.com/dp/B01FQKXRXA/ref=cm_sw_r_cp_api_3YnVAbW8V1DHG
DeHumidifier
https://www.amazon.com/dp/B000H0ZDD2/ref=cm_sw_r_cp_api_SZnVAbTSHMSQT
Humidifier
https://www.amazon.com/dp/B01D0POS7W/ref=cm_sw_r_cp_api_m0nVAbD00AGKP
Small Fan (on a timer, runs for 30 minutes every 2 hours or so)
https://www.amazon.com/dp/B00WM7TRTY/ref=cm_sw_r_cp_api_V0nVAb8XD3K7Q
Heater
https://www.amazon.com/dp/B00P7U259C/ref=cm_sw_r_cp_api_E1nVAbC6R49Z3
I got an old fridge on Craigslist for $25 that I thought was a small personal fridge but turned out to be about 6 cubic feet (perfect for hanging). I’m not sure of the brand actually (maybe Kenmore). So far I’ve done a Bresaola and a Copa, both have turned out great!
you need a digital temp controller ( here ), a 1000watt horse trough heater ( here ) and a submersible pump ( here ).
Custom made out of plywood. Exhaust on that Sony is in that front corner, so I put two fans, buy I'm actually only using one. I left a small gap along too back for intake.
Using this to automatically turn on.
https://www.amazon.com/dp/B01HXM5UAC/ref=cm_sw_r_cp_apa_i_RAztDbWC9XWZ6
And then the noctua plugs into this.
https://www.amazon.com/dp/B000MGG6SC/ref=cm_sw_r_cp_apa_i_IHztDbJCPQ5XY
And then I found a good temp for it to turn on, and it balances out nicely and keeps temps from skyrocketing, and even runs til it cools down and shuts off.
Lined it with carpet, and overall noise is good. Never hear it. That being said, I'm weird, and I could hear it in quiet scenes, and then I'd START listening for it, ruining the movie, so I made the box. Most normal people don't have this problem. 😆
I just bought a chest freezer off of craigslist for $80. Then I bought a STC-1000 from amazon for $25.
I wired up the STC-1000 with a 4x4x2 junction box, an extension cord, and an outlet (all from Lowe's).
I completed everything 2 nights ago and it has been working great. The controller will both heat and cool if you live in a colder climate. And the whole setup will allow me to ferment Ales and Lagers at proper temperatures, longer term lagering, and store beer or freeze food if I need to. No mods are done to the freezer, so I can unplug the controller and sell it off later if I choose to.
One warning: The STC-1000 is Celcius only, but just print out a conversion chart and you're good to go.
Probably here. That's where I got mine.
That's probably the cause of your weird flavors. Yeast need to be kept around an ideal temperature or they start pumping out lots of not so pleasant flavors. It sounds like you already know that though, so good luck with your fermentation chamber!
Lots of us use an older chest freezer with a cheap temperature controller such as the STC-1000. Other people that don't have room or the money for that use a tote filled with water and then add bottles of ice to keep the temps down. Both will work, but the freezer is a lot more hands off.
>Is the volt chart from Wagan Tech really correct?
Looks more or less close, I think a netbook would use more. The best way to find out is to check yourself with a killawatt.
>I think a trucker fridge or something designed for RVs would have a lower consumption.
You should look into a chest freezer conversion. It is very simple all you need is a thermostat controller, it is easily customizable. During the hot summer my outdoor chest freezer used 200 watts A DAY. Right now it uses about 10 watts a day because it's outside.
>What does 150AH a day require to support it? How fast would that drain a deep cycle battery?
Deep cycle batteries have different ratings for 20 hour periods. Example a battery with 150AH rating for 20 hours, would be able to support 150 Amp hours over 20 hours-meaning it could support 7.5 amps an hour. Which would translate to 90watts of DC an hour (7.512), OR 720watts AC an hour assuming inverter is 80% efficient(7.5120*0.8).
>24V deep cycle marine batteries are what I thought was gold-standard for van applications.
The gold standard is usually 12V battery systems, whether it's two 6v's run in a series or one 12v battery.
For more information I urge you to visit handy bob's site, which is a little harder to read but a wealth of knowledge.
As far as cheap temp control, if you are somewhat handy you can get one of these. There are instructions to add an outlet to it like this otherwise this is plug and play.
Get him a CO2 Keg system. Find a cheap garage fridge or deep freezer on craigslist for $30-$50, and buy this . Instant, easy, keg setup.
I just got this one off amazon and so far so good. Really easy to install and setup
Inkbird Itc-308 Digital Temperature Controller Outlet Thermostat, 2-stage, 1100w, w/ Sensor https://www.amazon.com/dp/B011296704/ref=cm_sw_r_cp_api_-L1MAbC4EPRYM
you can also get one on amazon for about the same price. It works very well
I wish I had more details on the strain. The seeds are from a friend who has been growing outdoors for probably a decade. He originally planted pure strains of afghani and blueberry and has just been growing with the seeds they've been producing for years without tracking who pollenated who, so it's kind of a grab bag on how much of each are in these ladies.
My DIY chiller...I'll start off saying I was using frozen water bottles once I got into flower to keep my temps down, and it was just a horrible experience. Changing them 2 - 3 times day (if I could), jostling my res lid up and down to put them in, temps are up and down, etc. PITA. I really wanted to just buy a chiller at that point, but I couldn't justify the cost for a 3'x3' tent. So I bought a stainless steel wort chiller used in home brewing and ran the tubing into a 5 gallon cooler you can pick up for $20. Dropped a 185 GPH water pump in the bottom of the cooler (my left over pump from using a top feed in veg) and the wort chiller in my res. I keep 2 or 3 frozen 2 liter bottles in the cooler. With the wort chiller circulating in my res, the temps dropped from 74 to 65 in probably 20 minutes or less. It works so good at pulling the heat out of my res I decided to get a temp controller to turn the water pump on and off. I wired a Ranco ETC temperature controller into the mix and set the temps for 64 - 67 degrees. Pump circulates once the temps hit 67 and shut off at 64. The frozen 2 liters keeps the water cold enough to stay in range for 2 - 3 days before swapping out new ones. Granted a real mechanical chiller is set and forget, but for a rough total of $150 I'm pretty satisfied with what I put together. Plus a chiller uses 200-300 watts of power and still requires a pump, so I'm able to cut that cost out as well.
EDIT: Here's a (bad) picture where you can just see the top of the wort chiller coming out of my res. I cut a slit in some paper plates to slide the chiller tubing through to cover the hole. The cooler sites just outside of the tent.
Guess I can give a short one.
Buy a craigslist chest freezer. Make sure you can fit your fermenter in it (mine fits 2.) Think I spent $50 on an old GE. One 7.9 gallon bucket fits on the hump, the base fits either a carboy or another bucket.
Buy this - http://www.amazon.com/Elitech-All-Purpose-Temperature-Controller-Thermostat/dp/B008KVCPH2
Buy this - http://www.amazon.com/Lasko-100-Personal-Overheat-Protection/dp/B00ATY1OXY
Buy a project box and either a duplex outlet or 2 outlets, and some wire. Wire it up per the diagram on top of the STC1000 (it's very easy.) Plug stuff in, tape the probe to the side of the fermenter. I keep the heater off unless I want it to run so that it isn't fighting the compressor to keep it in range. I've checked it against my thermometer in the beer, it's within 1 degree just by taping it on the side with a dry washcloth taped over the probe. Run one neutral wire to all the places it needs to go.
You can remove the freezers thermostat and wire the STC1000 directly to it, but don't bother. You won't be getting cold enough for the stock thermostat to ever mess with anything. Just plug the freezer into the correct outlet and the heater into the other one.
P.S. Here's a diagram I found. If you do it this way break the tab so the two sides are separate. http://www.homebrewtalk.com/gallery/data/500/medium/STC-1000_outlet_wiring.jpg
Ink bird 12v digital and 100amp relay found on amazon/ebay
https://www.amazon.com/Inkbird-All-Purpose-Temperature-Controller-Fahrenheit/dp/B00OXPE8U6/ref=sr_1_1?ie=UTF8&qid=1484277440&sr=8-1&keywords=inkbird+thermo
https://www.amazon.com/Support-Heavy-Split-Charge-Relay/dp/B012N09BFE/ref=sr_1_1?ie=UTF8&qid=1484277516&sr=8-1&keywords=12v+100+amp+relay
This. Is. Awesome.
I currently have a Monster cooler like this that is set up as a curing chamber with a simple temperature and humidity controller.
I would love to be able to integrate something like what you made into my setup. The data logging and interface are super nifty! Definitely let us know when/if you pull something together.
I unfortunately don't have all the photos I took of the build. Thankfully google saved a few.
The fridge was delivered and I ripped all the shelves out.
I cut a little hole in the bottom of the fridge (the bottom 6" are empty space for the compressor, so this was just thin plastic) and wired up an ITC-1000. The original freezer controls only go 10F max. I also removed the defrost timer so this fridge is on manual defrost now, though I've had no freezing problems in well over a year. The fan is now on 24/7 instead of coming on with...the defrost? I cant remember how it originally turned on. You're playing with electricity here, be smart and safe and dont start a fire or die, or have a professional do it.
The back panel in the above picture stayed on, RIGHT behind it is about 3" of space for the evap and fan. Right under the evap I drilled 3 holes. 1 for the main CO2 line, 1 for the Nitro line, 1 small one for the fridge temp sensor. Eventually another one for the 5v for the arduino. They all came up through the little slit and had grommets for the sheet metal. They shouldn't be moving around, but the last thing I want is a cut line.
I bought a 36"x5" drip tray without a drain and 3d printed 3 brackets for mounting. Since it doesnt have a drip tray I want it to be mobile. The brackets have magnets in them so it can easily be taken off the fridge door and cleaned. I really didnt want to put any holes in the door except the taps.
I cut the shelves off the door but left most of the skin. The plastic helps seal the door seal AND it's holding in the plywood I used to replace the door. I have no idea the thickness of the plywood anymore but I did have to sand down a good 1/8" where the taps are so they'd fit. Any longer shanks and I'd be poking kegs, any shorter shanks and I'd be too short and need smaller plywood.
You can see above how the CO2 is routed and the temp sensor right in the middle of the fridge.
The top distributor goes to the top shelf, middle splits to both sides, the bottom goes to the bottom shelf. I honestly could have gotten away with 2 different pressures. I really don't change off serving pressure except for quick carbing a beer. Most of the beers I brew end up around the same carbonation level. Maybe when I need something crazy high/low carbed I'll be excited.
That's also the best photo I have of the finished product before it got a bit more messy like now. I have some 3D printed brackets that hold the lines in place on the side of the fridge.
I did have an issue with the fridge leaking all of its damn r134a out. There was a small leak by the evap. A bit late in the build for a replacement. Found the leak and JB Welded it shut. It was too close to the wall to braze and JB Weld has held for over a year now. Luckily I had done a car AC before and had the manifold gauge, vacuum pump, and fittings. I learned to braze on the quick connect, pulled vacuum, hit it with nitrogen to ensure there were no leaks (though it held vacuum as well), pulled another vacuum and filled her to spec with r134a. Been working like a charm ever since.
There is a raspberry pi running RaspberryPints with some cheap ass flow meters. The only changes I made were how many pulses on the meters meant a pint. I've been fiddling with it ever since. I'm sometimes off by a handful of pints on my kegs. Enough to get me close, but I'd like to dial it in without spending $60 on each freaking meter. How much beer is left in my keg is not a $60 problem to me.
If you're going to use it fairly infrequently, they make temp controllers that attach to a crock pot and if you get a cheap fish aquarium bubbler, you have your own DIY version. We used this one for almost a year before upgrading to an Anova: https://www.amazon.com/dp/B011296704?psc=1
Sorry to hear that. Had that happen to my 55 gal, but I caught it at 94 degrees and saved most of my fish.
My main suggestion would be this little lifesaver.
https://www.amazon.com/Inkbird-Temperature-Controller-Aquarium-Breeding/dp/B01DZ5NVBQ/ref=sr_1_20_sspa?keywords=Temperature+sensing+plug&qid=1567371827&s=gateway&sr=8-20-spons&psc=1&spLa=ZW5jcnlwdGVkUXVhbGlmaWVyPUEyV043M1pDVTRMTjIyJmVuY3J5cHRlZElkPUEwMzY3NDM0MlZKNkpRMkc4Skw2SyZlbmNyeXB0ZWRBZElkPUEwMjczMzE2WlBPTE9PU004M1NMJndpZGdldE5hbWU9c3BfbXRmJmFjdGlvbj1jbGlja1JlZGlyZWN0JmRvTm90TG9nQ2xpY2s9dHJ1ZQ==
There are models that you simply plug into the wall and then plug the fridge into them. Should work universally. Just set the fridge's internal thermostat a little colder than you want it, then set the external therm where you want it.
Here is a moderately priced one.
Inkbird ITC-308 Heater Cooler Device Temperature Controller Carboy Homebrew Fermenter Greenhouse Terrarium 110V 10A 1200W https://www.amazon.com/dp/B01HXM5UAC/ref=cm_sw_r_cp_apa_i_xs1jDb09EQ53M
If you’re truly setting up your kitchen for prep, eliminate the standup refrigerator, convert another chest freezer into a chest fridge with a $35 part off amazon
This should be a significant power savings.
What wattage is your heater? Rule of thumb is 5 watts per gallon, so at 10g you should be using no more than 50watts for the entire tank, unless you are in an extreme cold environment and 50watt heater isn't doing enough then you can go up a bit more on wattage, otherwise 50watt should be maximum.
One thing you can try though, if you prefer to keep the current heater as-is, I recommend this product to externally help regulate the temperatures: https://www.amazon.com/Inkbird-Thermostat-Temperature-Controller-50-108°F/dp/B01M6WMUYI/
Basically plug your heater power cable into this thermostat outlet controller, set the desired temperature range on it, plug the thermometer probe into the thermostat outlet controller, and the longer/bigger silver tip goes all the way submerged into your tank's water (put it further away from the heater for more accurate readings). If the set temperature range is surpassed, this outlet thermostat controller will cut power to your heater until the lowest range has been met again. I set mine on 77-79 F and it always maintains the proper temperature range at around 78 F, regardless of what the heater does.
I keep posting this in the keezer builds for people who are about to build, here is the list of what I did with costs and where I bought things:
Here, while not basic, but a list that might help. This is a 4 keg setup. Some items are not exactly needed, for example hose clamps, MFL push to connect (you could just get barb ones), but helpful for disconnecting/cleaning. You can save a lot on faucets - my 4 costed me $280 total all in. You could also get a cheaper freezer.
I got a regulator with 2 possible pressures so I can have carbonation pressure plus serving pressure at the same time - also not a requirement.
Name|Price|Quantity|Total|URL
:--|--:|:-:|--:|:--
Inkbird Itc-308 Digital Temperature Controller Outlet Thermostat 2-stage 1100w w/ Sensor|$35 |1|35|https://www.amazon.com/gp/product/B011296704
Intertap Self Closing Faucet Spring|$1.99 |4|7.96|https://www.morebeer.com/products/intertap-closing-faucet-spring.html
Intertap Stainless Steel Faucet Shank|$32.99 |4|131.96|https://www.morebeer.com/products/intertap-stainless-steel-faucet-shank-4.html
Duda Energy HPpvc025-100ft 100' x 1/4"" ID High Pressure Braided Clear Flexible PVC Tubing|$28.50 |1|28.5|https://www.amazon.com/gp/product/B00LX6LS7E
Brewer's Edge UX-CAOO-IQIT Keg Lube 1 oz.|$5.98 |1|5.98|https://www.amazon.com/gp/product/B0064OK99S
Hilitchi 60 Piece Adjustable 8-38mm Range Stainless Steel Worm Gear Hose Clamps Assortment Kit|$12.99 |1|12.99|https://www.amazon.com/gp/product/B01IOE4RQQ
Taprite T752HP Two Product Dual Pressure Kegerator CO2 Regulator|$89 |1|89|https://www.amazon.com/gp/product/B0060NOX40
KegWorks Beer Tap Faucet Handle Black|$4.30 |4|17.2|https://www.amazon.com/gp/product/B000VI753Q
Intertap Forward Sealing Beer Faucet (Stainless Steel)|$31.54 |4|126.16|https://www.amazon.com/gp/product/B01NAGS3ST
4 Way Co2 Manifold|$42.99 |1|42.99|http://www.farmhousebrewingsupply.com/4-way-co2-manifold/
Accuflex Bev-Seal Ultra (3/16) 50'|$15.99 |1|15.99|http://www.farmhousebrewingsupply.com/accuflex-bev-seal-ultra-3-16-50/
Pin Lock Disconnect- 1/4 MFL Gas Side|$5.99 |4|23.96|http://www.farmhousebrewingsupply.com/pin-lock-disconnect-1-4-mfl-gas-side/
Pin Lock Disconnect- 1/4 MFL Liquid Side|$5.99 |4|23.96|http://www.farmhousebrewingsupply.com/pin-lock-disconnect-1-4-mfl-liquid-side/
1/4" MFL Push To Connect|$3.79 |4|15.16|http://www.farmhousebrewingsupply.com/1-4-mfl-push-to-connect/
5/16 x 5/8 BSPP (Shank Connector) Push To Connect|$5.99 |4|23.96|http://www.farmhousebrewingsupply.com/5-16-x-5-8-bspp-shank-connector-push-to-connect/
Igloo 7.1 cu ft Chest Freezer Black|$219.99 |1|219.99|https://www.walmart.com/ip/Igloo-7-1-cu-ft-Chest-Freezer-Black/31136433
Set of Four 5 Gallon Pin Lock Kegs Used|$28.90 |4|115.6|http://www.homebrewing.org/Set-of-Four-5-Gallon-Pin-Lock-Kegs-Used_p_3179.html
20 CO2 tank|$60|1|60|craigslist
2 in. x 8 in. x 10 ft. #2 and Better Prime Douglas Fir Board|$9.86|1|9.86|http://www.homedepot.com/p/2-in-x-8-in-x-10-ft-2-and-Better-Prime-Douglas-Fir-Board-604364/206182008
ZMAX 7 in. 16-Gauge Galvanized Reinforcing L-Angle|$3.27|4|13.08|http://www.homedepot.com/p/Simpson-Strong-Tie-ZMAX-7-in-16-Gauge-Galvanized-Reinforcing-L-Angle-L70Z/100375233
||||1019.36|
You would also need a wrench if you don't have one yet to unscrew the posts on the keg.
Oh absolutely. Most of the time I am making it for me and the wife to share so I dilute it more then I used to.
I heat 400 ml of everclear in a crockpot with a high accuracy temp controller added to it. here is the controller that I use. I set the temp to 160F and let the decarbed weed soak for most of the day, typically 6-8 hours. The temp controller holds to within +-1.5 degree when the crock pot is set to warm, so I just check on it about once an hour and give it a quick stirring.
After that I strain it through coffee filters a couple of times and reuse the everclear bottle to store it. I will give it a day or two to settle and then strain again. Once the bottle is free of particulates I do a test dose of 2ml and add more everclear to get it about where we like it. This typically makes between 500-750 ml. We then mix it into our drinks measuring with a micropipette. The wife will drop about 1-1.2 ml, I use around 2.5-3 ml. I like to float it on top of a vodka sprite to get my evening started.
For strength reference, I am a frequent smoker but not an all day toker. A good friend who is an all day toker will typically put a full teaspoon (5ml) in his hot tea when he wants to relax. 5ml puts me in orbit.
Do keep in mind that the strength of your tink will depend a lot on the quality of your weed. Living in a non legal state my batches vary a fair amount prior to adding more of the everclear. This is why I ALWAYS personally test each batch and adjust before I share with anyone.
Good luck, and don't hesitate to hit me up if you have questions. I am by no means an expert, but I have never had any complaints from anyone I have shared it with.
Heat mats don't heat air, only surfaces, and should never be used without a thermostat. You should be measuring surface temperature at the hottest surface the snake can reach (the bottom of the cage) using an IR temperature gun, and for a corn snake, it should read 85-87. You should then put a thin layer of substrate over it, as they don't heat through substrate. No heat source should be used without a thermostat. This is vital, because unregulated heat mats can lead to burns. They can easily reach 120+ in room temperatures in the normal range.
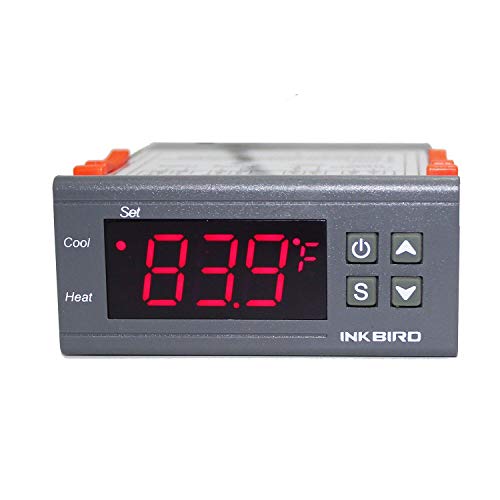
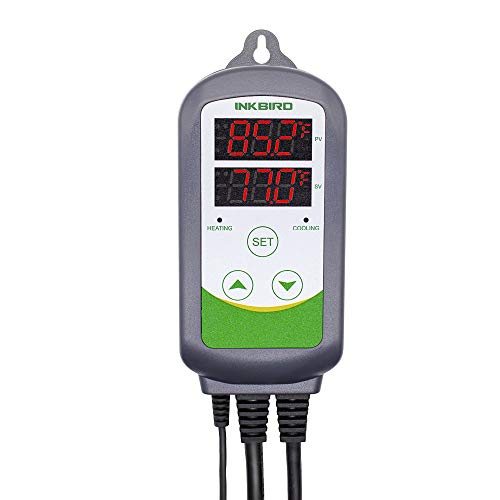
The Inkbird ITC-306T is my choice for a cheap thermostat. You can get much better ones for more money, but that one is sufficient.
I highly recommend unplugging the heat mat until you get this straightened out. It will be fine in room temperatures for a while, just don't feed it until you have everything settled.
Depending on how much a new controller costs, another option would be to use an ETC to control when the fridge turns on and off. Once configured, the fridge would turn on and off as needed. However if the controller on the fridge completely fails at some point in the future, this setup might no longer work.
Edit: Wrong acronym. ETC not ETR
It may be difficult to sanitize all the edges if there are any on the fish tank heater. There a lot of crud floating in a fermenting beer.
If you can spare about 50$ get an inkbird temp controller and a cheap heating pad (I use this one) set it on low or medium. I secure it to the outside and forget about it.
STC-1000 is always a safe bet. link
No idea what style of beer your brewing but 58-60 ° fits most yeast, Build yourself a son of a fermentation chiller about $25 for foam and glue and a STC 1000 and no worries then.
Or even cheaper w/ a MYPIN: http://www.amazon.com/dp/B0087O6S2A/
edit: I doubt we'll get an answer, user's account was created immediately before posting this link. And the name of the site is New England Temperature Solutions: netsinc.
I use these. They work great and they're only 14 bucks.
Not to ruin the maker fun, but something like this is only $13.
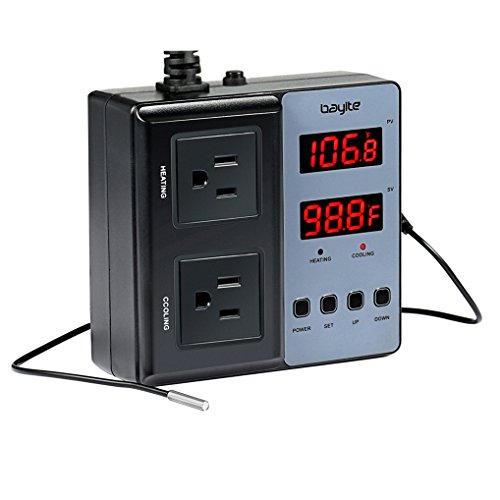
I use one of these to control some 120V halogen lamps inside my chamber. It can be used to control your heat and also cool with a ventilation fan if the temp gets too high.
Get one of these and any small fan.
I built a hot water bath using a temperature controller and heating element I got from Amazon. Whole thing cost me $70. Mounted the heating element in a plastic tub, wired up the temp controller, added a small aquarium pump to keep everything mixed well.
Element: https://www.amazon.ca/Camco-02203-2000W-Heater-Element/dp/B0006JLVBW/ref=sr_1_3?ie=UTF8&qid=1487969670&sr=8-3&keywords=heating+element
Controller: https://www.amazon.ca/docooler-Temperature-Controller-Thermocouple-Fahrenheit/dp/B00F05UI8O/ref=sr_1_4?ie=UTF8&qid=1487969690&sr=8-4&keywords=temperature+controller
The one you're linking to is a heating controller, to be used with a heating element to keep temperature up.
Here's one that does both heating and cooling. I don't have personal experience with it, but this would be more like what you'd want to convert a fridge into a curing chamber.
https://www.amazon.com/Inkbird-Itc-308-Temperature-Controller-Thermostat/dp/B011296704/ref=pd_sbs_328_1?_encoding=UTF8&pd_rd_i=B011296704&pd_rd_r=VG3NE5E8RAZBZZVKYZ2T&pd_rd_w=HwiY4&pd_rd_wg=NUioI&psc=1&refRID=VG3NE5E8RAZBZZVKYZ2T
Are you dead set on a fridge or do you have any interest in going with a chest freezer?
EDIT: With either setup you'll need a temp controller. I'd recommend an Inkbird
Not sure about shipping with Canada Post lately (maybe don't buy date sensitive products if shipping with Canada Post) but here's a short breakdown for Canada deals:
https://www.ontariobeerkegs.com/Articles.asp?ID=323 Lots of stuff on sale (free shipping over $100)
https://brewhq.ca/ 20% off equipment (free shipping over $75)
https://www.noblegrape.ca/collections/equipment/ 20% off equipment with coupon code: HAPPYMONDAY
https://www.hopdawgs.ca/ 10% off $100 or 15% off $250
https://www.everwoodavebrewshop.com/ 20% off Coupon Code: Everwood
https://torontobrewing.ca/collections/black-friday-sale Lots of stuff on sale
https://www.amazon.ca/Inkbird-Itc-308-Temperature-Controller-Thermostat/dp/B011296704 Apply $10 Coupon
https://goldsteam.com/ No specific BF sale but everyday low prices and didn't want to leave them out of the party
https://www.topps-hops.ca/collections/t90-pellets Same with Topps, always good pricing
https://www.plaato.io/plaato-airlock-bf Worth noting $99 (USD?) fun tool with free shipping worldwide
Don't forget to support your local Homebrew shop as well!
I don't see why that wouldn't work, but if you don't want to rewire things, consider the Inkbird ITC-308. Plug and play, much cheaper than other options (Homebrewfinds sometimes has shared coupon codes to get the cost below $35). I just picked one up for my keezer build.
I have this one and it's a lot less than $100 and works great. Plus no additional wiring is required, just plug it in and you're good.
I've been very happy with the ITC-308. One perk over the ITC-1000 is there's no need to wire it into the keezer, or mount it. If I ever want to convert my keezer back over to freezer use all I have to do is remove the collar.
Inkbird is very sturdy, no problems, and by far the cheapest I have found. (also Prime on amazon) https://www.amazon.com/Inkbird-Temperature-Controller-Aquarium-Breeding/dp/B01DZ5NVBQ/ref=sr_1_1?ie=UTF8&qid=1484141333&sr=8-1-spons&keywords=inkbird&psc=1
Can be anything as simple as this. You don't need the really fancy ones, and I'm sure there are cheaper ones that will do the job (this unit is bulky, but I can verify it does the job).
It has a temperature probe as well as a temperature setting. They usually have several other settings (to control the allowed temperature swing, etc.) Once configured it aims for the temperature and cuts power to the outlet when the temperature is met and within range. When it is too hot (above the set range) then the the outlet is turned on, so the wine fridge can bring the temperature back into the desired range.
e.g. Set for 68 +- 4F Then it'll turn on at 72, cool to 64 and turn off. Cycle begins again.
You will need to experiment to find ideal range, time and response for your area and cooling load (e.g. an empty wine fridge will cool quicker than one packed to the brim). You also don't want it your settings at 70F w/0F swing or it will turn on and off, again and again as it bounces off the temperature setting.
edited: For some clarification.
https://www.amazon.com/gp/product/B01KMA6EAM/ref=oh_aui_detailpage_o00_s00?ie=UTF8&psc=1
If you get the oil filled radiator and need an outlet turns on and off at different temps, this is one option. I used this all winter and it worked well. You set it to say, turn on at 34 and off at 40. I use the other outlet (which turns on if it gets too warm) to control a fan that helps make the most of the vents on the greenhouse.
Reposting the famous u/ _ataraxia info:
Glass tanks can be very challenging for ball python husbandry due to the high amount of air flow with the screen top and the total lack of insulation with the glass walls. It's generally recommended to use tubs or pvc reptile cages instead. wood enclosures can also be suitable if they're designed well and sealed properly to protect the wood against moisture. glass tanks can work, but they require a lot of modification and maintenance, which you'll find tips for in the second link. i'll give you product recommendations to cover options for tanks, tubs, and pvc/wood enclosures.
Many homebrewers just buy a conventional chest freezer, then use an external temperature controller like this Inkbird:
https://smile.amazon.com/Inkbird-Temperature-Controller-Thermostat-Fermentation/dp/B015E2UFGM
The freezer plugs into the controller, you put the temp probe inside the freezer space (make sure it's in air, not touching the sides/bottom of the freezer), and set to the desired temp. I personally use them and they work well. I have 2 freezers, one is a constant 35 f year round, and the other one I adjust to specific temperatures all the way up to the 60s and 70s for fermenting beer. Keep in mind using a 3rd party controller might void the freezer's warranty, even though most all have compressor cycle protection built in now.
Maybe 2 (50w) heaters on both sides? Gives you redundancy and if one fails off, you still have one to heat it somewhat. If you are going by the length of the tank then you'd probably need to place that 100w more towards the middle, but shouldn't be a problem with a submersible heater laid sideways.
As for brand, I like my aqueon pro. But it's a 250w model.
Another suggestion would be to run them on a temp controller to control then rather than rely on their enternal thermostat. It's a failsafe and gives you better control.
I use this inkbird
About the size, I've got a fairly large enclosure for my wife's little ball python, but there are two hides and lots of clutter, including greenery for him to hide in. Feeding has been a non-issue and he seems totally happy. Generally speaking, I can bet money on finding him in a hide, which is a good sign for them. At night, he's more active (as they're nocturnal by nature), but it's usually drinking, exploring and then back to sleep in a hide. Sometimes he'll climb his vines, sometimes not.
And yes, UTH (in my opinion) needs a thermostat. I've got an Inkbird that allows me to set both the UTH and CHE to the same temps and it works great.
https://www.amazon.com/dp/B01DZ5NVBQ/ref=cm_sw_r_cp_apip_4L5KskVt1pW1Y
Thanks, great idea! I didn't know these types of controllers existed.
I purchased a new eheim heater and this controller: https://www.amazon.com/gp/product/B01DZ5NVBQ/ref=od_aui_detailpages00?ie=UTF8&psc=1
Second this. I also put my CHE on one of these https://www.amazon.com/gp/product/B01DZ5NVBQ so that the general area will stay at one temperature during the day, but a bit cooler at night.
You can if you're willing to create a safe enviroment for it. I used a temprature sensing power outlet and connected it to two small fans inside an entertainment stand total setup is about 85$. Has been working for 4 years. 3 digit temps are very common for me.
This is the plug I used
https://www.amazon.com/Inkbird-Max-1200W-Temperature-Controller-Greenhouse/dp/B01HXM5UAC/
For me the path of least resistance was to buy an external controller like this one. You simply plug the fridge into the controller and place the probe inside the fridge. Takes a few minutes to setup and you're done.
7ft+ chest freezer (or smaller of space is a concern. 7 should give you took for two vessels most likely)
Inkbird or DIY BrewPi if you don't mind the DIY projects
Small heater with a fan
And a thermowell for whatever fermentation vessel you have. If you're looking for that too, I can't recommend Fermonster enough in terms of price/quality. Though your budget may allow a SS Brewbucket
He's controlling it with an Inkbird temperature controller, we use one connected to a chest freezer for the same purpose.
Very configurable, if you wanted to you could even add a heating element and keep it from getting too cold (if you're fermenting in winter).
I have multiple of these. They are good for the price.
And one of these that I use for my corn snake because it is more precise.
Yeah no problem. The fridge I got off one of those facebook local rummage/yard sale pages for $75. The temperature controller is a Bayite that ran me $50. The humidity controller is an Inkbird that was $35. Then add $30 or so for the ultrasonic humidifier. Not too bad around $185 total
There's some plans online, however mine has an aluminum insulated collar while most have wood since I have a good friend who works in a sheetmetal shop. The taps, hoses and everything else you need to hook up the kegs is a kit you can buy and the digital controller was $40 on Amazon. Other than that it's just making the collar tall enough to go over your keg or kegs.
i used this https://www.amazon.com/gp/product/B01KNXETWS/ but i'm sure there's a variety you could use
I use heating strips — hard to tell in the pic. I’ve got black fabric headbands around them to cover the big green text printed around the outside of them ‘cause it bugged me haha. I have the three strips plugged into an extension cord which is plugged into an Inkbird digital thermostat (probably not 100% safe, but I wasn’t buying 3 thermostats haha). I have the probe taped to the outside of the middle jar (since I don’t like the idea of leaving it submerged in the brew). Heat strips: here ; thermostat here
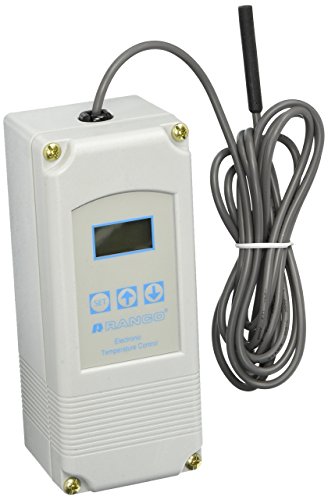
Ranco. End of discussion. It's an industrial grade temperature controller and as good as it gets.
And to elaborate, get the controller: http://www.amazon.com/gp/product/B0015NV5BE?psc=1&redirect=true&ref_=oh_aui_search_detailpage and then get a multi-outlet extension cord to wire it with. I used this one: http://www.amazon.com/gp/product/B0009JEBQG?psc=1&redirect=true&ref_=oh_aui_detailpage_o00_s00
For around $50 you now have the most reliable temperature controlling solution out there
I put one of these in my fridge and it works perfectly. Also a humidifier and humidity controller.
This is a useful guide
I've got three STC-1000s that I've ordered from multiple places and they have all been flashable - so I guess I've been lucky. The first two I bought from Amazon and the last one I bought from Alibaba although it took about 6 weeks to arrive. Mats has this link set directly on his Github page for the software so I figured this would be a really safe bet and it worked fine.
The flashing is pretty easy and there's a great instructional video on the blackboxbrew.com website. You'll need an Arduino Uno and some jumper wires which cost me about $20 at a specialty electronics shop. Best thing to do would be to ask around your homebrew club or brew shop if anyone has one that you could borrow. One guy brought his to a brew club meeting and flashed a whole bunch of peoples all at once.
Good luck with the build and feel free to hit me up for any questions. Go Leafs!
I based it on the Son of Fermentation Chiller plans but made modifications to the dimensions to allow it to fit two carboys. Originally I just had a cheap thermostat from Home Depot and only cooling, but had some issues in the winter months with the beer getting too cold at night and the yeast dropping out before it reached the targeted FG. So eventually I upgraded the temp controller to the STC 1000 which does both heating and cooling and picked up a 4" duct fan, some 4" duct, foil tape, and cut up an old brew belt I had laying around. I would highly recommend building one if you have the resources. It's probably the single biggest improvement to my brewing process I've ever made.
I'll see if I can grab one when I get home.
Danby dcr412 Fridge.
6G Better Bottle:
Therm-well stopper: https://morebeer.com/products/hood-thermowell-3-5-6-65-gallon-smooth-neck-carboys-15.html
Fermwrap heater: https://morebeer.com/products/fermwraptm-heater.html
STC-1000 temp control unit: http://www.amazon.com/All-purpose-Temperature-Controller-STC-1000-sensor/dp/B00862G3TQ
The only picture I have of the inside is with a plumb wine I was doing last year. http://i.imgur.com/WXFK5XX.jpg?1
The way that I would do this is with a SSR. A Solid State Relay. A normal relay only has so many uses that it is rated for. A SSR has no moving parts so it won't be harmed by being rapidly switched.
And, as much as I love tinkering for tinker's sake...what you are building has already been done. https://www.amazon.com/IMAGE%C2%AE-SSR-25DA-Auto-tuning-Temperature-Controller/dp/B0087O6S2A/ref=sr_1_1?ie=UTF8&qid=1465937455&sr=8-1&keywords=pid
Here's a controller and relay you can use to control the heating element. It's a dead simple solution, you can google sous vide diy for other ideas. They are controlling water heating, but the equipment will be similar.
Wow. Does he know that control panels are essentially just a PID temperature controller, some solid state relays, and some big clunky knobs in a metal box? Anybody can DIY one with little to no knowlege of electricity. http://www.amazon.com/gp/product/B0087O6S2A/ref=pd_lpo_sbs_dp_ss_2?pf_rd_p=1944687622&pf_rd_s=lpo-top-stripe-1&pf_rd_t=201&pf_rd_i=B002PIM3R8&pf_rd_m=ATVPDKIKX0DER&pf_rd_r=047MQEK1ETMMTNZBED62There's
No mysterious expensive computer inside.
It boggles my mind that anybody would think what your friend wants to do is a good idea. Then again, it sounds like he's probably pretty wealthy and it probably doesn't matter anyways.
Absolutely the STC-1000. They are very cheap on Amazon. (queue pricezombie)
I just did one myself. I posted it in the Monday Forum here with some pics and details.
I'm using mine already now. I didn't do any sort of airlock or anything in it. I think it will work fine. The only real place anything can escape is the small hole I drilled in the compressor hump to feed the probe into the chamber. Even if that is silicone'd though, don't worry about the seal.
The unit itself is currently $17.04 on amazon. I spent $11 on the box, $16 on a 15ft 15amp extension cord, and maybe $3 on the outlet and plate. Total cost = $47 or so.
Here's what you should do with it: Get a temperature controller unit like this, wire it up to an electrical outlet, and plug plug the smoker into it.
This will allow you to customize temps up to 212F. Then, get a cold smoke generator, put it in there, and you've got a temperature accurate cold smoker.
Not if you buy a flashed version:
knockoff and I won't do it again. DoCooler
I've done similar to what /u/Zephyrzuke had mentioned in comments.
My printer enclosure is pretty big (30.5" x 23" x 26.5") to enclose my Taz 6 and I print almost exclusively ABS, some recommended around 50C but I felt like it was a bit excessive after a few prints myself. The bigger your enclosure is the harder it is to maintain higher temperature. On the other hand the bigger your heated bed is the more it contributes to heating the enclosure. I only turn on my heater when doing bigger/taller prints and usually only keep it between ~40-43C/105-110F to minimize the amount of time my heater is on and no warpage on any of my prints; this of course also varies between different ABS filaments.
Used this controller and this cheapo heater. Usually these desktop personal heaters have a tip-over cutoff switch that I've had to bypass and wired directly to the controller.
I didn't like how the appliance-looking heater next to my printer so I designed/printed it a more fitting casing. https://imgur.com/a/xoils
I ordered all my parts back in Oct and during the Holidays actually had some time to build it. Sat down to build it, turns out I ordered this http://www.amazon.com/gp/product/B00F05UI8O/ref=oh_aui_detailpage_o06_s01?ie=UTF8&psc=1
Note to people, don't buy that if you want a STC1000, the linked one is single stage only. Had to rush order a real STC1000 and finally got it built over new years.
I have two cooler setups using this one: https://www.amazon.com/Inkbird-All-Purpose-Temperature-Controller-Fahrenheit/dp/B00OXPE8U6
I have a large one for large cooks, or meat, while using the small one for veggies, or a smaller cooks. They both work great. I use a tiny aquarium pump which will need to be replaced once in a while since they are not rated for heat and will wear out eventually. Mine have lasted about a year of weekly cooks. Have fun, build your own, and you'll probably learn something too! I use water heater elements for my heating element Get a hobby box for the temp. controller/wires, mount it on the cooler. I actually have a wire diagram I made and will supply you with a full parts list if you are interested. I integrated an external relay in my setup too, and it has it's own GFCI plug end on it for those times when you are not near a regular GFCI plug in a wall. Safety first around power and water! PM me if you want to goods!
I would replace that with an off-the shelf digital controller (like this super cheap model: http://www.amazon.com/Inkbird-All-Purpose-Temperature-Controller-Fahrenheit/dp/B00OXPE8U6/ref=sr_1_9?ie=UTF8&qid=1452810523&sr=8-9&keywords=pid+controller)
I have no previous knowledge of capillary tube thermostats, but personally I find PID controllers can be tuned more easily to get the response you would like out of a system.
Non-mobile:
^That's ^why ^I'm ^here, ^I ^don't ^judge ^you. ^PM ^/u/xl0 ^if ^I'm ^causing ^any ^trouble.
I'm BIAB, so that helps cut down on the space and equipment, but I'm looking at adding [240V Heating Element] (https://smile.amazon.com/gp/product/B000BPG4LI/ref=ox_sc_act_title_2?smid=ATVPDKIKX0DER&psc=1), Inkbird Controller, and [a basket to make raising the grains a bit easier to manage] (https://smile.amazon.com/gp/product/B000VXKJJI/ref=ox_sc_sfl_title_5?ie=UTF8&psc=1&smid=ATVPDKIKX0DER). Which doesn't seem like too much of an investment to make my brewday a LOT shorter, and a bit easier.
edit: [alternative inkbird controller] (https://smile.amazon.com/gp/product/B01KJZMWSI/ref=ox_sc_act_title_1?smid=A1RUFFFCQ74BCW&psc=1). This is the one i am currently considering, but i don't know the real differences.
No.
Get a cheap freezer off of ebay/craigslist, then get one of these and set your temperature:
http://www.amazon.com/Inkbird-Itc-308-Temperature-Controller-Thermostat/dp/B011296704
When it gets too cold, power to the unit gets killed...when it warms back up, you get the idea.
https://www.amazon.ca/Inkbird-ITC-308-Temperature-Controller-Thermostat/dp/B011296704 use one of these guys to save yourself the trouble of wiring an STC.
the side by sides do take a lot of room. If I would find a used (but in great condition) freezer chest. You can pick one up for between $50 to $150 depending on size etc. Build a simple wooden collar. There are lots of tutorials on here and homebrewtalk.com. Its not too hard to build the square just take your time and make sure all your measurements are right. Use this as your temp controller (https://www.amazon.com/Inkbird-Itc-308-Temperature-Controller-Thermostat/dp/B011296704) plug and play. no wiring needed. if you went this route you could probably do it for less than half the cost of what you posted.
If you really don't think you are capable of putting one together, then you need to look at that cost difference to see if its really worth it.
Also, shop around a bit. although its convenient to place one big order through one shop, it can often be more expensive.
I am no expert and still very much a newbie, so any veterans can chime in and correct me.
Maybe Inkbird is what you need: https://www.amazon.ca/Inkbird-ITC-308-Temperature-Controller-Thermostat/dp/B011296704
I just bought an Inkbird Controller
for my build, and it's been working wonderfully so far.
I just put mine together this weekend.
Around $220 for everything, but you can fit two 6 gallon carboys and two 3 gallon carboys or a few 1 gallon jugs on the hump.
What's the temp inside the unit? You could probably just keep it at a low setting or hook up a [temp controller] (http://www.amazon.com/Inkbird-Itc-308-Temperature-Controller-Thermostat/dp/B011296704/) to get to 50ish. Might cut down on the cycles.
I know many appliances are starting to integrate tools that allow them to run based on time of day pricing, but that will take forever.
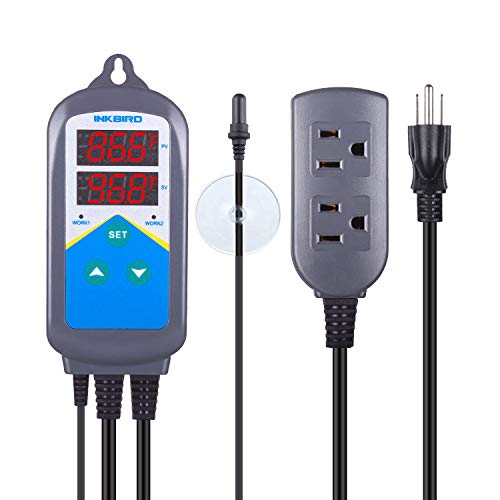
In homebreweing, we use temperature controllers like this: Inkbird Itc-308 Digital Temperature Controller Outlet Thermostat, 2-stage, 1100w, w/ Sensor https://www.amazon.com/dp/B011296704/ref=cm_sw_r_cp_api_EPwtzb2P3KEM1
It allows us to bypass the fridges regular on/off mechanisms to maintain specific temperatures. By setting your fridge and freezer to the coldest settings and plugging it into one of these you would just need a mechanism that looks at your LMP to decide if you are in appropriate price parameters.
I imagine people will start developing internet/app enabled "smart" plugs that go between appliances and the wall to allow them to take advantage of price signals. Naturally, this is all dependent on a shift in retail markets toward real-time pricing. The consumer is heavily insulated from pice volatility currently.
I have one of these and taped it to the lid with some electical tape. I have it hooked up to one of these dual temp regulators and it works great.
EDIT: Sorry, actually I have the 50w version - here's the link to that length
'Best' is a relative term, but one similar to the defunct BlackBox controllers you mentioned is the OhmBrew Fermostat.
Otherwise if you're a budget brewer like me, then perhaps the Inkbird ITC-308 is an option, but keep in mind that I've heard rumors that the wiring isn't technically up to US code, if that's a concern for you.
I'm guessing the substrate is eco earth (thats what it appears to be), which is good... water bowl size is good although takes up quite a bit of the enclosure. The hide appears to be mostly enclosed so thats good... however theres only one hide so you'll need another one for a cool hide if you use that as a warm hide. Basically you want at least two hides, warm hide and a cool hide... and if you can fit a third one in then that would be your humid hide. I'd also recommend getting more foliage so the snake feels safer. I'd get the heat lamps out of there and get a large heat mat to go underneath the warm hide and then a thermostat to control the temperature. This is the thermostat I use, it seems to work very well.https://www.amazon.com/gp/product/B011296704/ref=oh_aui_detailpage_o00_s00?ie=UTF8&psc=1
And then this is the heat mat I use for two of my animals, and both seem to work so far.https://www.amazon.com/gp/product/B018VQ72RI/ref=oh_aui_detailpage_o00_s00?ie=UTF8&psc=1
You'll also want to get new temperature and humidity gauges, stick on ones don't work. This is the one I use, works great so far.https://www.amazon.com/gp/product/B06XY3X7P9/ref=oh_aui_detailpage_o04_s00?ie=UTF8&psc=1
And then if you want you can also get a temp gun, which tells you the surface temperature. I like using it a lot, and sometimes rely more on it than my temperature gauges.
As far as humidity and temperatures go, the hot spot should be about 90-95, cool side around 70-80 or so, I would make sure temps dont drop below 70. And humidity about 50%, you can boost it up to 70% during sheds but I wouldn't go over that.
If temps aren't getting where they need to be you can use a low wattage CHE, also known as a ceramic heat emitter to heat the tank as additional heat (You'll still need a heat mat).
In all honesty if you could get more substrate (bedding) you could put even more hides in. In my BP's 20 gallon she has a total of 5 hides as her substrate is filled half way so I can put hides underneath the substrate and then put cork bark to keep the substrate raised. She has probably about two humid hides, one underneath the water bowl, one on the opposite side which is a standard hide, and then underneath that in the substrate she has a warm hide which is connected to a "tunnel" system of cork bark. https://imgur.com/a/h6ERs6Y
You mean something like this? https://smile.amazon.com/Inkbird-Electronic-Temperature-Germination-Controlling/dp/B01486LZ50/ref=pd_ybh_a_20?_encoding=UTF8&psc=1&refRID=1S3A6MQNWBD7HATW0MCY
Depending on how "presentable" you want it to be build the fermentation chamber it out of a chest freezer. You can throw a tablecloth over it w/o affecting the freezer functioning as long as you leave the motor uncovered.
This is similar to the setup I have. It’s big enough for 10 gallons of beer in two 5 gallon carboys. You could always right size the freezer for what you want.
I built my own controller, but these are cheap enough now that it probably makes sense to buy.
Good day everyone! this time the give away is ended. Congrats to our winners u/thescartographer from USA & u/MichelleTCM from Canada. Congratulation! I will PM you, pls check out your messages. Thank you everyone who entered! ☺️We've already got our next give away in the works so keep your eyes open for more chances to win free stuff!
Here are the 15% coupon codes if you are interested in.
US: G2UMWV9Q , https://www.amazon.com/dp/B07KC24CKD
CAN: KAV8MP3K , https://www.amazon.ca/dp/B07KF31BRT
(Enter code when you checkout)
If you can't find a decent small heater, can you find a temperature controller? In the U.S. you can get the Inkbird brand from Amazon for around $30 U.S. You plug the heater into it and it cuts power to the heater once it reaches desired temperature. I believe Finnex makes one as well. I know a number of saltwater reef keepers who use them as a backup to avoid heater failure catastrophes and keep the tanks from getting too hot.
This is the US link to this model: https://www.amazon.com/dp/B07KC24CKD
I found this https://i.imgur.com/gORCRm5.jpg, but it's a little hard to see. The mini fridge in the background is my old keg fridge that I use as my fermentation chamber. The temp controller I use is from Inkbird, just plug the fridge into the cooling port and set the temperature probe in a cup of water inside the fridge.
Inkbird 10A 110V Digital Thermostat with Heat and Cool Relays ITC-308 Home Brewing https://www.amazon.com/dp/B074NYSHBM/ref=cm_sw_r_cp_apa_i_tqm3CbMJT9GQS
Check this out.
I use this on my radiant oil heater:
https://smile.amazon.com/gp/product/B01M6WMUYI/ref=oh_aui_search_detailpage?ie=UTF8&psc=1
Set it and forget it, even has a probe.
Inkbird temp controller - Inkbird Pre-Wired Dual Stage Digital Temperature Controller Outlet Thermostat 110V, 1100W Heating and Cooling for Fermentation Kegerator Heating Mat ect https://www.amazon.com/dp/B015E2UFGM/ref=cm_sw_r_cp_api_60kEAbEGD0X7D
Chest freezer
Heat lamp
To Make yourself a ferm chamber
Stirplate and bar for making starters
A journal to document of/fg recipe and tasting notes
One won't be near enough, though that depends on its size. As far as heat transfer, yeah, wort doesn't pump well at all, and if anything, keeping it circulation as opposed to still would probably give the little yeasties some indigestion. I can imagine a complex system of tubing, heat sinks, pumps, and heat exchange fluid, but that's probably beyond most people's motivations and abilities. I think that you can make essentially an insulated box that's cooled by the Peltiers, essentially a refrigerator, and use a glass carboy for better thermal transfer to the fluid.
For example:
https://www.mpja.com/Peltier-Cooling-Assembly-12VDC/productinfo/15312+PM
This module uses 6A at 12VDC to move just 170 Btu of heat. Fermentation is exothermic, so let's do some math. According to this:
https://byo.com/article/fermentation-temperature-control-tips-from-the-pros/
It's possible for the fermentation process to raise the temperature 20°F in 6 hours. A common batch size is 5 gallons. A BTU is the amount of heat necessarily to raise one pound of water one degree F. A gallon is 8 lbs, so to raise 5 gallons, which is 40 lbs, of wort 20°F takes 40x20=800 BTU, and to do it in 6 hours takes 800/6= 133.3 BTUh.
The main physical problem with Peltiers is that the hot and cold side heat sinks have to be close together, and that makes it difficult to use them in an insulated box because insulation requires thickness to be effective. You'll need fans, both internal and external, to move air past the heat sinks, and in the inside, to keep it circulating. Putting the modules in the lid would probably be the most effective solution as hot air rises and that brings that air to the modules via convection.
The more I think about this, the more difficult and expensive it looks, honestly. If you're lagering, I think you'd actually be better off money and power wise using a small refrigerator. Actually, maybe a small chest-style freezer with an external thermostat controller to turn it into a refrigerator might be a more practical approach. In fact, here's a decent one on Amazon:
https://www.amazon.com/Inkbird-Thermostat-Temperature-Controller-Fermentation/dp/B015E2UFGM/ref=sr_1_4?keywords=Inkbird+ITC308&qid=1568383520&s=industrial&sr=1-4
That being said, it sounds like an interesting series of experiments to try!
Inkbird Pre-Wired Dual Stage Digital Temperature Controller Outlet Thermostat 110V, 1000W Heating and Cooling for Fermentation Kegerator ect https://www.amazon.com/dp/B015E2UFGM/ref=cm_sw_r_cp_api_pVplxbKZFRS0H
I used this for a similar application. It works well and is intuitive.
I just went through this with by 12”x12”x18” gecko tank. There is so little real estate on the screen top that I had to get kinda creative. Forgive the pink foam insulation on the sides and ignore the gauge outside the tank (just monitoring my room temp), it’s an ugly winter setup but it helps keep the heat in! So, in my the hood, which can only hold one bulb, I have a Jungle Dawn LED, same with the free floating one hanging from the left side of the tank. The one in the clamp lamp (attached to a square dowel rod sticking up at the back) is a 50W ceramic heat emitter. I use an Inkbird thermostat that allows me to set two temperature windows for different times of day and a degree differential. So in the day time, it keeps the temps between 74-76 (2 degree differential meaning it hits 76 then turns off the lamp and when it hits 74 it turns it back on) and night between 68-70. This achieves a good temp gradient for me, the bottom of the tank is typically 72-73, middle (where I have the probe) is 74-76, top usually has a nice little hotspot on his branch around 78 during the day. Ceramic heat emitters (or really any heat bulb I would imagine) can majorly dry out your tank though so keep an eye on your humidity levels. An auto misting system would probably help a lot.
Here's u/ataraxia's classic link dump I found on a other post. Although the informstion is written for bps (most common snake people have trouble with it seems- mostly due to the humedity) but the suggestions could definitely help you for the humedity aspect needed for your boa.
You should definitely read it through.
i'm going to dump a bunch of helpful links on you. the first three links are detailed care sheets, then a tub tutorial, and the rest are product recommendations. read everything thoroughly, come back with any questions.
glass tanks can be very challenging for ball python husbandry due to the high amount of air flow with the screen top and the total lack of insulation with the glass walls. it's generally recommended to use tubs or pvc reptile cages instead. wood enclosures can also be suitable if they're designed well and sealed properly to protect the wood against moisture. glass tanks can work, but they require a lot of modification and maintenance, which you'll find tips for in the second link. i'll give you product recommendations to cover options for tanks, tubs, and pvc/wood enclosures.
Inkbird is a good brand. There are different types. Some have two outlets for heating unit and cooling unit. Here is one for heating... It allows for up to two heating units. Inkbird ITC-306T Pre-wired Electronic Heating Thermostat https://www.amazon.com/dp/B01486LZ50/ref=cm_sw_r_cp_apa_rRo0BbNEVCSGE
So here we go,
First off a Danby 4.4 Cu Ft fridge, something like this. I got this off of some one on craigslist for a $100. I tried to talk them down but some one had informed them that the fridge was valuable to home brewers.
The tap tower was purchased on amazon.
The line connections were also purchased there, since the ones that came on the tower were incorrect for the five gallon kegs.
The temperature controller was also purchased on amazon. Really amazon was my go to.
Here is the CO2 tank I anticipate buying. I haven't really picked out a regulator yet.
How about the Inkbird 306T DAY and night temperature controller, only for heating.
https://www.amazon.com/Inkbird-Electronic-Temperature-Germination-Controlling/dp/B01486LZ50/ref=sr_1_1?ie=UTF8&qid=1498898758&sr=8-1&keywords=B01486LZ50
Sorry for the late response. Their are two versions, the 306 model and the 308 model. The 308 model has the ability to control a fan or chiller if it gets too hot and the 306 doesn’t - so it just turns the heater off if it gets too warm.
Inkbird ITC-306T Pre-Wired Electronic Heating Thermostat Temperature Controller and Digital Timer Controller for Aquarium, Seed Germination, Reptiles, Hatching ect, Without Cooling Controlling https://www.amazon.com/dp/B01486LZ50/ref=cm_sw_r_cp_api_i_cGVVCbSZA8C0W
Inkbird ITC-308 Max.1200W Heater, Cool Device Temperature Controller, Carboy, Homebrew, Fermenter, Greenhouse Terrarium Temp. Control https://www.amazon.com/dp/B01HXM5UAC/ref=cm_sw_r_cp_api_i_lEVVCb1KF4RSS
If you have an older fashioned slow cooker, one that has a knob that turns it on and not just buttons. You can use one of these to monitor the temp and it will turn the cooker on when it gets too cold. https://www.amazon.com/gp/aw/d/B01486LZ50/ref=yo_ii_img?ie=UTF8&psc=1
I use it to keep my fish tank a certain temp, so it's definitely waterproof.
I use an existing fan and this temperature controller to turn the fan on when the water is above 78F. https://www.amazon.com/dp/B015E2UFGM/ref=cm_sw_r_cp_api_8ZHNAbEYSH8NX
Craigslist freezer - we chose upright for vertical space. Chest freezer might work - but you would have to figure out how to hang in it.
Temperature controller - there are lots of options. This one is the Johnson 419. You plug it into the wall then plug the freezer into the female lead. It cycles the freezer on and off at the set temperature. There are cheaper options - but I had this one laying around. I'll link some suggestions below.
The fan is a computer fan with speed switch. I wired it to an old 12v wall wort I had laying around in the parts bin.
Meat hooks are just stainless hooks - again from amazon.
Temp controllers:
Johnson - https://www.amazon.com/Johnson-Controls-Digital-Thermostat-Control/dp/B00368D6JA/ref=pd_sim_328_1?_encoding=UTF8&psc=1&refRID=SG7X9CB5Z0VYY8RM7EVB
If you're comfortable with electricity:
https://www.amazon.com/Lerway-All-Purpose-Temperature-Controller-Thermostat/dp/B00BMLCGF8/ref=sr_1_2?ie=UTF8&qid=1481133568&sr=8-2&keywords=temperature+control
Best deal:
https://www.amazon.com/Inkbird-Temperature-Controller-Thermostat-Fermentation/dp/B015E2UFGM/ref=sr_1_1?ie=UTF8&qid=1481133568&sr=8-1&keywords=temperature+control
Meat hooks:
https://www.amazon.com/Meat-Hooks-Inch-Pack-Pieces/dp/B0195CE08Q/ref=sr_1_3?ie=UTF8&qid=1481133886&sr=8-3&keywords=meat+hooks
Fan:
https://www.amazon.com/Antec-TriCool-DBB-Cooling-3-Speed/dp/B00066ISES/ref=sr_1_5?ie=UTF8&qid=1481133824&sr=8-5&keywords=speed+fan+computer
Do you have temperature control figured out? I did it DIY with an STC-1000, but I'd suggest going with the Inkbird for $35.
https://www.amazon.com/Inkbird-Temperature-Controller-Thermostat-Fermentation/dp/B015E2UFGM/
Design and design considerations:
Heating/Cooling:
Active Aqua Chiller, 1/4 HP - Note in the temp graph below the blunting of the green curve as the red (ambient temp) went high. I have the dual stage temp controller set to kick on the cooling plug at 68, and this starts the second water pump that pumps through the cooler. The cooler is set for 69 currently so when the temp reaches 70, cooling kicks in. I am continuing to fiddle with this setting.
Nutrients:
Plant photos:
Plants received dry bare root with no green growth from starkbros.
Temp graph:
This is with the La Crosse wifi temp probe (https://www.amazon.com/Crosse-Technology-926-25106-Wgb-Wireless-Monitor/dp/B06ZYJ5L5B/ref=cm_cr_arp_d_product_top?ie=UTF8) so I can check remotely. Red line is ambient temp, green line is water temp.
Water changes:
I use a Digital Temperature Controller with a small chest freezer. Shop around for the freezer, I just used this one 'cause I was on Amazon. Think I got mine at Sam's Club. This is inexpensive to set up and really frugal on electricity. All the cold stays in the compartment when you open it. Also - super insulated compared to a beverage cooler. It's not stainless, but you can get compact chest freezers in black. If you like DIY, you could buy a cheap chest freezer and cover it with [stainless steel laminate] (https://www.amazon.com/Stainless-Appliance-BRUSHED-Nickel-Adhesive/dp/B00BAUPS9M/).
Hey folks, back again with another question.
I just took advantage of labor day sales and got my first equipment kit, linked below.
https://www.homebrewsupply.com/advanced-homebrew-beer-kit.html
I bought some extract recipe kits from northern Brewer. Stepson root beer, beerie and off the topper to be exact.
I have a small basement freezer already and plan to buy this item to control fermentation.
https://www.amazon.com/gp/aw/d/B015E2UFGM/ref=s9_simh_gw_d0_g60_i2?pf_rd_p=1c5f02ae-183e-4906-990b-5a293310a66c&pf_rd_s=blackjack-personal-1&pf_rd_t=Gateway&pf_rd_i=mobile&pf_rd_m=ATVPDKIKX0DER&pf_rd_r=Y4SZRWAJQ2ND3A86RR3W
Is there anything hardware wise that I'm missing to get my first batch ready ? Any recommendations?
Thanks in advance.
Since you asked your mom I'm assuming you're younger. I highly recommend an older beardie as they are so much cheaper to take care of. My 5 month old eats around $25 - $50 of bugs a week. I try to cycle through bugs so the cost depends on if I'm giving him BSFL (cheaper) or dubia roaches.
Adults only need bugs 2x a week and the rest of the week you just feed them veggies like collard greens and butternut squash. Which isn't only cheap but you can eat them too!
The bearded dragon kits in pet stores suck. Don't use night light lamps. Use a ceramic heater if you're house drops below 65F at night. There are also fairly cheap temperature controllers that will turn the heater on and off at night to keep the tank from getting too warm or two cold at night.
Don't get the fixture for the UVB bulb at a pet store. They're a ton cheaper at hardware stores.
I'm currently using a basking bulb from a pet store, but spot lights from a hardware store will also work for a cheaper price.
Get a bigger tank than the minimum requirement. If you end up with a beardie that likes to explore it can become stressed being cooped up in a tank that it finds too small.
These are what I use for my recommendations above:
Temperature Controller for ceramic heater
Ceramic Heater
UVB Bulb
UVB Bulb Fixture
I use this one-- https://www.amazon.com/gp/aw/d/B01DZ5NVBQ/ref=ya_aw_oh_bia_dp?ie=UTF8&psc=1
It allows me to run two heaters. Was super simple to set up too, although it felt confusing at first.
At a price point not far from an Arduino, you can get an Inkbird that is built for this.
Inkbird ITC-308 https://www.amazon.com/dp/B01HXM5UAC/ref=cm_sw_r_cp_apa_i_c65pDb5V1K87G
Commonly used for homebrewing, plug the fridge into it, along with a small heating pad, lightbulb or other heat source placed inside the fridge. Set your heat and cool setpoints and walk away.
For the future, if you want to be super safe, you can get a temperature controller. That way if the heater thermometer breaks again and causes the heater to stay on, then the temperature controller will catch it and turn off the heater:
https://www.amazon.com/Inkbird-Max-1200W-Temperature-Controller-Greenhouse/dp/B01HXM5UAC
One like this should be fine. You can look at similar products and find what suits your needs financially and such.
They're quite easy to make. I use mine all winter long. Just need a heater and a controller. I use the two below.
Brew Fermentation Heating Belt, 1-Count https://www.amazon.com/dp/B001D6IUB6/ref=cm_sw_r_cp_apa_Q3L1BbH29S370
Inkbird ITC-308 Max.1200W Heater, Cool Device Temperature Controller, Carboy, Fermenter, Greenhouse Terrarium Temp. Control https://www.amazon.com/dp/B01HXM5UAC/ref=cm_sw_r_cp_apa_04L1Bb1CAC4VY
If the fridge is your only option and you can't get above 45F then you can look into getting a heat wrap and a temp controller. There are several options to choose from. I personally use these (you can find both for quite a bit cheaper than those listed prices):
https://www.amazon.com/Inkbird-Max-1200W-Temperature-Controller-Greenhouse/dp/B01HXM5UAC/ref=sr_1_1?ie=UTF8&qid=1501262251&sr=8-1-spons&keywords=inkbird&psc=1
https://www.amazon.com/Weekend-Brewer-COMINHKPR125665-Fermentation-Heater/dp/B01J1WZNM2/ref=pd_bxgy_86_3?_encoding=UTF8&pd_rd_i=B01J1WZNM2&pd_rd_r=RFQ7WFS8YVB9XMBQQY2D&pd_rd_w=gm24D&pd_rd_wg=Nn18Z&psc=1&refRID=RFQ7WFS8YVB9XMBQQY2D
Temp controller : https://smile.amazon.com/Inkbird-Max-1200W-Temperature-Controller-Greenhouse/dp/B01HXM5UAC/ref=mp_s_a_1_1_sspa?crid=1CZISB4U1CU9M&keywords=inkbird+temperature+controller&qid=1556415981&s=gateway&sprefix=Inkbi&sr=8-1-spons&psc=1
I do a similar sous vide bath type setup, but have an Inkbird controller driving an immersion coffee heater and fountain pump in my cooler so it's 100% hands off
​
Nicely done!
This should do the job.
https://www.amazon.com/bayite-Temperature-Controller-Pre-Wired-Thermostat/dp/B01KEYDNKK
I use this in veg. It can both heat and cool (I never heat), and goes for 1 target temperature. https://www.amazon.com/dp/B01KEYDNKK/ref=cm_sw_r_cp_api_bN4ZAb9T6STGE
I use this in flower. It can either heat or cool, not both though (again I never heat). It cools to 2 target temps, day and night. https://www.amazon.com/dp/B007FNOAU6?ref=yo_pop_ma_swf
Both control a duct fan blowing in from a window.
I am still a newb on my first grow, so please take this as potentially wrong. Also, if anyone sees a problem, let me know. I'm trying to do my best.
I started in a tent but I built a 6'x8' grow room. I posted it to this sub a while back. Here is the album: http://imgur.com/a/Gshra
I upgraded to COB LEDs. They can pull 500 watts (40 watts per sqft) They are currently at 85% (34 watts per sq ft). The plan is to slowly ramp them up to 100% the first few week of flower. (I'm currently in the first week of flower). Here the album on that build: http://imgur.com/a/iWYiP
I'm in a basement where I can draw a large volume of cool air into the room. It becomes a problem during lights out because it gets too cold. I have on of those oil filled radiator heaters hooked up to a thermostat-controlled outlet:
https://www.amazon.com/dp/B01KEYDNKK
When it hits 69F, it kicks on until it gets up to 79F then it shuts off.
To control the upper end of the temperature, I use my fan and this speed controller.
fan:
https://www.amazon.com/dp/B018WM0EMQ
speed controller:
http://www.hyper-fans.com/shop/bybrand/hyper-fan/hyper-fan-temperature-speed-controller
I haven't had any need to run an A/C unit but I could plug one into the "cooling" side of that temperature-controlled outlet.
The humidity in the room is rather high right now (50-60%). It seems to go up when I water. I'm on the fence if I should get a dehumidifier or just let it ride. If I do get one, that will have to have a humidity I can set.
Also, I put my original grow tent in grow room to veg some clones. I covered up all the passive air vents and taped them closed with gorilla tape. Then, I used flexible ducting to make an exhaust tube and intake tube. Using the flexible tubing, I can make light traps. I put 4 CFLs in there on a 18/6 timer. I do have an exhaust fan in the tent. It does not, however, need a carbon filter as the whole room is filtered. I'm not sure how a veg tent in a flower room is going to work out, but I am going to find out. :)
Anyway, I'm a newb on my first grow. That is, however, how I am currently growing weed.
If you're looking for a fermentation fridge or kegerator, I can fit two 5 gal ball lock corny kegs and a 5 lb CO2 tank, or one glass fermenter, in one of these ($125)
https://www.farmandfleet.com/products/864091-danby-refrigerator-with-freezer.html?feedsource=3&gclid=EAIaIQobChMI3ty1irPx2QIVgyaGCh0xWgmOEAkYASABEgJ-2PD_BwE
And use one of these for temperature control ($35)
https://www.amazon.com/Temperature-Controller-bayite-Pre-Wired-Thermostat/dp/B01KEYDNKK/ref=sr_1_1_sspa?ie=UTF8&qid=1521222668&sr=8-1-spons&keywords=temperature+controller&psc=1
Minimum temperature is around 40F and I had to do some limited DIY work to remove the door mounted shelving.
But, I just found this prewired controller that's only $34.
It's a 10 Amp max but should be enough to run the refrigerator. It looks like a good deal.
Look online for Temperature Controller, it's a grounded outlet connected to a temperature controller with a temperature probe. Sort of like this.
I run my space heater outside the tent and just put it in front of a 6" flex duct that goes into the bottom of the tent with some pantyhose over the end to keep pests out. That duct is the only way fresh air can enter. I have the heater hooked up to one of these which has a sensor inside the tent and tells the heater when to turn on/off. Works really well.
Gotcha... I'd recommend checking the FG next time. Otherwise, you have no way of knowing how your yeast performed.
If you're fermenting in a colder than ideal environment, I'd recommend a temperature controller (like this one) and a cheap heating pad for your fermenter, especially if the temperature swings a lot. If possible, put the fermenter in an old sleeping bag with the heating pad, so it'll work a lot less to keep it warm.
Just don't chop until you know you can completely control your conditions/environment for the next 7ish days. Humidifier/heater/AC/dehuey, etc. Make sure the weather doesn't make shit difficult for you, and if it does, get the right equipment running.
I'm drying right now and it's 80F outside. Got an AC pumping and a humidifier humming. Earlier this week had a space heat on since it was colder. Just gotta keep shit in check.
I'm aiming for 65-70F and 55-60% humidity for 7-10 days.
This Temperature controller is a life saver for me: https://www.amazon.com/gp/product/B01KMA6EAM/ref=oh_aui_search_detailpage?ie=UTF8&psc=1
You plug in your heater and AC, and set the temperature points and the swing and you're off. If it gets below 63, my heater comes on, if it gets above 68, my AC comes on. All automated. Easily customizable.
YouTube video link for pid assembly
https://m.youtube.com/watch?v=Ra6Dn9tq7ks
Pid links:
Controller inkbird 106vh
https://www.amazon.com/Inkbird-Temperature-Thermostat-Controllers-Fahrenheit/dp/B01KNXETWS/ref=mp_s_a_1_4?keywords=inkbird+106vh&qid=1567355320&s=gateway&sr=8-4
(4pc) 2-2packs
https://www.amazon.com/YXQ-Cartridge-Electric-Heating-Fittings/dp/B06XWB86GF/ref=pd_aw_fbt_328_img_2/133-1641262-1548304?_encoding=UTF8&pd_rd_i=B06XWB86GF&pd_rd_r=735bc2a1-e25f-4088-a7ad-d7e433f94b0a&pd_rd_w=BRXp5&pd_rd_wg=AjA5r&pf_rd_p=3ecc74bd-d08f-44bd-96f3-d0c2b89f563a&pf_rd_r=F7X5VADH85ZGY8GWENXA&psc=1&refRID=F7X5VADH85ZGY8GWENXA
(1per controller) if you want two controllers you need 2 cables https://www.amazon.com/Cable-Matters-2-Pack-Heavy-Extension/dp/B0153T1NF8/ref=pd_aw_fbt_60_img_3/133-1641262-1548304?_encoding=UTF8&pd_rd_i=B0153T1LSM&pd_rd_r=3977bf62-6ee0-490f-8e51-e018d34cce3e&pd_rd_w=XfsUB&pd_rd_wg=HoWmy&pf_rd_p=3ecc74bd-d08f-44bd-96f3-d0c2b89f563a&pf_rd_r=08T228RMHA18JN1FP6HJ&psc=1&refRID=08T228RMHA18JN1FP6HJ&th=1
(1per controller) box for controller
https://www.amazon.com/BUD-Industries-CU-3283-Plastic-Utility/dp/B005T5A0W4/ref=mp_s_a_1_2?keywords=bud+industries+project+box&qid=1567355758&s=gateway&sprefix=bud+industries+p&sr=8-2
it was mentioned, but here is the link....try one of these
IF your heater doesnt turn off on its own, this will shut it down when it gets to the temp threshold of this heater controller.
Well it sounds like you're doing most everything right!
I'm not sure how much you've looked into thermostats but I'm currently using an Inkbird thermostat and a Hydrofarm and I like both of them! There's also the more reptile friendly ones like herpstat but your price range becomes $80+
Again, I'd recommend going with paper towel for his setup and possibly unplugging that unregulated heatpad... but I'm no expert! I'd also suggest leaving him alone for at least a week now that he's home beyond giving him water and checking to see if he's passed anything!
Thanks for being receptive to advice :) I'm super happy to help you can PM me if you need anything else! Also, Mojave isn't a recessive trait it's an incomplete or co-dominant trait. There's honestly so much to learn about morphs, literally thousands of combos!
You've got to buy a separate thermostat. There are some on ebay, but most people buy a Johnson Controls or Ranco external thermostat.
so what I'd do is get an ETC.
https://www.amazon.com/RANCO-ETC-111000-Digital-Temperature-Control/dp/B0015NV5BE
Not necessarily this exact model but this idea is that you plug your wineador into it - feed the temperature sensor into the wineador and sent a temperature point. Then the ETC will power on your wineador so that it cools to the appropriate temperature and then powers off as needed.
It'll easily keep it at the proper temperature level.
Buy a freezer/refrigerator off of Craigslist and wire this to it. But I live in AZ, so I am only worried about keeping the temp cool, and never require heat.
No, this is something you would hook into a solid state relay and a heating element, better used for something like an electric kettle. You want to pick an STC-1000, which will require you to wire something up, or you can buy a pre-built unit like the Ranco if you dont want to build something yourself.
It depends on how much you want to spend, but the easiest way to control temps is with a dedicated fermentation fridge with a temperature controller to regulate the temperature. I generally only need to regulate down (i.e., cool the fermenter to keep it from getting too warm), but some climates require a dual regulator to be able to either increase or decrease temp, especially depending on the seasons.
The cheapest regulator that's gained a lot of popularity in the community in the last few years is the STC-1000. There's a bit of DIY involved in connecting this controller to an actual electrical outlet. But it does dual control for around $30 total (once you buys the outlet, etc.).
If you're less handy but have the money, you can get a controller like this Ranco. There are tons of other options, so just Google "refrigerator temperature controller" or something.
There are also much less robust, but also much less expensive options. Google "fermentation swamp cooler" or "son of a fermentation chamber" for some good, low-cost, DIY options.
I use a slow cooker for sous vide. I had a ranco digital temperature controller that I was going to use to make a cheese cave/beer fermentation fridge, but never got around to. Hooked it up with two ends of an extension cord (wiring is very simple, and the design is both listed and safe) and it has worked great. I confirmed temp with a Thermapen, and it was right on. I set the variation allowance to 1 degree F, and it stays right where I set it.
Controller:
http://www.amazon.com/RANCO-ETC-111000-Digital-Temperature-Control/dp/B0015NV5BE/ref=sr_1_1?s=industrial&ie=UTF8&qid=1452127883&sr=1-1&keywords=ranco+temperature+controller
Check local classifieds
I checked min few years ago, might've been 3 and found a guy selling one of these for $30. Ended up being a guy in a homebrew club. He ended in giving me 50 lbs of malted barley free with the thermostat. Keep in mine the one I posted isn't wired, you'll have to wire it yourself. I've heard good things about the still cheap but slightly less so option Colin posted
https://www.amazon.com/RANCO-ETC-111000-Digital-Temperature-Control/dp/B0015NV5BE
You need a way to maintain low fermentation and lagering temperatures. This is usually achieved by a modified deep freezer or refrigerator plugged into a control unit such as Johnson Controls a419
Question One: Fridge Temperature Control
There are several different units available to adjust the temperature of your fridge. The Johnson Controls A419 will control only cold (or heat if rewired), but the Inkbird ITC-308 will control both cold and heat.
I’ve used both and the Inkbird better fit my needs and is less expensive by more than half. There are other options available as well. Google something like “temperature control unit homebrewing” and you have plenty to read. As for wiring your own, I’m sure it’s possible, but I have no expertise in doing so.
Question Two: Carbonation Pressure
There are many different ways to carbonate your beer and several different gas blends available. Oxygen is not a good choice, as it will cause your beer to oxidize quickly - this common tastes like wet cardboard smells.
I only use carbon dioxide (CO2), but I do draft line consulting for a bar that uses a “beer blend” of 80% CO2 and 20% nitrogen. I can’t taste a difference and it pours the same, but that gas blend costs a little more. There may be other reasons to choose a specific blend that I am unaware of.
As for carbonating your kegs, what you described sounds like burst carbonation. Brulosophy has a great write up on different carbonation methods. I normally use the Set It And Forget It method, but will use the Burst method if I’m in a rush.
Question Three: Infusions
Not sure if you mean infusing the beer with flavors in the keg or glass or if you mean adding fruits or other flavors during fermentation.
To infuse in the keg, I use a mess bag to keep the liquid diptube from clogging. To infuse in the glass you can use a coffee press or even a Randall The Enamel Animal.
As for adding things to fermentation, fruits, hops, oak, spices, and liquor all make good additions to the right beer. Google phrases like “beer infusion recipes, “adding fruit to fermentation,” and “keg dry hopping” for more information.
Happy home brewing and good luck. Kanpai.
https://www.amazon.com/Johnson-Controls-A419ABC-1C-Electronic-Controller/dp/B0026NDC5O
One of those bad boys set at 36F. I have the temp probe dangling above the fan slightly out of view in my image.
I'm currently using this in combination with this to get exacting temps. The sensor that comes with it is not really that good, but I use a infra-red temp gun on the inside of my chamber and increment the temp on my controller and I can get it within 3 - 5 degrees F of what I want.
I'll admit ordering from china can be costly but if you buy an enail and maybe some other equipment in the same order it becomes worth it in the end.
If you're up for a little diy you could always build an STC 1000 and hook a heating pad up to it. It should only cost you about $30 to build the STC 1000 and you can get a heating pad pretty cheap at CVS or on Amazon if you don't already have one.
Edit: These are the instructions I used to build my STC 1000.
http://www.amazon.com/AGPtek®-WH8040-Digital-Humidity-Controller/dp/B009VXXBCQ
Here is good temp controller:
http://www.amazon.com/Digital-All-purpose-Temperature-Controller-STC-1000/dp/B00862G3TQ
Seconded. I bought one of these on Ebay and wired it to a standard two-outlet receptacle in a project box from Radioshack. Cold phase supplies power to mini-fridge compressor and the hot phase runs to a FermWrap. Can go down to 40s in the summer and 70-80 in the winter...just in case I feel like a saison in December.
I use a cheap analog rice cooker, these things basically spliced through an AC extension cord with a thermocouple. Works great and you can, y'know, cook rice too.
Also, /r/sousvide - join us.
If you want to go cheaper than the Johnson Controller, you can get yourself one of these and DIY. Since you're comfortable with some handy skills, this should fairly easy. Tons of tutorials online and will save you about $50 or more!
Homebrewers use these to control temps in fermentation chambers.
http://www.amazon.com/Elitech-All-Purpose-Temperature-Controller-Thermostat/dp/B008KVCPH2/ref=sr_1_1?ie=UTF8&qid=1407875219&sr=8-1&keywords=stc-1000
fixed the link
It was 19 x 32 x 39 and use a stc 1000 temperature controller after 3-4 months I got a 18 cf fridge off CL and trashed the son of a fermentation chiller but keep the stc 1000.
Here it is: http://i.imgur.com/RY7BqXD.jpg
It's basically an STC-1000 in an enclosure I got from Home Depot, hooked up to a crock pot I got for our wedding. It cost about $40 in total and has yet to shut off randomly. :-)
Yup, that'll work perfectly for you. As long as everything else runs when the thermostat is bypassed, the STC-1000 would work. All it's doing is cutting power to the fridge when cooling isn't needed, so it's basically plugging/unplugging it as needed.
Just permanently bypass the thermostat and either wire the STC-1000 in directly or put an outlet on it that the fridge can plug into. Should work just fine. The most difficult part of the job depending on your setup would be getting the STC's temperature probe into the fridge. Mine comes in the top with the beer lines and is taped to the side of the keg so it's monitoring the beer temp more than just the air in the fridge.
Here's the one I bought: https://www.amazon.com/Lerway-All-Purpose-Temperature-Controller-Thermostat/dp/B008KVCPH2. Should be the one you need assuming you live in the US.
I just did this, literally last week!
It is pretty easy just takes a little patience.
You can look at my recent post to see how mine is coming. I am doing it with a new 7.1 igloo that I got from best buy for about $200 tax included. I bought a 3 tap system from kegconnection with a dual regulator and all stainless hardware and perlicks. That came to about $370, which is a lot BUT everyone recommends it, and if you're going to fucking do it, you might as well fucking do it right.
I probably spent close to $100 on materials for the collar, BUT this is my first real project and I didnt have a lot of tools/screws/misc stuff around to put that together so about $30 of that would go there.
I got a temp controller on amazon for $16 and an extention cord at home depot for ~$10, and have some leftover electrical accessories from my previous TC build so YMMV there.
I bought these dehumidifiers on amazon for $32
I bought two converted ball lock kegs from cornykeg.com for $100 with shipping and it was a breeze to clean them even thought they said they would be cleaned already.
I then got a 10lb steel air tank from adventures in homebrewing for $60 which I thought was a steal (steel hehe).
So this puts me close to $900. Which is $300 less than a very DIY-spirited blog post like this says it will cost. Sure I havent bought the last two kegs, but I then would still be $200 short of it.
There are some suggestions by the other guys in here that will save you money, and I'd say that my attempt is a little bit of combining both.
Hope I was some help!
http://www.amazon.com/Elitech-All-Purpose-Temperature-Controller-Thermostat/dp/B008KVCPH2/
Mind the 110v vs 220v before buying.
http://www.youtube.com/watch?v=7I-iwFLykxs
http://www.homebrewtalk.com/f51/ebay-aquarium-temp-controller-build-163849/
I bought the Lerway 110V All-Purpose Temperature Controller for $15 and have had great success with it.
https://www.amazon.com/gp/product/B008KVCPH2
I have this one. I can fit two 5 gallon carboys in there or one 8 gallon. There's a small ledge on the right side which prevents me from fitting two 8 gallons carboys. There is tons of room for bottles, though, and even 2 baskets which hang you could put bottles in.
I got this: http://www.amazon.com/gp/product/B008KVCPH2/ref=oh_details_o03_s00_i00?ie=UTF8&psc=1
To control the temp, which works well as well.
DIY sous vide style might be what you're looking for.
I've used this in my sous vide rig. You could wire this up to whatever electric (analog controlled) heating device you want. Then you only have to make it once and you'll know how long it takes.
Let me know if you want to know more.
I'm using this controller which is supplied with a NTC 25 thermistor.
http://www.amazon.com/Docooler-Temperature-Controller-Thermocouple-Fahrenheit/dp/B00F05UI8O
Temperature Controller - I thought I was buying the STC-1000 Fahrenheit model until it arrived.
Edit: finished project
If you can splice a few wires yourself, here is a cheaper option for temp control. You would still need to buy a couple of extension cords, and a heating element (I use a light bulb in a paint can). Set up a search alert on Craigslist for a cheap fridge or chest freezer and you are in business. If you are looking to go super cheap, your best bet is to submerge your carboy about 3/4 of the way in water, add ice, and wrap a towel around the top of the carboy to encourage evaporation. You really have to stay on top of the ice though.
I'm looking to build my ferm chamber in the next several months. So far the only components I have are a mini fridge and this Inkbird Temp Controller. I was planning on using OSB sheathing for the walls, lined with foam board insulation, and throw in a 60 watt bulb for a heat source and perhaps a small fan to circulate the air.
I'm pretty handy. I do a lot of home/auto repairs myself so I imagine this will be a pretty simple endeavor, but what are some common pitfalls/mistakes that people make when building these things?
Buy this. plug your induction stove top into it. You'll have to do a little wiring. It comes with a little temperature probe. Put that in your water bath. It will turn the power to you device off when you reach the target temp and back on when the temp dips below the target.
To make sure this will work turn on your induction stovetop, unplug it from the wall, plug it back in. If it heats up again after you plug it back in then it will work. If it doesn't heat up again then it won't work.
Can I recommend a different thermostat? I think you would be much better off with an STC-1000, with a probe that can be immersed in the beer with a thermowell, or stuck on the side of a carboy/bucket. They are really cheap, and easy to wire. It needs 120v to power the unit, and then you can switch the input voltage for the fan with the built in relays.
If you ever wanted to add a heater it would be easy too.
The [Inkbird](https://www.amazon.com/dp/B00OXPE8U6/ref=cm_sw_r_awd_spS8ub02194G2
https://www.amazon.com/dp/B00OXPE8U6/ref=cm_sw_r_awd_spS8ub02194G2) seems to be a pretty great option that has F instead of C
Probably, but the temp probe is not waterproof.
This is what I use. It's a bit diy
http://www.amazon.com/gp/aw/d/B00OXPE8U6/ref=mp_s_a_1_1?qid=1458699099&sr=8-1&pi=SY200_QL40&keywords=stc+1000&dpPl=1&dpID=41qoIapm7VL&ref=plSrch
This guy is for sale on Amazon right now for less than $15 and is in Fahrenheit:
https://www.amazon.com/gp/product/B00OXPE8U6
I actually converted my mini fridge into a wineador. You'd want to invest in a ETC (temperature controller) to keep the temperature at an ideal level for your cigars. Make sure to get an airtight tupperdor so you get no condensation and a few bovedas to control the humidity. Try it out with what works best for you for a few days and then put your cigars in. Hope this helps!
I bought mine in Germany, but they have the same one on amazon.com.
http://amzn.com/B00OXPE8U6
There are quite a few with different brand names, but they are all made by the same company, mine was branded 'Tinxi'.
For the plug and connection [to crockpot] I just cut an extension cable in half and attached either end to the relevant terminals.
And I use a pump a little similar to this: http://amzn.com/B00NPJECXO.
The crock pot is only 200W so it takes a while to get to temperature, but you can use something more powerful like a rice cooker or start with hotter water.
It's great for making yoghurt in jars too.
Just need a better vacuum sealer, any suggestions?
For temp control, you want something like This to control your heating/cooling, and a Carboy Wrap to heat your FV up.
If you get a thermowell you can put the temp probe down in your fermentation vessel, rather than just taping it to the side - you'll get more accurate readings. Downside is you can't set up a proper 1" blowoff hose, and counter-intuitively the first few days of fermentation (When you really need a blowoff hose) are the most critical to temp control (Based on what I've read in other threads here)... Might work well if you get a 6.5 gallon carboy, and do 5 gallon batches in it, so you've got extra head space for all the krausen. You can also use some standard size siphon hose as a blowoff, it's just more prone to clogging than 1" hose.
If you get a minifridge make sure your fermenter fits in it otherwise you might have to build a collar.
Then just plug the fridge into a temperature controller, like the one linked below and tape the temperature probe to your fermenter. Set the temperature and you're good.
https://www.amazon.com/Inkbird-Itc-308-Temperature-Controller-Thermostat/dp/B011296704/ref=mp_s_a_1_3?ie=UTF8&qid=1524708569&sr=8-3&pi=AC_SX236_SY340_FMwebp_QL65&keywords=temperature+controller&dpPl=1&dpID=417y0W4HFmL&ref=plSrch
This one: https://www.amazon.ca/Inkbird-ITC-308-Temperature-Controller-Thermostat/dp/B011296704
Where did you see the 15A? That'd be an incredibly high load for a mini fridge. I really doubt so. Probably closer to 5.
Screw the Johnson btw, check out these for half the cost and nicer: https://www.amazon.com/Inkbird-Itc-308-Temperature-Controller-Thermostat/dp/B011296704?ie=UTF8&*Version*=1&*entries*=0
Eh, what happened?
can you return it and get this one?
https://www.amazon.com/Inkbird-Itc-308-Temperature-Controller-Thermostat/dp/B011296704
$39. www.amazon.com/dp/B011296704/ref=cm_sw_r_wa_apa_8wczxbFDAWQ8W
$39 https://www.amazon.com/Inkbird-Itc-308-Temperature-Controller-Thermostat/dp/B011296704/ref=sr_1_2?ie=UTF8&qid=1465921855&sr=8-2&keywords=temperature+controller
Great plug & play controller with heating and cooling
Wow, really interesting work you're doing. I know a little bit about the challenge of your garage grow. I live in a temperate climate that requires both heating and cooling, and my grow space started in an uninsulated 8'x12' shed. I framed off the rear third of the shed, insulated the hell out of it, and equipped it with automated temperature control. My final space is a 3x5 flower area and a 2x3 veg/seedling area. I don't have a great relationship with computers, so I took a more low-tech approach to my controls. I used an Inkbird temperature controller to control heating/cooling switching. I then ran the cooling output of the Inkbird through an old Honeywell temperature controller which monitors outside air temperature and selects between blower or AC cooling. If the ambient temperature is below 65 degrees, the blower is used for cooling. Above 65 degrees, a little AC unit does the cooling.
When I was researching and brain-storming my grow-space build, I considered using a tent. Tents are not well insulated, obviously, so it crossed my mind to put a 3x3x6 tent inside of a 4x4x6.5 tent, with a 4x4 sheet of plywood atop rigid foam to insulate the floor. I believe that the 6" air-gap created by this arrangement would be a pretty good insulator.
Edit to add: Here is my build, if you are interested.
You can find a chest freezer on Craigslist for almost nothing.
I use this tiny space heater for heat. It turns off automatically if it gets too hot, so I’m not worried about it burning down the garage, and it works really well. And everyone loves the Inkbird ITC-308. It’s cheap as all hell and has separate plugs for heating and cooling. That’s pretty much everything you need.
Welcome to homebrewing!
For that stout you probably want to be around 67, but your beer is fine, don't worry! Higher temperatures can impart off flavors, but at the temperatures you are at, your beer should taste just fine. I use this attached to a wine fridge or chest freezer, and it works wonders for keeping your fermentation temperature consistent (plus you can make lagers).
Cold crashing improves clarity, which is not a big concern for a stout so i wouldn't worry about it for now, it is totally not necessary.
Both of those beers would be good, and there is nothing wrong with extract brewing/kits, don't let anyone tell you different! That being said, i switched to biab (all grain) and have enjoyed it more and gotten better beers.
Lastly, as you get deeper into brewing water will become more of a concern, but for now don't worry too much about it. Grocery store water has two problems. First, you don't know whats in it, though some water companies like crystal geiser post the info online. 2. If it is distilled/reverse osmosis/filtered it will not have much of any minerals which you might want in your beer. Calcium, for example, is important for great beer, though you can add gypsum salt to your water to give it the calcium content you might want.
cheers and good luck with your new hobby, its very rewarding and a lot of fun. let me know if you have any questions and ill try to share my (limited) knowledge
I've not seen that one! I use an inkbird unit:
https://www.amazon.com/dp/B011296704/ref=cm_sw_r_cp_awdb_qF45yb97BVBV0
It works just fine with the Crock-Pot. I've done a few steaks, a couple 36hr+ bacon cooks, chicken and veggies.
I use this for my aquariums, but it also works for measuring air temp. It even has an alarm in case your heating system ever starts to lose the battle against the cold air. You could also use it to control a ventilation system in the summer to keep it from getting too warm.
EDIT: The actual temp you target will probably depend on how well you get that thing sealed up and how much firepower you put into the heating system. You could create an overpowered system that can maintain room temp and then set it to exactly what you want, but you could also go for efficiency and design it to maintain just above 50F on the coldest nights. That said, you'll have lots of warning if your system won't be able to tolerate the coldest days of the year as long as you pay careful attention.
Plug your heat Mat into this
This device will only turn the heat mat on when the temperature of your mead drops below a set temperature
Something like this.. Temperature Controller will allow you to turn your freezer into a refrigerator. I brew beer and that is a common way to store kegs in a chest freezer. might work well in your case
Going to be turning a freezer into a fermentation chamber soon (I hope). This is the temp controller I'm looking at:
https://www.amazon.ca/Inkbird-ITC-308-Temperature-Controller-Thermostat/dp/B011296704/ref=sr_1_1?ie=UTF8&qid=1493653514&sr=8-1&keywords=inkbird
Do I need to rig up an old extension cord or anything or will this thing be ready to go right out of the box?
I feel like I'm becoming a shill for this product, but I see these questions and always feel like its worth a mention.
ITC-308
Heating and cooling, pre built, no fuss. I think there's a six stage version in the works, but I'm not sure.
Hope that helps!
I have one of these, and it works fantastic for controlling the temp in my crock pot.
http://www.amazon.com/Inkbird-Itc-308-Temperature-Controller-Thermostat/dp/B011296704/
Just use an older style crockpot with a manual knob and not electronics.
And I've noticed that too, my old crockpot I bought at goodwill would let you slow cook chili. My new one will boil it, even on the warm setting. I hate it.
> "the danger zone"
LANNAAAAA
https://www.youtube.com/watch?v=kyAn3fSs8_A
If he's an extract brewer, upgrading to an all-grain setup would be fun. Mash tuns, ported brewing kettles with temperature gauges and sight glasses, a nice gas burner or an all in one BIAB setup like the Unibrau or Wort Hog (especially if you have 240V power available, though 120v options are available). The latter two hit just around $1000 themselves but are ready to go out of the box.
If he's already an all-grain brewer in either multi-vessel or BIAB (or even if he's not), does he have a kegging setup? A good size chest freezer (consult the chart here for model numbers that fit the right number of kegs), a 4 pack of kegs with connectors, a gas manifold, a CO2 cylinder, and an Inkbird temperature controller will fall neatly within the budget range and is a significant "luxury" upgrade to buy all at once.
Already got that? He's probably already got fermentation temperature control if so, but if not, it's a nice one. This option tends to be the most awkward to just buy off the shelf and the temperature controlled conical fermenter I'm seeing runs around $1800, so its a bit out of budget. Again, a fridge or freezer with temperature controller are nice. I'd advise against a conical unless you know it will fit into his fermentation chamber. They are super sweet but they require a setup built with them in mind.
Already got all that? Ok, we're into the hilarious luxury items now. A reverse osmosis water setup? A high end pH meter? A giant stainless steel sink in his brewing area with one of those nifty shower head things for easy water filling and cleaning? A barrel of some kind for ageing? Can't help you past here, I'm too poor!
Badabing!
Inkbird Itc-308 Digital Temperature Controller Outlet Thermostat, 2-stage, 1100w, w/ Sensor https://www.amazon.com/dp/B011296704/ref=cm_sw_r_other_apa_xPpgyb5DPMEDA
[This guy] (https://www.amazon.com/gp/product/B011296704/ref=oh_aui_detailpage_o02_s01?ie=UTF8&psc=1)
It's awesome for keeping everything the right temp, humidity I use a shitty little monitor inside which can give a better reading of what the plants feel.
More of an electrical engineering question, but I feel like you guys would provide me with a better answer.
After doing a lot of research the past week, I found many guides on how to assemble a Freezer-Chest-Fermenter. I am using this temperature controller, and I just want to make sure I set it up correctly.
From what I can understand (PLEASE CORRECT ME IF IM WRONG), this tool lets me set a temperature and a range, and will heat or cool if necessary to reach that destination temperature.
If that's the case, what my plan is, is to plug the Chest Freezer into the "Cooling" out, and a small space heater into the "Heating" outlet.
So my two questions... Is my idea on how this works correct? And would my plan work? Or should I get something other than a space heater?
What's the unit of measurement for your dimensions?
If you want to go super cheap, I imagine you could could get a temperature regulator (two outlets and 1 temp probe); you could run a dedicated fan next to a space heater to keep the temperature moving around the space, while the probe sits somewhere in the middle of the room. You can set a temp range where on the low it would pop on the heater, and when it hits the top temperature it shuts off (and you could attach another fan in another part of the room/wall of the incubator to the other outlet which would switch on once it hits the top of the temp spectrum you hit to promote ventiliation and more quickly cool it down).
The space heater I suppose would be overkill for a 2 foot container, but if it's 6 feet (meters) it would be a lot. You could even scrap the extra fan by getting a heater that oscillates with a fan and then use the second outlet, again, to promote ventilation.
Not sure how ideal this would be for super consistent temperatures, but temp regulators are pretty darn cheap. https://www.amazon.com/gp/product/B011296704/ref=oh_aui_search_detailpage?ie=UTF8&psc=1 is what I used with a medium sized styrofoam cooler and a 60W bulb. It worked quite well.
Here's the hardware I ended up with for a simple continuous brew setup. For me, two gallons is a lot for a batch brew mostly just handling the vessel. Good luck! You're mostly limited by your imagination here.
Beverage dispenser Target is supposed to carry it also, but I never found one in the store.
Stainless spigot
Rubber bands
Heater
Temp controller outlet
Adhesive thermometer
Ahh! Thanks. Based on all of that I should be safe with something like... http://www.amazon.com/gp/product/B011296704 ?
I had to replace my fridge's dial thermostat with a digital one; it looks a bit hacked together but was able to control the temperatures much better
this is similar to the one i used:
https://www.amazon.com/Inkbird-Temperature-Controller-Fahrenheit-Thermostat/dp/B0152LYY0I
but if your fridge gets can stay below your target temp you could set the fridge to max and use something like this:
https://www.amazon.com/Inkbird-Temperature-Controller-Thermostat-Fermentation/dp/B015E2UFGM
Kegerators use a thermometer tied in with a freezer to automatically kick it on and off depending on temperature. If you tie it in to the space heater, that may help regulate the space.
​
https://www.amazon.com/Inkbird-Temperature-Controller-Thermostat-Fermentation/dp/B015E2UFGM/ref=as_li_ss_tl?ie=UTF8&qid=1489001949&sr=8-1&keywords=inkbird+kegerator+thermostat&linkCode=ll1&tag=kegerators-20&linkId=1861f6ca14056781d504e4797547f086&data1=999999
​
Just an example.
Beer fridge https://imgur.com/a/QenV5
The link is a post of my old setup and current setup.
My first setup was a result of me checking Craigslist constantly to find wine fridges. Found 2 and used those for a while.
The new setup was achieved when I went to a local furniture auction and won it for $300.
I would either look for good deals on commercial wine fridges or buy a garage fridge and something like this to control the temp:
Inkbird Pre-Wired Dual Stage Digital Temperature Controller Outlet Thermostat 110V, 1100W Heating and Cooling for Fermentation Kegerator Heating Mat ect https://www.amazon.com/dp/B015E2UFGM/ref=cm_sw_r_cp_apa_OKCNzbB8YSKW1
This related model might be better for beer-making: Amazon link to ITC-308.
The ITC-310T is a more fully-featured model that allows you to pre-program a fermentation schedule.
Outside of basic equipment like pots, fermenters and chillers, the 2 most impactful things that will make his beer better are the following:
Thankyou so much for the help. Yes I care about animals and she just doesn't look that happy. The new owner is a great person, but doesn't possess either the financial means nor "technical desire" to take care of the somewhat precise environmental needs.
Yes tank is glass, with a "wire frame" top. I am handy with carpentry, so am thinking of making a decent wooden lid for the cabinet, with air vents routed in to it.
So for a glass tank, should I go for a UTH and a ceramic lamp for ambient temperature? Would I need two thermostats? e.g would two of these suffice: https://www.amazon.com/dp/B015E2UFGM/
I used this green one for my sous vide before,it works great. You can try one out.
I've got one. I like it a lot. You definitely have to be aware of some of it's pit falls and plan accordingly. (In particular: making sure the thing doesn't leak, unscrewing the collection ball without unscrewing the valve from the tank, using a "S" style airlock instead of a three-piece style to prevent suck back when changing out the collection ball or bottling/kegging, and not using recipes that have tons of trub or hops.) If you know those pitfalls and take steps to avoid them, then the fast fermenter is really pretty awesome. The best way I've found to prevent leaks is to use the included teflon tape, and then use keg lube on all the joints. It is super easy to clean because of the wide opening on top. I clean mine right after use, I haven't really noticed any lingering smells. As for temp control - I sewed up a jacket for it with heating wires and a water tube in it. kinda similar to this system. A temp controller monitors the temp and turns the heat on, or turns a water pump on to recirculate ice water from a cooler. The thing comes with a wall mount bracket, I built a stand for mine using 2x4's and the wall mount bracket.
All in all- if you know about the pitfalls and how to avoid them, the thing actually makes your life a lot simpler and easier. It allows you to do a secondary fermentation without having to rack to a second fermentor(thus avoiding all the work of sanitizing all that extra equipment). It allows you to harvest yeast. And bottling/Kegging is a breeze.
Seem it is a good news to you now.
https://www.amazon.com/gp/aw/d/B011296704/ref=mp_s_a_1_3?ie=UTF8&qid=1504719712&sr=8-3&pi=AC_SX236_SY340_QL65&keywords=inkbird&dpPl=1&dpID=417y0W4HFmL&ref=plSrch
Well you've got a very cheap option and a still cheap but slightly less so option. Lots of homebrewers use that second one for kegerators & fermentation chambers.
I got an InkBird ITC-308 for temp control duties. I passed the temp probe up through the defrost drainage hole, and place it against the side of my plastic bucket fermenter, under a folded towel taped over it to insulate it from the air temp (so it reads close to actual ferm temp). Then just plugged the fridge into the "cooling" outlet on the IB, set the compressor cycle protection setting to 10 minutes, the target temp to the desired ferm temp, and the cooling temp differential to 1*F, and that was that!
To pass the temp probe up the defrost drainage you'll have to unbolt the drip tray to gain access, which is just two easy screws. And depending on how long/short they cut off the drainage tube externally, you might also have to loosen the bolts for the cross-members that the compressor is mounted to. I had to do that for one of my two units of this fridge.
I have two Inkbirds (http://amzn.com/B011296704) one on my Keezer and one on my fermentation/Beer fridge. Heat+ Cold control is really nice during winter. Digital is so much better than the old analog controllers I used to use.
I have one of these inkbirds on my 125g turtle tank because coming home to turtle soup would be traumatic. Highly recommend, and I want to add them to my smaller planted tanks as well.
Plug and plat WiFi thermostats (and WiFi everything) are out there now and pretty affordable. If you're into that.
Also, have you looked at inline heaters on a canister filter?
Okay I'm waaay late to the party, but here is what you can do. Buy some heat cord. Here is one by exo-terra
You just use electrical tape and make a zig-zag pattern on half of the bottom of the tank. Only go one side or the other, so if it gets too warm on one side, your frogs can move to the other side. I also would get this so you can set a desired temp and it will run the tape until it hits your target temp, and doesn't end up superheating your viv. You can also hook a small AC powered computer fan to the cooling side, so it will automatically maintain your desired temp, up or down. Just plug the fan to the cooling side, the heat cable to the heating side and presto.
I think the aqueon 20G long tanks are good to start. Only $20 during the $1/gallon sale. I would also want a heater, preferably an adjustable one, like the fluval m series (get the 100 watt or 2 50 watt ones in case one breaks do the tank doesn’t freeze or overheat too fast) a good thermostat is this one. A good temp controller (extra level of safety) is this one.
Edit: the type of stand doesn’t matter, just as long as the entirety of the tank is supported and the stand is sturdy enough to hold it.
Inkbird is a popular brand when it comes to thermostats. I'd set the differential to 1 degree, so the temperature doesn't fluctuate too much.
The temperature to use when you're using a calculator is the highest temperature the beer reached at any point during fermentation. So I would use 73.2 in your case.
I've heard that the stick-on thermometers are great. You might also want to look into some more temperature control options. You can go as simple as putting the fermenter into a tub of water, adding frozen water bottles as needed to maintain a cooler temperature, or as far as buying an extra fridge or freezer with a temperature controller. In my case, this time of year, my basement is reliably in the upper 50s/low 60s, so I just use one of these heat wraps plugged into an Inkbird temperature controller with the probe taped to the side of the carboy with a flattened koozie on top of it to insulate it from the ambient air temperature.
Inkbird Pre-wired Plug Digital Humidity Controller,
[Inkbird Pre-Wired Dual Stage Digital Temperature Controller]
(http://www.amazon.com/dp/B015E2UFGM)
try one out, I think they're good.
I got http://www.amazon.com/Inkbird-Temperature-Controller-Thermostat-Fermentation/dp/B015E2UFGM?ie=UTF8&psc=1&redirect=true&ref_=oh_aui_detailpage_o02_s00
It is an option within the device.
Ive used this before.
What /bodobeers said. I just bought an igloo 5.1 cuft chest freezer just for fermentation. (My bigger chest freezer is being turned into a keezer.) Got a slightly dinged one from Home Depot for ~$130, new ones are~$160-200 depending on brand. You can go with a 3cuft chest freezer (about same price, less space width wise than 5.1), but you will have to make a collar for it to fit carboy+airlock due to the hump. you can get the plugin Inkbird controller for around ~$30-40 for a cheaper temp controller with doesn't require wiring. If you want to be more precise with the Inkbird though, you will also need a heating element. If you don't mind it being off by 5 or degrees then you are ok with cold side only. I have one of the more expensive Johnson Controllers that are pretty precise with just cold side for my fermenter, and an Inkbird for my bigger keezer build for I'm not as concerned about exact temperature with the keezer.
Pre-wired Inkbird
Johnson Controller for reference
I just use an stc 1000 temp controller with my heaters. I have used the cheap chinese heaters, eheim ,and most in between. I use the internal temp setting on the heater as a failsafe should my temp controller fail. Though the relays in the stc are n/o so they should fail off, not on. In any case I feel confident using any crap heater lying around since the temp controller is running the show, not some crappy bending metal thermostat trapped in the same tube as the heating element. The stc 1000 is like 15 bucks on amazon. They also make a similar version that is already wired up, though it costs a little more.
Pre wired https://www.amazon.com/dp/B015E2UFGM/ref=cm_sw_r_other_apa_RpJxxbCN93ZZE
Stc-1000 https://www.amazon.com/dp/B00BMLCGF8/ref=cm_sw_r_other_apa_vrJxxb8CMPCKW
I use 2 250 watt eheim currently in my dual 40b setup. That way if one fails my corals stay nice and warm while I replace it. I fear no overheating! Also I keep my house like 65 during winter. So I need some serious wattage. To keep my uncovered tank at 80f
I hooked mine up to a cheap thermostat, and used a VERY cheap digital thermometer along with my TDS meter (not this exact one) to hone in.
Now I don't worry about my heater failing in the ON position, because if the tank gets too hot, it shuts off. I set my desired at 77 with a 1 degree in either direction swing before either my heater kicks on or a clip-fan pointed at my water surface does. I went from 81-84 (yikes!) swings to 76.5-77.5 degree stability.
USA!
https://www.amazon.com/Inkbird-Temperature-Controller-Controlling-Fermentation/dp/B07PVBG8K1/ref=sr_1_3?keywords=inkbird+wifi&qid=1558332739&s=gateway&sr=8-3
Price History
ReviewMeta: ★★★★✮ 4.6/5 from 102 valid reviews
CamelCamelCamel - [Info] │ Keepa - [Info]
_
Rook no further, PriceKnight is here!
^(Info) ^| ^(Developer) ^| ^(Inquiries) ^| ^(Support Me!) ^| **[^(Report Bug)](/message/compose?to=The_White_Light&subject=Bug+Report&message=%2Fr%2Famazondealsus%2Fcomments%2Fdvsyd3%2Famazon_inkbird_wifi_temperature_controlleritc308%2Ff7einix%2F%0D%0A%0D%0A%0D%0A%0D%0APlease+explain+here+what+you+expected+to+happen%2Fwhat+went+wrong.)**
I am using 50W heaters for everything from 1 to 10 gallons, the room is not cold.
If in a warm room, under 2 gal and tank is of odd shape, then 10W is OK, but it has no built in temperature controller and external controller has to be used.
For a cool room auto setting doesn't matter, more wattage: heater could be all time on and still be not powerful enough to keep tank warm. Like using mug warmer in attempt to heat a room. Price should be the same for 25W and 50W heaters.
Thank you very much for reply.
​
>I don't know about where you are, but where I live, regulations require two layers of insulation between you and mains voltage.
I live in west-europe, so I guess we must have pretty strict similar regulations. Would you recommend taping all cables with electrical tapes as an extra safety measure?
>I'm also concerned that the metal screws might be live.
They are, would electrical tape not suffice?
>An easy way to deal with this might be too stack a second lid on top, although that does increase the risk of overheating.
I can do this and will do a test day to see how high temps go.
>Is there a suitable fuse?
All electricity in the house has fuses in the general fuse-box. Is that fine? I was also thinking of adding this: https://www.amazon.de/gp/product/B01N9NP1CV/ref=ox_sc_act_title_3?smid=A3JWKAKR8XB7XF&psc=1 as an extra safety measure just in case.
>Can the wires carry enough current? (They look okay, but I can't be sure just by looking at them.)
It's electrical wire I just found in the house. It's a single copper wire with about 1mm thickness. Thickness looked fine to me, but I wouldn't know tbh, I'm not electrically adept at all.
>What about heat dissipation? What will happen if your cooling fan fails?
I would like a way to shut down the lights if the fans fail, but I don't really know how to do that. I thought about using this: https://www.amazon.com/Inkbird-Max-1200W-Temperature-Controller-Greenhouse/dp/B07PVBG8K1/ It has a temperature sensor and you can shut off your "heating" in case it gets too warm. So if my fans would fail and it gets too hot, the lamps would shut off. And I also can get notified on my smartphone.
​
This is the fan set-up: https://imgur.com/a/rny1aXL
Found this really nice connector thing: https://www.amazon.com/gp/product/B01MAU7QD4/ref=ppx_yo_dt_b_asin_title_o00_s00?ie=UTF8&psc=1
Mars hydro has 15% off link
Inkbird heat sensor 20% off for Amazon prime members link.
(Same for the humidity sensor switch I just don't have the link handy right now.
Try this. I've used it for camping trips and it works great.
https://youtu.be/FaC0dlRENk0
Couple it with this. And keep it below 75.
https://www.amazon.com/dp/B01M6WMUYI/ref=cm_sw_r_cp_apa_sHb0zbRSER7F9
Yes, they should be the same, Inkbird also could be used for heating pads. See it here. Probe goes under water, away from heater, and maximal temperature should be set. Temperature fluctuation should be around 2C.
I think the easiest fridge to use is a freezerless design. You don't need a freezer at all, so a freezer just becomes wasted space. 4.4 cubic feet is a good size that doesn't take up too much space, but still has enough room for several ferments.
This is the temp controller I'm using. It's pretty good at managing the temp in the fridge. It's very easy to set up. You choose a target temp and a range. Mine is set to 75 degrees F with a 2 degree F range. The controller turns on the fridge at 77 degrees, and turns on the heater at 73 degrees F. Plug the fridge into the cooling outlet on the controller, and the heating mat goes into the heater plug on the controller.
I'm using a seedling heating mat to heat up the fridge. I'm not convinced that it's the best solution, but I'm going to give it a chance before I swap it out for something like a reptile heating coil.
Do your best not to drill any holes into the fridge! I murdered the fridge in the picture this morning and had to go out and buy another one. :( In the new fridge, I fished the temp sensor up the moisture drain and passed the heating mat cable through the door seal. It works just as well, and doesn't require any drilling.
Yes. A thermostat is very important to maintain the appropriate temperature range. Heat mats can get very hot, too hot for your gecko. But a thermostat will keep it just perfect for your little friend.
My favorite thermostat is this Inkbird one from amazon.
You might also consider a separate temperature controller so your heater doesn't fall on. I use this one: https://www.amazon.com/gp/aw/d/B07KC24CKD/ref=ox_sc_saved_image_10?smid=A1RUFFFCQ74BCW&psc=1
check it out
Wine fridge is one way
I have a fridge with a temperature control plug( Inkbird Pre-Wired Dual Stage Digital Temperature Controller Outlet Thermostat 110V, 1100W Heating and Cooling for Fermentation Kegerator Heating Mat ect https://www.amazon.com/dp/B015E2UFGM?ref=yo_pop_ma_swf)
With a thing of water.
I am one day going to buy a humidity sensor
You could definitely go cheaper if your boss-man is worried about price: intertap faucets
kegco couplers
The intertaps are pretty new to the scene so IDK how well they perform. I think their design is pretty close to Perlick. Perlicks have been around forever and they are really solid.
I don't know if the freezer you end up buying will have a setting above freezing, or if it will have precise enough control for an optimal kegerator. You might plan on buying one of these temp controllers if the freezer isn't capable of holding ~38F +/- 1F.
Just take any 5 gallon recipe and divide by 5 ( 5.5 # wheat malt = 1.1 #. As for temp control just Google son of a fermentation chiller. And Temperature Controller paired with a heater.
Now your recipes, Google the recipe you want ( IPA, Pilsner) or ask r/Homebrewing.
Hello! I would reccomend using the inkbird ITC-306T. I've been using one for over a year with a heat cable and it has worked great! You can set a temperature range you like on it and set an alarm to go off if it goes outside the set zone. To monitor the heat, attach the probe to the glass or the surface closest to the heat mat (the nearest surface between the snake and heat mat). Hope that made sense!
Link: https://www.amazon.com/dp/B01DZ5NVBQ/ref=cm_sw_r_cp_apa_i_MzgqDbNTY789D
Instructions on set up (the advanced model, but set up is very similar) : https://youtu.be/MOQL2llj7AM
You could get something like this, but it may be overkill. Put that in between a smart outlet and the AC
Inkbird ITC-308 Digital Temperature Controller 2-Stage Outlet Thermostat Heating and Cooling Mode Carboy Homebrew Fermenter Greenhouse Terrarium 110V 10A 1200W https://www.amazon.com/dp/B01HXM5UAC/ref=cm_sw_r_cp_api_i_0G2pDbAZ23QY1
These are good and inexpensive.
https://smile.amazon.com/Inkbird-Max-1200W-Temperature-Controller-Greenhouse/dp/B01HXM5UAC/ref=sr_1_3?keywords=inkbird+itc&qid=1562805679&s=gateway&sr=8-3
Yeah, no problem! I bought this thermometer
and this fan. My aquarium is 29 gallons, so you may need to get a different fan if yours is larger.
I use that one but I bought it in 2015 heard they are not made as well recently so was suggested this one Inkbird ITC-308 Max.1200W Heater, Cool Device Temperature Controller, Carboy, Homebrew, Fermenter, Greenhouse Terrarium Temp. Control https://www.amazon.com/dp/B01HXM5UAC/ref=cm_sw_r_cp_api_i_0POhDbS76GY6G
It’s a good point with GFCI but it is protecting you against quite a few hazards. If you’re worried over that then I would look into a GFCI breaker on wherever that outlet runs. They’re a little safer I think but most people are probably hesitant to toy with their breaker box. I think it’s an easy install, but don’t quote me on that!
So you can do that with loc line or have it set up so your nozzle breaks the surface quickly enough that little water is drained. I mentioned the Random Flow Generator or Inductor nozzles as they have open slits to force water in and add current, and these slits break the siphon quickly without forcing your nozzle to face directly upwards.
What do you mean by glue both sides of the bulkhead? I normally stick to threaded fittings in case it ever needs changed. Don’t use Teflon tape though as it’s not recommended for the tapered threading. Use Teflon/PTFE paste or whatever it is called.
With four heaters you should run them on a strip to a controller just in case. It’s a cheap addition and can handle a chiller too.
These are all small nitpicks though, overall you’re definitely going to be set for a pretty nice setup.
Realistically, the only thing that you need to create a keezer is temperature control, and even that is optional depending on what your freezer is capable of.
The key to making a freezer into a keezer is getting the temperature right. The easy way is to add temp control, something like an Inkbird ITC-308 is relatively inexpensive and is plug-n-play. These max out at somewhere around 10 amps, so there is an upper limit on freezer size because larger freezers have larger amp draws during the compressor startup. I have run two different ~6-cuft chest freezers off an ITC-308 and they both worked fine. Another option is to locate the coarse adjustment setting on the freezer's own thermostat and adjust it until you can maintain beer fridge temps. I have successfully done this as well.
As for the collar, Most chest freezers are tall enough for a keg to stand up on the floor without a collar. In-fact, you'll find many keezers that use towers mounted to the top of the lid rather than collars for mounting taps. If you are willing to serve out of a picnic tap, you don't even need a tower. I ran a keezer with picnic taps for almost a year because it allowed me to very quickly and easily convert it back to a fermentation chamber. Another added benefit to not adding a collar is not having to lift the keg as far to get it in.
Yes
https://www.amazon.com/Inkbird-Max-1200W-Temperature-Controller-Greenhouse/dp/B01HXM5UAC/ref=sr_1_1?m=A1RUFFFCQ74BCW&marketplaceID=ATVPDKIKX0DER&qid=1550597694&s=merchant-items&sr=1-1
​
fermenter: 30L
Temp controller
Tap
Or remote wireless hemostat.. Does heating or cooling. I'm using one to control a window AC. Or an Inkbird type with the probe inside the garage. There are a bunch of models and probably clones.
I picked up a heating wrap and a temp controller to run mine in the colder months.
https://www.amazon.com/gp/product/B01J1WZNM2/
https://www.amazon.com/Inkbird-Max-1200W-Temperature-Controller-Greenhouse/dp/B01HXM5UAC/
This handily fits my one gallon jugs and my three gallon carboy, which I then wrap in a towel or two. Although it's a bit bigger than the gallon jugs I haven't had any problems using it, just use a few pieces of masking tape to hold it to the carboy. I have not tried with the five gallon bucket but I don't normally brew in that batch size much.
With those fluctuations in temperature and the humidity issues, it sounds like you’d be better off spending your money on buying a temperature control unit online (~$35 for an Inkbird) and trying to find an inexpensive chest freezer on Craigslist. I know that isn’t a utilization of the crawl space, but it would yield way better cellaring conditions. Which, in theory, should yield better cellared beers. Or maybe just less spoiled by temperature fluctuations, etc.
You could use a temp controller like this
https://www.amazon.com/Inkbird-Max-1200W-Temperature-Controller-Greenhouse/dp/B01HXM5UAC
If this model can't handle the wattage of your heater they have other models. I use the C929 to control an older AC and it works great.
So I actually posted this as a thread about 20 minutes ago but it was removed without telling me why... Maybe it fits better here anyway...
So I'm about to set up the laser in the garage - after drilling the hole for the venting I'm hoping to have it up and tested this weekend. And then I thought of something....
I'm going to have a glass tube filled with water in an unheated garage... There's a server-rack in the corner, and it's not likely to get below freezing in there, but it's possible. I really don't want the water freezing in the tube.
I have a CW-5000 chiller sitting in the box waiting to be installed. There doesn't appear to be any protection against freezing built into it either, so I'm wondering what the options are:
All this assumes there's a temperature-monitoring system that can control an external pump/heater, but aquarium monitors have that down pat, and some temp. monitors can control relays like that too.
So, in a plea to the wisdom of crowds... What do y'all do ? :)
Hi are you by any chance referring to this? https://www.amazon.com/dp/B01HXM5UAC/ref=asc_df_B01HXM5UAC5114756/?tag=hyprod-20&creative=395033&creativeASIN=B01HXM5UAC&linkCode=df0&hvadid=198101685250&hvpos=1o1&hvnetw=g&hvrand=2806952839949716824&hvpone=&hvptwo=&hvqmt=&hvdev=t&hvdvcmdl=&hvlocint=&hvlocphy=9060374&hvtargid=pla-318107594620
It seems like they're used for terrariums and plants? I do have a crockpot and im actually pretty intrigued.
Why not just connect the heater to a temperature controller like this.. https://www.amazon.com/dp/B01HXM5UAC/ref=cm_sw_r_other_apa_i_aXE1DbPZY09PC
Not sure if one of these would help you but:
https://www.amazon.com/dp/B01HXM5UAC/ref=cm_sw_r_sms_apa_i_kPjUDbR0GRYKV
How often depends on the outside temperature and how well your house is insulated. What you could try is to use a temperature based solution similar to https://www.amazon.com/gp/product/B01HXM5UAC/ref=s9_dcacsd_dcoop_bw_c_x_1_w Place the temperature probe on the pipe and when the water/pipe temperature drops below a certain temperature, the pump will turn on. The one I referenced may not be the best solution for you, but it was the first thing that came up.
Or...if you want to go all in....go get you a chest freezer and one of these. Careful though, its a slippery slope into a endless hunt for the next upgrade.
https://www.amazon.com/gp/aw/d/B01HXM5UAC/ref=ox_sc_act_image_1?smid=A1RUFFFCQ74BCW&psc=1
I use one of these to regulate my heating pads. Allows you to set a 1 degree differential. It’s a little pricey but super worth it to never have to worry about your heating pad going on the fritz and heating out of control
I have a Bayite 201 that another r/cigars fellow had mentioned: https://www.amazon.com/Temperature-Controller-bayite-Pre-Wired-Thermostat/dp/B01KEYDNKK
I plugged in a 3 to 1 outlet and have the fridge and fan plugged into the cooling circuit. I have it set to cool to 65 with a 3 degree delta, so at 68 degrees, it will kick on.
I keep the sensor up at the top since it's warmer there. There can be about a 2 degree variance between top and bottom. After circulation it evens out. I also figure that this will save on electricity long run as I had it plugged in and it sounded like it was always running. When it turns off, it will reset to the lowest cooling setting which is 55, but it will turn off well before that so it's not a worry.
I still keep everything in tuppers. I haven't gotten to that level of trust yet with this thing and haven't comfy w/ KL.
Get radiator/fan combos from a junkyard, like from an old suburu. They are matched set. Hot water in the top. Less hot water out the bottom, back to the tank and repeat. Lowe Depot has fountain pumps to circulate the water in the tank. (adapters need for different size piping) This is all low pressure you just need to move a lot of water. Heating/cooling thermostat. plug the pump into heating outlet. add an exhaust fan to help cool.
As far as solar collectors. They can be simple. I would buy a "real" one and test it against a 300' roll of 1" black pipe ($100) with water pumping thru it. Put that roll in a sealed, insulated box and get some heat.
i would like to build an air conditioning system like that. what air conditioner do you use? does the air conditioner go back to its settings when it turns back on? can you provide a link to the black box and can you provide a link to the air conditioner. i found this on on amazon
is this the one u used?
edit: this one is rated for more amps
Just grab a $30 temperature controller and you can use your slow cooker as a sous vide cooker.
https://www.amazon.com/bayite-Temperature-Controller-Pre-Wired-Thermostat/dp/B01KEYDNKK
Probably the coolest think i have found. I really want one for my area but its too small for a heater. if you want cheap plug in stuff this would be awesome https://www.amazon.com/dp/B01KEYDNKK/ref=wl_it_dp_o_pC_nS_ttl?_encoding=UTF8&colid=3W2SWX0CJYGCL&coliid=I33CPIYC3TOIPW
Yeah inside the humidor then you get much better consistency.
AC Infinity MULTIFAN S2, Quiet 120mm USB Blower Fan with Speed Control, for Receiver DVR Xbox Modem AV Cabinet Cooling https://www.amazon.com/dp/B012CL2V3I/ref=cm_sw_r_cp_apa_i_hHD9AbD4XJZ1Z
I have it at the back on the floor pointing up.
This is the temp switch I got:
Temperature Controller bayite BTC201 Pre-Wired Digital Outlet Thermostat, 2 Stage Heating and Cooling Mode, 110V - 240V 10A https://www.amazon.com/dp/B01KEYDNKK/ref=cm_sw_r_cp_apa_i_WID9Ab9WE8K1C
something like this ? https://www.amazon.com/Temperature-Controller-bayite-Pre-Wired-Thermostat/dp/B01KEYDNKK/ref=sr_1_2?s=lawn-garden&ie=UTF8&qid=1525685813&sr=8-2&keywords=attic+fan+240v
I use a IR temp gauge to measure the temp of the leave more than just go by with the tent thermometer reads. I have the Temperature power supply set to 75 degrees and it turns on at 76 degrees and kicks off when it gets to 73 since the window unit I have is cheap and just has an on and off along with fan speed and not much temp control. I could go cooler but I'm trying to save on the cost of energy. I run my flower from 7pm to 7am because it's easier to maintain the lower temp when the lights are off. You can find a new window unit on sale for around $100-$120. I got one at Walmart but later noticed one for cheaper at Atwoods.
I got a radiator type then one of these
https://www.amazon.com/gp/product/B01KEYDNKK/ref=ox_sc_saved_title_9?smid=A2EFSDTWMPHWEA&psc=1
I just purchased a bayite, it's supposed to be more accurate than the inkbirds, we'll see I get it saturday.
This is an old beverage chiller I had attached a temperature control switch to it and devote it to prepare my kombucha as well as fermented vegetables in the temperature range between 70-80f
Cause where I keep them the temperature go above 30c / 86F, so you can consider this setup as normal room Temp
and about your Q preserving the kombucha ( I consider my self a beginner) but from my research yes you can preserve the kombucha in the fridge
below you can see the temperature controller I use
https://www.amazon.com/gp/product/B01KEYDNKK/ref=ppx_yo_dt_b_search_asin_title?ie=UTF8&psc=1
Maybe something like this would help. I use this in both of my greenhouses. Heat side activates when temperature drops a set amount below a set point (which you can vary) and cooling side activates when temperature rises a set amount above a set point.
https://www.amazon.com/bayite-Temperature-Controller-Thermostat-Pre-wired/dp/B01KMA6EAM/ref=sr_1_1?keywords=bayite+Temperature+Controller+1650W+BTC211+Digital+Outlet+Thermostat%2C+Pre-Wired%2C+2+Stage+Heating+and+Cooling+Mode%2C+110V+-+240V+15A&qid=1567183786&s=industrial&sr=1-1
I bught this looks to be about the same thing
bayite Temperature Controller 1650W BTC211 Digital Outlet Thermostat, Pre-Wired, 2 Stage Heating and Cooling Mode, 110V - 240V 15A https://www.amazon.com/dp/B01KMA6EAM/ref=cm_sw_r_cp_apa_i_CjK2CbQ8PN8XZ
This was the entire set up I bought and it's working very well.
You might do fine with just one light instead of three.
One of these: $79.99
Roleadro LED Grow Light, Galaxyhydro Series 300W Indoor Plant Grow Lights Full Spectrum with UV&IR for Veg and Flower
https://www.amazon.com/gp/product/B00PH1MQV8/ref=oh_aui_detailpage_o03_s00?ie=UTF8&psc=1
Two of these: $69.99
Roleadro Upgrade and Newly Developed LED Grow Light Full Spectrum 2nd Generation Series 300w Plants Light
https://www.amazon.com/gp/product/B01HI3AFYM/ref=oh_aui_detailpage_o03_s00?ie=UTF8&psc=1
VIVOSUN Durable Waterproof Seedling Heat Mat Warm Hydroponic Heating Pad 48" x 20.75"
https://www.amazon.com/gp/product/B01EMXI6VA/ref=oh_aui_detailpage_o01_s00?ie=UTF8&psc=1
$53.99
Bayite Temperature Controller
https://www.amazon.com/gp/product/B01KMA6EAM/ref=oh_aui_detailpage_o04_s00?ie=UTF8&psc=1
Inkbird ITC-100 PID Thermostat SSR Heat Sink: https://www.amazon.com/dp/B01MFAOLXX/ref=cm_sw_r_cp_api_i_Qn30Cb07FF17Q
Would this PID work (0-400F)? Or not sure if you use a different model with more 'channels' (I think you said you run 2 per platen, and I think from one unit?)...
https://www.amazon.com/dp/B01KNXETWS
In my old day job, I've used setups like this (for different purposes)... you might find this link handy (and maybe some within) - lots of tips for DIY lab stuff (which is entirely relevant for this venture!)... this specific link has a build for a precise/reliable "thermo-coupled heating pad" (within 0.1-0.01deg) - but maybe this is overkill (and ~$200) unless you've found reliability issues with cheaper units...
https://labrigger.com/blog/2011/09/28/diy-heat-pad/
https://www.mcmaster.com/38615k71
Otherwise, I'll wait for the post to get other details... thanks again!
https://www.amazon.com/gp/product/B01KNXETWS/ref=ppx_yo_dt_b_asin_title_o07_s00?ie=UTF8&psc=1
Sous vide on the cheap. This requires a $60 initial investment, but you can turn a cheap cut into some of the best meat you've ever eaten so I promise it's worth it. You need a temperature controller for your crock pot, I bought this one you have to wire it yourself with an extension cord, or you can buy a prewired one for $25 more. Buy some Ziploc vacuum bags.
Fill your crock pot with hot water and plug it into the temperature controller. Put the probe in the bottom of the crock pot and set the temperature based on the type of meat your using and how done you want it,Here's a chart. Season the meat. Seal it in a vacuum bag, put it in the water and put the lid on the crock pot. I like to leave the corner of the vacuum bag with the valve out of the water, it helps it keep the seal a bit better. When the meat is done, if you plan on eating it immediately, pat it dry, then quickly sear all sides on a smoking hot pan. If not, chill it in ice water and save it in the fridge for up to a week, or freeze it. You can reheat thin cuts by searing them, reheat roasts in the crock pot. Depending on how big your crock pot is, you can cook several days worth of meat at once.
I find it's best to use dry spices, or a little bit of fresh herbs. Garlic powder works better than raw. Don't use quite as much seasoning as you would cooking using other methods. Avoid putting sauces in the bag itself, especially acidic/alcoholic ones. If you plan on marinating/brining, do that first, then pat the meat dry before putting it in the bag. Adding additional fats, like butter/baconfat/lard helps the meat retain even more moisture.
If you're using a tough cut of meat you can, and should, cook it for a long time. Some people cook it for 72 hours, the longest I've done is 48. If your cut has a lot of connective tissue, like brisket, you should cook it at at least 140-145F to help break it down. Most steaks are good after 4-6 hours, I wouldn't cook them for longer than 16. If you're cooking a thin tough cut, like flank steak, which requires about 12 hours, bunch it or fold it in the bag instead of laying it flat, to help prevent moisture loss. Delicate meat like chicken breasts should not be cooked for more than 4 hours. Fish no more than 1. Some meats have higher recommended temps, but the hotter you set the bath the faster the meat will lose moisture, so I recommend doing most of the cooking at a lower temp like 140F, then raising it to the final temp over the last hour or so.
It's fairly idiot proof, exact timing isn't really important, but the meat will come out at the perfect temperature. The results are really impressive, and you can feel proud serving someone a meal that was cooked in a crock pot.
Be careful about the minifridges. I had one from college I was going to use, but then I noticed the refrigerant lines were in the freezer portion, and I needed to remove that portion so the kegs could fit.
I ended up buying a chest freezer on craigslist. Then I bought this to control the temp.
Ranco link to buy: Amazon
Johnson's link to buy: Amazon
I use a Ranco ETC-111000. It's really simple to wire up an extension cord to it.
Awful price. http://www.amazon.com/gp/product/B0015NV5BE
edit: I see that this one is "pre-wired". I have one of these and it took me 10 minutes to wire it in using a left over computer power cable. I don't see how adding a wire results in a 40$ increase in price though.
I built my Keezer in stages and it really takes the sting out of the total cost. I started with one ball lock keg and one Perlick 525SS tap and 4" all stainless steel shank. Once I got things moving, I added a gas distribution block, another keg, another SS shank and another 525SS tap. Eventually I'll max out at 4 kegs in my GE 7cf keezer (fcm7suww) or 5 if I splurge and get a mini keg for the hump.
For a controller, I used a RANCO ETC-111000 Digital Cold Temperature Control that I got got $53.95 from Amazon. This is FAR superior to the STC-1000 that I have used in the past. The trick is, its not wired so you have to do a little work yourself. I found this video on youtube that explains how to wire it up in a way that even my little brother could figure out. I used automotive trim double stick tape and stuck it to the back of the keezer, done and done.
Everything in my keezer that is metal and touches beer is stainless steel. Its more expensive but it should last just about forever and I'll never worry about corrosion. I did all my gas and liquid in 1/4" MFL/FFL SS fittings and it makes taking things apart for cleaning super easy. Again, more expensive but I didn't go buy it all at once.
Johnson Controls A419ABC-1C Electronic Temp Controller https://www.amazon.com/dp/B0026NDC5O/ref=cm_sw_r_cp_apa_tH-Pyb47HP8YT
These are used for that kind of application. They are a bit pricey though. What are you trying to make? And what is the budget?
Another way: just get a cheap temp controller, like this: www.amazon.com/Johnson-Controls-A419ABC-1C-Electronic-Controller/dp/B0026NDC5O
Edit: STC-1000 looks better than that, imo anyway.
Probably the easiest way to do this. If you're like the OP (and me) and hardware hacking is your end goal, there is plenty of different ways, a couple quick ideas:
Relay: http://www.adafruit.com/products/268
Temp Probe: http://www.adafruit.com/products/381
Arduino R3: http://www.adafruit.com/products/50
Personally, I'd have it either hooked up to a PC, or wireless, to monitor it remotely. If you want the stand-alone setup, add buttons and LCD. It would be really easy to hack this together.
Apparently, this has been in the back of my mind, since I busted that out and the pseudocode in a couple mins... Now to make my mini fridge be able to hold my fermentation bucket...
Edit: Doesn't heat, of course, I'm assuming you're wanting to keep below room temp.
Temperature controllers are great. You can get a cheap-ish digital one at Amazon if you don't mind wiring it.
If you can use the fridge, you can use this temp controller (Johnson controls A419 in case the link doesn't post) to gradually lower your ferm temp.
http://www.amazon.com/Johnson-Controls-A419ABC-1C-Electronic-Controller/dp/B0026NDC5O
Good luck!
Things like these are why I love Reddit. Two of my fave things coming together. I tried a few months ago with a REALLY basic setup, and got pretty good results. It was on homemade juice that was really simple, but it did well. For the record, here's my setup.
controller
container/heating element
It's a pretty good and cheap setup, eventually I'll add a aquarium pump to give motion to the water bath.
If that's the case might I recommend a fermentation chamber? It's not going to fit a conical fermenter but I can easily put 3, 6.5 gallon, carboys in there.
https://www.homebrewtalk.com/diy-fermentation-chamber.html
The Inkbird is usually on sale for about $30 on Amazon. Follow http://homebrewfinds.com to get one on the cheap!
I built mine using an STC1000, but I had to go to Radio Shack and grab a project box to make it look pretty.
For the heating unit, I purchased a $12 mini heater from Amazon and also installed a 12V fan that is on 24/7. Eventually I tossed a unit to help with moisture in there as well. I can't remember the name of it...found it on Homebrewfinds.
I'd run outside to take photos of my build but it's raining something hard right now ;(
Yep, wire in a new STC 1000 to the power circuit, run the probe in through a hole and forget about the existing thermostat in my opinion.
Realistically its amazing this machine still runs and freezes after 65 years. This STC1000 will allow you to wire it to AC voltage, and the power of the fridge to the STC1000, it will turn the fridge power on or off based on a set point decided by that temperature probe. Best bet would be wire it all up, attach the STC1000 to the back externally, and place the probe inside a small tube of water mounted internally.
Look up STC1000 fridge mods, there are guides for beer fermentation chambers all over google that perform almost exactly what you'll be doing.
http://www.amazon.com/AGPtek-All-purpose-Temperature-Controller-STC-1000/dp/B00862G3TQ
I was going to get this one https://www.amazon.com/dp/B00862G3TQ/ref=wl_it_dp_o_pd_nS_ttl?_encoding=UTF8&colid=OKWRRIZTGC8S&coliid=I3LGI3WXJWR5S1
for $15 (but requires a tiny bit of wiring) and use with a turkey roaster oven (that I would have to buy) but the anova went on sale around halloween and was 3 miles away at target and easy to handle/store so I ended up with that.
Haha fancy. So you have this connected to, which lasko ceramic heater exactly? I think I'm just going to emulate your setup if you don't mind.
Distilling helps a bit, i.e. boiling and catching/condensing the vapour in a separate vessel, but not enough to get it clear. You could get clear ice in a freezer without a cooler/insulation if your set the freezer between 0°C and -1°C (you'll probably need a PID controller like the the STC-1000 (available on Amazon). It will turn the freezer on/off to keep the temperature steady at just below the freezing point, which should result in very slow freezing and larger ice crystal formation.
EDIT: only the most obsessive will do this.
Do you just want a kegerator/keezer for under 600 or a whole brew setup plus kegerator for 600?
If just a kegerator and assuming you are in the US then it is totally feasible.
STC-1000 $17.98
Keg, Faucet, Shank, Regulator CO2 tank $251.99 but cheaper if you use a picnic tap
7.1 cu ft Freezer $178
Total of $447.97
You could possibly get a CO2 tank of CL cheaper and a keg cheaper. I have paid well less then $100 for a keg and 5lb CO2 tank. But the point is a kegerator takes a bit of an initial investment but you can upgrade as you see fit once you make the initial jump.
before I got my anova I was going to make a diy sous vide rig out of a big crock pot or turkey roaster using the below $15 temp controller. put the probe into water turn crockpot on high and it will read the probe and keep it exact temp. You would need to maintain some level of liquid in there though.
https://www.amazon.com/dp/B00862G3TQ/_encoding=UTF8?coliid=I3LGI3WXJWR5S1&colid=OKWRRIZTGC8S
of if you don't want to wire it yourself + mount it in some kind of box, for $35 there's this one: https://www.amazon.com/dp/B011296704/_encoding=UTF8?coliid=ISIXJ4NHGY6W5&colid=OKWRRIZTGC8S
Really though if you have the $150 for an anova that's a purpose built thing that I think I'm the 3rd person at least to think sounds like it would do exactly what you want. If you don't want to use bags you could probably stick a heavy pot in a cooler or rubbermaid tub of water and the anova and there's your temp controlled slow cooker there. It costs more than the temp controller and a crock pot for sure but it will do some extra stuff that if you have the cash you will surely appreciate in the future.
I plan on building a dual-stage temp controller using a STC-1000 in the next week or so to replace my current analog controller. You could build always yourself a new one or I could sell you my analog controller for cheap as soon as I don't need it anymore.
Buy an stc-1000
http://www.amazon.com/Digital-All-purpose-Temperature-Controller-STC-1000/dp/B00862G3TQ
http://mostlyharmlessales.files.wordpress.com/2013/08/temp-controller-wiring-diagram.jpg
Cool, thanks! Do we know the difference between this and the one you got, which is 5 bucks cheaper?
I'm just going to echo others stating that the stc1000 is probably not the controller you want for HERMS. Look at a PID like this: http://www.amazon.com/IMAGE%C2%AE-SSR-25DA-Auto-tuning-Temperature-Controller/dp/B0087O6S2A/ref=sr_1_1?ie=UTF8&qid=1404837762&sr=8-1&keywords=pid
I went with this from Amazon.
It does not have an interal SSR that controls the other. Not sure if I've seen one that does. There are cheaper PID options out there, but, iirc, this was the best Prime deal I found that came with the SSR and heat sink.
Everything else in your post is spot on though as to why you'd want the PID over a temp controller.
You can install one of these. They are cheap and get the job done. My brewing partner and I have 2 17+ cu ft keezers going right now that use these controllers. We bought used chest freezers off Craigslist for less than $100 a piece. That way if they break it's no big deal. Then again, we just installed collars - nothing as nice as what OP did here.
thanks.
http://www.amazon.com/Elitech-All-Purpose-Temperature-Controller-Thermostat/dp/B008KVCPH2/ref=cm_cmu_pg__header
theres a bunch of videos on youtube using it
most fermentation chambers don't use the actual fridge/freezer thermostat to controll temperature. A separate temperature controller such as the stc-1000 is used. The fridge and a heating source are turned off and on by the temperature contoller.
http://www.instructables.com/id/Sous-vide-cooker-for-less-than-40/
I found some hotspots with the stagnant water, so I added this to keep the water moving, and a palce to tie the temp probe to.
stc-1000
crock pot
just saw your post after submitting my reply, deleting that and adding it as follows:
What i tend to do is use a large plastic tub with water in it, and have the fermentors submerge to the beer level in the water. Keeping it all in my basement which tends to stay below 60 in all seasons but summer (keep it upstairs in the AC then).
Someone else's example
I then use a fish tank heater hooked up through a Stc-1000 thermostat to keep it all at the right temp.
Used an old PC power supply housing, and an outlet i had laying around for the hookups. There are plenty of guides online for wiring up the thermostat.
Here's a better option: install a thermostat like This and rewire your freezer to run off of the thermostat, which comes with a thermometer probe that you could probably put directly in the carboy. That way, as soon as your fermenting wort reaches 1 degree too warm the thermostat will turn on the freezer until it cools back down.
Nice job for a first build. I've got 2 questions and a comment.
First the comment because I'm a pedant :P Since you are using a freezer for this it is actually a keezer and not a kegerator. But that's all semantics really.
Now for the questions. First off, how are you loading the kegs? I'm assuming that you've left the hinges in tact and you just lift the top like normal.
Second question. How are you regulating temperature inside the chest freezer? If you are using the freezer's thermostat I might recommend switching that out for a better temperature controler such as the STC-1000 This is what most folks use for their kegerator/keezer builds from the /r/Homebrewing community.
Nice work none-the-less.
If you use a smaller heat source, like a hotplate (or maybe an open-top electric pot) paired with a thermostatic controller and sensor, you can build a rig to accurately regulate your temperature. (Basically you are making a homemade sous-vide)
I used [heating wraps for car batteries] (http://imgur.com/GnKiENE) and [digital temperature controllers] (http://imgur.com/Z2iqK17) to build thermally-controlled propane tank heaters for our coffee roaster (to maintain consistent gas pressure). I'm sure you could adapt the principle using an appropriate relay and sensor for your heating device. [This] (http://www.amazon.com/Elitech-All-Purpose-Temperature-Controller-Thermostat/dp/B008KVCPH2/ref=pd_sim_indust_2?ie=UTF8&refRID=10GS75ZK14XMDTBE2J7W) is what I used and I know it isn't correct for your application, but it will give you an idea of what type of device to look for.
https://www.amazon.com/dp/B008KVCPH2/ref=pe_385040_30332190_TE_dp_1 este es el que me compre, creo q hay un equivalente en 220v por precio similar me imagino. Podes controlar o frio o calor uno a la vez. Por lo que entiendo le pelas el cable a la heladera y lo mandas a la salida, después pones enchufe a 220 en la otra bornera y listo, pones la temperatura que queres y funka.
I just use a mini space heater and temperature controller:
http://www.amazon.com/Lasko-100-MyHeat-Personal-Ceramic/dp/B003XDTWN2?ie=UTF8&psc=1&redirect=true&ref_=oh_aui_search_detailpage
http://www.amazon.com/Lerway-All-Purpose-Temperature-Controller-Thermostat/dp/B008KVCPH2?ie=UTF8&psc=1&redirect=true&ref_=oh_aui_search_detailpage
Simple, easy, and works extremely well.
STC-1000? its not "smart" but all it does is flip a relay when a set temp is reached. and its dirt cheap so that's also good. does require a little bit of AC wiring so if you're not comfortable with that might look else where.
I'm also hoping it's heating OR cooling (two outlets) to be controller by one controller ... otherwise that's an odd design. The seller should be able to clear it up. My guess is they can either build them with a dual stage Celsius controller or a single stage Fahrenheit controller.
In terms of advantages for the STC-1000+, you have a few advantages. Main thing is stepped fermentation control - so, say, 50 F for three days, ramp to 63 over twelve hours, hold at 63 for 5 days, and then drop to 35 over two days (a lager profile I just made up). Head over to HBT and look at alphaomega's thread on the STC-1000+. For a more condensed version, just keep in mind that the Blackbox is run by the STC-1000+ (but I can't tell you which version).
Another option would be to buy the Celsius dual stage controller, and ship it to the guy who does Blackbox and have him flash it for a fee (assuming he still offers this). If you'd like to do it yourself, you need a bit of DIY interest (usually common in homebrewers) and an arduino/jumper cables. Take a look at the guide for the STC-1000+ on github to get an idea of what's involved.
You can wrap this around your fermenter;
http://www.amazon.com/Brew-Belt-Fermentation-Heating-1-Count/dp/B001D6IUB6
Also use this as a thermostat to regulate temperatures/turn the brew belt on and off.
http://www.amazon.com/All-Purpose-Temperature-Controller-Thermostat-Stc-1000/dp/B008KVCPH2/ref=sr_1_1?ie=UTF8&qid=1421948732&sr=8-1&keywords=stc1000&pebp=1421948735262&peasin=B008KVCPH2
You'll attach the probe to the side of the fermenter, insulate it with a towel. Then put the brew belt either above or below (not touching the towel or the probe). The STC will kick on the belt whenever the beer is below whatever temperature you set on the STC.
The STC-1000, it's a temperature controller which is used by a lot of homebrewers in fermentation chambers
More info here and for example here.
I personally use something like the brewpi which I made myself (software and hardware), so I can't speak for how good an STC-1000 would work. But I hear a lot of people use it so it should be good.
Do you have a thermostat and if not have you considered getting one?
http://www.amazon.com/Elitech-All-Purpose-Temperature-Controller-Thermostat/dp/B008KVCPH2/ref=sr_sp-atf_title_1_1?s=hi&ie=UTF8&qid=1368237703&sr=1-1&keywords=thermostat+stc-1000
I would also increase the size of the hole from your tower to your cold storage. Keeping your lines cool will reduce your foam. Speaking of foaming, do you have any issues with that? If so did you equalize the pressure with beer line length and resistance?
Edit: Forgot to say. Looks great.
I use these for home brewing. They work great. I believe it has a wire break cutout.
http://www.amazon.com/Lerway-All-Purpose-Temperature-Controller-Thermostat/dp/B008KVCPH2/ref=sr_1_1?ie=UTF8&qid=1426563423&sr=8-1&keywords=temperature+controller
its on 120v controller, that's why I used 2 transformers. I guess if i got a 12v controller i would have no issues then?
For $20 this is pretty popular from what I understand, if you are willing to delve into your electronics.
http://www.amazon.com/gp/product/B008KVCPH2/ref=oh_aui_detailpage_o02_s00?ie=UTF8&psc=1
Nice. How about https://www.amazon.com/gp/product/B008KVCPH2/ref=oh_aui_detailpage_o04_s00?ie=UTF8&psc=1
To permenantly maintain it at that temperature? I use one to keep a freezer at 0 degrees Celcius for kimchi and meat.
This approach came up on the Facebook group:
https://www.amazon.com/gp/product/B07F3PBX7J
And control the temperature using one of:
https://www.amazon.com/gp/product/B01E9IO6N0
https://www.amazon.com/gp/product/B008KVCPH2
If I do this, I'd personally use an ESP32 microcontroller instead as I have those and like playing with them.
It's not stupid at all. If you have a chest freezer, you are ahead of the game.
The temp controller has an outlet for cooling, and another for heating. You plug your freezer into the cooling one, and something else (heating pad, light bulb in a can, etc) into the heating one. You then attach the temperature probe to your fermentor (I tape mine down with some foam insulation around it so that I don't measure air temp).
You set the desired temp, and when the beer is warmer than that (give or take a degree or so), the freezer comes on. When the desired temp is met, the outlet goes dead, and the freezer goes off.
An STC-1000 costs like $15. Get a project box, stick it in there with the outlets, wire it up. Takes 15, 20 minutes to set up, and there are tons of tutorials online.
I really want to get into kegging. I have a chest freezer that I can convert, and I have watched some videos about that, but the main thing I'm unsure about is the kegs themselves (and the parts that go along with it). What kind of keg do I want to get? Is there a list of parts that I need? What's a decent price for a keg? I was trying to see if there were some cyber monday deals that I could jump on, but I feel so out of my depths when it comes to this.
Edit: by the way I got this temperature controller already, but aside from that and the chest freezer itself I have/know nothing.
I've got a nice insulated cab built for my chamber. Just waiting for the right mini fridge to pop up on craigslist and I'm going to slap it on the side of the cabinet. Do you have one of these? http://www.amazon.com/gp/product/B008KVCPH2/ref=oh_details_o00_s00_i00?ie=UTF8&psc=1
Amazon. Simple and nice enough (in Celsius but whatever!)
I made one for maybe $60 and it works quite well.
Didn't really do it to save money. Just seemed like a fun project. It isn't quite done, but it is functional. Eventually it won't look so janky and will live in a project box of some sort.
Janky Sous Vide
Or be a big spender and get one of those $15 temp controls to cycle that light off and on.
This sure does seem expensive compared to something like this.
What makes the Fermostat better?
Can you possibly supply a general parts list? I must make one of these now! I found the controller here.
But what about the enclosure size? The tube connected to the submerged black box? We need details please!!!
This guy: https://www.amazon.com/Docooler-Temperature-Controller-Thermocouple-58-194-F/dp/B00F05UI8O/ref=sr_1_16?ie=UTF8&qid=1494304437&sr=8-16&keywords=digital+thermocouple
How about this? I imagine monitoring the temp of equipment is important. How hot do things get? This goes up to 194° F.
I know, right?
Boom...$15 dollars and has most of the same features except for the SD card stuff.
I got the temp controller from a recent homebrewfinds post. It's not quite an stc1000, I had one of those for my fermentation chamber but figured the dual stage temperature control would work better for my fermentation chamber. I got it from amazon an it works great so far http://www.amazon.com/gp/product/B00F05UI8O/
The temp unit is this one in case anyone was wondering.
I'm sorry, total noob here. Do you mean something like this and does this get wired directly into the mini fridge? I feel silly but I have no idea about any of this.
I made a box out of 3" solid insulation foam(dense styrene). The fermenter sits on a base and there are two 1" pvc pipes that go up through the corners. The 5 sided top slides over these. Generally this will keep it warm, but if not I use an aquarium heater with a [$16 thermocontroller from Amazon](Inkbird All-Purpose Digital Temperature Controller Fahrenheit &Centigrade Thermostat w Sensor 2 Relays https://www.amazon.com/dp/B00OXPE8U6/ref=cm_sw_r_cp_api_7TfjzbFJHYNNT)
Works great for letting those starches convert too
No need.
All you need is one of these things and a crock pot.
Getting everything working requires a bit of handiwork and some wiring, but it's a half hour project that has many uses beyond sous vide. I initially made mine for homebrewing, but now I use it more often for sous vide.
Here's a handy instructional.
I've found that water circulation isn't necessary unless you're doing large cuts in a massive crock, but if it's something you require you can use a high-temp water pump from Amazon for a few bucks.
All said my sous vide rig cost me about 40 bucks, plus putting the controller together was a fun project. I also use it to save money by controlling my fridge's temperature more precisely, control traditional crock meals more accurately, and to keep my space heater from over-heating my room.
Edit: I should have linked this: Inkbird ITC-1000
The other one only allows either cooling or heating at any given time as opposed to both at once. This other model is more versatile (though admittedly it won't make a difference for sous vide).
I'm planning on using an Inkbird temperature controller to regulate a heating element in a cooler used as a HLT. Will there be an issue if there is nothing hooked up the the cooling connections of the Inkbird?
You can get a cheap external thermostat that could help.
All you need is the slow cooker and a temperature control unit like this one or if your mechanically inclined the ITC-1000, and plug in the controller then plug the slowcooker into the controller then set the controller to desired temp and walk away.
But remember, you don't want the auto slowcooker. You want one like this with just a 3 way dial.
I set my slowcooker to low and the ITC-1000 to 112° for 5 hours, remove the yogurt and stick in the fridge.
Actually, right on Amazon. There are a bunch of different types, make sure you get one that has the wiring you need. Temperature probes can probably be bought on Amazon as well. I'll check later today for the link to where I get mine...
 
If you're going the crock pot route, you won't need these, though!
apfelwein, when fermenting you want to keep it at 20°, the crock pot is controlled by my stc 1000 Temperature Controller at that time it was 10° in the brewhouse, it also works for quark cheese.
Oh cool, thanks for that info!
The temp fluctuations are pretty normal for this thing. When completely stock they both jump around by ~4C. Not sure if it's a software or hardware thing.
What's really wild is if I monitor the hotend and bed thermistors at ambient temperature, they both "bounce" by a bit, but they bounce EXACTLY opposite; when the hotend moves higher than actual, the bed moves lower. The graph in Pronterface makes a pretty regular square wave, and the hotend and bed are inverse of each other almost exactly. It's pretty weird.
I use some D18B20 temp sensors on my Rasp Pi for homebrewing (beer) temperature control and those will only bounce around a fraction of a degree F.
Hell, I've built 2 temp controllers out of these suuuuper cheap Inkbird boxes: https://www.amazon.com/Inkbird-All-Purpose-Temperature-Controller-Fahrenheit/dp/B00OXPE8U6 that come with an NTC thermistor. I can tape it to my hotbed and it's reading is correct and only fluctuates by about 0.5F
Fridge's temperature controls are crap and incapable of controlling temperatures for ales, and inadequate for controlling temperatures for lagers or cold crashes.
You need a digital temperature control. You plug your fridge into it, you tape your temperature probe in the fridge, and you plug the control into the wall. Leave your fridge on the coldest setting and this will power your fridge on based on your set temperature to accurately control temperature within a couple degrees.
Complete solution: https://www.amazon.com/Inkbird-Itc-308-Temperature-Controller-Thermostat/dp/B01MDSWXY4/
Or you can do what I did and scavenge a computer cable and wall outlet and build one out of something like this: https://www.amazon.com/Inkbird-All-Purpose-Temperature-Controller-Fahrenheit/dp/B00OXPE8U6/
These are perfect for:
As a bonus, you can flip these into heating mode, wire up an element and use it to control mash temperature in a recirculated mash scenario, or to just make perfect sous vide.
Ziplock bags are fine, but don't skimp on them. Flimsy bags will get holes in them and ruin your food. And get the kind with the zipper, not the pinch-close.
If your apparatus is just a party cooler that you pour hot water into, then your thermometer can just be a cheap instant-read with its probe pushed through a cork. You'll need to check and adjust the water about every 20 minutes.
I do my sous-viding in Hefty brand freezer bags, in a part cooler, with a jury-rigged temperature controller made from an STC-1000, a cheap aquarium pump, and an immersion element. (Not those exact models.) Oh, and an outlet and outlet box I bought at Lowes, and the plug from an old fan, which I was later informed was not previously garbage.
Lessons learned: you'll burn out at least one heating element, and aquarium pumps are not reliable after your flimsy ziplock bag leaks meat juice into the cooler and gums up the impeller. Buy a spare of each.
Edit: Oh! and when you take the meat out, let it cool and dry off for a couple minutes before you finish it on the grill. You'll get a better crust and (very slightly) less overcooking around the edges.
You could try something like this in a closed Chamber.
build one for my FDM printer with a 220V version of this and it reaches 60°C easily. could definetly go higher i think.
A cheap temperature controller and you're good to go.
You could also just heat up the inside of your building chamber with a small version of this. This ensures a good cooling of any printer components.
Check the dimensions, but yea for the most part any will work, just add this.
https://www.amazon.com/Inkbird-All-Purpose-Temperature-Controller-Fahrenheit/dp/B00OXPE8U6/ref=sr_1_1?ie=UTF8&qid=1506542459&sr=8-1&keywords=stc-100
This is the temperature controller I purchased.
https://www.amazon.com/gp/product/B00OXPE8U6/ref=oh_aui_detailpage_o01_s00?ie=UTF8&psc=1
These controllers work great. Be sure to get the correct voltage and C° or F° as you require.
Inkbird's ITC1000 is basically the same as an STC and reads out in F.
Don't look at the wiring diagram in the pic scroll down and look at the reviews, the top review has the correct wiring diagram. Pretty cheap.
https://www.amazon.com/gp/product/B00OXPE8U6/ref=s9_top_hd_bw_bKkBEp_g328_i2?pf_rd_m=ATVPDKIKX0DER&pf_rd_s=merchandised-search-3&pf_rd_r=JBG83X938MVC4N3SSKC6&pf_rd_r=JBG83X938MVC4N3SSKC6&pf_rd_t=101&pf_rd_p=fa38cb29-47ed-4190-b66d-f09bac95dab6&pf_rd_p=fa38cb29-47ed-4190-b66d-f09bac95dab6&pf_rd_i=306533011#customerReviews
I assume not, but any idea if this would work in an Inkbird? Are internal boards the same, or different?
Thanks for the info. I was looking to add the extra relay because I have read that some devices draw more than 10A when they first turn on, which may cause a fuse to blow, malfunction in the STC-1000, and/or possibly a fire. These links describe what I am talking about:
http://www.homebrewtalk.com/f258/ebay-aquarium-temp-controller-modifing-ssr-361644/
http://www.reddit.com/r/Homebrewing/comments/2bmp54/i_see_a_lot_of_keezer_builds_on_here_but_never/
This is the exact controller I bought:
http://www.amazon.com/gp/product/B00OXPE8U6/ref=oh_aui_detailpage_o02_s00?ie=UTF8&psc=1
Here is the label on the back:
http://www.homebrewfinds.com/wp-content/uploads/2015/02/75per_img_7946-225x300.jpg
Here's a list of all the parts.
Project box:
http://www.amazon.com/gp/aw/d/B0002BSRIO
Power Socket Plugs:
http://www.amazon.com/gp/aw/d/B008J80J1A
Power Inlet:
http://www.amazon.com/gp/aw/d/B00917Z96S
Temp Controller:
http://www.amazon.com/gp/aw/d/B00OXPE8U6
I already had some wire and the crimp on connectors.
It certainly makes things easier. All I did was buy one of these minifridges and an InkBird to control the temp and I was off to the races. I can fit two 3gallon Better Bottles and their blowoff tubes in this setup without any modifications to the fridge.
Edit: crappy pic
Thanks for the tip, I'll look into them. as long as it's above 5% alcohol. And you really do need to check them out, though, you have to use this for their fermentation chambers:http://www.amazon.com/Inkbird-Itc-308-Temperature-Controller-Thermostat/dp/B011296704.
What is the temperature range you are dealing with? If your ambient temperature doesn't get too high you might be able to get away with just using a carboy heater and a temperature controller to keep it from getting too cold.. If your ambient temperature gets too high then a fridge might be your best bet. Check out [this] (https://www.amazon.com/Inkbird-Itc-308-Temperature-Controller-Thermostat/dp/B011296704/ref=sr_1_2?s=industrial&ie=UTF8&qid=1484573145&sr=1-2-spons&keywords=inkbird+temperature+controller&psc=1) temperature controller and pick up a cheap carboy wrap. Plug the fridge into the cooling outlet and the wrap into the heating outlet. You can keep it + or - 1 degree F with this setup.
Congrats! Adding onto what the others have mentioned, just to make sure, you're regulating your heat source(s) with a thermostat right?
If you're not, I highly recommend unplugging the heat for now and ordering one of these from amazon so your new baby stays safe.
Pull the wiring on the fridge (often under the light), and bypass the thermometer. The the fridge should run then constantly and no longer be effected by "auto-defrost". Next spend $35 on an external controller and set it to whatever range you want to keep the meat at. I let mine fluctuate between 34 and 38F.
I do but I usually go hiking/surfing and don't spend that much time at home either. I just bought a temperature controller though, gonna hook it up to my crockpot, hopefully the set up works!
http://www.amazon.com/Inkbird-Itc-308-Temperature-Controller-Thermostat/dp/B011296704/ref=sr_1_3?ie=UTF8&qid=1464917971&sr=8-3&keywords=temperature+controller
I just bought one from Best Buy for $169.99. This guy is 33 inches tall with an inside dimension close to 30. It's perfect. Fits 2 fermentors side by side plus a little shelf for other stuff.
http://www.bestbuy.com/site/insignia-7-0-cu-ft-chest-freezer-white/8390027.p?id=1219691058071&skuId=8390027&cmp=RMX
I combined that with an inkbird dual action temp controller from amazon for about $40. https://www.amazon.com/dp/B011296704/ref=cm_sw_r_other_apa_HGXwxbJ266D5X
https://www.amazon.com/Inkbird-Itc-308-Temperature-Controller-Thermostat/dp/B011296704?ie=UTF8&linkCode=sl1&linkId=a949b03071a96f82404568f00463b4ab&ref_=as_li_ss_tl&tag=brulosophy-20
Basically I'm wanting to make my kegerator run double duty as a fermentation chamber when I'm out of beer. I was thinking about getting [this](https://www.amazon.com/Inkbird-Itc-308-Temperature-Controller-Thermostat/dp/B011296704/ref=sr_1_3?ie=UTF8&qid=1465747113&sr=8- 3&keywords=inkbird+temperature+controller) temperature controller and having it regulate my mini fridge during fermentation and then removing it and letting the fridge's own thermostat take over when there's a full keg in it. Will this cause any problems with the fridge's own adjustable thermostat?
I bought this off Amazon and it works great with a chest freezer:
https://www.amazon.ca/Inkbird-ITC-308-Temperature-Controller-Thermostat/dp/B011296704?ie=UTF8&ref_=pe_386430_190052370_TE_item
Ok, I have done projects like this quite a bit; to get it all rigged up is going to take quite a bit of time. I think you should explore another option: for not much more you can buy a temperature controller that all you have to do is plug in. (see link)
Of course if you are building this because you want to have fun and do it yourself, the other guys in this thread have done a great job of explaining things.
https://www.amazon.com/dp/B011296704/ref=pd_lpo_sbs_dp_ss_1?pf_rd_p=1944687622&pf_rd_s=lpo-top-stripe-1&pf_rd_t=201&pf_rd_i=B00368D6JA&pf_rd_m=ATVPDKIKX0DER&pf_rd_r=843FW951JVNQDMT7TE1B
https://www.amazon.com/dp/B011296704/ref=pd_lpo_sbs_dp_ss_1?pf_rd_p=1944687582&pf_rd_s=lpo-top-stripe-1&pf_rd_t=201&pf_rd_i=B00OXPE8U6&pf_rd_m=ATVPDKIKX0DER&pf_rd_r=T14FVA59Q7GWT7AVFE30
They are pretty good
A digital temperature controller and a crock pot will work. The one below is ~$40 but you can build one cheaper using an ST-1000 controller.
https://www.amazon.com/Inkbird-Itc-308-Temperature-Controller-Thermostat/dp/B011296704
Correct the one you linked or http://www.amazon.com/Inkbird-Itc-308-Temperature-Controller-Thermostat/dp/B011296704/ref=sr_1_1?ie=UTF8&qid=1463775409&sr=8-1&keywords=itc+308 will be what you want, you basically plug the fridge into this and plug this into the wall, like a surge protector. It has a temp probe you can stick in the fridge, it stops supplying power once fridge is at a certain temp. These work great for fermentation control as well because they are 2 stage meaning the can controll the fridge as well as a heater so if its too cold they can heat and if too warm they can chill. The one you linked will require some DIY (Wires an outlet and a box) where as the 308, is prebuilt and ready to roll right out of the box.
No way not for beer. All you need is a cheap craigslist freezer/fridge, this controller and this heater. You could put it all together for about 100 dollars, maybe add a usb computer fan for better circulation.
It's this controller, but I had a coupon code for $15 off.
brew pi is awesome, but without any knowledge of linux or electronics, I would advise against it.
get whatever refrigerator is cheapest that fit your dimensions and buy one of these
I ended up going with one of the "easy" ones that you don't have to wire anything at all. All you do is plug the freezer into this thing, and then plug this thing into your power outlet. Then the Inkbird has a thin wire that you just have to get inside the freezer somehow. It can be just inbetween the freezer and the lid it's that skinny (i think).
The one I got is here:
http://www.amazon.com/Inkbird-Itc-308-Temperature-Controller-Thermostat/dp/B011296704/ref=sr_1_1?ie=UTF8&qid=1464032917&sr=8-1&keywords=inkbird
Just have to have a strong arm, the feezer is at about waist height so the buckets can be heavy but nothing too bad. I can fit one on the floor and then have wood at the same level as the hump filling up the rest of the space. With that there I can fit in two more buckets. I had to build a collar on the freezer in order to get enough clearance for an airlock though.
I have this temperature controller and just tape a sponge to my fermentation bucket with the probe pressed against the bucket under the sponge. Seems to work fine! I also have a muffin fan in there blowing air around to try and normalize the temp everywhere.
Temperature control was a marginal, nay, Significant upgrade for me. I found a mini fridge large enough to hold a fermenting bucket off Craigslist (after removing the door molding) and got one of these on Amazon. The fridge has about a 2'x2'x3' footprint and is definitely worth finding room for in a small apartment.
Sure! The prices are a bit different as I was timing what I bought when the prices were low or refurbs.
Tank
Media basket(absolute must have)
Auto top off
Powerhead
Heater
Temp Controller, Fan, and Gooseneck
Light, and Mount
Upgraded return pump
My lagering chamber is a chest freezer with a temperature controller and a little heater.
With this I can do the primary fermentation in the 50's, raise it up to the 60's for a diacetyl rest, and then drop the termperature down into the 30's for the lagering. The lagering just refers to letting the beer sit for a while at very cold temperatures, which is supposed to allow all the gunk to drop out and leave a clear and crisp beer. I've got two batches lagering right now, which I lagered in the fermenter for a couple weeks and have been in the keg for about 10 days at 32 degrees.
You're talking about a ferm chamber, not a keezer, right? You don't need to drill at all. For my ferm chamber, all I did was buy a freezer at Costco, then plug the freezer in to the "cold" outlet from my Inkbird, then plug the Inkbird in to the wall outlet. Then I taped the probe thermometer from the Inkbird against the side of the carboy in the freezer with some bubble wrap.
Basically, the Inkbird measures the temperature of the carboy, and when it gets too warm it activates the freezer to turn on and start cooling the beer. When the thermometer registers that the beer is now at the correct temperature, it turns off the freezer.
Really simple setup, there's no real assembly required.
That being said, if you do want to drill through a fridge (to build a kegerator/keezer setup, or whatever), you're almost always safe to drill through the door, and basically anywhere where there isn't the compressor or the coils.
Yep! Temp regulator. I just ordered this one: https://www.amazon.com/Inkbird-Itc-308-Temperature-Controller-Thermostat/dp/B011296704/ref=sr_1_1_sspa?s=hi&ie=UTF8&qid=1517952030&sr=1-1-spons&keywords=inkbird+temperature+controller&psc=1
Inkbird Itc-308 Digital Temperature Controller Outlet Thermostat, 2-stage, 1100w, w/Sensor https://www.amazon.com/dp/B011296704/ref=cm_sw_r_cp_api_rTHRBb9E4YV35
Is this what I’m looking for in terms of temp control for a freezer for fermenting?
Pardon my Newbness. I'm preparing to use some temp regulation equipment for my next (or next next) brew and right now I was planning on picking up this inkbird and a ferm wrap for this next brew i need to keep warm. Is the only difference with the unit you have linked that you can have it maintain specific temperatures at specific times of day?
Thanks =)
The swamp cooler method (tub, water, swapping ice bottles, old tshirt to wick the water up on the fermenter, fan, etc.) does work with a certain amount of dilligency, but if you're like me and get pulled a million different directions, that dilligency might get strained. I did it for awhile, and if I was super anal about changing out the ice bottles at the exact time every morning and evening, it worked well. For those times I got pulled away, not so much.
With a small investment, you can absolutely take your fermentation to a new standard. For me, the game changer was a $60 used wine fridge off Craigslist (I see these popping up all the time for far less than I paid for mine) and a <$40 Inkbird controller. And when I say game changer, I mean set the controller and walk away never worrying about whether you swapped your ice bottles out on time, perfect fermentation game changer.
The plus on using a wine fridge is that there's no build required like there would be with a mini fridge (no removing the door shelving to make room, no building a collar or shelf, etc), plus the door is glass, so you can keep an eye on things without opening and closing the door all the time.
Absolute worst case scenario, you can buy an external temperature controller. This one is pretty commonly used in the home brewing community and works great.
I use these, they work great and you don't have to wire them. Plus they have a heating side should you ever want to use it on a fermentation chamber.
http://www.amazon.com/Inkbird-Itc-308-Temperature-Controller-Thermostat/dp/B011296704
Buy an Inkbird Temperature Controller. I also worry about this, but since I've installed these for my tanks it's like a weight off my shoulders. You basically plug the heater into it, and once the thermometer built into the device reads that it's at your desired temperature, it cuts the power to the heater. It's a great device for peace of mind.
Just to put your mind a little more at ease though, I think heater related fires are very rare, and probably because someone wasn't using it correctly or heating their tanks too much. I've heard great things about Hydor 50W (and I'm actually using the 25W right now with no controller). You're fine. :)
Keep in mind that ambient temp can be much different than your beer. A relatively cheap and easy solution if you have the room: a $50 deep freezer from Craigslist (I was amazed at how many I found) plugged it into this , then use this on your carboy.
Drop in your carboy and you’re good to go.
Edit: Woops. I missed the “no room” part. Good luck
I bought this freezerless refrigerator from Lowe's and regulate the temperature using the same item others mentioned here.
This is what you want and it's on sale right now.
I zip tied the probe to a full bottle of water and set it at 39° with a ten minute compressor delay. Water bottle sits on the "hump" of the compressor and the probe wire just sits between the seals on the lid and body of keezer.
I tried to mess around with the stock thermostat and could never get it consistent either. Not worth the time when this is only $28 right now and works great.
Went that route 2 times before this was made available.....sealed, no muss no fuss. Plug and play for cheaper then you can build one.
Avanti 7.0 Cu. Ft. Chest Freezer - White $178 with 2 year warranty
https://www.pcrichard.com/Avanti/Avanti-7-0-Cu-Ft-Chest-Freezer-White/CF70B0W.pcrp
Bev Rite Air Distributor 5/16", CO2 Manifold(4way) $38.95
https://www.amazon.com/gp/product/B00J4P4POY/ref=oh_aui_detailpage_o02_s00?ie=UTF8&amp;psc=1
Inkbird Itc-308 Digital Temperature Controller Outlet Thermostat $35
https://www.amazon.com/gp/product/B011296704/ref=oh_aui_detailpage_o02_s00?ie=UTF8&amp;psc=1
Oetiker Stepless Ear Clamp 15.7 mm $11.99
https://www.amazon.com/gp/product/B00ZJFWAG8/ref=oh_aui_detailpage_o02_s01?ie=UTF8&amp;psc=1
Apollo
3/8 in. Stainless Steel PEX Barb Pinch Clamp $6.93
https://www.homedepot.com/p/Apollo-3-8-in-Stainless-Steel-PEX-Barb-Pinch-Clamp-10-Pack-PXPC3810PK/301541078
Bev Rite Beer Faucet and 4-Inch Shank Kit with Black Handle $24.95
https://www.amazon.com/gp/product/B00829HM98/ref=oh_aui_detailpage_o02_s02?ie=UTF8&amp;psc=1
Co2 Beer Regulator Two Product Dual Pressure $69.99
https://www.amazon.com/gp/product/B01M093URP/ref=oh_aui_detailpage_o07_s00?ie=UTF8&amp;psc=1
Beverage Factory Ball Lock Taps 1/4 $9.32
https://www.amazon.com/gp/product/B005STZO4U/ref=oh_aui_detailpage_o07_s00?ie=UTF8&amp;psc=1
25 Foot Clear 3/16" ID 7/16" OD FDA Approved Vinyl Tube $15.99
https://www.amazon.com/gp/product/B01HDNNYPO/ref=oh_aui_detailpage_o07_s00?ie=UTF8&amp;psc=1
25 Foot Red Gas/Air Hose, 5/16 inch ID $ 22.99
https://www.amazon.com/gp/product/B01D8VKUWK/ref=oh_aui_detailpage_o07_s01?ie=UTF8&amp;psc=1
5 Gallon Cornelius Keg (Ball Lock) $129.99
https://www.amazon.com/gp/product/B004VUOE98/ref=oh_aui_detailpage_o08_s00?ie=UTF8&amp;psc=1
1-1/4 in. x 30 ft. Camper Seal Foam Tape $6.97
https://www.homedepot.com/p/M-D-Building-Products-1-1-4-in-x-30-ft-Camper-Seal-Foam-Tape-02352/202066511
I had it in 2" wide, It is what i used to seal the collar to the freezer
the collar is not attached to the freezer at all besides the weight of the plywood,collar,lid. I am able to return the freezer back to factory without much effort.
3/4 in. x 4 ft. x 8 ft. PureBond Red Oak Plywood $52.97
https://www.homedepot.com/p/Columbia-Forest-Products-3-4-in-x-4-ft-x-8-ft-PureBond-Red-Oak-Plywood-165956/100046409
Needed one and a half sheets
1 in. x 4 in. x 8 ft. Premium Kiln-Dried Square Edge Whitewood Common Board $ 6.72
https://www.homedepot.com/p/1-in-x-4-in-x-8-ft-Premium-Kiln-Dried-Square-Edge-Whitewood-Common-Board-914681/100023465
Needed about 4 total. I ripped them down for bottom edge and then ripped them at 45degs for the corners
Parts Still needed:
Surface Mount Drip Tray
https://www.amazon.com/ACU-Precision-Sheet-Metal-0100-30/dp/B00WQ9M5K6/ref=sr_1_43?ie=UTF8&amp;qid=1522070155&amp;sr=8-43&amp;keywords=beer+drip+tray
Here's my setup, I have two of each of these:
Temp Controller
Humidity
Dehumidifier
Heat
I have a little humidifier, too... but I disconnected it and put it away after a while because it never was needed
What about this as a suggestion?
https://www.amazon.com/Lasko-100-MyHeat-Personal-Ceramic/dp/B003XDTWN2
go with this 200w heater
and a temp outlet thermometer like this
https://www.amazon.com/Inkbird-Itc-308-Temperature-Controller-Thermostat/dp/B011296704/ref=sr_1_1?s=hi&amp;ie=UTF8&amp;qid=1482432154&amp;sr=1-1-spons&amp;keywords=outlet+thermostat&amp;psc=1
so the heater comes on when your room dips below a certain temperature.. and so it turns off at the right temp as well.
Yeah I was going to use it in coordination with a Temperature Controller to keep it to fridge-like temperatures
My Anova was $180. It's quite easy to use, there is a button and a scroll wheel (yeah, strange input mechanism for consumer electronics). I have a couple differently sized tupperware containers to hold the water and you just stick the Anova in it. http://assets.ilounge.com/images/reviews/anova/precisioncooker/anova5.jpg
I'm an engineer so I was considering building one with an arduino, thermistor and heating element, but the Anova is a really nice gadget and I figured it would be worth the money to not have to screw around with it. Of course, here I am screwing around with it anyway. ;)
Many people use a rice cooker in combination with a temperature sensor that can turn the power off and on for the rice cooker. I found this on amazon but it's a bit expensive: http://www.amazon.com/Dorkfood-Sous-Vide-Temperature-Controller-DSV/dp/B0088OTON4
Edit: Much cheaper controller here http://www.amazon.com/dp/B011296704
This was an interesting thread you might glean some insights from. Its not bio pellet specific, but nitrate removal.
https://www.monsterfishkeepers.com/forums/threads/diy-algae-scrubber.683050/
If I remember right, the issue you'll have with bio pellets, or something like purigen too, is dialing in the gph, via a reactor of some sort. Too much or too little and its a waste but there are arguments thats its not even worth the effort. Idk, i havent explored that option myself. I use 3 sun sun canisters on my 200 gal, and a ton of plants in the tank to keep my numbers to zeros.
That said, what has truly changed the hobby for me is a continuous drip system that automatically does water changes for me.
https://youtu.be/RmJoC4MUqlM
I did the exact same setup, but took the advice he offered another guy and used a durso for the drain pipe.
Edit-- also, might want to look into inline heaters with controllers <--- this is a must. I will never use an intank heater again, seriously they are great
Inkbird Itc-308 Digital Temperature Controller Outlet Thermostat, 2-stage, 1100w, w/ Sensor https://www.amazon.com/dp/B011296704/ref=cm_sw_r_cp_apa_HgOGzbE6EX893
A normal fridge + something like this would work excellent and would cost you half the price.
https://www.amazon.com/Inkbird-Itc-308-Temperature-Controller-Thermostat/dp/B011296704/ref=sr_1_1_sspa?s=industrial&amp;ie=UTF8&amp;qid=1526634669&amp;sr=1-1-spons&amp;keywords=inkbird+itc-308&amp;psc=1
That's the exact same thing I was thinking of doing, except I was going to use a small blowing space heater. I'm going to need to figure out how to keep the air circulating a LOT and also control the temp / on / off with a thermostat. Not sure how to do that yet.
https://www.amazon.com/Inkbird-Itc-308-Temperature-Controller-Thermostat/dp/B011296704/ref=pd_sbs_328_4?_encoding=UTF8&amp;pd_rd_i=B011296704&amp;pd_rd_r=DWGKNSCHN568QXE934HT&amp;pd_rd_w=wT1BS&amp;pd_rd_wg=km2ah&amp;psc=1&amp;refRID=DWGKNSCHN568QXE934HT is what I've just bought, and I'm going to hook it to a heat lamp and a little fan in an old freezer and let it heat things to 106F for a few hours and see what happens. I'm going to test one frame first.
10 gal anvil kettle $250, BrewBag $30-40, Keg $75, Regulator $45, Co2 tank $85
I'm sure you can find some of this cheaper, but this gets you brewing 5gal batch's and kegging them. I'd add in an Inkbird temp controller $35, a used fridge off Craig's list and a fermenter.
I read you wanted to do 10gal so you could keg half and bottle half. I'd keg it all and bottle off as needed with The Bru Bottler. Super simple to build and works fantastic. I find it to be better then my blichmann beer gun.
If you've got $35 to your name then this will do it.
https://www.amazon.com/gp/aw/d/B011296704/ref=mp_s_a_1_1?ie=UTF8&amp;qid=1518548755&amp;sr=8-1&amp;pi=AC_SX236_SY340_FMwebp_QL65&amp;keywords=temp+controller+thermostat#productDescription_secondary_view_div_1518548815624
There is a cheaper version for 15 which is more of a DIY unit to stick into an enclosure. Look for STC-1000 on ebazon
I have this controller.
For the start of fermentation I place the probe on the outside of my fermenting bucket, cover it in insulated material, and tape the material to the outside of the bucket. That way I have decent idea of the outside wort temp, then like you said I will set the temp to ~5° below the ferment temp I want.
I basically follow Brulosophy's Ale Fermentation Schedule.
Can't say for sure if it is shot or not but you can get an inkbird digital temperature controller for less than $40 to replace it. I have two and they work perfectly.
https://www.amazon.com/gp/aw/d/B011296704/ref=sxl2?qid=1464309268&amp;sr=2&amp;pi=AC_SX236_SY340_FMwebp_QL65
Looks like a normal crock pot and one of these https://www.amazon.com/gp/aw/d/B011296704?pc_redir=T1
I have one for homebrewing and it works well for that, so I'm sure it works for this too
Why would you go through all that trouble when you could just get a controller for the chest freezer itself? Something like this: https://www.amazon.com/gp/product/B011296704/ref=oh_aui_detailpage_o00_s00?ie=UTF8&amp;psc=1
Generally curious, thanks!
Go with a few of these bad boys https://www.amazon.com/gp/product/B0064O8OYK/ref=oh_aui_detailpage_o00_s00?ie=UTF8&amp;psc=1 instead of buckets and then you can easily No-Chill and don't need to DIY/buy a chiller. Get some voile fabric and make a bag. Find an old/busted external 3.5" hdd, an 80mm pc case fan and a potentiometer and make a stir plate. I built my own temp controller but if I were to do things again I'd just buy this https://www.amazon.com/gp/product/B011296704/ref=ox_sc_sfl_title_2?ie=UTF8&amp;psc=1&amp;smid=A1RUFFFCQ74BCW .
Only equipment I've actually bought from a homebrew shop is bottling wand, racking cane, racking cane clip, hydrometer, capper, wine thief.
You need a good thermometer but most of the homebrew store ones are shitty, get something made by thermowerks.
You don't need airlocks, saran wrap + rubber band or just a lightly screwed on lid work fine. airlocks always seemed like weird mysticism to me.
All you really need is a dual stage temp controller. I have this one. Then you just plug the fridge into the temp controller and tape the temp probe to a can of beer (this ensures temp stays constant without excessive compressor cycling).
http://m.kmart.com/kenmore-7.0-cu-ft-chest-freezer-white/p-022W007672415001P
I have this freezer and it will easily fit four ball locks with co2 with room for extra storage. I use the extra space for any bottles I get. You'll have to hook it up to a temperature controller. You don't need anything fancy so I just grabbed a $20 one I had laying around.
Something like this
http://www.amazon.com/gp/aw/d/B011296704/ref=mp_s_a_1_1?qid=1458306144&amp;sr=1-1&amp;pi=AC_SX236_SY340_FMwebp_QL65
I had a tap tower laying around so I just used that instead of a collar so I can't be much help there.
Get one of these and start sous vide cooking with that crock pot:
https://www.amazon.com/gp/product/B011296704
Couple thoughts: I would definitely go the keezer route. You can get a big chest freezer that can hold 3 kegs plus a CO2 tank for a lot cheaper than you can a mini fridge. I just saw one on the front page of this sub from costco for $100.
I did the whole fridge (full size) to kegerator conversation and it was terrible. I got an old fridge due to budget and it had a hard time keeping everything cold, it looked junky and recently crapped out on me which is why I have a keezer now. I've also read that drilled holes in the fridge can really impact its ability to keep the temp regulated.
You're also going to want to buy an external temp gauge as well as a fan to circulate the cold air.
https://www.amazon.com/gp/product/B011296704/ref=oh_aui_search_detailpage?ie=UTF8&amp;psc=1
https://www.amazon.com/gp/product/B002OJN250/ref=oh_aui_search_detailpage?ie=UTF8&amp;psc=1
Great video:
https://www.youtube.com/watch?v=zHWy_Vlw3J4
Edit:
I get that budget is important but having a QUALITY kegerator/keezer is more important. Here is why: if you skimp on it, you're going to have a crappy beer drinking experience and you'll be wasting way more money than you saved (not to mention the frustration and embarrassment of serving bad beer to your friends haha I've been there). With that being said, you can definitely make one for $300.
The UTH needs a thermostat, which will read the temperature and also control it.
Just to be clear, since I think you might be confusing the two:
thermometers measure temperature
thermostats control the temperature of something like a UTH
UTHs need thermostats or they can get too hot. You should never use a UTH without one.
There are nicer versions like herpstats, but you can also use something like this: https://www.amazon.com/gp/aw/d/B011296704/ref=sspa_mw_detail_5?ie=UTF8&amp;psc=1
I strongly recommend using an IR thermometer to calibrate the thermostat.
+1 just turned my old freezer into a beer fridge with this here:
https://www.amazon.com/gp/product/B011296704/ref=oh_aui_detailpage_o02_s00?ie=UTF8&amp;psc=1
Anyone use the inkbird?
http://www.amazon.com/gp/aw/d/B011296704/ref=pd_aw_sim_328_1?ie=UTF8&amp;dpID=41vCaa1QSWL&amp;dpSrc=sims&amp;preST=_AC_UL100_SR100%2C100_&amp;refRID=0SPCEYRY1FCM9ZZS20QN
https://www.amazon.com/gp/product/B011296704/ref=oh_aui_search_detailpage?ie=UTF8&amp;psc=1
i used this when i made a sous vide. you set a high temp and a low temp and it has a thermocouple to measure the temp. basically when the temp hits a set level it will turn on the outlet. when the temp hits another set temp it will turn off.
Something slightly different for the lazy: http://www.amazon.com/gp/product/B011296704?psc=1&amp;redirect=true&amp;ref_=oh_aui_detailpage_o00_s00
If you're doing one gallon batches, consider the volume lost to readings.
Chest freezer and this: http://www.amazon.com/gp/product/B011296704?psc=1&amp;redirect=true&amp;ref_=oh_aui_detailpage_o00_s00
This is the one that I use (Inkbird ITC-308):
https://www.amazon.com/gp/product/B011296704/ref=oh_aui_search_detailpage?ie=UTF8&amp;psc=1
I have it and an anova. I like the inkbird for multi-day cooks because I don't like hearing the anova's motor running for days. Also, having two sous vide options is good for planning if I'm going to sous vide vegtables and meat for the same meal.
I cooked a chuck roast at 131 for 3 days with the inkbird in a crockpot. It worked very well. You want the crockpot on hot setting with water until it gets close to the target temperature, then turn it to the "keep warm" setting. On keep warm, the crockpot + inkbird kept it consistently at 130-131 the entire time.
Ive used the ITC-308 for some time now and it works great. $35
I have some cheaper temp controllers I have used for brewing beer, I wonder if these would work? They are accurate down to the degree.
http://www.amazon.com/AGPtek-All-purpose-Temperature-Controller-STC-1000/dp/B00862G3TQ
WiFi version will be $40
Edit: $35 https://www.amazon.com/Inkbird-Max-1200W-Temperature-Controller-Greenhouse/dp/B07PVBG8K1/ref=sr_1_3?keywords=inkbird&amp;qid=1563240500&amp;s=gateway&amp;smid=A1RUFFFCQ74BCW&amp;sr=8-3&amp;th=1