(Part 2) Best test, measure & inspect products according to redditors
We found 4,660 Reddit comments discussing the best test, measure & inspect products. We ranked the 1,275 resulting products by number of redditors who mentioned them. Here are the products ranked 21-40. You can also go back to the previous section.


Read through the links before you add anything to your cart, the tools at the top are what I personally use and can vouch for, the tools at the bottom are in kits and case save you some money if you only do this once in a while but I can't vouch for the quality. I'm also assuming you own a wire stripper.
Crimping tool(17$):
TRENDnet 8P/RJ-45 and 6P/RJ-12, RJ-11 Crimp, Cut, and Strip Tool, TC-CT68 https://www.amazon.com/dp/B0000AZK4G/ref=cm_sw_r_cp_apa_piZVAbZZVWPM7
Has a built in perfect cut wire strippers
Connectors(9$):
Cybertech Cat6, Cat5e RJ-45 8P8C Ethernet Modular Crimp Connectors Plugs Pack of 100 https://www.amazon.com/dp/B00LG6DQUI/ref=cm_sw_r_cp_apa_YiZVAb72959BY
Cat5e Cable(25$) (200ft, pre-made but you can clip and make your own out of it)
200FT Feet CAT5 Cat5e Ethernet Patch Cable - RJ45 Computer Networking Wire Cord (White) https://www.amazon.com/dp/B071XBHM6Y/ref=cm_sw_r_cp_apa_RkZVAbZ8D2F00
The cable is actually not that good of a deal because you can get 1000ft for 50$ without any ends, but I was aiming for sub 50$.
Total cost: 51$
Additional extras I'd recommend:
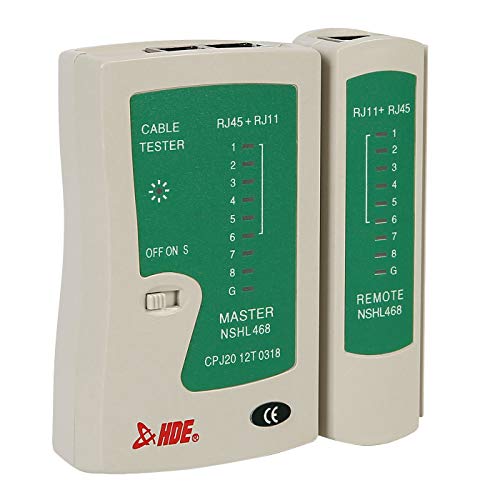
Cable tester(8$) tests if the cables and connections you made are good. A great investment for beginners and pros)
Zoostliss Network Cable Tester RJ45 RJ11 RJ12 UTP LAN Cable Tester Networking Tool https://www.amazon.com/dp/B06XZYXN63/ref=cm_sw_r_cp_apa_tnZVAb616Y59H
Cable boots(6$) protect your cable ends from having the tips broken and looks cleaner IMO
uxcell 100 Pcs Soft Plastic Ethernet RJ45 Cable Connector Boots Cover https://www.amazon.com/dp/B00K82RNX2/ref=cm_sw_r_cp_apa_qoZVAb54MHXCJ
They also have combo kits like this that exist, I can't speak to their quality but the tools are simple tools so this may save you some scratch
>UbiGear Cable Tester +Crimp Crimper +100 RJ45 CAT5 CAT5e Connector Plug Network Tool Kits (Crimper315) https://www.amazon.com/dp/B008UY5WL0/ref=cm_sw_r_cp_apa_hqZVAb8RM9GVK
Has the tester and everything, includes a wire stripper which is nice
>Maxmoral 7 in 1 Cable Tester + Crimp Crimper + Wire Stripper + 50 RJ45 CAT5 CAT5e Connector Plug + 100 Cable Ties + 100 Cable Cord Holder Clips + 2 Ethernet Connector Network Tool Kits https://www.amazon.com/dp/B01J7S5X6Q/ref=cm_sw_r_cp_apa_VrZVAb10QP91E
Same deal, has boots though.
And every garage I've been in has 1 compact fluorescent bulb. Buy a nice LED shop light or 2 depending on how big your garage is. Buy all the tools you need to wire it in like a nice set of Klein strippers and a cheap multimeter.
https://www.amazon.com/gp/aw/d/B000F9HIEC/ref=mp_s_a_1_4?ie=UTF8&qid=1495670572&sr=8-4&pi=AC_SX236_SY340_FMwebp_QL65
https://www.amazon.com/gp/aw/d/B00NWGZ4XC/ref=mp_s_a_1_9?ie=UTF8&qid=1495670627&sr=8-9&pi=AC_SX236_SY340_FMwebp_QL65&keywords=Multimeter&dpPl=1&dpID=417YqOjJ1mL&ref=plSrch
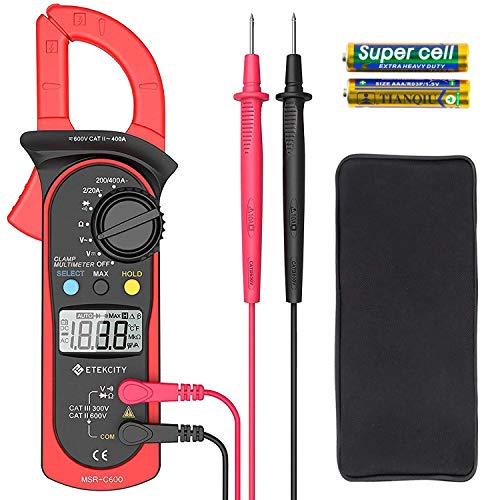
Cheap multimeters are fine for things around the house or troubleshooting most things on cars. You can also use the clamp yo measure current draw for some more advanced troubleshooting like seeing how much your AC compressor is drawing. If you do lots of tinkering with electronics I'd recommend dropping a few hundred on a Fluke.
You probably want something like this, which is a toner and inductive amplifier, aka fox and hound. You plug one end of the cable (or use the alligator clips) into the tone generator, and use the probe on the other unit to locate the signal. Or you could punch down/terminate both ends and move the tester until you found the right pair.
I guess people want to know a little more. There's plenty of tutorials online, so do some google work if you want a more in-depth description.
Materials/Tools:
Process:
And then you're basically all done. It took me probably an hour or less. Total cost for one holster (because I was able to make 2 holsters off of one 12"x12" sheet), was about $6-$7, with the bulk of the cost being the clips. I'll try and answer any other questions others have.
Batch cooking ahead of time is a great way to save time and the food is just as good as cooking fresh. Having food ready to go in the fridge has also helped me save money from eating out less. I've also lost weight from having better portion control and feeling more satisfied. Definitely nice bonuses I did not expect when I got a sous vide machine to make better food.
Understanding the food safety behind sous vide cooking is a good place to start. Watch this video a few times and study it: https://www.youtube.com/watch?v=FH9V8Dg86Zw
For more knowledge, listen to the catalog of the podcast Cooking Issues. Lots of info nuggets about sous vide along with many other aspects of technical cooking. And it's a hilarious show too.
This may only apply to novice cooks, but knowing how to cook an assortment of sides to go along with the sous vide proteins helps. I've been really enjoying butternut squash puree lately. Other go-tos are mashed potatoes, sauteed vegetables, roasted vegetables, and salad + dressing. As crazy as it sounds, when done right microwaved vegetables are great too!
Bonus: some of my favorite non-meat things to do sous vide:
All crowd pleasers. Especially the creme brulee with the theatrics of a torch.
Edit: I forgot to include what I learned about searing.
A mitersaw is probably going to be less accurate/repeatable than a table saw. One thing you can do is get a angle gauge for your table saw so you can actually dial in the 45 degree angle, chances are the indicator on your saw is off and causing the issue not the fact that you're using a table saw. The next thing I'd suggest is a sled for your table saw, which is pretty easy to make... if you're doing 45s for things like frames a sled like this would be useful as well.
I've been researching this and I've come to the conclusion that EVERY SINGLE AVAILABLE HEATER has the problem where it can get stuck "on" and boil your fish. Just look at Amazon reviews. It's rare but it happens with every one.
So for my new tank I'm getting a separate temperature controller. The heater will plug into it, and it has its own temperature probe, and if the heater gets stuck on then the controller will still regulate the temperature. this one seems to be good, I'm sure there are others.
I just ordered an Eheim Jager heater. I've had nothing but good luck with these, but check the reviews again -- someone has had one nuke a tank. So better safe than sorry, spend $30 and get a controller.
Also, get a low-wattage heater if you can get away with it (2-3 watts per gallon.) Whether that works depends on the climate control in your house. Some people recommend two half-wattage heaters so that if one of them freaks out it isn't powerful enough to hurt much.
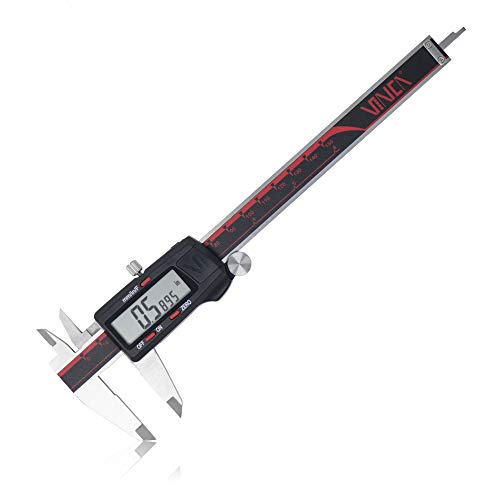
I cant' speak for other people, but in my case, I have an interest in building and making things outside of work, so I have invested time into learning how to use Fusion 360, and also purchased calipers (specifically this one) to get accurate measurements.
For this particular model, I had the broken part, and could measure everything using the pieces I had and the calipers. Using those measurements I could use Fusion 360 to model the part.
If you want to get started with making your own things, I would suggest first learning a program like Fusion. Tinkercad is a great starting point for people with no 3D modeling experience because it's free and is easier than a CAD program. Once you are comfortable with that, I would start tinkering with Fusion 360. Maker's Muse has a playlist that was helpful for me.
From there, it's whatever you think of to create.
https://www.fishersci.com/shop/products/digital-calipers/nc1265765#?keyword=Calipers
$185
https://www.thorlabs.com/thorproduct.cfm?partnumber=DIGC6
Thorlabs price $150
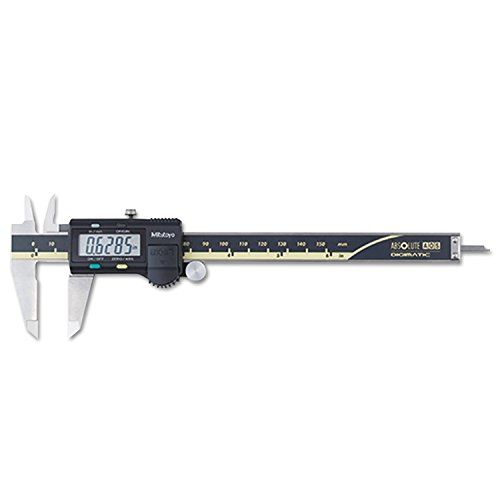
https://www.amazon.com/Mitutoyo-500-196-30-Advanced-Measuring-Resolution/dp/B00IG46NL2/ref=mp_s_a_1_1?qid=1572896783&refinements=p_89%3AMitutoyo&s=industrial&sr=1-1
Amazon price $108
You can see the price difference by cutting out 2 extra middlemen.
I think what you want is a Toner & Probe.
Basically you plug one side in the jack you want to locate, then use the probe to sweep across the patch panels to locate which one it is.
As for labeling, I've come to like the <IDFroom><Patchpanel><Number>. Like 101A23 (IDF Room 101, Patch panel A, port 23).
I use a decent ($100) one of these every day for work.
Before, I used a cheap-ass ($20) one every now and again for work.
I have NEVER seen a cable tester/tone generator fry a network appliance. I've had network appliances fry a cable tester (those cheap ones really dislike passive PoE).
Your patch panel is fucky, but that's easy to fix. Get a punchdown tool and re-terminate. There should be color coding on the back of the panel to tell you what wires should go where. If not, Google is your friend. It seems like this panel likely used to run cables for telephony, or something else aside from networking. No biggie to fix, just takes a little time and diligence.
Your router, and anything else on the other end of these runs, should be totally fine.
Edited to add links.
It has 4.10's so I'll have to swap (or pay someone to swap) the front gears to match. I mocked the axle up in the Jeep with perches just sitting on top and measured all the angles with an angle finder.
https://www.amazon.com/gp/product/B00T6YZ0K6/ref=oh_aui_search_detailpage?ie=UTF8&psc=1
Then I pulled it out and welded it up.
Edit :
Good ones are expensive. Cheap ones kinda work but are very frustrating. You'll waste more money in labour than you save buying a $30 one.
I have this fluke cable tracer and it works quite well. It's not super expensive, and it will trace wires fairly well, though if there are a lot of wires in a tight bundle it can still be difficult to pick out exactly which one the signal is coming from.
What it doesn't do that more expensive ones can is test the signal quality on the cables and determine how far away breaks are. It only does basic toning to make sure all the pairs are connected and in the right order.
This
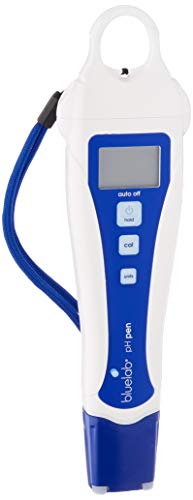
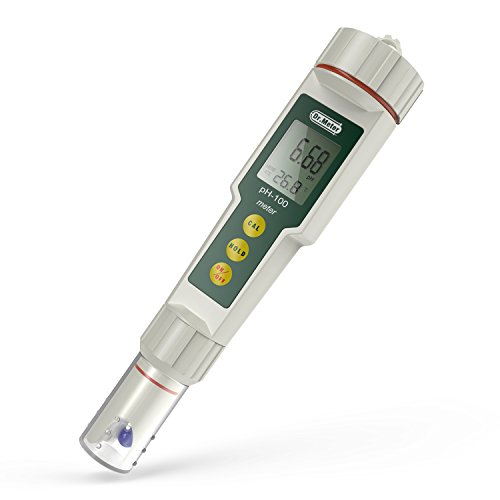
https://www.amazon.com/Milwaukee-MW102-PH-Temperature-Meter/dp/B001DTNDME/ref=sxts_k2p_hero1?pf_rd_m=ATVPDKIKX0DER&amp;pf_rd_p=2668834182&amp;pd_rd_wg=9CtKr&amp;pf_rd_r=NCR05BC9Z88V201TP5R5&amp;pf_rd_s=desktop-sx-top-slot&amp;pf_rd_t=301&amp;pd_rd_i=B001DTNDME&amp;pd_rd_w=7nCR6&amp;pf_rd_i=milwaukee+ph+meter&amp;pd_rd_r=AXE04PGSEQN7Q65JE2K1&amp;ie=UTF8&amp;qid=1478860555&amp;sr=1
The temperature probe means you can measure mash ph without cooling it down, as it will adjust the measurement according to the temperature.
We have a hanna version of this ph meter And it has lived a hard life, and still goes.
While the may be refrigerators that can maintain the temps you're going to need out of the box, the correct solution is to use an inkbird with any fridge/freezer. No handyman skills needed.
https://www.amazon.com/gp/product/B017KUC6XQ/ref=ppx_yo_dt_b_asin_title_o06__o00_s00?ie=UTF8&amp;psc=1
Patch cables being 568B and in-wall jacks being 568A are absolutely not a problem. BUT, if half your house is 568A in-wall and the other half 568B, my spider senses would definitely be tingling that you've just plain got some miswired jacks. I'd recommend grabbing an inexpensive cable tester (example) and making certain all runs are okay.
It's $160, but this has been the best I've used for reliability and precision, and I suspect anything sub-50 will be mostly garbage if you don't want springy/unreliable calipers.
Edit: Amazon link for $115
Fluke Intellitone Pro 200.
Can also trace individual cables burried in a bundle and other challenging trace environments.
No. Double the budget and come back.
-----
servers draw Oh, I dunno 700W each typically, but can triple that under serious load.
A typical switch needs right around 200W.
A PoE switch needs 200W plus the PoE load.
I have no idea what "6-7 other network devices" means.
But lets be kind of safe and call them 300W each.
Thats 6,100W of capacity using rough, approximate estimates.
So for that base load you're looking at about an 8kVA UPS unit like this one:
http://www.apc.com/shop/us/en/products/APC-Smart-UPS-SRT-8000VA-RM-208V/P-SRT8KRMXLT
He will run for 8 minutes at 6000W of load.
http://www.apc.com/products/runtime_for_extendedruntime.cfm
So we will need some extra batteries.
http://www.apc.com/products/runtimegraph/runtime_graph.cfm?base_sku=SRT8KRMXLT&amp;chartSize=large
You're looking at two extra runtime battery packs like this one:
http://www.apc.com/shop/us/en/products/APC-Smart-UPS-SRT-192V-8-and-10kVA-RM-Battery-Pack/P-SRT192RMBP2?isCurrentSite=true
-----
So either:
Clamp that on a power cable, and it will tell you the amps passing through.
it might tell you the voltage too, or you will need to take a reading from an unused outlet using the two included probes.
Volts times Amps equals watts.
Total Wattage demand determines UPS size.
WARNING: devices use more power during boot-up than they do at idle.
Personally, at this size, I'd start thinking about a small Symmetra Frame like this:
http://www.apc.com/shop/us/en/products/APC-Symmetra-LX-8kVA-Scalable-to-16kVA-N-1-Rack-mount-208-240V/P-SYA8K16RMP
Yeah, its more expensive.
But it offers N+1 redundancy / high-availability, and it can scale up to 16kVA by adding power modules.
As someone who has struggled with dog shit PH pens from Amazon get yourself something decent. All my problems have stemmed from PH problems and nothing else.
https://www.amazon.ca/gp/aw/d/B00ST3VTQ4?psc=1&amp;ref=ppx_pop_mob_b_asin_title
This one has been way better
You can be assembled and printing with the included tools in about half an hour, with no prior 3D printer experience. That's not a problem.
Actually getting the most out of the printer though, that depends on what you want to use it for.
I use it for making functional prints, replacement parts, and sometimes cool trinkets. I am not an artist, if you want to model and print sculptures, good luck. I haven't a clue.
If you're like me and want to make what I make, here's a list of things you should get:
Things you should print:
Things you should download:
While I'm making suggestions, I'd say you should get some PLA and PETG to start with, ignore ABS entirely. It's slightly cheaper per kilogram, but there are toxic fumes to worry about and it really needs an enclosure to print (well).
PLA is cheap enough, but doesn't flex as much as ABS so it's better for different applications. PETG is like the best parts of PLA and ABS, but you have to print at lower speeds.
I print at 45mm/s, 5 second minimum layer time using both PLA and PETG and it works perfectly. 210C/60C for PLA and 250/70 for PETG.
If you have any questions, you know where to find me. :)
To be honest there really is no such thing as a good $25 pH meter. Save a bit more cash and look into purchasing a proper unit at around the $100 price point.
I recommend the following meters.
Omega PHH-7011
Milwaukee MW102
Edit: Meant to say MW102 and not the MW101 since it has ATC but it's good practice to always if possible try to get your solution to be measured as close to your calibration temperature as you can.
Chances are one of the wires isn't connected. All 4 wire pairs are needed for Gigabit.
Get a cheap network tester. It doesn't have to be this exact one but they should all be similar.
Yep, it's a nice tool to have for a lot of different things. I use this one: https://www.amazon.com/dp/B00DMI62HM?ref=emc_b_5_t
https://www.amazon.com/Mitutoyo-Advanced-Absolute-Digital-Caliper/dp/B00IG46NL2/ref=dp_ob_title_def
Pretty much a staple in the engineering world.
I often have to check large amounts of Injection molded parts with 5-20 measurement point each. Usually each point 5-10 times to account for measuring errors. A quality digital caliper pays for itself in a day.
Unless your boyfriend is a machinist, go with the calipers all day long. Mic's are for very precise measurement of specific items and are much less versatile for everyday use. You'll notice that most micrometers will only measure 1 inch, so if you actually need to use them you will often you'll have a set of many mics that measure 0-1", 1-2", 2-3"... ect. Whereas calipers measure 0-6 inches and are much faster (but do sacrifice some accuracy).
So as for calipers, Mitutoyo's are pretty hot right now. This is the pair my wife bought me a few years ago and I couldn't be happier:
https://www.amazon.com/Mitutoyo-500-196-30-Advanced-Measuring-Resolution/dp/B00IG46NL2/ref=sr_1_1_sspa?ie=UTF8&amp;qid=1550246576&amp;sr=8-1-spons&amp;keywords=mitutoyo+caliper&amp;psc=1
If you want to shop around make sure that you get either a Mitutoyo, Brown and Sharpe, or Starrett brand.
I wish I had more details on the strain. The seeds are from a friend who has been growing outdoors for probably a decade. He originally planted pure strains of afghani and blueberry and has just been growing with the seeds they've been producing for years without tracking who pollenated who, so it's kind of a grab bag on how much of each are in these ladies.
My DIY chiller...I'll start off saying I was using frozen water bottles once I got into flower to keep my temps down, and it was just a horrible experience. Changing them 2 - 3 times day (if I could), jostling my res lid up and down to put them in, temps are up and down, etc. PITA. I really wanted to just buy a chiller at that point, but I couldn't justify the cost for a 3'x3' tent. So I bought a stainless steel wort chiller used in home brewing and ran the tubing into a 5 gallon cooler you can pick up for $20. Dropped a 185 GPH water pump in the bottom of the cooler (my left over pump from using a top feed in veg) and the wort chiller in my res. I keep 2 or 3 frozen 2 liter bottles in the cooler. With the wort chiller circulating in my res, the temps dropped from 74 to 65 in probably 20 minutes or less. It works so good at pulling the heat out of my res I decided to get a temp controller to turn the water pump on and off. I wired a Ranco ETC temperature controller into the mix and set the temps for 64 - 67 degrees. Pump circulates once the temps hit 67 and shut off at 64. The frozen 2 liters keeps the water cold enough to stay in range for 2 - 3 days before swapping out new ones. Granted a real mechanical chiller is set and forget, but for a rough total of $150 I'm pretty satisfied with what I put together. Plus a chiller uses 200-300 watts of power and still requires a pump, so I'm able to cut that cost out as well.
EDIT: Here's a (bad) picture where you can just see the top of the wort chiller coming out of my res. I cut a slit in some paper plates to slide the chiller tubing through to cover the hole. The cooler sites just outside of the tent.
Start by reading the FAQ at /r/reloading. Make sure you have a look see at a reloading manual or two as well.
Bare minimum equipment you will need is:
Press
Dies for your caliber
Calipers
Scale
Lube
I started with a Lee Challenger kit which is $116 and has everything you will need, minus a set of calipers for about $25. I also got a digital scale and a tumbler. All in you will be about $200 or so to start pumping out rounds.
The "never buy another one" option is Blue Labs. https://www.amazon.com/dp/B005POOJHG/ref=asc_df_B005POOJHG5099993/?tag=hyprod-20&amp;creative=394997&amp;creativeASIN=B005POOJHG&amp;linkCode=df0&amp;hvadid=167118301188&amp;hvpos=1o1&amp;hvnetw=g&amp;hvrand=14084295331685499952&amp;hvpone=&amp;hvptwo=&amp;hvqmt=&amp;hvdev=c&amp;hvdvcmdl=&amp;hvlocint=&amp;hvlocphy=9028321&amp;hvtargid=pla-311195096389
These work great.
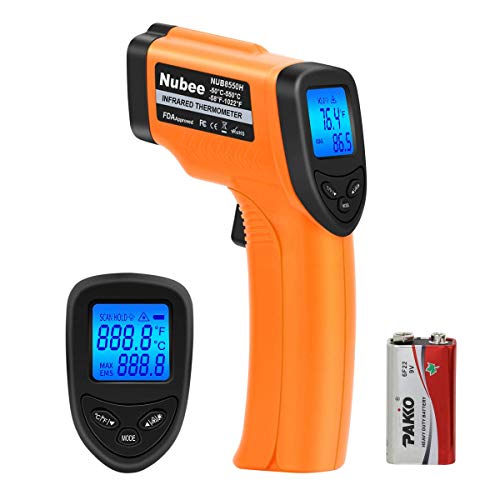
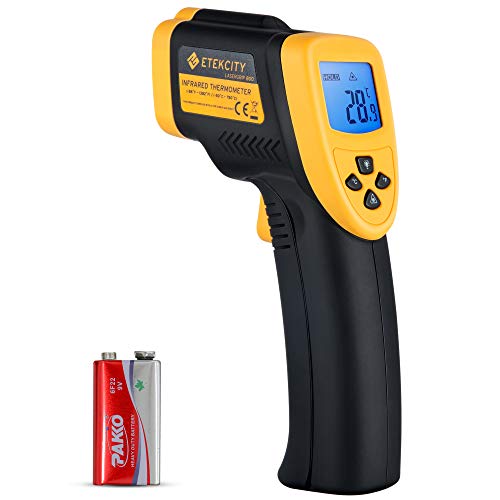
Etekcity Lasergrip 800 Digital Infrared Thermometer Laser Temperature Gun Non-contact -58℉ - 1382℉ (-50℃ to 750℃), Yellow/Black https://www.amazon.com/dp/B00DMI62HM
Check out a clamp meter. You would need to be able to get to the wiring near the breaker to measure the amp draw there.
https://www.amazon.com/dp/B00NWGZ4XC
There are also ones you can put between the outlet and item, but that only measures that item, not the whole load. It only works on 110v items (not an electric dryer).
https://www.amazon.com/P4400-Kill-Electricity-Usage-Monitor/dp/B00009MDBU
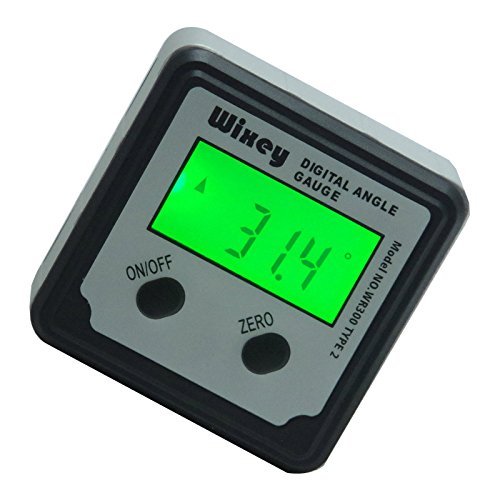
try one of these digital angle gauges. I bought a cheaper version of this (about $15 iirc) from HF and it has saved me hours of headache. I've used this on a cheap jobsite saw and managed to get perfect 90 degree cuts every time.
you didn't really ask a question, so I have to infer that you're asking why you're only getting 100mbps on some, and Gigabit on others?
100mbps networking, or 100BaseTX, only requires connectivity on two pairs: pins 1,2 and pins 3,6. where pairs on pins 4/5 and 7/8 are unused. This gives 100mbps in each direction (full duplex).
Alternatively, 1000BaseT, the most common copper Gigabit standard, uses all 4 pairs in the wire to handle the 1000mbps throughput. Duplexing is not an option, since there isn't half-duplex operation built into the 1000baseT standard. so it always requires all four pairs to be correctly connected to work.
additionally, older and especially more budget PCs will provide only "FE" or "Fast Ethernet" network interfaces, which are only capable of 10/100mbps operation (10BaseT and 100BaseTX). Regardless of what's on the other end.
So a few things could be happening: you could have a wire with only two pairs connected - it's uncommon but I've seen it with patch cables; cheap wires only connected pairs 1/2 and 3/6. and that exists somewhere in the link, either in the patch at one end or the other, or the cabling inbetween; OR, Some of the extra wires necessary for 1000BaseT are damaged, and therefore inoperable; OR, the device on one end or the other doesn't support Gigabit operation.
In my experience one or more of those things will be true in your situation. If you want to validate your cables, you can buy a cheap cable tester ( something like this one: https://www.amazon.com/Zoostliss-Network-Cable-Tester-Networking/dp/B06XZYXN63 ), and it will show you whether or not all pairs are correctly connected.
Good Luck.
These are helpful little things Zoostliss Network Cable Tester RJ45 RJ11 RJ12 UTP LAN Cable Tester Networking Tool https://www.amazon.com/dp/B06XZYXN63/ref=cm_sw_r_cp_api_i_oGpvCbWQEFE94 to make sure the wiring is all correct if the issue persists I would then try requiring TIA568B.
Heat mats don't heat air, only surfaces, and should never be used without a thermostat. You should be measuring surface temperature at the hottest surface the snake can reach (the bottom of the cage) using an IR temperature gun, and for a corn snake, it should read 85-87. You should then put a thin layer of substrate over it, as they don't heat through substrate. No heat source should be used without a thermostat. This is vital, because unregulated heat mats can lead to burns. They can easily reach 120+ in room temperatures in the normal range.
The Inkbird ITC-306T is my choice for a cheap thermostat. You can get much better ones for more money, but that one is sufficient.
I highly recommend unplugging the heat mat until you get this straightened out. It will be fine in room temperatures for a while, just don't feed it until you have everything settled.
Oh absolutely. Most of the time I am making it for me and the wife to share so I dilute it more then I used to.
I heat 400 ml of everclear in a crockpot with a high accuracy temp controller added to it. here is the controller that I use. I set the temp to 160F and let the decarbed weed soak for most of the day, typically 6-8 hours. The temp controller holds to within +-1.5 degree when the crock pot is set to warm, so I just check on it about once an hour and give it a quick stirring.
After that I strain it through coffee filters a couple of times and reuse the everclear bottle to store it. I will give it a day or two to settle and then strain again. Once the bottle is free of particulates I do a test dose of 2ml and add more everclear to get it about where we like it. This typically makes between 500-750 ml. We then mix it into our drinks measuring with a micropipette. The wife will drop about 1-1.2 ml, I use around 2.5-3 ml. I like to float it on top of a vodka sprite to get my evening started.
For strength reference, I am a frequent smoker but not an all day toker. A good friend who is an all day toker will typically put a full teaspoon (5ml) in his hot tea when he wants to relax. 5ml puts me in orbit.
Do keep in mind that the strength of your tink will depend a lot on the quality of your weed. Living in a non legal state my batches vary a fair amount prior to adding more of the everclear. This is why I ALWAYS personally test each batch and adjust before I share with anyone.
Good luck, and don't hesitate to hit me up if you have questions. I am by no means an expert, but I have never had any complaints from anyone I have shared it with.
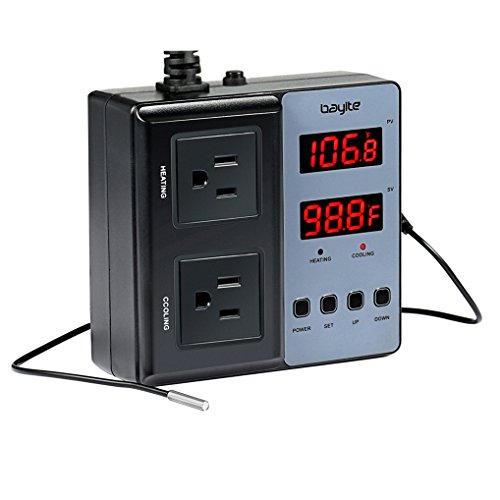
Can be anything as simple as this. You don't need the really fancy ones, and I'm sure there are cheaper ones that will do the job (this unit is bulky, but I can verify it does the job).
It has a temperature probe as well as a temperature setting. They usually have several other settings (to control the allowed temperature swing, etc.) Once configured it aims for the temperature and cuts power to the outlet when the temperature is met and within range. When it is too hot (above the set range) then the the outlet is turned on, so the wine fridge can bring the temperature back into the desired range.
e.g. Set for 68 +- 4F Then it'll turn on at 72, cool to 64 and turn off. Cycle begins again.
You will need to experiment to find ideal range, time and response for your area and cooling load (e.g. an empty wine fridge will cool quicker than one packed to the brim). You also don't want it your settings at 70F w/0F swing or it will turn on and off, again and again as it bounces off the temperature setting.
edited: For some clarification.
Could try a network cable tester like this: https://www.amazon.com/dp/B06XZYXN63
-----
1A) Art of Electronics book (3rd edition)
1B) you can download old versions of many text books (this suggestion is not meant as a gift)
-----
-----
Comparison Review:
iGaging EZCal IP54 6" Inch/Metric/Fraction (#100-333-8):
https://www.youtube.com/watch?v=n2lza0RZII8
Buying this: https://www.amazon.com/gp/product/B07RD6D2ZQ/ref=ppx_yo_dt_b_asin_title_o06_s00?ie=UTF8&psc=1
and buying this in order to properly calibrate e-steps: https://www.amazon.com/gp/product/B001AQEZ2W/ref=ppx_yo_dt_b_search_asin_title?ie=UTF8&psc=1
These two things took my prints from adequate to pristine. Huge improvement.
going shopping? Here is a list
but seriously now, do you have fertilizer dedicated to veg and flower? If you don't already, maybe a pH pen to make sure you water is properly pH'ed. If you're worried about smell, maybe a carbon filter?
You have most of the essentials right now. The light, the timer, the grow tent environment (mylar). All I could really think of I added above. Good luck with the grow!
First of all, great to see that all the cables are terminating in one spot.
Are you planning on making all the jacks for your network, or are you planning on leaving a couple jacks for your telephone?
What you need to do is attach those network cables to a patch panel. Since you already have the OnQ telephone distribution module, probably the easiest replacement would be the OnQ Network Interface Module:
http://www.amazon.com/On-Q-Legrand-363486-01-Network-Interface/dp/B0002M5NKI
A cheaper option is the Leviton panel: http://www.amazon.com/Leviton-001-47603-0C5-Category-Voice-Expansion/dp/B00022742I/ref=sr_1_1?s=hi&amp;ie=UTF8&amp;qid=1414892331&amp;sr=1-1&amp;keywords=leviton+network
You could buy 3 of those patch panels to provide a jack for each cable in your house.
Now, what if you want to leave some jacks as telephone jacks? one of the issues is that since I don't see any labelling, you don't know quick cable goes to where.
You could buy a toner (http://www.amazon.com/VicTsing-Network-Ethernet-Telephone-Tracking/dp/B008G8KE90/ref=sr_1_2?ie=UTF8&amp;qid=1414891492&amp;sr=8-2&amp;keywords=network+toner) but the telephone distribution module will redistribute the toner signal to all the other cables (making locating difficult).
A "Plan of Attack" would be:
Note: Since the house was prewired for telephone, the jacks in each room may only be RJ-11 (4P4C) and/or only have one pair punched down. You might want to see if they are RJ-45 Jacks (8P8C) and have all 4 pairs punched down.
Edit: Since it seems you only have a cordless phone in the house (and if you are willing to make all jacks network jacks), you can ignore steps 3 & 5.
One thing you'll learn with the ecobee and the heat pump is that you'll have to do a lot of the learning. The thermostat just doesn't have the data needed to figure out the best settings for your particular set up, and there is no "the way" for each system. I highly recommend spending the money on a laser temperature gun to measure the air coming out of your vents to judge whether or not your system is running ok without aux especially once the temps drop below 30 (assuming you change the ecobee defaults for this). Just feeling it won't be enough - once you get in the teens there's a chance you are blowing out 90 degree air. Warm enough to hopefully keep your place warm, but will still feel slightly cool to the touch.
They are pretty damn cheap and now that I have one I went around checking for cold spots, measuring skillet temps, pointing at my wife, etc. Definitely got my twenty bucks worth.
Get one of these and any small fan.
I built a hot water bath using a temperature controller and heating element I got from Amazon. Whole thing cost me $70. Mounted the heating element in a plastic tub, wired up the temp controller, added a small aquarium pump to keep everything mixed well.
Element: https://www.amazon.ca/Camco-02203-2000W-Heater-Element/dp/B0006JLVBW/ref=sr_1_3?ie=UTF8&amp;qid=1487969670&amp;sr=8-3&amp;keywords=heating+element
Controller: https://www.amazon.ca/docooler-Temperature-Controller-Thermocouple-Fahrenheit/dp/B00F05UI8O/ref=sr_1_4?ie=UTF8&amp;qid=1487969690&amp;sr=8-4&amp;keywords=temperature+controller
Agreed. But go with the intellitoner if you can afford it.
I was able to easily find lines in a boat I couldn't trace with an analog toner due to noise.
https://www.amazon.com/Fluke-Networks-MT-8200-60-KIT-IntelliTone-Toner/dp/B00N2S6RPY
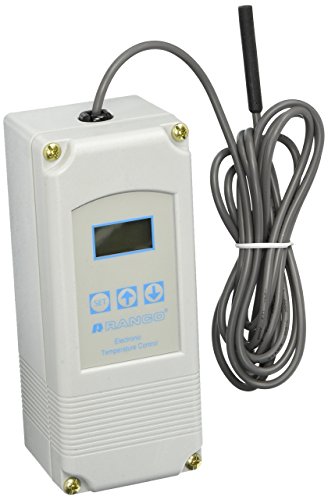
Ranco. End of discussion. It's an industrial grade temperature controller and as good as it gets.
And to elaborate, get the controller: http://www.amazon.com/gp/product/B0015NV5BE?psc=1&amp;redirect=true&amp;ref_=oh_aui_search_detailpage and then get a multi-outlet extension cord to wire it with. I used this one: http://www.amazon.com/gp/product/B0009JEBQG?psc=1&amp;redirect=true&amp;ref_=oh_aui_detailpage_o00_s00
For around $50 you now have the most reliable temperature controlling solution out there
These digital calipers have been great for me. They are extremely accurate and precise, and the ability to switch between mm, decimal inches, and fraction inches is great if you live in the one developed country not yet on the metric system for some reason. It also includes two batteries, which is nice.
I recently picked up a caliper ... went with this one. It's $26 rather than $9, but I read a comparison review that pushed me towards it. (review here)
I've had the really cheapo ones before and they are not very well made. They also seem to fall apart / damage relatively easily. I've only had the one above for a month or two but it meets my needs and feels very solidly made.
I have this meter.
It was given to me by my sister who actually works in a lab setting for her job. She indicated its the best balance of price/performance you can buy. Its not as cheap as some of the others, but the probe itself is a very high quality and supposed to last a decent amount of time with proper care.
I currently run a Milwaukie 102 PH meter that runs to +/- .002, so I typically round to the nearest .05 and call that close enough. .03 would be nothing, but I am seeing more of a .2-.3 swing from what should be happening in theory. I'm just curious as to why, because in theory I should be seeing the calcium additions in the mash help precipitate out more alkalinity and from Maillard reactions in the boil.
If you're looking to buy a pH meter, I would recommend this one. A meter with a detachable probe will last longer than one that's built in, the electrode should be replaced every few years. You'll also want a meter that has automatic temperature compensation and a separate temperature probe (pH is a function of temperature). You will also need calibration standards for pH 7.01 and pH 4.01 and electrode storage solution. A small quantity of these usually come with the meter but it's good to have more on hand. Make sure you read up on how to use a meter as well, taking accurate pH readings is a bit more involved than accurately reading temperature. If your product is chunky, also make sure to separate the chunks and bulk liquid and measure their pH's separately to ensure the recipe is safe.
I just got my PH Meter the other day too. I got the Milwaukee MW102. Brewed a Belgian Witbeir with it on Friday and nailed my PH as well.
so i would suggest a 1000w MH/HPS setup with a 6 inch inline fan and carbon filter (for the smell). you'll probably need to spend 30$ on nutrients you'll need something to adjust the pH of your feed get a good pH meter blue labs is one of the best brands for this tech, you will also need a 24h timer and then to choose a medium: soil, dwc, soilless, coco, rockwool, etc. that should bring you under budget.
I second the bluelab or the Hanna
The way I would do it is to terminate all the cables with appropriate RJ-45 plugs. Terminate the other ends of the cables at jacks, starting with the one that you want, but go ahead and do the rest. Use either two laptops or a laptop and a router to test the cables one by one and label them once you get ones that establish a link (watch the little blinky lights on the ports). You may need a couple of RJ-45 inline couplers and a couple of patch cables, depending on how much cable is sticking out of the walls. Once you have the cables id'd, you can cut the ones with plugs to jacks, depending on your need. (plugs are cheaper than jacks and I have lots of them laying around, that's why I'd do that)
There are other ways. You can get a network toning tool which has the advantage of getting to buy more tools, which is a plus in my book. :-) The way I described is how I would do it because I have the tools and materials on hand (cables, plugs, jacks, crimper).
Not if you buy a flashed version:
knockoff and I won't do it again. DoCooler
I've done similar to what /u/Zephyrzuke had mentioned in comments.
My printer enclosure is pretty big (30.5" x 23" x 26.5") to enclose my Taz 6 and I print almost exclusively ABS, some recommended around 50C but I felt like it was a bit excessive after a few prints myself. The bigger your enclosure is the harder it is to maintain higher temperature. On the other hand the bigger your heated bed is the more it contributes to heating the enclosure. I only turn on my heater when doing bigger/taller prints and usually only keep it between ~40-43C/105-110F to minimize the amount of time my heater is on and no warpage on any of my prints; this of course also varies between different ABS filaments.
Used this controller and this cheapo heater. Usually these desktop personal heaters have a tip-over cutoff switch that I've had to bypass and wired directly to the controller.
I didn't like how the appliance-looking heater next to my printer so I designed/printed it a more fitting casing. https://imgur.com/a/xoils
I ordered all my parts back in Oct and during the Holidays actually had some time to build it. Sat down to build it, turns out I ordered this http://www.amazon.com/gp/product/B00F05UI8O/ref=oh_aui_detailpage_o06_s01?ie=UTF8&amp;psc=1
Note to people, don't buy that if you want a STC1000, the linked one is single stage only. Had to rush order a real STC1000 and finally got it built over new years.
Find the best looking Brown and Sharpe used dial caliper on ebay. I think I paid $35 and it is still mint and the movement is silky smooth. Your mileage will vary though.
But if I were you, I'd just save up and drop some coin on a Mitutoyo digital. A new standard 6" is $100 right now.
https://www.amazon.com/Mitutoyo-500-196-30-Advanced-Measuring-Resolution/dp/B00IG46NL2/ref=sr_1_3?ie=UTF8&amp;qid=1468330954&amp;sr=8-3&amp;keywords=mitutoyo+digital+caliper
Mitutoyo 500-196-30 Advanced... https://www.amazon.com/dp/B00IG46NL2?ref=ppx_pop_mob_ap_share This is a great set of calipers
Don't use the printed manual for assembly, use the online manual. Before doing each step, read the comments made by previous buyers. If you see a lot of comments on a particular step, call it a night and wait until you're fresh before proceeding.
I also recommended getting digital calipers. If you're made out of money, get a Mitutoyo.
https://www.amazon.com/Nubee-Non-contact-Infrared-Thermometer-Temperature/dp/B00JA3BMDW/ref=sr_1_2?ie=UTF8&amp;qid=1474395011&amp;sr=8-2&amp;keywords=hand+held+temp+gun
Ill try to go over your concerns, i hate quote posts but here we go.
>so I got the 40 gallon
Good choice
> Warm Light
Consider that your dragon will need temps from 90 - 100f 10 hours a day in his basking spot down to no lower than the upper 70's in his chilling spot. Buy [This](https://www.amazon.com/Nubee-Non-contact-Infrared-Thermometer- Temperature/dp/B00JA3BMDW/ref=sr_1_3? ie=UTF8&qid=1482273280&sr=8-3&keywords=ir+thermometer+gun) no really, go buy it now.
If that bulb which sounds like its one of the little spotlights can keep your tank to that temp then great, if not you want to look at heating solutions, a ceramic heat bulb is a favourite, relatively low cost and high heat out put, very high so be careful ive clocked mine at over 220f.
> I set everything up including adding the sand to the bottom
Nope. I mean shes your pet but sand is harmful, especially to a young lizard, you will notice they lick EVERYTHING this means all that sand may build up and cause compaction, which is where the content of the gullet presses against the spinal cord eventually severing it. Key Hint: Never feed your lizard a item of food larger than the space between its eyes.
I would use kitchen paper for now as she will be a little poop monster but eventually switch out to tile, you can use chia seeds or the like as a bathing area for her to dig.
The size of the tank can be a problem, just slide a cardboard divider in half the tank, you will be taking it out soon enough.
Now, regarding food. In the juvenile stage you should be feeding her exclusively protein based foods, insects, then after a few months move to some greens uptill adulthood where it should be no more than 80% greens to 20% insects.
This si where it gets fun, those dried flukers insects you bought, go throw them away, one of the largest problems with keeping dragons is hydrating them they dont really drink, they absorb moisture through their food and skin, feeding them dried food means they have to use moisture to digest it, so rather than be a gain its a loss, im surprised they even sell that trash.
What i and many would reccomend is the good old dubia blaptica. The NUMBER one best feeder and the worlds worst roach. Many of us keep a small colony of these things as free feeders as you will notice the cost of insects is going to be one of the highest, there are many many good sites online to guide you in this process, in the meantime try to avoid crickets, they smell and are noisy.
UV light wise, as long as it is a strip light and INSIDE the tank (the UVB she needs is 99% reflected by glass) and she can be in bright direct light for at least 10 hours a day she will be fine.
Buy a cheap laser thermometer and figure it out for yourself- every device and coil configuration varies.
https://www.amazon.com/Nubee-Non-contact-Thermometer-Temperature-Adjustable/dp/B00JA3BMDW/
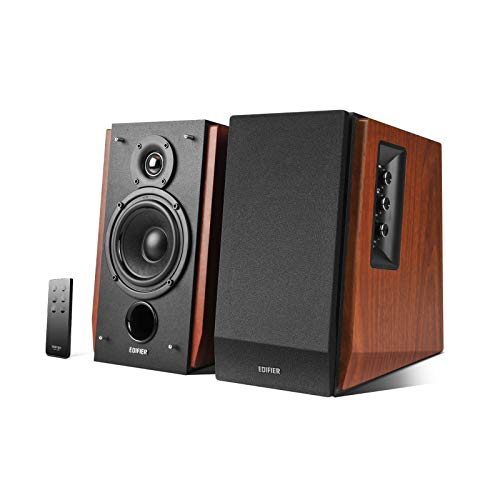
https://www.amazon.de/EDIFIER-R1700BT-Studio-Bluetooth-Lautsprechersystem-Infrarot-Fernbedienung/dp/B00MXY21LW
Not sure how small you need but the Edifier R1700BT are known to be really good value and to sound great.
Alternatively, if you can't fit those, something like the Mackie CR4 are also a decent option. They will lack on bass compared to the edifiers and have less features. Mackie also do a smaller 3" version (CR3) however if you're not wanting a subwoofer, the bass will be lacking.
A nice middle of the road option
Edifier R1700BT
If you want something cool and different
Edifier Luna E25
this should do most all your talking about.
http://www.amazon.com/Fluke-Networks-MT-8200-60-KIT-IntelliTone-Generator/dp/B00N2S6RPY/ref=sr_1_1?ie=UTF8&amp;qid=1452881493&amp;sr=8-1&amp;keywords=fluke+tester+and+tone
Here are things from my wishlist (past and present)
Wera Screwdrivers
https://smile.amazon.com/dp/B0085NTQJK/
Oscillating blade set:
https://smile.amazon.com/dp/B0109SELWA/
Clamp multimeter:
https://smile.amazon.com/dp/B00NWGZ4XC/
Kreg Jig Jr.:
https://smile.amazon.com/dp/B000J43A7W/
Angled Long Nose Pliers:
https://smile.amazon.com/dp/B00N3VSS4S/
Groove Lock Pliers:
https://smile.amazon.com/dp/B000FK1R0W/
11 ft wifi endoscope:
https://smile.amazon.com/dp/B01MYTHWK4/
non contact voltage tester:
https://smile.amazon.com/dp/B001UAHZAM/
claw nail puller:
https://smile.amazon.com/dp/B0015YPJMY/
Workmate portable work bench:
https://smile.amazon.com/dp/B000077CQ0/
Cable snake fish tape:
https://smile.amazon.com/dp/B000BP7WBO/
9 Outlet metal power bar:
https://smile.amazon.com/dp/B00F8ZQY5M/
Spade drill bit set:
https://smile.amazon.com/dp/B00099E7WE/
36" bubble level:
https://smile.amazon.com/dp/B000UKMWMO/
I was concerned about drilling any holes in my roof. Being a born pessimist, I figured if anything can go wrong, it will go wrong. The fewer holes in my roof the better.
I started looking for a roof rack. What I really wanted was a full-length roof rack with a diamond-pattern, "hardware cloth" platform surface upon which to mount my solar panels. All the racks I could find were around $600. Getting a rack custom built was estimated at $1300. Too much.
I finally found a very heavy-duty-looking rack made of black-painted round tubing for $311. "That's more like it," I thought. I ordered it off the internet.
When it arrived, I was annoyed to see that all the parts weren't there. Two long side panels seemed to be missing. I called the vendor, and after a very confusing conversation, it turned out that I had only ordered "half" the rack. The other part number was the side panels. Guess how much they cost? $300. ($611 for the whole rack. Dammit.)
Once I got the whole rack at my house, and started trying to install it, I realized that it's a two-or-three-man job. I finally got it installed, but Lord, what a pain in the ass!
I bolted a piece of 4x8 plywood to the rack tubing using large U-bolts. The PV panels bolt to the plywood.
I feel pretty sure that bolting the panels directly through the roof would work just as well, maybe better.
A really good book that describes solar panel installation is "Photovoltaic Design & Installation for Dummies" by Ryan Mayfield. He is the president of the Renewable Energy Associates solar power company.
A solid wire is called a "wire." A bundle of wires together covered with plastic insulation is called a "cable." You want cables of at least 6 gauge diameter. (The smaller the gauge number, the larger the cable. I know, it seems backwards.) A lot of solar power kits come with 8 gauge or even 10 gauge cable. TOO SMALL. Cable this small is inefficient for DC current, for our purposes.
You will need a "cable gland" (Amazon) and a good quantity of "Dicor self-sealing lap sealant." (Amazon). Be generous with the Dicor. Every time a cable goes through a steel bulkhead or floor you MUST put a grommet of some kind (rubber, plastic) there to protect the cable insulation. If you ground out a positive cable, it could cause a fire. Ground the negative (black) cable of the system TO THE VEHICLE'S FRAME, directly to clean steel (NOT PAINTED STEEL), through the floor. Bolt the ground cable connection securely to the frame. Don't forget the grommet.
https://www.amazon.com/Link-Solar-Weatherproof-Project-Campervan/dp/B0111RNZDY/ref=sr_1_2_sspa?ie=UTF8&amp;qid=1506480381&amp;sr=8-2-spons&amp;keywords=double+cable+gland&amp;psc=1
https://www.amazon.com/Scosche-WPG8-10-Gauge-Waterproof-Grommets/dp/B00OYGLP32/ref=sr_1_12?ie=UTF8&amp;qid=1506480517&amp;sr=8-12&amp;keywords=8+gauge+cable+grommet
https://www.amazon.com/Auto-ranging-Multimeter-Resistance-Capacitance-Frequency/dp/B01N014USE/ref=sr_1_14_sspa?s=automotive&amp;ie=UTF8&amp;qid=1506480598&amp;sr=1-14-spons&amp;keywords=clamp+style+multimeter&amp;psc=1
https://www.amazon.com/dp/B00NWGZ4XC/ref=dp_cerb_2
Always use BLACK cable for the negative (ground) side of the circuit and RED cable for the positive side. This will prevent you from screwing up and short-circuiting your system. Hopefully.
Do not hook up the PV panels until everything else is installed and you have tested it for continuity with a digital multimeter (DMM.) The kind that has a "clamp", automatic ranging, and an audible alarm is best. (It looks kind of like a lobster claw and doesn't necessitate puncturing the insulation of the cables.) You start wiring from the storage battery bank and work backwards to the PV panels. Keep in mind--if those panels are exposed to the sun, they are GENERATING ELECTRICAL CURRENT POTENTIAL. Cover them with cardboard or heavy paper and tape until you are ready to energize the system. You don't want to get electrocuted accidentally. The risk of shock is small, but it does exist.
You need either a fuse (good) or a DC breaker (better) between the positive cable between the PV panels and the charge controller, and also between the charge controller and the battery bank. If you install an inverter, you need a breaker on the positive cable between the battery bank and the inverter. (Inverters burn amps just sitting there hooked up. You need to be able to "turn off" the DC power supply to the inverter. Turn the power to the inverter back on to use it.)
https://www.amazon.com/MidNite-Solar-Photovoltaic-Circuit-Breaker/dp/B004EQK8SA/ref=sr_1_7?s=automotive&amp;ie=UTF8&amp;qid=1506481155&amp;sr=1-7&amp;keywords=DC+breaker
Try to make the cable runs as short and direct as possible, within reason. The longer the cable run, the more resistance and the more voltage drop. All cables should be secured to the bulkhead with cable clamps in a neat, tidy, workmanlike fashion. If it's worth doing, it's worth doing correctly.
EC meter you can get away with a cheap one. PH Meter, the cheap ones are junk, spend around $50+ for a good PH meter. PH is critical to get right, so spend some money on a PH meter to make sure you always have that dialed in.
&#x200B;
I have this PH meter, had to calibrate it, but it has been ROCK solid so far.
&#x200B;
https://www.amazon.com/gp/product/B00ST3VTQ4/ref=ppx_yo_dt_b_search_asin_title?ie=UTF8&psc=1
This is a really solid starter kit. Regarding Turn Left at Orion-- it is a good reference book, but I find myself using the mobile app "Sky Safari Pro" every night I get a chance-- it's a very easy and intuitive app to find objects in the sky and get detailed information on each. When you find an object and click on it, it will tell you its exact coordinates in the sky... when paired with something like a Wixey Inclinometer:
https://www.amazon.com/Wixey-WR300-Type-Digital-Backlight/dp/B00T6YZ0K6/ref=pd_lpo_sbs_469_t_0?_encoding=UTF8&psc=1&refRID=F5YD2EXBRDSNZF1R10JS
...It makes it very easy to find things. As long as the Wixey is calibrated properly, you just adjust the telescope's inclination readout on the Wixey to match the inclination of the target object on the app, and then simply rotate the telescope to the general area of sky you need to be in. The app can also serve as a map for doing "star hopping". (Make sure to have some clear red tape to cover the bright green lighted screen, otherwise it can hurt dark adapted eyes).
The Z8 or AD8 are much better, solid choices over the Orion. You're an awesome wife! I asked my wife for a telescope for Valentine's and she got me one.... I wound up getting crazy obsessed and now have 5 telescopes. i hope you can enjoy the hobby with your hubby!
Hard to say for sure without knowing his shop, so you'd probably want to try to scope out any recommendations for specific stuff to see if he already has something similar before you buy.
A good suggestion that I think always works well for any budget is to go to a local hardwood dealer and just pick out a selection of interesting exotic lumber, any woodworker will always appreciate getting cool woods to use in their projects.
If you want to have some ideas for stocking stuffers / tools though I'll list some cool things that I think are not super common that I enjoy owning or make my life easier.
Tiny-T Pocket rule
6" precision t rule
A really nice miter gauge
Router setup bars
A nice marking knife
Marking gauge
Magports
Tapeboss
Grr-ripper
Dozuki & Ryoba
Alexa (Alexa, what is 5 and 3/8 times 16... Alexa set reminder for 30 minutes to spray the second coat... Alexa order shop towels... etc, it's actually really useful, and it plays music too)
Shop apron
Quick sanding strips
Digital Angle Gauge
Digital Height Gauge
Anything from Woodpeckers is pretty much guaranteed to be great, albeit kinda pricey
You mean something like this? https://smile.amazon.com/Inkbird-Electronic-Temperature-Germination-Controlling/dp/B01486LZ50/ref=pd_ybh_a_20?_encoding=UTF8&amp;psc=1&amp;refRID=1S3A6MQNWBD7HATW0MCY
Decent, inexpensive calipers.
Here's what I got: http://www.amazon.com/VINCA-DCLA-0605-Electronic-Fractions-Conversion/dp/B017KUC6XQ
Per the description:
I can't imagine I need anything better than that given resolutions of typical consumer 3D printers.
Of course, YMMV, but I have been nothing but happy with mine.
How To Measure Your IPD covers it pretty well. I used Digital Calipers that I already happened to own (not the exact ones linked, however), but you can use a regular ruler to do it.
A cheap digital caliper is great if you're going to be making parts that need to fit onto something else.
https://www.amazon.com/VINCA-DCLA-0605-Electronic-Fractions-Conversion/dp/B017KUC6XQ/ref=sr_1_4?s=industrial&amp;ie=UTF8&amp;qid=1495820845&amp;sr=1-4&amp;keywords=iGaging+EZCAL
Long nose pliers for removing support material, and for cutting filament before you load it.
https://www.amazon.com/Stanley-84-101-Basic-Cutting-Plier/dp/B000B8FRQ8/ref=sr_1_4?s=hi&amp;ie=UTF8&amp;qid=1495821639&amp;sr=1-4&amp;keywords=nose+cutting+pliers
I use this set daily and they are a workhorse, I check them with gauge blocks and have had no issues with either of my pairs. It comes in 6, 8 and 12” length. It also features fractional inches if you use those. I also own their digital micrometer and it has been very reliable.
https://www.amazon.com/dp/B017KUC6XQ/ref=cm_sw_r_cp_awdb_t1_QDKNDbHGK45N4
Torque wrench
Socket set
Hex sockets
1/2 inch Ratchet
1/4 inch Ratchet
Combo wrench set
Calipers
Chain tool
Pretty close to everything you'll ever need to work on a bike, besides specialty tools. Buy or borrow other stuff when the issue comes up! You can do it!!
Edit: Added calipers.
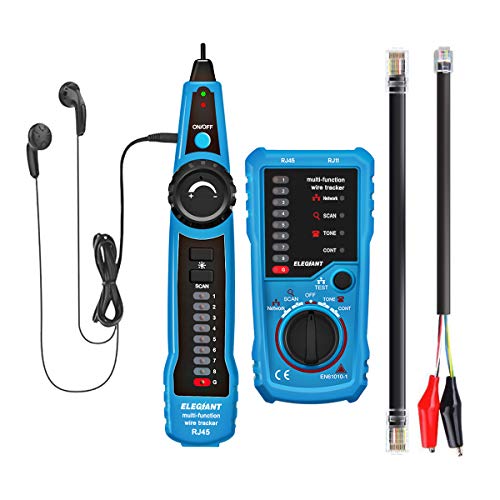
I've got something similar to this, but in orange:
https://www.amazon.com/ELEGIANT-Multifunction-Collation-Telephone-Continuity/dp/B01HCQSHNG/ref=sr_1_5?keywords=cable+tester&qid=1558715360&s=gateway&sr=8-5
Figure out how it works with a spare patch cable, but basically you plug it in and it should count down from 1-8 in sequence. if either end skips, your cable is probably wired bad.
better test gear will show the distance to a cable fault... But that's going to cost a bit more.
I have multiple of these. They are good for the price.
And one of these that I use for my corn snake because it is more precise.
Wrap the back edge of the knife with tape and make sure your clamp is parallel.
&#x200B;
Use an angle cube to make sure you have a consistent angle through out the blade edge or you can use an app on a smart phone to zero and measure it. You can also use paper binder clips to make a moveable angle guide for more accurate angles throughout the knife's length. Here is my set up
&#x200B;
Use a marker on the blade edge to see your progress and where you are cutting or to get an idea of where your knife's blade angle sits. If you cuts are far from the edge, your angle is too small and you will have to remove more material if you want to get to the very edge. When you start cutting the edge it will start to form a burr that is very noticeable, then you can move on to finer grits. Just make sure that you do equal strokes on both sides to have an even bevel.
&#x200B;
And of course make sure you use honing oil on your stones to prevent plugging.
&#x200B;
If have an accurate common angle (20/25degrees) you can use a Lansky Turnbox to maintain the edge with a ceramic rod and quickly do some small repairs with the diamond rod. and it is easily portable.
&#x200B;
Hope this helps
I looked at 5 or 6 different stores wanting one of these before I broke down and odered it on amazon. The home depot near me doesn't have much as far as precision jigs in general either.
https://www.amazon.com/Wixey-WR300-Type-Digital-Backlight/dp/B00T6YZ0K6/ref=sr_1_2?ie=UTF8&amp;qid=1512074427&amp;sr=8-2&amp;keywords=wixey
Buy an inexpensive angle gauge at Home Depot (digital is better but costs more). Place on jack stands. Remove brake caliper and bracket, but leave one lug nut on tight. Place the magnetized portion against the rotor. Note the angle of the rotor. Do all the work and put the angle gauge back on and adjust the strut bolts until you get close to the original angle. Do the same thing the following week when you do the struts. This will get you close to the same ballpark each time. Then get a real alignment.
https://www.amazon.com/IRWIN-Tools-Magnetic-Locator-1794488/dp/B005XUHKSM/ref=sr_1_5?ie=UTF8&amp;qid=1499728247&amp;sr=8-5&amp;keywords=angle+gauge
https://www.amazon.com/Wixey-WR300-Type-Digital-Backlight/dp/B00T6YZ0K6/ref=sr_1_1?ie=UTF8&amp;qid=1499728474&amp;sr=8-1&amp;keywords=angle+gauge
You can get digital angle finders pretty cheap that are incredibly accurate. I use one like this to set precise angles on my table and miter saws all the time.
https://www.amazon.com/Wixey-WR300-Type-Digital-Backlight/dp/B00T6YZ0K6
There's 14 sections, they were 3/4" wide at the bottom and were angled at 12.9° (360° / 28 surfaces = 12.86°). I stuck my digital angle gauge on the table saw blade and tilted it until it read 12.9°.
After it was glued up, I rounded the outside on a benchtop belt sander and the inside with a drum sander chucked in a drill press. I really wish I owned my lathe then, it would have drastically sped up the process.
Clamps are important, and when it comes to clamps never buy an odd number. Get a mix of different types: quick grips are great for quickly clamping things together one-handed; f-style clamps are great for their reach and pressure, and pipe clamps are wonderful for their length flexibility and pressure. Down the line, consider panel clamps, band clamps, corner clamps and parallel clamps.
Get a speed square and a framing square. For the table saw, consider a digital relative angle finder like this. Get a tape measure and research how to use it effectively (eg why is the tab on the end loose). Learn how to mark wood accurately with a pencil, and then learn how to do it with a knife.
Get a set of inexpensive chisels and a mallet. Get a cheap block plane. Get a combination square. Get a shop vac and make sure your tools can connect to it.
Safety is of course top priority. Get good quality eye protection, respirator (even when using dust collection) and hearing protection (routers and planers are loud). Wear them every time.
For around the shop, make sure you put everything on casters because that perfect shop design you make on paper won't work in practice. Add more outlets and lighting. Build a good flat level workbench.
Just a few thoughts from someone who's been doing it for fun for over a decade. Not necessarily the right way for everyone, but those are what I wish someone had told me when I first started.
you need thermostats for anything that produces heat as it prevents malfunctions that can injure your geckohttps://www.amazon.com/Inkbird-Electronic-Temperature-Germination-Controlling/dp/B01486LZ50 this is a good, brand that is reasonably priced.
note: thermostats dont come with the heating element its something you plug the heater into.
Inkbird is a good brand. There are different types. Some have two outlets for heating unit and cooling unit. Here is one for heating... It allows for up to two heating units. Inkbird ITC-306T Pre-wired Electronic Heating Thermostat https://www.amazon.com/dp/B01486LZ50/ref=cm_sw_r_cp_apa_rRo0BbNEVCSGE
How about the Inkbird 306T DAY and night temperature controller, only for heating.
https://www.amazon.com/Inkbird-Electronic-Temperature-Germination-Controlling/dp/B01486LZ50/ref=sr_1_1?ie=UTF8&amp;qid=1498898758&amp;sr=8-1&amp;keywords=B01486LZ50
Sorry for the late response. Their are two versions, the 306 model and the 308 model. The 308 model has the ability to control a fan or chiller if it gets too hot and the 306 doesn’t - so it just turns the heater off if it gets too warm.
Inkbird ITC-306T Pre-Wired Electronic Heating Thermostat Temperature Controller and Digital Timer Controller for Aquarium, Seed Germination, Reptiles, Hatching ect, Without Cooling Controlling https://www.amazon.com/dp/B01486LZ50/ref=cm_sw_r_cp_api_i_cGVVCbSZA8C0W
Inkbird ITC-308 Max.1200W Heater, Cool Device Temperature Controller, Carboy, Homebrew, Fermenter, Greenhouse Terrarium Temp. Control https://www.amazon.com/dp/B01HXM5UAC/ref=cm_sw_r_cp_api_i_lEVVCb1KF4RSS
If you have an older fashioned slow cooker, one that has a knob that turns it on and not just buttons. You can use one of these to monitor the temp and it will turn the cooker on when it gets too cold. https://www.amazon.com/gp/aw/d/B01486LZ50/ref=yo_ii_img?ie=UTF8&amp;psc=1
I use it to keep my fish tank a certain temp, so it's definitely waterproof.
I just went through this with by 12”x12”x18” gecko tank. There is so little real estate on the screen top that I had to get kinda creative. Forgive the pink foam insulation on the sides and ignore the gauge outside the tank (just monitoring my room temp), it’s an ugly winter setup but it helps keep the heat in! So, in my the hood, which can only hold one bulb, I have a Jungle Dawn LED, same with the free floating one hanging from the left side of the tank. The one in the clamp lamp (attached to a square dowel rod sticking up at the back) is a 50W ceramic heat emitter. I use an Inkbird thermostat that allows me to set two temperature windows for different times of day and a degree differential. So in the day time, it keeps the temps between 74-76 (2 degree differential meaning it hits 76 then turns off the lamp and when it hits 74 it turns it back on) and night between 68-70. This achieves a good temp gradient for me, the bottom of the tank is typically 72-73, middle (where I have the probe) is 74-76, top usually has a nice little hotspot on his branch around 78 during the day. Ceramic heat emitters (or really any heat bulb I would imagine) can majorly dry out your tank though so keep an eye on your humidity levels. An auto misting system would probably help a lot.
It's worth spending the $20 to buy a digital caliper (accurate to .001mm) to double check your work.
Here is the one i bought last time i had to rivet a master link:
A network tester like this one doesn't cost much and might help you diagnose the issue. It can test if a link is working if you plug it in at each end, and you can also use them to send a signal through the link which the other piece can detect from nearby. Pretty useful if you ever need to suss out the location of a cable through a wall or something.
Imo the most likely case is that the connection at one or more of the ends has become broken. You should be able to fix that rather easily yourself. Google "RJ45 wall jack installation" for more info on that. You would need a punch down tool for that.
Not sure how much money you want to through into it but a signal tester Is helpful ensuring all the pinouts are correct and making good contact end to end.
Especially if this is your first time crimping there might be couple times you need to cut off what you messed up and try again.
This is a selection of what I keep in my tech go-bag. You'll build your kit as you learn and build experience, or realize you could have helped a customer out of a jam quicker if you had that tool with you.
Various extra parts I've accumulated over the years like screws, ATX Molex Power to SATA Power Adapters, ATX Molex Y splitters, SATA cables etc..
Good luck and some tools overlap like multi tools and pliers so if budget is low, go with the tool that covers the most jobs.
Edit: I noticed your bag is kind of expensive compared to something like a Dewalt tool bag. I use a plain Dewalt bag which is not as cool as the one in the link, but it's just as tough. This might be a good and less expensive consideration for you if you don't require the look of a briefcase for your tool bag.
Edit 2: You may want to mark your tools with a wrap of some crazy bright color electrical tape to be able to recognize them when they walk away.
It sounds like what you're looking for is a cable tester? You'd basically connect a toner on the wall jack side that sends out a continous tone adn then you would search in the server room side for the tone to identify the drop that the signal is coming from to your patch. Then you can identify the patch going to the switch.
&#x200B;
Cheap one from Amazon:
https://www.amazon.com/ELEGIANT-Multifunction-Collation-Telephone-Continuity/dp/B01HCQSHNG/ref=sr_1_4?crid=170G8HQ7MQQDT&keywords=cable+tester+toner&qid=1572455475&sprefix=cable+tester+ton%2Caps%2C183&sr=8-4
I'm not 100% clear on what your problem is? You have a 16 port switch at the patch, and you're trying to use an 8 port at the other end of a run?
I don't see where you used a cable/continuity tester to confirm the drops / terminations are good. You can spend hundreds on one, but get a reasonably cheap tester. This will confirm that no pairs are broken or swapped.
----
> ... seems to be capped at 100mb/s (I cannot confirm this though, running SpeedTest on the device shows around 95mb/s,...
There are all sorts of reasons why you can't "trust" the numbers you get from some app. Always check with your hardware about what link speed it was able to negotiate. Software will help you confirm the negotiation was correct, as well as find other bottlenecks in the full connection. It's a good measurement to have, but not the important one here.
> I suspect they may have used a 100mb/s Cat5 cable for this run...if that's the case, is 100mb/s Cat5 not able to provide PoE?
cat5 is old. The unit you have was probably wired with cat5e cable; cat5 was "common" in construction during the late 90's, but should have been switched to cat5e in the early 2000's (somewhere around 2001 is when cat5e standard was "finalized")
the "cat" rating of a cable is only it's "certified" specs; as in, this cable will work at least up to $some-value. cat5e is certified for gigabit, but i have used it in applications that specified cat6a. 10/100 eithernet requires two pairs of cables, gigabit requires all four. This is why i suspect you're not getting the full gigabit speeds. You have a continuity issue on this drop; either a broken pair or a bad termination.
I don't remember which pins are used for which PoE standard, but you can push some PoE types over 10/100 connections.
Start with a simple termination/cable tester. you have an incorrectly wired termination somewhere, i think.
This should do the job.
https://www.amazon.com/bayite-Temperature-Controller-Pre-Wired-Thermostat/dp/B01KEYDNKK
I use this in veg. It can both heat and cool (I never heat), and goes for 1 target temperature. https://www.amazon.com/dp/B01KEYDNKK/ref=cm_sw_r_cp_api_bN4ZAb9T6STGE
I use this in flower. It can either heat or cool, not both though (again I never heat). It cools to 2 target temps, day and night. https://www.amazon.com/dp/B007FNOAU6?ref=yo_pop_ma_swf
Both control a duct fan blowing in from a window.
I am still a newb on my first grow, so please take this as potentially wrong. Also, if anyone sees a problem, let me know. I'm trying to do my best.
I started in a tent but I built a 6'x8' grow room. I posted it to this sub a while back. Here is the album: http://imgur.com/a/Gshra
I upgraded to COB LEDs. They can pull 500 watts (40 watts per sqft) They are currently at 85% (34 watts per sq ft). The plan is to slowly ramp them up to 100% the first few week of flower. (I'm currently in the first week of flower). Here the album on that build: http://imgur.com/a/iWYiP
I'm in a basement where I can draw a large volume of cool air into the room. It becomes a problem during lights out because it gets too cold. I have on of those oil filled radiator heaters hooked up to a thermostat-controlled outlet:
https://www.amazon.com/dp/B01KEYDNKK
When it hits 69F, it kicks on until it gets up to 79F then it shuts off.
To control the upper end of the temperature, I use my fan and this speed controller.
fan:
https://www.amazon.com/dp/B018WM0EMQ
speed controller:
http://www.hyper-fans.com/shop/bybrand/hyper-fan/hyper-fan-temperature-speed-controller
I haven't had any need to run an A/C unit but I could plug one into the "cooling" side of that temperature-controlled outlet.
The humidity in the room is rather high right now (50-60%). It seems to go up when I water. I'm on the fence if I should get a dehumidifier or just let it ride. If I do get one, that will have to have a humidity I can set.
Also, I put my original grow tent in grow room to veg some clones. I covered up all the passive air vents and taped them closed with gorilla tape. Then, I used flexible ducting to make an exhaust tube and intake tube. Using the flexible tubing, I can make light traps. I put 4 CFLs in there on a 18/6 timer. I do have an exhaust fan in the tent. It does not, however, need a carbon filter as the whole room is filtered. I'm not sure how a veg tent in a flower room is going to work out, but I am going to find out. :)
Anyway, I'm a newb on my first grow. That is, however, how I am currently growing weed.
If you're looking for a fermentation fridge or kegerator, I can fit two 5 gal ball lock corny kegs and a 5 lb CO2 tank, or one glass fermenter, in one of these ($125)
https://www.farmandfleet.com/products/864091-danby-refrigerator-with-freezer.html?feedsource=3&amp;gclid=EAIaIQobChMI3ty1irPx2QIVgyaGCh0xWgmOEAkYASABEgJ-2PD_BwE
And use one of these for temperature control ($35)
https://www.amazon.com/Temperature-Controller-bayite-Pre-Wired-Thermostat/dp/B01KEYDNKK/ref=sr_1_1_sspa?ie=UTF8&amp;qid=1521222668&amp;sr=8-1-spons&amp;keywords=temperature+controller&amp;psc=1
Minimum temperature is around 40F and I had to do some limited DIY work to remove the door mounted shelving.
But, I just found this prewired controller that's only $34.
It's a 10 Amp max but should be enough to run the refrigerator. It looks like a good deal.
so what I'd do is get an ETC.
https://www.amazon.com/RANCO-ETC-111000-Digital-Temperature-Control/dp/B0015NV5BE
Not necessarily this exact model but this idea is that you plug your wineador into it - feed the temperature sensor into the wineador and sent a temperature point. Then the ETC will power on your wineador so that it cools to the appropriate temperature and then powers off as needed.
It'll easily keep it at the proper temperature level.
Buy a freezer/refrigerator off of Craigslist and wire this to it. But I live in AZ, so I am only worried about keeping the temp cool, and never require heat.
No, this is something you would hook into a solid state relay and a heating element, better used for something like an electric kettle. You want to pick an STC-1000, which will require you to wire something up, or you can buy a pre-built unit like the Ranco if you dont want to build something yourself.
It depends on how much you want to spend, but the easiest way to control temps is with a dedicated fermentation fridge with a temperature controller to regulate the temperature. I generally only need to regulate down (i.e., cool the fermenter to keep it from getting too warm), but some climates require a dual regulator to be able to either increase or decrease temp, especially depending on the seasons.
The cheapest regulator that's gained a lot of popularity in the community in the last few years is the STC-1000. There's a bit of DIY involved in connecting this controller to an actual electrical outlet. But it does dual control for around $30 total (once you buys the outlet, etc.).
If you're less handy but have the money, you can get a controller like this Ranco. There are tons of other options, so just Google "refrigerator temperature controller" or something.
There are also much less robust, but also much less expensive options. Google "fermentation swamp cooler" or "son of a fermentation chamber" for some good, low-cost, DIY options.
I use a slow cooker for sous vide. I had a ranco digital temperature controller that I was going to use to make a cheese cave/beer fermentation fridge, but never got around to. Hooked it up with two ends of an extension cord (wiring is very simple, and the design is both listed and safe) and it has worked great. I confirmed temp with a Thermapen, and it was right on. I set the variation allowance to 1 degree F, and it stays right where I set it.
Controller:
http://www.amazon.com/RANCO-ETC-111000-Digital-Temperature-Control/dp/B0015NV5BE/ref=sr_1_1?s=industrial&amp;ie=UTF8&amp;qid=1452127883&amp;sr=1-1&amp;keywords=ranco+temperature+controller
Check local classifieds
I checked min few years ago, might've been 3 and found a guy selling one of these for $30. Ended up being a guy in a homebrew club. He ended in giving me 50 lbs of malted barley free with the thermostat. Keep in mine the one I posted isn't wired, you'll have to wire it yourself. I've heard good things about the still cheap but slightly less so option Colin posted
https://www.amazon.com/RANCO-ETC-111000-Digital-Temperature-Control/dp/B0015NV5BE
I got some digital 4" off amazon made by a company called igaging, they measure the same and repeat just as well as my brown and sharpe calipers.
Here is the same thing I have but the 6" version. https://www.amazon.com/iGaging-Electronic-Digital-Fractions-Stainless/dp/B001AQEZ2W/ref=sr_1_2?ie=UTF8&amp;qid=1468282237&amp;sr=8-2&amp;keywords=igaging
~$25 can get you a pretty darn good digital caliper tho.
https://www.amazon.com/iGaging-Electronic-Digital-Fractions-Stainless/dp/B001AQEZ2W/ref=pd_lpo_sbs_469_t_0?_encoding=UTF8&amp;psc=1&amp;refRID=24JYAF83MNG8BTGTSMVR
I don't do super precise stuff with mine, but it's worked well for shimming electric motors inside of fan housings.
And it doesn't eat batteries while in storage. So ¯_(ツ)_/¯
I got this caliper recently and have found it to be excellent for the money.
Best of the budget category is probably the iGaging calipers. Yes, it's absolutely worth the price difference over the $10 versions. If you weren't looking for the "best" recommendation and just looking for "cheap", then I would recommend the $10 ones. They're fine after a few minutes of cleaning them up.
https://www.amazon.com/dp/B001AQEZ2W/
This is how
Cheap digital calipers could get the job done, plus they are very useful in a lot of random situations.
I got these. Nothing at all special, but they've held up to a couple years of abuse now.
You can measure depth with the end that sticks out on the right, inside lengths with the top, and outside lengths with the bottom.
&#x200B;
But also, the movers should take responsibility.
It's not that hard if you have the mind for it and don't mind watching a lot of videos. Fusion360 has all of the tutorials built right in and it's free software if you are a maker. You will need some tools to measure things and plan them in the real world. I bought this and it has been all I have needed so far, but I've mostly been printing board game things.
https://www.amazon.com/gp/product/B001AQEZ2W/ref=ppx_yo_dt_b_asin_title_o07__o00_s00?ie=UTF8&amp;psc=1
Milwaukee MW102 PH and Temperature Meter https://www.amazon.com/dp/B001DTNDME/ref=cm_sw_r_cp_api_fpoJAbPKH7DFE
I use this one. It's not lab grade but the probe is replaceable. It also has a temp probe so that you can see when your sample is cool (so you dont fry the probe).
https://www.amazon.com/Milwaukee-MW102-PH-Temperature-Meter/dp/B001DTNDME
I used to use a pocket pH meter... it wasn't very accurate in that you could test the same sample twice and get a .1 difference in the reading which I found frustrating. To me the Milwaukee is a "good enough for homebrew" choice. Not a throwaway but not lab quality.
https://www.amazon.com/Milwaukee-MW102-PH-Temperature-Meter/dp/B001DTNDME
It's a bit expensive, but does a fantastic job!
I have been very happy with this meter(https://www.amazon.com/gp/product/B001DTNDME/ref=oh_aui_detailpage_o03_s00?ie=UTF8&amp;psc=1) I think i got it for like $80 though 3 years ago. I tried 3 other meters and returned them for just not being consistent enough. I'd say just spend the money on a decent/good meter and do it once, instead of going through multiple cheap ones. I agree with /u/mmussen though, your first two bullet points go hand in hand :)
i went through 2 cheap ones before just buying this one and it has been perfect for almost two years. we only really calibrate maybe once/round and it's usually not even 0.1 off. it's also waterproof which can be handy depending on how you grow and how clumsy you are :)
pH Tester
Here's what I use.
Bluelab PENPH pH Pen for Plant Germination https://www.amazon.com/dp/B005POOJHG/ref=cm_sw_r_cp_apa_i_h09TCbCTSEYSD
https://www.amazon.com/Bluelab-PENPH-Pen-Plant-Germination/dp/B005POOJHG/ref=asc_df_B005POOJHG/?tag=hyprod-20&amp;linkCode=df0&amp;hvadid=167118301188&amp;hvpos=1o1&amp;hvnetw=g&amp;hvrand=15543687523906767160&amp;hvpone=&amp;hvptwo=&amp;hvqmt=&amp;hvdev=m&amp;hvdvcmdl=&amp;hvlocint=&amp;hvlocphy=9030904&amp;hvtargid=pla-311195096389&amp;psc=1
We use these on a commercial grow. 1000+ plants, 65 resi’s.
only have 4 of these meters and only have to replace one about every year. Kinda pricey, but accurate, dependable, and very well built.
Just try not to drop it into hard surfaces, that seems to do them in pretty quickly lol.
If your grow is set up somewhat permanently, I’d go with the Bluelab guardian. Forget ph’ing every again
https://www.amazon.com/Bluelab-pH-Pen-Measuring-Temperature/dp/B005POOJHG/ref=sr_1_1?ie=UTF8&amp;qid=1480919988&amp;sr=8-1&amp;keywords=bluelabs+ph+pen
Probably the best pen you can get :P
If you're trying to figure out where those cables go, a cheap cable toner is always a huge help.
Just realized you may need to get yourself a cheap toner if you don't know which rooms are wired to where; http://www.amazon.com/VicTsing-Network-Ethernet-Telephone-Tracking/dp/B008G8KE90
IDK what that 410 thing is, tried googling it but no luck. Sounds like a switch but might be a patch panel. Anyway, what you need is to verify all cables in your home.
Go out and get yourself a Cable Toner. Plug it to your outlet in the bedroom, go downstairs and check which cable it is. Label it.
Do this for every ethernet outlet.
It's possible that these cables are wired for phone, to check this take out one of the outlets and verify if all wires are being used. Better yet take a picture and post it.
Once you have all the wires labeled, make sure the runs downstairs are properly crimped.
You now need to plug all of these runs into a switch. A regular/non smart switch is your best bet. TrendNet has some really great options.
Finally plug one cable from the router to the switch.
Final set up should look like ISP Modem > Router > Switch > all the outlets.
Get a decent crimping tool and a cheap tester to make sure your pairs are matching up on both sides. I do this for work and home and will never go back to buying Ethernet cables at specific lengths.
https://www.amazon.com/TRENDnet-RJ-45-RJ-12-RJ-11-TC-CT68/dp/B0000AZK4G/ref=pd_lpo_vtph_147_tr_t_2?_encoding=UTF8&amp;psc=1&amp;refRID=0DZ16D14CWPHKTYK159J
https://www.amazon.com/HDE-Network-Cable-Tester-Phone/dp/B009ZXYI1U/ref=lp_7701919011_1_7?s=industrial&amp;ie=UTF8&amp;qid=1524075376&amp;sr=1-7
Also, if you plan on running multiple cables, I suggest using different color boots so your cable can all be the same color (since you're buying it in bulk) but the boots are different colors to help note which cable goes where.
https://www.amazon.com/Accessbuy-Ethernet-Network-Strain-Connector/dp/B01LYLGWSY/ref=pd_bxgy_469_img_3?_encoding=UTF8&amp;pd_rd_i=B01LYLGWSY&amp;pd_rd_r=MMCFM6WPJ3Y2Y3H7M3WA&amp;pd_rd_w=3qix5&amp;pd_rd_wg=S3Y6R&amp;psc=1&amp;refRID=MMCFM6WPJ3Y2Y3H7M3WA
https://www.amazon.com/TRENDnet-RJ-45-RJ-12-RJ-11-TC-CT68/dp/B0000AZK4G/ref=pd_lpo_vtph_147_tr_t_2?_encoding=UTF8&amp;psc=1&amp;refRID=0DZ16D14CWPHKTYK159J
recrimp it, you likely fucked up an end. do you have a cheap cable tester, like this? That would tell you what pair isn't working. You can usually find something similar to that at a local hardware store for around the same price as amazon.
For a single cable it does not matter what spec they used (A or B) since it is a closed cable. It would only be a problem if you wired one end as A and the other as B. Anyone suggesting that it is an A or B problem for a pre-made cable did not read your question.
You could see 100 Mbps if there was damage to some of the cable pairs in the wire. You can get a tester to see if any of the pairs are damaged. The wires can snap inside the line or get pulled out of the connector.
How long is the cable? Also buy monoprice (they sell on amazon) for great prices and pre tested cables that are not shitty Copper clad aluminum (CCA). CCA cables are not to spec and should never be purchased.
https://www.amazon.com/HDE-Network-Cable-Tester-Phone/dp/B009ZXYI1U/ref=zg_bs_7701919011_4?_encoding=UTF8&amp;psc=1&amp;refRID=5TEW1V61S5Q1WK1RCRBJ
Cat6 cables are better but should not be necessary for what you have described so far. If you were buying new I would say go cat6 just because they don't cost that much more.
Crimper $15
Connectors $7
Snagless Boots $6
Outdoor CAT5e $50
Cable Tester $8
Charging all your neighbors to wire up their Ethernet for $50 bucks a pop: Priceless.
Bruh https://www.amazon.com/gp/aw/d/B009ZXYI1U/ref=zg_bs_7701919011_4?ie=UTF8&amp;psc=1&amp;refRID=QVHFZ3SJRQ3N04MBFMVQ
9 dollars
Everything Rupert said. Youll need at least two hides (one on the cool side, one on the hot), bedding they can burrow in (like aspen shavings), a wide and shallow water bowl, and you need an appropriate heat gradient in your tank. I'd reccomend purchasing a temperature gun (like this: https://www.amazon.com/Etekcity-Lasergrip-Thermometer-Temperature-Non-contact/dp/B00DMI62HM/ref=pd_aw_lpo_328_bs_img_1?_encoding=UTF8&amp;psc=1&amp;refRID=B8X0RMRJVYPW27N07V3X), so that you can check the temperautures all around your tank while you set it up. I'd reccomend setting everything up and letting it run for at least a week or so while you ensure that everything is working smoothly before adding a snake to it. Google either "california king snake caresheet" or "corn snake care sheet" and read through the results for specifics of what they'd need. Care for both is relatively simple and nearly the same, and either would make a good beginner snake. I'd also add branches to climb on (that they may or may not use much, depending on your snake), and lots of things to clutter up the tank (hides, foliage, various decor). The more clutter, the more secure your snake feels. But I will warn you, baby snakes won't be seen much, amd they're very flighty. The first year or so with either of those your tank will look like it's empty 99% of the time, and they'll basically try to run away every time you get them out. But they'll warm up to you as they get bigger, and my corn (whose nearing three) is one of my favorite pets I've ever had. Hmm, what else. I'd reccomend feeding them frozen/thawed mice that you've warmed up instead of live mice. You can get them at nearly every pet store or you can buy them in bulk. Google snake mice injuries or look through this sub for pictures of mice attacks to see why, they can mess an animal up. Don't take your snake out of the enclosure to feed, cage aggression is a myth as long as you hold them sometimes. The snake will need a tank that's about 40 gallons when it's an adult, I wouldn't reccomend keeping them in a 20 long forever like some people say. Don't forget a thermostat, it could save a snakes life. It's absolutely necessary if you use an under tank heater. Don't ever, for ANY reason, leave your lid off of the tank. Not even for a second. There's also no reason to not have snake clips for the tank, or to leave any hole at all in the tank. They can escape so easily. And don't put any tape in the enclosure at all. Super glue and a hot glue gun are your best friends (as long as those aren't applied to the snake or put in the enclosure before dry), and tape of any sort will rip the scales off of your friend and leave nasty wounds.
I use one all the time for my clear quartz bangers, not sure if its accurate but I hold it directly under or over the banger (within a quarter inch) and get consistent dabs every time at 600°. I haven't timed or burnt a dab in the year I've had it. I also use it to check the temp on my enail, witch is probably more accurate because the coil covers the bottom of the banger.
https://www.amazon.ca/dp/B00DMI62HM/ref=cm_sw_r_cp_apa_i_NZfECb3SGRW7R
I'm probably the 30th person to suggest this, but if he's into beer and science and technology AND DIY, you seriously need to consider homebrewing.
You need to figure out if you want to bottle or keg, but I would ONLY suggest kegging, because bottling is dangerous (if you have too much sugar and hungry yeast, your bottles will explode). If you DO want to homebrew, I would suggest getting a kegerator and soda kegs. It's relatively compact, can hold up to 10 gallons if you set up two soda kegs, and has wheels.
You'll need a 6 gallon glass carboy with a lifting harness. I wouldn't suggest using the metal rim grip kind because it chipped our carboy. The nylon harness you see in this picture would be a good substitute, it just makes it so you can more easiliy lift 5 gallons of liquid. You'll also need a bubbler plug, which is very inexpensive. Probably the cheapest thing, aside from the hops bags.
You'll also need a thermometer (infrared is a better option than a dip thermometer because it'll protect your hands better)
If you're going with a kegerator, you'll need CO^2, which they usually sell and fill at the homebrew store.
You'll also need a giant, stainless steel kettle. Actually if you buy a turkey frying kit, it has everything you'll need except a propane tank (which you can rent at the grocery store).
The most important object though, is probably an auto siphon
You'll also need sanitizing powder. You can use bleach, but then you run the risk of bleaching other stuff.
They should have all this stuff at your homebrew store, and definitely ask them for help. They'll also have recipes there you can grab for free, and can suggest a good recipe for beginners based on what type of beer he likes.
I left some comments on the imgur album, but overall it was a great success. It was my first time making pizza and learned couple things along the way.
Specs:
Pizza stone I used
Infrared Thermometer
Can't wait to try it again next weekend! Send me some more tips!
buy one of these and sleuth out some promising spots on google earth. definitely worth knowing the temp of any pool you're going to jump into.
https://www.amazon.com/Etekcity-Lasergrip-Thermometer-Temperature-Non-contact/dp/B00DMI62HM
I use this one and it has never failed. Just gotta make sure you are putting the sensor about an inch from the top of your banger. Don't use the laser to line it up, the laser is only to help aim at a large object from a few feet away!
https://www.amazon.com/Etekcity-Lasergrip-Thermometer-Temperature-Non-contact/dp/B00DMI62HM/ref=mp_s_a_1_4?keywords=Temperature+gun&amp;qid=1554348709&amp;s=gateway&amp;sr=8-4
If you find yourself thinking about this a lot, you might want to buy or borrow an infrared laser thermometer. It is inaccurate on reflective surfaces like stainless steel but works well with cast iron. Not something you need to do every time of course, but it'll take the mystery out of a lot of questions.
I'm using this controller which is supplied with a NTC 25 thermistor.
http://www.amazon.com/Docooler-Temperature-Controller-Thermocouple-Fahrenheit/dp/B00F05UI8O
Temperature Controller - I thought I was buying the STC-1000 Fahrenheit model until it arrived.
Edit: finished project
Snap On does not make all their own tools. It wouldn't surprise me if the Snappy set is just a re branded starrett. The boxes look identical. That being said, what kind of work do you do? I do a lot of structures and I barely use my combination set. I use the shit out on my little 4" square. Unless you're in a machine shop I think the big name sets are way overkill.
I mostly use a 6", 18" scale, a 4" Combination square, and a Mitutoyo Caliper
This site helps with Nova thread adapters.
Some other instructions.
Also, you should look into some decimal inch calipers. Or dial Or digital. I guess if you are used to that scale it’s fine. But using 16ths and then going to 128ths just seems pretty difficult. (1 + 12/16 + 4/128 = 1.78125) If you can do that in your head I’m impressed.
It does seem that 1.75-6 is what those measurements come out to. But idk how you determine what thread type it is. It could be metric? I’d probably do everything I could to find a published thread size and type from the manufacturer.
What size morse taper is this?
Very cool and informative video. Really neat use of salvaged parts and the guy is intelligent and skilled. However I think he kind of down plays and under estimates the cost of the product and tools he was using and he also mentions the fact that you can buy a lathe (that would almost certainly work better) for a similar price. The big kicker is the other tools. The tools to use and or build this lathe would cost more than the machine itself. I'm going to link you some of the tools you'd want to be able to use this machine effectively (and make it).
This granite block will be the basis for all of your measurements it is extremely flat. You'd probably want to make a stand for it and it is very heavy as well. The 933$ version would be ideal for bigger stuff but maybe you could just make small stuff it's a small lathe anyways so lets say the 235$ version
https://www.amazon.com/HHIP-4401-1812-Granite-Surface-Accuracy/dp/B01LTHIHCK/ref=mp_s_a_1_3?keywords=granite%2Bblock&amp;qid=1569402248&amp;s=gateway&amp;sr=8-3&amp;th=1&amp;psc=1
Mitutoyo Digital Caliper 120$ The waterproof version is better if you intend to use coolant. I think you could use cheaper no name ones for the ones that he built into the machine but you would need one good one.
https://www.amazon.com/Mitutoyo-500-196-30-Advanced-Measuring-Resolution/dp/B00IG46NL2/ref=mp_s_a_1_3?keywords=mitutoyo+digital+calipers&amp;qid=1569402063&amp;s=gateway&amp;sprefix=mitutoyo+digital&amp;sr=8-3
Range dial indicator (runout gauge). He used one in the video and you'd be using one a lot. 219$
https://www.amazon.com/Mitutoyo-64PKA075-Indicator-Magnetic-Plastic/dp/B007XZIT5I/ref=mp_s_a_1_4?keywords=runout+gauge+mitutoyo&amp;qid=1569402528&amp;s=gateway&amp;sr=8-4
Micrometer set with standards. 354$
https://www.amazon.com/Mitutoyo-103-922-Micrometer-Standards-Graduation/dp/B0006J42OA/ref=mp_s_a_1_5?keywords=mitutoyo+micrometer&amp;qid=1569403065&amp;s=gateway&amp;sr=8-5
That's just getting started. Now you might be able to find some of this stuff used but I'm not sure if I would trust it. You wouldn't believe how careless people treat tools that cost several hundred dollars. If you did go used I'd try to find someone getting rid of their personal tools, not shop tools.
This isn't to discourage you though. I just want people to realize it's not easy or cheap. I'd start out with a lathe for wood and make stuff on it that doesn't need the tight tolerances.
Check out this guy. https://youtu.be/yCaGW9z4blM
Mitutoyo AOS for $102
https://www.amazon.com/gp/product/B00IG46NL2/ref=ox_sc_sfl_title_8?ie=UTF8&amp;psc=1&amp;smid=ATVPDKIKX0DER
Bet they've been overheating. Buy one of these:
https://www.amazon.com/Nubee-Non-contact-Infrared-Thermometer-Temperature/dp/B00JA3BMDW
check the temp after it has been on over an hour or two. My enclosures have seen temps over 350 degrees. You could bake a cake in there.
This site has a pretty good explanation of what i am talking about with thermostats.
Unfortunately proportional thermostats are not cheap. A basic model is general >$80 (USD). Herpstat by Spyder Robotics is the most best around from everyone I talk to.
Honestly, before i dropped that kind of $, I would put in a 75 Watt bulb and check temperatures to see if you even need a thermostat. Too hot, try a 50watt and see if that is better.
Re: checking temps. I would suggest one of these they are cheap and fairly accurate.
what type of thermometer/hygrometer are you using, analog or digital? where exactly are you measuring the temperature? on the wall? on top of the substrate? on the floor beneath the substrate? a UTH that is not regulated by a thermostat will run somewhere between 100 and 200 F. you need a thermostat, like this. the probe can be sandwiched between the UTH and the outside of the enclosure, or it can be placed inside the enclosure secured to the floor by hot gluing the probe to the floor. you should have an infrared thermometer, like this, to accurately spot-check the temperature anywhere in the enclosure, which will help ensure your thermostat is on the right setting to maintain a floor temperature of 90 F. if your cool/ambient temperature is below 75 F [with 80 F being the ideal] you'll need some sort of supplemental heat source like a second UTH run on its own thermostat, a radiant heat panel, or a ceramic heat emitter.
glass tanks are not great enclosures for ball pythons. the glass doesn't retain heat, and the screen lid allows too much air flow to retain any humidity. glass tanks can work, but it's an uphill battle of modification, monitoring, and maintenance. plastic storage tubs or pvc reptile cages are much more suitable for BPs. plastic is a much better insulator for heat, and the minimal air flow means you should be able to maintain 50%+ humidity with no special efforts. substrates like aspen are very dry and will contribute to low humidity, though, so you may want to switch to something more moisture friendly like cypress mulch. going backto enclosure types, i personally have one BP in a 74qt sterilite underbed tub secured with a pair of luggage straps, and my other two are in pvc cages from boaphile plastics. tubs aren't pretty, but they're cheap and effective. pvc cages are nice to look at, but they cost somewhere between $150 and $350 depending on which manufacturer you buy from and what size you get.
even without knowing how much your BP weighs, i can tell you that you're severely underfeeding her. a hatchling BP is capable of eating prey the size of an adult mouse. at two years old, she should be big enough to eat small or medium rats. get a digital kitchen scale to weigh her. right now, while she's growing, she should be eating approximately 15% of her own weight, though you'll want to build up to that gradually so you don't shock her system. you'll also want to switch to appropriately sized rats ASAP, because feeding several mice per meal is impractical at best and just not going to happen at worst. on rare occasions, a BP will just take a rat with no hesitation, but in most cases they won't eat it because they don't recognize it as food. i wrote a simple breakdown of how to switch a BP from mice to rats here. you won't find rats that are smaller than small adults in places like petco, petsmart, etc, so you may need to find a different rodent supplier if she's not ready for smalls yet.
your hides are inadequate. there should be two, one for the warm side and one for the cool side, that are snug [little/no empty space around the snake], enclosed [one entrance, snake is actually hidden], and identical [except for temperature]. this is VERY important to fix. your snake needs to be able to feel secure and be able to thermoregulate comfortably. hides like this are ideal. half logs are not appropriate.
regarding your snake biting you: she's immensely stressed. everything from your poor enclosure, being underfed, being moved to a feeding tub, all of these things are contributing to her being stressed, scared, and defensive. right now, you need to forget about handling her unless you're taking her out to weigh her. she should be fed inside the enclosure, and she should not be handled at all for your own pleasure until she is 100% healthy.
Everything looks good, but a little feedback.
First with your UVB Light unit, I see that you have selected a double bulb unit. In addition to the bulbs being quite expensive, the beardie doesn't need two of them in their cage. One is perfectly sufficient, so save your money and at least get a single bulb fixture. Also, feel free to use a dedicated fixture if you want, but a standard cheap household fixture like this is just fine. I paid $15 for this at my local store instead of a "reptile" fixture for $60. Edit: I just noticed you're going with a 4ft wide viv, so that may be why you're doing the 2 lamps fixture. If thats the case, disregard my comments about you not needing the second bulb. The standard rule is 2/3rds the length of the viv should be ran with uvb lamps so you may be on track.
Secondly, the 2 temp gauges are okay, but the stick on ones are known to be wildly inaccurate (especially since the thermometer will not be on the beardies basking spot). I don't even have thermometers in my viv, I decided to use this to monitor temps and it has been great. Especially as you move the furniture around the viv getting your setup finalized.
Third, you'll want a humidity gauge in there for sure. As you put food and water and whatnot in the viv, it can raise the humidity too high and cause respiratory infections. In fact they get a lot of their hydration from veggies and fruits so you may want to forego a water dish altogether (they're desert animals, after all). A lot of times they just poop in their water dish anyway.
Fourth, I'm assuming by the double dome fixture you're planning on a ceramic heater. Take a look at the lamp stand I posted in another comment so you can lift the lamps up away from the screen if needed. By the time you put something for him to bask on, he may be 12-14 inches in the air, you don't want the lamps only a few inches away or you may cook your lizard. I only have mine up in the air a couple inches, but it was necessary. When the lamps were resting on the screen his basking spot was up over 120 degrees. I can't tell from the website, but if your viv is not a screened top, the lamp stand may not work and if that's the case, your solution will be to either buy higher/lower wattage bulbs as needed, or maybe a dimmer.
Lastly, don't forget a reptile light timer. Cut corners somewhere to get one, but it will make your life so much easier and your beardie life so much less stressful.
Edit: No upvotes yet after all this typing? Help me out!! 😂😂
I've done that as well. But I found that with just the light on, the temp can get to the 90-100F range over a couple hours in my cheap apartment oven. I cooked some starter that way. I've had better success with a tiny heat pad used for reptiles.The tiny 4-watt one is still pretty hot, but with some dish towels placed on top, it works really well.
I use one of these to monitor the temp. It's kinda awesome and fun.
http://www.amazon.com/gp/product/B00JA3BMDW?psc=1&amp;redirect=true&amp;ref_=oh_aui_detailpage_o02_s00
An external DAC is nice to have but not essential, especially in a budget set up. That mobo also seems to have some sort of upgraded and shielded onboard sound chip so it should perform better than your average one and be less noisy, i'd say you can get away without one for now then maybe get one down the track if you feel you need it. The Khadas Tone Board is a $99USD option that outperforms many other DACs in it's price range.
Also when you say you prefer non-powered as there will be less cables, that isn't necessarily the case. With passive speakers you'll have to have an amp with 1 power cable plus 1 interconnect cable from the PC to the amp then 2 speaker cables from amp back to the speakers making a total of 4. With budget powered speakers you'll have 1 power cable from the active speaker to the wall, 1 interconnect cable from the PC to the speaker with the amp in it and then an umbilical cable from the main speaker to the slave, so you'll actually end up with one less in that scenario as you'll have 3 instead of 4. The Edifier Studio 2.0 are $164 and a bit more powerful than those other ones I linked if you can stretch the budget a tiny bit. Scroll down and read the reviews.
Definitely stay away from Logitech.
These Edifiers would probably be my first choice.
Since this is a system for a PC, I would be inclined to recommend these, though there are many more options to consider. If this system will be PC and PC only, the following Active Speakers will do. Remember Active Speakers have built in amps -
Edifier R2000DB - £235/pair - 4.5 Star Rating on Amazon -
https://www.amazon.co.uk/EDIFIER-EDFR2000DB-Home-Audio-Speakers/dp/B00O3K7GP0
Very High Power, and has the additional feature of an Optical Input, plus a Remote Control, and Bluetooth capability so you can Stream music from your Smart Phone or other Smart Device, and if you computer has Bluetooth capability, you can stream audio wirelessly.
Though I don't have a link, the Edifier R2000DB is also available in Walnut (woodgrain) similar to the speaker shown below. This is a relatively common speakers, and should be available in Poland and/or Germany.
Here is a alternative that is similar but lacking the Optical Digital Input -
Edifier R1700BT - £130/pair -
https://www.amazon.co.uk/Edifier-R1700BT-loudspeaker-loudspeakers-Built/dp/B00MXY21LW
Now if you want an Amp and Speaker separately, probably the best low cost amp would be the Yamaha AS201 -
Yamaha AS201 - £160 -
https://www.richersounds.com/product/amplifiers-receivers/yamaha/as201/yama-as201-blk
And for a computer, the Q Acoustic 2020i bookshelf speaker would be excellent -
Q Acoustic 2020i - £100/pair -
https://www.richersounds.com/product/standmount-speakers/q-acoustics/2010i-gr/qaco-2010i-graph
The current model is the Q Acoustic 3020, so if you can find them the older 2020i, which are still very good, are available at very nice discounts.
I have a pair of 3020 on my computer and they do an excellent job.
The Whardedale 220 are a very well regarded speaker, but they push the budget up to about £170/pair. Though I'm not sure of availability in Poland, the Cambridge Audio SX50 and SX60 are good speakers at deep discounts -
https://www.richersounds.com/product/standmount-speakers/wharfedale/diamond-220/whar-diam-220-blk
https://www.richersounds.com/product/standmount-speakers/cambridge-audio/sx50/camb-sx50-dk-wal
https://www.richersounds.com/product/standmount-speakers/cambridge-audio/sx60/camb-sx60-dk-wal
Though you are more likely to find the Wharfedale or the Q Acoustic in Poland or Germany than the Cambridge.
The Edifier R2000DB are nice in that they have an Optical Digital Input, which means, at some point in the future, they could be moved to the TV for TV/Movie watching. Plus, you can Stream Music to the Speakers from your Smart Phone or other Smart Device (bluetooth).
NOTE: Both the Edifier R2000DB and the Edifier R1700BT have REMOTE CONTROLS, which isn't so important if you are sitting at the computer desktop, but for TV, a Remote is a must, and very handy for general music listening.
The separate Amp and Speakers would give you a system that could potentially go beyond a PC system.
Here are the full specs on the Yamaha AS201 -
https://uk.yamaha.com/en/products/audio_visual/hifi_components/a-s201/index.html
Approximately 100w/channel. Phono Input.
I'm not sure about the Market in Germany or Poland, bit if you can find them, also consider the Yamaha RS202, I don't think it has a Phono Input, but it does have Bluetooth capability. If you can find it, it is also a very good Receiver to consider.
Here are the specs on the Yamaha RS202 Receiver with Bluetooth -
https://uk.yamaha.com/en/products/audio_visual/hifi_components/r-s202d/index.html
In the UK, this has DAB and DAB+ Radio, don't know if that is relevant in Poland.
But there are a few choice, let me know what you think.
https://www.amazon.co.uk/Edifier-R1700BT-Bluetooth-Active/dp/B00MXY21LW
They're mad tings, love them.
You cannot do what you want to do with that speaker set. They are designed to only be used as a set. The speakers get their power from the subwoofer box. You can't just connect them separately. I would suggest either you just stick with what you have or one of these options: 1. get new passive speakers and an integrated amplifier(example SMSL), 2. get a new set of better active speakers (example Edifier)
&#x200B;
For a turntable, make sure to get one WITH a built-in phono-preamp as most amplifiers you will be considering will not have one included. (example Dual)
are you dead-set on computer speakers, or are you willing to upgrade to something a bit more substantial?
the suggestion I leave often is to get a Lepai amp and the cheapest bookshelves you can find on Amazon. I don't know what online stores Poland has, but I'm assuming you can order off of amazon.de
powered monitors are another option, which combined the simplicity of computer speakers with the sound quality that bookshelves provide. this seems to be a decent pair in your budget, but due to the language barrier, I'm having trouble navigating the german site
Fluke is the lifetime brand in this dept. Below is the basic tester I buy for my structured cabling technicians. The cheaper ones will get the job done, but they sometimes fail and have inferior warranties. This is a digital toner / tracer, which also will run wiremaps, continuity, and inject tones.
https://www.amazon.com/Fluke-Networks-IntelliTone-Toner-MT-8200-60-KIT/dp/B00N2S6RPY/ref=sr_1_1_sspa?ie=UTF8&amp;qid=1518912207&amp;sr=8-1-spons&amp;keywords=Fluke+tracer&amp;psc=1
https://www.amazon.com/Fluke-Networks-MT-8200-60-KIT-IntelliTone-Toner/dp/B00N2S6RPY
It's like $200 bucks. You don't need each tech having their own. Get two or three, tops.
Disclosure - I have been doing cabling and telecom for 10+ years. I am recommending the same tools that I carry in my own bag.
First, that tool is garbage. I had that same kit once upon a time and the teeth in those crimps actually bent.
Since price is no option, get yourself a nice pair of crimps.
http://www.allentelproducts.com/catalog/model_AT680.htm?sid=5053870E92469B0FBDE26B823299C951&amp;pid=2010
Also, since price is no option - Get a nice toner that includes a cable mapper to make sure crimps/punchdowns are okay.
https://www.amazon.com/Fluke-Networks-MT-8200-60-KIT-IntelliTone-Toner/dp/B00N2S6RPY
You will also need a punch down tool.
https://www.amazon.com/Fluke-Networks-10055501-EverSharp-Starter/dp/B000FJCRBG/ref=sr_1_3?s=office-products&amp;ie=UTF8&amp;qid=1475089176&amp;sr=1-3&amp;keywords=fluke+punchdown+tool
Last, do not crimp RJ-45 ends on solid copper cable. Solid copper is for terminating on jacks and patch panels. When you terminate an end on solid copper, the blade is actually not cutting through the wire as intended. Instead its either bending or cutting to side of the wire. This can lead to poor connection and oxidation of the wire over time. You will start having connection problems with no idea why. If you are set on simply using crimps, purchase your cable with stranded copper. With stranded, the blade inside of the RJ-45 end will actually cut through the middle of the wire coating and settle in between the copper strands.
Also, I would skip the Cat-7 and go with shielded CAT-6.
Well I'll be the first one to give you generic information that you could have found with the search function.
You just do the needful.
https://www.amazon.com/dp/032194318X/ref=wl_it_dp_o_pC_nS_ttl?_encoding=UTF8&amp;colid=3IXCECMPTZ0C5&amp;coliid=IJFXHOHENJ2FH
https://www.amazon.com/dp/0321492668/ref=wl_it_dp_o_pC_nS_ttl?_encoding=UTF8&amp;colid=3IXCECMPTZ0C5&amp;coliid=I3J2AR8V86JZMD
https://www.amazon.com/dp/0596007833/ref=wl_it_dp_o_pC_nS_ttl?_encoding=UTF8&amp;colid=3IXCECMPTZ0C5&amp;coliid=I2OPTI4J0S4UG2
Good screwdriver set.
https://www.ifixit.com/Store/Tools/64-Bit-Driver-Kit/IF145-299
A network tone tester in case you need to map out your network and document everything. Also functions as a basic cable tester.
https://www.amazon.com/Fluke-Networks-MT-8200-60-KIT-IntelliTone-Toner/dp/B00N2S6RPY/ref=sr_1_5?ie=UTF8&amp;qid=1473701817&amp;sr=8-5&amp;keywords=fluke+networks+tester
A punch down tool.
https://www.amazon.com/TRENDnet-Punch-Krone-Blade-TC-PDT/dp/B0000AZK4D/ref=sr_1_1?ie=UTF8&amp;qid=1473702091&amp;sr=8-1&amp;keywords=punchdown
An ethernet crimper.
https://www.amazon.com/TRENDnet-RJ-45-RJ-12-RJ-11-TC-CT68/dp/B0000AZK4G/ref=sr_1_1?ie=UTF8&amp;qid=1473702137&amp;sr=8-1&amp;keywords=ethernet+crimper
A quick cable stripper.
https://www.amazon.com/Monoprice-Stripper-Cutter-Cables-107051/dp/B0069LRBU6/ref=sr_1_3?ie=UTF8&amp;qid=1473702190&amp;sr=8-3&amp;keywords=ethernet+stripper
A usb hard drive dock.
https://www.amazon.com/Sabrent-External-Duplicator-Function-EC-HDD2/dp/B00IKC14OG/ref=sr_1_2?ie=UTF8&amp;qid=1473702021&amp;sr=8-2&amp;keywords=usb+hard+drive+dock
A notebook.
https://www.amazon.com/Rhodia-Meeting-Book-Made-France/dp/B001DCDSW6/ref=sr_1_1?ie=UTF8&amp;qid=1473702220&amp;sr=8-1&amp;keywords=rhodia+meeting+book
Your necessities may vary, this applies to more of a one-man shop, and there's plenty of other things you'll want to get that I don't have listed here depending on your job.
I dunno how much you should get paid.
For 80% of hardware work you just need a good, solid multi-tipped magnetic screwdriver and a pez dispenser full of excedrin.
Toss in a power supply tester like a Dr. Power II and you have nearly all hardware tools you need.
Just be aware that many software tools on Hirens are only licensed for personal use, using them for professional use would be a violation of license agreement.
If you're going to be checking networks, you're going to want a good fluke toner, and a fluke voltage tester so you don't kill yourself
You're also going to want a cat5 crimper that won't break
If you're troubleshooting big networks then pick up a fluke microscanner II, but only if it will save you several thousand bucks in effort.
A Toner & Probe kit would definitely help out identifying cables. There are less expensive ones, but if work's paying for it, I recommend Fluke.
You get what you pay for. I use this kit at work and it's an invaluable tool to me. Oh, oops, forgot we were in /r/homelab :D
Tl/Dr: video of what i just wrote out (video is not mine as I would start at the wall first. I had that beaten into me as an apprentice)
first invest in an inexpensive meter. heres an auto ranging clamp meter
then test the outlet. going by this pic check Line to line it should be 240v then line to neutral and line to ground 120v on both lines. and ground to neutral 0v
if all is good with the outlet, meter the connection on the unit the same way
l
Instead of flipping each breaker for an hour, try this. Get a multimeter that tests amperage. Something like this:
https://www.amazon.com/dp/B00NWGZ4XC
You'll have to carefully remove the panel cover from your circuit breaker panel. Set the meter to amps and put the clamp around the black wire coming off each breaker. You'll be able to tell pretty quickly what circuit is using all the power, and you won't have to shut anything off.
There is a link in the FAQ on the page for how to do this. If it's an AC device (plugs into a household wall), then the most accurate thing to do is buy a Kill-a-watt meter and actually measure it.
Most devices list their max power draw, either in watts or amps. If it's in watts, just plug that into the calculator. If it's in amps, we have the converter at the top of the page to get the watts. If you can't find the power listed on your device, but own the device, you can get an ammeter (like this one) and measure as it's being used.
First off, in order to use a pH meter, you must calibrate it every. single. time. Or at least once a week. They're notorious for drifting even when stored correctly. You will need 4.0 and 7.0 calibration solutions, they're sold as powder or in liquid form. You should also have probe cleaning and probe storage solution. Contact lens solution (not hydrogen peroxide stuff) can work as probe cleaning solution in this context, as it works well on organics in a gentle way.
Unfortunately the $10 specials aren't really that great, and you won't get really repeatable results until you hit about the $35-$50 price point. At this price point they should start to have replaceable probes. e.g.: this or this . I'm pretty sure /u/chino_brews knows the specific generic design name of the 2nd one I linked, lots of different vendors have a house brand white box version of it. Fisher Scientific design that went off patent, can't remember the number.
Unfortunately, that meter probably wasn’t going to be very accurate or have a long life anyway. The cheapest meter I recommend is the 8689 model, which is about $70 from Thermoworks, but you can get it for about $45 from China. Probes are good for a year, maybe two, in most cases although some get a slightly longer life with excellent care. The probe on the 8689 is replaceable and readily available so you can figure about $18/year in equipment cost if your probe works for two years.
I’ve seen some users in this sub say this one is OK too, but I can’t vouch for it:
https://www.amazon.com/dp/B00ST3VTQ4?aaxitk=PfM4qruJcvUcFfTDj2w9mw
The most recommended pH meters run in the $120 to $150 range. I figured I did not want to ruin a good meter while I learn how to use, calibrate, and store a pH meter, so I picked up this $40 one (the reviews seemed better than the $20 ones).
https://www.amazon.com/Dr-meter-PH100-V-Resolution-Accuracy-Measurement/dp/B00ST3VTQ4
There are plenty of threads on pH meters if you search this subreddit.
I don't have a TDS meter, but I get the impression that the under $20 ones are fine for the job. I am not positive what use a TDS meter plays in brewing. I could see where it might be useful for checking RO water, or maybe getting a feel for how much your tap water varies month to month. Do others find a TDS meter useful?
For you or somebody else? A pH meter does required a bit of an investment in time learning how to calibrate, store and use...as well as learning about water chemistry/how to adjust pH.
I went toward the cheap side since I figured I would rather ruin a cheap meter than an expensive one. After 7 months I don't have any regrets with the $40 Dr Meter PH100. That Apera model seems recommended often.
Sous vide on the cheap. This requires a $60 initial investment, but you can turn a cheap cut into some of the best meat you've ever eaten so I promise it's worth it. You need a temperature controller for your crock pot, I bought this one you have to wire it yourself with an extension cord, or you can buy a prewired one for $25 more. Buy some Ziploc vacuum bags.
Fill your crock pot with hot water and plug it into the temperature controller. Put the probe in the bottom of the crock pot and set the temperature based on the type of meat your using and how done you want it,Here's a chart. Season the meat. Seal it in a vacuum bag, put it in the water and put the lid on the crock pot. I like to leave the corner of the vacuum bag with the valve out of the water, it helps it keep the seal a bit better. When the meat is done, if you plan on eating it immediately, pat it dry, then quickly sear all sides on a smoking hot pan. If not, chill it in ice water and save it in the fridge for up to a week, or freeze it. You can reheat thin cuts by searing them, reheat roasts in the crock pot. Depending on how big your crock pot is, you can cook several days worth of meat at once.
I find it's best to use dry spices, or a little bit of fresh herbs. Garlic powder works better than raw. Don't use quite as much seasoning as you would cooking using other methods. Avoid putting sauces in the bag itself, especially acidic/alcoholic ones. If you plan on marinating/brining, do that first, then pat the meat dry before putting it in the bag. Adding additional fats, like butter/baconfat/lard helps the meat retain even more moisture.
If you're using a tough cut of meat you can, and should, cook it for a long time. Some people cook it for 72 hours, the longest I've done is 48. If your cut has a lot of connective tissue, like brisket, you should cook it at at least 140-145F to help break it down. Most steaks are good after 4-6 hours, I wouldn't cook them for longer than 16. If you're cooking a thin tough cut, like flank steak, which requires about 12 hours, bunch it or fold it in the bag instead of laying it flat, to help prevent moisture loss. Delicate meat like chicken breasts should not be cooked for more than 4 hours. Fish no more than 1. Some meats have higher recommended temps, but the hotter you set the bath the faster the meat will lose moisture, so I recommend doing most of the cooking at a lower temp like 140F, then raising it to the final temp over the last hour or so.
It's fairly idiot proof, exact timing isn't really important, but the meat will come out at the perfect temperature. The results are really impressive, and you can feel proud serving someone a meal that was cooked in a crock pot.
Be careful about the minifridges. I had one from college I was going to use, but then I noticed the refrigerant lines were in the freezer portion, and I needed to remove that portion so the kegs could fit.
I ended up buying a chest freezer on craigslist. Then I bought this to control the temp.
Ranco link to buy: Amazon
Johnson's link to buy: Amazon
I use a Ranco ETC-111000. It's really simple to wire up an extension cord to it.
Awful price. http://www.amazon.com/gp/product/B0015NV5BE
edit: I see that this one is "pre-wired". I have one of these and it took me 10 minutes to wire it in using a left over computer power cable. I don't see how adding a wire results in a 40$ increase in price though.
I built my Keezer in stages and it really takes the sting out of the total cost. I started with one ball lock keg and one Perlick 525SS tap and 4" all stainless steel shank. Once I got things moving, I added a gas distribution block, another keg, another SS shank and another 525SS tap. Eventually I'll max out at 4 kegs in my GE 7cf keezer (fcm7suww) or 5 if I splurge and get a mini keg for the hump.
For a controller, I used a RANCO ETC-111000 Digital Cold Temperature Control that I got got $53.95 from Amazon. This is FAR superior to the STC-1000 that I have used in the past. The trick is, its not wired so you have to do a little work yourself. I found this video on youtube that explains how to wire it up in a way that even my little brother could figure out. I used automotive trim double stick tape and stuck it to the back of the keezer, done and done.
Everything in my keezer that is metal and touches beer is stainless steel. Its more expensive but it should last just about forever and I'll never worry about corrosion. I did all my gas and liquid in 1/4" MFL/FFL SS fittings and it makes taking things apart for cleaning super easy. Again, more expensive but I didn't go buy it all at once.
I have this ~25 dollar iGaging:
https://www.amazon.com/iGaging-Electronic-Digital-Fractions-Stainless/dp/B001AQEZ2W
For quick checks, sanity checks, basic stuff, etc. 20 dollar calipers are fine. My iGaging rarely disagrees with the calibrated Mitutoyo's in our quality department.
I just bought some calipers from Amazon for about $30. Can someone explain to me how these Mitutoyo calipers that cost >$100 are better than my $30 ones?
Knowing that he made a 4 ft x 4 ft cnc machine, I would venture to guess it would be a cnc router and he is planning to mainly cut wood and maybe some aluminum. That said I really wouldn't buy expensive machinist tools if you wanted to better budget your money.
Here are some stuff that can be made on a cnc router:
http://www.shopbottools.com/mSupport/projects.htm
I'm assuming he may have told you what kind of stuff he could build or wanted to build when he said he wanted to build one. If it was for wood projects, then you can get a good 6 in. digital caliper under $40, such as these:
http://www.amazon.com/iGaging-Electronic-Digital-Fractions-Stainless/dp/B001AQEZ2W
I have the large readout version of that one by the way.
Not sure what he plans to use for clamping his stuff down to the table, but here's a great option:
http://www.rockler.com/hold-down-clamp-5-1-2l-x-1-1-8w
OK, you built a cnc router, but what do you make? Here are some 3D files for purchase:
http://www.vectorart3d.com/
This 3D router bit set will work for sign making (not sure what diameter bit he needs, and also add some spiral bits)
http://www.rockler.com/rockler-3-pc-signmaking-router-bit-set
This is a great work shop apron because these shoulder straps are more comfortable than the ones the just go around your neck. Also the mesh pockets let saw dust fall out instead of collecting in there.
http://m.duluthtrading.com/store/mens/mens-workshop/tool-bags-tool-belts/85021.aspx
If your not sure what he plans to cut them a gift card is always welcomed.
iGaging IP54 Electronic Digital Caliper 0-6" Display Inch/Metric/Fractions Stainless Steel Body https://www.amazon.com/dp/B001AQEZ2W/
Most definitely. I find new uses for it all the time and they were pretty cheap!
iGaging IP54 Electronic Digital Caliper 0-6" Display Inch/Metric/Fractions Stainless Steel Body https://www.amazon.com/dp/B001AQEZ2W/ref=cm_sw_r_cp_apa_saf8ybK2EF6Y9
I'm a cnc machinist and these impressed me a lot. I highly recommend them for anyone's shop
[Igaging] (https://www.amazon.com/iGaging-Electronic-Digital-Fractions-Stainless/dp/B001AQEZ2W)
This won't give you an immediate answer, but a caliper would tell you and they are handy to have around.
Even a super cheap harbor freight one would do. Personally, I like my not as cheap as it could be, but far from costly set.
Oh and get a valve cap.
Listen: this time I am going to help you out but please understand much of this hobby is learning to do stuff for yourself. There is a ton of problem solving based on intuition, ability to search for others solutions, and taking shit apart. You will not have very much fun if you aren't willing to put in the work.
For the time being just fold up pieces of paper to shim the feet. You really need a carpenters square and a line level to make sure everything is square.
Start with the table. If the surface you are trying to level your system on isn't level then leveling the system is going to be impossible. You want gravity to help you not hurt you.
[Here] (https://www.thingiverse.com/thing:1653631) is the link for z braces.
I also highly recommend [this mod] (https://www.thingiverse.com/thing:1454073)
Once those are installed and properly calibrated then everything on the frame should be square.
Next step is to get have you system properly trammed. That is essentially leveling the build plate to the extruder. With the pressed sheet metal plate on there it cannot be done properly. You need to get a much thicker aluminum carriage. Somebody else in this thread already offered to sell you one. I for one am a big fan of supporting the maker community and think you should take him up on that offer as the same thing online costs about the same amount.
Here are the tools you need to be successful in this endeavor. A proper magnetic line level. I got mine at harbor freight for a few dollars. A carpenter's square the bigger the better IMO about 1 foot on each side. And a good pair of calipers. The calipers are the most expensive tool on this list but you don't need top of the line Mitotuyos. At work we have the Mits but at home I use [these.] (https://www.amazon.com/gp/product/B001AQEZ2W/ref=oh_aui_detailpage_o05_s00?ie=UTF8&amp;psc=1)
If you are willing to put the time in this hobby is great, very informative, and useful for all times of machining in the future.
Good luck I wish you well.
I just bought http://www.amazon.com/gp/product/B001AQEZ2W?psc=1&amp;redirect=true&amp;ref_=oh_aui_detailpage_o02_s00 the other day
Milwaukee MW-102
I'm debating between two PH meters: The Milwaukee MW101 or the Milwaukee MW102. Does anyone own either? Can anyone recommend a meter that is under $100 that they love?
I'm using this guy. I tried in the boil as well as a partially cooled sample of the wort I took out incase the temp was too much for it to adjust.
I understand that most adjustments are for mashing but I've also read that sampling the boil can help balance the acidity/alkalinity of the final product. Extract is supposed to have this covered (I'm using distilled water) and found out that it measured 4.8.
Its not the end of the world, and I have the feeling I'm over thinking it. Just wanted to know what was going on. Thanks and have a happy new year!
I use a Milwaukee MW102. I don't know if it's the best, but it's worked for me and seems to be a popular choice:
http://www.amazon.com/Milwaukee-MW102-PH-Temperature-Meter/dp/B001DTNDME
Probably my most enjoyed tool is my digital PH pens. 1 issue is you have to calibrate them so you will need solution I don't believe comes with this 1. I have both a soil and hydro PH pen from them constantly in use for over a year. You get about 30-50 reads then need to recalibrate. The hydro pen can do your nutes for dirt and hydro, the soil pen allows you to stab into your soil and see in the grow medium.
If you are doing hydro: https://www.amazon.com/Bluelab-pH-Pen-Measuring-Temperature/dp/B005POOJHG
Soil has some used 1s in your range, I paid $180 when I got mine:
https://www.amazon.com/gp/aw/d/B00CJIDFAS/ref=mp_s_a_1_2?ie=UTF8&amp;qid=1484082345&amp;sr=8-2&amp;pi=AC_SX236_SY340_FMwebp_QL65&amp;keywords=blue+lab+soil+ph&amp;dpPl=1&amp;dpID=314dYy7eMKL&amp;ref=plSrch
No problemo!
This is a moderately pricey pen, but it's fantastic, I've owned two of them (one dried up because I forgot to add water to the cap(need to keep the sensor thing wet)). https://www.amazon.com/Bluelab-PENPH-Pen-Plant-Germination/dp/B005POOJHG/ref=asc_df_B005POOJHG/?tag=hyprod-20&amp;linkCode=df0&amp;hvadid=167118301188&amp;hvpos=1o1&amp;hvnetw=g&amp;hvrand=16523942976628365276&amp;hvpone=&amp;hvptwo=&amp;hvqmt=&amp;hvdev=c&amp;hvdvcmdl=&amp;hvlocint=&amp;hvlocphy=9033565&amp;hvtargid=pla-311195096389&amp;psc=1
If you can't afford to do that yet (I would recommend it in the future if you're going to grow, it's months and months and months of feeding every couple days, a good pen is a great benefit to your grow) then the Hanna one will work, but it is less reliable for the long run. https://www.saltwateraquarium.com/hi98103-checker-ph-tester-with-0-1-ph-resolution-hanna-instruments/?gclid=Cj0KCQiAw5_fBRCSARIsAGodhk_YcmPTvhggiq3-aAIYcxhWBLPLL8HVepUW0QgXr7QHghSiTX1SOREaAoMyEALw_wcB
Right on - what exact kind of soil are you using?
I've never used strips at all so can't comment on their effectiveness in DWC at all. I've only ever used a PH pen. I use a cheap yellow Chinese one from eBay for about £5 but I would not recommend it, i'm on my second. I'm planning on upgrading to this (this payday actually) as this is a good middle of the road pen.
If you can afford it i've been recommend a Bluelab pen time and time again, but I can't justify that cost just now.
Buy a new one?
https://www.amazon.com/Bluelab-pH-Pen-Plant-Germination/dp/B005POOJHG
spend a lot now and never worry!
I use blue lab ph meters and have never had a problem with it. http://www.amazon.com/Bluelab-pH-Pen-Measuring-Temperature/dp/B005POOJHG/ref=sr_1_1?ie=UTF8&amp;qid=1420673855&amp;sr=8-1&amp;keywords=bluelab+ph+meter
Had mine 3 years now no issues. Dont go cheap.
what IS a quality pH meter? One of my books recommends the bluelab multi reader but they are in the $200 range.
Is this a necessary item? Thanks for the response!
https://www.getbluelab.com/
EDIT: They also have this pen in the $70 range, but the reviews are mixed for whether it is accurate or not. What do most people use, disposable pH strips on the runoff water?
https://www.amazon.com/Bluelab-PENPH-Pen-Plant-Germination/dp/B005POOJHG/
Its as simple as dip a piece of the strip in the water and compare the color it turns to the little chart. (Under white light) its not instant or as dead accurate as a good meter but its still not hard by any means.
This is the meter I've seen recommended most often and the guy at my local "gardening" store recommended: http://www.amazon.com/Bluelab-pH-Pen-Measuring-Temperature/dp/B005POOJHG/ref=sr_1_4?ie=UTF8&amp;qid=1451480751&amp;sr=8-4&amp;keywords=ph+meter+blue
Also, to keep your meter working well, you need to do maintenance. This is that brands starter kit: http://www.amazon.com/Bluelab-Probe-Conductivity-Accurate-CAREKITPHCON/dp/B00GG9C16U/ref=pd_bxgy_86_img_3?ie=UTF8&amp;refRID=1BERVZZ3C2K3GR5MZ856
As long as you don't get lazy and start cutting corners, or experimenting too much before you're ready, you'll see steady improvement.
IMO, stick to the directions and LST for a couple grows until you've got it down to where you really aren't having to look up each step and you aren't making any little mistakes causing the plants stress. Then try some HST like Super Cropping to increase your yield even more.
If you plan on continuing to grow, my best advice is to invest in a good pH meter like this one. and measure the pH of your runoff so you know if your soil pH is drifting and compensate on your next watering by going up or down by .2 or so. Keep it between 6.3 and 6.8. Beware of cheap pH meters, they need to be recalibrated constantly to be even remotely reliable.
Bluelab Ph Pen is one of the best pen style digital Ph meters available. Do a Google search and see what others say. I loved mine when I had it. I had to sell it when I moved.
http://www.amazon.com/gp/aw/d/B005POOJHG?pc_redir=1413174374&amp;robot_redir=1
Thank you, there aren't many post here with people that have used MC so it's great to get some recent info. I will flush them tonight and give them only pHd water for one feeding and then go to 0.75x of MC and a lesser frequency for Recharge. I also decided to finally splurge a little bit on a Bluelabs pH meter and hopefully not have it break on me like the cheap one I first got; it just arrived, actually.
I'm a big fan of this:
https://www.amazon.ca/gp/aw/d/B005POOJHG/ref=mp_s_a_1_2?ie=UTF8&amp;qid=1498767108&amp;sr=8-2&amp;pi=AC_SX236_SY340_FMwebp_QL65&amp;keywords=bluelab+ph+pen&amp;dpPl=1&amp;dpID=41k7gjUUstL&amp;ref=plSrch
I've used one myself for 2 years and it is quick and stable, temperature compensating up to 50C. After using mine for 6 months, the brewery at wich I work bought one too! Bluelab has a good reputation for high quality, durable products and that has been my experience with this pH Pen.
Unless you have a "toner" that will let you trace which wire is which, like this - yes, you're stuck "trying them".
Learned from my last job: Toner
http://www.amazon.com/VicTsing-Network-Ethernet-Telephone-Tracking/dp/B008G8KE90
Never hand trace a cable again.
I think that this is the right answer.
So, if you want to switch these over to network jacks rather than phone jacks:
One of these cables either goes to your telephone demarcation point or to another jack where it is daisy chained, one step closer to the demarcation point.
The other two cables are going to other phone jacks in your house. So, if you wanted to place your DSL modem and router in this room, while making the these other two cables real network jacks, it would be a quick job.
My recommendation to trace the cable is to buy one of these: http://www.amazon.com/VicTsing-Network-Ethernet-Telephone-Tracking/dp/B008G8KE90/ref=sr_1_3?ie=UTF8&amp;qid=1393815640&amp;sr=8-3&amp;keywords=trace+cable
doubt it. phones can plug into cat5 jacks. they're backwards compatible so to speak. you can't run internet on them, but you can run voice. it's rapidly becoming the standard to simply use cat5 jacks everywhere. can you unscrew one and take a picture? i would be willing to bet all of your wires are punched down to those 2splitters and bridged together. You could easily replace them with a couple of these and use some of these to connect to one of these and rewire the jacks in using RJ 45 T568-b standard or follow this video a quick toolkit will cost about 20-35 and since you've already got the wiring and parts should be pretty cheap. make sure that if you're no longer using the landline to pull the wire from the box to the Network interface for the phones. (unless it's DSL). may want to add a shelf underneath the media panel, although i've seen some creative people tuck a shitload of stuff into those media panels and it look quite nice. Hope this helps. Let me know if you have more questions.
Edit: you can use one of these to quickly and easily trace out if all of those wires end in that cabinet or if some of them ARE going somewhere else. If they are I would check attic areas and other panels around the house. POSSIBLY they terminate outside, but doubt it since your Network interface box is in the basement.
Absolute cheapest? Grab a buddy and some cell phones or 2-way radios. One of you monitors the activity lights on the switch, the other unplugs things one-by-one. Switch side looks to see what light went dead, and labels it. Label other end as well. Repeat until done.
Best? Get a Fluke network testing device.
Good compromise? This.
Something like this is pretty helpful in figuring this out. Unplug from the uplink, plug into the toner and wave the magic wand around until you find the cable.
http://www.amazon.com/Upgraded-VicTsing%C2%AE-Ethernet-Telephone-Tracking/dp/B008G8KE90/ref=sr_1_3?ie=UTF8&amp;qid=1427681337&amp;sr=8-3&amp;keywords=cable+toner
So I looked a little closer and I'm convinced it has to be the cable. I noticed the port is not lighting up on the first switch for that cable either, so no signal from switch to switch. I'm going to buy a cable tester to confirm. I found this tester on amazon. Is this all I need? https://www.amazon.com/HDE-Network-Cable-Tester-Phone/dp/B009ZXYI1U/ref=sr_1_20?keywords=ethernet+cable+tester&qid=1563130965&s=gateway&sr=8-20
So something like this?
Sounds like the tool. I have one of these ...
https://www.amazon.com/dp/B009ZXYI1U/ref=cm_sw_r_em_api_i_1UHvDbCG8D4EN
... and have tested 100ft with no problems using a make shift RJ45 to alligator clip pigtail.
You can try a cheap Cable tester. When I was wiring my house I was doing them directly in the wall and used these. Turns out one of the wires wasn't fully making connection when it looks like it was in there pretty tight. The tester tells you that pretty quickly.
Something like this and a couple patch cables would work fine.
Buy pass through connectors like these. - EDIT: Good up to Cat5e.
Edit
Here is a youtube video about the same type of connector. Your existing crimper should work, but you will have the extra wire to cut off. Just get a cheap pair of edge cutters.
/Edit
Use a cable tester.
You Tube videos will also help.
This is a PITA exercise. You will get better at it.
Oh, get a cable tester. $9.
Did I mention a tester?
Did I mention do not use a cable tester if the cable is hooked up to anything? Only use a tester to test Both ends of the cable at the same time.
use a cable tester
You could use a simple cable tester to see if they work, connect it to both ends of the cable and presto. You will see the lights flash on numbers 1 to 8, which means it is sending a signal through each of the cable-strands. If all lights blink, it works.
https://www.amazon.com/HDE-Network-Cable-Tester-Phone/dp/B009ZXYI1U/
For seeing what type of cable it is you have, pull it out of the wall/cable-mount/wherever or find an exposed piece of cable. The classification should be stamped on there, cat5e=< is recommended. If it has no markings on them it might be very cheap cables.
Edit: link in post above even more pro solution including cable tracking.
This is what you need to test which pair messed up. Its possible it just needs repunched at the jack or the end recrimped if there is no patch panel.
https://www.amazon.com/HDE-Network-Cable-Tester-Phone/dp/B009ZXYI1U/ref=zg_bs_7701919011_5?_encoding=UTF8&psc=1&refRID=9SBCR8ARD2PH8NYVSWH1
&#x200B;
This is a handy tool once its connected to make sure the connection back to the network is working. A little pricier but it has come in handy quite a few times for me.
https://www.amazon.com/Fluke-Networks-LinkSprinter-Network-Tester/dp/B00I5CKF3M/ref=sr_1_2?s=sporting-goods&ie=UTF8&qid=1550147004&sr=8-2&keywords=linksprinter
I have one of these, should be able to test for the type of damage you'd be looking for https://www.amazon.com/HDE-Network-Cable-Tester-Phone/dp/B009ZXYI1U/
(This only works if you're putting new ends on the cables)
I am running some cables at my new place and am just using regular 9mm label tape and some cheap clear heat shrink tubing of appropriate size.
I put on a couple cm (about an inch) of tubing, then the boot, then the termination, push the boot into place, apply label, slide tubing into place, shrink it.
if you're running it through walls, use a tester to make sure you know which cable is which.
....This is of course for home use, I might not do this at a larger business. (I'm also subbed to /r/homelab)
I use something similar. I would switch to this if I hadn't spent money on my solution already. Bluetooth console is a must have.
https://www.get-console.com/shop/en/27-airconsole
SecureCRT offers so many features it would be impossible to list them all. Key ones being it saves your sessions into easy to manage shortcuts and can keep a log of what you do on a device. Very critical to know where you went wrong or did.
https://www.vandyke.com/products/securecrt/
Even the most basic cable tester can save you hours of headache. The more expensive ones will tell where the break is and will be more sensitive to the break. I find this is good for testing new cables that I've made. Odds are there isn't a break in the middle of the cable just a poor crimp.
https://www.amazon.com/HDE-Network-Cable-Tester-Phone/dp/B009ZXYI1U/
This book may be a little dated, but it was instrumental in my early carrier. I highly recommend a read through.
https://www.amazon.com/Network-Warrior-Everything-Need-Wasnt/dp/1449387861/
Another noob question, when CLink installed my fiber, they placed the modem/router near my box panel in the walk-in-closet. How do I go on transferring it if I wanted it in my DEN? Fiber box is located in the garage. Also the builder labeled all the CAT6 in the panel but
I really can't figure out 2 cables which says DN1ARC or DR1ARC, it's also the same cable CLink used on the LAN/WAN slot in their modem router for the internet.
Thank you so much!
It would if they are using the settings like static IP but most router use DHCP(BTW check if you're using DHCP since it may be a conflict with the IPs), but probably the matter is between your PC and the cable: Check your config, reinstall your drivers, use a tester on the cable and try with another PC in the same cable.
To be honest I was doing this as a hobby and wouldnt want to spend $50 on a tool I might only get a few uses out of. I found one on Amazon for $10. Would it be worth it for my needs?
https://www.amazon.com/dp/B009ZXYI1U/ref=cm_sw_r_cp_apa_i_Upg.AbF5HRKGB
You can go on amazon, if you search “temp gun” the top ones are actually the same models that I bought from a head shop. Most people dab between 5 and 700 so I’d get one that can read in that range and maybe a little higher to gauge time.
https://www.amazon.com/dp/B00DMI62HM/ref=cm_sw_r_cp_api_i_8XCWCb7F8SVZG
This one looks just like mine and I think would do everything you need.
Water drops should evaporate within maybe a second on a hot skillet. If you want to be precise, you can get an infrared thermometer.
You can check your video ram temps by using something like this. If you don't have a back plate you should be able to point it straight at the chip. I've been thinking about getting those stick on copper heatsinks since my 970 doesn't have a back plate. I'd like to put some better cooling on my (VRM) voltage regulator module chips too.
http://www.amazon.com/gp/product/B00DMI62HM/ref=pd_lpo_sbs_dp_ss_2?pf_rd_p=1944687702&amp;pf_rd_s=lpo-top-stripe-1&amp;pf_rd_t=201&amp;pf_rd_i=B002YE3FS4&amp;pf_rd_m=ATVPDKIKX0DER&amp;pf_rd_r=1E6ZZE71SQA8XEQK8M9M
This sure does seem expensive compared to something like this.
What makes the Fermostat better?
Can you possibly supply a general parts list? I must make one of these now! I found the controller here.
But what about the enclosure size? The tube connected to the submerged black box? We need details please!!!
This guy: https://www.amazon.com/Docooler-Temperature-Controller-Thermocouple-58-194-F/dp/B00F05UI8O/ref=sr_1_16?ie=UTF8&amp;qid=1494304437&amp;sr=8-16&amp;keywords=digital+thermocouple
How about this? I imagine monitoring the temp of equipment is important. How hot do things get? This goes up to 194° F.
I'm also hoping it's heating OR cooling (two outlets) to be controller by one controller ... otherwise that's an odd design. The seller should be able to clear it up. My guess is they can either build them with a dual stage Celsius controller or a single stage Fahrenheit controller.
In terms of advantages for the STC-1000+, you have a few advantages. Main thing is stepped fermentation control - so, say, 50 F for three days, ramp to 63 over twelve hours, hold at 63 for 5 days, and then drop to 35 over two days (a lager profile I just made up). Head over to HBT and look at alphaomega's thread on the STC-1000+. For a more condensed version, just keep in mind that the Blackbox is run by the STC-1000+ (but I can't tell you which version).
Another option would be to buy the Celsius dual stage controller, and ship it to the guy who does Blackbox and have him flash it for a fee (assuming he still offers this). If you'd like to do it yourself, you need a bit of DIY interest (usually common in homebrewers) and an arduino/jumper cables. Take a look at the guide for the STC-1000+ on github to get an idea of what's involved.
I know, right?
Boom...$15 dollars and has most of the same features except for the SD card stuff.
I got the temp controller from a recent homebrewfinds post. It's not quite an stc1000, I had one of those for my fermentation chamber but figured the dual stage temperature control would work better for my fermentation chamber. I got it from amazon an it works great so far http://www.amazon.com/gp/product/B00F05UI8O/
The temp unit is this one in case anyone was wondering.
I highly recommend getting a decent set of digital calipers.
I use these at work:http://www.amazon.com/Mitutoyo-500-196-30-Advanced-Measuring-Resolution/dp/B00IG46NL2/ref=sr_1_1?ie=UTF8&amp;qid=1419944639&amp;sr=8-1&amp;keywords=mitoyo+digital+caliper
for around $100 they hold up well, easy to read and about as accurate as calipers can get (reasonably)
If you want to go cheap, buy harbor freight. They'll be just fine for this application.
If you want the bees knees, the ones that will last a lifetime, buy Mitutoyo. https://www.amazon.com/dp/B00IG46NL2/ref=cm_sw_r_cp_apa_15BWzbPF2TE7R
I just used this:
https://www.amazon.com/gp/aw/d/B00IG46NL2?psc=1&amp;ref=ppx_pop_mob_b_asin_title
It could not be any easier .
[Laser thermometer](Nubee 8380H Non-contact Infrared Thermometer Temperature Gun with Laser Sight MAX Display https://www.amazon.com/dp/B00JA3BMDW/ref=cm_sw_r_cp_api_1R8Dyb693VYQJ) costs 10 bucks
And the Vidometer app cost $1.99 if you want the fancy map, Otherwise it is free!! Then you simply upload from the phone.
If your temp gun has emissivity settings, then you can adjust the number to get an accurate reading on shiny surfaces. But of course if you can't adjust the emissivity, then something black and matte is the best to get a reading from. That bbq paint is a good idea.
I picked up this guy a while back, https://www.amazon.com/Nubee-Non-contact-Infrared-Thermometer-Temperature/dp/B00JA3BMDW it great, and allows changing the emissivity setting to get accurate temp across a wide range of materials.
Also make sure you stay fairly close to a 1:1 ratio for your "distance to spot size" or you risk your measuring area to be too wide and may get some inaccurate readings.
this
https://www.amazon.com/Nubee-Non-contact-Infrared-Thermometer-Temperature/dp/B00JA3BMDW/ref=sr_1_3?ie=UTF8&amp;qid=1475072152&amp;sr=8-3&amp;keywords=infrared+thermometer
Just need to understand that any of these contactless thermometers are +/-5 degrees.
Okay, I was on mobile earlier so I couldn't tell you everything I wanted to. Those stick-on thermometers aren't very reliable and they measure the ambient temperature - you need to be able to measure the temperature on his basking spot. I use one of these which are pretty cheap from amazon. His basking spot should be right around 105F. It is pretty important that you get a good thermometer and find a bulb that gives you the correct temperatures.
The other issue is his UVB lights. Those tank kits usually come with coil UVB bulbs, which do not give out adequate UVB for beardies and have been known to cause eye problems as well. This ReptiSUN 10.0 bulb is the one you need for a 40 gallon tank. It will fit in this plug-in fixture (the plastic cover needs to be removed and thrown away). This thread on bd.org explains how to set up proper lighting. I highly recommend reading through this care guide to double-check the rest of your setup and husbandry.
Please let me know how Hagrid is doing and if you have any other questions! :)
If the sensor on the card is giving misleading results due to a hardware problem with that sensor then no software tool is going to provide better results. You will need to use something like a non-contact thermometer: https://www.amazon.com/Nubee-Non-contact-Infrared-Thermometer-Temperature/dp/B00JA3BMDW
I ordered one of these infrared guns from amazon. It allows to measure the surface temperature of hot surfaces.
Here's one close: http://www.amazon.com/gp/aw/d/B00JA3BMDW/ref=mp_s_a_1_2?qid=1463704231&amp;sr=8-2&amp;pi=SY200_QL40&amp;keywords=ir+temperature+gun&amp;dpPl=1&amp;dpID=510Uzei5jZL&amp;ref=plSrch
Here is the mobile version of your link
EDIFIER Studio R1700BT - Kit d'enceintes 2.0 Bluetooth (66 Watts) Avec télécommande IR, idéal pour TV, PC, Notebook, Tablette, Smartphone etc.
de Edifier
Permalien : http://www.amazon.fr/dp/B00MXY21LW
If you can't save up for a better AT, then the downsides to a lower budget turntable are higher wow and flutter and speed variation or speed drift. You don't need 78 unless you plan on collecting vintage 78s.
I don't know how much better the CET-500 is than the 1by1s, they are all lowest budget entry level but they are a step up from all in one suitcase players.
The Lenco L-3808 £179 seems like it is a step up from the CET-500.
If you can't go £249+ for one of the better ATs, the Fluance RT80 is £199.
These popular Edifier R1280T speakers should be noticeably better than the 1by1 speakers. Or the slightly better Edifier R1700BT adds bluetooth. Or use WiFi streaming with a Chromecast Audio which can be added to any speaker or amp with an Aux input.
Or SMSL SA-36A mini amp with Mordaunt Short M10 speakers and Speaker Wire, then 4 Ways to Strip Wire - wikiHow.
Or look for a used stereo or AV receiver or integrated amp and some used passive speakers.
Home Audio Guides: Intro to home stereo systems • Zeos Tutorials, Diagrams and Videos • r/audiophile Guide to Home Audio • Speaker Placement for Stereo Music Listening.
Thanks for the amp suggestions.
How's the Edifier R1700BT? It has a built in amp, and comes with cables and adapters, so at £127 it's slightly cheaper. Has anyone got any good info on it?
Actually, that model does not have a DAC. Sorry. I forgot. If you look at powered speakers and they do not have some kind of digital input, then the speakers don't have a DAC built in.
Here is a model with a DAC: https://www.amazon.es/EDIFIER-Studio-R1700BT-altavoces-Bluetooth/dp/B00MXY21LW/
Grazie, penso che andrò sull'attivo allora e mi comprerò ampli + passive pi avanti quando avrò uno stipendio mio.
Ti chiedo giusto un paio di cose, la differenza fra R1280T e R1280DB sta solo nel bluetooth?
E poi non capisco cosa abbiano queste due casse in più o in meno: R1700Bt e R1010Bt.
That's a toner & probe. Yes, fluke has that for 8X more new.
https://www.amazon.com/Fluke-Networks-IntelliTone-Toner-MT-8200-60-KIT/dp/B00N2S6RPY/
That isn't fluke's main deal though. They test signal integrity and where that drops off via their DSX network analyzer($15,000). The toner and probe is fairly basic.
The tool you picked should be fine for doing home cable routing. Don't need high end for that.
I use this - https://www.amazon.com/dp/B00N2S6RPY/ref=twister_B0732VPHMG?_encoding=UTF8&amp;psc=1
Fluke's Intellitone
It's expensive, but you'll only buy it once.
For Tone gen, Fluke makes the gold standard. They also have a cheaper version.
You didn't mention a probe, so maybe you are looking for a cable certifier?. That's super expensive though. if you just have to test that there is continuity and not certify the cables, you can use this, or this if you want to look like a pro.
As for Screwdrivers, Wiha makes the best screw drivers, hands down. I have this set for working on electronics & laptop repair. Magnetic tool-kits are fine. This isn't the 80's anymore. There aren't too many magnetically sensitive items inside a computer anymore. especially with the advent of SSD drives.
As for a toolbox, depending the work, I prefer a tool bag or pouch.
Good luck, hope that helps. What helped for me when I started was to go to harbor freight and just get an assortment of tools. As I worked I slowly replaced the stuff I used all the time with quality gear, and didn't have to burn myself buying expensive tools and gear that I would never use.
Yeah you even said that you changed it... My bad.
To the onboard diagnostics, there is no real difference between a magic box (sensor) and the magic pathway going to it. What kind of line goes to the sensor? Is it just a regular wire? Coax type line? Something else fancy? Do you have a multimeter? If so can you disconnect both ends and check resistance (ohms) through the wire?
For anything that plugs in, you can use a smart plug like this to track its energy usage. For anything hardwired, you could use a meter with a clamp like this to measure instantaneous current.
So with the plug, rotate it around the biggest appliances in the house. Keep the fridge plugged in for a day, see what the average draw is, etc.
But you are right that heating/cooling is likely to be the culprit. The clamp meter will help you gauge its impact. Despite how it seems though, a 1990's air conditioner isn't dramatically less efficient than a new one...assuming it's in good working order. Make sure the condenser outside is all clear, no leaves piled up against it, dirt clogging the fins, etc. Then inside, follow the ducts wherever you can to make sure nothing came disconnected and is dumping conditioned air into you attic or something.
If it helps as a point of reference, our 2,400 sf house has central air from the 80's that is set for 75 when we're home and 82 when we're not, and our power bill for the July-Aug cycle when we were using AC consistently was $104. We're in coastal New England/ag zone 6b.
Then as the other commenter mentioned, your power company may offer free energy consultations where they come test your house for efficiency in a variety of ways, give you free LED bulbs and programmable thermostats, and make recommendations for how to reduce energy use.
There's proper voltmeters that can test it better than just a pen. I got this one.
Etekcity Auto Ranging Clamp Meter, Digital Multimeter with Amp,Volt,Ohm,Diode and Resistance Test https://www.amazon.com/dp/B00NWGZ4XC/ref=cm_sw_r_cp_apa_i_NLKtDbMQ00KZ3
Multimeter
Sorry lots of electronics technical stuff I just spat out there... this video might help
https://www.youtube.com/watch?v=HWA9WqSEjg8
The issue is it's a bit of "chicken and egg" problem, you need a powerful enough supply (high enough amp output) to make sure the load has as many amps as it will draw if the power supply can't supply enough current then your current you measure will be that limit instead of what the device actually wants to draw. If the power supply isn't able to supply enough amps for a given load (a device drawing current like the raspi) then it may overheat or shut off to protect itself or switch on and off depending on the power supply design.
Regarding a bench power supply this video shows how to DIY and compares with bought version and shows how they work:
https://www.youtube.com/watch?v=wI-KYRdmx-E
Basically any multi-meter can measure voltage and amperage:
https://www.amazon.com/Etekcity-Multimeter-MSR-R500-Electronic-Multimeters/dp/B01N9QW620/
For higher current stuff or measuring AC current without hooking the meter physically into the circuit can use a clamp meter like this instead:
https://www.amazon.com/Etekcity-Multimeter-MSR-C600-Auto-Ranging-Multimeters/dp/B00NWGZ4XC/
^^ second one also does auto-ranging so it works out what the right unit is to show you is based on the power going through it (shows mV or V or A and mA or milli-ohms, ohms, kilo-ohms, and mega-ohms depending on what you're measuring)
A simpler video just covering the whole concept of "load" and current here too (youtube suggestions did a good job)
https://www.youtube.com/watch?v=cxkVxi9P0EA
OLA is Open Lighting Architecture .. lets you convert one type to another .. but generally it has an ArtNet interface and lots of fun output interfaces including SPI. For some thoughts: last year I built 4 4'x8x16' steps we used on stage. We drove them with SPI Controllers .. that worked great .. but was expensive. The reason I went pi is the pi itself is $35 and built in wireless .. fadecandy is $22 .. can drive a pixel set of 64x8. This year we're building 12 steps 8'x8"x9" with 6 rows of 64 px driving off the QLC. I have githubs of the ansible code I use for all of this .. happy to share.
Some things to consider:
Please feel free to reach out any time .. do lots of work in this space and always willing to help ;)
Anything like this, also referred to as a clamp meter:
Etekcity Digital Multimeter, MSR-C600 Auto-Ranging Clamp Meter https://www.amazon.com/dp/B00NWGZ4XC/ref=cm_sw_r_cp_apa_i_W9eQCb7BVGEM3
You run it over one half of a circuit to see the real time usage. For most devices you just grab one of those flat extension cords and carefully separate the insulated wires, or clamp it over the wires in the breaker box.
I bought this one a year ago and I use it all the time, it's been great so far.
https://www.amazon.com/gp/aw/d/B00NWGZ4XC/ref=mp_s_a_1_3?ie=UTF8&amp;qid=1500249073&amp;sr=8-3&amp;pi=AC_SX236_SY340_QL65&amp;keywords=etekcity+multimeter&amp;dpPl=1&amp;dpID=417YqOjJ1mL&amp;ref=plSrch
I use this one it's supposed to be ±0.02 accuracy, and I am using it with the proper calibration buffers (I used to work in a testing lab, so I'm familiar enough with the maintenance)
So, idk. I'm going to try a different bacteria next attempt and hope for better results.
I bought a digital meter and it works great and will save quite a bit, PH PEN hope it helps good luck op and stay strong friend:)
Dr.meter PH100-V 0.01 Resolution High Accuracy Pocket Size pH Meter with ATC, 0-14pH Measurement Range https://www.amazon.com/dp/B00ST3VTQ4/ref=cm_sw_r_cp_apa_i_Rb9CDbZVWF4D7 here's the one I bought.
I have this one - https://www.amazon.ca/Digital-Dr-meter-Resolution-Accuracy-Measurement/dp/B00ST3VTQ4/ref=sr_1_2_sspa?keywords=dr+meter&qid=1558368922&s=gateway&sr=8-2-spons&psc=1
&#x200B;
I'm using distilled water (sanity checked it pH) and if I take soil and mix it up in the water it's 6.5. I'll try some more samples. Thanks for the direction! Is it salvageable?
I would hope it works well. Double the price of the one I have which works great:
https://www.amazon.com/Dr-meter-PH100-V-Resolution-Accuracy-Measurement/dp/B00ST3VTQ4/ref=sr_1_5?keywords=ph+meter&amp;qid=1549900925&amp;s=industrial&amp;sr=1-5
Been using it for a couple years. works great and easy to calibrate. Get yourself some pH solutions for calibration which i do every grow. Dr.meter PH100-V 0.01 Resolution High Accuracy Pocket Size pH Meter with ATC, 0-14pH Measurement Range https://www.amazon.com/dp/B00ST3VTQ4/ref=cm_sw_r_cp_apa_i_QDJ2Db1TBW961
If you can spend a little extra money I'd go for this one instead of those generic yellow ones, I haven't had any PH issues since I upgraded.
https://smile.amazon.com/gp/product/B00ST3VTQ4/ref=ppx_yo_dt_b_asin_title_o03_s00?ie=UTF8&amp;psc=1
I use this 0.01 accuracy ATC pH meter that's about $40. It needs to be calibrated using 3 solutions (powders to be mixed with DI water included and you can get extras separately), but a better meter needs better calibration. Took me about 30m and it works great. Make sure to use grocery store distilled water or RO.
They're challenging but not impossible. If you've done the brick pattern one and you are satisfied with it, I'd say that you could do the Q-Bert one. I think the two hardest things for me were accurate planning for material (I had another reply here that goes into more detail) and actually getting the confidence to start; once you're doing the work, you can constantly refer back to his videos and basically see step-by-step how to do the things, and the steps make a lot of sense.
The one piece of equipment I would say is a requirement for this is a magnetic angle measure for your table saw (I have this one and it works well). And an accurate and sturdy rip fence that doesn't wobble. Two. The two pieces of equipment I would say are requirements. I mean, I personally wouldn't attempt this without my benchtop planer, but it's totally possible to use hand planes and/or sanders.
When's the last time you calibrated the saw? tighten the blade, made sure the fence is square, etc. Pick up a digital angle gauge which can help
ok I got this https://www.amazon.com/gp/product/B00T6YZ0K6/ref=oh_aui_detailpage_o00_s00?ie=UTF8&amp;psc=1 and I'll give it a shot or I'll return the Ryobi I guess.
I have one of these inkbirds on my 125g turtle tank because coming home to turtle soup would be traumatic. Highly recommend, and I want to add them to my smaller planted tanks as well.
Plug and plat WiFi thermostats (and WiFi everything) are out there now and pretty affordable. If you're into that.
Also, have you looked at inline heaters on a canister filter?
Okay I'm waaay late to the party, but here is what you can do. Buy some heat cord. Here is one by exo-terra
You just use electrical tape and make a zig-zag pattern on half of the bottom of the tank. Only go one side or the other, so if it gets too warm on one side, your frogs can move to the other side. I also would get this so you can set a desired temp and it will run the tape until it hits your target temp, and doesn't end up superheating your viv. You can also hook a small AC powered computer fan to the cooling side, so it will automatically maintain your desired temp, up or down. Just plug the fan to the cooling side, the heat cable to the heating side and presto.
I think the aqueon 20G long tanks are good to start. Only $20 during the $1/gallon sale. I would also want a heater, preferably an adjustable one, like the fluval m series (get the 100 watt or 2 50 watt ones in case one breaks do the tank doesn’t freeze or overheat too fast) a good thermostat is this one. A good temp controller (extra level of safety) is this one.
Edit: the type of stand doesn’t matter, just as long as the entirety of the tank is supported and the stand is sturdy enough to hold it.
I believe this model is one. I have to admit that I don't use them (I made the switch from Jumpstarts to Herpstats and haven't looked back), but it seems the consensus these days is that Inkbird is more reliable than Jumpstart.
Inkbird is a popular brand when it comes to thermostats. I'd set the differential to 1 degree, so the temperature doesn't fluctuate too much.
I've got one. I like it a lot. You definitely have to be aware of some of it's pit falls and plan accordingly. (In particular: making sure the thing doesn't leak, unscrewing the collection ball without unscrewing the valve from the tank, using a "S" style airlock instead of a three-piece style to prevent suck back when changing out the collection ball or bottling/kegging, and not using recipes that have tons of trub or hops.) If you know those pitfalls and take steps to avoid them, then the fast fermenter is really pretty awesome. The best way I've found to prevent leaks is to use the included teflon tape, and then use keg lube on all the joints. It is super easy to clean because of the wide opening on top. I clean mine right after use, I haven't really noticed any lingering smells. As for temp control - I sewed up a jacket for it with heating wires and a water tube in it. kinda similar to this system. A temp controller monitors the temp and turns the heat on, or turns a water pump on to recirculate ice water from a cooler. The thing comes with a wall mount bracket, I built a stand for mine using 2x4's and the wall mount bracket.
All in all- if you know about the pitfalls and how to avoid them, the thing actually makes your life a lot simpler and easier. It allows you to do a secondary fermentation without having to rack to a second fermentor(thus avoiding all the work of sanitizing all that extra equipment). It allows you to harvest yeast. And bottling/Kegging is a breeze.
It takes a while to dial in your printer. There's a bit of a learning curve, but it's not too steep and... It's totally worth it! Your print quality will increase dramatically after you tweak some of the underlying settings. Here are a couple of things you need to do if you haven't already done them.
Good luck and happy printing!
I have a set of mitutoyo for my work, but for knock around and loaners I got these from amazon and I’ve been pretty happy with them.
https://www.amazon.com/VINCA-DCLA-0605-Electronic-Fractions-Conversion/dp/B017KUC6XQ
The ones from Lowes may be too small at only 3inches. It'd be best to get something closer to your print bed size
I bought these 6 inch calipers from amazon and they have been great https://www.amazon.com/VINCA-DCLA-0605-Electronic-Fractions-Conversion/dp/B017KUC6XQ
VINCA DCLA-0605 Quality Electronic Digital Vernier Caliper Inch/Metric/Fractions Conversion 0-6 Inch/150 mm Stainless Steel Body Red/Black Extra Large LCD Screen Auto Off Featured Measuring Tool https://www.amazon.com/dp/B017KUC6XQ/ref=cm_sw_r_sms_apa_i_VA7ODbFZ6TE6K
I'd also agree with Mitutoyo, they're top of the line in my opinion. I use them at work, and they're great. However for at home I just bought these. I will only be measuring ID or OD of hose, etc.
https://i.gyazo.com/4236146349e1e7c6e712be3963a7462f.png
https://www.amazon.com/VINCA-DCLA-0605-Electronic-Fractions-Conversion/dp/B017KUC6XQ/ref=sr_1_4?s=industrial&amp;ie=UTF8&amp;qid=1502910277&amp;sr=1-4&amp;keywords=digital+caliper
I just started about six months ago, and I thought I would add some pretty un-sexy things to the list... but Im so happy with them
Silicone Glue Brushes Are completely reuseable
Digital caliper Since grabbing this I have used it countless times when making cuts to match
Edit: Apparently I can't bullet point :(
https://www.amazon.com/gp/product/B017KUC6XQ/ref=oh_aui_detailpage_o06_s00?ie=UTF8&amp;psc=1
Thanks for getting back to me. Yes, there can be a small or a huge difference between the blade and the flat part. Usually it's the difference between 1.7515 and 1.75 inches from blade to flat.
Worst case scenario, those are the ONLY cables that exist (low voltage wise). If you’d like, you can use this cable toner to confirm if that Ethernet cable is the other end of that wall plate jack.
If you’re unable to find any proof of previous cabling elsewhere, I’d recommend to just do it right and run the cables yourself. I’d choose a central place other than the attic.
RJ-45 Cable Tester:
https://www.amazon.com/ELEGIANT-Multifunction-Collation-Telephone-Continuity/dp/B01HCQSHNG/
It would much faster to troubleshoot bad ports than installing new cable runs...
With no controller, you're flat out not going to be able to get them to light up an SSID. As I see it, you've got two basic ways to find the little buggers.
The first is to bring up a controller. The 2332 was a rebranded Trapeze AP, which was then bought up by Juniper. One of their last acts before letting the product line die was to release a virtual controller which, if I recall correctly, had a built in license for 4 APs. You can find the software by going to support.juniper.net and searching for "JunosV Wireless LAN Controller". Once you bring it up, you'll have an SSID up you can go hunt down.
The alternative way, if you don't feel like resurrecting all that infrastructure, is to go analog. More specifically, get yourself a toner, like this one:
https://www.amazon.com/ELEGIANT-Multifunction-Collation-Telephone-Continuity/dp/B01HCQSHNG
You'll need to unplug the cable from the switch port and plug it into the signal generator unit. From there, it will greatly facilitate physically tracing the cable through bundles, letting you check that you still have the right one at intermediate points without having to eyeball it or rely on someone tugging at the other end.
Neither way ends up being trivial, but if you don't have any good maps to fall back on, they're your best bets.
This Will help you trace it. It sends a tone over the line and you can use the probe to follow it. Works well for tracing power lines as well.(Turn em off!)
>what is the best way to determine what wiring protocol was used at the wall plates?
Pop them out and take a look. Usually, they are labelled which standard the wiring diagram is for. It may just say "A" and/or "B."
>For the cable input, is there a way to tell which end is live or is it trial and error?
Yes, but for a project this small trial and error is probably easiest. In larger instances, you can use a toner: https://smile.amazon.com/ELEGIANT-Multifunction-Collation-Telephone-Continuity/dp/B01HCQSHNG/
>Any other suggestions? I am new to this
At least buy a cheap cable tester! I have this one, works fine: https://smile.amazon.com/Zoostliss-Network-Cable-Tester-Networking/dp/B06XZYXN63/ You can waste SOOOO much time checking things just to realize you had a bad crimp or punch or miswired something. That device will let you know of any continuity/wiring issues.
I mean, it's certainly possible that whoever ran those was using network cable to run audio. Each RJ11 (phone connector) has a pair of wires, and theoretically each pair could be +/- in an audio cable. You'd need a breakout at each end to wire it up to your receiver.
I'm racking my brain trying to remember if there were any integrated systems that used RJ11 modular connectors for the speaker / receiver interface, and I swear that I've seen it before, but my google-fu is failing me and I can't find it.
Personally, I wouldn't do it this way for amplified signals, too much possibility for cross-talk and too small a wire gauge. But maybe it would work for speakers that have their own internal amps?
Do you have a tone generator? If so, hook it up and see if the tone comes out of the speakers. Then you're guaranteed that they connect to the overheads and are there to carry an amplified signal...
If you don't know what I'm talking about, this is a good example, you'd plug in each jack to the emitter box, start a tone going, and you'll hear it through the speaker if they're connected and passive.
Edit - adding an afterthought:
Ultimately, you're mixing tech here. Best method might be to use those network cables as the fish lines to pull proper speaker cables. You could hack something together to convert the phone lines to patch into a normal amp (provided the surrounds are passive), either with an RJ11 patch panel or just cutting off the connectors and using the colored line as + and the white as - per speaker.
If you could pull a surround out of the ceiling and take a picture of how it's wired up and the brand or model of the speaker, I could tell you more about how it might have once been.
Why worry about labels for a home install? They always go missing during construction. This from Amazon is cheap and a great back up when lables fail.
You can buy a network testing kit like this: https://www.amazon.com/gp/product/B01HCQSHNG and track down where it's coming from/where it's going to.
I have a Bayite 201 that another r/cigars fellow had mentioned: https://www.amazon.com/Temperature-Controller-bayite-Pre-Wired-Thermostat/dp/B01KEYDNKK
I plugged in a 3 to 1 outlet and have the fridge and fan plugged into the cooling circuit. I have it set to cool to 65 with a 3 degree delta, so at 68 degrees, it will kick on.
I keep the sensor up at the top since it's warmer there. There can be about a 2 degree variance between top and bottom. After circulation it evens out. I also figure that this will save on electricity long run as I had it plugged in and it sounded like it was always running. When it turns off, it will reset to the lowest cooling setting which is 55, but it will turn off well before that so it's not a worry.
I still keep everything in tuppers. I haven't gotten to that level of trust yet with this thing and haven't comfy w/ KL.
Get radiator/fan combos from a junkyard, like from an old suburu. They are matched set. Hot water in the top. Less hot water out the bottom, back to the tank and repeat. Lowe Depot has fountain pumps to circulate the water in the tank. (adapters need for different size piping) This is all low pressure you just need to move a lot of water. Heating/cooling thermostat. plug the pump into heating outlet. add an exhaust fan to help cool.
As far as solar collectors. They can be simple. I would buy a "real" one and test it against a 300' roll of 1" black pipe ($100) with water pumping thru it. Put that roll in a sealed, insulated box and get some heat.
i would like to build an air conditioning system like that. what air conditioner do you use? does the air conditioner go back to its settings when it turns back on? can you provide a link to the black box and can you provide a link to the air conditioner. i found this on on amazon
is this the one u used?
edit: this one is rated for more amps
Just grab a $30 temperature controller and you can use your slow cooker as a sous vide cooker.
https://www.amazon.com/bayite-Temperature-Controller-Pre-Wired-Thermostat/dp/B01KEYDNKK
Probably the coolest think i have found. I really want one for my area but its too small for a heater. if you want cheap plug in stuff this would be awesome https://www.amazon.com/dp/B01KEYDNKK/ref=wl_it_dp_o_pC_nS_ttl?_encoding=UTF8&amp;colid=3W2SWX0CJYGCL&amp;coliid=I33CPIYC3TOIPW
Yeah inside the humidor then you get much better consistency.
AC Infinity MULTIFAN S2, Quiet 120mm USB Blower Fan with Speed Control, for Receiver DVR Xbox Modem AV Cabinet Cooling https://www.amazon.com/dp/B012CL2V3I/ref=cm_sw_r_cp_apa_i_hHD9AbD4XJZ1Z
I have it at the back on the floor pointing up.
This is the temp switch I got:
Temperature Controller bayite BTC201 Pre-Wired Digital Outlet Thermostat, 2 Stage Heating and Cooling Mode, 110V - 240V 10A https://www.amazon.com/dp/B01KEYDNKK/ref=cm_sw_r_cp_apa_i_WID9Ab9WE8K1C
something like this ? https://www.amazon.com/Temperature-Controller-bayite-Pre-Wired-Thermostat/dp/B01KEYDNKK/ref=sr_1_2?s=lawn-garden&amp;ie=UTF8&amp;qid=1525685813&amp;sr=8-2&amp;keywords=attic+fan+240v
I use a IR temp gauge to measure the temp of the leave more than just go by with the tent thermometer reads. I have the Temperature power supply set to 75 degrees and it turns on at 76 degrees and kicks off when it gets to 73 since the window unit I have is cheap and just has an on and off along with fan speed and not much temp control. I could go cooler but I'm trying to save on the cost of energy. I run my flower from 7pm to 7am because it's easier to maintain the lower temp when the lights are off. You can find a new window unit on sale for around $100-$120. I got one at Walmart but later noticed one for cheaper at Atwoods.
I got a radiator type then one of these
https://www.amazon.com/gp/product/B01KEYDNKK/ref=ox_sc_saved_title_9?smid=A2EFSDTWMPHWEA&amp;psc=1
I just purchased a bayite, it's supposed to be more accurate than the inkbirds, we'll see I get it saturday.
This is an old beverage chiller I had attached a temperature control switch to it and devote it to prepare my kombucha as well as fermented vegetables in the temperature range between 70-80f
Cause where I keep them the temperature go above 30c / 86F, so you can consider this setup as normal room Temp
and about your Q preserving the kombucha ( I consider my self a beginner) but from my research yes you can preserve the kombucha in the fridge
below you can see the temperature controller I use
https://www.amazon.com/gp/product/B01KEYDNKK/ref=ppx_yo_dt_b_search_asin_title?ie=UTF8&psc=1
Test the cable.
https://www.amazon.com/Zoostliss-Network-Cable-Tester-Networking/dp/B06XZYXN63/ref=sr_1_9?keywords=cable+tester&amp;qid=1564446411&amp;s=gateway&amp;sr=8-9
Also might be a good idea to replace that router in the middle with an unmanaged switch.
https://www.amazon.com/Ethernet-Splitter-Optimization-Unmanaged-TL-SG105/dp/B00A128S24/ref=sr_1_4?crid=27LCEVX1D3MKD&amp;keywords=unmanaged+switch&amp;qid=1564446575&amp;s=gateway&amp;sprefix=unmanaged+s%2Caps%2C148&amp;sr=8-4
Modem -> Unmanaged Switch
Unmanaged switch -> Router A
Unmanaged switch -> Router B
Should be no issue with each of your routers pulling their own public IP. Two separate networks.
I'm guessing that line either has a bad punchdown, or the wire is damaged. When you say you did a wire test I'm not sure what you mean by that. You might want to pick up something like this
Zoostliss Network Cable Tester RJ45 RJ11 RJ12 UTP LAN Cable Tester Networking Tool https://www.amazon.com/dp/B06XZYXN63/ref=cm_sw_r_cp_taa_lfFxDb0WRMX94
It will tell you which part of the cable is bad.
Granted it's more expense than you expected, but something like this is pretty cheap: https://www.amazon.com/dp/B06XZYXN63/ Or probably even cheaper on ebay. They're all basically the same. The circuitry is so simple that it's hard for it to go wrong.
Alternatively, if you're that way inclined, you could Macgyver something, all you're doing is checking each wire for continuity at the RJ45 connectors.
-_-
hmmm....
Then all I can recommend to you is...
I’d honestly invest in a wire tester. you can get them at local bit box retailers. you attach it to the jack and then one to the opposite end of the line and itll tell you which twisted pair is as fault.
Zoostliss Network Cable Tester RJ45 RJ11 RJ12 UTP LAN Cable Tester Networking Tool https://www.amazon.com/dp/B06XZYXN63/ref=cm_sw_r_cp_api_skE6BbN7QDDT3
You could use a punchdown tool to push in each of the wires at the connections to make sure they all have good contact. Then use a tester like, this or this, to make sure all wires test out. I like the latter one, as it is nicer and it also can test coax cables.
It is hard to tell if that is Ethernet or phone from the photo, if it has 8 wires going into the back then it's Ethernet.
I would suggest one of these to figure out what goes where.
Yeah it sounds like there is a wiring problem. I would recommend getting an inexpensive cable tester. You can then verify that all connectors are terminated correctly.
I bought this one a while ago when I did wire tech work professionally. It works really well and also allows you to tone out the cable. You plug in the block side and at it to either tone out test depending on your need. Than use the wand to listen for the sound or plug in the cable and test.
Wire Tracker, ELEGIANT RJ11 RJ45 Cable Tester Line Finder Multifunction Wire Tracker Toner Ethernet LAN Network Cable Tester for Network Cable Collation, Telephone Line Tester, Continuity Checking https://www.amazon.com/dp/B01HCQSHNG/ref=cm_sw_r_cp_api_i_XzQyDb4Q69CQN
On an unmanaged switch it usually doesn't matter but make sure the switch support auto crossover. Usually if it is going to matter one port on the switch will be labelled 'uplink'.
To summarize: you can keep your router where it is if it's able to get link through that coax port. Make sure that Ethernet jack terminates to an uplinked switchport in your closet (TP Link is one of many decent and inexpensive gig switch brands. POE might be a useful feature to consider in a switch if you plan on adding wifi APs or IP phones later.
Also, if the Jack's are not well numbered or indicated, one of these ~$10 devices can prove to be very useful:
<https://www.amazon.com/Zoostliss-Network-Cable-Tester-Networking/dp/B06XZYXN63/&gt;
Hope that helps
Cable toner and probe. Don't go cheap, a good Fluke tester is ~200US and they work great.
https://www.amazon.com/Fluke-Networks-Intellitone/dp/B00N2S6RPY?th=1
The cheap ones may work on the shorter runs, but the Fluke always works and the one I linked has a built in patch cable tester.