(Part 2) Best hand tools according to redditors
We found 20,208 Reddit comments discussing the best hand tools. We ranked the 7,188 resulting products by number of redditors who mentioned them. Here are the products ranked 21-40. You can also go back to the previous section.


Read through the links before you add anything to your cart, the tools at the top are what I personally use and can vouch for, the tools at the bottom are in kits and case save you some money if you only do this once in a while but I can't vouch for the quality. I'm also assuming you own a wire stripper.
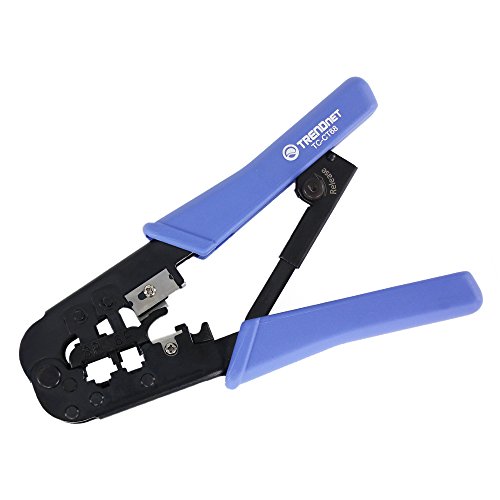
Crimping tool(17$):
TRENDnet 8P/RJ-45 and 6P/RJ-12, RJ-11 Crimp, Cut, and Strip Tool, TC-CT68 https://www.amazon.com/dp/B0000AZK4G/ref=cm_sw_r_cp_apa_piZVAbZZVWPM7
Has a built in perfect cut wire strippers
Connectors(9$):
Cybertech Cat6, Cat5e RJ-45 8P8C Ethernet Modular Crimp Connectors Plugs Pack of 100 https://www.amazon.com/dp/B00LG6DQUI/ref=cm_sw_r_cp_apa_YiZVAb72959BY
Cat5e Cable(25$) (200ft, pre-made but you can clip and make your own out of it)
200FT Feet CAT5 Cat5e Ethernet Patch Cable - RJ45 Computer Networking Wire Cord (White) https://www.amazon.com/dp/B071XBHM6Y/ref=cm_sw_r_cp_apa_RkZVAbZ8D2F00
The cable is actually not that good of a deal because you can get 1000ft for 50$ without any ends, but I was aiming for sub 50$.
Total cost: 51$
Additional extras I'd recommend:
Cable tester(8$) tests if the cables and connections you made are good. A great investment for beginners and pros)
Zoostliss Network Cable Tester RJ45 RJ11 RJ12 UTP LAN Cable Tester Networking Tool https://www.amazon.com/dp/B06XZYXN63/ref=cm_sw_r_cp_apa_tnZVAb616Y59H
Cable boots(6$) protect your cable ends from having the tips broken and looks cleaner IMO
uxcell 100 Pcs Soft Plastic Ethernet RJ45 Cable Connector Boots Cover https://www.amazon.com/dp/B00K82RNX2/ref=cm_sw_r_cp_apa_qoZVAb54MHXCJ
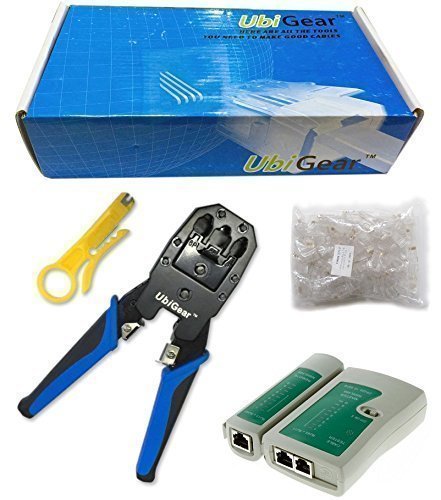
They also have combo kits like this that exist, I can't speak to their quality but the tools are simple tools so this may save you some scratch
>UbiGear Cable Tester +Crimp Crimper +100 RJ45 CAT5 CAT5e Connector Plug Network Tool Kits (Crimper315) https://www.amazon.com/dp/B008UY5WL0/ref=cm_sw_r_cp_apa_hqZVAb8RM9GVK
Has the tester and everything, includes a wire stripper which is nice
>Maxmoral 7 in 1 Cable Tester + Crimp Crimper + Wire Stripper + 50 RJ45 CAT5 CAT5e Connector Plug + 100 Cable Ties + 100 Cable Cord Holder Clips + 2 Ethernet Connector Network Tool Kits https://www.amazon.com/dp/B01J7S5X6Q/ref=cm_sw_r_cp_apa_VrZVAb10QP91E
Same deal, has boots though.
Steel is steel mate. You can go with the expensive stuff, or with the cheap stuff - We're talking expensive at several hundred and cheap as under 20-50. I've seen 20 dollars knives made just as well as the 600 dollar knives, they just dont have the name brand. It's a chunk of steel, treated so it stands up to specific conditions and holds an edge better. It looks to be full tang - not sure what is up with the holes in the blade, or the design near the MT-5 logo. I found pictures online, looks like the steel comes out a bunch there? No idea what this design is or what purpose it could have - looks sketchy. And the holes in the blade...I mean I've seen the 5 dollar walmart knives with holes so you can create a makeshift spear but..Other then that, no idea why they are on this knife, and they cause more harm then good. You can use it for basic bushcrafting tasks but I'd be careful batoning, I've personally never heard of the brand - it could be name brand and be great, but it has some weird designs.
​
Really, steel is steel - all the fancy features cause more harm than good.
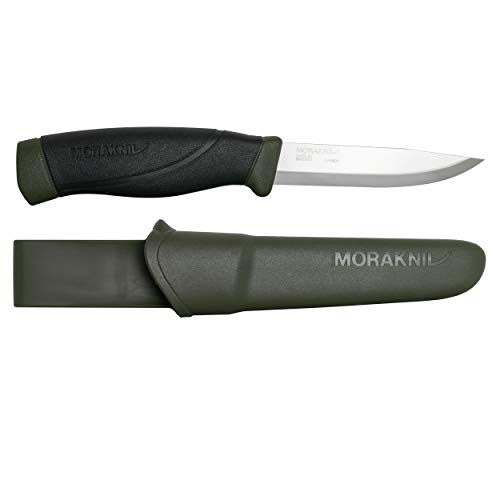
https://www.amazon.com/Morakniv-Companion-Stainless-4-1-Inch-Military/dp/B004ZAIXSC/ref=sr_1_4?dchild=1&keywords=morakniv&qid=1571462370&s=sporting-goods&smid=ATVPDKIKX0DER&sr=1-4
That is a 12 dollar knife, and you really won't ever need more, but there are better options. The 12 dollar knife has a thinner blade and isn't suitable to as heavy duty work, but is a great beater knife for doing anything.
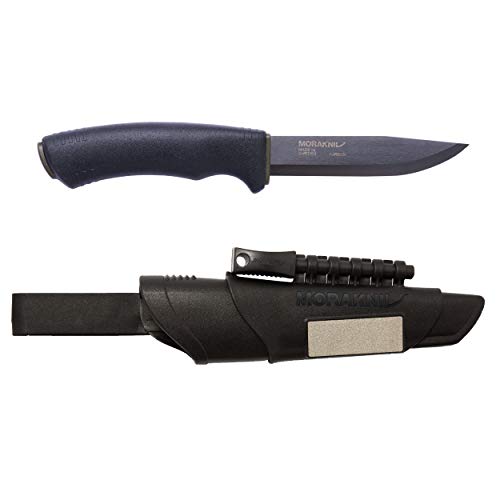
https://www.amazon.com/Morakniv-Bushcraft-Survival-Starter-4-3-Inch/dp/B00BFI8TOA/ref=sr_1_7?dchild=1&keywords=morakniv&qid=1571462370&s=sporting-goods&smid=ATVPDKIKX0DER&sr=1-7
And their top of the line knives are
https://www.amazon.com/Morakniv-Garberg-Carbon-Leather-Sheath/dp/B07B8SP4G9/ref=sr_1_10?dchild=1&keywords=morakniv&qid=1571462370&s=sporting-goods&sr=1-10
https://www.amazon.com/Morakniv-M-12642-Stainless-Compatible-4-3-inch/dp/B01I1GITMA/ref=sr_1_12?dchild=1&keywords=morakniv&qid=1571462370&s=sporting-goods&sr=1-12
There's a carbon version and stainless steel version. I'm gonna be honest...for the most part, they all do the same thing, but people want different things and fancier things - the garberg is the only full tang out of the bunch, but even their half tang knives are bulletproof, they hold up incredibly well and I've batoned with him countless times without issue. Mora, IMO makes the best knives - I have several other brands, and there are some I like better for ergonomics - but that's not the point, the point is any knife will work, steel is steel. Just find what you think looks and feels good, learn how to sharpen it and what you like, it depends on the what materials/types of trees you are working with, and what type of work you do. I prefer convex and Scandinavian grind (V Grind) knives, the Cudeman MT-5 looks to be a full flat grind - which I mean..AFIAK is mostly used in like chef knives and stuff, it's incredibly sharp but it's not durable, hitting hard objects is gonna cause knicks and it's gonna be brittle. This is all from experience, it's not like im an expert - but to be fair, I'd just keep trying different ones and see how you like it, but I wouldn't go spending crazy money, the $300 knives you see all the fancy bushcrafters use...these are what I call wall knives..They use them in the videos cause they look good but most people would just keep them at home and keep using their beater knives, because we are hard on our equipment and honestly, they work just as wall, all the fancy scalings and what not make them expensive, but they don't make them better.
TL;DR: Steel is steel. Get a cheap knife, in a better grind suited for the work your doing. All depends on what work you do, and what tress you have, soft woods, hard woods ETC.
​
Edit: Definately don't have to go with Mora, I've just always used them and they've done me well.
>So I've given up and have booked it in to the workshop, but I just hate how I cant seem to accomplish the simplest of mechanical tasks, I'm really just venting here. fuck my useless mechanical ability, I just ruin things like screw heads when I try >:( >:(
Few pointers from a guy whose been wrenching for a long time:
So what do you do?
For those soft screws that love to strip: You use an impact screwdriver to break it loose and/or a good creeping lubricant to break the rust (PB blaster, Kroil).
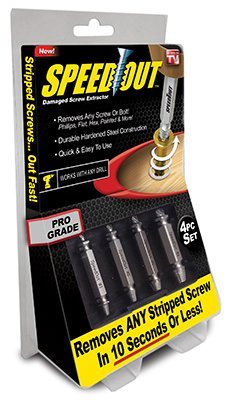
Once you munge a screw up badly, you will need an extractor set. I recommend you learn this skill by deliberately ruining a few screws that yo have screwed into a board and use the set to get them out.
Here is one example of an extractor kit:
http://www.amazon.com/SpeedOut-Damaged-Screw-Extractor-Bolt/dp/B00IRL3WP4/ref=sr_1_1?ie=UTF8&qid=1414453572&sr=8-1&keywords=screw+extractor
My advice to you:
EDIT: Thanks for the gold, whoever sent that. Totally unnecessary but I appreciate it and gold helps reddit avoid selling out completely to advertisers. Cheers!
Here's an Amazon link. It's cheaper.
I would strongly suggest against most of those tools, especially that hand plane.
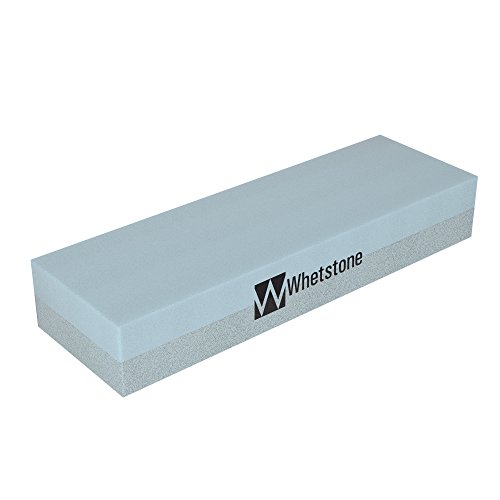
I'm sure the stone is fine but I can't vouch for it. I'd rather recommend wet sandpaper w/ rough to fine grits. And some compound for stropping. Initially, you can strop it on anything -- even cardboard.
That square is dumb as f and useless as f. Unless you're doing framing or construction. Yes, I bought one when I started out. I still kept it as an example of a stupid purchase. Get this instead or something similar. It won't be as accurate as a starrett, obviously, but more than enough for 99% of woodworking.
Coping saw...eh, buy whatever you want. They're decent and better ones cost significantly more.
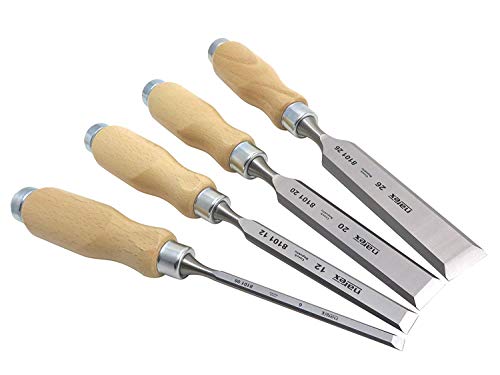
Chisels....those chisels suck. They're made out of butter instead of steel. Get these instead.
As for hand plane, buy a No4 pre WWII stanley from ebay or you'll have to fork over some serious cash to get a lie nielsen or a veritas. Don't ever touch the new stanley shit.
So...sandpaper (buy them from wherever),
Stropping: $12ish
narex chisels $38 ish
empire square $11 ish
japanese handsaw $27 ish
Coping saw: $6 ish
About $94. Leaves you with a couple of bucks for sandpaper--maybe. Get em from home depot/lowes to get started. Be sure to finish off all cutting edge with stropping on the compound.
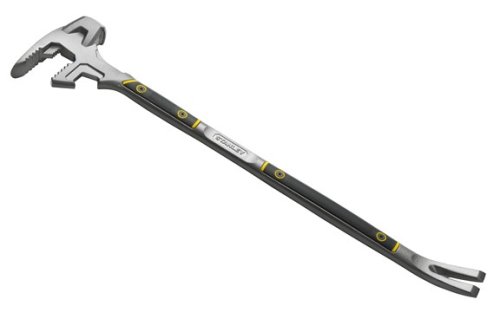
Have you bought a crowbar yet? If not may I suggest the Stanley FatMax Xtreme 55-120 FuBar III - yours for only $79.90, a saving of 9 cents on the recommended retail price - and this item ships for FREE with Super Saver Shipping.
You never know when it may come in useful...
Someone else in this sub said it best:
> The difference between "no blade" and "tiny blade" is vast; the jump from "tiny blade" to "BFK" isn't nearly as great.
I have a tiny pair of folding Fiskar scissors in my first aid/Dopp kit, as well as a Leatherman Skeletool which has a decent utility blade. If you prefer an unserrated version in 154CM steel, get the Skeletool CX.
FWIW: the mini pliers on the Skeletool have been critical to me. They let me squeeze a sleeping bag zipper runner that wasn't closing the teeth properly. Lacking that, my bag wouldn't have closed.
EDIT - if I wanted a knife to whittle with, I'd probably carry a Mora. (light, strong, sharp)
>He mentioned that your armies go obsolete like every 2 years! Is this true?
No, not really. New rules will come out every few years, which may force you to alter the roster of models and wargear you’re fielding, but models are almost never written out of the game.
>Should they just start with A Start Collecting Pack?
Yes. Start Collecting packs are fantastic.
>This pack would be a 500pt or 1000pt?
Start Collecting packs are closer to 500 points. There isn’t an exact point number because you can change the number of models in a squad or give them different wargear.
>Co worker also suggested taking them both to GW to see if they can even get their head around playing the game as the rule book is pretty intense…
Yeah, going to a game shop and having someone experienced walk you through the game is a pretty good way to get a handle on the basic rules. GW shops love new people, although they tend to be very pushy salesmen.
>Or should they get a Rule book to read. Then their codex. One wants Necrons the other Dark Eldar. And then decide on a 1000pt army and start buying/building/painting etc?
I’d say see if a game shop can give them a demo first before you commit to models and books. This stuff is expensive.
Don’t worry about what a 1000 point army is. It takes time to get there. I say…
(Also don't let them buy new boxes unless the ones they have are already built.)
Good luck!
You want multifunction? Stanley (the tool company) makes a line called "FUBAR". Crowbar meets sledgehammer. http://www.amazon.com/Stanley-FatMax-Xtreme-55-120-FuBar/dp/B000VSSG3O/ref=sr_1_2?ie=UTF8&qid=1344489238&sr=8-2&keywords=Stanley+fubar
Awesome name too.
Words to get killed by.
Seriously...
"Organize before they rise" - Being prepared is one thing, but organizing some sort of zombie-fighting, apocalypse-surviving group of people are only going to make you seem like a bunch of idiots. Not to mention you'll most likely worry your life away about something that will never happen. It's better to just be prepared for any kind of natural disaster/civil uprising... that way you've pretty much got everything covered.
"They have no fear, why should you?" - Because if you aren't scared of an undead horde of flesh eating zombies that want nothing more than to tear you limb from limb and eat you alive... then you've got a serious mental disability and you probably won't last long.
"Use your head, cut off theirs." - Except that a decapitated zombie head is still dangerous if you are talking about Romero zeds or even Brooks zeds. Better to crush the skull and/or destroy the brain. And better to use something that has a better-than-arms-reach length.
"Blades don't need reloading." - True. But they do need sharpening. Better to save your blade for when you actually need to cut something and bash in their brains with something that is designed to do a lot of smashing, such as a good long framing hammer, war-hammer or a mace. These things exist and are MUCH easier to find than Brooks' mythical "Monk's Spade". Besides, it takes almost no training whatsoever to swing a hammer/mace type bludgeoning weapon.
"Ideal protection, tight clothes, short hair." - Only really works if they actually get their hands on you. For that matter, a leather jumpsuit and a helmet would serve you better. They can chew on the leather while you bash their brains in.
"Get up the staircase, then destroy it." - Seriously, this is one of the most idiotic things I've ever read. First of all, do you have any idea how incredibly hard it would be to destroy a staircase in most modern homes or apartments? Impossible. And even if you could, then you are trapped upstairs waiting to die of hunger or dehydration? Might as well lock yourself in the tool shed or jump off a bridge. The best way to get away from the unstoppable hordes of the living-dead is to KEEP MOVING. No "fortress" is ever safe, especially from Romero-type zeds because anyone in your group that dies will come back as a zed... then you are trapped inside your "fortress" with one.
"Get out of the car, get onto a bike." - This may work for a congested city area, but once out of the city, I'd much rather be in a large truck... with maybe a bike rack on top. Like I said, you're gonna want to keep moving and getting away is your best option. Unless you bike on a constant basis, You're gonna get tired as hell after a few miles, then you are gonna have to stop to catch your breath and drink lots of water. Not that great of a scenario in any kind of populated area.
"Keep moving, keep low, keep quiet, keep alert." - This is the first thing he's said that's made any sense to me.
"No place is safe, only safer." - Again, this is actually good advice. As I said above, No "fortress" is 100% safe in a Romero-style zombie situation.They will eventually find you because they NEVER stop. And if someone in your group dies. They're a potential zed.
"The zombies may be gone, but the threat lives on." - True. Especially in a Romero-type zed situation. Nobody knows what causes it, but anyone who dies from then on becomes a zombie. Friend, family member or not. It never ends as far as I've ever seen.
If you want a weapon that is perfect for cracking skulls, but is still a wonderfully handy tool at the same time... pick yourself up one or two of THESE... and a box of nails. That way you have a formattable weapon and a great tool for either getting into places or boarding them up for defense if you need to. They also make a smaller one, which is easier to handle. And a longer one, which has a better reach and greater leverage. I have used all three for demolition work and I can attest to their brutality.
And if anyone ever finds a "Monk's Spade" and a Shaolin monk that will train you in it's use , let me know.
Here, this might help with that edge
JIS Screwdrivers - Regular Phillips don't fit bicycles well. Park is ironically one of the worst offenders.
Use these to cut zip ties. Alternatively, cut the zip tie with regular side cuts and then burn the remaining bit to "mushroom" the cut portion, making it less likely to pull out.
If you're wrapping handlebars and get pulled away, grab some Park pin spanners and slide it over the section you're leaving to keep it from unraveling.
Presta nuts are spacers. Use them to push the water bottle cage away from band-clamp front derailleurs, or in between a frame and a set of fenders to create smoother lines.
"Bike wash" is a scam. Put a few drops of Dawn (or any dish soap) into a spray bottle. Works better than anything costing more than $.00004 an bottle. Simple Green isn't safe for aluminum and is generally less effective at removing grease than Dawn (this has been tested and proven by Consumer Reports).
If you're installing new road levers, take the handlebar off and put them flat on a bench or table. Find the angle you want and tighten both levers down before you install them, and they will be perfectly even.
Boeshield T9 is a better frame protectant than Frame Saver, and it's much cheaper. You can also use it for chains (it sucks in the rain, though) and anything else at home you need moving.
Pedals with hash marks are always left side pedals.
Shimano's next-generation slick cables dramatically improve the performance of 7900/6700/5700 generation shifting. It can be a hard sell to convince a customer to buy $50 cables and housing, but if they have persistent shifting woes, this is the trick.
Speaking of cables, if you need a Campy cable in a pinch (and don't stock them), use a file or bench grinder to reduce the head of a regular Shimano or SRAM shift cable. Test before you install, of course, but this method works just fine.
Lube the bottom bracket cable guide. Shimano SP41 grease is perfect for this, but even a bit of Tri-Flow can make a big difference.
Sharpen a spoke on the bench grinder to make your own picks. You're going to be ruining them all the time no matter what, so they might as well be free.
I've got a lot more, but I need to make breakfast and study, now.
an 8X10 equinox tarp, $45 shipped:
http://www.amazon.com/Equinox-145774-Egret-Tarps-8-Feet/dp/B000C3MIL4/ref=sr_1_1?ie=UTF8&qid=1394138363&sr=8-1&keywords=equinox+tarp
Wetterlings Forest axe, $110
http://www.amazon.com/S-A-Wetterling-Axe-Wetterlings-Axes/dp/B002NWT68K/ref=sr_1_1?ie=UTF8&qid=1394138611&sr=8-1&keywords=wetterlings
wide mouth stainless steel water bottle, $16
http://www.amazon.com/Klean-Kanteen-Stainless-Brushed-64-Ounce/dp/B0093IS22I/ref=sr_1_6?ie=UTF8&qid=1394138674&sr=8-6&keywords=klean+kanteen
Mora bushcraft, $50 (includes firesteel)
http://www.amazon.com/Morakniv-Bushcraft-Carbon-Survival-Starter/dp/B00BFI8TOA/ref=sr_1_1?ie=UTF8&qid=1394138730&sr=8-1&keywords=mora+bushcraft
100 feet of parachute cord, $9
http://www.amazon.com/Rothco-Commercial-Paracord-550-Pound-50-Feet/dp/B000S5ODN2/ref=sr_1_2?ie=UTF8&qid=1394138780&sr=8-2&keywords=paracord
MSR stainless steel pot: $20 (I have one of these, they're fantastic)
http://www.amazon.com/MSR-321109-Stowaway-Pot-1-1-Liter/dp/B000FBSZGU/ref=sr_1_1?ie=UTF8&qid=1394138913&sr=8-1&keywords=msr+alpine+pot
leather work gloves, $13
http://www.amazon.com/Carhartt-Grain-Leather-Driver-Glove/dp/B005I34I5W/ref=sr_1_2?ie=UTF8&qid=1394139051&sr=8-2&keywords=leather+work+gloves
That all adds up to $263.
brand isn't that important, but you can also find the following on Amazon for probably around or under $60-$70 total.
The remaining money, probably about $150, I would put on a gift card to EMS, REI, Cabela's, or some other outdoor goods store where he can get some basic outdoor clothing or fill any remaining gaps with his gear, such as a pack. I generally don't recommend bags over the internet because it's so important that you try one on in person before buying it.
I know it's a little late now, but for future reference these work amazingly well: https://www.amazon.com/Ontel-SpeedOut-Damaged-Screw-Extractor/dp/B00IRL3WP4
Go to your local hardware store and buy a screw extractor kit or a left hand drill bit, they're cheap and easy to use(i'll put an example at the end of the comment) punch the screw um the middle and with the extractor kit(instructions should be included) or with a left hand drill bit just drill ir out, it should come right of, i used the following kit to remove a broken crankshaft pullei bolt with success:
https://www.amazon.com/Ontel-SpeedOut-Damaged-Screw-Extractor/dp/B00IRL3WP4/ref=mp_s_a_1_8?keywords=screw+extractor+kit&qid=1574073325&sprefix=screw+extracto+kit&sr=8-8
If you have any other questions, ask, im here to help.
I looked at these for awhile but decided to take a chance and spend the money on what people claimed to be the superior tool, and having used it for awhile now I can agree it is awesome.
Behold, the Knipex 10" Pliers Wrench
It works like a combination crescent wrench / channel lock but has a lever mechanism (like vise grips) that bites down hard when you squeeze the handles together. Basically the harder you push/pull, the tighter the grip gets. The jaws always stay parallel so you can even use it on small nuts/bolts. Superb German design and construction. I am not a pro mechanic (or really a pro anything) but this is one of the coolest tools I've ever bought and is totally worth the $50 (at least if you like to buy awesome/$$$ tools). Oh and no more messing with that dumb thumbwheel on the crescent wrench. Fuck those things.
This has been brought up pretty often on this subreddit, and I feel like there is a division between two main theories on the problem:
I was in the same situation (very similar screenshot) and was told by a Google representative after a few e-mails back and forth that I was out of my warranty period. I finally got fed up with it enough that I bought a new battery and replaced it a few days ago. As others who have also replaced their batteries have said, it truly is like having a brand new phone. I highly recommend it, though the process is a pain in the ass. Being concerned anytime the phone is below 60% battery is no way to live, especially when it drops to that point so quickly after being taken off charge.
Battery - $8.99 Amazon Prime; comes with opening tools but does not include a precision knife.
Replacement back glass camera cover - $7.99 Amazon Prime; because the battery did not come with precision knives and I am not a patient man, so I clearly broke the glass.
Precision knife - $3.58 add-on item; plan ahead. Don't be like me.
Heat gun - $19.97 Amazon Prime; you can use a hair dryer but this is a ton easier.
Tutorial
If you decide to go ahead with it, best of luck.
They sell a special pack to get the chair without the logo, and It's only 15$ extra.
https://usa.clutchchairz.com/product/pewdiepie-edition-throttle-series-brofist-removal-kit/
don't worry dude, the other 99'11" of this line is still good, no need to rip it out
Something like this https://www.amazon.com/UbiGear-Crimper-Connector-Network-Crimper315/dp/B008UY5WL0/ref=sr_1_3?ie=UTF8&qid=1518894673&sr=8-3&keywords=ethernet+kit&dpID=51DjZejC9oL&preST=_SY300_QL70_&dpSrc=srch should have everything you need for under $15 - will sort you out perfectly.
It took me about 20 minutes to learn to use the tools, and now whenever I need a short cable I can just make one. Boot split and frayed? Who cares, I'll just replace that bad boy, no throwing out the entire run for me. Drilling through a wall to feed a cable outdoors, how will the plug fit? No problem. So convenient as a future-proof ability to have under your belt.
Unsurprisingly, excellent instructions for dummies like me are incredibly prolific on the internet, including lots of great YT videos
As others have mentioned the interference from multiple unshielded cables right next to each other will be slowing your entire network down right now (loads of dropped packets and failed attempts), so I agree this is more /r/techsupportgore than MacGyver. Fix this right and everything will be significantly less laggy, plus you only gotta buy cheap tools once and then you're set to be able to make incredibly low price Ethernet lines wherever you live for the rest of your life
well, rj45 plugs and a crimping tool.
something like this.
Do check the outlets if they have been wired properly. Mostly they are color coded and should be either in A or B variable. Wikipedia has a list of how they should be put into the connector.
After that connect everything to a switch and it should all work automagically. But this entire setup seriously looks like someone wanted to link multiple phones to one number so I will say you need to check every last wallmount to see if and how they are wired.
Even if it's something basic, you'd be surprised how useful it comes in.
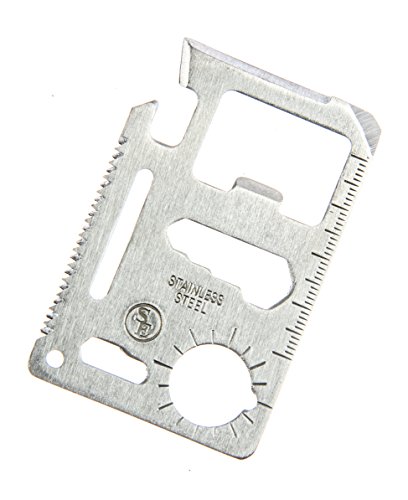
I keep one of these on my keychain at all times.
These are small, cheap(ish) products with a lifetime guarantee and a good track record:
Merkur Safety Razor, $20
Victorinox Swiss Army Knife, $13.39
Leatherman Multi Tools, $20-Infinity
Darn Tough Socks, ~$20
Saddleback Leather Wallets, $40-infinity
Buck 110 Hunter, $30
Study ohm's law and battery safety. If used improperly, mech mods can become a pipebomb.
That being said, here's a list of stuff you should get.
I ended up getting these, trusting the crowd on this one. If all else fails I can probably make a return.
There is a sleazy furniture donation place around the corner from me. People are constantly dumping the furniture that they won't take in the dumpster behind my apartment. I bought this bad boy and go to fucking town on that shit when I'm stressed out. It will absolutely melt a coffee table.
I just pulled out a tiled floor in my kitchen last night. I got lucky because they stapled down a 1/4" sheet of plywood and tiled to that as opposed to nailed/screwed down concrete board. All I had to do was get my FuBar under the plywood and all of the tiles popped easily.
The real bitch with tile removal is carrying it all out to the dumpster and the chips/shrapnel. $1 psf is a bargain for the demo price. For a project as big as yours, it's something to seriously consider paying for.
10" Knipex pliers wrench. They are $50 but you will never ever ever touch one of those nutfuckers your looking at after using one. I hate crecent wrenches
https://www.amazon.com/Knipex-8603250-10-Inch-Pliers-Wrench/dp/B000X4OG94/ref=pd_sim_469_1?_encoding=UTF8&pd_rd_i=B000X4OG94&pd_rd_r=VX8PKF1YN20PPH46C2RE&pd_rd_w=fdtkj&pd_rd_wg=UHsQM&psc=1&refRID=VX8PKF1YN20PPH46C2RE
It's time you guys upgraded to the best tool ever made. http://www.amazon.com/Knipex-8603250-10-Inch-Pliers-Wrench/dp/B000X4OG94
My favorite knife by far to whittle with is this one, the Cold Steel Tuff Lite:
http://i.imgur.com/w0PhkOw.jpg
I use it, and the smaller version of it, the Mini Tuff Lite, for most of my carving (full disclosure, I'm a novice wood carver who just enjoys killing time noodling around).
While I generally prefer the inexpensive Cold Steel knives, I do own a dozen or so dedicated carving knives of a wide variety of makers, including some custom knives.
For an inexpensive option in fixed blades I really like the Mora 120 and Mora 122:
http://i.imgur.com/6L0w1lZ.jpg
I do also own some traditional whittlers, but I really haven't ever warmed up to carving with them.
I use the Tuff Lite knives so much that I've got an assortment of them, and have converted some of them to prison-shank style fixed blades by wrapping them heavily for comfort:
http://i.imgur.com/j8pN4Gd.jpg
They're cheap, sturdy and easy to sharpen. I do use a file to break the edges on the blade spine when I get them, but other than that I find them incredible comfortable to carve with. I frequently complete entire projects with nothing but the Tuff Lite (though I do have a collection of gouges and chisels and such as well, I prefer to work with a knife).
http://i.imgur.com/3tbo2Ds.jpg
I've had to cut a case of sweet potatoes into wedges every single day. For the last three years. I'm tired of it.
Also, if you have a decently expensive knife, you shouldn't use a pull-through sharpener on it, especially not frequently. Find a waterstone. You shouldn't need to really sharpen more than once a year.
Can't really tell from this picture, but alot of times, it looks like ethernet, but it ends up not being terminated correctly, or setup for something like voice only or some other non-standard thing.
If it were me, I'd make a small investment in the following;
If you are lucky, whomever setup that panel wired it correctly, and the runs will test out. If you are not lucky, you'll need to take the next step and fix it yourself. This will require some more stuff;
There are many tutorials on the web on how to terminate Ethernet - essentially, you're going to need to make sure that the wires are terminated properly on the punch panel (in your living room) to the specifics on the keystone jack at the far end. Most likely, the jack at the far end looks something like this - https://www.amazon.com/Generic-Keystone-Ethernet-Compatible-Connector/dp/B014RAT7ZC/ref=sr_1_6?s=electronics&ie=UTF8&qid=1504982947&sr=1-6&keywords=keystone+jack
If you get the connectivity right, and that cable has all the pairs (8), you should be able to connect, and be on the road.
Not sure where you are located, but usually Fry's or MicroCenter is a good place to source these tools.
Holler back if you need more info.
Table, chairs, box of pens, box of sharpies: ~$200 from staples, free delivery, your ass will thank you.
http://www.staples.com/Sudden-Solutions-6-Standard-Grade-Resin-Folding-Banquet-Table/product_749944
http://www.staples.com/Staples-Steel-Folding-Chair-Black-with-Luxura-Seat-4-Pack/product_886001
Amazon:
A fist-full of the cheap $1 philips and flathead screw drivers from home depot.
Monoprice: Pigtail adapters for your PDU's to go from c14 to 5-15R. Almost every electronic device these days is universal power (90-240v, 50/60hz.) The notable exception is your driver charger. Never order fewer than 5 of anything. 10 for ethernet cables. On that note, order 2x 50' ethernet cables, and 10 of every other length and color you might need. Some long micro usb cables for phone charging. $100 extremely well spent.
http://www.monoprice.com/products/product.asp?c_id=102&cp_id=10228&cs_id=1022804&p_id=1302&seq=1&format=2
Pole-style crash cart. Your own crash cart is worth its weight in gold, and one you can't leave shit on is worth another weight in gold because it cannot get messy and junked up. $350? I forget.
All in all $1500 worth of stuff you will see once a year at best. However your on-site techs will never spend much if any time rooting around for tools. Do not travel with this stuff, buy one kit per colo site.
Also never let anyone tell you square-holed racks are bad. Order 1000 extra fasteners and nuts. This is on top of whatever you need to mount the stuff you know about. Only ever order one type. Throw away any fastener kits which come with your equipment because they might be slightly different. Remember 1000 fasteners is only 125 rack units assuming top, bottom, front, back, left, right. It's fewer still if you put in the center locking one. Have them toss in a cage nut tool, or learn to use a small flathead. Blood for the datacenter gods. Eventually you get extremely good at them and will stop cutting yourself.
Now off the reservation: Wifi router (buffalo) $80 prime, network printer (Brother, use the wired connection) $125 prime, ream of paper ($10, prime or staples).
http://www.amazon.com/SpeedOut-Damaged-Screw-Extractor-Bolt/dp/B00IRL3WP4
You are orders of magnitude better off with the 4 piece Narex set for the same money. Irwin cheapened up those marples. https://www.amazon.com/dp/B00GPC74ZQ/ref=psdc_553148_t1_B000RG2Y56
I would suggest a FUBAR
Seriously you've never seen one of these?
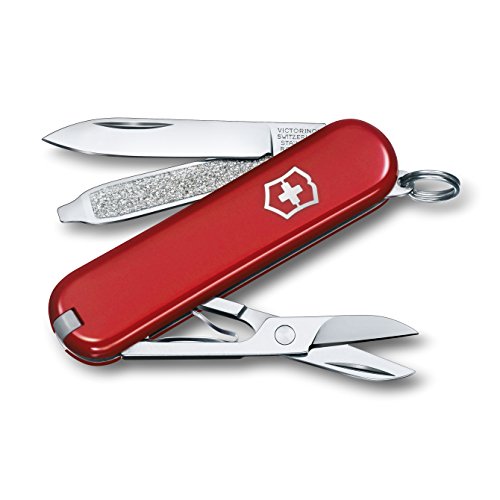
http://www.amazon.com/Victorinox-Swiss-Classic-Pocket-Knife/dp/B00004YVB2/ref=sr_1_4?ie=UTF8&qid=1334995197&sr=8-4
Every job I've had has been blue collar, or at least a mix of field and office work. Currently, I'm a woodworker, so I'm sure you can imagine how often things like splinters are a thing. I first started carrying the emergency knife when I worked at a climbing wall. It was there to cut a harness or potentially even a rope in the event of extreme emergency, but it was/is also good to have in case of a car accident or something (window breaker and seat belt cutter). I'm thankful that I've never had to use it. And that's what a lot of my gear is for. Things I want to have ready to use, while hoping I never do.
Emergency knife This isn't the one I actually have, but it's similar enough. You can find this same design in a multitude of places, at all different price points.
Normal use I also have a cheap little $6 Ozark Trail one that I've used for around 12 years or so. Long as you care for your knife, it will last and serve you well. You don't have to have a top-of-the-line one. I do greatly prefer the single-hand operation ones, though. They have the little pin near the base of the blade so that you can just slide it open with your thumb. And I usually prefer the liner lock, which allows you to unlock the blade with your thumb, and close it with your forefinger. With enough regular use, it all becomes one swift motion that you don't even think about
Swiss army knife I was gifted mine and likely wouldn't have bought it on my own, but I found myself very appreciative of it and think it's worth the money. If mine gets lost, broken, or whatever, I'll likely buy a replacement.
Bonus! Gerber multitool This has been on my key ring for 6 years. I use it almost daily, and think it is probably one of the best EDC purchases I have ever made.
My recommended buying list for a new painter is:
Tools
Sprays
○ Grey is standard, white if you're painting a majority of light colors, and black if the majority is dark.
Brushes
○ Round 0
○ Round 1
○ Round 2
All in all it should be around $60 USD for the tools and about $40 USD for the brushes. However, this list gives you every tool you will need to get started and to continue with the hobby.
This is just what I like to have on hand, this does not reflect the "perfect list". I hope it helps :)
clockwise from top left:
Why not buy the right tools and do a proper job?
Bonus: New tools
Or you can get this one. Or many many others like this from Amazon for 90% less.
we use the Fubar hammer from stanley in the fire co. very good for opening walls/removing walls.
The Pliers-Wrench is a truly new tool, which is just beginning to get picked up on by the el cheapo tool companies. They're great for someone who does a lot of everything.
Tamiya make a good Willys Jeep - the more recent version is item # 35219. Amazon link. Get him some Tamiya extra thin cement, an x-acto knife, and consider a starter set of model paints. For brush painting I suggest Vallejo Model Color paints - basic colors for the jeep would be something like black, white, olive drab green and a brown.
I'm getting this for my sister when she moves out because a bat just isn't good enough. Also it has some utility elsewhere.
Couldn't see safety glasses. If that is drywall wear some goram glasses. That shit will scratch your corneas.
Also get this. It doubles as a zombie defence weapon. https://www.amazon.com/gp/aw/d/B000VSSG3O/ref=pd_aw_fbt_469_img_2?ie=UTF8&psc=1&refRID=DDNRB1A1PP6RT5P0Z44X
You don't need to take them anywhere! Something like this is all you need https://www.amazon.com/Whetstone-Cutlery-20-10960-Sharpening-Stone-Sharpener/dp/B0055B2RGO
[Victorinox Swiss Army Classic] (https://www.amazon.com/dp/B00004YVB2/ref=cm_sw_r_cp_apa_-Nw.BbK33CE2Q)
Just put it on your keys and be thankful
Gerber Shard
If opening bottles is a thing you need it for over a knife, which was not the case for me, I got rid of this tool as well.
Simple but it works
This is what I carry now, after ditching my shard as well because there's plenty of ways to open bottles and tweezers are crazy useful.
IT'S DANGEROUS TO GO ALONE!
TAKE THIS! AND THIS TOO!
Mora companion HD. 4.83 ozs with sheath and there are plenty of YouTube vids of people beating on them without any problems. The bonus is that it's less than $20
I'd recommend saving 30$ and getting yourself a Morakniv Heavy Duty Companion blade. About 20$ on Amazon, much better for bushcraft and general camp tasks. Link here.
Just a simple setup would be, in no particular order:
 
 
That's what i can think of off the top of my head, you probably won't need all of that if you only plan on building a lower first. It'll be useful down the line to get most of those tools, but i'd go with first:
If you have Amazon Prime, there's quite a bit of stuff you can get on there, it's where i got most of my tools.
 
^Edit: ^Formatting.
If you decide to go the hand tool route, money and space are a lot less of a concern. Rather than throw out hypotheticals, I'll give you some examples of tools you can actually buy right now:
Panel saw. Yeah, 10 bucks. It's actually a nice saw too. The only issue is the teeth cannot be sharpened - but it's 10 bucks. Use this for breaking down big stock into smaller stock
Back Saw. Also 10 bucks. Same as above. Disposable but cheap and will last a long time (it's disposable because the teeth have been hardened). This is for precision cross cuts and cutting tenons.
Dovetail/fine joinery saw. 25 bucks plus a 3 dollar xx slim double taper saw file to make it not suck.
Now for some planes. These may seem kind of pricey for "broke" status, but these aren't POS-get-you-by planes. These are lifetime tools. To get something comparable new, you are looking at 150.00 to 300.00 a piece. You can get better deals by bidding on some planes, but these are all "buy it now"
Stanley #4. Needs some love but that's a good user for 30 bucks.
Stanley #5 for 42$
Stanley #7. 90 bucks.
Pick up a 4 dollar card scraper too.
Chisels
Narex $36. Use one of these and a block of wood to make yourself a router plane also.
Combination square 10 bucks.
A cordless drill of some sort and some bits (assuming you have one already)
70 bucks in 2x12's so you can make a knock down Nicholson style workbench which doesn't need vises. When you are done working, break it down and put it in the closet.
35 bucks for a pair of holdfasts from Gramercy
30 bucks worth of F style clamps from harbor freight will get you started there.
14 bucks to get sharp (not at all ideal but completely workable on a budget)
So for 410.00 or the price of a decent sander and miter saw, you can make literally anything in a small space with a small amount of localized dust. The trade off of course it time and labor.
Down the road you are definitely want to get some better saws, maybe some specialty planes, different chisels, some better measuring/marking equipment. But this will more than get you started.
I don't know if that screw would be too small for this tool but I have used it for stripped screws and it works well.
​
https://www.amazon.com/Ontel-SpeedOut-Damaged-Screw-Extractor/dp/B00IRL3WP4
Paying someone to run Ethernet is a huge waste of money. Even with buying all the tools and supplies yourself you will save lots of money.
In your situation I would go up into the attic then run down into the walls to your wall jacks.
Stuff you'll need: (not including drywall saw and gang boxes/gang frames to mount the wall jacks)
http://www.amazon.com/UbiGear-Crimper-Connector-Network- Crimper315/dp/B008UY5WL0/ref=sr_1_2?s=electronics&ie=UTF8&qid=1457464334&sr=1-2&keywords=rj45
http://www.amazon.com/C2G-Cables-Go-19958-Steel/dp/B0017RAHSA /ref=sr_1_2?s=electronics&ie=UTF8&qid=1457464421&sr=1-2&keywords=wire+fish
http://www.cablingplus.com/t/networking/jacks-and-connectors/cat5e-keystone-jacks-25-packs
http://www.cablingplus.com/t/networking/wall-plates/classic-keystones- wall-plates
http://www.amazon.com/Cable-Matters-Punch-Down-Impact-Blade/dp/B0072K1QHM/ref=sr_1_1?ie=UTF8&qid=1457464708&sr=8-1-spons&keywords=110+punch+down&psc=1
http://www.amazon.com/Cat5e-Ethernet-Cat-5e-VIVO-CABLE-V001/dp/B0092TG310/ref=sr_1_5?s=electronics&ie=UTF8&qid=1457464781&sr=1-5&keywords=cat5
For around $165.00 you'll have everything you need. Less if you need less than 1000' of cable.
It's true that the cable I listed is not plenum rated but you're not going to be in the attic if your house is on fire anyway. I wouldn't worry about it or waste the money on it.
I've installed hundreds of miles of cat5 in my earlier career before switching to sysadmin stuff.
Mora all the way. If you want to spend more, upgrade to the
Morakniv Bushcraft with a 50% thicker blade, firesteel, and sharpener.
EDIT - another excellent value (I'd argue highly undervalued) knife is the Gerber Strongarm. Check reviews online. Gerber hit a home run... even the sheath is top notch and multifunction. (MOLLE, vertical or horizontal belt attachment, you name it)
Disclosure: I have a Mora "Light My Fire" as my camp kitchen knife and two Strongarms for general camp use. The Light My Fire is more like the $15 Mora with + firesteel. The Morakniv Bushcraft is a much heavier duty blade.
Thick, largish blade and the blade's got an anti-rust coating over the non-sharpened part to protect it (the only Mora I know of that does). IIRC it's available in two configurations: one with a normal sheath and one with a sheath that has an integrated firesteel and sharpener.
Here's the version with the firesteel:
http://www.amazon.com/Morakniv-Bushcraft-Carbon-Survival-Starter/dp/B00BFI8TOA/
I highly suggest a hand packer. You'll need a jack capable of lifting your trailer (I highly suggest a bottle jack), and stands to support it while your wheels are off. You'll need a 1-1/2 socket (I won't use a wrench on the castle nut), cotter pins if that's what your axle uses. You won't know until you take it apart so just buy a kit since they're cheap and you can use them if/when you need to work on your awning anyway. I use water pump pliers to remove the dust cap without damaging it. You'll need a seal puller. Breaker bar, torque wrench, and sockets to fit your lug nuts. Brake clean, I use varsol to clean everything but the drum. Varsol and cast iron don't mix. I'll clean everything after the varsol with brake clean because it evaporates. You'll need high temperature high pressure grease and new seals (if you bring your make and rating of axle to a dealer they can hook you up).
Jack up the trailer, take off the wheels, pop off the dust cap, take off the cotter pin or other retainer, remove the nut, washer, outer bearing, remove the drum, remove the seal, remove the inner bearing. Clean the bearings with varsol, clean everything with brake clean, blow everything with compressed air to evaporate the brake clean, pack new grease into the bearings, coat the axle spindle with grease, coat the bearing races with grease, reassemble.
The correct torque on the axle nut is 50ft/lbs while spinning the wheel to set the bearings, then loosen and retighten to finger tight.
Firstly, sorry about your holiday.
Secondly, I've done this a few times now. Make sure that you double your downtime from what you are planning. Unless all the equipment is brand new, something WILL go wrong.
If any equipment is in with screws have a set of EasyOuts, they will save a ton of time if there are stripped screws.
I pre-label everything (cables, switches, machines) and then create a spreadsheet with each cable ID and associated switch/machine port IDs. This gets documentation out of the way and my focus is solely on racking and cabling.
This is a huge undertaking; make sure that you take the time to plan first, then execute. If you don't you're asking for trouble.
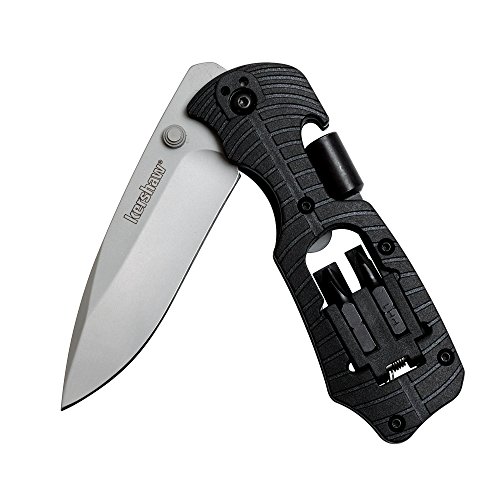
This achieves about the same thing, and with 10 more functions than cutting, and is overall just a better tool. I got it from BudK a while ago for a dollar. Looks like the price increased a bit though.
Kershaw 1920 Select Fire Multi-Tool https://www.amazon.com/dp/B002IVPKOU/ref=cm_sw_r_cp_apip_OJb9PFDifaKs4
Try this Kershaw for $30. Might look cheaply but this is my favorite knife. Comes in handy more than you might expect.
It's the Classic SD. Probably the most commonly carried SAK, and for good reason. I admit I like the Rambler (same tool with a bottle opener/small magnetic ph screwdriver added) a bit better.
I had acceptable but less than ideal performance with WiFi too. I had range issues on 5 GHZ wireless N and interference issues on 2.4 N (which I couldn't really attribute to anything in particular - it's just a crowded frequency). My house isn't all that big either (1750 sq ft).
I ran Cat5E. It was pretty easy even though it was my first time. I just watched a couple YouTube videos on making Cat5E and bought a crimper, RJ45 connectors, and a big box of cable from Amazon (they have different sizes so just determine how much you would need). I ran and terminated speaker wire, coax for my antenna in the attic, and the networking cable all in one afternoon. If you're considering going that route I would encourage you to do it, it isn't difficult with a decent crimper. Just watch a couple people do it on YouTube and print out a wiring diagram when you're terminating the cables. Make a couple short practice cables before trying to terminate on the cable you ran in the attic.
Before my computer and router were at opposite sides of the house and I was getting speed tests of ~20 MBit down; now with the cable I get ~120 MBit down. I have an Asus router on each side of the house so wireless coverage is excellent as well.
If you are OK with buying brand new, a few popular options here are some suggestions with Amazon (USA) links:
There are many other popular "solid state" keychain tools like the Shard out there, but I did not want to list out many of those.
That's a fine recommendation. I don't agree - but it's valuable for OP to see different approaches from different redditors.
My whole point is to not spend the extra money on accessories like this.
I'm a big fan of 'buy once, cry once' - but for some people it's valuable to go low budget at first. Especially with accessories like this. As I gained experience - I learned that cheaper/smaller knifes were better for me. So, for example, the 'better' knives I invested in previously now sit in a drawer unused.
Choosing which gear to buy high quality first is complicated. Different ways to approach for sure. I'm recommending to focus on the 'big 4' first, not the accessories.
​
For example - I carry these as my knife and flashlight often:
Phone: iPhone 5c + cheap Spigen case
Watch: Seiko SKX007 + Super Oyster II Bracelet
Wallet: Radix One
Keychain: Remove Before Flight tag, Sandisk Ultra Fit, Dollar Store Carabiner
Keychain Multitool: Victorinox Classic OR Leatherman Micra
Multitool: Leatherman Skeletool
Flashlight: Streamlight Microstream
Pen: Fisher Space Pen OR Modded Zebra 701
Yoyo: The Sage (for now)
First post, any questions or suggestions please feel free. Thanks guys!
I can't tell for sure from the photos, but that cable is probably at least CAT5e or better, which is just fine for 1GB ethernet in the house.
You need to cut off the phone jacks and install CAT5e or better RJ-45 jacks with a punch down tool. Do this conversion at every place where you want network. Then in the basement you need to punch down the other end of each cable separately to a CAT5e or better patch panel. Then you need to run short CAT5e or better patch cords from the patch panel to an Ethernet switch. Finally you need to connect your router to the switch, either directly, or through one of the network jacks you installed in the house.
I use this one. My co-worker that also uses it has smaller hands than I do and it works okay for him
Like any hobby the initial cost to start will always be high. You may be tempted to buy cheaper tools but whats the point if you plan on building Gunpla for a while and will end up replacing them. If you only want to build 1-2 kits then you can get away with 2 dollar clippers and a box cutter but it won't give you good results.
Despite the cost these are still the tools I recommend that EVERY Gunpla owner who doesn't plan on painting their kits purchase
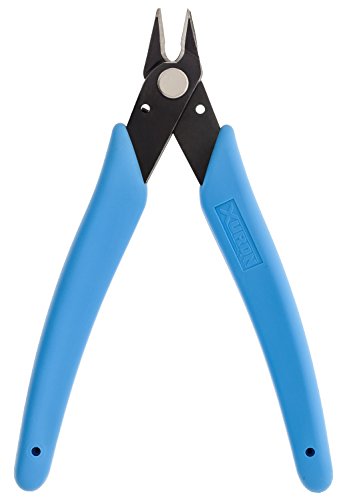
A) Tamiya 74035 Sharp pointed side cutters, worth every penny
B) Xuron 410 Side Cutters, very durable at an affordable cost
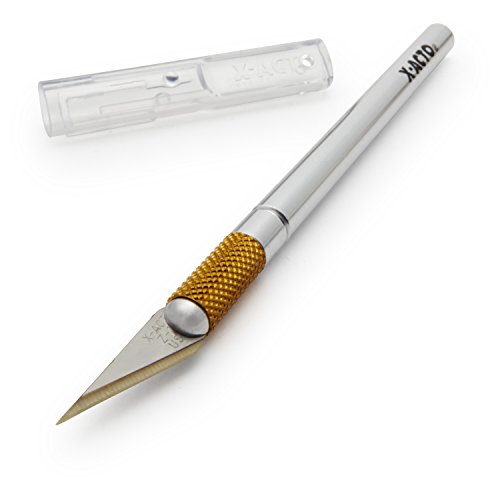
C) X-Acto X3000, Comfort rubber grip, comes with 2 blades
D) 3 Fine tipped Gundam Markers, Black, Grey and Brown
E) Krylon Acrylic Flat Coat, large can for only $5-6
And that's it.
2)Use the Tamiya cutters to cut the remaining nub, with practice you can get it practically flush to the part.
3)Clean up the nub with a hobby knife. You don't need sandpaper or a file if you did the steps above correctly and the flat coat will mask any scratches.
4)Use the Gundam markers for lining
6)Finally finish with a top coat
Total cost with amazon prime is $65. Yes the Initial cost is high but the tools above will last you for 20+ kits (you will need to buy more blades and flat coat). If you really can't afford that you can save up for the Tamiya sharp pointed side cutters and use the Xurons in the mean time (you will have more work to do).
So $38-65 initial investment to me is really not that expensive
I would get a pair of flush clippers
https://www.amazon.com/Xuron-410-Micro-Shear-Flush-Cutter/dp/B000IBOOWQ/ref=sr_1_12?keywords=flush+clippers&qid=1556217849&s=gateway&sr=8-12
To mention some other homebrewing supplies and tools that haven't come up here:
Even cheaper in Carbon Steel
Edit: or carbon with a thicker blade
Check out the Mora Bushcraft Black this way you get a decent sharpener and a fire steel as well.
I was just looking at a 3piece craftsman prybar set at the store which was on sale for $30some odd dollars. It was down from $40something odd dollars.
Started looking online and ran into this 3 piece pry bar. Look familiar?
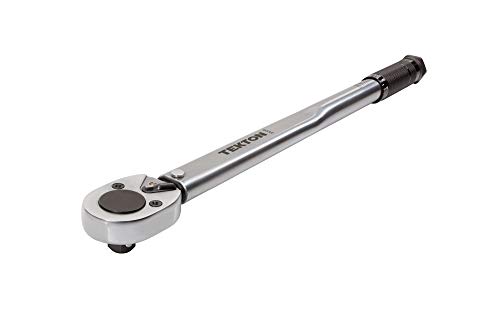
Same thing is going on with this tekton torque wrench i found its twin here
It isn't necessary, but torque wrenches are very useful and versatile tools for cars, motorcycles, lawnmowers, and guns.
Basically, if you like toys, get a torque wrench. They don't have to be expensive.
Alright... ignoring the fact that your asking how to install gears implies heavily that you don't know the first step... OR the first thing. Here's the basic run down. I'm not going to go into detail on torque specs, or specific procedure... i'd be here all night on a how-to that most people don't give two shits about. I'm also doing this ONLY for the 8.25. DANA 44's are too rare in stock, and DANA 35's don't deserve to be rebuilt.
Tools needed:
Parts needed:
On a 8.25...
Go for a drive. If everything was done right, you should now have more power, and no rear end noise. if you do... you need to take the rear apart again, and reset the gears to clear the noise.
I'm sure i forgot something, like thrust washers. Don't crucify me for it. If you want a REAL guide, you need to do more research.
https://www.amazon.com/gp/product/B00C5ZL0RU/
I like this one, as you end up with more stuff in the 10-150lb range than you do the 25-225 lb range.
This style of screw extractor has worked well for me in the past: https://www.amazon.com/Ontel-SpeedOut-Damaged-Screw-Extractor/dp/B00IRL3WP4/
I was on tour a year ago and brought my bike to this one-man bike/ski shop and he managed to strip both of my XTR crank pinch bolts just like yours. Had to bring it to another shop and they drilled out the head on one of the bolts and that was enough to ease tension pull it off. Finally got around to removing those stuck bolt pieces yesterday with this screw extractor set, which worked really pretty well.
Anyways, the key to using the larger wrenches with higher torques and small bolts is to use one hand to hold it steady in place at the pivot so that there's no chance of misalignment.
And yes, Shimano sells bolts just for your crank. Assuming you have 105 5800 cranks, the shimano part number is Y1GS21000
Oddly enough, the bolt is not available on the bike shop distribution companies, nor anywhere else online (in the US). The only place I could find it is in this ebay listing from the UK: https://www.ebay.com/itm/Shimano-HollowTech-II-Crank-Arm-Pinch-Clamp-Bolt-105-Tiagra-XT-SLX-Deore-/191815279489
However, I'm 99% sure this one would also work fine http://www.jensonusa.com/Shimano-Hollowtech-II-Pinch-Bolt-Single-For-Hollowtech-Ii-Crankarms
You could probably also get a generic bolt to work -- it's an M6 bolt and it's 21mm in length (as long as the head fits in the slots).
My absolute favorite vape related thing that I use daily.
> Get yourself a prybar (Like This but better ).
If one really felt the need for a prybar, I'd go with a proper breaching tool like any of these
At 8lbs and change though it's not something you just want to be toting around in your bag.
A sillcock key (you've seen what these are used on if you've ever got bored in a drive-thru line) might be handy too as a last resort for water /u/Practical_Citizen
Some things that I'd consider missing but important would be: a bottom bracket tool, crank puller, cone wrenches (for those who have cup and cone bearings), torx drivers (for disc brakes). I'm not sure about the cable puller (it's a nice to have). I'd put a small grease gun and some nitrile gloves above a cable puller. I'd replace the spanner set with an adjustable crescent wrench (or better yet, a Knipex plier wrench - they're amazing). I also keep scissors in my kit for silly things (cutting handlebar tape, opening packages, etc.).
I wholeheartedly agree with omitting a spoke wrench ; )
Typical home owners and typical car diy people don't need snap on tools. Yes they're much much better than Craftsman and 10000x better than harbor freight, but they are over kill for home use. I would definitely go buy decent tools over the cheap harbor freight kits. I had a few of the wrenches snap, and sockets chip far too easily. I have a decent 100 something piece set of Craftsman I bought during black Friday for about 35 dollars. One of the best investments I made in tools.
The only thing I actually bought that was top of the line are knipex locking pliers. My God. They are... I can't even explain how amazing they are. They have never slipped, ever. Even on wet nuts, total lockage. http://www.amazon.com/Knipex-8603250-10-Inch-Pliers-Wrench/dp/B000X4OG94
Kershaw Select Fire (1920); Multifunction Pocketknife with 3.4-Inch 8Cr13MoV Stainless Steel Blade, Black Glass-Filled Nylon Handle, 1/4-Inch Hex Drive, 2 Flathead Bits and 2 Crosshead Bits; 5 oz. https://www.amazon.com/dp/B002IVPKOU/ref=cm_sw_r_cp_apa_O25KBb33EFJJB
> I personally use a 1x30 belt sander with high grit paper,
"So your first step is to build a belt sander..."
Just buy a whetstone and learn how to properly use it. That's how you sharpen a knife. You can build them with your setup. I use this one. My knives come out scary sharp.
Oh PLEASE don't use that type of sharpener on any sort of quality knife. You're just going to get a jagged edge and a tone of steel removed each time. Get even a cheap whetstone and you will be much happier with a knife that lasts much longer :)
This thing gets my Miyabi razor sharp for probably half the price.
https://www.amazon.com/gp/product/B0055B2RGO/ref=ppx_yo_dt_b_asin_title_o09__o00_s00?ie=UTF8&psc=1
The 3 things you need are:
That's pretty much it. If you want to dive in really deep I have a massive post that lists other tools and touches on a lot of customization that people have done. But none of that's mandatory, you can very easily forge ahead with just the 3 tools I linked above.
Thanks for starting this, it has come at a good time for me. I will be expanding my keychain carry soon and hadn't come across a couple of those. Here are a few more to add to the list:
https://sites.google.com/site/jrpcustomknives/tools
The ruler on this is nice:
http://www.leevalley.com/us/wood/page.aspx?p=61101&cat=1,43456
Fairly popular, but worth mentioning here:
http://www.amazon.com/Swiss-Tech-UKCSB-1-Utili-Key-MultiTool/dp/B0001EFSTI
I originally saw this one on ThinkGeek:
http://www.amazon.com/True-Utility-TU47-Multifunction-Stainless/dp/B003F527NU
Cheap and very portable:
http://www.amazon.com/SE-Function-Credit-Survival-Pocket/dp/B000Q06LI4
Of course, there are the various pry-bars over at CountyComm:
http://countycomm.com/barfamily.html
And lastly, some unique tools:
http://www.americankami.com/swag.html
Not strictly a 'pocket tool', but for organizing them.
http://www.amazon.com/True-Utility-TU45-Stainless-Organizer/dp/B003A5E5IK/ref=pd_sim_misc_5/177-6248037-1918428
This can be achieved using snap rings like those from TEC Accessories. I bought some at the same time I purchased my P7 clip. Only 40 cents each + keyring of your choice, however, I'm not sure where to find the horseshoe in the previous example, or how to DIY.
http://www.tecaccessories.com/products/category.php?CA=7
**EDIT: formatting and keyring stuff~
I'm in need of some help, I am trying to find a place to buy key rings in various shapes other than the typical circle. What I would prefer is a heart/D shaped ring and my google-fu is too weak to find anything.
je traine sur /r/frugal et comme idée cadeau j'ai trouvé cette année :
http://www.amazon.fr/gp/product/B002ZK45IQ/ref=as_li_tl?ie=UTF8&camp=1642&creative=6746&creativeASIN=B002ZK45IQ&linkCode=as2&tag=payrecom-21&linkId=7ZWXWNRL6AJARAS6
http://www.amazon.fr/gp/product/B000Q06LI4/ref=as_li_tl?ie=UTF8&camp=1642&creative=6746&creativeASIN=B000Q06LI4&linkCode=as2&tag=payrecom-21&linkId=WPNOEJQAMHEU47GR
The modern replacement is the plier wrench. Knipex is the go to but there are a few other copies:
https://www.amazon.com/Knipex-8603250-10-Inch-Pliers-Wrench/dp/B000X4OG94
The fight pad frame has a thin indented line that you can run a xacto knife thru ( ill leave a amazon link below) so you layer it with the decals you can get the from amazon as well just type whaterver you want and the word "decals" after and you will see a few that sell 100count for $9.99.
The process
Layer the decals to fill space i suggest putting the ugly decals you dont want first and put the ones you do like last on top to show off the ugly ones are just to cover the area as the will become a background to the ones you put last. Then over lap the decals over the thin line around the frame of the fight stick and take the knife and run it down the gap to get that perfect cut and rinse and repeat.
As for the buttons just lay the decal over the button and the area you would like to place it then before peeling the back of the decal cut the round shape out of the decal then peal then place. Other than that be careful not to cut your self and have a trash can to throw the back of the decals aways smoke a blunt and have fun. And add fb_playerb on xbox so we can fight on a game good luck
X-ACTO #1 Knife, Z Series With Safety Cap https://www.amazon.com/dp/B005KRSWM6/ref=cm_sw_r_cp_apa_i_McFhDb8DTM7XA
100 PCS Dragon Ball Z Stickers, CATTA DBZ Stickers Pack Waterproof Removable Vinyl Decals for Laptop, MacBook, Bottles, Skateboard https://www.amazon.com/dp/B07SQ74R7W/ref=cm_sw_r_cp_apa_i_udFhDbAZD19S6
I had some issues with people being shocked when I was a lot younger (early 20's) after I'd pull out a 3-4" blade from my pocket to cut something that needed it (Box, string, meal, packaging, etc.), but I've become a bit more aware of my surroundings since then and tend to opt for a smaller blade (my SAK on my keys) when I think someone might freak out about it.
FWIW though, I have since pulled my normal EDC blade when shopping or out and about though with no reaction by bystanders whatsoever. I use my primary EDC knife whenever I need to for whatever task is at hand. It may help that I'm a bit older now, or it may have become a more accepted thing since I've been around. Heck, maybe all of the people I know just expect me to have one now. Maybe it's because my EDC blade is no longer black. Dunno.
I just realized that the flashlight is the only thing that hasn't changed since I started carrying tools when I was ~17... It's like my Hobbes :3
I use these. I got them at a local hardware store for $6. I like them because I can grip against the wire when I wrap and can pinch the coil against the screwdriver.
This is everything I Use.
I bought these hoping they would do the trick. http://www.amazon.com/gp/aw/d/B00009OYGV/ref=mp_s_a_1_1?qid=1421534510&sr=8-1&dpPl=1&dpID=41PADNxaDfL&ref=plSrch&pi=AC_SY200_QL40
Cat 6 is perfectly fine, as it can support up to 10Gb, so its pretty future proofed as 1Gb is still the standard. We won't see 10Gb becoming the norm for a while.
As far as cable, I usually get it from Monoprice, or sometimes from amazon. I just bought a 1000ft spool of Cat6 for like $65
If you are putting drops in each room, its probably best to put in wall plates, and punch down the cable to a jack. You'll need a Punchdown Tool for this.
I'd highly recommend running all the cables to a patch panel. Ideally have them run to the same location as your modem and other networking equipment. You'd use the same punch down tool here as well.
If you need to terminate any cables to a normal Ethernet connector, it isn't difficult, but it is a bit tedious. The first one you do will take you a bit to do, but once you get the hang of it, each one will become a little quicker. you can watch a youtube video on how to do it.
You'll need a Crimping tool to crimp the ends on.
I have yet to find a punch down tool that's too cheaply made.
This is the one I had at my last job.
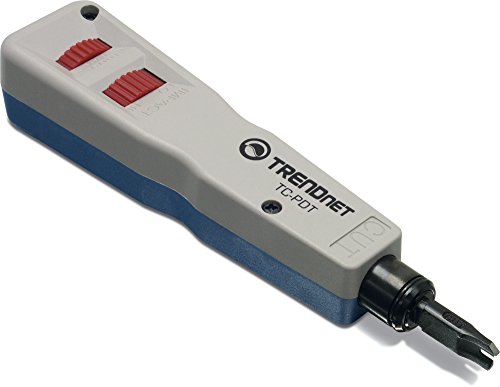
Get yourself a punch down tool as it will make the wiring process much easier, also make sure the data cable is anchored somewhere in the box so it's not pulled free from those crimp connections.
Something like this: http://www.amazon.com/TRENDnet-Punch-Krone-Blade-TC-PDT/dp/B0000AZK4D
Plastic is fairly soft. As long as you're not trying to cut too close to the model anything with a sharp edge will work. Just make sure the blades are thin enough to work in between pieces. I'm using a Xuron.
Ka-Bar Becker BK2 short of the mythical 'valyrian steel', this is the knife you would pick up when you see the Night King proceeding. Failed torture test.
Morakniv Companion HD Think Sweden without the girl with the dragon tattoo but a dragon waiting to shave you on a budget. Bang for the buck, come razor sharp out of the box.
No, these aren't EDC, even though you could carry them around.
Check out the Mora Companion HD Carbon for fixed and Opinel #8 Carbon for folding knife.
Both should be OK importing into Canada.
Ok I got ya on this. I recently had all three bolts on my oil filter cover snap in the casing while I was working on it. (p.s if that ever happens to you, do not torque them to 7 ft/lbs as stated in the manual, just tighten to snug)
The reason this happens is that Honda cheaped out on screws, I guess in the event that those break before more important parts do. It's scary but not the end of the world
First thing I would always recommend is either downloading a factory service manual if you can find one. As well as BUY A HAYNES / CLYMER MANUAL. It will save you in the future.
a quick google turns up this, tada:
https://thumpertalk.com/forums/topic/610432-xr650l-owners-manual-inside/
and heres the clymer link to buy one:
https://www.amazon.com/Honda-XR600R-1991-2000-XR650L-1993-2012/dp/1620921537/ref=sr_1_1?gclid=EAIaIQobChMI-Nv0_9vm4wIVhRx9Ch1KeQ5-EAAYAiAAEgLtS_D_BwE&hvadid=177528169391&hvdev=c&hvlocphy=9032056&hvnetw=g&hvpos=1t2&hvqmt=e&hvrand=6356380794860257313&hvtargid=kwd-10840489131&hydadcr=6586_9585033&keywords=clymer+xr650l&qid=1564835915&s=gateway&sr=8-1
So back to these screws. you need to extract em. good news is they are soft and easy to extract. use a speed out kit : https://www.amazon.com/Ontel-SpeedOut-Damaged-Screw-Extractor/dp/B00IRL3WP4/ref=sr_1_3?crid=2BIIO15IIO5JY&keywords=screw+extractor&qid=1564835981&s=gateway&sprefix=screw+ex%2Caps%2C203&sr=8-3
Basically what you are gonna do is use one side of the bit to drill a cone shaped hole in the top if the screw, then take it out, flip it around, and use the other side to SLOWLY extract it. Boom, easy and out. just go slow and don't rush it. you will thank yourself.
If you do mess up the threads, consider installing a helicoil so it can easily be saved in the future.
Next you need to find the screw. Your amazing new manual will have the parts diagrams all in it, so start there. If you just can't be bothered to read, we have the glorious internet! Hondapartshoues, Babbits online, and many others will help you find the size.
Look how easy it is! Here is the diagram for the screw in question:
https://www.babbittsonline.com/oemparts/a/hon/5054117cf870021c54bee45d/handle-switch-cable
It is a m5x16 panhead screw. I personally would go down to your local ace, and get the same size screw in a harder material. Either 10.9 or stainless, or even chromey bois as they will have it all. But if you just must must must have OEM, order it from that site. I am guilty of this sometimes even though it is so much more expensive.
Anywho good luck! hope this helps.
Anywho good luck!
Cable tester, RJ-45 crimper, jacket stripper, and 100 RJ-45 terminators:: $14
250 ft pull box, cat 5e cable: $21.50
Just make sure you get the color order right when crimping the modules onto the end of the cable. Getting the pattern right is not optional; just any old pattern won't do, even if they match on both ends. (Yes, really. It has to do with the way the wires are twisted internally, and avoiding "crosstalk" from one wire to another inside the cable.)
There should probably be a handy guide printed on the crimper itself, but if not, it goes like this: with the pins of the RJ-45 facing up and the retaining clip facing down, and the open end of the RJ-45 facing you, from left to right: white-orange, orange, white-green, blue, white-blue, green, white-brown, brown.
https://www.handymanhowto.com/wp-content/uploads/2015/08/TIA-EIA-568B-Ethernet-RJ45-Plug-Wiring-Diagram.png
You will screw up quite a few of these, most likely. Don't sweat it, that kit comes with 100 of 'em. Just make sure you cut your cable a few feet long to start with, and if it doesn't test out right, clip off the end you feel the least good about, crimp another one on, and test again. Still doesn't test out right? Then go clip the OTHER end off, crimp a new one on THERE, and try again.
You get the hang of it pretty quick.
You're also going to need a router/switch to stick where all those runs terminate.
You can buy the tools to do this yourself for pretty cheap and you'll use them in the future. Example: http://www.amazon.com/UbiGear-Tester-Crimper-Connector-Network/dp/B008UY5WL0/ref=sr_1_2?ie=UTF8&qid=1450368467&sr=8-2
If you can match colors you can terminate network cables.
Here's a cheap kit with everything you need
http://www.amazon.com/Wild-us-Tester-Crimper-Connector-Network/dp/B008UY5WL0/ref=sr_1_2?ie=UTF8&qid=1425623073&sr=8-2&keywords=rj45+crimper
Condor Bushlore
Morakniv Companion HD
Well, since i saved on the first knife i have this in my cart right now
https://smile.amazon.com/Morakniv-Bushcraft-Carbon-Survival-Starter/dp/B00BFI8TOA/ref=sr_1_1?s=sporting-goods&ie=UTF8&qid=1493054568&sr=1-1&keywords=Morakniv+Bushcraft+Carbon+Steel+Survival+Knife+with+Fire+Starter+and+Sheath%2C+Black
Oh. Ya. Didn't think of that. There's this at about the same price point. http://www.amazon.ca/gp/aw/d/B00BFI8TOA/ref=mp_s_a_1_1?qid=1426036192&sr=8-1&keywords=morakniv+bushcraft&dpPl=1&dpID=41TlXunNG6L&ref=plSrch&pi=SX200_QL40
If you buy from PSA, I'd recommend using a pre-paid credit card, as they've had site security issues in the past.
I think by "80% lower" you may have been thinking of a stripped lower, where all you have is the aluminum lower, with none of the controls installed. A stripped lower is s great place to start! YouTube has a bunch of easy how-to videos. I recommend /u/nsz85 videos, which I used for my first build.
Some other things you'll want to have handy:
Vice Block for Lower
Vice Block for Upper
Roll pin starter kit
Rubber Mallet
Torque Wrench
These are the basics, and once you buy them, you'll never have to buy them again for future builds. There's other tools out there to consider, but get you started.
Best of luck!
EDIT: shit, how could I forget the AR Wrench!
I just got a relatively nice 1/2" Tekton torque wrench for $37. They have a longer one that goes up to 250 ft-lb for $54. I'm not saying it's the best, but it's solidly middle-of-the-road and way better than HF.
Torque wrenches are precision equipment and should be treated as such. Don't apply more than 150 ft-lb in the reverse direction (i.e. dont use it as a breaker bar). For the models that have to be stored with the torque set at the lowest setting... make sure you do that.
Then why not do that?
Here you go $38
theyre OK but not great. I still use one of the larger ones (2") since I haven't found a decent old one yet.
at 9-10 bucks each; you are better getting a set like these. https://www.amazon.com/Narex-Republic-Woodworking-Chisels-863010/dp/B00GPC74ZQ
I got mine by picking up 1-2 vintage ones at a time from ebay
Spyderco Paramilitary 2 (usually a Delica 4 or sometimes a Dragonfly Salt)
Dockers Leather Wallet, with this inside
Streamlight Microstream (sometimes swapped for a Foursevens Preon P2)
Leatherman Squirt PS4
Carmex
Motorola Droid Bionic
Keys, carried on a belt loop then stuck into my back pocket.
Shitty picture!
Go for the 30 inch model for even more fun.
https://www.amazon.com/Knipex-8603250-10-Inch-Pliers-Wrench/dp/B000X4OG94
These things are life savers, they are like a crescent wrench in that they close parallel but you can let up and reset them much easier than a crescent wrench, basically a ratcheting action. they are expensive but you get what you pay for for and these are top notch.
Grab a pair of Knipex pliers and be done with it. I used crescents until I learned from my mistakes (by rounding a few bolts). Made the investment into Knipex tools and haven't looked back.
Everyone making an AR should get this wrench. Perfect for pushing in roll pins and great for thousands of other tasks around the house/car etc.
https://www.amazon.com/gp/product/B000X4OG94/ref=oh_aui_search_detailpage?ie=UTF8&psc=1
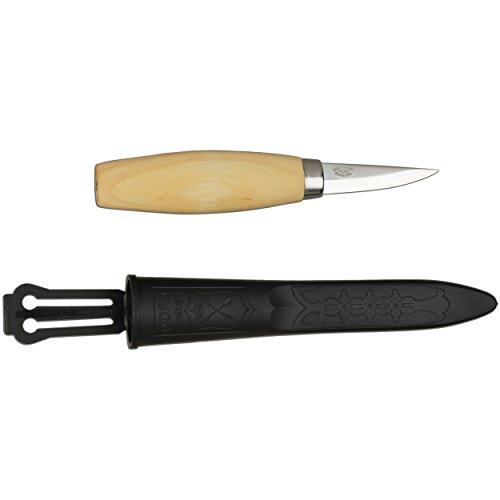
Fellow beginner here. I'm pretty happy with this knife so far: https://www.amazon.com/Morakniv-Carving-Knife-Laminated-2-4-Inch/dp/B004GATX62
Someone linked you a $4 sharpener. Those would probably do a decent enough job for knives you don't much care about.
If you actually do care about your knives, taking care of them, and don't mind taking a bit of time to learn to sharpen them properly... try something along the lines of this
400 is rough enough to 'quickly' hone out small chips in the blade's edge, and set a rough shape to your edge. 1k is fine enough to make a more-than-just-passable edge for a western style kitchen knife. The jump between them isn't so big that you'd need (or really want) an intermediate stone.
As monkeys says, I recently did an Airfix starter set. I was between houses so had very little stuff.
I bought a Airfix Electric English Lightning. If you search for Airfix starter sets you’ll find other options.
I used minimal tools:
You could find some of that grouped into one product if you look about like this.
There’s some good YouTube videos to help a new user like this one from Airfix themselves making their own Spitfire starter kit.
So here’s my album of what I used. And here’s the finished Electric Lightning.
Get a Patch Panel, a Punch Down tool, a ethernet crimper, some ethernet ends (i prefer the EZ, but they are pricy), and a network tester. All that for $70 and you can terminate and troubleshoot all the cables you desire!
My personal kit is a little more expensive, but really the only thing I wouldn't trade for a cheaper tool is the tester. Crimper, Punchdown, Tester.
$17
https://www.amazon.com/TRENDnet-RJ-45-RJ-12-RJ-11-TC-CT68/dp/B0000AZK4G/ref=sr_1_1?ie=UTF8&qid=1485982437&sr=8-1&keywords=rj-45+crimper
You would be better off making your own. I've found that a lot of the sets are cheap.
Here's my take on it.
1.Cable tester:
http://www.amazon.com/gp/aw/d
/B000P1OA1O?cache=6447edf9df8336c37ffb445471642e6b&pi=SY200_QL40&qid=1412645606&sr=8-1#ref=mp_s_a_1_1
Simple cat5 tester, cheap and works decently.
2. Cable stripper:
Here I've given two options, one is a spinning stripper made for things like taking the jacket off cat5, the second is a more of an electrical stripper for a bunch of gauges of wire with cutters at the back side. If your comfortable with it you can use the cutters to strip just about anything.
2.a http://www.amazon.com/gp/aw/d/B0099DIV4G?cache=6447edf9df8336c37ffb445471642e6b&pi=SY200_QL40&qid=1412645735&sr=8-1#ref=mp_s_a_1_1
2.b. http://www.amazon.com/gp/aw/d/B00080DPNQ?cache=6447edf9df8336c37ffb445471642e6b&pi=AC_SX110_SY165_QL70&qid=1412645735&sr=8-12#ref=mp_s_a_1_12
3.punchdown tool :
If your in a spot where you get to do punchdowns it's nice to have, they are cheap and work well,
http://www.amazon.com/gp/aw/d/B000KMFDZ0?cache=6447edf9df8336c37ffb445471642e6b&pi=SX200_QL40&qid=1412646040&sr=8-1#ref=mp_s_a_1_1
4. Cat 5 ends:
Always keep plenty of these, a bag of them is cheap and you will be glad you have them.
http://www.amazon.com/gp/aw/d/B003M5BIII?cache=6447edf9df8336c37ffb445471642e6b&pi=SY200_QL40&qid=1412646222&sr=8-1#ref=mp_s_a_1_1
5: crimper:
Never underestimate a good crimper. I have had no luck with the cutting portion of them but that's why I have other tools.
http://www.amazon.com/gp/aw/d/B0000AZK4G?cache=6447edf9df8336c37ffb445471642e6b&pi=SX200_QL40&qid=1412646393&sr=8-2#ref=mp_s_a_1_2
6. #2 philps head.
I like ratcheting screw drivers with multiple heads but this is easily the most used screwdriver in my set.
http://www.amazon.com/gp/aw/d/B000NNK9MS?cache=6447edf9df8336c37ffb445471642e6b&pi=AC_SX110_SY165_QL70&qid=1412646575&sr=8-5#ref=mp_s_a_1_5
The flat head out of this set is also nice, depending on your bag keep them all handy.
Everything beyond this point is optional or situational.
8. Power supply tester: if you do any sort of computer repair these are very handy to hold on to.
http://www.amazon.com/gp/aw/d/B001MKCALY?cache=6447edf9df8336c37ffb445471642e6b&pi=SY200_QL40&qid=1412646902&sr=8-3#ref=mp_s_a_1_3
9. Tweaker: good for laptop repair or if you deal with any sort of building controllers/ low voltage electrical.
http://www.amazon.com/gp/aw/d/B0058I6VNE?cache=6447edf9df8336c37ffb445471642e6b&pi=SX200_QL40&qid=1412647026&sr=8-1#ref=mp_s_a_1_1
I also have a similar sized Philips head screw driver but I use it much less frequently.
10. Electrical tape: some people say it's for those who mess up doing electrical, I call it insurance.
11. Linemans: I use mine to crimp chicklets mostly but they come in handy a lot. I couldn't find the exact ones I use b
http://www.amazon.com/gp/aw/d/B000A0S4XK?cache=6447edf9df8336c37ffb445471642e6b&pi=AC_SX110_SY165_QL70&qid=1412647275&sr=8-4#ref=mp_s_a_1_4
12: a bag:
Personally, I use an old back pack. I find its a lot easier to carry that along with a box of cable. This is entirely preference.
Ok, I see this is a bit touchy lol. But it's definitely worth investing in some form of set of tools eventually. Start small. A pair of cutters like this will do wonders in the beginning. A little sandpaper, you can get from the dollar store if you want. And a marker, if you really want to stay cheap with it, you can use a crayola marker and wipe away excess with a tissue or q-tip.
I want to share my hobby with someone who wants to get started, but remember, it is a hobby and it is still a model. It's part of what makes the experience awesome. You can start small and always revisit a kit if you want to make it look better. You don't need the marker or pen, but it does add a new dimension to the kit. An X-acto is recommended, but not required. The motor control happens with time and patience.
But I digress, just remember, this is a model. Like any other model, you can make it look amazing, but you need to also put forth the effort. Good luck on your kit and remember, it's about having fun lol. Or else why do it in the first place?
These are way better - the exact pair I have had for the past four years or so. They're pretty small so they can get into tight places, also don't take up as much room in the tool box.
Side cutters / nippers / these things to cut the parts off of the runners: Link
One of the most essential gunpla tools. You have an Xacto knife to trim off the remaining plastic after you cut it off and you have a file to sand off that little nub that's left over.
While not essential I would recommend getting some fine grit sandpapers. I built my RG RX-78 with no paint and only using fine grit sandpaper and polishing sandpaper (max is 2000 grit) and it looks pretty good.
If you're looking to do a straight build, all you need are the knife, a file, and side cutters.
Various tutorials are available on this website; I've included the one about welding parts together that would be most relevant to a beginner:
http://www.scalemodelguide.com/construction/techniques/how-to-glue-parts-together/
Model Recommendations:
Airfix Zero, or a Spitfire Mk.22.
They both are new tool kits, cheap, should fit well, and have simple paint schemes. I have built the Mk.22 and the Spitfire PR XIX below; both fit very well and require minimal filling.
Don't pick camo paint jobs; pick something simple thats one to three colors with straight lines for color demarcations.
http://www.amazon.com/Airfix-A02017-Supermarine-Spitfire-Military/dp/B0021L9BNI/ref=sr_1_1?ie=UTF8&qid=1394416699&sr=8-1&keywords=spitfire+PRXIX
http://www.amazon.com/Airfix-A01005-Mitsubishi-Model-Building/dp/B0055ANHD2/ref=sr_1_1?ie=UTF8&qid=1394416717&sr=8-1&keywords=airfix+zero
Basic materials:
X-acto knife
Brushable paint, e.g. like Model Master Acrylic.
Wide, medium, and fine detail brush (I recommend golden talkon brushes you get at art stores for quite cheap) Like say, 1/4 inch wide brush, a smaller brush, and then a fine detail brush, maybe 1/0 or 5/0 brush for fine detail work. (The total of that shouldn't come out to more than 10 dollars at most.)
Liquid cement:(See tutorial here)
https://www.youtube.com/watch?v=U2clHW2UN0w
The idea is to weld it together with the solvent and then shave off the excess so you don't need to fill the seams.
Decal setting solution (a simple bottle of microsol will generally be adequate)
Tweezers.
A spray can of primer (it can be like krylon, probably).
If you're wanting to get fancy, a sprue cutter:
http://www.amazon.com/Xuron-170-II-Micro-Shear-Flush-Cutter/dp/B000IBSFAI/ref=sr_1_1?ie=UTF8&qid=1394416917&sr=8-1&keywords=sprue+cutter
Other tips:
Brushes that come in "starter packs" generally suck, as does the paint.
PS: Don't buy "packages" of tools offered by model retailers until you google the price of each component separately. Those tool packages are often made of cheap junk that are lumped together and then sold at a premium.
The bare minimum (assuming you don't have a good, SHARP pocketknife) is liquid cement, and then a starter kit that includes paint, and three paintbrushes (of the widths I mentioned), and wet and dry sandpaper from the hardware store (try for 800 grit or higher).
Oh. And patience. Lots of it.
These are just suggestions, I'm sure there are cheaper or better quality alternatives to these, but it's a good start.
Also, you're a cool brother.
I have some pretty severe OCD when it comes to my EDC. Haven't lost anything major but I have gone through about a dozen Victorinox Swiss Army Classic and every time I lose/have confiscated/misplace/break/wear out one I have to get another one immediately.
Get one of these!
Greetings all!
My main suggestion to anyone wanting to get into vaping it is to skip the ego-starter kits, MVP2 (cheapish Vv or Vw boxes), non-rebuildable tanks (Protanks, Nautilus) and just drive right into the mechanical mod / box mod world. I say this because the vaping experience is so much better with rebuildables. I went with the all of the above, and I personally wished that someone would’ve told me to just dive right in, because all that stuff is sitting around not being used. The people that I’ve talked to are typically hesitant to do so because of the coil building, but there are so many YouTube tutorials, suggestions and information on /r/RBA and /r/electronic_cigarette that it’s much easier than it seems. Anyway, if I were to start all over again, these are the things which I’d buy.
Must Haves
These are the things which I consider essential to starting off the on the right foot. I’ve purchased a lot of things, and these are the things which I suggest to my friends. Most of the links are from Amazon, because it’s what I’ve primarily used.
Battery - Sony VTC5
http://www.eciggity.com/2-pc-sony-18650vtc5-2600mah-30a-battery/
These are pretty much the standard when it comes to “safe” batteries. They’re affordable, good amp limit and have been recommended many times. If you purchase from the link above, they also give you a plastic carrying case!
Charger - Nitecore i2 or Nitecore i4
http://www.amazon.com/Nitecore-IntelliCharger-i4-Battery-Charger/dp/B005UAI372/ref=sr_1_1?ie=UTF8&qid=1404287334&sr=8-1&keywords=nitecore
Affordable, reliable and these won’t “overcharge” your batteries. The difference between the i2 and i4 is the amount of batteries they can charge at a single time. They also have a new fancier one out, called the Digicharger D2 and Digicharger D4. Those are nice because it has a LCD panel that displays a lot more information than the i2 and i4. I personally use an just an i2.
Mechanical Mod - Stingray
http://www.vaperoyalty.com/hcigar-stingray-mod-stainless-steel/
Now, 90% of what is suggested for an actual mechanical mod is going to be of personal taste. The Stingray is the “older brother” of the Nemesis. This is what I purchased when I first started out vaping. The unit is very easy to break apart, clean, has a locking ring, has a floating 510 connection and venting holes in case of a battery leak. Almost everyone I know has a Stingray.
Rebuildable Dripping Atomizer - Magma by Infinite
http://101vape.com/rebuildable-atomizers-tanks/309-magma-atomizer-clone-by-infinite.html
One of the best purchases I’ve made. The juice wells are very deep compared to everything else on the market (that doesn’t have a tank system). Threads are nice, easy to build on, post holes are large and the air-flow is easy to manipulate. You can run this on a single coil or a dual coil. Blows almost all the other RDAs I have out of the water. This is my main RDA.
Organic Cotton - Maxim Hygiene Products Organic Cotton Balls
http://www.amazon.com/Organic-Cotton-Balls-Triple-count/dp/B00E8T2X36/ref=sr_1_3?ie=UTF8&qid=1404288337&sr=8-3&keywords=organic+cotton
I suggest using un-bleached, organic cotton. Some people take it one step further by washing them, I think thats taking it a bit far and I don’t do it. You can pick them up from any convenience store or supermarket (CVS, Walgreens, Target, Whole Foods), a 100 count will last you AGES.
Kanthal - AWG A1 26 Gauge
http://www.amazon.com/Kanthal-Gauge-100ft-0-40386-Resistance/dp/B00HALND7Y/ref=sr_1_1?ie=UTF8&qid=1404288659&sr=8-1&keywords=kanthal+26
I like to use 26g kanthal wire for my dual coil builds. 26g is a bit thicker than what a lot of people suggest (28g), but for me, because it’s thicker, it’s easier to work with.
Screwdrivers - Stanley 6 Piece Screwdriver set
http://www.amazon.com/gp/product/B00009OYGV/ref=oh_details_o05_s01_i02?ie=UTF8&psc=1
The screwdrivers which come with your RDAs are short, small and crappy. I like these screw drivers because they come in a variety of sizes and you do not need to mess with a drill-bit. What I really like about these, is at the end of the drill bit is a small little ledge (can’t think of a better word), where you can push your coil and scrunch it up a bit.
Ohm meter / Multimeter - Any generic ohm reader or Innova 3300
http://101vape.com/meters/170-ohms-meter.html
http://www.amazon.com/gp/product/B001O1X65A/ref=oh_details_o02_s01_i01?ie=UTF8&psc=1
You can use a multimeter to do basically the same thing as an ohm reader. The multimeter has an added benefit of being able to read the volts are your battery as well. I have both, but I prefer to use a “regular” ohm reader. This video below can teach you how to use a multimeter for that purpose.
https://www.youtube.com/watch?v=wgXAmPBAO5g&index=2&list=LLU7AM2JUxXCrj4TSCDQDffw
Optional items
Things that I’ve purchased that you can probably substitute with something in your house. They’re nice to have, most people have these, but I decided to link these anyway, because I didn’t have some stuff (my scissors were too large).
Scissors - Generic surgical scissors
http://www.amazon.com/Amercian-Diagnostic-Corporation-3425-Stainless/dp/B000GHIUR2/ref=sr_1_5?ie=UTF8&qid=1404289491&sr=8-5&keywords=surgical+scissors
To cut your cotton. Small, sharp and gets the job done.
Tweezers - Ceramic tweezers
http://www.fasttech.com/products/0/10007588/1655800-heat-resistant-stainless-steel-tweezers-for-e
Allows you to hold your coil together and torch them without heating up the tweezers.
Wire cutters - Hakko CHP-170
http://www.amazon.com/gp/product/B00FZPDG1K/ref=oh_details_o03_s00_i02?ie=UTF8&psc=1
For cutting your kanthal off that spool!
Atomizer holder - Plano 23630-01
http://www.amazon.com/Plano-23630-01-Stowaway-Adjustable-Dividers/dp/B000E3FKVC/ref=sr_1_4?ie=UTF8&qid=1404289861&sr=8-4&keywords=plano
You’re gonna buy a bunch of atomizers. Everyone buys a bunch. You’re not going to be able to help yourself. I use this plastic case to keep everything neat and separated.
Building deck - Tenderfoot Stands
https://www.facebook.com/tenderfoot.stands?fref=ts
You don’t need this. But it makes building RDAs easier. You can also place your juice filled RDAs on here.
Torch - Mini Jet Flame 503
http://www.amazon.com/gp/product/B007A9YSPW/ref=oh_details_o00_s00_i00?ie=UTF8&psc=1
This will help you get those coils nice and tight, without having to fire off your mechanical mod.
Battery Case - Bluecell
http://www.amazon.com/gp/product/B007Q6PJO8/ref=oh_details_o03_s00_i00?ie=UTF8&psc=1
If you don’t buy the batteries from the link above, you’re gonna want a battery case. Do not keep your batteries loose in your pocket or floating around your bag. They can come in contact with something metal and potentially damage the battery.
Here is the desktop version of your link
A good set of small screwdrivers, some sort of wire cutters, cotton, and a good pair of tweezers (preferably with ceramic tips)
I got these ones and they are great. They have from 1 - 3mm drill bits and then two Phillips ones for screwing your posts down.
Nice rubberised grips that help you keep tight hold. I'm ashamed to say I saw them on a rip video.
http://www.amazon.co.uk/gp/aw/d/B00009OYGV
First of all, does the wall plate in your office have just 1 phone line? 2 or all 4?
All 4 would be ideal, but you need at least 2 for this to work because Ethernet needs at least 2 pairs of wires.
Also if you only have 2 pairs of wires then you'll only get 100Mbit Ethernet. Gigabit Ethernet requires all 4 pairs.
This job would be made easier with a Tone & Probe kit (also known as a Toner). Simply plug the tone generator into the phone jack in your office, then go down to the basement with the probe and use it to identify the correct pair of wires.
Once you identify the pair of wires, you're going to have to remove all 4 pairs of wires (BlueWhite/Blue, OrangeWhite/Orange, GreenWhite/Green, BrownWhite/Brown) from the patch panel (the thing you showed in the picture)
It looks like you've got plenty of wire there to work with. Instead of crimping an RJ-45 plug directly on to the wire (and definitely DO NOT just twist the wires together), I would recommend punching the wire down to a surface-mount RJ-45 jack like this one.
You'll need a punchdown tool like this
As far as the jack in the office, You'll need to replace that too. You'll probably need to replace the wall plate as well.
Edit to make more clear
Only IF you have only 2 pairs of wires in the office
Then punching down the RJ45 jacks is a bit trickier. You still follow the [TIA-568B standard] (http://www.ertyu.org/steven_nikkel/ethernetcables.html) but you leave the Blue and Brown wires out (Pins 4,5,7 and 8).
It's going to be a bit confusing because the colors of the wires won't necessarily match the chart. Just make sure that you punch down each end of the cable the same way. Remember, you'll only be punching down pins 1,2,3 and 6.
Hope that helps. Good luck! :)
Damn I didn't see the second and third pictures duh! So if you use that panel I showed you from amazon (or one like it, there's a lot of wires there) this may be a better choice.
https://www.amazon.com/TRENDnet-Unshielded-Wallmount-Compatible-TC-P24C6/dp/B0000AZK72/ref=sr_1_7?keywords=patch+panel+wall+mount&qid=1550278079&s=gateway&sr=8-7
This panel will work with cat5 or cat6, I can't tell what type of wiring you have there but you'll need that
You'll also need some way to mount it on the wall, I used one of these:
https://www.amazon.com/Tripp-Lite-Hinged-Bracket-N060-004/dp/B000E887XU/ref=sr_1_4?keywords=patch+panel+wall+mount&qid=1550278079&s=gateway&sr=8-4
Now with the patch panel, you don't need to put ends on the wire. You use a punch down tool and they go into little clip type things. It makes more sense if you look at the pictures. Here is a punch down tool:
https://www.amazon.com/TRENDnet-Punch-Krone-Blade-TC-PDT/dp/B0000AZK4D/ref=sr_1_5?keywords=punch+down+tool&qid=1550278185&s=gateway&sr=8-5
you're gonna need some patch cables to run from the patch panel to a switch. You're also gonna need a switch down there to connect all the ethernet cables together.
To mount the switch, you're gonna need a rack mount (to look the nicest, and a 19" rack switch).
A nice mount I used is this: https://www.amazon.com/NavePoint-Vertical-Mountable-Server-Hardware/dp/B01M151AOJ/ref=sr_1_4?keywords=vertical+rack+mount&qid=1550278400&s=gateway&sr=8-4
and then a switch, something like this (which I picked more or less at random) https://www.amazon.com/Linksys-LGS124-Rackmount-Unmanaged-Enclosure/dp/B00H1OQBLA/ref=sr_1_3?keywords=rack+mount+switch&qid=1550278467&s=gateway&sr=8-3 will do the job quite well. It's a gigabit unamanaged switch. You can spend a lot more if you want to, but this will probably do the job.
So from there, you need a cable from switch to that box in the first picture with the ethernet ports on the back.
That will give you wired internet in the whole house. Adding access points from there is trivial.
I know it's a lot of information, feel free to ask anything.
Edit: That verizon box in picture 3 looks like it might be more than just a modem, it might be a modem/router. If that's the case you can plug that into the switch. But if it's just a modem, that won't work even tho the ethernet port will physically connect. The best way to tell is that if it only has one ethernet port, then it's just a modem, if it has more than 1 then it's a modem/router.
I agree, build you own kit. Below is my take. Know that some of those tools are not for every day use in networking, but who can resist getting more tools? Also, if you get all of these I realize it will be over $200. So, just use this list as a guide not a definitive list.
BAGS
ETHERNET TOOLS
SCREWDRIVERS
PLIERS and WRENCHES
POWER
MISC
SUPPLIES
https://www.amazon.com/Platinum-Tools-15015-Jacket-Stripper/dp/B000FI2RVC/
Best stripper ever made. Put it on. Spin twice one way, once the other way. In my 10 years of using mine, I have never had it even scratch one of the pairs, but it cleanly cuts through even thicker cat6a jacket.
Pair that with this, and a good set of electricians scissors and you are set.
https://www.amazon.com/TRENDnet-RJ-45-RJ-12-RJ-11-TC-CT68/dp/B0000AZK4G
Not at all, making Ethernet cables only require a crimping tool and stripper for the male ends, and a punch down tool for the female ends. I personally use this crimper stripper combo, and I find that it works quite well.
I'm really sorry you've lost your fingers. That's so horrible. I myself work in a shop using powertools on a daily basis so I know the risk and how easily it can happen, it's one of my greatest fears and I wouldn't wish it on anyone. I hope you're coping alright all things considered.
There are definitely resources out there for you and people who can help. Here is one, I know there are more out there. I think there's one in particular I couldn't find.
Here's a list of a bunch of .stl databases.
Here's another list.
There's probably some overlap in those but that should help. I googled 'list of 3d model repositories' to find those, you may find more with similar searches like '.stl databases'. Add 'medical' or 'prosthetic' in there too, combine them and you should find some helpful search results.
There are also places online you can pay people to print stuff for you. But honestly if you find a model that you think works for your hand situation, please pm me! I would love to print it for you and send it to you probono if you want something from asap until you can print your own (I imagine you probably will have alterations you'd like after the 1st attempt) after you've figured out your printer. I'd be happy to help you get started as well if you have any questions at all. I have gone through the initial learning curve myself for about 2 years now so I know what you're in for challenge-wise. Check out the r/3dprinting subreddit, there's a lot of helpful folks over there, there also might be a specific subreddit for your exact printer. Yep, just checked, I believe it's r/MPselectMiniOwners. I've also gotten lots of help from 3dprinting discord channels (namely '3dprinters') Discord is a chat server program incase you're unaware.
Tools and materials wise, you will need only a few basic hand tools and filament. PLA will probably do just fine for your situation (you can use more durable filament later, PLA is just the easiest to work with and best for prototypes. Hand tools that I use are a metal spatula like these, and a pair of snips like these. I also regularly use 99% (highest % is best) isopropyl alcohol to clean my printbed surface. Also get a nice gluestick to help print adhesion to the printbed surface if you run into adhesion issues. That's about it, I have other tools and stuff I use but those are my most frequently used. You might want to get a decent set of hex head wrenches these are the ones I use, they work a lot better than allen 'L' style hex wrenches for working on your machine. That's assuming your machine uses hex head nuts though.
Also, Fusion 360 is the program I'd recommend looking into if you're trying to do your own modelling. It's actually pretty easy to learn, I used a site called udemy.com which offers cheap lessons (~$10 a course sometimes cheaper) that are very helpful. Fusion 360 is free for hobbyists.
Seriously though, please don't hesitate to pm me, I'd love to help you out if you're interested in that. :)
My gf found a pair of those Fiskars scissors at one of the crafty stores around here. Changed my wick trimming life.
One other thing that changed my rebuilding life that you're missing in your list, however. Flush cutters.
http://www.amazon.com/BeadSmith-410-Micro-Shear-Flush-Cutter/dp/B000IBOOWQ
Probably flush cutters like these and a set of files to smooth the cut areas are your best option.
I just started after 20+ years, literally got my stuff yesterday in the mail. I decided to go warhammer 40k, space wolves.
I read alot before I made any decision, these two links helped me a bit:
http://www.reddit.com/r/warhammerFAQ/comments/1nzxps/the_definitive_guide_to_getting_started_in/
http://www.reddit.com/r/warhammerFAQ/comments/1nzzag/the_definitive_guide_to_getting_started_in/
From a painting perspective I started with these:
http://www.reddit.com/r/warhammerFAQ/comments/msf23/guide_to_painting_warhammer_models_part_i/
http://www.reddit.com/r/warhammerFAQ/comments/mtz5u/guide_to_painting_warhammer_models_part_ii/
I also watched a TON of painting tutorials and product reviews on youtube.
That being said, here's what i've got so far:
Brushes:
Windsor and Newton Series 7 size 00, 0, 1
Army painter wargamer regiment - for base coating stuff
Paints/Modeling Materials:
I went with citadel b/c Im following the codex color scheme. GW has paint bundles for the type of army you are building. Many others use Vallejo and reaper paints as well.
Green stuff/liquid green stuff - I need to buy this to fill in some gaps I have in my models.
Tools:
Xacto knife and blades
Micro clippers - http://www.amazon.com/Xuron-410-Micro-Shear-Flush-Cutter/dp/B000IBOOWQ/ref=sr_1_3?ie=UTF8&qid=1427198666&sr=8-3&keywords=micro+clippers
There are many other tools you can get, depends on how far you want to go. Hopefully it helps.
On the miniatures wargame? video games? or lore?
I'm going to assume the miniatures tabletop wargame since that's the main focus of this sub...
There are many ways to enjoy the hobby. That's probably the most important thing to realize at first. For most people Warhammer is a hobby, not just a game you pickup and play. There are a few board game like games in the warhammer pantheon that are less of a full blown hobby, but still require some model building before play. For the most part Warhammer (or tabletop wargaming in general) becomes a full on hobby that takes a good amount of free time. That's the point of a hobby really, to enjoy your free time doing something other than just mindlessly watching TV.
First thing to do is decide which of the many Warhammer games you want to play. For you, this is likely easy, as you have a friend trying to get you into it.
After that, you'll want to decide on a faction to play within the game you friend is playing. Examples are Space Marines, Daemons, Orks... To decide you'll want to look at the model ranges and read a little of the lore/story behind them. Pick whichever one calls to you, whichever seem "cool."
Once you've decided on a faction, you'll start small. Assembling and painting a single box to see if this is enjoyable for you. Pickup either a single starter box that includes your faction or a "Start Collecting Box".
Startup costs are not insignificant as there are tools and supplies you'll need. But once you are going the main supplies you'll need are expanding your paint collection and replacing brushes.
Blackspray primer to prepare the models for painting. Inexpensive Rustoleum or Krylon from a hardware store/walmart works well for your first set of models. Stick to White or Light Grey if you plan to use the new easy to use Citadel "Contrast" paints. Don't forget a mask to protect you a bit from the fumes of spraying the primer and later the varnish......
If you are less into the hobby idea, but still want to play some tabletop games with Warhammer miniatures, look at the Warhammer Underworlds line. it plays like a mix of miniatures game, deck building, and boardgame. But the models are already pre-colored plastics and push to fit, so no glues or paints needed to play. Just clippers.
http://www.amazon.com/Xuron-170-II-Micro-Shear-Flush-Cutter/dp/B000IBSFAI
Best side cutters money can buy, IMO. I used to work at a plastic injection molding company as a machine operator and these blue-handled Xuron cutters were the standard tool for cutting and trimming parts fresh out of the press.
Well, if you can use the lab and it has a scope in it then you just scored big time.
As far as $100. I would get:
(amazon links for convenience, use any supplier you wish)
EDIT: Light bulb socket, 100W + 60W real light bulbs (not the hippy engery saving kind), electrical outlet - these are for making a dim bulb tester.
All I can think of right now.
I'm surprised no one has mentioned WinPE... Go find a guide on how to create a bootable WinPE 3.0 image with all the tools. It's immensely useful for changing boot partitions (bcdboot.exe) and capturing images (imagex.exe).
Also snips/shears. Like these ones:http://www.amazon.com/Xuron-170-II-Micro-Shear-Flush-Cutter/dp/B000IBSFAI/ref=sr_1_8?ie=UTF8&qid=1323835862&sr=8-8
I don't ever make enough custom cables to bother with much more than the standard cheapo. The mechanics of crimping are pretty simple. Find a brand name tool with a life time warrenty or just buy a couple $8 cheapos.
https://www.amazon.com/UbiGear-Crimper-Connector-Network-Crimper315/dp/B008UY5WL0/ref=sr_1_2?ie=UTF8&qid=1487354206&sr=8-2&keywords=cat6+crimper That little yellow tool or something like it is the deal breaker for me when working on ethernet. (I assume we are talking ethernet.)
Thanks for explaining. 1000ft of cat5e, a bag of connectors (and covers) plus the crimping tool and tester
Here are the links for exactly what I bought.
SolidLink CAT5e 1000ft Premium... https://www.amazon.com/dp/B019POIH2E?ref=ppx_pop_mob_ap_share
UbiGear Cable Tester +Crimp... https://www.amazon.com/dp/B008UY5WL0?ref=ppx_pop_mob_ap_share
Three Pack of Your Cable Store 15... https://www.amazon.com/dp/B01LYLGWSY?ref=ppx_pop_mob_ap_share
Man, Amazon does not make it easy to search your order history. At least not when you order as much as I do. But I found it:
http://smile.amazon.com/dp/B008UY5WL0
Mora companion is alot of bang for the buck.
If you are looking for a knife, head over to a site like this and just check out their sale/clearance blades. I linked to a stainless steel one that has a good shape for cleaning fish.
If he really is a knife guy, then he will have personal preferences, so a blade might not be the best.
I would suggest picking up a Mora HD Companion (~$20 with sheath) which is my all time favorite outdoor blade. A Custom Strop (~$45) there are a lot of custom makers of those here (see other comments) and a sharpening system (If he doesn't have one, a Lansky is an excellent field sharpener for ~$40, otherwise a 1k/6k stone for ~$30. )
Let's see...
http://www.fedtacticaldirect.com/Kershaw-Camp-10-1077_p_49809.html
Kershaw Camp. Great kukri style blade on a budget that performs excellently.
http://www.bladehq.com/item--Kershaw-Cryo-Spring-Assisted--11101
Kershaw Cryo. Hinderer design for a cheap price! Small blade, but feels big in the hand. The Cryo 2, the larger version, will be coming out soon.
http://www.amazon.com/Mora-Made-in-Sweden-511/dp/B004GAVOUU/ref=sr_1_2?s=sporting-goods&ie=UTF8&qid=1372063610&sr=1-2&keywords=mora
http://www.amazon.com/Mora-Companion-Heavy-Duty-Knife/dp/B009NZVZ3E/ref=sr_1_3?s=sporting-goods&ie=UTF8&qid=1372063610&sr=1-3&keywords=mora
Moras. 1095 carbon steel, strong and used to do a lot of good things in the woods. Very tough, very sharp, very cheap.
At higher prices, the BK2
http://www.amazon.com/Ka-Bar-Becker-BK7-Combat-Utility/dp/B001IPMG8K/ref=sr_1_2?ie=UTF8&qid=1372063915&sr=8-2&keywords=bk2
http://www.amazon.com/Ka-Bar-Becker-BK2-Campanion-Fixed/dp/B001N1DPDE
And of course, the tried and true classic Kabar
http://www.bladehq.com/item--Ka-Bar-Short-USA-FightingUtility--16358
A few to get you started, though, with knives, you generally get what you pay for. Generally, you'll want to figure out exactly what you want in knives, especially in how you use them to find the best deals and blades.
Collecting knives is an expensive habit that ends up going into 500 dollars knives and 1k customs. ;) Budget and collecting don't mix!
It's definitely enough for a nice knife, though you might want to go a bit higher for a great knife. The KaBar BK2 is actually designed with things like batoning (hammering the knife through wood as a kind of faux hatchet using another piece of wood against the blade of the knife as the hammer itself) or chopping. It's a bit over $60, currently available for $69 to be precise, but as long as you don't flat out abuse it (prying heavy things, for example) it'll serve you well and quite possibly for the rest of your natural life.
At a lower price, you can get the Condor Bushlore, which at $35 is a perfectly valid choice that will serve you well indeed.
For an even lower price yet, the Mora Heavy Companion is from one of those few cheaper knife companies that does incredible work. I wouldn't baton with it, honestly, but even if you did it'd probably hold up just fine.
At a more expensive range, the Ontario Rat-5 is an amazing bushcraft knife. The Fallkniven Pilot Survival Knife is also an amazing knife. The Benchmade Bone Collector is spectacular knife made in D2 tool steel, one of the better steels available at that price. Another amazing knife is the Spyderco Bushcraft made in O1 tool steel. Finally, the Benchmade 162 is a pretty amazing knife.
One thing you'll notice about all of these knives with the exception of the Pilot Survival knife and the BM 162 is that they're all carbon steel knives. Carbon steel is a lot tougher than stainless (with a few very, very rare exceptions I'd never trust a long knife to be stainless steel) with the trade off of being a lot more of a hassle to take care of, since it needs to be regularly cleaned and oiled.
If you want a fire starter, carry a magnesium fire starter. With the carbon steel knives, you can probably strike it against the back of the blade to create the sparks you'll want and if not (like with some of the coated ones) you'll be carrying the striker anyway.
For sharpening, you'll want to get a decent sharpening setup and start stropping. A couple of easy sharpening systems would be the superior Spyderco Sharpermaker (usually available on Amazon around the $50 mark) or the Lansky Sharpening system which while cheaper isn't as good. You could take the time to learn how to free hand it, but most casual users don't care that much because it takes a long time to get proficient at freehand sharpening. Stropping is running the blade against something like smooth leather (usually smooth leather, actually) to remove burrs along the blade of a knife made by use and sharpening and the restore a blade to a better edge without removing metal. Stropping allows for a level of sharpness unachievable by sharpening alone and extends a knife's lifetime by allowing sharpness to be achieved for longer without removing metal from the blade. To learn how to strop, watch videos on YouTube or check out guides from the sidebar of /r/knives.
Finally, if you want a whistle, just carry a whistle. If you want a mirror for signaling, carry a small signaling mirror or mirror polish the knife you buy (a process where you sand the blade with increasing grit level sandpaper until it shines like the sun and you can see yourself in the blade).
If you have any more questions, feel free to ask.
Have you seen the price on some of the "specialist" versions? They're outrageous.
Here's two almost identical blades, but the "bushcraft" has a blackened finish and different handle for 3x the price. Any of the moras besides the standard old versions are all overpriced from what I've seen.
Morakniv Companion Heavy Duty Knife with Sandvik Carbon Steel Blade, Military Green, 0.125/4.1-Inch https://www.amazon.com/dp/B009NZVZ3E/ref=cm_sw_r_other_awd_FY61wbG6GZAKF
Morakniv Bushcraft Carbon Black Tactical Knife with 0.125/4.3-Inch Carbon Steel Blade and Plastic Sheath https://www.amazon.com/dp/B009O01H0Y/ref=cm_sw_r_other_awd_c061wb6NWB39Q
Mora, Mora, and then another Mora. You can find the Heavy Duty carbon steel version for 15 dollars if you watch for deals. Seriously. Why even bother sharpening them, at that price they are almost disposable. But then there's the fact that they are great knives, so yeah sharpen that thing and use it forever.
If you don't like it, or want something different then you are only out $15. It's not a matter of why, but why not.
So get this and this, that's way under your budget. I got the two-pounder and I love it.
If you wants tool to get out of a car buy a car hammer. If you want a knife for camping get a fixed blade like a Mora Companion.
This is the old Mora Bushcraft Black.
I bought this from Amazon for $45, now it's $52. The new one comes with a firesteel and a holder attached to the sheath, and even that costs $66.
I really like my mora with the fire steel on the sheath. Amazon shows its for $65 now, but I think it's cheaper at times. Mine was a gift for Christmas that a buddy got me and I think it was on a great sale. Super sharp, thick enough blade for prepping fire wood and shaving kindling.
I ended up getting a tek-lok from blade tech to attach the knife to my belt more securely.
Of course the $15 moras are a super great deal too. Heck, get a thicker one for your fire wood needs and a smaller one for your carving desires.
Morakniv Bushcraft Carbon Steel Survival Knife with Fire Starter and Sheath, Black https://www.amazon.com/dp/B00BFI8TOA/ref=cm_sw_r_cp_awd_pdW9wbVAXQSEE
$150 is plenty of budget for a good knife. This one is just slightly over that budget but will last you the rest of your life. It's kind of my dream survival knife.
The Fallkniven F1 is very popular as well and right in your price range.
Currently I use this knife which is also very good.
If you want to go a little less expensive still, Becker makes some good ones such as the Bk16. I know the Becker doesn't look anything like "hand made", but I have the BK2- I used paint remover to take the black coating off the blade, replaced the plastic handles with micarta and stained it to look more like wood, and built a leather sheath for it. It's a beautiful knife now. Too bad it's so goddamn heavy.
You could also go with something like the Mora bushcraft. I have that one also, very decent knife.
You could even just get a regular Mora or a Condor bushlore which are even more economical options.
Got a blade material are you looking for? (stainless steel or carbon)
Blade profile? (drop point, tanto, spear, clip)
Blade grind? (Flat, Saber, Scandinavian, or Hollow)
Off the top of my head:
Becker BK16 - flat 1095Cro-Van
Esee Camp Lore PR-4 - Saber 1095
Esee 4P - flat 1095
Esee Izula - flat 1095
Morakniv Bush Crafter - Scandinavian 1095
Morakniv Garberg - Scandinavian 14C28N
Cold Steel Master Hunter - Flat VG1 in San Mai
​
FYI The ESEE brand has perhaps the best lifetime warranty of fixed blades. Return and they will replace with no questions asked policy. It is also transferable so they do tend to keep their value over time. Tactical Intent is a verified seller on amazon. At that price range you can get a pretty great knife.
Hope this helps!
I spend a lot of time in the woods and have been very happy wth this one http://www.amazon.com/Morakniv-Bushcraft-Carbon-Survival-Starter/dp/B00BFI8TOA look at reviews around the web. The price is also great. Here is a good review http://rockymountainbushcraft.blogspot.com/2012/11/review-mora-black-carbon-bushcraft-knife.html?m=1
It's not difficult, you just need the tools to pull your current handguard off and remove the barrel nut (because most handguards comes with their own proprietary barrel nut). Then you'll thread on your new barrel nut, tighten it down to roughly 30ftlbs, install the new handguard, and you're done.
You'll probably need an AR15 armorers wrench, anti-seize/grease of some sort (I like Loctite Anti-Seize, but some people have heartburns over what to use. Something is better than nothing), and a torque wrench. And probably also another inch-lb torque wrench.
As for the quality of the handguard, I've never used that one, so I can't speak for it.
In my experience, 85% of "gunsmiths" are FUDDs. I've had some who refused to remove the pin & weld on a *stripped* barrel (it was not even connected to an upper, even though that wouldn't have made a difference because the lower is serialized/the firearm) because it would have violated the NFA. And he was extremely popular in the area and a complete koala-dick prick.
Meanwhile, I know a guy who supposedly took an AK to have the barrel chopped when it was still connected to the serialized receiver... and technically that'd make the gunsmith the maker and not the dude who had done the Form 1.
I know it's not what you're looking to do, but I strongly suggest you treat yourself to some self-education and invest in a torque wrench ( https://www.amazon.com/gp/product/B00C5ZL0RU/ref=ppx_yo_dt_b_search_asin_title?ie=UTF8&psc=1 ) and also a do-all tapco wrench (yes Tapco, but the wrench is GTG: https://www.brownells.com/gunsmith-tools-supplies/rifle-tools/wrenches/ar-15-m16-armorer-s-tool-prod54530.aspx Sadly, amazon doesn't have it atm). With these two things, you will be able to master your upper receiver/barrel group life.
Then, YouTube has all the videos you need on replacing the barrel https://www.youtube.com/watch?v=1NjNEQr4lCM&list=PLmovdvtE7X-iTinH_f2fTsVW6CWYMPcln&index=4&t=0s It's very much not that difficult.
It's worth it, I promise. You'll pay that much anyways just for one barrel change. And you can do it yourself, for the first time, in just 2 hours to account for the hemming/hawwing. Afterwards, with experience, it takes ~20min (removing the handguard, replacing, etc.).
It's good to have for a lot of jobs. I have this one, works great.
https://www.amazon.com/gp/product/B00C5ZL0RU/ref=oh_aui_search_detailpage?ie=UTF8&psc=1
Torque wrench
Socket set
Hex sockets
1/2 inch Ratchet
1/4 inch Ratchet
Combo wrench set
Calipers
Chain tool
Pretty close to everything you'll ever need to work on a bike, besides specialty tools. Buy or borrow other stuff when the issue comes up! You can do it!!
Edit: Added calipers.
I bought this set of Narex chisels off amazon when I first started getting into wood working and they have been great for a couple of years now. They sharpen up really well and they are perfectly strong. I would definitely recommend to beginners even if they are in the pricier end of beginners sets.
*Editted for formatting the link
My father in law gave me a set of Narex for Christmas last year. They have been a great set of starter chisels for me. This is the set I have:
Narex (Made in Czech Republic) 4 pc set 6mm (1/4"), 12 (1/2"), 20 (3/4") , 26 (1 1/16") mm Woodworking Chisels 863010 https://www.amazon.com/dp/B00GPC74ZQ/ref=cm_sw_r_cp_apa_i_lbgwCbF0AGCB0
While I don't own these, Narex chisels get a lot of good press in this sub.
I was able to find a large set of Sorby chisels (18 of them I think it was, including a 2") on Craigslist for $100, so looking carefully online might be another option to find some good chisels for a bargain, but as always, buyer beware. :)
As /u/jakkarth points out, you'll need to tune and sharpen any chisel you get your hands on, and Paul Sellers videos are very informative and approachable.
Good luck!
Hard to beat Narex for the price.
Good set with the basics
A little nicer set
Planes are harder on a budget, the cheapest that is pretty likely to be good out of the box is the bench dog, but I'd try to find a stanley #5 to restore first.
For fine woodworking hand saws, pretty hard to beat a japanese ryoba and dozuki on a budget.
See this comment for a budget sharpening setup for the chisels and plane irons.
I have removed many of those types of hex heads. You need to go to a hardware store and purchase a drill bit called an ez-out. Here is what they look like
Snag a SpeedOut kit off amazon or your local tool place
Here is a good link that really explains everything well.
http://www.ecigclick.co.uk/ultimate-rda-guide-for-beginners/
Some pointers, get a building kit, they are life savers, I would however recommend a different pair of wire cutters, this is the pair I use, and they are phenominal:
http://www.amazon.com/Hakko-CHP-170-Stand-off-Construction-21-Degree/dp/B017ODDPNO/ref=sr_1_1?ie=UTF8&qid=1463530354&sr=8-1&keywords=flush+cutter
I use Koh Gen Do cotton, they spelled it wrong, but it's my go to. I just like it. Hope this helps
Hey, would you mind taking a look at my Audi? The sunroof won't open.... Kidding, of course.
For future use, and for all the techs out there, this is the ideal tool to cut and trim zip ties. They'll never have that irritating little sharp tang again, and you wont accidentally slice the wire you're working on:
https://www.amazon.com/Hakko-CHP-170-Stand-off-Construction-21-Degree/dp/B017ODDPNO
I use these. They're cheap, cut really well, and are just small enough to fit between my coil and the post. They're one of the best investments I've ever made in terms of RDA tools
> Thanks in advance for answering my questions.
I purchased it last August. (781 hours logged) It's almost litterly been printing out of the box since day one. The only issue I had out of the box is that the one screw on the build plate got bent as a result of the 2 free spools bouncing into it. I ordered a box of them from McMaster and had it fixed by the end of the week. I contacted Lisa on their google chat form and from what I understand, they now come with the screw as a result of my support ticket. This was an annoyance yes, but I've had more issues with my reprap and that costed me more than this pritner when I bought it. (I originally had a Makergear Prusa)
Most: I love the fact that it prints 100% of the times I try to print something. I rarely, and I mean RARELY have a failed print. I love that I can hit print before I go to bed and wake up to a completed part in the morning.
Least: This is small, and it took a while but I have since out grown the build platform (9x6x6 inches). I recently ordred an 8x12 plate from McMaster and that arrives on monday and we'll see how that works. (PSA this requires removing one of the extruders - if you want more info on this let me know)
Yes, no issues. Just close up the printer with the included panels.
No, I use a glass build plate and a thin coat of purple glue stick. I then spritz water on the plate before each print. I never have a sticking issue and I never have warpage. I personally prefer PLA though since Hatchbox has come to light and makes GREAT PLA
Like I said just above, I use a glass build plate, so I haven't had any warpage issues with the bp. Leveling the bed is a bit of a challenge but I'm fussy about it and I want it within 0.0005 or less so it takes me a while. The reason I'm fussy is because I've only had to level the bed 2 or 3 times since owning it.
The first was when I got it
The second was when I added the glass build plate
The third was when I removed one extruder and added an aluminum carriage.
That's it. It never lost it's level and it's gone through 3 moves (like I moved apartment to apartment)
The only experience I had was with that screw initially. I contacted Lisa on their Google Chat forum and she handled it mostly. Sadly, it wasn't as 'perfect' as I wanted since their solution was to send the printer back instead of sending me a new screw. Never the less, they did try to help on the matter and told me how I could go about getting money for the screw if I so desired. In the long run, it's a screw and I just ordered them from McMaster. I have zero regrets from it and I think I know my printer a bit beter because of it.
single extruder carriage (PSA: their single extruder block is not FF compatible.
My Thingiverse for example prints
Some things I would buy shortly after getting the printer:
Spare Extruder fan : I tend to slip and put a screw drive in the path of this, shattering the blades. If you're a clutz like me, get it. I've needed 4 so far. ::hangs head in shame::
Glass Build Plate : Best purchase I've made for my FF. Works great, easy to install and use. Also get thermal sheets and purple elmers glue, and print the spacer found on my Thingiverse page under "Flashforge Upgrades". Also get a spatula, and dikes
Simplify3D : A lot people tend to spend $X,XXX on a printer and then try to use free software with it and complain when it doesn't print right. To me that's like buying a car without tires. A Corvette ain't shit without a decent set of tires. It's kind of pricy compared to free, I know, but at real CAM programs (which is what this basically is) cost $8,000 or more. It truely is a great printer program and I wish I had purchased it much MUCH sooner than I had.
Last and most importantly, get the an active cooling fan. I originally printed this, and purchased a 12v power supply and added some fans to it. I have since moved on to the offical one from FF. It's not as good but I haven't really ran into an issue. If I had to print from my right extruder, it would be an issue though. What I liked about it, is that it's a plug and play added on. No "modifications" needed to added.
TL;DR / Closing thoughts: I would buy this printer again in a heartbeat. ESPECIALLY if they came out with one similar to the Replicator 2 with the 11.9" build plate. Instead it looks like they went a different way judging by CES but oh well, there's always next year. Further more, I think this is a great entry level printer for someone looking to have a printer help with projects and not be one of them. That doesn't mean you can't mod it or upgrade or whatever, it just means you don't have to if you don't want to.
Hope this helps and answers any questions you might have. Feel free to ask more though!
Let me let you in on a little secret: http://www.amazon.com/gp/product/B017ODDPNO?keywords=hakko%20flush%20cutters&qid=1449088184&ref_=sr_1_1&sr=8-1
The HF are good for the money, no doubt, but the Hakko are better.
You're really going to want rotary tool like a dremel. Power drills don't spin fast enough to make good use of the bits.
You can also use a pair of flush cutters to snip those off. You specifically want flush cutters, may be labled as flush side cutters, and not regular side cutters. They cut lower than the regular ones and fit into the space better.
The tool should be available at any craft store for <$15. Do not cut axles with the flush cutters as the metal is much harder than the base metal an can damage the tool.
The metal on the base is rather soft so these work fairly well. It take some finese to do it with out having to clean anything up though.
I believe its a credit card size function tool that you store in your wallet. I don't know OP's brand but this one is popular but if you're looking more at what OP has then this one looks pretty similar. I haven't tried either so I would look at the reviews before deciding to buy.
I have and like my swiss card, it isn't really credit card sized IMO, but it has really useful tools, just not that fit in your wallet, I keep a $1.50 card knife in my wallet that comes in handy a lot.
http://www.amazon.com/SE-MT908-Function-Credit-Survival/dp/B000Q06LI4/ref=cm_lmf_tit_3/177-4685031-0787254
That is pretty much exactly what I have, I don't use the blade function often but the wrench, bottle cap opener and saw have all come in handy in a pinch.
I don't normally recommend cheaper products but this one has worked really well.
If your needing more blade oriented card knives then one of these could be recommended:
http://iainsinclair.com/products.php
But if you like the boker card knife that might work, can't speak from experience on those though.
Survival Tool
Fire Starter
Energy
Water Bottle w/ Storage
I don't know much about Burning Man but those sound useful.
> un outil "11 en 1 Spécial survie" qui vient de Hong Kong à 1€ port compris http://www.amazon.fr/gp/product/B000Q06LI4/ref=as_li_tl?ie=UTF8&amp;camp=1642&amp;creative=6746&amp;creativeASIN=B000Q06LI4&amp;linkCode=as2&amp;tag=payrecom-21&amp;linkId=WPNOEJQAMHEU47GR
A mon avis, le gars qui utilise ça y laisse un doigt à chaque fois qu'il s'ouvre une bière. Si c'est de la bonne bière, ça vaut le coup, mais perdre un doigt pour une heineken, ça le fait pas.
heres one $1.30 free shipping
or $1.40 free shipping
I picked up this on sale on day. Still use the big one from this set more often than anything else, but it is fun to have.
Fuck lock picks.
one of these or this, and a bolt cutter and you're set.
This oughta do the trick.
Vice grips work better than punches in my opinion. Just make sure to electrical tape up the jaws. For about $50 you can get these which have flat jaws that stay parallel to each other and make roll pin installation the easiest part of an AR build.
https://www.amazon.com/Knipex-8603250-10-Inch-Pliers-Wrench/dp/B000X4OG94
These ones won't
These seem to be becoming the new standard.
http://www.amazon.com/Knipex-8603250-10-Inch-Pliers-Wrench/dp/B000X4OG94/ref=sr_1_3?s=hi&amp;ie=UTF8&amp;qid=1453173766&amp;sr=1-3&amp;keywords=pliers+knipex
I still use regular style channel locks, when lose or break the sets I have I'll probably upgrade.
If we are talking about EDC on your person... you may find that a Kershaw Select Fire is a "good enough" compromise between a Leatherman and repair kit.
It has a standard 1/4" bit driver, and has built-in slots to store four bits of your choosing. That makes it easy to mix and match any bits you want, and you can replace them for cheap at the hardware store rather than buy expensive replacement bits for a Leatherman.
The ifixit kits are cool, I have one... but it isn't something I would carry around in my pants all of the time.
Honestly how does a person even convey the sheer ability of Knipex pliers wrenches? I can never work without them now. I have the 6/7 1/4/10" and love them all. I think I am going to get another 6" for the glove box. I ran across this the other day, have not bought it yet but I thought I would share: https://www.amazon.com/dp/B002IVPKOU/?coliid=I2DBWNRFFC16BG&colid=1STK45ZF72T31&psc=1&ref_=lv_ov_lig_dp_it
Kershaw Select Fire. Man, does it come in handy.
I have a Kershaw is the most useful knife I owne. I'd take it over my leatherman surge, Victorinox tinker, or Sog power assist. Not for wilderness stuff but for stuff I do every day (mostly taking apart computers) and the blade is decent steel and long enough to be useful. I recently used it to help butcher a pig and I was able to do lots of skinning and cut through the sternum with the knife. I had to sharpen it after cutting the bone and it's a pain to clean but if I could only have one knife for the rest of my life it would be my Kershaw.
[This (Keshaw select Fire)] (https://www.amazon.com/dp/B002IVPKOU/ref=cm_sw_r_cp_apa_.6azybTTQWBH1) has easily been the most useful knife I've owned. The blade itself is good, not great, but certainly good enough for everyday tasks. With typical knives I found myself using the blade to do things that I should have just gone and grabbed a screwdriver for and would end up chipping the edge.
However if you just want something with a good blade I'd recommend [Kershaw Leek] (https://www.amazon.com/dp/B0009VC9Y0/ref=cm_sw_r_cp_apa_SlbzybWEZ68XA)
Kershaw Select Fire: http://www.amazon.com/gp/aw/d/B002IVPKOU/ref=mp_s_a_1_8?qid=1416936726&amp;sr=8-8&amp;pi=AC_SX110_SY165_QL70#
Morakniv Wood Carving 120 Knife with Laminated Steel Blade, 2.4-Inch https://www.amazon.com/dp/B004GATX62/ref=cm_sw_r_cp_api_FQH6BbJ0F936A
Basswood for sure.
https://www.amazon.com/Morakniv-Carving-Knife-Laminated-2-4-Inch/dp/B004GATX62/ref=sr_1_1?ie=UTF8&amp;qid=1501763648&amp;sr=8-1&amp;keywords=mora+wood+carving
Thats actually a good outlook. I started respecting knives more when i started carving. You could get a cheap mora carving knife and go that route. It teaches control and also is super fun.
https://www.amazon.com/dp/B004GATX62/ref=emc_b_5_t
You could go for the roadie. Its a slip joint but has a 50/50 choil. Youd get a scare but could likely prevent a complete closure on fingers.
https://www.bladehq.com/item--Spyderco-Roadie-Slip-Joint-Knife--26845
First of all, never buy a matching set of knives. Instead, buy a generic knife storage block, and fill it out as you need it. I have this one from Amazon and like it a lot.
For chef's knives, I'm really happy with the Kiwi knives I got from the Wok Shop. They're certainly no Henkels or Wusthof, but they're absolutely fantastic for the price. They see daily use in my kitchen, right alongside my $100 Global santoku. Get a real whetstone (like this) and learn how to use it, and you can get a really nice edge on them too.
Freehand and under $15 the Whetstone Cutlery 400/1000 Grit Whetstone is a nice starting affordable freehand whetstone.
Guided and under $25 the Work Sharp Guided Field Sharpener is a nice mini complete package that includes a 220 grid diamond plate for chip repair, a fine 600 grit diamond plate, 1000+ grit ceramic rod and a leather strop with compound.
You can also send the knife back to Kershaw for a free sharpening then just invest in a nice strop with compound to touch up the edge. Done properly you only need to send it back to Kershaw probably once a year if that.
Get you a good waterstone (or called whetstone) & watch a video or two on how to go about using it.
A lot of people like the double edge japanese saws on Amazon (the Ryoba ones). I have one and it works well, but I also have a table saw, circular saws and a band saw, hackzall.. etc.. so it doesn't get used often.
I'd recommend getting a decent #4 hand planer.. but not the cheap stanley one that makes you mess with two knobs to adjust the cut depth (it's hard to keep straight).
Little machinist square helps make sure blades are square to tables (also that corners are square) - https://www.amazon.com/gp/product/B005W0W34O/ref=oh_aui_detailpage_o09_s00?ie=UTF8&amp;psc=1
Also worthwhile to pick up a cheap kanna block plane, they work well for chamfering corners: https://www.amazon.com/gp/product/B071CF33BG
Pick up a good dual-grit sharpening stone for your chisels, and preferably a chisel bevel guide. You don't need expensive chisels to have them work well (they will hold an edge better though). Being sharpened well is the most important thing. Finish off your sharpening jobs with light strokes on a leather strop with some polishing compound.
I started practicing with one of these. Find some really old steak knives or chef knives. I had some steak knives that couldn't cut anything but butter, and if I threw them away I'd be happy to just be rid of trash. Knives you really don't care about.
Anyway, watch some videos and get to work on them with the 400 grit. You'll have to remove a lot of steel, but that's fine. You don't care about the knives so it's fine if you ruin them, which you probably won't. At some point you'll get a new edge on it and can move to the 1000 grit side to finish it off.
It's actually pretty easy and it doesn't take long to get the feel for holding an angle.
Chisels: Aiskaer White Steel 3mm 1/2/4/6 Prong DIY Diamond Lacing Stitching Chisel Set Leather Craft Kits(3mm) https://www.amazon.com/dp/B014549STU/ref=cm_sw_r_cp_apa_CRaSBbK7CG7MJ
Burnisher: YazyCraft Multi-Size Wood Slicker Leather Leathercraft Solid Wood Round Burnishing https://www.amazon.com/dp/B00IZAV998/ref=cm_sw_r_cp_apa_aSaSBbMVYTCE1
Exacto knife: X-ACTO #1 Knife, Z Series With Safety Cap https://www.amazon.com/dp/B005KRSWM6/ref=cm_sw_r_cp_apa_PSaSBbF4PTFBC
Edger: Kinee 7 in 1 Pro Stitching Groover and Creasing Edge Beveler,DIY Leathercraft Sets,sew & Crease Leather,Wood & Steel Hand Tool https://www.amazon.com/dp/B073F6WCBT/ref=cm_sw_r_cp_apa_GTaSBbESQHWPV
Glue:Fiebing's Leathercraft Cement, 4 oz - High Strength Bond for Leather Projects and More - Non-toxic https://www.amazon.com/dp/B003W0GFTU/ref=cm_sw_r_cp_apa_-TaSBbWHMVA13
Thread: Rugjut 8 Roll 8 Colors 150D Leather Sewing Waxed Thread Cords,0.8mm,Each of 33 Yards https://www.amazon.com/dp/B07BN8JMQ1/ref=cm_sw_r_cp_apa_aVaSBbM0KJ3E7
Total: my math says around 35 +-3$ which is not bad considering you will definitely need these tools. My kit was a waste of money even though it was cheaper.
I love painting the hero forge minis; sounds like you did yours in the new high detail plastic.
I've done a few of those recently and once you get them primed, it's not much different than painting die cast minis.
Give me a minute, I can link you to a comment I found explaining it in depth
EDIT: I'm just gonna paste it here. For reference, I,believe priming is coating it in a thin layer of paint to act as a base. Use black primer for darker results and white for lighter. Credit to u/pyrese
I love painting the hero forge minis; sounds like you did yours in the new high detail plastic.
I've done a few of those recently and once you get them primed, it's not much different than painting die cast minis.
Try to find the flexible sand paper sheets that are meant to be hand-used. I found them in Loews 3m brand, this is the exact type of sheets i use: https://www.amazon.com/3M-COMPANY-28320SB-UF4-320G-Sandpaper/dp/B00PPD1CYA/ref=sr_1_7?s=office-products&amp;ie=UTF8&amp;qid=1527015867&amp;sr=8-7&amp;keywords=sandpaper+320+grit+3m
I use these cloths on the LCD screen and the resin vat FEP sheet. After cleaning the resin vat FEP sheet and the LCD with paper towels, I give them a nice polish with the cleaning cloth to remove any other smudges or dust. Make sure to have a cloth dedicated to ONLY the LCD screen, as you want the keep the LCD screen pristine and free of dust and smudges.
You'll also want a print curing station to harden the prints once they have been cleaned. I bought:
I'm gonna copy and paste my comment from a similar post. I didn't add something like a 110 block to the list cause at that point I feel it's a bit ridiculous.
As an 06 (low voltage technician) this hurts me to see x.x there are other options for repair that would be much better than this current set up. Here's a few methods;
(https://www.homedepot.com/p/Ideal-Yellow-IDC-Connectors-25-per-Pack-85-950/100036034)
basically you put both ends of the cut cable inside color for color then use pliers to push the yellow button down. If you're able to trim the cable a bit then you could maintain the twist going into these connecters (the twist is important) and it'll be a fairly solid splice. I believe their also gel filled so the copper won't tarnish. It has some protection.
This method would add solid connections all the way through. Even though you experience a little loss at each jack, it would probably be negligible for home use. You'd just terminate the two Jack's and plug them in to one another.
One Cat5e jack and an Rj45 crimper tool that comes with Rj45 connectors (Ethernet plug ins) and a 4 pair tester you could use to verify you punched it all down correctly. The idea here is you'd plug the cable with the Rj45 termination directly into the Cat5e jack. It's similar to the last method, youll just have one connection instead of two.
Spend any more than that and you're better off just replacing the cable all together.
Keep in mind, I don't do these quick fixes professionally unless it's a matter of safety (a customer that deals with life safety calls, etc) and need to be up while replacing their data drop. The most ideal method would be to replace the cable entirely, but any of thes could work fine. Also leaves less of a headache for the next guy.
http://www.amazon.com/Xuron-170-II-Micro-Shear-Flush-Cutter/dp/B000IBSFAI
Those are what I use to trim my leads when I build my 454.
https://www.amazon.ca/Xuron-170-II-Micro-Shear-Flush-Cutter/dp/B000IBSFAI/ref=asc_df_B000IBSFAI/?tag=googlemobshop-20&amp;linkCode=df0&amp;hvadid=292954691968&amp;hvpos=1o1&amp;hvnetw=g&amp;hvrand=13078948668856573607&amp;hvpone=&amp;hvptwo=&amp;hvqmt=&amp;hvdev=m&amp;hvdvcmdl=&amp;hvlocint=&amp;hvlocphy=9000821&amp;hvtargid=pla-435531736464&amp;psc=1
Here's a big fat messy shopping list I made for someone a while ago. You might find it useful too.
http://www.amazon.com/Quickshade-Ink-Warpaints-Army-Painter/dp/B00HC8D80W
Amazon.com: Quickshade Ink Set Warpaints Army Painter
http://www.amazon.com/Pacer-Technology-Zap-Zap-Adhesives/dp/B00SXJJ2QI
Amazon.com: Pacer Technology (Zap) Pacer Technology (Zap) Zap-A-Gap Adhesives, 1 oz
http://www.amazon.com/General-Pencil-Company-Masters-Preserver/dp/B0009RRT9Y
Amazon.com : General Pencil Company The Masters Brush Cleaner & Preserver 2.5 0z. : Brush Soap
http://www.amazon.com/Army-Painter-Wargame-Starter-Paint/dp/B01BJ55UDQ
Buy Army Painter Wargame Starter Paint Set - PLUS Promo Undead figure
http://www.amazon.com/280715-American-Accents-Primer-12-Ounce/dp/B00KZ6LLZW?
Buy Rust Oleum 280715 American Accents Ultra Cover 2X Spray Paint, White Primer, 12-Ounce
http://www.amazon.com/TEKTON-6655-Needle-File-10-Piece/dp/B000NPUKYS?
TEKTON 6655 Needle File Set, 10-Piece
http://www.amazon.com/Xacto-X3311-Precision-Knife-Blades/dp/B0000DD1N4?
Buy Xacto X3311 N0. 1 Precision Knife With 5 No. 11 Blades
http://www.amazon.com/Most-Wanted-Wargamer-Set/dp/B007H4YR8S
Amazon.com: 1 X Most Wanted Wargamer Brush Set
http://www.amazon.com/Xuron-170-II-Micro-Shear-Flush-Cutter/dp/B000IBSFAI
Xuron 170-II Micro-Shear Flush Cutter: Wire Cutters
http://www.amazon.com/Milliput-Standard-2-Part-Hardening-Yellow/dp/B011BO9R5W
Amazon.com: 2 X Milliput Standard 2-Part Self Hardening Putty, Yellow/Grey
Edit: Of, and I used this guide for making my Thinner. http://www.reapermini.com/Thecraft/15 But I'm going to experiment more, because this is not perfect.
It looks like people have mostly got you started here in terms of supplies. In terms of tools though, this is what I keep in my rebuilding stuff (linking to Amazon just because its easier):
Other generic stuff:
You can now get flush cutters in blue too!
Yeah, I bought these:
https://www.amazon.com/gp/product/B000IBSFAI/ref=ppx_yo_dt_b_search_asin_title?ie=UTF8&psc=1
They work perfectly. It just takes a few seconds per switch. I'll clip the pins in a paper bag so they don't go flying when they're cut.
Not that exciting, I can guarantee you but still a sweet sweet freeby :
http://www.amazon.com/SE-MT908-Function-Credit-Survival/dp/B000Q06LI4
this multitool is pretty cool
I think this is pretty rad
Duct tape wallet! Had it for 7 years now. I used to constantly lose wallets until I got pissed and made this one.
I carry it in my front pocket and only carry the basics (CC, Passport copy, DL, Cash, and a Multi-Tool)
More useful, much cheaper, same size
Or less, on amazon.
[This] (http://www.amazon.com/gp/product/B000Q06LI4/ref=oh_details_o00_s00_i00?ie=UTF8&amp;psc=1) works for me and is always in my wallet, though it isn't carbon fiber.
This collapsible shot glass is really cool and only $2.28
http://amzn.com/B0042B36Q8
Also I keep this thing in my wallet at ALL times, and it comes in handy
http://amzn.com/B000Q06LI4
HAPPY BIRTHDAY!!
Surprise me! :p
this is what i am going to use.
Don't be afraid to dream a little bigger.
The ban hammer is ready.
>If it doesn't move and it should, use WD-40
Or a FUBAR deconstruction tool.
I like my Stanley FatMax Xtreme FuBar III
Someone mentioned making a bug out bag to me and I started an amazon wishlist just to keep track of it. At first it was MREs, water, firestarters paracord etc. Then knives. Then various machetes. Then I got on a khukri kick. Eventually I was looking at things like this monstrosity thinking it would be PERFECT for scrounging in the suburbs.
If you can't quite decide between a hammer or a crowbar you could always go with a fubar. been a depot goon for a while, and always wanted to grab it for the outbreak.
There's so many designs, it kinda depends what you are using it for. Something like a Fatmax FuBar is nice because the lumber grabber lets you pry on the board itself instead of between the board and something else. If you are just looking for a big ass crowbar, just wrap the shaft of the dewalt you have with some grip tape.
Demoing a whole structure like that, I'd probably be using a recip saw/ circ saw to chop it up into manageable chunks instead of trying to deconstruct it board by board.
Pencil, marker, clean rag. Kneepads, don't fuck around without knee pads you will regret it.
These in 7,10,12"
These are for when you have smooth surfaces/ new fixtures and you need them looking good. Crescent wrenches are fine but don't open up a damn.
http://www.amazon.com/Knipex-8603250-10-Inch-Pliers-Wrench/dp/B000X4OG94#
Same 7,10,12"
These are 100xs better than channel locks or any other plier on the market, look up reviews, spend the money you will be rewarded.
http://www.amazon.com/gp/aw/d/B000X4J2H0/ref=pd_aw_sim_469_1?ie=UTF8&amp;dpID=31LOSVBfTAL&amp;dpSrc=sims&amp;preST=_AC_UL130_SR130%2C130_&amp;refRID=1H2GD45SXC4HQERP5X1W#
Impact driver, drill, flashlight, sawzall (Milwaukee)
Stanley tape measure or just not a piece of shit, always have a backup.
6 in 1 screwdriver
You will lose the bits so but a decent/ inexpensive one
Torpedo level/ Plumbers grade level
It'll do both
http://www.amazon.com/gp/aw/d/B00BYFN4RG/ref=mp_s_a_1_2?qid=1462941320&amp;sr=8-2&amp;pi=SY200_QL40&amp;keywords=milwaukee+level&amp;dpPl=1&amp;dpID=41Ip481jzUL&amp;ref=plSrch#
Angle stop wrench/ dumbbell http://www.amazon.com/gp/aw/d/B002XFW328/ref=mp_s_a_1_3?qid=1462941252&amp;sr=8-3&amp;pi=SY200_QL40&amp;keywords=angle+stop+wrench&amp;dpPl=1&amp;dpID=31z9chR-rrL&amp;ref=plSrch#
Mapp gas turbotorch/ goss
http://www.amazon.com/gp/aw/d/B00D2ZW0SA/ref=mp_s_a_1_5?qid=1462941416&amp;sr=8-5&amp;pi=AC_SX236_SY340_FMwebp_QL65&amp;keywords=goss+mapp&amp;dpPl=1&amp;dpID=51Ynt7Fg1OL&amp;ref=plSrch#
That's my quick recommendation, those will be enough to get you into trouble.
Knipex for Lineman's pliers: (with or without crimper). Their grip and cutting edge are significantly better than any other brand I've tried.
Wera for screwdrivers: I recommend the XXL 3 set. For sale here.
I still like Klein for strippers. I use the Kurve everyday and the Katapult for wire with thick insulation like PV wire.
Fluke for your meter. Most people recommend the T5 for basic stuff, but the 323 has a proper clamp and removable leads for the same price.
Knipex Cobras for your channel lock style pliers. These are absurdly good and have saved my ass a couple times.
I also recommend buying a Knipex Pliers Wrench. I own a 7-inch and a 10-inch pair and they're way better than a traditional adjustable wrench.
Stanley newest Leverlock tape measures are just as good as Milwaukee's tape and less bulky for half the price.
Milwaukee's Fastback series are the best utility knives by a pretty wide margin. I use the compact one, but that's a matter a preference.
I'd suggest a Knipex Pliers Wrench (expensive, but very nice to use for a lot of projects) and some spring punches and a head lamp to keep both hands free to use all your other tools.
Eh. These are better.
No problem, in no particular order of relevance, a few other great ones to consider are:
Knipex Pliers Wrench - My single favorite tool ever
Felco C7 Cable Cutters - You can usually find these used and sharpened for $20 on eBay
Dualco Grease Gun - Your bike needs grease, this makes it easy
Motorex 2000 Waterproof Grease - Can grease be beautiful? I think so. Exactly like the Dura Ace grease
Wera Hex+ Keys - I know you have some already, but the slightly scalloped faces of these "hex plus" keys really do allow you to remove very stuck fasteners without stripping, and I have even removed bolts stripped with standard keys
They have 7, 10, 12 on amazon.
https://www.amazon.com/Knipex-8603250-10-Inch-Pliers-Wrench/dp/B000X4OG94/ref=cm_wl_huc_item
The biggest risk is going to be the new user buying crap parts. Those can be swapped later.
The second big pain point is going to be roll pins. I hate roll pins. A set of parallel pliers like these Knipex make squishing in a pin a 5 second job.
After that is detent pins and springs. Those are easy enough to work around if you watch the videos.
"Dikes". Believe it or not, those are diagonal cutters.
https://en.m.wikipedia.org/wiki/Diagonal_pliers
Look under "jargon".
Also, as an aside, if you want high quality "channel locks" look no further than a German brand called Knipex (pronounced Kinnepex). I'm partial to the push button Cobra plier, but the more traditional "water pump plier" is also excellent. They cost a lot more than Channel Lock, but they have excellent leverage and really tough jaws that are narrow enough to fit into spaces other brands can't reach.
They also make a tool called the Pliers Wrench that replaces your adjustable crescent wrench and doesn't slip, need constant adjustment or round off corners.
Finally, their high leverage "dikes" get extremely high ratings.
Sorry to sidetrack you with a sales pitch, but I got excited when I read that you were starting to shop for better tools. If I had known about this brand ten years ago, I would have bought them first instead of wasting my money on cheaper tools.
The 10inch without a doubt.
http://www.amazon.com/gp/aw/d/B000X4OG94?pc_redir=1405352048&amp;robot_redir=1
No, Pliers Wrench. Apologies for the mobile link.
Allow me to change your world... these are the smooth jaw versions which have a camming action such that the two faces are always parallel and there’s a high mechanical advantage on the grip. I own the 10 and 7” size... never go without them.
https://www.amazon.com/gp/aw/d/B000X4OG94/ref=mp_s_a_1_sc_5?ie=UTF8&amp;qid=1525621589&amp;sr=8-5-spell&amp;pi=AC_SX236_SY340_QL65&amp;keywords=kinpex+pliers
Steel pegboard with slots and holes is pretty awesome for storage. You can put shelves, bins, and hooks on it to hold just about anything, and it's easy to rearrange things when your storage needs change.
Also, tape.
Also, if you don't have an EDC multi-tool already, the Kershaw Select-fire 1920 is pretty awesome for tech work. It's not the kind of multi-tool that has a bunch of little crappy tools. It just has 1 pretty good knife and one pretty good screw driver. Unlike most multi-tools though, the screw driver is center aligned and uses standard hex bits, four of which can be stored in the tool itself. It's been worth every penny.
http://www.amazon.com/gp/product/B002IVPKOU/ref=oh_aui_detailpage_o01_s00?ie=UTF8&amp;psc=1
http://www.amazon.com/Flashlight-Torch-Adjustable-Focus-Light/dp/B006E0QAFY/ref=sr_1_2?ie=UTF8&amp;qid=1408984916&amp;sr=8-2&amp;keywords=flashlight
2 pens and a notepad
In no particular order:
Headphones: Airpods (https://www.amazon.com/Apple-MMEF2AM-AirPods-Wireless-Bluetooth/dp/B01MQWUXZS/ref=sr_1_3?ie=UTF8&qid=1539218047&sr=8-3&keywords=airpods0
Keys: Nothing special on there except for a Tile Mate and Kershaw Cinder (https://www.amazon.com/Kershaw-1025X-Multifunction-Performance-Stonewashed/dp/B01BAJK7DE/ref=sr_1_1?ie=UTF8&qid=1539217909&sr=8-1&keywords=kershaw+cinder)
Watch: G-Shock (https://www.amazon.com/gp/product/B01GR7MG9C/ref=oh_aui_detailpage_o08_s00?ie=UTF8&psc=1)
Wallet: Andar Baron (https://www.amazon.com/Andar-Leather-Minimalist-Blocking-Bi-Fold/dp/B01F4KDQGA/ref=sr_1_2_sspa?s=apparel&ie=UTF8&qid=1539218111&sr=1-2-spons&nodeID=7141123011&psd=1&keywords=andar+wallet&psc=1)
Paracord Bracelet: No link, got it a gun show last weekend
Flashlight: Olight I3T EOS (https://www.amazon.com/gp/product/B07DLRK7Q5/ref=oh_aui_detailpage_o05_s00?ie=UTF8&psc=1)
Pen: Pokka Pen (https://pokkapens.com/pages/produkts)
E-Cig: Aspire Breeze 2.
Knife: Kershaw Select Fire (https://www.amazon.com/gp/product/B002IVPKOU/ref=oh_aui_detailpage_o04_s00?ie=UTF8&psc=1) or Leatherman Skeletool (https://www.rei.com/product/123035/leatherman-skeletool-topo-multi-tool) depending on which one I think looks better that day
Firearm: Sig Sauer P320 compact with a subcompact frame on it and a Pyntek Compact IWB Holster (https://pyntek.com/products/compact)
Belt: Trayvax Cinch (https://www.trayvax.com/collections/gear-1/products/cinch-belt)
Water Bottle: Yeti Rambler (https://www.amazon.com/YETI-Rambler-Stainless-Vacuum-Insulated/dp/B01ADWO0E6/ref=sr_1_4?ie=UTF8&qid=1539218323&sr=8-4&keywords=yeti+water+bottle)
29 bucks on Amazon
Kershaw Select Fire (1920); Multifunction Pocketknife https://smile.amazon.com/dp/B002IVPKOU/ref=cm_sw_r_cp_apa_i_5L00Cb3YQDX52
Sister in-law expressed interest in this when I showed: https://www.amazon.com/dp/B078K28DGG/ref=cm_sw_r_other_apa_i_X5JRDb8AB9HHA
Cheap EDC with incredibly bright flashlight. I'm not a huge fan of the bulk and height of the body where the light and fire starter are housed.
I personally keep putting this one back in my pocket and is most common EDC https://www.amazon.com/dp/B002IVPKOU/ref=cm_sw_r_other_apa_i_D8JRDbXJ0313J
Being a Kershaw, warn them on closing. Sliced my finger within 3 mins of unboxing... The driver and screwdriver heads are solid and don't fall out line cheaper versions. Just love having a very sharp blade with screwdriver handy
Here is a pocket knife/ but driver. Did you decide yet? https://www.amazon.com/dp/B002IVPKOU/ref=cm_sw_r_cp_awdb_kOfWzbRAWNX87
I've never heard of or seen an assisted opening knife with a screwdriver. Kershaw has the Select Fire which is an inexpensive manual open knife with a few screwdriver bits.
I'd personally suggest getting something like the Piranha tool and carrying a Kershaw Speedsafe knife.
I would like to suggest something different. Instead of a full multi-tool, you might like the Kershaw Select Fire.
It has decent steel, and comes with a small and large bit for both flat head (good for picking ice without damaging blade), and phillips (good for adjusting bindings etc.).
I used to carry the Ken Onion by Kershaw, but I think I'm going to get one of these as a Christmas present to myself, because that looks awesome. A little too thick but ultimately incredibly useful.
For the price, I would recommend the Kershaw Select Fire - not only does it sport a pretty rugged, sharp blade, but it has a built-in screwdriver set. I use this thing a few times a week and love it.
Industrial mechanic/electrician here. This is probably the most used tool in my arsenal.
These guys probably sell what you need.
Depending on the complexity of design that you have in mind, you can just sand and finish the right piece of wood and get to hiking.
If you're limiting the carving part to basic and minimal designs, you could probably get by with a simple carving knife like this Mora.
I have just never understood the point for so much belly on such a small blade. IMO one of these is a far better option, particularly if the knife is going to be used for whittling:
https://www.amazon.com/Morakniv-Carving-Knife-Laminated-2-4-Inch/dp/B004GATX62
To start you need 4 things imo. Knife, sharpening stone, wood, and a glove.
I like Morakniv Wood Carving 120 Knife with Laminated Steel Blade, 2.4-Inch https://www.amazon.com/dp/B004GATX62/ref=cm_sw_r_cp_api_i_JF87CbW24FV4W
It’s cheap and after many years of carving I still use it.
I use a home made honing strop 80% of the time and a diamond stone the remaining 20% when needed.
I use a lansky extra fine but there are probably better options.
Basswood is the standard carving wood. It’s available from hobby shops and on amazon.
Wear a (clean) leather or knife guard glove on your non dominant hand. It’ll save you a lot of cuts.
That is super cheap for a knife. Morakniv makes decent quality cheap knives for beginners. I can't even imagine how bad that steel is
Edit: Morakniv Wood Carving 120 Knife with Laminated Steel Blade, 2.4-Inch https://www.amazon.com/dp/B004GATX62/ref=cm_sw_r_cp_apa_i_kD.KDbBB5VHQ1
No. Check out this thread
[The Mora 120](Morakniv Wood Carving 120 Knife with Laminated Steel Blade, 1.9-Inch https://www.amazon.com/dp/B004GATX62/ref=cm_sw_r_cp_api_33wyyb6HJVJC3) is affordable and on Amazon
Pic up one of these, and a good strop. It will save you a lot of frustration.
http://www.amazon.com/Morakniv-Carving-Knife-Laminated-2-35-Inch/dp/B004GATX62
I got him this single knife and this set here . They are good enough to get you started.
For the core, ya I am putting something...interesting in it. My buddy and I are trying to figure out an easy way of hollowing out the middle of our "branches" without damaging the integrity too much. That same buddy has a magnificent red beard, beautifully manicured, so we are going to be pulling some of those off, braiding them, and coring the wand with that. If any material we muggles have contains magical properties, it's that beard.
Lucky you, wish I had that kind of supply, as in where I live there is really a few variety of woods to choose.
For both the carvings I used a Morakniv for the shaping of the general figure. (The yggdrasil one is a square, so no shaping ;)).
And for the general engraving, carbon paper for transfering the pattern and a Pfeil 9/4 gouge that really makes wonders, for working the bits that are too small for the gouge I use the knife.
And the usual supply of saw, rulers and such for cutting/marking.
I don't use electrical tools, but I heard Dremels and similar rotary tools work wonders for engraving.
Feel free to drop in /r/Woodcarving and ask a few questions if you fancy!
Sir buy a $20 knife and buy this whetstone https://www.amazon.ca/Whetstone-Cutlery-20-10960-Two-Sided-Stone/dp/B0055B2RGO
Whetstone Cutlery 20-10960 Knife Sharpening Stone-Dual Sided 400/1000 Grit Water Stone-Sharpener and Polishing Tool for Kitchen, Hunting and Pocket Knives or Blades by Whetstone https://www.amazon.com/dp/B0055B2RGO/ref=cm_sw_r_cp_api_i_0XOlDb6EP4BM6
This is a good cheap combo stone to sharpen knives but I wouldn’t waste time on that kukri shaped object. Get a proper knife made out of carbon steel and get after it.
https://www.amazon.com/dp/B0055B2RGO/ref=cm_sw_r_cp_apa_RJ-WBb86QVD1C
https://www.amazon.com/Whetstone-Cutlery-Two-Sided-Stone/dp/B0055B2RGO
I've had this one for ages, and it's pretty solid.
Ok, $100 isn't going to go very far, especially if you need everything, but here we go.
Whetstone - This is slightly better than the hardware store combination stones, but it's cheap, it's a water stone, and it's got a good grit combo.
Handsaw - Japanese style, cuts on a pull stroke, crosscut and rip teeth. I have this exact saw, still works pretty damn good after a dozen years of occasional use.
Beater chisels - Not the best steel, but a chisel is better than no chisel. You'll want at least 2 sets of chisels anyway - don't beat the hell out of your good set.
Block plane - Don't expect super high quality from Stanley anymore, but we've all got at least one of these little block planes somewhere.
And I'm $6 above the gift card budget. The chisels and plane will need some sharpening before use, but it's enough to get you started. You still need marking/measuring tools, a square, a work surface, clamps, vise, and obviously, some wood to sink your teeth into.
Whetstone Cutlery 20-10960 Knife Sharpening Stone-Dual Sided 400/1000 Grit Water Stone-Sharpener and Polishing Tool for Kitchen, Hunting and Pocket Knives or Blades by Whetstone https://www.amazon.com/dp/B0055B2RGO
Ended up ordering this combo stone. Probably not a great one if price is any indicator but I figure it's good enough until I improve my technique. Thinking I may have to mount some 180 or 240 grit sandpaper to a block of wood before getting to work with the 400 🤔
Here's what I use.
This $3.97 addon is my cheapest! https://www.amazon.com/dp/B005KRSWM6/ref=cm_sw_r_cp_api_lHNIxb2WR7KGZ
I'm in the US, but this is what I bought (with Prime shipping) from Amazon:
Tamiya Basic Tool Set, $18.90
Gundam Marker 2-pack Black and Gray, $8.99
Alvin 18"x12" Cutting Mat, $9.12
Not sure if this is what you mean by design knife, but you can get an x-acto pretty cheap as an add-on item. I just picked mine up from a local store. Link
Advice I got from this thread, pick up one of these when you can, great little twister.
https://www.amazon.com/dp/B07GXGNMV2/ref=cm_sw_r_sms_awdo_t1_4VNvCbM29TDAC
Personal advice, always twist 90° and always twist clockwise. That way you know which way and how far when you need to untwist it.
Also (learned from other resident experts) an exacto knife (something like this https://www.amazon.com/dp/B005KRSWM6/ref=cm_sw_r_sms_awdo_t1_PZNvCbZ40WD5) is great for getting under those tabs when you need to pry them up. You can dull the edge a little, or live dangerously.
I use this X-Acto knife to cut off excess from the heads. Takes at most 1min.
Barbie Complete Looks Teen Titans or Barbie DC Fashion are both preorders. They are so cute! This is available now for crafts.
Thank you for the contest!
Airbrush
Compressor
X-acto -Z series blades are great.
For sandpaper you can just buy some popsicle sticks and 400, 600, 1000 grain, and then a buffing pad from a nearby hobby store or something like walmart even, it's all the same honestly. The popsicle sticks you can wrap the paper over to give you something to rub it against easily. Just practice on some of the parts that come with a kit that don't get used so you aren't eating away too much plastic.
Hmm...
It looks like you have $396.41 left over for a fountain pen!
I got my X-acto Knife here
Has done me great justice so far. And, like Dan said, it definitely takes some practice to really use the knife to its full potential.
Nah.
Here are tools that will get you going well, IMO.
http://www.amazon.com/Xuron-410T-Tapered-Tip-Shear/dp/B000IBQEEW/ref=pd_sim_sbs_469_4?ie=UTF8&amp;dpID=31aHJgL3pNL&amp;dpSrc=sims&amp;preST=_AC_UL160_SR160%2C160_&amp;refRID=1QA091E0TTJ7J8FW3MKN
http://www.amazon.com/X-ACTO-Series-Knife-Cap-XZ3601/dp/B005KRSWM6/ref=pd_bxgy_469_img_2?ie=UTF8&amp;refRID=0QC3ZT6985MJV0ZTB72N
http://www.amazon.com/Piece-Precision-Needle-File-Set/dp/B006N3EPKE/ref=sr_1_3?ie=UTF8&amp;qid=1453474293&amp;sr=8-3&amp;keywords=needle+files
This x-acto knife is an add on item on my $5 and under wishlist that I need. I actually ordered it two weeks ago, but the package got lost some how and I just got myself a refund :/
pay attention in class! Ironic, because I'm actually in class right now, haha.
Highly recommend Unifi AP's with a mikrotik controller. Even better if you can leave an old laptop on site for managing the unifi stuff remotely.
A single unifi outdoor model might be a good place to start, then it doesn't need to be located inside the tenants premises-- no one wants to have a tech banging around in their attic to re-align the antenna. They are also very impressive with better range than the enterprise or long range hockey puck units.
Adding additional units if necessary (and the software will be able to tell you unlike other brands/models) is a cinch, the controller software sets them up so that the network is seamless and centrally controllable.
A mikrotik rb2011 would be a good choice for a router. It has 10 ethernet ports which is formidable, and it has lots of horsepower so that you can implement content blocking if necessary to preserver the quality of the network.
http://www.amazon.com/Mikrotik-RB2011L-IN-10-Ethernet-Ports/dp/B008GZ7NEC/ref=sr_1_4?s=electronics&amp;ie=UTF8&amp;qid=1405127763&amp;sr=1-4&amp;keywords=rb2011
http://www.amazon.com/Ubiquiti-UniFI-Outdoor-Access-802-11bgn/dp/B0066DV06I/ref=sr_1_1?s=electronics&amp;ie=UTF8&amp;qid=1405127813&amp;sr=1-1&amp;keywords=unifi+outdoor
Don't forget CAT5e, RJ-45 connectors, and a crimping tool if you don't have them already:
http://www.amazon.com/Cat5e-Ethernet-Cable-500ft-Cat-5e/dp/B0092THNDW/ref=sr_1_1?ie=UTF8&amp;qid=1405127939&amp;sr=8-1&amp;keywords=cat5e
http://www.amazon.com/Cable-Tester-Crimper-Connector-Network/dp/B008UY5WL0/ref=sr_1_1?ie=UTF8&amp;qid=1405127990&amp;sr=8-1&amp;keywords=rj-45+crimpers
These should work...not high quality, but will get the job done.
https://www.amazon.com/UbiGear-Crimper-Connector-Network-Crimper315/dp/B008UY5WL0/ref=sr_1_2?ie=UTF8&amp;qid=1468289842&amp;sr=8-2&amp;keywords=cat5+crimper
It's easier than it looks...just take your time and use scissors to cut the ends of the Cat5 straight. A few YouTube videos and you'll be a pro in no time.
You might be able to call up some cabling companies in your area and tell them you just need the cat5 cable terminated. Not sure how much they'll charge you... but it's probably more expensive than just buying the crimper and doing it yourself (it's not really that hard).
https://www.amazon.com/UbiGear-Crimper-Connector-Network-Crimper315/dp/B008UY5WL0/ref=sr_1_1?s=pc&amp;ie=UTF8&amp;qid=1473190092&amp;sr=1-1&amp;keywords=cat5+crimper
I can almost guarantee this is cable-related, especially given the intermittent nature of the issue. First, make sure the cable isn't loose, and try to push the cables into the connectors a bit. If this doesn't fix your issue, you will need to fix the cable.
A cat5 cable is comprised of four twisted pairs, a total of 8 little
wires. Somewhere in those 20m, one of those wires is cut or damaged.
It is most likely to be at the tip where the RJ45 connector (clear piece) attaches, and if the cable is run through the floors, you better hope this is the case.
Figure out what order the cables go into the connector by looking at them. They are identified with pairs of colours, as shown here
The connector will most likely look like this
Notice that there are two distinct standards. It's important that you use the same standard when re-crimping the cables on both ends.
You can simply cut about 10cm off each end, and obtain a crimper tool to reattach new connectors.
To use the crimper, insert the ends of the cables into the slots in the "empty" connectors, and then press down with the crimper to lock them into place. It's not very difficult, but you need to decide if it's worth your time and effort.
If the break in the cable is in the middle (unlikely, but possible) you're looking at ripping out the cable and running a whole new one. I don't know how exactly the cable is run, if it comes through a plate in the wall, or if it's just a cat5 cable shoved through a hole drilled in the wall, but either way replacing it is going to be pretty expensive unless you do it yourself. I would personally recommend doing this professionally, and getting two "plugs" installed in the walls.
edit: If you know any computer geeks who might know how to do this, or who already have a crimper, invite them over for a beer or something it'll take them 5 minutes
edit2: If you live in Montreal i have the day off and like beer
Nice man, both your kits are pretty solid. I'm at work so I can't be as thorough as I would like but here are a few ideas that stood out.
1/8" Pad: Drop it, cut two panels off your zlite to use as the frame and then just pull them out the pack to use at night to sleep. I did this all summer with my KS50 and it worked great. You'll need to cut a little bit off the width for it to fit, but it's minimal and not noticeable when sleeping.
Headlamps: There are much lighter headlamp options and many prefer flashlights for night hiking to bring the light closer to waist level and elongate the shadows. You can also clip them to a brim of a hat for hands free use around camp. A little thrunite ti3 would be a good bet if you don't plan on much night hiking, or a Nitecore Tip 2017 for night hiking.
Knife: The Victorinox Classic SD only weighs 22grams or if all you need is a knife check out Spyderco Ladybug at 16grams. Avoid amazon for the ladybug, there are counterfeits going around i hear.
FAK: You could likely pair this down, mine only weighs 1.5oz
Houdini P/O: Seems unnecessary with the versalite? But I've never worn the Nano-Air Light Hoody, is the idea that the houdini would provide a breathable wind barrier when used in combination? I know this is a common strategy with fleece.
Kahtoola Micro Spikes: If we end up needing them this year I'm going to try Snowline Chainsen Light. Quite a bit lighter than microspikes.
On a side note, when do you start?I'm heading out on May 18th. Edit: Nevermind...somehow missed this in your post...maybe I'll see you all in Oregon or Washington! I'm targeting a late August finish.https://www.amazon.com/Victorinox-Swiss-Classic-Pocket-Knife/dp/B00004YVB2/ref=sr_1_2?ie=UTF8&amp;qid=1485888088&amp;sr=8-2&amp;keywords=swiss+army+knife
IMO, it's worth investing $12 in a Swiss Army knife. The one you chose looks to me like it'll break fairly easily, but I haven't used exactly that one so I can't be sure.
I dunno if that's all the food you're taking, but you might consider adding some variety. I'd get pretty sick of that diet after a day of it, but maybe you're not so picky.
I'd be interested to hear how that pack holds up! The gear snob in me says there's gotta be a reason why good packs cost $250, but the starving college student in me is more willing to compromise.
I"m assuming that you will be going soon, say the next month or so, time of year counts, but I'll assume it's soon.
Your tent is a little "meh." it'll work but it might not last so long; especially take core of the poles, they beak easily. Also the cheapo tent stakes that come with the tent are going to bend and you will curse them every time you set up your tent. Pick up some like these and they will serve you well. (Personally I hate using tents; they are hassles to set up and take down, and generally not pleasant to sleep in. If you can help it try sleeping under the stars and see if that suits you.)
You might find your sleeping bag to be a bit chilly, I'd recommend a 20 degree bag with a hood. I know it won't get that cold but the degree ratings are quite exaggerated so 20 degrees is really more suitable for 50 degrees. If you don't want to spend more money on a bag, make sure you have warm clothes and a good fitting beanie.
Air mattresses are fine, just take care to feel out for thorns or anything that might puncture it. Also you might want a blanket or something in between you and the mattress because it will suck out the heat from underneath you if you don't have some insulation.
You should have a tarp or footprint to put your tent on to protect it and the air mattress from punctures, it's worth it. The tarp you have should be fine (maybe doubled over if its thin), but a footprint will be more convenient.
For $15 that stove is a great deal, buy it if it still works fine. It runs off of white gas AKA "camp fuel", which you can find at many grocery stores, gas stations, any place with a sporting goods section, and many stores near popular camping areas. Finding white gas is not really an issue.
Don't buy matches, just get 2 or 3 Bic lighters. Really you should learn to make a fire using only your lighter, make that your goal each night. In a pinch my favorite fire starter is one you can make at home before your trip. Get an old egg carton and stuff each cup with cotton balls or dryer lint. then pour melted candle wax into each cup until about 90% full. Let the carton harden then pack it away. To use it rip off one cup and light the cardboard edge, you will have a strong flame for about 15 minutes.
Don't buy a filter. Water will be easy to come by at most campsites, but not all of them have a tap so make sure to bring along a few extra gallons just in case.
Lanterns produce almost no usable light, save your money and stick with the headlamp. Also that headlamp is excellent I highly recommend it. Protip: leave it around your neck like a necklace when you sleep then it's easy to find in the middle of the night.
I have a lot of experience with wilderness medicine and those pre-made kits are mostly worthless, you are much better off making your own kit.
I Recommend:
Chair looks comfy, get one you like with at least 1 cupholder
A good knife makes a great survival tool and is just generally a useful item, check here every few days for a good deal on high quality knives. Multi tools are great to have around camp but an inexpensive set of tools would be much better for your situation. If you want a true multi-tool this one is good quality and a fair price.
You can watch like 6 videos and know how to build a computer. Once you know what fits where, it's like putting together legos. These screwdrivers make everything way easier too.
You'll want some precision wire cutters, not sure if thats included with the pliers you listed.
Once you get tired of dealing with the piece of shit coil jig you can pick up some precision screw drivers like
http://www.amazon.com/Stanley-66-052-6-Piece-Precision-Screwdriver/dp/B00009OYGV/
or even the all metal ones that have more options for smaller coils
This and my hands make a pretty solid wrapping kit
SECTION | CONTENT
:--|:--
Title | Vaping Coil Winding Jig Tool
Description | Fasttech Vaping Coil Winding Jig Tool for Rebuildable Atomizers https://www.fasttech.com/p/1926001 stainless steel / 1.5mm + 2.0mm + 2.5mm + 3.0mm + 3.5mm sections SKU 1926001
Length | 0:01:17
SECTION | CONTENT
:--|:--
Title | UD Coil Jig V3 - Demonstration
Description | UD Coil Jig V3 http://www.vapetime.co.uk This is a quick demonstration of the Coil Jig V3 by Youde Technology. For more information please visit: http://www.vapetime.co.uk/ud-coil-jig-v3/ If you have any questions please do not hesitate to call, contact us or leave a comment. We are always happy to help :)
Length | 0:04:00
SECTION | CONTENT
:--|:--
Title | Quick and Effective coil build for RDA atomizers
Description | ::EDIT:: It's a good idea to check your resistance ( ohms ) BEFORE you attempt to glow and fiddle with your coils. The resistance will change as your coils get more even. So check before, then check again after. Thanks. Hey everyone! If i'm being 100% honest. I mostly shot this video for my brother who recently got into the world of rebuilding. He was really struggling with it. Rebuilding has become such second nature to me that I often forget how it feels to be building for the first time and that sense of frustration that sets in quickly. So hopefully some other people will find this video helpful. Rebuilding honestly just takes practice and patience. ANYONE can do a solid simple build that will produce both great flavor and large clouds ( if you want ) The build in this video came out to 0.3ohms, which will work great on a mech mod, or on a higher wattage regulated device like the Sigelei 150w or iStick 50w I used 24g Kanthal, 6 wraps around a 2.5mm screwdriver. Below I have links to most everything I used in this video. Including some "beginner friendly" RDA atomizers. Precision screw drivers http://www.amazon.com/Stanley-66-052-6-Piece-Precision-Screwdriver/dp/B00009OYGV/ref=sr_1_1?ie=UTF8&amp;qid=1435336275&amp;sr=8-1&amp;keywords=precision+screwdriver+set&amp;pebp=1435336344707&amp;perid=1M11EBNKQ3Z63A7B0VQ8 Wire Clippers http://www.amazon.com/Hakko-CHP-170-Stand-off-Construction-21-Degree/dp/B00FZPDG1K/ref=sr_1_1?ie=UTF8&amp;qid=1435336368&amp;sr=8-1&amp;keywords=Wire+Clippers 24g Kanthal http://www.amazon.com/Genuine-Lightning-Vapes-Kanthal-Resistance/dp/B00JWYIHLY/ref=sr_1_1?ie=UTF8&amp;qid=1435336391&amp;sr=8-1&amp;keywords=Kanthal&amp;pebp=1435336399204&amp;perid=0Q2SHF5N87Q64YJT5F9E Organic Japanese Cotton http://www.amazon.com/Japanese-Organic-Cotton-Organic-unbleached-Largest/dp/B00P219C5Q Unfortunately the VapeKit has been discontinued. They are doing a V2 kit, but in the meantime check this one out http://www.coil-master.net/product/diy-kit Some good RDA's for new builders IMO Mutation X V4 http://www.vapordna.com/Project-Sub-Ohm-Designed-Mutation-X-V4-RDA-p/psmxv4.htm The Mako http://www.beyondvape.com/store/import-cat-c-1_2/beyond-vape-mako-rda-p-1927.html The IMP http://www.empiremods.com/product_p/youdimp.htm Thanks so much for watching everyone! hope this is helpful. Feel free to follow me on Instagram http://instagram.com/grimmgreen/ Twitter https://twitter.com/GrimmGreen Facebook https://www.facebook.com/GrimmGreen Also please remember that unless you make it so I can reply to you. I will be un-able to reply to your comments.
Length | 0:22:32
****
^(I am a bot, this is an auto-generated reply | )^Info ^| ^Feedback ^| ^(Reply STOP to opt out permanently)
Here is the screen you need ($53). Here is a precision screwdriver set you can use ($4). Here is video showing you how to fix it.
Do it yourself, and save $100 or so.
Youtube I guess. Here's some info about rebuilding in general, feel free to skip what you already know. Make sure you get an ohm reader first thing. You can buy wire and an ohm reader at lightningvapes.com with coupon code LV20 for 20% off. I think most people recommend 26g wire. I went with 24 and it's awesome for subohming, if you're planning to build higher, 28g would be the best. I'm not sure how well 30g will work out but the link below will let you know!
Also check out this website: http://steam-engine.org/coil.asp
On there you input your gauge wire, single/dual/etc coil, your target resistance and what the diameter of your coil is (you'll know this by which drill bit you wrap your wire around. It'll tell you how many wraps to do to get the resistance you want. After you build you'll want to throw the atty on the ohm reader to check for shorts (it won't show a regular reading if it's shorting) and also to check if you're near what your target resistance was. Don't be worried if it's not exact, the 510 ohm reader boxes aren't known for accuracy. If you're within 0.05 ohms you're good. Also some people like to build on their ohm reader, it's nice.
As far as other tools for rebuilding. I would recommend this screwdriver set: http://www.amazon.com/Stanley-66-052-6-Piece-Precision-Screwdriver/dp/B00009OYGV/ref=sr_1_2?s=hi&amp;ie=UTF8&amp;qid=1420044741&amp;sr=1-2&amp;keywords=stanley+6+piece+precision+screwdriver+set
It's great, I use it everytime I touch my mod for maintenance. Not sure what other people use but since I got that I never looked for anything else! The bits are awesome for wrapping coils around and the phillips will fit your post screws for sure.
That's about all you need really. Other than wire cutters and pliers/tweezers. You can get these awesome ceramic tipped tweezers from that first site. The ceramic won't get hot so you can squeeze your coils tighter with them while the coils are hot.
As far as preventing shorts, well I've never had a short so I can only tell you what I do. Don't let your coils' excess legs be hanging out and flying around all willy-nilly. Cut them nice and close and if you can't get close enough, bend them upward. That's about it as far as I know.
Let me know if you have any questions, sorry I couldn't teach you to build!
28g is good to start with. You'll also need something to wrap your coils on. These screwdrivers are a popular choice. You can also use the little blue screwdriver that will come with your magma. SteamEngine is your friend for coil wrapping.
Pro tip: throw out the pre-made wick and coils that come with your RDA, because they're crap. Keep the extra screws, O - rings and screwdriver, just in case.
Size 0 Phillips, 1.4mm slotted. Here is the kit on Amazon; http://www.amazon.com/Stanley-66-052-6-Piece-Precision-Screwdriver/dp/B00009OYGV/
They're usually called "precision screwdrivers." Something like this: http://www.amazon.com/Stanley-66-052-6-Piece-Precision-Screwdriver/dp/B00009OYGV
http://www.amazon.com/gp/aw/d/B00009OYGV?pc_redir=1411139902&amp;robot_redir=1
there's the link to the one I have
1 - They make a lot of variations of this:
http://www.homedepot.com/p/Vanco-1-Gang-3-4-in-x-1-1-2-in-Hole-Hinged-Wall-Plate-for-Cable-White-120617X/205359407
https://www.amazon.com/Datacomm-Electronics-45-0008-WH-Recessed-Voltage/dp/B00390IT7O/ref=sr_1_8?s=audio-video-accessories&amp;ie=UTF8&amp;qid=1484761144&amp;sr=1-8
Just do a search for "data wall plate" or "Multimedia wall plate"
2 - Not sure what you are talking about. Do you mean where your ethernet terminates and the networking gear will be? They make network boxes, but if space is no objection I prefer racks.
3 - Definitely punchdown. You don't need a different punchdown for cat 5 vs 6. There are 2 primary punchdown types (110 and krone). If you get the below punch down tool, you'll be able to use either punch down panel type. 6 is a little more annoying to punch down because it has the extra insulator in it, otherwise it's all about punch types.
https://www.amazon.com/TRENDnet-Punch-Krone-Blade-TC-PDT/dp/B0000AZK4D/ref=sr_1_1?s=electronics&amp;ie=UTF8&amp;qid=1484761269&amp;sr=1-1&amp;keywords=punch+down+tool
What's the extra PITA? I did a few drops of CAT6 in my house and it's not that difficult. All are successful in one try.
This is what I use:
https://www.amazon.com/TRENDnet-Punch-Krone-Blade-TC-PDT/dp/B0000AZK4D/ref=sr_1_4?ie=UTF8&amp;qid=1472754190&amp;sr=8-4&amp;keywords=punch+down+impact+tool
Requires quite a bit of force but when it makes that slot machine sound, it works.
Other useful things:
If you used the plastic tool that came with the jacks, they suck. Push and wiggle (parallel to the groove) to get the connections to terminate; but be careful not to cut the wires inside the jack - as opposed to just the excess.
Or make your life easier. Though if it's one-time it may not be worth it. Note how the blade is only on one side with that.
As u/manarius5 point out the cat-5 cable is setup as phone; and you will need to change it over to network.
Best option is to get a patch panel, a punch down tool, jacks, 2x WAP; maybe this one. You might or might not need a switch, you might also want to consider going with POE to power the WAP. You would also want to get some cat-5 jumpers.
Please make sure your parents are not using POTS( plain old telephone); if they are, you can still do this, but would need to proceed with caution. Install new wall jacks, install new punch down block down stairs; when punching down, follow the color coding for A or B, dosn't matter which, just keep it the same on both sides. Move Comcast modem next to the location in your pictures. Setup the WAPs on either side of your house, plug the Roku in hard wire. This setup would use 3 ports on the Comcast modem/router, so no switch needed.
If your parents are still using the phone, only move the jacks to network that you are going to use.
A more advance solution would be to go with a wall mounted rack, Ubiquiti equipment for router, switching and WAPS, buy a cable modem and return the Comcast unit.
Well I'll be the first one to give you generic information that you could have found with the search function.
You just do the needful.
https://www.amazon.com/dp/032194318X/ref=wl_it_dp_o_pC_nS_ttl?_encoding=UTF8&amp;colid=3IXCECMPTZ0C5&amp;coliid=IJFXHOHENJ2FH
https://www.amazon.com/dp/0321492668/ref=wl_it_dp_o_pC_nS_ttl?_encoding=UTF8&amp;colid=3IXCECMPTZ0C5&amp;coliid=I3J2AR8V86JZMD
https://www.amazon.com/dp/0596007833/ref=wl_it_dp_o_pC_nS_ttl?_encoding=UTF8&amp;colid=3IXCECMPTZ0C5&amp;coliid=I2OPTI4J0S4UG2
Good screwdriver set.
https://www.ifixit.com/Store/Tools/64-Bit-Driver-Kit/IF145-299
A network tone tester in case you need to map out your network and document everything. Also functions as a basic cable tester.
https://www.amazon.com/Fluke-Networks-MT-8200-60-KIT-IntelliTone-Toner/dp/B00N2S6RPY/ref=sr_1_5?ie=UTF8&amp;qid=1473701817&amp;sr=8-5&amp;keywords=fluke+networks+tester
A punch down tool.
https://www.amazon.com/TRENDnet-Punch-Krone-Blade-TC-PDT/dp/B0000AZK4D/ref=sr_1_1?ie=UTF8&amp;qid=1473702091&amp;sr=8-1&amp;keywords=punchdown
An ethernet crimper.
https://www.amazon.com/TRENDnet-RJ-45-RJ-12-RJ-11-TC-CT68/dp/B0000AZK4G/ref=sr_1_1?ie=UTF8&amp;qid=1473702137&amp;sr=8-1&amp;keywords=ethernet+crimper
A quick cable stripper.
https://www.amazon.com/Monoprice-Stripper-Cutter-Cables-107051/dp/B0069LRBU6/ref=sr_1_3?ie=UTF8&amp;qid=1473702190&amp;sr=8-3&amp;keywords=ethernet+stripper
A usb hard drive dock.
https://www.amazon.com/Sabrent-External-Duplicator-Function-EC-HDD2/dp/B00IKC14OG/ref=sr_1_2?ie=UTF8&amp;qid=1473702021&amp;sr=8-2&amp;keywords=usb+hard+drive+dock
A notebook.
https://www.amazon.com/Rhodia-Meeting-Book-Made-France/dp/B001DCDSW6/ref=sr_1_1?ie=UTF8&amp;qid=1473702220&amp;sr=8-1&amp;keywords=rhodia+meeting+book
Your necessities may vary, this applies to more of a one-man shop, and there's plenty of other things you'll want to get that I don't have listed here depending on your job.
I dunno how much you should get paid.
Just FYI, it's just an Ethernet jack. There's no such thing as an Ethernet splitter, because Ethernet uses point-to-point links only. The thing to use when you have one Ethernet connection and need more is a switch.
That looks to be a standard punch-down Ethernet jack. Get a punch-down tool. Remove the cover from the jack. The jack will have labels indicating which wire goes where for the A and B wiring schemes, note which was used. Pull the wires out. Move the cable to its new location. Trim the wires back a little so you aren't punching down the same bit of wire a second time. Put the wires in the jack's slots according to the same wiring scheme you noted earlier, and punch them down. If the tool has a cutoff blade, make sure it's facing away from the center of the jack so you're not cutting off wire you just punched down.
Also, the tech did a HORRIBLE job of terminating it. A properly punched jack should have the cable looking like this witht he cable entering from the back center of the jack and the individual wires being as short as possible.
And disregarding the horrible job he did of it, installing a jack is absolutely the right way to do this and certainly does not make him an idiot. The alternative would be to crimp a RJ45 plug onto it, which is much worse. The plug wouldn't fit through the hole either, can't be reused if you cut it off, and is much harder to install properly than a jack.
Also, keep the tool. Being able to run and terminate your own Ethernet is always a good thing. You've probably got quite a few devices that stay put (i.e. game consoles) that are on Wi-Fi but could and should be on Ethernet instead.
Here's what I have found handy around the house:
I think the odds of me crimping RJ11/RJ12 are pretty slim, so I don't worry about that ability.
All you need is a (cheap) punch down tool and some sort of a patch panel. It's really not that hard. If you have to pull any insulation back you might want to use a stripper. But you can probably just get away with small dykes. Just try and keep the twist as close to the punch down as you can---but it doesn't have to be perfect to work.
Also, there are two wiring standards 568A and 568B. They have to match on each end so you might want to pull one of your wall jacks to see how it is wired. Just Google for a wiring diagram to see the difference. Or your jack and panel might actually have both color coded on them and you can see which way they did the jacks.
I aways have used the B standard. IIRC the A standard provided backward compatibility with old AT&T standards. But if your jacks are A I would not change them to B.
This is a selection of what I keep in my tech go-bag. You'll build your kit as you learn and build experience, or realize you could have helped a customer out of a jam quicker if you had that tool with you.
Various extra parts I've accumulated over the years like screws, ATX Molex Power to SATA Power Adapters, ATX Molex Y splitters, SATA cables etc..
Good luck and some tools overlap like multi tools and pliers so if budget is low, go with the tool that covers the most jobs.
Edit: I noticed your bag is kind of expensive compared to something like a Dewalt tool bag. I use a plain Dewalt bag which is not as cool as the one in the link, but it's just as tough. This might be a good and less expensive consideration for you if you don't require the look of a briefcase for your tool bag.
Edit 2: You may want to mark your tools with a wrap of some crazy bright color electrical tape to be able to recognize them when they walk away.
Do you live anywhere near Phoenix?
If not they are not difficult. The ends are just keystone Cat(x) jacks that go into a wall plate.
You might borrow or buy a punch tool to make the connection.
I had Cat6 run in my house a few years ago and had the electrician run one end into a closet and leave them unterminated. I patched them to this patch panel myself (even though I have nearly no electrical or wiring experience) using this punch down tool. It's a bit time consuming, but not hard at all. You can wall mount or rack mount (this is what I did) the patch panel then run short cat6 patch cables from the patch panel to your switch. If you do it yourself, be sure the electrician leaves a few extra feet on the unterminated end in the closet, just to give you some flexibility, and that he or she lets you know which standard was used on the terminated ends (since there's an A and a B standard and you'll have to know which to use on the patch panel).
If you are running CAT cable around the house, you will probably want to run all the cable to a common point where they can connect to your patch panel, switch(es), servers/NAS and routers. Most people locate this place out of the way in a basement, to hide the clutter.
If you are running CAT cable you should really use CAT6A which is certified for 10G speed. CAT6 is not a standard. CAT6A is. I used shielded CAT6A. You should buy a spool of solid CAT6A wire that you can cut to specific lengths.One end gets wired to a keystone jack that is usually mounted in the wall of where you need to connect something. The other end is wired to the patch panel. The patch panel has normal jacks that you would use with regular premade patch cables to connect to switches which then connect to the server/NAS/router, etc.
Examples and tools needed:
CAT6A structure cable: https://www.firefold.com/064-series-cat6a-shielded-cable
Patch Panel: https://www.amazon.com/gp/product/B00AQL46TY/ref=oh_aui_detailpage_o06_s01?ie=UTF8&amp;psc=1
Small Rack to hold patch panel and switches (servers would need bigger rack):https://www.amazon.com/gp/product/B000VDPBXM/ref=oh_aui_detailpage_o06_s00?ie=UTF8&amp;psc=1
keystone jacks: https://www.amazon.com/gp/product/B00CLVAJCK/ref=oh_aui_detailpage_o06_s03?ie=UTF8&amp;psc=1
Wall plate mounting bracket: https://www.amazon.com/gp/product/B003JQL0S8/ref=oh_aui_detailpage_o05_s00?ie=UTF8&amp;psc=1
Keytone wall plate cover: https://www.amazon.com/gp/product/B0072JVUPG/ref=oh_aui_detailpage_o06_s02?ie=UTF8&amp;psc=1
Tools:
Punch down tool:https://www.amazon.com/gp/product/B0000AZK4D/ref=oh_aui_detailpage_o06_s02?ie=UTF8&amp;psc=1
LAN Cable tester: https://www.amazon.com/gp/product/B00OUFX38W/ref=oh_aui_detailpage_o06_s02?ie=UTF8&amp;psc=1
Extremely easy, you just need a crimp tool and a couple extra heads.
Then just follow a wiring diagram.
(Some are wired differently, if you have it plugging into a switch or a router, just make sure the order matches the order on the other end of the cable)
To clarify:
A switch will several ethernet ports. One of these is an "uplink" port, and the rest are for your devices.
If you connect the "uplink" port to something that would allow a computer to connect to the internet, it can provide that to everything else plugged into it.
A switch doesn't provide internet access or wireless connectivity on its own.
I would recommend:
The only possible reason I can think for this arrangement is if those were supposed to be phone lines, which work completely differently and usually use a different plug. (Many businesses do use RJ45 and cat5 for phones, but they don't do it quite like that)
If you draw out the layout for how your network should work, it should look something like this:
Get a decent crimping tool and a cheap tester to make sure your pairs are matching up on both sides. I do this for work and home and will never go back to buying Ethernet cables at specific lengths.
https://www.amazon.com/TRENDnet-RJ-45-RJ-12-RJ-11-TC-CT68/dp/B0000AZK4G/ref=pd_lpo_vtph_147_tr_t_2?_encoding=UTF8&amp;psc=1&amp;refRID=0DZ16D14CWPHKTYK159J
https://www.amazon.com/HDE-Network-Cable-Tester-Phone/dp/B009ZXYI1U/ref=lp_7701919011_1_7?s=industrial&amp;ie=UTF8&amp;qid=1524075376&amp;sr=1-7
Also, if you plan on running multiple cables, I suggest using different color boots so your cable can all be the same color (since you're buying it in bulk) but the boots are different colors to help note which cable goes where.
https://www.amazon.com/Accessbuy-Ethernet-Network-Strain-Connector/dp/B01LYLGWSY/ref=pd_bxgy_469_img_3?_encoding=UTF8&amp;pd_rd_i=B01LYLGWSY&amp;pd_rd_r=MMCFM6WPJ3Y2Y3H7M3WA&amp;pd_rd_w=3qix5&amp;pd_rd_wg=S3Y6R&amp;psc=1&amp;refRID=MMCFM6WPJ3Y2Y3H7M3WA
https://www.amazon.com/TRENDnet-RJ-45-RJ-12-RJ-11-TC-CT68/dp/B0000AZK4G/ref=pd_lpo_vtph_147_tr_t_2?_encoding=UTF8&amp;psc=1&amp;refRID=0DZ16D14CWPHKTYK159J
I just bought a Rosewill Gigabit card for $10. Works great. I also bought a cheap 8-port Gig switch, stress boots, RJ-45 terminators, and a pair of crimpers. Someone had given me most of a box of Cat5e. So, for something like $80 I ran Gigabit Ethernet in my crawlspace and now have a fat wired LAN in addition to wireless. It makes backups and streaming HD movies fly.
I recently bought a crimper and tester. They're kinda on the cheap end of tools, but they work well (at least the crimper does, I only used the tester once).
http://www.amazon.com/dp/B0000AZK4G/
http://www.amazon.com/dp/B000P1OA1O/
Crimper $15
Connectors $7
Snagless Boots $6
Outdoor CAT5e $50
Cable Tester $8
Charging all your neighbors to wire up their Ethernet for $50 bucks a pop: Priceless.
Sure thing!
These are the RJ45 heads I bought off of amazon.
These are the 6ft USB A-B cables I bought off of amazon.
This is the crimp tool I used.
If something isn't working, give me some pics and I can try to give some guidance or make a video tutorial.
Flush cutters. This pair and this pair are the industry standard workhorse. Absolutely essential tools.
PanaVise clamps are a must have. This one and this one are my favorites.
A manually operated solder sucker will be an important buy as well.
You should only cut zip ties with flush cutters. http://www.amazon.com/Xuron-410-Micro-Shear-Flush-Cutter/dp/B000IBOOWQ
Otherwise cut the sharp part off with a knife.
I use flush cutters to snip the parts out of the sheets for the most part. Here is an example.
For bending tabs I use a precision plier set and sometimes small tweezers.
Xuron makes a set of plastic nippers that are more than acceptable for beginners and will last you until you decide to upgrade.
https://www.amazon.com/dp/B000IBOOWQ/ref=cm_sw_r_cp_api_mAKQyb4XASNKF
So ideally you go to a local hobby store and look at what models they have, then pick one you like and within your price range. You can start off with 1/144 scale HGs (High Scale), but I am a firm believer that if you can follow instructions, you can start at any scale and any grade. I am a sucker for kits with cool box arts (like the MG Shin Musha). Get a pair of side cutters to help with [piece from tree removal] (http://www.ghostofzeon.com/diy/assembly/removingparts.html). Obviously, shop around to get a good price. There are a wealth of useful links and threads on right hand column under "Current Events" (not sure why it is under current events...) Other model kits include [Zoids] (https://www.amazon.com/Zoids-Japanese-Kotobukiya-Model-RZ041/dp/B003UTUEVI/ref=sr_1_1?s=toys-and-games&amp;ie=UTF8&amp;qid=1481057397&amp;sr=1-1&amp;keywords=zoids), Evangelion, and even [Batman] (https://www.amazon.com/SpruKits-DC-Comics-Batman-Arkham/dp/B00L5KKUR2/ref=sr_1_3?s=toys-and-games&amp;ie=UTF8&amp;qid=1481057500&amp;sr=1-3&amp;keywords=batman+model). There are also like tanks and planes and battleships...
Ah, okay. Still, super glue isn't a bad option for plastic.
Oh! The one other optional thing I forgot would be some kind of epoxy putty. It comes in strips of two colors, which you knead together to activate it so it will eventually harden. It's used to fill in gaps where you fit together pieces that don't fit together quite right (or imperfections in the model). The most common is "green stuff" made by GW (though I've seen other brands). Again, totally optional, but you can keep it in mind if you have a model that didn't come together quite right and you'd really rather fix it than let it be.
The way you thin your paint isn't the thing that's going to clog your brushes. Much more important is how you use and maintain the brush. Try not to get the paint deep down into the ferrule (the part where the bristles meet the handle), like by pushing the brush down hard onto the palette or model. Also, be sure to clean your brushes when you're done! A little soap and water is plenty. Some people occasionally use conditioner (it is hair, after all). I use this. It's great because you can soap up the brush after you get the paint out of it, reshape the point, and let it dry. It helps keep the brush in the right shape.
As for clippers, I just picked up the ones my local hobby shop had in stock. Xuron. They've worked great, and cut through plastic and metal nice and neat. Again, one of those things that are nice to have but not strictly necessary. You could also probably use something cheaper, as long as you don't try to get too precise (which might go off and scratch the model). Most board game minis won't have any use for them, but they'd be handy for something that comes on sprues like KDM.
And I'm glad to help! Let me know if you have any more questions. You can also go to /r/minipainting for more.
You can use either type of switch.
That being said, I'd recommend that you use plate-mount switches. Many people do use PCB-mount switches, but they're not really necessary since the switches fit quite snugly into the plate, and the plate is made of beefy stainless steel. Besides, if you use the PCB-mount switches, you'll have a bugger of a time getting them to sit flush on the PCB since those leg holes are smaller than the legs themselves.
One thing to note: if you've bought Zealios for your planck, I highly recommend clipping those legs for best results. You can use a pair of flush cutters to clip those things off quite nicely. (This is what I use on my Zealios.)
EDIT: Re-read your question. Hope this is a better answer.
This is a very useful tool and will significantly cut down the work time you spent. However, I think that this will serve you better in the long run as it will contain a lot of the basic tools that you will need for this hobby.
No offense, but your title implies nail clippers are the #1 way to remove nubs for model kits, when they are definitely not. As someone who used nail clippers to remove nubs since building Tomy Zoids in the early 2000s for over 15 kits, I had become experienced (and tired) with them.
They leave terrible gash marks, are uncomfortable to use after working on a kit for hours at a time, cannot reach into odd spaces which you mentioned, and can get dull after a short while if you work on kits occasionally as well as clip your nasty-ass nails.
Maybe you have fancy nail clippers that are comfortable, are extremely sharp, and cheap, but I imagine most people have ordinary dull nail clippers meant solely for cutting nails.
These side cutters have been with me since I started the hobby last year. I've been through 9 kits in varying grade and they haven't stopped being a good tool. I've also used them for cutting brass rods, paper clips, wood, etc.
If you really really prefer them over proper cutters then I can't be one to judge, but in the long run a good pair of nippers will be your best friend (along with your hobby knife)
http://www.amazon.com/Wild-us-Tester-Crimper-Connector-Network/dp/B008UY5WL0
http://www.amazon.com/Cat5e-Ethernet-Cable-000ft-Cat-5e/dp/B0092TG310/ref=sr_1_2?s=electronics&amp;ie=UTF8&amp;qid=1416346085&amp;sr=1-2&amp;keywords=ethernet+1000ft
http://derose.net/steve/guides/wiring/cat5split.png
> landline
> im older
lol
anyways, what you want is an ethernet switch. (with Gigabit speed preferably) you don't necessarily need new RJ45 cables unless your existing ones are damaged or you don't have enough. it might be worth the cost to get a crimping toolkit and spend the time to make 1 cable into 4 shorter cables that go to a switch, so you don't have to buy more cable for each device.
here's a listing for an 8 port gigabit switch that should work
existing combo modem/router/switch/AP boxes can be configured as a wireless access point/switch.
information on how to use a second router as an access point/switch
here's that crimping kit I was talking about
You can crimp ethernet cables quite easily - just need the end pieces and a crimp tool (this kit is GREAT)
Power cables can also be done but are a bit easier then Ethernet or telephone cables as they are just a positive/negative/ground wire into an end....pretty straight forward but I advise getting a cord that is already destroyed and working on it first...duh :P should just be copper inside colored tubes that goes to a specific end...typically red is power spot / grey or black is negative / and a completely different color is for ground - but that is a guess on my part as I've not taken one apart in forever as it is cheaper and faster to just get a different/new one.
Telephone cables are basically the same as Ethernet, just need to know the wire pin layout <-- that link is both RJ11 telephone and RJ45 ethernet layouts and its the same process (obviously need telephone ends to crimp onto it - that link has 50 to a bag).
Most cables are straight forward ESPECIALLY with the internet having the answer to cable layouts and everything :)
EDIT - once you do an ethernet cable crimp job everything else becomes very easy haha.
you can get a [kit] (https://www.amazon.com/gp/product/B008UY5WL0/ref=oh_aui_detailpage_o01_s00?ie=UTF8&amp;psc=1)
for pretty cheap and I got over 700' of cable for $20 on craigslist.
I just got this, that look ok? And the 1000M lights up, so yea I'm betting it's his wiring....
So that pic doesn't do the the other two cables justice but neither have lights on their ports. So is it possible both of those were meant for phone connectivity and I need to hook up the two detached white wires to get data on my bedroom ports?
I don't think you can find a better knife for the money. $17 on Amazon when I picked mine up. There is nothing about this knife that would lead you to believe it was $17. http://www.amazon.com/Morakniv-Companion-Sandvik-Military-4-1-Inch/dp/B009NZVZ3E/ref=sr_1_4?ie=UTF8&amp;qid=1407359237&amp;sr=8-4&amp;keywords=mora
Edit:
I carry a kershaw. Here is one under $20, that is nice.
https://www.amazon.com/Kershaw-3840-FreeFall-Folding-Knife/dp/B00AU6NRJU
Pre-Edit.
Mora.
https://www.amazon.com/Morakniv-Companion-Sandvik-Military-4-1-Inch/dp/B009NZVZ3E
You won't regret this knife. it is great.
That said, just realized this is EDC. Apologies - this one is not something that fits in a pocket.
Opinel is also a great suggestion.
Guys tend to get all enthusiastic about the dramatic stuff like knives. Sure, a knife is important in your kit, but it's just one of a bunch of items. Keep it simple and concentrate on the big picture. Unless you are going to study Krav Maga, or MCMAP it won't be used for much more than cutting rope or maybe dressing an animal.
Wow, that's a lot of cash for a piece of steel. A lot of sailors swear by Mora Knives which have a high carbon core within a more flexible lower carbon blade, allowing it to hold an edge but not be brittle. I'm not saying it's "best" but I'm not sure I'd spend over $40 on a knife unless I used it every week.
Mora, good and cheap though I might upgrade to the $17 one soon.
Water, high calorie food, full tang survival knife, fire starting materials (I have flint/steel, lighter, and waterproof matches), basic first aid kit plus anti-diarrheal tablets, gauze, medical tape.
That was how I started my kit and looking back I think I'd start with those same basics again.
I'm sure you'll get a million opinions on a starter knife, but this was super cheap and the first knife I got in my kit. It's a beast for the price: https://www.amazon.com/gp/product/B009NZVZ3E/
You should pick up a few high value knives for the money. Here are a few that are worth way more than their price tag:
Mora Companion - this blade is incredibly useful for camp tasks and bushcraft projects, very strong even though it's not full tang (I've never heard of one breaking).
Ontario RAT Model 1 - This is one of the best folders I've used, at any price. For $26 you won't find a better knife.
Utilitac 2 - This knife comes in a ton of different styles, made by Ontario like the RAT, and of equally high quality. These knives are built like tanks, and can take abuse.
Schrade SCHF9 - Unlike the Mora, this knife is a huge chunk of steel. I doubt you could break it with a hammer to be honest, so if you're tastes run towards the bigger camp knife, this is it.
There's a Mora Bushcraft Survival on Amazon Lightning deals right now.
47 minutes left...
http://www.amazon.com/dp/B00BFI8TOA/ref=gb1h_img_c-2_7022_de62d697?smid=ATVPDKIKX0DER&amp;pf_rd_m=ATVPDKIKX0DER&amp;pf_rd_t=101&amp;pf_rd_s=center-2&amp;pf_rd_r=0FV8CC7BDRAMCEGYWVFT&amp;pf_rd_i=384082011&amp;pf_rd_p=1980507022
thanks in advance.
here is a link to the bush crafter https://www.amazon.com/Morakniv-Bushcraft-Carbon-Survival-Starter/dp/B00BFI8TOA
It seems like it should suite my needs well in terms of shape and size. I have one in stainless now that I like. I was looking at blanks and found that you can get a morakniv blank that I could work with, but I'm liking the interest that damascus provides. I'm not really sure what the pros and cons of the material might be for camping and bushcrafting, but I do think it would look cool. I'm thinking I'd do a wooden handle possibly with some brass guards if I'm feeling ambitious.
These beard socks are funny :)
A cool chamber light.
This awesome survival knife.
This really gorgeous beer glass.
A classic Jacob Bromwell copper flask.
I can't help you on the chain rivet tool
In terms of a ratchet kit - since the rear axle nut needs to be torqued down pretty heavy, you'll want a decent torque wrench that can comfortably hit the spec on the rear axle nut. Do you know lb ft your rear axle nut needs to be torqued to? I'd suggest getting a torque wrench that does 15-150 ft lbs something like this , as most axle nuts need somewhere in the 75-110 ft lbs. Then, at the least you need a socket that 1) matches the drive size on your torque wrench (likely .5 inch) and 2) the axle nut size (can vary a lot. mines 27mm, some are 24mm, recommend checking service manual and/or google). You'd be even better off for doing other work to just get an impact socket set, should be able to find something decent for ~$20 on harbor freight, and then a cheap ratchet (for when you just need to loosen things up or other various tinkering activities)
I like the Tekton torque wrenches, have 2 sizes and never had an issue. In terms of sockets, anything not made out of chinesium is fine (Harbor freight set has been good for me)
Buy a torque wrench. They're important to have and not terribly expensive either. This one has worked great for me. $35.
https://www.amazon.com/TEKTON-24335-2-Inch-ft-lb-13-6-203-5/dp/B00C5ZL0RU/ref=sr_1_3?s=power-hand-tools&amp;ie=UTF8&amp;qid=1524178399&amp;sr=1-3&amp;keywords=torque+wrench+1%2F2+inch+drive
>Okay wow much more expensive than oil bought at the auto store, but I think I’ll take your advice and spring for it.
Oh I forgot - if you do, Omaha is a partner of this subreddit. If you use the code RedditDucati at checkout, you get 5% off and free shipping. It is more expensive than generic oil or whatever, but this is the oil they use from the factory, as well as a factory filter, the o-rings and washers and wrench you need, etc.
Ideally, you should also have a torque wrench to re-torque the drain plug and filter (you don't have to use one, but it's a good idea and I'm really anal about stuff like this). I use a Tekton one from Amazon. (I also have a smaller one that I use for lower torque stuff.)
>I can’t seem to get the free play in a place where the clutch fully engages yet lets me find neutral.. Perhaps I wore the clutch too much or maybe even with the recommended spacing my cable is too long after putting lower handlebars on.. although tension is tension so I’m not sure how much extra length should matter.
Tension is tension, you're correct. If you replaced the bars, though, you do need to make sure that the cable is routed in a way that it isn't binding up anywhere. This means no sharp bends or turns or twists, especially right near where it connects to the lever mechanism. I've seen people with swapped bars who end up putting a lot of pressure on the cable right there with how it's routed and that makes the cable not slide freely.
>As far as the oil thing goes, I thought paying the extra fees and going through a dealer would make buying used safer but aside from that I don’t know how one buys a used bike while making sure there’s nothing wrong under the hood.. is there any way to ensure against buying a bike with a problem like oil consumption or leaking?
It's tough, because it can get expensive. You can do things like leakdown tests and compression tests to see how well the cylinders and pistons are mated, but that's not cheap, especially on a bike like a Duc where getting to that rear cylinder head is a pain in the ass.
Honestly, it's entirely possible that your bike isn't eating oil, and that it just got underfilled when you bought it. I would do the oil change and get it so you know that the oil level is right. Then ride it for a while (like weeks / months) and keep an eye on the oil level. It shouldn't change.
You should get a tekton torque wrench. Mine has stayed true for a few years and it goes up to 150 ft/lbs. Cheap too.
I got a tekton one for about $40 on Amazon, it doesn't have to be high dollar as the torque range is huge. I built my dad's without one and just went to the next gas tube spot past "tight" never had any issues and that thing shoots. That method wouldn't work so well for the aero Handguards that have 4 spots for the gas tube and a set of shims though so I got one for a friend's build.
TEKTON 24335 1/2-Inch Drive Click Torque Wrench (10-150 ft.-lb./13.6-203.5 Nm)
https://www.amazon.com/dp/B00C5ZL0RU/ref=cm_sw_r_cp_apa_LNTWAbP1FXQPT
TEKTON 24335 1/2-Inch Drive Click Torque Wrench (10-150 ft.-lb./13.6-203.5 Nm) https://www.amazon.com/dp/B00C5ZL0RU/ref=cm_sw_r_cp_api_pz2izbFQR4974
You need to buy a torque wrench.
I own this one.
https://www.amazon.com/TEKTON-Torque-10-150-Lb-13-6-203-5-24335/dp/B00C5ZL0RU
If you want to build an AR on your own (grown man legos ftw) I suggest you build one. You can build a quality AR on the cheap. There is a barrier to entry from the tools you will need but from there on out you can use those tools for multiple builds. At a minimum you will need:
---
As for AR parts you can go pretty basic with an Anderson lower (~$45 not including paperwork). Or you can get a "better" lower that has build in ambi mag release, that tab that prevents rattling (can't remember what it's called atm), etc. The lower will last you through multiple builds. I'm still rocking the Anderson lower on this ~$4,500 build so it's definitely versatile.
From there you can also go basic with the upper, where I suggest an Aero Precision (~$65). From there you'll need a BCG, barrel, handguard, buffer tube (technical term is receiver extension), stock, pistol grip, trigger, and lower and uppers parts kits.
If you want something you can just go and shoot and don't care to modify, then buy a pre-built AR. If you want to build one to custom fit your needs then I suggest you put down the money on the tools. Best part about the tools is that you can fix and replace most issues that comes up with your or your friends ARs.
Also don't forget to buy some liquid blue and aluminium black just in case.
Totally man. I don't mind paying for good tools, but after a certain point you just get diminishing returns. The truck guys might make sense for someone who makes a living from their tools and, for some reason, can't drive to a store or wait 2 days for a replacement in the mail, but for anything else there's good tools to be found for reasonable cost.
For example, I love my Tekton 1/2" torque wrench. Thing is sturdy as hell, comes in a nice case, will do anything from 10ftlbs to 150ftlbs, and is only $40. It was the first tool I got from them, and I've been so impressed that nearly all of the hand tools I've purchased sense have been Tekton, if they make the tool in question.
I do occasionally end up at HF if I really need the thing same-day, or don't expect to use it more than a few times a year, but for the basics it's hard to beat Tekton in my experience. Hell, just the other day, I needed a T8 Securty Torx bit, so I ordered this thing and it's way better made than I expected it to be.
Reading back over this, I sound like a corporate shill, but I've found it hard to beat Tekton's intersection of price, quality, and Prime shipping.
I bought this guy off Amazon and I've been very pleased with it.
I used a torque wrench for the barrel nut on my AR15.
Something like this: http://www.amazon.com/gp/aw/d/B00C5ZL0RU/ref=mp_s_a_1_1?qid=1451251714&amp;sr=8-1&amp;pi=SX200_QL40&amp;keywords=torque+wrench&amp;dpPl=1&amp;dpID=31migy44iyL&amp;ref=plSrch
That is a torque wrench and what I think of when I hear that term, which is why I was confused about this product being called a torque wrench.
I just started getting into woodworking and bought this set which is a cheaper version of #1 :
https://www.amazon.com/Narex-Republic-Woodworking-Chisels-863010/dp/B00GPC74ZQ/ref=sr_1_1?ie=UTF8&amp;qid=1485379559&amp;sr=8-1&amp;keywords=aldi+chisels
I then sharpened them following Paul Sellers video using sandpaper and I'm very happy. I contemplated getting #1 instead of these for a while but went the cheaper route so I could turn that $15 into other tools.
Once they were sharp it made quick work of some pine I had. Will be trying on some hardwoods tonight, so hopefully I'm still happy.
Or something in between perhaps https://www.amazon.com/Narex-Republic-Woodworking-Chisels-863010/dp/B00GPC74ZQ
These are some good chisels not only to start with but to use until you really want to make the move up. You'll probably have to do some work to get them flat but it won't be that bad. Flatten the back and hone to a 30-degree micro bevel and you're ready to rock and roll.
For the money, you can't beat the Veritas dovetail saw. I'd suggest the 14tpi. I have that and the LN and they're both really good but the Veritas is a lot cheaper.
Good luck!
The problem with vintage is they are not commonly in good condition, or at a good price and are rarely both. You need help now. I like my two woodriver planes and think it's a great option. I have had the Stanley one there and it's not good. Also the z saw and the gyo are essentially the same thing.
Here are some things I think are better values or super useful.
https://www.amazon.com/Narex-Republic-Woodworking-Chisels-863010/dp/B00GPC74ZQ/ref=sr_1_1?ie=UTF8&amp;qid=1491542519&amp;sr=8-1&amp;keywords=narex+chisels
https://www.amazon.com/Japanese-Shop-Hammer-13-Oz/dp/B0037MHXVW/ref=sr_1_1?ie=UTF8&amp;qid=1491542635&amp;sr=8-1&amp;keywords=japanese+chisel+hammer
https://www.amazon.com/DMT-D3EFC-Dia-Sharp-Extra-Fine-Diamond/dp/B00006IIO3/ref=sr_1_11?ie=UTF8&amp;qid=1491542814&amp;sr=8-11&amp;keywords=dmt+diasharp
https://www.amazon.com/iGaging-34-707-Wheel-Marking-Gauge/dp/B00B3ZS2J2/ref=sr_1_2?ie=UTF8&amp;qid=1491542992&amp;sr=8-2&amp;keywords=marking+gauge
By hand tools do you mean chisels, planes and saws or power hand tools like a random orbit sander..
I would think a good set of chisels should be on the list even if you want to mostly use power tools
A good idea is to find a project and then get the tools to build that project, with a table saw and jigsaw you can make most any straight or curved cuts but you'll need boards that are flat and square (getting a planer, buying pre-dimensioned stock)
Narex offers tons of value. They are quality products and affordable. Narex Chisels
Here is a chisel sharpening video for your reference.
Here is a chisel sharpening prep video for your reference.
You most likely know this but it can't hurt to have a refresher.
I can't comment on the ones in your pic, but I bought the ones above it (you can just barely see the bottom of them) and it was not worth the $10 or whatever I spent. They are softer metal and now essentially garbage for me. I next bought the Stanley Sweetheart 4 piece set for $75 and they are outstanding. (If that's too much for you FWW says these are really good for like $40.) So like I said, can't comment on these but in general, with tools, you pay for what you get. I'd rather spend $75 on something that will last my lifetime than $1 on something that will cost me time to replace, will fail when I need it, doesn't do the job quite as well.
Narex chisels are the best bang for the buck if you ask me. https://www.amazon.com/Narex-Republic-Woodworking-Chisels-863010/dp/B00GPC74ZQ. This is a nice starter set. As others have said, keep them sharp and they will last you a long, long time.
https://www.amazon.com/IRWIN-Tools-Double-Edge-9-5-Inch-213103/dp/B0001GLEZ8
https://www.amazon.com/Z-saw-Dozuki-Z-Saw/dp/B001DSY7G6/ref=pd_sbs_469_3?_encoding=UTF8&amp;pd_rd_i=B001DSY7G6&amp;pd_rd_r=RBVEGF6TKKCZHVCH7WSH&amp;pd_rd_w=16INj&amp;pd_rd_wg=gFI50&amp;psc=1&amp;refRID=RBVEGF6TKKCZHVCH7WSH
https://www.amazon.com/Narex-Republic-Woodworking-Chisels-863010/dp/B00GPC74ZQ/ref=sr_1_1?s=hi&amp;ie=UTF8&amp;qid=1499302108&amp;sr=1-1&amp;keywords=narex+chisels
https://www.amazon.com/Crown-135-Marking-Gauge-Beech/dp/B00EC9AOZQ/ref=pd_lpo_vtph_469_lp_t_4?_encoding=UTF8&amp;psc=1&amp;refRID=ZBYMV8TF850C6M5JDGDG
Other than clamps, glue, mortice gauge, etc, this is good enough to get you started making carcass (dovetailed) pieces of furniture, like a shoe cubby or bookshelf. (Currently making a chimney bookshelf for myself)
Thats around $200 for getting you started. Add a mortise chisel and mortise gauge and you can start mortise and tenon work. Invest in pipe clamps when you reach a glue up point.
I just ordered these after some of the reviews for them being a good chisel for the money.
http://www.amazon.com/Narex-Republic-Premium-Chisels-Hornbeam/dp/B00H6RD4PI/ref=pd_cp_hi_0
You could also go with these for a little less.
http://www.amazon.com/dp/B00GPC74ZQ/ref=wl_it_dp_o_pC_S_ttl?_encoding=UTF8&amp;colid=2YB4RTPHDX5A5&amp;coliid=I1T0JYFCYL2C55
I think the one Sellers mentions cost like $15 US for a 4 pack which is a a bit crazy. I saw the pack you linked and started drooling. I love the look, and that it comes with leather carrying case. I don't have a problem paying $70 for quality, however I would be more comfortable if I understood why they cost $40 more than something like this pack http://www.amazon.com/Narex-Republic-Woodworking-Chisels-863010/dp/B00GPC74ZQ/ref=sr_1_1?s=hi&amp;ie=UTF8&amp;qid=1426702020&amp;sr=1-1&amp;keywords=aldi+chisels
Basically am I getting a nicer tool, or just a nicer look and brand name?
These narex chisels are a good option.
You could try a flat head that is the width of the widest part of that hole. You could also try a screw removal bit such as this one: Ontel SpeedOut Damaged Screw Extractor & Bolt Extractor Set https://www.amazon.com/dp/B00IRL3WP4/ref=cm_sw_r_cp_api_-XdGAb8WRRP78
Third option could be to take a Dremel and cut at flat-head slot in the top. Good luck not damaging the laptop tho
I don't have experience using this kind of tool, but you could try these stripped screw removers:
http://www.amazon.com/Alden-8440P-Grabit-Damaged-Extractor/dp/B001A4CWHO/ref=sr_1_1?ie=UTF8&amp;qid=1410556525&amp;sr=8-1&amp;keywords=STRIPPED+SCREW+REMOVER
Home Depot carries another brand called SpeedOut, but the reviews for that one do not look good:
http://www.amazon.com/SpeedOut-Damaged-Screw-Extractor-Bolt/dp/B00IRL3WP4/ref=sr_1_2?ie=UTF8&amp;qid=1410556525&amp;sr=8-2&amp;keywords=STRIPPED+SCREW+REMOVER
There are also 'bits' you can buy for a drill that run in reverse and 'bits' into the bolt in order to grip better and torque it out. Similar to this https://www.amazon.ca/SpeedOut-Damaged-Screw-Extractor-Bolt/dp/B00IRL3WP4
My best recommendation... [linked below] The teeth grab in a counter clockwise direction and could give you the leverage you need to get the threaded piece out
Ontel SpeedOut Damaged Screw Extractor & Bolt Extractor Set https://www.amazon.com/dp/B00IRL3WP4/ref=cm_sw_r_wa_apa_i_quqIDbX33B1DA
[Haven't seen them mentioned yet but these things will save you from many fucks.] (https://www.amazon.com/dp/B00IRL3WP4/ref=cm_sw_r_awd_WAeuub0TTK73R)
OP: you need to get your hands on a screw/bolt extractor kit. Most hardware stores sell them (or Amazon). Everyone should have one of these kits, they can be a life saver.
If you happen to have a dremel around, you could also try to cut a slot so you can use a flat-head screwdriver (have done this successfully several times).
If you have an electric drill, these work better than cutting slots in screws
https://www.amazon.com/Ontel-SpeedOut-Damaged-Screw-Extractor/dp/B00IRL3WP4?ref_=fsclp_pl_dp_5
These work as a last resort providing the head is large enough. Pivot screws are usually plenty big enough.
I would recommend buying the Adafruit 200mAh battery, just to avoid Chinese knockoffs.
https://www.amazon.com/Battery-Packs-Lithium-3-7v-2000mAh/dp/B0137ITW46/ref=sr_1_1?ie=UTF8&amp;qid=1485110664&amp;sr=8-1&amp;keywords=2000mah+battery
There's a video you can Google pretty easily for replacing the battery. I'd recommend having a small screwdriver set and also angle cutters of some sort, something like https://www.amazon.com/Hakko-CHP-170-Stand-off-Construction-21-Degree/dp/B017ODDPNO/ref=sr_1_1?ie=UTF8&amp;qid=1485110742&amp;sr=8-1&amp;keywords=angle+cutter though it isn't really necessary, just makes it easier than using needle nose pliers and it is cleaner.
HEY THANKS! When I was new to the game I didn't know how to tell what props go on which motor, and when i threw them into my bag I wanted to be able to know what i'm pulling out. SO I wrote the motor numbers under the props (see this pic for motor numbers. I no longer do this, I started flying with some guys who showed me a "trick", if you will. With the kwad facing forward from you, putting on props the pitch will always face UP when parallel front and back... errr wow that's hard to explain in words. If you don't know what i'm talking about let me know I can post a pic, lol.
As far as what's in my "tool stand", lol. I have Hex Drivers, X-Acto knife, multibit screw driver, flashlight, sharpie, wire snips, and small pair of plyers. tagging /u/medium2slow.
Not sure if you already have these clippers yet but I find them pretty convenient when trimming leads.
With decks like that I generally like to use the positive that's furthest away from the negative per coil, I find it easier to keep the coil centered and accessible for trimming. Usually I'd make my adjustments after everything is trimmed.
I'm not telling you to buy anything different but a velocity style deck is really easy to build on for someone new and keep things as even as possible.
No problem; also a pair of tweezers (ones that don't cut and have blunt ends) helps with applying stickers.
These are the side cutters I bought if you're buying from Amazon
HOLY SHIT!!!! TRIM YOUR ZIP-TIES!!!
https://www.amazon.com/Hakko-CHP-170-Stand-off-Construction-21-Degree/dp/B017ODDPNO/
EDIT: I have to agree with everyone else. Whoever made the splice tray did a great job, they just need to "finish" it.
I just watched this youtube [video] (https://youtu.be/Ck9dfeoKwhs?t=1097) and it doesn't look all that complicated since there is no need to do it perfectly, you can just cut them on the go using something like this also you gonna need a rubber mallet and double check you order the molding with the proper width.
Hm, I suspect you might have damaged one of the pads by using those cutters (if you did use them). Something like https://www.amazon.com/dp/B017ODDPNO would be much better.
Great job finding the broken link though!
I've been using a small Hakko wire cutter. If you gently cut into the plastic housing it breaks apart and the metal pins just fall right out.
Checklist:
Coupon code for Lightning Vapes: ohmsweetohm (17% off)
http://www.lightningvapes.com/collections/kanthal/products/kanthal-a1-resistance-wire?variant=993078056
http://www.lightningvapes.com/products/ceramic-heat-resistant-tweezers-pointed-tip?variant=740212113
http://sweet-vapes.com/coil-master-v3.html
http://www.amazon.com/Koh-Gen-Do-Organic-Cotton/dp/B00NU3H3KE/ref=sr_1_2?ie=UTF8&amp;qid=1453852567&amp;sr=8-2&amp;keywords=koh+gen+do
http://www.amazon.com/Hakko-CHP-170-Stand-off-Construction-21-Degree/dp/B017ODDPNO/ref=sr_1_1?ie=UTF8&amp;qid=1453852717&amp;sr=8-1&amp;keywords=flush+cutters
http://www.amazon.com/Fiskars-Inch-Micro-Tip-Scissors-94817897J/dp/B00006IFNA/ref=sr_1_6?ie=UTF8&amp;qid=1453852757&amp;sr=8-6&amp;keywords=fiskar+scissors
You should buy an ohm meter if you have a regulated mod. Also, you can use the steam-engine website to calculate your ohms and your mod will be able to read it out for you. But an ohm meter is just for safety precautions.
Personally, I like storing all my gear in a bin so I bought this
http://www.amazon.com/Stanley-STST14027-SortMaster-Tool-Organizer/dp/B00O7R6RS6/ref=sr_1_2?ie=UTF8&amp;qid=1453852881&amp;sr=8-2&amp;keywords=stanley+storage+boxes
You could also use needle nose pliers to help you with your leads when trying to get them in your post holes.
PSA: Buy the protective tube with your ceramic tweezers. It will shatter your heart to see the tips break if the tweezers are dropped.
You could just buy the coil master kit but I'm not a very big fan of it because you can only store what comes with the kit (no room to expand your tool selection)
With SS316 wire, you can run it in power (wattage) or TC mode, whichever you prefer. With Kathal wire, only power mode. I mostly stick with power mode. TC mode is fiddly, even with a DNA mod, especially with clapton coils.
The 50mm x 60mm organic Japanese cotton pads are very popular among builders. "Puff" is one of those brands you can get on Amazon.
An RDTA is essentially an RDA sitting over a tank. Since neither has a chimney, you can get great flavor from each, depending on the particular unit.
Dual coils will produce a more intensive vape but can also be twice the work, use twice the cotton, twice the wire, twice the juice, and make your RDA twice as hot. That last one is real important to me. I only use one fused clapton in my Goon to keep it from getting too hot. Not all RDAs support single coil mode, however. You typically want to shut off the airflow on the empty side so as not to dilute the flavor.
Coils are ambidextrous, they don't care which end is negative or positive.
You'll save a lot of money buying spools of wire. A good flush cut wire cutter is essential.
IMO you just need a box cutter and wire cutters.
It would also be handy to have a cable tester.
Edit:
>I definitely can't afford them
I call shinannegans. Cheap af
While you could put a keystone on the other end and then use a short Cat6 cable to connect to the AP, I'd recommend doing it this way instead:
https://www.amazon.com/UbiGear-Crimper-Connector-Network-Crimper315/dp/B008UY5WL0/ref=sr_1_4?ie=UTF8&amp;qid=1522779845&amp;sr=8-4&amp;keywords=rj45+crimper&amp;dpID=51DjZejC9oL&amp;preST=_SY300_QL70_&amp;dpSrc=srch
https://www.youtube.com/watch?v=ysYLdFxNVuc
If you want to take it off you have to cut the old one and put on a new one..
it can be done..
Thought a crimp tool does not cost that much and they will come in handy one you have one.. No more will you be forced to use whatever length you buy..
I recommend this one: https://www.amazon.com/ECore-Cables-93-100-018-Professional-Crimping/dp/B01LX16ZCH
Or you can get this little kit for the sameish price which is adequate..
https://www.amazon.com/UbiGear-Crimper-Connector-Network-Crimper315/dp/B008UY5WL0
IF you are truly cheap LOL - You can cut the cable with about 6 to 10 inches from the end and then cut the rest of the cable to length THEN cut the rest of the cable to the length you want and strip both ends and splice all 8 wires back together (but THIS is NOT recommended LMAO)
UbiGear Cable Tester +Crimp Crimper... https://www.amazon.com/dp/B008UY5WL0?ref=yo_pop_ma_swf
It comes with the crimper tool the cable tester the RJ45 connectors all for $15.
I used this when I ran CAT5e for my Security Cameras and I had to make sure the cable still worked after pulling through the run and the cable tester worked great. Just plug in a short CAT6 cable in each room and attach the cable tester then go to your utility room and hook up the other end of the tester until it passes, label and move on.
UbiGear Cable Tester +Crimp Crimper +100 RJ45 CAT5 CAT5e Connector Plug Network Tool Kits (Crimper315)
by UbiGear®
Learn more: https://www.amazon.com/dp/B008UY5WL0/ref=cm\_sw\_em\_r\_mt\_dp\_U\_7efzCbDCN9H6S
If you can build a pc you can run some cat5e cable where ever you live. People say im just renting and I can't put holes in the wall and all other kinds of things. You can run it along the base boards using cable clamps or do any number of things to make it work. Just get some cable https://www.amazon.com/dp/B0092TG310/ref=cm_sw_r_cp_dp_T1_haCnzb6BHCV61 and here's everything else you need including the tool https://www.amazon.com/dp/B008UY5WL0/ref=cm_sw_r_cp_dp_T1_DdCnzbFAGCRX7 so for about $50 you can run as much cable as you need. I would run one line to your gaming room and use a Gigabit Ethernet switch for everything in the room. A real gamer never uses wifi because they know about networking.
You can get an ethernet crimper and some RJ45 ends for very cheap online, there's a ton of guides on the internet on how to properly terminate cat5/6 cable, no point getting a shop etc to cut a cable when you need to size it for your needs in the room really :)
EDIT: here you go - linky
I have everything in my media center. The biggest thing I did to clean it up was custom cut-to-length ethernet cables. You can get the tools to do it yourself quite inexpensively, it's easy to learn, and it makes a big difference. Plus, then you'll get the itch and re-wire everything in your house.
&#x200B;
Unfortunately a lot of the power cables are non-standard so it's harder to get different lengths. I have a cable management box that I shove a power strip and all the power plugs into, and then velcro all the cables into a bundle to run to the hubs.
&#x200B;
Quick Guide on custom cables:
https://www.youtube.com/watch?v=zX17FF47deI
&#x200B;
Toolkit on Amazon:
https://www.amazon.com/UbiGear-Crimper-Connector-Network-Crimper315/dp/B008UY5WL0/ref=sr_1_3?ie=UTF8&qid=1541653653&sr=8-3&keywords=ethernet+crimp+tool
(Note: This only includes cable ends, but you can do what I do and cut up the longer cables you already have to make shorter cables, instead of buying cable stock... until you need more)
&#x200B;
Cable Management Box:
https://www.amazon.com/Management-Organizer-Storage-Holder-Computer/dp/B074T8BBGV/ref=sr_1_3?ie=UTF8&qid=1541653791&sr=8-3&keywords=power+strip+box
&#x200B;
UbiGear Cable Tester +Crimp Crimper +100 RJ45 CAT5 CAT5e Connector Plug Network Tool Kits
I'm sure sure what you mean. Are you using keystone jacks, or just making your own male connectors with a crimper?
You need four connected wires in total, because if you have something like 6 functional wires in there instead of 8, your network equipment might try to negotiate at gigabit, and it won't work. Whereas if you have 4 wires at positions 1,2,3,6, it'll go straight to 100mbps, afaik.
Edit: If you were using a pre-terminated cable that you are now modifying, you'll need buy a crimper.
Are you sure this is where it is bad/what is causing the problem. It is hard to tell from the picture exactly, so here is some general info.
The outer black layer is pretty much just for protection/shielding and could be replaced with electrical tape in a pinch (which it sounds like you have tried).
Inside you have 8 wires in 4 color pairs (a solid and a stripe). One or more of those wires may be damaged/disconnected.
I would look at them closely, peal back the black outer coating more if needed, and see if you can find any breaks in the 8 smaller wires. If you find one and absolutely don't want to buy anything to fix it right or run another cable, you may be able to strip off the outer coating on the individual wire to expose the copper wire inside.
Do that on both sides of the break, twist it together, cover with electrical tape, then try it out. If it works, cover the whole thing back up with electrical tape.
If you don't see any obvious breaks or issues, check into other issues (like is it maybe the router, the XBox, the cable RJ-45 plugs (the ends), etc).
Anyway, good luck. If you really want to fix it right, you could get a not that great, but serviceable crimper set for under $15:
http://smile.amazon.com/Wild-us-Tester-Crimper-Connector-Network/dp/B008UY5WL0/
Cut the cable on either side fo the tear, use that to put an RJ45 jack on each end of the break, then use a coupler like this to join them back:
http://smile.amazon.com/Britta-Products-271710-Coupler-Straight/dp/B000BSLW8U/
I know that isn't what you want to do, but it may be the best way if that is the true cause/location of your problem.
http://www.amazon.com/dp/B00004RGYL/
http://www.amazon.com/gp/product/B008UY5WL0
Get yourself a Mora knife. They are cheap, and sharp as a razor. You can get a fire steel and some fire starter packs as well.
Morakniv
Swiss Army
&#x200B;
There's a difference but it's only a few ounces. I currently have a benchmade that I bring with me, so I don't have a lot of room to talk but I will be switching to the swiss army.
http://www.amazon.com/Morakniv-Companion-Sandvik-Military-4-1-Inch/dp/B009NZVZ3E/ref=sr_1_2?ie=UTF8&amp;qid=1382540279&amp;sr=8-2&amp;keywords=mora+knife
http://www.amazon.com/Spyderco-Ambitious-Black-PlainEdge-Knife/dp/B004MMSDHO/ref=sr_1_9?ie=UTF8&amp;qid=1382540355&amp;sr=8-9&amp;keywords=spyderco+tenacious
http://www.amazon.com/Opinel-No8-Carbon-Pocket-Knife/dp/B002SCUO04/ref=sr_1_2?ie=UTF8&amp;qid=1382540386&amp;sr=8-2&amp;keywords=opinel
http://www.amazon.com/Svord-Peasant-Knives-Knife-Handles/dp/B004HV3A3W/ref=pd_sim_hg_15
All good quality knives under $30
So I am going to get a Mora blade, it is between these three, that are all close to each other!
http://www.amazon.com/New-Swedish-Mil-Mora-Knife/dp/B004TNWD40
http://www.amazon.com/Mora-Companion-Heavy-Duty-Knife/dp/B009NZVZ3E/ref=pd_sbs_sg_2
http://www.amazon.com/Mora-HighQ-Robust-Knife-Carbon/dp/B00816PZ8W/ref=pd_sim_sg_1
At this point the $5 differences aren't an issue, what would be my best bet of those three?
They make a "heavy duty" version of the Mora Companion; significantly thicker blade. http://www.amazon.com/Morakniv-Companion-Carbon-Military-4-1-Inch/dp/B009NZVZ3E
I baton the living crap out of everything any chance I get, never oil it, haven't sharpened it, and it's still sharp enough to do rough carving/whittling. It's damn impressive considering the price.
just saw the heavy duty mora has dropped by 4 dollars to $14.
https://www.amazon.com/gp/product/B009NZVZ3E
Morakniv bushcraft. Great blade, great friction fit sheath, nice tacky handle, plus it comes with a firesteel and sharpening stone built in to the sheath. I have dozens of knives--some waaaay more expensive--but this is my go to.
Great. I'm excited. I'm going to go with http://www.amazon.com/Morakniv-Bushcraft-Carbon-Survival-Starter/dp/B00BFI8TOA
https://www.amazon.com/Morakniv-Bushcraft-Carbon-Survival-Starter/dp/B00BFI8TOA/ref=sr_1_7?s=prime-day&amp;psr=PDAY&amp;ie=UTF8&amp;qid=1499806974&amp;sr=1-7&amp;keywords=knife
I love my small forest axe. Best survival purchase i've made. I wouldn't stray from that idea, unless you decide to refurbish an antique hatchet. I've seen people fix up sixty year old plumb scout hatchets to gransfors quality.
For knives, i use my moraknive survival and the condor bushlore. The bushlore a hardy-ass knife and it's only about thirty bucks. I use the mora regularly. That particular one is what i have, i picked it up based on the thickness of the blade, but they have far cheaper ones if you don't want to throw down that much. I believe you can get an almost identicle knife without the firesteel for around 15 bucks cheaper.
Good Review on the bushlore
Machete-wise, i love my Condor Parang. It's giant, it sharpens well, it holds an edge, and it's tough as nails. The thing is 1/4 inch thick. It's big. It also comes with a sexy leather sheath of equally high quality and durability.
I've also played around with the full size bear grylls Parang by gerber. Thing cuts like you wouldn't believe, with great weight length and balance. I use the condor, my survival bud uses the gerber. They're about equal in different ways.
Honestly I'd prefer to get both a hatchet and a saw. Do you have any specific recommendations on hatchet brands and styles?
Also is this the knife you have?
Thanks!
all the moras are nice. get a carbon steel mora classic if you just want a base model, or if you don't like the wood handle/traditional look you can grab the mora frost which is cheaper and has a nice and grippy rubber handle. if you wanna spend a bit more cash, they have a line of thicker blades, designed for specific bushcraft use (whatever that means) such as the mora bushcraft black. basically they don't make a bad knife. even if you get the cheapest mora utility you will not be disappointed.
your sog is legit though, i really like it. i've been meaning to add a combo straight/serrated fixed blade to my collection and the seal pup elite really caught my eye. good looking blade for sure.
I agree in the Mora suggestion. Mora's are great knives for the money.
http://www.amazon.com/Morakniv-Bushcraft-Carbon-Survival-Starter/dp/B00BFI8TOA
I went a bit crazy, and bought three knives based on the recommendations from this post. The ESEE 4HM, Morakniv Bushcraft, and Ka-Bar BK11.
The Morakniv stays in my main pack with the rest of my backpacking gear, while the small Ka-Bar is in my day pack. I use the ESEE around the house on a near daily basis and carry it along with the Mora if I can remember to grab it. So far all three are incredible knives
x 2! the Mora is a good starter work knife. They are cheap enough to have a few, which is better IMO than one super expensive knife. I keep one in my vehicle, one in my winter emergency bag, and one with my camping stuff. Plus a few other lying around, I think. (I'm not even sure how many I have now...)
They are not perfect, but for the price they are a great value.
Depends on the tools you have. If you have all the tools and fixtures it is a total cake walk to build an upper around a barrel. If you don't have the tools/fixtures, you will struggle.
You can get a Magpul BEV block, armorer's wrench and a torque wrench for all under $100 and are worth their weight if you get into more serious AR building.
alot of this is dependent on your model, but to give you a rough idea...
the most important tool you can own is a copy of the Factory Service Manual for your car, it can make fixing any part of the car 10x easier, and gives you torque specs for almost everything so you dont wreck your car. Subaru uses aluminum engine blocks, and over torquing will strip the threads from the block, or if you're really unlucky you can crack the block or head leaving you with a 3,300lb paperweight.
99% of fasteners are Metric, common sizes are 8, 10, 12, 14, and 17mm. there are also some 19, 21, and 23mm but they're less common. If you do any engine work you'll want a 14mm 12-point to remove the head bolts. If you need to split your short block, those are 12mm 12-point i think...
changing the engine oil will require a normal 17mm socket, but if you feel like changing manual transmission or rear diff oil you'll need a Torx T70 bit. (im doing mine this weekend) thats about $10 on amazon
If you plan on doing any engine/timing belt work, consider getting a set of cam/crank pulley tools. they're specific to Subaru and its nearly impossible to get the timing belt pulley's and harmonic balancer torqued correctly without them. There are a few different tools for different pulleys, each is about $50. you can find them here and on amazon.
I'm not sure about older models, but the fuel line that connects to the intake manifold on my subie has a quick-disconnect that requires a special tool to remove, you can remove the fuel line in other locations, but its nearly always a pain in the ass to get it back on and will risk damaging a hose. this is only really needed if you think you'll ever remove the intake manifold or plan to pull the engine at any point.
Other than that...
Breaker bars are great, especially for head bolts, brakes, and oil drain plugs
Feeler Gauges for checking tolerances
If you jack up the car, throw some jack stands under there for redundancy so if your jack slips, you aren't killed (this happens, alot.)
a compressor, impact wrench, blowgun, air ratchet, and some impact sockets can be infinitely useful, but know when to use them and when not to use them.
a good set of torque wrenches is always good, the torque specs on subarus are anywhere from 3.6ft/lbs to something like 136 ft/lbs. Amazon has some pretty good ones which cover this range... i bought this, this and this
im sure i can come up with more, if i do i'll add them as an edit. If you can give me an idea of what you plan on doing maintainance-wise, maybe we can give you an idea on what you'll need/expect
You are getting horrible advice and this thread is complete shit. Here is exactly what you need:
Vice.
Upper Vice Block.
Torque Wrench 1/2”.
Anti-Seize Grease.
Blue Loctite.
Punch Set.
Torx & Allen Set.
The reason people are recommending an armorers wrench is for the muzzle break install. Every armorers wrench has a slot designed for installing one. This isn’t mandatory because you can use a regular wrench but you might as well get one because you will need one to build a lower when installing the castle nut.
I bought this torque wrench for $40. It's been working fine so far. $22 on this vice. I picked up a BEV Block at GT's I think.
It's not amazing or anything, but I've been able to do everything I've needed to up to this point.
Just get a torque wrench. Most people dont bother and just use a normal wrench to reef on their lugs and that's bad for them. Your lugs should be around 80 ft lbs, just google 'em.
good idea for "to change flat tire". in the shop today, I want to use my hand tool to loose that lug nuts to make sure it's smooth, that piss off the boss, he asked me to get lost. I should come up with a reasoning of "just in case I need to change flat tire".
>remove them often enough
do you remove them every 3 months or 6 months? I usually didn't touch it if there is need to, such as to change a flat tire.
> Torque it down, dry
you dry the lug nuts before put it on? May I know what's the purpose?
Thank you for your recommendation of the 3 tools, do you think these 3 looks Ok:
https://www.amazon.com/gp/product/B00C5ZL0RU/ref=s9_acsd_top_hd_bw_b2Lfk_c_x_1_w?pf_rd_m=ATVPDKIKX0DER&amp;pf_rd_s=merchandised-search-3&amp;pf_rd_r=CWTA8X0BR49HVQ186Y8Y&amp;pf_rd_t=101&amp;pf_rd_p=365b646d-0ab5-53c3-9063-fe500e13a356&amp;pf_rd_i=559968
http://www.sears.com/craftsman-1-2-in-drive-quick-release-teardrop-ratchet/p-00944809000P
https://www.amazon.com/TEKTON-15356-2-Inch-24-Inch-Breaker/dp/B00MWVAUT6
Thank you!
Just get a torque wrench and whatever socket fits your lug nuts. Look up what your car is supposed to have and just leave the wrench set to that.
Check it up every few months, only takes like 10 seconds to do and doesn't need any special skill to accomplish. If you can use a screwdriver you can use a torque wrench, just makes a loud click when it hits the setting. Sure beats going to a tire place every time you need to do that.
Now if you want to get it fixed professionally, by all means do so. But I wouldn't let lack of a torque wrench hold you back. This 1/2" drive one is only $40. I'm sure it's not the world's greatest torque wrench, but Tekton has a decent reputation. Harbor freight sells a 1/4" drive for $10 (after coupon, ~$20 otherwise).
You can rent a lot of specialty tools for bearings, etc from part stores like Autozone or Orielly's. I haven't seen anything saying they rent torque wrenches, but I'd give them a call at least.
good call given the spec for my rims is 120 Nm +/- 10. Given that i think I may order the 1/2 one and get a 1/2 to 3/8 reducer and deal with the bulk when I'm under the car doing an oil change. By that time i may invest in a 3/8 or 1/4. Had to add in I'm so excited to order my Rhino Ramps instead of jacking up my car I'm like a kid in a candy store lol
no, no torque wrench in the kit, but I probably wouldn't want a "kit" torque wrench. This kit just gives you basically every and any size socket you will ever need, plus a lot of wrenches, a screw driver with changeable bits, and a few other things. I got this one on Amazon, I've cranked on it up to 140 lbs on my Toro zero degree mower and it's great.
I just go to Autozone and use "rent a tool" to borrow their breaker bars, torque wrench. They charge your credit card and give you 90 days to return it in same working condition. Having said that I know youtube channel "Chris Fix" recommended one of amazon's best selling torque wrenches for weekend garage diy'ers... here's the link
https://amzn.com/B00C5ZL0RU
https://www.amazon.com/Narex-Republic-Woodworking-Chisels-863010/dp/B00GPC74ZQ/ref=sr_1_4?s=power-hand-tools&amp;ie=UTF8&amp;qid=1483244140&amp;sr=1-4&amp;keywords=chisel
These? They seem to be of similar quality as the Aldi chisels that Paul Seller's recommended, but they are much more expensive.
I'm looking to get into woodworking and just when I thought I had my starter tools picked out I got distracted! I have been looking at the Japanese style tools and I am mainly curious about if it would be possible to find a set of three or four general purpose ones for a price that is not so intimidating of an entry fee compared to all the premium handmade ones. I was planning on getting this 4 piece Narex set ..... I wouldn't want to go over $100 for a set and would be much more comfortable around $50 similar to the Narex ones. Since it is just my curiosity getting the better of me I would also be okay with getting a single Japanese chisel in a commonly used size with the intention of experimenting with the style.
&#x200B;
I would also appreciate some small beginner project ideas! Don't have a ton of room for random chairs and all that nonsense to lay around so something small that helps me practice. I am interested in connecting wood with joins and dowels and using as few nails as possible.
I just started as well using only hand tools. Hopefully this helps in some way. Don't hate me if it doesn't.
So far here is what I've collected:
Note - I have no idea if that knife sharpener is correct to use with the chisels and plane. I'm only using the fine stone and it seems to work, but I have no idea what I'm doing in that department.
This seems to cover the basics for me. I'm about halfway through a desk project and struggling, but I think that's user error more than the tools. More clamps and a better workspace would work wonders.
Great thanks. So I'll probably pull the trigger on the Veritas Carcass saw....
For the Narex chisels, I am assuming these will work.
However, also read that Lee Valley is a good place to grab them....and they are $62 for a set of 4. :D
Thanks for the advice
These are about the same price and should do everything you need for the most part. https://www.amazon.com/dp/B00GPC74ZQ/ref=cm_sw_r_cp_apa_VOemybFFCNFPY
Okay I'm going to give it another shot this weekend with the 3/4" stock I have. I have these narex chisels. Should these work?
Ha ha yeah mdf and oil/moisture don't really mix but the boxes look nice!
I just bought a set of Narex chisels and as far as I understand, I'll need to sharpen them before use (I'm completely new to woodworking, sorry!).
I realize I could probably piece together a much cheaper version from a hardware store, but if this set is great to use out of the box, I'd rather spend the extra few bucks for a perfect surface and a guide as well.
Are these acceptable Narex chisels or not?
Narex Chisels
Porter Cable Forstner Bit Set
Eclipse Coping Saw
Countersink Wood Drill Bits
Narex Marking Knife
Bessey F-Clamps from Home Depot. 4 pack for like $20.
Bessey 3/4" pipe clamps from Home Depot. $12-ish. Black pipe is about $1 a foot.
Great info, I appreciate it greatly! I've seen a few of Paul Sellers' videos on sharpening, so I'm not sure why they're called "scary sharpening", but it does look like it takes quite a bit of time, but I've got plenty of that while my wife and children are out of the country visiting relatives. I don't have an Aldi nearby, and they don't seem to sell from their web site, so I think I may be out of luck on those famous chisels. Every time I try to search for them online, I end up with links like this to Amazon, even when just looking for singles.
Use the heat gun as suggested, and either this or this from your local big box hardware store.
Time to buy a set of EZ out s
SpeedOut Damaged Screw Extractor & Bolt Extractor Set https://www.amazon.com/dp/B00IRL3WP4/ref=cm_sw_r_cp_api_8xmxxb6TY2MJM
Designed to run in a drill in reverse. Grabs in and backs it out.
I use Grabit for work but these will work as well. You can also get one from any hardware store, lowes/home depot.
I use these things all the time at work and they are very helpful timesavers
Not sure how far down that is, but if you have a drill, you can purchase "easy-outs". In order to use one, you take a drill bit slightly smaller than the easy out, drill a hole into the screw you are trying to get out, then use the easy out to extract.
Easy outs are essentially reverse threaded bits that bore into the screw and then, when it reaches the bottom of the hole you pre-drilled, turns the screw out.
A set like this can be found for cheap at your local hardware store
I've seen the rubber band trick on just about every "picture list of life hacks." I've tried it about four times and have never been able to make it work.
In my experience the only things that work are using a dremel to carve out a new groove, getting a pair of pliers and turning the screen or, if you can't get to the screw with pliers, use a screw extractor, like this: https://www.amazon.com/SpeedOut-Damaged-Screw-Extractor-Bolt/dp/B00IRL3WP4/ref=zg_bs_2225074011_1
Spent my first several weeks working GA as, basically, a panel bitch. Combined with time in the USAF where power tools were not allowed and coin-slot screws were commonplace, I have an extremely well-exercised skillset in removing stuck screws.
Screwgun, using snap-on bit, won't get it out? Use the ratcheting screwdriver with those biting bits - you can get more direct force on it.
Ratcheting screwdriver with biting bit won't get it out? Oh, it's gonna come out, I'm not asking. Get the speed handle with almost-new bit, with a little valve-lapping compound on the tip. Put a lot of pressure downwards towards the screw, and first try the pop method - give the handle some pops. That doesn't work? Grab a rag, fold it up, and use your whole body to put maximum force on that little screw, and slow turn it. If you feel it start to slip? Stop. It's time to stop playing. Get the SpeedOut.
Drill out that head. Flip around, use the right-angle screwdriver (sometimes also called a Yankee, whatever works) to put a lot of pressure and slooooowly bite that sucker into that new hole. Continue with slow, even pressure to get the screw to break. That's not working? Okay, you've got a special snowflake, this fixes 95% of stuck screws.
Left-hand drill bit, waaaaaaaay down deep in the screw, and the pointy-type easy out you usually get from snap-on with the T handle. Drill clean thru the screw if you gotta, get MAXIMUM PENETRATION. Turn that sucker out, slow stead pressure to get it to break.
Still not working? Holy fuck. Use a bigger left-hand drill bit, and use the wrench-type easy out that is usually for bolts. Put some valve lapping compound on there for good measure, just to be sure.
That's not working? Fuck it. It ain't coming out. Drill the whole thing out, you're gonna need to rivet in a new nutplate. If it's not countersunk, drill it out like a rivet. If it is countersunk, well shit. You can try to drill it like a rivet, or you can match the hole and take the nutplate and all with it.
If that somehow fails, you're replacing significant levels of sheetmetal.
Something like this will work way better.
https://www.amazon.com/Ontel-SpeedOut-Damaged-Screw-Extractor/dp/B00IRL3WP4?ref_=fsclp_pl_dp_5
I use this trick all the time, it's so simple and yet awesome. And when that fails I use this.
This.
The last line was confusing.
I'm overseas so I don't really know any place but as somebody who dealt and still deals with fucked up screws, read this.
What kind of device do you have? If the screw is small, then I'd recommend a speedout tool https://www.amazon.com/SpeedOut-Damaged-Screw-Extractor-Bolt/dp/B00IRL3WP4
Or you put a piece of rubber over the head and push down with a screwdriver then unscrew. You wanna keep a constant downward pressure while unscrewing.
If your "device" is big enough to withstand a stronger force and the screw head is big enough, use a Johnson bar.
Lastly, my favorite one, make the screw head a flat head. Make a groove on the head to fit your flat head and that should do the trick.
Or you can say fuck it and drill the crap out of the screw until it's reduced to shavings
Snag this set
https://www.amazon.com/SpeedOut-Damaged-Screw-Extractor-Bolt/dp/B00IRL3WP4
Iv used this kit probably a hundred times, never snapped one bit. If it did snap, then you'd hav fresh grade 8 steel to weld on to. In all hon sty, I bought this exact set from walmart for $5.99, if it didn't work I wasn't out any real money. I was pleasantly surprised when it worked the first time, and the many times after that were just icing on the cake
They make tools like this to remove stripped screws. You could try putting a little oil or WD-40 on the threads which should make it easier to remove.
For future reference, it's always best to put a little light grease on steel screws to avoid stripping the aluminum.
I've used these extractors on a drill http://amzn.to/1CVA7aq - they work perfectly, I just don't know if they're going to be too big to fit in that hole.
Doubtful, but it can't hurt to shoot them an email.
You can get a decent pair for $5 on Amazon.
https://www.amazon.com/Hakko-CHP-170-Stand-off-Construction-21-Degree/dp/B017ODDPNO/
Check out some of these videos:
https://www.youtube.com/results?search_query=build+your+first+coil
I order my wire on Amazon, and its like $8 for 100ft of your choice in gauges, $12 or so for a bag of Japanese Organic Cotton, maybe another $15-$20 for wire cutters/tweezers, and $18 for a Coil Master jig if you want to use them. Oh, and don't forget anything your atty might need like a Phillips screwdriver (though even though they're crappy, pretty much every atty comes with a tool for it). All in all you're probably looking at around $40 up front, but you'll have about a years supply of cotton at least, and even rebuilding a lot to test things enough wire to last a couple months or so.
Here's some of the stuff you'll want to look for (don't have to use these ones specifically of course):
https://www.amazon.com/100ft-Kanthal-Resistance-Gauge-Lengths/dp/B00MW4O0WG/
https://www.amazon.com/Koh-Gen-Do-Organic-Cotton/dp/B00NU3H3KE/
https://www.amazon.com/Hakko-CHP-170-Stand-off-Construction-21-Degree/dp/B017ODDPNO
https://www.amazon.com/Authentic-InnoVaper-Precision-Ceramic-Tweezers/dp/B00TI6M3WK
https://www.amazon.com/Stanley-66-052-6-Piece-Precision-Screwdriver/dp/B00009OYGV
flush cuts? just cheap little nippers for cutting off the ends of zip ties but if you don't hold it flush it leaves sharp lil points on all those zip ties. https://www.amazon.com/Hakko-CHP-170-Stand-off-Construction-21-Degree/dp/B017ODDPNO/ref=sr_1_1?ie=UTF8&amp;qid=1466608831&amp;sr=8-1&amp;keywords=flush+cuts
For sure get these wire cutters. I bought a couple other ones before from B&M stores and they ended up breaking on lower gauge wire. Complete crap.
These are on amazon for $5 and if you have prime free 2 day shipping. Been using over a year no problems at all.
https://www.amazon.com/Hakko-CHP-170-Stand-off-Construction-21-Degree/dp/B017ODDPNO
These ceramic tweezers are nice and cheap too.
https://www.amazon.com/Genuine-Lightning-Vapes-Ceramic-Tweezers/
These are nice for cutting cotton.
https://www.amazon.com/Thread-Tailor-Spring-Scissors-Stitch/dp/B00M6JK3T6/
Best thing you can do is just build up a kit separately. Purchasing the preassembled kits are usually over priced and junk.
You don't use scissors to cut zip ties, you use wire cutters.
Buy pass through connectors like these. - EDIT: Good up to Cat5e.
Edit
Here is a youtube video about the same type of connector. Your existing crimper should work, but you will have the extra wire to cut off. Just get a cheap pair of edge cutters.
/Edit
Use a cable tester.
You Tube videos will also help.
This is a PITA exercise. You will get better at it.
Oh, get a cable tester. $9.
Did I mention a tester?
Did I mention do not use a cable tester if the cable is hooked up to anything? Only use a tester to test Both ends of the cable at the same time.
I can work with that. Buy a tobecco velocity clone and a geek vape tsunami. You will also need drill bits in various sizes, or a coil jig to wrap the coils. A set of precision screwdrivers is also helpful. Get a roll of 24 and 26 gauge A1 kanthal. Plus this, this and tweezers or needle nose pliers to work the coils.
I use these: https://www.amazon.com/Hakko-CHP-170-Stand-off-Construction-21-Degree/dp/B017ODDPNO/ref=sr_1_3?ie=UTF8&amp;qid=1499887364&amp;sr=8-3&amp;keywords=flush+cut+pliers
And these: https://www.amazon.com/SE-DD312-12-Piece-Stainless-Double-Sided/dp/B000SVRSRY/ref=sr_1_2?ie=UTF8&amp;qid=1499887406&amp;sr=8-2&amp;keywords=wax+carving
I make my own beaded bracelets, basically you just need a crimp plier and a [wire cutter] (http://www.amazon.com/Hakko-CHP-170-Stand-off-Construction-21-Degree/dp/B017ODDPNO/ref=sr_1_1?s=power-hand-tools&amp;ie=UTF8&amp;qid=1453178055&amp;sr=1-1&amp;keywords=wire+cutter). After that you choose your beads, wire, and clamp. The obvious benefit is you will always have bracelets that fit you exactly the way you want, and you choose your beads. And they will always be cheaper than store-bought bracelets. Same goes for leather bracelets.
Would this cable cutter suffice to cut custom length patch cables?
Beyond the standard screwdrivers/metric allen wrenches/etc that you'd have for your job, there are a few things that are good to have on-hand. I'll give a bit of an overview of what I use regularly and consider pretty essential.
Calipers. When you want to make prints designed to real-life sizes (rather than just artistic models), calipers are almost essential. I've got some digital calipers that I got on amazon for $30-40 and I use them constantly.
Flush cutters. Little cutters like these are amazing for working with 3D printing. I use them to cut filament for a clean end to feed into the printer, to clean supports off of finished prints, cutting zip ties (which are sometimes used to hold 3D printer belts cleanly), little stuff like that. Get yourself a set for $5-10 and dedicate them to the printer; keep them reserved for soft-ish plastic to avoid killing the edge, use something else for cutting metal and thicker plastic.
Scraper. Many printers come with one, but you definitely want something like a fine-bladed putty knife or something similar. It's not uncommon to need to pry a bit to get a print off the print bed (depending on the bed surface), so having something to pry with is nice.
Thin tweezers. They don't have to be anything fancy, but tweezers are useful for grabbing little bits of plastic that came out wrong before they mess up the rest of the print or other little stuff like that.
There are a lot of other things which are useful to have on hand, but somewhat less essential. Here's some of what I have and use.
High-purity Isopropyl Alcohol and a clean cloth. I have a PEI print bed, which works great. I keep some 91% rubbing alcohol in a spray bottle; every few prints I'll give the print bed a spray or two and wipe it down with a microfiber cloth. It does a great job of keeping the print bed clean and letting prints stick well (and PEI releases prints well once it cools down).
Scale. It's definitely not essential, but it's nice to have a small scale that can give weights in grams, since it'll let you know how much of your 1kg spool is remaining and lets you weigh things quick and easy.
Small flashlight. It doesn't need to be something fancy, but I keep a cheap little flashlight near my printer for when I need to look at some part or detail and it's in a weird spot or I don't want to turn on the big light.
Small blowtorch and/or heat gun. Great for making little stringy retraction issues shrivel up and go away, restoring the color of a section of print that turned white from removing supports (from plastic fatigue) and whatever else. I've got a little butane torch that works great for doing those sorts of things.
Dental mirror. Definitely not strictly necessary, but it can be handy for seeing up under your print head without spending a couple min moving it up to the top and bending your head at an awkward angle.
Sharpie marker. Being able to write on or label a print is handy. There'll be times when you're tuning the printer settings or something similar and want to make a note of what settings you used for that print that you're tweaking for other prints; Sharpies do the job well.
There are also a few consumables which are very handy to have on hand if you're making any kind of mechanical print or doing any printer mods.
Small machine screws, especially metric. I've got a couple boxes of M2-M5 machine screws and nuts in various lengths that I use for prints that need to be fixed together or for any printer mods that need to be mounted. A $10-20 assortment box on Amazon will last you a good while.
Zip ties, in an assortment of widths. They're just really useful for tying stuff together. You've probably got a bunch already laying around, but it's worth mentioning.
Superglue. It's great for gluing prints together; I keep some thin CA glue and also some gel CA glue on-hand for gluing prints together. Just don't get your fingers stuck.
I'm sure there's also other useful stuff that I'm forgetting that someone else will mention.
As to the humidity, it really depends on how humid your house actually gets. Given that you're in Florida, however, you probably want at least a bit of protection for your filament. I'd suggest getting some kind of airtight container and some rechargeable silica beads. Keep the filament in the dry container as much as possible and cook the water out of the beads as-needed and you should be fine without having to actively dry out the filament. Just keep an eye on it and tweak your setup if you're having issues due to wet filament.
Flush Cut Wire Cutters
Miniture Multi-drive Set
Battery Cases Never transport cells naked, especially near change/keys.
Also, I would highly suggest getting 9 batteries, I keep one set on the charger, one in the mod and one in the cases fully charged as a backup. I picked up those cases, specifically sol I could color code my battery sets, helps keep them together.
If you don't want to mess with building your own coils, I've recently started using these pre-built coils and I absolutely love em. I'd built a few claptons on my own, but frankly it was a lot more time than I wanted to mess with sometimes. They are pretty decent quality, they are all machine built so they are perfectly uniform and they make a quick coil change reletively painless.
For cutting I use flush cutters, something like this.
I've found split ring pliers to be really useful for digging in there to get things really tight at the end. (I originally got them for actually attaching split rings (aka keyrings) and I actually really like these for making keyrings and attaching charms and such
I'm not sure how to help with the knots coming undone. Are you finishing the ends before you start? Your description of the problem there is a little unclear as I'm not sure if you're talking about the cord fraying (in which case always start with nice clean-melted ends), or if the knot itself is coming untied (a more technical issue that could just need adjustments to the way you hold it and how much initial tightening needs done).
Looks like a solid start to me! I would recommend not fully assembling your models before you paint them, some places can be hard to reach when fully assembled.
Necessary Hobby Items
If you have a local hobby store you can get everything you need there.
If you have the internet you can get what you need on Amazon.
You have the internet.
Gluing plastic models. You want this stuff. It's the same stuff as Citadel plastic cement.
https://www.amazon.com/Testors-3509C-Plastic-Cement-Value/dp/B00JDMWVSU/ref=sr_1_1?ie=UTF8&amp;qid=1481560583
That glue permanently welds plastic parts together. If you don't want a permanent bond then use CA glue or "superglue" that every hardware store has.
You'll also need sprue clippers:
https://www.amazon.com/Xuron-170-II-Micro-Shear-Flush-Cutter/dp/B000IBSFAI/ref=sr_1_2?s=hi&amp;ie=UTF8&amp;qid=1481560725
And a hobby knife, you mentioned x-acto so you know where to get that.
You are correct, it is cheaper not to buy these things from GW.
You will need "side cutters".
Lots of us would recommend:
http://www.amazon.com/Xuron-170-II-Micro-Shear-Flush-Cutter/dp/B000IBSFAI/ref=sr_1_1?ie=UTF8&amp;qid=1381645308&amp;sr=8-1&amp;keywords=xuron+side+cutters
or
http://www.amazon.com/Xuron-410-Micro-Shear-Flush-Cutter/dp/B000IBOOWQ/ref=sr_1_2?ie=UTF8&amp;qid=1381645308&amp;sr=8-2&amp;keywords=xuron+side+cutters
To start off with. Then you can upgrade, if you want to, to heavy duty cutters later on.
To the right on the subreddit, check the useful links for... useful links!
If you want the real deal, they are Xuron 170-II micro-shear flush cutters.
I use these as well as and the larger 2175 set for bigger things. Note - these are only good for soft metals (copper, tin, lead) not steel. My son was nice enough to make one pair a set of wire strippers when he tried to cut some steel wire once. :-(
Xuron 170-II Micro-Shear Flush Cutter
Doubles as a hangnail remover in a pinch, and vaping toe jam sounds like a bad idea. :)
You mean these?
http://imgur.com/gallery/Jmu5C
Those are some binding/terminal blocks I made awhile back for testing speakers/drivers, etc. I can plug in cables with banana plugs on them, and clip on to the terminals to test different drivers, etc.
There's some led tape/strip lighting under the top most shelf, and a clamp on adjustable led light with magnifying glass built in. I can swing it in when I need, and out of the way otherwise.
I think the magnifying lamp is this one: https://amzn.com/B00UW2IRJ2
The diagonal flush cutters are:
https://amzn.com/B000IBSFAI
and the small nose pliers are:
https://amzn.com/B0006N73BU
The little parts boxes are from a Bosch organizer:
https://amzn.com/B00BD5G6X6
There's cheaper options, but I had the organizer and extra bins so I used those.
Fire extinguisher is a Kidde ~3lb standard fire extinguisher. An absolute must imo.
The drawers are great, when I'm properly using them I can keep the desk clutter free.
Generally when I'm working on a project, if it's going to take longer than an hour or so, I put all the parts needed into bins, organize/label all the components. Then get started on the build. I have a small whiteboard to the left of the desk that I can pin up schematics, and take any quick notes while I'm cussing myself for forgetting something obvious.
A wallet-sized fresnel lens could come in handy. I've seen one used to start a fire.
I love the 11-in-1 card that ikeyballz mentioned. I've never found a tool that so perfectly sits at the intersection of small, cheap, and useful.
One of the cheapest things on my list is this credit-card sized survival multi-tool. :3
Phobia - Flying / Falling. Although I'm adventurous enough I'd gladly go skydiving. XD
Food - COCONUT SHRIMP. AWWW YISSSS.
Pet Peeve - When people ask me what I'm eating. EAT YO OWN DAMN FOOD. ಠ_ಠ MY SHRIMP.
I have a few of these and I honestly use it all the time. I don't necessarily carry it with me cause it's awkward to keep in a pocket or something but they're so cheap I bought a few of them, have them around my house, in my car and at work. http://www.amazon.com/SE-MT908-Function-Credit-Survival/dp/B000Q06LI4/ref=sr_1_cc_1?s=aps&amp;ie=UTF8&amp;qid=1370663558&amp;sr=1-1-catcorr&amp;keywords=credit+card+multitool
SHUT UP AND TAKE MY MONEY AMAZON
probably not as nice but i have one of these and it's awesome;
http://www.amazon.com/SE-Function-Credit-Survival-Pocket/dp/B000Q06LI4/ref=sr_1_2?ie=UTF8&amp;qid=1321243641&amp;sr=8-2
It is useful, although I still have no idea how to use the sun component. The saw works surprisingly well, and the can opener.
Edit: Here's the amazon link for more info. Pretty cheap there.
Looks like this http://www.amazon.com/SE-MT908-Function-Credit-Survival/dp/B000Q06LI4
credit card survival tool $1.12 free shipping
A few years ago I picked up one of these, and it's been in my wallet ever since. I made it through security with it a couple of times before I ever realized it.
Since then it's become a bit of a game to see if anyone will ever catch it. So far the little guy has made it onto 14 different flights.
Um, yes, let me find it!
It's super awesome!
Here it is! AND it's super inexpensive! http://www.amazon.com/SE-MT908-Function-Credit-Survival/dp/B000Q06LI4/ref=sr_1_15?ie=UTF8&amp;qid=1347304826&amp;sr=8-15&amp;keywords=all+in+one+tool+card
Edit: Needs more of these ->!!!!!!!!!!!!!!!!!!!!!
All of these come from China so expect a 4-6 week delivery time.
Waterproof Indestructible Wallet – $2.45
http://www.amazon.com/gp/product/B002JWF6OC/ref=oh_details_o09_s00_i00?ie=UTF8&amp;psc=1
Credit Card Size Survival Pocket Tool - $1.18
http://www.amazon.com/gp/product/B000Q06LI4/ref=oh_details_o02_s00_i00?ie=UTF8&amp;psc=1
Ring Bottle Opener – $0.65
http://www.amazon.com/gp/product/B001U2RNXE/ref=oh_details_o01_s00_i00?ie=UTF8&amp;psc=1
Totals to $4.28 so you would have some left over.
You could also get
World’s Smallest Solar Powered Car - $1.99
http://www.amazon.com/gp/product/B004FEXUP4/ref=oh_details_o09_s00_i00?ie=UTF8&amp;psc=1
I got back in town from a Magic: The Gathering tournament today. I got eighth place, which is pretty good. I stopped at a Sonic on the way, but that was the only thing I ate all day. Also, my allergies have been bothering me quite a bit lately, but I took some medicine, and it's starting to kick in. I've been sleep deprived the past two days, so I'm going to go to bed soon. This is the thing that I want. It was the only thing on my wishlist under three dollars. I hope that you have a happy day. Be happy tomorrow too, since today is almost over.
Crowbar or Fubar https://www.amazon.com/Stanley-FatMax-Xtreme-55-120-FuBar/dp/B000VSSG3O/ref=pd_sim_469_1?ie=UTF8&amp;pd_rd_i=B000VSSG3O&amp;pd_rd_r=X69KMMQWF4GRZSJBXCSY&amp;pd_rd_w=iQFXY&amp;pd_rd_wg=4ITIQ&amp;psc=1&amp;refRID=X69KMMQWF4GRZSJBXCSY
There are tools specifically made for destruction. http://www.amazon.com/Stanley-FatMax-Xtreme-55-120-FuBar/dp/B000VSSG3O/ref=pd_bxgy_hi_img_c
if you're going to use a hammer, i'd suggest a framing hammer over a ball peen, which has 2 faces, a 'half ball' and a 'flat'. the framing hammer also has a claw, designed to pull nails, but would work well when you want to penetrate a skull...
http://www.amazon.com/Stanley-51-168-24-Ounce-AntiVibe-Framing/dp/B000I1KH90/ref=sr_1_16?ie=UTF8&amp;s=hi&amp;qid=1251936764&amp;sr=8-16
one tool that's always mentioned is the crowbar, something that i'm not a fan of. have you ever tried to strike something with one? the grip is tenuous at best and would be horrible covered in gore. if the only choice i had was a crowbar, this would be my pick...
http://www.amazon.com/Stanley-FatMax-Xtreme-55-120-FuBar/dp/B000VSSG3O/ref=sr_1_3?ie=UTF8&amp;s=hi&amp;qid=1251937333&amp;sr=1-3
Had to Google that one. That thing is a brute! I think that would be too heavy for my 140lb frame, and I'd be concerned about those spikey bits getting caught up in zombies, brush, and buildings.
Though you did remind me of the FuBar Forcible Entry Tool, I think that's my ideal zombie weapon. Heck, it even comes in an 18" version in case you think you'll get pinched in tight quarters.
how's about we all post one BIFL item that we own FUBAR is mine
What I love about the Amazon listing is two actual tools that are shown in the similar items section. They're a third of the MSRP and far more practical.
Stanley FatMax Xtreme 55-120 FuBar III
Dead On AN18 18-Inch Annihilator Utility and Wrecking Bar
Honorable mention:
Trucker's Friend All Purpose Survival Tool-Made in the USA
Sometimes you need a little persuasion.
It's not like the State Department has been doing nothing all this time.
My ultimate recommendation is Stanley FatMax Fubar III:
http://www.amazon.com/Stanley-FatMax-Xtreme-55-120-FuBar/dp/B000VSSG3O/ref=sr_1_1?ie=UTF8&amp;qid=1416358868&amp;sr=8-1&amp;keywords=Stanley+Fatmax+Fubar
Something that would be better at destroying brains. Baseball bats are too blunt force and need to crush skulls - requiring multiple hits per zombie. I want something that will pierce and destroy brains with single hits if possible.
I would start with a rock hammer because I have one on hand and it is light and compact enough that I can carry a spare if one gets stuck in a skull.
A rock pick would be on my scavenge list because it has a little more reach and can also serve extra functions: pry bar, digging, push off/hold back.
Both of those tools happen to be widely available near me. If they weren't, I'd start with claw hammers. A hardware store would probably have a FuBar, I would have Halligan tools on my scavenge list.
Any melee weapon I would add grip tape and have a backup.
I disagree with WindowShoppingMyLife, reach IS important. You're in trouble if zombies start grabbing you, so being able to kill zombies 24" before they can grab you (25" rock pick) is superior to being able to kill zombies 10" before they can grab you (12" hammer), especially if there is more than one zombie.
THIS
I have a Fubar3 it's bigger. I like to call the one you linked "son of Fubar"
Stanley FatMax Xtreme 55-120 FuBar III
I'd say the huge version of the FATMAX fubar. The thing is a monster! http://www.amazon.com/Stanley-FatMax-Xtreme-55-120-FuBar/dp/B000VSSG3O
http://www.amazon.com/Stanley-55-099-FatMax-Functional-Utility/dp/B000FCGS0Y/ref=sr_1_2?ie=UTF8&amp;qid=1367860480&amp;sr=8-2&amp;keywords=fat+max
http://www.amazon.com/Stanley-FatMax-Xtreme-55-120-FuBar/dp/B000VSSG3O/ref=sr_1_9?ie=UTF8&amp;qid=1367860480&amp;sr=8-9&amp;keywords=fat+max
Great weapons, and great tools to have around. The smaller one would probably be best, lighter and shorter so you don't get tired swinging it, and can use it in close quarters.
Here is the mobile version of your link
FUBAR III
I prefer the FUBAR III:
http://amzn.com/B000VSSG3O
Be sure to wiggle the trigger guard a little bit as you're pushing the pin in so the pin doesn't bottom out.
Honestly, all the roll pins on an AR convinced me to buy Knipex pliers.
https://www.amazon.com/Knipex-8603250-10-Inch-Pliers-Wrench/dp/B000X4OG94
$58.99 USD
https://www.amazon.com/Knipex-8603250-10-Inch-Pliers-Wrench/dp/B000X4OG94/ref=sr_1_6?qid=1549846144&amp;refinements=p_89%3AKNIPEX+Tools&amp;s=power-hand-tools&amp;sr=1-6
Might be an easier to purchase from link, but /u/RainBoxRed got it right. I'm not sure if they're worth it but if you don't own a crescent wrench and think you need one, I'd but that instead. They stay tight on the fastener and when you use them in the right direction, they tighten as you pull or push on them.
Seems similar to the Knipex Pliers Wrench.
Okay, this one is not exactly beginner, but for me no tool set is really complete without Knipex pliers. The parallel jaw design gives them an amazing combination of adjustment range and gripping power, all without marring the surface of bicycle components. They are expensive, but well worth it.
Knipex Pliers Wrench
Knipex 8603250 10-Inch Pliers Wrench https://www.amazon.com/dp/B000X4OG94/ref=cm_sw_r_cp_api_I24OAb4WRGRNK
https://youtu.be/q11mziNfzmc
Great for the Bolt catch pin as well as the trigger guard pin. No more broken “tabs” or having to use an armorers block with punches. Plus you can use this wrench around the house/shop and isn’t an “AR only” tool.
Have you heard of knipex?
This is my favorite tool
Kershaw Select Fire. It's my EDC. It's a folder knife first and foremost, with a flip-out 1/4" bit driver, and the capacity to carry four 1/4" bits. When you flip the screwdriver part out, it also exposes a bottle cap opener, which is a nice touch. Mine has the half-serrated blade. Most of the ones I see don't have the serrations.
It comes with two each standard and philips drive in anodized black, however I replaced two of them with bits that I find myself needing frequently (An allen driver that fits almost everything on my bicycle, and a T25 security Torx, because I find myself needing a T25 for some strange reason or another, very frequently (servers at work, my big ham radio at home).
The pocket clip can be mounted left or right, but due to the screwdriver bit holders, you're limited to "tip down" configuration. Not my usual mode, but in the 3 years I've had this trusty thing on me, it's come to not bother me much. Highly recommended for anyone whose main multi-tool needs are a great blade and some real, usable screwdrivers.
Hello, fellow IT guy. I love this knife myself, have you ever seen it?
EDIT: There's also a serrated version, which is what I have, but I can't seem to find it on Amazon at the moment.
I really like the Kershaw with a screwdriver built in. Can't remember the name of it, but it has a bottle opener and 4 bits for the screwdriver.
Edit: here it is: Kershaw 1920 Select Fire Multi-Tool https://www.amazon.com/dp/B002IVPKOU/ref=cm_sw_r_cp_apa_0QNMxbMZQY1CA
/u/redh4re asked for a list of all the items:
[Kershaw 1920 Select Fire Multi Tool] (http://www.amazon.com/Kershaw-1920-Select-Fire-Multi-Tool/dp/B002IVPKOU)
Maui Jim Polarized sunglasses
Standard bi-fold leather wallet
Survival Straps Para-cord keychain with Wounded Warrior Project dogtag
Survival Straps Para-cord bracelet with Wounded Warrior Project logo dogtag
Otterbox for iPhone 5 (used phone to take picture)
Men's Drive from Citizen Eco-Drive AR 2.0 Chronograph Watch
I think it's a Kershaw Select Fire
Kershaw Select Fire knife
if its the kind of sysadmin who actually has to do some of everything, including hardware, i am in love with this thing:
https://smile.amazon.com/Kershaw-1920-Select-Fire-Multi-Tool/dp/B002IVPKOU/ref=sr_1_1?ie=UTF8&amp;qid=1496869018&amp;sr=8-1&amp;keywords=kershaw+screwdriver+knife
its a screw driver knife with a really sturdy screwdriver. its on the bulky side, and i dont have a need for it anymore but it use to be my EDC when i had to deal with this, that and hardware too.
Yes, that's exactly what I was thinking for the wire. And the eyeglasses kit could come in handy at other times when you need a small screwdriver set. Along those lines, I have one more suggestion. I've been carrying the Kershaw Select Fire for my EDC lately. It's a tiny bit more bulky than most of my other pocket knives, but it has a bit driver and holds 4 bits. Comes with 2 types of Phillips and standard, but you could really put in any bits. That thing comes in handy more often than not! I think it would really round out your repair carry.
Kershaw Select Fire (1920); Multifunction Pocketknife with 3.4-Inch 8Cr13MoV Stainless Steel Blade, Black Glass-Filled Nylon Handle, 1/4-Inch Hex Drive, 2 Flathead Bits and 2 Crosshead Bits; 5 oz. https://www.amazon.com/dp/B002IVPKOU/ref=cm_sw_r_cp_apa_Eo2KBbXB7ZA5H
I carry both. I carry my knife everywhere. I can't carry my gun at work, but I still carry the knife. I'm not really supposed to, but it's a knife/screwdriver combo so I convince myself it's a multitool instead of a knife.
Another option is the Kershaw Select Fire.
The Get-a-way driver is a great keychain to carry. Also the Kershaw 1920 is an awesome multi tool knife.
My boss gave us some of these kershaws and I like them, it's a decent knife with a nifty 1/4 nutdriver and some screwdriver attachments. I lost the one he gave everyone and just bought a new one on amazon.
If you want an inexpensive folder that will work for carving Try this:
https://www.amazon.com/Benchmade-Mini-Griptilian-Folding-Knife/dp/B019J0DYY0/
That's my daily EDC btw. I like the Benchmade with the "spyderco blade" in it. Works good, it's fairly sharp out of the box, that kinda thing.
compare the blade shape to a dedicated carving knife:
https://www.amazon.com/Morakniv-Carving-Knife-Laminated-2-35-Inch/dp/B004GATX62
Then when you want a little nicer handle...
http://wilkins-knives.com/wilkinsgrip
I used a morakniv carving knife for the entire carving. This is the exact one I bought Morakniv Wood Carving 120 Knife with Laminated Steel Blade, 1.9-Inch https://www.amazon.com/dp/B004GATX62/ref=cm_sw_r_cp_apap_XcePFM5ymJj2o
The Mora carving knife is an absolute classic and works wonderfully. It's not the prettiest thing but it really works.
I do a lot of carving and frequently use:
Basically any Mora (the red, wood handled classic is a great option too)
Helle: Odel (not a traditional carver but I love using it)
Kellam: Puukko
Enzo: Trapper (a bit beefier than a usual carving knife choice but works quite well)
Bark River: Bravo EDC (again not a traditional option but I really love carving with this thing)
A small Ahti puukko
A small and medium Wood Jewel puukko
Another idea that might be fun is get him a couple of the small Lauri puukko blades and he can carve his own handle, drill a hole and epoxy it on. Just a thought. The Lauri blades are wildly affordable and the smaller thinner ones make amazing little carving knives.
Well, ShitOnYourMom, the best way to get a start in whittling is to start. That may seem silly, but you'll need practice, and the acceptance that it will take a bit to get comfortable understanding the grain and learning to work with it. You'll need wood (I prefer green, unseasoned wood - as in directly from a living tree) and some basic tools. I'll give examples for someone on a budget, so that this will be relevant advice for anyone who may read it. Any small axe with a narrow profile and a blade you can choke up on will work. like this: http://www.knifecenter.com/item/CN4052C15/Condor-Tool-and-Knife-Woodworker-Axe-5-12-inch-Carbon-Steel-Head-American-Hickory-Handle-Leather-Sheath
I use this one (A Hans Karlsson sloyd axe):
http://4.bp.blogspot.com/-KoKxz2rDEAE/UfiKUo8EhhI/AAAAAAAAAK8/UMz87UUUEII/s1600/axe2.jpeg
And you'll need a knife or two. I suggest a Mora 120 or 106. The difference is the 106 has a longer blade. The longer blade allows you to take longer continuous cuts, while the shorter allows you to choke up and get finer detail work. Example: http://www.amazon.com/Morakniv-Carving-Knife-Laminated-1-9-Inch/dp/B004GATX62/ref=sr_1_2?ie=UTF8&amp;qid=1396873922&amp;sr=8-2&amp;keywords=mora+carving
I suggest the Mora knives because they're quite decent for the money.
You'll also want a hook knife if you'll be making spoons, cups, etc. You want to make sure you go quality on this one. A poorly designed and executed hook knife is unpleasant and ineffective to use.
I have one of these, and I enjoy it very much: http://www.deepwoodsventures.com/301spooncarver.html
Lastly, you'll need something for sharpening. I just went the route of buying decent tools that arrived razor sharp, and then used a leather strop to keep them sharp. Like this: http://www.sharpeningsupplies.com/8-Leather-Bench-Strop-P263C11.aspx
The strop should have some honing compound rubbed on it. I use jeweler's rouge. You can easily make a strop from some tanned leather. Now that I've listed all of that, you just need some inspiration, some knowledge, and some patience. You can find the first two of these in this giant list:
Good luck, and feel free to PM me or post more questions. The reason I share photos of my work (and the work in person) is to inspire others to pursue crafts. The world needs as much art and craft as possible.
-Adam
Sure, I'm interested in your work.
As for the knife, it's a cheapie I ordered on Amazon. I like the size, since I can carry it in my pocket with a small block and not feel bulky. The handle, however, leaves a lot to be desired when it comes to my hands. I think I'll need a thicker handle to avoid fatigue, but I'm looking into that. The handle on this Morakniv might be more what I need.
I bought my Mora off of Amazon and I love it. I went with the Mora 120, it has a small blade which makes it good for intricate cuts. They're only bout $40, here's the link
I had a few chances to use it. Honestly, it was a waste of money. It was extremely dull when it came in. I’d suggest buying individual knives after having experienced both. I ended up buying a mora 120 and a mora 164 and I am very happy with them. You’re better off buying high quality knives. It’ll save you money in the long run.
Yeah that's unfortunate man. I would just reprofile the entire edge. Is there a reason why you didn't get a mora? It isn't really that expensive in my opinion.
https://www.amazon.com/Mora-Wood-Carving-Tool-106/dp/B06XTNYHP8/ref=sr_1_1?ie=UTF8&amp;qid=1538751071&amp;sr=8-1&amp;keywords=mora+106
https://www.amazon.ca/Morakniv-Carving-Knife-Laminated-2-4-Inch/dp/B004GATX62
If money is tight that's cool I get it. Make this one work, remove the secondary bevel in favor of just 1 primary bevel that goes from middle of the blade to the actual edge.
Carving knives NEED to be scandi. There really is no better grind for carving. Especially for a beginner.
I've been carving for 6 years now and all my carving knives are mora with scandi grinds.
Thanks for the answers, unfortunately the shipping, duties, and exchange would cost me a lot for those :p
What do you think about these:
gouge set
knife
$31
I also found a mix:
but idk if 4 tools is worth $77
Ended up purchasing a Mora 120. Hope it turns out well.
I started whittling a few months ago and I've been using a Mora 120. I appreciate the big wood handle and the smaller 1.9 in blade, plus, it takes and holds a sharp edge well.
Oops, thanks for letting me know the link wasn't attached. Here it is. I believe what I want to do would just be considered woodcarving. I thought that was where I was posting, but apparently not! I'll repost this there.
There's a few good videos to watch on YouTube. Here is a one I found useful
There's multiple tools that you can use, but I've found these two to be indispensable for the job.
Carving knife
Gouge
I also used a spokeshave and a hook knife. I didn't find the hook knife to be all that useful though. Another way to shape the outside of the spoon is with a belt/disc sander. I found that to be a quick, although very messy, way to get the rough shape I wanted. Then I'd clean it up with the spokeshave and knife. Sand it up to 400 or more then finish with a food safe product like howards butcher block conditioner
Morakniv 106, get the short one and the long one for about $50 total. Great multi purpose knives.
They're about $25 each, so you can start with one and add as you can.
From most of the reviews of the knife, it comes with a pretty good edge, not razor sharp though.
Ok, after searching amazon, looks like the green compound is pretty cheap, so I'll get that. 6oz green compound for $3
And if 1000 grit is what I need for a whetstone, looks like you can get cheap ones on amazon too. Here's a double sided 250/1000 grit stone Also, the blade on the knife I'm getting is only 2.8 inches long, so I assume the size of this whetstone should be good enough.
I guess that's only $10 more than what I would have spend on sandpaper. I assume the cheap whetstone and green compound on cardboard would be a better choice? I also read that the back of a coffee cup is almost like a 1000 grit stone, but I assume the actual whetstone will just work a lot better?
Thanks for all the info.
Just get a cheap whetstone
http://www.amazon.com/Whetstone-Cutlery-Two-Sided-Stone/dp/B0055B2RGO/ref=sr_1_8?ie=UTF8&amp;qid=1405834961&amp;sr=8-8&amp;keywords=knife+sharpening+stone
https://www.amazon.com/dp/B01LB27UFI/ref=cm_sw_r_cp_apa_i_V4HuDbM4F90KW
This one seems to have a pretty decent combination of grits, but there's a 400/1000 stone that's even cheaper and more popular.
https://www.amazon.com/dp/B0055B2RGO/ref=cm_sw_r_cp_apa_i_p9HuDb60N5X9J
Something like this
I bought one of these about 6 months ago. It works great. Sure it won't give my knives a mirror shine, but it's easy to use and keeps em sharp
http://www.amazon.com/Whetstone-Cutlery-Two-Sided-Stone/dp/B0055B2RGO/ref=sr_1_1?ie=UTF8&amp;qid=1418801719&amp;sr=8-1&amp;keywords=whetstone
Thank you for your reply!
I currently have those 2 whetstones:
As a side note, I thought there would be more difference performance wise between the whustof and the henckles international, since they have such a significant price difference. I know they use the same steel but I thought perhaps a thinner blade?! Anyway, if the only performance improvement is the handle, that is definitely not worth the upgrade.
This is the one he had on his wishlist.
Whetstone Cutlery Two-Sided Whetstone Stone https://www.amazon.com/dp/B0055B2RGO/ref=cm_sw_r_cp_api_RVhtybPHDZA68
Honestly, stones are your best (and possibly cheapest) option if you're willing to put in a little bit of effort to understand how to use them. Even the cheapest, simplest one will work wonders. Personally I use this one: $13 https://www.amazon.com/Whetstone-Cutlery-20-10960-Sharpening-Stone-Sharpener/dp/B0055B2RGO
It's fantastic for actually putting an edge back on to a dull-as-shit knife, and the 1000 grit is more than enough to absolutely change your mind on what "sharp" should be. It's not going to be the "as-seen-in-Youtube-videos cutting silk scarves" sharp, but will be more than enough to improve your knife skills. And if you want to go crazy, this one (which progressively gets it sharper and sharper) is only another $15:
https://www.amazon.com/TOOPONE-Sharpener-Sharpening-Japanese-Whetstone/dp/B07B7HVHT5
Watch a youtube video on how to do it (it's really not that hard), and go to town. You won't regret it.
You can always go the traditional whetstone route and learn to freehand sharpen. As long as you're patient and diligent the process is very relaxing and rewarding. I'll throw some links to some good stones in here for ya:
Whetstone Cutlery | Beginner Stone for Sharpening
Sharp Pebble | Beginner Stone for Finishing
I also recommend you check out Burrfection on youtube for a good overview of beginner knife sharpening using whetstones. You'll save money, albeit use more time learning a new skill with this path but it's my preferred method of sharpening on the cheap currently.
Thanks for the advice. I bought this whetstone to keep my knives sharp. https://www.amazon.com/gp/product/B0055B2RGO/ref=oh_aui_detailpage_o00_s00?ie=UTF8&amp;psc=1
Was that a smart move or did i mess up?
https://www.amazon.com/gp/product/B0055B2RGO/ref=oh_aui_detailpage_o01_s00?ie=UTF8&amp;psc=1
This has actually been the most frustrating thing for me because I'm an engineer and I DIY everything as I enjoy being able to do most things like this myself. I've now sat down in front of the TV probably four times with this whetstone. I've watched all the YouTube videos, I've paid attention to the angle, how hard I'm pressing, sliding the knife forward only, then tried back only, back and forth, counting all the strokes to make sure I'm sharpening both sides the same amount... Still have a dull knife. Not even a serviceable edge. I'd like to know what the hell I'm doing wrong.
I would drink diet pepsi and do silly things
Yay, add on! I broke the one I have now :(
PnP Redesign
Materials you will need.
So I'll give you a link to a list that you may find useful for checking all the boxes on what you may need. I'll post my opinions below on some of the stuff I have found is most important. (I went through this process about 2-3 months ago)
http://www.reapermini.com/Thecraft/32
I LOVE this hobby knife Very important for removing mold lines, cutting off flash, etc. Very important to get one that starts and stays sharp
Primer is incredibly important. You want to make a suitable surface for your paint to adhere to. I would also look up some articles about how to prime. Contrary to popular belief you don't want the entire model to be the color of your prime when you are done! You want it to look almost speckled and have about 80% coverage.
Paint Here is a decent starter box of citadel paint, with a box and some 1/2 decent brushes. Obviously this is a bit pricey, but you get 45 paints plus some helpful extras
Brush Cleaner VITALLY important. Keeps paint out of the ferrule and helps your brushes stay conditioned and pointed
Brushes I just got a Winsor and Newton Series 7 #00, #1 and #2....WOW the difference between these and synthetic brushes is night and day. Painting tasks that seemed to take forever or require too much of a steady hand are MUCH easier now
Dull Cote Matte Spray Essential for providing a matte finish and protection to be able to actually use your minis. This product is excellent for that
Obviously there are many more items that are important to have that are described in more detail in that link I provided. But the ones above are the ones I would consider most essential
This is the hobby knife I use and I highly recommend it.
There's a lot of ways to approach stenciling. I just started about 5 months ago and have a decent number of pieces completed, but i'm still learning each time I cut and paint.
I'll be happy to share a list of what I use, but just keep an open mind and remember that there's not just a single way to do this.
[] Materials []
(https://www.amazon.com/X-ACTO-Designer-Hobby-Craft-X3254/dp/B002A2QTGK/ref=sr_1_22?ie=UTF8&qid=1501185899&sr=8-22&keywords=xacto+11+knife)] [link]
[] General Tips []
Hope this is helpful, remember to share your pieces!
I am using 4mm (nearly 1/4 inch) foamboard purchased from my local Dollar Tree. The foamcore from places like Office Depot is expensive enough that we'd be better served by just buying laser-cut MDF terrain. If I'm looking to experiment, then the "cheap stuff" is more than sufficient, and I honestly can barely tell the difference once the terrain is assembled.
As far as tools go, I am only using a metal straight edge, and a hobby knife. For a while, I was also using a tiny t-square, but I'll be damned if the factory cut edges weren't straighter than what I was getting from the tool. In hind sight, I should have bought on of these.
Getting the lines straight is a beast of a different stripe. That is patience put into practice. Try to draw out as much of the feature as possible so you can take your time with the cuts. Using the metal straight edge as a guide, I drag the knife just over the cut to break the first layer of paper over the foamcore so that the shown edge is as straight and clean as possible. It's super important to use a decently fresh blade. You know you're doing it right when the drawn line looks like it's being erased by the knife; it looks so weird! Once I've made the first cut, I'll line up the second. This cut is for the actual foam of the foamcore. For this cut, the central focus is keeping the blade as straight up-and-down as possible. I do this to ensure that the actual meat of the cut looks as perpendicular as possible to the surface of the material. The third and last cut is for the for the bottom layer of paper. Ultimately it's three cuts per edge, and it's time consuming, but you can't argue with results.
I hope I've answered your questions. If you have any more, please feel free to ask.
A nipper cut vs a hobby knife cut?
Ok, a total noob here trying to mind the ballooning expenses on my first build.
So as I understand it, the proper order of cutting out the pieces off a sprue starts out with a nipper, then a hobby knife, and finishes with optional sanding.
Does that mean that a quality hobby knife cuts/carves cleaner than a nipper, even a God Hand (because of the mechanics involved in nipping?), and would it make sense then to spend more/most on a quality hobby knife?
And if I'm not totally misguided here, how would a decent X-ACTO knife like this fare against a Tamiya branded one?
Don't buy that toolset, its very... I'd say low quality but its between low quality and medium quality.
Buy this instead.
You will be much better off. They are good tools and will last you ages. Also the blades for the knife should be replaced after one or two builds. But they are cheap and high quality. BE CAREFUL many, many cuts.... Also, You might want to start with a High Grade kit. You will learn a lot after building two or three of them.
Get this: http://www.amazon.com/Elmers-XZ3601-X-ACTO-Knife-Cap/dp/B005KRSWM6
Very cheap, very durable, very sharp. You're going to gouge a few pieces slightly before you get better with your technique, but that's all part of getting better.
First I'll answer your last question, no, there is nothing wrong with not painting or going all out on a model. Like you said, you have only been at this for a few months and it is always best to start small. If you keep at it, who knows, months down the road you may be making your own custom models. That being said, lets see what I can suggest for getting the best out of your model without putting a ton of time (or money) into it. The first few things I would pick up are:
http://www.amazon.com/Elmers-XZ3601-X-ACTO-Knife-Cap/dp/B005KRSWM6/ref=sr_1_4?ie=UTF8&amp;qid=1451350392&amp;sr=8-4&amp;keywords=hobby+knife
http://www.amazon.com/Squadron-Products-Value-Sanding-Stick/dp/B000CDR5K8/ref=sr_1_2?ie=UTF8&amp;qid=1451350756&amp;sr=8-2&amp;keywords=squadron+tri+grit
http://www.amazon.com/Uni-Pin-Fineliner-0-05mm-Black/dp/B00A7BSEKK/ref=sr_1_fkmr2_2?ie=UTF8&amp;qid=1451351047&amp;sr=8-2-fkmr2&amp;keywords=uni+pin+.5+fine+liner
http://www.amazon.com/Krylon-53530-Acrylic-Interior-Exterior/dp/B001C42OXY/ref=sr_1_1?ie=UTF8&amp;qid=1451351086&amp;sr=8-1&amp;keywords=flat+top+coat
The most important part is have fun with it, and do what you like.
Sure thing! A high-carbon blade would be good to sharpen, but will dull easily and quickly. A stainless steel/HSS blade is incredibly difficult to sharpen, but will hold and edge for a bit longer.
I didn't get to look at your exact examples because I'm on mobile.
Again, I don't know anything about what's available in Turkey, but an X-Acto knife (craft knife, hobby knife, etc) has extremely sharp, cheap, replaceable blades that are amazing for beginner carving. I know you were looking for an all-in-one, but I just recommend this because I think you'd have a better experience, and here in the US you can get an x-acto knife with replacement blades for ~$3 if you buy locally. Amazon has onefor 3.82 without replacement blades. They're super nice knives because if you decide not to use them for carving (you either upgrade or decide you don't enjoy it), they still have a billion uses around the house. And since they're the size of a pen, they're easy and discrete to carry! I would mail you one if I could afford postage. :-P
So this is going to be my first model and want some general advice and whatnot. So I had a $25 amazon GC and wanted to try model making so i figured why not. So i bought. https://www.amazon.com/gp/product/B00DUV1G2C/ref=oh_aui_detailpage_o02_s00?ie=UTF8&amp;psc=1
https://www.amazon.com/gp/product/B005KRSWM6/ref=oh_aui_detailpage_o01_s00?ie=UTF8&amp;psc=1
https://www.amazon.com/gp/product/B0055ANWKA/ref=oh_aui_detailpage_o03_s00?ie=UTF8&amp;psc=1
So just want some advice about this stuff really. Like how to paint, weathering, all that stuff.
All the cat5 cables ive seen have 4 pairs; blue, brown, green and orange/red and a striped counterpart. In the image posted it looks like the colors are still there, they just went with different patterns and shades.
So im seeing the orange one come out of the wall, and it LOOKS like its going into the third block from the left, but i notice its actually connected to the second from the left, so its matched with the solid orange. The fourth from the left appears to be the solid greens, as i can also see the third block contains the striped greens (as well as some of the leftover from the wall cable). And of course the far right block houses the orange striped wires. So it looks like someone was bridging the orange and green pairs, but the green striped line is broken or cut on purpose.
So like i said before if it was coming from the phone line we would only need 2 to get data to the modem, but as this is coming from a router, itll need most, if not all, of the 8 wires connected. There is a guide to wiring all this up and it goes by color of the wires, but thats just a guide and may not always be the case in how it was actually wired up.
This is how a standard ethernet cable is hooked up
Also cat 5e is just a cat5 cable that can handle more data and is better shielded so thats a non issue.
So long story short, its looks like all of them need to be hooked back up. All the suggestion in my first post should still be valid and if i were doing it i would probably run a whole new cat5 cable from the router to the pc. Failing being able to do that, i would trim up the cables in your pic, crimp new heads on following the diagram color chart, and patch them together with a female-to-female rj45 patch socket. Failing ability to do that, i would solder each wire to the other and shrink tube the joint. And lastly i would resort to twisting them together with electrical tape, or using a wire block like in your pic to join them and throw the whole thing in an enclosure like a plastic bag or something lol. Basically anything to get those wires touching and not falling apart will net some degree of success.
You'll need:
Edge trimmers
Cat5 head crimper
F2F rj45 coupler
Cat5 heads
Something similar to this 8 wire bus bar will work, but smaller would be better
And thats about it, depending on how you decide to go about the repair. Also no problem at all. shoot me another message if anything else pops up and ill help however i can.
There's this RJ45 cable tester that's a part of this kit (crazy how popular this model is), if you don't have one and if you just moved in, you might find it useful to double check to make sure the cabling is "correct", and that all 4 pairs/8 wires are actually working.
https://www.amazon.com/UbiGear-Crimper-Connector-Network-Crimper315/dp/B008UY5WL0
Victorinox classic swiss army knife is only $16. Weighs 3 oz less than the knife on the list and includes scissors, which are infinitely better for first aid than a knife.
-Basic safety glasses
-FourSevens Mini ML-X
-Rite in the Rain Notebook
-Basic wallet
-Spyderco Kiwi3
-Leatherman Wave
-Victorinox Classic
-Nexus 4
-Eklind folding allen keys
-Snap-On 3/8" wrench
-Ti Click Classic pen
-Chris Reeve Sebenza 25
This has come in handy more times than I can recall.
I couldn't have said it better myself. I would like to add on to what he said about the knife. When I was in high school (a public school in California) I carried a small swiss army knife like this during the day and a cheap Jeep knife that i left in my car during school. if you buy a knife, for a first EDC just get a $15-$20 knife. upgrade when you find it necessary
It's hard to go wrong with a Victorinox Classic, or a Day Packer for even more minimalism.
I use a knife like this one. I have never needed a larger blade for anything. The scissors and tweezers have saved my trip on several occasions. (One time my friend did not trim his toe nails before the hike. We finished the first day and his feet were killing him. After trimming his toenails with the scissors he was fine for the rest of the hike.)
This is literally the reasons why I have this swiss army knife on my key chain. Bonus that scissors are one of the most useful tools.
https://www.amazon.com/Victorinox-Swiss-Classic-Pocket-Knife/dp/B00004YVB2/ref=sr_1_1_sspa?keywords=swiss+army+knife&qid=1558022683&s=gateway&sr=8-1-spons&psc=1
Good question! I was thinking about the same thing today. I've had one of these for years. I'm definitely looking for a newer option.
I generally have either a SAK classic or a leatherman squirt on my keychain, both are tiny, useful and in no way can be mistaken for a weapon and they suit my everyday cutting needs. The other SAK I might take if I need it is a SAK tinker, I like SAK's as they don't look threatening when you use them and they are good pocketknives.
You just have to be smart about what you're carrying and if you don't have a legitimate reason to carry one then don't.
Top Row:
-2004 Jeep TJ Rubicon key with a SAK Classic SD on a carabiner clipped to my beltloop
-New Addition Thrunite TN12 (2016) Warm clipped on my front left pocket
-New Addition Fisher Bullet Space Pen with clip thrown in or clipped to my front right pocket
-New Addition Benchmade Minigrip black and combo edge blade clipped to my front right pocket (rotates with Spyderco)
-New Addition Spyderco SS Delica 4 with combo edge this is clipped in my right front pocket (roatates with Benchmade)
-Yeti Rambler 18oz. SS this is almost always nearby with ice cold water in it
Bottom Row:
-New Addition Magpul iPhone 7 Case my jet black iPhone 7 is always in my front left pocket, cannot reccommend this case enough
-Field Notes Black Ice this is in my back right pocket
-Matte Green Zippo Lighter I don't smoke but I know people that do and it's always handy to have a lighter, when carried it's thrown in my front right pocket
-Old Geoffrey Beene Wallet sorry it's the closest thing I came across. This lives in my back right pocket
Items for outside the classroom
Biggest thing to carry is a bottle opener
Cheap Keychain Bottle Opener
You don't want some expensive bottle opener because you'll be passing it around alot and you might forget to ask for it back
BIC Lighter
Kershaw Cinder
BUT preferably swiss army knife classic
SAK Classic
or the rally with a bottle opener
SAK Rally
you sacrifice scissors for bottle opener
wallet
dont get a bifold wallet those are out of style no (no offense to anyone who still carries them) but a simple slim card holder is alot better and sleek
Things you need in the classroom
Best Red Pens a must for note taking
I wouldn't get the blue one uniball because its a dark blue almost black
So get these instead
BIC blue pen
Most "EDC" notebooks are expensive and offer very little sheets of paper. You could use one as an assignment pad but something with acutal dates is better so once you get your syllabus you can right down all the assignments during the first week.
Note books I would just go to walmart. You can get five subject notebooks for $2 now during their back to school special. Where ever you buy notebooks take advantage and buy for the spring semester because prices are only this cheap in aug/september.
Not your usual edc recommendations but I wasn't rolling in dough early on in my college career and rather let people borrow a cheap pen and let them keep it then stress about getting my pen back when I let the next person borrow it to sign in.
your edc should be what you like to carry and use
sure do homs. i got this bad boy wid me at all time.
I'd get a Classic SD Swiss Army Knife and a Spyderco Pocket Stone. With that you'd be set for many years.
I use these all the time:
http://www.amazon.com/Victorinox-Swiss-Classic-Pocket-Knife/dp/B00004YVB2/ref=sr_1_1?ie=UTF8&amp;qid=1426191481&amp;sr=8-1&amp;keywords=pocket+swiss+army+knife
http://www.amazon.com/Streamlight-73001-Miniature-Keychain-Flashlight/dp/B0011UIPIW/ref=sr_1_4?ie=UTF8&amp;qid=1426191502&amp;sr=8-4&amp;keywords=keychain+led+light
The only tools that I had available when I built my PC was a six-piece Stanley set. Luckily for me, building a PC doesn't require much more than a screwdriver. As such, the most useful and only tool for me when building my PC was a precision screwdriver.
Due to the fact that my PC is still very new, I have not yet experienced any need to maintain anything.
I bought a set at my local hardware store. They're the doitbest brand precision screwdrivers. http://www.amazon.com/5-Piece-Best-Precision-Screwdriver-SCREWDRIVER/dp/B000HE89Z2
They've been great for the past few years I've had them. The star versions of those aren't so hot though.. I've ruined 2 of the T5 drivers working on firearms and RC cars. The rest of them have stood up to some pretty serious abuse though.
I've had these before, but they are kind of small to hold onto when turning larger screws: http://www.amazon.com/Stanley-66-052-6-Piece-Precision-Screwdriver/dp/B00009OYGV/ref=sr_1_2?s=hi&amp;ie=UTF8&amp;qid=1393730634&amp;sr=1-2&amp;keywords=Precision+Screwdriver
They work fine though IME.
If you want to buy the best you can get, Klein tools makes a mighty fine set of screwdrivers. They're pretty expensive though. http://www.amazon.com/Klein-85614-Piece-Electronic-Screwdriver/dp/B0076RWZMQ/ref=sr_1_37?s=hi&amp;ie=UTF8&amp;qid=1393730830&amp;sr=1-37&amp;keywords=Precision+Screwdriver
Thanks for the suggestion, but I was already looking at this.
I just ordered some temco 28 gauge kanthal from amazon. I've been using this to wrap with. I dont have any drill bits at the moment.
https://www.amazon.com/dp/B00009OYGV/ref=cm_sw_r_udp_awd_5wjYtb0V52W8FXG7
So, $35 for that one, or you can get this for 1/10th the price.
http://www.amazon.com/Stanley-66-052-6-Piece-Precision-Screwdriver/dp/B00009OYGV
Because the handles are plastic you can even heat up a pin and set it into the handle to hold your wire better while you wrap.
My apologies, It was 9 wraps and it turns out that my screwdriver is in fact a 0pt. (Assumed it was 3/32.)
Trying to figure out what the actual diameter is but I'm having a bit of trouble.
It's out of this set of Stanley screwdrivers if it helps.
http://www.amazon.com/Stanley-66-052-6-Piece-Precision-Screwdriver/dp/B00009OYGV
Do you wrap them around something? And torching the kanthal will help if you find it to be particularly springy. Here is a coil wrapping calculator that will tell you how many wraps you need to reach your desired resistance based on your kanthal gauge and the size of whatever you are wrapping around.
I would suggest investing in a set of screwdrivers like these to wrap on. They are super cheap and wrapping with them is super easy.
I used a 2mm screwdriver. I have a set like this one.
The necessities are:
I'd recommend 26, 28, and 0.8x0.1 ribbon to start. That gives you a lot of options for building. You'll notice the first two links are add-on items on Amazon, so you'll have to buy $25 worth of wire, wire cutters, tweezers, or just add it to some other amazon order you're making.
I know I'm not adding much in the way of telling you what to use (mostly because I feel like the other replies have done a stellar job at doing just that), but when you do go to look for a set of screwdrivers to build with, this is what most people use:
http://www.amazon.com/Stanley-66-052-6-Piece-Precision-Screwdriver/dp/B00009OYGV
to piggy back: The Stanley Precision Screwdriver Set for wrapping the coils. amazon has them and target sells them as well if you don't want to order them.
Or maybe the stanley screwdriver set?
Something like this?
https://www.amazon.ca/gp/aw/d/B00009OYGV/ref=mp_s_a_1_4?ie=UTF8&amp;qid=1491577769&amp;sr=8-4&amp;pi=AC_SX236_SY340_QL65&amp;keywords=precision+screwdriver+set&amp;dpPl=1&amp;dpID=41josrE03YL&amp;ref=plSrch
Yeah I was going to go with the EK Vardar fans, I'm looking to keeps temps as low as possible mostly, but less sound would be nice as well. Would the EK Vardar 1450rpm pair well with a EK PE rad?
If you don't mind waiting fast tech is great heres a great rda and good mod for $15
http://www.fasttech.com/products/0/10012340/2088800-tugboat-styled-18650-mechanical-mod-w-rda-atomizer
Also grab an ohm reader there as well for $5
http://www.fasttech.com/products/0/10010372/1897900-atomizer-resistance-tester-ohm-meter
Here's some kanthal I suggest 26 gauge 25 feet Is about $4
http://lightning-vapes.theshoppad.com/#/product/kanthal-a1-resistance-wire
Also pick up a battery for about $8 or two for $14 (worth having a backup battery) use the coupon "lv15" for 15% off
http://lightning-vapes.theshoppad.com/#/product/samsung-inr-18650-25r-battery
I'd suggest this charger for $12
http://www.amazon.com/gp/aw/d/B0096U26QQ/ref=mp_s_a_1_1?qid=1421740585&amp;sr=8-1&amp;pi=AC_SY200_QL40&amp;dpPl=1&amp;dpID=41E7nbJ5btL&amp;ref=plSrch
And these screwdrivers if your local dollar store doesn't have it for $4
http://www.amazon.com/gp/aw/ol/B00009OYGV/ref=mw_dp_olp?ie=UTF8&amp;condition=all
Roughly under $50 for a good setup in my opinion
26ga kanthal
Cotton
Screwdriver set
Ohm reader
Velocity clone by tobecco
Pliers
That's about $60 bucks after shipping, and gets you pretty much everything you need.
You can opt for higher quality things. There's some great coil jig sets out there for about $15, which basically make coils for you. Theres higher quality cotton, better kanthal but this is a good basic setup. It's what I use, at least.
You'll see a lot of people vouching for the velocity clone, its a great RDA with a lot of room to build on.
As far as what mod you want? That's tough. That's a whole other conversation. I can tell you what I use, and what I like about them, though.
I use a Sigelli 150 TC, it's a dual 18650 box mod with temp control, I have two Samsung 25r's that have been "married" since I got them, and live in my mod. My Velocity usually sits on top of it. I use this set up at home, and try new builds on it.
My on the go set up is a Smok xcube mini box mod single 18650, with a royal hunter mini on top. I make sure to build around .3 to .4 on this set up, and stay in a safe range for the single battery. Using an online ohms law calculator, I'm vaping a .38 build at 40 watts. Which is drawing 10a from my battery that's rated for 20a.
Network Tech here..
This is the tool to properly punch down those wires into the white block (known as a keystone RJ45 jack)
If you're only doing one though, you can punch the cables into the grooves with a pair of tweezers or a small screw driver (gently!) and trim the wires flush with the side of the block with a sharp utility knife.
TRENDnet Punch Down Tool with 110 and Krone Blade TC-PDT https://www.amazon.com/dp/B0000AZK4D/ref=cm_sw_r_cp_api_LAJYAbB8B0HVF
This is what I have.
>Personally, i'd opt for this instead of that tp-link plastic one. It's a few bucks more, but has a great track record.
http://www.amazon.com/Netgear-GS105NA-Prosafe-5-Port-Gigabit/dp/B0000BVYT3/ref=sr_1_3?s=electronics&amp;ie=UTF8&amp;qid=1459347764&amp;sr=1-3&amp;keywords=5+port+gigabit
Same guts? I picked the plastic... cus Im cheap but mostly because I think the front ports look sloppy in a HT cabinet or on a desk.
>The CMR looks good, though monoprice wire is cheaper for the same quality (spend some of that difference on the metal 5 port gige switch I pointed out above):
http://www.amazon.com/Monoprice-1000-Feet-500Mhz-Copper-Ethernet/dp/B008I8AJIY/ref=sr_1_1?s=pc&amp;ie=UTF8&amp;qid=1459347852&amp;sr=1-1&amp;keywords=monoprice+cat+6+cmr
Thanks! swapped for monoprice
>I would also recommend against crimping your own cables. Solid core is not meant for crimping.
ok then, I really wasn't looking forward to crimping a dozen cable but I felt like Ill have so much cat6 it would be a waste not to make my own.
>Get this punchdown tool, it has both 110 and krohn. A lot of punchdowns are universal, and with those, the krohn works better.
http://www.amazon.com/TRENDnet-Punch-Krone-Blade-TC-PDT/dp/B0000AZK4D/ref=sr_1_1?s=pc&amp;ie=UTF8&amp;qid=1459348192&amp;sr=1-1&amp;keywords=trendnet+punch+down+tool
So what your saying is most of these keytones labeled 110 will except a krohn style punch? Id like minimize my cost and the 110/66 punch I linked is basically in my hands, its still worth going with this other tool?
So should I bother with the crimper/rj45 ends at all? Just buy a pack of 3ft patch cables and be done with it?
>Source: I built this and wired my house to 1GigE
https://imgur.com/9vhZYS1
nice rack (giggity)
You need a punch tool. It's likely that the jacks are fine, but the push tool isn't doing a good enough job.
This is the one I have at home:
https://www.amazon.com/dp/B0000AZK4D/ref=cm_sw_em_r_mt_dp_U_yac5Cb49KNM3H
&#x200B;
A good punch tool serves two purposes:
&#x200B;
By pushing the wire all the way down in the the connector, it's forcing the V-shaped metal blades to bite into the wire. It doesn't look like the push tool you're using is pushing it enough to bite into the wire.
Crap! Just bought pretty much the same items (different brands) less than 24 hrs ago on Amazon.
Product|Price|
:---------|---------:|
TRENDnet 8P/RJ-45 and 6P/RJ-12, RJ-11 Crimp, Cut, and Strip Tool, TC-CT68|$14.35
Network Cable Tester|$4.17
TRENDnet Punch Down Tool with 110 and Krone Blade TC-PDT|$20.34
CableWholesale CNE16127 RJ45 CAT-5 E Crimp Connector Solid|$4.55
C2G / Cables to Go 27352 Cat5E UTP Solid PVC CMR-Rated Cable, Grey (1000 Feet/304.8 Meters)|$99.85
Used CAT5E since CAT6 would be overkill for my needs and the budget is always tight.
I have no experience with some of these specific items but I wouldn't hesitate to buy them from what I've seen:
The cable:
https://www.amazon.com/Outdoor-Shielded-Waterproof-Ethernet-trueCABLE/dp/B01JAVN1C8/
The "ends" -- these are keystone jacks. You could put RJ45 plugs on, but I think keystone jacks are more forgiving, plus it's more flexible since you can plug a patch cable into this. Also, putting RJ45 ends on this direct bury cable will be tricky since it will have thicker shielding.
https://www.amazon.com/10-Pack-Cat6-Keystone-Jack-Compatible/dp/B07JRD69V6
The punchdown tool -- you could get by with a cheaper/simpler one like this -- you'll probably want this for stripping the jacket (it does both), though a razor blade will work too:
https://www.amazon.com/Mini-Wire-Stripper-Rj45-Cat5-Cable/dp/B07MQB7STL/
This is kind of a basic middle of the road example of a proper punchdown tool, though the previous one is fine for a small amount of work.
https://www.amazon.com/TRENDnet-Storage-Interchangeable-Reversible-TC-PDT/dp/B0000AZK4D/
Once punched down, you can plug those keystone jacks into wall plates like these:
https://www.amazon.com/Cable-Matters-10-Pack-Profile-Keystone/dp/B074HGPH18
Or surface mount boxes:
https://www.amazon.com/Monoprice-2-Port-Surface-Mount-107089/dp/B0069MDB9U/
You could even find a small patch panel.
Each cable is for each room would this work You need to cut off the phone jacks and install CAT5e or better RJ-45 jacks with a punch down tool. Do this conversion at every place where you want network. Then in the basement you need to punch down the other end of each cable separately to a CAT5e or better patch panel. Then you need to run short CAT5e or better patch cords from the patch panel to an Ethernet switch. Finally you need to connect your router to the switch, either directly, or through one of the network jacks you installed in the house.
I had the same exact question for DIY subreddit a few months ago looking to do the same thing as you. Forget about the patch panel and the big box stores. Don't spend a ton of money. You are just wiring a couple rooms. You can get everything off Amazon or ebay for cheap. If you don't care about phone service then just cut the cables and crimp on new. Then plug all the crimped ends into a switch. No need for a panel. You can get a tester for cheap at amazon:
http://www.amazon.com/HDE-HDE-H11-Network-Cable-Tester/dp/B000P1OA1O/ref=sr_1_2?ie=UTF8&amp;qid=1346567376&amp;sr=8-2&amp;keywords=network+cable+tester
I bought and used that one and it worked great. Probably not the best out there, but for a one time simple project to get a few rooms online it is more than enough.
The only thing to spend some money on is the punch down tool (Although doesn't look like you may need one based on your wall jacks). The ones that come free with other stuff are useless and will waste your time and wiring. This one worked well for me:
http://www.amazon.com/TRENDnet-Punch-Krone-Blade-TC-PDT/dp/B0000AZK4D/ref=sr_1_1?s=electronics&amp;ie=UTF8&amp;qid=1346567733&amp;sr=1-1&amp;keywords=TRENDnet+Punch+Down+Tool+with+110+and+Krone+Blade+TC-PDT
Crimping is easy as hell if you use connectors like this:
http://www.amazon.com/gp/product/B0009JCVI6/ref=oh_details_o03_s00_i00
The crimping tool by the same brand actually cuts the excess wiring while you crimp. I did about 10 crimps and all worked perfect the first time. I bought a EZ RJ-45 $60 crimp tool from someone on ebay. Then sold it for the same amount two weeks later when I finished using it.
So according to that picture, if they wired it according to the color coding, it's 568A, so if you were to wire it up yourself, make sure the OnQ side is 568A as well to save yourself 50% of the work. But all depends if they did the blue, orange, green, brown pairs accordingly, which I'd assume they would to make their life easier.
If you were to get an 8 port Cat5E patch panel, you're going to need a punchdown tool in order to get the wires hooked up to said patch panel. It isn't hard by any means, and there are tons of videos on Youtube about terminating ethernet cables into rj45 jacks as well as onto patch panels. It isn't rocket science by any means, and depending on your comfort level and if you want to buy what you'd need (watch youtube videos first, maybe you'll find terminating rj45's directly to plug into your switch to be your cup of tea), that might be a MUCH cheaper route than getting someone out there to do it. Maybe you have a friend that can assist, if they are into networking.
But absolutely, Cat5E is Cat5E, be it used for POTS (telephone) or home networking, it's the same media, just how it's terminated on both ends is what matters.
Here is an example of an 8 port Cat5E patch panel. It has color codings for 568A and 568B (in your pic above, 568A per the wall plate, if wired correctly):
https://www.amazon.com/dp/B01LVZVUBO
Punch Down Tool w/ cutter (be careful when using that you pay attention which end the blade is so you don't cut the wrong side of the punch!):
https://www.amazon.com/dp/B0000AZK4D
https://www.amazon.com/dp/B01E58M5EG
This is just to hopefully give you an idea of what to search on Youtube for information. Glad to help, just research and research before tackling it yourself, but this isn't something that is going to be super difficult, but also don't want to see someone charge you $500 to do this job!
Good luck, and it's always fun to learn a new skill!
Is the original coax is going through a hole in the drywall or an actual wall plate?
You could get a
punch down tool
(1) keystone jack wall plate
(1) cat5e/cat6 RJ45 punch down keystone jack
(1) cat5e/cat6 RJ45 punch down surface mount box
The setup would be to make a run of your Ethernet cable (solid core) between the ONT and router. Terminate the Cat 6 in the basement with the surface mount box and attach a patch cable between it and the ONT. For the router side you would do the same except using a wall plate instead. If no wall plate then you could get two of the surface mount boxes.
You can get single pieces of what I linked at most home stores or places like Micro Center, etc.
The advantage of using Ubiquiti stuff is the amount of info available: https://www.youtube.com/results?search_query=ubiquiti+nanostation+ptp
PtP means Point-to-point, which is the kind of link you want to do. You will need some outdoor ethernet cable and a crimp tool + connectors. A simple cable tester would be useful too to make sure the cable is OK.
Also, Ubiquiti uses passive PoE. Plug your injector correctly or it will fry your computer's network card!
Don't hesitate to contact me if you have any more questions!
First, you should cut the wires to length. You can buy new connectors for your Cat 5 cables and a crimper to put the connectors on with.
Option 1: Use a network switch, turning multiple cables into a single one..
Option 2: Use a panel like this to make it more uniform.
Option 3: Hide them in your baseboards.
OP, this is a suitable crimper on amazon
TRENDnet 8P/RJ-45 and 6P/RJ-12, RJ-11 Crimp, Cut, and Strip Tool, TC-CT68 https://www.amazon.com/dp/B0000AZK4G/ref=cm_sw_r_cp_apa_NCT5Bb9R485EM
These are suitable cable connectors on amazon
Cable Matters 100-Pack Cat 6 / Cat6 RJ45 Modular Plugs (RJ45 Plugs) for Stranded UTP Cable https://www.amazon.com/dp/B004D5RFCE/ref=cm_sw_r_cp_apa_zFT5BbGGADAGM
Youll see "pass through" connectors advertised on amazon and other retailers on amazon, I dont have experience with using them.
For RJ11 usage, most crimpers have an RJ11 slot and an RJ45 slot, the 45 wont fit into the 11 slot and the 11 would be damaged if you used it in the 45 slot. I think youre making this more complicated than it needs to be.
Uh, everybody gets upvotes!
Edit:
So essentially something like this would be fabulous? Amazon Link
Desktop Link to same item: http://www.amazon.com/dp/B00AWQ13R6
Should be able to run it up to 100m without a repeater or anything like that. If you buy that bare cable you will need
Crimpers: http://www.amazon.com/dp/B0000AZK4G
Rj45 connectors: http://www.amazon.com/dp/B00BS92DCK
Make sure you look up how to attach the cable ends to the cables. There are 8 wires in the cable and they're color coded. You have to put them in the correct order or they won't work. [Technically, the actual color order doesn't matter, but they have to be consistent.]
Might not be worth it for a one-time job, but a cable tester like:
http://www.amazon.com/HDE-HDE-H11-Network-Cable-Tester/dp/B000P1OA1O
... is handy to check your work before it drives you insane. You plug in the remote to one end and the base to the other and it lights up if you have a connection or shows mismatches. When you're done, you can test cables using the base. Definitely worth the $5 since now you can make custom length ethernet cables for a fraction of the cost you can buy them at the store for.
You have to decide if you want to put plug ends on (like the end of an ethernet cable) which will plug straight into your device or receptacles that you mount to the floor/wall in a plate (and then you use a regular cable [that you can now make!] to connect it to your device.)
They both work, the receptacles and plates look nicer than a cable sticking out of the floor.
You'll need a drill and drill bits to put holes in things.
If you're going under, you'll want clips that hold the cable in place, maybe. Zipties work too.
You'll need a crimper, like:
http://www.amazon.com/dp/B0000AZK4G
You get the wires lined up into the plug and this squeezes the metal contacts down into the wires to hold them and make a connection.
It's totally doable, go for it!
Not sure if adding these links is allowed but I looked on amazon and couldn't really find good infrastructure wiring. Could I buy these three things, cut the end off the cable, feed it through, put another connector on and crimp it?
Connector: https://www.amazon.com/CableCreation-100-PACK-Connector-Connectors-Transparent/dp/B01K9Z4C3G/ref=sr_1_3?keywords=ethernet%2Bcat6%2Bconnector&qid=1554753267&s=gateway&sr=8-3&th=1#customerReviews
Crimper: https://www.amazon.com/TRENDnet-RJ-45-RJ-12-RJ-11-TC-CT68/dp/B0000AZK4G/ref=sr_1_8?crid=1UGT8TER83M2A&keywords=ethernet+cat6+crimper&qid=1554753078&s=gateway&sprefix=ethernet+cat6+cr%2Caps%2C132&sr=8-8
Ethernet: https://www.amazon.com/KabelDirekt-Ethernet-Connector-High-Speed-Corrosion-Resistant/dp/B016A910N0/ref=sr_1_14?keywords=ethernet%2Bcat6%2B50ft&qid=1554752929&s=gateway&sr=8-14&th=1
Don't buy wire cutters. What you want are flush cutters; Xuron 410 Micro-Shear Flush Cutter https://www.amazon.com/dp/B000IBOOWQ/ref=cm_sw_r_cp_api_UGAEybYWNV2D7
Just use something like this it should be fine - https://www.amazon.com/Xuron-410-Micro-Shear-Flush-Cutter/dp/B000IBOOWQ
For me the benefit of better plant health with more ventilation is cheap compared to the price of a pot :)
Yep, that's gonna be a pain to cut without a laser, water jet, or edm. Dremel is probably your best bet, the nibblers won't be fine enough. If the sheet is thin enough you might be able to use clippers. Maybe something like https://www.amazon.com/Xuron-410-Micro-Shear-Flush-Cutter/dp/B000IBOOWQ? I've never tried.
Edit: at .008" you can definitely get away with the flush cutters. Heck, you might be able to get away with nail
clippers.
Next time get some flush cutters to trim the zip ties. Smooth cut every time if you do it right.
I think its way better than the xuron and tamiya ones that I own these two:
xuron
tamiya
Please don't feel intimidated. I'm getting into gunpla again after like 10 years myself. The only intimidating thing is getting the equipment needed and knowing some tips on how not to screw some little things up. I personally use these clippers and I also use an xacto hobby knife with #17 blades. Just go slow and cut the pieces from the mold with the clippers leaving some leftover plastic that you can take off with the hobby knife. All those kits you mentioned sound good in terms of starting out. Any newer HG kit for that matter is probably a good start. You might want to look into getting some ultra fine tipped Gundam Markers for panel lining too. Have fun!
If you want something better than a pair of fingernail clippers.
I bought a pair of these microshears. Best tool for the job.
For cutters, I use these: Xuron Side Cutters. I also use an xacto-branded hobby knife. I'll use 2-3 blades on a HG kit, and probably double that on an MG. You can never have too many blades.
I have some sand paper (800, 1000, 2000 grit), but I rarely use it unless I paint.
Have you tried using a pair of flush cutters? They have a narrower jaw point and are mainly designed to cut copper with. http://www.amazon.com/Xuron-410-Micro-Shear-Flush-Cutter/dp/B000IBOOWQ
Something like those
I would go with http://www.amazon.com/Xuron-170-II-Micro-Shear-Flush-Cutter/dp/B000IBSFAI/ref=sr_1_1?ie=UTF8&amp;qid=1370150182&amp;sr=8-1&amp;keywords=xuron or http://www.amazon.com/Xuron-410-Micro-Shear-Flush-Cutter/dp/B000IBOOWQ/ref=sr_1_3?ie=UTF8&amp;qid=1370150182&amp;sr=8-3&amp;keywords=xuron I personally use the latter of the two.
Something something Kingdom Death...
Of the three I don't think any can compare to GW, especially considering GW uses plastic almost exclusively. Infinity makes some nice models but I was never a fan of painting pewter.
You'll pretty much always have to clean mold lines and fill gaps though. Even GW and KD, both do amazing work in plastic, have mold lines that should be cleared and gaps filled.
Make sure you're using the correct tool for clipping. You'll want a flush cutter like this:
https://www.amazon.com/Xuron-410-Micro-Shear-Flush-Cutter/dp/B000IBOOWQ/ref=pd_sbs_21_1?_encoding=UTF8&amp;pd_rd_i=B000IBOOWQ&amp;pd_rd_r=5KJZ0XRMB3R7355FNZAN&amp;pd_rd_w=blY62&amp;pd_rd_wg=jYgcH&amp;psc=1&amp;refRID=5KJZ0XRMB3R7355FNZAN
It sounds like, for your uses, you want precision pliers such as those made by Lindstrom or Xuron and not so much Klein or Channellock (who make tools for tradesmen).
Cut with these
Sand with this
Fill in stressed plastic with these
That's great to hear! I guess if I'm not happy with the result, I could always go back and fix it. Although Would it be better to go with another 00 then rather than a RG? Considering this would be my first time that is?
Also I was planning on buying the ones the guide linked to on Amazon:
Xuron 410 Micro-Shear Flush Cutter https://www.amazon.com/dp/B000IBOOWQ/ref=cm_sw_r_cp_api_WjCIzb3B9QYHJ
I have a pair of these and they're amazing.
^ I started about a week ago and this is where I started.
His recommendations are solid and all of the tools are amazing so far.
Only thing I switched out was the snipperz because I had heard that these last longer(?) but I have never used any others so I wouldn't know.
4 Kits in and still going strong.
IMO best way to depin, use http://amzn.com/B000IBOOWQ
Can do rx in like 20 seconds and looks just about as good.
you can probably find the wire cutters at walmart too, I think I bought a pack that had a mix of pliers and other things with the clippers. These were recommended on some thread a while back.
Amazon Link
The exacto knife doesn't matter, you'll be using it to cut off excess sprue and scrape mold lines off so if its smaller that'd be best, maybe like pencil size. Mine has some ridges on the handle that doubles as a file too.
Flush cutters. They're also the best for cutting the tail off zip ties and not leaving a sharp edge. I've used these for years.
Xuron 170-II Micro-Shear Flush Cutter https://www.amazon.com/dp/B000IBSFAI/ref=cm_sw_r_cp_apa_i_v2PxDb635JSYY
Another old guy tip -- use flush cutters (http://www.amazon.com/Xuron-170-II-Micro-Shear-Flush-Cutter/dp/B000IBSFAI/ref=sr_1_1?ie=UTF8&amp;qid=1395328103&amp;sr=8-1&amp;keywords=flush+cutter) on your ties so you don't have all those sharp, shred your hands, edges.
It's this tooless wiring cap type of jack, like this: the third picture. I installed a couple of them just this last summer and now they don't seem to be available pretty much everywhere anymore. I found that they are easier to get loose connections on than punch-down patch panels, but I believe I came up with a best practice for them. I suggest you re-terminate to your standard TIA-EIA 568 A or B and use a needle-nose pliers to really get the conductors firmly into their grooves in the connector with a gentle pull. Then after turning the twist part of the wiring cap making sure it is fully turned and cannot turn any more use a flush cutter to trim the excess wire extruding past the edges flush so it's less likely to have connectivity issues from physical contact.
Welcome to the hobby.
Let me make some tool/resource suggestions for you.
Resources:
Gunpla TV if you're just starting out in the hobby this should be your go to resource. www.hobbylink.tv/category/gunplatv
For your advanced tips and tutorials check out Hux's tutorial collection here. http://www.reddit.com/r/Gunpla/comments/kzg5v/the_big_list_of_gunpla_tutorials_resources_100/
Tools:
These are the tools I use.
Side cutters
http://www.amazon.com/Xuron-170-II-Micro-Shear-Flush-Cutter/dp/B000IBSFAI/ref=sr_1_1?ie=UTF8&amp;qid=1320331584&amp;sr=8-1
Sanding Pads (fine and extra fine)
http://www.amazon.com/3M-916DCNA-Contour-Surface-Sanding/dp/B00004Z49L/ref=sr_1_2?s=hi&amp;ie=UTF8&amp;qid=1320331548&amp;sr=1-2
X-acto knife
http://www.amazon.com/Xacto-X3601-Precision-Knife-Safety/dp/B00009R8JZ/ref=sr_1_3?ie=UTF8&amp;qid=1320331502&amp;sr=8-3
Painting:
If you're just stating out, hand brush and try rattle cans. Check out the tutorials for specifics.
If I think of any others, I'll add them, but that's a good start from me.
I've seen tiny cutters that allow you to cut flush with plastic. Cheap solution to that problem, I'd think.
http://www.amazon.com/Stanley-66-052-6-Piece-Precision-Screwdriver/dp/B00009OYGV
While you can get good punches with those, you need to make sure your keystone is on a good solid surface, and press down cleanly and smoothly; make sure not to "rock" the tool from side to side as it might crimp or otherwise damage the wire. (A keystone "stand" might help) Your keystone should also have come with a protector which you should use immediately as it helps seat the wire as well.
If you expect to do this regularly, the investment in a real 110 punch-down tool is worth it. I'm a huge fan of the comfort-grip Fluke, but there are many other brands which will do just as good of a job for a quarter of the price (they're just not as comfortable or feature-packed).
https://smile.amazon.com/dp/B000FGWPK2/
Fluke Comfort Punch: $70
https://smile.amazon.com/dp/B0000AZK4D/
TrendNet 110 Punch: $17
https://smile.amazon.com/dp/B008NXK3NU/
Keystone Stand: $6
IMO a 110/66 punch-down tool is the only cabling tool a networker still needs in her bag.
A coax line would not work, because it cannot be used in place if an Ethernet line. A cable modem (which is the only device that will except a Coax, requires a CMTS (Cable Modem Termination System) in order for it to function. CMTS's are thousands of dollars. You could use an Ethernet over power, which is the power line adapter you are talking about. The only issue, an especially with old houses, the wiring is done in sections. Which is why you have circuit breakers for turning off parts of the house, without needing to turn the whole house off. In other words, you wont be successful with the Power Line Adapter, because your room is most likely in a different section of the house, than the modem. Also, appliances that use large amounts of energy, such as washers, dryers, microwaves and fridges can cause your latency to spike up into the 4000ms (You can see how Ethernet over Power didn't really catch on).
Your best option, is buying a 350 ft of CAT 5 Cable, and fishing it up to your room. This will require Crimpers and CAT 5 ender and cable tester. This will cost you about $50 dollars, and it's really easy to do. Here is a Guide
Edit: Never heard of MoCA adapter's apparently that works too
If you're willing to go up to $39, how about some chisels?
https://www.amazon.com/dp/B00GPC74ZQ/
the small one of these might work:
http://www.amazon.com/SpeedOut-Damaged-Screw-Extractor-Bolt/dp/B00IRL3WP4/ref=sr_1_1?ie=UTF8&amp;qid=1426164320&amp;sr=8-1&amp;keywords=stripped+screw+extractor
personal fix is a pair of wire nippers like these https://www.amazon.com/Xuron-170-II-Micro-Shear-Flush-Cutter/dp/B000IBSFAI
And some needle nose pliers to grab the then nipped nail and pull.
This is why I drive a Jeep with steel bumpers and carry one of these:
https://www.amazon.com/dp/B000VSSG3O?ref=ppx_pop_mob_ap_share
Don't listen to the guys saying you need to buy truck brands like Snap-on or MAC, they are overpriced and while they are very good quality the biggest reason mechanics use them is because they are frequently visited by the tool trucks meaning exchanging broken tools is easy. For the home mechanic they are extreme overkill.
Craftsman is OKAY, despite the detractor whining they are chinese-made (and lets be honest, unless you willing to pony up most tools you will buy will be Chinese anyways). I put them at the same level as Harbor Freight (at least the Harbor Freight Pro line, it will say on the label) mostly because they both have the same return policy on hand tools, if it breaks take it to the store and get it replaced.
I would put the box store brands (Husky for Home Depot and Kobalt for Lowes) in the same category as Craftsman and Harbor Freight but don't because while they have the same life time warranty on paper as HF and Sears (at least until it goes bankrupt like people have been predicting for a decade) I have heard stories of them making it either very difficult or impossible to return and exchange broken tools.
Either way unless you need high precision tools like torque wrenches, tractor wrenches, or high strength impacts you really can't go wrong with anything above discount bin or dollar store tool sets. The important thing is having the proper tool for the job, no using 3/8 ratchets to break rusted lug nuts business. I will also stress don't buy gimmick tools like spline sockets or ratcheting wrenches.
If what you are really looking for it tools off the beaten path I would recommend SK, Williams, Bahco, Craftsman Professional, and Proto for hand tools. The first 3 are OEMs for the truck brands and can usually be bought cheaper then them except for being a little harder to find, the Craftsman Professional line is still made in the US (with the price tag to match), and Proto is the pro line for Stanley.
Wera, Wiha, Kline, Knipex are all good brands for screwdrivers and pliers. I wouldn't know to much about them except for the decade old Kline crimper I have that's still chugging along after all the abuse I've heaped on it, and electricians swear by them. Knipex also makes one of the greatest tools known to man, probably the only gimmick tool worth it's salt.
This thread can give you a good starting point if you would like the truck brand quality without the truck brand price.
You also can't go wrong browsing craigslist for people who are upsizing/upgrading/retiring/downsizing and looking to dump their old stuff.
Blade to handle ratio is a dumb concept. Some knives are designed to have a large hand filling handle and short blade. Larger blades aren't always desirable. It's like people think they're getting ripped off - "Hey they coulda fit more blade in there what are you trying to pull?"
Look at this terrible blade to handle ratio.
God. I just went through this on my truck. Took me 4 tries to get it right. Heres what ended up working. Hopefully it will save you a similar nightmare.
First thing to do is leak test that manifold. Just looking for cracks isn't enough. I made a flange out of particle board and silicone kitchen sealant. Then I cut the valve stem out of a bike tube and made another flange for the collector opening. Pressurized to about 5 PSI and sprayed soapy water all over it. Its a good thing I checked because one of the welds was cracked. Ended up returning it. That would have been a 12 hour mistake had I installed it. The second set I had passed.
Clean the surface of the manifold and the mating surface of the engine block. Make sure the surface of the manifold is as perfectly flat as you can get. Most gaskets will only take up 50 thousandths or so of gap, less if its a scratch. So measure it first against a really flat surface. If its warped, a good trick is to glue fine grit sand paper to a really flat surface and sand down the high spots. I used a sharpie to color in the entire manifold surface first so I could see where the high spots were. Sanding took a while
I used a new knife sharpening stone like this one to polish the mating surface of the engine block. I broke the stone with a hammer to get a decent sized piece that would fit. The goal isn't to remove metal, its to clean the carbon off without distorting the flatness of the engine block. Some people recommended sand paper for this, but yikes. Maybe scotch bright would work too.
Last thing is to buy a good gasket. I used Percys Seal for good dead soft aluminum gaskets on my first attempt with the recommended bolt torque. They leaked. Second attempt was upping the torque by 50%, leaked worse. Third try was putting a little RTV on each side of the gasket, still leaked. What finally worked was a JBA steel core crush gasket with no RTV. It has graphite or something on it for the crush. Fel-pro makes a decent equivilent.
I tightened the bolts in 4 steps - hand tight to locate the manifold, then as tight as I could get with a combination wrench, then 50% of the torque value, then 100%. Each time tightening them from the inside out and alternating from top to bottom. There was a significant amount of crush happening on the 50% torque step. Make sure you use a small amount of copper anti-seize on the bolts. You'll strip out the threads on your block next time you remove them otherwise.
I went back after two days and retightened the bolts. The had loosened up significantly. Went back again a week later and everything was still tight.
That's so much more work than cutting it and crimping on a new end... crimper kits are actually pretty cheap.
Dont buy a harbor freight torque wrench. I bet your hand is more accurate. Seriously, HF stuff is just a waste of money.
If you want to own one, spend a little bit more and have some patience. This one will do and its only $40.
If you dont want to spend $40, go to Autozone and rent one for free. You pay them the price of the wrench and then bring it back in 48 hours for a full refund. It a program they started to stop people from buying and returning tools all the time and its great. I think O'Riley has something similar too.
SpeedOut Damaged Screw Extractor & Bolt Extractor Set https://www.amazon.com/dp/B00IRL3WP4/ref=cm_sw_r_awd_9a3Dub1RZ8KAW
I think this should be a meme or something. I bought my parents this one christmas and can now actually cook at their house: http://www.amazon.com/Whetstone-Cutlery-Two-Sided-Stone/dp/B0055B2RGO/ref=zg_bs_553346_9