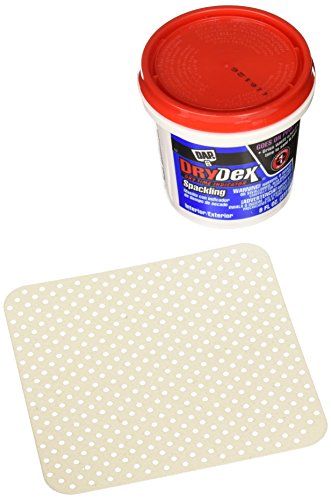
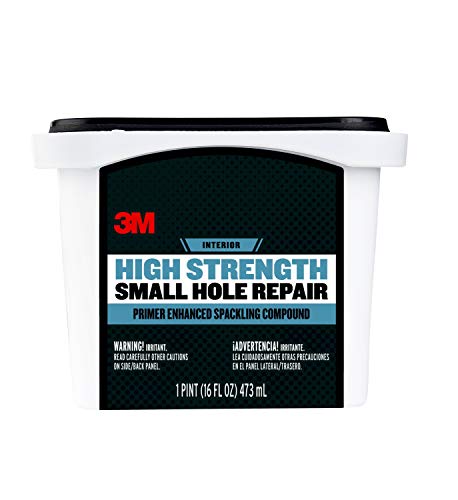
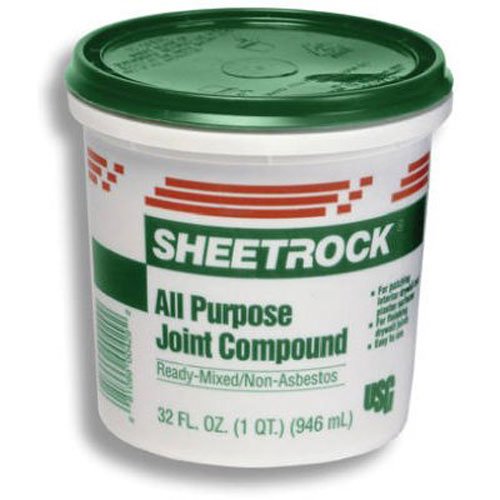
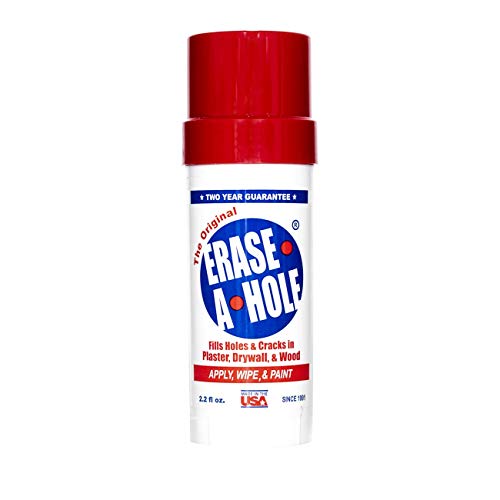
Best wall surface repair products according to redditors
We found 130 Reddit comments discussing the best wall surface repair products. We ranked the 55 resulting products by number of redditors who mentioned them. Here are the top 20.
We found 130 Reddit comments discussing the best wall surface repair products. We ranked the 55 resulting products by number of redditors who mentioned them. Here are the top 20.


Hydrophobic coatings have been a thing for a while. You can do the same thing for much, much cheaper.
If you want that specific bag to have water resistance, you can add a hydrophobic coating to it with this [Rust-Oleum spray.](Rust-Oleum 278146 NeverWet 11-Ounce Outdoor Fabric Spray, Clear https://www.amazon.com/dp/B00KRHF8E4/ref=cm_sw_r_cp_api_AuQ-zbEF5DKD1) Then it'll be perfect for everything but extended submersion.
There's also a multipurpose variant in [a can.](Rust Oleum 274232 Never Wet Multi Purpose Kit https://www.amazon.com/dp/B00DNQBFAW/ref=cm_sw_r_cp_api_EvQ-zbMNGXTYW)
Get something like this, any brand will do - its all the same shit really. I did a real botched job in my last apartment and my landlord had no idea. Just smear it on, wait for it to dry and sand it down. Paint if necessary, but if you are lucky the eggy white tinge might match whatever you are patching.
Remove the caulk, sand and use a touch up paint https://www.amazon.com/Sheffield-1126-Porcelain-Touch-Up-White/dp/B000BZX28Q
then recaulk.
I would sell it as is and offer no allowances. You can add those to your negotiations. People will know, when they purchase, that things will need redoing.
Check out Never Wet. I've heard good things!
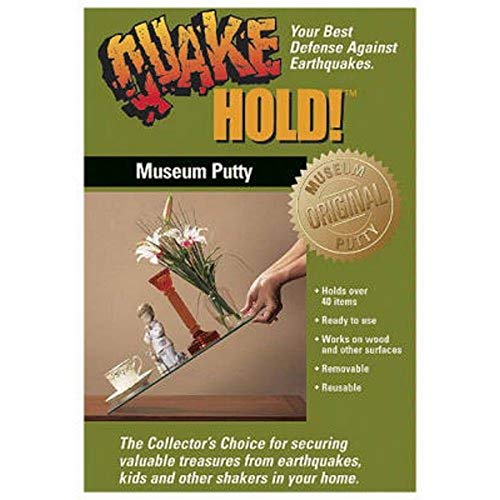
We SoCalians invest in Museum Putty. : )
https://www.amazon.com/Quakehold-88111-Museum-Putty-Neutral/dp/B0002VA9NA
Some kind of museum putty or blu tack?
What you need is this. It's got everything you need.
Paint as needed.
I have a very curious cat, and I also have some sentimental, breakable items that I'd like to keep in once piece, but also have out on shelves. I invested in some museum putty, and every single thing in my home that isn't food has survived his antics. https://www.amazon.com/Quakehold-88111-Museum-Putty-Neutral/dp/B0002VA9NA/ref=sr_1_1?ie=UTF8&qid=1493008406&sr=8-1&keywords=quakehold
Not glue, museum putty.
Famowood epoxy resin.
https://www.amazon.com/Famowood-5050060-Glaze-Epoxy-Adhesive/dp/B008G8ON9W Start there, you can change brand/size as you see fit. :)
Get a 4 inch wiz roller with a clothe roller, as pictured (not the sponge roller)
https://www.amazon.com/Work-Tools-International-54164-Premium/dp/B000I1CKJ0/ref=sr_1_15?ie=UTF8&qid=1474398359&sr=8-15&keywords=4%22+wiz+roller
Put some joint compound on the wall, a teaspoon or tablespoon to start. Then use the roller to spread and roll the compound back and forth, until you get a very thin texture similar to that around it. The roller fabric should be moistened before use, a little bit, to keep too much of the joint compound from sticking to it. If at any time you don’t like what’s happening and you want to start over, get a towel and just wipe it off the wall. The joint compound must dry and usually over night before painting. What you create with the compound can be sanded a bit when dry, to knock off any high points, to further match its surroundings. Essentially, you're replicating possibly years of paint being rolled on the walls. Good luck.
https://www.amazon.com/GYPSUM-380270072-Gypsum-380270-Compound/dp/B000PDL6F0/ref=sr_1_sc_1?ie=UTF8&qid=1474398609&sr=8-1-spell&keywords=joint+comopund
museum putty helps with this
I love art. Hi
[item] (http://www.amazon.com/dp/B000HSENKS/ref=wl_it_dp_o_pC_nS_ttl?_encoding=UTF8&colid=3MZKKTPS3LUTM&coliid=IAQNXEEULTIQF)
like art is my favorite
OK. Super cheap:
(1) Clean out the crack and fill it with self leveling concrete caulk: http://www.homedepot.com/p/Sikaflex-29-fl-oz-Grey-Self-Leveling-Sealant-106711/202523824
More money, but still kinda cheap:
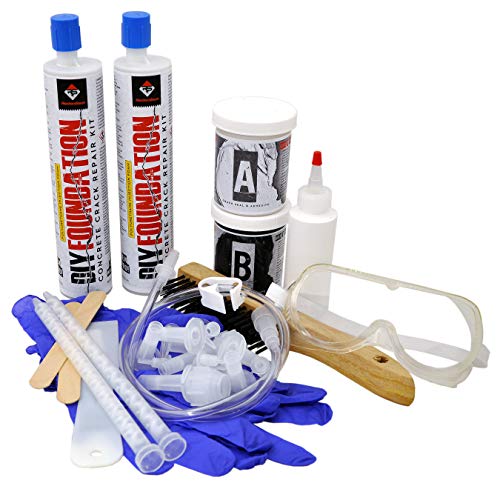
(2) Clean out the crack and inject it with epoxy: https://www.amazon.com/DIY-Concrete-Foundation-Crack-Repair/dp/B006OP30L6
Still more money:
(3) Resurface the whole garage with a concrete overlay: https://www.concretenetwork.com/concrete-overlays
The long term repair:
(4) Control the water before it gets beneath the slab: http://www.aquamasterplumbing.com/2015/01/26/everything-you-need-to-know-about-weeping-tile/
This is just me.......Do you have gutters and downspouts? If so, are they directing water away from the garage foundation? Do you have a problem with water sitting against the garage on any of it's sides?
In fact the first search result for museum putty is called Quakehold so there you go.
I live in earthquake country, too, and we get those all the time. The criteria I use is:
(A) Is there a change of plane? Is one side higher or lower than the other side?
(B) Is it wider at the top vs the bottom?
(C) Has it pulled apart? Can you stick a coin into the slot?
(D) For a basement, has water or soil come through the crack?
(E) Has the wall bowed outward?
If the answer is no, then I don't worry about it. If I want to seal it, I will use a thin masonry blade on an angle grinder, open the crack a bit wider, then use masonry caulk to seal it:
http://www.homedepot.com/s/masonry%2520caulk?NCNI-5
You could also use an epoxy repair kit, if you want:
https://www.amazon.com/DIY-Concrete-Foundation-Crack-Repair/dp/B006OP30L6
You’ll need to clean all the caulk off, then treat with a rust neutralizer, then paint with special enamel repair paint before recaulking the edge.
https://www.amazon.com/Loctite-8-Ounce-Extend-Neutralizer-1381192/dp/B001000VS0
https://www.amazon.com/Sheffield-1126-Porcelain-Touch-Up-White/dp/B000BZX28Q
https://www.amazon.com/gp/aw/ol/B000ZZYQ6E/ref=olp_tab_all
5 dollars, shipping included. That's after 4 seconds of searching. I'm sure you can find a lower price with more time
https://www.amazon.com/Quakehold-88111-Museum-Putty-Neutral/dp/B0002VA9NA Makes a huge difference... not sure if it would hurt the tea things though
https://www.amazon.com/Quakehold-88111-Museum-Putty-Neutral/dp/B0002VA9NA
Stock up! 1 package was good for me for about 100 figures. I'd post my display but my friends could identify me from it and I'm a horrible nasty person on reddit.
Mobocrat707, meet Quakehold. Quakehold, meet Mobocrat 707
Fellow southern Californian. This product might be useful:
Quakehold! 88111 Museum Putty Neutral https://www.amazon.com/dp/B0002VA9NA/ref=cm_sw_r_cp_apa_NqvVAb0CS82N0
Buy a putty like this and then if needed paint over. You can take a paint chip to any paint store or Lowes/Home Depot and they can match it.
something like this
You just want a small all in one patch kit. If you are new to repairs, just do a little at a time give it plenty of time to dry.
Nothing wrong with checking out “drywall repair” on YouTube either.
Good luck
As an out of box collector I have come to rely on museum putty, cheap and very effective. http://www.amazon.com/Quakehold-88111-Museum-Putty-Neutral/dp/B0002VA9NA/ref=sr_1_1?ie=UTF8&qid=1457246633&sr=8-1&keywords=quake+hold
Get some Quake Hold from Home Depot
This stuff
http://www.amazon.com/Quakehold-88111-Museum-Putty-Neutral/dp/B0002VA9NA
You should look into spray cans of wall texture. They come in different size grit, etc.
You could just spray it on and not ruin brushes or have huge amounts of sandy paint.
http://www.amazon.com/Homax-Group-4592-Professional-25-Ounce/dp/B008Z3XJHA/ref=sr_1_1?ie=UTF8&qid=1457367720&sr=8-1&keywords=wall+texture+spray+can
Museum putty is made for this exact application.
Depending on how the mesh broke, you could get a screen repair kit pretty cheap. Just make sure any rough edges are on the too side so he can't scratch himself. http://m.homedepot.com/p/Phifer-Brite-Aluminum-Screen-Patch-Repair-Kit-3007751/100566717
If you need to replace the whole screen, something like this might work.
http://www.amazon.com/gp/aw/d/B000AY24FA/ref=pd_aw_sims_8?pi=SS115&simLd=1
Or maybe screen tape. http://www.amazon.com/gp/aw/d/B0081S4H3O/ref=pd_aw_sims_3?pi=SS115&simLd=1
I fixed a chip in my white porcelain sink using Sheffield Porcelain Touch-up. It worked very well.
https://www.amazon.com/Sheffield-1126-Porcelain-Touch-Up-White/dp/B000BZX28Q/ref=redir_mobile_desktop?_encoding=UTF8&psc=1&ref_=ppx_yo_mob_b_inactive_ship_o0_img
https://smile.amazon.com/Quakehold-88111-Museum-Putty-Neutral/dp/B0002VA9NA/ref=sr_1_3?crid=3GSDWI8M67Q2R&keywords=earthquake+hold+museum+putty&qid=1557850809&s=gateway&sprefix=museum+earth%2Caps%2C154&sr=8-3
http://www.amazon.com/gp/aw/d/B000BUCWB4?pc_redir=1398506246&robot_redir=1
All three are pretty sturdy actually and don't require any careful positioning. Try different surfaces as well. And if all else fails, use display putty.
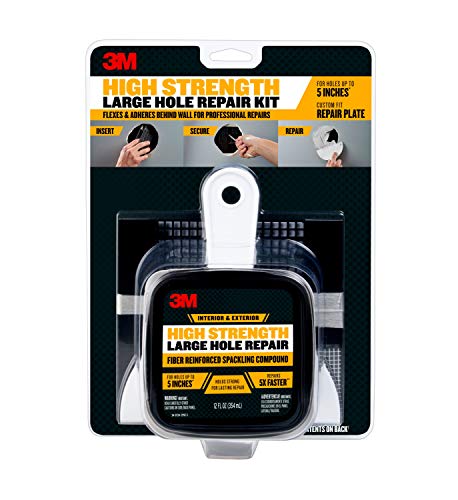
get something like THIS and you should be good to go even for a hole up to an inch or 2.
What about some of this stuff: http://www.amazon.com/Oleum-274232-Never-Multi-Purpose/dp/B00DNQBFAW
If you read the packaging, on the upper left it says "FROSTED CLEAR".
If you read the description of the product on their website, it states "Sprays clear and dries to a flat light haze"
The frosted hazing is normal.
Amazon has it.
As /r/rudderusa said, just use mud / joint compound.
I picked up some of this: https://amzn.com/B000ZZYQ6E and it works great. Just apply, smooth it out, let it dry (8'ish hours to be 100% safe), then sand it down and you will be ready to prime and paint.
This stuff is really nifty for keeping stuff from falling.
Quakehold! 88111 Museum Putty Neutral
https://www.amazon.com/dp/B0002VA9NA/ref=cm_sw_r_cp_api_bWTPAbWX379DW
One option is furniture securing straps. If you live somewhere prone to earthquakes, you've probably seen them before.
The same people also make special putty for securing stuff to shelves. That was very helpful for childproofing at my house.
Yeah nothing out there on that...thought about doing a video but too lazy X).....I used painters tape on bottom of the headlights and over the blinkers. and just sprayed the whole front fascia(using a large piece of cardboard to protect any stray spray from getting on the rest of the car)....it does kinda puddle up and drip if you put too much in any one area. Worked perfectly everywhere so i'd say you just need a nice thin coat...again not sure how long it'll last, it does seem to wipe off fairly easily as it's not permanent. Also due to all the snow on the road I couldn't use auto drive much so not a big deal...I bought this, and just used the top coat per recommendations: https://www.amazon.com/Rust-Oleum-274232-Repelling-treatment-top-coat/dp/B00DNQBFAW/ref=sr_1_4?keywords=neverwet&qid=1574971342&sr=8-4.....did a section of concrete stairs with the base and top coat that worked really well to prevent icing so i'll probably buy some more for that.
$31 on Amazon for 18oz
How big is it? If it's less than 5" or so, these kits work well and are pretty self explanatory. There are also instructional videos on youtube. If this is an apartment that you rent, there is limited value in fixing it too well.
3M Patch Plus Primer Kit with 8 fl. oz Patch Plus Primer, Self-Adhesive Patch, Putty Knife and Sanding Pad https://www.amazon.com/dp/B00IOQKUQG/ref=cm_sw_r_cp_api_RBxSBbDZW9JS0
I’d recommend that one. Use a drop cloth under the wall so you won’t get any on the carpet if you have any... good luck and I pray you find paint to match the wall.
https://youtu.be/qvtoikKG318 the guy in this video uses the same kit
If it is not under warranty, you could do this yourself:
https://www.amazon.com/DIY-Concrete-Foundation-Crack-Repair/dp/B006OP30L6
Museum putty:
http://www.amazon.com/Quakehold-88111-Museum-Putty-Neutral/dp/B0002VA9NA
depends. You have two main routes.
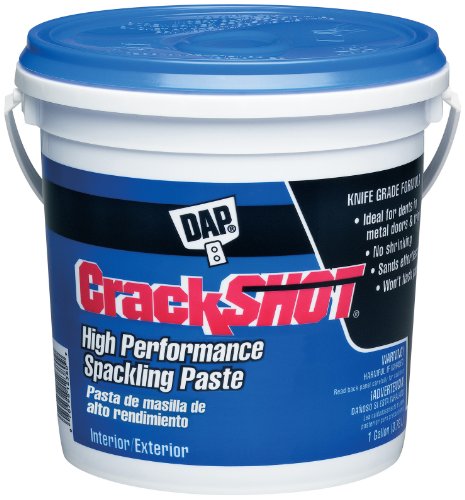
A) fast and dirty. Buy http://www.amazon.com/12372-CrackShot-Spackling-Paste-5-5-Ounce/dp/B000HSENKS
and http://www.amazon.com/Great-Neck-125PC-4-Inch-Flexible/dp/B000OC4YUG/ref=pd_bxgy_hi_img_y
Put paste into holes. smooth and make flush with wall with the knife. sand and paint.
or
B) the more labor intensive but correct way.
Get a ready-made drywall patch. These are available at big-box home centers and hardware stores. They use a peel-and-stick, metal-backed patch for added strength.
Clean up the edges of the hole. Trim away frayed edges with a utility knife and press back into place any small chunks still hanging by a flap.
Cut or shape the patch carefully to fit the hole. Make sure to leave extra backing all around the patch to attach to the drywall surrounding the hole.
Clean and dry the repair area to allow maximum adhesion. To clean greasy areas (as in a kitchen), use trisodium phosphate ("TSP"), which can be found at most paint centers. Warm, soapy water can do the job, too, but don't let the drywall get too wet.
Apply the patch to the wall and smooth the taped edges with your putty knife. This will remove air bubbles.
Use a wide-blade putty knife to spread a thin topcoat of joint compound (sometimes called "mud") over the area surrounding the repair. The aim is to create a smooth transition between the patch backing and the surrounding wall. Because the patch backing lies on top of the existing drywall, there can be an unattractive layered look to your work if you don't do something to disguise it. Therefore you must learn to apply compound around the patch in such a way that the patch backing is "feathered" gradually into the rest of the wall. With practice, you'll learn the technique of making this transition smoothly. It will often require more than one coat of mud.
Example: If repairing a 2- to 3-inch (5- to 7.5-cm) hole, you will want to use a 10-inch (24 cm) putty knife to apply a skim coat of joint compound as a final topcoat. Remember to "screed" (gently scrape) the mud in one smooth, final stroke.
Apply a liberal amount of non-shrink joint compound with a putty knife. Wider putty knives will produce smoother results.
Smooth the compound with the putty knife. Pull the blade toward you in one steady, smooth motion, letting the knife make a 30-degree angle with the wall. If your finish doesn't look smooth, simply wipe off the blade, wet it and scrape the wall again. Make the mud as smooth as you can, but don't worry if it's not perfect. You will be able to sand the compound later when it's dry (although this can create a bit of a mess, so it's best to leave it as smooth as possible before it dries).
Let the patched area dry thoroughly before applying additional coats or sanding.
Once the compound is dry, lightly sand the area smooth using drywall sandpaper attached to a drywall sander. (Regular sandpaper will work, just not as well.) If there are large blobs or strips, shave these off with the putty knife first. You want to create as little dust as possible.
Hide minor imperfections with an ultra-thin topcoat of joint compound. Apply this topcoat over pin holes or hairline cracks as if you were trying to scrape it all off with your knife without leaving any behind. With experience, this step can often be accomplished without additional sanding.
A standard sized plaster wrap package will be about 10 dollars, but depending on how large your shell is going to be or how much armor you are going to make you will be needing much more than that. Standard size plaster wrap
This amount of wrap will do about 10 regular thickness masks (if that guesstimate helps?). I would buy the regular size plaster wrap and test it out, this will also help you determine how much more wrap you are going to need. If you need a lot buy in bulk, the price per amount of wrap goes down considerably the more you buy, rather than buying a bunch of the regular size.
Tutorials-
These two go over the basics of plaster wrap with the example being one of the most traditional uses of plaster wrap.
part one of traditional use of plaster wrap
part two of mask tutorial
Now I couldn't find a tutorial for the armor bit but I can explain as best I can. As the link below mentions to make armor bits you're going to need a frame or base shape for you to put the wrap on top of. Traditionally the base is someone's face or hand. The site below mentioned chicken wire being used as a base. For my base I used crumpled newspaper, masking tape (to hold it together) and plastic wrap(to keep the water out of the newspaper). I built up the shape (squirtle's shell) by adding more paper or punching down budges (haha, it was getting a little to close to the con for my comfort). Then I built a couple of layers of plaster wrap and let it dry. Be aware that that using a non-breathing base like this will take a day or more to dry fully.
this tutorial goes over surface finishing technique that i used
I used a spackle plaster for filling nail holes in a wall to cover the gauze texture and give me a surface to smooth (sand) and paint. (what was nice about the stuff I used was that it went on pink and dried white). I put the plaster on top of the wrap as smoothly as I could without fusing with it too much. I then waited for it to dry. Now I had to do a couple of layers. The first one is for filling all the divets and dips. Take a medium grit sand paper and smooth until you've got the right shape. The second, third (etc) layers are for finer and finer details. The more layer you do, the finer sand paper you'll want to use. Keep sanding until you are stratified with the smoothness. If you have OCD like me, then you can use a additional technique of primer-ing the piece then gently sanding to check for highs and lows. But this is not necessary.
I used a product like this
Aha! So I found it! By luck! I had seen this before a long time ago but didn't bookmark it.
Armor making tutorial There is a translation in the comments below. Though it's not a very good translation you'll get the gist of it.
Painting the piece.
Gently dust the surface. Primer all of the pieces in the most suitable color (black, gray, white). Then paint them. Then seal with a clear.
A can of spray paint costs about 5 bucks in my area.
A very very very rough estimate for everything would cost about 50 dollars. (£30 ).
Hope this help. Let me know if you need clarification.
I've always had good luck with [Earthquake Putty] (https://www.amazon.co.uk/Quakehold-Earthquake-Preferred-product-stabilizing/dp/B0002VA9NA/ref=sr_1_1?ie=UTF8&qid=1467150201&sr=8-1&keywords=earthquake+putty) It seems to hold a bit better than the blue stuff. Maybe you can pair it with something like [this] (https://www.amazon.co.uk/Newest-Colorful-Multipurpose-Organizer-Smartphone/dp/B016KF3M44/ref=sr_1_7?s=shoes&ie=UTF8&qid=1467150308&sr=8-7&keywords=cable+tidy) for the actual cables to run through.
It's called Famowood Glaze coat. It was about $25 at menards for a quart which barely covered the top. First time using it. But I'm pleased with the results.
I'd actually recommend Museum Putty. It doesn't leave a residue like standard blue sticky tack and it'll provide just enough hold to keep components from blowing away. Additionally, it won't obstruct the front of the components.
We use it to prevent cat-lateral damage, but if you kept a slab of this at the table within easy reach I think it would serve you well.
Drywall Repair Patch :: $5
1 Quart of Paint :: ≤10$
I don't even know if you could file a case in civil small-claims court for that small of an amount, but if you could, it would be an absolute waste of time and energy that's likely motivated entirely by the desire for payback.
$29 for 4 ounces. Rustoleum Neverwet is only $15 for 18 ounces and does the same thing.
There are hydrophobic sprays, which might make a deck last a little longer. It will be immediately destroyed on the nose/tail when you pop off the ground, but it might slow down waterlogging.
My guess is that it wouldn't do much, but it might be worth a shot if you're desperate.
If you don't want to use adhesives, museum putty works too. https://www.amazon.com/Quakehold-88111-Museum-Putty-Neutral/dp/B0002VA9NA
It's actually this stuff called "Quake Hold", which is reusable/stickable putty to hold stuff down during earthquakes and such. It's easy to ball up and manipulate to any size and it wont leave residue on the caps. Does a great job holding knick-knacks on shelves too =)
Buy this Franklin Sensors stud finder or something higher, nothin lower. You will have it for life. I own one and it's the tits.
Also buy a roll of paper drywall tape. That mesh stuff is crap. You need to rebuild those holes with paper and gypsum (spackle). Any will due.
Clean holes with stiff bristle brush. Try to save any chunks that have intact, contiguous paper that are flapping around, they will increase strength.
Fill, mud and tape. Let dry. Light wet sand (wet dish rag). Let dry. Mud again if you see edges. Let dry. Wet sand. Dry sand. Paint. Dry times are 24 hours to be safe.
It is the only way!
Reference: Parent of 2 children under 5.
These work great if you can't simply use a thicker screw:
https://www.amazon.com/Woodmate-2498-Grip-Screw-Repair/dp/B001B38ALG/ref=sr_1_1?ie=UTF8&qid=1466008472&sr=8-1&keywords=mr+grip
My husband, son and I just moved into a temporary place while my hubby is in school and I HATE it. So, while we stock my house some stuff has to be done. It has the terrible wood paneling and old 70's green sink and bathtub. It's a cheap arrangement to help us save money to get a house after he finishes with his schoolin'. I NEED something to make it more cheerful in here. I plan to paint the walls, but I need primer and I heard this was good stuff. And if at all possible, this shit. Apparently the people who lived here before us had no clue what they were doing with ANYTHING so there's shit that needs fixin'.
Made this hole way back when I was in school. Tried hiding it with thick paper and tape. Now that im planning on repainting my walls from this pee colored yellow to a shade of grey, I need to repair this hole first.
Whats the easiest way for me to repair this without costing me too much? Take into consideration Ive never done anything like this before.
I was thinking this Patch Plus Primer, Fiber Mesh Patch, and Plastic Knife Set? Will these be all that I need?
https://www.amazon.com/GYPSUM-380270072-Gypsum-Compound-Off-White/dp/B000PDL6F0/ref=pd_cp_60_2?pd_rd_w=6ymG1&pf_rd_p=ef4dc990-a9ca-4945-ae0b-f8d549198ed6&pf_rd_r=8H8Q8B9AQY1ABEWYG868&pd_rd_r=0c287f59-a7c4-11e9-97ec-85e598983ee7&pd_rd_wg=z3If8&pd_rd_i=B000PDL6F0&psc=1&refRID=8H8Q8B9AQY1ABEWYG868
​
https://www.amazon.com/Walboard-Tool-54-007-Drywall-Repair/dp/B003NSBQF4/ref=sr_1_3?crid=3SYGBH6UL94J4&keywords=8x8+drywall+patch&qid=1563279667&s=hi&sprefix=8x8+drywall%2Ctools%2C133&sr=1-3
I don't know what happened but I'm glad to hear it seems better.
Saw this on shark tank, it may make you think wtf
Hey, yea I was able to seal it up. Unfortunately I didn't take any pictures during the process.
But, I essentially followed all of the suggestions in here.
I removed the face plate on the inside wall. Put a piece of insulation in the slot. I had to cut it to size and pull it up the slot from the outside. Sprayed some minimal expansion foam around the edges of the metal slot. Took off the outside faceplate and put this insulating wrap over the slot. Reattached the outside faceplate and superglued it shut.
Used this drywall patch kit to fix the inside. I had to get creative with mounting the included piece of sheetrock because the metal slot in the wall didn't leave any room to mount the wood blocks to the surrounding drywall. Spackled, sanded, spackled, sanded, (rinse repeat until smooth), and painted.
I didn't color match my paint well enough but otherwise its a really smooth finish and I still like the old nostalgic look of the outside faceplate. The true test will come in the winter to see if it's insulated well enough.
Quakehold! 88111 Museum Putty Neutral
https://www.amazon.com/gp/product/B0002VA9NA/ref=oh_aui_detailpage_o01_s00?ie=UTF8&psc=1
Something like this should be fine.
https://www.amazon.com/gp/product/B0002VA9NA/ref=ppx_yo_dt_b_search_asin_title?ie=UTF8&psc=1
You can also use the cheaper blue sticky tacky for posters, I guess, but I haven't tried that.
Get some scrap window screen. Lay a very small bead of some sort of glue that adheres to plastic around each vent. Cut the screen to the overlap the vent, push it into the glue. Allow to dry. Trim excess as necessary.
Or buy adhesive screen repair patches.
Check out Museum Putty. It is what museums use to hold down artwork and secure it from small earthquakes. Easily removed.
https://www.amazon.com/Quakehold-88111-Museum-Putty-Neutral/dp/B0002VA9NA/ref=sr_1_1?ie=UTF8&qid=1485061346&sr=8-1&keywords=museum+putty
Also cats generally hate sticky stuff. It may not be the most attractive option but apply some double sided tape to the surfaces of the dock. They will soon learn to leave it alone. Expecting parents with cats put double sided tape on cardboard and leave it in the crib and other surfaces they don't want cats to jump on.
Something like this would work: https://www.amazon.com/3M-Repair-Compound-Self-Adhesive-Sanding/dp/B06Y4682NF or https://www.amazon.com/3M-Patch-Primer-Self-Adhesive-Sanding/dp/B00IOQKUQG/
(Drywall repair kits can also be purchased at Lowes, Home Depot, etc.)
Do you have leftover paint for touch-up?
+1 for board-mounted pots, or board-mounted-something-that-also-attaches-to-the-enclosure.
But for stripboard builds I've been using a few little balls of this putty stuff on the back of the board, it works both to insulate and keep the board in place.
Just use nails, screws, molly fasteners or some other kind of drywall anchor. When you move, do as /u/krnewman21 says and get something like this to fill the holes. Also, maybe take a chip of paint in and get a sample jar of new paint that's the same color.
Steel putty. Not sure about polishing but it’s used for patching up steel.
https://www.amazon.com/Hy-Poxy-H-800-Stainless-Steel-Repair/dp/B07DM1WDTK
You might have to live with a dull patch unless you paint over it.
You can get these from your local hardware store. They work great for me.
Screw hole repair
Wait till you learn about Mr. Grip.
Quakehold! Museum Putty
Museum putty. That shit is magic.
edit: link
Window screen repair tape. Yes, it's because we have cats
Ah, so something like this should do the trick. I may have to do some test runs.
https://www.amazon.com/Grade-Texture-Orange-Water-Based/dp/B008Z3XJHA/ref=sr_1_6?ie=UTF8&qid=1481753517&sr=8-6&keywords=texture+spray+wall
Ugh, I appreciate your reply immensely but just fuck.
What kind of saw should I cut with if I go your route?
What does vee out mean?
I know you don't like kits, but how about this kit if I decide to cut out the dent? It uses a plastic piece instead of a square piece of drywall. If it's trash, which lightweight joint compound do you recommend?
My wife swears by Quake Hold putty.
In addition to your aquarium, anything extremely fragile and valuable (display china plates, heirloom vases, that sorta stuff) that would fall over in a bigger quake, you may want to use Museum / Earthquake putty. http://www.amazon.com/Quakehold-88111-Museum-Putty/dp/B0002VA9NA/ref=sr_1_1?ie=UTF8&qid=1314809160&sr=8-1
Earthquake insurance is very expensive and not really worth it, especially if you are living in an apartment and have renters insurance (i.e. don't need to worry about rebuilding a home in a worst case scenario). The building codes and the 1989 Loma Prieta quake basically make it so that unless you are living on fill there is nothing to worry about your home falling down. If you're very unlucky your foundation may crack (thus the reason for earthquake insurance), but most likely even in a big quake any building you are in will at worst have cracks in the walls.
So that being said taking small, simple precautions is worth it, but no one thinks or worries about earthquakes on a daily (or even yearly) basis.
Here is a link to Amazon. Looks like something similar. Might be a little easier to get there.
It's at the big box hardware stores also.
problem solved