Best welding equipment & accessories according to redditors
We found 1,521 Reddit comments discussing the best welding equipment & accessories. We ranked the 569 resulting products by number of redditors who mentioned them. Here are the top 20.
We found 1,521 Reddit comments discussing the best welding equipment & accessories. We ranked the 569 resulting products by number of redditors who mentioned them. Here are the top 20.


Its a solder sucker, used to de-solder components. You press the plunger down, then heat the solder then press the button on the sucker with the nozzle next to the solder and gone. Here is a link
Well you could save yourself $2900 and just house one of these in a nerf gun rifle with a custom paint job...
https://www.amazon.com/dp/B00282LP34/ref=sxbs_sxwds-stvp_2?pf_rd_m=ATVPDKIKX0DER&pf_rd_p=3341940462&pd_rd_wg=OpZHd&pf_rd_r=WWRMWNH8J98VB371Y7NR&pf_rd_s=desktop-sx-bottom-slot&pf_rd_t=301&pd_rd_i=B00282LP34&pd_rd_w=oO6q7&pf_rd_i=Propane+torch&pd_rd_r=bf89caa9-5455-445f-9334-3f3e141728f1&ie=UTF8&qid=1518034992&sr=2
Propane Torch.
https://www.amazon.com/Hot-Max-500G-Propane-Torch/dp/B00282LP34/ref=sr_1_1?ie=UTF8&qid=1537380675&sr=8-1&keywords=driveway+cleaning+propane
I've started to get into electronics myself, and I can say that soldering is easy, but you need the right tools for the job.
You'll need an adjustable temperature soldering iron and 1/2 milimeter iron/lead solder as the bare minimum.
I suggest grabbing some tip tinner, solder wick & vacuum, and some cheap boards to practice soldering.
This video shows how to do the actual soldering, while this video covers the tools you'll need and explains their use. These videos are made by EEV Blog and explain soldering in GREAT detail, which is how I learned to do it.
As far as making actual circuits, you have to have an idea AND parts to fulfill your idea. The Arduino UNO is a great way to program and test circuits. It's essentially a small comptuer designed to repeat whatver task you give it over and over. Alternatively, there's the Raspberry Pi, which comes in a few different models. The difference between the Pi and the Arduino is that the Pi is essentially a mini computer. You can literally hook it up to a monitor via hdmi and slam an operating system into it.
Both boards typically come in kits like this one for the Ardunio, or this one for the Raspberry Pi. The Ardunio kits with come with a lot of peripherals, like sensors and LEDs that actually do things, while you'll have to invest more with a Raspberry Pi. These kits come with detailed instructions, code you can copy and paste, and are a great way to learn how circuitry works, and is exactly what I'm doing right now. I'm no expert by any stretch of the imagination, I've just done a decent amount of research to find out what's what.
There are two ways to hook up circuits - temporarily and (somewhat) permanently. Breadboards are used to prototype circuits without having to solder anything, typically using these wires to link different parts of the circuits together. Soldering components to those green boards I linked earlier is what you'd do when you have your circuit up and running and want to move it to something more permanent. I say "more" permanent because you can usually de-solder stuff if you needed a component for something.
Adafruit has a decently sized library of projects you can try. They often sell stuff in kits where you get everything you need to make something -- for example, this DIY MIDI controller.
Sparkfun has a great series of articles that explain the very basics of circuits and electricity
Hopefully I've explained everything enough so that you can venture off on your own. Feel free to ask questions!
it's all about having the right tip, the right diameter solder, a temperature controlled pencil set to the right value, and that the tip is free of oxidation so that you always make good contact with the parts you're joining.
a breadboard may be more suitable until you get down your technique, watch some youtube videos in the meantime and practice on inexpensive parts.
edit: more tips:
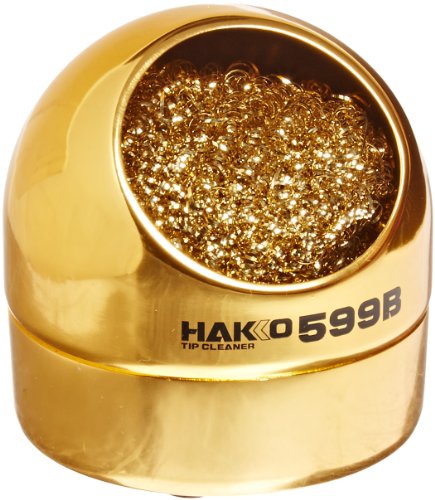
it's also good to have a copper or steel mesh to clean your tip after every joint. the oldschool wet sponge doesn't do as good a job. here's a link:
http://www.amazon.com/Hakko-599B-02-Solder-Cleaning-Holder/dp/B00FZPGDLA
A 1mm / 1.2mm tip is suitable for most everything including surface mount, the Hakko 900M-T is recommended. Don't be tempted to use a .5mm tip, the heat transfer is not as good and with techniques like drag soldering (youtube it) there's really no reason for it.
For iron temps, if you're using standard rosin core solder the sweet spot is 430 degrees. At that temp I've fooled around with sensitive surface mount parts for longer than I should have and they've all survived.
If you're shopping for a pencil that will last, look at the value models from aoyue and hakko. if you have a bigger budget, weller is the brand to own.
invest in good tools, and practice makes perfect.
Holy mother of god..
I'm assuming it's any or a combination of:
Those definitely look ruined. :/
Having the right tools is super important for soldering/desoldering, especially if you lack the experience/know-how. If you used a desoldering braid/solder wick, one with better quality will make a massive difference when you're trying to desolder. I remember struggling with a cheap wick/solder sucker combo I got a while back. Switched to a Chemtronics Desoldering Braid and was shocked at how much easier desoldering could be.
Oh man, something I can finally contribute to on this sub, I do electronics repair and a ton of microsoldering. Sorry to hijack but I'm here way too late and a main level comment will never be seen
Solder naturally wants to stick to copper (the circular "pads" are copper or some copper alloy, and the legs should have some amount of copper in it as well) when it's liquid, so getting a 'volcano' is a lot easier than you'd think. The trick is to keep the pad, pin, and solder you're feeding in hot, as soon as it starts to solidify it becomes significantly more work to re-heat and rework. If it's not perfect, I wouldn't worry about it. As long as it's making solid contact and wouldn't come loose from you tapping the key, you're good to go. Excess solder is perfectly fine as long as it's not bridging.
Another thing on solder, GET LEAD SOLDER, lead free solder is a giant pain in the ass. It doesn't melt easily, clumps and balls up, and will not heat up evenly. Also have proper ventilation, solder/flux fumes are not good.
Another possible reason for having problems is your soldering iron tip being dirty/oxidized. If it's looking black or really dull you need to clean it in a wire sponge like this. Stick the tip in and furiously move it around. If it's still dull after that/you've used the same tip for a long time, you need to tin it with a tinner, like this (lead free is totally fine for this, just dip it in while it's hot for 1-3s and clean it in the wire sponge immediately after. Smoke is normal (don't breathe it in) and it'll come out real freaking shiny.
Flux is basically a liquid-gel-ish substance that covers whatever you're working on so it doesn't oxidize and make a bad connection, although for larger scale soldering like keyboards with a ton of contact area it's not nearly as much a concern. Flux also helps a lot with more even heat distribution, as in if you need to rework/remove solder just apply a ton of flux and it'll help heat up the solder more evenly/liquefy it more quickly.
Flux is non-conductive so you don't have to worry about it bridging anything, and you can leave it on if you want to but it's always good to clean it with 99% alcohol after because it gets dry and nasty pretty quick (about the same texture and consistency as dried jizz, pretty undesirable).
Wick is a copper weave that soaks up solder when you're trying to remove it. If you, for example, bridge a connection, you would apply flux over the whole area, put the wick directly over the spot, and your iron directly on top of that. You'll be able to see the solder flow 'upwards' through the weave and the copper will turn silver.
The finer the "weave" of the wick the more effective it is, finer also means more flexible so you can tell really easily. Once a section is silvery with solder you should cut it off and unroll some fresh wick. Also copper conducts heat really well so hold it far away from the place where your iron is touching it or use heat proof gloves if you want to (not rubber/latex ones, they'll probably melt into your skin or something).
P.S. If you're having a lot of trouble removing the factory solder, that's probably because it's lead free solder. Add some leaded solder and melt it in, everything will come out easier. If you're REALLY having issues after a ton of flux, use a heat gun, be careful to not melt the plastics on the other side, although the PCB usually isolates heat pretty well
P.P.S. Don't ever heat anything for too long, if it's not coming off check the temp on your iron (you can just see how melty it is, don't need a thermometer or anything), and if it's at a good temp try adding flux or solder or both, or get a better wick. If a pad comes off the board you're fucked unless you wanna spend an hour jumping.
P.P.P.S. If you have the option, go for a blade-style soldering tip. It's really good for rougher applications like this and heats things up super fast.
ama if anyone still cares
You may have heard the old saying:
>The road to success is through experience.
>
>The road to experience is through failure.
It sounds like you have already achieved some failure, so this means you are well on your way on the road to success!
Let me add another old saying that I just made up:
>Good technique may overcome a bad soldering iron.
>
>A great soldering iron will never overcome bad technique.
You didn't mention what kind of iron and what kind of solder you are using now. But if you are getting cold joints, that is more likely a sign of bad technique rather than the wrong iron.
Cold joints happen when you heat the solder instead of heating the work material. The hot solder hits the cold metal and freezes in place instead of flowing onto the hot metal.
You need to heat the work material itself first. If it's a through-hole component, then after you turn the board upside down, touch the iron to both the component's wire lead and the board's pad. Only after both of those heat up do you apply the rosin core solder to melt onto and into them. Then you will have a beautiful shiny solder joint.
This does take some finesse and attention to timing. So I would do this Heathkit style. The Heathkits I bought when I was a teenager always came with clear instructions on how to solder, and most importantly, some extra pieces to practice with. I learned to get the technique down on those before tackling the kit itself. So practice on scrap material until you have it down.
Of course a good iron and good solder will help. If you're using lead-free solder, I might suggest a traditional lead-tin solder instead, as it is easier to work with.
For an iron, you didn't mention what you're using now, or what your budget might be. If something around $100 works for you, you can't go wrong with the Hakko FX888D. You might want some extra tips of various sizes too.
Desoldering is an art to itself. Do you have some desoldering braid? I used to use the "soldapullit" suction pumps and similar things, but the braid always gave me better results. It comes in different widths so you can pick one that fits the work you're doing.
I hope these notes are helpful. Holler back with any questions, and happy soldering!
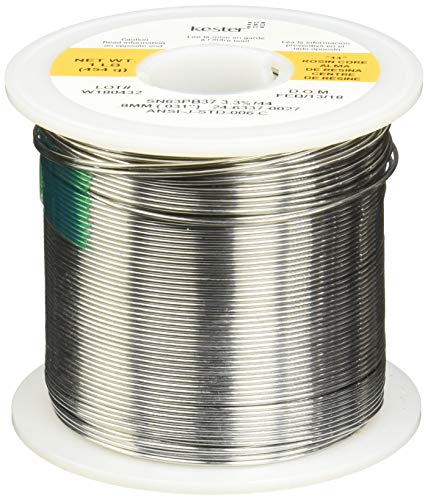
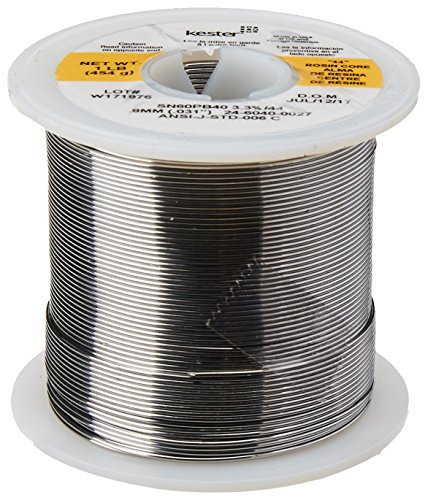
Kester #44 63/37 0.031" diam solder ...The link is to a 1-pound spool; I think there are offerings of a few ounces in there too. I know there's a link to a 1-oz dispenser at the bottom of the page.
I've been using this stuff for decades, since I was first introduced to it as a production solderer. Nothing else comes close, in my opinion.
Mouser carries it too, but the Amazon link is cheaper.
I know. That was the first thing I thought. I bought two kits for my x220 and x230, I screwed up royally the first attempt and wound up needing to use the second set of items.
Before you start, the equipment you will need:
A few words of "wisdom"
Also, on the V5, I used the old installation guide and the big difference is that the power is connected to the far left under the fuse marked "P". In the picture your finger is kind of covering it.
EDIT: Anyone trying to justify spending ~$125US on a good soldering iron and solder just remember that replacing the motherboard will cost you about the same and will not be as useful a decade from now.
So I got into the first batch on massdrop for the WhiteFox by Matt3o. Price wasn't too bad, picked the Aria with Cherry MX browns, came out to 189 shipped I believe (I can look at massdrop, but I don't recall if that included shipping or not). I will say that this wasn't planned, or at least I didn't think it was planned. I thought I got the assembled version, but I actually got the kit. I contacted massdrop about it, who was very kind but simply told me what I ordered and provided the receipt. Yup, I fucked up... or did I?
For those who are like me, decent with there hands but never did this before don't sweat it. It isn't that hard, but here are a few tips (esp if you have a WhiteFox you need to assemble):
Soldering the switches was a breeze. Did I fuck up a few solders? Sure, but the switch works :) Did I fuck up a few of the LED and had to desolder / resolder them, fuck ya lol. The LED solder pads are fucking tiny. That is all I will have to say. My only tip would be take your time, and when you put the LED in make sure you bent the leads a bit to make sure they don't fall through (now you know why I had to desolder and resolder).
Besides that from unboxing to testing fully on my wife's laptop (ill get into that below, which is kinda funny) took me a little under 3 hours.. Not bad for a first time, and the feeling that I actually built something I will use for years to come is amazing. The keyboard overall is a joy to type on, and I love it.
The only non-keyboard related issue I had was with the LED actually. So I did the top row of LEDs, and then plugged it into my machine. Machine recognized the keyboard like it did with all the switch tests I did as I soldered them, the LED would turn on and then off about two seconds later. I panicked, checked the solder joints and then searched the internet. I got nowhere, so I emailed Mat3o. Since it was late, I went to my wife's laptop downstairs (mine is in the truck, and I am too lazy to undo the alarm to go outside and get it) and it worked fine. Everything worked fine. This computer will be formatted tomorrow since there is a number of issues I found with system files, thank you Windows 10 updates /s (I looked at the windows updates logs to when the issue started - or issues, and it was after an update which ended up corrupting a few system DLL).
TL;DR:
Edit
Does anyone understand how the hell you update the firmware?
Edit #2
Along with updating the firmware, a manual or at least tell me which controller is in here :)
Super Important Edit #3
Flash your firmware! /u/mister-la gave me a great article here but I wanted to add that for some reason my board came with some firmware issues which caused the LED issue. It was only happening on Windows 10 for whatever reason, and what would happen is the keyboard would be recognized by Windows and LED would turn on, along with do the little "device plugged in" noise. About 2-3 seconds later the keyboard would still function but the LED would not work, and then do the "device disconnected" chime. I did some Google FU along with searching the input club and realized back in late May they released a new firmware to solve a ton of USB bugs for the KLL board, which is what the WhiteFox runs.
I ended up following the article above except the GUI tool ended up crashing. What I did was take a blank Aria firmware from input.club, and flashing it with dfu-util.exe. It is really simple:
That is what fixed my keyboard, and now it works wonderfully. I think its pretty awesome how the configurator tool on Input Club allows you to remap a bunch of the keys with ease, and then using the command line flashing is a breeze.
Cheers!
Screw that. If you really want to have fun use one of these. Burn it up.
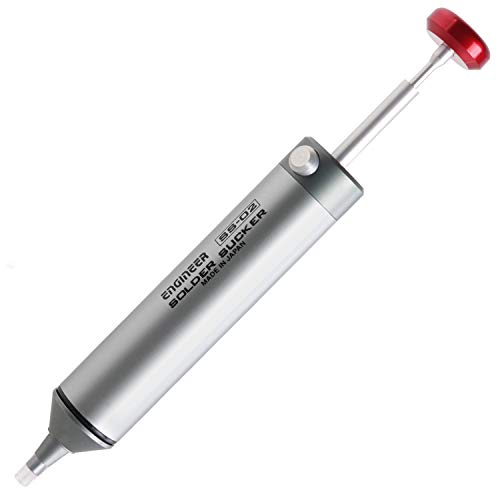
The Engineer SS-02 changed my life.
Awesome solder sucker. I swear by that thing!
https://www.amazon.com/Engineer-SS-02-Solder-Sucker/dp/B002MJMXD4
Regardless of how it looks, the only important thing is that it functions. Congrats for that. I would recommend keeping a cheat sheet with the old cap values since the SMD caps don't really tell you their values (in case they ever go bad) :)
The only real suggestion I can make is:
LEARN TO USE FLUX <3
Those pointed bits of solder would get fixed if you put a dab of flux on the blob and touch it with the iron. :D
That's my only critique.
I use this:
https://www.amazon.com/MG-Chemicals-Clean-Paste-Syringe/dp/B00425FUW2/ref=sr_1_1?ie=UTF8&amp;qid=1483361217&amp;sr=8-1&amp;keywords=mg+chemicals+no+clean+flux
Good basic guide. I would add that most people get flux cored solder, so they don't need to work about fluxing before solder.
Second thing is, if you're going to do more than one keyboard's worth of soldering, I'd suggest ditching the sponge and getting a brass / copper wire tip cleaner.. It's not super great for the tip to be put on a wet sponge.
I'll just give you a list of the items I've been using (and like):
https://www.amazon.com/Hakko-T18-D08-D12-D24-D32/dp/B00C1N30DI Hakko FX-888D. The extra tips may be unnecessary, I only ever use the one chisel tip
https://www.amazon.com/gp/product/B00068IJPO Leaded solder
https://www.amazon.com/gp/product/B004SPGFT8 Brushes
https://www.amazon.com/gp/product/B00FZPDG1K Side cutters
https://www.amazon.com/gp/product/B00425FUW2 Flux
https://www.amazon.com/gp/product/B008O9VLA2 Solder Wick
https://www.amazon.com/gp/product/B0013HT2QW KimWipes
https://www.amazon.com/gp/product/B001B5JT8C Isopropyl Alcohol
https://www.amazon.com/gp/product/B005CU56KM Acetone spray (use carefully/sparingly)
https://www.amazon.com/gp/product/B004G5T9M0 Jewelers loupe
https://www.amazon.com/gp/product/B019SLLOMY Tweezers
https://www.amazon.com/gp/product/B00P8Z4RPG Hot air station (works well despite Chinesium)
Also, I noticed in Dave's videos he rarely adds flux, just the flux that's built into the multicore solder. I don't know if I'm alone on this one but with flux I always felt the bigger the glob the better the job. Just have to clean it afterwards with the solvent, tissues & brushes.
Edit: Okay that's a much bigger list than I thought, this stuff can get expensive!
Some videos on soldering:
https://www.youtube.com/watch?v=vIT4ra6Mo0s
https://www.youtube.com/watch?v=J5Sb21qbpEQ
https://www.youtube.com/watch?v=fYz5nIHH0iY
In addition to the videos from /u/analog-dan https://www.youtube.com/channel/UCt3W-LdbWcGFSddiOtl1bWQ/videos, you can also watch the videos from /u/advicevice https://www.youtube.com/channel/UChbLnX8JcsN9bH4BNgJZ6wA/videos
Epoxy: https://www.amazon.com/gp/product/B0002BBV46/
Solder I'd recommend: https://www.amazon.com/gp/product/B00068IJX6/
Additional paste flux: https://www.amazon.com/gp/product/B00425FUW2/
Do you have a soldering station/iron? If so which one, if not would recommend the following: https://www.amazon.com/gp/product/B00AWUFVY8/
Need anything else just ask
https://www.amazon.com/Engineer-SS-02-Solder-Sucker/dp/B002MJMXD4
that one is great. I've desoldered complete boards with it.
Although not the cheapest, ebay is probably the easiest way to find faulty systems.
Some equipment recommendations:
this pump is great
I had the cheap one, and this one blows it out of the water
You basically just traded a big snotty cold joint for a little dry cold joint.
Tip: If you're not crazy talented at soldering, there's no shame in using a little externally applied flux to get a properly flowed joint.
Soldering iron: Hakko FX888D Digital Station with a 5 ft. Spool Soder-Wick Desoldering Braid https://www.amazon.com/dp/B015YGBUO4?ref=yo_pop_ma_swf
Solder: Kester 44 Rosin Core Solder 63/37 .031" 1oz Dispense-Pak https://www.amazon.com/dp/B00AVLM4SO?ref=yo_pop_ma_swf
Get yourself a Weller WE-51 http://www.amazon.com/Weller-WES51-Analog-Soldering-Station/dp/B000BRC2XU
and some Kester 63/37 solder http://www.amazon.com/Kester-Rosin-Core-Solder-Dispense-Pak/dp/B00AVLM4SO/ref=sr_1_3?s=hi&amp;ie=UTF8&amp;qid=1454222158&amp;sr=1-3&amp;keywords=kester+63+37
That's all you need
That's waaaaay overkill in my opinion. Don't spend that much on something you're gonna use once a year or something. I treated myself because I solder several times a month and got this guy.
And if you plan to only do kits where you only have to solder switches, you can literally do that with a $5 RadioShack iron (my friend did that for his MiniVan). Switches are pretty much the single easiest thing to solder. They're huge and very heat-resistant. If you want to do, for example, surface-mount diodes, you might want something heat-controllable, but any junk will do for switches.
BUT GET GOOD SOLDER. In particular, most stores sell 60/40 (60% lead, 40% tin) solder. 60/40 solder is awful. 63/37 solder is way better because 63/37 solder melts at a lower temperature and its melting point is one point instead of a range of temperatures where it's partially solid. Kester 44 63/37 is some of the best.
Get 63/37 instead -- it's eutectic, so no more cold joints! You can get a big roll from Kester on Amazon: https://www.amazon.com/Kester-24-6337-0027-Solder-Alloy-Diameter/dp/B0149K4JTY/
To mention some other homebrewing supplies and tools that haven't come up here:
I use rosin core solder, so I usually don't bother with flux. (It wouldn't hurt, though.) Here's what's probably causing you trouble:
Thick solder. The thicker your solder is, the harder it will be to get it to melt, and the less control you'll have over how much solder you apply. I use 0.6mm 60/40.
Heat capacity. Components with more metal, like thick power writing on ESCs, will suck a lot of heat out of your iron, and it might not be able to keep up. If you have an adjustable iron (you should), crank it up a bit. I usually set my iron to 320° C, but I'll turn it up to 400° or so for things like battery wires. A hotter iron will, paradoxically, mean less heat in your components.
Tips. Conical tips are the devil, get a wedge ("screwdriver") tip of you can, something around 1-2mm will work for most jobs. Tin and clean your tip! I prefer brass to a sponge, but both work. As your iron sits around, the tip will oxidize, which inhibits heat transfer; that oxide layer is what you're cleaning off.
Technique. Here's how you solder: apply the iron to both pieces. You want to heat them up enough that the solder melts when it touches them, not your iron. This is called a "hot joint, and it's mechanically and electrically strong. If you just put solder on your tip and glob it into the parts, you'll get a cold joint. You don't want that. However, you can put a little solder on your tip to help transfer heat faster; this solder is not what you make your joint with, you still apply the solder to the components, but it speeds things up. The faster you heat up the joint, the less time you spend pouring heat into the component and risking damage. (There's such a thing as too hot though, so stick with 300-400° to start with.) To tin your pads/wires, hold the tip to it for a few seconds, then touch the solder to the part. If it's hot enough, it will wick onto the metal. Then you can put the tinned wire on the tinned pad, put the iron on top and let their solder melt together. Don't move the wire until the solder had solidified, this weakens the joint.
Okay, I reread your post, and when you say Radio Shack iron, A) Where did you find a Radio Shack? and B) is it just a pencil with a cord that plugs into the wall? Because those things are worthless. I used this cheap Stahl for the better part of a decade. (It still works, too, I just replaced it with a $130 Weller.) It comes with a conical tip, but it works okay and it can be replaced anyhow. If you want, you can get a bread tip cleaner, but that Stahl comes with a sponge and you must clean your tip, I do it every time I put the iron into its holster and every time I take it out, but you only really need to do the latter.
I also recommend checking out the EEVBlog videos on soldering: part 1 part 2 Dave knows this stuff front to back, definitely better than I do, and he explains it really well. (Protip: start calling it "sohl-der" like he does to mess with American nerds.) Also, take a look at this picture, happily enough you can tell visually whether you've done a good joint once you know what they look like.
Hope this helps, assuming you actually read through my little novel here.
I'm using a Yihua 936B (a Hakko 936 clone that is reportedly alright) and this Hakko tip.
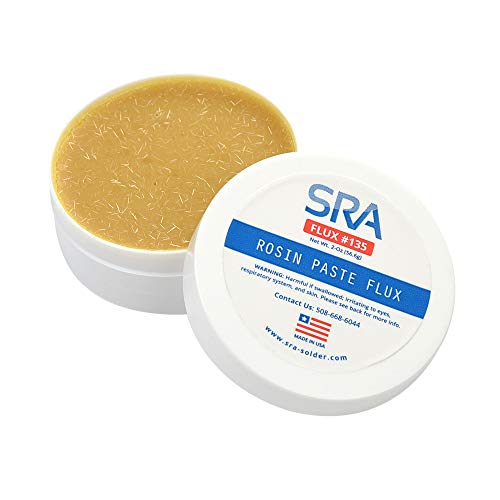
Yes, I have this 60/40 solder and this rosin paste flux handy.
Parametrek suggested lifting the board off the heat sink before desoldering (seems obvious in retrospect), so I'll try that. Any other suggestions will also be appreciated.
If you're taking your first steps into wiring, then you should get comfortable working with wires and tools. Here is a kit that will introduce you to wiring, soldering, etc.
Along with that, there are a few tools that might be useful to you:
And there are videos on YouTube that will teach you how to properly solder a wire to a soldering point. For that Elenco kit, the main goal is to get both the siren and the flashing lights to work, which it will if you wired everything correctly and used the correct resistors. It can be easy to make mistakes while learning to solder for the first time but most mistakes can be fixed, and it's very difficult to cause enough damage to render the board completely unusable.
Also, one note of caution: soldering irons are extremely hot, as the intent is to liquify the solder and attach it to the soldering points.
Build Log 5: Viterbi
Highlights
Parts List
Resources
Tools
Notes
I do a back yard show too and I find the board method too cumbersome. I now use the duct tape/bag/stake method.
Not a fan of roman candles. Dont waste your money.
Make sure you test your fuse and know what speed it burns. My white fuse burns super fast. My green fuse burns faster than my yellow. My yellow burns much faster than the Pink. The pink is slower than the Shiny green fuse. That wasn't always the case. My green fuse was always the slowest and yellow was the fastest.
I also don't like the idea of reloading shells during the show. If you must, you can prep them by zip tying the fuses together in groups of 8 or so. Throw 8 in the tubes and light the bunch. Dont put your head over any part. Stick the rest of prepped shells in a ready box. A ready box is designed so it cannot be left open. You lift up the lid, grab a bunch, the box has a string so that closes itself after opening
Invest in zip ties and metal tape. Use this to tie your fuse together.
https://www.amazon.com/3M-Foil-Tape-3381-Silver/dp/B00A7I5L86
https://www.amazon.com/Aviditi-CT422E-Nylon-Length-Purple/dp/B00DY98M1I/ref=sr_1_3?s=office-products&ie=UTF8&qid=1525752899&sr=1-3&keywords=4&#37;22+zip+ties
I cant begin to tell you how much I love these fuse cutters. This tool changed my fuse cutting life. I spit on scissors now.
https://www.amazon.com/Craftsman-Edge-Utility-Cutter-9-37309/dp/B0037IX2BG/ref=sr_1_12?s=power-hand-tools&ie=UTF8&qid=1525752808&sr=1-12&keywords=handi+cut
This fuse igniter will change your life. Lighters might as well be flint. Thats how next gen this is. Get some propane or MAPP
https://www.amazon.com/Bernzomatic-TS4000-Trigger-Start-Torch/dp/B00008ZA09/ref=sr_1_3?s=office-products&ie=UTF8&qid=1525753004&sr=8-3&keywords=berzomatic
This headlamp makes flashlights a thing of the past and changes your life. Make sure you get one that doesnt have a third strap along the top. If youre not using it you can wear your headlamp on your neck and not lose it.
https://www.amazon.com/Black-Diamond-Spot-Headlamp-Octane/dp/B06W9HPY25/ref=sr_1_6_twc-13d22461-ce_1?ie=UTF8&qid=1525753147&sr=8-6-acs&keywords=head+lamp&content_id=13d22461-ceea-426c-b620-9fe11db17513&ascsubtag=13d22461-ceea-426c-b620-9fe11db17513&tag=ospsearch-20&widget_name=expert_recommendation&content_provider=osp&ingress=search&content_type=story
Also invest some money in some eye and ear protection. I can't tell you how many times I went to bed with a "reeee sound" in my ears, and have gotten pyro shit in my eyes.
Build yourself some real racks if you're up for it. I just recently built myself some and it was a snap.
https://www.youtube.com/watch?v=-p7J4HV4Gak
Don't buy 60/40 solder. Buy 63/37.
https://www.amazon.com/dp/B00068IJOU/
https://en.wikibooks.org/wiki/Practical_Electronics/Soldering
So, what's the difference between this sort of solder that has the flux separate and the electronics type solder that I'm more familiar with used with a soldering iron?
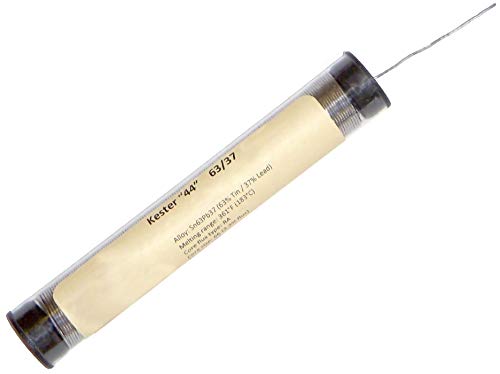
This is highly recommended: Kester 44 Rosin Core Solder 63/37 .020 1 lb. Spool https://www.amazon.com/dp/B00068IJWC/ref=cm_sw_r_cp_api_Tn0vybNY3QZ01
And if you plan more than one project this soldering iron is great: Hakko FX888D-23BY Digital Soldering Station FX-888D FX-888 (blue & yellow) https://www.amazon.com/dp/B00ANZRT4M/ref=cm_sw_r_cp_api_Bo0vyb4YNQS1G
pffft... flamethrower my ass; https://www.amazon.com/Hot-Max-500G-Propane-Torch/dp/B00282LP34
a ten dollar supersoaker and five bucks worth of gas is closer to a flamethrower than the 500 dollar trinket musk is selling here...
Unless they're going to make propane torches illegal that "flamethrower" is going to sell like hotcakes to every idiot with 500 dollars to burn...
Use a propane torch. Before herbicides it was standard.
You have to wet it down first, to 'boil' the roots.
propane torch
I actually had put this up on mechmarket last week before I decided I wanted to keep the case but change out the switches. I originally had BOX Burnt Oranges in here, which I found to be too heavy, so I desoldered them and put in 67g Zealios—MUCH better. The process was actually pretty painless due to this solder sucker—HIGHLY recommended. The PCB is a DZ60, and the case is from Shenzhen YMD (I believe he is sold out at the moment). The stabs are genuine cherry, of course, and have been clipped and lubed. Keycaps are GMK Muted. The low profile case works great with cherry profile keycaps.
"Build log" (mostly pictures) is in the imgur album.
This started off as a stock WASD V2 with Cherry MX Clear switches. I bought a 55g uniform RealForce not long after, and that has been my daily driver pretty much ever since. I actually thought I might just sell the WASD for whatever I could get for it.
I decided instead to go for the ergo clear mod, which sounds absolutely fantastic on the videos I've seen here, here, and others on YouTube. I also decided that while I had the case all apart I would add dampening foam to it and paint it to go with the SA carbon I just received.
Paint and clear coat for the case were from the local hardware store. I found the dampening foam on Amazon. I also picked up a Hakko tip cleaner and Engineer solder sucker from Amazon. The 62g gold springs and lubes are from Mehkee. They were out of their kits, but the lubes that are in the kit are all sold separately on their site, so no problemo.
The whole thing took about a week, give or take, and it was very tedious, to say the least. But the outcome has been simply spectacular. The ergo clears are so buttery smooth, and they sound awesome with SA doubleshot caps. I think the case color came out great. The WASD is now feeling a whole lot more premium!
Edit: this video was super helpful for the case painting.
Edit: here is the “before” post - https://www.reddit.com/r/MechanicalKeyboards/comments/76s7rx/is_it_worth_it_to_do_the_ergo_clear_mod_on_a_wasd/?st=JFBLDQYL&amp;sh=a9f5b0f2
Yes, this is the right place! Here's a few things to help you.
The only tip I have is use your solder sucker in your strong hand and the iron in your other. I have much better hand control with my right, so I can more accurately place the solder sucker to take it out in one or two tries. Oh, and easy on the caffeine! You don't want shaky hands while doing this.
>I am worried about the soldering
Soldering is easy. Use this solder and a decent quality hot pen, optimally with adjustable heat that goes up to 500C, you'll need the extra heat for soldering down the 12ga power wires to the flat contacts on the hotbed. I bought this kit on a Christmas sale for like $20 and it was fantastic for my build; had everything I needed. The pen might not last a lifetime like a Hakko or Weller pro station, but it got the job done wonderfully and I'm sure it will get me through my second v3 build here in about a week. (yes, I love this one so much, I'm building a second!)
>cutting out of plastic pieces
There's no cutting anything out, everything is laser cut for you already, you just pop it out.
>is it pretty self-explanatory?
The instructions could be clearer, I'll say. They could definitely reorder a few steps to make the build a bit easier during later steps. That said, it all came together without any issues. Just make sure you keep everything WELL organized.
Now listen,
Disregard everyone on this sub that says "deltas are more difficult," including and especially those with "Rostock Max V2 w/E3dV6" in their flair! ;-) Seriously folks, the meme that deltas are more difficult is dead. Repetier firmare has advanced to the point where calibrating them is even easier than Cartesian and I mean that!
Just so you're aware, I had in my possession 2 Cartesians prior to building this delta, and the cartesians never printed 100 microns perfectly. Literally straight after I finished my v3 build, ran the calibration script, dialed in KISSlicer, and hit print, the Rostock was laying down 100 microns at 80-100mm/sec without issue. I've never had a print lift off the heated bed, and I don't use anything to increase adhesion, just the bare glass.
At .3mm layer height, I can push the speed to 160mm/sec which seems to be the limit of the 8-bit RAMBo board before it starts artifcating pretty routinely. Nothing severe, but there's definitely some imperfections at that speed. Guess what: no one on this sub is printing 160mm/sec on their Cartesians without it looking like absolute shit, and my 160mm/sec prints are passable for prototypes. You're just not going to get that much speed with that high of a precision out of a desktop Cartesian, even with a bowden. You just will not.
Much larger build volume. Lower maintenance. Awesome SeeMeCNC customer support. Higher precision. Faster build times.
Listen, I could have streched my budget and gotten 3 Prusa MK2s and had a friggen sweet little farm going for what I'm paying for two v3s, but the MAX v3 is simply the superior option if you can afford the slightly higher price over the MK2. If you can't hit $999+shipping, just get the MK2. If you can hit that target, just get the v3. It's a better printer.
These are all pretty solid Personally I'm a fan of Aoyue's products too, though both the units I've owned have been on the expensive side, I can link those if you're interested. For solder, I always use this stuff, it works great for switches and stuff like that and is small enough to work alright for SMD work.
Do not use that solder.
Do not use that solder iron.
I use 63/37 resin core solder mostly.
I use a Hakko FX888D (also get T18 compatible wedge tips).
Try this solder. I am using a thicker solder now, but I am going to switch to this one probably.
Some more advice: the wattage you use with cheap soldering irons like that depends on many factors. Do not focus on the temperature/wattage alone. What you want is to get the contact hot enough within 2 seconds to form a good joint. So, touch the iron, two seconds, touch solder, immediately wets and forms the joint (and you remove the solder and iron as the situation dictates).
solder connections are on the bottom of the board. It's going to be a bitch to get off without burning or peeling up leads - those boards are not meant to be re-worked. I'm pretty handy with soldering, this is not something I would attempt except as an absolute last resort, and if I did, I'd go into it prepared to have a ruined board.
If you want to have a crack at it:
But here are some better ideas:
Questions asked by chat during stream:
Question by /u/anthonyooiszewen:
------
Will edit comment if more come up, and of course corrections if I took notes incorrectly :D
ChipQwik - use it like solder. It mixes with the solder and lowers its melting point, making it stay molten longer. This is good for desoldering tiny things.
Flux pen - flux is a liquid that helps guide the solder. Any youtube video about soldering can provide an explanation.
Solder sucker - melt the solder, suck it up
Solder wick - melt the solder, soak it up.
You don't need to get these exact products, but they're all handy. You can get by without the chipqwik, but the rest should be in every soldering toolkit. Also remember that solder will like to move towards the soldering iron, so you can kind of use it to pick up any excess solder if you do it right.
I should note that I've never done a usb port before, so I can't guide you on exactly how to do it. I'm a bit of a newb myself. Just devour a few youtube tutorials, and try it. Soldering is really a skill learned by doing, and like I said, you have nothing to lose at this point. No point in being afraid to fail now.
Oh wow, MX black switches are usually not very tight fitting with caps either. MX clear switches are the ones that are notorious for this! Sorry this happened to you OP. This isn't the greateast video showing how to de-solder switches but should give you a decent ideal of what you'll need to do. The only tools you'll really need are a sodapullt, some solder wick, & a decent temp controlled soldering station. Well, TBH you could get away with a cheaper soldering iron if all you plan on ever using it for is replacing these few switches. Although I will say cheap soldering irons with no temp. control are much easier to damage the PCB or pads with.
https://www.amazon.com/Engineer-SS-02-Solder-Sucker/dp/B002MJMXD4
make sure to clean it periodically and make sure the nozzle sits flush. otherwise look into this one https://www.amazon.com/Engineer-SS-02-Solder-Sucker/dp/B002MJMXD4
I used this one from amazon:
https://www.amazon.com/Engineer-SS-02-Solder-Sucker/dp/B002MJMXD4/ref=sr_1_6?keywords=desolder+pump&amp;qid=1567697886&amp;s=gateway&amp;sr=8-6
Be really careful. Don't rip the switches out if they don't come out. Just keep trying to remove the solder successfully without burning any pads or damaging any traces. Not being careful is how I managed to screw up my Poseidon Z. (funnily enough I tried installing the same switches)
If you don't mind spending extra money, I really recommend the Engineer SS-02 solder sucker. It has a silicone tip that allows you to get right up against the soldering iron to suck up as much solder as possible.
Got a soldering iron for Christmas and dove right in. This is my third 60% build, and by far my favorite.
Parts
Tools
I'm still tweaking my QMK keymap, but will contribute it to the repo once I get it to a good spot.
I'm still pretty new to this myself, but like you I have some electronics experience in the past. I just got this Weller 40w iron station with a desolder braid/sucker and a solder tip cleaner. Oh and a more precise tip for the solder iron
I'm really happy with it all so far, and couln't imagine needing more for a while. A heat gun would be nice for de-soldering and reflowing premade boards (like modding Boss pedals), but that can also be done with a regular solder iron as far as I know. You can get the above for about $60 total, so it's a nice way to get your feet wet without a huge investment. Then you gotta add on components/enclosures/pots/switches etc. Maybe get a helping hands and/or circuit holder if you need
Oh and get a good multimeter. I went a step up from the $20 ones and got this one which I'm also really happy with.
Might be worth getting a solder wick for when you inevitably screw up. Solder vacuum isn't a terrible idea either. I have both, I use them for different things. A third hand is also useful. I find myself using the glass more than the arms but it's all useful. If the iron you buy doesn't come with one a brass ball is great for keeping your tip clean without cooling it off like a sponge will. Micro-cutter is useful, not sure if angled or straight is better, up to you I guess. Last but not least a pair of angled tweezers. You can get those anywhere.
These are all the things I have within arm's reach when I'm doing a project. Have fun!
USD 150 is a very good budget, you need to get some reliable and proper tool.
Soldering iron: https://www.amazon.com/Hakko-FX888D-23BY-Digital-Soldering-Station/dp/B00ANZRT4M/ref=sr_1_3?ie=UTF8&amp;qid=1523249667&amp;sr=8-3&amp;keywords=hakko+888
Solder: https://www.amazon.com/Kester-24-6337-0027-Solder-Alloy-Diameter/dp/B0149K4JTY/ref=sr_1_4?s=industrial&amp;ie=UTF8&amp;qid=1523249737&amp;sr=1-4&amp;keywords=kester+63%2F37
Cleaning wire: https://www.amazon.com/Hakko-599-029-Replacement-Insert-Cleaner/dp/B00Q88Q1ZG/ref=sr_1_2?s=industrial&amp;ie=UTF8&amp;qid=1523249854&amp;sr=1-2&amp;keywords=hakko+brass+wire
Helping hand (Optional ) https://www.amazon.com/SE-MZ101B-Helping-Magnifying-Glass/dp/B000RB38X8/ref=sr_1_1?s=industrial&amp;ie=UTF8&amp;qid=1523249902&amp;sr=1-1&amp;keywords=soldering+helping+hands
Here’s the solder wick I got that works great! https://www.amazon.com/dp/B0195UVWJ8/ref=cm_sw_r_cp_api_i_z1kcBbWDJCB0T
I highly recommend using one of these to remove components: https://www.amazon.com/OMorc-Desoldering-Solder-Sucker-Length/dp/B01I14V4X8/ref=sr_1_5?ie=UTF8&amp;qid=1519764865&amp;sr=8-5&amp;keywords=solder+remover it will make the job much cleaner, I wish I had brought one of these years ago.
If you want to go ahead with a real reflow, grab some high temperature flux and a decent heatgun that you can adjust the temperature on.
First, you'll want to mask off the other surrounding components with Kapton tape or foil tape to insulate them. Next, squirt a thin line of flux along three of the four edges of the chip. When you start heating the chip, the flux will melt and flow under the chip. Get your heat gun and start at a low output tempurature and slowly ramp it up. Eventually, you'll want to maintain a temperature of 220°C for about 30 seconds. If you dont have a diffuser to cover the entire chip evenly, you'll want to move the tip of the heatgun in a regular pattern to maintain even temperature across the chip.
After you've finished the reflow, let the card cool off slowly for about 15-30 minutes
This video is particularly good (check out the first two as well)
One particular point to keep in mind with this is that you can't go amiss with flux. Something like this. And when you do the surface mount parts, make sure you use some.
Here's an assembly video. It seems pretty well put together, the guy uses SMDs, so you'll get to see that process.
Don't use lead-free solder, that was my lesson a few days ago. And I was pretty okay with it... but man, the 60/40 stuff is night and day difference with its lower melting point.
Use flux. Like a lot of it. Get one of the containers of it. Anything you're about to touch the soldering iron to, dip it into the flux or wipe flux onto it. I always forget this and when I remember, again, huge difference, things are much easier. I don't understand how it works, I think it conducts heat, but it definitely helps. Even if you have flux-core solder, do this, the flux inside the solder is not enough.
Keep solder on your iron. Any time you need to heat something, put some solder on the iron (if it doesn't already have some) and THEN touch it to that thing. Don't just touch it dry onto something. The solder on the iron is called a solder bridge and it vastly helps heat up whatever you're trying to heat.
When it comes to soldering tips, the bigger the better. And don't use the stupid cone ones; get one of them with one or two flat sides to it. Obviously you can go too big, but the bigger it is, the more surface/mass to conduct the heat from the iron to the thing you're heating.
Preferably get a temperature controlled iron. I heat up things like bullets (non-sensitive components) to 410 C and sensitive things like my ESC wires I drop down to 370. Don't hold it for more than about 10 seconds, if you need longer you're doing something wrong, and the heat is being conducted down the wire onto the sensitive components. You can hold it to the bullet as long as you want though. If the flux is turning black and chunking up your solder, the iron is too hot (it's burning the flux).
Pre-tin wires and bullets. Might be best to find a youtube video. For wires, basically put some solder on the very end of the wire bundle, hold your iron there and try to push your solder into the side of the bundle. When the bundle gets hot enough, you will be able to just push solder into the bundle and it'll disappear as the bundle sucks it up. Once you fill the bundle it'll collect on the outside and that's when you know to stop. For bullets, just put some solder in it and hold the iron until the solder sticks to the edges (sort of makes a U shape), that's when you know the bullet itself heated up enough. Make sure to put enough solder in the bullet, I usually underestimate so I put a little more than I think I need and it turns out alright.
Oh and learn what a cold solder joint is. Don't do it. You can't just heat up solder in the bullet, and then shove your wire into it. Always pull on your connection (HARD) after you solder it to make sure you didn't make a cold joint. But usually you'll know when you made a proper joint, the heat should be adequate and the solder should flow.
These have been my latest lessons learned, hope it helps. Soldering bullets is still a HUGE pain.
edit: (I keep editing) -- make sure to get one of these brass sponge things, basically you shove the iron into it a couple times and it 'wipes' the old solder/flux off the tip, then you tin the tip again (i.e. just put a thin layer of solder on the soldering iron). Do this between everything, and also when you're done with your iron (don't let it cool messy). And optionally get one of these too, it's a little jar about the size of a US quarter and it seems like it's full of rock or something, but you wipe your iron on it and it melts a little, cleans the iron and lightly tins it. I use this if the iron is messier than the brass can handle, or solder doesn't seem to be sticking to the iron.
I think that's all for reals this time.
No, she was sanding it, which removes the plating and destroys it. You clean a tip with something like this, or failing that, a wet sponge or paper towel. This is what the tip of a clean soldering iron looks like, and this is what it looks like when it's working properly (apologies for the focus on the second one, I don't have enough hands).
Never use abrasives on the soldering iron tip. First, use a wet sponge to wipe off the tip before soldering. If there's krud building up that doesn't come off with the sponge, wipe it on a cleaning wire. If the tip gets really bad, it can often be restored with a chemical tip tinner.
Like other posters have said, to make the tip last longer leave a blob of solder on the tip when you are done soldering, wipe it off before starting soldering. And turn the iron temperature down when not using (I turn it down to 450F when it's idle).
It'll be blackened, solder won't stick to it, and it'll have poor heat transfer.
Properly tinning and caring for your tips is one of the first things you should learn--use the bronze puff (or less ideal sponge) to clean off flux and excess solder during use.
If it's a good quality tip, the black stuff will only be burnt on flux, rather than full oxidation of the cladding (at which point, you should replace it). To quote myself from another post (n.b. don't use sand paper to try to clean up your tips):
> I use a scour pad (keep a small part of one in your toolbox, inside a ziplock) on my tip when it gets really carbonized, and then follow it up with Weller tip tinner / activator. As many others are saying here, a low-abrasive bronze puff is better than a damp sponge for cleaning your iron when in use, since it can better wick solder and doesn't subject the tip to as much thermal stress.
Thanks! Glad I could be helpful.
The reflow station/solder paste is just awesome. The results are so much better than the hand soldering I tried to do initially.
My tips for the hot air reflow- Keep the air speed low (I do 1.5 - 1.75 speed @ 350c), you don't want to send the components sliding around the PCB. You only need a tiny dab of solder paste on a tinned board, otherwise you'll end up with little balls of solder where the excess collects. These can be knocked off with tweezers, but you should be careful to check for them as they can cause shorts.
I forgot one of the most useful tools out there! This is maintained by one of the FB Euro SMD DIY Noobs members.
This is the repository I use for .hex files. It's maintained by another SMD Noobs member.
These are the tweezers I use for handling SMD parts.
You'll also want a flux pen! Flux pens are wonderful.
I'd also suggest a magnifying glass or jeweler's loup of some sort for inspecting the PCB for shorts. I use a 10x loupe.
Here's a pic of my current workspace in an unusually clean state.
My SMD component filing technique. A work in progress.
Feel free to let me know if you have any more questions.
Flux Pen
Here is the flux pen I am accustomed to using. It works well for most applications, and is fairly inexpensive.
From my research that I've done in the past this indicates:
1 - bad ribbon connection.
2 - the CPU in the main board (t-con) is going bad.
3 - the cpu has developed some microscopic solder cracks.
Open it up and check for faulty ribbon cable connections. They are fairly easy to take apart just remember where everything goes.
If messing with ribbon cable didn't do anything, and since we may be looking at a bad main board anyway, you may try to reflow the main board CPU.
There are different ways to go about doing this like sticking it in kitchen oven at a certain temperature but the easiest would be to use a heat gun with no clean solder.
Here's an el cheapo heat gun that you can try with out breaking the bank.
http://www.harborfreight.com/1500-watt-dual-temperature-heat-gun-572-1112-96289.html
Here's a no clean solder pen:
https://www.amazon.com/SRA-Soldering-Flux-Low-Solids-No-Clean/dp/B008OC0E5M
Youtube "heatgun CPU reflow" to see what I'm referring to.
As /u/Harakou commented, make sure to have desoldering materials. But for desoldering several switches at a time, I had trouble making progress with a regular solder sucker (the braid is very useful for small scale rework). So I bought a desoldering iron for several Planck and Ergodox rebuilds.
And to add to /u/deaconblue42 , a flux pen helped me a lot whenever I struggled to get good wetting action (watch the videos, it's a thing).
The soldering iron you have is fine. I bought my batteries from console5.com . As far as other things, I would suggest some flux and a desolder braid/wick. If you don't have solder I would grab some of that too. I've got alphafry solder, mg chemicals desolder wick, and sra flux.
Batteries:
https://console5.com/store/panasonic-cr2032-3v-lithium-battery-with-solder-tabs-pins.html
Desolder wick:
https://www.amazon.com/gp/aw/d/B00424S2C8/ref=mp_s_a_1_6?ie=UTF8&amp;qid=1525828012&amp;sr=8-6&amp;pi=AC_SX236_SY340_FMwebp_QL65&amp;keywords=solder+wick
Flux:
https://www.amazon.com/gp/aw/d/B008OC0E5M/ref=mp_s_a_1_3?ie=UTF8&amp;qid=1525828121&amp;sr=8-3&amp;pi=AC_SX236_SY340_FMwebp_QL65&amp;keywords=solder+flux+pen&amp;dpPl=1&amp;dpID=31u2-ijUmFL&amp;ref=plSrch
Solder:
https://www.amazon.com/gp/aw/d/B00030AP48/ref=mp_s_a_1_3?ie=UTF8&amp;qid=1525828185&amp;sr=8-3&amp;pi=AC_SX236_SY340_QL65&amp;keywords=solder
You should be able to clean off the pads, re-tin them, and re-solder new wires to them.
&nbsp;
You'll need a few tools:
&nbsp;
Clean and tin the soldering iron tip:
&nbsp;
Remove the solder from the pads on the heat bed:
&nbsp;
&nbsp;
Add some solder to the pads - you'll want a little bit of solder to cover the whole pad, with enough to make a small bump.
&nbsp;
Tin the wires:
&nbsp;
Attach the tinned wires to the tinned solder pads on the heat bed:
&nbsp;
Also: You can use some isopropyl alcohol (rubbing alcohol) to clean up the excess rosin paste - it can get sticky.
&nbsp;
Hope this helps!
Edit: Please make sure you turn off and unplug your power supply before cutting any wires.
Parts / tool list below, this what i used but there are substitutes out there.
Note: Main thing that is slightly challenging is soldering the XT60s, basic idea is to “tin” (soldering term) the wires and the XT60s first, then heat the connector with your iron as you put the wire in to get a good fusion. Decent video on soldering them:solder XT60s
My soldering Iron:
https://www.amazon.com/gp/product/B00ANZRT4M/ref=ppx_yo_dt_b_asin_title_o00_s00?ie=UTF8&psc=1
Soldering Flux:
https://www.amazon.com/gp/product/B008ZIV85A/ref=ppx_yo_dt_b_asin_title_o01_s00?ie=UTF8&psc=1
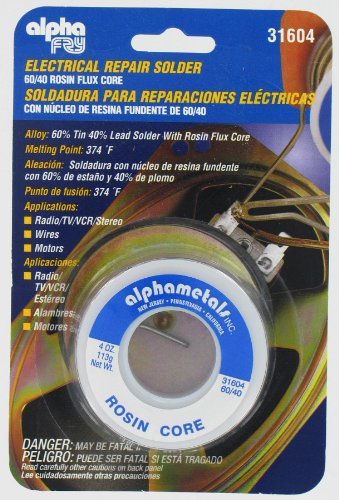
Solder (60-40)
https://www.amazon.com/gp/product/B071G1J3W6/ref=ppx_yo_dt_b_asin_title_o01_s00?ie=UTF8&psc=1
New XT-60’s and Shroud:
https://www.amazon.com/gp/product/B074PN6N4K/ref=ppx_yo_dt_b_asin_title_o03_s00?ie=UTF8&psc=1
Helping Hands (not required, but def helpful)
https://www.amazon.com/gp/product/B000RB38X8/ref=ppx_yo_dt_b_asin_title_o01_s01?ie=UTF8&psc=1
Bought this a while ago, but any heat shrink will do:
https://www.amazon.com/gp/product/B01MFA3OFA/ref=ppx_yo_dt_b_asin_title_o02_s00?ie=UTF8&psc=1
Wire - If you’re new to soldering and need practice, or you’re going to split your cables for Rasberry Pi, or other components, etc:
https://www.amazon.com/gp/product/B01ABOPMEI/ref=ppx_yo_dt_b_asin_title_o03_s00?ie=UTF8&psc=1
Do not get a cheap radioshack soldering iron. Get a cheap Chinese soldering iron off amazon. Something with a digital temp gauge. I’ll edit this comment with a link to the one I have later. Their are a couple different methods to this job. Some people get little angled clippers and clip the 4 legs off of the tact switch and then heat up the solder and pull out the legs this method is easy but you risk cutting into the board. The other method is to properly use a solder sucker / solder wick and desolder the old switches. Do not hold the soldering iron to this board for too long you will pull traces. Believe me I did it my first time. Soldering is not that difficult but with everything the more you practice the better you become. I think some early mistakes are using too much solder, you really don’t need a lot.
My soldering set up: Soldering iron
better solder tip cleaner
better solder sucker
better solder (reccomended)
Also if you’re soldering leaded solder indoors maybe think about your health and what you’re inhaling.
air filter
Last words: everything in that kit will get you by just fine. Personally I think the solder it comes with is garbage. I hate the cheap solder suckers and I use them so often I bought that other one. Keep your iron tips clean. This means basically run some solder on the tip and dunk it in that gold wire mesh often. If your tip is getting dark it’s getting too hot and will have a harder time flowing solder. Keep it nice and shiny.
How much are you going to be making electronics a hobby? If you're just going to be soldering some boards occasionally you could save a bit on the iron and get this Weller. Also a cleaner. If you go with the 888 that will have a wire cleaner built in. I'm getting old so I personally would recommend at least a magnifying glass. I have this helping hand The clips didn't do much for me but the glass did. There are times where the switch pin just gets lost and the glass helped a lot. I also picked up this kit when I started, primarily for the sucker, but I thought the other tools may come in handy. So far they haven't, other than the solder. The first time I tried to use the sucker I could not get it to work correctly, I just wasn't getting enough of a seal around the hot solder, thinking I'd melt the tip, so I ended up buying a different pump that I still have never used, because I eventually DID learn to use the cheaper sucker. I also can't make solder wick work properly, apparently. If this is your first time soldering/desoldering I recommend getting a cheap practice kit that you don't care if you ruin. I can recommend this one as it has you intentionally foul up joins so you can learn to fix them. You won't need strippers. Flush cutters would be helpful if you need to trim the pcb mount legs off your switches (like Zealios, which you will if you have a GH60 Satan pcb) or trimming LEDs. Work mat would be helpful to keep your work area clean but not necessary. You will need a small screwdriver but I can't remember what size. Tweezers or one of these grabber thingies are always helpful when the screw flips sideways when you are trying to seat it. I used this solder on 3 builds so far and have had no issues with joins failing.
Brass all the way. This one is only $10. There are other ones that are cheaper that I have used, but I like the Hakko one best. It only costs as much as a few bags of props. I "dip my tip" before every joint and I have consistent heat and a good tin. A cleaner also helps extend the life of your soldering iron tip and heating element. The problem with using a wet sponge is that it cools the tip down every time and the iron has to heat back up to temp. This probably isn't a huge deal for occasional use, but for frequent use this constant heating/cooling cycle can cause the tip to wear out prematurely. A sponge is also more prone to holding contaminants unless you are regularly swapping it out. For example, if you have some excess solder the blobs will build up in the sponge. With a brass cleaner, they will drop down to the bottom and about once a month you can pull the brass out, and empty the holder in the trash. I started out using a wet sponge, and I also noticed that my tip didn't seem to get as clean as when I switched over to the brass cleaner.
For the majority of people just doing the occasional build I don't think there is anything wrong with a wet sponge. But if you are doing a lot of other electronics work or building / repairing more frequently, it's a good idea to get a cleaner.
https://www.amazon.com/Hakko-599B-02-Solder-Cleaning-Holder/dp/B00FZPGDLA/ref=pd_lpo_vtph_469_bs_t_2?_encoding=UTF8&amp;psc=1&amp;refRID=JQJM1RVZMHS0H0J1QZ2M
This cleans my solder tip amazingly well. I use the sponge to wipe down debris, then run it through the wire and it looks brand new.
Drop what you're doing and order this.
+1 for the Hakko FX888D-23BY
Some solder wick and a desolder pump is something else I would add. Also a cheap tip thinner for a noob (like me). Helping hands are cheap and can be useful. Also a cheap variety pack of tips. Nothing expensive till you are comfortable with keeping them clean and tinned.
These are all things I bought when I purchased my Hakko FX888. All have been useful.
Desolder Pumps and Wick
[Tip tinner] (https://www.amazon.com/dp/B00NS4J6BY/ref=cm_sw_r_cp_apa_i_k1kZDbJ5TS5Q6)
Helping hands w/magnifying glass
Various Tips
Hakko FX888D-23BY
All of this cost me $146 shipped. Right now, it'll all total to $139.83 shipped if in the US
Get yourself some tip tinner.
You want this stuff: https://www.amazon.com/Kester-24-6337-0027-Solder-Alloy-Diameter/dp/B0149K4JTY/
Kind of off-topic, but if you end up needing a kitchen torch regularly, I'd suggest upgrading to something like this.
It'll run for what seems forever on a canister of propane camp fuel. Propane is a lot cheaper than butane as well.
Plus, it's a multitasker all around the house. I can go from finishing a sous vide steak to loosening the lug nuts on my car's tires. It has also replaced all the flaky lighters in my house.
I have this torch and use MAPP fuel. I would recommend:
Well, if you can use the lab and it has a scope in it then you just scored big time.
As far as $100. I would get:
(amazon links for convenience, use any supplier you wish)
EDIT: Light bulb socket, 100W + 60W real light bulbs (not the hippy engery saving kind), electrical outlet - these are for making a dim bulb tester.
All I can think of right now.
This is a pretty awesome iron
https://www.amazon.com/X-Tronic-Model-3020-XTS-ST-Soldering-Station-Complete/dp/B079VVHPPS/ref=mp_s_a_1_1_sspa?keywords=xtronic+soldering+station&amp;qid=1572960802&amp;sprefix=xtronic&amp;sr=8-1-spons&amp;psc=1&amp;spLa=ZW5jcnlwdGVkUXVhbGlmaWVyPUE1SDY4UVpHMkNEOEomZW5jcnlwdGVkSWQ9QTAzNjMxNDRKQVlBOUE0WkRYMUcmZW5jcnlwdGVkQWRJZD1BMDYzMTgyNDFRNEdPRUZIV0g3NVgmd2lkZ2V0TmFtZT1zcF9waG9uZV9zZWFyY2hfYXRmJmFjdGlvbj1jbGlja1JlZGlyZWN0JmRvTm90TG9nQ2xpY2s9dHJ1ZQ==
And add the solder https://www.amazon.com/gp/aw/d/B00030AP48/ref=ppx_yo_mob_b_inactive_ship_o1_img?ie=UTF8&amp;psc=1
Never burned solder with these two. Never over heated or melted anything that wasn’t supposed to be heated up.
Ec3 connectors
https://www.amazon.com/gp/aw/d/B00XC7QKF2?psc=1&amp;ref=ppx_pop_mob_b_asin_title
I typically use 60 40 0.031 lead solder, which is cheaply available from amazon, including prime. One of these spools will last a very long time for only $30. These tubes are available for smaller quantities.
The main concern with solder is the flux fumes, which are actually worse with higher temperatures and lead free solder. One simple solution to solder fumes is a pc fan with some sort of filter on it, such as this one. I made one for around $4, and it works very well. It also helps to mount it on some sort of arm, such as solid copper wire or one of these. There are many types of fume extractors that would work.
As for the soldering iron, I use a weller wes51, but a hakko fx888 is also good.
Soldering iron, $9. Solder, $2.50. Some shrink tubing, $3.50.
This will do for 90% of casual hobby electronics, for a grand total of $15. If you enjoy it, you'll upgrade the iron (and still be able to use solder and heat-shrink).
You need to learn to solder, but it's easy.
This is my go to list for what you need for soldering:
hakko soldering iron w/ diagonal cutters $91
hakko diagonal cutters $4.37
solder $7
solder sucker $6
solder flux $8 check digikey
solder wick $7 check digikey
wire strippers $10
helping hands $7 check harbor freight
check for lower price
One of the hakko clone stations paired with some genuine hakko tips is probably a good compromise on price/value. Maybe someone else that's from the UK could suggest something different that's also affordable there.
Soldering iron for sure. If you're serious about it then I would get a large one (60-70 watts) and a small one (30 watts), the pencil type are cheap. Or just get one 40 watt.
Get good solder, seriously, you'll fucking hate life with shitty solder. I used to be able to buy it locally but the mom 'n pop store went out of business, and I've tried every solder at Home Depot and they all suck. Both of these are good, however, and you should be able to solder as small of a wire you want with that.
I use 67g zilents and they are pretty good. I like them. Personally, I'm currently using T1 switches, but these are pretty loud.
As for soldering, what equipment do you have right now? All you need is a steady hand, a good soldering iron/station and lots of patience.
And make you sure you have the right solder too - this is highly recommended - it's thin solder (0.031 inch diameter) - and 60/40 - do not get lead-free solder. it just doesn't work as well
https://www.amazon.com/KESTER-SOLDER-32117-24-6040-0027-Diameter/dp/B00068IJPO/
Don't use the new solder. It's crap. Use real lead/tin 60/40 solder. Thankfully, Amazon has us covered.
https://www.amazon.com/KESTER-SOLDER-24-6040-0027-Stand-Diameter/dp/B00068IJPO/ref=pd_lpo_201_tr_img_3?_encoding=UTF8&amp;psc=1&amp;refRID=W9A6T0888VBDR9442A5N
That teleporter is halfway built!
My recommendations, and what I have used for a long time. Really don't go super cheep on your iron, you will regret it:
Weller WES51
Long Conical Tip Really necessary if you are going to be building things with small components.
Kester 44 Rosin Core Solder 63/37 .020 the link is to a full pound which you might not want to spend the money on right away. The price seems to have doubled in the last 3 months at amazon for some reason. But plenty of places sell Kester Solder
This is a great first kit to get you started. I bought this exact one and built like 5 keyboards with it before I upgraded to a nice Hakko station.
The one thing that you do NOT want to skimp on, though, is desoldering braid. A lot of newbies make the mistake of not planning for mistakes. This kit comes with a cheap desoldering pump, but it is garbage. It might seem pricey, but this stuff is the best desoldering braid on Earth, and will last you a long time. If you even have to desolder so much as a single switch, you'll be glad that you bought this stuff.
Outside of that, as /u/clee290 said, you'll want to watch some soldering videos. It's not terribly complicated stuff, but you'll want to have an idea of the basics to prevent common mistakes.
I’m using
Hot Max 500G Big Max 500,000 BTU... https://www.amazon.com/dp/B00282LP34?ref=ppx_pop_mob_ap_share
will pair it with a well insulated metal trashcan, one or two layers of ceramic blanket with satanite, and fire bricks at the bottom. Could it get as high as 2300 F? I’d rather not buy a higher range temperature gun if I don’t need to. Thanks for the help.
Actually I do have a flamethrower
https://www.amazon.com/dp/B00282LP34/ref=cm_sw_r_awd_mOHaub1087HP0
so that could work. But I would most certainly die in the attempt! Horribly.
Right fucking here, boss.
I've done cast iron on an 1800W induction top. I can get that thing in the 600 range, if my IR thermometer is to be believed.
I'm not talking about a plumber's torch like the TS8000. I'm talking about a "weed burner".
One like this https://www.amazon.com/Hot-Max-500G-Propane-Torch/dp/B00282LP34/ref=sr_1_7?keywords=weed+burner&amp;qid=1569026185&amp;s=gateway&amp;sr=8-7
Edit: I want to say that these flamethrowers are incredibly powerful and loud. They sear a steak in 5-10 seconds per side. They're also so loud, that it's kinda awkward to use. I'm just waiting for the day for one of my neighbors to come over and ask me WTF I'm doing and why am I running a jet engine in my back yard.
If you don't want to use toxic chemicals, try this bad boy for cookin' them to the ground: Hot Max. Makes weeding actually fun! Then, to keep them from coming back, Sprinkle some of this around: corn gluten. Completely non-toxic, prevents any seeds from sprouting (not just weeds so be careful if seeding), and lasts for several years.
Propane and natural gas burners are not compatible. Make sure whatever your source of fuel matches the burner you buy.
These are good for raku temperatures and beyond.
https://www.amazon.com/gp/product/B006NXASIC
https://www.amazon.com/gp/product/B00282LP34
*pout* That kit has now officially dropped in price about 60% since I purchased mine just under two years ago. :-(
It's a freakin' awesome soldering station though!
Next on my list is the FR-300 or -301 desoldering gun. For now though, I'll continue to use my Engineer SS-02.
+1 for this.
https://www.amazon.com/Engineer-SS-02-Solder-Sucker/dp/B002MJMXD4/ref=sr_1_1?s=industrial&amp;ie=UTF8&amp;qid=1485890789&amp;sr=1-1&amp;keywords=Engineer+SS02
On the cheap ones, I do remove the iron before activating the suction. If you have a lot of desoldering to do, this one doesn’t require you to remove the tip and does a much better job.
Engineer SS-02 Solder Sucker https://www.amazon.com/dp/B002MJMXD4?ref=ppx_pop_mob_ap_share
https://www.amazon.com/gp/product/B002MJMXD4/ref=ppx_yo_dt_b_search_asin_title?ie=UTF8&amp;psc=1 this is the best one I've ever owned.
It really sucks.
For sure. I've made my fair share of desoldering mistakes and they aren't fun. First tip, find a tool you like, some swear by wick, and some use desoldering irons, for me it was simply this desoldering pumpwhich features a silicone tip that makes it easier to create a seal. Second, don't leave the iron on the PCB for too long. Three seconds should do it. If its doesn't, take it off, find another angle, and put it down again. Leaving it on for much longer risks damaging the PCB. Third, make sure you get ALL the solder off the pin, if it looks like you got 90% save for a tiny bit touching the edge, DO NOT try to forcibly remove the switch, you risk yanking out the small metal ringlet within each hole of the PCB. Instead, reapply some solder and try sucking it up again. When a switch is properly desoldered, it should pop right out when you squeeze in the little clips on the top and bottom of the switch. Never apply tremendous force when trying to remove a switch (this usually means you haven't fully desoldered).
And finally, if you do make a mistake, it's not the end of the world. A broken switch is easy enough to replace and a damaged PCB is possible to repair just by running a wire (which means soldering a connection between the two points that were disconnected by the damage).
No problem! Happy to help. I study computer science, but there's something about soldering that has always given me a greater sense of accomplishment than any code I write, so I'm happy to see your excitement towards it as well.
That's the same soldering station that I use, so you're good there. Great tip with a nice, fine point. Perfect for soldering to small pads, as you plan to. I prefer straight tips, but that's just preference and you may or may not like your chosen tip better.
You're definitely going to need some other materials. I would provide links to them all but I'm on mobile and that would be a huge pain in the ass. Things you will need:
Like I said in the list, the less heat you need the better. When you're desoldering the connector, the best way to go about this would be to put leaded solder over top of the existing solder so that they mix which will decrease the melting temperature required for the successive desoldering attempts.
I also suggest a hot air station if you're wanting to really get into this kind of stuff. It may even be necessary for a beginner to desolder this type of connector without damaging the board, honestly. I use this hot air station and it's been fantastic.
If you have any more questions I'll be happy to answer them.
That iron isnt going to win any awards, but it will probably be enough to get the job done, I personally use a TS100 these days because I can power it off my LiPo Flight battery's in the field as well as off a laptop power brick. I still have my Weller station but it's seen decades of abuse by my dad before he gave it me, so i only use it when I'm at home with lots of big solder joints to do.
Get a decent tip cleaner those sponges are worthless and will cool the iron.[1]
Make sure your solder has good quality Flux core OR or you can buy some better solder / buy flux seperatly
I personally use this but you can get stuff cheaper
I can't stress this enough, If you have never soldered before, practice tinning wires/ soldering through hole connectors until your solder joints look neat and shiny and you feel happy, buying a couple of led's headers and protoboard will save you the pain of ruining your shiny new PCB kit.
Adafruit has some nice images to help compare good/bad solder.
[1] - added comment about sponges
Just a heads up, the REV-C to GND jumper wire won't fix all of the issues only seen on the 40-pin models.
Search eBay for a "40 pin type b" cable. It's a revision that fixed quite a few problems ... and one that you haven't seen yet, awful pixel retention / ghosting.
If you go with the "type b" cable, you won't need the jumper connection pictured.
Now, onto your question ...
There's an issue with the way the jumper cable was prepared. The solder point on the REV-C looks like it's touching several pads, not just the intended. To fix what's pictured ...
Again, all of this is done to fix what I'm seeing in the picture, but this won't fix the next problem, ghosting and pixel retention.
Grab a "type b" cable.
Also, I learned how to solder from watching endless YouTube videos. Here's a good one from Ben Heck.
Those are fine but honestly you don't need all those extra bit and bobs.
Just get the same basic soldering iron off Amazon, a desoldering iron like this one or a desoldering pump.
A solder sucker and solder wick are definitely necessary for fixing mistakes. I use one like this.
Uf, that's quite the problem you've got there. For future reference, clean the contact pins on the cart with isopropyl alcohol or electrical contact cleaner. It's the most common cause for "jumbled Nintendo logo."
As for the solder, you'll need a solder sucker and desolder braid to remove that. Reflowing a chip is definitely not something I'd recommend to someone who hasn't soldered much before. It's not going to be easy, but it shouldn't be too difficult either. Avoid using the cart until you fix it, though. You might just damage the cart further.
Edit: Details.
As others have said, SMD hand soldering is very doable. I just want to add BUY SOME GOOD NO CLEAN FLUX. Paste flux is the most fun you can have with a syringe outside of heroin. Really it makes everything easier. Just make sure to give a good alcohol cleaning afterwards to get off residue.
The soldering station you're looking at will be fine for replacing capacitors. Its adjustable, which will come in handy when you want to further your skills. Get some extra tips, and find some fine point ones. I like to use long conical ones, as well as long small flat ones.
As other posters have said, you want to practice on something you don't necessarily want to keep. Find something cheap from a thrift store and take it apart.. an old clock radio, vcr, something of that sort. Then identify the capacitors and give it a go. Once you get the hang of it, try on the genesis.
Solder - you want some 60/40 solder (60%tin 40%lead). Stay away from acid core, its not for electronics. Find this in a thin gauge, you'll have a better time with it.
Flux - nice to have around. On some joints, the old solder doesn't really like to flow all that well. You can put some flux on it, and it'll flow a bit better. Use it on the new joint as well. There's several different types, and you can get lost in it, but you really want a liquid or gel type flux that is "no clean". I still give it a rinse with alcohol and a brush after I'm finished, but it cleans up way easier than regular flux. Here's what I use : MG Chemical's Paste flux
You will also need something to remove the old solder from the holes. Tools like this Vacuum pump and desoldering wick like Desoldering wick are good for removing the old solder.
As for the actual removal and replacement of the capacitors, I usually heat up one side from the bottom of the board, and rock the cap so it slides out a bit, then do the other side, working the cap out a little at a time. After that I clear the hole with a vacuum pump (while heating the solder up, get the vacuum pump as close as possible and press the button) or the desoldering wick (put the wick on top of the solder, then heat both, pull the soldering iron and the wick off at the same time, lest you pull up traces - This takes a bit more practice to perfect)
Make sure you put the new capacitor in correctly. Electrolytic caps are polarized. You want to make sure positive goes to positive and negative to negative. Look at the cap before you remove it. Most boards are marked, but no reason to risk the board being marked wrong.
Make sure the caps you're using are the proper rating. A general rule is the capacitance needs to be the same (farad rating), and the voltage rating needs to be at least the rated, but can be higher with no ill effects.
Its late and I'm rambling. Hope this helps.
60/40 rosin core should be good.
Alpha Fry AT-31604 60-40 Rosin Core Solder (4 Ounces) https://www.amazon.com/dp/B00030AP48/ref=cm_sw_r_cp_apa_BhXXzbASH0FHM
Use solder wick and a wide tip to clean the old solder off
NTE Electronics SW02-10 No-Clean Solder Wick, #4 Blue, .098" Width, 10' Length https://www.amazon.com/dp/B0195UVWJ8/ref=cm_sw_r_cp_apa_9eXXzb1S3RHKS
Use lots flux. Coat the area before you use the wick and again before you solder. It helps bond the solder to the metal.
MG Chemicals No Clean Flux Paste, 10 ml Syringe https://www.amazon.com/dp/B00425FUW2/ref=cm_sw_r_cp_apa_mgXXzbTRM5G78
A good iron helps so very much. This is what I have
Weller WES51 Analog Soldering Station https://www.amazon.com/dp/B000BRC2XU/ref=cm_sw_r_cp_apa_RiXXzb76H6WDS
However this should do for occasional use
Vastar 60W 110V Welding Soldering Iron with Adjustable Temperature Dial, 5pcs Interchangeable Different Soldering Iron Tips and Solder Tube for Soldering Repaired Usage, Blue https://www.amazon.com/dp/B071RCB7KB/ref=cm_sw_r_cp_apa_slXXzbQRJVVZ2
When you are done clean with 90% or above isopropyl alcohol and let dry before you use.
Watch some videos on how to use the wick. Its a great tool to have and works so much better than the crappy suckers.
Yeah if it came with a kit it's probably lead-free. I'd just get a pound of 63/37 or 60/40 tin/lead rosin core solder, small diameter. Kester is my go-to. Super easy to work with and a pound should last you years. This is my go-to flux. Pricey but the two in combination actually make soldering enjoyable.
Thanks for the invite! I love barbecue. 🤤
I don't have any kit recommendations, but you'll need:
That covers everything that you'd basically need for a job like this.
I think a lot of people have trouble because they don't have a hot clean tip. My friend who "can't solder" has a 20+ year old soldering iron with a corroded tip. I use a wet sponge, cleaning wire, and tip tinner interchangeably to keep it clean as I go.
Also having one of those magnifying glass/alligator clip holders is extremely helpful.
Heated PCBs are hard anyway because they are a weird combination of heatsinking and thermally insulative. If you are ever going to solder a second thing, just get a good Hakko or something. I have the analog version of the linked iron, and love it. I leave it at 350C constantly ... it gets to temp in like 20 seconds and holds it rock solid.
http://www.amazon.com/Hakko-Digital-FX888D-CHP170-bundle/dp/B00AWUFVY8/ref=sr_1_1?ie=UTF8&amp;qid=1421772043&amp;sr=8-1&amp;pebp=1421772044939&amp;peasin=B00AWUFVY8
Also:
http://www.amazon.com/SRA-Soldering-Flux-Low-Solids-No-Clean/dp/B008OC0E5M/ref=sr_1_1?ie=UTF8&amp;qid=1421772121&amp;sr=8-1&amp;pebp=1421772121985&amp;peasin=B008OC0E5M
I'd highly suggest you plunk down and get both. You'll feel like a wizard from now on with soldering. For the flux pen, just drown your connections, wire, pads, etc in flux before soldering. Within a very generous reason, you cannot overflux things, and it makes the solder actually behave like it should. It globs where it's supposed to, doesn't make those stupid little peaky points that bridge everywhere, and so on.
> along with a soldering iron to do repairs.
Totally agree. I would suggest any of the Weller pro series models(Indicated with the light blue chasis like the Weller WP35). Even their most inexpensive model is better than anything I have used off the shelf at Home Depot. Consistent tempuratures and fast heat up.
Additionally, I would also recommend a solder sucker and a flux pen. You could splurge for something like a Haako Desoldering gun which works great but unless you are doing entire board repairs the simple spring loaded ones work fine and costs considerablly less.
It comes in a wide variety of forms including wax and a liquid. It removes the oxidation that’s getting in the way of your soldering.
I've done a few NES console builds and a few more NES cartridge builds. This album isn't mine, but for the port access I HIGHLY recommend using the decora keystone wall plate. You can get a gray one on Amazon that comes decently close to matching, and with some good glue work you'll barely notice it's there. Since you'll be using a dremel anyway to get rid of screw standoffs that are no longer necessary, cutting that opening should just take some patience.
I was a complete idiot with a soldering iron, and after getting some reps with it doing projects like these it's kind of amazing what you pick up. I found this site hugely helpful, since a lot of what I was doing was desoldering USB cables from PCB's (for the cartridge builds) and resoldering microUSB heads. You won't be doing a lot of desoldering, however everyone makes mistakes and sometimes fixing those mistakes involves removing solder. There are plenty of youtube vids out there for soldering, but all you need to get started is something like this. It's not the best iron in the world, but it's temperature controllable and something cheep to get you started. The only thing I'd add to that is a little flux, it will help tinning wire ends immeasurably.
Something else that's going to help you out a LOT for the console build: RELOCATE THE MICROSD CARD. Buy one of these, I routed mine to the left side of the cartridge opening, set vertically against the opening and at an angle so i can get the SD card in and out. You really don't want to rip apart 6 screws to open and close the unit, and if the SD card gets corrupted or you just want to change something on there that's exactly what you'll have to do. Move that sumbitch to the front and you'll never have to worry about it.
This is what I've been using to build my quads
Solder
Wick
Flux
Does this look good?
https://www.amazon.com/gp/product/B0747KYF6S/ref=oh_aui_detailpage_o00_s01?ie=UTF8&amp;psc=1
https://www.amazon.com/gp/product/B008ZIV85A/ref=oh_aui_detailpage_o00_s00?ie=UTF8&amp;psc=1
https://www.amazon.com/gp/product/B000G36BYU/ref=oh_aui_detailpage_o00_s00?ie=UTF8&amp;psc=1
This is the lead free solder I am using... https://www.amazon.com/gp/product/B01B61TWGY/ref=oh_aui_detailpage_o04_s00?ie=UTF8&amp;psc=1
And here is my flux... https://www.amazon.com/gp/product/B008ZIV85A/ref=oh_aui_detailpage_o04_s01?ie=UTF8&amp;psc=1
It wets the tip of my iron just fine, but if I hold the iron against the wire lead I'm trying to tin the wire lead never seems to get hot enough for the solder to flow. It's really maddening. I clean the tip of the iron frequently, and it always comes away from the sponge shiny silver. It's definitely getting hot (and I can show you the spot on the back of my right thumb where I learned that lesson the hard way). I will check for tightness of fit on to the iron whenever I get home, but I don't think it's loose.
If you don't have any solder I recommend [63/37 Resin Core](Kester 44 Rosin Core Solder 63/37 .031" 1oz Dispense-Pak https://www.amazon.com/dp/B00AVLM4SO/ref=cm_sw_r_cp_api_xwuEybG623XFQ), don't need flux or anything with resin core, just the solder. GL!
Kester 44 63/37 is approximately the best solder you can buy for keyboard related needs, available in both 1lb spools and 1oz tubes. Yes it's a bit pricey, but solder is one of those things where you get what you pay for, and dealing with cheapo no-name solder can actually lead to damage to components.
Nothing expensive required. I suggest starting with a kit like this it contains a lot of the tools you will need for keyboards. The only change i would make would be to also get some Kester 44 solder like this. I'm happy to walk you through it via facetime or in person. Let me know.
I would recommend solder a little thicker than the other gentleman because with .5mm solder you'll be spending a bit more time feeding the solder than .8mm solder.
I solder at 270 °C. Temperature is more or less a preference (there are limits though).
Soldering keyboards doesn't really require any holding of the pcb. Perhaps you mean holding the solder? - Use your hands.
Edit: bonus soldering station recommendation: If you plan on doing a bit more soldering work in the future you might want to consider this cheap but decent soldering station. Only con is that it doesn't come with extra tips or tweezers etc.
If you already own a couple of customs, go Hakko or go home.
Pick that up, and some small gauge Kester 63/37, and you're good to go.
Check Craigslist for guitars that have electronic issues or are completely dead. For example I got an rg321mh that has a perfect neck and frets for $60. All I had to do was rewire a new input jack. Get a cheap solder pen and some 63/37 rosin core solder.
Wiring guitars is WAY easier then most people think. You can find diagrams for almost any production guitar/pickups.
Just make sure your frets, neck, and nut are good, that stuff is a pain to fix. The rest you're replacing anyways.
I just do a full rewire. Buy the following for a dead guitar: 1. CTS pots. 2. Switchcraft input jack and switch. 3. 22awg cloth sleeved wire. Use a multimeter to check pickups resistance. Or just get some guitar fetish pickups of your choice for a cheap option of new pickups. Then just do the full rewire following a diagram. Make sure to pre-tin your solder pen, the solder point, and your wire. Also sand the back of your cts pots for easier adhesion. Pickup a $5 helping hands from harbor freight to hold stuff to solder.
All this stuff will cost you around $50-60 with a cheap solder pen kit ($12 Amazon) and you will have enough wire and solder to do a bunch of guitars.
You will have a completely rewired guitar in less than 2 hours of work.
Here is links to solder pen, solder, and wire. The rest just lookup for your guitar you're gonna rewire.
https://www.amazon.com/Vastar-Soldering-Iron-Full-Welding/dp/B01712N5C4?ref_=fsclp_pl_dp_6
https://www.amazon.com/Gavitt-Cloth-covered-Pre-tinned-Pushback-Vintage-style/dp/B00JYJFE72/ref=mp_s_a_1_4?keywords=22+awg+wire+cloth&amp;qid=1556147584&amp;s=gateway&amp;sr=8-4
https://www.amazon.com/Kester-Rosin-Core-Solder-Dispense-Pak/dp/B00AVLM4SO/ref=mp_s_a_1_4?crid=IRV7SJBS91YR&amp;keywords=63+37+solder+kester&amp;qid=1556147625&amp;s=gateway&amp;sprefix=63+37&amp;sr=8-4
Indeed. This and this are perfectly adequate for an enormous amount of practice, and come to less than $40, delivered.
It's way, way better kit than what was available inexpensively when I got started.
i'm gonna go with what everyone else says: get a decent temp adjusting iron. it makes a world of a difference...add to that a small chisel tip (usually not provided on a cheap pen iron)...such much easier and enjoyable soldering. though, its not worth spending 80-300 dollars on a soldering iron for one project..
i use/recommend:
also another good affordable iron:
everyone says weller...and its because they dropped the money on one and want other people to do the same haha...if you have the money, sure go for it. if not, many stations in the 80-100 range are excellent quality to begin on.
also get a helping hand, tweezers, needle nose pliers, snips, and maybe a wire stripper.
For frame of reference, I am also BRAND NEW to this hobby. Been poking around for maybe 2 weeks tops. Before this, I had never even seen a soldering iron in person.
How much of an investment is a huge investment for you? If you can stomach around 100 bucks, this package has ALMOST everything you need. The only addition I would make is this 10 dollar cleaning station.
As far as learning technique, check out this series of videos, particularly the soldering and de-soldering ones.
Kester 44 Rosin Core Solder 63/37 .020" 3/4oz Dispense-Pak http://www.amazon.com/Kester-Rosin-Core-Solder-Dispense-Pak/dp/B00AYJ0B7Y/ref=sr_1_7?s=hi&amp;ie=UTF8&amp;qid=1395671772&amp;sr=1-7&amp;keywords=kester+44
Desoldering Wick - 2mm http://www.amazon.com/Aven-17541-Desoldering-Wick-Width/dp/B003E48ERK/ref=sr_1_3?ie=UTF8&amp;qid=1395672458&amp;sr=8-3&amp;keywords=desoldering+braid
No Clean Flux Paste http://www.amazon.com/MG-Chemicals-Clean-Paste-Syringe/dp/B00425FUW2/ref=sr_1_2?ie=UTF8&amp;qid=1395672365&amp;sr=8-2&amp;keywords=flux
Solder Tip Cleaner
http://www.amazon.com/Hakko-599B-02-Solder-Cleaning-Holder/dp/B00FZPGDLA/ref=sr_1_1?ie=UTF8&amp;qid=1395673163&amp;sr=8-1&amp;keywords=solder+tip+cleaner
velcro strap for battery! 300mm if you're wrapping around the entire quad
clear double-stick Gorilla Tape
also [this](https://www.amazon.com/Hakko-599B-02-Solder-Cleaning-Holder/dp/B00FZPGDLA/ref=sr_1_6?
s=hi&ie=UTF8&qid=1464845046&sr=1-6&keywords=hakko) soldering iron tip cleaner is freaking awesome
poster putty for soldering stuff, way better than helping hands
Ok, so there are a lot of things I'd probably change :)
&#x200B;
Motors - SabotageRC Booty 2306-2300kV, they're cheaper and significantly higher quality than the DYS you're looking at (they are made by DYS, as well, but with much higher quality components and build quality)
&#x200B;
ESC - beware Racerstar. Some things they OEM and you get a good product for a good price, but others you get significant drops in quality. I would pay a few cents more apiece and get Spedix ES-20 Lite ESCs.
&#x200B;
VTX - the one you selected is decent, but your soldering skills need to be up to par, the wires come undone from the VTX extremely easily and are incredibly difficult to reattach. I would recommend a few dollars more to get an AKK VTX with either larger pads or a connector.
&#x200B;
VTX antennas - There are better ones out there. Lumenier Axii is one of the best and most durable (and significantly lighter), pagoda antennas being slightly better in some regards but more fragile.
&#x200B;
Radio - The Turnigy Evolution is about the same price now and is a better choice than the FS-i6. Still uses the Flysky AFHDS2A protocol, so it will work with the receiver you selected (and there are now others that are good, as well). If the phonebook style radio appeals to you, then the i6 is the only cheap choice, but keep in mind it is a CHEAP radio, not an inexpensive one.
&#x200B;
Wire - I would suggest ordering some 14, 16, 18, 20, 22, 24, 26, 28 gauge wire from Hobbyking (as much as they suck, they're the only place that sells lengths of wire inexpensively). Getting 1m of each wire in both black and red should only be 10-15 bucks IIRC.
&#x200B;
Power supply for charger - get a supply that is at least 19v and 200 watts, like this: https://www.amazon.com/MEAN-WELL-LRS-200-24-211-2W-Switchable/dp/B00YMA7I7C/ it is a few dollars more, but you can also run your charger at its full output, which will come in handy for charging your batteries in a timely fashion.
&#x200B;
Soldering iron - get a quality one, you're going to need it. https://www.amazon.com/Weller-WLC100-40-Watt-Soldering-Station/dp/B000AS28UC/
&#x200B;
You should also get some no-clean flux: https://www.amazon.com/MG-Chemicals-milliliters-Pneumatic-Dispensing/dp/B00425FUW2/
&#x200B;
Decent solder: https://www.amazon.com/MAIYUM-63-37-solder-electrical-soldering/dp/B076QF1Y85/
&#x200B;
And a tip cleaner: https://www.amazon.com/Hakko-599B-02-Wire-type-soldering-cleaner/dp/B00FZPGDLA/
&#x200B;
That should get you well on your way - still on a budget, but you'll hate yourself WAY less when you go to build it and have decent equipment. :)
If you can avoid the sponge and go for a coated metal Brillo pad type scrubber. Temperature shock can lower the life span of tips.
Here is an example:
https://www.amazon.ca/Hakko-599B-02-Solder-Cleaning-Holder/dp/B00FZPGDLA/ref=asc_df_B00FZPGDLA/?tag=googlemobshop-20&amp;linkCode=df0&amp;hvadid=293027932547&amp;hvpos=1o2&amp;hvnetw=g&amp;hvrand=9051192495741392112&amp;hvpone=&amp;hvptwo=&amp;hvqmt=&amp;hvdev=m&amp;hvdvcmdl=&amp;hvlocint=&amp;hvlocphy=9000801&amp;hvtargid=pla-432940967999&amp;psc=1
It doesn't necessarily need to be that brand, just the general idea
soldering iron $40
solder (I think this might be a little too thick, but I can't find any 0.022" solder)
I recommend this if you can squeeze it into your budget because it makes cleaning the soldering iron tip sooo much easier
desoldering pump
if you want ergo clears, you'll need some springs too.
I got this kit. [Vastar Full Set 60W 110V Soldering Iron Kit] (https://www.amazon.com/dp/B01712N5C4/ref=CM_SW_R_CP_APA_ZV6IZBDB771M1)
I ended up getting a few other things and a better solder sucker after a few jobs.
[Hakko 599B-02 Solder Tip Cleaning Wire and Holder] (https://www.amazon.com/dp/B00FZPGDLA/ref=cm_sw_r_cp_apa_9Y6IzbHX1H6MD)
[Engineer SS-02 Solder Sucker] (https://www.amazon.com/dp/B002MJMXD4/ref=CM_SW_R_CP_APA_W06IZBVBPKVMP)
The sucker was totally worth the extra cost.
it will get you started, for sure. this is a very comprehensive kit for an absolute beginner, but it lacks in quality of components.
i bought what seems to be another version of the exact same kit, my soldering iron looks the same, the solder sucker, multimeter, tweezers, wire cutter and multitool.
my issues with this kit: the soldering iron tips seem like they're extremely low quality; i've soldered 3 or 4 pedals and i've had to change the tip (thankfully there are a few different/replacement tips in there). the solder is nothing to write home about; my dad has since gifted me some proper, thin, good quality 63-37 solder. he also gave me a brass tip-cleaner (like this: https://www.amazon.com/Hakko-599B-02-Wire-type-soldering-cleaner/dp/B00FZPGDLA/ )
whenever i move out of this tiny apartment i'll certainly spring the extra cash for a soldering station setup from a reputable brand (weller, hakko)
Sure, though I can't vouch for the quality of any of those items. A cheap soldering iron can make the job more difficult.
I would also suggest one of these for cleaning solder off the tip between soldering items, and good solder like this. Again, cheap solder will make any job ten times harder.
Of course, that kit is dirt cheap at 20$, maybe just give it a shot and see what happens.
Looks like you got an even cheaper iron that looks very similar, but wanted to mention I just got this soldering iron and I'm very happy with it.
Also, I got some soldering wick, which I much prefer to the solder-sucker. My mind was blown by how much easier my life got with solder wick.
I also got one of these, which is nice.
I'd suggest:
http://www.amazon.com/gp/aw/d/B000AS28UC
Plus a smaller tip:
http://www.amazon.com/gp/aw/d/B0002BSP4K
Weller is a highly trusted brand and buying a variable one means you'll likely never need another soldering iron for any job.
Other items:
Solder itself
http://www.amazon.com/gp/aw/d/B00068IJPO
In case you mess up:
Either a solder sucker
http://www.amazon.com/gp/aw/d/B005GIPKOW
or solder wick
Nice but not needed(since that iron comes with a sponge):
http://www.amazon.com/gp/aw/d/B00FZPGDLA
Make sure to tin your tip and keep it clean. You can wipe it off on a wet sponge, or get a tip cleaner. I use that tip cleaner, and for $9 it's awesome.
Get your self some tip tinner, which is usually a combination of sal ammoniac and solder paste. Use it sparingly-- only once your tip won't wet on its own after being wiped clean.
I recently bought one of these for myself and I couldn't be happier as a DIY hobbyist:
Hakko Dial type temperature limiting soldering iron FX600
I only use it for hobby stuff such as Quadcopters, 3D printers and electronics kits but it's way better than the 8watt USB powered I was using before.
Pair it with this and this and you should be good for a while and roughly within budget.
Check YouTube for soldering tutorials. Plenty out there.
Definitely tin the tip of the iron everytime you solder. I also use some of this to help keep the tip clean.
I know you don't want to go for a more expensive iron but my hakko iron is awesome and it really makes soldering more enjoyable. Worth the investment if you stay in the hobby.
This is the one that I use, its been holding up pretty well. Just be sure to keep the tip clean and tinned, it's a pain when they start to oxidize. I use something like this. Also be sure to get the right sized tip(s) for your projects.
yep, get this! should fix up the tip basically back to new
I have an old thing of Radio Shack brand tip tinner but you can get it from Amazon by just searching "tip tinner". My Radio Shack stuff looks a lot like this.
I hate having to retype stuff. But you should have a look those posts anyway.
Also get some kapton tape and maybe some tip cleaner/tinner.
I will third this choice. Just buy a big spool- you will not be sorry. This solder doesn't have a plastic state- it goes directly from liquid to solid so your chance of cold joints are virtually nil.
https://www.amazon.com/dp/B00068IJOU/ref=cm_sw_r_tw_dp_U_x_pLjXCbHS5HRYE
Also the Hakko 888 is a dream. Like others I got a wide assortment of tips with it so I have the right tool for each job. If I could add one other must must must have, it's this:
https://www.amazon.com/dp/B00NS4J6BY/ref=cm_sw_r_tw_dp_U_x_tOjXCbDNSRC4K
That stuff is the cat's ass. Get it.
is this a good one?
https://www.amazon.ca/gp/product/B00NS4J6BY/ref=crt_ewc_img_oth_10?ie=UTF8&psc=1&smid=A614WYM65K035
Does Amazon sell internationally? I have no idea. The best solder is this stuff https://www.amazon.com/gp/product/B0149K4JTY/ref=oh_aui_detailpage_o00_s00?ie=UTF8&amp;psc=1
If you can find kester 63/37 anywhere that'll ship to you that's the stuff. I wasted a lot of money on little tubes from my hardware store until I just stocked up with a reel of this
This stuff is awesome and will last you forever. It's worth the cost. it's 63/37 which flows a little better.
i used kester 63/37 with a 0.031" diameter at 650°
https://www.amazon.com/gp/product/B0149K4JTY/ref=oh_aui_search_detailpage?ie=UTF8&amp;psc=1
Kester 44 Rosin Core Solder 63/37 0.80mm (0.031 inches) 1 lb. Spool - $22.95 (Prime)
You are building a flying machine. In order to build a flying machine, you need to start with good tools.
Soldering is an important part of building a flying machine. You need to learn to solder:
You are building a flying machine, do it right.
As was said before, these are rotary encoders.
I had an old piece of gear with these. One knob was broken. I discovered there are many options to consider for what the encoder is:
So probably this https://www.digikey.ca/product-detail/en/bourns-inc/PEC11R-4020F-N0024/PEC11R-4020F-N0024-ND/4699190
&#x200B;
In general, I used their search filters, here is a link to one less narrowed down too https://www.digikey.ca/products/en/sensors-transducers/encoders/507?k=&pkeyword=&sv=0&pv545=142&sf=0&FV=fffc0076%2Ca4019a%2C1140291%2C6240002%2Cffe001fb%2C3400006&quantity=&ColumnSort=0&page=1&pageSize=25
&#x200B;
To remove these from the PCB, you need to be good at desoldering. I used a solder iron with desolder wick
&#x200B;
I have this solder station https://www.circuitspecialists.com/csi-premier-75w-Soldering-Station.html
A good solder station is important as the tip is very fine point, the heat is regulated and can be adjusted. I used about 350 to 400 degrees C heat. And the device is safe to use for static sensitive boards.
And solder wick https://www.amazon.ca/NTE-Electronics-SW02-10-No-Clean-Blue-098/dp/B0195UVWJ8/ref=sr_1_1?keywords=solder+wick&qid=1565443539&s=gateway&sr=8-1
Having some fine tweezers is good too. I have these https://www.amazon.ca/TWEEZERMAN-Stainless-Tweezer-Assorted-Colors/dp/B000782SQY/ref=sr_1_54?keywords=tweezers&qid=1565443795&s=gateway&sr=8-54
&#x200B;
It is very important to not damage the circuit board when desoldering. be patient. The hard part with taking out rotary encoders is desoldering the mechanical support metal clips on the sides. These usually are wider and require more heat and time to melt and more messing with the solder wick to get all the solder out. I recommend desoldering the pins first, using small tweezers to move the pins to make sure they are loose. then work with the iron to alternate the mecanical support pieces to heat and gently rock back and forth.
&#x200B;
Another thing migh to try is to destroy the old broken encoder, small cutters to cut apart the pins and the supports. Just be careful again to not damage the other parts and the board. Then you can easier desolder the loose bits of metal remaining in the holes.
The approach worked well for me. I had a few iterations, since the first time I replaced an encoder, put the device back together, then i found a different encoder had stopped working. So back apart and I had to desolder it as well. But then I went on the learning curve of getting an encoder with the wrong number of pulses per revolution. It was a big wheel for the options, so it had 24 detents, but 12 pulses per revolution, and a push button switch, so some kind of special snow flake.
If these encoders you have here are just regular encoders without switches it should be possible for it to be repaired.
Of course if you don't have the tools already then it can be very expensive to ge them just to do this. I would recommend then finding someone who does have the tools and experience doing this.
https://www.amazon.com/NTE-Electronics-SW02-10-No-Clean-Solder/dp/B0195UVWJ8/ref=sr_1_2?ie=UTF8&amp;qid=1498946921&amp;sr=8-2&amp;keywords=copper+wick
Don’t forget, you need one with a tip the size of a pen. Any bigger and you will burn your pcb. This is a decent one that I use
Weller WLC100 40-Watt Soldering Station https://www.amazon.com/dp/B000AS28UC?ref=yo_pop_ma_swf
Weller ST7 ST Series Conical Solder Tip Hobbyist for WP25, WP30 and WP35 Irons, 0.31" https://www.amazon.com/dp/B0002BSP4K?ref=yo_pop_ma_swf
OMorc Desoldering Wick, Solder Sucker & Solder Braid (2.5mm Width, 1.5m Length) – Desoldering Vacuum Pump Solder Removal Tool https://www.amazon.com/dp/B01I14V4X8?ref=yo_pop_ma_swf
Sometimes for the smaller welds, like on LEDs, try adding solder before sucking.
You're using one of those "kitchen" torches aren't you? They're garbage. Get a real torch and it'll be easy as can be.
http://www.amazon.com/Bernzomatic-TS4000-Trigger-Start-Torch/dp/B00008ZA09
Seriously. It's pretty much impossible to use those kitchen torches for anything beyond lighting candles.
unlimited budget? challenge accepted:
backup vitaprep base, multiple backup vitaprep tops. another robot coupe, with the extended housing and specialty blades. extra robot coupe blades. extra circulator or two. whatever size the professional kitchen aid mixers are these days - one of them, with all the gadgets and gizmos. depending on the size of the gear you have, large and small immersion blenders.
more pans. a few of something like these that will stay flat for searing fish. more pots. more plates. more plastic squeeze bottles. one or two of these. if you're also in charge of glasses and silver, more of that. more china caps. more chinoises.
more cambros. more lids. more 1/9,1/6, and 1/3 pans - deep and shallow, with enough false bottoms for all sizes to cover 25% of the pans. more pan spacers for the service coolers. more sheet trays. more 1/2 sheet trays - perforated and non perforated. more hotel and 1/2 hotel pans - 2, 4, and 6 inch; perforated and non perforated. more ladles, particularly 2oz and 4oz. more cutting boards. more buss tubs. more lexans, both perforated and non perforated. lids for those lexans.
if a tilt skillet can be a thing, one (or more) of them. or a steam jacket kettle. just something you can conveniently roll stocks in. garbage disposals in the dish pit. couple of blowtorches.
butcher's twine, cheesecloth, blue (or whatever color you choose) tape, sharpies, and pens - enough that finding any one of those items shouldn't be an issue. a case of bic lighters to keep in the office. more clipboards, because they're fucking useful.
http://www.amazon.com/Bernzomatic-TS4000-Trigger-Start-Torch/dp/B00008ZA09/ref=sr_1_1?s=industrial&amp;ie=UTF8&amp;qid=1374969761&amp;sr=1-1&amp;keywords=bernzomatic
brass pencil flame torch + propane tank might be cheaper than a creme brulee torch + you can do dabs with it
A torch is better for this because a soldering iron concentrates the heat in a very very small area. And since metal is so conductive and has a high thermal mass, it looses heat faster than you can apply it with a soldering iron, so it will never get hot enough to actually solder. Flux comes in a paste (or sometimes liquid) and is a weak acid that etches the metal to clean and roughen the surface so the solder wets to the metal and bonds better. It also helps keep air out of the connection to prevent oxidation while you're soldering, which would weaken the joint.
The steps would be to clean each piece, position or clamp them together, apply a good amount of flux, heat it all up with the torch, then touch the solder to the hot metal so that it melts on. If you need to apply heat directly to the solder (ie, the solder doesn't melt on its own when it touches the metal) then your metal isn't hot enough and it will make a cold solder connection that will be weak, or completely non-existent if it's too cold. It may look like it joined things, but the smallest bit of force (even from just normal handling) would break the joint and you would need to start all over by first cleaning off all the solder, then cleaning the metal, applying flux, and trying again.
Here's the torch I use:
Torch
Fuel
Optional extension hose so you don't have to hold the cylinder the whole time
Solder and flux. This kit comes with some emery cloth to clean the metal a bit before soldering.
EDIT: Here's a video about soldering copper pipe. Same process for small sheet metal parts.
I got a 2-pack of propane tanks as well as a torch tip for under $20 total. Burns hotter and will last much longer. You can get a self-igniting tip if you prefer for only a couple dollars more.
propane and butane and the mixture of the two gasses have the exact same combustion temperature with air.
http://www.engineeringtoolbox.com/flame-temperatures-gases-d_422.html
the combustion of propane and butane is an oxidation reaction, thus a more complete oxidation to CO2 is actually a good thing. neither propane or butane is more susceptible to incomplete oxidation than the other.
properly functioning propane and butane torches producing ideal burns present no danger of carbon monoxide poisoning.
http://www.propane101.com/carbonmonoxideandpropane.htm
as long as sufficient oxygen is present (the 21% present in the atmosphere is more than sufficient) both propane and butane are safe to use.
on a side note, a propane torch like the one linked below is much better built and thus safer to use than the crème brûlée butane torches most people use.
http://www.amazon.com/BernzOmatic-Basic-UL2317-Pencil-Propane/dp/B00008ZA0C/ref=sr_1_7?ie=UTF8&amp;qid=1451884928&amp;sr=8-7&amp;keywords=bernzomatic+propane
If I had nothing and wanted to purchase decent quality stuff but still being affordable, I'd do the following.
Multimeter $45
Soldering Station $38
Solder $25
Desoldering Pump $6
If this is the only time you ever plan on soldering, then you can get away with the cheap stuff. You could probably source some of it locally for cheaper. None of this is great quality, but it will do the job for a 1 time project. While I wouldn't enjoy it, I could build an Ergodox with the following setup.
Desoldering Pump $6
Multimeter $13
Solder $9
Soldering Iron $8
Iron Holder $6
Hey! Glad to help. This Is the exact soldering iron I use. Extremely effective, I keep it at a 3 at all times, seems to be a legit temperature for everything Gameboy related.
The Solder I use works really well, rarely sticks to the soldering tip (like many other ones I've tried) and seems to be the most consistent. It's also supported by HHL - so you know it's solid!
Hope that helps.
I wanna be unhelpful, too!
I suppose I could've been less helpful...
Look up some tutorials on youtube. A good iron makes a world of difference. I struggled with properly tinning all the irons I've used previously which were just those cheap $8 dollar irons from like walmart. The weller that was in my dad's stuff wasn't much more expensive but they make quality stuff.
The tip tinned very well and everything was fairly smooth. If you don't have a decent stock of soldering supplies I would purchase them before you start.
Here's a quick rundown of what I would recommend:
Simple Weller Soldering Iron
Helping Hands
Desolder Wick
Kester .03" solder
Having the desolder wick saved me a few times when I had some bad flow from the parts not having adequate heat and the solder just clumping on the pin rather than flowing into the connection. You just lay the braid over the solder and press your iron on top and it will soak the solder into the braid and leave your parts clean. You'll probably want something to clean your solder iron tip with. You can buy a Hakko cleaning stand with wire brush for $10 on amazon or you can just wet a scotch brite pad you buy from walmart for a few dollars.
You can use solder you already have if it's a small enough diameter. You want small diameter so that when you touch it to the part (not to the iron) it melts quickly and you dont have to continue to apply heat to the parts. As far as actually handling the solder while you're trying to work I like to cut a small length of solder, maybe 6-8 inches and then wind it in a mini spool around my pinkie finger and leave a length of it sticking out so you have something to hold on to that will give you good control.
How-To Solder Instructable
Once you make the connections look at them, a good connection should typically be shiny and not cloudy. It's likely overkill for this project but those are good practices.
I find Kester to be a pretty decent solder.
Assuming you want a 60%, that's already 59 without shipping just for the MOD-M's. Unfortunately, no matter how you swing it this specific board is not going to be possible for under under $100. Even with the cheapest parts I can think of:
We're at $137 already even ignoring the underglow.
But, assuming you want to go through with it - here's where to get the goods.
Here's a guide to make the GH60 have underglow
Wow thanks for such a thorough response!!!
6/9/10 - I think they were written into the manual as different ways in which to attach the crossover board to the bottom of the box. how do you normally attach it to the bottom of the box?
I'm considering Crossover Board , just to help with organization, however i'd still need to attach it to the bottom of the box.
&#x200B;
I just realized I forgot speaker wire for the internals, does it matter a lot which gauge? any general guidance.
&#x200B;
I would really like to complete the outside of the boxes , as i may end up giving them away as a gift eventually. wondering if i'll need a Sander , if i plan on doing vinyl or some sort of wrap? I'm not against painting, just against spray painting.
&#x200B;
&#x200B;
Also forgot Snips
You probably also have local maker/computer stores that sell it. Look for the type of place that sells Arduinos or Raspberry Pis. You can also order from Digi-Key, Mouser, etc. Fry's also sells it, but unless you live near one, it's unlikely to beat Amazon Prime.
Glad to help :)
Here is EEVblog's tutorial set on soldering. Part 1 and 2 will be more relevant for your purposes. In the first part he talks about tools (which includes your actual solder), how they work, and why certain properties are important, so you know what you need. In the second he talks about the process for through hole soldering (like you need for the holtites) and how to know you're doing it properly, and things to look for. Part 3 is for SMD stuff, which doesnt affect you in this scenario, but I tacked it on just for good measure.
FWIW you dont need a great iron, it just makes it easier to avoid damaging your board, and do things at a speed you're comfortable with. You can absolutely get good results with a cheapo iron, it just requires some extra precision.
I'd recommend picking up some extra holtites (if you have a few already thats fine you don't need a ton), and a piece of breadboard, and just practicing a bit first until you're comfortable with the process, as well as your iron and materials. A small piece of breadboard like this would work.
https://www.amazon.com/gp/product/B0778G64QZ
This is the solder I use, you can also buy it by the ounce (1lb is quite a lot). You can get it thinner than that even, too, but thats ~3-4 sheets of paper thick.
https://www.amazon.com/gp/product/B00068IJOU
Seems like theres a leaded one too (which seems to make a better connection?) https://www.amazon.ca/Kester-Rosin-Core-Solder-Spool/dp/B00068IJPO/ref=sr_1_fkmr0_1?ie=UTF8&amp;qid=1486408969&amp;sr=8-1-fkmr0&amp;keywords=Kester+44+Rosin+Core+Solder+63%2F37+0.80mm+%280.031+inches%29+1+lb.+Spool
Like others have said, unfortunately, yeah it's dead, but don't let that get you down! My first desoldered job, I did some serious butchery to the board. Luckily I was able to fix it so that it's functional, but it ain't pretty. But now I have no problems with desoldering. Like /u/anthonyooiszewen said, it could have been a few things. Definitely make sure you use a good leaded solder. I, personally, like this stuff. Next, definitely make sure you have a soldering iron with temperature control, and DO NOT RUN IT TOO HOT. Lastly, do yourself a favor, and get one of these.
I <3 my Kester, but I'm not sure if they sell it in smaller sizes. I got this a while back and I have a ton of it left after soldering 8 boards since I got it, so not sure if OP would want 1 lb. of solder if his/her only plan is to de-solder and solder 1 board.
This stuff, Kester 63/37, 0.20 inches, is pretty perfect for small fiddly stuff without being too thin to use for through-hole soldering. The 63/37 mix is eutetic which is a fancy way of saying that both the tin and lead melt at the exact same temperature.
For flux, you won't regret getting a flux pen, for example something from SRA soldering or MG Chemicals.
This low temperature solder paste is interesting, also. It is lead free, and melts at fairly low temperature. In fact I think this is the same alloy also sold as 'Chip Quik'. Even if you only have a soldering iron, assembling boards can be quite a bit faster with solder paste. And hey, a hot air station is only like 50 bucks.
I agree here. If you can spring for some "good" stuff, Kester 44 Rosin Core Solder 63/37 (in your diameter of choice) is my go-to all purpose solder, and a 1lb spool lasts a really long time.
Also, some rework flux is good for fixing mistakes. I can personally recommend ChipQuik
Unless I specifically need solder paste, I can do anything with those two products.
Yeah, that would be alright. An unregulated iron would get way too hot, so having any kind of regulation makes all the difference. With one of those irons, I would use an official Hakko T18-S7 tip, this solder, a flux pen, and some 99% isopropyl on q-tips to clean up the flux afterwords.
The temperature you want is as low as possible but still hot enough to melt the solder pads as soon as the iron contacts. Somewhere around 330C. When you're doing a hard mod, you don't want to make contact with the iron for more than a few seconds at a time or you could start melting off SMD components around the pads. Allow the board time to cool between wires.
To contradict OP, almost anyone can do a hard mod with the right equipment and technique. It's basically cheating with the above setup. People who botched theirs had to be doing things very wrong.
This is what I use.
Oh shoot! Thanks for reminding me, I was at work when I responded. I use this https://www.amazon.com/gp/aw/d/B00068IJWC?psc=1&amp;ref=ppx_pop_mob_b_asin_title
It's 0.02" not sure about mm sorry Dx
Are you referring to solder wick? This sort of thing:
http://www.amazon.com/Chemtronics-Desoldering-Braid-Chem-Wik-10-50L/dp/B0019V5MAC/ref=sr_1_3?s=hi&amp;ie=UTF8&amp;qid=1462654881&amp;sr=1-3&amp;keywords=solder+wick
The microswitch looks to be a Omron switch. Would make sense since Razer also sells gaming mouses that use this switch. As far as the joystick, I have to agree with /u/ScryptHasher and say that this is more than likely an off the shelf part. For this I would just search on Ebay for replacement Xbox One joysticks and find one that matches closests to the original.
For desoldering I highly recommend watching some videos on YouTube. Take your time. Also pick up some decent desoldering wick with flux, such as Chemtronics Desoldering Braid.
Good luck on your adventures repairing this controller and hopefully many more electronic projects in the future!
For soldering the number one advice I can give is to make sure you always leave a little bit of solder on the tip of your iron when you put it back on its cradle. This prevents the tip from oxidizing. If you do this your tips will last a very long time and you will not have to use tip tinner / cleaner. You clean the tip before you make a solder joint and you put solder on the tip when you are done with it. That is not intuitive to a lot of people.
For protoboard vs breadboard the same "best practice" things apply. Check to make sure ground or power isn't connected where it shouldn't be before you power it up, use star grounding, etc.
For the iron the gold standard is the Hakko 888. If you want to save some money go with the Weller WLC100. The good thing about that WLC100 is that it will heat any tip that will fit in there whereas the 888 you have to have the right tip. Don't waste your money on one without temperature control. The WLC100 and 888 will last forever. The Chinese clones most likely will not.
Conical tips are terrible for most any soldering, don't use them. You want a chisel tip. My advice to practice is get some wire and solder pieces of it together without. Do it without twisting the wires and do it until your solder joints come out nice an clean without a long solder tail attached to the iron. That happens when you burn all the flux out of the solder. The fumes off solder are the flux burning and flux smoke is terrible for you. Don't breathe it. Your solder joint is good when the wire will break before the solder joint.
For wiring up perfboard I always use magnet wire. You remove the enamel with the soldering iron an a bit of solder. The fumes from doing this are really nasty is the only drawback. If it doesn't want to come off nick the enamel insulation with a hobby knife and it will come right off. I find with plastic insulated wire I am always melting the insulation.
Hopefully someone will chime in on online soldering tutorials that are worth watching. I learned my tricks from a week long IPC-610 training class years gone by so I don't have any to recommend.
Lead free solder is much harder to work with than lead solder. Only use lead free if you have to because your product is going to be sold in Europe. Not all desoldering wick is created equal. Some of it pulls solder right off your board. Some of it just pushes the solder around the board without sucking it into the braid. You want a wide braid with a good flux on it. I bought a spool of this recently and it is the best I have used in a while:
https://www.amazon.com/Chemtronics-Desoldering-Braid-Chem-Wik-10-50L/dp/B0019V5MAC/
https://www.amazon.com/Hot-Max-500G-Propane-Torch/dp/B00282LP34
Hooks up to a propane tank and burns at 500,000 btu.
It was pretty simple. Here's what I used:
A little pricey for the torch, but it's great for getting rid of weeds/killing sod. And I use it to light my pizza oven and fire pit quickly.
I have pictures of this very test here: https://imgur.com/a/647Im
The average house fire is 1,100 F / 593 C. We used this blowtorch, which reaches temps of at least 1,200 F because we used it to melt aluminum in the video on our site.
will that suffice? A video might take me a few days since we weren't filming when we did this test
https://www.amazon.com/Hot-Max-500G-Propane-Torch/dp/B00282LP34/ref=sr_1_1?ie=UTF8&qid=1542209334&sr=8-1&keywords=roofing+torch&dpID=3103D4nMAQL&preST=_SY300_QL70_&dpSrc=srch
&#x200B;
With
&#x200B;
https://www.amazon.com/dp/B00DMICFQ4/ref=sxts_kp_tr_2?pf_rd_m=ATVPDKIKX0DER&pf_rd_p=8778bc68-27e7-403f-8460-de48b6e788fb&pd_rd_wg=NYalm&pf_rd_r=7KV1MT8QCVRF9GMFY594&pf_rd_s=desktop-sx-top-slot&pf_rd_t=301&pd_rd_i=B00DMICFQ4&pd_rd_w=5b3jF&pf_rd_i=propane&pd_rd_r=4013d02b-f02a-427d-b777-440aa0d49392&ie=UTF8&qid=1542209378&sr=2
Some will recommend the Engineer SS-02. I prefer the Soldapullt.
There's also this, but I haven't tried it myself. It's apparently good too.
I would buy some decent soldering wick just in case, for those stubborn pads. 99% of the time you won't need it in my experience though, given how big switch holes are.
I initially got one similar to that and it’s junk. Get this one instead. It pulls a much stronger vacuum than those plastic ones and the replaceable silicone tip lets you get right onto the work without melting anything.
Here's every desoldering tool I've used so far, from worst to best:
Depends on your budget. The best solder sucker that I've found is this. It's more expensive, but works much better than the few other common ones that I've tried.
For soldering irons I've seen a number of recommendations for the TS100 (and similar models). There is also the classic choice of the Hakko F-888D (which is what I have). You should pick something appropriate for your budget.
Buy this and it'll be just about as easy taking them out as putting them in, once you've got the hang of it. I had it down using the cheapo one that cheap soldering kits come with but I actually enjoy desoldering with this one.
/u/emenelopee Sick board btw!
Honestly I got a cheap one like that and I hated it, it was a nightmare. Someone recommended I get the Engineer instead and it was night and day:
https://www.amazon.com/Engineer-SS-02-Solder-Sucker/dp/B002MJMXD4/ref=sr_1_1?ie=UTF8&amp;qid=1481839367&amp;sr=8-1&amp;keywords=engineer+solder
Three times the price, but worth every penny. If you do not intend on doing a lot of desoldering, then it's probably not worth the extra investment.
https://www.amazon.com/Engineer-SS-02-Solder-Sucker/dp/B002MJMXD4/ref=sr_1_5?s=hi&amp;ie=UTF8&amp;qid=1481945597&amp;sr=1-5&amp;keywords=solder+sucker
Simply the best.
I had to go out to the garage and look, that's the same company, but not the right model. Mine is a little different than what Adafruit sells. It's an SS-02. I really love it.
Also available on Amazon.
https://www.amazon.com/gp/product/B002MJMXD4/ref=od_aui_detailpages00?ie=UTF8&amp;psc=1
It's a bit more, but hey guaranteed shipping timeframe so it's worth it to me. Thanks for the tip, I've been using wick and about to do a 104 key, let's hope this baby lasts through that.
https://www.amazon.com/gp/aw/d/B002MJMXD4/ has gotten very good reviews but is $20 more expensive. Adafruit also recommends and sells it. Personally I’m having a hard time resisting getting a vacuum desoldering station.
I own this kit and it works great! Solder sucker wasn't too good so I got [this]
(https://www.amazon.com/gp/product/B002MJMXD4/ref=oh_aui_detailpage_o00_s01?ie=UTF8&amp;psc=1) to go with it.
You're getting some great advice here, and I'm glad you're enjoying the process of learning to solder! I thought I'd copy a previous post of mine going over my favorite fluxes. Maybe it'll be useful to you as well!
-----------------------------------------------------------------
Certainly not the same. Over time you'll acquire a number of fluxes that you use for different things. You'll want different types depending on the kind of soldering you're doing, or if you're trying to ensure compatibility (i.e. with a flux-cored solder) between fluxes. I mostly use no-clean but rosin fluxes are great. You're supposed to clean them off but there are plenty of 30 year old boards with rosin flux residue on them that work fine. A note on flux pens, I personally hate them. I'm referring to the ones that are built like those paint markers with the tip you need to push in to get it to flow. Very overpriced for the amount of flux and they never work right. Bonkote brush pens are the best, but unfortunately expensive. They are however refillable and the brush tips are replaceable and relatively cheap. The cheap dispenser bottles work great as well but for very thin fluxes are easier to make a mess with.
Here are my go-to fluxes:
I have a water soluble flux that I use as well Kester 2331-ZX but you must clean all traces of it off before you put boards into service, so it only comes out rarely.
Flux - like solder - is one of those things that seems expensive when you buy the good stuff, but unless you're a CM buying drums of it the cost-per-use is so low that it makes no sense to fuss with the cheap shit IMHO.
And speaking of flux, if you want clean shiny boards then consider getting some flux remover. The best I've used so far is Techspray E-line Universal Cleaner. Used to use MG Chemicals Heavy Duty Flux Remover but this beats the pants off it - does the job in 5 minutes where the MG would take half an hour. Rosin-fluxes clean easily unless you reflow them or let them get baked on. No-clean fluxes don't usually need to be cleaned - hence the name - but if you use rosin flux to rework a board (i.e. solder through-hole parts onto a board that was reflowed with no-clean) and then use bad flux remover, the no-clean will turn into a white powdery film that's very unattractive and hard to clean. Thus a good flux remover is handy.
If you're careful with it you can really stretch it out. I recommend against the aerosol cans of flux remover. While they can work well they're expensive and very wasteful, and by the time you clean off a particularly challenging flux you'll have emptied the $20 can.
EDIT: One little trick that most EEs I've met aren't aware of - pick up a little bit of straight phosphoric acid. It works like magic if you ever need to solder to bare aluminum, steel, or stainless steel. You could probably use an acid flux (usually intended for plumbing) but I can't imagine it being any better than regular old cheap phosphoric acid. You'll never get regular flux and solder to wet steel, but this makes it just as easy as soldering anything else.
Just a little PSA I used this stuff as a micro solder tech and it’s awesome. https://www.amazon.com/MG-Chemicals-milliliters-Pneumatic-Dispensing/dp/B00425FUW2/ref=mp_s_a_1_11?ie=UTF8&amp;qid=1549255535&amp;sr=8-11&amp;pi=AC_SX236_SY340_QL65&amp;keywords=solder+flux+syringe&amp;dpPl=1&amp;dpID=210ZqIs41HL&amp;ref=plSrch
It's a pretty damn good deal considering that those wimpy Bernzomatic torches sell for $50 on Amazon.
why would you pay that much for a butane torch?
http://www.amazon.com/Iwatani-Torch-Burner-Professional-Cb-tc-pro/dp/B0027HO3XO/ref=sr_1_1?ie=UTF8&amp;qid=1398663434&amp;sr=8-1&amp;keywords=iwatani
or if you wanted to use a propane fuel tank
http://www.amazon.com/Bernzomatic-TS4000-Trigger-Start-Torch/dp/B00008ZA09/ref=sr_1_1?ie=UTF8&amp;qid=1398663495&amp;sr=8-1&amp;keywords=propane+torch
Here is a
All of that I did with:
Let me know if you have any questions, I definitely wouldn't oil quench your stainless putter, but that's the finish mine originally had!
Sorry just a little hand torch like this Bernzomatic TS4000 Trigger Start Torch https://www.amazon.com/dp/B00008ZA09/ref=cm_sw_r_cp_apa_kY-nzb7B0874G
it will turn it to Ash then it will wipe off.
As Aureolin22 said, I doubt the flowerpot would tolerate very many heating and cooling cycles before it broke. Have you considered doing the same thing but lining a small charcoal grill or a cheap steel wok instead?
Serious question: Why is propane not an option? Stores won't sell propane to you, or your parents won't let you?
I ask because you might have good luck making a small propane forge using a spiral flame propane torch, a small coffee can or large soup can, and a 50/50 mix of sand and Plaster of Paris. (refractory cement would probably work as well or better than the sand/plaster mix)
There was a post here on it a short while back. It seemed interesting so I built one myself just to see how well it worked. Turns out, it works pretty good! It won't produce welding temperatures, but it gets plenty hot for forging. It worked even better after I partially closed off the mouth of the forge with three pieces of firebrick. The one I made also has a 9/16" hole drilled through the back so that I can heat round stock up to 1/2" inch diameter anywhere along its length. I have used it twice now for about 30 minutes each time and I still have only used about half of the fuel in the tank. (I started with a full tank just to see how long it would last in one of these.)
If you are interested I can take some pictures of the one I made.
If coal or charcoal is your only option and you want to stay really cheap just dig a little hole and build your fire in the hole with your air pipe poking in from the side. (assuming the powers that be at home won't lose their minds over you digging a hole and you have a yard to dig in.)
http://www.amazon.com/gp/aw/d/B00008ZA09?pc_redir=1397090166&amp;robot_redir=1
That's what I have. I've used a Newport torch as well which was nice for how small it was but it constantly needed to be refilled and took much longer to heat up my nail
I have a bernzomatic ts4000 that can be used for mapp or propane. Has a decent sized swirl tip on it.
http://www.amazon.com/gp/aw/d/B00008ZA09?cache=1e7ae5e33b54b847bd2ca8af21498496&amp;pi=SY200_QL40&amp;qid=1405599047&amp;sr=8-1
Sorry about the huge link. I'm on my phone.
I also have an extension hose I found at home depot for $17. I love that thing.
If I wanted to make a propane forge could I use this propane head ( http://www.amazon.com/gp/aw/d/B00008ZA0C/ref=pd_aw_sbs_2?pi=SL500_SS115&amp;simLd=1 ) and just attach it to the side of the forge or do I need something like a trigger start torch ( http://www.amazon.com/gp/aw/d/B00008ZA09/ref=pd_aw_sbs_3?pi=SY115&amp;simLd=1 )?
I know this is a dumb question but I'm on a budget for my starter setup
Would a torch like this work? or this one?
you are overkilling it for that little furnace. You could just use a propane tank and burner from home depot like in that imgur album. You dont need to go crazy with it if that small. you will focus the heat on the little crucible and the wool will hold in the heat. so you wont need to make a burner or use a 20lb tank to melt an oz or two of metal. you could buy a 15.00 bernzomatic setup and start on this right away.
&#x200B;
also - maybe look into spin casting (centrifugal casting) as that's the right method for casting precious metals into smaller shapes like a ring. its kinda different and comes with its own way of doing things that means different PPE than typical metal casting.
Here is the desktop version of your link
Good hardware store might have one, any pluming supply store, online .
http://www.supplyhouse.com/Taco-334-3-Taco-Cast-Iron-Pressure-Reducing-Valve-Dual-Control-Sweat
learn how to solder pipe. lots of Utubes out there, you don't need a fancy rig for homeowner stuff, this is good enough for homeowners.
https://www.amazon.com/BernzOmatic-Basic-UL2317-Pencil-Propane/dp/B00008ZA0C/ref=sr_1_6?ie=UTF8&amp;qid=1481992375&amp;sr=8-6&amp;keywords=propane+flame+torch
Basically clean the fitting with a fitting cleaning brush, clean the pipe with plumber sandcloth, flux the inside of the fitting, the outside of the pipe, assemble, apply heat , when the flux stops boiling apply the solder to the opposite side of the heat and let it run around.
Don't over heat the fitting if the flux turns black you got it to hot, I usually move the flame around a little when heating the fitting.
If making up adapters solder them to the pipe ( short piece ) before screwing them to the valve.
Buy some extra pipe and fittings and practice, ells are pretty inexpensive, practice on them.
I like my orca torch very much... I upgraded from using a basic propane torch attachment (https://www.amazon.com/BernzOmatic-Basic-UL2317-Pencil-Propane/dp/B00008ZA0C/) on a regular small green propane tank.
I'm interested in building one of these. About how long does one of these cans last in one of these?
Also, would one of the basic use BernzOmatic Basic Use Pencil Flame Propane Torch Head work with one of these, or does it need to be one of the higher-intensity torches?
THIS is very similar, if not identical to, the torch head I used.
EDIT: OK, I went back and looked at the torch I bought, it says Propane only. I returned it and and got a Berzomatic TS8000
Ok, thanks for the replies!
I picked up this flux: Harris SSWF1 Stay Silv Brazing Flux, 1 lb. Jar, White https://www.amazon.com/dp/B002075B0U/ref=cm_sw_r_cp_apa_i_790RCb2K2T97F
^(And this torch head: BernzOmatic Basic Use UL2317 Brass Pencil Flame Propane Torch Head)^(https://www.amazon.com/dp/B00008ZA0C/ref=cm_sw_r_cp_apa_i_N.0RCbY4860NK)^(And did buy propane, but it was only like $6 for 2 camping cans so no big loss.)I'll grab a can of MAPP.
I assume that because it's only 12 gauge wire and a 20 gauge "solder" it won't take long at all to heat up. As I understand it:
I've also seen people cut little bits of the soldering wire and place it on the target, then heat the wires until it flows. Is that incorrect?
Thanks again!
Hard to say... I personally enjoy doing little electronics projects from time to time, so in my case, I already had a soldering station on hand, and I use it probably once a month or so for various things. Chances are if you haven't needed a soldering iron in your life up to this point, that you will rarely have a use for one later on.
While it's certainly easy to spend a decent amount of money on a nice soldering station, a cheap iron like this one on Amazon would be fine for jobs like this. A small spool of solder will run you about $4 dollars. You could find similar prices to these at Radio Shack as well.
I suggest this:
http://www.amazon.com/Elenco-Practical-Soldering-Project-Kit/dp/B0002LUAL6/ref=sr_1_4?ie=UTF8&amp;qid=1406761425&amp;sr=8-4&amp;keywords=learn+to+solder+kit
It's a very good kit, and will give you plenty of practice before you solder your Poker 2. No frills, and will give you plenty of practice for through hole soldering.
Combine this with a practical, but good quality soldering station:
http://www.amazon.com/Weller-WLC100-40-Watt-Soldering-Station/dp/B000AS28UC/ref=sr_1_3?s=power-hand-tools&amp;ie=UTF8&amp;qid=1406762091&amp;sr=1-3&amp;keywords=soldering+iron
A desoldering pump:
http://www.amazon.com/Sucking-Vacuum-Desoldering-Solder-Remover/dp/B005GIPKOW/ref=sr_1_3?s=hi&amp;ie=UTF8&amp;qid=1406762167&amp;sr=1-3&amp;keywords=desoldering+pump
And some solder:
http://www.amazon.com/Alpha-AT-31604-60-40-Solder-Ounces/dp/B00030AP48/ref=sr_1_1?s=power-hand-tools&amp;ie=UTF8&amp;qid=1406762345&amp;sr=1-1&amp;keywords=solder
To learn, there are plenty of Youtube videos, I recommend you also solder the Elenco kit, then desolder everything to get a feel for how the desoldering pump works (it's super easy, you can't really screw it up). Then, solder it together one more time for extra practice.
All together, about $66 bucks. Add in the cost of the switches, and you're looking at a little over 100. Still a bunch cheaper than the Poker 2 from Massdrop ($143.50), and you've just learned a life skill. For me, that's totally worth it, but then again, I'm an engineer, and learning useful skills is what my entire profession is based on.
---
EDIT: Get this soldering kit instead:
http://www.amazon.com/Elenco-SP3B-Practical-Soldering-Project/dp/B0002LUALG/ref=pd_tcs_compl_t_3?ie=UTF8&amp;refRID=00RQRQTCJ767WDS4D7KV
Cheaper and has more soldering points. The other one has a shitty speaker which doesn't add much to the soldering lesson, but drives the cost up.
If you need to solder on a pcb you'll want a temperature controlled soldering station, other essentials are rosin core solder, some flux to apply before soldering, and a helping hand to hold the pcb/component and wire in place when soldering. I leave my soldering station at a little less than 350 when I'm tinning wires and soldering on a pcb. Wipe excess solder off the iron, heat up the spot you want to solder to with the wire in place, then apply solder to the wire when the flux has smoked off, it should flow into the joint. You don't want to keep heat on a pcb for too long as it can damage components on the board. Make sure you tin the tip/s of the soldering iron with solder before and often during use, or the tips will oxidize and refuse to tin until you scrape the oxides off with a razor knife. Typically a problem at high temps, around 300C solder will melt and oxides form very slowly and the tip will stay hot without needing a retin for a 5-10 minutes. I usually set my temp on max when I first turn it on and hold a bit of solder to the tip and then turn it down when the solder melts. Saves a few minutes of warm up between use.
If you need to heat up a larger surface area (like a battery terminal) for tinning or soldering it helps to bump up the heat - sanding a large surface also will help. Steel and other metals may require use of a corrosive flux made specially for that.
That's about all I know XD
Oboy, I'm probably the wrong person to ask. However, /u/BriThePiGuy recommends Joe Knows Electronics boxes, and /u/NeoMarxismIsEvil recommends the following:
> I would order some cheap assortment kits from people on aliexpress. These are the sort that come with like 10 of most common values of resistor, capacitor, etc.
> Other stuff:
> - WeMos d1 mini or mini pro
> - small i2c OLED displays
> - small LCD display
> - tacswitches (buttons)
> - SPDT switches
> - 74HC595 and 74HC165 shift registers
> - either bidirectional logic level shifter modules or mosfets and resistors needed to make them
> - 7 segment led displays (individual)
> - 8x8 led matrices
> - various environmental and physics sensors (often come as a kit of 20+ different modules)
> - extra breadboards
> - jumper wires
> - male and female header strips (for modules that lack pins)
> - cheap breadboard power supplies
> - voltage regulators (both LDO ICs and buck converter)
> - possibly some 4xAA or 4xAAA battery holders
> - trim pot assortment
> Those are just ideas. Some things like 7 seg led digits are pretty cheap and worth having a few of but not terribly important if you have a real display of some sort.
I personally like the assortment of bits I got in my Sparkfun Inventor's Kit, but found that I wanted more of the following:
I got this iron: http://www.amazon.com/Soldering-Station-Features-Continuously-Variable/dp/B0029N70WM/ref=sr_1_7?ie=UTF8&amp;qid=1413223923&amp;sr=8-7&amp;keywords=soldering+iron but for throughhole work a pen is fine.
the elenco soldering kit I got was this: http://www.amazon.com/Elenco-FM-88K-FM-Radio-Kit/dp/B004YHZE0G/ref=sr_1_1?ie=UTF8&amp;qid=1413223964&amp;sr=8-1&amp;keywords=elenco+fm
you can get a flux pen, is that what you're asking? you probably won't need one for throughhole work but this one's good: http://www.amazon.com/SRA-Soldering-Flux-Low-Solids-No-Clean/dp/B008OC0E5M/ref=sr_1_1?ie=UTF8&amp;qid=1413223992&amp;sr=8-1&amp;keywords=flux+pen
solder pump: http://www.amazon.com/Parts-Express-Solder-Sucker--desoldering/dp/B0002KRAAG/ref=sr_1_1?ie=UTF8&amp;qid=1413224011&amp;sr=8-1&amp;keywords=solder+pump
soldering wick: http://www.amazon.com/Aven-17542-Desoldering-2-5mm-Length/dp/B003E48ERU/ref=sr_1_1?ie=UTF8&amp;qid=1413224038&amp;sr=8-1&amp;keywords=soldering+wick
and solder: http://www.amazon.com/Alpha-AT-31604-60-40-Solder-Ounces/dp/B00030AP48/ref=sr_1_3?ie=UTF8&amp;qid=1413224060&amp;sr=8-3&amp;keywords=alpha+fry
I've been using this stuff, https://www.amazon.com/dp/B00030AP48/ref=cm_sw_r_cp_dp_T2_wFUozb8CNSSVY
That's really nice. What else would I need? Just solder and a vice?
Gotcha, I bought Alpha Fry AT-31604 60-40 Rosin Core Solder (4 Ounces)
What's the best way to clean it up, any specific cleaning material or will some simple household approach work?
Do you mean something like this pencil solderer and this solder?
I've never done any soldering before so I'm not quite sure what I need to do. Would watching guides on youtube be enough for a simple soldering job like this?
It's a pencil type iron. I think that's what you're asking for.
Also, is this what I should be using?
This is what I've been using for a while. I generally like it, but it might have been a tad too big for this job. I really do think my main problem was pre-tinning both contacts before attaching a component.
thinking about picking up the AOYUE 936 and this solder. will i need flux as well?
https://smile.amazon.com/gp/product/B00030AP48/ref=crt_ewc_title_dp_3?ie=UTF8&amp;psc=1&amp;smid=ATVPDKIKX0DER
Thanks for sending the video along. I never knew what that little syringe was for until now.
I'm pretty sure the solder I'm using is for electric work. Here is what I've been using. I'll admit I pretty much never clean the solder tip which probably is having an impact on the ability of connections to stay put.
I started with 40/60 rosin core and then ran low so I bought the only thing I could get, this crap. I now know that rosin core was a mistake and that lead free isn't really popular.
The quality of solder is important. Don't skimp out. Example of good solder that would fit your needs.
What copper? Something like this?
Kester 83-4000-0000 Solder Pocket Pack, 0.031" Wire Diameter https://www.amazon.com/dp/B00068IJNQ
Here's a super cheap solder pencil: Link
and some solder
Good quality adjustable irons can be quite a bit more expensive, but this should work for a simple cable swap.
Solder wire
No flux and $8 iron. This was incredibly frustrating to do. The connections are solid but look like total shit. I was afraid of accidentally getting solder touching two pads since this is so tiny. How do you guys do it? The videos make it look so easy. -_-
EDIT: Thanks everyone. I ordered some flux and a new soldering station online, rush ordered so it'll be here tomorrow. My ESCs and motors arrive today and tomorrow too so trying to get everything together so I can maiden this this weekend. I soldered everything on my 450 but the soldering pads were huge in comparison and most of what I did was adding bullet connectors to the pads. I've been flying it for months, no flux on it either.
I'll post the re-do afterwards.
63/37 Rosin Core, No Clean, 0.031 solder: https://www.amazon.com/dp/B00068IJOU
If you plan on soldering again in the future I'd pick up a Hakko FX888D: https://www.amazon.com/Hakko-FX888D-23BY-Digital-Soldering-Station/dp/B00ANZRT4M. Otherwise there are a few cheaper stations that would work.
https://www.amazon.com/Kester-No-Clean-Core-Solder-Spool/dp/B00068IJOU/ref=sr_1_3?ie=UTF8&amp;qid=1469107079&amp;sr=8-3&amp;keywords=63%2F37+flux+solder
Is that a good solder to use if I'm soldering switches for my Planck? Also do I need a flux pen and should I get better tips for my iron?
I just got the Hakko fx888 station if that helps.
Does this look right for the Solder?
https://www.amazon.com/Kester-24-6337-8800-Activated-No-Clean-Diameter/dp/B00068IJOU/ref=sr_1_3?s=hi&amp;ie=UTF8&amp;qid=1494117583&amp;sr=1-3&amp;keywords=kester+solder+63+37
there are about 5-6 other components that I could still replace in the horizontal linearity circuit and I will probably do this. I do think it will solve the issue but I will likely try because of how much effort and money I have invested into this set. I love the set other than the geometry problems and the geometry issue isn't really that noticeable in 3D games. I don't notice it at all when playing Super Mario 64 and N64 looks great on the JVC D201 set. Also, keep in mind that when you are dealing with geometry issues, you only need to focus on the horizontal and vertical linearity circuits which contain 20-30 aluminum electrolytic capacitors combined. Replacing capacitors isn't hard at all with the right tools. I did make sure to watch a ton of videos on how to solder and desolder and I bought my tools based on recommendations in Youtube videos and on several electronics forums.
&nbsp;
I use this soldering iron and it works great, https://www.amazon.com/Hakko-FX888D-23BY-Digital-Soldering-Station/dp/B00ANZRT4M/ref=sr_1_3?keywords=hakko+soldering+iron&amp;qid=1556333443&amp;s=gateway&amp;sr=8-3
&nbsp;
I use this solder sucker and it is also great. You just have to make sure to push out the old solder with the pump after every 1-2 connections, https://www.amazon.com/Engineer-SS-02-Solder-Sucker/dp/B002MJMXD4/ref=sr_1_3?keywords=engineer+solder+sucker&amp;qid=1556333566&amp;s=gateway&amp;sr=8-3
&nbsp;
I recommend have a desoldering wick as backup as well. Use a no-clean solder wick of 2.0mm for general desoldering. As far as flux, flux paste is easier to use as it doesn't drip. The AMTECH NC-559-V2-TF no-clean tacky solder flux is good. Any no clean liquid flux from Kester or MG Chemicals will work fine as well. Definitely get some wire cutters for cutting solder and cutting component leads.
&nbsp;
I use this solder (I recommend lead solder with a rosin core and also no clean) https://www.amazon.com/gp/product/B00068IJOU/ref=ppx_yo_dt_b_asin_title_o03_s00?ie=UTF8&amp;psc=1
&nbsp;
Any time you work on a CRT, you need to discharge the anode cap. This is very easy to do with the proper tools. For example, you could use a flat head screwdriver and an alligator clip wire to do this. You connect one end to the screw driver, the other end to a ground point on the CRT chassis (i.e. the metal frame around the CRT), slide the screwdriver under the rubber anode cap with the CRT unplugged until you hit the metal connector in the metal. Rub the screwdriver on this metal connector for about 5 seconds and it will be discharged. Retrotech on Youtube has a video on how to do this. I wouldn't say you need $80 electrical gloves to do this but at least wear a rubber or leather glove or both and only use one hand. Retrotech actually has quite a few videos on how to work on CRTs.
&nbsp;
Overall, doing basic things like replacing capacitors in CRTs isn't that hard, you just have to spend the time to educate yourself, be patient and it will click. If you have any questions, just ask me or anyone else on here. If you ever work on any power circuit capacitors, make sure to discharge them with a high wattage and ohm rated resistor but using insulated pliers to hold the resistor legs to the capacitor legs for about 5 seconds to discharge the cap before you remove it.
I don't care for rosin core, personally. It smells nice, but it burns, leaving scorched black particles on your joints, and it leaves an ugly (though protective) residue, which is tough to clean, especially if you leave it for a while.
I much prefer Kester No-Clean, which cleans up very easily with a drop or two of isopropanol.
This is what I use for all of my thru-hole stuff.
Surprising! That's the first good thing I've hear about the K tips! Sounds like a lot of people toss em or basically never use them after getting some chisel tips.
As for solder, I was originally going to order some off Aliexpress, but it sounds like that's a terrible idea. Kester 245 No Clean 63/37 in a 0.031" (0.8mm) sounds like a good balance for genera purpose solder. I'm afraid 0.5mm will be too narrow for soldering THT, splices, etc.
So this? https://www.amazon.com/gp/product/B00068IJOU/ref=ox_sc_act_title_1?ie=UTF8&amp;psc=1&amp;smid=AJ3PYHDIZANTK
[Soldering Iron I use] (https://www.amazon.com/dp/B07GJNKQ8W/ref=cm_sw_r_cp_apa_i_fp4PDb7MMWHSY)
[Tip Cleaner] (https://www.amazon.com/dp/B076X1NYBB/ref=cm_sw_r_cp_apa_i_.p4PDbBFGG9GA)
[Flux Core Wire] (https://www.amazon.com/dp/B00068IJPO/ref=cm_sw_r_cp_apa_i_Sr4PDb7JX44SZ)
0.6 to 0.8 mm (0.031 inch)
Can't go wrong with kester 60/40. 63/37 is slightly better but 60/40 is fine.
https://www.amazon.com/KESTER-SOLDER-32117-24-6040-0027-Diameter/dp/B00068IJPO/ref=mp_s_a_1_6?keywords=solder&amp;qid=1572723893&amp;sr=8-6
I'm using Kester solder with flux in it, is that fine? This is what I soldered my Ergodox Infinity with.
https://www.amazon.com/gp/product/B00068IJPO/ref=oh_aui_search_detailpage?ie=UTF8&amp;psc=1
Here's the solder I use :)
This, this and this should get you started.
Maybe in USA/GB.
For me, it’s $60
Edit: now $90
amazon.fr
BUT I ordered it even if it was 3x more expensive and I don’t regret that choice
Okay, so what you're saying is you do not necessarily need additional flux if you're using rosin core? Makes sense. Getting a pen sounds like a good idea here then, and will probably be much cheaper. Thanks!
I am thinking of buying these two rolls of solder:
Kester 44: 63/37 .031 diameter (For general soldering)
Kester 44: 63/37 .020 diameter (For SMD's)
& Kester 951 in a 12mL pen
Would these be suitable?
Continuing this thought process, I just got this iron and [this](
https://www.amazon.com/gp/product/B00068IJWC/ref=oh_aui_detailpage_o00_s00?ie=UTF8&amp;psc=1) solder in the mail the other day and they've treated me incredibly well. If that's out of our price range then I suggest getting only the solder and going for a cheaper iron.
A desoldering braid is the way to go. Not very reusable, but very effective and easy to use.
My WhiteFox recently started getting chatter on the R and the 2 keys, so from what I've read it seems like I need to desolder the switches and put new ones in? So for desoldering, do the Engineer SS-02 and this desoldering braid seem good, or is anything else someone might recommend for desoldering?
Also wondering for putting the new switches in, if there's any specific size or type of solder I should get?Thanks!
edit: figured out the solder, but what would be a good flux? what are the different types for and why is flux important?
Sorry I'm a little late to the conversation, but when desoldering a component, this stuff is what we use in the business for a clean removal.
Here is a short build inventory for people who may want to perform this mod in the future:
Lube and replace switches based on WFD's guides. Get two small paintbrushes and a pair of forceps or tweezers to help manipulate the components during the lubrication process. You should also whip up a couple of these guys. They make opening the switches a hell of a lot easier.
This was only my second time desoldering so I learned a lot along the way. Quality, flux-treated desoldering braid and a temperature controlled soldering iron with a chisel tip was the most reliable method I found to desolder. I used the Hakko FX888D soldering iron and station with a 2.4 mm x 14.5 mm Hakko chisel tip. I used Chemtronics' Chem-Wick desoldering braid to remove the solder from the plated through holes on the PCB. You have to take extra care when using desoldering braid not to heat up other components on the board, but with enough practice you will be a pro!
I do not know if he got you the links but here they are all on Amazon. The funniest thing is that I have it all ready for when I get enough money for this and the Hakko FX-888D.
Solder is the Kester 44
Solder sucker
Desoldering wick
Hakko cleaning tip wire station
I personally have had really shitty luck with using a solder sucker combined with cheap solder.
You might want to try using some desoldering wick - I've had decent results with this stuff. Even if you don't want to try this, you should get some anyways because there are things a pump cannot save you from.
Same but I use this for the Smokey Joe, and this for the big fires.
https://www.amazon.com/Hot-Max-500G-Propane-Torch/dp/B00282LP34/ref=pd_sim_469_14?_encoding=UTF8&amp;pd_rd_i=B00282LP34&amp;pd_rd_r=DMADQDKGYX3HFY7SJ2VT&amp;pd_rd_w=tcTSD&amp;pd_rd_wg=CRfhJ&amp;psc=1&amp;refRID=DMADQDKGYX3HFY7SJ2VT
This with plastic https://www.amazon.com/Hot-Max-500G-Propane-Torch/dp/B00282LP34/ref=mp_s_a_1_2?ie=UTF8&amp;qid=1542335405&amp;sr=8-2&amp;pi=AC_SX236_SY340_QL65&amp;keywords=roofing+torch&amp;dpPl=1&amp;dpID=3103D4nMAQL&amp;ref=plSrch
I used map for my first couple but just upgraded to a weed burner - https://www.amazon.com/gp/product/B00282LP34
https://www.amazon.com/gp/product/B00282LP34/ref=ppx_yo_dt_b_asin_title_o01_s01?ie=UTF8&psc=1&pldnSite=1
I use the Engineer SS-02 Solder Sucker. It's definitely not as good as a proper desoldering station with a vacuum pump and all but it's probably the best of the spring loaded bunch. The tip is regular silicone tube that you can buy anywhere and cut to your preference. It also comes with about two inches of the same tube so you don't need to go shopping right away (you'll need about 5mm of tube to make one nozzle for it)
solder sucker
No way to say about the Pro Micro unless tested
This is the solder I like MG Chemicals 63/37 No Clean Leaded Solder, 0.032" Diameter, 1/2 lbs Spool
These are the sockets uxcell 20 x 24 Pin DIP IC Sockets Adapters Solder Type Socket
Have fun!
yeah the one i have isn't so good. So i'm thinking of getting this guy
Nice. Yeah might just get the J-Spacers since finding o-rings is a hassle here in the UK. Out of curiosity, does the greens have a more pronounced bump or is it just heavier? I would assume the latter since the stem is similar to blues right?
Nothing too fancy -- a decent adjustable soldering iron and a high quality desoldering pump. (This part is important because the cheaper ones screwed me over the first time I desoldered). Here's what I'm talking about. For this next project I'm probably gonna invest in a stand since doing it while laying it flat kinda sucks for my neck after some time but I'll see how it goes.
Soldering Station
Solder Sucker
Just these two tools (and solder of course but I already had that laying around), a Phillips head screwdriver (to unscrew the PCB from the case), and a small flat head screwdriver (to pop the old switches out of the plate). I highly doubt you’ll break something though. Soldering/desoldering isn’t that difficult and as long as you’re careful about it you won’t mess anything up.
I also have a custom planned for my first GMK set coming at the beginning of next year! Gonna throw some 67g Zealios or Zilents in it (haven’t decided yet).
Are those cheap vacuum ones any good?
I've been eyeing the Engineer SS-02
ok, that is pretty awesome. yeah, i was gonna say that they are able to be swapped out, and learning to solder and desolder if you don't know how to can actually be a lot of fun. if you have the money for a decent iron and desoldering pump, i'd highly recommend trying it. look for pumps like this, if you do this brand, even better. there are so, so many resources for how to do these things just by searching on the subreddit and carefully going through the wiki, it's how i've learned a lot.
I just received this one from Amazon today: Engineer SS-02 Solder Sucker https://www.amazon.com/dp/B002MJMXD4?ref=ppx_pop_mob_ap_share
It’s an upgrade from an older less functional one I had. The new one has a silicone tip so it is heat resistant. The old one was too large and unwieldy and had a plastic tip.
I'm planning on doing the same when Novelkeys restocks the Box Royals.
You're going to want a solder sucker. I've used both of these with great success. The first link works well on switches; I desoldered an entire TKL in under an hour today with mine. The second one works well for smaller things like LEDs and Pro Micros. It would also work for switches, but would clog up fairly quickly and might need more than one pass per joint.
https://www.amazon.com/dp/B01K72SBWY/
https://www.amazon.com/dp/B002MJMXD4/
Are tips readily available? As on my desoldering station, the tips die pretty quick - I imagine that will happen with this too. I stopped using electric ones and stations - This is the best desoldering tool https://www.amazon.co.uk/innovative-silicone-Japanese-quality-engineer/dp/B002MJMXD4/ref=sr_1_1?ie=UTF8&amp;qid=1492409686&amp;sr=8-1&amp;keywords=engineer+ss-02 bar none, I've bought pretty much all of them. Edsyn, hakko station, hakko clones etc. etc. etc.
Just bought this one. :(
https://www.amazon.com/Engineer-SS-02-Solder-Sucker/dp/B002MJMXD4/ref=sr_1_1?ie=UTF8&amp;qid=1492374703&amp;sr=8-1&amp;keywords=engineer+solder
Did you know Amazon will donate a portion of every purchase if you shop by going to smile.amazon.com instead? Over $50,000,000 has been raised for charity - all you need to do is change the URL!
Here are your smile-ified links:
https://smile.amazon.com/dp/B01712N5C4/ref=CM_SW_R_CP_APA_ZV6IZBDB771M1
https://smile.amazon.com/dp/B00FZPGDLA/ref=cm_sw_r_cp_apa_9Y6IzbHX1H6MD
https://smile.amazon.com/dp/B002MJMXD4/ref=CM_SW_R_CP_APA_W06IZBVBPKVMP
---
^^i'm ^^a ^^friendly&nbsp;bot
I think I have to pay about $30 shipping to send it back they have some sort of weird me to turn policy then I'll have to read over before sending it. I sent them an email with the video attached and they told me they will send it over to the supplier so they can review the video. It's been almost a week and I haven't heard anything back yet sometimes I think they like to run down the clock so that your return window of time draws to an end.
Ideally I would just buy a real 110v for around $150 Canadian. I'm gonna take a it now, because I'm not gonna get my money back for the de- soldering gun I can't really resell it because shipping would wont make it worth it. I can spend $50 and buy a better step-up/down voltage converter i guess. But i was trying to save some cash. I paid $90 Canadian for the de soldering gun. If I buy voltage converter it's going cost $140 do which is ultimately the price i was trying to avoid in the first place. Plus it will add another box on my bench for example this one. plus I barely will ever will use this thing for anything other than the disordering iron.
&#x200B;
I'm open to any suggestions. has anyone used an inexpensive compact 150 W step-up-transformer?. Should I just throw this disordering gun in the garbage ? and move on. I feel like if i spend $50 dollars on a disordering tool it might as well be this one Engineer SS-02 Solder Sucker ?
FR301 would make it easier. It's expensive though.
SS-02 may also be easier than a cheap solder sucker, it would be the same process though
Quick de-soldering question:
Using this fancy-feelin' Japanese solder sucker and every time I get a good suck, the the solder jams in the silicon tubing and I have to put my iron down and fish it out with a screwdriver. Is there some technique I can employ to get it out with one hand?
Yeah I have this but it would still be a lot of effort as you said. I really want to try out V2 Zealios so I might just buy a 60% PCB and some lube. Now that I think about it, maybe I should just get a hotswap pcb hmmm
To everyone having a hard time with desoldering: buy one of these or if you really want to get the slightly more expensive version
I like to add patients lots of patients! I desoldered 2 switches recently. I found the best advice one can give is take your time and don't apply to much heat for to long. Also buy a decent solder sucker otherwise, be prepared to hate life. Personally I have this one https://www.amazon.com/Tabiger-Solder-Desoldering-Sucker-Remover/dp/B0777LMVTT/ref=sr_1_4?s=hi&amp;ie=UTF8&amp;qid=1526775806&amp;sr=1-4&amp;keywords=Solder+sucker and its a step up from the one included with my 25 dollar kit. I have heard this one is amazing. I have thought about investing in it https://www.amazon.com/Engineer-SS-02-Solder-Sucker/dp/B002MJMXD4/ref=sr_1_6?s=hi&amp;ie=UTF8&amp;qid=1526775806&amp;sr=1-6&amp;keywords=Solder+sucker
I have that exact set, and it's great for soldering. For desoldering, I wasn't a huge fan of the pump or a separate solder wick I tried. This seems like a far superior version of a desoldering pump, mainly for the silicone tip to keep a tighter vacuum seal.
This is what I rock.... https://www.amazon.com/gp/product/B002MJMXD4/ref=oh_aui_detailpage_o03_s01?ie=UTF8&amp;psc=1 loving it hard!
I use the Hakko FX888D:
https://www.amazon.com/gp/product/B00AWUFVY8/
And this solder sucker:
https://www.amazon.com/gp/product/B002MJMXD4/
I heat up the solder and suck it up with the solder sucker one pin at a time.
Bought this one https://www.amazon.co.uk/gp/product/B002MJMXD4/ref=ox_sc_act_title_1_1_1?smid=A3P5ROKL5A1OLE&amp;psc=1
Engineer SS-02 Solder Sucker, got it off Amazon for $26.50 shipped.
Go for it!
I used:
Honestly the most important thing IMO is having a good solder sucker. The Engineer is pretty good. I've broken a few cheap ones and it's pretty annoying to be half-way through a project and have it break.
The Masterkeys Pro is a pretty straight forward keyboard. Fairly standard key sizes, easy to take a part (especially with a spudger). The solder they use is a pain to remove though. Just take your time and be careful not to damage the PCB like I did.
To remove the switches?
You'll have to use a Desoldering Tool/Solder Sucker such as this one
For future situations, I highly reccomend, buying this: https://www.amazon.com/MG-Chemicals-milliliters-Pneumatic-Dispensing/dp/B00425FUW2?ref_=Oct_BSellerC_10704395011_4&amp;pf_rd_p=d35cdc17-a5b5-5f92-966c-e8649e5eb85d&amp;pf_rd_s=merchandised-search-6&amp;pf_rd_t=101&amp;pf_rd_i=10704395011&amp;pf_rd_m=ATVPDKIKX0DER&amp;pf_rd_r=FT4EK0NPGCKWTQW77PJV&amp;pf_rd_r=FT4EK0NPGCKWTQW77PJV&amp;pf_rd_p=d35cdc17-a5b5-5f92-966c-e8649e5eb85d for $10 Plus this iron for $20 https://www.amazon.com/HAKKO-Soldering-electronic-board-FX511-01/dp/B0072QN66U/ref=sr_1_32?keywords=hakko&amp;qid=1564415393&amp;rnid=16310161&amp;s=hi&amp;sr=1-32
and whatever solder you can find and I swear you will become a soldering expert in no time. It all comes down to having the right flux, everything else is easy if you have the right flux.
Wish I could upvote you 1000 times. the flux needles are money too
You can absolutely FLOOD all the contacts you want to solder with flux. I wasn't joking when I said there's no such thing as too much :). I will say that you should clean up when you're done with 99% isopropyl. I don't even like to leave no-clean flux on a board (it feels sloppy).
Flux cleans the contacts you're soldering to and surface tension helps draw the solder to what you want it to stick to. It makes the process of soldering way easier. I like to keep both a pen of flux as well as a syringe full of flux in gel form, but I seem to use the gel a whole lot more: https://www.amazon.com/MG-Chemicals-8341-10ML-Clean-Syringe/dp/B00425FUW2/ref=sr_1_3?ie=UTF8&amp;qid=1523147159&amp;sr=8-3&amp;keywords=no+clean+flux&amp;dpID=210ZqIs41HL&amp;preST=_SX342_QL70_&amp;dpSrc=srch
Also, in the future if you bridge pins by accident, it's a good idea to clean the iron's tip with a wet sponge, apply some flux on the solder shorting the pins, and the "brush" it off with your tinned iron. You want to follow the direction the pins are going with your iron to sort of "wipe" it away. Keep trying this until you get the short off.
I use this stuff and clean the part with a toothbrush and alcohol after soldering:
http://www.amazon.com/MG-Chemicals-Clean-Paste-Syringe/dp/B00425FUW2
IMO You can never have too much flux, but its very common for people to not use enough.
I worked as a gaming console repair tech for a couple years and have modded probably over 100 xboxes at this point. Here's some tips I've learned.
> How can I avoid causing permanent damage to the machine?
Get a decent iron. Something $60 or more. The cheap ones from walmart and such are a waste of time and money. Spend a little bit more and you'll save time and aggravation. Get something with enough power to stay hot while you're using it. Get one that has a usable temperature control (not just a 20-watt or 40-watt switch but something that gives the temp reading in degrees). Get something that lets you change tips and get something that has small/precise tip options. A good cheaper option is the Auoye int 2900. I used that one for years before upgrading to a better one. Try to keep it hot enough to melt the solder, but not much higher. More heat = higher risk of damaging something. Use flux and use it often. I use MG Chemicals 8341 No Clean Flux Paste just about every time I solder something. Keep the tip clean. Clean it often while you're working. A lot of folks will use a wet sponge but that's not ideal (temp change can reduce lifespan of the tip). Use a brass-wire one instead like this one. Try to not over-do it with the solder. Use enough to form a secure connection, but don't use so much that there's a big blob leftover on the wire when you're done. I usually dab a small amount of solder on my iron, then add more once the tip is on/next to the spot I'm working on.
> Can this be done indoors, if a window is open?
Sure. I usually open a window and run a box fan in the window blowing air outside, plus a ceiling fan. I also wear a facemask. It helps to be conscious of your breathing. I'll take a breath in, then get over my work and tap where I need to while exhaling, and I'll to try to turn my head away from my working area when inhaling just to limit fume inhalation. Ideally, you'd have a fume extractor, but those are often expensive.
> What protective equipment do I need?
I usually wear a mask/respirator and eye shields and that's about it. I'll sometimes wear an anti-static wristband but static hasn't been a big issue in my working area.
> What's the best way to setup a hard drive?
This doesn't require soldering but I'll comment anyways. My preferred workflow is to softmod the Xbox, then do a TSOP flash, then drop in a new hard drive and use a disc like HeXen to format the drive. Your 1.6 xbox cannot be tsop-flashed, so you'll you can either install a modchip (more difficult) or just setup your new hard drive with the softmod files on it (easier). You can use the app Chimp to clone a small hard drive to a bigger one and it doesn't require a modchip to be installed. If you don't have a modchip/tsop-flash, then make sure you lock the new hard drive after you're done.
> Where would you suggest looking for a 'soldering mentor' of sorts, if need be?
Soldering isn't all that hard. I never had a mentor. I just screwed around in my room until I got the hang of it. It seems harder than it is before you actually start doing it. You just need to take your time, use tools that are good enough, use the proper temperature (not crazy high), clean your tools as you go, use flux, and try to keep a steady hand. You can look up YouTube tutorials and stuff, but I didn't. I used to teach console repair when I did it professionally a few years back and I used to teach people who had no prior experience. Once you've done it a couple times, you'll see that it's not that hard. Feel free to practice connecting wires to broken electronics you have just to get the muscle memory down.
Have you ever soldered before? It might be best to practice on another PCB. You'll need a desoldering tool like this:https://www.amazon.com/OMorc-Desoldering-Solder-Sucker-Length/dp/B01I14V4X8/ref=pd_day0_hl_469_3/134-2481876-5881468?_encoding=UTF8&pd_rd_i=B01I14V4X8&pd_rd_r=40385555-6693-11e9-bbed-57e65051719f&pd_rd_w=OpK6z&pd_rd_wg=NE4R0&pf_rd_p=ad07871c-e646-4161-82c7-5ed0d4c85b07&pf_rd_r=5VBDX2Q70628W5B650NK&psc=1&refRID=5VBDX2Q70628W5B650NKIf anyone can recommend a better one please do -- this will get the job done, but could be easier
&#x200B;
I would practice on another PCB first (anything can work, maybe an old remote you're not using -- I learned to solder on an old PS2 modding in a chip years ago -- high bar of entry working on smd pcb components). But this was my first time desoldering correctly. With the tool above it took a while and was a bit frustrating because the tool wasn't perfect. From my understanding, you're supposed to head up the solder on the pcb until you see it liquify (time depends on your soldering iron -- mine is a 15W or 30W switch, at 30W it took about 4-5 seconds), then you're supposed to put the tool directly over the melted solder and release and it should suck it all up. It sucks up what it can that's melted -- a better desoldering tool could get it all in one go. Mine didn't work that well, so I'd have to use it on an angle for a few actuations. Eventually, you'll see that the PCB hole is solder free or the legs are free enough to remove the switch.
For the really stubborn components, I'd end up having to use my switch puller and heat the switch legs a bit while pulling lightly -- not recommended: doing something like this can pull off the traces. Overall, first go took about an hour an a half just to desolder, mostly because of the meh-quality of my desoldering tool. Do not attempt this with just braid, you'll hate yourself.
&#x200B;
The Mill Max sockets work very well. When installing if you have a switch that is solder free on its legs, you can put the sockets on the switch place it on the board and solder the sockets in -- make sure you don't make the mistake I did with switches with solder on them, then heating sockets and melting the solder inside. I was able to save my mistake with the solder sucker, but it cost me a switch or two -- I bought spare MX Clears on novelkeyz.xyz ahead of time. Alternatively, you can use a toothpick to hold the inserted socket, then solder from the other side -- takes a bit of dexterity to get it right. Make sure to use only a little solder because you do not want to get any into the socket.
I have no complaints about the Mill Max sockets, they get the job done perfectly. The one thing you may want to be careful of is there are certain keys where the PCB mount hole is only half there, you can either be very careful when you solder in the socket, or just regularly solder it in, I think there are two or three of them, the default fn button is one of them I believe.
tldr:
Get a desoldering tool, do not use braid. A high-quality desoldering tool will make your life MUCH easier. Mill Max sockets can be installed using a clean switch or a toothpick. Long Live the hot-swappable Race 3.
Try one of these. Then resolder.
Remove the plastic piece if you can get it off, or snip the pins close to the plastic. Remove the pins 1 by 1, then use a solder sucker and wick to get as much off as you can.
The guide I linked for this keyboard seems to imply that diodes are necessary... or are those already installed and not needed for a switch swap? If that's the case, this is even easier. Is the soldering pump like this? https://www.amazon.com/OMorc-Desoldering-Solder-Sucker-Length/dp/B01I14V4X8/ref=sr_1_4?ie=UTF8&amp;qid=1526757800&amp;sr=8-4&amp;keywords=desoldering+pump
And yes, I looked inside the housing and the copper leaf (?) is mangled.
Not a kit, but I can throw you a couple links to what I use. These work great for me:
https://www.amazon.com/gp/product/B071S5Z1R2/
It's under $10, but I've built two numpads and two TKL boards (handwired) with it. Still running fine with no damage to the tip.
https://www.amazon.com/gp/product/B00MCKKBVE/
It's good to have one of these. If your solder isn't taking easily, this can help out a lot.
https://www.amazon.com/gp/product/B01I14V4X8
I only got this because I needed to desolder a full PCB from a case. Might be useful if you mess up and need to remove solder from somewhere.
Not really sure on this one. My dad had an extra spool that I borrowed from him. I've heard that lead-free solder can be a pain to work with so keep this in mind!
> Can you point me in the direction of a guide to fix it? Thanks for the response, also.
r/AskElectronics can help you find the problem and fix it. You will need a soldering iron and related accessories. This is what I got for myself to fix my mouse:
You will save money in the long run by fixing your stuff. Use your rights or lose them. Right to repair was first lost when consumers started tolerating proprietary batteries. Then proprietary non-replaceable batteries (NRB's). Then disposable devices. Then pre-paid charging. Then pay per charge. It keeps getting worse. The only way to stop it is to go back to the beginning and eliminate the proprietary NRB's. Before you can regain the right to repair, you first need to regain the right to open your device and put in new batteries.
There are 2 subreddits committed to ending the reign of proprietary NRB's:
Another notable subreddit with right to repair content:
You can learn more about this issue here:
> research found repair was "helping people overcome the negative logic that accompanies the abandonment of things and people" [...] relationships between people and material things tend to be reciprocal.
A few other subreddits to help you or inspire you to fix your stuff:
I got some of this to try out. I wanted the syringe type instead of a tub and brush.
If you can't get it with a Q-tip, it's nothing to worry about. Grab yourself a soldering iron on Amazon, as well as some quality solder and flux. I will link some in an edit to this comment in a few minutes. Also, screw everyone else in this thread, that is damn near the perfect amount of thermal paste.
EDIT: Here are my recommendations and reasons!
&#x200B;
SOLDERING IRONS:
Cheapo soldering iron:
&#x200B;
https://www.amazon.com/GLE2016-Soldering-Adjustable-Temperature-Different/dp/B01N413T8U/ref=sr_1_5?keywords=soldering+iron&qid=1554943755&s=gateway&sr=8-5
&#x200B;
This one will do you some good for the quick fix, although I can't speak to the longevity of the iron or its ability to melt some of the higher temperature solders that factories use.
&#x200B;
More expensive (but WAAAAAAY BETTER) iron:
&#x200B;
https://www.amazon.com/Weller-WLC100-40-Watt-Soldering-Station/dp/B000AS28UC/ref=sr_1_6?keywords=soldering+iron&qid=1554943755&s=gateway&sr=8-6
&#x200B;
This is a great soldering iron if you think electronics is something you'd like to get into. Quality replaceable tips are available, and it has a stand and comes with a cleaning sponge. I've used these, and absolutely love them. Honestly though, if this is going to be one of very few times you solder, just go for the cheap one.
&#x200B;
&#x200B;
&#x200B;
SOLDER:
&#x200B;
The cheap iron comes with some solder, and honestly you can probably get away with that for this one repair. If you decide to get the more premium iron though, here is some good solder:
&#x200B;
https://www.amazon.com/Mudder-Solder-Electrical-Soldering-0-22lbs/dp/B01B61TWGY/ref=sr_1_5?keywords=solder&qid=1554944194&s=gateway&sr=8-5
&#x200B;
OR (I've never used this particular solder but MG chemicals is a great brand)
&#x200B;
https://www.amazon.com/MG-Chemicals-Leaded-Solder-Diameter/dp/B004258YDE/ref=sr_1_2_sspa?keywords=mg+chemicals+no+clean&qid=1554944408&s=gateway&sr=8-2-spons&psc=1
&#x200B;
I usually stick to smaller diameter solders because you have a lot more control over how much you're putting onto a joint. This stuff is good, but really you just need to make sure it's lead solder because it melts a lot easier and is easier for beginners to work with.
&#x200B;
&#x200B;
&#x200B;
FLUX:
&#x200B;
If you want your joints to form and form well, you need some flux. At least coming from me, this is mandatory. Here's some good no-clean flux that you can use that will mostly evaporate off and shouldn't be much fuss to clean.
&#x200B;
https://www.amazon.com/Paste-10-milliliters-Pneumatic-Dispenser/dp/B00425FUW2/ref=sr_1_3?keywords=mg+chemicals+no+clean&qid=1554944408&s=gateway&sr=8-3
&#x200B;
&#x200B;
&#x200B;
TUTORIAL:
Although kind of slow, here's a pretty good soldering guide. This relates more to soldering electrical components, but most of the lessons remain the same.
https://www.youtube.com/watch?v=IpkkfK937mU
&#x200B;
Best of luck!
This is what I'm using, still working on my technique. The POS terminal on the sled has 4 wires soldered to it, so it doesnt look so good :P
P.S. It also doesn't help I stayed up all night building this.
I use flux on everything I solder and it helps a lot.
I bought this in 2015 and have built MANY quads and other electronics, still half of it left. A little goes a long way.
Sorry for the late reply. First of all, take all of this with a grain of salt. This is my first build, so I am by no means an expert. You should definitely look in to all this on your own rather than blindly trust my purchases.
Here are the tools I got in my Amazon order:
I hope this helps.
Yep, around 1:56. Here's an example of stuff you can get from Amazon: http://smile.amazon.com/gp/product/B00425FUW2
That solder should be just fine. The soldering iron tip should really look like this: http://bolty.net/wp-content/uploads/2010/11/tinned_tip.jpg It turns black from oxidation, and if you don't keep it clean and tinned with solder it will turn black very quickly. I don't mean rust, it's a different type of oxidation. What do you use to clean it? Wet sponge? I really like the brillo pad things: http://www.amazon.com/Aoyue-Soldering-Cleaner-sponge-needed/dp/B005C789EU/ref=sr_1_1?ie=UTF8&amp;qid=1397104627&amp;sr=8-1&amp;keywords=brass+soldering+iron+cleaner
You can get just the pads for cheaper I think but shipping will get you usually. It's possible you can buy actual cleaning scourers if they're made of the right material. If the oxidation is really bad you may have to use something a little more abrasive, but you also might need to just try a new tip.
If it didn't work initially that should tell you the method is wrong. Watch some of the videos on soldering to see what it should look like when you fully wet something with solder. The wire will wick the solder up like a sponge.
My goal is to try and get a job (I've never had one before, and as this is the summer between my 2nd and 3rd years of college, I think its about time I get one). So far I've been tracking down one at a music store. My hobby is playing and learning instruments, as well as repairing them, so the employee discount at this store would be incredibly useful to me. I've followed up several times, and just recently I called again and they said that they have me on their list. So hopefully that means I'll eventually get the job.
465
Here's something less than $5-$10
Here's something that is in the $5-$10 range.
Good luck on your goal. I took up that goal awhile back, made moderate progress and then loss sight of it in the hectic mess of schoolwork, sports, and clubs. That's not to say I'm mean now, it just means I made progress, and haven't made anymore. Hopefully I can pick that back up soon! I'm sure you'll be fine!
This: http://www.amazon.com/Stahl-Tools-Variable-Temperature-Soldering/dp/B0029N70WM/ Best cheap iron I've played with. Tips are a bit rough and seem more prone to heavy oxidation than my normal Weller ones (or maybe people just liked to crank the temp all the way up), so you probably want this too: http://www.amazon.com/Aoyue-Soldering-Cleaner-sponge-needed/dp/B005C789EU/ A sponge mostly just cleans off excess flux and solder. The brass shaving ball scrapes off oxidation really well without damaging tips.
Don't cheap out on the solder either. Buy a 1lb. spool of Kester "44" 63/37 (old school 60/40 works too), should last a normal DIY lifetime.
30 W is definitely hot enough. I have a switchable 15/30w and the 20 will cook sensitive components.
Once its hot check the tip with pliers to ensure it's screwed in snug. Cleaning with a sponge will work. If it's all crusty and black it won't transfer heat correctly. But I prefer to use copper mesh. Something like THIS
But I just use copper Chore Boy stuffed in a small sample size jelly jar.
Get a brass shavings cleaner. I don't like the wet sponge method
https://www.amazon.com/Aoyue-Soldering-Cleaner-sponge-needed/dp/B005C789EU
If you plan on taking it further than just simple mods a couple times a year, I recommend spending a little more if you can. You don't have to go crazy either. I know that a lot of people go the Hakko or Weller route, but I've been very happy with my Aoyue 9378. Here is the Aoyue 937+ which is cheaper (45w vs 60w and a couple other things). Like others have said, get some wick and grab one of these over the sponge crap.
EDIT: Oh, and pick up some flux. There are flux fans and some that use it sparingly, but just pick it up.
Also, this goes much further than just installing a battery holder, but check out Voultar's videos to watch some technique. He's also a liberal flux / No Clean user and you'll see why.
Looks like you've started down the road to learning how to make your own cables, and you need some guidance while you're practicing.
This page has a nice picture of good, bad and ugly results. Yours are not bad for a beginner but ... ugly.
This set of search results will provide lots of information. Read as much as you can.
Here's what I use for guitar cable soldering tools. The links are for explanation. You don't have to get them at Amazon. An electronics store will have them. You may decide it's less expensive to buy the patch cables. But, if you are a do it yourself type, the tools will pay for themselves.
Weller 25W iron Get some extra chisel tips. They get destroyed quickly by noobs.
Helping hands
Wire stripper
Solder sucker
Brass wool solder iron cleaner
63/37/resin core .6mm solder
Thank you for the reply, /u/naturalorange!
And I agree with the copper/brass mesh cleaner: I bought this one when I placed the order for the new iron. Bonus iron holder, too =)
I've used both the WESD51 and a few Hakko stations, they're both great. Personally I have the WESD51 because its easier for me to get tips, but either way hakko and weller and both pretty good, definitely go for the digital if you can afford it. Also I'd get a few spare tips and a tip cleaner along with some no clean flux. But I wouldn't get just a reflow, unless all you do is SMD, which you can totally do with a slightly steadier hand and an iron.
I typically go over all of the pads with a flux pen
Then for every set of pads, I solder a small amount on one side.
Then I get all of the diodes ready and with a pair of tweezers in one hand and the soldering iron in the other, I hold them in place and reheat the solder and contacts to tack them down on one side.
After they're all soldered down on one side, I put the tweezers down and grab the solder wire and solder down the remaining sides.
This build guide for the Helidox actually shows pretty well.
https://github.com/foostan/crkbd/blob/master/corne-cherry/doc/buildguide_jp.md#%E3%83%80%E3%82%A4%E3%82%AA%E3%83%BC%E3%83%89
You can, http://www.amazon.com/SRA-Soldering-Flux-Low-Solids-No-Clean/dp/B008OC0E5M/ref=sr_1_3?ie=UTF8&amp;qid=1450382622&amp;sr=8-3&amp;keywords=soldering+flux
And yes, most solder has flux as well.
Soldering is one of those tasks where it really pays off to invest a little bit more in your tools at the beginning. /u/1-11 mentioned the Weller WLC100 - I second this recommendation. I've had one for almost 8 years and it's never let me down, though I bought a nicer iron a few years ago (Aoyue 968A+) and the Weller hasn't seen much use since.
The kit you posted is probably not very high quality. I would steer away from it and spend the extra money to get something you know will perform well for years. You do want some of the things from that kit, though:
A good way to practice is to get some perf board (the tan-colored breadboard-looking PCB prototyping boards), a pack of random wires and/or resistors/capacitors, and just start soldering things in. SparkFun sells some good kits for beginner soldering, and they have a few good tutorials as well.
Always use flux, always tin your wires before soldering them to anything, and always hold the iron on the solder long enough for it to completely flow. Learn how to use solder wick and you'll be able to repair just about anything. Finally, always tin your tips before storing the iron - don't want the tips to corrode!
I'm not sure what you mean by "...more controlled way to connect each button to ground".
As far as connecting wires to pins, soldering is often the best way. A tutorial on soldering would probably be useful if you've never done it before. I recommend lead free solder, some flux, and a cheapo soldering iron with a finer chisel tip. Such as, this one. Or, something comparable. Flux: Rosin Flux. You want to make sure it's a thick rosin based flux otherwise you may have to obsessively your joint and the surrounding area.
&#x200B;
Google images:
http://slagcoin.com/joystick/pcb_diagrams/gc_diagram1.jpg
http://3.bp.blogspot.com/-Yy4Wdbp3cpM/VRYTb7T4fGI/AAAAAAAAAbU/AcAbPTgP05g/s1600/2015-03-27%2B17.22.34.jpg
http://gc-forever.com/mega/Ashen/Controller_Trimming/1.png
&#x200B;
The button work by closing the circuit to ground. Personally. I would just solder the wires to the corresponding contacts on the PCB simply because it would make trouble shooting easier on an unknown board. A daisy chain could be fine, but only if all those grounds are a common ground, but with signals I'm not sure that can be relied upon. If they aren't a common ground, linking them could lead to unexpected/undesired behavior. You could probably use a voltmeter to carefully explore if they are a common ground, and if you find that they are, your daisy chain idea would probably be fine. I would use solder and cover joints with shrink tubing.
what kind of flux do you recommend? is this good? how about what solder to use? someone said that .8mm is better than what i'm using.
bit of a newbie, but I have the same pen, and it does basically work like a paint pen requiring you to 'pump' the tip for flux to flow, which is problematic and annoying. The flux is also quite loose, I've found that I greatly prefer paste flux and a toothpick over this quick evaporating liquid that runs all over. pastier flux like this:
https://www.amazon.com/SRA-Rosin-Paste-Flux-135/dp/B008ZIV85A/ref=sr_1_3?keywords=flux+paste&qid=1572457035&s=industrial&sr=1-3
also, given your application, you may want to look into chip quik :)
Thanks for the information. This is the liquid flux I ordered. Would you recommend something different?
Kester 67/37 0.03" is what I've seen recommended before several times.
It's only slightly thinner than the 0.6mm stuff. I bought a very similar one, because I don't live in the US. It's a good thickness for keyboards. Flows nicely.
That 1lb spool is big enough to last you a lifetime if you're not doing a lot of soldering, you can get smaller quantities.
I recommend a Tekpower TP13 off Amazon. It's a cheap clone of a popular Weller design and I've had one for almost three years now that I still favor over my Hakko for some PCB work. The sponge is enough for a small amount of work but you'll eventually want to go to wire for better tip cleaning. Good solder can also make a big difference in the quality of your work; I use exclusively Kester 63/37 leaded flux core for all of my soldering work with the exception being their "no clean" formula for more sensitive work.
What solder were you using? Either rosin core or lead free? The percentage also matters. I personally use Kester 44 Rosin core solder 63/37 from amazon. I never had any issues.
I have the Weller WES51 and I really love it. I can definitely recommenced it.
Also, I recommend getting some solder tip wire cleaner, such as this one. If you plan on doing a fair amount of soldering.
I would recommend getting a fume remover:
https://www.amazon.com/Absorber-Remover-Extrator-Prevention-Soldering/dp/B07VWDN29F/ref=sr_1_39?keywords=soldering+fume+remover
As well as a tip cleaner:
https://www.amazon.com/Hakko-599B-02-Wire-type-soldering-cleaner/dp/B00FZPGDLA/
I really like my Hakko FX888D, as I like having the digital control of temperature, and it comes with a copper cleaning sponge, but that's minor -- they're similarly priced. If you're going with the Weller, you'll want to add some flux-impregnanted copper cleaning sponge and holder like this one from Hakko for 10 bucks. Nothing cleans tips better in use. Blob on a bit of solder, mash it in there for a second, tin a bit more fresh solder on, good to go.
I also have that Kester reel, and I love the stuff.
EDIT: Also, no helping hands? No ESD mat? Sure, it might put you over 150, but man are those things useful... They should be on the list for an "I want to get serious about soldering" kit.
Wet sponge drops the heat to quickly, better off using this
Soldering is a good skill to have, in general.
And if you're careful, there's not much you can screw up.
Watch a YT tutorial or two and you'll be good to go.
For tools you'll eventually want what is in this kit, but probably not that kit itself.
I bought a Weller WLC100 40 watt kit (definitely get a norrower ST2 or ST3 tip as well), a solder sucker tool (you can use desoldering wick, but the solder sucker is worth the money), a Helping Hands and 60/40 rosin-core solder.
In addition, I like using tip tinner, a wire tip cleaner like this because I found that using a wet sponge reduced the tip temperature too much.
Also, solder fumes are not great so only do this is in a well-ventilated area. I like to use a small fan to blow the fumes away from my face.
The only thing you'll need to do is desolder/clip the existing swtich and wire up the replacement. You don't have to mess with the pots or caps unless you want to.
Phostenix Tele diagram page.
edit: fixed solder type
Yep. All good stuff here. On the note of equipment I'd add that the hakko tip cleaners are way better than a sponge imo. You just jab the tip in a few times and it looks good as new. Also it would be a good idea to pick up a narrow chisel point tip and some ceramic tweezers for doing the surface mount diodes. Of course if op is on a tight budget and doesn't solder often then all that is excessive.
My business partner and I just started making our own cables in December. We use Switchcraft connectors (personal preference) and Canare Star Quad cable. It hasn't been too hard to learn on star quad. We use a Weller WES51 which is around $85.
Also recommend a brass sponge and this helping hands tool if you have the budget for it.
EDIT: Neither one of us had really soldered much before, but we did have someone showing us how to do it. So Quad-Core might be tough if you're totally trying to teach yourself.
Will do. for some reason that [item] (https://www.amazon.co.uk/Hakko-599B-02-Solder-Cleaning-Holder/dp/B00FZPGDLA/ref=sr_1_6?ie=UTF8&amp;qid=1494242378&amp;sr=8-6&amp;keywords=hakko+tip+cleaning) is £46 in the UK. Does the hakko wire sponge have much over just some random sponge?
Loose the wet sponge and get a brass sponge/wire to clean your tips.
Hakko 599B-02 Solder Tip Cleaning Wire and Holder Hakko http://www.amazon.com/dp/B00FZPGDLA/ref=cm_sw_r_udp_awd_1MHPub0NEFXNF
I bought this one a while ago and I built a couple of boards and unsoldered over 10 boards and I’m satisfied by it. Probably are better options out there but it works and you can set your temperature with a knob which is ok.
Don’t forget to buy some tip tinner and maybe a tip cleaner like this.
Do you have a de-solder wick? Or a suction tube/bulb?
It's lit-tree-lee as easy as heating the solder and letting the wick do its job or sucking it up into the bulb.
Buy it:
https://www.amazon.com/Aven-17542-Desoldering-2-5mm-Length/dp/B017ODKIPC
https://www.amazon.com/Apex-Weller-Desoldering-Bulb-Solder-Off/dp/B00011TUZY
I like this cleaner to clean the tip of your iron:
https://www.amazon.com/Hakko-599B-02-Solder-Cleaning-Holder/dp/B00FZPGDLA/ref=pd_lpo_469_bs_img_2?_encoding=UTF8&amp;psc=1&amp;refRID=5T5GCF0MQZC3DGJ93YQ8
Learn how to do it:
https://www.youtube.com/watch?v=htrcZuK_ZsY
Do you have solder flux paste? You'll need that too.
If you don't own a soldering iron, but foresee yourself continuing down this road in the future, I implore you to buy a decent soldering iron. Getting a cheap $10 iron will just result in horrible joints and a lot of frustration.
Start off with something like the [Weller WLC100](https://www.amazon.com/Weller-WLC100-40-Watt-Soldering-Station/dp/B000AS28UC]. It's a no-frills iron, but it's quality and will serve you well. One of these little metal sponges is great addition, too. Better than using a wet sponge to clean your tip.
As for kits...I don't know off hand. Listen to the others for that advice. Just try to do something that's through-hole and not SMD for your first project.
then something like this?
http://www.amazon.com/LyonsBlue-Desoldering-Vacuum-Solder-Removal/dp/B003FHYL7I/ref=sr_1_1?ie=UTF8&amp;qid=1449426345&amp;sr=8-1&amp;keywords=soldering+vacuum
and this?
http://www.amazon.com/0-8mm-Rosin-Core-Soldering-Solder/dp/B00JR3ROV4/ref=sr_1_4?ie=UTF8&amp;qid=1449426415&amp;sr=8-4&amp;keywords=60+40+solder+tin
and this to practice on?
http://www.amazon.com/Solderable-BreadBoard-matches-tie-point-breadboards/dp/B0040Z3012/ref=sr_1_8?ie=UTF8&amp;qid=1449426442&amp;sr=8-8&amp;keywords=prototype+pcb
and this (which i saw WFD use)
http://www.amazon.com/Hakko-599B-02-Solder-Cleaning-Holder/dp/B00FZPGDLA/ref=sr_1_9?s=hi&amp;ie=UTF8&amp;qid=1449426488&amp;sr=1-9&amp;keywords=soldering
Those desoldering irons are straight up dangerous. I'd avoid at all costs. Grab a threaded solder sucker, it's much safer and works about as well.
The general consensus is that a small, conical tip works best for switches. I personally like an elbow tip for SMD soldering, but you can use the same one you're using for switches.
Your soldering station looks like a piece of shit. Buy this one instead. Set it to 4 and solder away.
You've got solder paste in your order. That won't work properly without a hot air setup. Kester 0.031" is the solder of choice for building. You can also find similar, lead-free solder on amazon, but lead free is harder to work with.
If you don't have flush cutters and ESD-safe tweezers, I recommend grabbing some. Ifixit has some for pretty cheap.
Your cleaners are bad. Get this instead. It is, again, safer than your selection.
You don't need flux, the kester solder has it in the solder already.
That kit looks pretty good, though I haven't used it. From my own experience, I would recommend a couple of optional upgrades to be thrown in. First, a brass wire type soldering iron cleaner. The sponge on stations like these is fine, but it's much easier to clean with the brass type mid-project. There are cheaper versions available, but my experience is all with the Hakko. Second, I've never had luck with those wire cutters. I've had much more luck with strippers that give separate holes for each gauge. Here's a cheap one and here's the Hakko pair I have.
Like I said, these are optional as the kit comes with basic solutions for both of these tools, but maybe something to think about for the future.
Some tips I learned the hard way:
You definitely want to get a soldering station. So something that can control the temperature of the of the iron. The reason being is the ones that just plug into the wall usually fluctuate between extremely hot and very hot which can become if you’re trying to solder next to very delicate transistors on the pcb.
I know people say you can get away with the cheapest everything but that’s usually not the case at all and sometimes dangerous to your health.
Getting good solder, tip tinner, brass sponge, flux pen, and a fan with a carbon filter will do you great things.
The fan is extremely important when your desoldering as that will give off a tonne of chemicals.
This is what I personally have
https://www.amazon.com/gp/aw/d/B00BSW69LI/ref=ya_aw_oh_bia_dp?ie=UTF8&amp;psc=1
https://www.amazon.com/gp/aw/d/B074J6R1KQ/ref=ya_aw_oh_bia_dp?ie=UTF8&amp;psc=1
https://www.amazon.com/gp/aw/d/B001W2XZOS/ref=ya_aw_oh_bia_dp?ie=UTF8&amp;psc=1
https://www.amazon.com/gp/aw/d/B00FZPGDLA/ref=ya_aw_oh_bia_dp?ie=UTF8&amp;psc=1
https://www.amazon.com/gp/aw/d/B00NS4J6BY/ref=ya_aw_oh_bia_dp?ie=UTF8&amp;psc=1
The soldering iron is overkill if you’re just using it for trains
https://www.amazon.com/gp/aw/d/B00FZPGDLA/ref=mp_s_a_1_1?ie=UTF8&amp;qid=1480774918&amp;sr=8-1&amp;pi=SY200_QL40&amp;keywords=solder+clean&amp;dpPl=1&amp;dpID=51B7RqNpe1L&amp;ref=plSrch
lol yeah sorry.
Desolder
Iron
Solder
Cool gold thing Amazon suggested
I did it with my MD Preonic, both switches and LEDs. I used the gold plated 8134-HC-8P2 and 8134-HC-5P2. They're available in various MK stores as well as component wholesalers like DigiKey.
The fit wasn't perfect, with both switches and LEDs they were a bit loose. My process was to tin each hole thoroughly, then use a solder sucker to clear the hole, leaving a thin layer of solder to make the fit tighter. Then I went through and installed the holtites, using a hot soldering iron to press them in while swiveling it back and forth. The iron was hot, but not super hot, so the solder wouldn't melt quickly. Also the iron itself should be as "dry" as possible, with no excess solder on the tip. You can use metal mesh cleaning clumps to do that, like this (just make sure to re-tin the tip regularly to avoid damaging it). Both of those are because if too much solder melts and wicks into the holtite, you've got a ruined holtite. Even if you use a solder sucker to clear the hole, the lower "prongs" of the holtite will be stuck together, so it will be difficult to impossible to get a wire through it.
Unfortunately, this means it's also pretty much impossible to secure the holtite in place by soldering it, because again the solder will wick inside. This meant that with some of my installations the holtite wasn't held firmly in place and came out along with the wire. Re-tinning the hole and reinstalling the holtite helped most of those cases, though I had to do it a few times for some.
I'd also suggest using a stiff wire of similar thickness to the led legs (even one of those will work) to "pre drill" the LED holtites after they're installed. Some of them will be fairly stiff, and using a pair of pliers to force a short length into the hole will make it easier to fit the LEDs in without bending the legs. Doing the same for the switches with a spare switch is also a good idea (just a warning - a couple of the switch holtites were so stiff they forced the switch leg to come loose, so installing the switch pushed the leg back into the switch housing. The leg can be pulled back into place with pliers, but the leg is loose after that and will be dislodged if you try to use it with holtites. The switch should still work for soldered boards or switch testers though.) This pre-drilling will loosen the holtites, and also help you catch some of the looser ones that come out when you extract the pre-drill wire.
Anyway, I consider the end result a success. I just started installing holtites on an EOTW preonic with the same process. For the MD board, I've already swapped switches once (which also meant swapping LEDs). At that time there were three LED holtites that came loose and had to be reinstalled. Still less work than desoldering and resoldering everything, and less risk to the board as well.
Tip tinner.
I personally prefer pucks, as the solid flux stays in place until you hit it with the iron. The main concern is that flux is acidic, which is why it's important to clean it off. No-clean flux is no-clean, because it's less acidic. However most types of flux will indeed, over time, eat away at your iron. Referring to you're other comment, you are correct in assuming that lead-free solder is crap, otherwise it would have replaced leaded solder a long time ago. If you're really into preserving your solder tips (like me) you might buy some tip tinner (doesn't matter whether it has lead or not). Just tin your iron with that after use, and it'll keep the tip from oxidizing, or being eaten by acidic flux.
https://hobbyking.com/en_us/soldering-station-with-adjustable-heat-range-us-warehouse.html is the best value iron IMHO. I have one I keep at the office and a ~$100 Hakko at home, and find them to be about equivalent so far.
I'd recommend picking up a cheap tip set as well. They won't last forever, but good for light use to figure out which ones work best (usually chisel tip style) and you can replace the ones you wear out with better ones.
You'll also need some solder ( or this is a lifetime supply of good stuff) and tweezers at minimum, and there's more stuff that's useful too, especially side cutters and solder wick.
37% lead.
I'm using this:
Kester 24-6337-0027 Solder Roll, Core Size 66, 63/37 Alloy, 0.031" Diameter https://www.amazon.com/dp/B0149K4JTY/ref=cm_sw_r_cp_apa_UU-QBbXSERJ3H
https://www.amazon.com/Kester-24-6337-0027-Solder-Alloy-Diameter/dp/B0149K4JTY
Don't buy anything else...
If you plan on building more than one keyboard, I would go for a more expensive soldering iron, or at least one that has a temp of ~625 F (330 C). That was the sweet spot for the solder I used, Kester's 0.031" Sn67/Pb37 (handy amazon link). Alternatively, you might be able to borrow a nice iron from someone.
https://www.amazon.com/gp/product/B0149K4JTY/ref=oh_aui_search_detailpage?ie=UTF8&amp;psc=1
This is what I use. It's super easy to use. I'm not sure but I think yours should be fine. I would ask in the Bottlehead forumr; their support is great .
This is what I use when soldering switches: https://www.amazon.com/gp/product/B0149K4JTY/ref=oh_aui_detailpage_o01_s00?ie=UTF8&amp;psc=1
63/37 is slight easier to work with, and the flux doesn't need to be cleaned. I use a smaller diameter for SMD work (I think its 0.02 diamter, but may be even smaller). When soldering switches though the smaller diameter is a hassle- you have to feed several inches into the joint before you have enough solder.
Edit- and I linked huge rolls, it'll be a long time before I need to buy more, and I solder a lot. If you can find a smaller roll it may be worth getting it instead.
https://smile.amazon.com/NTE-Electronics-SW02-10-No-Clean-Solder/dp/B0195UVWJ8/ref=sr_1_4?s=hi&amp;ie=UTF8&amp;qid=1498369574&amp;sr=1-4&amp;keywords=solder+wick
This is what I got and it works pretty well. Try adding a little more solder so the wick can get better access to what's left and take it all away.
The wires have to be disconnected, otherwise you will be measuring the parallel resistance of the speaker and the crossover board, which is different than just the speaker alone. Since parallel resistance is always less than the lowest of the separate resistances, that means the board could read 8 and your speaker could read 50 and your meter would say 6.9 measuring them together.
The sticker on the side says it's a 6 ohm, so it should measure somewhat close to that. If you get some solder wick and a solder sucker, de-soldering becomes much easier.
The backs of those tweeters do look different. Is that black part on the back the magnet, or is it a plastic cover? It makes me think maybe someone has been in these speakers before trying to figure out what was wrong with them. Although, it could be that they're just a different year and design than the other ones. Testing them will at least give you a rough idea if the voice coils are shot. You could replace them but if that doesn't fix the problem, then you've spent a lot of money for nothing. I prefer to test things and only replace the broken parts.
If you're convinced there is something wrong with these speakers, and you can't find anything wrong with the tweeters, then I think you may have no choice but to dig into the crossover board. It's the most likely culprit. The nice thing is, caps are not all that expensive, they're just a lot of work.
On the high end stuff, sometimes the crossover is integrated with the wire hookups, so you unscrew that from the back and pull it out. But if these don't have anything like that, you might have to take out the woofer. Make sure you save all the stuffing and put it back when you're done. Either way, there should be a way to access the board, usually either through the back or the woofer hole if the cabinet is glued together.
Still, make sure you double check everything upstream before you tear these speakers apart. This really sounds like an amp or a source problem.
I can dig it! I originally had this one but it was crap. It looks like yours is similar. Before you buy the big desolder station (which granted, would be much better and great for future) I'd do the cheap price on a higher volume pump. Like I said, it made all the difference for me. =)
Nice! Please let me know what how it goes!
There are a number of ways to desolder, and the better ways increase in price and can hit up your pockets really hard. I personally use a desoldering braid for these small time projects, but you could always use a desoldering pump as well:
https://www.amazon.com/OMorc-Desoldering-Solder-Sucker-Length/dp/B01I14V4X8/ref=zg_bs_8107034011_1?_encoding=UTF8&amp;psc=1&amp;refRID=0SCH7RKJR6YGQEBFH5HT
You'll want to use your soldering iron to heat up the area that you want to desolder in one hand and then use the pump to suck up the solder in the other. The pump is spring loaded -- you push it down and it will click into place until you need to have it suck up the solder. You'll get it with some practice! :D
---
Alternatively I find desoldering braid personally easy:
https://www.amazon.com/gp/product/B005T8UPQC/ref=oh_aui_search_detailpage?ie=UTF8&amp;psc=1
This particular braid is very high quality and works even without any flux (though flux helps alot and I recommend it). You can simply use the braid, place it over the area and heat it up with the iron to wick up the solder. If you have some sort of flux, you can flux the tip for easier wicking.
There are also desoldering bulb suckers that heat up, allowing you to depress and suck up the solder, but results may very and the tips on those are usually poor if you are paying +/- 20$.
I'd recommend one of those pumps!
If you get the small propane torch, make sure to get the "clicker" kind that automatically light. This is the one I use.
It is SO nice to just click the button and shove the flame into the smoker and three seconds later it's lit perfectly.
http://www.amazon.com/Bernzomatic-TS4000-Trigger-Start-Torch/dp/B00008ZA09/ref=sr_1_1?s=hi&amp;ie=UTF8&amp;qid=1395417266&amp;sr=1-1&amp;keywords=propane+torch
If you want a torch that will last you for years.
http://www.amazon.com/Bernzomatic-TS4000-Trigger-Start-Torch/dp/B00008ZA09
http://www.amazon.com/Worthington-MAP-Pro-Cylinder-14-1-oz-Yellow/dp/B00826MGT2/ref=pd_sim_469_3?ie=UTF8&amp;dpID=41AuM2ahO7L&amp;dpSrc=sims&amp;preST=_AC_UL160_SR160%2C160_&amp;refRID=1NKPJB1K45ZKEDB48YNM
You probably won't find the right kind of solder offline. Just buy this.
additional parts
ribbon cable
Pro micro 3 pack
solder
Flux
Solder Wick
EDIT
In case you lose your marbles