(Part 2) Best wine making equipment according to redditors
We found 193 Reddit comments discussing the best wine making equipment. We ranked the 104 resulting products by number of redditors who mentioned them. Here are the products ranked 21-40. You can also go back to the previous section.


A true god would not be caught with plastic or even thin metal cups.
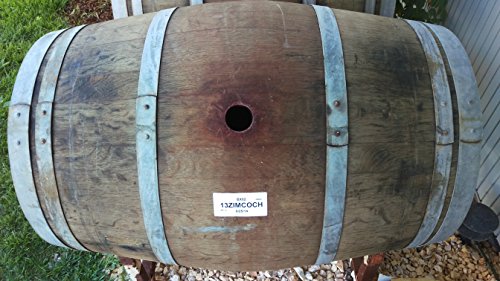
http://www.amazon.com/Wine-Barrel-Solid-Valley-Creations/dp/B004Q2AUTO/ref=sr_1_3?s=home-garden&ie=UTF8&qid=1312611271&sr=1-3
It's not difficult, but it requires a fruit press or something similar (you could probably do it with a #10 can and a very heavy weight of some sort). All you do is cook an octopus or two in almost boiling water, like 97C, until it is fully cooked and tender (about an hour) and let it cool in the same water. Take the octopus, season as desired, chop into large chunks (or don't, it's not a critical step) then wrap in cheese cloth, put it in the press, and tighten that sucker down (my first reddit pun!). Leave it at least over night to congeal, take it out of the press, cut thin sheets out of it by rolling it while you cut a thin layer with a large, sharp knife (look up daikon sheets to get the idea). Then wrap your salmon with the sheets, roll tight with plastic wrap or a sushi mat, and cut it like sashimi and brush it with some kind of shiny glaze.
For the record, I've never used that method for sushi, but during my time in Italy we made octopus carpaccio like that.
I think it’s a press. Or a juicer. It’s missing a piece.
Old ol timey version of this - https://www.amazon.com/E-C-Kraus-Table-Top-Fruit-Press/dp/B00838WJBO
Fruit press.
For the older bottles you may want to invest in a Bilame Bottle opener because old corks tend to crumble. You should decant carefully to avoid sediment and be sure to cut away all of the foil because bottles that old's foil tends to have lead
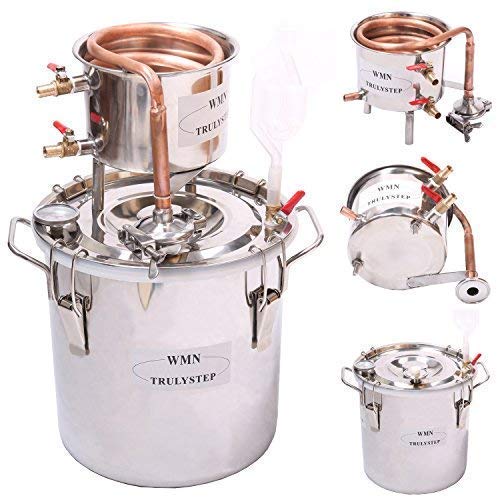
Hell, Amazon sells a simple pot still: https://www.amazon.com/dp/B01A4EVWYY
Since I actually find the links in the sidebar to be fairly unhelpful, at least for someone as detail oriented as me as a beginner, and I'm still enough of a beginner to remember how hard it was to get started, I'll go ahead and give you a start here.
Equipment needed
Equipment Wanted If you think you'll get really into this, here's some equipment that I have that I feel makes life a lot easier.
Ingredients Needed
To Brew a Mead
NOTE If you're making a 1 gallon batch, you can put your batch directly into your jug carboy and shake instead of stir. You can also use a balloon instead of an airlock. I recommend sanitizing a food-grade funnel to put all your ingredients in if that's the case. To make smaller batches - just divide everything in my recipe (except the yeast, always just use 1 packet of that regardless of the batch size) by 6.5x. For example - for a 1 gallon batch you would use 1.5 cups of pumpkin mash instead of 10.5 cups. etc etc etc.
As time goes by
they make screw top wine bottles these days. They work just fine.
https://www.amazon.com/North-Mountain-Supply-Flat-Bottomed-Screw-Top/dp/B07NDVXG1N
​
Though for a red, perhaps cork is better. My local homebrew store rents them out for $5.00/day.
​
https://www.tastingtable.com/drinks/national/screw-top-wine-vs-cork
It will start to denature at 149F. What I did was add this stuff to the mash tun after mashing for 20 minutes at 144-146F and then did an hour long rest.
Some people use it in the fermenter, some add it while transferring from mash tun to boil kettle and do a 30 minutes stand (provided you stay under 149F). Adding it to the mash was easy enough and I got good results (1.058 —> 1.000).
edit: Here's a tip! Check your local winery or meadery and ask what they do with their bottles from the tasting room. You might be able to grab a few at a time for free! It might vary by state, but in Michigan at least the establishments are unable to re-use bottles they empty in their tasting rooms. So they will end up tossing them in recycling for lack of a better option.
I've always used wine bottles previously, but just recently I've come into a large hoard of baby bellissima bottles which I've really come to love. A 750ml wine bottle is great for when you're sharing with friends, but sometimes I just want a glass or two to myself or share with my fiancee. The 375 bellissima is perfect for two glasses, and the petite bottles are beautiful. They are extremely sturdy, with thick bases, and the clear ones show color very well.
it looks like the ones pictured on amazon don't appear to have the thick sturdy bases like the ones I have. I didn't buy my bottles from amazon, and instead picked them up from my local meadery.
I got 100 for $12 on Amazon.
https://www.amazon.com/dp/B005IQW2A2/ref=cm_sw_r_cp_api_i_XxaNDbSVSACBB
I've made some slight modifications to this, mostly to make it easier to follow. I've also included steps that should be quite obvious to someone who's done any homebrewing before, but I wish someone had told me when I first started.
I'd link to the original, for the sake of attribution, but the user who posted this deleted their account not long after I wrote everything down.
This will produce a sweet fruit-mead (or melomel). WARNING this will be far more alcoholic than it tastes, and should not be consumed if you've recently taken antibiotics, or suffered gastric distress, as the yeast culture will still be alive, and will happily colonize your intestines if your gut microbiome is too fucked up.
Equipment: Most of this stuff will be a good deal cheaper at your local homebrew store, but I've included amazon links (also to the yeast).
At least 2 (3 is better, for reasons we'll get to) 1-gallon jugs (I don't recommend scaling this up), glass preferred. Add an extra jug for each additional batch. This one includes a drilled stopper and airlock
Drilled stoppers (or carboy bungs) and airlocks, non-drilled rubber stoppers.
An autosiphon and food-safe tubing.
Food-safe sanitizing solution (I recommend StarSan).
An electric kettle with temperature selector is useful, but not needed.
If you want to bottle it rather than just keeping a jug in your fridge:
Empty beer or wine bottles (just save your empties), capping or corking equipment, caps or corks, and a bottling wand.
Ingredients:
2.5 lbs (1130g) honey, clover recommended.
A cup (approximately 250ml) or so of fruit (I recommend blackberries, and I strongly recommend against cherries, other recipes have worked for me, but this yields a very medical flavor with cherries).
1 packet Lalvin EC-1118 yeast (a champagne yeast notable for its hardiness, its ability to out-compete other microorganisms, and its high alcohol tolerance).
Optional: potassium sorbate (to reduce yeast activity when our ferment is done), pectic enzyme (aka pectinase - for aesthetic purposes). Both are also available in bulk.
Process:
Day 1:
Mix sanitizing solution with clean water at specified proportions in one of your jugs, filling the jug most of the way. Stopper it, shake it. Remove stopper, set it down wet-side-up (to keep it sterile), pour the fluid to another jug. There will be foam left behind, this is fine, don't bother to rinse it or anything. At low concentrations this stuff is totally fine to drink, and won't ruin your fermentation or flavor.
Add honey to jug, all of it.
If you have a kettle, and your jug is glass, heat water to around 160F (71 Celsius), pour a volume into your jug roughly equal to the amount of honey present. Fix sterile stopper to jug. Shake until honey and water are thoroughly combined. The heat will make it FAR easier to dissolve the honey. Set aside for an hour or so while it cools. Add clean water 'til mostly full, leaving some room for fruit and headspace.
If you're missing a kettle, or using a plastic jug, this is gonna be a little harder. Fill most of the way with clean water (I recommend using a filter) leaving some room for fruit and headspace. Fix sterile stopper, shake 'til honey and water are thoroughly combined. This will take a while, and you will need to shake VERY vigorously.
At this point, you should have a jug mostly-full of combined honey and water. To this, add fruit (inspecting thoroughly for mold, don't want to add that). Then dump in a single packet of the Lalvin EC-1118 yeast, don't bother rehydrating it first or anything, it'll be fine going straight in. Add pectic enzyme if you have it (this does nothing to the flavor, it just makes the end product less cloudy). Stopper it up, shake it again. This jug now contains your "must" (pre-ferment mead).
Pour some sterilizing fluid in a bowl, put a carboy bung/drilled stopper in the bowl, with an airlock. Ensure full immersion. Let sit for a minute. Replace stopper with your bung/drilled stopper, affix airlock. Fill airlock with clean water, sanitizing fluid, or vodka. Rinse the stopper, fix it to your jug of sanitizing fluid.
Place must-jug in a dark place, I recommend a cabinet or closet.
Days 2-7:
Retrieve jug, give it a little jostle. Nothing so vigorous as to get your mead into the airlock, but enough to upset it. This is to release CO2 buildup, and to keep any part of the fruit from drying out. The foaming from the CO2 release may be very vigorous. Do this over a towel for your first batch. If the foam gets into your airlock, clean your airlock and reaffix it. Perform this jostling procedure at least once per day, more is better.
Day 8:
Final jostling, I recommend doing this in the morning.
Day 9:
let it sit, we want the sediment to settle.
Day 10: Time to get it off the sediment
Shake sterilizing fluid jug. Affix tubing to siphon. Put the siphon in the sterilizing fluid, shake the jug a little just to get the whole siphon wet. Siphon fluid into either a third container or a large bowl. This is all to sterilize both the inside and outside of your siphoning system.
Remove siphon from jug. Give it a couple pumps to empty it of any remaining fluid. Place siphon in your mead jug, leaving the end of the tubing in sterilizing fluid while you do this.
Take the jug that you just siphoned the sterilizing fluid from. Dump what fluid remains in it. Place the end of the tubing in this jug, then siphon the mead into it. Make no attempt to get the last bit of mead into your fresh container, it's mostly dead yeast and decomposing fruit.
Add potassium sorbate if you have it, stopper the jug, place it in your fridge.
Clean the jug you started in. Clean your siphon and tubing.
Day 11:
Let it sit
Day 12 or later: time to transfer again, or bottle it.
If you no longer have a jug full of sterilizing fluid, make one.
Repeat the earlier steps to sterilize the siphoning system, with a bottling wand attached to the end of the tubing if you want to bottle.
Sterilize your bottles or a clean jug, either with fluid or heat.
Siphon mead either into your bottles or jug. Stopper/cap/cork when done.
Put your jug/bottles in the fridge.
The yeast culture is still alive, and will continue to ferment. The fridge, and optional potassium sorbate, will merely slow this down. I recommend drinking any bottles within two months, to avoid a risk of bursting bottles. The mead should already be tasty at this point, but usually tastes much better after a couple more weeks.
EDIT: Fixed the formatting up a bit.
I don't see why you would need 2 coolers. Also those cylindrical coolers are more expensive than the rectangular ones by quite a bit. The stir plate is overkill even though it's "free".
Make your own mash tun! This is all stainless unlike the one you linked. Brass sucks.
52 quart cooler $39
Stainless spigot with bulkhead and bushing $29
6" stainless screen $10
1/2" stainless barb adapter $7
And some 1/2" foodsafe silicone tubing, maybe 3 feet
Assembly is super easy, just remove the plastic spigot and put on the stainless one.
https://www.amazon.com/Distiller-Moonshine-Alcohol-Stainless-Thumper/dp/B00XZ381F0
You can order ultra ferm from White Labs, or amyloglucosidase/gluco-amylase online or from Amazon, but that won't solve your problem for tomorrow :(
This is what I used. The first barrel they sent me didn't seal so they sent me another free of charge and that worked great.
https://www.amazon.com/gp/aw/d/B009K5DSJG
Here you go!
An entire Amazon search of them!
Hahah. I did recently order one of these but not sure it will help.
Cut the apples up and use something like electric cheese grater and then a press
https://www.amazon.com/gp/product/B01J5AMV98/ref=oh_aui_detailpage_o00_s00?ie=UTF8&psc=1
> Essential oil stills
Will this work?
https://www.amazon.com/Distiller-Moonshine-Alcohol-Stainless-Thumper/dp/B00XZ381F0/ref=sr_1_1?ie=UTF8&qid=1494693460&sr=8-1&keywords=essential+oil+still
this should work then, right?
http://www.amazon.com/Dickson-Homebrew-Bazooka-Kettle-Screen/dp/B00RI8R24O/ref=sr_1_3?ie=UTF8&qid=1427747921&sr=8-3&keywords=kettle+screen****
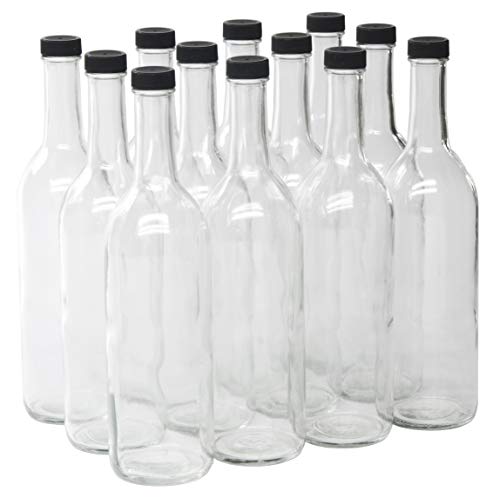
https://www.amazon.com/North-Mountain-Supply-Bordeaux-Flat-Bottomed/dp/B07NDYN3JF/ref=mp_s_a_1_3?adgrpid=61587280768&gclid=CjwKCAjwsIbpBRBNEiwAZF8-zxbTVQdPAQI0HKOqCGTfBXDLxdhdmsD3eY75XpG0urQcdEmbFEMRJhoCffUQAvD_BwE&hvadid=274687827300&hvdev=m&hvlocphy=9005871&hvnetw=g&hvpos=1t1&hvqmt=e&hvrand=3094460036716751752&hvtargid=kwd-314510425886&hydadcr=14888_10218910&keywords=750ml+glass+bottle&qid=1562538958&s=gateway&sr=8-3
My friend uses these, he inspired me to make my first mead which I got fermenting now. I plan on bottling into old scotch and bourbon bottles myself for now though.
I got them off Amazon. It’s about the only place where I can find supplies where I am.
Here’s a link.
Hi there!
Thank you soooo much for the tip. She is just getting into tinctures, glycerin extractions etc. The hydraulic tincture press is out of my price range, but would this be the manual version of that?
https://www.amazon.com/Fruit-Press-Italian-Liter-Stainless/dp/B00K6OSUDO/ref=sr_1_27?s=kitchen&ie=UTF8&qid=1480872077&sr=1-27-spons&keywords=tincture+press&psc=1&smid=A3VDBPE82S43CG
Thank you! I got my stuff of Amazon. It's pretty basic but $15 for the carboy and the airlock and yeast and nutrients, I thought it was a steal!
https://www.amazon.com/dp/B00K5Z78SC/ref=cm_sw_r_cp_apa_i_rgE1Db6491NPK
Do you need an airlock for the secondary? My impression is primary w/ airlock then you essentially transfer to smaller bottles and this is "racking?" Please correct me if I'm wrong but I'm trying to figure out what I need.
Right now I'm looking at this starter kit from Amazon + $12 for Starsan of Amazon
Is there any majorly wrong doing this for starting out?
I just ordered some of these stoppers, they should get here today or tomorrow.
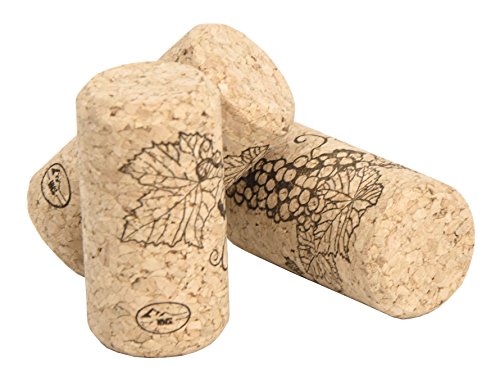
Tasting Corks-25 Count https://www.amazon.com/dp/B00B5DVMAI/ref=cm_sw_r_awd_paSVub1YGEVPZ
I'll be using them this weekend. I'll report back my experience. I've never used them so hopefully they work as well as the vacuum stoppers.
Edit: added link.
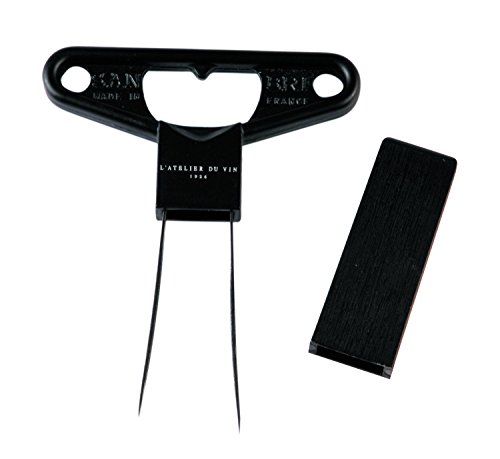
These should come in handy precisely for incidents like these.
Buy a super cheap bottle of wine, drink or dump it. Fill it with booze, put the cork back in, and then use this to seal it. If you use a dark bottle they have no way of knowing without opening your wine, which they won't do.
Try these
Amazon
I want to get into wine making / brewing. At the moment I'm thinking about getting this but other than that I don't really know what to do.
> 375 ml bottles
http://www.amazon.com/375-Clear-Bellissima-Bottles-case/dp/B0064OG1RW/ref=sr_1_2?ie=UTF8&qid=1451098516&sr=8-2&keywords=375+ml+bottles
thanks!
I use a Vinbrite gravity based filter, essentially pulls the mead into a filter body with a filter pad in there, usually takes a couple of hours for a 1 gal batch to filter since it's pretty slow but it does the job really well.
https://www.amazon.co.uk/Vinbrite-Mk3-Wine-Filter-Kit/dp/B004NXSPLG/ref=sr_1_2?keywords=vinbrite+filter&qid=1574555889&sr=8-2
This is the one I use.. It's kinda spendy to start up, $50, but then the pads are about $7-$10 a pack and I can run 6 gallons (biggest batches I make) with no noticeable slowing and no pump needed. But, I DO make sure I'm pretty clear before I filter it.
Yes you can lol
https://www.amazon.com/Suteck-Moonshine-Spirits-Distiller-Stainless/dp/B01A4EVWYY/ref=mp_s_a_1_3?keywords=liquor+still&qid=1570686802&sr=8-3