Top products from r/3Dprinting
We found 649 product mentions on r/3Dprinting. We ranked the 3,284 resulting products by number of redditors who mentioned them. Here are the top 20.
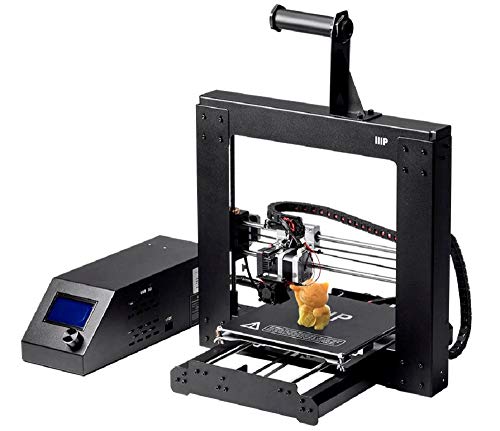
1. Monoprice Maker Select 3D Printer v2 With Large Heated (200 x 200 x180 mm) Build Plate + Free Sample PLA Filament And MicroSD Card Preloaded With Printable 3D Models.
Sentiment score: 28
Number of reviews: 54
Includes Heated Build Plate, 2 Gb Micro Sd Card and Sample PLA Filament. Compatible softwares: Such as Cure, Repeater, or Simplify 3D, the Maker Select is compatible with Windows, Mac OS X, and LinuxQuality Assurance/Technical Assistance: Live chat at Monoprice.com Mon through Fri 6am – 6pm PST ...
 Show Reddit reviews
2. uxcell 400mm x 205mm x 0.5mm Silicone Thermal Pad for CPU GPU Heatsink
Sentiment score: 26
Number of reviews: 47
Product Name : CPU Thermal Pad;Material : SiliconeSize : 40 x 20.5cm/15.7'' x 8.1'' (L*W)Thickness : 0.5mm/0.02''Weight : 103gPackage Content : 1 x CPU Thermal Pad
 Show Reddit reviews
3. BIQU Heat Bed Power Module Expansion Hot Bed MOS Tube for 3D Printer
Sentiment score: 13
Number of reviews: 39
A general add-on heated bed power expansion module for 3D printerCompletely solve the hot bed power is too large and the load current issue. It can work with the Anet A8With this addon module to your 3D printer motherboard you can lead the maximum current up to 15AUnder the premise of normal heat di...
 Show Reddit reviews
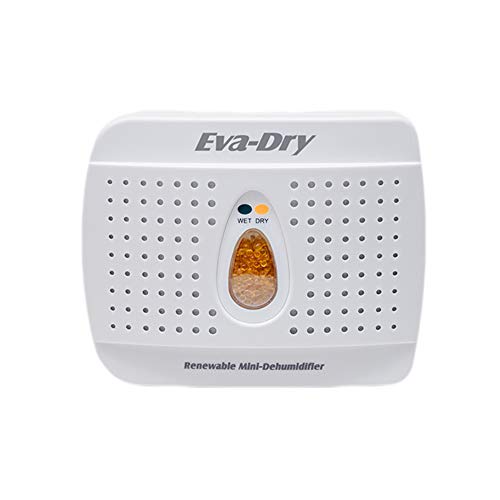
4. Eva Dry Wireless Mini Dehumidifier. Top Moisture Absorber for Small Spaces. Rechargeable & Portable. Perfect for Bedrooms, Closets, Cars, RV & Gun Safes. Removes Humidity & Helps Prevent Mold Growth
Sentiment score: 16
Number of reviews: 39
EASY TO USE: This mini dehumidifier is spill and mess free. Just hang and go! Non-toxic, child and pet safe! Your small rooms will be dry and odor free. Works for areas up to 333 cubic feetMINI DEHUMIDIFIER GOES A LONG WAY: Super dry dehumidifier unit lasts 20-30 days before recharging the silica ...
 Show Reddit reviews
5. POP VIEW Dog Bark Collar for Small, Medium, Large Dogs, Anti Bark Collar with Sound and Vibration, No Shock, Harmless & Humane
Sentiment score: 15
Number of reviews: 31
wellwellwellwellwell
 Show Reddit reviews
6. Micro Swiss All Metal Hotend with Slotted Cooling Block for Wanhao i3 w/.4mm Nozzle
Sentiment score: 17
Number of reviews: 28
Fits: Wanhao i3, Monoprice Maker Select 3D Printer v2, Cocoon Create 3D Printer.4mm Nozzle Plated with HIGH LUBRICITY WEAR RESISTANT TwinClad XT CoatingKit Includes: Thermal Barrier Tube, Plated Nozzle and Slotted Cooling blockSlotted Clamping system, No set screw to ding and damage thermal tube, Si...
 Show Reddit reviews
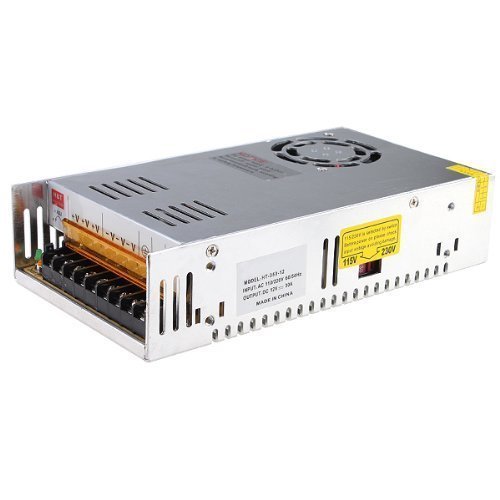
7. eTopxizu 12v 30a Dc Universal Regulated Switching Power Supply 360w for CCTV, Radio, Computer Project
Sentiment score: 13
Number of reviews: 27
IN-DOOR USE ONLY!High quality Switch Power Supply Widely used in Industrial automation, LED display, communications, etc.You can choose the input voltage (110V/240V) by switch.Smart device surge protection for Shortage Protection, Overload Protection, Over Voltage Protection
 Show Reddit reviews
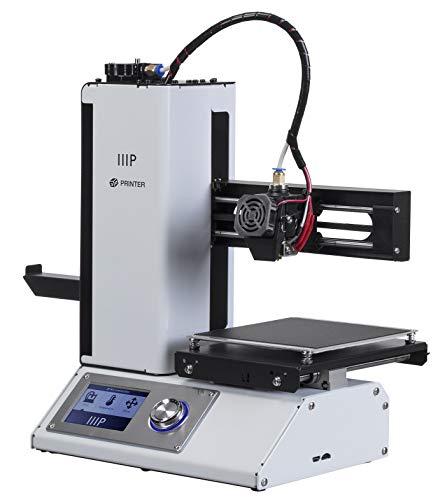
8. Monoprice Select Mini 3D Printer v2 - White With Heated (120 x 120 x 120 mm) Build Plate, Fully Assembled + Free Sample PLA Filament And MicroSD Card Preloaded With Printable 3D Models
Sentiment score: 15
Number of reviews: 26
Support for All Filament Types: The heated build plate and wide range of extruder temperatures allow this printer to work with any type of filament, from basic filaments, such as ABS and PLA, to more advanced materials, such as conductive PLA, wood and metal composites, or dissolvable PVA.Supported ...
 Show Reddit reviews
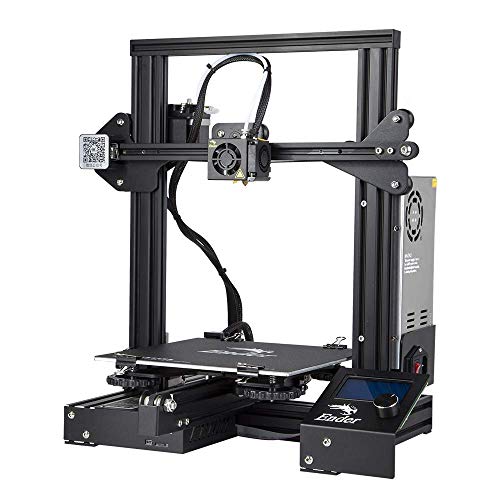
9. Official Creality Ender 3 3D Printer Fully Open Source with Resume Printing Function 220x220x250mm
Sentiment score: 18
Number of reviews: 26
Resume Print Function: Ender 3 has the ability to resume printing even after a power outage or lapse occurs.Easy and Qucik Assembly: It comes with several assembled parts, you only need about 2 hours to assemble 20 nuts well.Advanced Extruder Technology: Upgraded extruder greatly reduces plugging ri...
 Show Reddit reviews
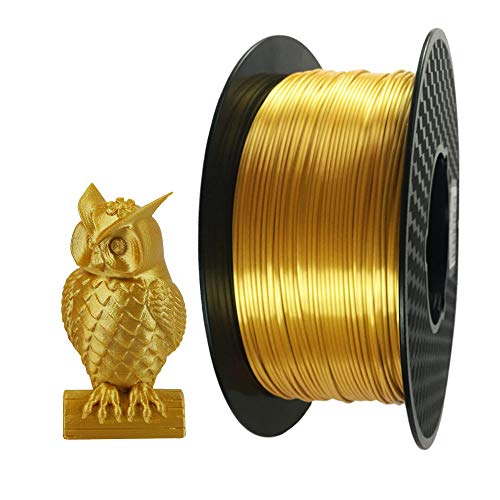
10. Silk Gold PLA Filament 1.75mm 3D Printer Filament 1 KG 2.2 LBS Spool 3D Printing Material CC3D Shine Silky Shiny Metallic Metal PLA Filament
Sentiment score: 12
Number of reviews: 23
No need polishing, the surface of the prints have a shiny metallic color, just like real gold.Highlight silk pla filament.Made of high quality with American raw materials.Easy to printing,support almost all FDM 3D printers on Market.For better printing effect,Recommended print speed:30-45mm/s.Indust...
 Show Reddit reviews
11. ZIRO 3D Printer Filament PLA 1.75mm Marble Color 1KG(2.2lbs) - White
Sentiment score: 7
Number of reviews: 23
We suggest setting the heat bed to 50℃ or use mask tape on the heat bed.The surface of printed objects looks like Marble.Suggest using a 4 mm or larger nozzle.Low print speed is recommended.Suitable for most 3D Printer and 3D Pen.Suggest print temperature:190-220Vacuumed Sealed and free Bone bag f...
 Show Reddit reviews
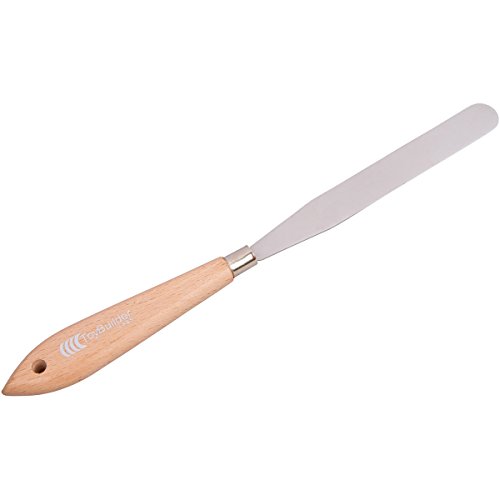
12. 3D Print Removal Tool
Sentiment score: 10
Number of reviews: 23
120 mm / 4.5 inch long flexible blade helps to reach underneath large printsRounded edge is safer and less likely to tear print bed tape.Speeds removal of parts from print bed.Useful to pop prints off the bed, and to scrape off stuck-on plastic.An essential addition to your 3D Printer Tool Kit.
 Show Reddit reviews
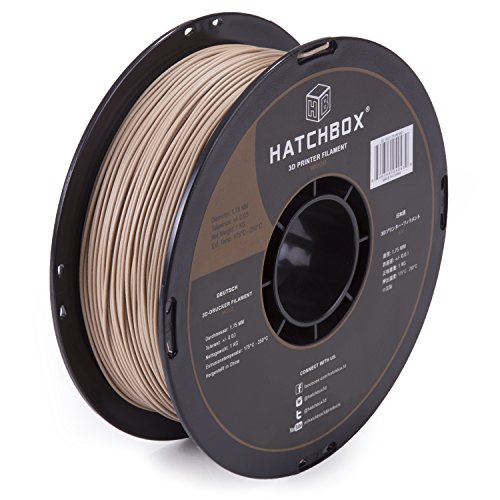
13. HATCHBOX 3D Printer Filament, Dimensional Accuracy +/- 0.03mm, 1.75 mm, 1 kg Spool, Wood
Sentiment score: 9
Number of reviews: 20
1KG (2.2 lb) SpoolWood 3D Printer Filament Vacuumed Sealed With DesiccantRecommended Extrusion/Nozzle Temperature 175°C - 220°C (347°F - 428°F)1.75mm Filament Diameter (Dimensional Accuracy +/- 0.03mm)Spool Diameter: 7.88" - Spool Width: 2.69" - Spool Hub Hole Diameter: 2.20"
 Show Reddit reviews
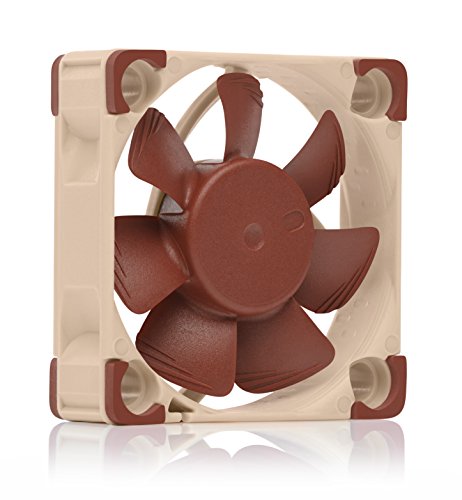
14. Noctua NF-A4x10 FLX, Premium Quiet Fan, 3-Pin (40x10mm, Brown)
Sentiment score: 15
Number of reviews: 20
Premium quiet fan, 40x40x10 mm, 12V, 3-pin Molex, 4500/3700 RPM, max. 17.9 dB(A), >150,000 h MTTFAward-winning 40x10mm A-series fan with Flow Acceleration Channels and Advanced Acoustic Optimisation frame for superior quiet cooling performanceIdeal replacement for noisy or broken 12V 4cm fans in 3D ...
 Show Reddit reviews
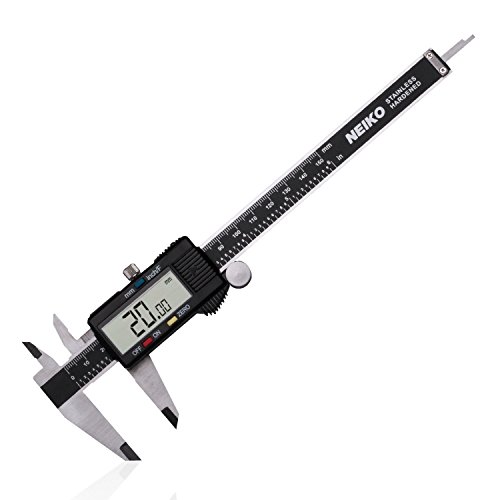
15. Neiko 01407A Electronic Digital Caliper Stainless Steel Body with Large LCD Screen | 0 - 6 Inches | Inch/Fractions/Millimeter Conversion,Silver/Black
Sentiment score: 12
Number of reviews: 19
THREE MEASURING MODES: one button quick change between three measuring modes: inch, fractions, millimeterPRECISION | ACCURACY: Measurement Range: 0 - 6” and 0 - 150mm; Resolution: 0.0005” / 1/128” / 0.01mm; Accuracy: 0.001” / 0.02mmSTAINLESS STEEL: finely polished stainless steel frame with ...
 Show Reddit reviews
16. PEI (Polyetherimide) Sheet, Opaque Natural, Standard Tolerance, ASTM D5205 PEI0113, 0.03" Thickness, 12" Width, 12" Length
Sentiment score: 11
Number of reviews: 19
PEI is a strong, rigid plastic that withstands high temperatures and offers excellent electrical insulation over a wide range of temperaturesColor is opaque NaturalMeets ASTM D5205 PEI0113 specificationsNote: The Standard Cut Tolerance on the Width and Length is (+/-) 3/16”
 Show Reddit reviews
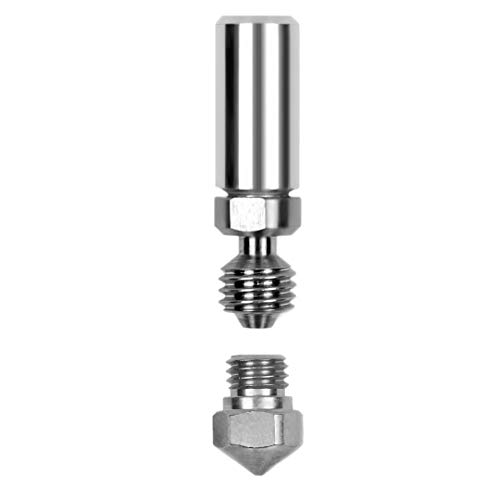
17. Micro Swiss MK10 All Metal Hotend Kit .4mm Nozzle for WANHAO, FlashForge
Sentiment score: 5
Number of reviews: 17
Fits: FlashForge Creator Pro / FlashForge Creator X / FlashForge Dreamer / QIDI TECH I / PowerSpec 3D Pro / PowerSpec 3D X / PowerSpec Ultra 3D Printer / Wanhao Duplicator 4S / Wanhao Duplicator 4X / Wanhao i3 / Monoprice Maker Select 3D Printer v2 / Cocoon Create 3DKit Includes: 1 Plated B...
 Show Reddit reviews
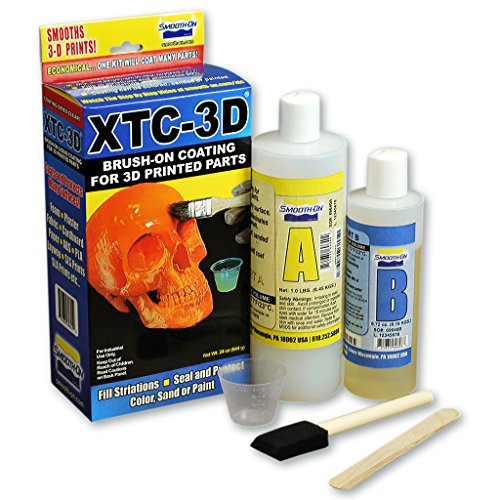
18. XTC-3D High Performance 3D Print Coating - 24oz. Unit
Sentiment score: 5
Number of reviews: 17
Epoxy Coating for 3D Printed ObjectsSmooths 3D Printed ObjectsCompatible with SLA and SLS prints.It works with PLA, ABS, Laywoo, Powder Printed Parts and other rigid media. It also can be used to coat EPS, EPDM and urethane foam as well as wood, plaster, fabric, cardboard and paper.
 Show Reddit reviews
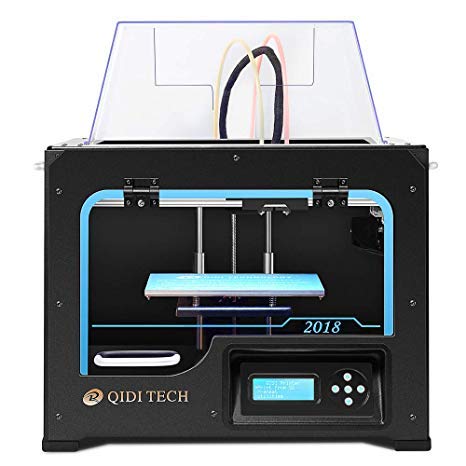
19. QIDI Technology Dual Extruder Desktop 3D Printer QIDI TECH I, Fully Metal Frame Structure, Acrylic Covers, with2 Free Filaments, Works with ABS,PLA
Sentiment score: 9
Number of reviews: 16
FDM technology;dual extruder;obtained CE,FCC,ROHS certificates;QIDI TECHNOLOGY is registered Trademark by Edify Technology INCAviation level aluminum plate guarantee its surface is completely flat and will not warp during heating processEasy to use software for simple customization of 3D modelsFully...
 Show Reddit reviews
20. 3M 468MP Adhesive Transfer Tape, 12" squares (pack of 6)
Sentiment score: 7
Number of reviews: 16
High speed processing of parts in the medical, telecommunications and electronics markets (medical components, durable labels, flexible circuits).Bonding graphic overlays for membrane switches and for bonding the complete switch to the equipment surface.Bonding metal nameplates and rating plates in ...
 Show Reddit reviews
If it helps, I bought the MonoPrice Maker Select a few months ago. I absolutely love tinkering, so it was perfect for me. I have had more fun figuring out what's going on. It took some time and effort, but I now have a solid printer (relatively speaking, as it's my first printer). :)
If you do end up going with this printer, I recommend searching for standard duplicator i3 mods. It's essentially the same, but already has some decent upgrades, such as the x-axis dampers. Here are the mods that have made a huge difference for me:
Overall, I'm super happy with the $350 + $50-$75 I've spent on the printer. It does a pretty damn good job. I've certainly learned that it requires patience, knowledge, and tweaking to create the prints you want. Take this as you will, though. It's my first printer. Still saving for something higher end. :)
A couple other nice-to-haves:
SAFETY GLASSES. Depending on how youre removing support material, those tiny peices of plastic can go flying, and I've ended up being saved by my blinking reflex more than once. Just get a cheap pair and use them. Support material will go flying towards your eyes, its not a safety cliche.
Everyone says to use a heat gun to clean up stringing(which can still occur even with near-perfect retraction settings, its just the nature of plastic.), but i prefer a butane pocket torch. Just quickly flicking the switch will vaporize the strings, without waiting for a loud heat gun to heat up, potentially warp your parts if theyre thin, and set it down to cool. Just dont hold a flame to your parts, they will ignite. A very brief(fraction of a second) flame works perfectly. If youre just using your printer for functional parts right now, dont worry about this.
A pair of curved tweezers for picking plastic off of the nozzle before/during(if youre OCD)/after a print (depending on how your cooler is setup). Side note- if your nozzle is really dirty, heat it up to ~200c and brush it with a wet qtip. Works great without scraping the nozzle with a wire brush.
X-acto blades #17 and #11. #17 is great for removing support material. Just please make sure youre not pushing the blade in the direction of your hand/leg/chest/eye/other body part.
As far as finishing prints- I've only used sandpaper, but a resin like xtc-3d is also popular.
Calipers. Get a nice pair of calipers.
As far as modding your printer.... https://www.trimcraftaviationrc.com/ has all the nuts & bolts you might need for great prices.
As far as software goes, I used to use simplify3d but after switching to slic3r prusa edition i think its amazing. Join https://www.facebook.com/groups/prusacommunity/ and get chris warcocki's pretty PLA profiles for slic3r. Really great facebook group, they'll keep you updated on all the latest mk3 improvements/news
Oh, and get some isopropyl alcohol, at least 90%. Wipe down the bed with it after every single print. Occasionally wipe with acetone, but not too often.
As far as filament goes, everyone has different recommendations. Avoid makergeeks. Great filament, horrible company. Atomic is great, but $30/kg which is a bit much for daily PLA, especially if its just going to be used for light brackets or whatever. I've been trying lots of manufacturers and i just ordered some makeshaper, i'll update in a few days if its lives up to the expectations.
Youre going to love your mk3.
I bought an i3x at the beginning of June. Some thoughts are below. The tl;dr: Not the prettiest parts, and a subpar hotend, but I wanted an aluminum frame (humidity in my state is horrid) and knew I was buying a long-term project anyways. Overall, I'm happy with my purchase. Feel free to PM me if you have specific questions or whatever.
Things I want to improve include:
I have a Maker select. It's my first and only 3D printer so my review compared to others is unreliable.
Here's a copy/paste of a review I did on it about a month ago. It's long but detailed with links:
I will give you my background before my opinions. As everyone has different goals, opinions, and experiences.
I got my printer near the end March of this year. I have something like 2500m of filament run though it, and no idea how much print time.
When I received my printer, my test prints failed and I was pissed. But this community helped improve my Cura settings and started producing usable parts. I then went nuts and printed out a BUNCH of mods. This is by far my most favorite thing. There's always something I can print to improve the quality of the prints.
THe down side is I went too far and got to a point where I couldn't produce anything of quality. So, 2 weeks of tweeking and researching later I'm printing in PETG with beautiful quality and very minimal visible layers.
My most recent project in PETG:
http://i.imgur.com/sVf7S2D.jpg?1
So, now to answer your question...
> How do you like your Maker Select?
I love it. It allowed me to buy a cheaper printer (One of the cheapest at the time @ $350) that produced amazing results. It also has upgrades you can purchase or print to improve the quality, so investing smaller amounts over time to make it better and better. I highly recommend it to anyone who is starting because it does require tweaking which forces you to learn and understand how exactly 3d printers work. A major plus was that this community has a lot of Maker Select users for support, which was a MAJOR plus for me.
As of today, I've purchased the following upgrades:
So, in the last ~3 months I've spent an additional $264... Oh god, don't tell my wife! All are totally not necessary, mind you. The only thing I'd 100% recommend you do are print out the following to mods:
DiiiCooler along with buying the 50mm blower fan. There are cheaper options out there, I just wanted it faster so I bought it through Amazon to get free 2 day shipping.
z-Brace - This is key, and will run you maybe $15 worst case scenario to get enough M4 screws and the threaded rods.
Edit: Forgot a couple more things I bought.
That's another $59, so $323... I have a problem. again, 95% of this is NOT NECESSARY. I'm just addicted to modding.
That looks great. I'm not sure what sort of cooling fan mods there are for that model printer, but you could check out Thingiverse. I once had a Printrbot and I had an improved fan shroud that I 3D printed and then added a larger fan to.
I'm not sure if the stock fan is 30mm or 40mm, but if you get a 40mm fan shroud, then it'll help with air flow on print cooling.
I like Noctua fans (they are popular with PC modders and quiet) - but if you want to save $8 or so, you can get a cheaper 40mm x 20mm size 12v fan (the 20mm thick ones will be louder than 10mm):
https://www.amazon.com/Noctua-Cooling-Blades-Bearing-NF-A4x10/dp/B009NQLT0M/ref=sr_1_fkmr0_1?s=electronics&ie=UTF8&qid=1500093919&sr=1-1-fkmr0&keywords=noctua+12v+40mm
If you mod the fan, there are some easy soldering tutorials online, and you can do something called a "lineman's splice" that makes it pretty easy. A little heatshrink or electrical tape and you can wrap up the soldered wires cleanly.
The Mini Select is a very popular printer - so mods will be constantly be made that you can 3D print and improve the printer, so check Thingiverse frequently to see what people are modding.
SILK PLA is amazing. it DOES have serious issues. the stuff is crazy strong but very very poorly sticks to itself (brittle layer adhesion) Print it hot 220c higher if the plastic behaves for you.
so thin parts? forget it. your not likely to get it off the bed without cracking it (use ultra base)
and even 3 perimeter 25% infill grid parts can "snap" if the nozzles catches an edge (broke my adalinda dragon a few times) and if you drop it it will break.
BUT the results are simply stunning.
Here are some links (gold is not in stock that I can find right now) these are direct non affiliate links. if you want to help me out goto todays3dprint.com and use any of the links their (and then these links) but you don't have to.
Silver (I have not tried this one but they all print the same)
https://www.amazon.com/Silk-Silver-Filament-Printing-Material/dp/B06XSBFB17
Copper
https://www.amazon.com/Silk-Copper-Filament-Printing-Material/dp/B0761PMW3X
if this one was prime I would be ordering one as it looks VERY nice.
These from 3d Solutech are dirt cheap and some of my favorites! I have printed with all of them except the lavendar. I have it just have not used it yet in a print.
They call them "ultra pla"
Yellow
https://www.amazon.com/3D-Solutech-Filament-Dimensional-Accuracy/dp/B01B5KACX8
sample print Drogon
https://www.youtube.com/watch?v=ImOW0N1LNSA
Blue (my favorite)
https://www.amazon.com/3D-Solutech-3DSUPLA175BLU
Sample Print Adalinda (75 hour print truly stunning)
https://www.youtube.com/watch?v=qZV0LTx-MlY&t
Green (out of stock right now)
https://www.amazon.com/3D-Solutech-3DSUPLA175GRN-Dimensional-Accuracy/dp/B01B5KPNUK
Sample Print. Aria Dragon (another truly stunning model)
https://www.youtube.com/watch?v=3g-5oyVsyRA
White
https://www.amazon.com/3D-Solutech-3DSUPLA175WHT-Dimensional-Accuracy/dp/B01B5KFRHO
Sample Print (Loubie Swan)
https://www.youtube.com/watch?v=DOavv-K-mYw
Red (really pink I have yet to find a true RED silk they all come out pink)
https://www.amazon.com/3D-Solutech-3DSUPLA175HPK-Dimensional-Accuracy/dp/B01B5LIL58
Sample Print (faceted Tree)
https://www.youtube.com/watch?v=ZbuFM0UUo2c&t=100s
Here is the GOLD I used (sample print squirrel)
https://www.youtube.com/watch?v=DOavv-K-mYw&t=420s
but its not available right now (not sure if it is coming back or not)
https://www.amazon.com/gp/product/B06XRPYXP2
again. its a PAIN IN THE ASS filament but damn are the results incredible. worth the suffering :-)
again the links are "clear" direct links. if you want to help me visit one of the links to amazon in my videos first which will help me out. or use the direct links here if not.
in general search for "ultra" or "silk" PLA.
Poly Alchemy ALSO makes some disgustingly gorgeous SILK PLA's !! check out Night Shade and Night Sky in particular to be truly awestruck with the beauty of these filaments
Here are some higher resolution images of some of these filaments
Poly Alchemy Night Shade (stunning and dark)
https://i.imgur.com/tyMb4Xn.jpg Another
https://i.imgur.com/fphprtA.jpg
Poly Alchemy Night Sky (I love this one)
https://i.imgur.com/BWv59dv.jpg Another
https://i.imgur.com/9zz93el.jpg
Poly Alchemy Bubble Gum
https://i.imgur.com/6WyaMIY.jpg
Elixr is NOT CHEAP $30 for 750 grams or something like that. (its around $50 a kilo)
in the US Printedsolid.com sells it.
3D Solutech Ultra Green
https://i.imgur.com/5n7nQZx.jpg
As you might be able to tell I REALLY like these plastics :-)
Glad I could help. (Maybe? ;)
Good turning down the accelerations and jerk I had to do the same thing and it does help.
So for the glass bed, I bought [this one] (https://www.amazon.com/gp/product/B00QQ5Q3BI/ref=oh_aui_detailpage_o09_s00?ie=UTF8&psc=1) which has been excellent for me despite some of the bad reviews. I also bought this thermal pad. It has to come from china which is kinda a pain but it delivered pretty quickly and is HUGE compared to some of the other ones on amazon. That means I can use it for other projects and have replacement pads, which is nice.
Here's a great guide for this and for most things related to this printer
I also went ahead and upgraded to a Micro Swiss nozzle which has been a really nice upgrade for me. I also upgraded the filament feed lever because I like fancy aluminium replacement parts and the plastic one didn't seem like it was going to make it in the long run.
A note about shipping: They are FAST. I hit order and within fifteen minutes my order was out their door and on it's way.
The final thing I did was purchase a shim set. At my work, we do a LOT with 3D printing. We've found that using shims to set the nozzle exactly .2mm off the bed is the best way to get the printer to excel on the first layer. If you are confused on how to use the shims to achieve this, I can take a picture.
EDIT: When using the glass bed you're going to have use Elmers Disapearing Purple School Glue to get prints to stick. It's cheap and has been giving me excellent results. I may switch to Elmers Glue-All which we were using at work for Nylon prints and Gahddamn is that stuff great for nylon prints.
EDIT: RECALIBRATE YOUR ESTEP. This fixed a lot of my infill and layer problems because now my extruder is laying down the correct amount of filament.
Congrats and welcome to the club!
> Some of the supports looked "wonky" during the print. Like, they didn't go "straight up". Is that normal or did it not have enough cooling?
Not sure what you mean. This print doesn't use supports. Do you mean the walls? Any photos that can show us what you observed?
When printing PLA, more cooling is almost always better: hard to have too much. I'm not sure what problem you observed or whether cooling would have solved it, but better cooling will definitely improve future prints.
> As you can see, it was printed on a raft. If you look cloesly, the bottom of the of the butterfly has a slight lip around it (like the first couple layers are wider than the rest. Is there anything I can do to improve upon that so it's straight the whole way up and down?
Hm, it's not as common to see elephant's foot for something printed on a raft. Usually it happens from the nozzle really squishing the first layer into the bed, or the bed being too hot.
You'll want to learn how to print without rafts ASAP, at which point you'll want to keep an eye on that. Leveling and temperature will make a difference once you're printing directly on the bed, but the best solution is usually a model that compensates for this with a chamfer. After all, really squishing that first layer helps with adhesion and finish. A chamfer allows this without the elephant's foot.
> It has a heated bed with that "sticker/tape/thing".. Does that mean I don't need to bother with painter's tape/a glue stick/hair spray?
I just print straight to my Maker Select bed (with their version of Buildtak that you show in your photos).
Some people still add tape/glue on top of it, but I haven't found it necessary. I've printed everything straight on the bed (mostly PLA, some PETG and TPU) and haven't had a problem yet with adhesion (knock on wood).
> I plan on doing the MOFSET mod and getting a glass plate as soon as I replenish my "fun" funds next month (kinda drained it all picking this thing up).
Just my opinion - some others will disagree - but I'd put money towards the MOSFET before new filament. Maybe you don't have some of the tools and would need to buy them, but the MOSFET itself is just over $10. That's less than a roll of filament and protects the integrity of your new purchase.
>However I think I have to replace the motherboard (not quite sure what the best word for the main controller board is). Why would I have to do this?
Because the melzi board in your printer (saying main print controller board / main controller board is fine) doesn't have enough memory in it for a feature like auto bed leveling. It's pretty much using all it's extra pins and available memory to run the version of repetier host on it (which is an older version before they added auto bed leveling).
>Could I not just replace the Z endstop switch, and wire the inductive sensor into the same inputs?
You could, but your firmware is still going to do what it's still doing, which is probe for X min, Y min, Z min, all only at 1 point. Auto bed leveling can be set up to probe multiple points on the print bed, then adjust the Z level in realtime while it's printing to make sure it's keeping the nozzle the same height from the print bed at all times. For example lets say your front left corner of your bed is at Z height 0, your front right corner is at Z+0.5mm, your printer will adjust the z height as it's printing left to right +0.5mm.
>If I do in fact need to replace the motherboard, what would my best option be?
Cheapest option is a ramps 1.4 board.. You can find them cheaper than amazon, but you'll at least need to get the arduino mega 2560, the ramps 1.4 shield, and the stepper drivers (A4988's are what your melzi board has). Basically, the display is optional if you want it to be cheaper, just remember you can't use your current melzi display on ramps though. That being said, changing over isn't too difficult, but it scares a lot of people away because it's pretty easy to fry a ramps board if you don't follow directions too closely, and it requires uploading firmware to the board (which means downloading arduino software, loading a sketch -- the link has a copy already preconfigured for the i3, but there's plenty of tutorials on the net for changing options over to using a Z probe and enabling auto bed leveling). It's a bit of new learning for new people.. but again, there's plenty of tutorials out there now on how to get it done. That being said, if you do learn how to do it, it opens up a lot of cool new options, you can pick from different firmwares like repetier host or marlin, configure lots of new features available in firmware (have the printer turn on LED lights when starting a print, etc..)
That all being said, if you want the easiest, cheapest fix, buy a new carriage plate for your heated bed. The one that comes on a lot of the newer I3's is prone to warping / bending and that's probably why you can't get a completely level bed. Swapping it out for a better quality one means you can forgo all that other work and have a bed that can be level with your current setup.. it's a lot less work and learning and probably a better solution that using auto bed leveling to solve a problem you'd want to fix anyway even with auto bed leveling.
I'm pretty new to this too, I bought my Ender 3 Pro around the same time as you. Quiet printing is pretty high on my list as well as being able to print high-temp exotic filaments in the long term while maintaining reliability.
First upgrades I purchased were stiffer bed springs so I would be less likely to throw the bed out of level while removing prints or working around the printer and Capricorn XS tube since it has a more consistent internal diameter, fits closer to the filament, and can work with slightly higher temps. I also picked up a pack of bowden couplers recently as I noticed the end nearest the extruder is sliding past the coupler jaws on de/retraction; don't worry about that unless it's an issue for you. That's about $30 alone since I don't have a supply shop locally and have to order those parts in bulk. I had a Pi 3B laying around unused and flashed Octoprint onto it. Highly recommended. I have a replacement Noctua hotend fan, buck converters, and 5015 blower on order to quiet the fan noise; about $32. Just replaced the Meanwell psu fan with a 60x25mm Noctua I had lying around (Note: there may be better options in the 92-120mm range to replace part of the PSU housing, but that's what I had laying around). Next upgrade coming is the SKR Mini E3 with TMC 2209 drivers ($28) to eliminate almost all of the stepper noise. Also looking into a replacement for the control board fan and some vibration isolating feet for the frame. As far as higher temp printing I haven't made a lot of progress aside from buying a titanium all-metal heat brake ($11) winch I have yet to install or inspect, and looking into enclosure and electronics relocation avenues.
Either way the mods I purchased came in at around $100 US which should quiet the printer and help with reliability. Also looking into picking up a good M3-M4 bolt kit if any exist in the US.
Here are some links to the things I picked up and will, which may be helpful if you're in the US. Mostly from Amazon.
Type | Name | Link | Price
---|---|----|----
Reliability | 8mm x 20mm yellow springs | Link | $6.98
Reliability | Capricorn XS Tubing | Link | $11.49
Reliability | PC4-M6 / PC4-M10 Pneumatic Bowden Fittings | Link | $11.99
Silence | Noctua 40mm x 10mm 3-pin fan | Link | $13.95
Silence/Various | LM2596 Adjustable Buck Converters | Link | $10.95
Silence | 24v 5015 Radial Ball Bearing Fans | Link | $7.19
Silence/Various | SKR Mini E3 w/ TMC 2209 drivers | Link | $28.81
High Temp | Titanium All-Metal Heat Brake | Link | $11.52
TOTAL: $102.88 US + Tax
Parts already purchased/ bought with printer
Type | Name | Link | Price
---|---|----|----
Reliability/High Temp | OEM Ender 3 Glass Bed | Link | $20
Reliability | Feeler Guage Set | Link | $5
Reliability | 608zz Bearings, using with this(My Remix), this, and this, though I like this design a bit better | Link | $5.98
QoL Improvement | Raspberry Pi 3B w/ Octoprint | Link | $34.46
Silence | Noctua 60mm x 25mm 3-pin fan, goes with this mod | Link | $14.95
TOTAL: $80.39 US + Tax
Future planned upgrades
https://www.amazon.com/gp/product/B01MUAMRN7/ref=oh_aui_search_detailpage?ie=UTF8&psc=1
upgraded carriage plate, should be one of the first things you do, the stock one is flimsy and prone to warping, making the print bed extremely hard to level reliably.
https://www.amazon.com/Micro-Hotend-SLOTTED-Cooling-Wanhao/dp/B01E1HANLS/ref=sr_1_fkmr3_1?ie=UTF8&qid=1497736485&sr=8-1-fkmr3&keywords=i3+plus+all+metal+hotend
all metal hotend will enable you to print at much higher temp, and increase reliability of the print head. not strictly needed, but a great upgrade if you want to print abs, petg, or other higher temp filaments.
https://www.amazon.com/dp/B01HCVJ3K2/ref=sxr_rr_xsim_1?pf_rd_m=ATVPDKIKX0DER&pf_rd_p=3008523062&pd_rd_wg=sUxZ5&pf_rd_r=W5Q7RV181EJYGTBW4YDJ&pf_rd_s=desktop-rhs-carousels&pf_rd_t=301&pd_rd_i=B01HCVJ3K2&pd_rd_w=ZPXZq&pf_rd_i=tri+gorilla&pd_rd_r=F2X8G4XDPCVTNXX6J560&ie=UTF8&qid=1497736655&sr=1
heater bed mosfet upgrade. again, not strictly needed, but also useful for high temp filaments like abs, as you can run the heated bed at higher temps. also solves (small possibility, i3 plus supposedly fixed issue) of stock mosfet burning out and catching fire.
https://www.thingiverse.com/search?q=i3+plus+cooler&sa=&dwh=295945a7ab3d0cd
print a cooling fan shroud, i use the ciiicooler, the diiicooler is great as well. preferably in abs. BIG quality improvement, the stock fan is useless.
these are some of the ones i use, and there's a lot of other things you can do, extruder gear, improved bearings, too many to count really, just a matter of how far you want to go for incremental gains. the carriage plate and the cooling fan shroud are the only strictly necessary ones though.
oh and i made my own version of this z-brace, don't have the files anymore unfortunately, but this one is fine:
https://www.thingiverse.com/thing:1653631
that's also something you should do asap.
So, I am here to post my solution. It was the hot end fan, 100%!! Responsible for 85% of the noise I was hearing. I replaced it with a Noctua A-Series Cooling Fan ( https://www.amazon.com/gp/product/B009NQLT0M/ ) and almost immediately I saw a difference. Not only when printing, but even when the machine is in idle. Thank god, I was running out of ideas.
___
I also printed these: https://www.thingiverse.com/thing:2557700 which I think help with some of the vibration on the bench (less ghosts in the prints as well). I will probably make these eventually, as I think they will work best: https://www.thingiverse.com/thing:2742599 I printed this guy also: https://www.thingiverse.com/thing:2318614 but haven't put it on yet. I am hoping that it helps with the remaining 15% vibration noise.
____
The stock fan they are using now is flawed. I can say this for sure, since I was in the lucky position to have two machine here at the same time (sending the lesser of the two back). They both had the same vibration noise issue coming from the hot end. Well, I am happy now.. since you can no longer hear the printer from every room in my house. I hope this helps someone else going through the same issue.
Congrats, just got mine 2 months ago.
SeeMeCNC forums are awesome. Start reading every new post.
Best upgrade I've done: PEI Bed
http://www.amazon.com/gp/product/B0013HKZTA
http://www.amazon.com/gp/product/B007Y7D5NQ
~$30 in upgrades; all my prints stick and pop off with ease. Also, the underside of every part is glassy and smooth. So good.
Buy "feeler gages" to assist with leveling the bed.
http://www.amazon.com/Stanley-Proto-J000AA-Master-Feeler/dp/B001HWDOK8/
My bed leveling process is kinda like this:
Let's see, what else. If you can spare the cash, I moved to Simplify3d for all my slicing needs ($100~$150 for the license). Love it. If you can't afford it, maybe you'll find a way.
Also, get ready to do a bajillion calibration runs. I mean it, don't be in a rush.
Find a nice 20mm box off thingiverse or whatever, and you're gonna want to print that repeatedly while you dial in your settings. Once that's set, move on to the hollow pyramid, or the 5mm stairs.
I seriously printed at least 20 of each of these while I dialed in my settings:
ASAP, move over to PLA. Prints so much nicer for me than ABS.
Oh, before you go to PLA, make sure you print 3x of the layer fans housings (not just 1x) and order up 2 more of the "squirrel cage" fans (centrifugal fans) from SeeMeCNC. edit: I spliced the single pair of layer-fan wires into three right at the connectors, I didn't bother running extra wire for them.
Oh, and one other big improvement I made was putting connectors in-line with the hot-end and for all the fans. This way, if I have to replace a fan or upgrade the hot-end I don't have to cut and splice wires, I can just pop it off and connectorize another new one. Here are the connectors I used:
That was probably too much info -- just take your time and try not to get frustrated while you get things all set up. It is not a plug-'n-play object, it requires care and feeding.
... oh, and have fun! Whatcha gonna print?
My Maker Select came with a small putty knife. Maybe don't need the removal tool. Definitely skip on the z brace kit. That's too much. Hardware stores have the parts you need for < $5. Glass and thermal pad are slightly cheaper on Amazon (I used https://www.amazon.com/gp/product/B007PPEW52 and https://www.amazon.com/dp/B00QQ5Q3BI).
I seem to recall seeing some issues with Inland filament, though I can only find this thread: https://www.reddit.com/r/3Dprinting/comments/4owjlc/inland_microcenter_brand_pla_issues_is_this_not/
I <3 BAMtack. It's inexpensive, prints well, doesn't have any strange odors (or much of an odor at all, for that matter), and is packaged well (vacuum bag with desiccant inside). I print mostly with their natural color PLA (https://www.amazon.com/dp/B016EFX8Y4), but I have a friend that prints with their colored PLAs all the time and he loves it.
I had a hard time with the DiiCooler mod, mainly because I still couldn't see the part printing very well. I opted for http://www.thingiverse.com/thing:1246425 instead. Uses the same fan and everything, but it's a much easier print, and it gives you complete visibility in the front.
You may also be interested in taking a look at the mod list on https://www.youtube.com/watch?v=tS8u_oqNH7A. It's pretty impressive.
Sorry for the delayed response!
I appreciate the compliment, sometimes I still get the feeling like I'm over my head with this stuff, but I still want to help however I can. Qui docet discit, as they say...
OK, if your results are coming back that far off, I would take a big step back and start with the basics. From what you've told me, my first guess is that the steps/mm for your towers is off. In your case, I would throw the assumption that your towers are all moving the same right out the window for now, and check each tower independently:
(Current steps/mm) x (Expected mm traveled) / (Actual mm traveled)
If that doesn't work, or if your steps/mm is still off, it's probably still a firmware setting, so try the following one at a time:
Don't give up! Running a 3D printer is an exercise in patience, and I find it extremely gratifying when it works! Trust me, you'll start keeping backups of your config settings, it's a hard lesson that most operators don't need to experience twice.
What you're in the middle of is exactly the kind of situation where "you have to know how to walk before you can run" applies, except in an extreme case like this, you have to learn to crawl first.
I'll help in whatever way I can! If you'd like, put your config and config-override files on pastebin, and I'll take a look to see if anything stands out!
My MS is out of commission right now due to a motherboard issue - but that's not something that's common occurence with these machines. That aside - I love my MS, it's a damn good printer for the price and works really well. Plus it's on the cheaper side of things and can be upgraded pretty easily. I would suggest getting this printer, and a glass sheet for a bed upgrade. The buildtak stuff they put on it is fine for a little bit, but the glass just produces better results in my experience. And if you want to at a later point in time, a MK10 all metal hotend nozzle upgrade (with cooling block) is also a fairly cheap and easy buy/install. Just the core machine though, no mods - is really good and easy to install and calibrate. Totally would buy another one if I could right now.
Glass bed
Nozzle upgrade
Seconding everything people have said here and want to add the following.
A glass bed with 10mil PEI from CS Hyde will do wonders for bed leveling.
Upgrade your Y plate as soon as possible, the stock one warps over enough time making bed leveling nearly impossible.
All metal hotend such as the micro swiss is amazing, no more clogged PTFE tubing, easier to clean if it does.
Z brace is a must, also print a fan cooler like the Diicooler on thingiverse. Replace the stock part cooling fan with a nice radial fan, plenty on amazon, make sure its 12v. This helps prints come out cleaner.
Yours should come with thumbwheels, if not, print some, bed leveling is easier with it.
Print some spring cups as well, keeps the springs straight and not bending when leveling the bed.
DO THE MOSFET MOD TO MAKE IT SAFE!
Watch this vid and do his printed mods https://www.youtube.com/watch?v=Tpcm4XEbP1Q&amp;t=752s&amp;list=PLyIdpN_zILcknsQzSZSiWhQ685NxkWsvD&amp;index=2
Also, stay far far FAR away from Shaxon filament! It broke my hotend, check my post history to see the red glob of death I dealt with. I have had very good luck with eSun PLA.
Links for bought parts:
Fans: [here (https://www.amazon.com/gp/product/B00MJU6JR2/ref=oh_aui_detailpage_o02_s00?ie=UTF8&amp;psc=1)]
Glass plate: [Here (https://www.amazon.com/gp/product/B07B2YLWF9/ref=oh_aui_detailpage_o03_s00?ie=UTF8&amp;psc=1)]
Hotend: [Here(https://www.amazon.com/gp/product/B01E1HANLS/ref=oh_aui_detailpage_o05_s00?ie=UTF8&amp;psc=1)]
Y plate: [Here (https://www.amazon.com/gp/product/B07B251KBS/ref=oh_aui_detailpage_o01_s00?ie=UTF8&amp;psc=1)]
MOSFET: [here(https://www.amazon.com/gp/product/B01HEQVQAK/ref=oh_aui_detailpage_o02_s00?ie=UTF8&amp;psc=1)] and wires [here(https://www.amazon.com/gp/product/B017U6PGLO/ref=oh_aui_detailpage_o02_s00?ie=UTF8&amp;psc=1)]
Sorry I can't answer all of your questions, but here's a few suggestions. Number one, a better part cooling fan. Just buy a cheap blower fan like this one, and print a radial cooling fan like this one. This should help a bit with your bottom screw holes being messy. For bigger prints this is a necessity. When it comes to getting prints off of the beds, I use a glass bed with a gluestick for adherence, and to remove prints I use this thing. Incredibly, incredibly useful. It's thin enough to get under prints without denting them, and the long design lets you move it underneath prints to free the whole this. The end is also sharp enough to scrape glue off of the printbed. Works a lot better than the scraper included with the printer.
Budget: $300 Max ( $220 - $250 Preferred )
Country: USA
I would be willing to build it from a kit - It's no problem. I don't have much experience with electronic maintenance, but I'm good w/ making stuff and my dad has experience.
I plan to print things out for fun, maybe mini figures. I would like to print things out that are larger though.
No circumstances. I just prefer fast-ish shipping if possible. Also must be a cyber-monday sale. I found some deals that fit my budget and look nice and I don't know whether or not they're good or worth. I'll link them in the post. If you could find a better one or give me opinions as to which one is the best to buy that'd be appreciated.
https://www.gearbest.com/3d-printers-3d-printer-kits/pp_1841229.html?wid=1433363&amp;lkid=17765773
https://www.gearbest.com/3d-printers-3d-printer-kits/pp_725101.html?wid=1433363&amp;lkid=17749496
https://www.aliexpress.com/item/ANYCUBIC-Formax-3D-Printer-Large-Plus-Size-FDM-Impresora-4max-Diy-Kit-Modular-Design-Nozzle-3D/32852262715.html?spm=a2g01.12110341.layer-3te59f.543.3924dfaczlvX5Z&amp;gps-id=5780592&amp;scm=1007.19881.118560.0&amp;scm_id=1007.19881.118560.0&amp;scm-url=1007.19881.118560.0&amp;pvid=e1ff7053-f1ef-45eb-b234-73ffb4b482a8
https://www.gearbest.com/3d-printers-3d-printer-kits/pp_009713679625.html?wid=1433363&amp;lkid=17749753
https://www.amazon.com/Monoprice-Printer-Filament-Preloaded-Printable/dp/B018GZBC3Y/?tag=all3dp0c-20
I've had an Anet A6 (similar) for just over 2 years now, and (after a lot of tuning) I've been able to use it for applications that require a fair bit of dimensional accuracy. I have a RAMPS 1.4 setup with Skynet, a mosfet for the bed, and that's about it. As long as you take care of it, you should be able to get some pretty darn good prints out of it. I unfortunately don't have a picture of it, but a while ago I was able to make a nice looking desk ornament that looks sort of like this with no weird artifacts popping up or even support. So, you could feasibly use your A8 for making tabletop figurines.
However, I actually prefer printers that use extruded aluminum frames like the Tarantula, Ender 3, and HE3D IE3, since its really easy to print attachments for mods that fit nicely into the t-slots of the aluminum bars. You can even get an Ender 3 on Amazon for $230. I've never owned or used one before, but I've heard from many that they work pretty well even out of the box.
Honestly it depends on your free time, level of technical competency and how much of that free time you want to spend working on a 3D printer rather than printing with it.
A kit like a FolgierTech kossel will get you much larger print volume for the money. The down side is that getting a kit running can almost be a hobby in and of itself.
If you are comfortable soldering wires and PCB components, flashing firmware to an arduino and know enough C and/or C++ to make the occasional firmware tweak yourself a kit can be a great way to go.
The down side is that it can take hours to assemble and troubleshoot.
An off the shelf printer will have a much lower price to print area ratio, but will often come ready (or nearly ready) to print.
Also, another thing to consider is support- often with a kit you're pretty much on your own unless a part arrives missing or broken. Sometimes there is a forum or the manufacturer has an e-mail address you can contact but that's about it. Most prebuilt manufacturers actually do offer some kind of warranty where they can and will repair your printer if something goes wrong.
Something like the MP Select would let you print 8" square and 7" tall parts for pretty cheap which is honestly why it's so popular. Whether or not it's big enough for you and you're OK potentially printing pieces for cosplay costumes that have to fit together like a jigsaw is up to you.
Not much really. The benefit of buying the mk2s is that you really don't need to modify or swap anything.
Here are a few things you might want in my opinion:
Thanks for the advice guys. I still haven't decided if I will go for it, but I thought it might be worth summarizing a bit of research I did in case others come across this post.
Here is a useful table (that I hope is accurate) to give you a list of chemical resistances by plastic type.
After consulting a few more chemical resistance charts through many a google search, I found that PVDF would do the job, but it seems like it may be tough to keep consistent temperature for a good print, and I would need a heated build plate. I found a relatively inexpensive (~$340) printer from Monoprice that should be able to print at the temperature I need and though seems to be pushing it, the build plate seems like it can get hot enough to print PVDF.
I've found from sellers like this one and this one that print temperature should be around 210C with a bed temperature around 120C (both costing ~$200).
I haven't decided if I will go ahead and buy it to try out. It might be nice to have the 3D printer for other things even if this doesn't work. I will look into how easily I could just fashion the basket from a block as suggested as well.
The Ender-3 and Ender-3 Pro are good budget first printers. I would advise to buy the Pro over the standard Ender 3 since it has a Mean Well UL Certified power supply, rather a generic one. If you can afford it.
Recommend to buy it from Amazon for good customer service or Banggood and Aliexpress if you want the best price.
Ender-3: https://www.amazon.com.au/Comgrow-Creality-Ender-Aluminum-220x220x250mm/dp/B07BR3F9N6/ref=sr_1_1?keywords=ender+3&qid=1573525773&sr=8-1
Ender-3 Pro: https://www.amazon.com.au/Comgrow-Creality-Printer-Upgrade-Certified/dp/B07GYRQVYV/ref=sr_1_3?keywords=ender+3+pro&qid=1573525812&sr=8-3
There are other printers in that price range such as the Anycubic i3 Mega, Anet A8 and the Monoprice Select Mini, the Ender 3 is the most popular and easily available in Australia.
> Also wanting to know other than a printer what would I need to start 3d printing. i.e. what sort of computer programs and other periferals
You will need to install a slicer on your computer, which will convert 3D models into instructions for your 3D printer. If you don't want to have your printer plugged into your computer while it is printing, your computer will need to have an sd card slot, if not purchase an adapter.
Highly recommend reading through the Getting Started guide for this subreddit.
Also here is a guide on how to build the Ender 3: https://www.youtube.com/watch?v=me8Qrwh907Q
And the Ender 3 Pro: https://www.youtube.com/watch?v=ibsOYzXduYc
Hope that helps
Looking at the price of some of the printers recommended here you aren't far off the price of the Monoprice Maker Select V2 right now. It is on sale for $280 from Monoprice (Use code MAKER15 at checkout for the discount) or Amazon right now. Free shipping from Monoprice. (not sure what country you are in so maybe that will make a difference for you on shipping)
If you can stretch your budget about $40-50 you will get a highly recommended printer (here and other sites) that is very easy to setup, has a large community/support for tweaking/upgrading later, and takes 15-20 minutes to setup out of the box (its pre-assembled, literally 6 screws to build it). Also it prints fantastic out of the box, and with a few minor upgrades it rivals printers far above its price range.
I recently got a MP Select v1 with an upgraded hot end and PEI laid on the bed for 230 shipped on eBay. It has been working great, so far. I honestly wouldn't recommend buying a used printer for your first one though (exactly what I did) as it is a gamble and mine field right now with used printers, (I got lucky thankfully and was covered by eBay if anything was wrong).
Also, depending on your requirements of build volume, I would highly recommend looking at the MP Select Mini Amazon. It has a 4x4x4" build area, comes completely pre-assembled and leveled (most of the time leveled) out of the box. Literally unpack, and print. It is highly recommended here and other places for an entry level/low budget printer. Very high quality prints from it, the only downside is the smaller build area, but that depends on each person/use case. It is portable, so trade offs I suppose.
TL;DR: The Maker Select V2 is on sale right now for about $40 more than the prices of most printers linked here, and it is an outstanding printer out of the box, and highly recommended. If you can stretch your budget a little, I would buy that. If you need to save and don't need a large build volume I recommend the MP Select Mini. Don't get caught up on one specific sale/website, keep an eye on other options as there are sales other places.
TL;DR of TL;DR:
See also
Source: Have been in the same too expensive boat for 3 years. Finally purchased a MP Select for my first printer last week and out of the box got fantastic prints with 0 knowledge/experience.
First off, check out the Wiki:
https://www.reddit.com/r/3Dprinting/wiki/index
https://www.reddit.com/r/3Dprinting/wiki/gettingstarted#wiki_what_printer_to_get
https://www.reddit.com/r/3Dprinting/comments/ckjcu6/purchase_advice_megathread_what_to_buy_who_to_buy/
The only one I have personal experience with is a Wanhao Duplicator i3. It's fine for what I paid for it three years ago, but there are better options available today.
I'm posting links from Amazon below because I'm lazy. You can probably shave off $20 or more if you do some bargain hunting. Beware of shady dealers though -- some will give you opened/used stuff, so check the reviews.
The consensus here for the best quality bottom-dollar printer seems to be the Ender 3 at around $230:
https://www.amazon.com/Comgrow-Creality-Ender-Aluminum-220x220x250mm/dp/B07BR3F9N6
The Monoprice Mini is supposed to be good too, but I would find the limited build volume annoying.
The cheapest one I would personally consider buying today is the Ender 5 at around $350. I like printers that are designed so the print bed doesn't have to shuttle the whole print back and forth with every movement in the y direction -- in general, you can get high quality prints at faster print speeds if the print bed is only moving slowly in the z direction and the hotend does all the jerky x and y movement.
https://www.amazon.com/Comgrow-Creality-Printer-Printing-Function/dp/B07KQ2MTGM
If I was going to spend a little more for some nice bonus features, I'd probably go with a Monoprice Ultimate 2 at $550:
https://www.amazon.com/dp/B07V9YBVY9/ref=sspa_dk_detail_3?psc=1&amp;pd_rd_i=B07V9YBVY9
If my budget was higher ($800-$1200), and I had a ton of free time, I'd build a Voron from parts:
http://vorondesign.com/
https://www.reddit.com/r/voroncorexy/comments/86vs8b/why_is_voron_superior_comparing_to_others_3d/
I'm not sure how much help I'll be, but I also use a Flashforge Creator Pro...
1: If you're sick of dealing with abs, just put some blue painters tape on the bed and print PLA, once you open up the thing enough and modify your settings it does PLA perfectly well.
2: PVA glue stick, (though it looks like you are already using this) helps with bed adhesion with ABS and also gives you a bit of an ablative layer for when you are scraping things back off.
3: get a print removal tool like https://smile.amazon.com/ToyBuilder-Labs-Print-Removal-Tool/dp/B00VB1U886/ref=sr_1_4?ie=UTF8&amp;qid=1494526580&amp;sr=8-4&amp;keywords=print+removal+tool to help pry things off the bed without destroying the sheet.
4: rafts, these really help with getting things off the bed, you waste quite a bit of plastic, but it's much easier to get things off.
5: bed level (and height) adjustment (and this really should be number 1) the little plastic sheet they give you to slide under the nozzle is of no real value, you may just be printing the first layer way too close to the bed, and absolutely squishing the filament into the bed. It is far more useful to just print a leveling pattern and then see where the bed needs adjustment and how it's extruding than to even bother with pulling the sheet out from under the head. I use this one http://www.thingiverse.com/thing:97151 and generally will tweak things until the strands are attached but will come off with my fingernails.
I'm at 2,000 meters of filament printed with my Maker Select, very happy with it, some tips:
-The Maker Select V2.1 is simply a re-brand and upgrade of the Wanhao Duplicator i3. You'll see that name "i3" thrown around more than Maker select, so just be aware they are nearly synonymous
-First, definitely get the blower fan upgrade: https://www.amazon.com/gp/product/B00MJU6JR2/ref=oh_aui_detailpage_o03_s00?ie=UTF8&amp;psc=1
Buy two of them to have an extra in case of death
-Print out a blower fan housing for that fan: http://www.thingiverse.com/thing:1025471
The fan upgrade provides a huge improvement in print quality
-Get the all metal hot end from micro swiss: https://www.amazon.com/Hotend-Nozzle-WANHAO-FlashForge-Builder/dp/B01C3HEQZC
-THe "Z-Brace" mod reduces vibrations from the machines movements: http://www.thingiverse.com/thing:921948
Some people swear by it, but the print time for those parts is roughly 20-24 hours total. In my 2,000+ meters of print, I haven't bothered because of the print time, but still bought the extra pieces in case I decide to do it.
-I've been mass printing tiles for d&d too, I looked at openforge and decided against that line, but went with TrueTiles instead. https://www.youtube.com/watch?v=JUecWG1W-ss
Highly recommend truetiles over the other tile lines out there - the creator is a crafting genius (look him up on youtube - "wyloch"). They take less plastic, are more versatile, faster print time.
I found that Cura 15.04.x was much better than the recommended Cura 2.5.x. My setting for churning out tiles is something like 210C nozzle, 70 mm/s, 55C bed, 0.25 resolution, 0.8 shell, 10% fill, 2mm retraction, 20mm/s retract speed, 60mm/s travel speed, no brim/raft, no supports. You should print at resolution multiples of 0.04 (because of the way the filament feed gear works), ie. 0.08, 0.12, 0.16, 0.2, etc. I'm going to switch to 0.24 resolution for tiles. I do 0.12 for small figures. The printer can reliably print resolution 0.08 right out of the box (lower the speed to ~35 mm/s) but takes a long time to print.
-The black material on the heated bed is call Buildtak - be careful not to puncture it with the supplied putty knife. Get some blunt tools such as https://www.amazon.com/gp/product/B01A81FXMK/ref=oh_aui_detailpage_o06_s00?ie=UTF8&amp;psc=1
-you don't need any tape, glue stick, hair spray, for buildtak
-Be sure not to use any acetone or alcohol on Buildtak - both will ruin it.
-Apparently you don't really even need to heat the bed with buildtak, the stuff is super effect with first layer adhesion running at room temp. I ruined my original buildtak by using the supplied putty knife to remove a print that was so super stuck to the bed because I kept it heated. Doesn't hurt to keep it heated though, but be aware heat + buildtak = much adhesion
-That slight lip on the butterfly's bottom layer is due to the settings of first layers being laid down slightly thicker than the others. Sometimes called "elephant's foot" it can also be caused by the nozzle being too close to the bed, which will smush those initial layers more than needed. Closer nozzle = more smushed first layer = better adhesion, but with buildtak you can get away with keeping the nozzle further away, and adjusting your cura settings for a first layer thickness equal to the rest of the print
Definitely buy plastic in bulk if you're planning on using that to save money and profit long term. If you have one near you, Microcenter has PLA, PETG, ABS, and many other assorted filaments in many different colors for sale starting at $14 per (2kg spools I think, been a long time since I've checked the mass amount on my spools period). Some people have had issues with the Inland filament, but I've never had a single issue. My favorite is their off color "cream" white PLA. These are usually distinguishable by a Green dot sticker on the box. Produces a really nice surface finish, and even better after sanding.
However, I also suggest you invest in a storage solution. What I've gone with:
- For storage if you have a Container Store near you (or just get something similar): https://www.containerstore.com/s/clear-weathertight-trunk/d?q=weather%20tight&productId=10024301
- For filament dehumidifying: https://www.amazon.com/Improved-Eva-dry-333-Renewable-Dehumidifier/dp/B000H0XFCS/ref=sr_1_41?keywords=rechargeable+silica&qid=1570113444&s=gateway&sr=8-41
I have filament from when I first purchased my 3D printer in 2016, and after continuously storing it in this solution since, it still prints effectively and cleanly with minimal to zero water vapor related issues.
OK good info! I can get loads of 3mm hardware easily so no worries there.
I found this hot end and cooling block in the related items: Micro Swiss All Metal Hotend with SLOTTED Cooling Block for Wanhao i3 https://www.amazon.com/dp/B01E1HANLS/ref=cm_sw_r_cp_apa_d.w0xb2R481VR is this good for the price? I'll look online but are there specific enclosure designs that work best?
Also found a laptop cooling fan that is supposed to fit, and borosilicate glass for the bed.
I'm going to start slow with PLA and see where my adventures take me but I might get a reel of ABS too, hopefully I can make RC car parts and stuff like that the some point.
I personally love the Ender 3 by Creality, it has a little of assembly but its way worth it, I would watch a few videos on youtube about it. You will also have to level the bed, this is my favorite way to do that, Chep Ender 3 Bed Level. some great filament is this.
Good luck!
Prices are without promotions. Monoprice are often on sale.
$200 Monoprice mini. Small 120mm^3, fast to out grow. Good secondary printer. Would be good if you plan to get a nicer, bigger one in the future.
https://www.amazon.com/Monoprice-Select-Printer-Heated-Filament/dp/B01FL49VZE/ref=sr_1_1?ie=UTF8&amp;qid=1479528271&amp;sr=8-1&amp;keywords=monoprice+mini
$320-400 Monoprice Maker Select/Wanhao I3. Same machine, monoprice is a rebrand and has a cheaper base price. Larger then the mini at 200mm by 200mm by 180mm. Good machine to start out with. Does have some cheap parts but is easy to work on and there is a large community to help out.
https://www.amazon.com/Monoprice-13860-Maker-Select-Printer/dp/B018GZBC3Y/ref=sr_1_2?ie=UTF8&amp;qid=1479528290&amp;sr=8-2&amp;keywords=monoprice+mini
$700-800 Prusa I3 MK2. Available in kit form or pre built. High quality machine with parts to match. Same size as the Maker Select. Prusa offers addition upgrades to keep the machine relivenent like the multi-material upgrade that changes the machine from having 1 extruder to 4. If you are able to, this may be the best machine to start with.
http://shop.prusa3d.com/en/3d-printers/59-original-prusa-i3-mk2-kit.html
Edit: added links
I have a sheet on both aluminum and glass. For for both I used 3M 468 adhesive. Works great, just be careful as it loves to stick to itself and once it's down you can't straighten it out.
I used this (Amazon link): [TapeCase 12" squares (pack of 6), Converted from 3M 468MP Adhesive Transfer Tape] (https://www.amazon.com/dp/B007Y7D5NQ/ref=cm_sw_r_other_apa_Ux1sxbDHBG4C0)
Make sure your build surface and PEI sheet are squeaky clean beforehand. Alcohol is your friend (rubbing, not drinking, though that's good too). Take your time laying down the adhesive to the PEI to minimize bubbles (there will be bubbles). Smooth it out as much as you can. You'll end up with a handful of larger bubbles still, but that's OK. Peel of the remaining sheet from the adhesive, and pop those suckers. I used an exacto knife and carefully scored the bubbles, then used a small piece of the discarded backing sheet to smooth them out. Now that that's done, carefully align and lay the stickified PEI sheet onto the aluminum bed. You only get one shot here, so make it work. What I did was lay one edge down and carefully push it down, keeping the farthest edge of the PEI up until the end. Take your time and keep bubbles to a minimum. Once your down, congrats. You now have a a super surface for printing.
Why all the stuff about bubble though? Well, hot air expands. This can cause minor warping of the PEI sheet as it warms up, and can mess up your first layers. You'll have some areas that might not go down smoothly, and others that the nozzle drags on. It's annoying. Trust me, I still need to redo my aluminum the right way.
Side note: if at all possible, I'd recommend getting a PEI sheet larger than your bed. Less work aligning it, then you can cut it to fit after putting it down. Drill holes through it afterwards, hell even counter sink it a bit. You'll have a nice looking print area afterwards!
...shit, time to order a 12in PEI sheet.
Everything he said is spot on. I have 4 cheap Chinese printers and those are all the recommended upgrades regardless of the brand.
I recommend this power supply. It can provide 50% more power and has a cooling fan.
These mosfets have worked very well for me and lowered bed heating times significantly as well as make your printer a lot safer.
Personally I haven't had any issues with the bed connector, but maybe some epoxy or hot glue would keep the wires from moving around too much.
One of the best upgrades I did was to flash Marlin onto the board as the stock firmware is kind of crappy.
This also allows the use of a Inductive proximity sensor which makes leveling the bed significantly easier.
The bearings he recommended, the Drylin ones, will make the movements of your printer a little smoother and a lot quieter.
The belts stretch. The ones from China are rarely reinforced. I'm lazy so i just tighten them every so often. But it would be worthwhile to just start with the higher end reinforced belts.
That aside, once your printer is up and running and somewhat calibrated, head over to thingiverse and search for your printer. There are thousands of upgrades available.
Good luck!
Maker Select V2 is a good beginner printer under 350 with minimal setup, and the important parts are metal. Stick away from anything with an acrylic frame.
An alternative and cheaper unit would be the Maker Select Mini which has a smaller print bed but is around a hundred dollars less.
Both of these choices are pretty good and if you choose between the 2 I would opt for the Maker Select V2 because of the larger print bed.
Common filaments like PLA, PETG, and ABS are anywhere from 15-40$ depending on the quality you buy and more exotic filaments can be $50+ dollars. Maintenance cost for the most part is pretty minimal unless you break something like the hotend.
3d models are loaded into something called a slicer which converts the model into layers so if you can get it into the slicer and it slices you can use any model.
My roommate and I got a Select v 2.1 a few weeks ago (most that ship out from any retailers are 2.1s now, you can tell because the bed leveling screws are thumbscrews instead of wingnuts).
Just to get it out of the way early, just print a filament guide. Enough said about that.
You're absolutely right about the z-brace, worlds of difference. We also did the z-extension, not quite as important but it gives you the full print height potential. The fan upgrade doesn't do much for PLA from what we've tested but it helps on overhangs for ABS and the type.
I've noticed ringing pretty recently, which is from the springs used for belt tensioning. You can print belt tensioners that use screws instead to help alleviate that.
Bed warping is an annoying issue as well, that'll have you leveling your print bed at least twice a week. We got a y-carriage and got a piece of glass cut 8" x 8.5" x 1/8" for a print surface, which you can just secure down with scotchblue tape. Glue stick on the glass helps with print adhesion.
And just some tips for the road: Do not underestimate the amount of bolts/nuts/screws you'll need. It'll take at least a week and a half to get all the mods you want done, and it will never feel like you're finished. Finding a cabinet or some kind of enclosure is nice if you need it in the same room as you do your daily stuff/sleep in (like if you're in a dorm). Print settings like temperature and speed do more for print quality than any mods you can find. You will fail most of your early prints while trying to find the right settings. The bearings used are kinda crap and they make a cringey crunching noise, but I'm convinced it isn't affecting the prints much, if at all.
Any other questions, feel free to ask. We don't have the most experience with it yet but we've gotten a feel for the ins and outs. Welcome to the club!
I have had mine for a few weeks. I could not consistently produce anything until I did the glass bed mod. To me this is the MOST important mod to do as soon as you get your printer.
A couple notes on this :
Here are the parts I used specifically for my maker select v2.1
Glass:
https://www.amazon.com/gp/product/B00QQ5Q3BI/ref=oh_aui_detailpage_o07_s00?ie=UTF8&amp;psc=1
Thermal pad:
https://www.amazon.com/gp/product/B007PPEW52/ref=oh_aui_detailpage_o04_s00?ie=UTF8&amp;psc=1
When you start this mod you will have to remove the buildtac pad that comes on the bed. This was the hardest part of the installation. I warmed up my bed and tried to peel the surface off but no matter how I went at it I ended up leaving all of the glue on the plate with only the pad coming up. Hopefully you will get lucky and at least some of the glue will come up.
After removing the pad I had a TON of glue to clean up, I used a citris based goop off solution and spent well over a half hour scraping glue. if I did it again I would have used a plastic scraper instead of the metal one that comes with the unit because the metal one put scratches on the bed. I don't think there is a functional issue with that it just looks ugly.
One thing to note about removing the glue. There is a hole in the middle of the plate and if you use a adhesive remover liquid it will get into this hole, which then drips into the the pocket created by the tape that is holding the heating element on. In other words you might want to cover the hole.
After you get all the glue off, just cute a bunch of squares out of the thermal pad. using someone else's tutorial I measured out 2 inch squares and found I had an uneven pattern when I put them on. This didn't seem to make a difference.
Make you you adjust the Z endstop. If you are facing the front of t he machine it is on your left behind the support. I adjusted mine up one notch of what appeared to be 4 available.
DiiCooler, Z braces, thumbscrews for bed leveling, and the melzi temp fix are all common mods that I can recommend. You could also get the all Metal Hot end from Micro Swiss but I have not done this myself.
As for supplies, I would recommend getting a sheet of PEI and some 3M adhesive to stick it to the print bed. PEI is a great, low maintenance print surface that prints stick to very well even without any form of fixative to improve bed adhesion. If you don't go that route I would say get some buildtak to put on the print bed with washable gluestick depending on the filament you use. Basically you don't want to be printing directly on to the bed as there is a hole where the thermistor comes through.
Other than that, just get extra filament and have fun with it.
At that price range, I've been extremely happy with my QIDI Tech printer. (http://www.amazon.com/TECHNOLOGY-3DP-QDA16-01-Extruder-Structure-Filaments/dp/B01D8M32LU/ref=sr_1_1?ie=UTF8&amp;qid=1463690261&amp;sr=8-1&amp;keywords=qidi+tech) My friends who have 3d printers are all very impressed by the quality that it prints straight out of the box.
I'll also recommend, the biggest quality upgrade I've experienced is when I paid $140 to get Simplify3D. All objects instantly came out with better quality than when I used the free Makerbot slicer.
You're right about the Z motors, but I don't think irock168 was talking about the heat bed. He was talking about the Y carriage below the bed. It's flimsy and will continually cause leveling issues. The replacement from Amazon is this. Unavailable right now on Amazon, but you may be able to get it directly from RepRap Champion.
Other than the MOSFET mod for safety, it's the best mod I've done to my Maker Select. I rarely have to level my bed unless I move the printer.
Our 3D print removal tool or any other similar long-reaching palette knife is useful to remove prints and for setting consistent nozzle gaps.
Just don't use it as a pry-bar to try to pry the entire print off all at once. Instead, incrementally separate the print off the bed. As can be seen by our Amazon reviews
A hot glue (so you'll need a gun) can rescue a lifting print from continuing to lift - if caught early, it can save a huge print job, and can come off the plastic cleanly with just a little bit of practice.
A portable butane torch is great if you want to thoroughly burn off PLA and ABS crud off nozzles - in most cases, though, just get a spare nozzle. For switching out nozzles, you'll want the appropriate nut driver or wrench to make it easier to remove the nozzle.
Looking to buy my own printer for whatever comes my way. I like to 3d print random stuff I make or things i find online from moving parts to figures. Was looking around amazon and saw this [Comgrow Creality Ender 3](Comgrow Creality Ender 3 3D Printer Aluminum DIY with Resume Print 220x220x250mm https://www.amazon.com/dp/B07BR3F9N6/ref=cm_sw_r_cp_apa_i_XxgODbQCRC3R1) but also found [this](Comgrow Creality Ender 3 Pro 3D Printer with Removable Build Surface Plate and UL Certified Power Supply 220x220x250mm https://www.amazon.com/dp/B07GYRQVYV/ref=cm_sw_r_cp_apa_i_GzgODbTQ6ZNAJ) which looks identical for a higher price. I don't see a difference. My budget would be around 300 to 400ish. I'm looking for one that'll either be enclosed or be easy enough to enclose since I'll be in a college dorm, so I don't want my roomate to be bothered by the smell if left alone. Any wireless features would be neat, but I'm fine with plugging my laptop and leaving it there. The more safety features or safer in general it is, the better.
Did you print using the generic filament they give you? I also just purchased this printer and printed the same thing but I used Hatchbox filament and it printed perfect. I wish I had a better answer but I'm also new to printing. If you haven't ordered one of these yet https://www.amazon.com/gp/product/B01C3HEQZC/ref=oh_aui_detailpage_o04_s00?ie=UTF8&amp;psc=1 order it right meow well worth the $$ and a glass bed will make your print bottoms butter smooth https://www.amazon.com/gp/product/B00QQ5Q3BI/ref=oh_aui_detailpage_o02_s00?ie=UTF8&amp;psc=1
I can't get over how amazing this filament looks. This is my 5th "gold" filament purchase and I think I've finally found a filament that actually looks like gold!
Most "gold" filaments look like bronze or worse, goldenrod (yellow). This is Zhuopu New Materials (ugh, someone tell this company about branding) "Silk Gold" PLA. Now that my second 1kg spool has been ordered I feel better about sharing it (because... They might run out... forever!):
https://www.amazon.com/gp/product/B06XRPYXP2/
IMPORTANT: I have absolutely no affiliation with this company. I simply bought a whole bunch of filaments labeled "gold" from Amazon with my own money and this one just happened to blow my mind.
I was so excited about how well this print turned out I made a video!
https://youtu.be/34v9TFZOiYs
Here's the model if too you're interested in printing your own Low-poly Rose Twist Vase:
https://www.thingiverse.com/thing:2173745
Info about this print:
To understand why I'm so excited about this filament find, here's a comparison between what most manufacturers consider "gold" filament and this filament:
http://i.imgur.com/jm0GUmc.jpg
How can BamTack! call their filament "gold"?! It's bronze!
In regards to sound, the mods I have done:
(https://www.thingiverse.com/thing:1590987)
The mods I plan to do:
This is reddit, of course I'd be happy to answer your questions!
I sourced mine from Amazon, they're running about $13 right now free shipping with prime, which is less than the ~17 I payed in Feb. I believe I bought 4 in total, one for each stepper, and one for my PS.
I did use lawsy's design, this one to be specific.
I got my bearings from Misumi USA when they had their $150 free deal going on. They were the LMU-N8's.
In that same order I ordered new rods for the x and y axis. The PSFU8 shaft specifically, two 290mm long and two 310mm long. I would recommend getting new ones no matter what as the stock ones are pretty terrible, especially if you've been using the brass and HDPE "bearings" for a while. When I had my printer all apart, I realized that the stock rods weren't even straight and were a bit oversized.
All the upgrades I've done have made my printer 10x better than it was stock, but to get that I have invested a bit into it, probably in the range of ~$200, including fans, linear bearings, bowden conversion, sealed acrylic case, and heated basalt bed. I've created parts that rival or beat parts from much nicer printers, including a uPrint and industrial stratasys at my uni.
Feel free to reply with any more questions
I was originally going to buy an ender 3 as my first 3d printer. I have zero experience but after lurking here a bit I thought I knew what to buy. However amazon currently has some good deals on some of these printers. so my options are now:
Ender 3: $229.99
Monoprice Maker Select v2: 239.99
Ender 3 pro : $259.99
Monosprice Maker Select Plus: $289.99
&#x200B;
I'm sort of leaning toward the Maker Select v2. But having no experience I'm hoping you guys will know better. I don't think building an Ender kit would be an issue, but for my first one I think Monoprices may be easier. I'm mostly looking to start with some minis and maybe randon little knick-knack type things. Although I think this may be something I get really into down the line, so as long as they're versatile I will probably build anything and everything I can :-p
Hotend replacement:
I replaced the stock hotend/PTFE tube setup with an all-metal Micro Swiss hotend ($50):Amazon link to the Micro Swiss all-metal hotend kit: https://amazon.com/gp/product/B01E1HANLS/ref=ppx_yo_dt_b_search_asin_title?ie=UTF8&psc=1
Bed leveling:
Frame Stabilization:
I printed the parts, and purchased the hardware at Home Depot for the Z-brace mod, which stabilized the printer frame:Thingiverse link for Z-brace mod for I3 Plus: https://www.thingiverse.com/thing:1653631(note the original Thingiverse link in comments, which is required for the other Z-brace parts: https://www.thingiverse.com/thing:921948)
Cooling:
I printed a Dii Cooler in PETG and replaced the stock cooler with one of those 24V "squirrel cage" fans, which provided much better cooling for all sides of my prints. Before that it really only cooled the front of prints, leaving the sides and especially the rear of prints looking pretty bad.Thingiverse link for Dii Cooler for i3 Plus: https://www.thingiverse.com/thing:1025471
Yeah I'd say bad bearing. The ones The came with my Plus were noisy too on fast moves.
I picked up some better ones from Amazon and switched them out when I had the bed apart for the Y carriage replacement.
Bearings (pack of 12 for $8.99 so I've got spares for down the road): edit: they're $10.99 now, Amazon having fun with supply and demand.
CTYRZCH 12Pcs LM8UU Linear Bearings for 3D Printer, RepRap Prusa Mendel DIY CNC Motion, Prusa Mendel, reprap(8mm x 15mm x 24mm) https://www.amazon.com/dp/B01CE4H5PC/ref=cm_sw_r_cp_apip_6t3NqiIxMNsPK
These were longer than the stocks and fit perfectly in the brackets on the Select Plus. Haven't changed my X axis bearings yet.
Also, I upgraded the Y carriage, highly recommended:
RepRap Champion Y Carriage Plate Upgrade for Wanhao Duplicator i3 and Monoprice Maker Select V1, V2, V2.1 and Plus 3D printers https://www.amazon.com/dp/B01MUAMRN7/ref=cm_sw_r_cp_apip_bTZZKsFBnZWRg
Here is a list of things that people will always need, I understand you can't stock everything as overhead is an issue with retail, and storage as well, but most of these are small enough that they can occupy the shelf space you currently have. As for the larger things, like the 2020 extrusions, you could sell them in common lengths of 500mm and 1000mm and let the customer cut them down to the size they need, or just don't carry these at all. It's not a niche item, but for a retail store like you it would be hard to store and maintain, but man, would it be nice to be able to get those locally if i needed a piece for a project instead of having to wait on mail order.
this is just a basic list, others have listed other things as well, Steppers, Belts, Pulleys, Bearings etc. If you want 3d printing as a reason for other people to go to your store, these items will satisfy the need. Just keep prices fair, I have no issue paying a bit more compared to amazon to get it today.
I can't say this is what the "best" method is, just what has worked for me in the past:
My biggest gripe with 3D printing was that the ridges were always present. This process makes it so the ridges are non-existent and easier to paint!
Edit: I should mention I've mostly worked with large scale cosplay props. This process might not work for everything, like you probably don't need to put epoxy on small stuff.
Hello everyone, I am currently in the market for my first 3D printer, and was hoping to get some advice on what printer would best fit my needs. I would like to spend no more than 300 USD max, and I live in Wisconsin in the United States. I am willing to build a printer from a kit, and I have limited electronics experience (though I am very willing to learn and my brother has a lot more experience). With the printer I would like to print a variety of things, such as pieces for props I am making, a lightsaber, probably some miniatures for DnD, and any other stupid things I can think of and design. I don’t really have any extenuating circumstances. Currently I am looking at 3 different printers, all around the same price:
Monoprice Maker Select V2: https://www.amazon.com/dp/B018GZBC3Y?tag=thewire06-20&linkCode=xm2&ascsubtag=AwEAAAAAAAAAARPY
Anycubic Photon: https://www.amazon.com/ANYCUBIC-Assembled-Innovation-Off-line-Printing/dp/B07TVW9HGH/ref=mp_s_a_1_1_sspa?adgrpid=61744442371&gclid=Cj0KCQiA-4nuBRCnARIsAHwyuPr9qUkHk3c-bjztvPtoPCnQfwmJiur43IW5Sqo_gLb2kfWEBrmndEMaAusvEALw_wcB&hvadid=274732107337&hvdev=m&hvlocphy=9018836&hvnetw=g&hvpos=1t2&hvqmt=e&hvrand=1205846483522208665&hvtargid=kwd-409136528305&hydadcr=21036_9428322&keywords=anycubic+photon&qid=1573068757&sr=8-1-spons&psc=1&spLa=ZW5jcnlwdGVkUXVhbGlmaWVyPUFZUVVYT0NERzhRTFImZW5jcnlwdGVkSWQ9QTEwNDE5NjlRMUFTUlBNR1ZRNksmZW5jcnlwdGVkQWRJZD1BMDUzMDYwN1BBOEZWNFRKU01GVyZ3aWRnZXROYW1lPXNwX3Bob25lX3NlYXJjaF9hdGYmYWN0aW9uPWNsaWNrUmVkaXJlY3QmZG9Ob3RMb2dDbGljaz10cnVl
Ender 3: https://www.amazon.com/Comgrow-Creality-Printer-Upgrade-Certified/dp/B07GYRQVYV/ref=mp_s_a_1_2_sspa?adgrpid=56791742355&gclid=Cj0KCQiA-4nuBRCnARIsAHwyuPpuBebDhMzsbSGWKX2y-Dq2wg37UXSEJqeqqEfB5I6zU-MDqdo4q8QaAiFfEALw_wcB&hvadid=274684426752&hvdev=m&hvlocphy=9018836&hvnetw=g&hvpos=1t3&hvqmt=e&hvrand=5031503050646445943&hvtargid=kwd-446200976551&hydadcr=14671_9484359&keywords=ender+3+3d+printer&qid=1573068855&sr=8-2-spons&psc=1&spLa=ZW5jcnlwdGVkUXVhbGlmaWVyPUEyNlJNRVZTSEVBVkdHJmVuY3J5cHRlZElkPUEwMDY2NTcxMVlVNjFBVExFSTZWUCZlbmNyeXB0ZWRBZElkPUExMDIzODY4V1BDMkY5UUpZR0NMJndpZGdldE5hbWU9c3BfcGhvbmVfc2VhcmNoX2F0ZiZhY3Rpb249Y2xpY2tSZWRpcmVjdCZkb05vdExvZ0NsaWNrPXRydWU=
I am open to other printers, these are just the ones that were on my radar, so feel free to suggest other options.
Thanks for the help and sorry for the long links!
Hey! I got the same printer and was using ABS for my first couple prints. Couple things--First the built in items on the SD card are sliced for PLA printing, so you need to up the temps on the extruder and bed--I had success just upping it to 240/80. This got it to stick, but I had to get my z positioning (the thumb wheels on the corners) just right. Also I absolutely needed a raft for anything to really stick.
If you're slicing your own items in Cura, the default filament size is 2.8mm and you're probably using 1.75mm filament.
Unfortunately on any prints longer than an hour the ABS would start to curl off the bed--I chalked that up to the somewhat breezy room I have my printer set up in currently.
tl;dr Make sure your bed/z is leveled precisely so that a piece of standard printer paper can slide underneath the nozzle in each corner with resistance. Try upping your temps and checking your slicer settings as well.
/u/Redditull mentioned a glass bed. I picked one up on amazon, this fits the bed pretty nicely (just lays between the corner screws)--you do need to raise your z-stop, there's a metal lever contraption screwed into one of the sides of your printer's frame that you need to unscrew and raise. I also attached a PEI sheet to this and I used thermal pads to attach all this to the bed. This all improves adhesion greatly, I've mostly been using PLA after the difficulties I had but I would imagine ABS would stick just fine as well.
Borosilicate Glass
PEI Sheet
Thermal Sheet
While I've never had success with a Rep2X and PLA (except for one roll this one time), it sounds like you've got it extruding fairly well at this point.
So your current difficulty is getting the print to stay stuck to the bed? I'd recommend getting a sheet of PEI (I use 0.03" thickness) like this:
https://www.amazon.com/gp/product/B0013HKZTA
Then cut it to size and stick it to your print bed with this:
https://www.amazon.com/gp/product/B007Y7CZ32
I've had awesome success with PEI and PLA. It sticks great until it cools down, then it comes off easily. Print with the bed at 50C.
The glass bed does not need to touch for the heat transfer. As /u/Grey406 recommends, get thermal pads, but get these:
https://www.amazon.com/gp/product/B007PPEW52/ref=oh_aui_detailpage_o04_s01?ie=UTF8&amp;psc=1
Cut them in two inch squares and put them maybe in each corner and one in the middle (do not fill the whole bed). I would highly suggest not using binder clips. I have the maker select 2.1 and this is a great setup, PLA and PETG have been great with it. The heat will transfer just fine with it floating on top and I've found the binder clips will warp thinner glass. Use aqua hairspray if you need to.
For the glass size: Either get the glass cut to fit within the screws, or buy a dedicated piece of borosillicate glass on amazon that will fit your bed size.
Wanhao i3 Duplicator v2.1 by way of Amazon.
I have two of them, easy to use and improve machine.
Here's a Facebook group dedicated to them.
If you get this printer, this is a highly recommended upgrade. It's a hardened steel nozzle and slotted cooling block kit. Very easy to install, improves holding a given temp in the hot end.
And here is a good deal on filament that's made in America, a grab bag of four rolls for $60, your choice on type.
Excellent information, thank you very much. Do you think it would be safe to power that bed with this power supply? It's 24V 15A 360W which I guess doesn't really leave a lot of headroom. Alternatively this one is 24V 20A 500W which I guess may be the better choice, albeit possibly somewhat overkill.
Also, would the typical MOSFET Board just be a drop in replacement for the SSR as outlined in the wiring guide? Spauda commented above and said to just wire the Heated Bed and 24V PSU through the DC/DC SSR as shown, although I am on the fence since I don't really know the difference (other than what you and others have pointed out about the SSR being from China).
Thanks again for all of the help, electrical questions make my head spin.
Basic Cura guide for simple problems-https://ultimaker.com/download/170/Cura_User-Manual_v1.0.pdf
Sli3r manuel (I know you are using cura but the advanced settings are adusting the same things and some of the different settings can get confusing this can explain each setting)-http://manual.slic3r.org/
Your machine has a max temp of 230C and I print my wood filament (http://www.amazon.com/HATCHBOX-1-75mm-3D-Printer-Filament/dp/B01092XXD4) at about 205-210C so you are good.
As for all the speeds you have to experiment to see what is right for your printer but I would start slow and work up. I agree 60mm/s is a good starting point. Use the suggested temps for the filamnet as a baseline and work from there. I believe the Maker Select is almost identical to the Wanhao Duplicator i3 so these articles might help you also-http://3dprinterbrain.info/pmwiki.php/DupI3/SlicerSettings
After you start printing use this to tune and troubleshoot, it is very good-https://www.simplify3d.com/support/print-quality-troubleshooting/
Above everything, you are going to fail some prints and you are probably going to troubleshoot, but when you have a problem just come back and we help you troubleshoot.
Hey guys,im brand new to 3d printing and looking to get my first printer. Im wanting it to make scenery and miniature stuff for wargaming. I would much rather get a pre built one and have found this
https://www.amazon.com/gp/aw/d/B01FL49VZE/ref=cm_cr_arp_mb_bdcrb_top?ie=UTF8&amp;th=1&amp;psc=1
Is it any good? Seems pretty good according to ebay. Any advice or tips would be verry much appreciated thanks!
I cant speak to the quality of the printer, but I will never buy a 3rd party product from Walmart ever again nor their warranty. They will not back up the warranty and will want you to deal directly with the manufacture on any issues. This manufacturer is in China and it will take days to get a response. They will also not allow you to return it to the store since its 3rd party.
You can pick up a Ender 3 for a great price and get amazing prints out of it when you dial it in.
https://www.amazon.com/Comgrow-Creality-Ender-Aluminum-220x220x250mm/dp/B07BR3F9N6/ref=sr_1_8?keywords=creality+cr10+3d+printer&amp;qid=1550091365&amp;s=gateway&amp;sr=8-8
Hi there! I'm looking to explore 3D printing, because it interests me. I'd be a hobbyist. Maybe make youtube videos for fun or something like that. The biggest thing to me is that I don't have an engineering background, so friendly, obvious, accessible interface is the single most important thing to me.
Let me put it this way, affordable is a plus to me, but I'm willing to give on price if it buys me a printer that's easier for me to use as an amateur. Let me says this . . . NO MORE than a thousand.
Printing trinkets, maybe models. I don't have any intention of making parts for heavy use.
Must be assembled. Building one sounds terrible to me.
Yes.
Just to be clear, I've got one in mind. But there's no way for me to really grasp the range of options without using one.
I was looking at the:
Monoprice Select Mini 3D Printer
It's this one on Amazon. Feedback?
Also had a recommendation to take a look at the Select as opposed to the mini . . . all comparison info is also helpful.
Not sure if this is the 'PDF' you speak of, but best place is here: http://manual.prusa3d.com/c/Original_Prusa_i3_MK2_kit_assembly because you get high resolution images and can read comments against each step that other builders have made during their builds. Lots of good hints & tips there, plus a video from Joseph about calibration.
Edit: Buy one of these for bed-removal of objects: https://www.amazon.com/gp/product/B00VB1U886/ref=oh_aui_detailpage_o00_s01?ie=UTF8&amp;psc=1
And a pack of these to clean your bed: https://www.amazon.com/gp/product/B00KJ6U8NE/ref=oh_aui_detailpage_o06_s00?ie=UTF8&amp;psc=1
To give an opinion contrary to Linkdead404's, I think the heated bed is absolutely worth it. I only print in PLA, and I dealt with the painters tape on the Printrbot Metal for a long time. After I got my Rostock and used the heated bed with PLA, I upgraded the Printrbot as well. Everything sticks like glue and comes out super flat. I also have a sheet of PEI on the print bed of both printers which lets me print with nothing more than a quick wipe off with rubbing alcohol. So awesome.
Edit: I should have put this as a reply to OP. I bought the $99 upgrade kit, you also need a power supply, which I got on sale from Newegg.
The Monoprice maker select v2(.1?) Is a little over $300 on Amazon, but other than that, it fits all of your other needs. It uses standard metric screws and such, so fixing and modding the printer is easy. It's also has a respectable build volume of 200mm^2 and a height of 180mm, which is nice to have. It comes mostly assembled: you just need to use 4 included screws to attatch the gantry to the base and 2 more to attach the filament holder. It took me no time at all to start a test print. I'm coming up on six months with my printer now, and it hasn't given out on me once. For the best prints, you'll want to do some mods, but only the absolutely necessary MOSFET mod requires non-printed hardware that isn't just screws and nuts (or the standard M8 threaded rod used in AzzA's Z-brace mod).
Tl;dr: Monoprice Maker Select v2 on Amazon, order a MOSFET to go with it, 10/10 IGN
I'm noticing a trend involving multi-tailed foxes...
Very cool, but I have a question. Do you think the filament would still be sensitive enough to heat if it was coated in epoxy such as this stuff to give it a nicer, more "sculpture"-like finish? It'd be fun to have something like this, but I typically do everything I can to obscure print lines on display pieces. Can't prime or paint this though, obviously.
Actually, the parts are pretty standard, so it doesn't really matter where you buy from.
I bought them from various sources (electronics markets, amazon, and some local shops), so my links are just to be seen as examples:
Printed upgrades:
There is one small error in the assembly videos: The bed mounting plate (the H-shaped thing) is mounted upside down in the video. The bar that goes across the axes and connects both outer plates should be under the plates, not above as in the assembly videos.
https://www.amazon.com/Monoprice-13860-Maker-Select-Printer/product-reviews/B018GZBC3Y/ref=cm_cr_arp_d_viewopt_sr?ie=UTF8&amp;reviewerType=all_reviews&amp;showViewpoints=0&amp;pageNumber=1&amp;sortBy=recent&amp;filterByStar=one_star
Thats the 1 star reviews, only 14 of them (and one is just calling out what they think are fake reviews) - 84 5* reviews.
I posted this on here in another thread, but the one I bought this week came with a 4GB card (and a slot that has the card stick out for easy access) & a larger spool holder along with metal thumbwheels for the base adjustment - so they are improving in-versions, making a couple of the criticisms unwarranted.
It seems lots of people will recommend other printers, but almost all of them are twice the cost or more - so I guess it boils down to how much you want to invest. Personally I think its better to learn on a cheaper unit by printing
Set it up and use the existing hotend to print out a z-brace kit, I printed for days without it but it really helps. This will also help you understand and appreciate the difference when you upgrade the hotend :) People run into the connector problem when heating the bed up for ABS and other higher-temp filaments, I have had no issue running PLA. I also never leave the house when it's running, but that's a general distrust of robots thing. Now, with z-braces, allmetal hotend, and a pei sheet, I have had awesome prints every time.
I have been looking into 3d printing and decided the best place to start would be with an ender3 so that I would be able to have quality prints, for a reasonable price. However, looking on several websites there are different prices and I am just not sure which one would be best to go for.
Amazon has the ender-3 from Comgrow for $230 here: https://www.amazon.com/gp/product/B07BR3F9N6/ref=ox_sc_act_title_1?smid=A2ALB3RMNIRLH8&psc=1
However, it says the official one, again for $230 is here: https://www.amazon.com/Official-Creality-3D-Printer-Source/dp/B07D218NX3/ref=sr_1_3_sspa?keywords=creality&qid=1569107314&s=gateway&sr=8-3-spons&psc=1&spLa=ZW5jcnlwdGVkUXVhbGlmaWVyPUExWjJVQlE0MjhKMEQ2JmVuY3J5cHRlZElkPUEwODU2MjU2MzNSMTQ2SlFGUjg1OCZlbmNyeXB0ZWRBZElkPUEwODA4ODAzMldSNTRQMDZOTzBXQyZ3aWRnZXROYW1lPXNwX2F0ZiZhY3Rpb249Y2xpY2tSZWRpcmVjdCZkb05vdExvZ0NsaWNrPXRydWU=
I also found a website listing it on sale for $189 here: https://www.gearbest.com/3d-printers-3d-printer-kits/pp_1845898.html?
I got the last link from Maker's Muse video and I am just very confused. I do not want to spend more money than I need to as filament is also rather expensive.
Any help would be appreciated, I really want to get it for the cheapest price without it coming in damaged or in a month.
I recently stopped using blue tape and switched to PEI sheets on glass. I'll never go back. I think this would be a good thing for you to try, the PEI sheet releases pretty easily once cool.
PEI (Polyetherimide) Sheet, Opaque Natural, Standard Tolerance, ASTM D5205 PEI0113, 0.03" Thickness, 12" Width, 12" Length https://www.amazon.com/dp/B0013HKZTA/ref=cm_sw_r_cp_apa_j.9Dxb7FAEG3J
TapeCase 12" squares (pack of 6), Converted from 3M 468MP Adhesive Transfer Tape https://www.amazon.com/dp/B007Y7D5NQ/ref=cm_sw_r_cp_apa_S.9DxbBW56J7Z
Do yourself a favor and use some 3M 468MP transfer tape and a piece of PEI. You'll never have to worry about adhesion again. PLA and ABS stick to it perfectly and pop off when cool without issue. I've had hundreds of prints without adhesion issues, even when my offset is way off and I'm printing at 0.4mm height instead of 0.1mm. If you want to see what it looks like, check out the post I submitted yesterday
First of all, thanks for the awesome post!
But I have 3 questions about what you wrote on the Monoprice Maker Select V2 and Plus models:
Are you talking about other Amazon sites besides the .com/US site?
Hope this helps! Good luck. PM me if you have any other questions.
I basically order everything off amazon since I have prime.
200mm x 213mm x 3mm Borosilicate glass and also the silicon pad sheet that I cut 4 squares out of.
Glass link: http://www.amazon.com/gp/product/B00QQ5Q3BI?psc=1&amp;redirect=true&amp;ref_=oh_aui_detailpage_o02_s00
Silicon Pad link: http://www.amazon.com/gp/product/B007PPEW52?psc=1&amp;redirect=true&amp;ref_=oh_aui_detailpage_o07_s00
Haven't really done much upgrades yet been too busy printing other items. Mainly a settlers of catan board and also a lightsaber for a party I have this weekend and little knick nacks that I've given away, I can see if I can snap a pic tonight but it's going to look like every other monoprice maker with a glass bed ;). I printed out a z-switch adapter since I put in a glass bed, but then noticed that there are extra screw holes on the Z-frame that does the same thing. I also printed an updated cooler http://www.thingiverse.com/thing:1025471 but decided against using it until I can reprint it in ABS, I'm concerned the PLA would melt being so close to the hot end. A good summary of mods I want to do is on this youtube link: https://www.youtube.com/watch?v=WzvZnw9mZAs, the dampeners and z couplers were already included in my version. I really do want to print out the mod that PuffThePed suggested: http://www.thingiverse.com/thing:921948 This should help with rigidity for large prints and let you print faster.
Hi All!
Just ran into this while doing a search. I got a v2.1 for Xmas as well.
Have fought many battles, won't go into it here, you'd be reading for hours, LOL!
But I did install the MOSFET upgrade, as well as installing a 300W power supply. One's a safety issue, the other is so I can safely run a higher temp hotend with elevated bed temps. The 200W unit they used is marginal at best (trust me, I'm an Electronics Tech for 47 years...).
Here's the MOSFET board I used:
BIQU Heat Bed Power Module Expansion Hot Bed MOS Tube for 3D Printer (About $11)
https://smile.amazon.com/gp/product/B01HEQVQAK/ref=oh_aui_detailpage_o01_s00?ie=UTF8&amp;psc=1
and the Power Supply: eTopxizu 12v 30a Dc Universal Regulated Switching Power Supply 360w for CCTV, Radio, Computer Project ($18 - $20, varies)
https://smile.amazon.com/gp/product/B00D7CWSCG/ref=oh_aui_detailpage_o01_s00?ie=UTF8&amp;psc=1
I also got some cork sheets to put under the hot bed at Michael's called ArtWall Cork Tiles 12:x 12" - used the App and got 40% off cost less then $5! I used some 3M adhesive (468MP) strips stolen from a sheet I got when I bought a Gizmodorks PEI sheet I put on a glass plate stolen from an old Canon scanner that was toast. :-) Recycling ...LOL! Nice thing was it's DEAD flat, and FREE!
Well that's all for now. Any Questions will be answered next time I drop by Reddit (which is pretty infrequently, sorry!).
PuterPro
I'd do a different spool setup. I use the TUSH The only needed hardware for that one is 4 skate bearings. If you need bearings I'll send you 4 for $5 or 8 for $6. Shipping included to US.
The other tools I recommend:
&nbsp;
Thingiverse
&nbsp;
Prusa Multi-Material!
We're having a LAN party so...I decided to cut up an existing heartstone model from thingiverse for multi-material.
I'll upload the model to thingiverse later today for my fellow nerds/geeks.
&nbsp;
Images
&nbsp;
Print time: 35hrs
Detail: .15mm
Filament:
Stone
Blue
&nbsp;
The stone filament worked, surprisingly, great with the multi-material. Multi-material is insanely picky about filament quality so I'm pretty happy with the outcome. The first print I tried had some bleeding with the blue, so I increased the wipe tower a bit, which solved the issue.
After months of fighting with the MMU, I think I've finally got it tuned in...knocks on wood.
Yes, and probably better to do it that way than baking. Using heat can also drive off other volatile additives and compounds.
I'd use something like this (Just one example picked from Amazon; there are other, similar products.) for the desiccant, since it's rechargeable. Toss in an indicator strip. You're probably good when it reaches equilibrium at 20% in the container.
I'm a connoisseur of purple.
Other than that, I enjoy Ziro Marble and Proto-Pasta Teal.
Buy
($6)Wires:For the MOFSET mod
($1o)MOFSET
($6)Wire spades:For the MOFSET mod
($8)Assorted M3 Bolts:You need some for a few mods and for the bolts you will inevitably strip on this
cheapwonderful machine($13)Longer assorted M3 Bolts:For a few mods
($9)M4 Bolts:For one of the mods
($9)Metric allen wrench set:Had to order one of these since metric tools aren’t common round these parts
(~$20) PLA of preferred choice- You’ll run out of the sample bit quick so go ahead and order a roll or two to be prepared. You will note some upgrades require ABS so a small spool of that to your order will also help.
($6)M3 Lock nuts:Critically needed for a simple mod
($10)Threaded rod and nuts:Please note that this item seemed difficult to find online. I recommend going to your local hardware store and getting two 5/16” rods of at least 16” in length. They should have an assortment of threaded rod in various lengths available. Also note that the pitch of the threading matches the nuts you buy. Further instructions regarding this can be seen in Azza’s Z-Axis braces below.)
($6)9mm Wrench for the nozzle: Don’t wait for your first clog, go ahead and have this on hand to remove/change the nozzle. Note to only tighten/loosen the nozzle when heated.
Below is the order of printable upgrades I recommend but I suggest you mix in a few other prints along the way because this is a hobby after all and you should be having fun. It helps to have your quality as tuned in as much as possible for some of these so be patient and keep trying if you need to.
Print
Spool holder- temporary : Until you can mount your spool on top of the enclosure or any other personal preference.
Belt tensioner- print x2
Z-brace
Shielded stop button
Cable relocator : It’s a pain, but if you spend the time to do this and turn your extruder motor 90 degrees then you can get the full Z height without ruining your cables. It does involve opening all the cables to the PSU and feeding a few extra inches back through the cable chains.
Cable shroud : Looks nice if you do the cable relocator.
The following need to be printed in ABS:
M3 Bed Nut retainer: 10/10 upgrade. I know they look worse than the nice metal stock ones, but these help keep your bed level longer.
CiiCooler
Glass bed Holder
Now that the first major round of printed upgrades is done it’s time to shift to a few more supplies to pick up to really fine tune the machine.
Buy
($5)Radial fan: For CiiCooler
($5)Glue sticksThis and a glass bed is magic
($25)Borosilicate glass 8” x 8”
($26)Y-Carriage plate upgrade: This has been a nice upgrade as I now only need to relevel the bed every couple weeks instead of every print. Check out this guide for a ‘how to’ as well as a free upgrade by shifting your Y pulley over.
($15)rechargeable dehumidifier: For keeping in the bin with your opened filaments
($9)Extruder gears: Might be able to hold off on these, but will need eventually. If for some reason you have a Maker Select with metal X-axis blocks (V1 and V2, but not V2.1) then this is a must. You can follow this guide for a how to.
($28)Metal extruder plate and lever: Not needed, but nice.
($14)Noctua 40mm fan: Not needed, but makes the printer a lot quitter. A LOT quieter.
($50)MicroSwiss All Metal Hot End: The destruction of my PTFE tube by this point pushed me to doing this upgrade. If needed you can follow this guide for replacement. Remember to tighten/loosen when the nozzle its hot.
($6)Ceramic cotton: Tore off the stock one when replacing for the all metal hot end by accident. At least its thicker than stock
Now that the printer is in its final form, its time for the enclosure which is a stacked Ikea Lack hack.
Print
Spool holder
Pi Case
120mm fan cover
Fan grill
120mm fan PSU modification: I edited this to fit upside down since my PSU is mounted on the underside. This was nice since I blew the 40mm fan anyways so it made everything a lot quieter than before.
IKEA Lack filament guide
Webcam holder: This is one I designed specifically for the webcam I happen to have lying around. The camera mount piece can be changed out no problem though for what ever webcam you have or buy. The SketchUp file is included on Thingiverse for such purpose.
Buy
($20)2x Ikea Lack: Luckily there is one right down the street from me. I am located in North America though, so we do not have the STUVA, if you live literally anywhere else you may check in to this as an alternative.
($80)Plexi glass for enclosure: Could be cheaper alternatives, but it looks cool
($9)Foam pads for feet
($42)Raspberry Pi3: For OctoPrint. I also suggest using a different USB cable than the stock one provided by Monoprice or you will have issues.
($9)2x 120mm fans: Used for the power supply cooling and enclosure
($6)Rocker Switches so that the enclosure fan can be on for PLA, but off for ABS
($15)Dimmable LED lights
($10)8mm LED light connectors
Total:
$250 printer + $452 upgrades/parts + ~$80 PLA/ABS to date
I've only used https://www.amazon.com/gp/product/B01092XXD4/ref=ppx_yo_dt_b_asin_title_o09_s00?ie=UTF8&amp;psc=1 but had some great results.
Here's some of my wood pla projects. The first two images are sanded and stained, the final is fresh off the printer with some fuckups I was troubleshooting. https://imgur.com/a/DdEEXzZ
I haven't tried it myself, but this Gold Silk PLA has gotten good reviews and I've seen people post some really beautiful prints made with it.
There's limits to how precise FDM can get. Well, less a limit on the precision and more on resolution. There's a Maker's Muse video that covers this very well. You could probably just put a smaller diameter nozzle on an Ender 3 and do pretty well with some longer print times.
But if you really want to go incredible precision and stay exclusively small scale (and have a well ventilated space) I would recommend the Anycubic Photon. SLA blows the precision of FDM out of the water.
You can't, I've destroyed mine and installed PEI.
https://www.amazon.com/gp/product/B01KBGJU5S/ref=oh_aui_detailpage_o01_s00?ie=UTF8&amp;psc=1
Stick it down with this stuff here:
https://www.amazon.com/gp/product/B007Y7D5NQ/ref=oh_aui_detailpage_o00_s00?ie=UTF8&amp;psc=1
When you use this stuff you just wipe it with rubbing alcohol to clean the surface. Then it gives you near perfectly smooth prints where it touches the surface. The prints pop off easy after it cools but holds tight when it's warm. Personally I find it a waste of money to buy glue sticks/hair spray if you don't have to. Although I did buy glass I never installed it after this worked so well. It's amazing stuff and you'll never have to replace it.
So creating this took a bit of practice and patience. Basically, I built the 3d model from scratch using a software called fusion 360. Once I got the model built I used Simplify 3d to get the printing parameters set (layer hight, print speed, nozzle/bed temp etc...)
You then send that file directly to the printer for printing. I’m using a JG Aurora A5s which is a relatively cheap intro printer. I loaded it up with some wood PLA filament (amazon link for reference: HATCHBOX 3D Printer Filament, Dimensional Accuracy +/- 0.03mm, 1.75 mm, 1 kg Spool, Wood https://www.amazon.com/dp/B01092XXD4/ref=cm_sw_r_cp_api_i_3AulDbTCWTM9X).
I’m not sure exactly how this filament is made but it seems like a mixture of saw dust and plastic that functions almost exactly like the normal PLA plastic most 3d printers use.
Anyways, once the print is done. (This took about 4-5hrs) you can sand it down and polish out any imperfections the printer may have left. And also being wood, it will absorb any type of wood stain.
You can still see some layer lines but if I adjust the layer hight and put more effort into sanding, then those would be a lot less noticeable.
Hope this helps!
Just getting this today (I also missed the monoprice promo cutoff). But good news, Amazon has it for $272 + free shipping w/prime.
edit: just saw same comment below. The same good news twice is still good news...?
Looks like you have a clog in your nozzle. Happened to me recently and i had to end up swapping the whole thing out.
Do your self a favor and grab one of these: http://www.amazon.com/Hotend-Nozzle-WANHAO-FlashForge-Builder/dp/B01C3HEQZC/
Its an all-metal hot end upgrade that is all sorts of better than what came stock on your printer and really easy to install. It will also fix the issue you're having right now.
Otherwise you need to figure out a way to get what ever is clogging your print head and causing you to under extrude out.
I have the Qidi Tech version of this printer and love it (https://www.amazon.com/TECHNOLOGY-3DP-QDA16-01-Extruder-Structure-Filaments/dp/B01D8M32LU/ref=sr_1_1/137-3764290-4585929?ie=UTF8&amp;qid=1494515935&amp;sr=8-1&amp;keywords=qidi+tech). Well worth the money spent and a very solid printer, I did an extrusion upgrade to it as well as changing to a PEI platform and I can print flex material / ABS with zero issues.
from the black friday thread, deal is done but you can still get it here:
For the Canadians looking for a deal, Amazon.ca has the Monoprice Maker Select for a good price at $398 CAD with free shipping. Ships from Amazon's Toronto warehouse so you won't have to worry about duty. https://www.amazon.ca/gp/product/B018GZBC3Y/ref=oh_aui_detailpage_o00_s00?ie=UTF8&amp;psc=1 - JeffDM
You don't need to do any electrical mods. The higher voltage in the plus fixes the problems that were present on the older versions. The Z-brace mod is a good idea, but not necessary. It's easy to do and improves print quality though, so you should do it.
It's also probably a good idea to swap out the steel y carriage with a stiffer aluminum one like this, but again, it's not entirely necessary.
It’s ZIRO “Marble Color” PLA from Amazon! ($21.00)
Awesome Filament. Hides Layer Lines Incredibly Well.
It’s as smooth as normal PLA, just looks textured from the speckles.
This was printed at .2mm on my Ender 3. One of my Favorite Materials And Prints to date!
It's a super easy mod to do. The parts are like $8 on Amazon and you print the mount. This is the first thing I did on my Maker Select.
Mod link: https://letsprint3d.net/2017/01/29/guide-installing-a-mosfet-board-maker-select-v2/
Part: https://www.amazon.com/dp/B01HEQVQAK/ref=cm_sw_r_cp_apa_i_cZbPCbG4PRAN7
http://m.sterilite.com/mobile.html?id=803&amp;ProductCategory=0&amp;section=0
Stacked properly you can fit 15 spools in one tub. And it seals which is awesome
New and Improved Eva-dry E-333 Renewable Mini Dehumidifier https://www.amazon.com/dp/B000H0XFCS/ref=cm_sw_r_cp_apa_Vt5UBb698T1AA
Plug in renewing desiccant beads. Throw that in the tub and you're golden!
Just an alternative to digging through bags and having to vaccum the bags every single time
There actually already are quite a few sales on atm. Online retailers like extending sales the entirety of the weekend to make more profits. $221 w/$15 off coupon Ender 3(partially assembled) that being said there are lots of printers out there that can work pretty well for similar.
Important thing to remember: Nothing is -ever- mandatory unless it's a major safety issue. The closest thing to that on that printer is the mosfet. I believe your original message implies you replaced the buildtak, so the Mosfet upgrade would be a very good idea unless you plan to change out the control board entirely.
Everything else is Optional and Quality of Life/Print stuff. ^.^
The following are examples on Amazon. Other folks and posts may have better advice on where/what to get.
Y Carriage plate
https://www.amazon.com/dp/B01MUAMRN7/ (This is the part under the heated bed)
MicroSwiss all metal hotend (From other person's post):
https://www.amazon.com/dp/B01E1HANLS/
Linear bearings would be LM8LUU for the Y rods. If you have the plastic bearing holders, it's easy. If you have the aluminum block bearing holders, you'll have to find somebody else to source info on the circlips and how to not become sad with them.
You can print things just fine without any of these upgrades, so don't worry about the long print (unless you run out of filament).
A new controller board can do extra stuff and is required (Highly recommended, since you "can" make the probe work on the Melzi board, but poorly and at the cost of other things) for Z-Probe use, dual extruder, and with the heated bed on that printer, can remove the need for a separate MOSFET. It opens the path for other upgrades, can improve print quality to a degree in some cases, and can drive you absolutely nuts trying to set it up.
The inexpensive Quality of Life I'd recommend are thumbwheels with nylock nuts (hard to turn, but keep your level for a long time); corner-bracket spring cups (printed); and glass print bed. Two sets of printed things and about $12 at worst for the glass.
The bearing upgrade (If you can do it without fighting circlips) helps reduce Y-axis stutter and vibration. That upgrade brought my print quality up hugely. $25 or so if you get a lot of spares or higher quality ones.
The Y platform helps you with leveling and staying level.
The lack enclosure has some printed parts, $20-40 worth of Ikea furniture, and up to $50 worth of siding depending on your ability to cut glass and plexiglass.
So many things you CAN do. None that you MUST do. Some that you SHOULD do. And everything else is Just For Fun.
If you get the entire upgraded hotend from Micro Swiss it will allow you to print with more abrasive filaments, like color changing, exotic infused filaments (ie. carbon fiber, bronze, wood) and at higher temps which is needed for things like PETG.
The glass plate makes sure you get a flat surface since the build plates are usually not 100% flat.
With that being said, buy the Maker Select printer from monoprice then head over to amazon and get the micro swiss hotend from there along with the boro glass plate. Total price will be around $441 with shipping of everything.
Yeah, maybe my post wasn't clear.
Printer board is an MKS Gen 1.4: https://reprap.org/wiki/File:MksGenV14-Pinout.png
Mosfet board is one of those cheap things from Amazon: https://www.amazon.com/BIQU-Power-Module-Expansion-Printer/dp/B01HEQVQAK
This is a DIY printer that started life as an Anet A8, but now is a mix between an AM8 mod (bed and frame) and a Prusa MK3S clone (extruder), all running Klipper and Octoprint.
Currently this external Mosfet is controlled by D7 (the onboard Mosfet output for the second extruder) and powers the bed. The hotend is on D8 (because its Mosfet is a bit beefier), the extruder fan is on D9 and the print fan is on D10.
Filament sensor and BLTouch are on D10 and D6.
I'd like to use D7 to power an enclosure fan, but to do this I need to control the external Mosfet from a different pin, ideally D4 or D5 (which are marked as "servo" pins on the pinout diagram). I've tried various other pins and combinations with +5V and GND and various resistors in between, but I can't get the Mosfet to switch.
Well, starting to look at this one as well since it's enclosed:
https://www.amazon.com/gp/product/B01D8M32LU/
But the X-ONE could have an enclosure added with some work. Definitely have gotten a good impression of Qidi
Hey guys, I'm extremely new to 3d printing and after viewing various reviews and comparison videos I think I'm going to get the Ender 3. I am ok with getting a Kit.
I'm from Ireland and saw this one for sale on amazon:
Ender 3
Is this ok to go ahead an purchase? Is there any thing I should be aware of? I saw comgrow was just a creality reseller from another reddit thread and everyone was happy with that aspect.
Thank you,
I have this printer and have been very impressed with it. there is a large Reddit community for it and it is pretty cheap. Really nice quality too full metal construction.
https://www.amazon.com/Monoprice-Select-Printer-Heated-Filament/dp/B01FL49VZE/ref=sr_1_1?ie=UTF8&amp;qid=1486656173&amp;sr=8-1&amp;keywords=select+mini
This is a model I found and printed for a friend with this new gold filament that I purchased it came out really well aside from the fact that I printed at .2 layers and not .1 or lower layers like I meant to.
Ganesh 3D scan found on #Thingiverse https://www.thingiverse.com/thing:2545113
Here is the filament I forgot to share it
3D Printer Filament PLA 1.75 mm Silk Gold 1 KG ( 2.2 LBS ) Spool 3D PLA Printing Material https://www.amazon.com/dp/B06XRPYXP2/ref=cm_sw_r_cp_apa_gsVIAbA6ZHJ43
So I did something very similar, for the dehumidifier part I used this instead - Eva-Dry New and Improved E-333 Renewable Mini Dehumidifier. It is awesome and works really well and when the indicator shows that it needs recharged you just plug it in for a bit and then you can use it again.
My own shoutouts:
Hatchbox Wood: https://www.amazon.com/gp/product/B01092XXD4/ref=ppx_yo_dt_b_search_asin_title?ie=UTF8&amp;psc=1
This sands easier than any classic plastic filament, after which you'd swear someone whittled the wood themselves. After stain, it's my very favorite thing to use. It's abominably stringy if you use anything smaller than 0.15mm layers, but that really doesn't matter since you're gonna sand it anyway.
Photos: https://imgur.com/a/wDIbPRq
CCTree Marble: https://www.amazon.com/gp/product/B07CVJJB9Y/ref=ppx_yo_dt_b_search_asin_title?ie=UTF8&amp;psc=1
This prints like butter, but I've been unable to stop it from stringing. It's easier to sand than other non-wood filaments I've tried though. I like the appearance, which seems to naturally hide subtle layer lines like the wood does.
Photos: https://imgur.com/a/R23qBsw
Special mention to Prusament: the very least stringing I've seen among the few filaments I've tried, but I don't buy it because it's expensive in the USA and because the fumes make my eyes hurt while doing squeaky noises in the extruder. Weird.
Photo: https://i.imgur.com/bNYNJYj.png
Sure can!
Get one of these sheets from Mcmaster carr:
12"x12" 3/32nd thick sheet of Ultim PEI plastic
http://www.mcmaster.com/#8685K41
Stick it to the existing glass with this adhesive:
3M 468MP transfer adhesive
http://www.amazon.com/gp/product/B007Y7D5NQ
Trim it to fit, then print on it as you normally would. remember to re-adjust your Z stop to compensate. For ABS at least I have not found anything that works better so far, and I've tried most things. You don't need ABS slurry with it, you can print without brim, things just stick, and then release when cooled off. Polyethalene Tape is garbage compared to this stuff. It's by far the best upgrade you can do for your printer after the heated bed itself, and it costs under $40 to do. If you are having trouble getting things to stick to your bed, this is the way to go. It supposedly works just as well for PLA, though I have not tested that personally.
My best results have been prints in clear resin, but "transparent" PLA can be enhanced as well.
I bought the following:
https://www.amazon.com/gp/product/B00PFXK4JY
You mix it like epoxy, and lightly coat the outside. I use my hands (with gloves). It removes minor blemishes, and makes for a "smoother, shinier" part.
It is not for everyone; sometimes I prefer the "frosted" look on a part.
PRO TIP: Buy a box of thumb tacks. Put a bunch of them point up so your part can dry without sticking to anything.
Silk Gold 3D Printer PLA Filament... https://www.amazon.com/dp/B06XRPYXP2?ref=ppx_pop_mob_ap_share this stuff is pretty good but make sure you use it right or you will end up like me...
There are ways to make it cheaper.
A MOSFET (basically a relay that switches the circuit for the heated bed) would be a huge upgrade.
You can flash the firmware of the board with proper security measures in place. Lookup Marlin firmware.
That would be your number one tasks and a huge safety upgrade.
There are lots of tutorials on how to do both.
Here is my setup.
This is the silicone. It comes in a sheet and I just cut 50mm squares :)
Hope this helps. Sorry for the late reply to the late question! Happy printing!
https://www.amazon.co.uk/gp/aw/d/B007PPEW52/ref=mp_s_a_1_1?ie=UTF8&amp;amp;qid=1491168216&amp;amp;sr=8-1&amp;amp;rps=1&amp;amp;pi=SL75&amp;amp;keywords=gpu+thermal+pads
This one looks similar to the one I bought in the states. It should come as a big pad with clear plastic on both sides to protect the adhesiveness.
Just cut shapes out of the pad, remove the plastic backings, and carefully put it on the bed. It might be a little tricky to get it on there, but once it's on it should stick pretty well.
210-215 so far. The printer auto heated to 215, then I tried at 210 since that's what the Hatchbox directions said. Is this the hotend? I actually already purchased this but didn't install it yet. So I should purchase this as well? Thanks so much for the help!
Ringing and banding is a really hard problem to fix. Ultimately, it comes down to making sure your printer is insanely rigid and its firmware settings are tuned in to fit YOUR printer.
I see you already dropped acceleration and jerk settings, which will go a long way to helping with ringing and banding. Make 100% sure your belts are tensioned well. That's the #1 key to successful prints IMO, and I see you didn't mention it here.
Consider upgrading your printer with a stronger Y carriage. Here's the one I use: https://www.amazon.com/gp/product/B01MUAMRN7
After replacing the Y carriage, make add some auto-bed leveling to your printer so that you can rigidly secure your heated bed to the Y carriage. The springs that let you level your printer now add springy-ness to the print results from the sharp movements of the very heavy Y axis moving.
The default Cartesian design's biggest flaw is the moving heat bed IMO. Its very large and very heavy, which means precise movements at high speeds is always going to be very hard.
Also, can we see some pictures? You might be where I am at this point, limited by the factors of your printers design on a mechanical level as opposed to the quality of the build and parts.
I'll start with the non-printable mods:
Replaced the PSU with a 750w ATX PSU I had lying around.
If you do this, you will more than likely need to add a power resistor to the 5v rail. I also removed all the original wires and connectors from the PSU and resoldered just what I needed with better rated wire.
Glass bed on top of the aluminum. I just went to Lowes and got them to cut a few pieces of single pane glass.
Mosfet circuit for the heated bed:
https://www.amazon.com/BIQU-Power-Module-Expansion-Printer/dp/B01HEQVQAK/ref=sr_1_1?ie=UTF8&amp;qid=1493092441&amp;sr=8-1&amp;keywords=3d+printer+mosfet
Upgraded Y Carriage:
https://reprapchampion.com/collections/heated-beds/products/anodized-aluminum-y-carriage-plate-upgrade-v2-for-prusa-i3-reprap-3d-printer
New Belts:
https://reprapchampion.com/collections/linear-motion/products/10-meters-6mm-width-gt2-timing-belt-for-reprap-delta-3d-printer-kossel-rostock
Geared Pulley to replace the smooth one:
https://reprapchampion.com/collections/linear-motion/products/3d-printer-idler-pulley-aluminum-dual-ball-bearing-3mm-bore-16-teeth-gt2-belt
Upgraded Heated Bed, this bed heats up slow and I also lost a little bit of build volume. I plan on getting something better here very soon. Once it's up to temp it works well though.
https://reprapchampion.com/collections/heated-beds/products/new-improved-mk3-aluminum-reprap-3d-printer-prusa-i3-heated-hot-bed-build-plate
Inductive Sensor for auto level:
https://www.amazon.com/gp/product/B01LWNCY4C/ref=oh_aui_search_detailpage?ie=UTF8&amp;psc=1
Copper Tape Because the inductive sensor can't see glass I put this on the bottom side.
https://www.amazon.com/Tapes-Master-10ft-Copper-Foil/dp/B00Z8MCJW2/ref=sr_1_6?s=industrial&amp;ie=UTF8&amp;qid=1493092625&amp;sr=1-6&amp;keywords=copper+tape
Firmware:
To get the sensor working, you'll have to change the firmware unless you only want to use it as a limit switch. The only option that i'm aware of is Skynet which is based on Marlin and works fairly well. You can find that on their facebook page: https://www.facebook.com/skynet3ddevelopment/
Blue LED Extruder Fan (because the original broke). I don't remember where I got this from. I'd like to find an RGB one! ha
I added a bunch of WS2812 LEDs controlled by an Arduino at the moment, I am using OctoPi so eventually i'll have that control them but at this point they're set to UV colors because it looks cool.
Printed mods:
Frame braces:
http://www.thingiverse.com/thing:1857991
http://www.thingiverse.com/thing:1430727
Y Carriage Risers:
The Y carriage sits too low and will smack into the Y axis motor so I made these risers to solve that:
http://www.thingiverse.com/thing:2226564
Y Belt Clamp: You'll need one for the new carriage, but I cannot find the one that I used.
Auto level bracket: Though I only have PLA and it kept warping so I made a metal version of it:
http://www.thingiverse.com/thing:2006986
Anti-Z Wobble I modified this but no longer have the file, I also printed a cylinder to wedge into the hole above the lead screws.
http://www.thingiverse.com/thing:1858435
Bearings I used:
https://www.amazon.com/Beerings-Malt-ABEC-Skateboard-Bearings/dp/B005NFXHQG/ref=sr_1_2?ie=UTF8&amp;qid=1493094188&amp;sr=8-2&amp;keywords=beerings
Belt Tentioners I can't remember which ones I finally used.
I think this is everything. If I remember something else i'll post it.
It's marble, it prints like crap. https://www.amazon.com/gp/product/B01IIAC2MW/ref=ppx_yo_dt_b_asin_title_o00_s00?ie=UTF8&amp;psc=1
Just note that it can jam pretty easily. Luckily on this run it hasn't for me. But I'm also running it hot. In fact, if you zoom in and see the first surface area (at the bottom of the symbol) you can see where I didn't run it hot enough.
I totally recommend the All-Metal extruder Hotend for the i3 as well, once I threw that on, my prints were beautiful.
https://www.amazon.com/gp/product/B01E1HANLS/
Grab a couple of Ikea 365+ boxes with gasketed lids (792.767.60), and Eva-dry E-333 Renewable Mini Dehumidifier at Amazon to store your filament in. These gasketed bins aren't the larges,t but they do seal really well.
I also have Ikea Samla bins that I added my own gasket to and printed clips for, as well as Sterilite 24Qt latched bins as well for my filament storage..
as for their translucent filaments, what temperature are you printing with it at? I dont have the MMU2, but I do have the MK3s that has the tapered extruder. I have found that some materials require higher temps to print properly. I normally print with the AB PLA at around 210-215c, and I have not experienced any issues with that filament. Sometimes you need to print at a higher temp than what the filament says on the package with the newer extruder.
Ender 3
I took the fan case off and cleaned off all the pla that was on top and the sides of the silver brick. It is clean now, and the wiring looks good.
I'm Thinking About Purchasing A Monoprice Select V2 At Amazon At Black Friday/Cyber Monday But Don't Know In Wich One I Can Get The Best Deal So Want To Know What You Guys Think About That Based On Your Experiences In Previous Years. Thanks.
Also known as Ultem, it can be purchased here from CSHyde. There are several options there for size and thickness. The bonus is that these sheets come with adhesive already laminated to the sheet. I believe you can also get custom sizes, although larger sheets are no problem to cut to size.
Alternatively (and probably more common), you can purchase PEI sheets here on Amazon. The recommended adhesive (transfer tape) is here, and there may be other sizes for both available on Amazon as well as wBay.
The whole idea on using PEI as a print surface is that you get good print adhesion with most common print materials. Using a heated bed with PEI works great for getting prints to stick while warm, and also pop off of the print bed fairly easily as the bed cools.
I went with the stuff from CSHyde for convenience, but I think most users here are going with the Amazon stuff (they have thicker sheets which many users prefer as it can last longer before needing replacement).
I bought a Monoprice Select Mini last week, and it's currently just under $200 (I could have saved $25 if I waited until today) and I've been pretty happy with it. The build area is a 120mm (4.7") cube, so should be fine for your small projects. It ships almost fully calibrated; all I needed to do was adjust the height of the build plate.
It can print via either USB or MicroSD (card included, but no adapter). The recommended slicer is Cura, a version of which comes on the MicroSD card or can be downloaded for free.
I've had a few problems, but I attribute most of them to my inexperience with settings and build surfaces rather than to the printer itself. My only issue with the printer is that it's controlled by a button/wheel combination that's awkward to use.
So long as the 120mm size isn't too small for your paintball projects, I'd recommend it. Though admittedly it's the only 3D printer I've used, so I don't know how it compares to others.
Yeah, I was actually surprised at how good the color turned out. Here’s what I used:
Silk Gold 3D Printer PLA Filament 1.75 mm 1 KG (2.2 LBS) Spool 3D Printing Material CC3D Shine Silky Shiny PLA Metal Gold Like Metallic PLA Filament
https://www.amazon.com/dp/B06XRPYXP2/ref=cm_sw_r_cp_api_i_NAHPCbR59STKJ
Happy to be here the day the thread was created.
I'm looking at some improvements for my Wanhao duplicator i3. I'm looking for new nozzles, a new fan, and a glass bed. This'll be my first time modifying the printer other than adding the heating bed mosfet.
Also I recently learned that hatchboc lists their PLA as having a +-.03mm tolerance when in reality it's .05 and they charge enough that I could've been going with amazon basic this whole time. So I'm looking for a new filament manufacturer.
These are the nozzles (amazon link) I was looking at. I'm still using the .4mm the printer came with and I'm planning on using the smaller sizes mostly. My question is is this a fair price for this range (two each, .2 .3 .4 .5 .8 1.0) of sizes? Nobody is talking about the durability in the reviews (which are all 5 stars so I'm extra cautious) so what should I be looking for? They're all brass which is what I'm used to, and I'll I've ever really heard of.
This is the fan (banggood link) I was looking at to go with the cooler (thingiverse link) I've been using. Not too concerned with this buy. Just wanted to see if anyone else is familiar with the seller. I haven't spent much time on it but if I can find the same fan with prime on amazon I'm probably going to jump on it.
This is the glass bed (Amazon link) I was looking at. It's been months since I've worked with a glass bed and I don't really want to use binder clips. I was looking at this thermal pad (Amazon) and I have no idea what to look for. The size is what I'd expect but is there some spec I should be looking for? Is silicone just silicone and I should be buying the cheapest thing I can find? I believe I have the tools to cut the corners on the glass myself so I'm not too concerned with that.
That you for the read! Sorry I have so much I'm trying to be very careful with all this.
http://www.amazon.com/dp/B0013HKZTA/ref=biss_dp_t_asn
http://www.amazon.com/TapeCase-squares-Converted-Adhesive-Transfer/dp/B007Y7D5NQ/
Do note I am using a rostock, but psi will work on all regardless, it's also acetone resistant, so you could clean really easily
I had the exact same issue. I solved it by:
The glass holders were nice while I was transitioning from using the stock buildtak but the steps I described only take about 20min once you have all the parts. I would also replace your Y Carriage plate. It will save you a lot of time leveling your bed. I only level mine about 3-4 weeks.
Wow, both the V1 and the V2 are out of stock on monoprice.com now. It looks like you can still get the Mini off of Amazon, however. Though for just $50 more you can get a refurbished Maker Select V2 off of Monoprice.
Having just built one based on a design a local maker was using at a demo, it's not exactly a lot of time, or money. I got one of these at the local department store for $15:
New and Improved Eva-dry E-333 Renewable Mini Dehumidifier https://www.amazon.com/dp/B000H0XFCS/ref=cm_sw_r_cp_apip_JrTHAVxFlcbzq
And a bin something like this for $9 (note this link is to a 6 pack, shipped... way cheaper to just buy one at a local store):
Sterilite 17571706 66-Quart ClearView Latch Box, Clear lid & base with Purple Latches, 6-Pack https://www.amazon.com/dp/B003EH1GH2/ref=cm_sw_r_cp_api_Ry.pzbVP0W4RB
You can size the bin to your space and expected open spool count... just look for a latching lid and a lack of holes in the bin. I found the safety stickers about not letting kids play in the bin were a good hint that they sealed air tight. :)
Drop the evadry in the bin, load it up with filament and close the lid. Done. Cost about as much as a decent kilo of filament.
Every time I get a roll out or put one back I look at the evadry. When it is showing green I pull it out and plug it in in a bathroom overnight with the fan on. I had to do that about a week after setting this up. It's been months since and I've not seen any noticeable change in its indicator.
If I wanted to get fancy I could seal up the four small holes where the latches attach... but as long as I'm not having to do a drying cycle very often I'm not going to bother.
The nozzle on that printer is a MK10 nozzle. There's a bunch on Amazon.
https://www.amazon.com/s?k=mk10+nozzle&amp;sprefix=mk10&amp;ref=nb_sb_ss_i_0_4.
Unless you've been really abusive, it could just use a nice clean. I use a brass brush on mine. Just pre heat the hot end and scrub away. It'll be fairly clean when you're done.
But if you want to change the nozzle, you may want to go ahead and upgrade to an all metal setup with the Micro Swiss hot end. This comes with a new nozzle and some other stuff.
https://www.amazon.com/Micro-Hotend-SLOTTED-Cooling-Wanhao/dp/B01E1HANLS/ref=mp_s_a_1_1?keywords=micro+swiss+maker+select&amp;qid=1562131663&amp;s=gateway&amp;sprefix=microswiss+maker+&amp;sr=8-1
I personally have the Micro Swiss kit with their plated nozzle. After scrubbing it, it always looks good as new.
That ziploc storage bin looks perfect! going to my local walmart to see if they have one. Would you say the silica gel is better than one of these fancy dehumidifiers?
Is it the 12" i3v? The PCB heatbed tends to warp when heated because the heating element is on one side of the PCB. When I was using bang-bang, I placed the nozzle at the center and was able to visibly see the PCB warp away from the nozzle during the heating portion of the cycle (every ~5 seconds).
The following helped me:
So, 12V at 1.2 ohms, assuming your meter is even remotely correct is 10A. That's 120W, if you're using a computer PSU, iirc the cables are only rated for 75W each for one. In addition, your voltages should stay pretty much nuts on 12V, seeing a voltage drop indicates either an overloaded or poorly made power supply.
I would suggest purchasing a 12V 30A supply from someplace like Amazon like the Makerfarm manuals say to. They're pretty much all the same, just make sure you set the line voltage on the supply properly. Go to your local hardware store and get some low gauge (14 should be good) copper lamp cord. Use that for your heatbed wiring.
The e3d V6 lite needed this carriage mount (and this is the direct-drive version, not the bowden setup) to be printed in ABS (and ONLY ABS, PLA will warp and eventually bust. Plus, ABS repairs with acetone really well and easily, so I've busted the one I printed a while back a couple times and just re-welded it together). This is the power supply I got, and I also got two of these MOSFETs. More info on the wiring here, I'd also recommend their advice in replacing the wiring to the bed and the mainboard with higher-gauge wires to prevent issues.
Ninja edit:
I also had to adjust my printer firmware to have the new center-point for the hotend set to actual center, for that I had to flash SkyNet3D firmware, a Marlin-based firmware made specifically for the board the A8 came with. If you're replacing the board with a RAMPS board, more than likely you'll be setting it up for all that anyways.
Highly recommend getting one of these and stick it into your filament box.
https://www.amazon.com/gp/product/B000H0XFCS
it works really well and when it gets too moist (you can see the color change) you just pop it onto a wallsocket for 24hr and it's goo to go again.
beats collecting the little packets of desiccant and drying them in the oven :)
Not 100% sure, but seems like people need to drill new holes for the carriage you linked.
https://www.amazon.com/gp/product/B01MUAMRN7/ref=crt_ewc_img_dp_1?ie=UTF8&amp;psc=1&amp;smid=A2YI8XQU239Q2W
I'm about to get this one though, since y'know, it has the words "Monoprice Maker Select v2.1" in the title :)
I am looking to get into the world of 3D Printing. I was looking at this from Amazon I was also looking at this (I would love some input on this if someone is willing to give it)
Yes I would say the heated bed is a necessity if you want to print ABS the stock bed only reaches 45-50c and takes along time to heatup , the bed I bought is from folgertech it's the 12v silicone heated bed 300x300 and yes you could do a separate PSU as well I just didn't need to and the mosfet I bought is the trigorilla mosfet on Amazon, I would recommend that mosfet over any other as I bought a DCDC SSR and it didn't work, i then bought a BIQU mosfet on Amazon and it started smoking so I returned it but the trigorilla mosfet has had no issues so far, to add to my heated im going to add some cork to insulate it to hold the heat better.. hope this helps
Hatchbox and AMZ3D wood PLA from Amazon print just fine. AMZ3D filament comes from the same factory as Hatchbox. If you like one, you'll like the other. Also, AMZ3D has more blues and purples than Hatchbox (just in case you were interested).
Nothing to feel bad about! This stuff is new to everyone at some point and none of it is super intuitive.
My recommendation is to peel them both off, clean up the build plate up with rubbing alcohol, then get some glass sheets and cut them to 8x8" or 8x8.5", and use some of this stuff cut into 8-12 1x1" squares to hold it onto the build plate, 400mm x 205mm x 0.5mm Silicone Thermal Pad for CPU GPU Heatsink https://www.amazon.com/dp/B007PPEW52/ref=cm_sw_r_cp_api_5.EBxbMP1HDRT.
Spray it with a thin layer of hairspray and let it dry while the printer heats up. You'll have to re-level the bed of course and might need to move the z end stop to make it fit.
Thanks for the interest everyone.
I used Hatchbox 3D Wood filament, printed with PLA settings, bed 60, extruder 210. The only problem I have is it's super stringy as the extruder moves from finish to start locations.
I'm going to finish this with sandpaper, this filament sands very nicely. Once it's sanded I'm going to assemble the boat pieces with wood glue, sand again then use wood stain to finish.
Think I'm going to print at least 5 of these and experiment with different wood stains and some colors. I don't have any serious plans to use them in water but I've heard this filament does float.
If I use some spray lacquer it might help but I'm guessing introducing the print to water probably wouldn't be the best for it's longevity.
If you look at the reviews in the below link you'll see some finished prints.
Link to filament - https://www.amazon.com/gp/product/B01092XXD4/ref=oh_aui_detailpage_o08_s00?ie=UTF8&amp;psc=1
Building a kit printer should be easy if your printer has good documentation and a good community. Here are 3 printers with large ownership. I chose printers from the lower end because you're going to want some extra space in your budget for upgrades or replacement parts.
Folgertech i3 aluminum | 270 USD (bring your own bed)
Monoprice Maker Select | 350 USD
MakerFarm Pegasus 8" | 375 USD
Thanks, got this on order: RepRap Champion Y Carriage Plate Upgrade for Wanhao Duplicator i3 and Monoprice Maker Select V1, V2, V2.1 and Plus 3D printers https://www.amazon.com/dp/B01MUAMRN7/ref=cm_sw_r_cp_apa_jlzQzbN4W6Y04
Hey everyone!
Was curious if anyone can help me out with this.
It’s an Ender 3 Pro using the Hatchbox wood filament.
Anything small prints fine. Usually good for 2-3 hours no issues.
Anything 4+ hours I come back to a jammed extruded several inches above the print with nothing comes out.
Filament: HATCHBOX 3D Printer Filament,... https://www.amazon.com/dp/B01092XXD4?ref=ppx_pop_mob_ap_share
I have been printing for about 9 months now and wanted to know if anyone has any recommendations for a budget dual extrusion printer.
I currently have a MP Maker Select 2.1 and I am looking to upgrade to a dual extrusion printer. Been looking around and found 2 that are pretty much the same,
&nbsp;
Are there any others that may be with a $500 - $800 range.
Any input or suggestions are greatly appreciated.
Something like this? Certainly seems like what I'm looking for.
As I understand it, it helps the glass make good thermal contact with the hotbed. It was a pain to get in place (think the world's most unruly and sticky saran wrap). But it is the best upgrade Ive made so far. Here's what I have:
thermal pad:
https://www.amazon.com/gp/product/B007PPEW52/ref=oh_aui_search_detailpage?ie=UTF8&amp;psc=1
glass plate:
https://www.amazon.com/gp/product/B00QQ5Q3BI/ref=oh_aui_search_detailpage?ie=UTF8&amp;psc=1
For the Canadians looking for a deal, Amazon.ca has the Monoprice Maker Select for a good price at $398 CAD with free shipping. Ships from Amazon's Toronto warehouse so you won't have to worry about duty.
https://www.amazon.ca/gp/product/B018GZBC3Y/ref=oh_aui_detailpage_o00_s00?ie=UTF8&amp;psc=1